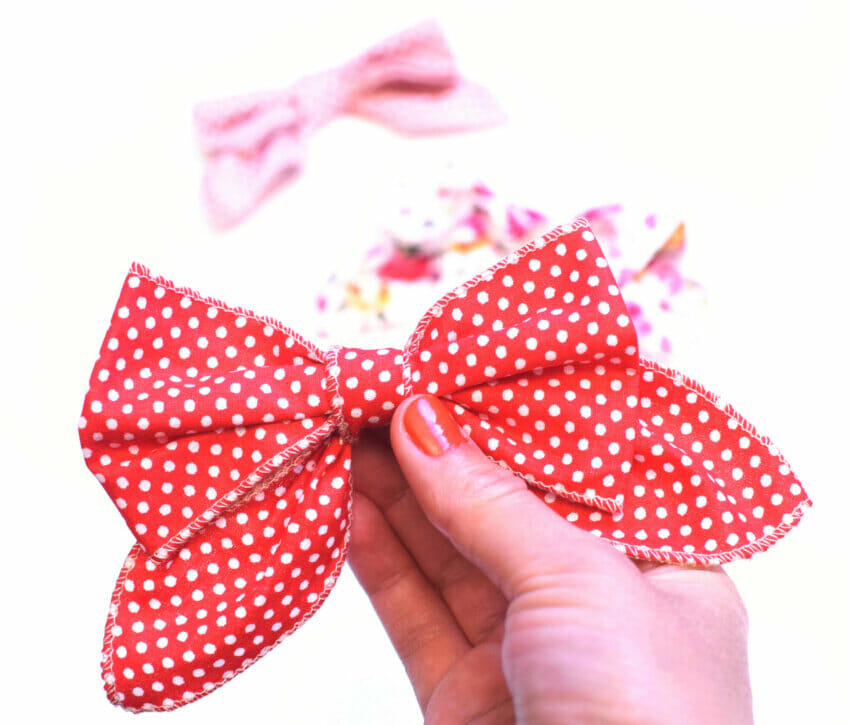
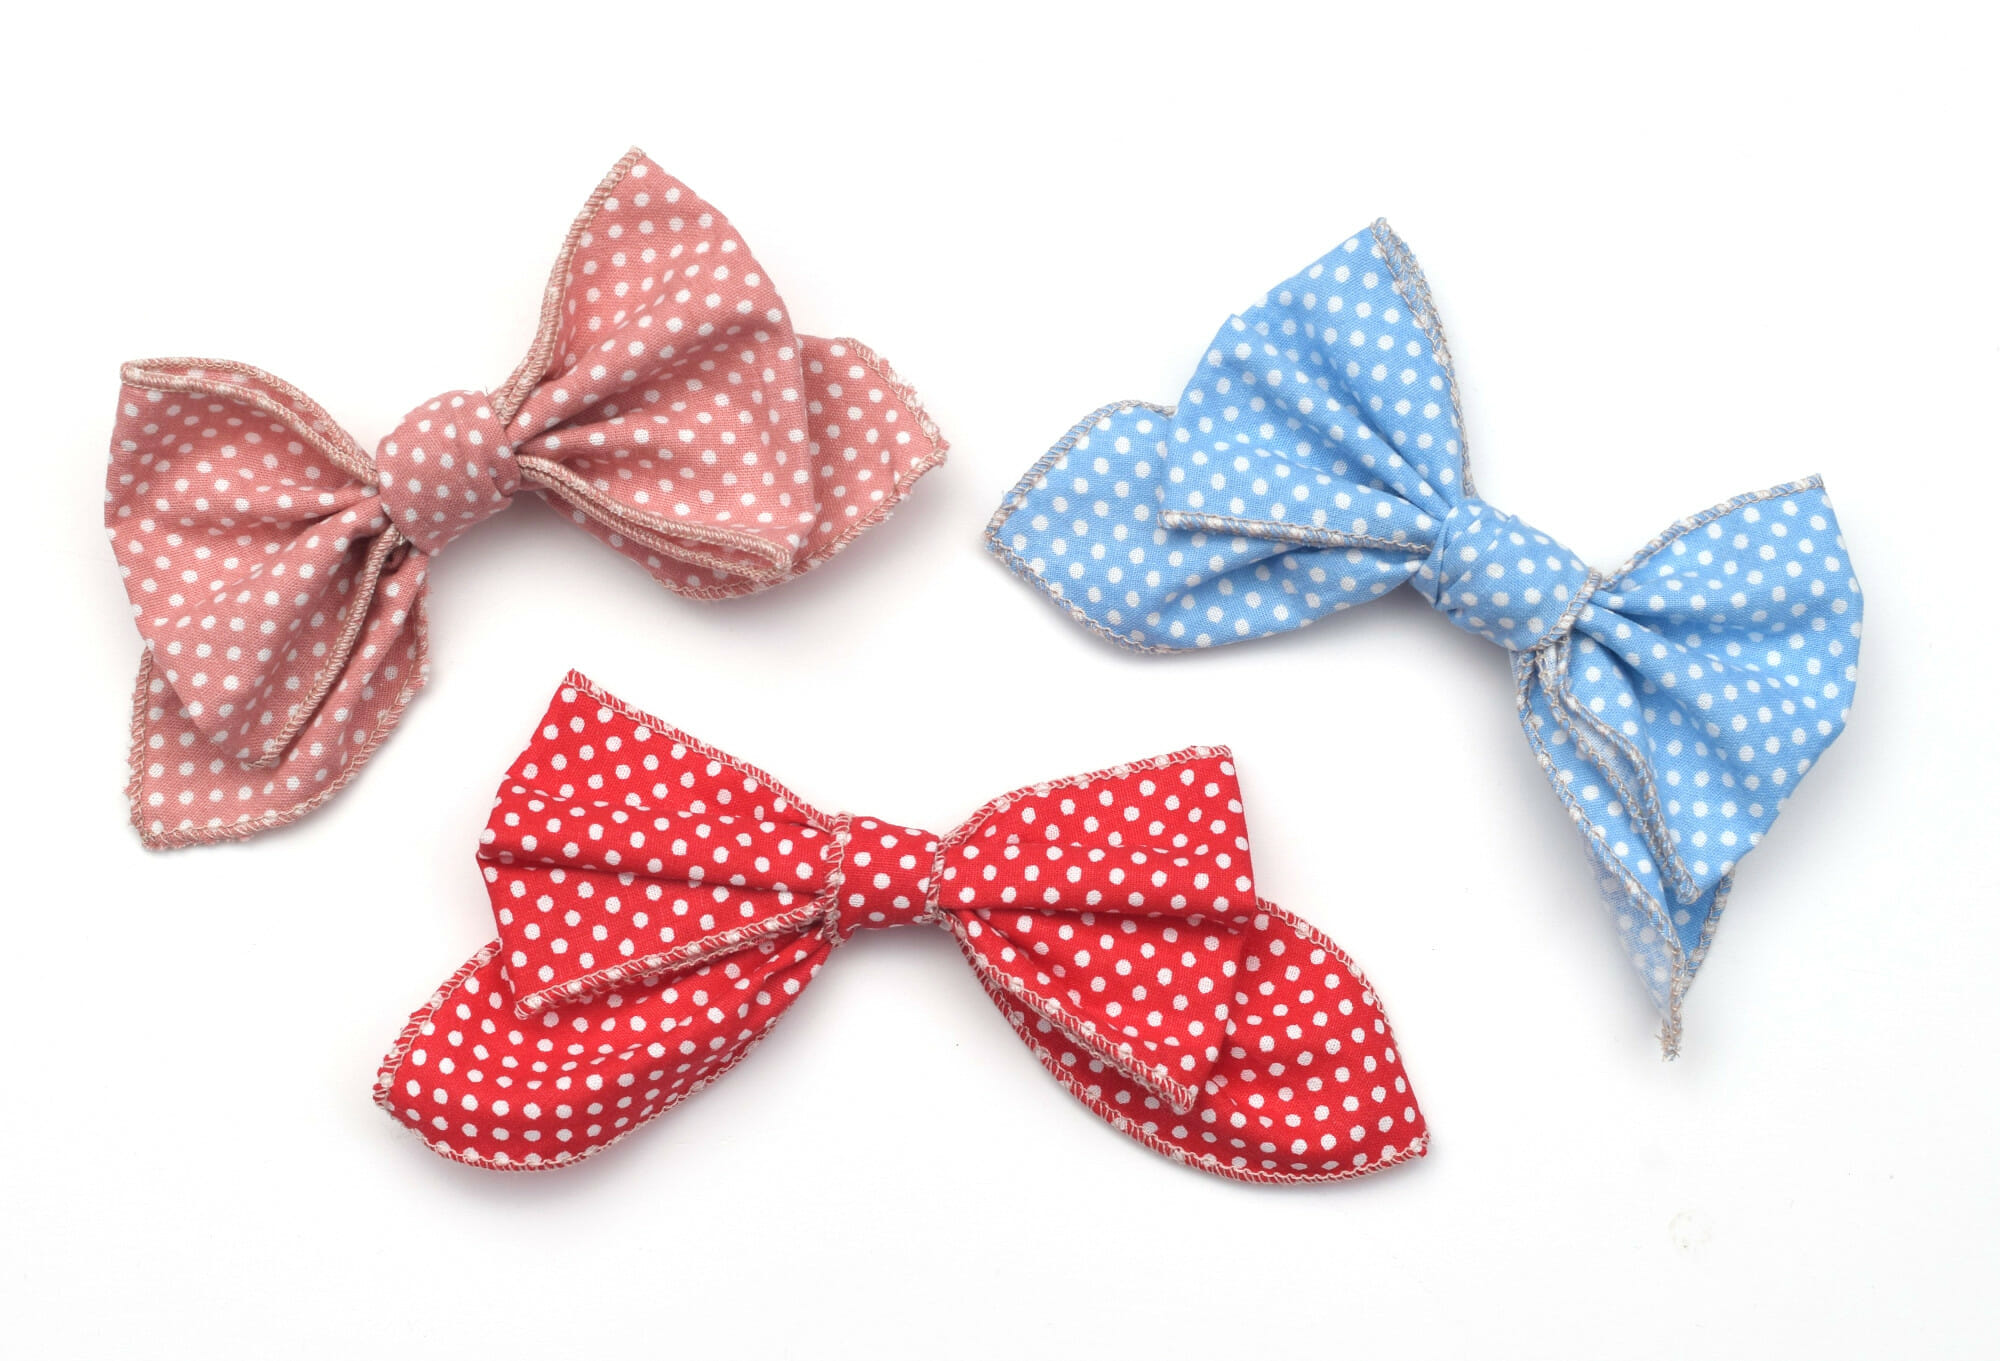
Learn how to make your own beautiful hair bows in less than 10 minutes. DIY fabric bows made using an overlocker. Create the most beautiful hair bows, perfect for babies and girls of all ages, with this easy tutorial.
This is a great scrap-busting project that only takes a really small amount of fabric and time. Just use your serger to quickly hem two strips of fabric and you can have a cute DIY bow within minutes!
DIY hair bows made with a serger
Usually the hair bows made with woven cotton use almost twice this amount of fabric, because you have to fold and sew the fabric pieces to hide the raw edges.
But, if you serge the raw edges you get the same result, only it’s quicker and you also get to save fabric. I personally like better this serged fabric bows, as they are lighter yet sturdy enough to hold their shape very well. Therefore, much more suitable as a hair accessory for babies and little girls, in my opinion.
And they are so quick to make, you’ll be amazed.
Related: 50 easy sewing projects for beginners to try / Easy knot bow hair ties (free pattern)
You can attach these adorable fabric bows to a soft and stretchy headband, or an alligator clip. These cute hair accesories are the perfect way to finish off your princess outfit.
Moreover, these bows make a great gift for your friends and colleagues.
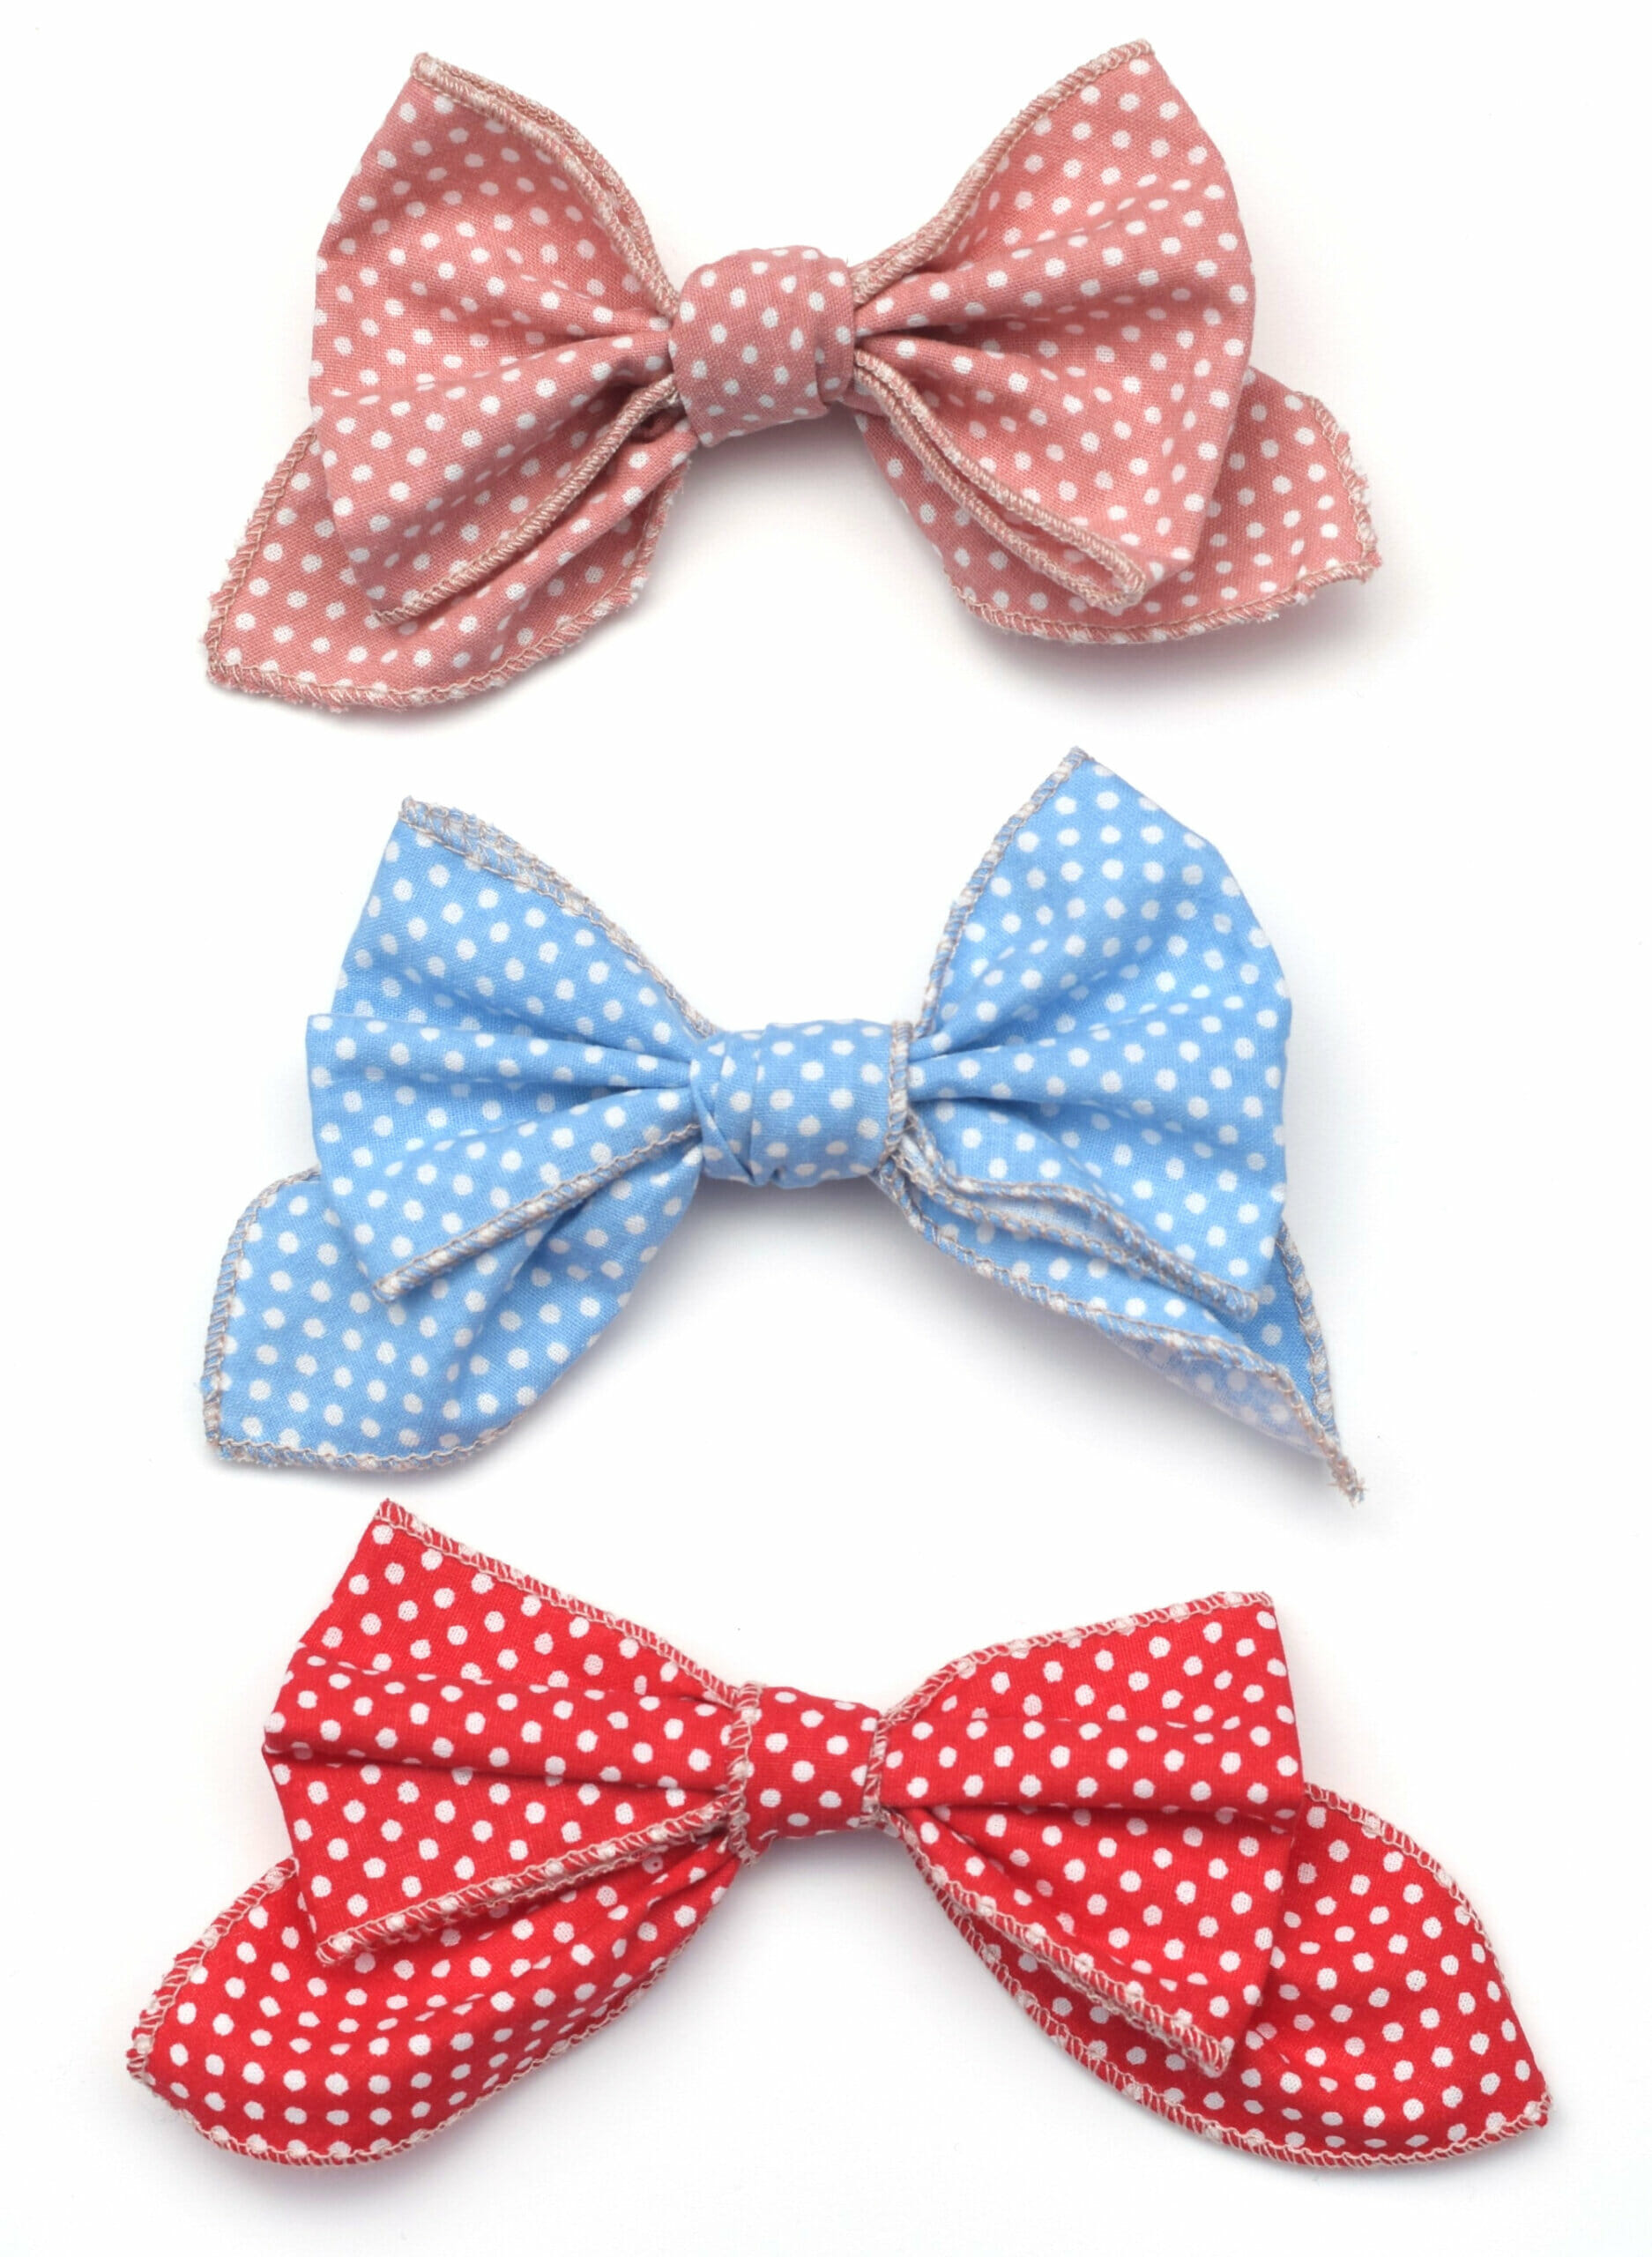
Choosing thread color for DIY fabric bows
Well, thread color matters and you can match the color of the thread to the fabric if you want.
But you don’t need to always use a thread color that matches the fabric for your bows. It would be tedious to change the thread each time you start making a new bow, especially if you plan to make them in different colors.
I used a cream-colored thread for all my bows. It’s better to opt for neutrals, in this case; some colors that blend easily are ivory, gray, beige, or rose.
Setting up your serger for a narrow hem
For this project I used a narrow hem sewn with three threads. That means you have to remove the left needle and the stitching finger, and set up the overlocker to the correct settings. If you don’t know how to make a narrow hem on your overlocker, here are some useful links: this tutorial on lbg-studio.com, this tutorial on blog.bernina.com, or maybe head to Youtube for more tips and tricks.
Sewing supplies for DIY fabric bows
- Cotton scraps
- Serger / overlocking sewing machine
- Matching thread
- Scissors
- Needle
Related: Free knotted headband pattern and tutorial
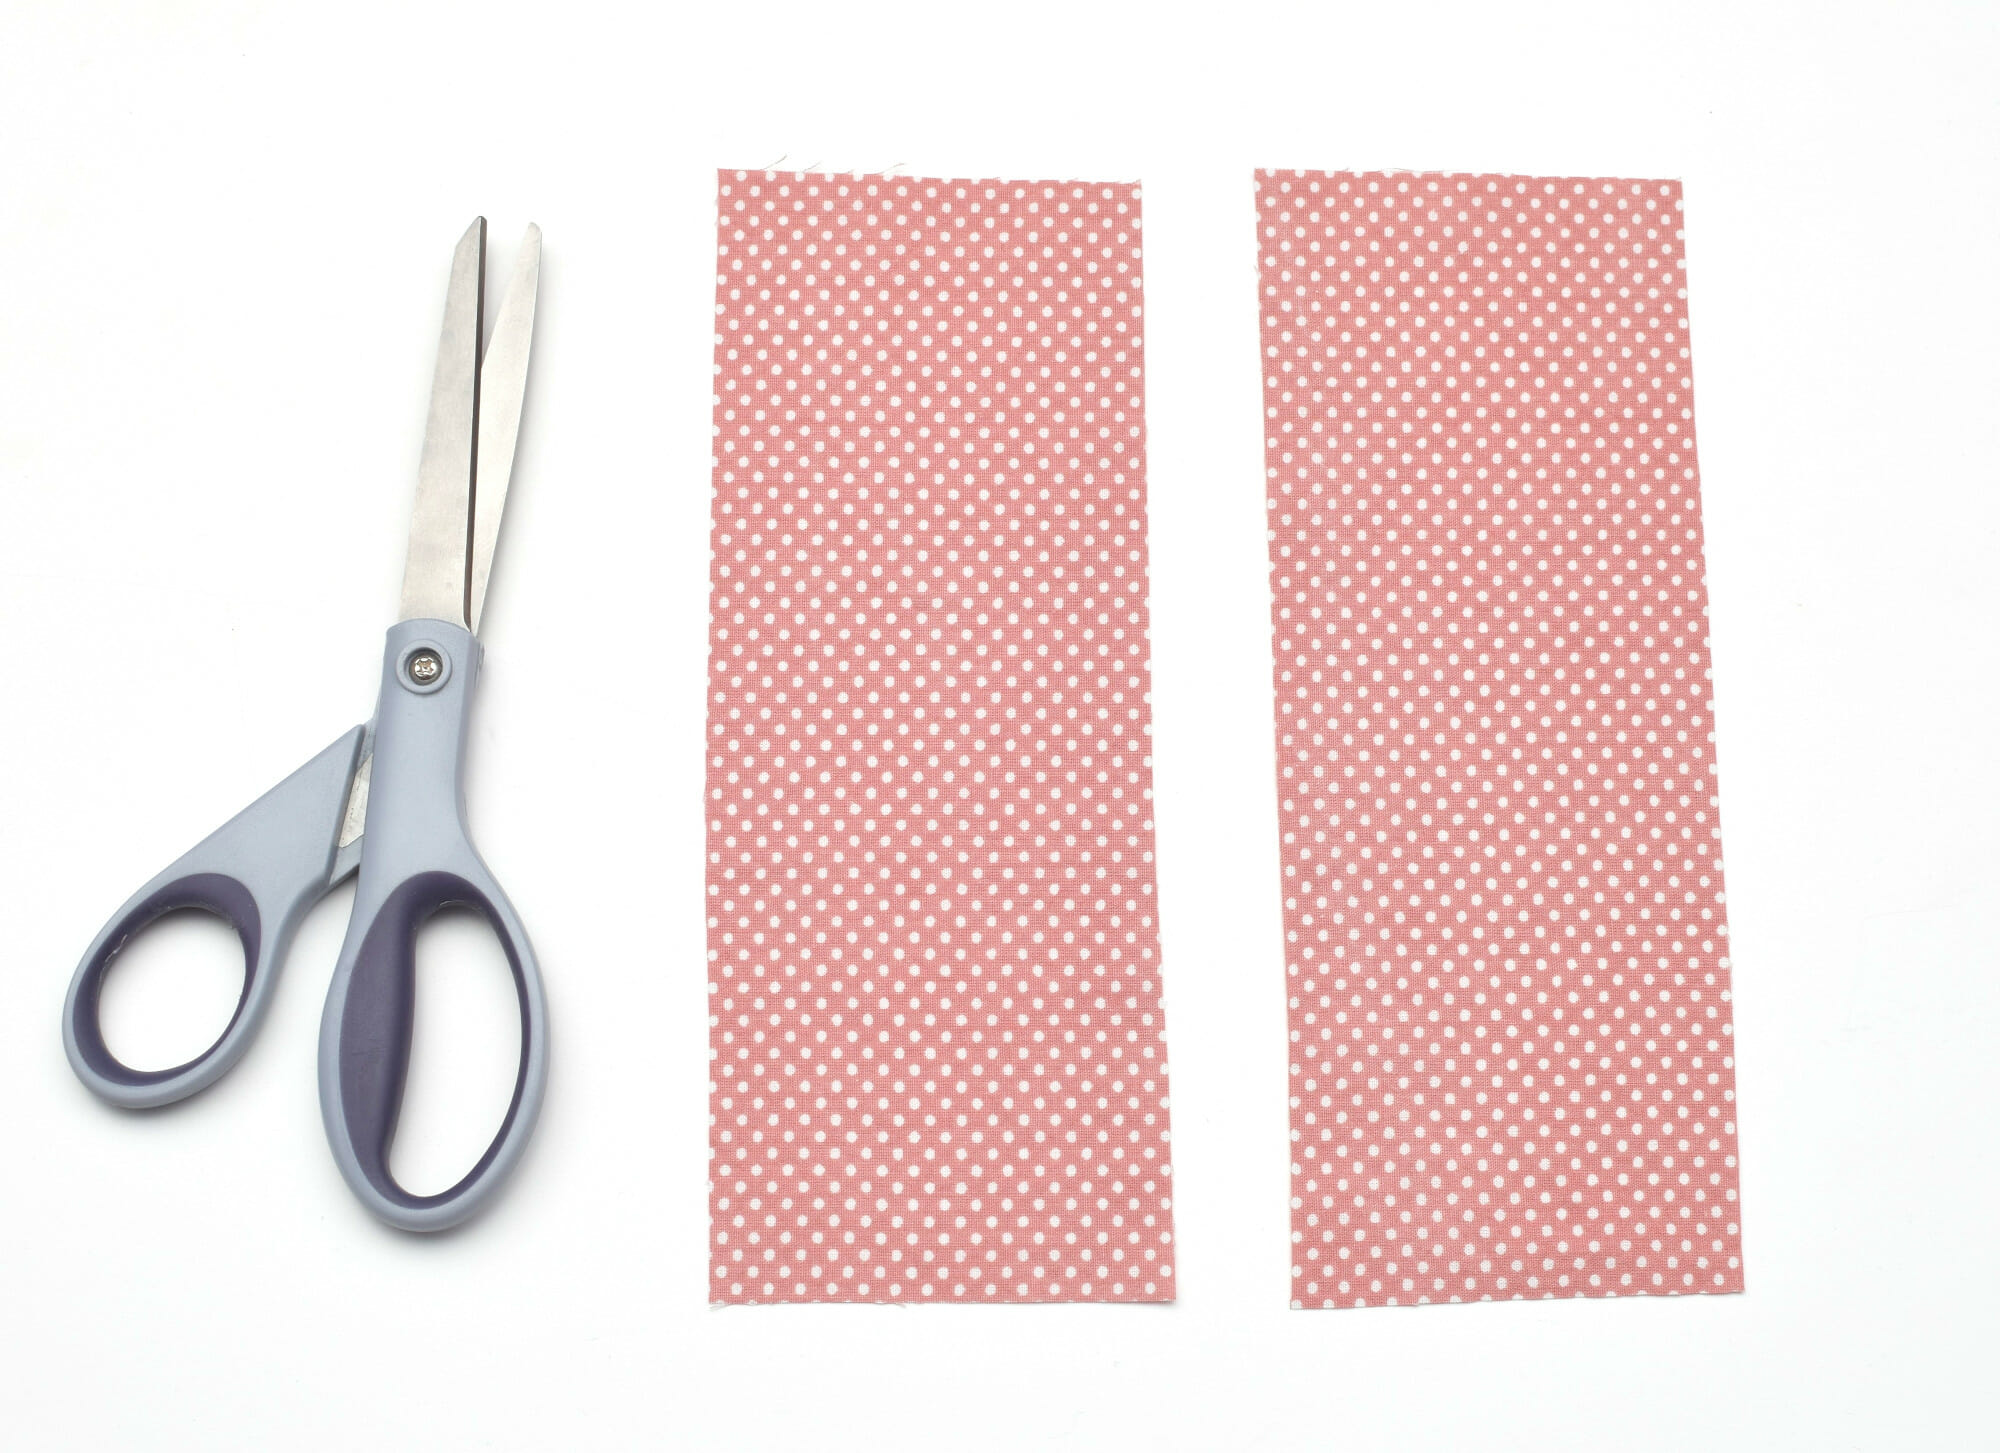
Step 1
Cut two fabric pieces.
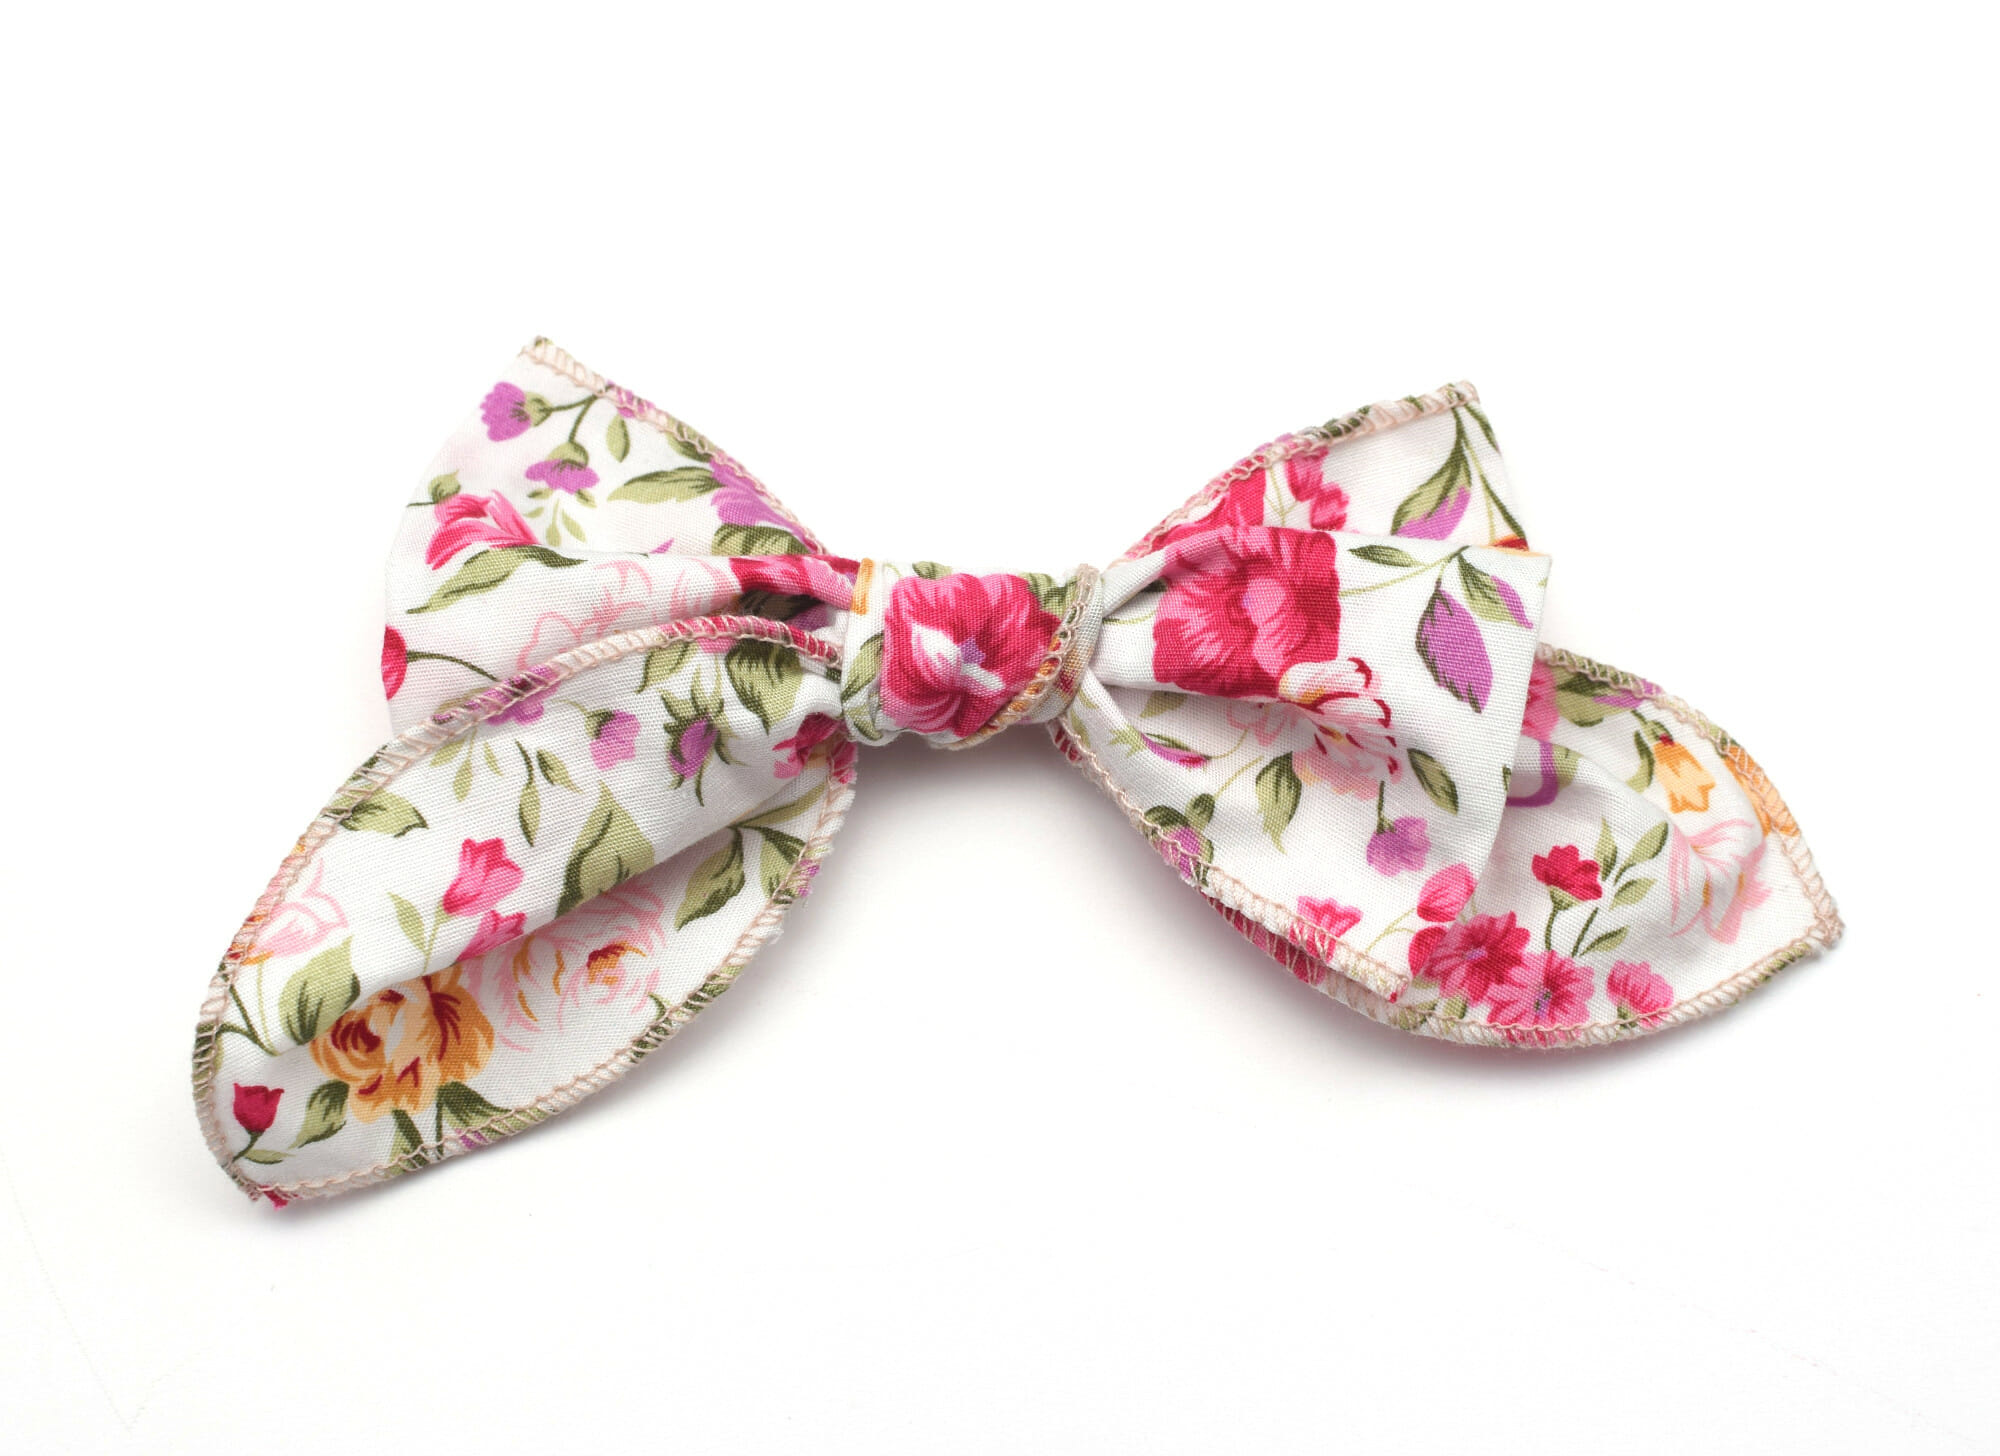
I actually used some bedsheet scraps – the red bow is made with the same fabric as this doll dress and one of these fabric face masks. And I made the floral hair bow with remnants from this casual princess dress I sewed for my daughter. I love giving new life to leftover fabric scraps!
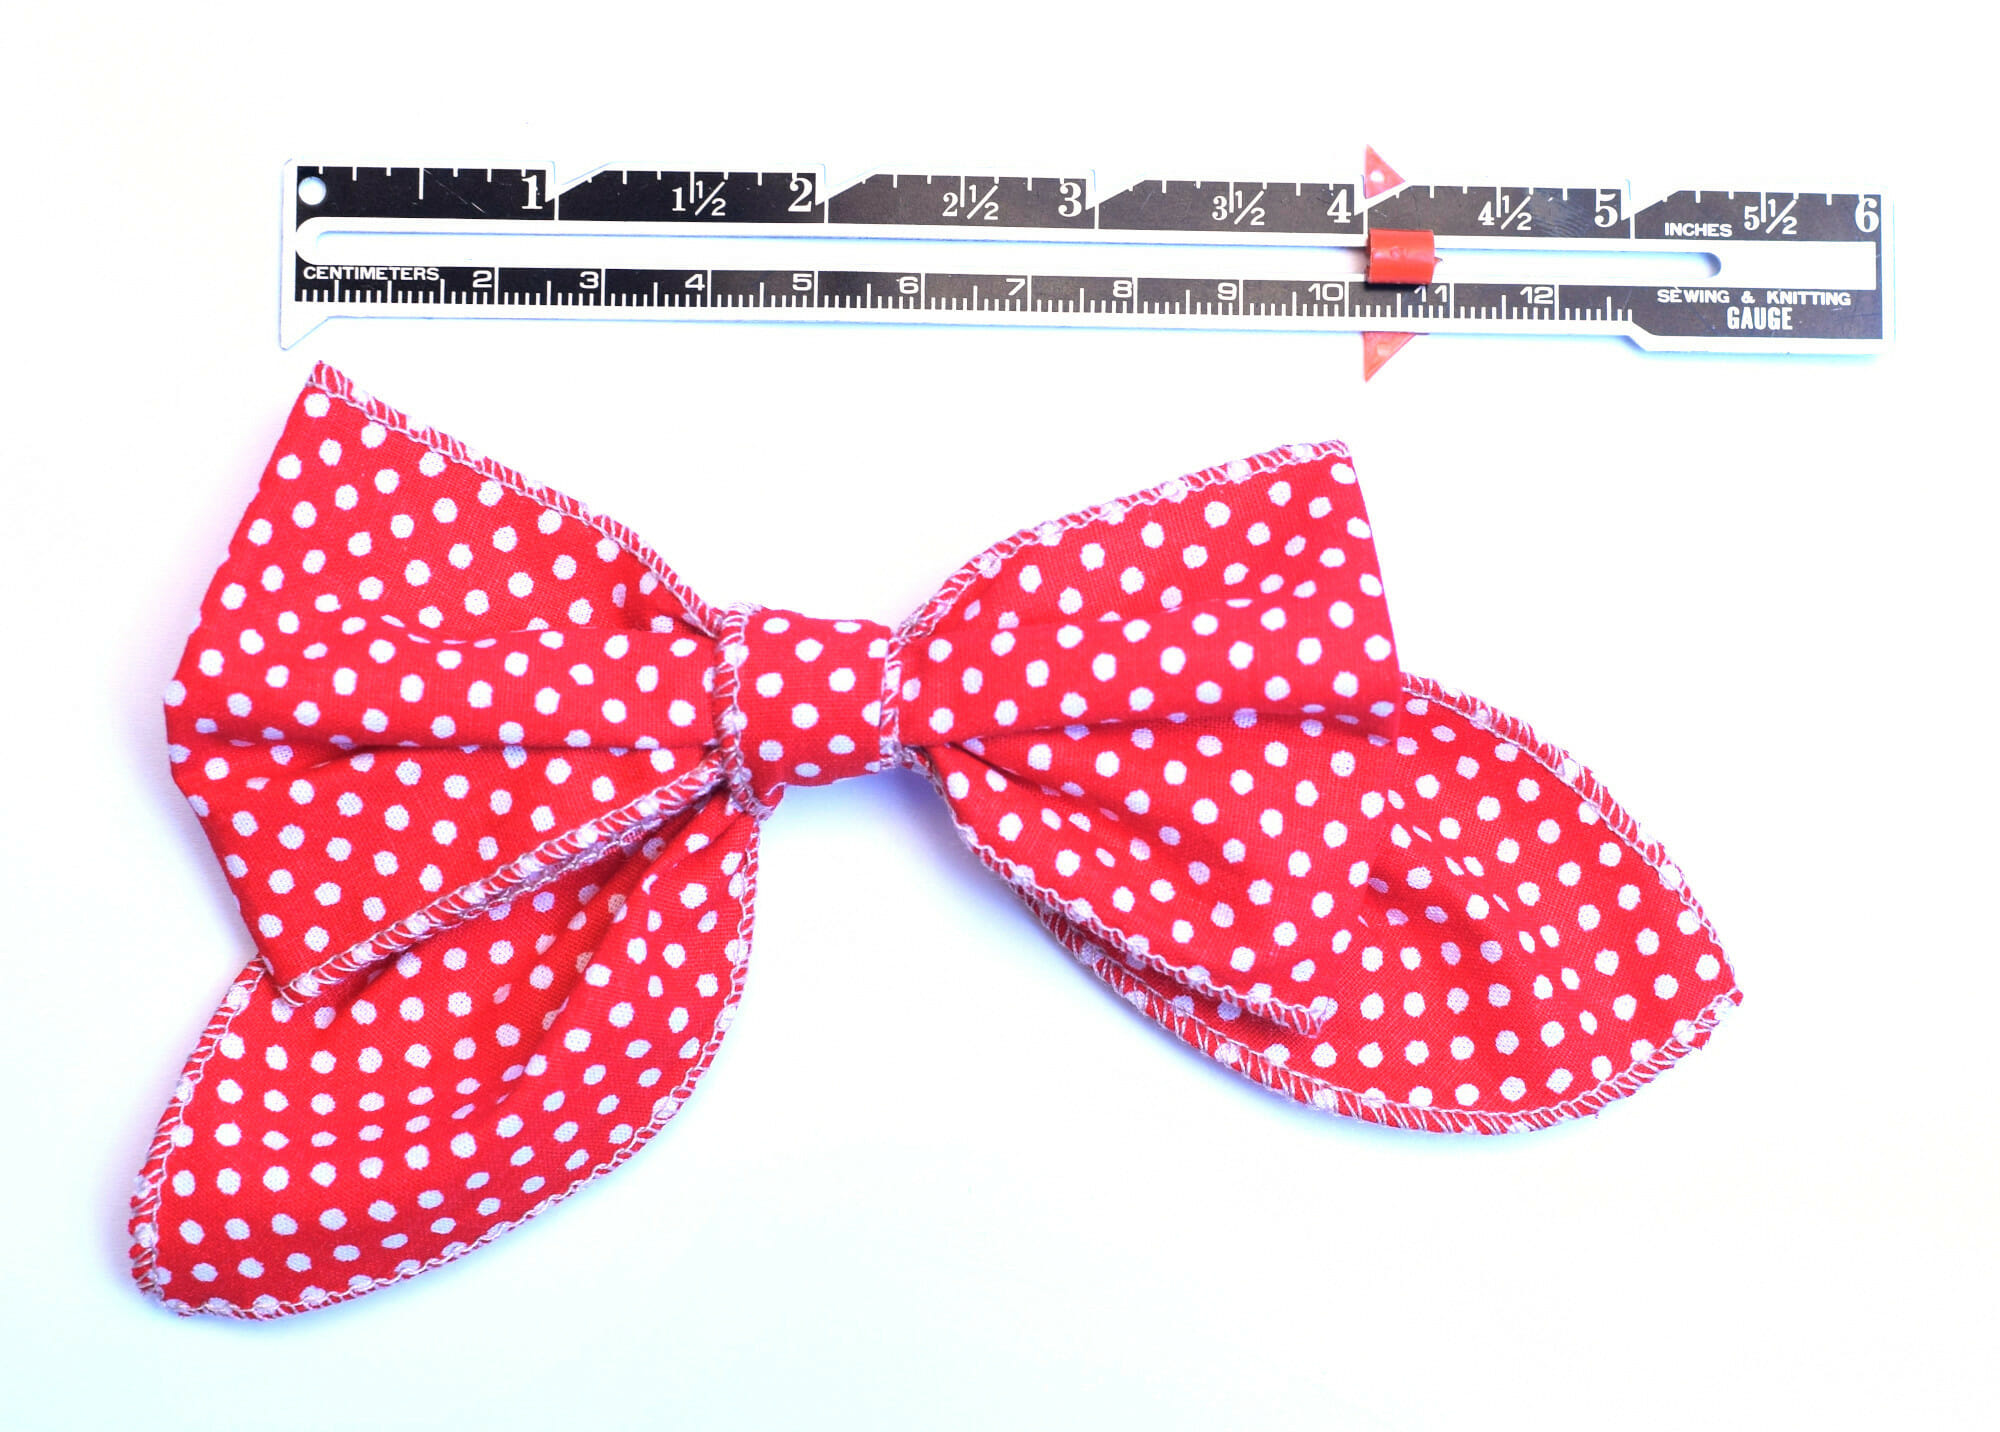
Small bow – cut 2 fabric pieces measuring 7 x 2 inches.
Medium bow – cut 2 fabric pieces measuring 9 x 3 inches.
Big bow – cut 2 fabric pieces measuring 11 x 4 inches.
Step 2
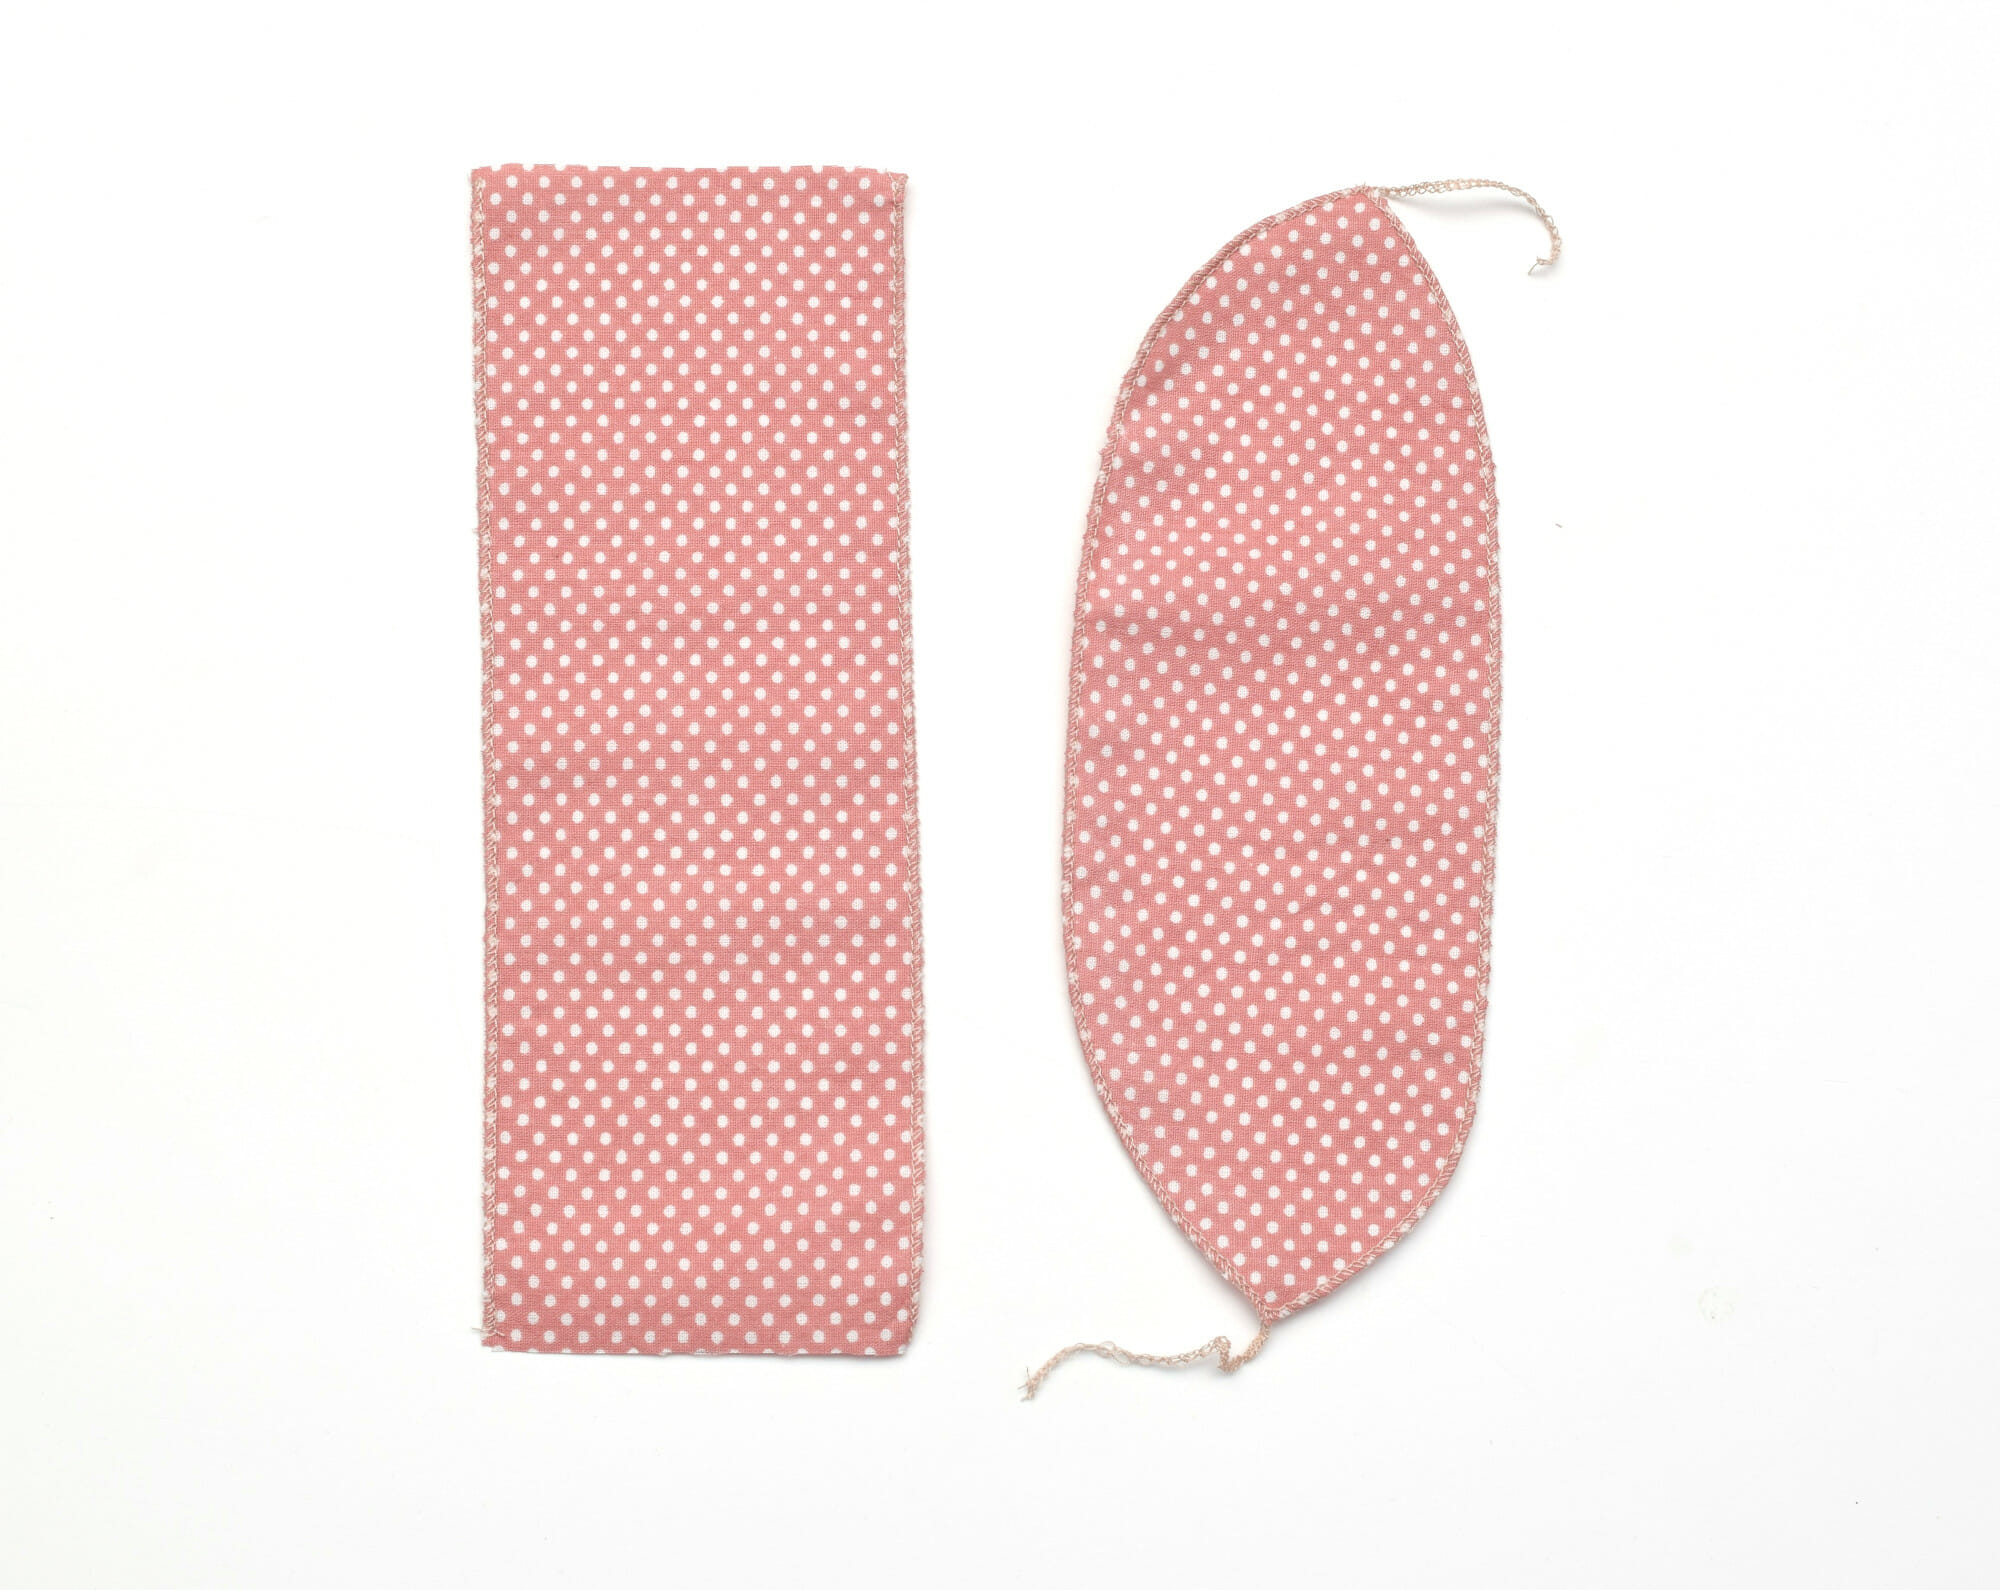
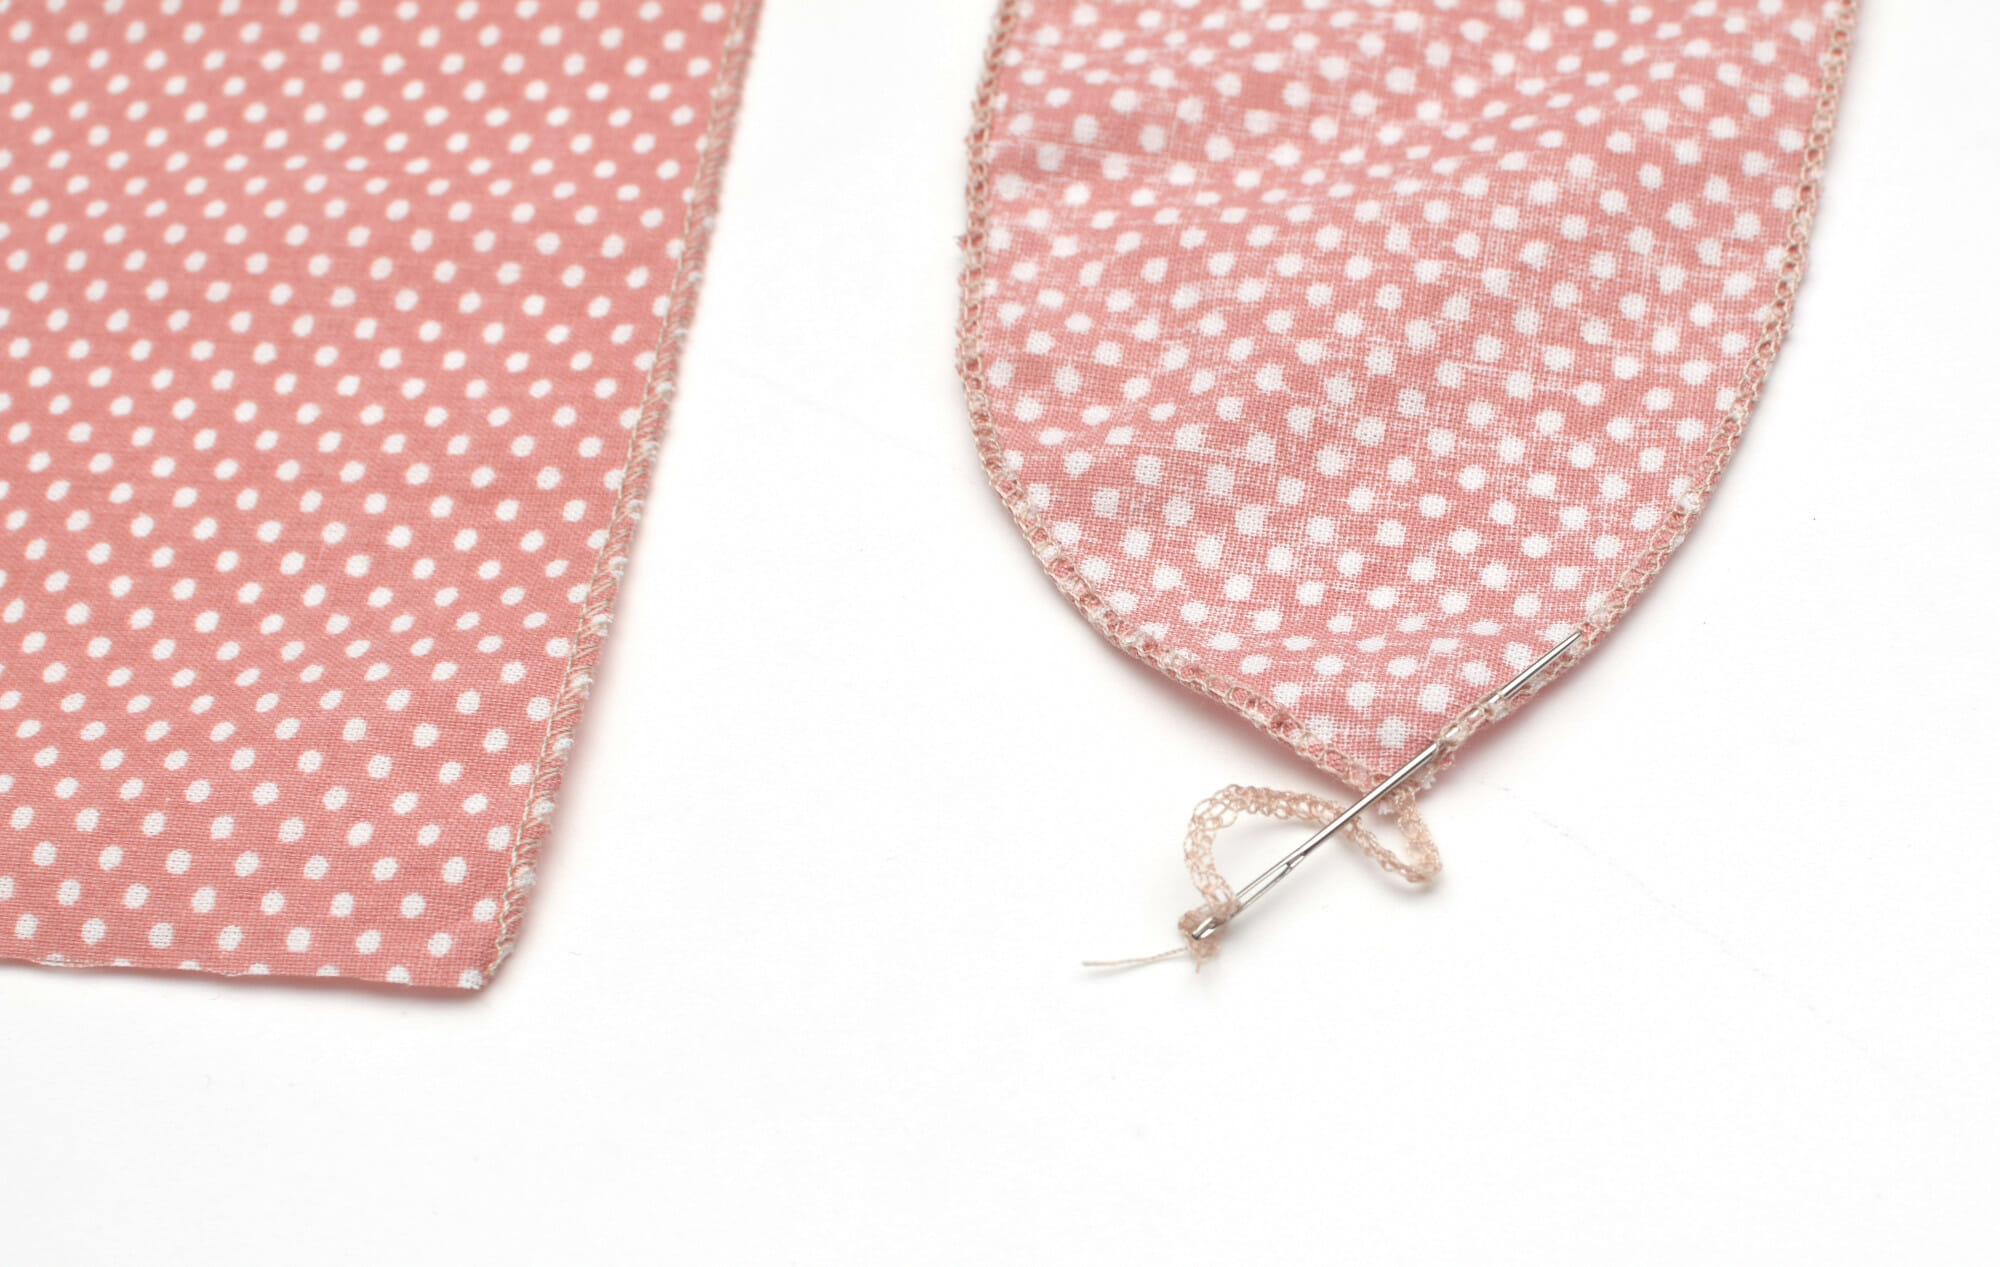
Now, serge the long edges of one fabric piece, then clip the thread tails near the edge of the fabric. No need to worry about fraying, as there will be no visible raw edges in the end.
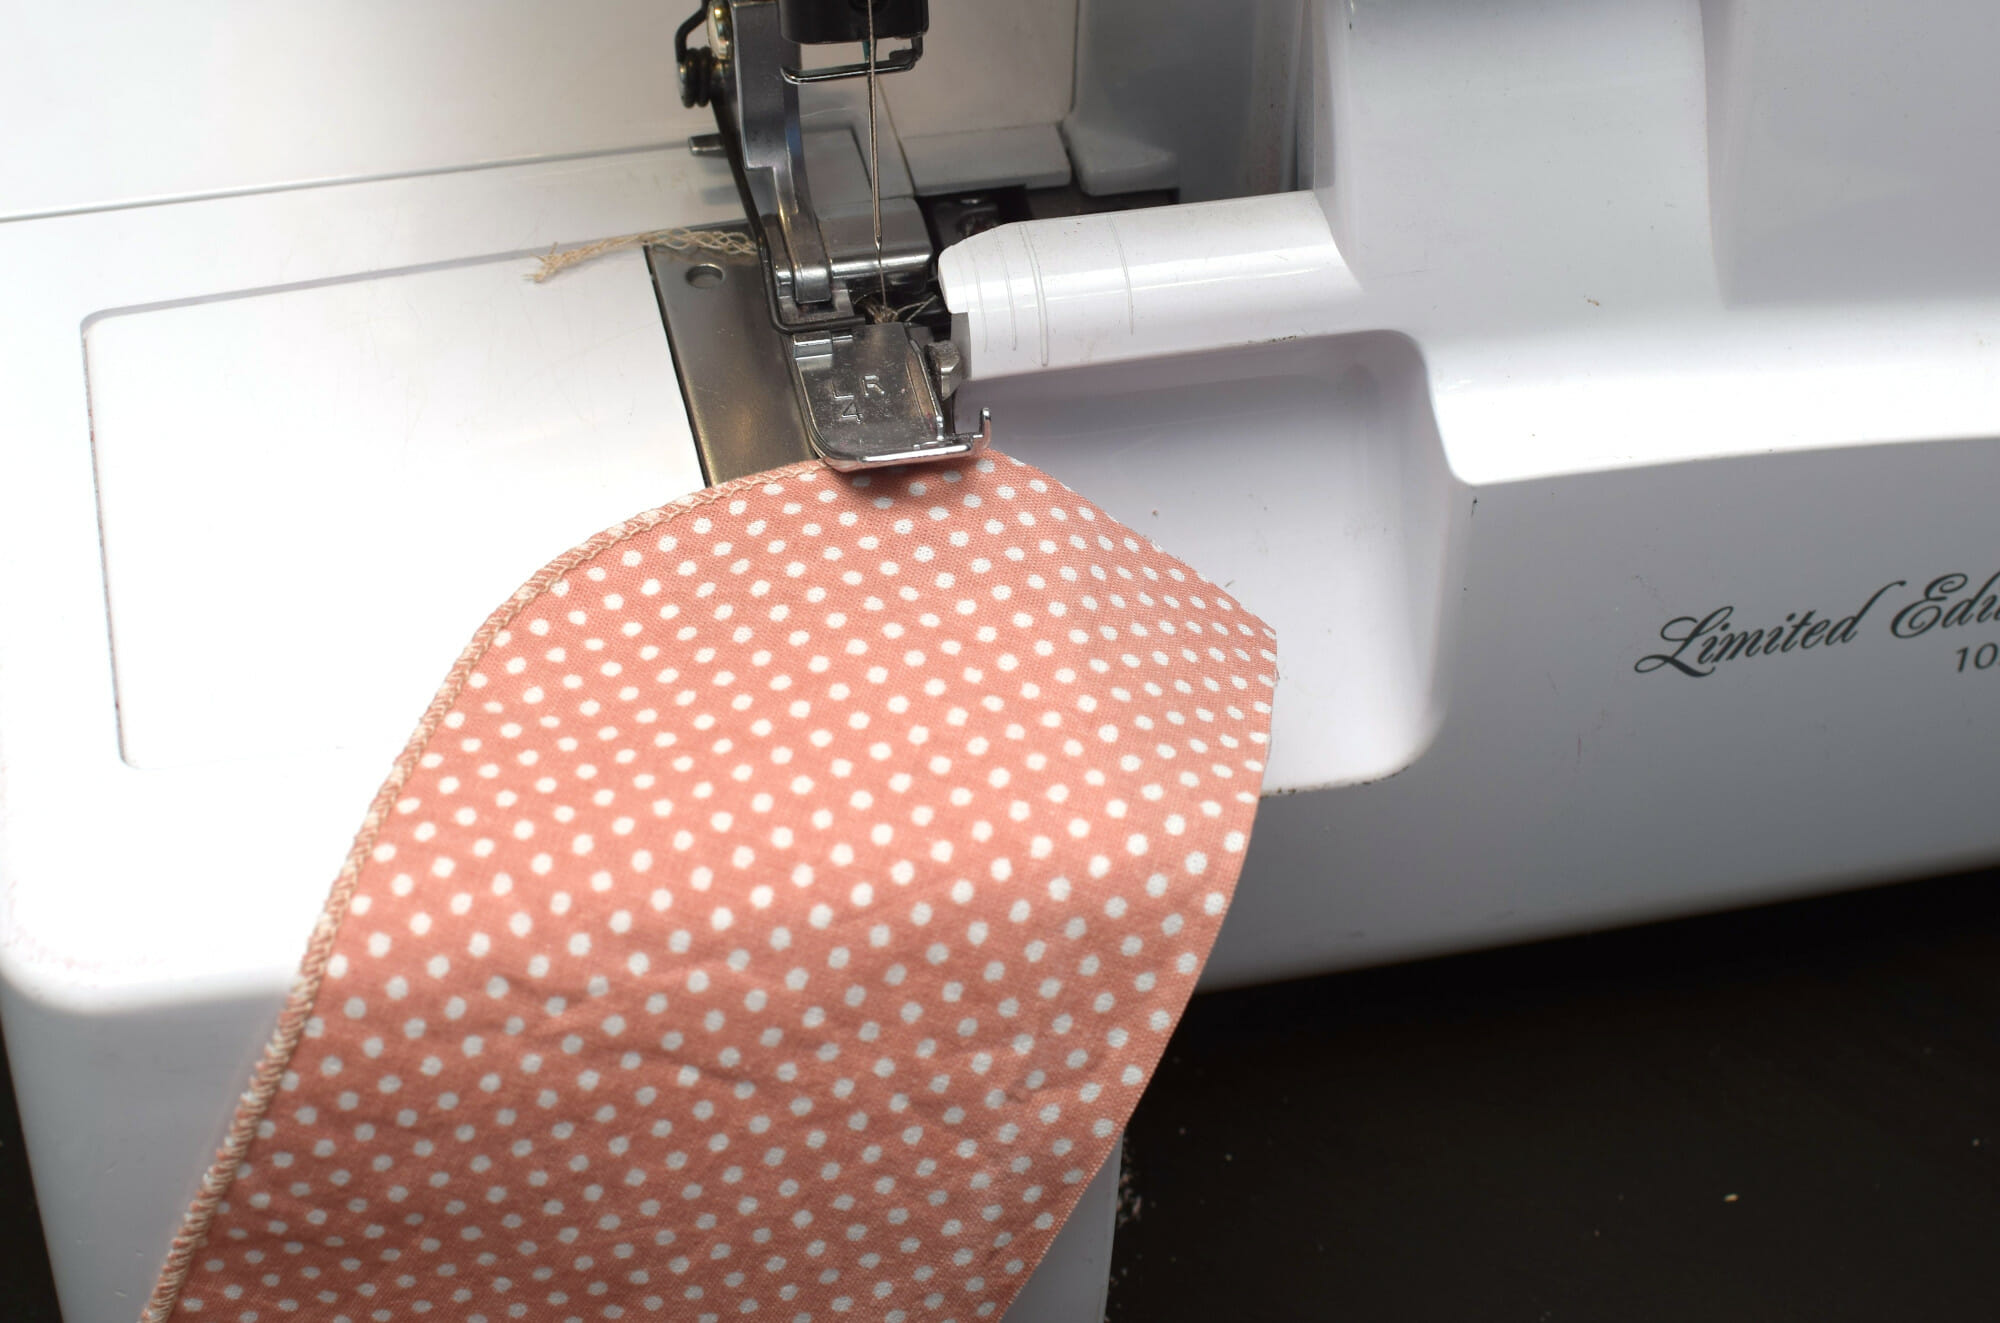
For the second fabric piece, start serging in the middle of one of the short edges, heading towards the long edge, and then continue straight.
When you are 1-inch away from reaching the end of the fabric piece, go towards the middle. Just sew slowly, the goal is to form a curve like shown in the below picture.

After this, we still have to serge the other side of the second fabric piece. Start serging from one corner to the opposite one, to form a somewhat oval shape.
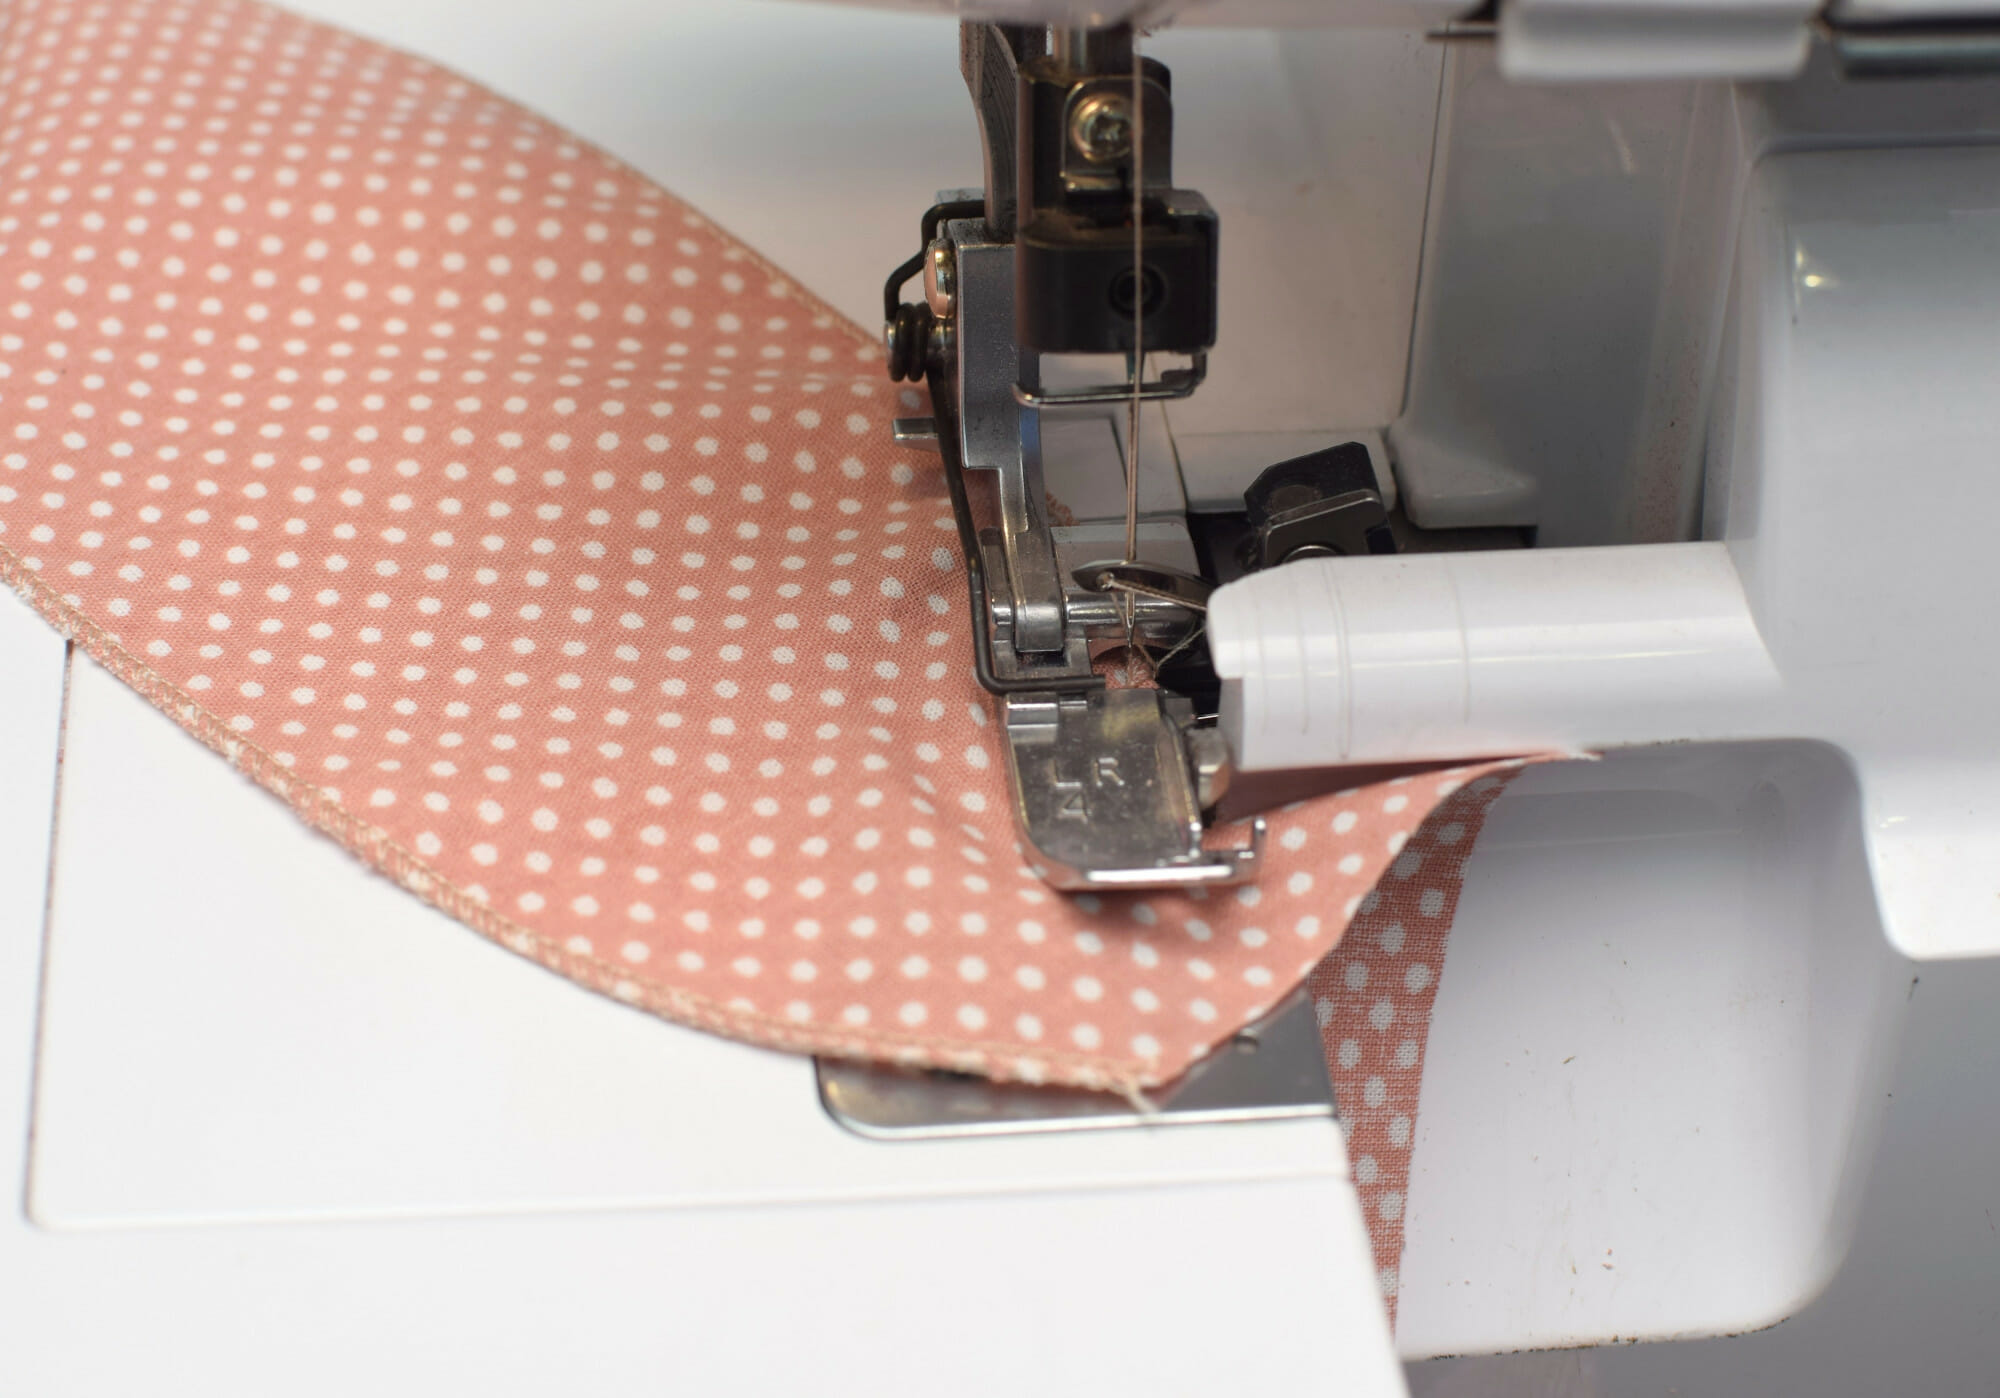
I finished the serger chain by feeding the tails back into the original stitching using a large-eyed needle. You could also use fray check or untangle the threads and then knot them off.
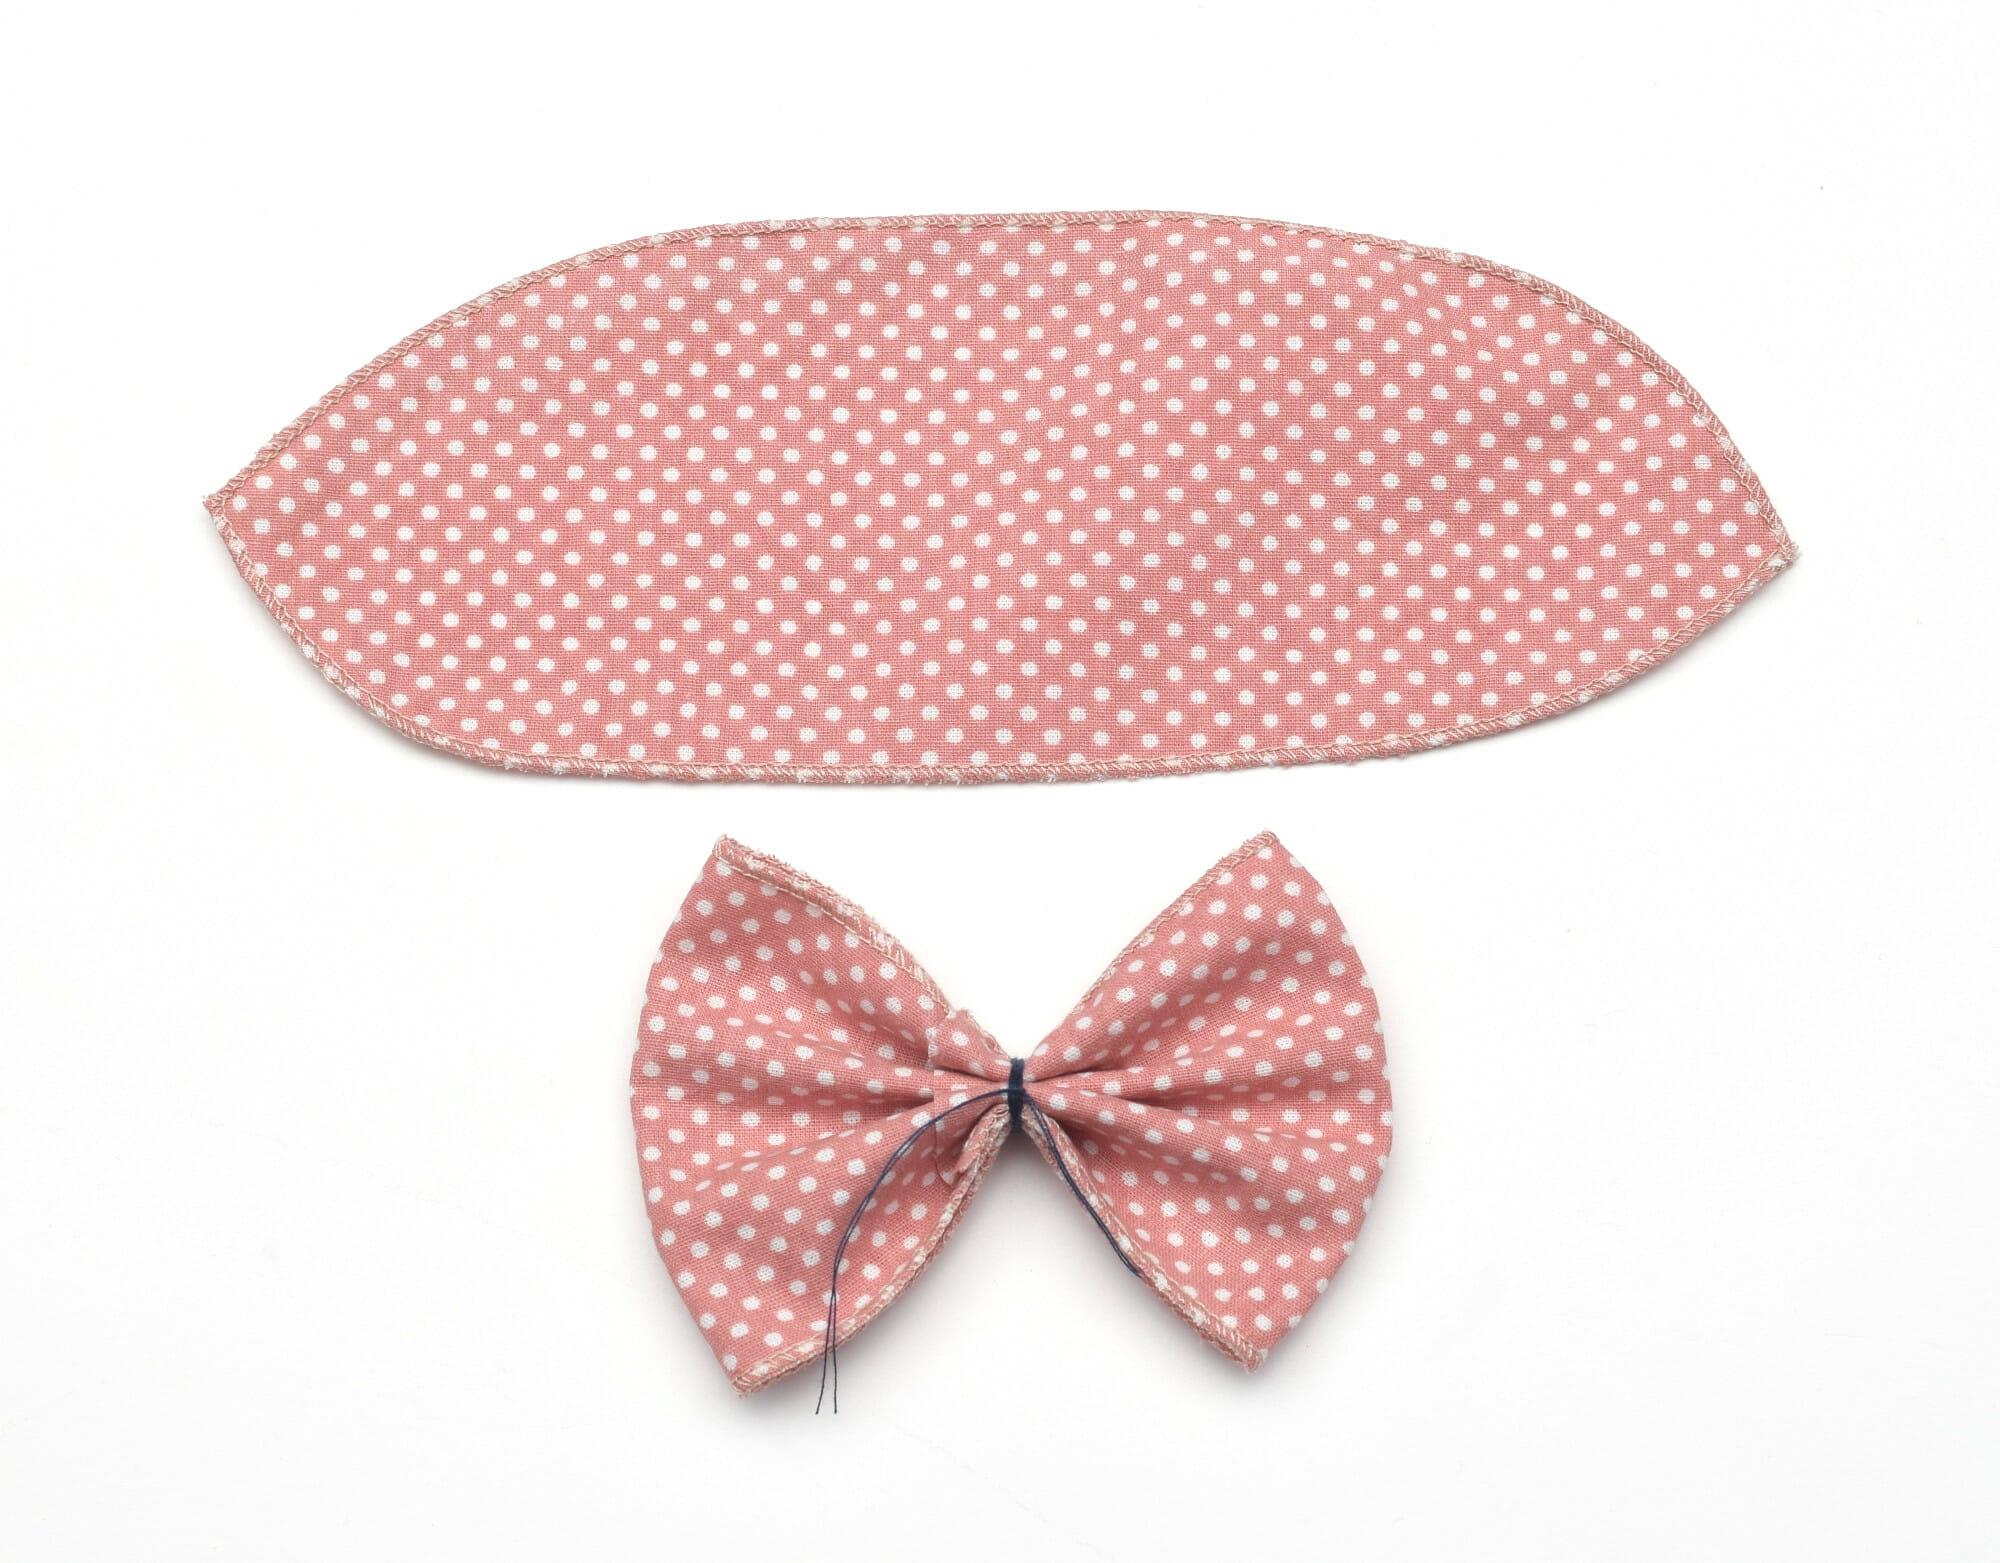
We’ll use this oval piece to tie the fabric bow.
Step 3
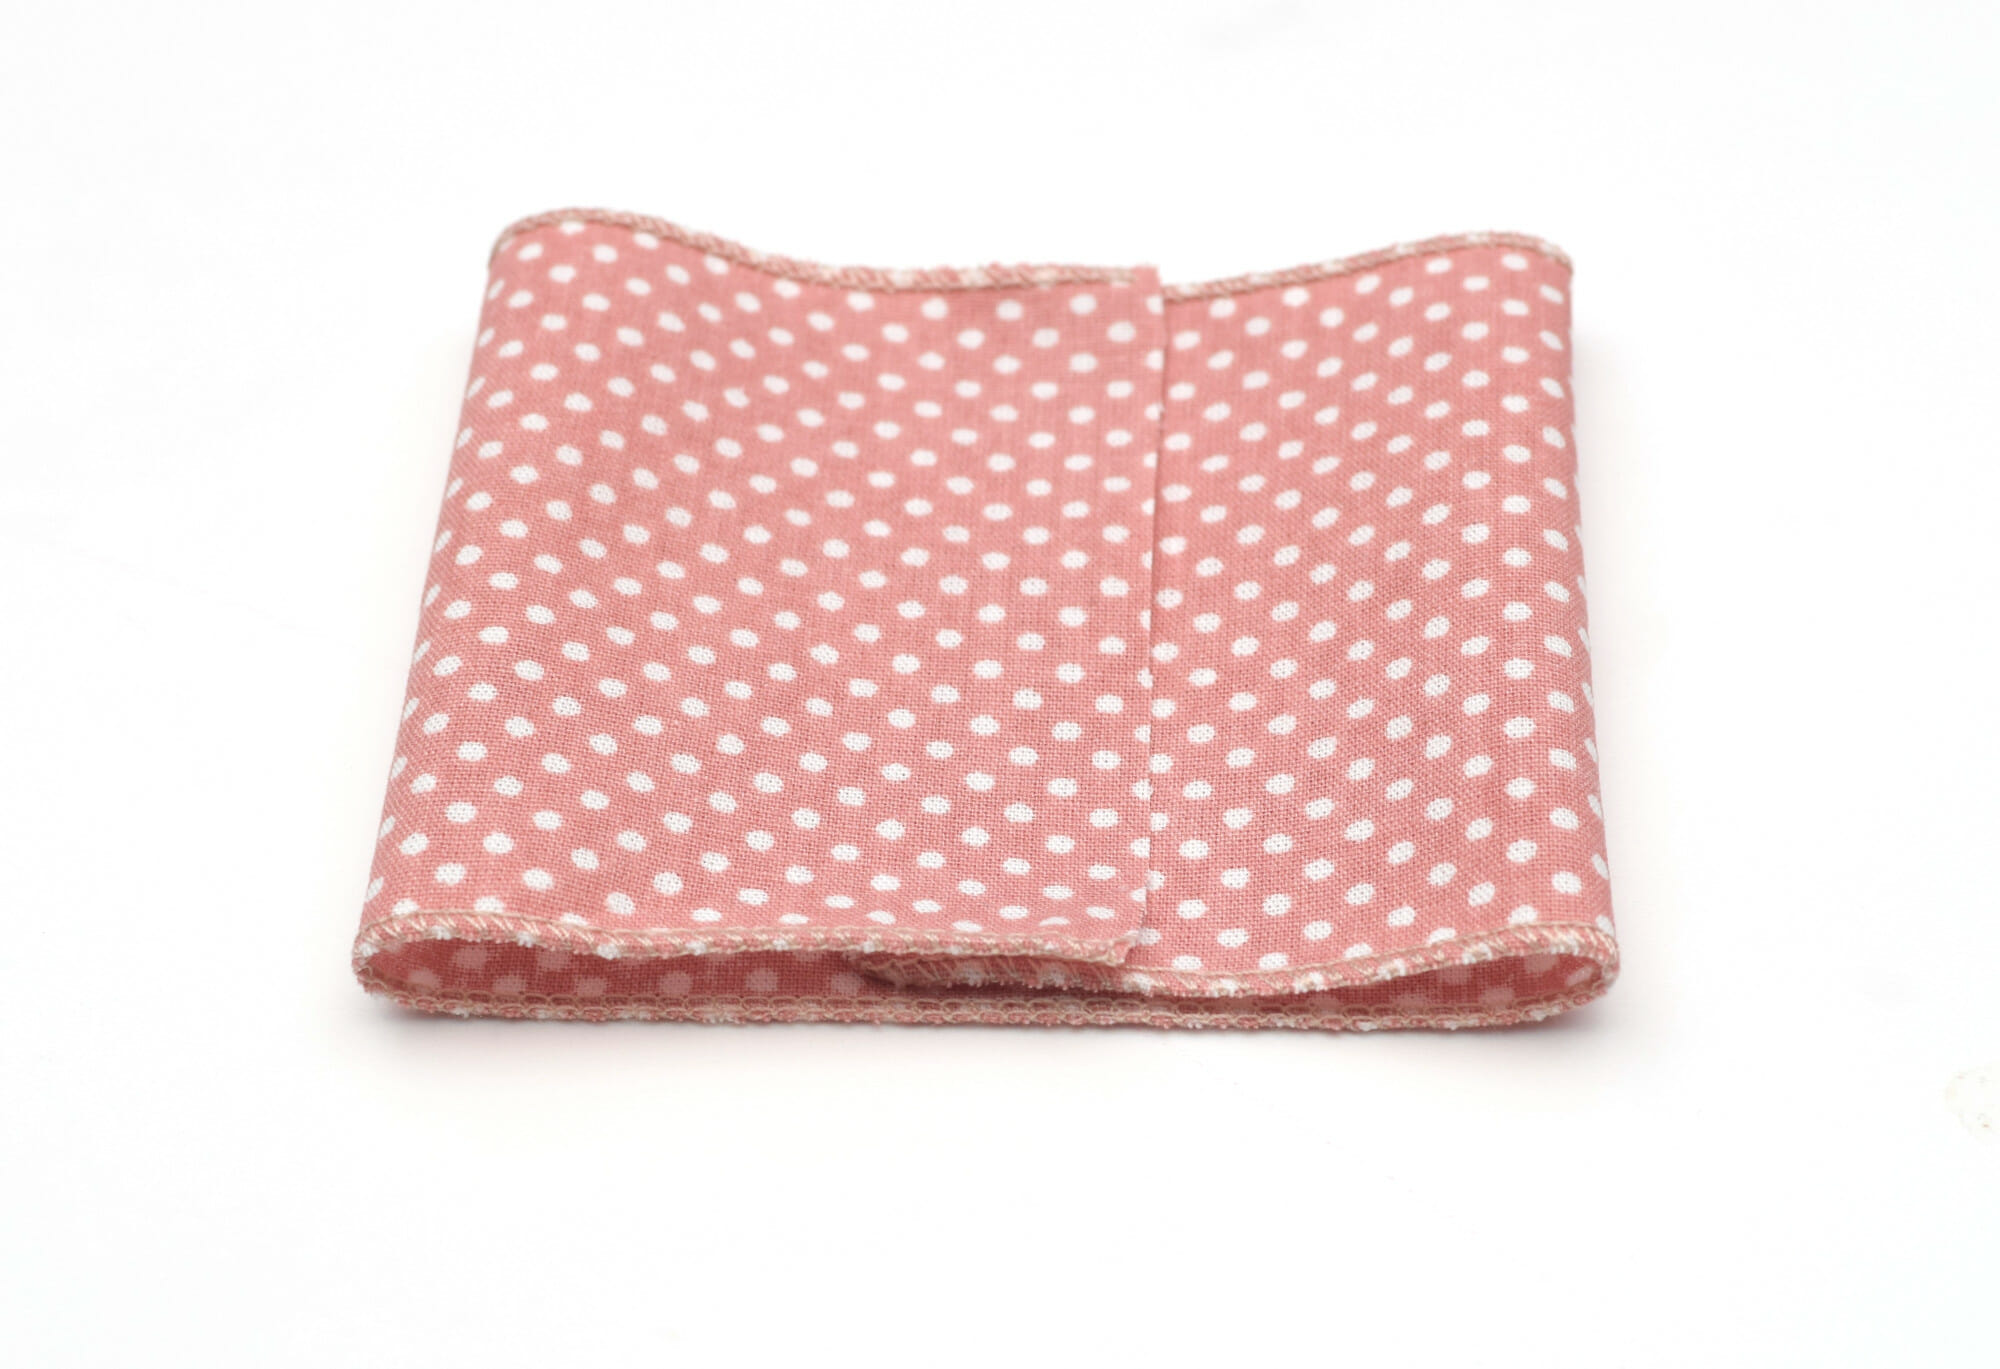
Fold the rectangular piece in half and mark its center. Then lay it down with the wrong side up and fold the raw ends into the center. Overlap them by 3/8”.
Step 4
Thread a needle with a double thread and sew a running stitch up the center of the bow.
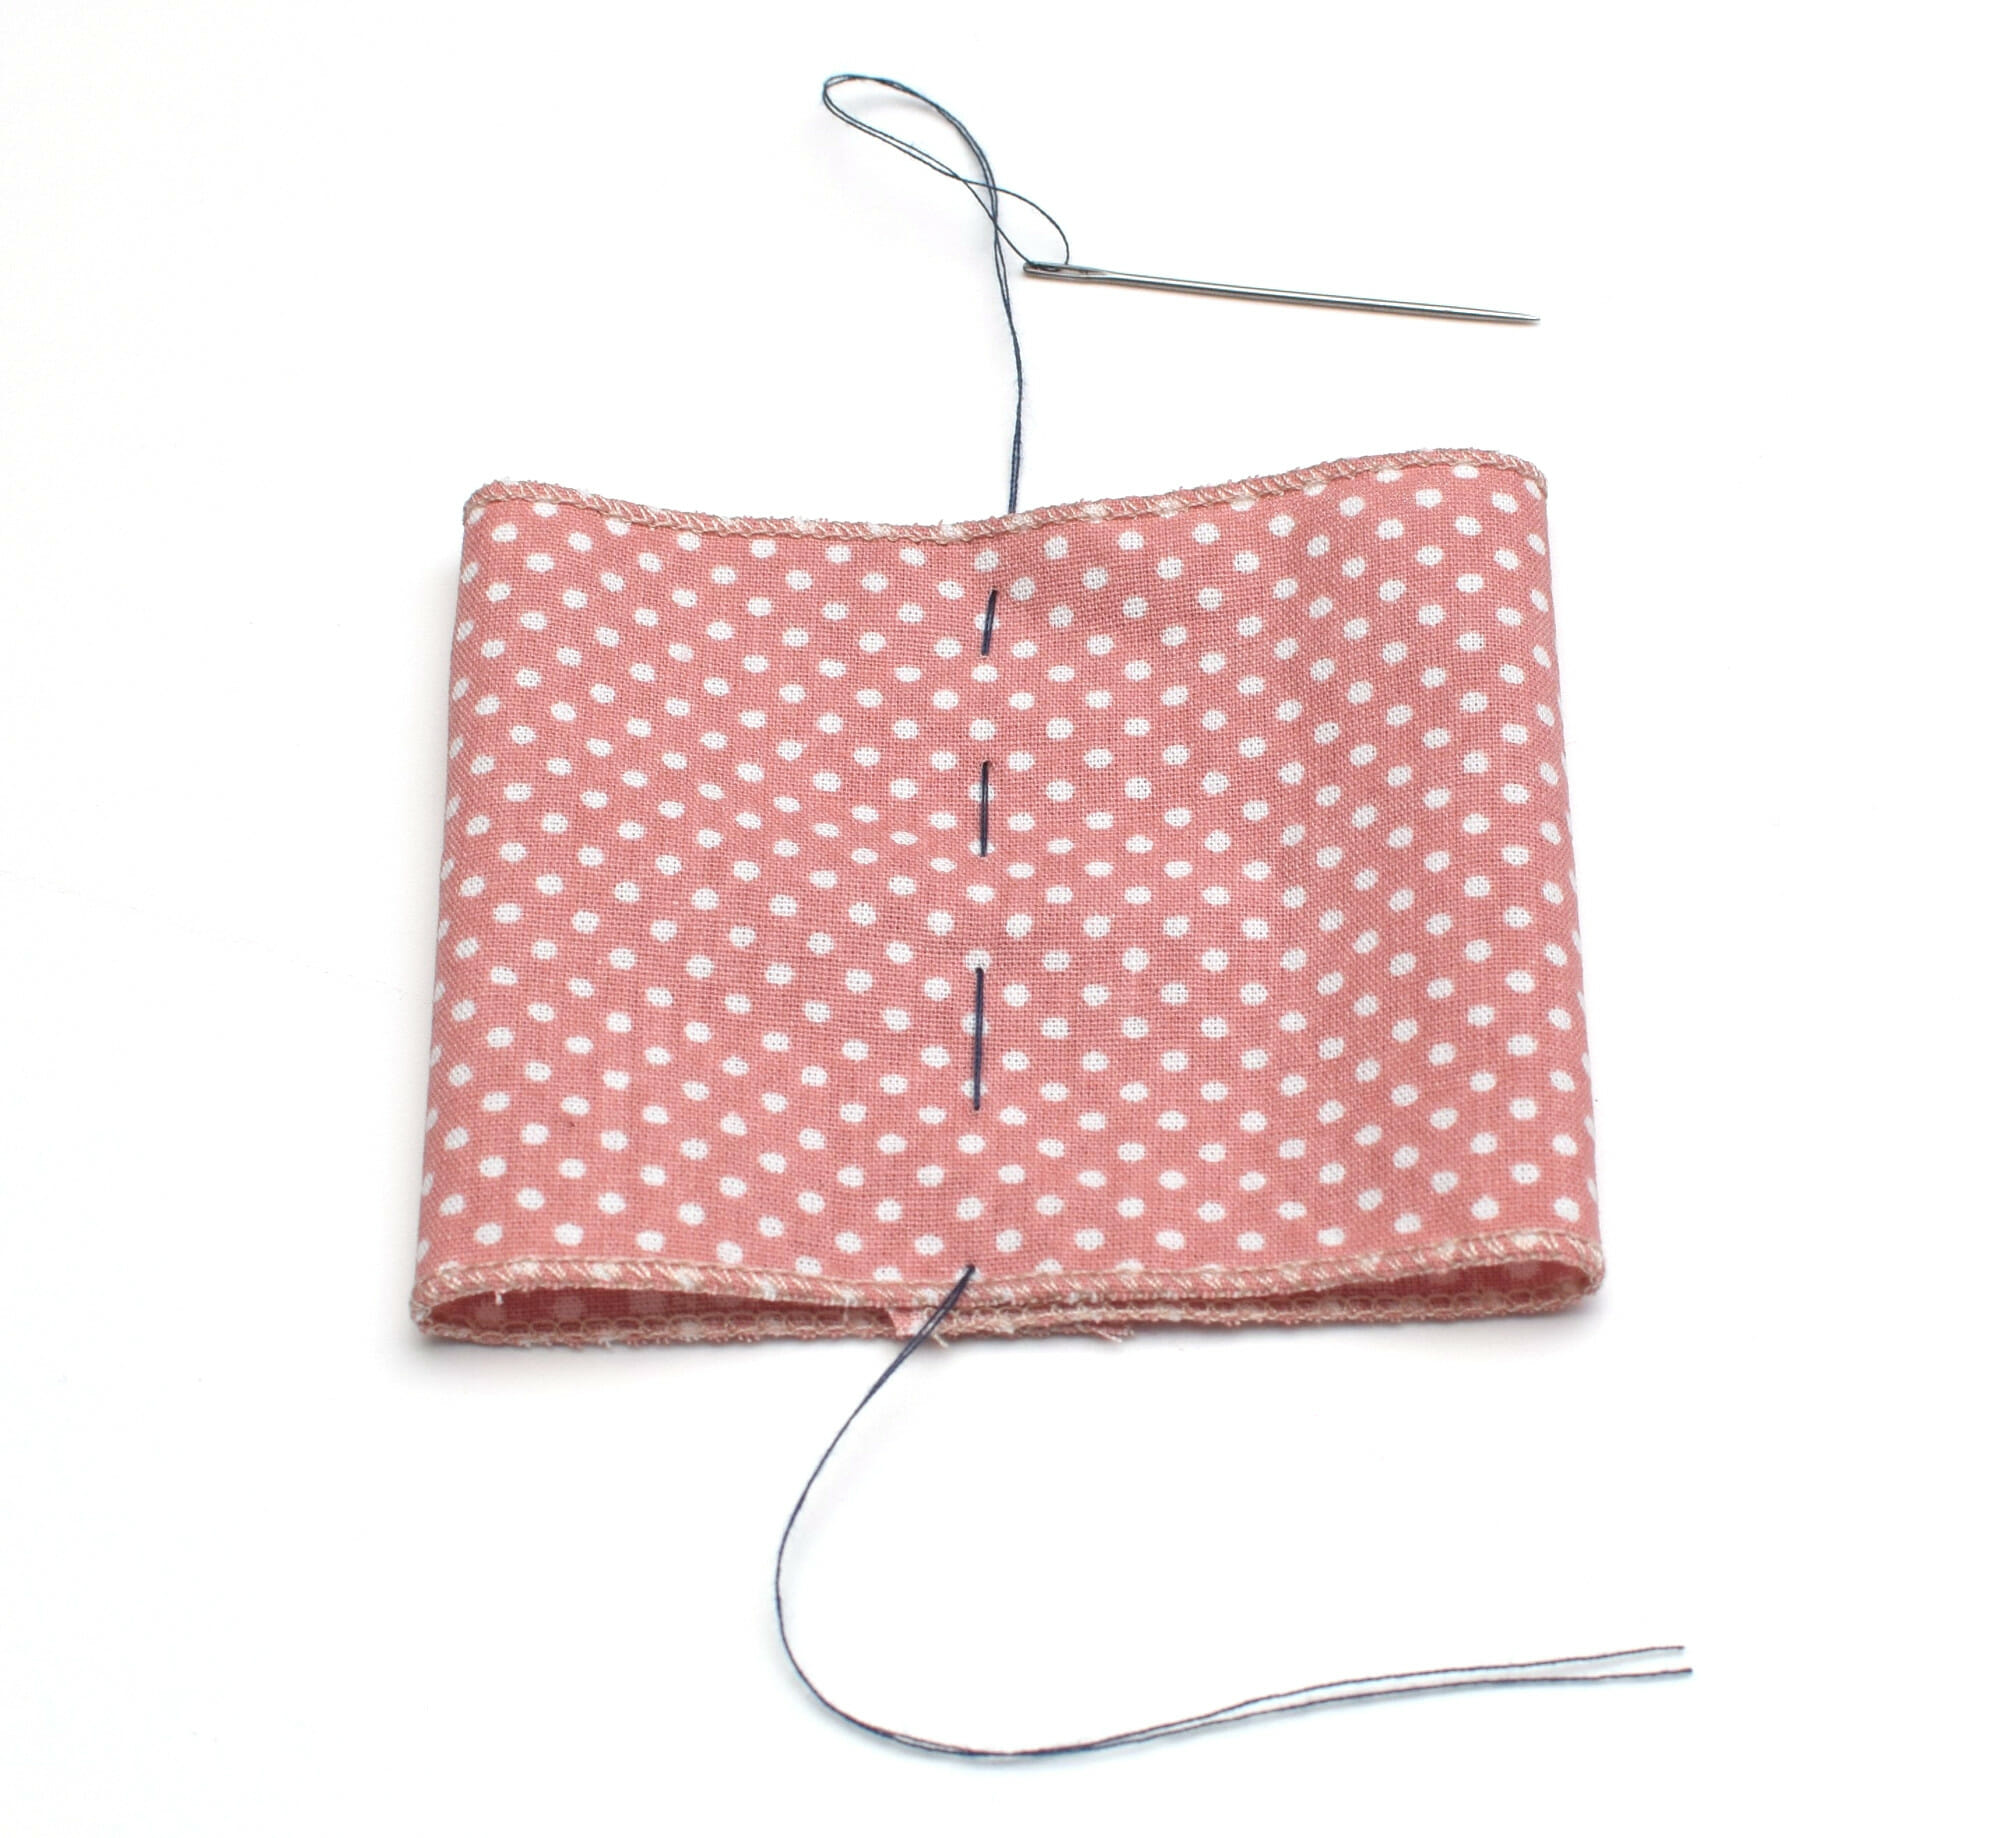
Then pull the thread tight to gather the center and play around with the folds until you like the look of your bow. This is an important step – just take your time and don’t settle until you are satisfied with the folds.
After that, wrap the thread around the center, tie it off a few times, and trim the tails.
As you may have noticed from the photos, no two of my bows look the same, however I love every one of them.
There are some small imperfections and differences in shape and size and that’s ok, since these are handmade items.
Step 5
Wrap the bow middle with the oval fabric piece and tie it on the back. Make sure the bow is balanced and arrange the folds to your liking. And that’s it!

But don’t stop here, make one in every color! This is such an easy and quick DIY project. I hope you enjoyed learning how to make a fabric bow.
Let’s keep in touch! You can find me on Facebook, Instagram, and Pinterest.


I love how you show everything in detail (showing measurements as well). Helped me a lot. Thanks.