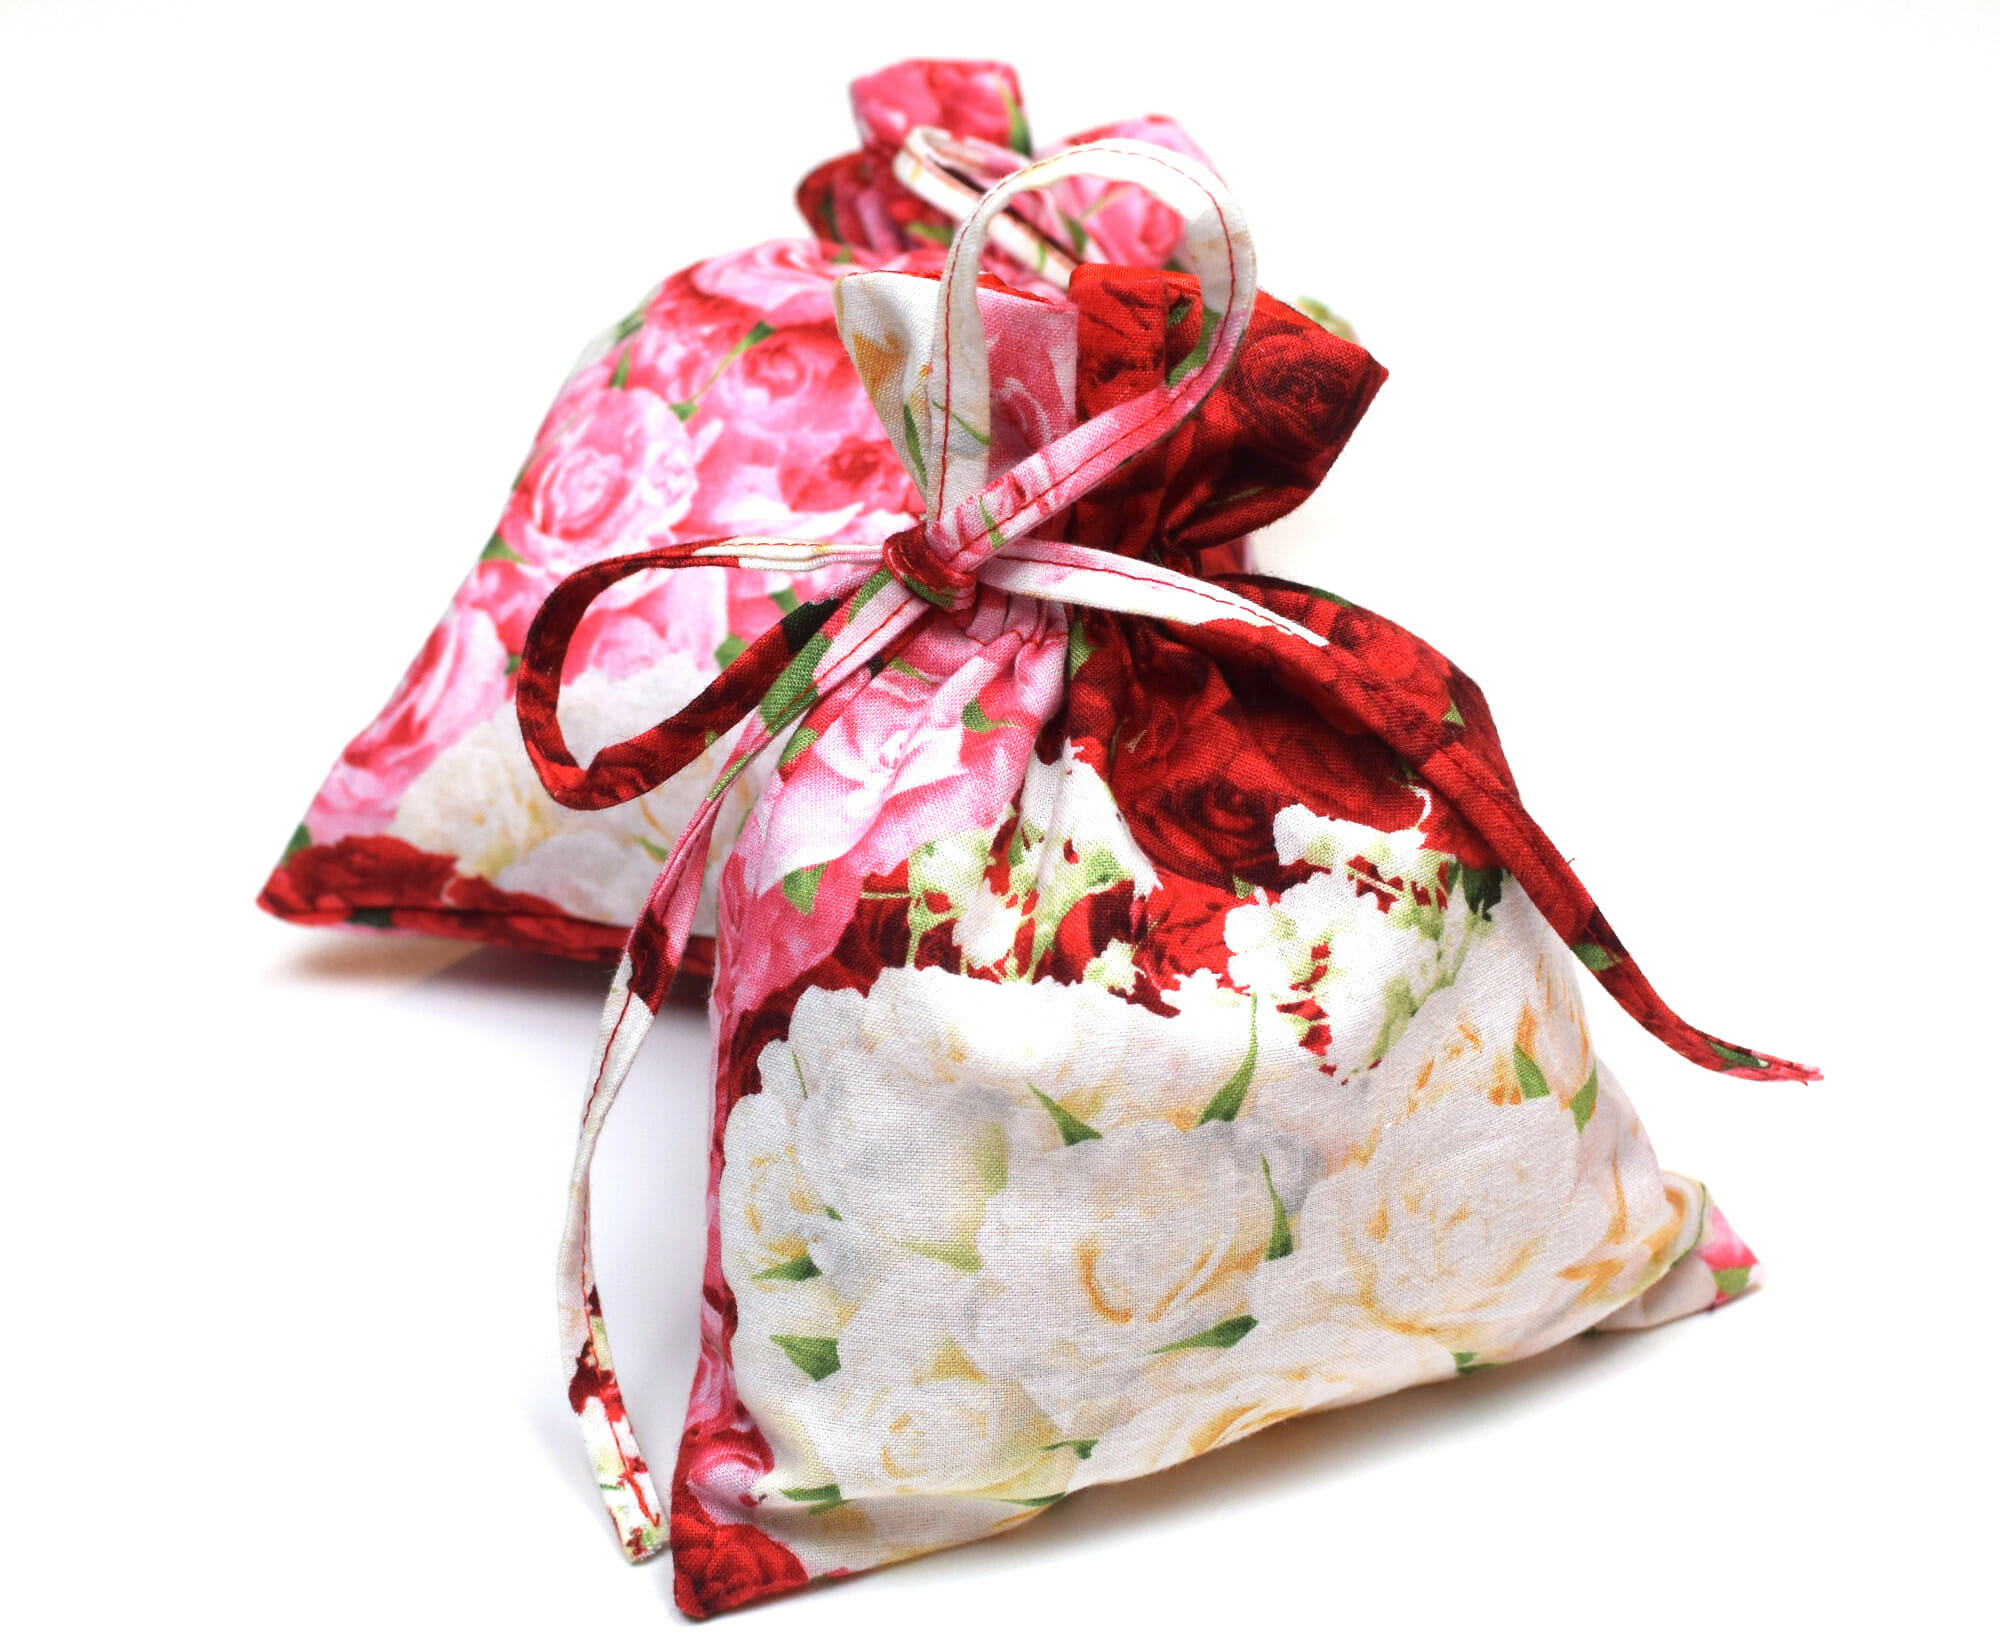
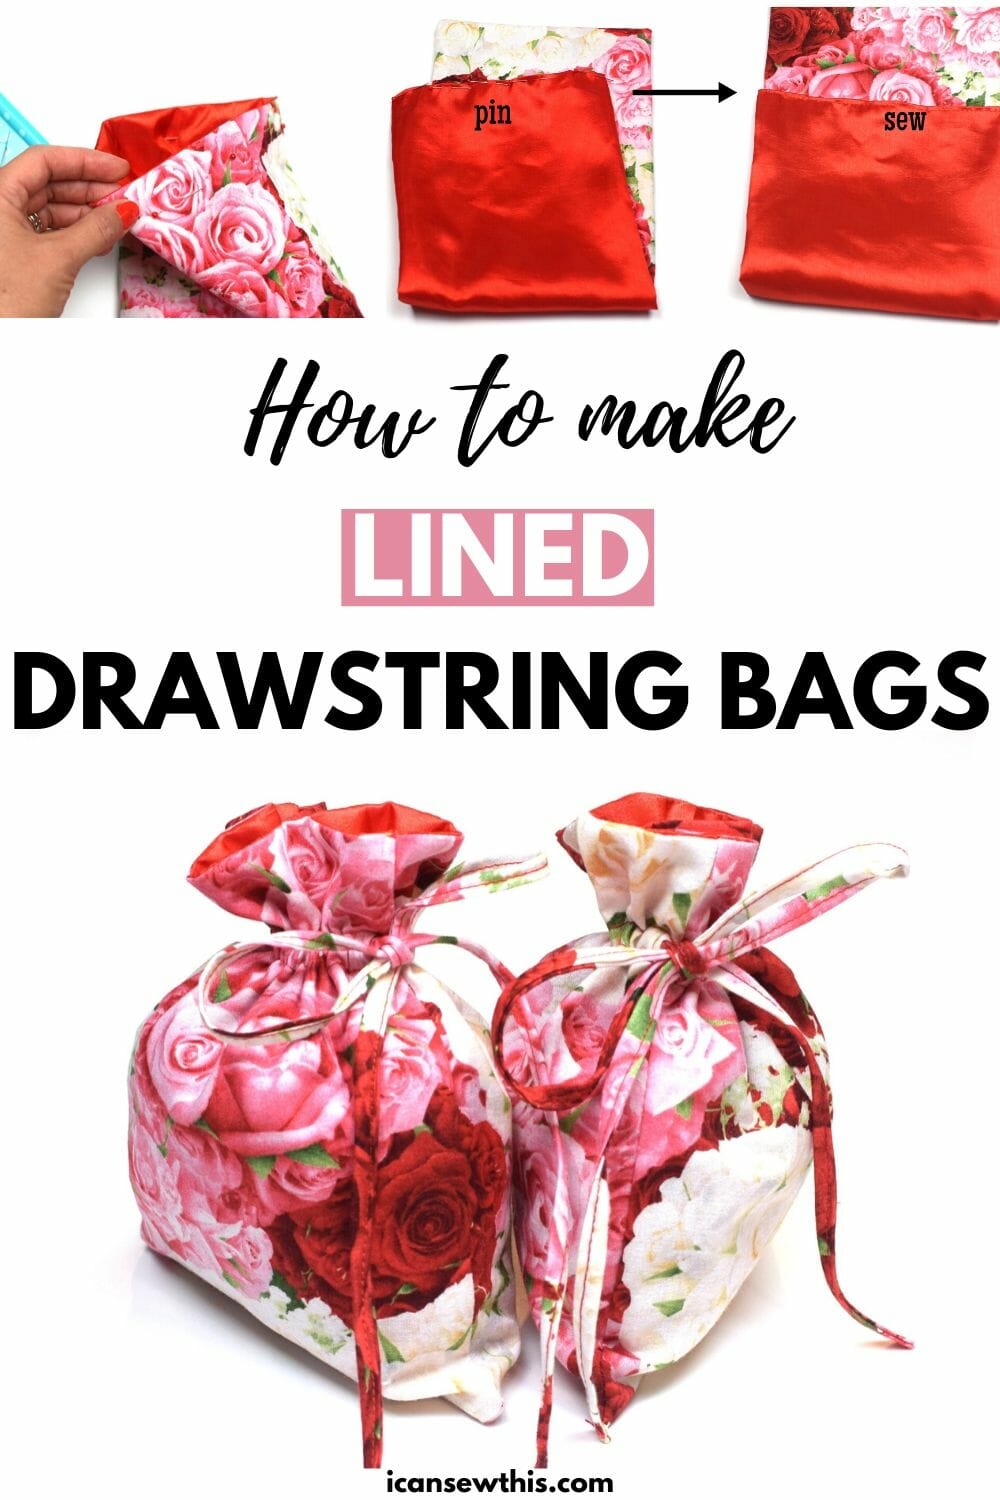
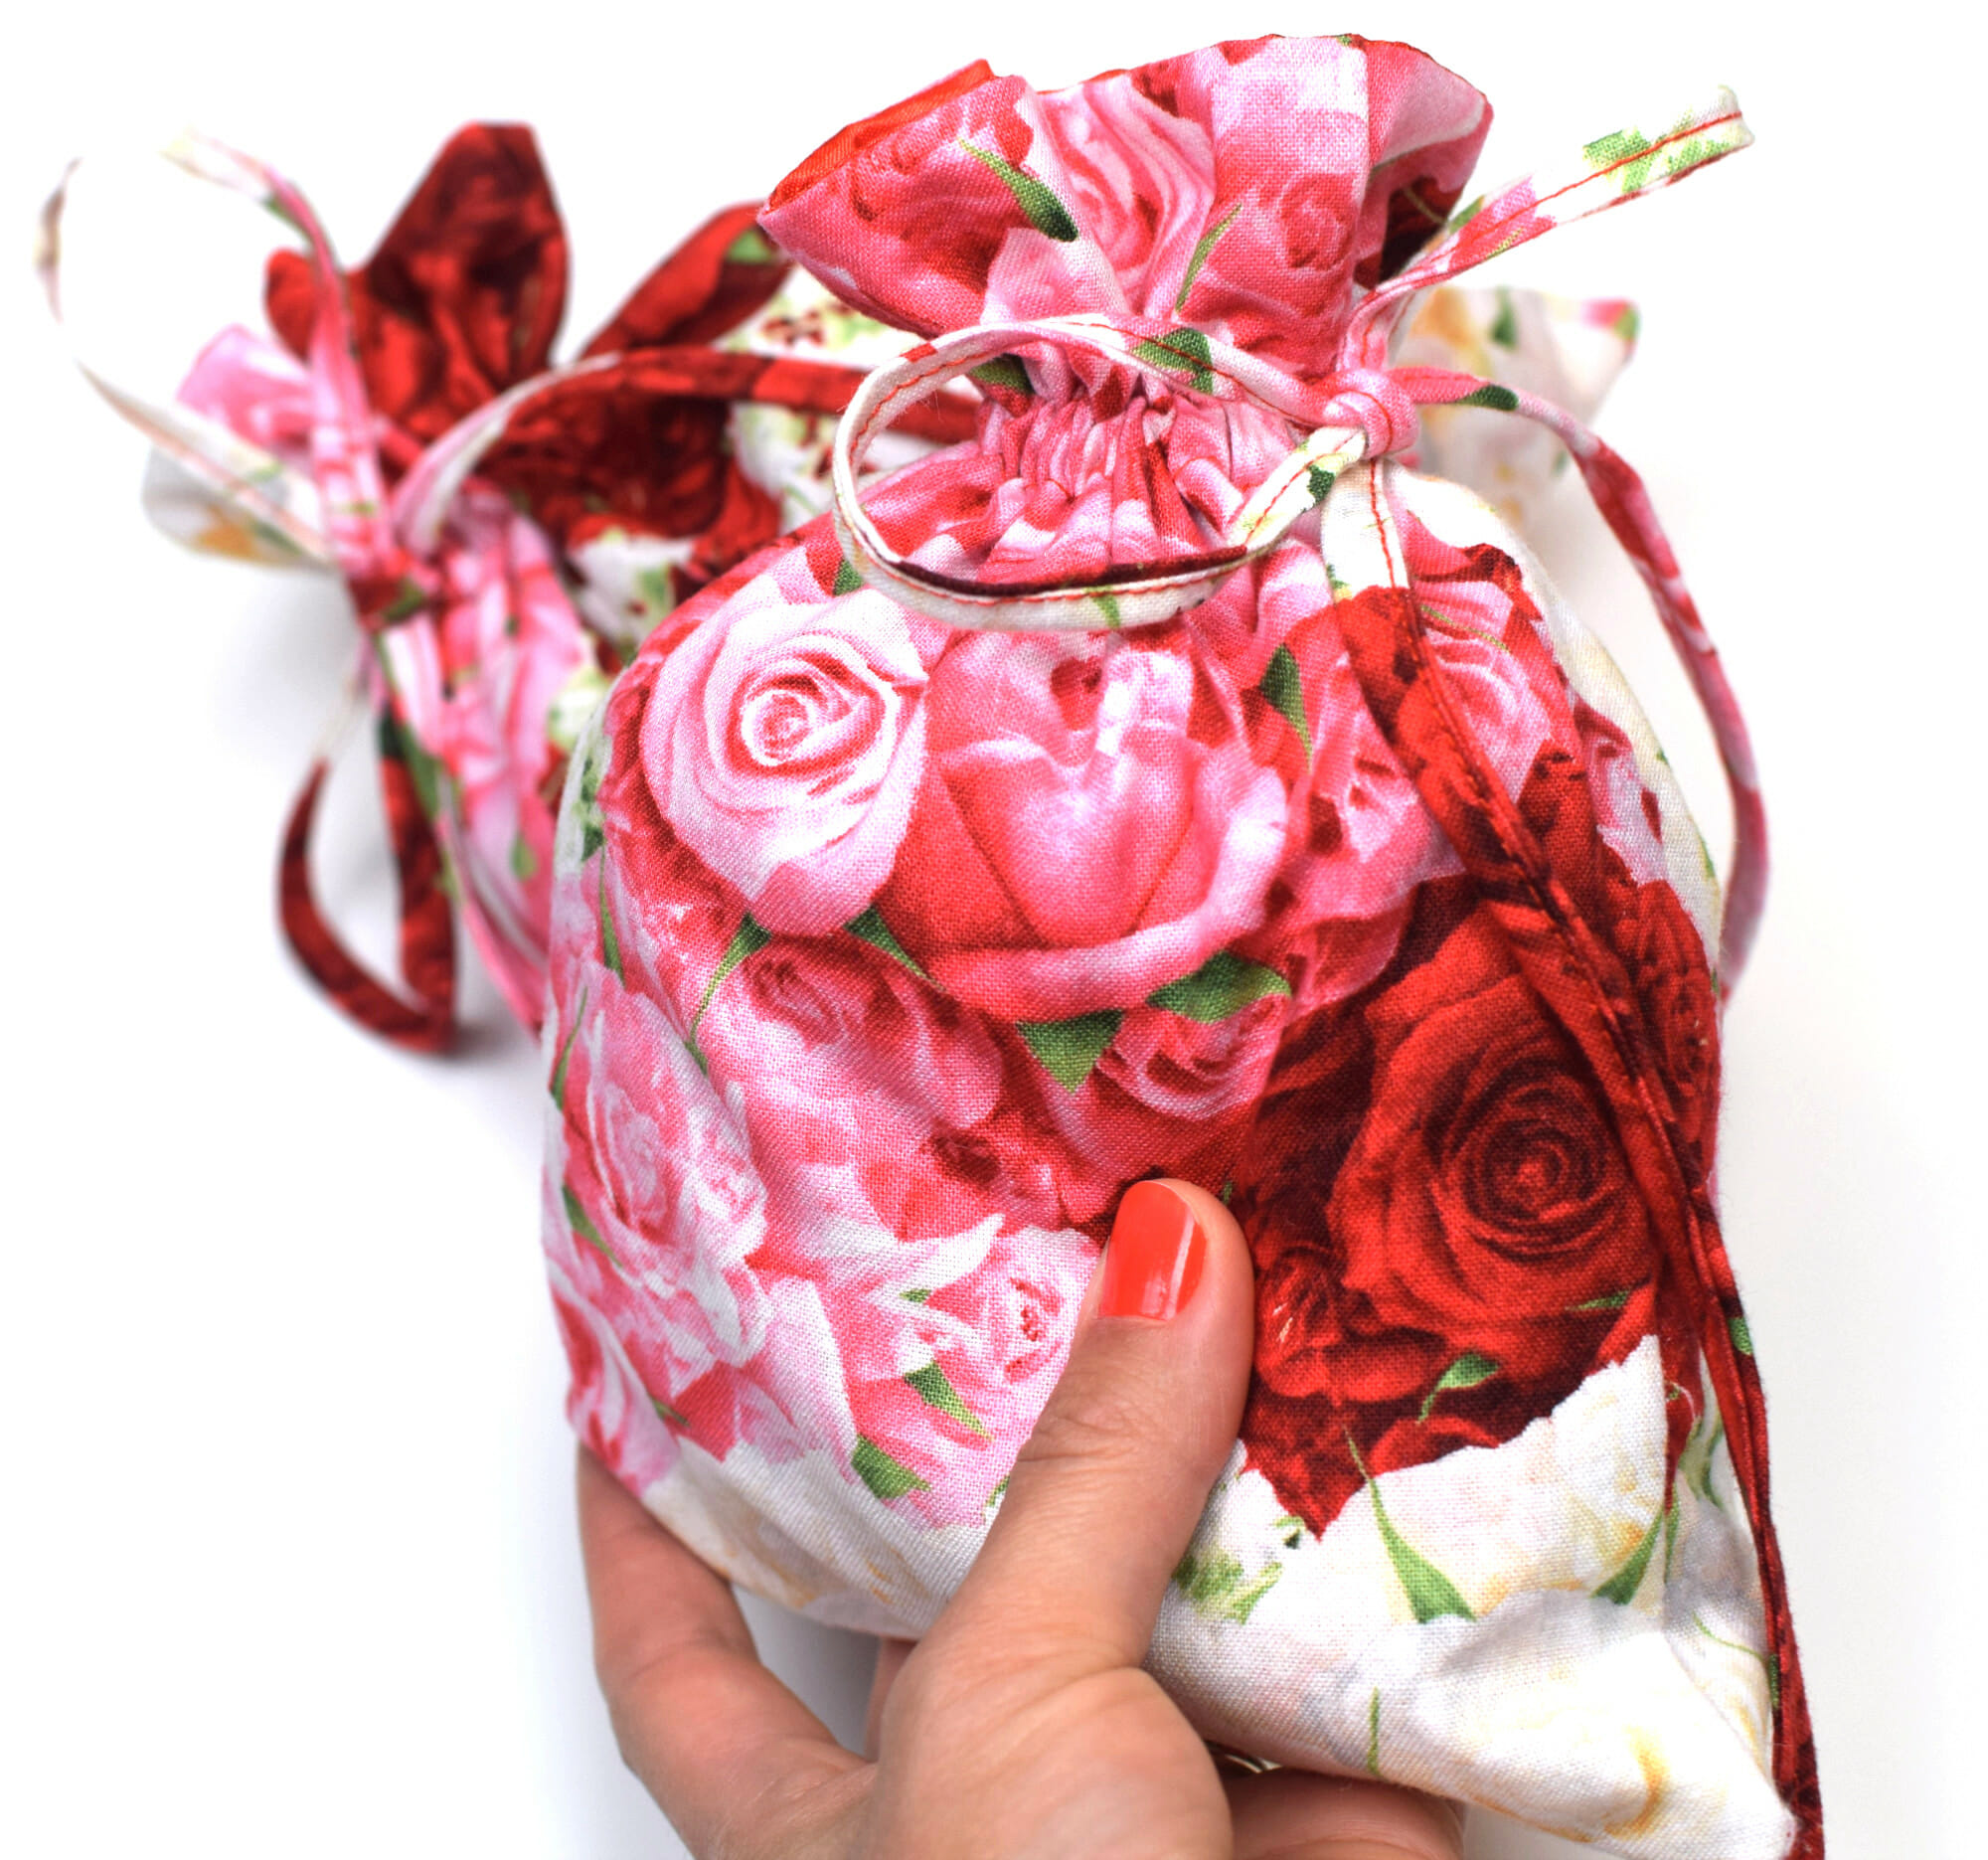
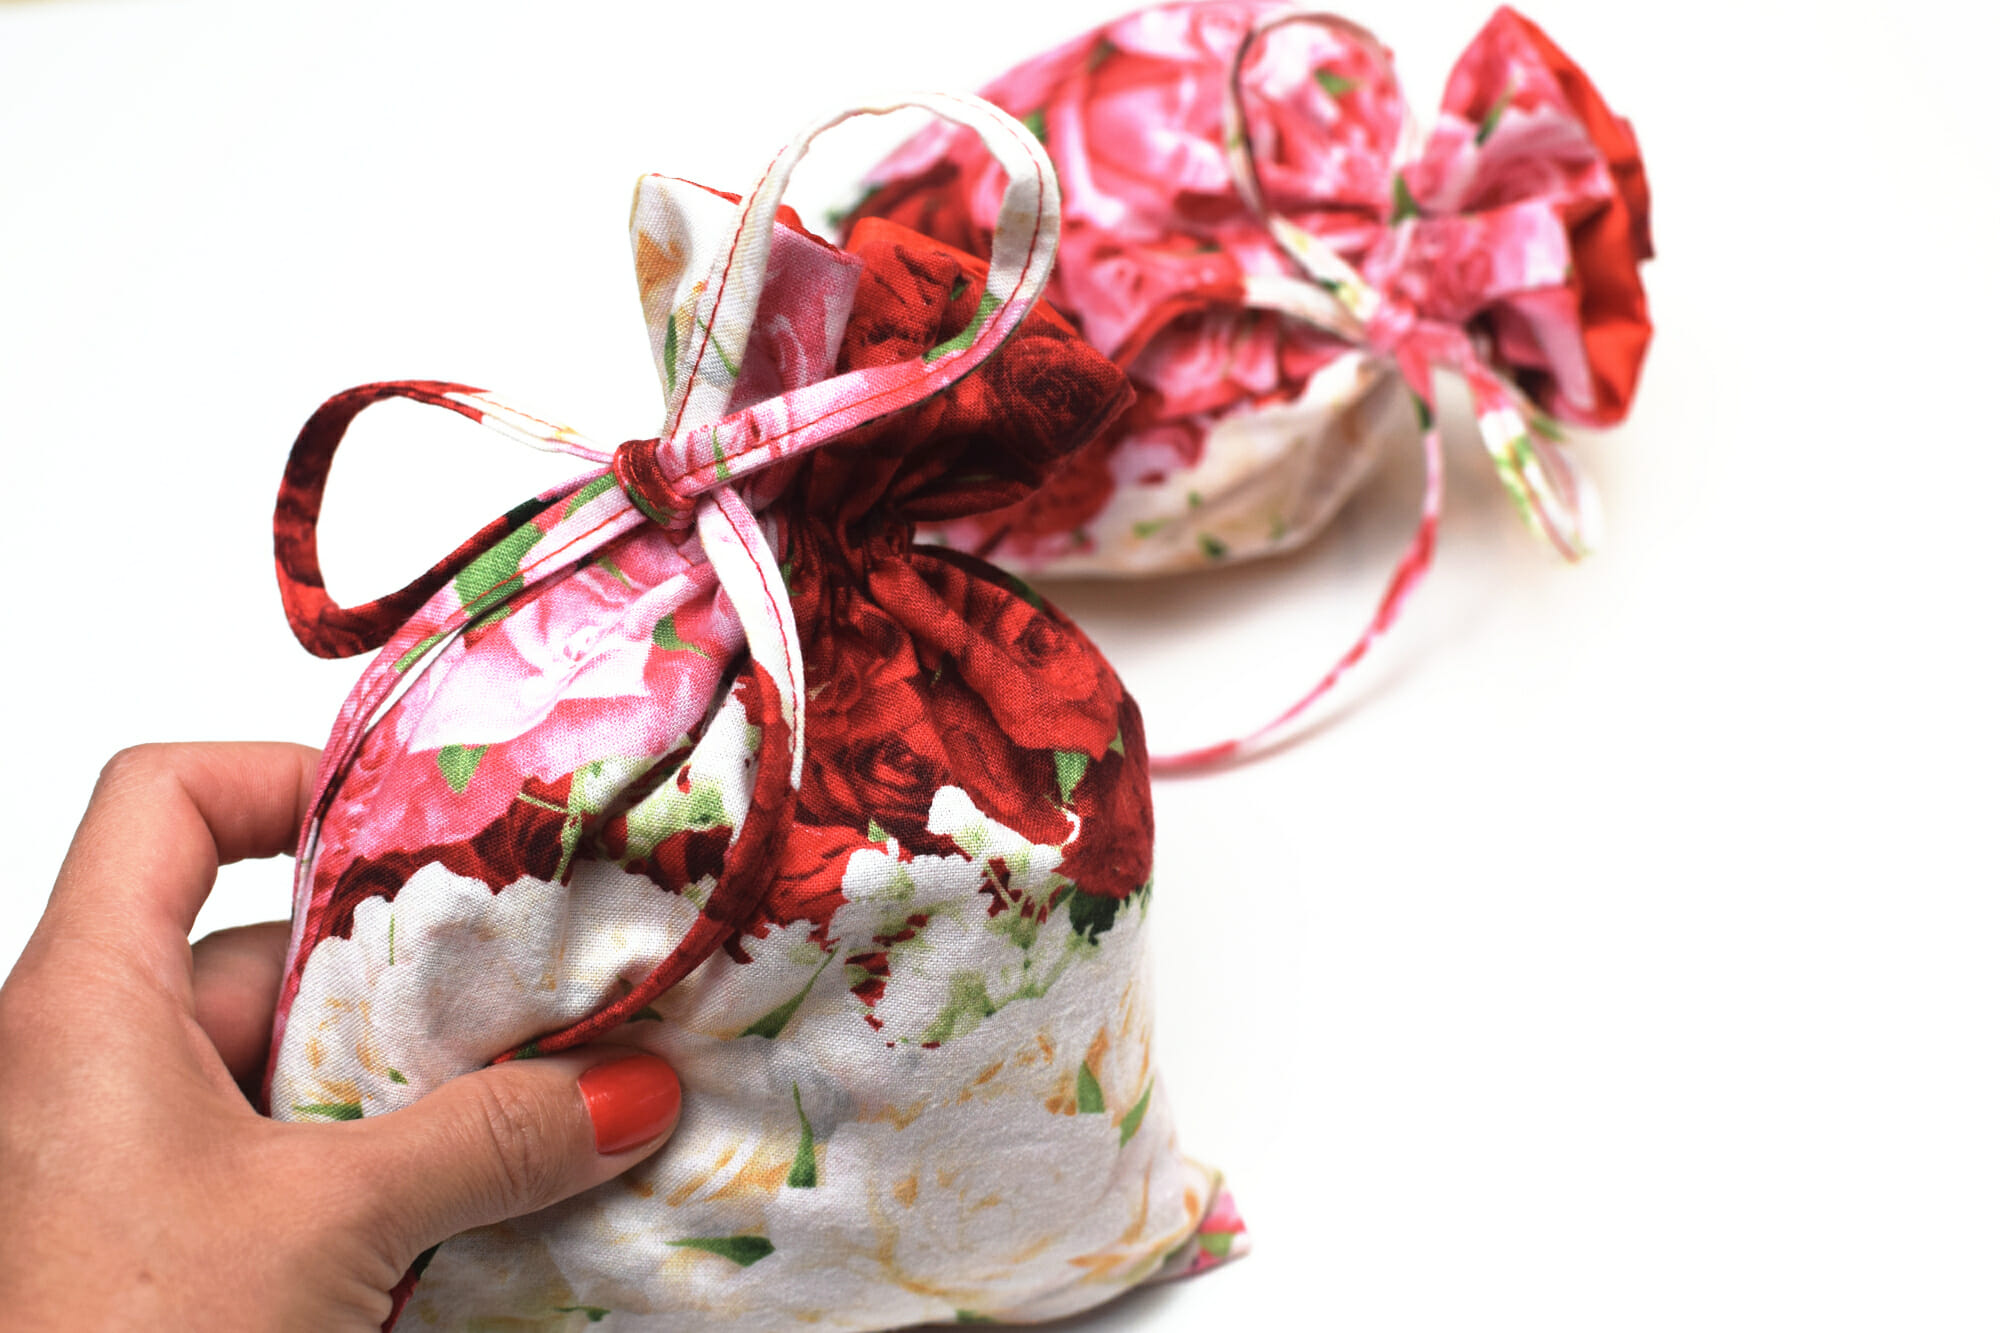
Lined drawstring bag tutorial. This fully lined drawstring bag is adorable and can be used in any size, for a wide variety of purposes. It’s beautiful inside and out and it’s great for long term use.
Follow these step-by-step instructions to make your own. If you need a quick, simple gift bag, this is just perfect!
With this easy tutorial, making a lined drawstring bag on your sewing machine should take about 10 minutes.
Looking for quick and easy sewing projects? Here are some other things you can sew in about 10 minutes: reversible fabric coasters, scrunchies, infinity scarf.
Creative uses of drawstring bags
These lined drawstring bags are perfect for containing jewelry, candies, make-up, small toys, diaper bag essentials, art supplies, or accessories like socks, scarves, and gloves.
The possibilities are endless!
For instance, you could make a lined drawstring bag in organza, satin or chiffon, and there you have an awesome gift bag you can use to store fine jewelry or as a wedding bag for bride/bridesmaids.
Moreover, you could even make a big one as a Christmas present bag, a laundry bag, or a travel bag.
I made these cute drawstring bags for my daughter; this is where she now keeps her scrunchies.
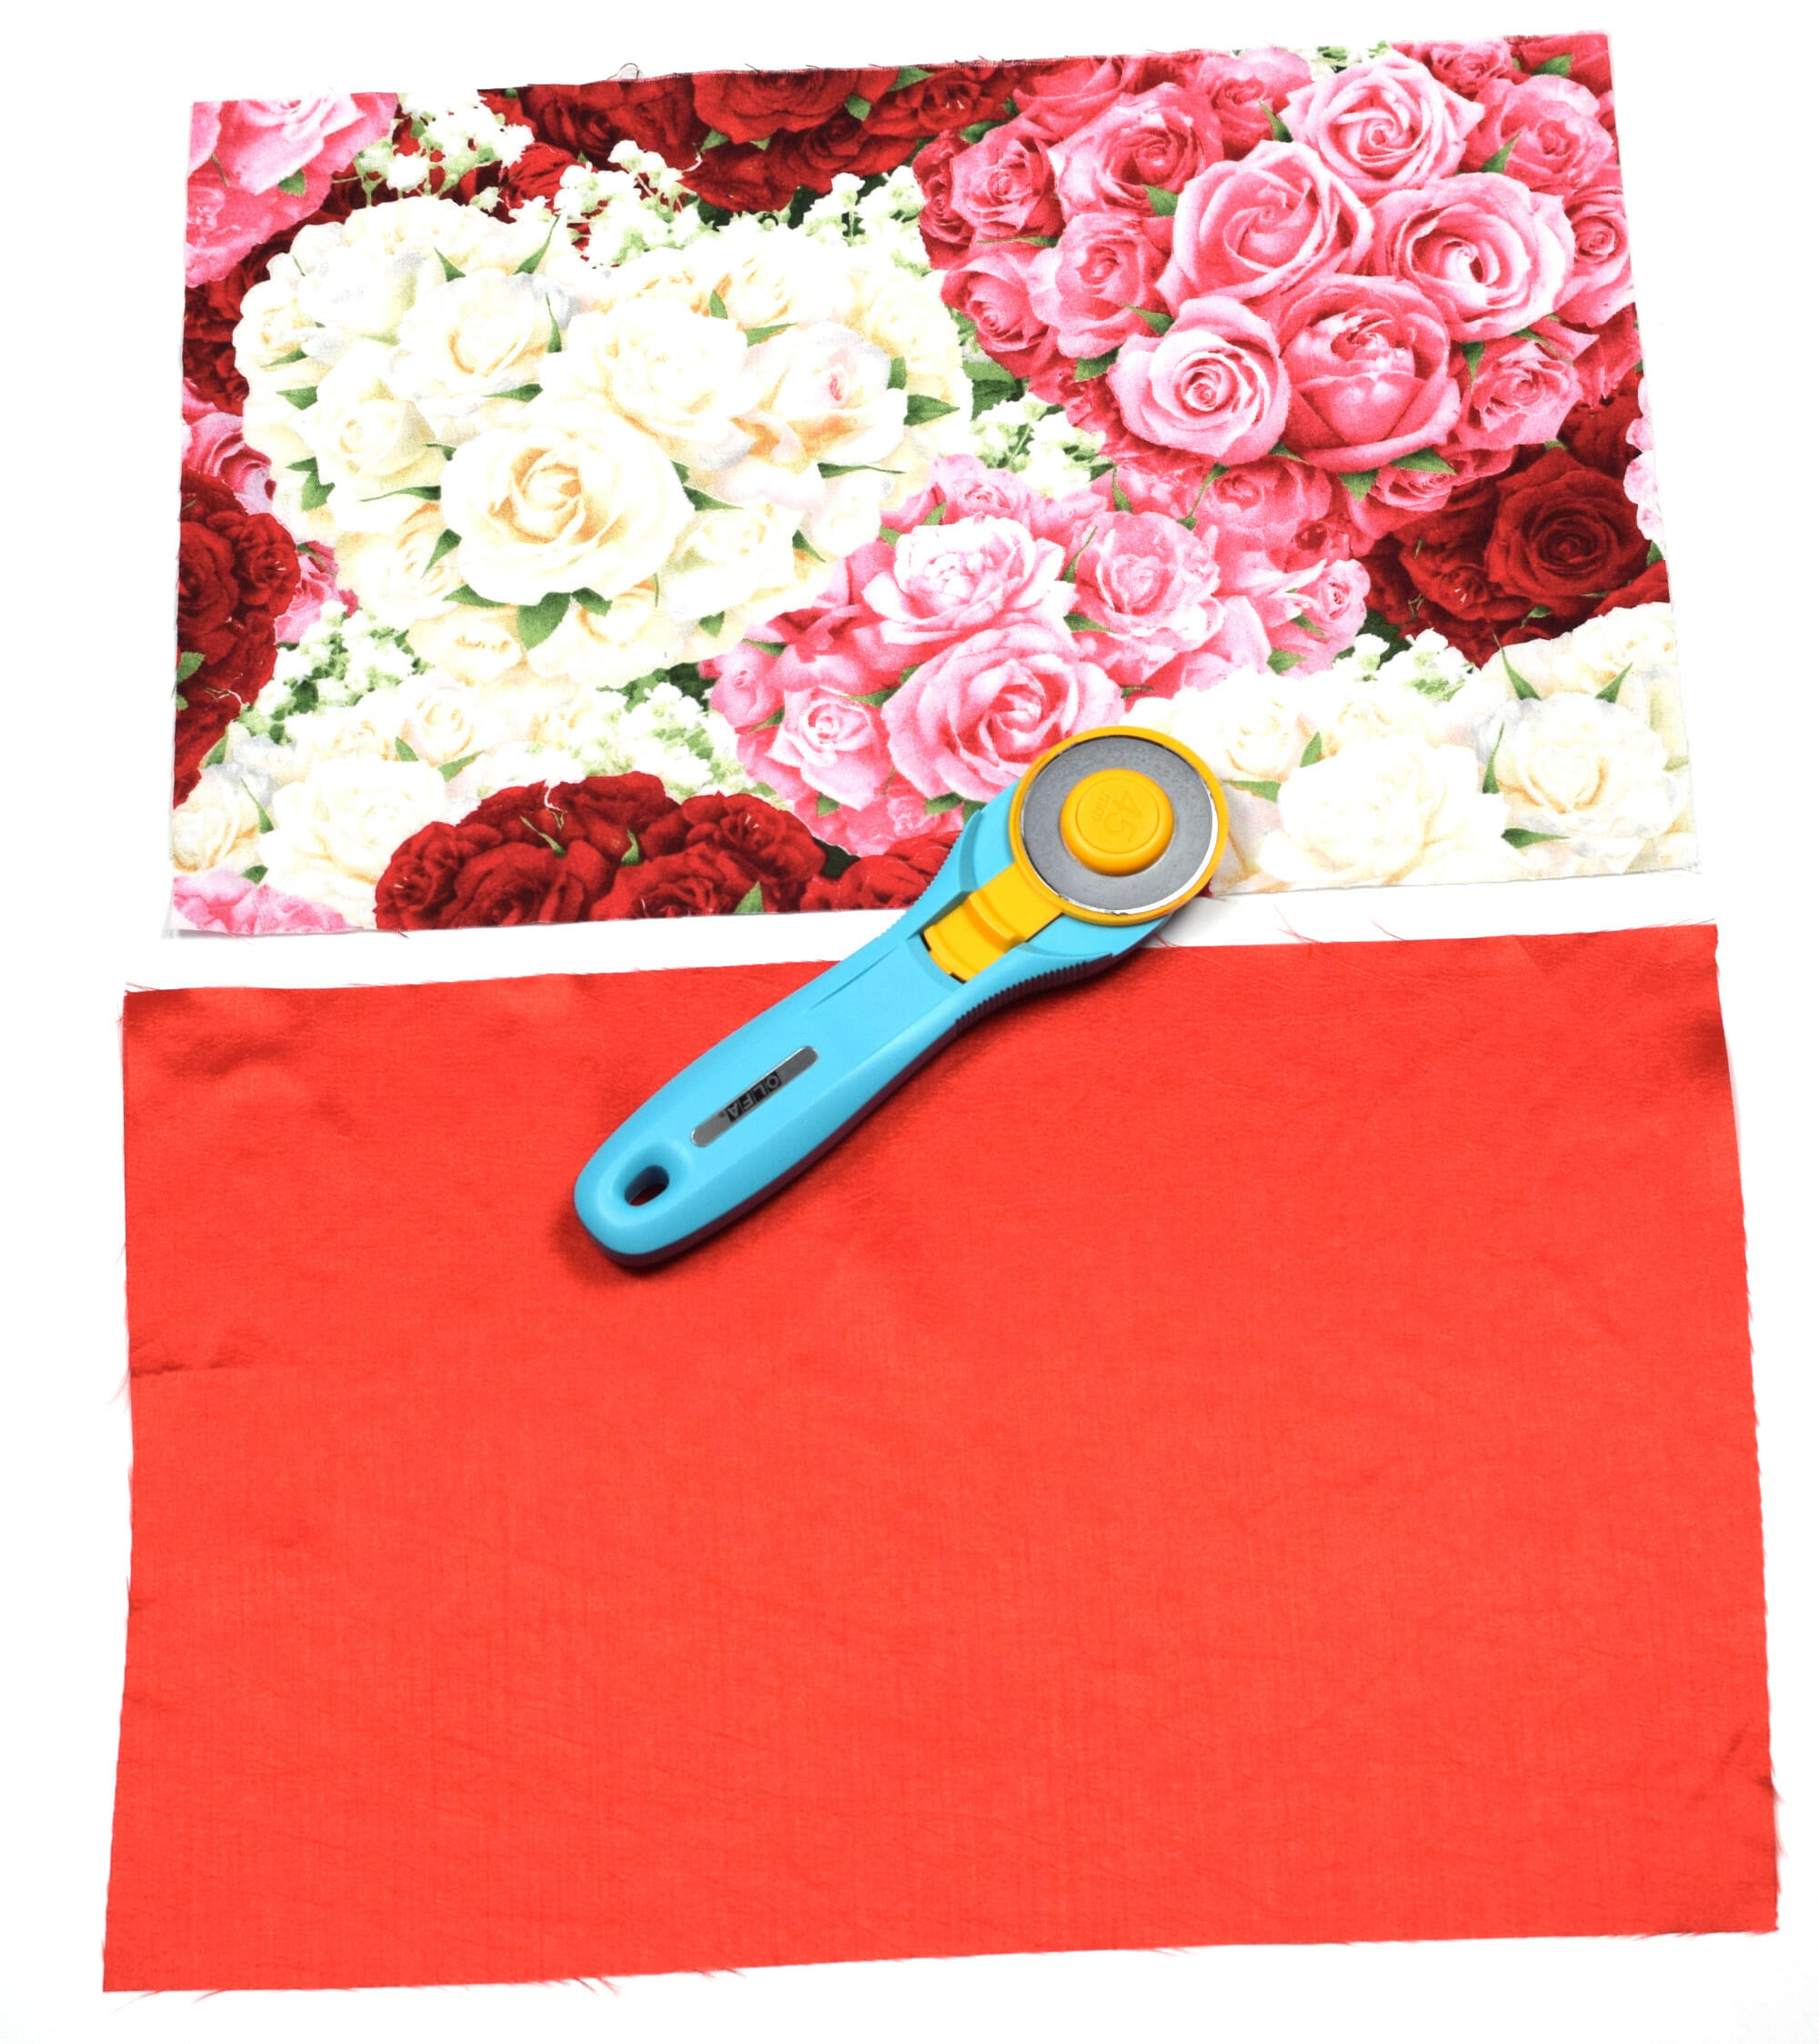
Sewing supplies
- fabric for the outside layer of the bag
- fabric for the lining of the bag
- ribbon or cord – approx. 26″ long
- sewing machine
- sewing machine needle
- matching thread
- sewing pins
- sewing gauge
- fabric scissors or rotary cutter
- iron
Be sure to check out my other tutorials on how to make a simple zipper pouch and an envelope pillow cover.
Lined drawstring bag tutorial – easy sewing project
Sewing Level: Beginner
Finished bag size: 6” wide x 8” tall
Use this formula to make a lined drawstring bag in ANY size:
Desired width for the finished bag = W
Desired height for the finished bag = H
Cut 2 pieces of fabric (W*2)+1 wide and H+1 tall.
Examples:
Finished bag size 7” wide x 9” tall – cut 2 pieces of fabric, each 15” wide x 10” tall
Finished bag size 10” wide x 12” tall – cut 2 pieces of fabric, each 21” wide x 13” tall
How to make a lined drawstring bag tutorial in 10 simple steps
Step 1
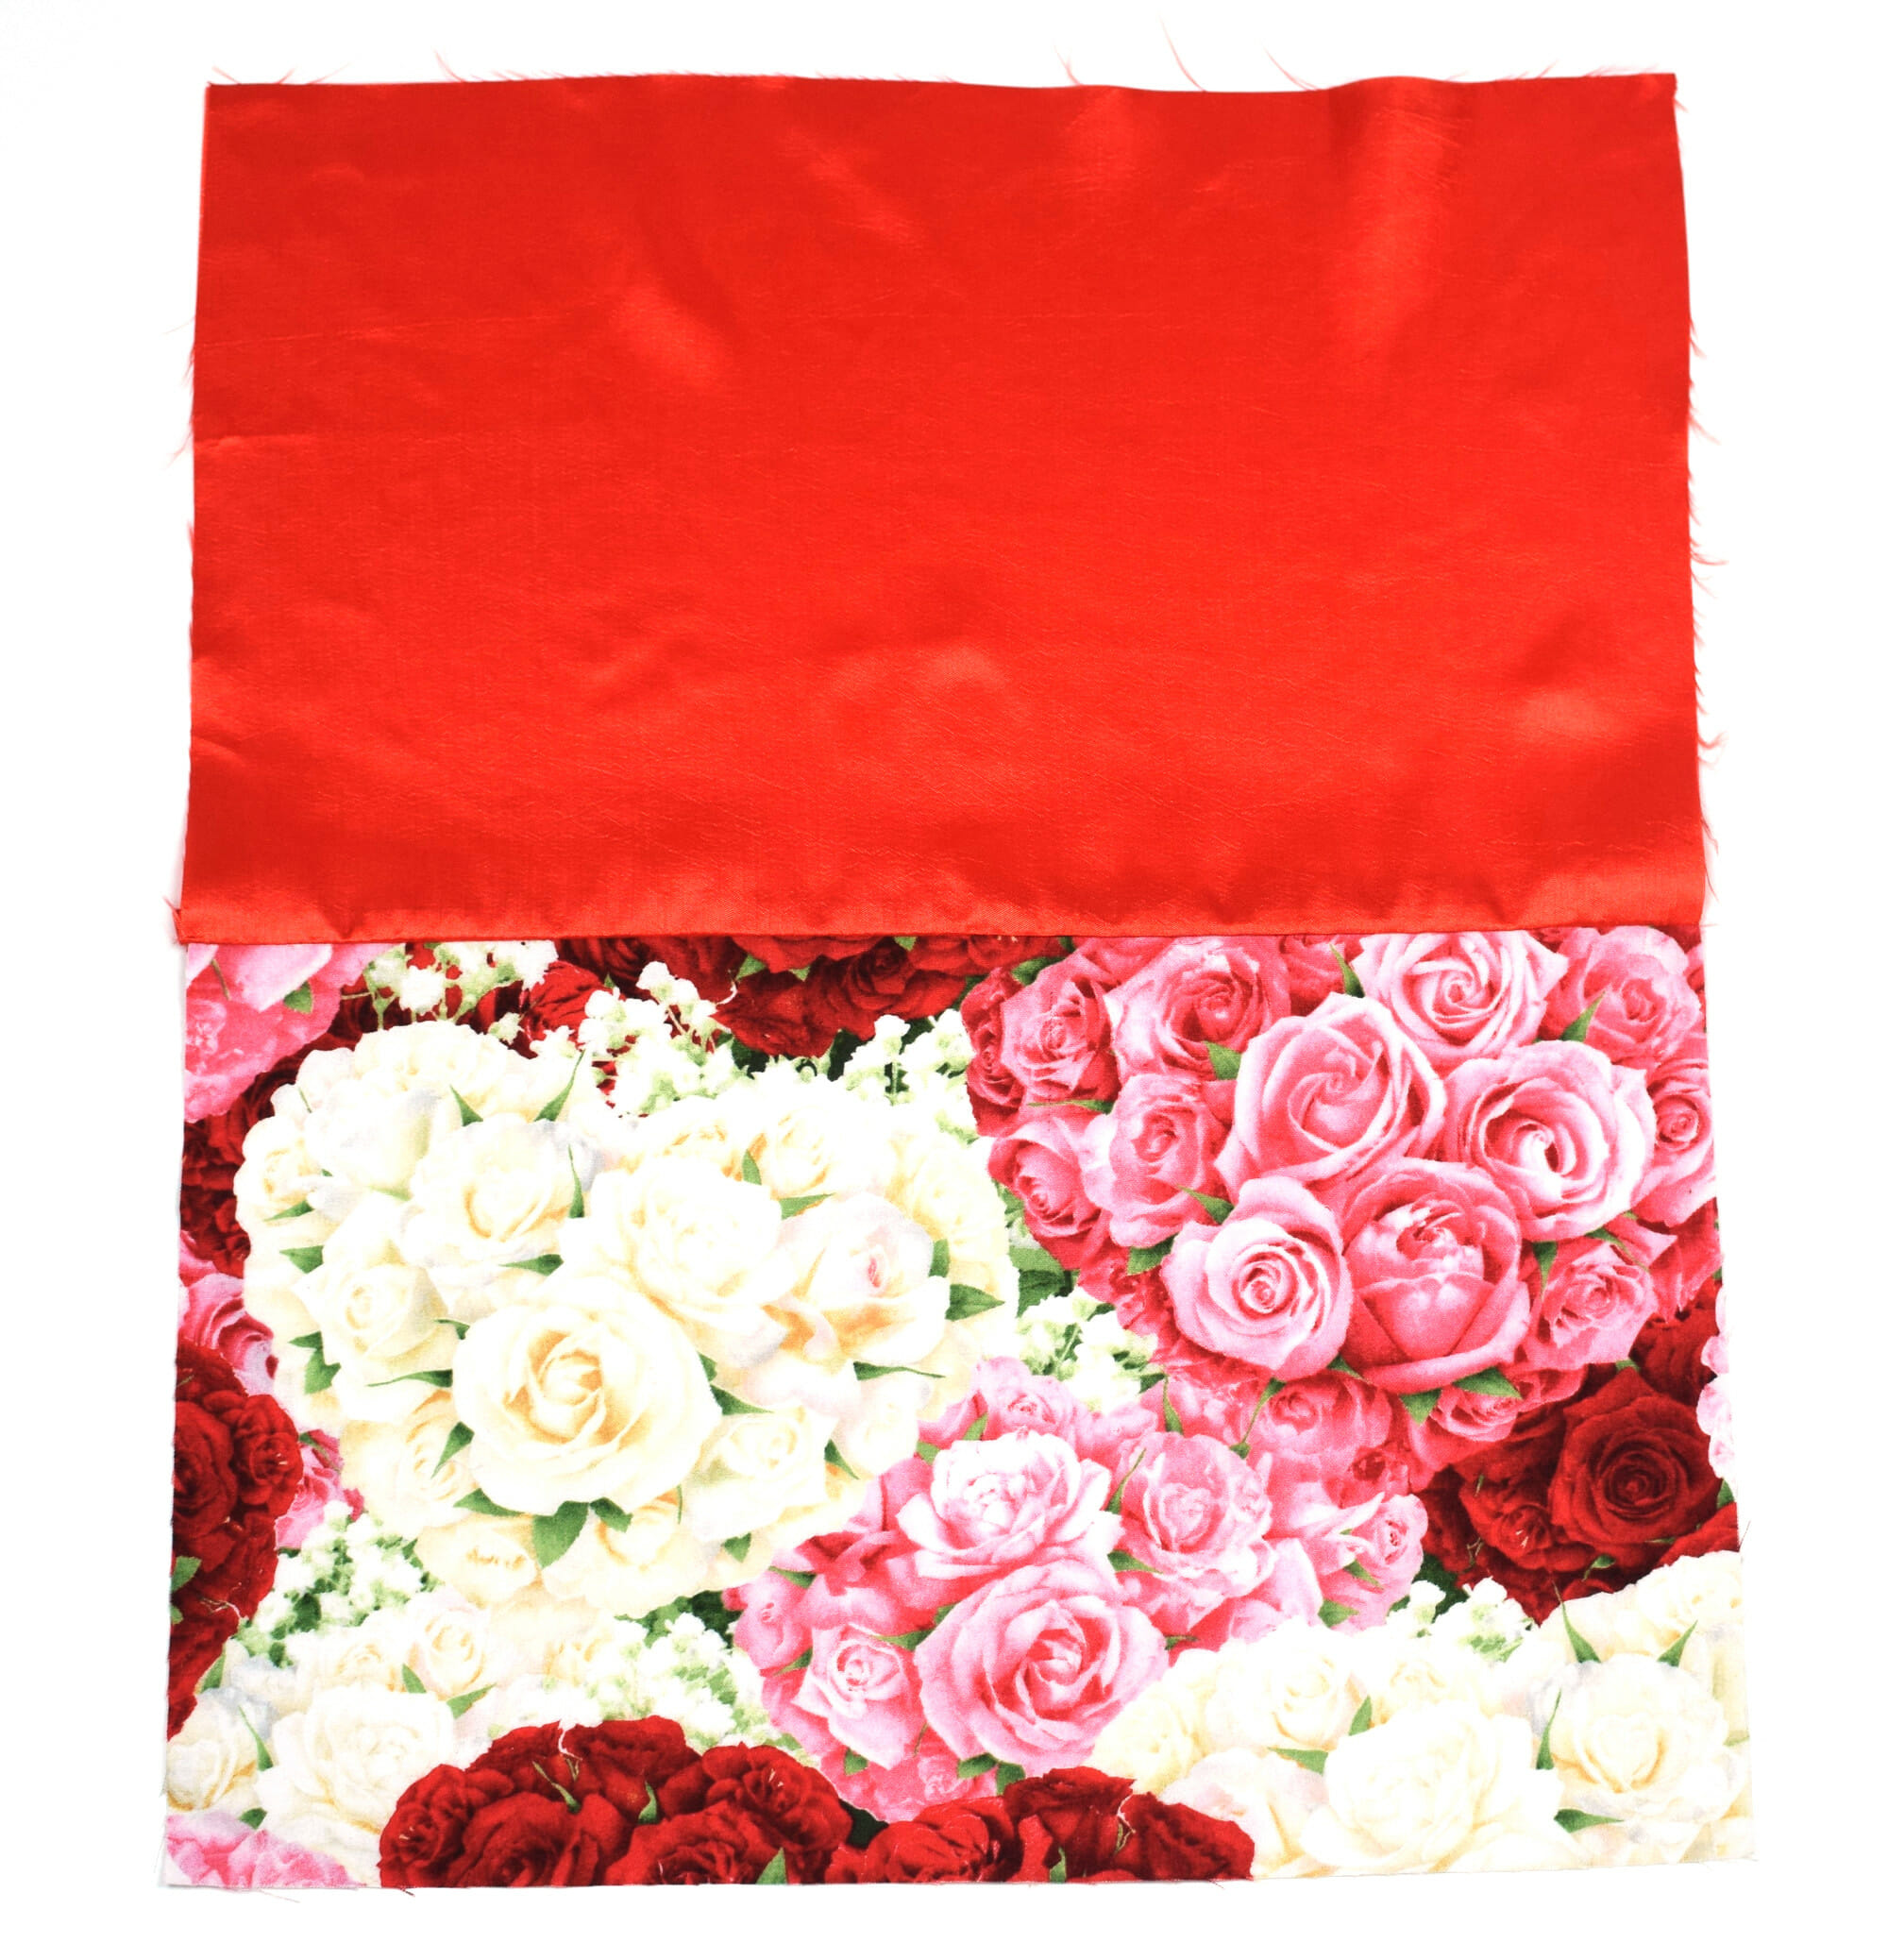
Cut two pieces of fabric, one for the outer layer, one for the lining – each 14″ wide and 9″ tall. Finished dimensions of my drawstring bag: 6” wide x 8” tall.
Step 2
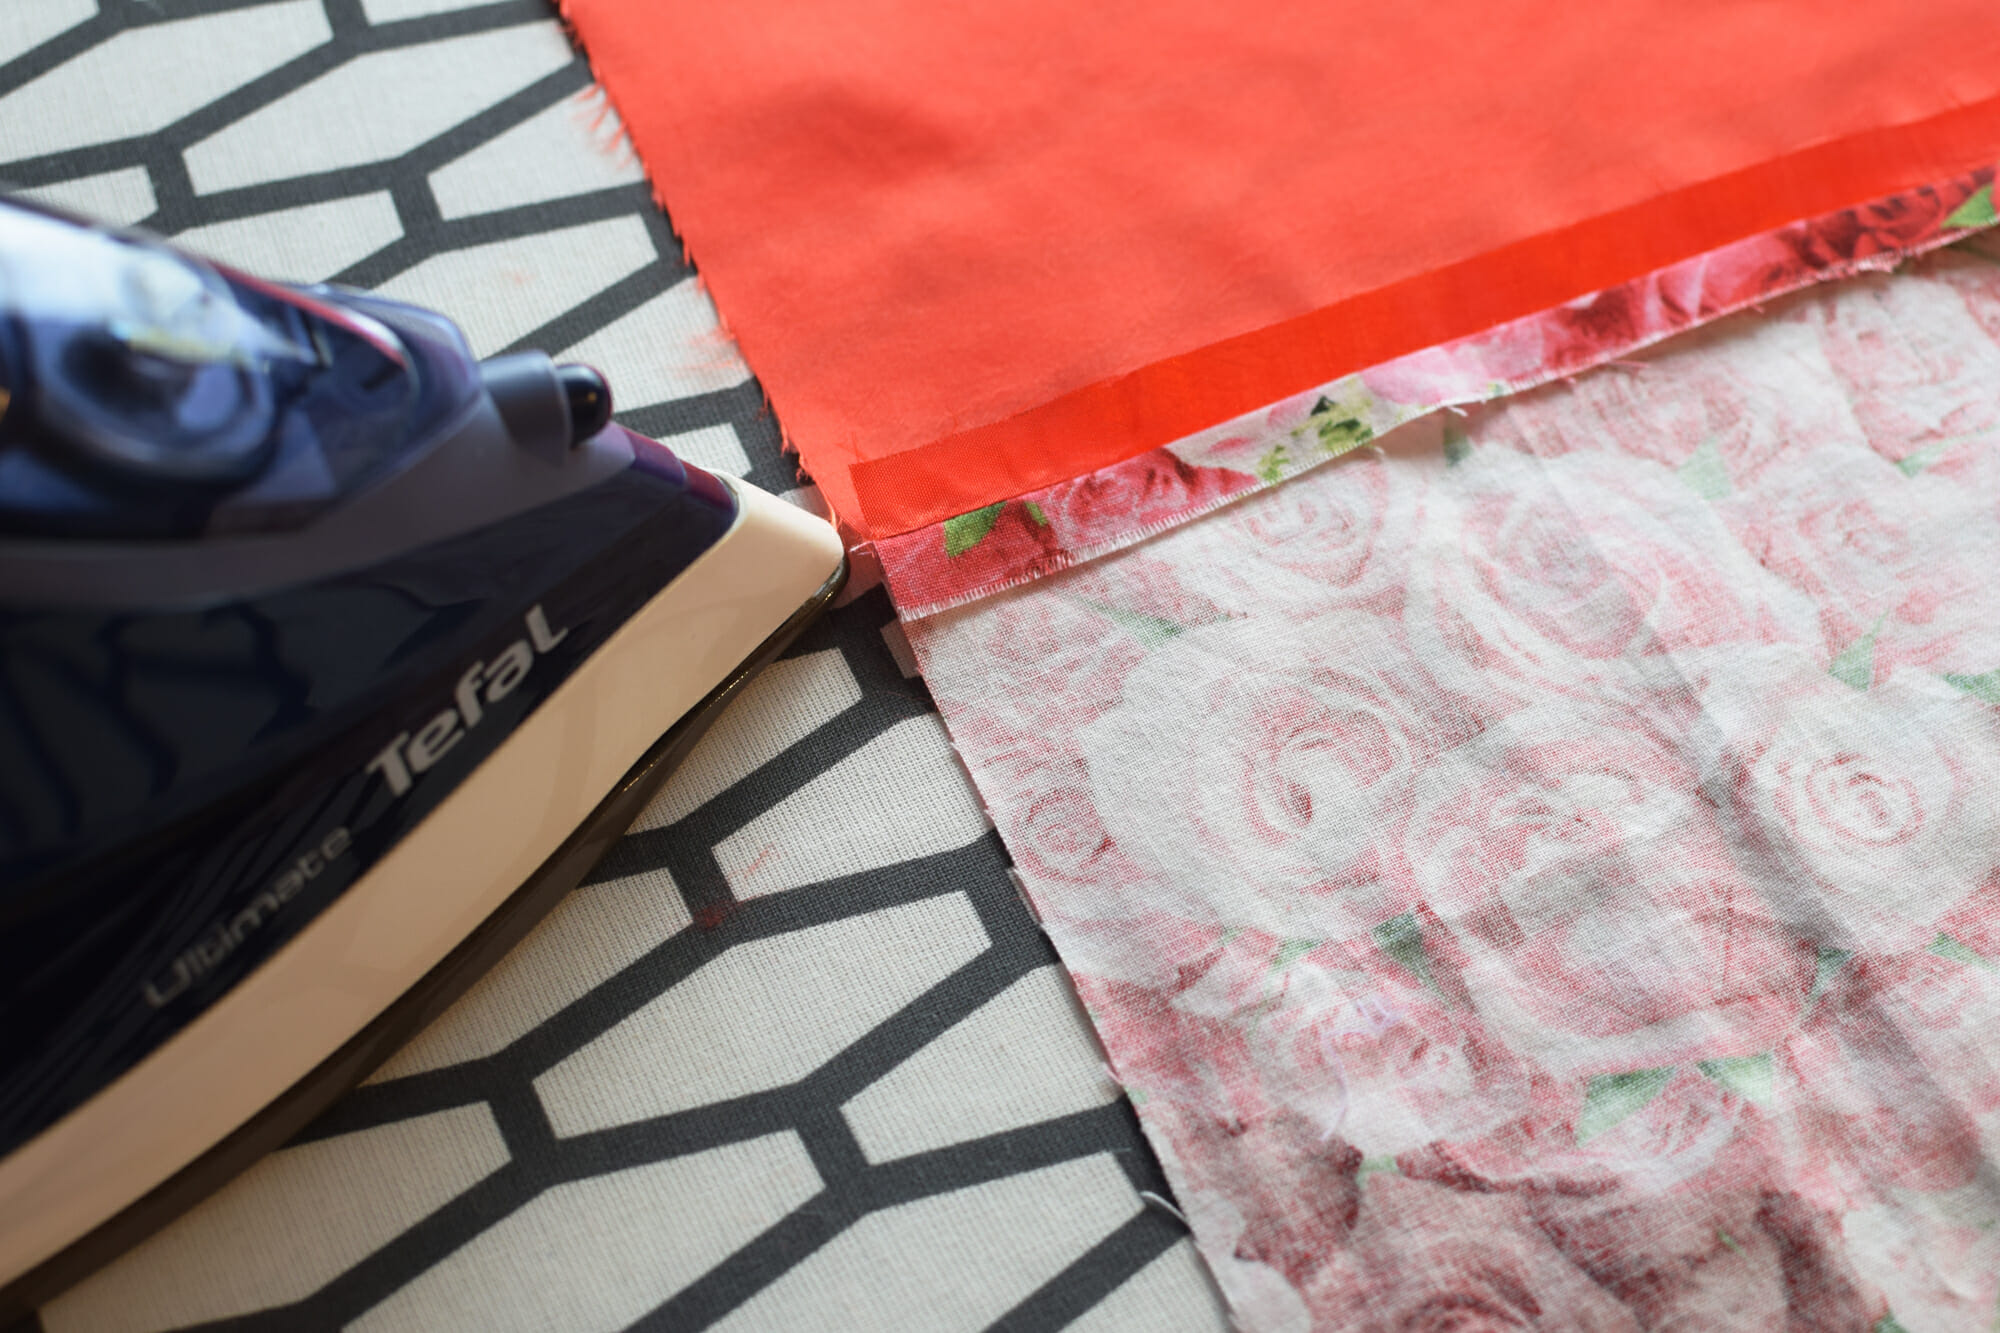
With right sides together, sew the two rectangles together along the 14” edge. Use a 3/8” seam allowance. Press the seam open with an iron.
Step 3
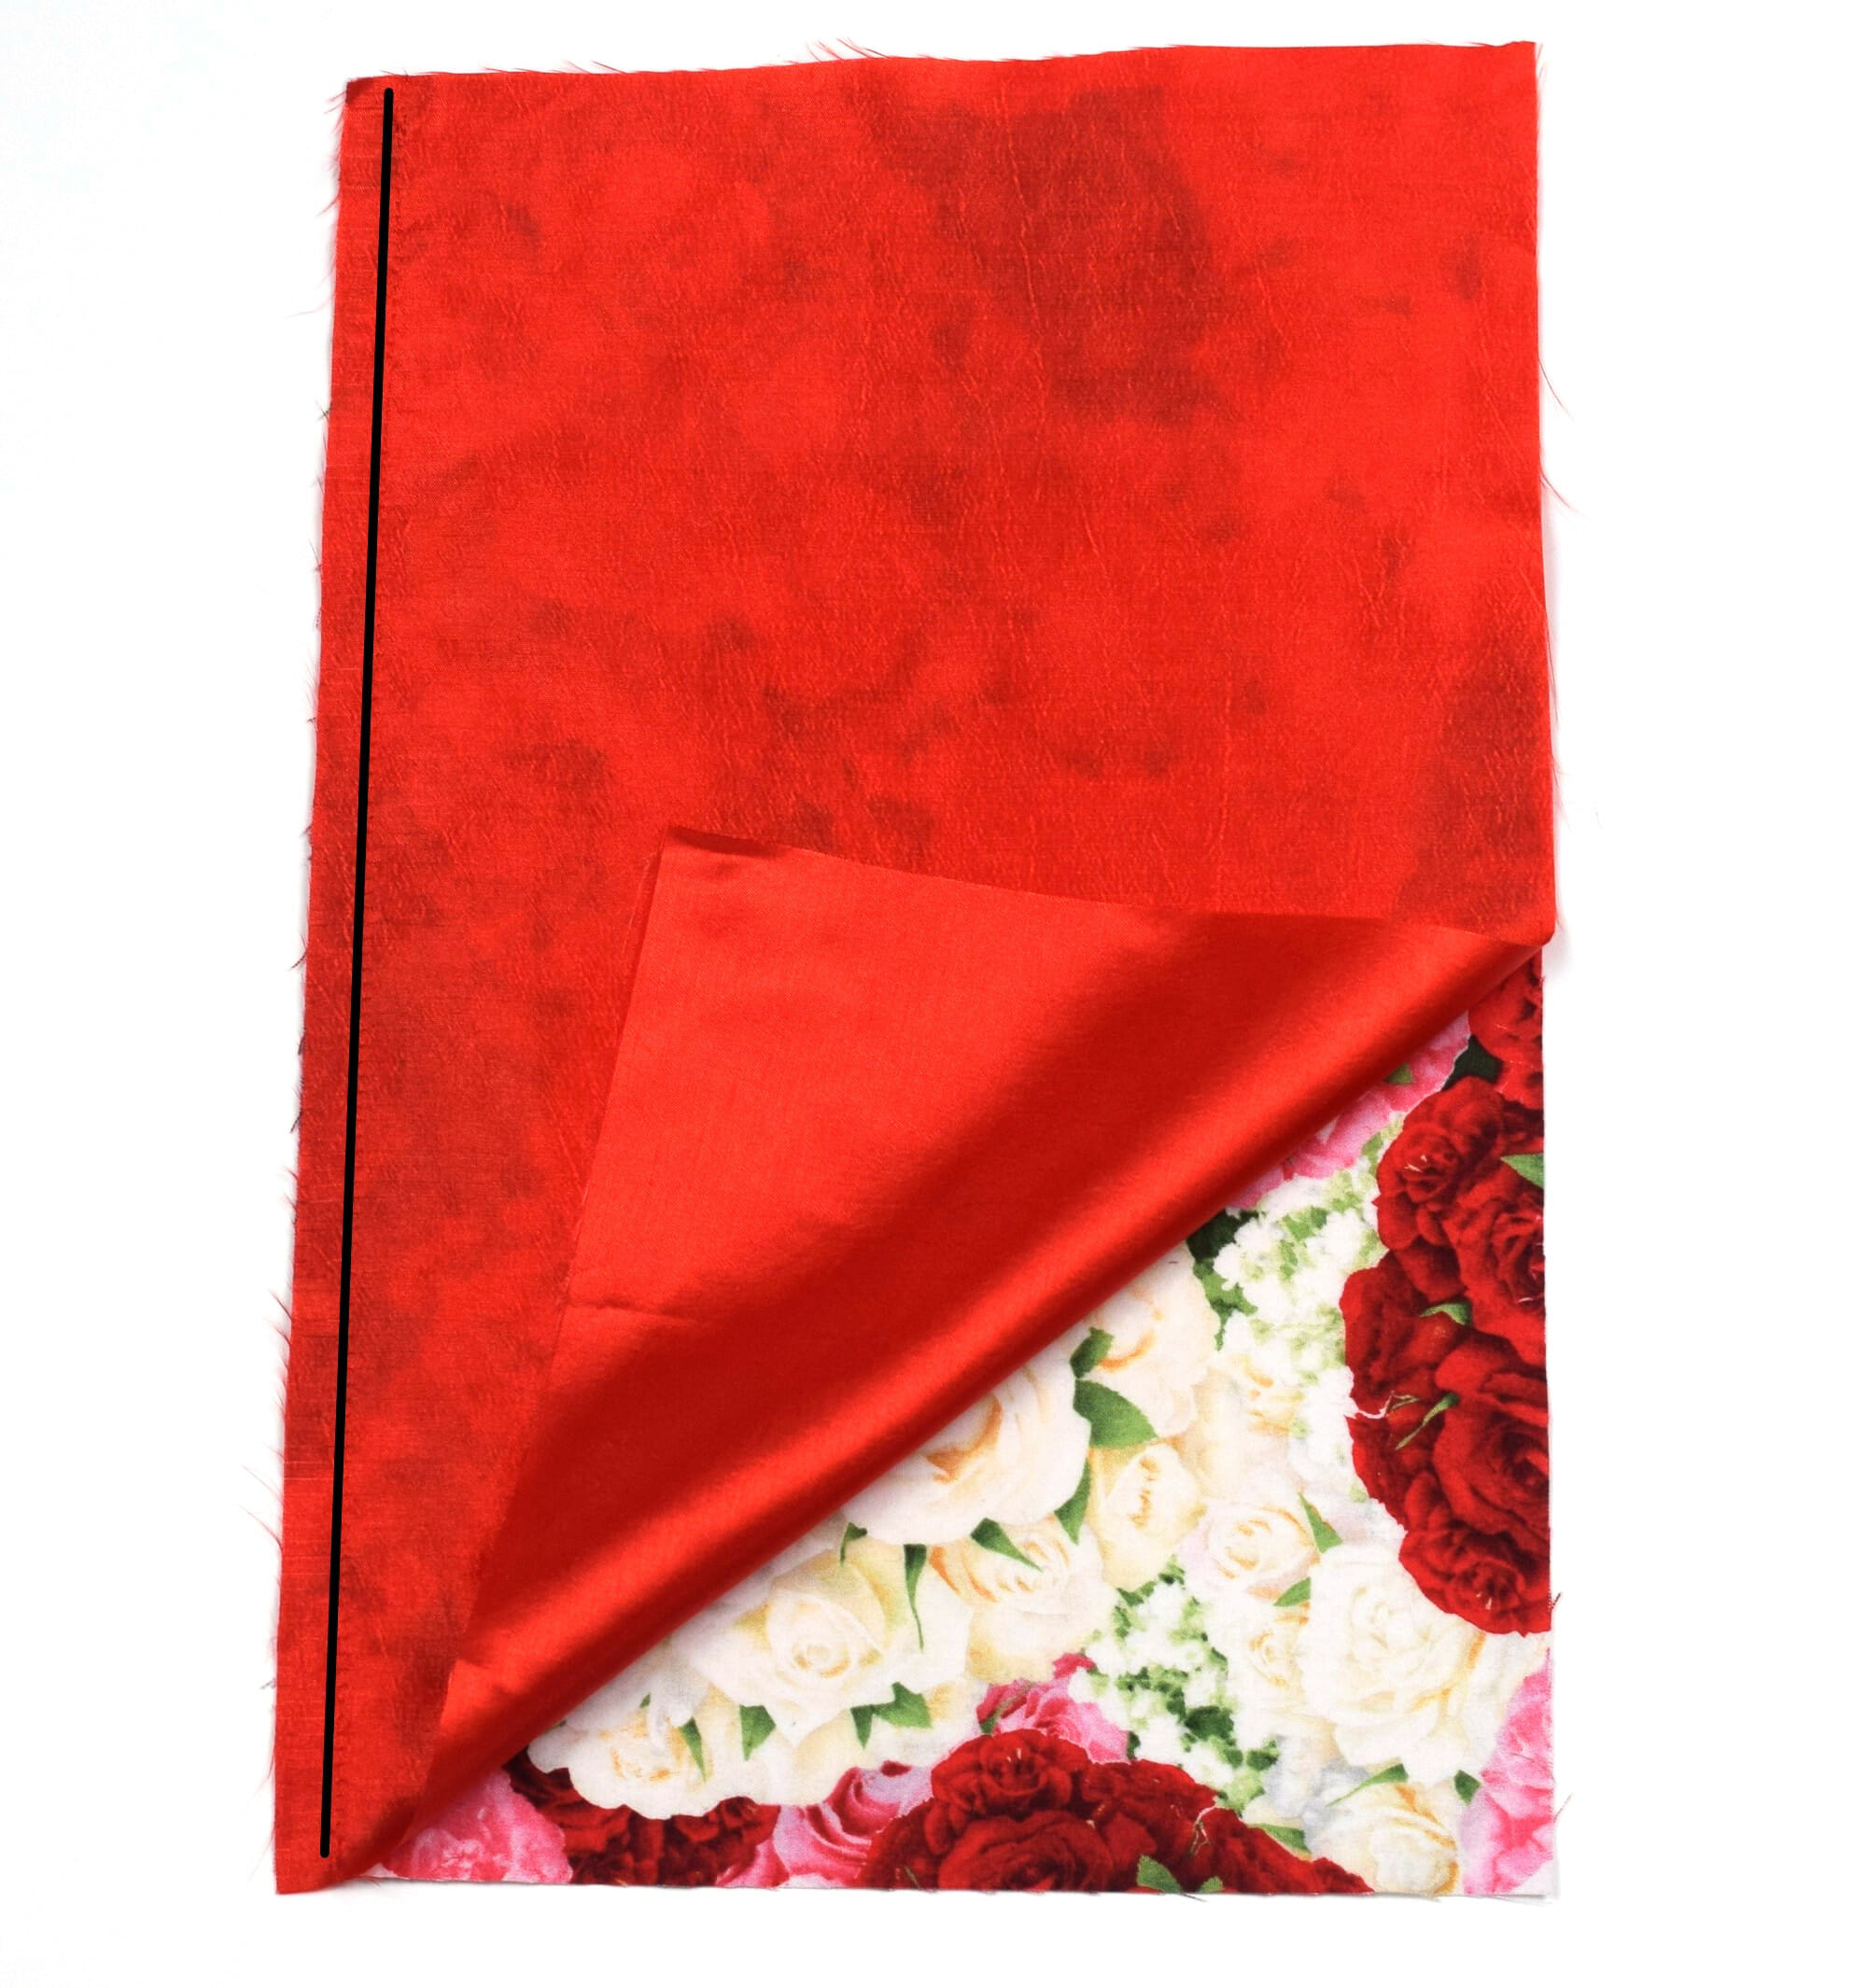
Place the sewn fabric piece with the right side up on the table. Fold it in half from left to right, right sides together, and make sure the seams are aligned.
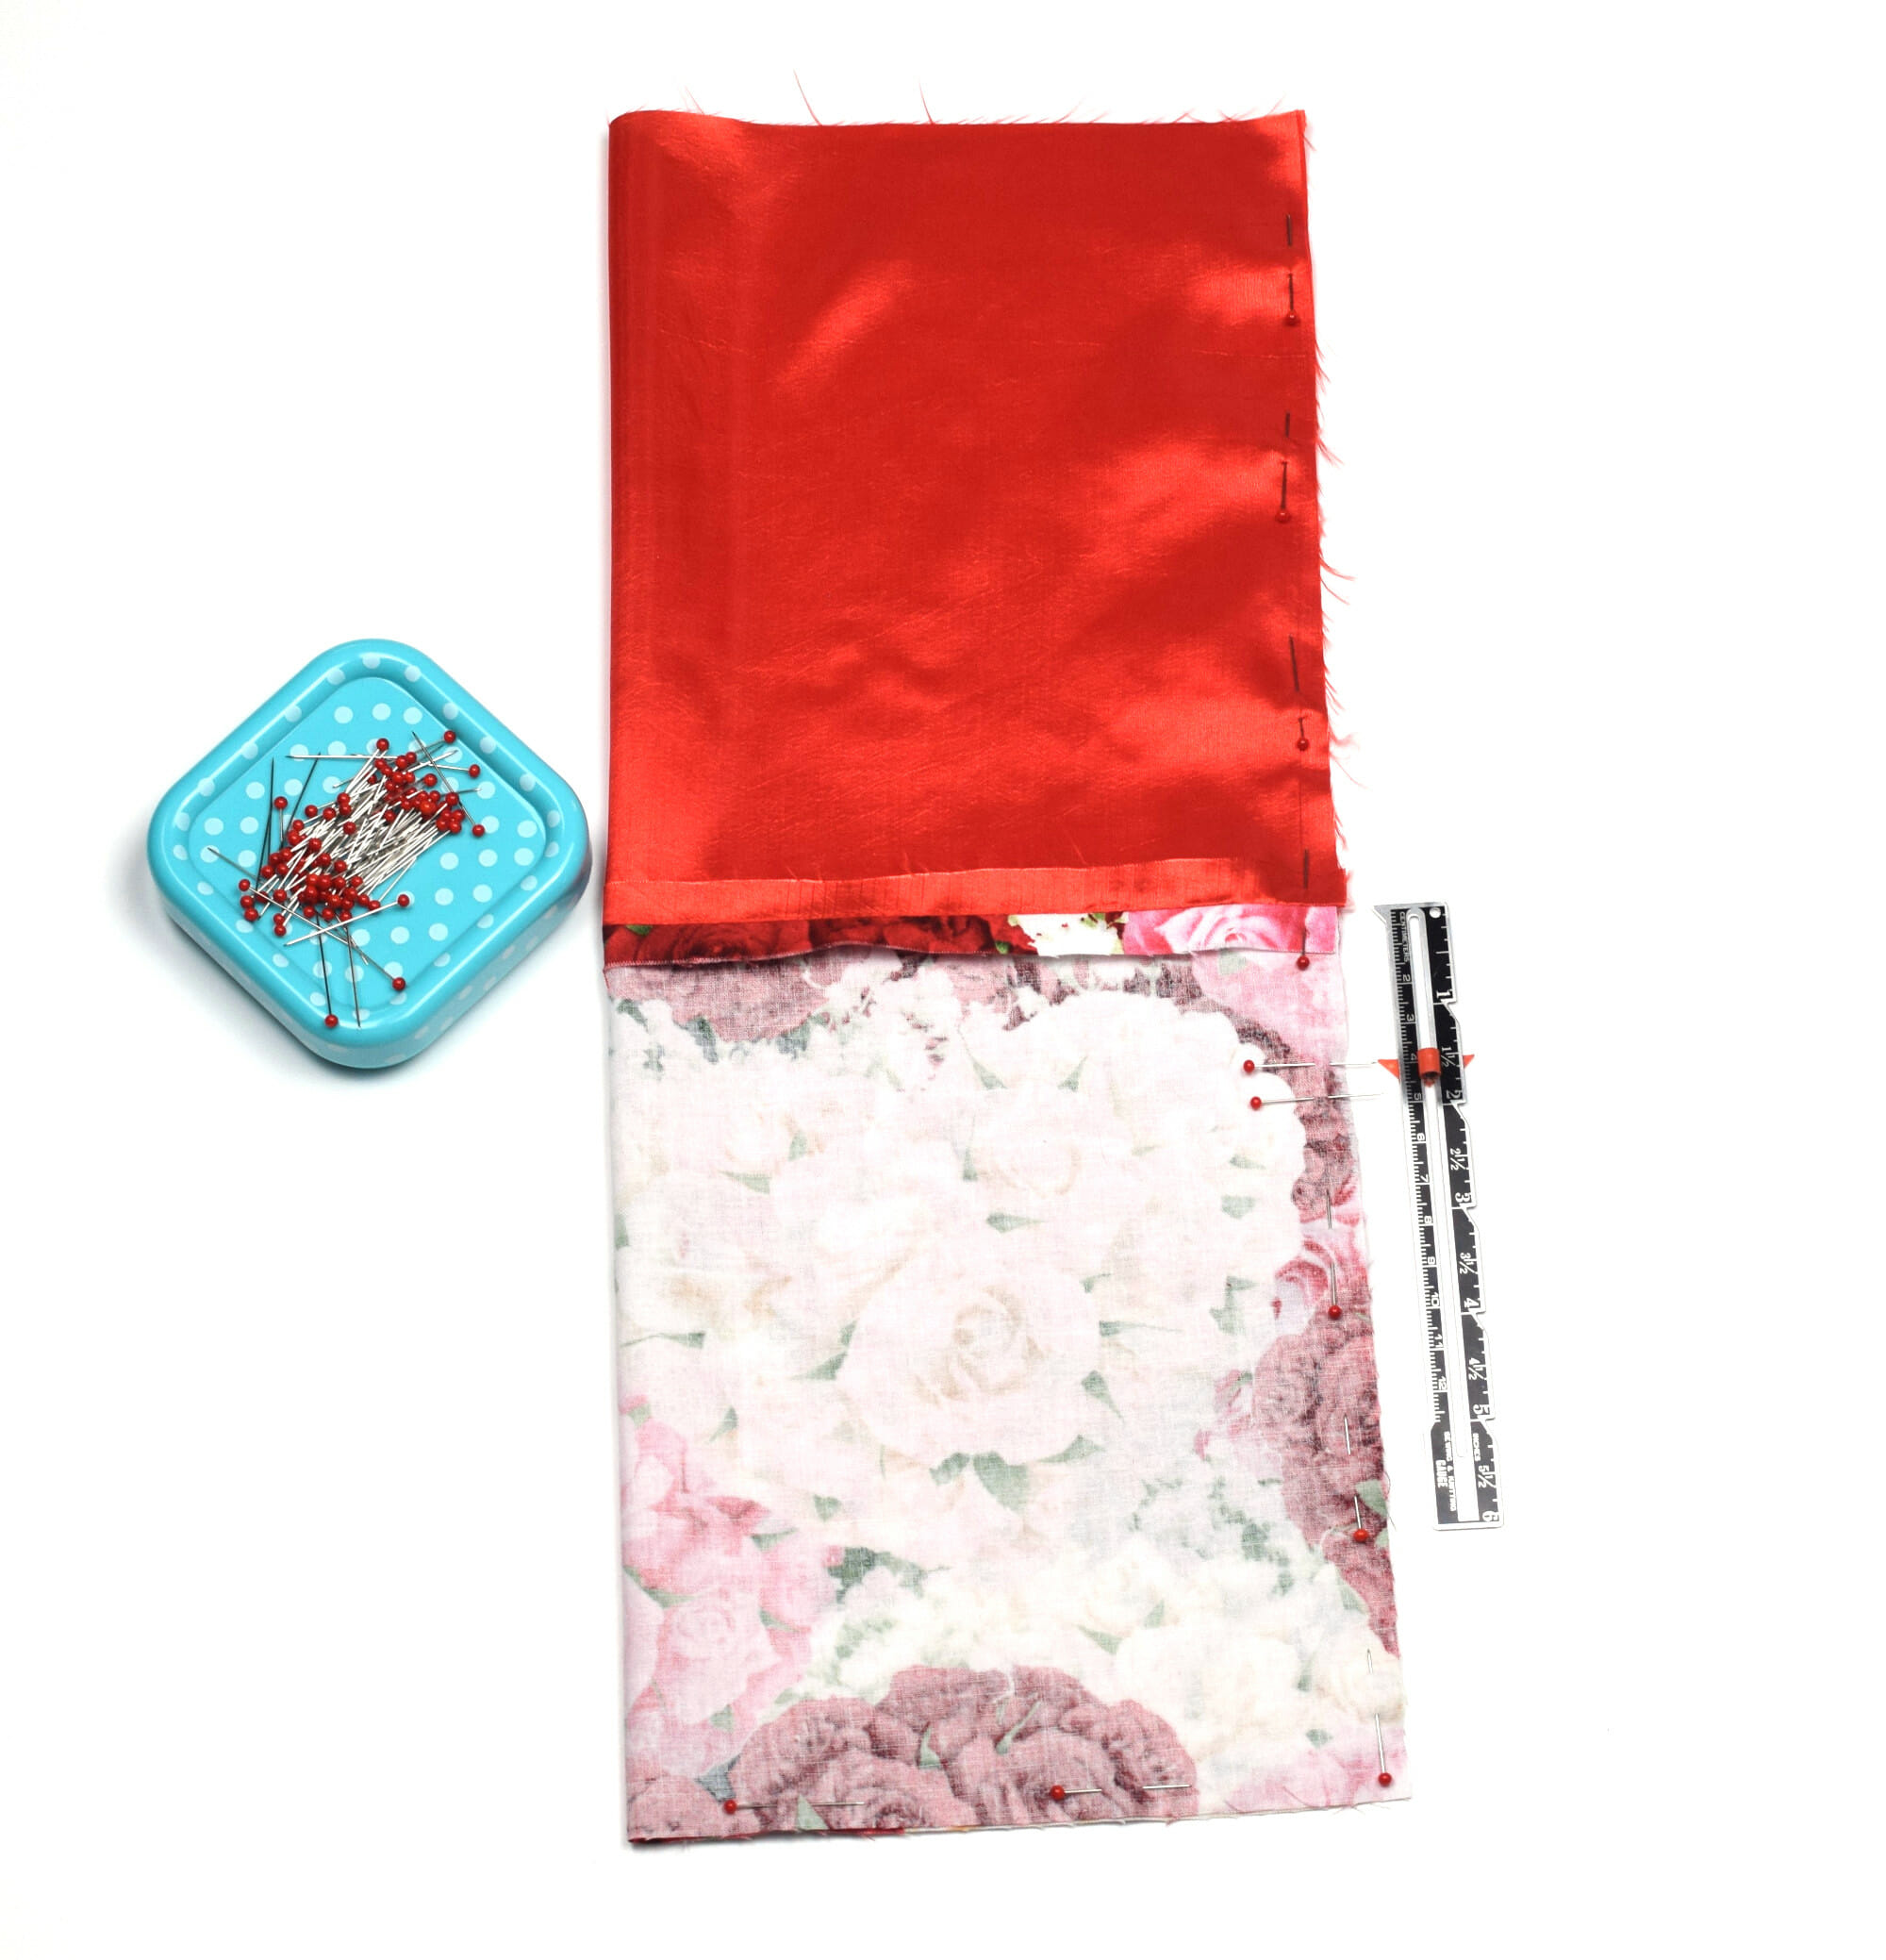
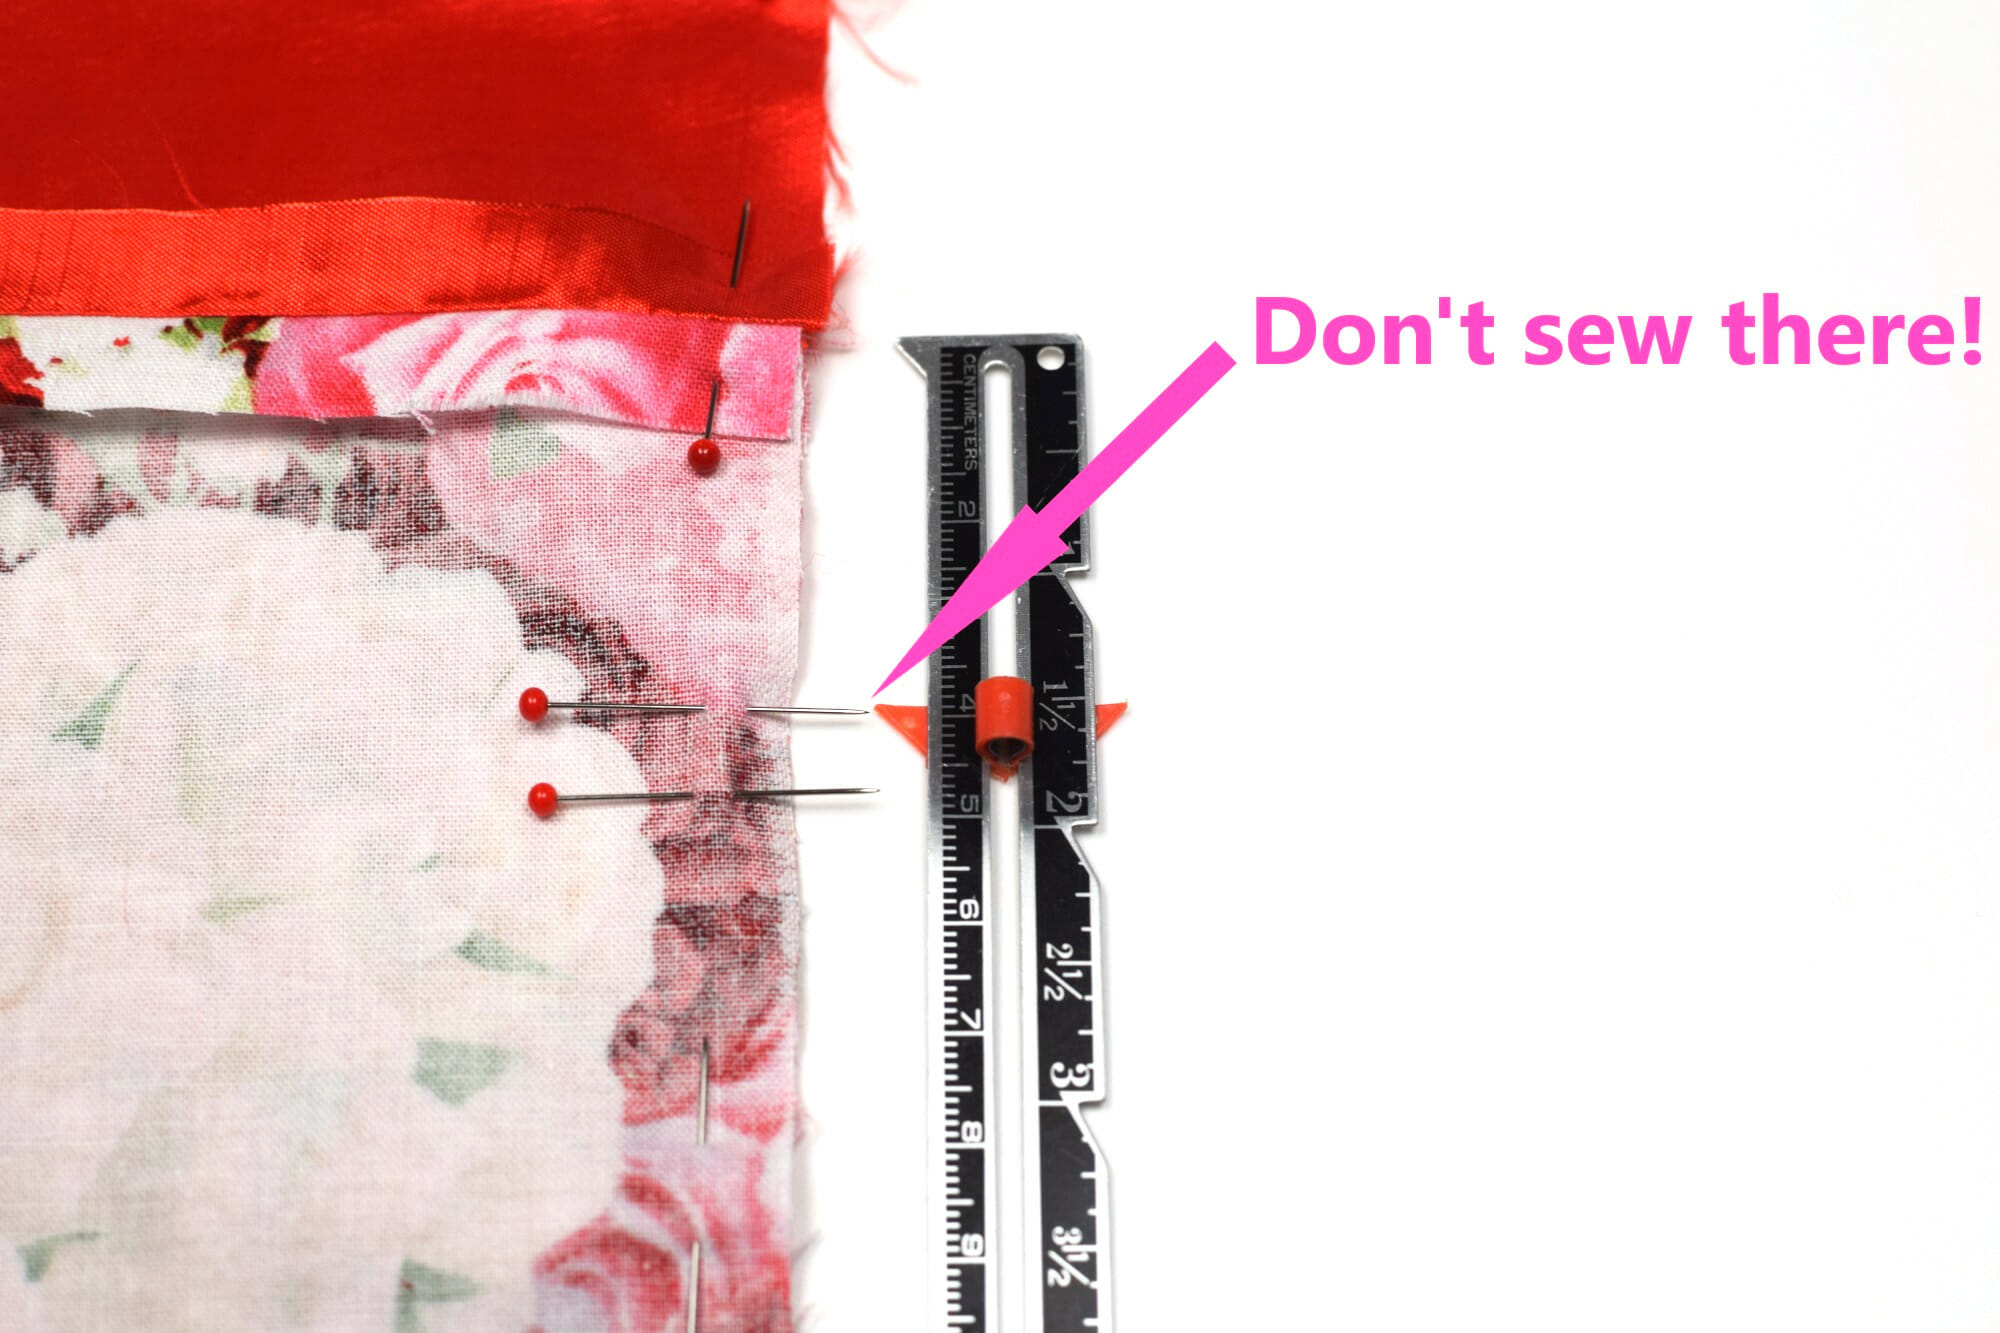
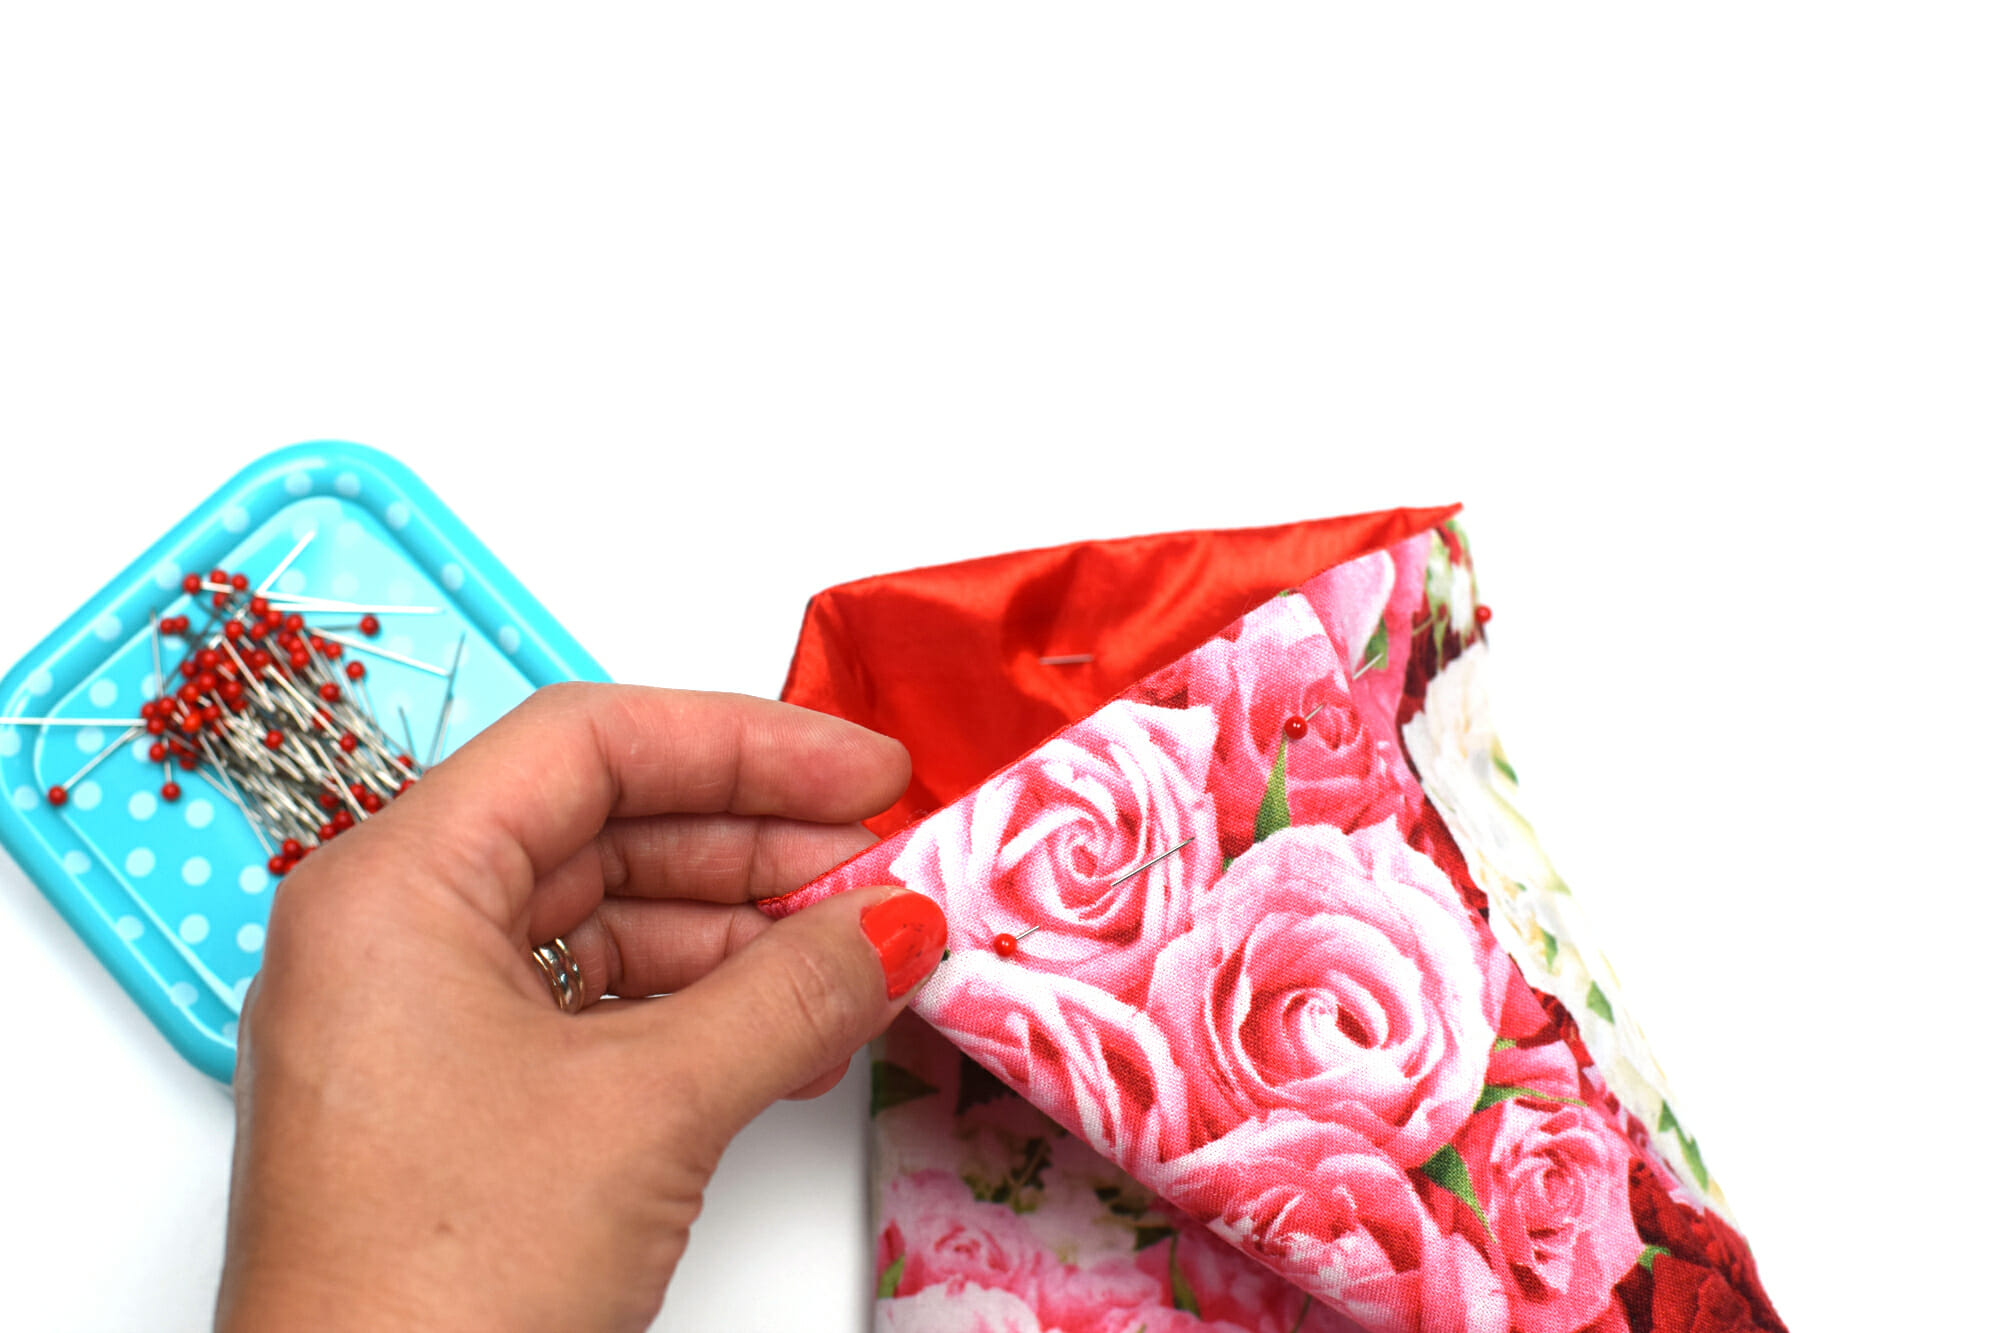
Pin along the long side and the bottom of the main fabric piece.
Now measure 1 ½ inch from the seam and mark a 1/2” opening with two pins, as shown in the next photo.
We need that small opening to feed the cord into the drawstring casing.
Step 4
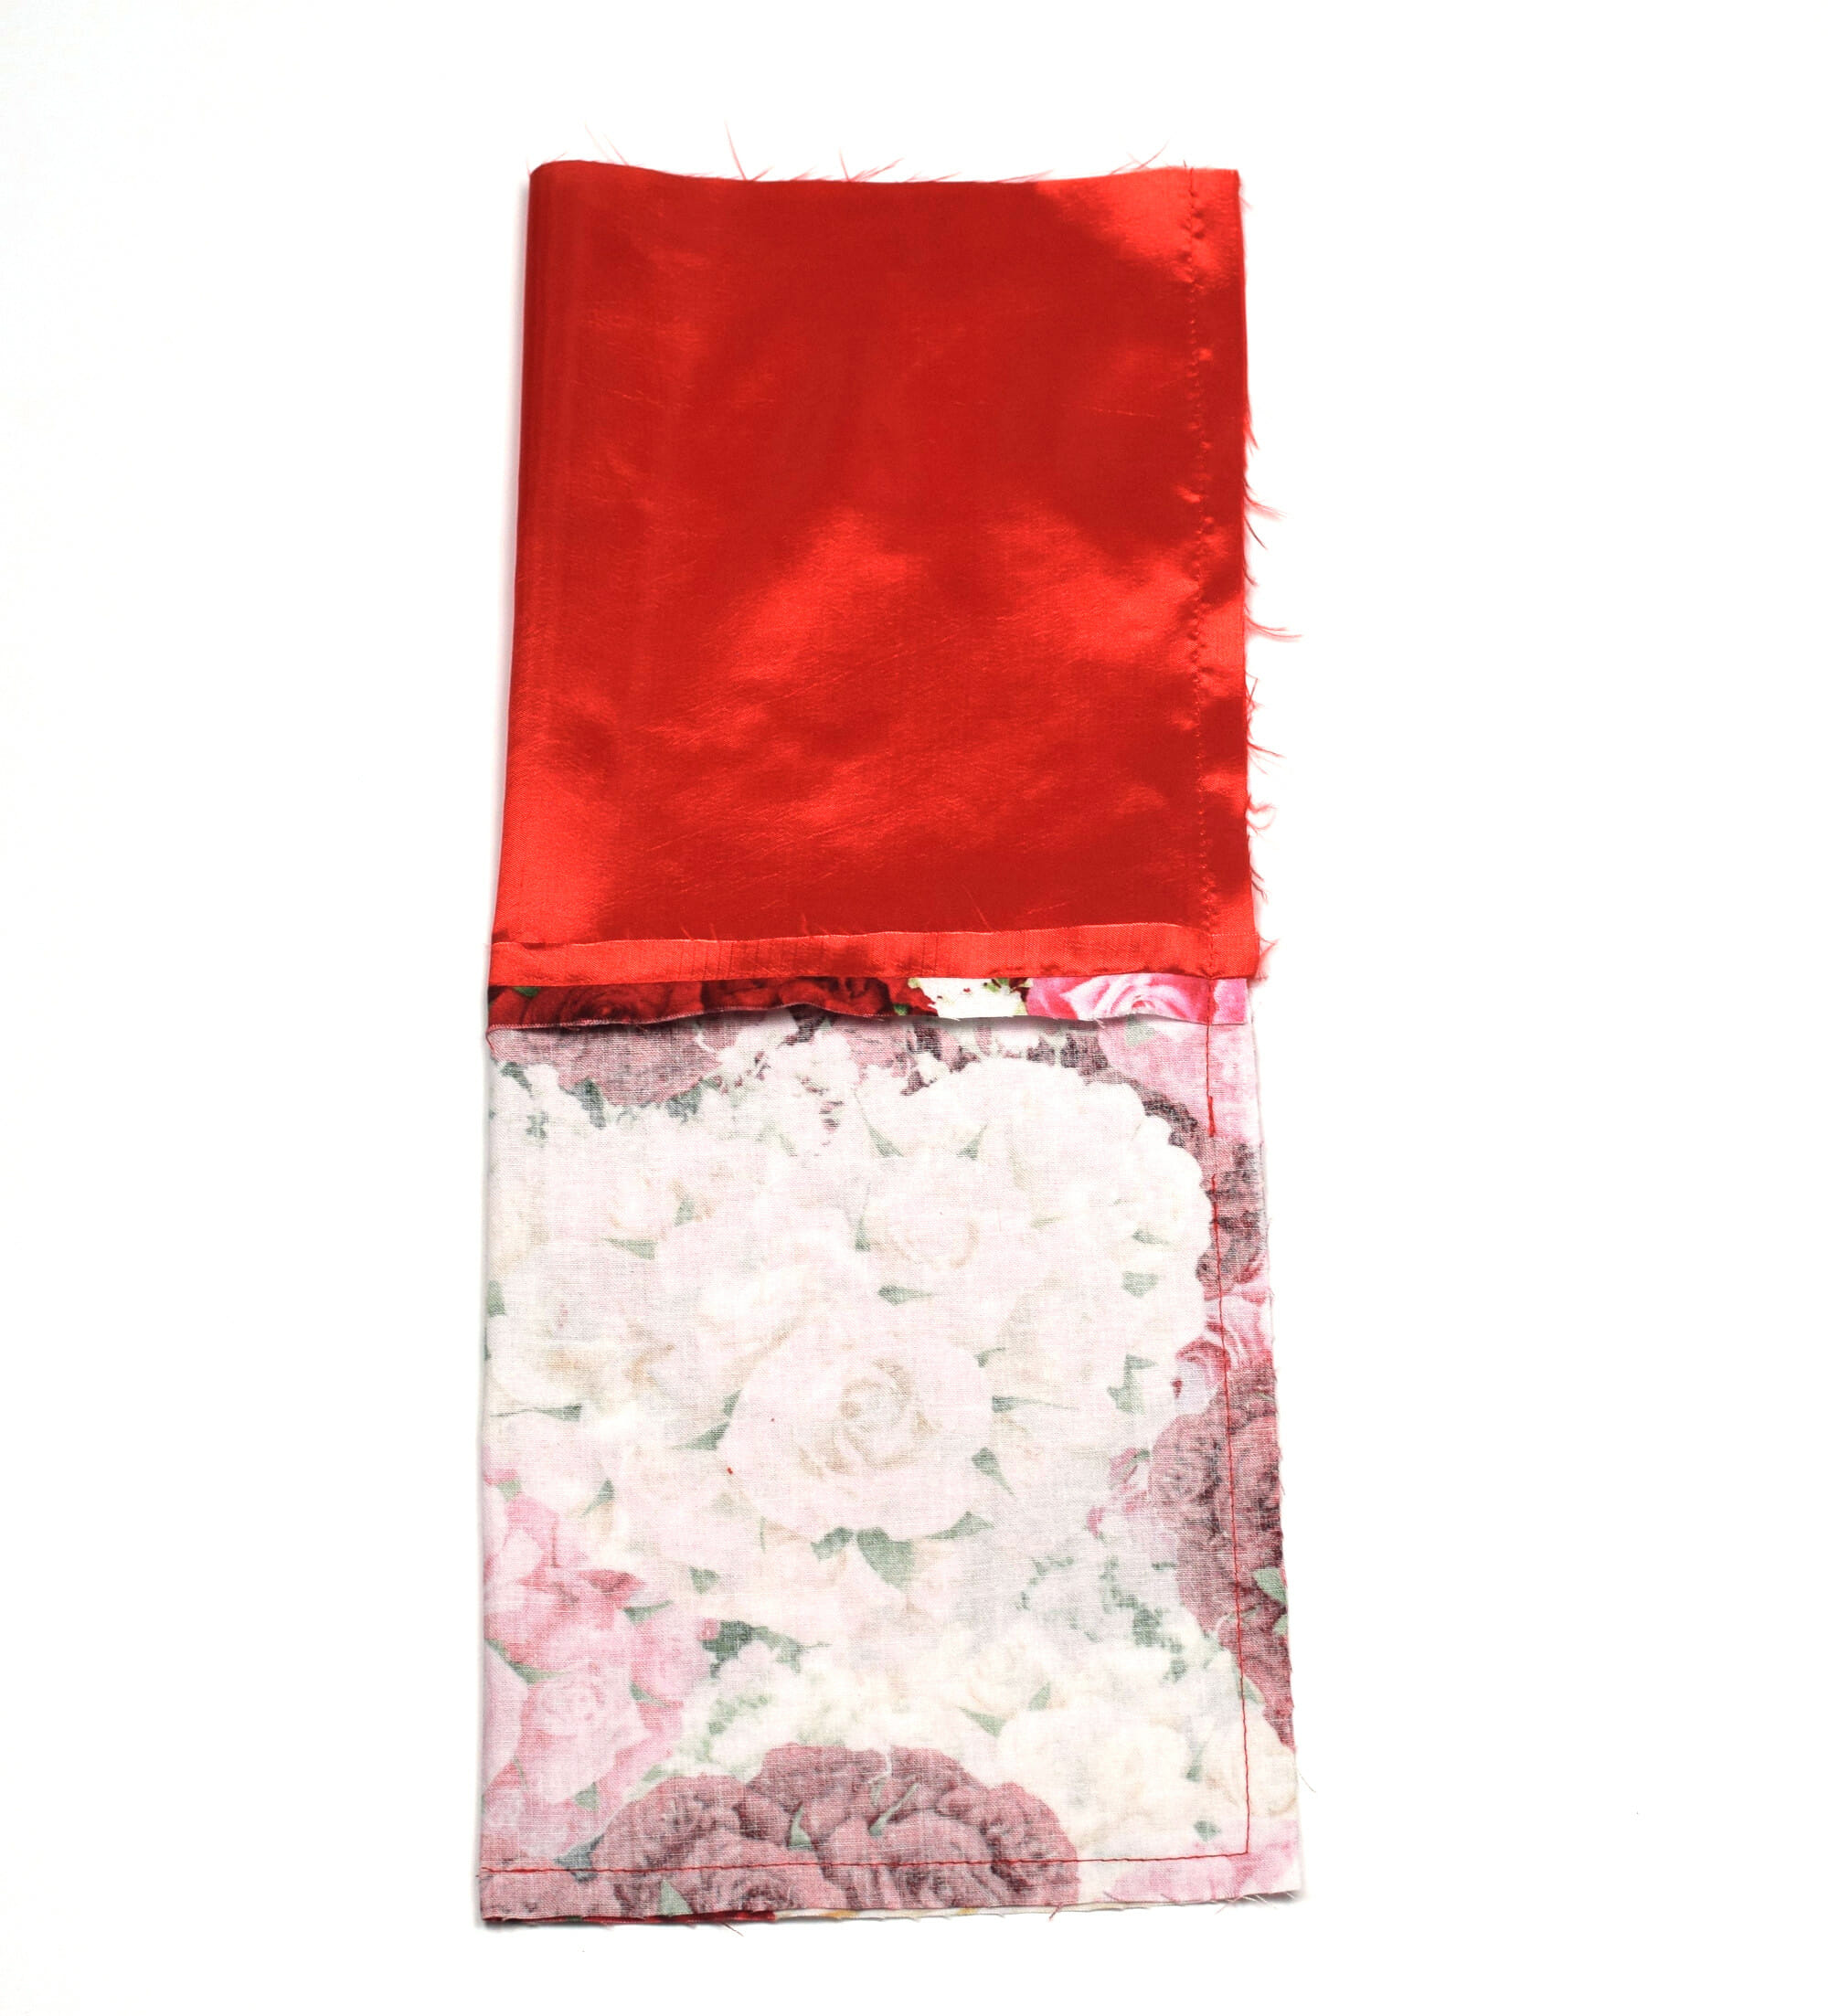
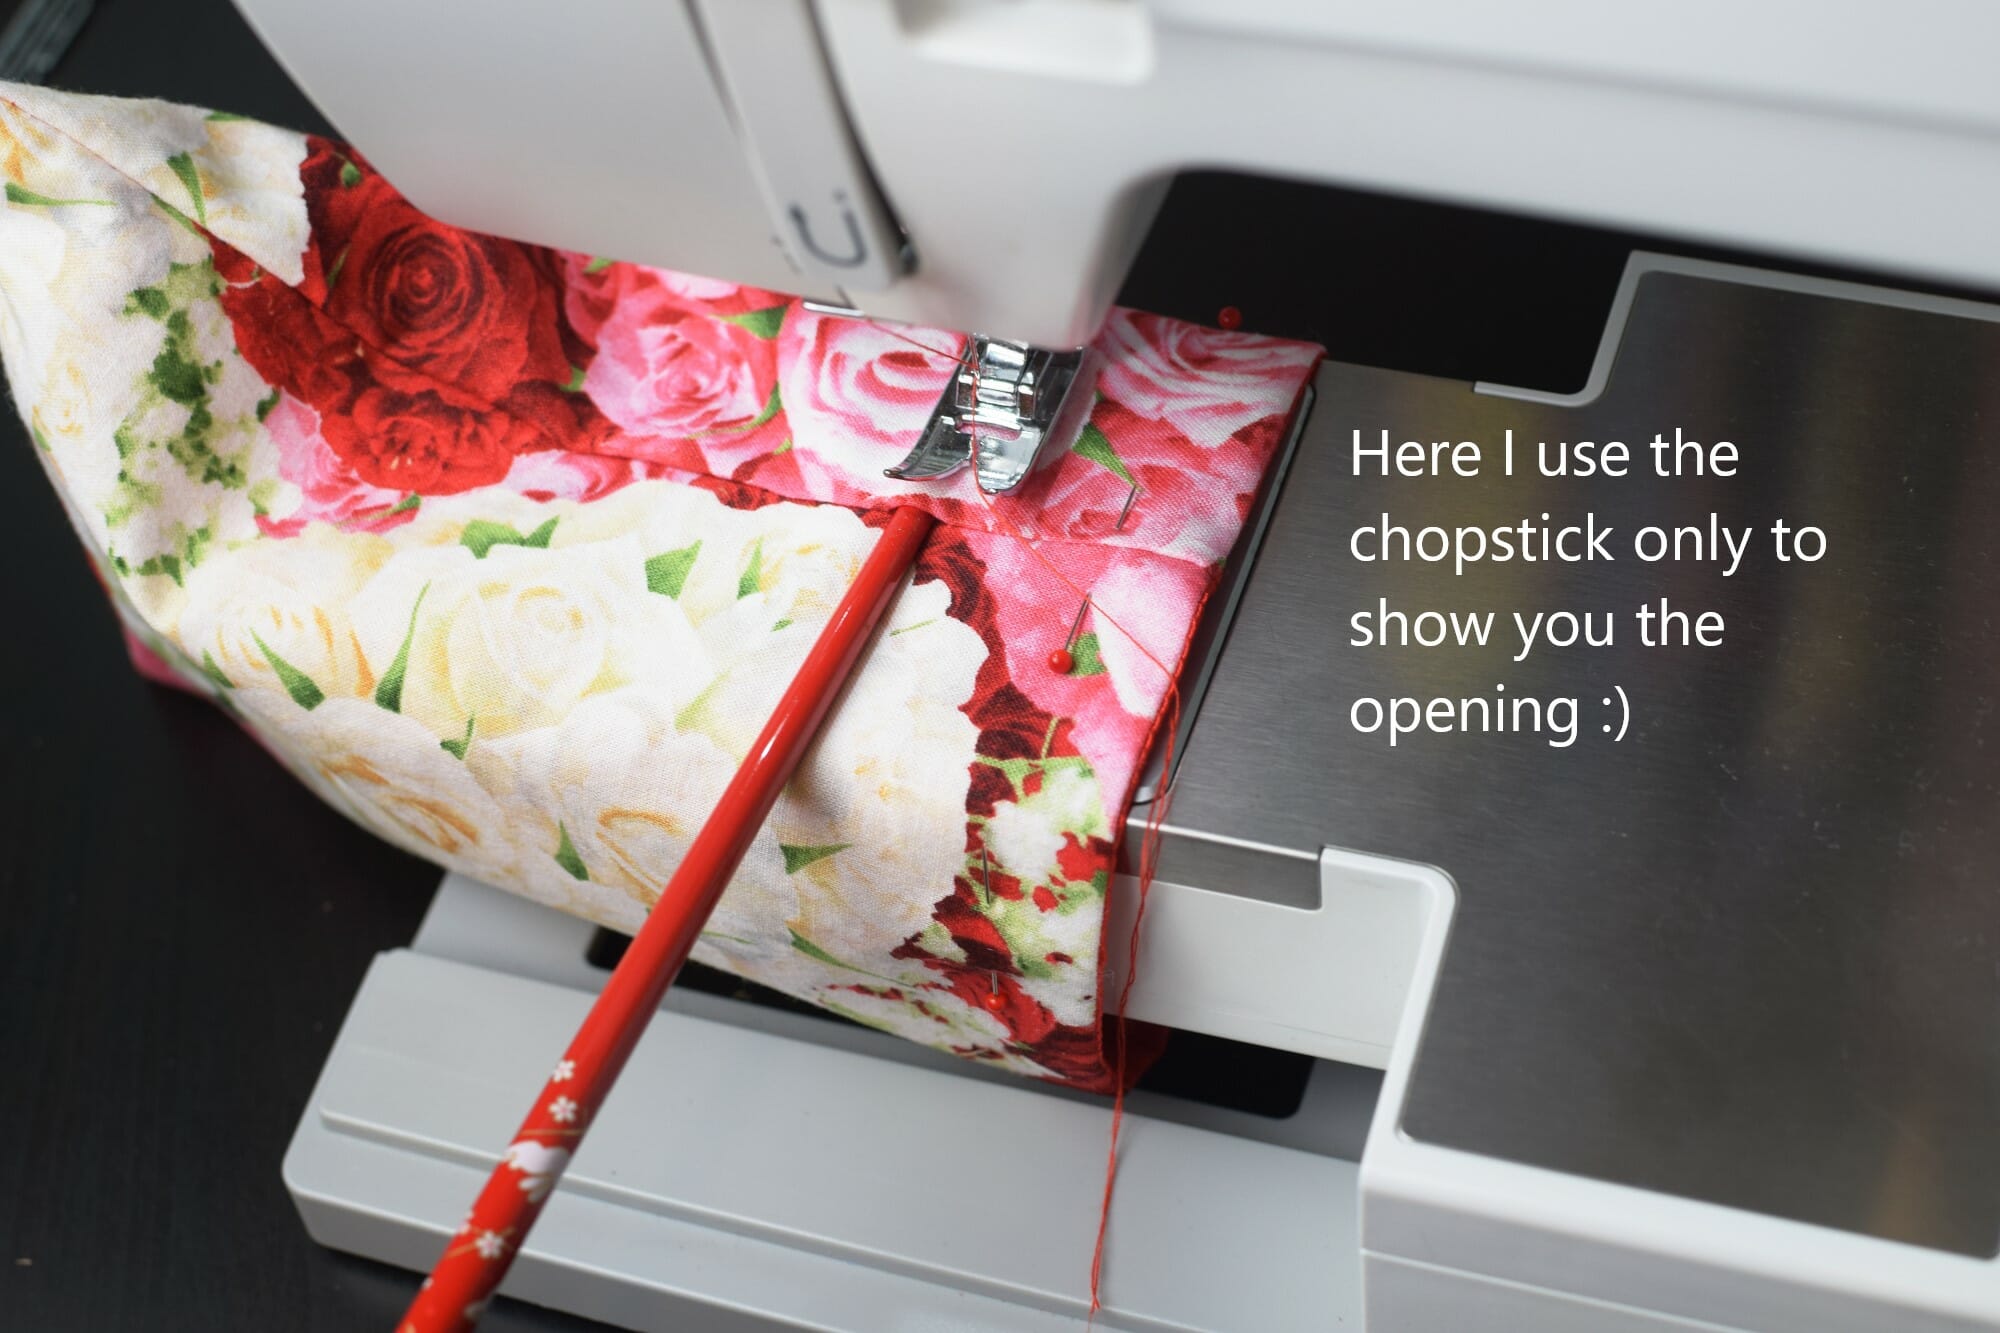
With right sides together, sew from the top edge of the lining piece to the first mark. Backstitch to secure, then stop. Backstitch as you start again and sew from the second mark to the bottom.

Step 5
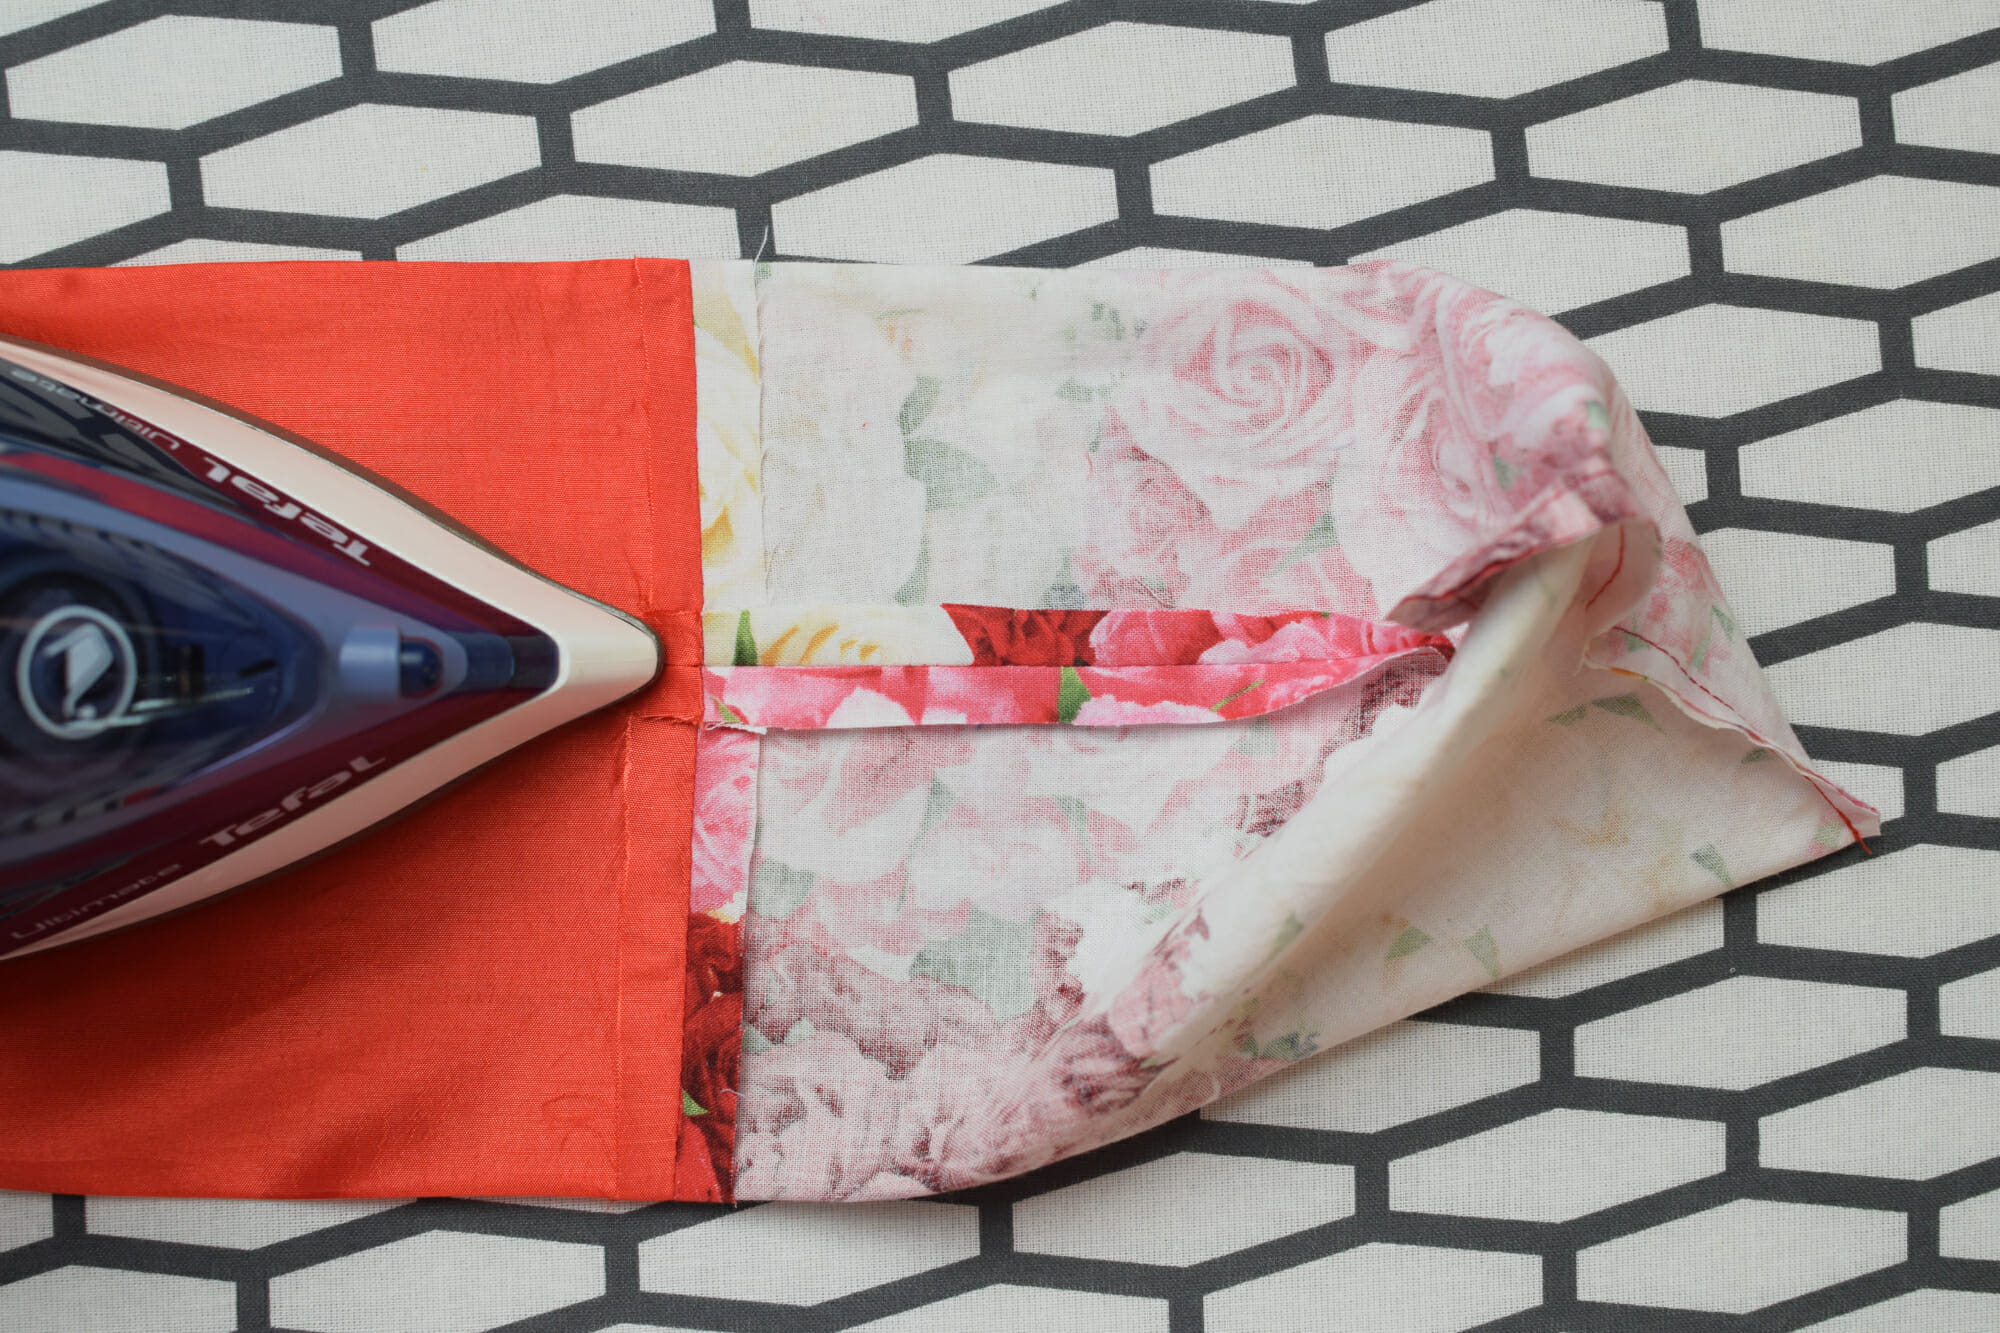
Press the seams of the main fabric piece open. This will help feed the safety pin through the casing.
Step 6
Flip the bag right side out and poke your corners square with a pencil or a chopstick.

Step 7
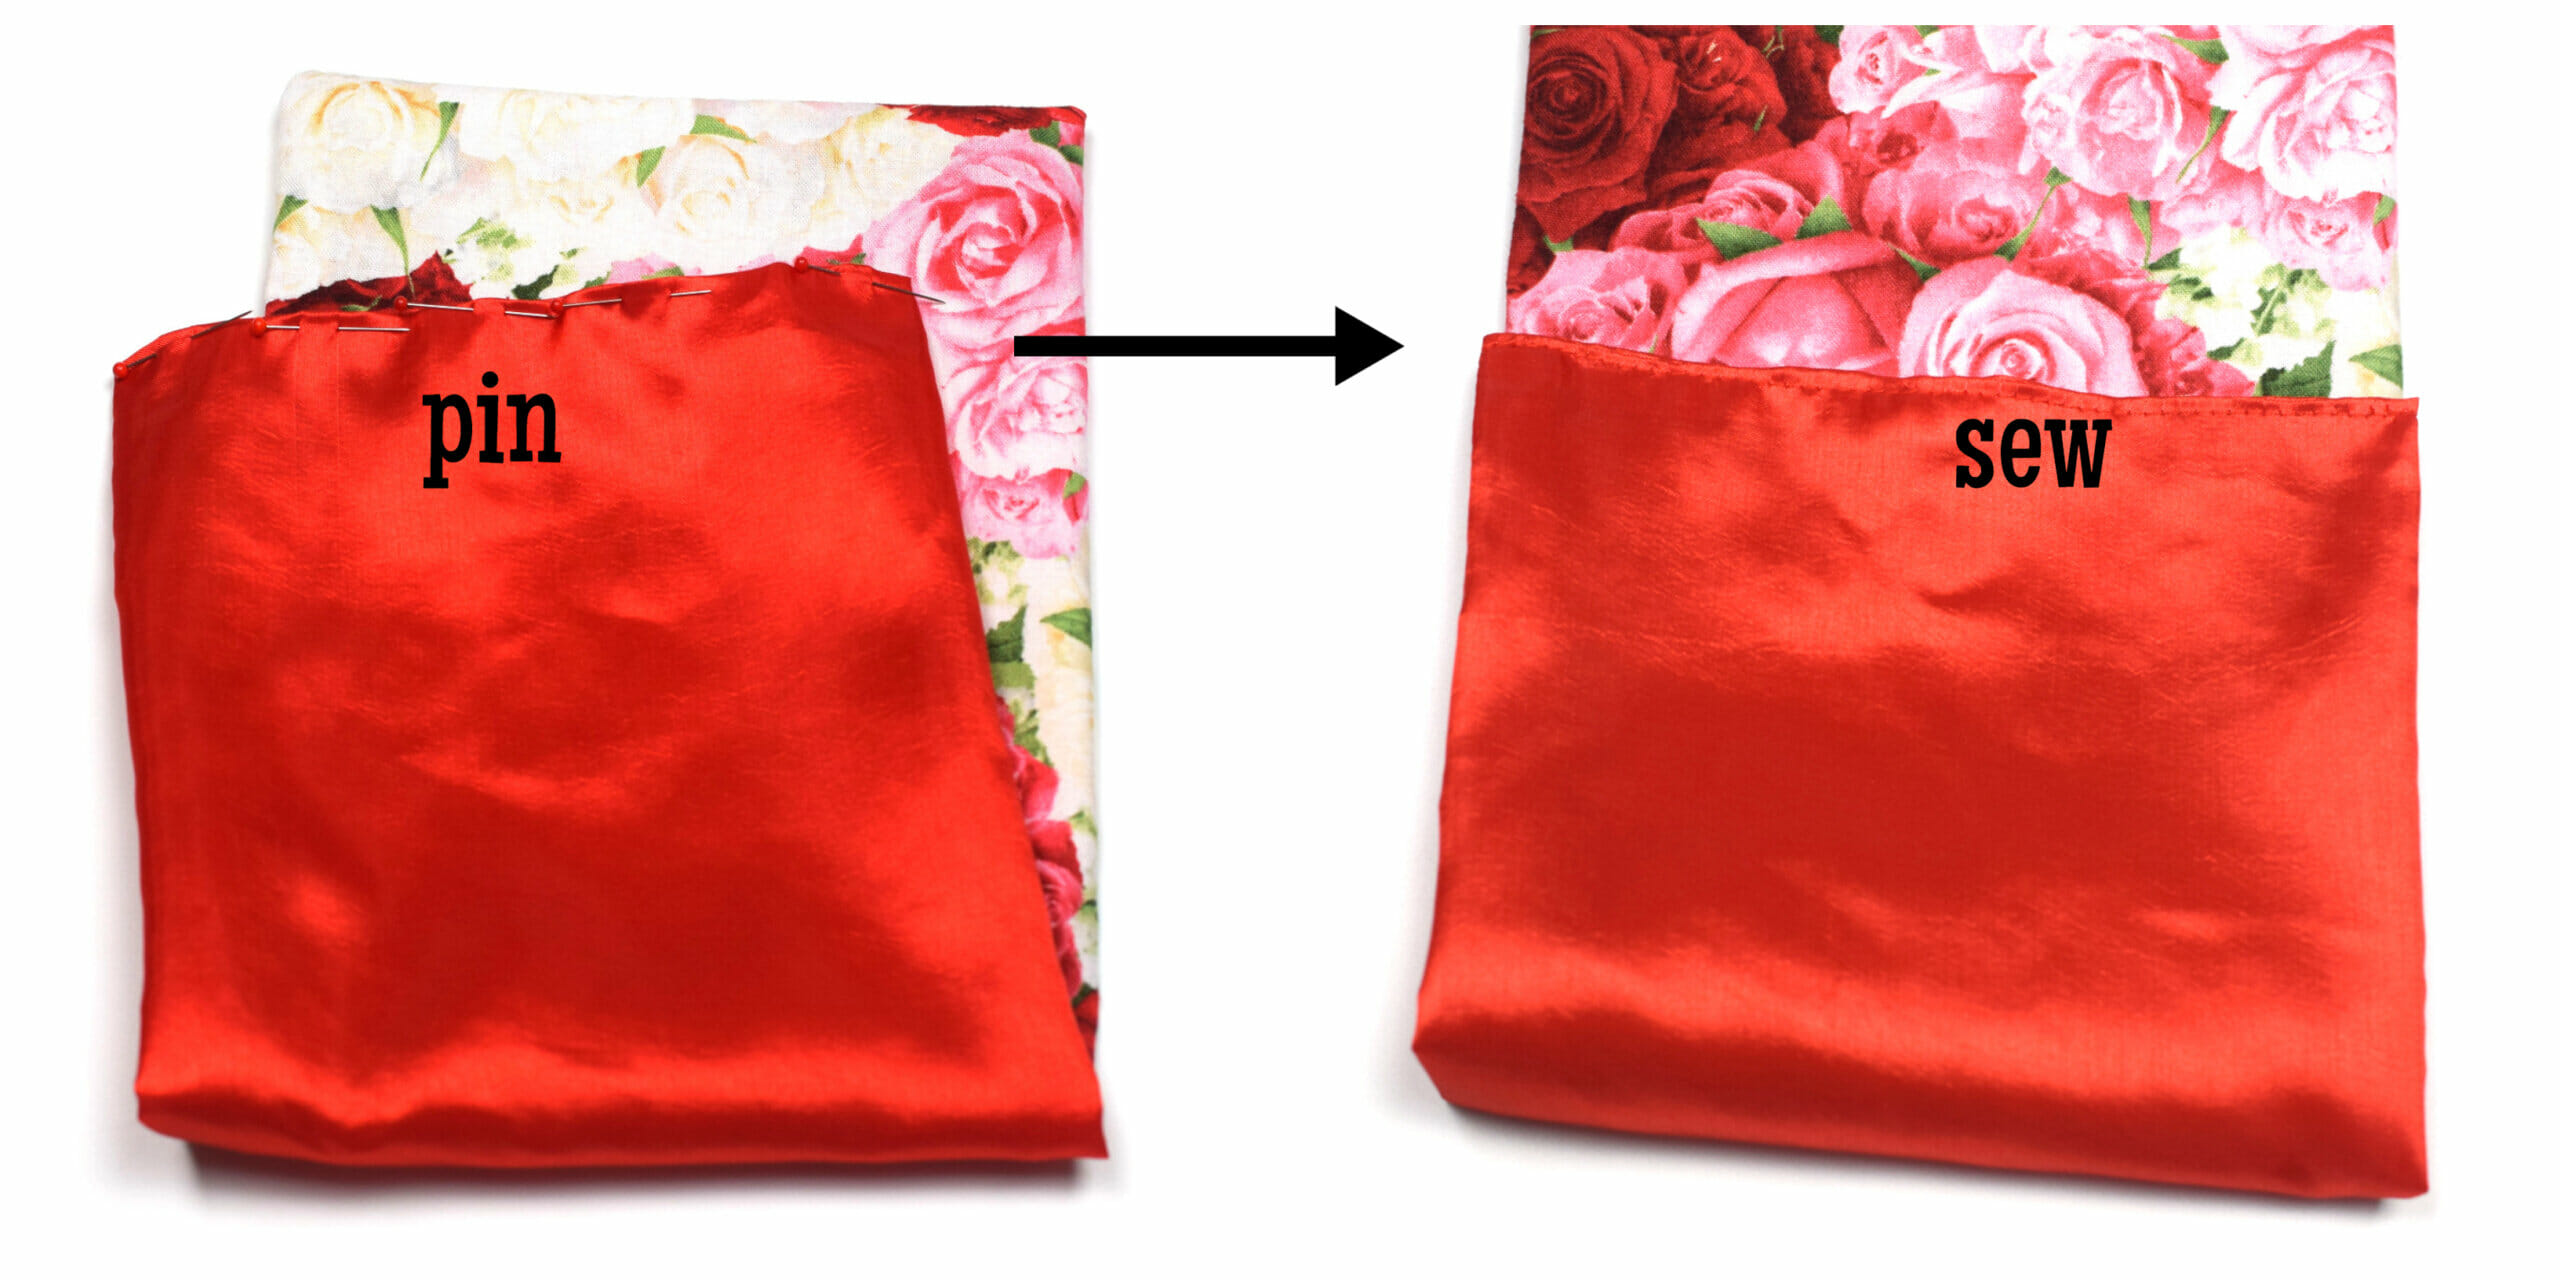
Turn under the raw edges of the lining piece about 1/2″ and pin to hold in place. Sew the bottom of the lining closed.
Step 8
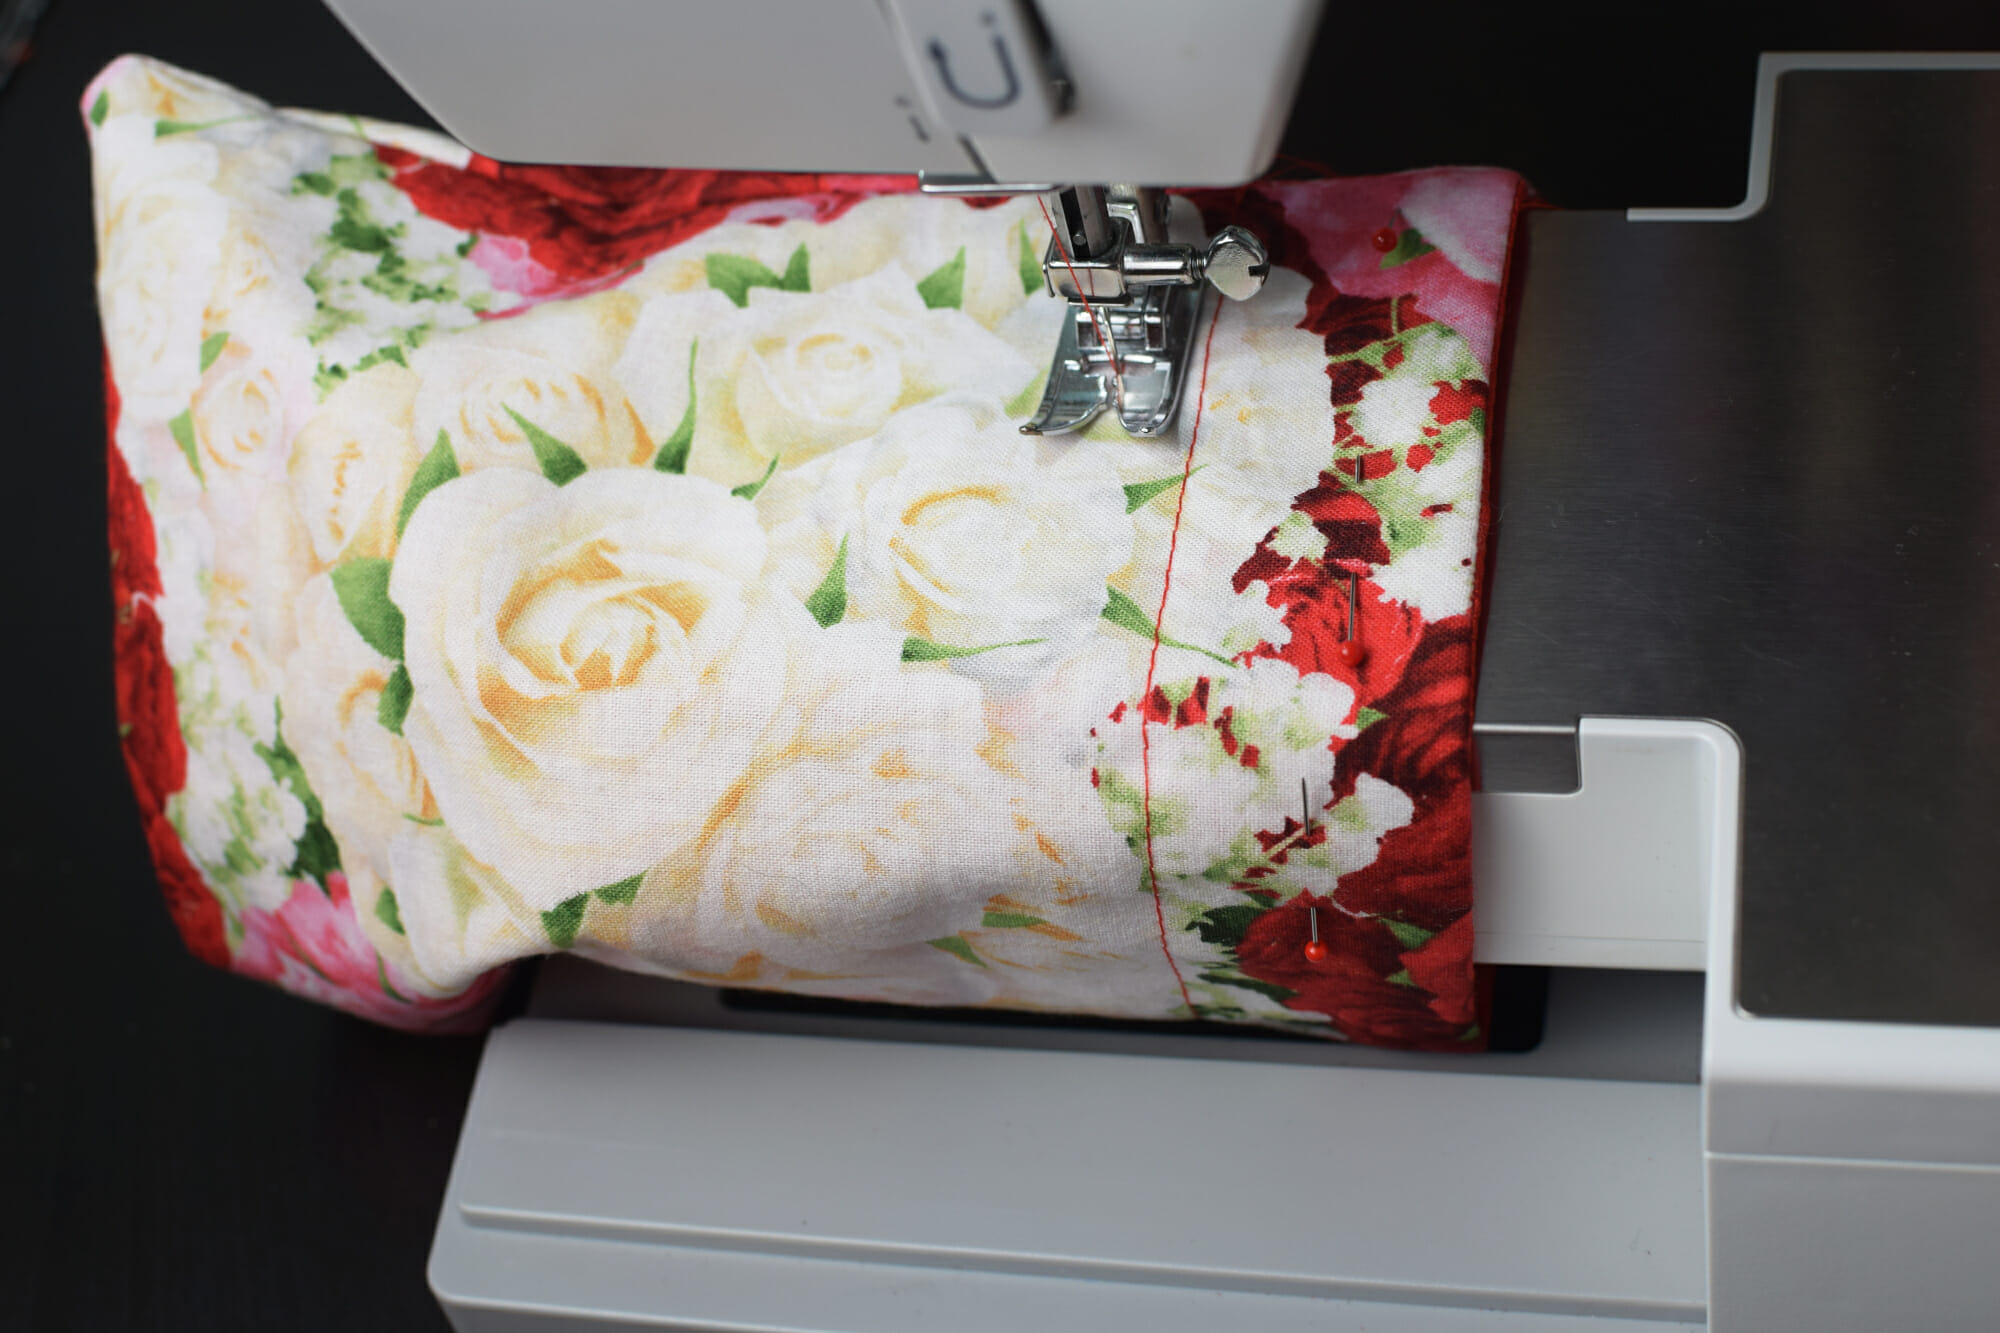
Push the lining to the inside of the bag and stabilize the top of the bag by pinning around the edge.
Step 9
Now let’s make the channel for the drawstring! Using the free arm on your sewing machine, sew a row of stitches about 1 1/2 inch from the top of the bag, just above the drawstring opening. Sew a second row of stitches, just above the side opening.
The spacing will depend on how wide your cord is. For a thin cord, a 1/4 inch gap will do just fine, but for wider cords, you might want to go up to 1/2 inch.
Step 10
Attach a safety pin to one end of your drawstring cord, and feed it through the casing. Tie the ends of the cord with a simple bow.
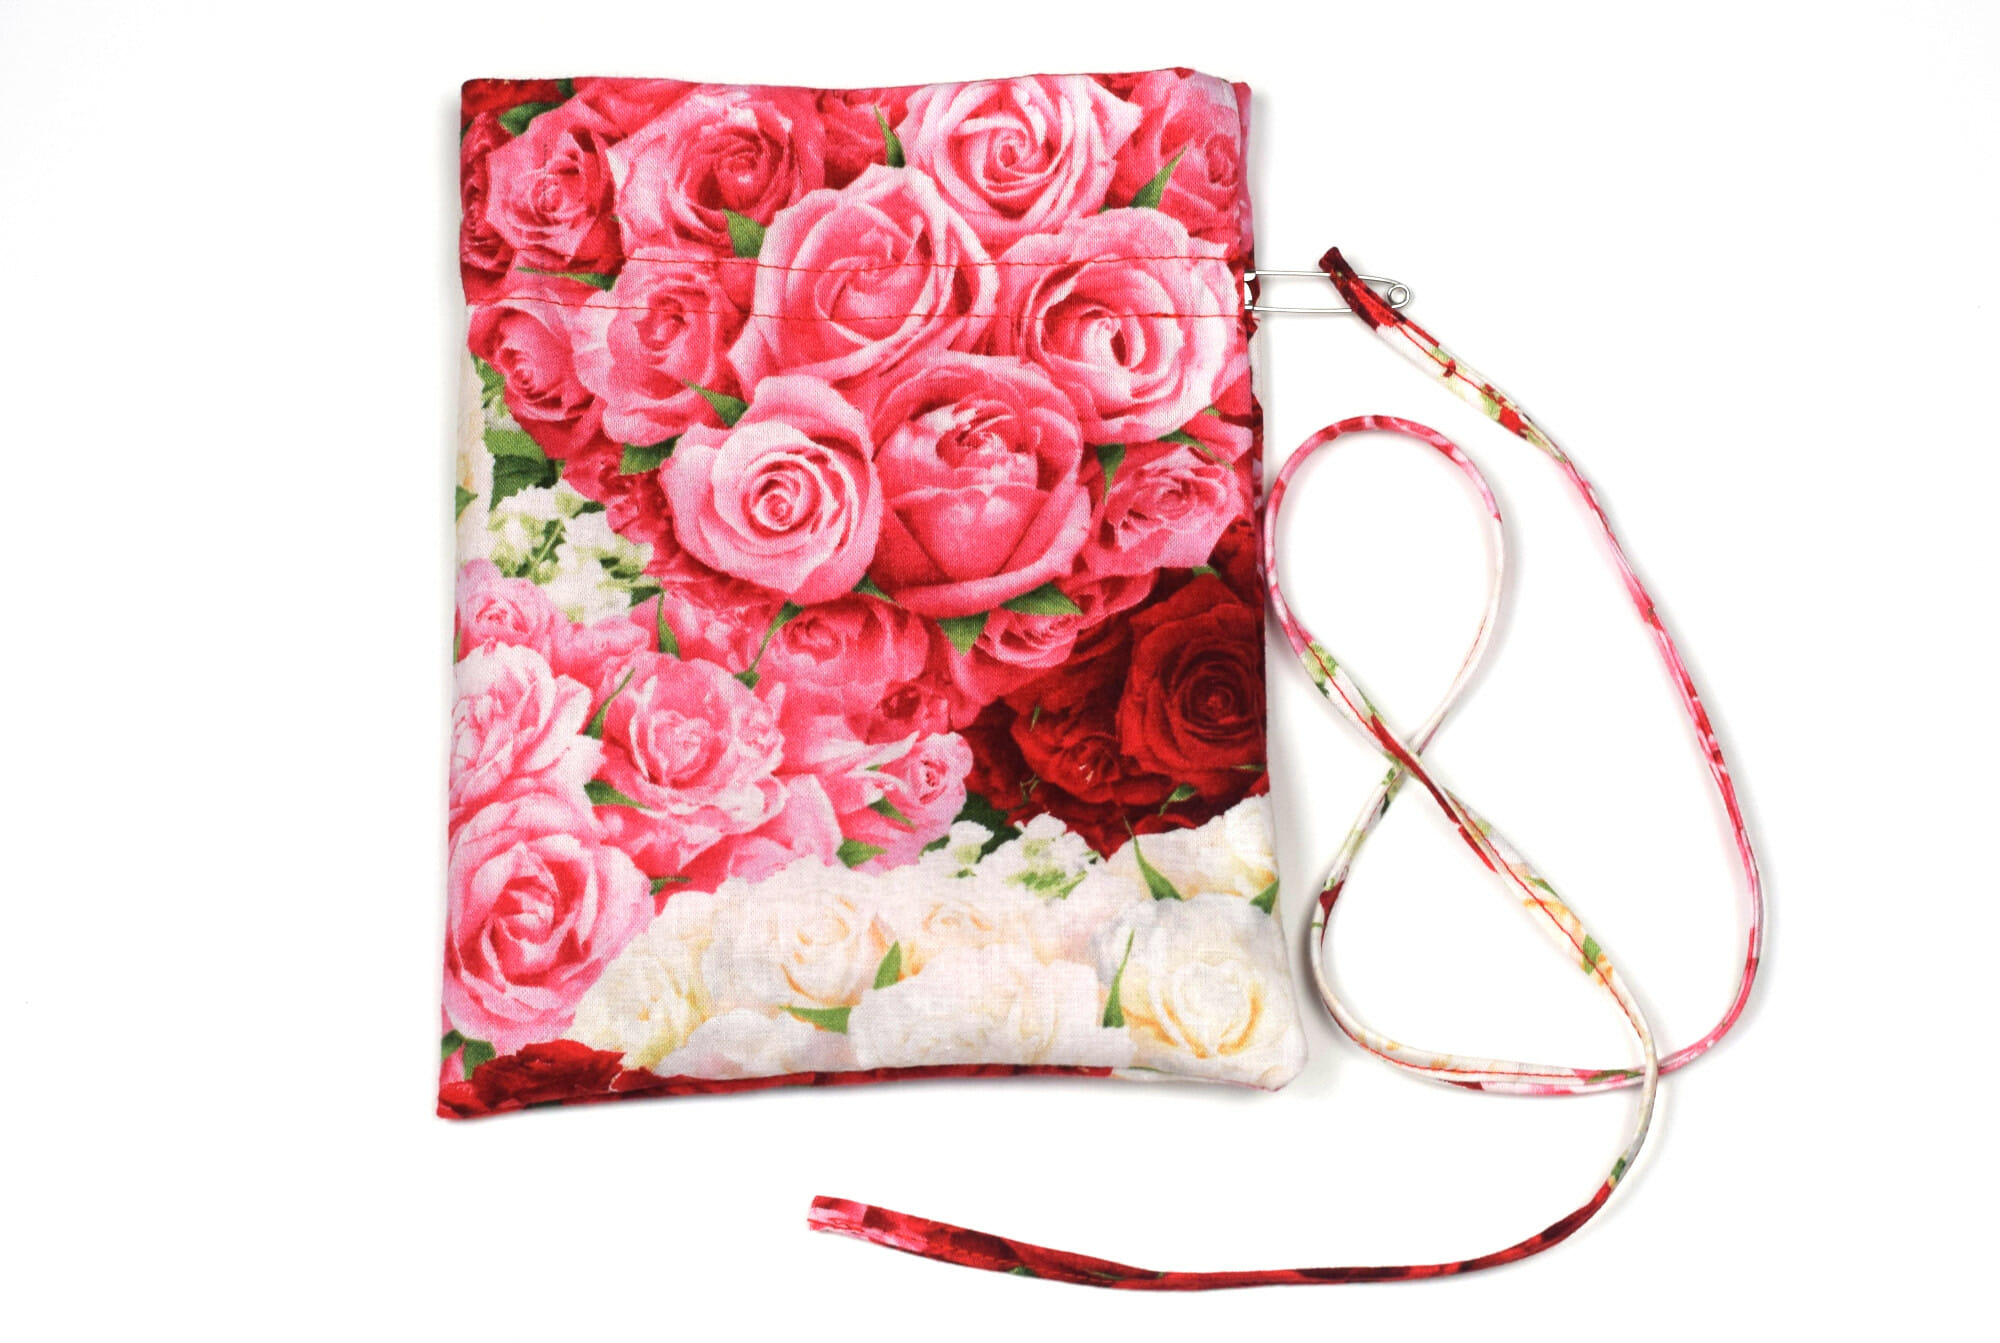
The DIY drawstring bag is a great alternative to wrapping paper, as it will get used over and over for many years before it finally comes apart.
Let’s keep in touch! You can find me on Facebook, Instagram, and Pinterest.


I wanted to be able to cinch mine with a bow, so cut the fabric in half width-wise and make openings on BOTH sides of the bag. Instead of ribbon or fabric, I chain-stitched (crochet) my drawstrings. They turned out really cute! I keep an assortment of ribbons (for sewing or crafts) in one bag, another has an assortment of embroidery floss, etc. So easy to make, and so useful!
Thank you for your comment, Nancy! I’m glad you found it useful.
All the best!
I made some last Christmas and they turned out wonderfully. Thank you so much for a great tutorial. Making more this year.
It was super fun and easy says my sun.
I did the download but it will not send the instructions? It tries to install the PDF
What am I doing wrong?
This was so easy to follow, thanks for sharing
These directions are great. Very easy to follow.
This is a beautiful bag and your directions are great.
Thank you so much, Lourdes! 🙂
I made two of these to use instead of Christmas wrap. The hardest part was remembering how to lay out my directional fabric so it went the way I wanted it to when finished. I really love the way they turned out. Thanks so much for sharing this easy tutorial.
Thank you for the kind comment, Linda! You’re more than welcome! 🙂