Are you having trouble sewing straight lines on your sewing machine? You’re not alone. It is a common challenge faced by beginners, time after time. Here are my top tips and tricks for sewing a straight stitch, and all the things I wish I’d known when I started learning to sew.
More often than not, learning a new skill from the beginning, especially as an adult, is scary and difficult.
I taught myself how to sew six years ago and I vividly remember reading and watching all the tutorials on the internet, and thinking to myself – no way, these people with their straight stitching lines must have some superpowers!
How could an average Jane or Joe possibly be expected to sew those perfectly parallel lines?
Maybe their sewing machine is better than mine, or maybe I should attend a sewing class after all.
How can you learn to sew on your own?
Is sewing really supposed to be this hard or is there something else I don’t understand?
It could be that I’m not talented or good enough for this. Perhaps this is not the right hobby for me.
Does that sound familiar to you?
However, I made it, despite those negative thoughts that held me back. I’m no sewing expert, but now I sure know how to sew straight lines!
As cliché as it may sound, the toughest battle is the battle within yourself. How fast you can learn to sew – that’s completely up to you.
In this tutorial, I want to help you overcome some of your fears and to reassure you that it’s ok to feel frustrated, uncomfortable, or disappointed at times.
When you get right down to it, neatly sewing straight lines IS one of the hardest skills to acquire. Getting the hang of it is a major breakthrough for all sewing beginners.
So, how do you close the gap from where you are to where you want to be? Let’s dive right in!
Related: 50 easy sewing projects for beginners
Stop comparing yourself to others, strive to be better than yesterday
First, you should not compare yourself with people that have been practicing their skills for years.
For a true beginner, those perfectly straight lines must look like sorcery, right?
But all the successful people we see on the internet, showing off incredible skills, they all started from somewhere, and perfection does not happen overnight.
Is this something you can really learn on your own?
Yes, you can teach yourself to sew without formal education and any prior knowledge of the subject at hand. Having mentors and teachers is useful, but not necessary. The best learning resources for learning how to sew are sewing blogs, Youtube, books, and magazines.
I started sewing six years ago. I did not take any sewing classes, and I never saw anybody else in real life using a sewing machine – although I really wanted to and often felt I would never make it on my own.
But here I am, six years after unboxing my first sewing machine, and I want to tell you it’s entirely possible to acquire and improve sewing skills through lots of practice and commitment.
So, are you ready? Let’s learn everything there is to know about sewing straight seams. Here are the best actionable tips and tricks that work.
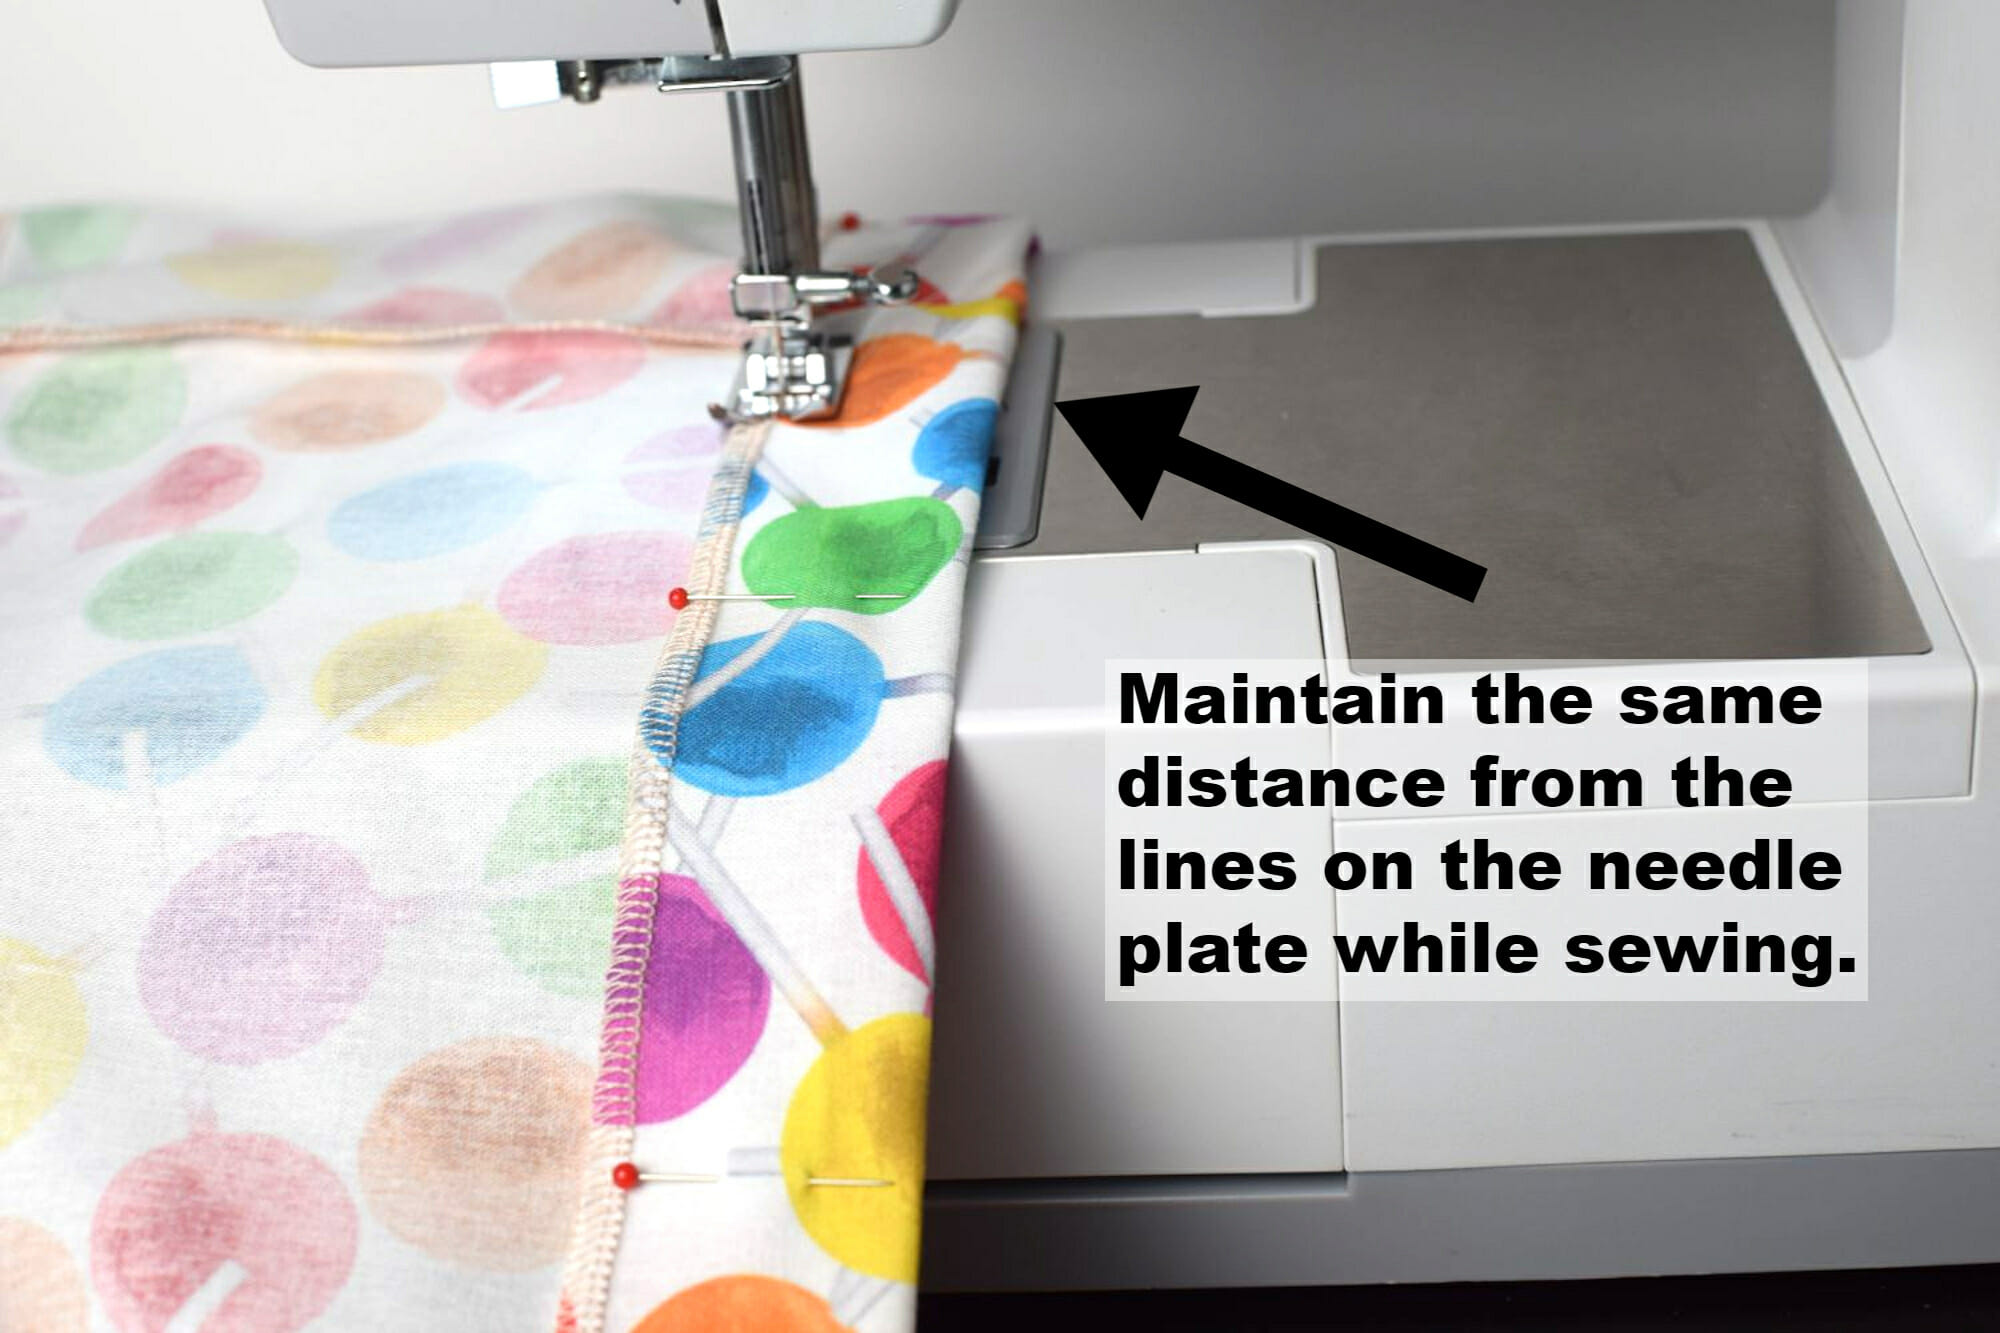
Pay attention to the guides on your needle plate
You’re not supposed to look at the needle or elsewhere than the guide on your footplate while sewing. But you already know that, don’t you?
Back when I was a beginner, I knew that too, and yet I struggled for weeks to do this simple thing. More on that in a moment.
Related: Frayed edges linen dress tutorial – probably the easiest dress you’ll ever sew!
Practice sewing on paper
At first, I practiced sewing straight lines on a blank paper sheet – that’s a great exercise to improve your skills. However, you might have to change your needle after sewing on paper, because this will most likely make your needle dull faster.
Should you want to practice sewing on paper, I’ve included a practice sheet you can print at home – here’s the PDF document.
This is something I wish I had known back then:
First, you should sew on the first column from the right. Sew slowly, and don’t take your eyes off the edge of the paper sheet. With the second column, your next guide is the last stitching line you made, and so on. The last column to sew on is the first from the left.
After that, hopefully you’ll feel more confident and ready to take things to the next level – sewing with fabric!
Put a piece of painter’s tape on your machine to use as a guide
In case your sewing machine does not have seam guides marked on the needle plate, you can place a painter’s tape across the width of your sewing machine’s arm. This makes for an excellent guide – just line up your fabric to the edge while you sew.
Related: 10+ cool sewing tools you might not have yet
Learn to sew accurate seam allowances
The very first time I sewed on a piece of fabric I got it all wrong. My idea of learning to sew involved randomly sewing (somewhat) straight lines in the middle of the fabric piece.
That helped a bit to sense the movement of the fabric and to gain control of the foot pedal. Needless to say, it was impossible to keep an eye on the guidelines since the fabric was all over the needle plate.
The seam allowance is the area between the raw edge and the stitching line on two (or more) pieces of fabric being sewn together.
In real life, when you sew actual things, you won’t just randomly throw some stitches in the middle of your pillow cover or your bodice.
The seam allowances are key to any sewing project – the stitching made in the middle is called „embroidery” or „quilting” and that’s another thing, one that requires different tips and tricks.
In almost all situations, you must pay attention only to how far you are from the fabric edge. So, always follow the seam allowance, because this can make or break your sewing project.
Use specialty presser foot
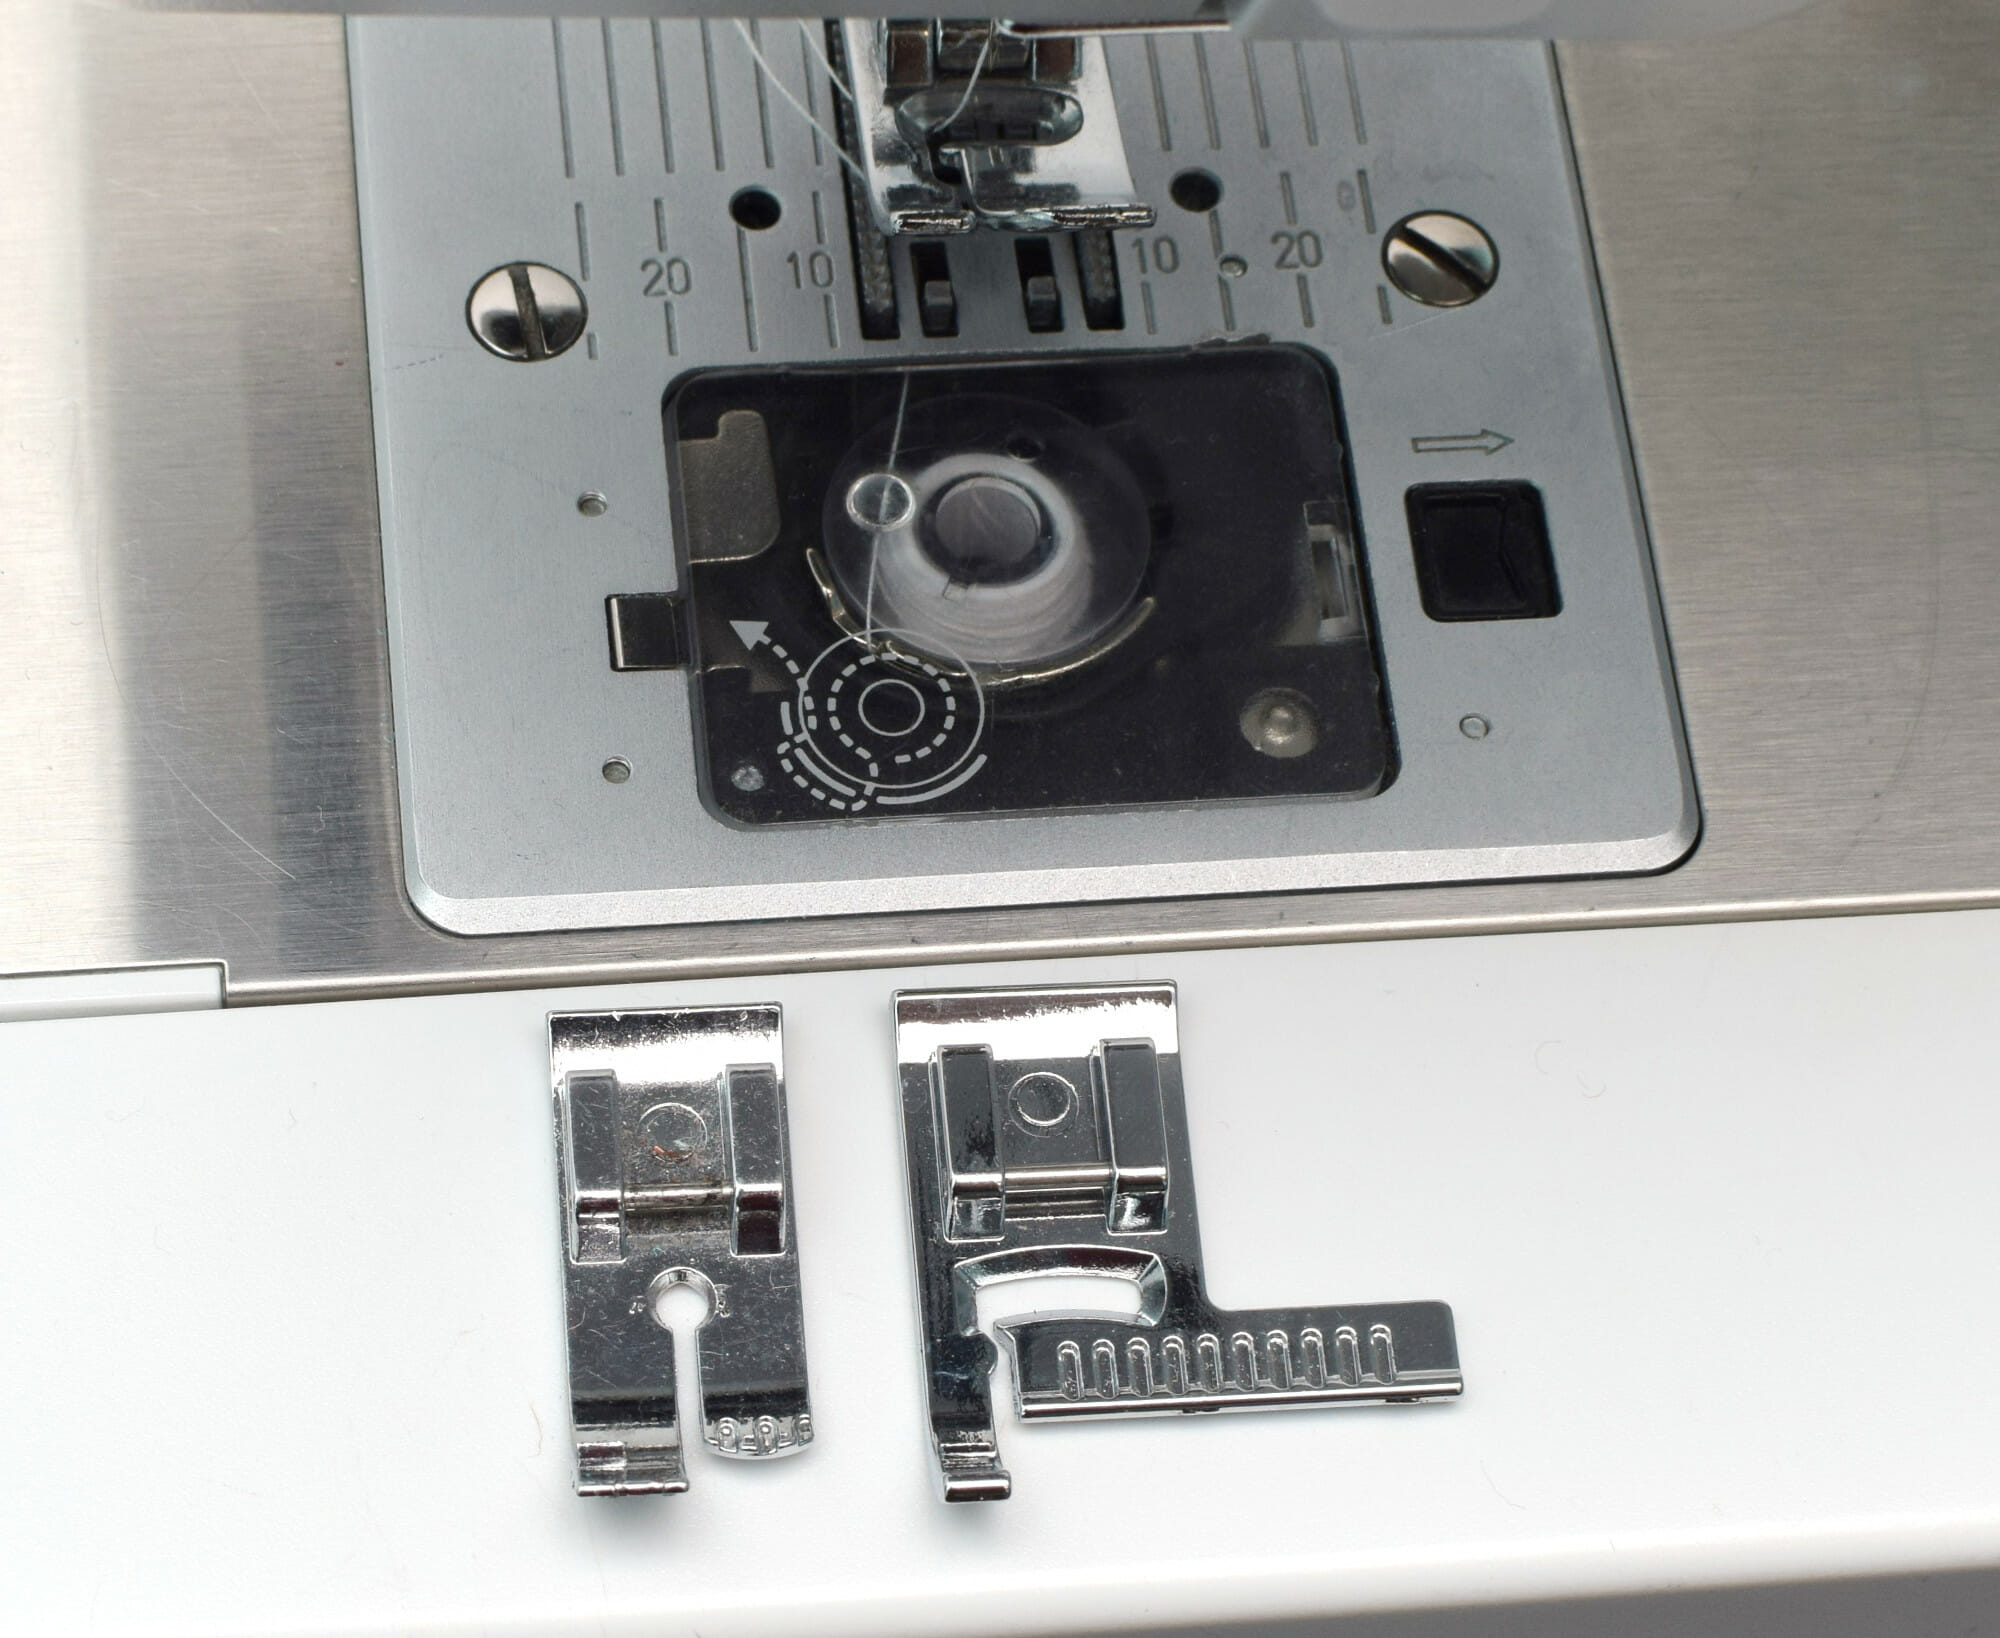
I did, and I thought them helpful at the time. But to be completely honest, I quickly got tired of changing the presser foot several times a day, and since then, 99% of the time, I simply go with my good old all-purpose presser foot.
For a complete beginner though, a straight stitch presser foot or an adjustable guide foot might make a big difference. It is worth trying, even if it’s only to see for yourself that sewing a straight stitch can be easy.
What do you do with your hands when sewing?
Another important aspect is what exactly you should be doing with your hands while sewing. Place the left hand on the fabric, gently guiding but without pushing or pulling it.
Indeed, you’re not there to fight neither the sewing machine nor the fabric. The feed dogs are in charge of pulling the material under the presser foot, not your hands.
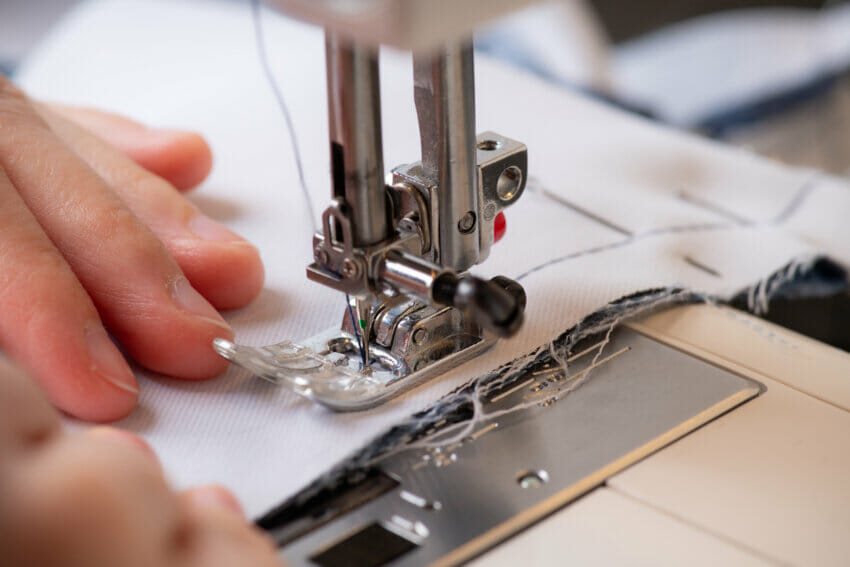
Please observe the photo below – the left hand is in the back, to the left of the needle – guiding the part of the fabric that’s already sewn, and preventing it from piling up and reducing the drag. The right hand guides the fabric from the front.
I actually like this photo, it gives me a nice feeling of serenity. Take a moment and breathe it in.
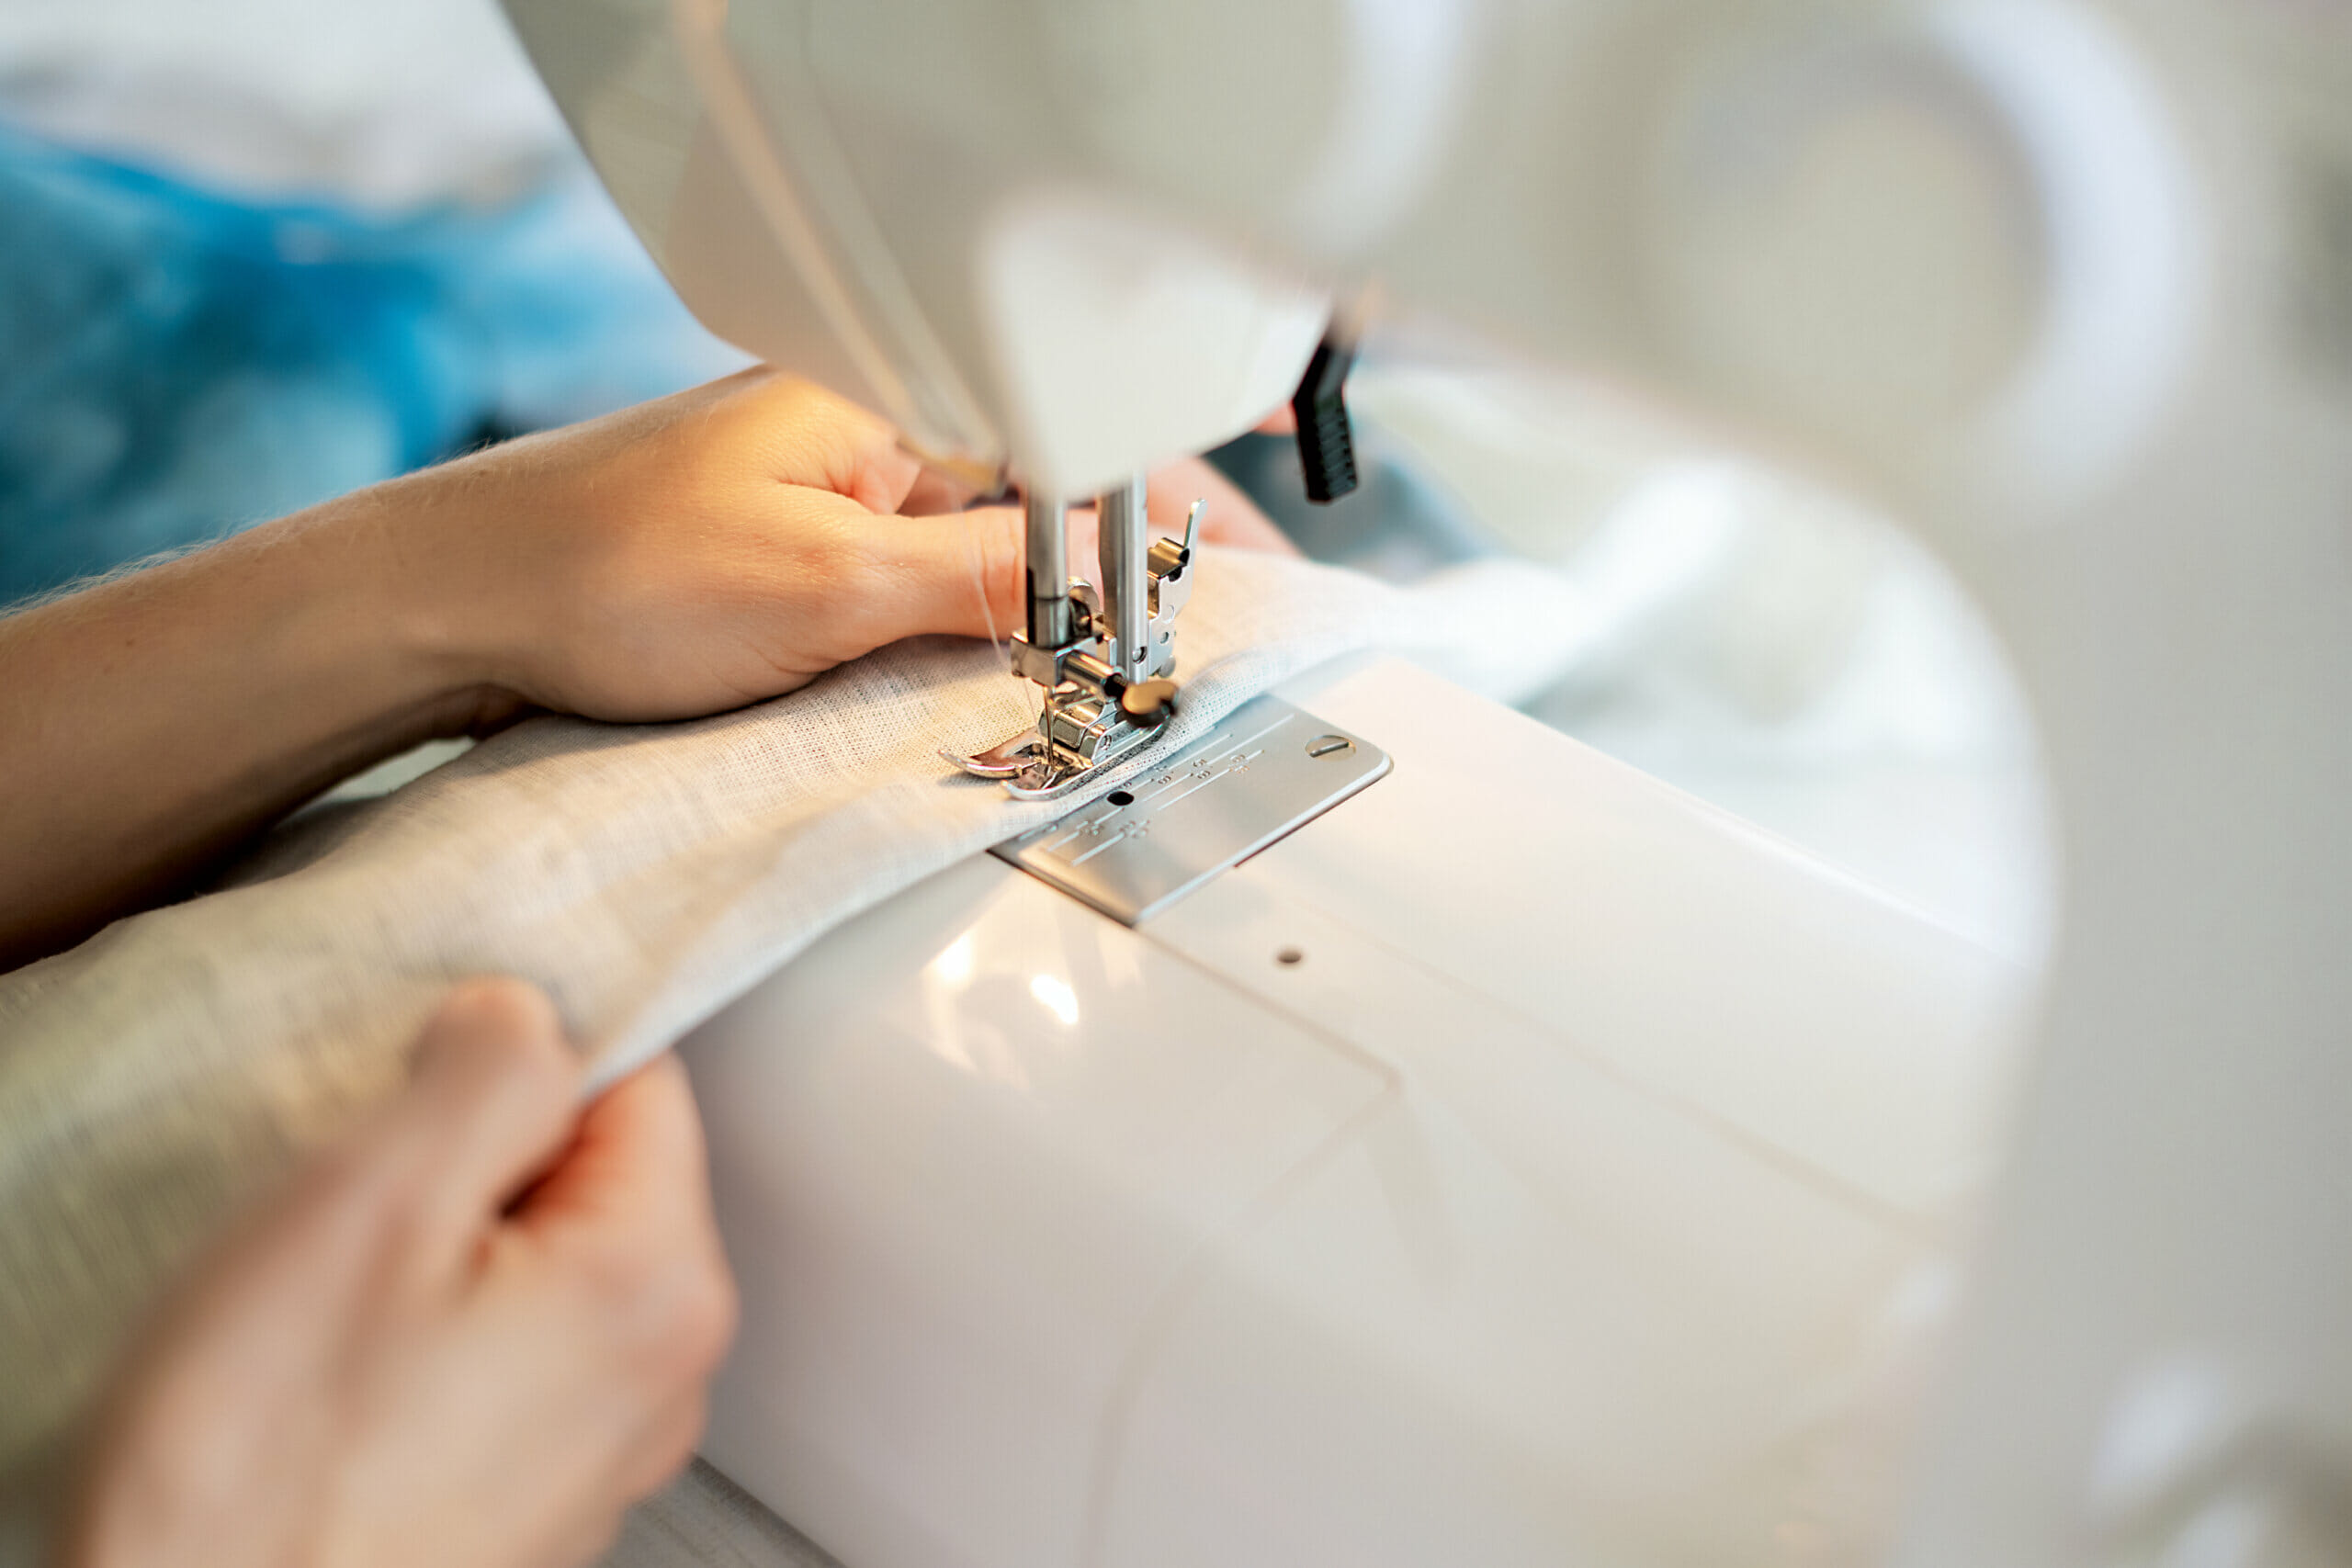
Instead of pulling or pushing the fabric, you need to watch ahead of the needle to make sure you are serving the fabric in line with the seam allowance.
All you have to do is let the fabric run smoothly between your thumb and index finger. Easier said than done, I know – it takes quite a bit of practice to grasp this skill.
Be sure to check out my other tutorials on how to make a flutter sleeve peasant top for little girls, an envelope pillow cover and a flared summer skirt with pockets (super easy!).
Slow down the speed of your sewing machine
We must learn to walk before we can run, as the proverb says. You’ll want to sew as fast as you can maintain control. The best thing to do is sew slowly and at a constant speed. That will help you perceive what happens under that presser foot.
Finally, one more thing about sewing with fabric.
Not all fabrics are created equal
You should know there are different types of fabric, and some are more difficult to sew than the others.
The easiest fabrics to sew are cotton, linen, shirting fabric, chambray, and flannel. They do not slip or stretch that much and are recommended as fabrics for beginners.
On the other hand, stretchy and slippery fabrics like satin, silk, rayon, and cotton jersey are notoriously difficult to sew, so you might want to avoid them for a while.
In other words, if you’re a beginner, it might not be a good idea to practice straight lines on old t-shirts or leggings.
A great alternative would be an old pillowcase – cut it into several smaller rectangles. Then, drew parallel lines on each rectangle (you can use a regular pen, it doesn’t matter much). Try the same tips I mentioned in the paragraph „Practice sewing on paper” above.
What stitch length should you use?
This is me speaking from personal experience. My first sewing projects were some simple cotton skirts I made for my daughter, and I remember thinking that the smallest stitch length was definitely better, since it seemed the strongest to me. So silly!
Little did I know then about the long and painful hours where I had to remove those tiny stitches with the seam ripper. So please, don’t make the same mistake I did.
The standard stitch length is between 2.5 – 3.0, and that is hard enough to tear. Don’t go below 2.5; in fact, it would be much better to use 3.0 or even 3.5.
Learning to sew – muscle memory is real
You’ll certainly need a lot of practice, but eventually, the muscle memory will set in.
Learning to sew is a similar process to learning to drive or ride a bike, and muscle memory plays a critical role in this. According to Wikipedia, muscle memory is found in many everyday activities that become automatic and improve with practice, such as riding bicycles, driving cars, or typing on keyboards.
With time, you’ll build a strong connection to your sewing machine. You’ll be able to sew effortlessly, without pausing to think about how to guide the fabric, or how far to press down on the pedal. Everything comes naturally after a while.
Keeping these tips and tricks in mind as you get to know your sewing machine will help make the experience a lot more enjoyable.
What tips and tricks on how to sew straight lines have worked for you? Please add your suggestions in the comments section!
Let’s keep in touch! You can find me on Facebook, Instagram, and Pinterest.


Interesting comment about smaller stitches being stronger. Here’s another point: you should always aim to make your stitches a little weaker than the fabric, so that if there is a tear, it will occur along the seam.
Been sewing 4 days now and I find sewing straight the part I find the most frustrating. Ohh and my tip for beginners…dont make your first project anything with fleece!
Straight line is a challenge, thank you for assistance.
Hey, I’m glad you’ve found this post useful. Thank you for the comment!
I am learning to sew leather with a machine from hand sewing. It is not easy keeping a straight line. I think with constant practice I will get there. Thanks for your tips especially the use of hands.
Hi Martha,
Sewing with leather is a bit more difficult than sewing with quilting cotton. Are you sewing exclusively with leather? Because let me tell you this – when I started, I wanted specifically to get better at sewing with satin and tulle, since these are the fabrics you need for making tulle skirts. I only sewed with satin and tulle, and it was pure torture at times. I wasn’t interested in learning much else besides this, I had my goals set and I was slowly moving towards them. And looking back, I think it was a mistake. It would have been easier for me if I learned first to machine sew using woven cotton fabrics. It would have made me trust my sewing machine and my skills much earlier. The learning process overall would have been smoother and quicker, but I chose the hard way. Maybe my perspective helps a bit. Anyway, you’ll get there eventually, I’m sure of it. Practice is everything.
Best of luck!
Thanks a lot for your advice, i am sewing since a few years and never was able to sew straight lines , now I am practising and the results are already noticable
Thank you. that is a huge challenge for me also keeping my foot at a slow constant speed.
I am iinterested.