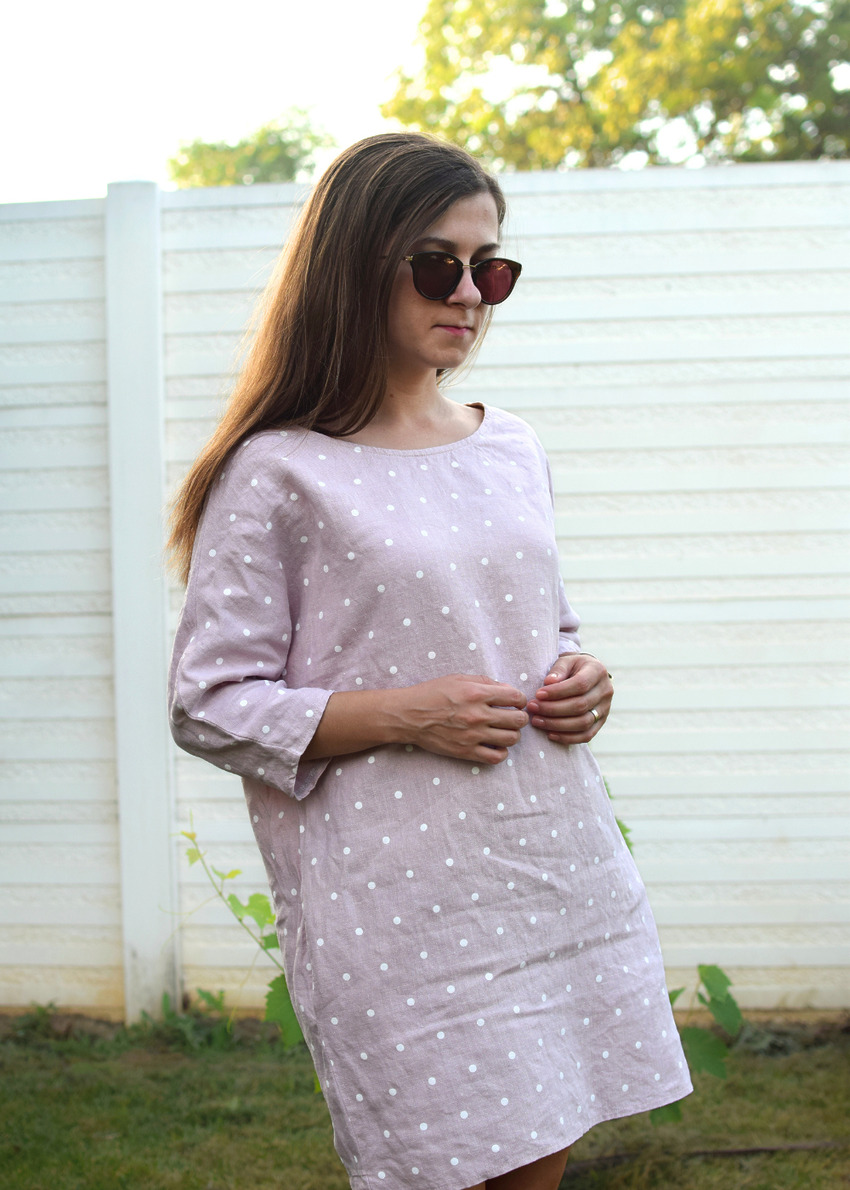
Want to learn how to sew a linen tunic dress that’s stylish, comfy, and super easy to wear? You’re in the right place! In this quick and easy sewing tutorial, I’ll show you how I transformed a basic frayed edges linen dress into a cute tunic-style dress with a soft neckline and a relaxed, effortless vibe. This project is great for beginners – if you’ve never sewn a dress before, this is a perfect place to start.
A while back, I made what might just be the easiest linen dress in the world – seriously, it was all straight seams and no fancy stuff. But recently, I decided to give it a little upgrade and turn it into a breezy tunic linen dress with a fabric belt and a better neckline. Here’s exactly how I did it!
Step-by-step DIY tunic linen dress tutorial
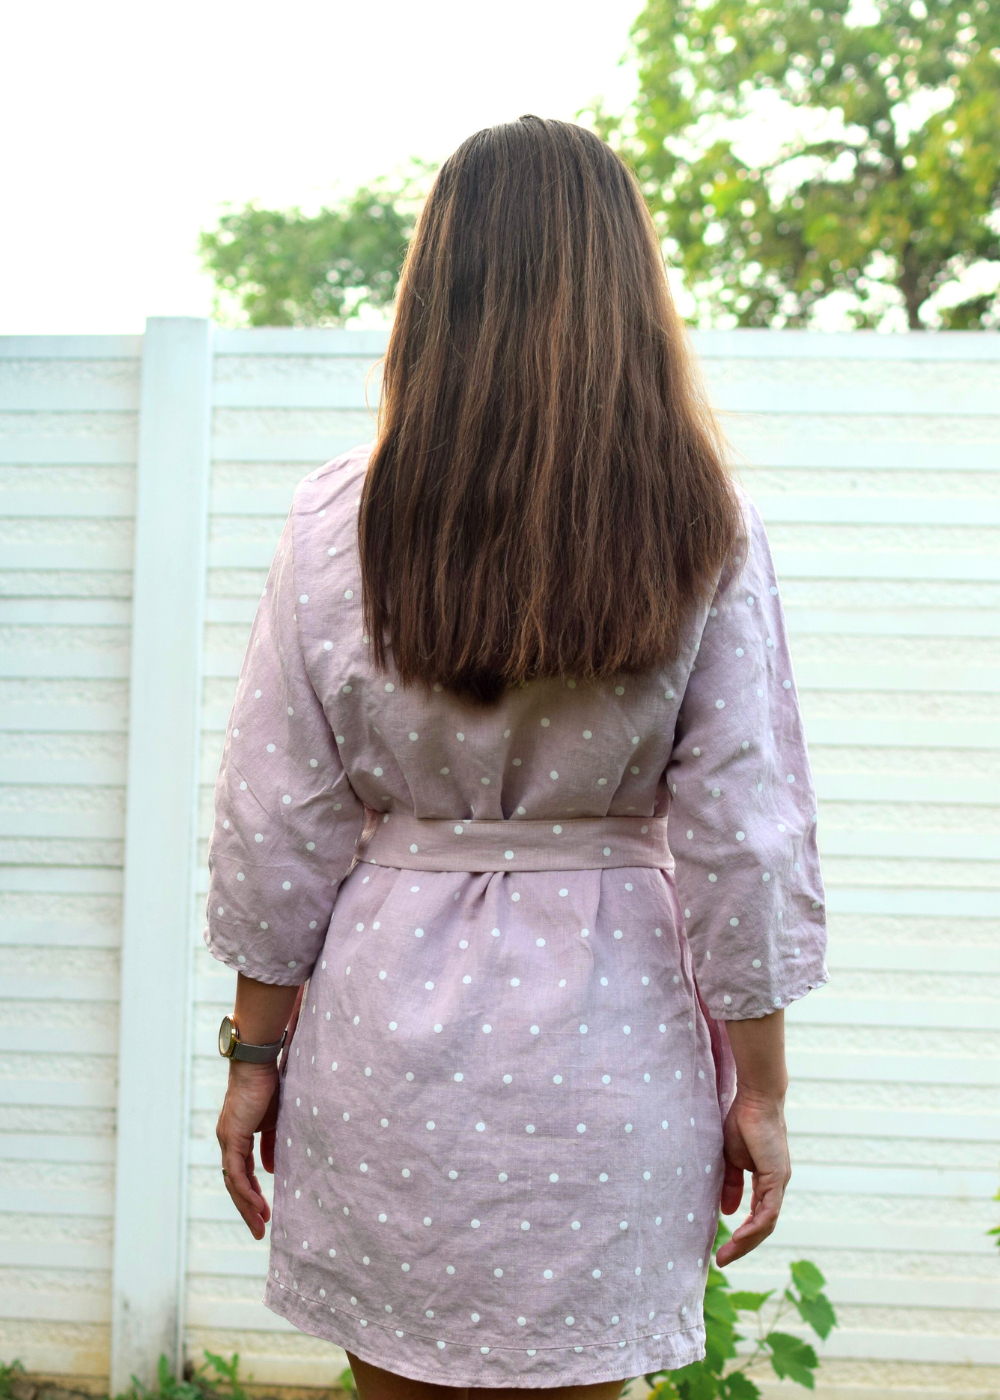
Let’s jump right in. First things first – finish your inside seams. You’ll want to sew and finish the shoulder seams and side seams of your dress. I used a serger for mine, but you can use a zigzag stitch or French seams if you don’t have one. (And yeah, I wish I had photos from the very beginning of the process – sorry about that!)
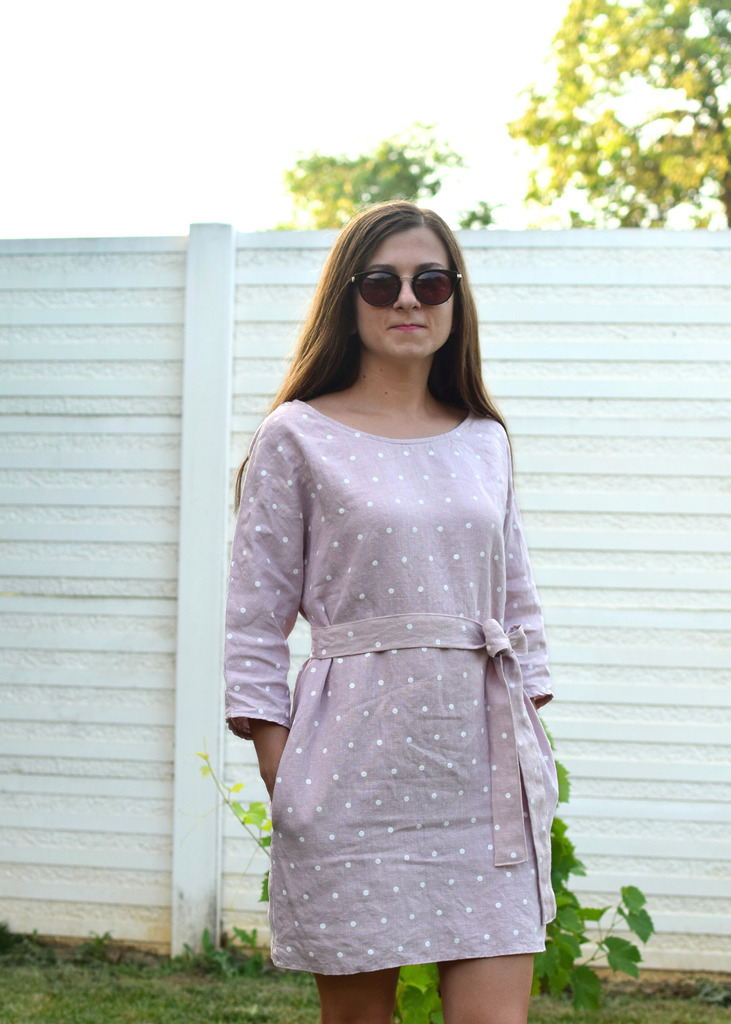
Next up: reshaping the neckline. I wanted a more relaxed look, so I dropped the front neckline about 2 inches lower from the original center front. You can adjust this however you like – just make sure you draw a nice curve that blends into the shoulder seam.
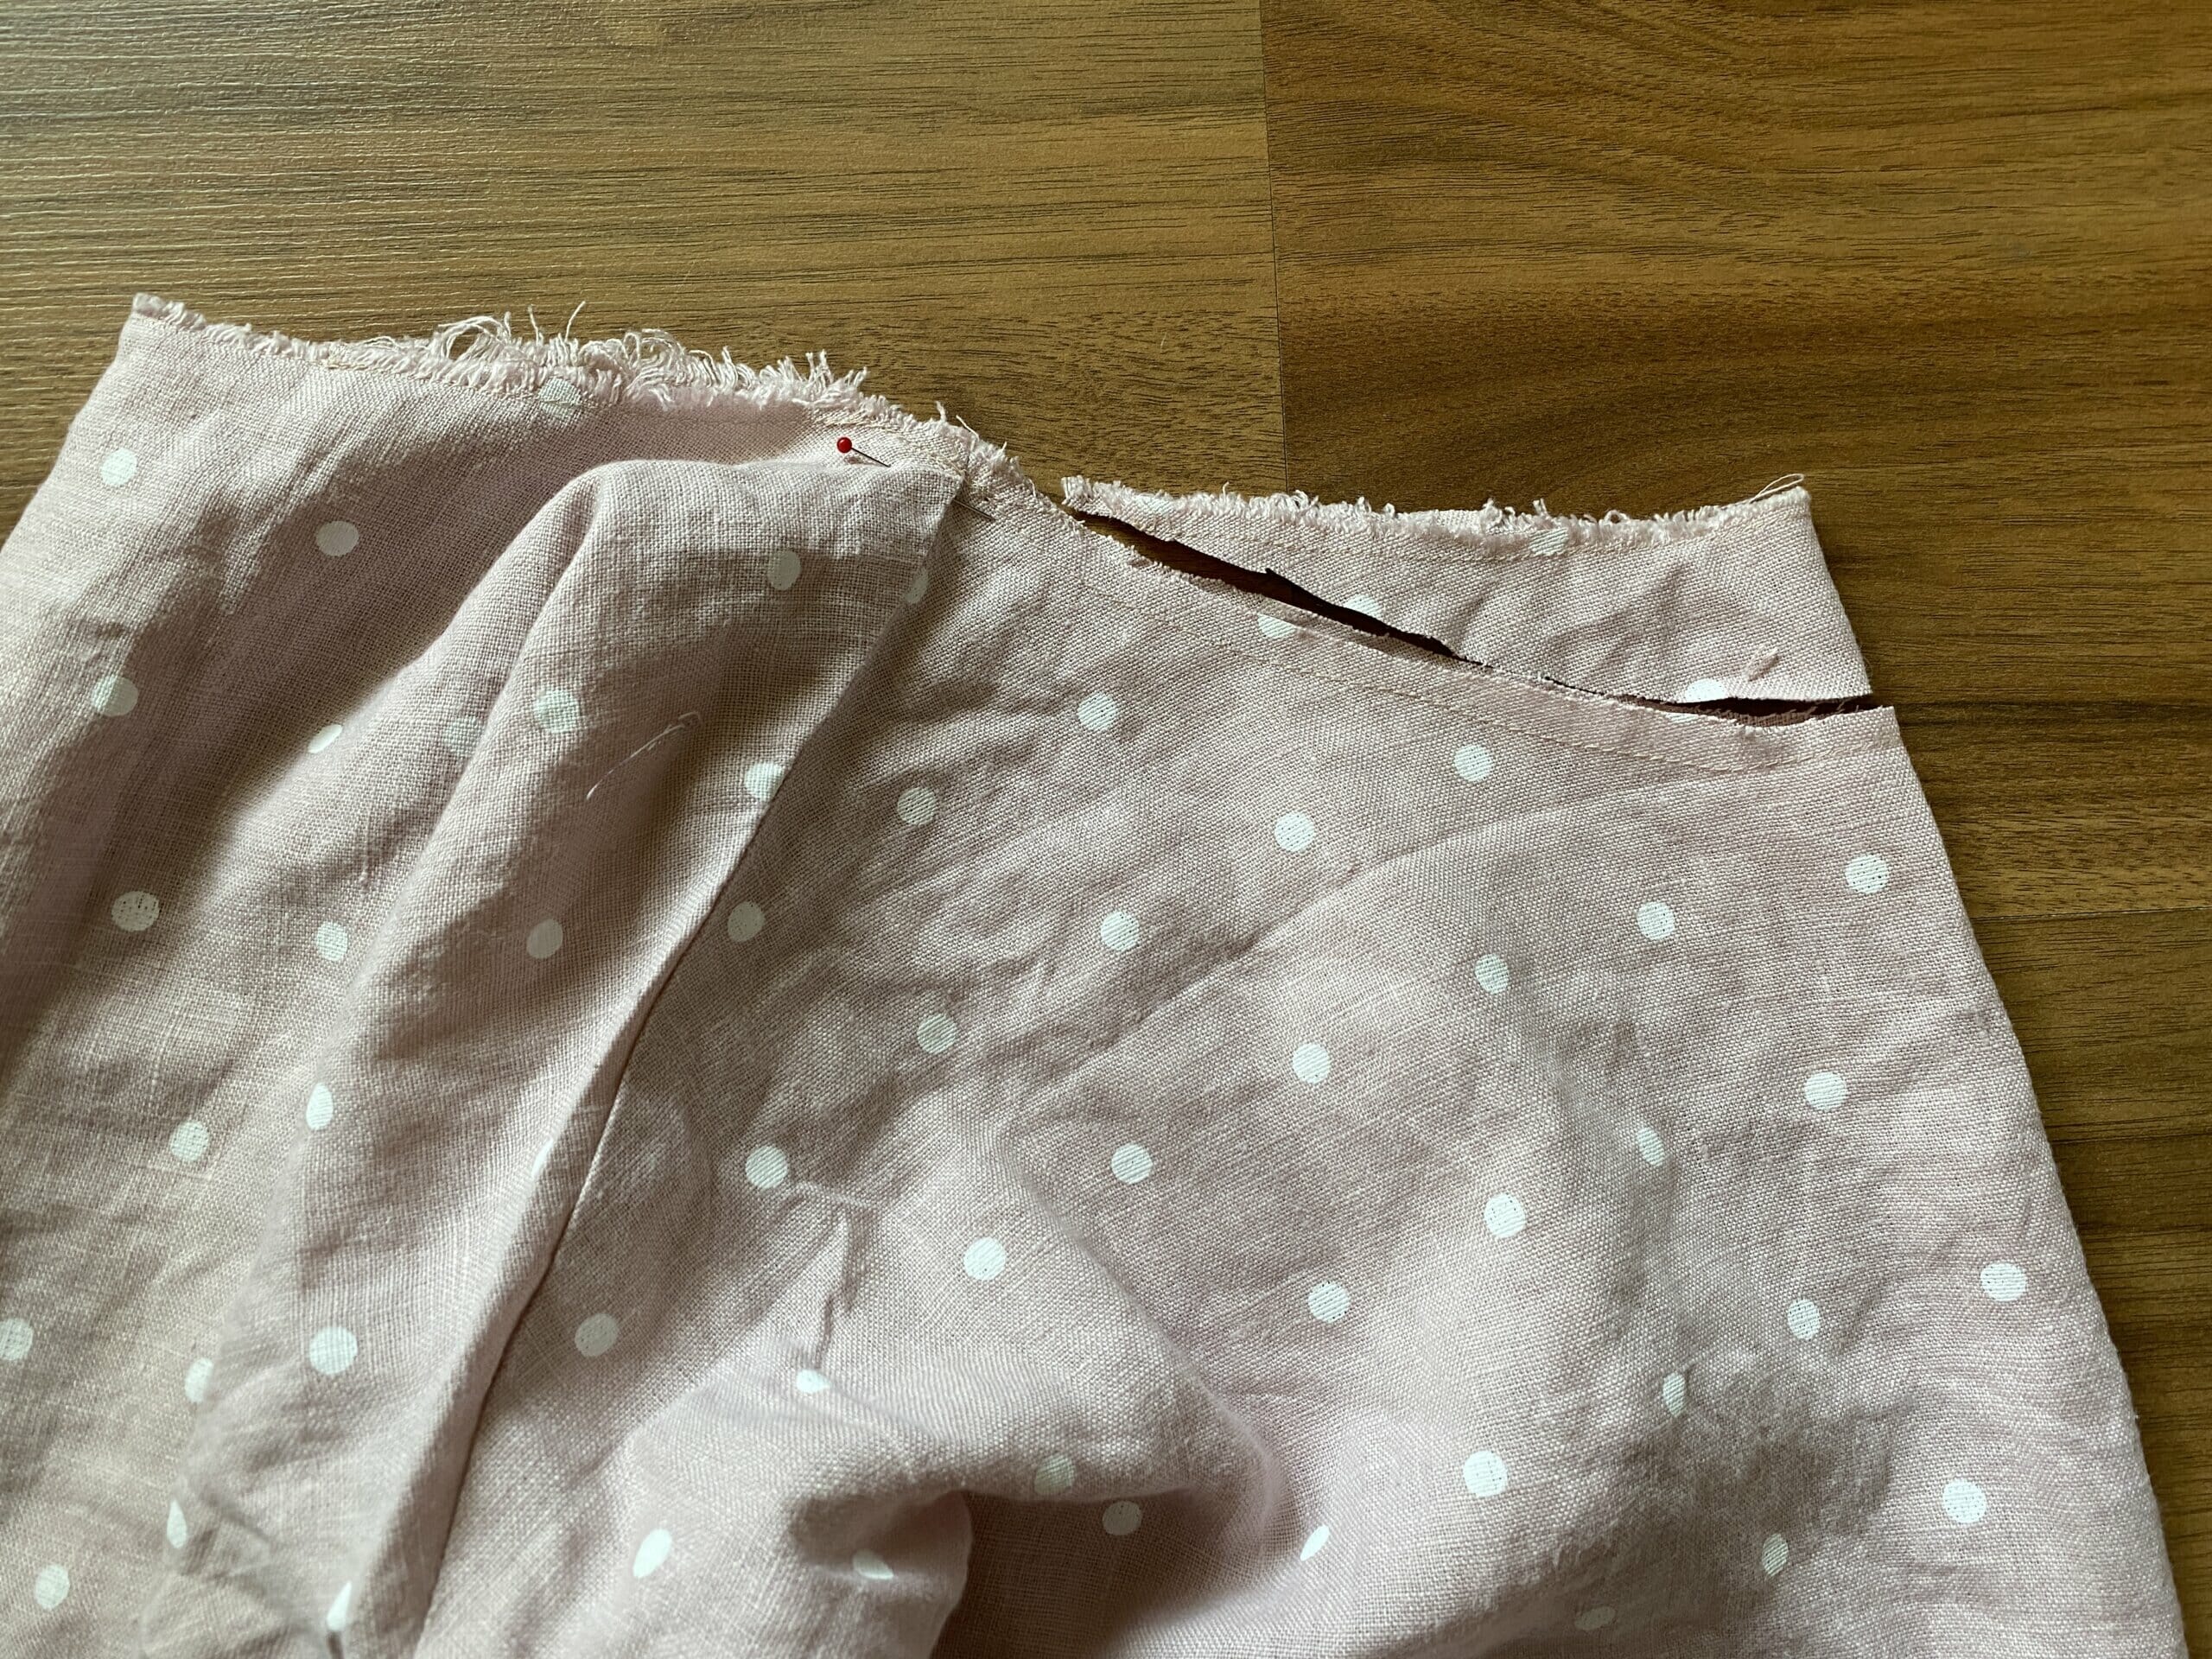
To keep the neckline from stretching out, I staystitched along the new curve. This step is key when working with soft, lightweight fabrics like linen.
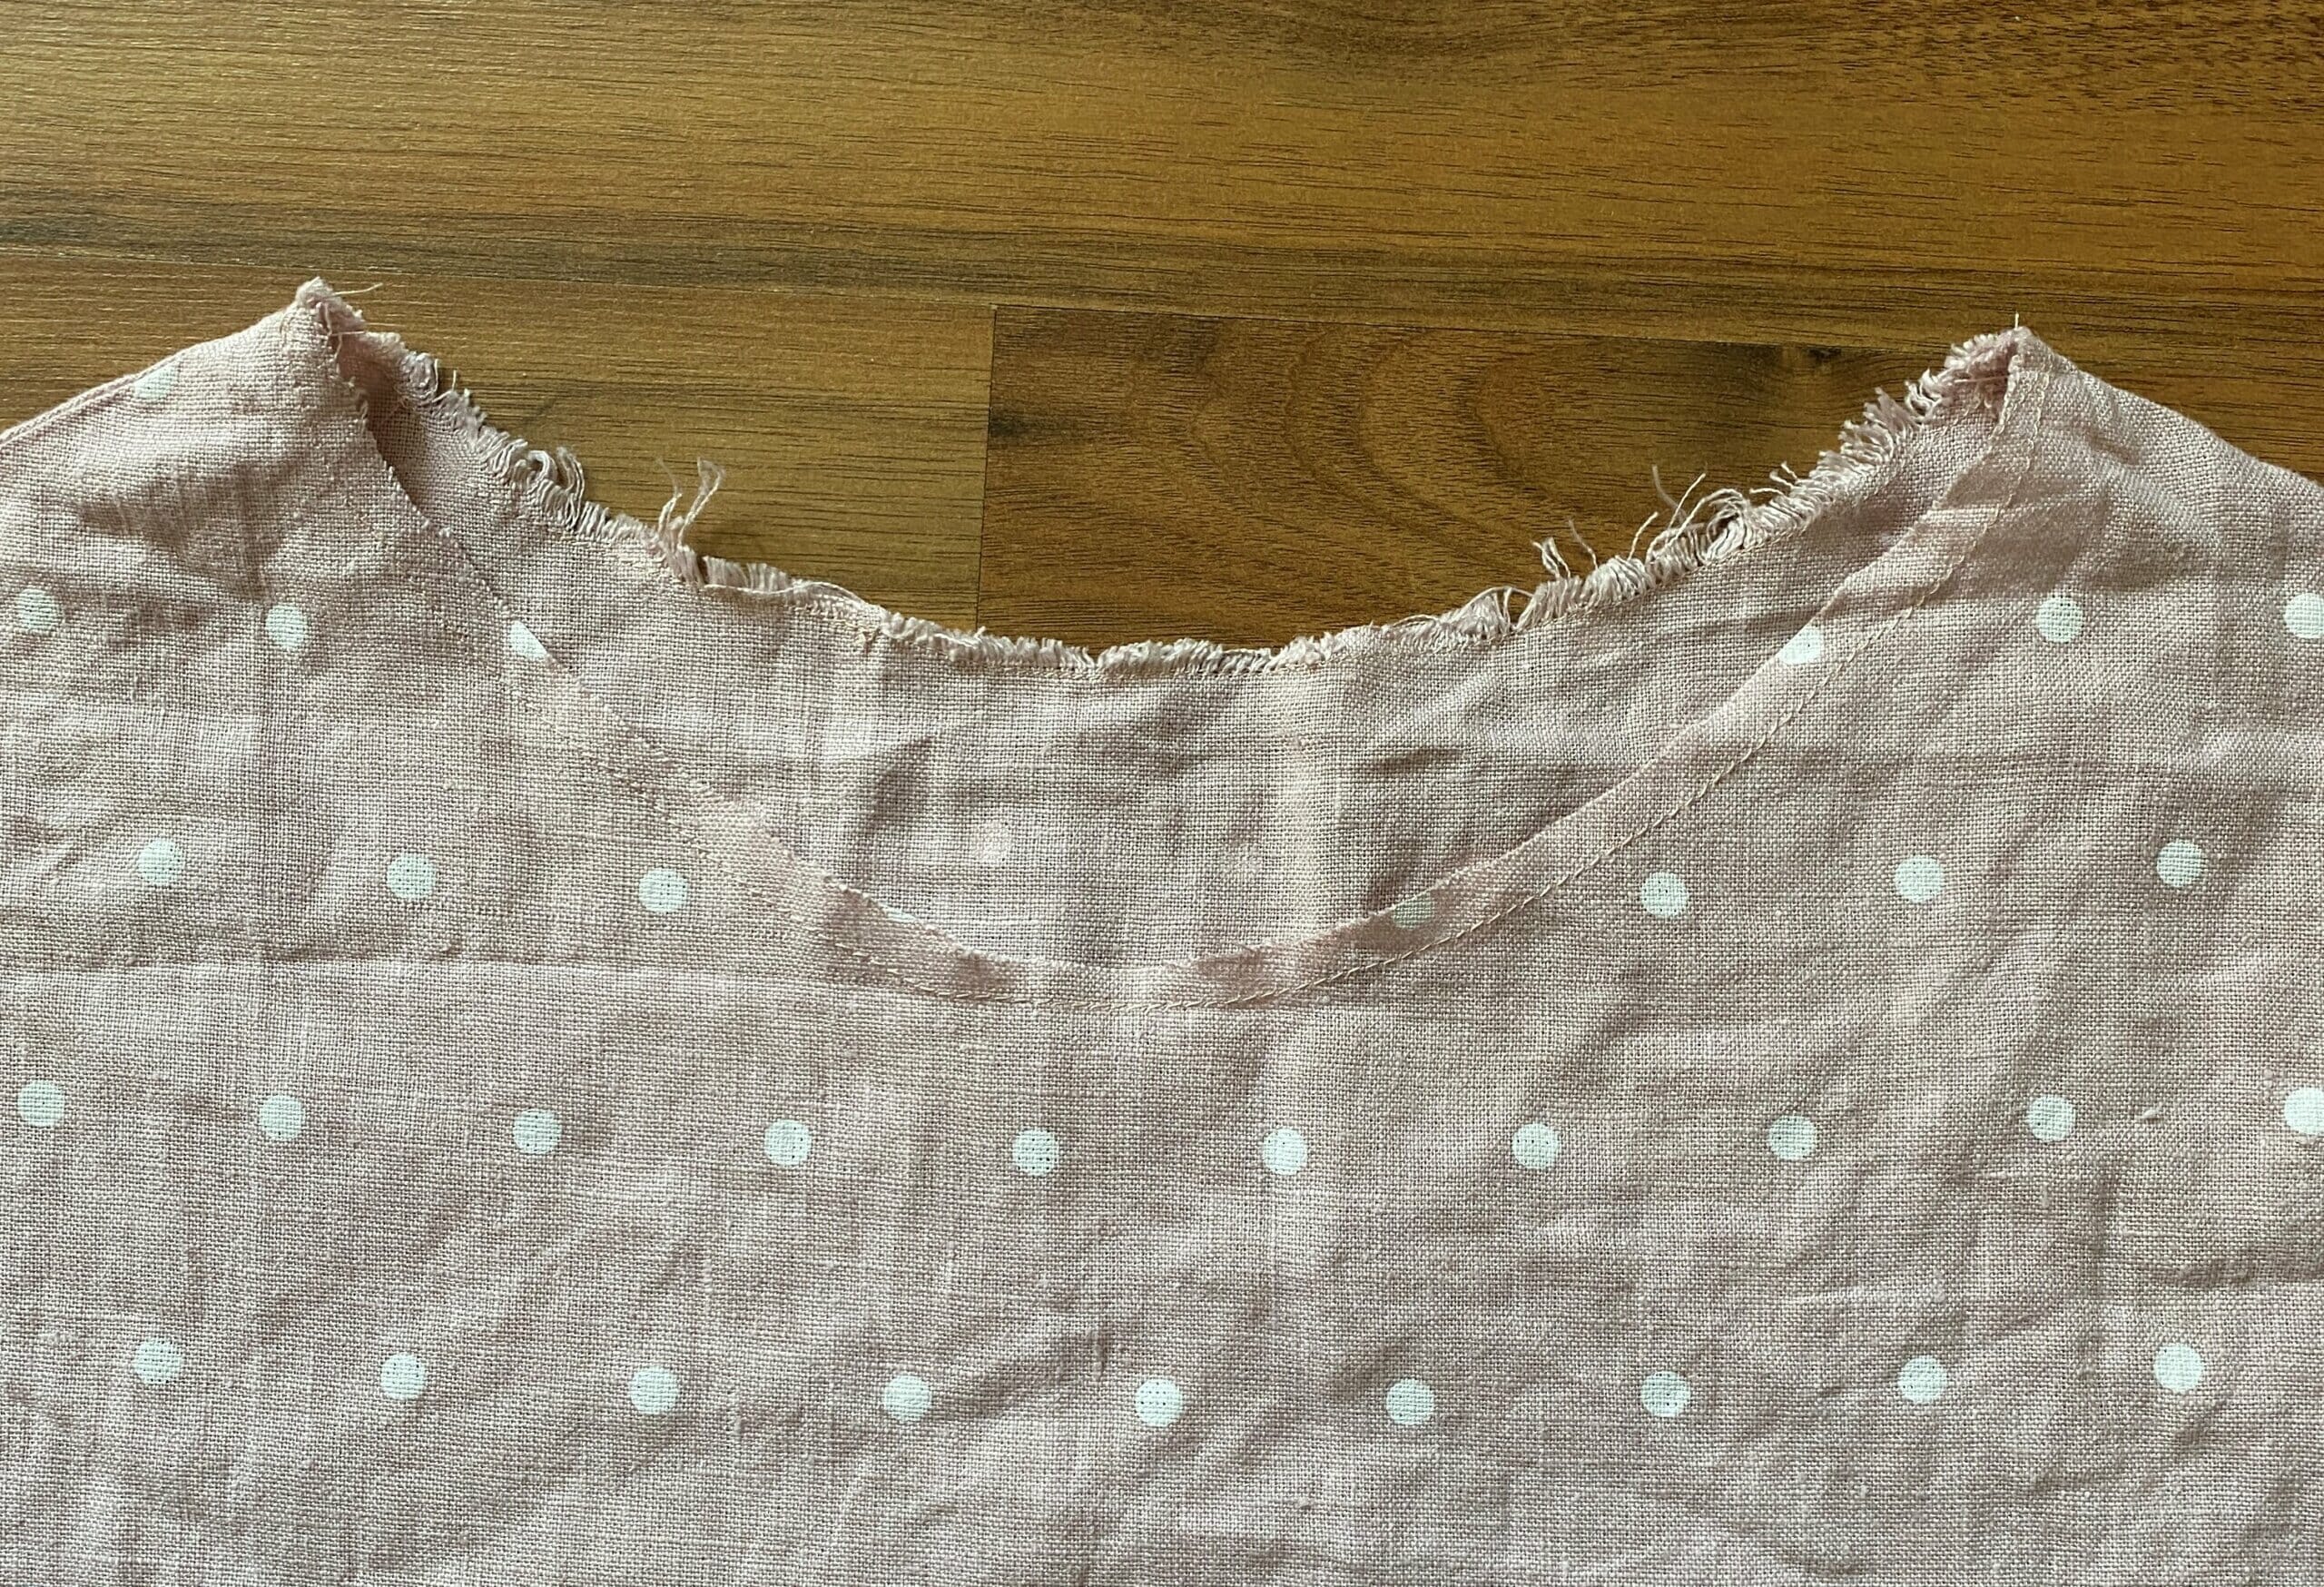
Then it was time to finish that neckline! I used self-made bias tape. If you’ve never made your own bias tape before, don’t stress – just cut strips of fabric on the bias (diagonal), fold them in half lengthwise, and give them a good press. Here’s a great tutorial on how to make bias tape.
I pinned the folded bias tape all around the neckline and stitched it down with a small seam allowance – go slow and keep it even.
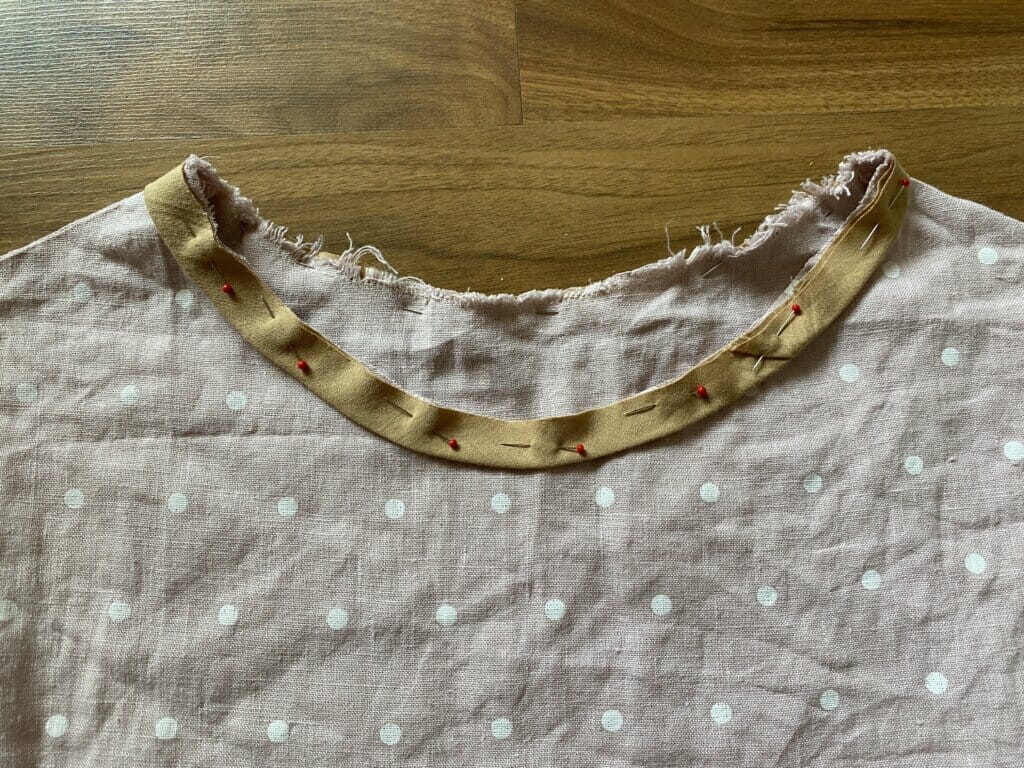
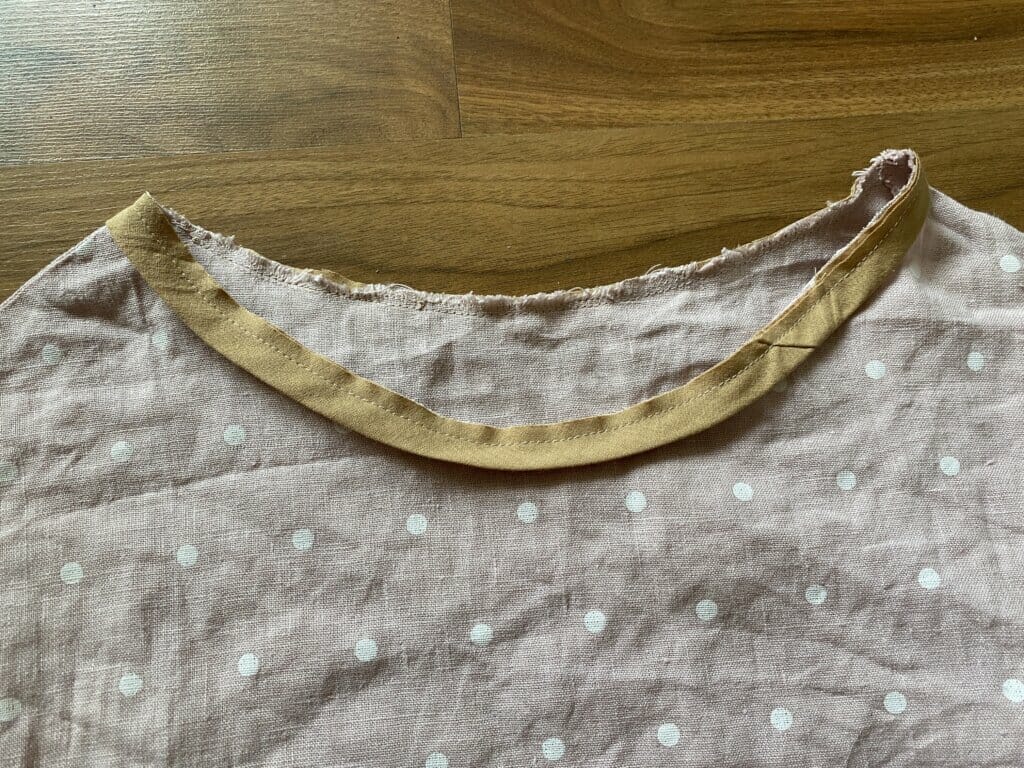
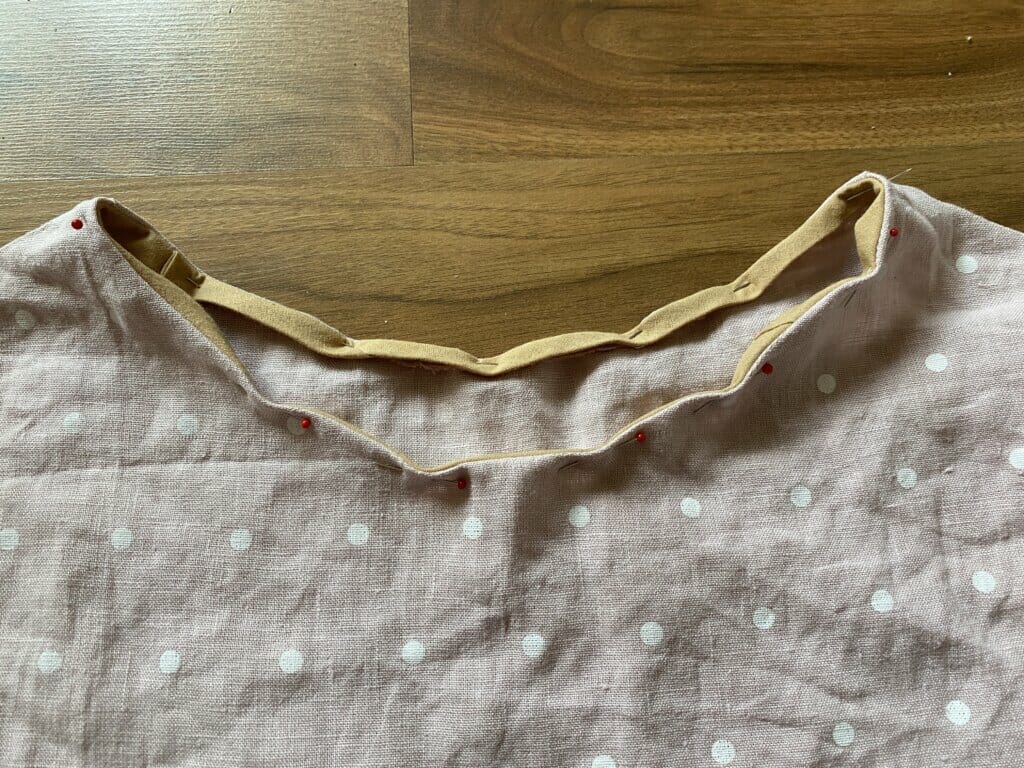
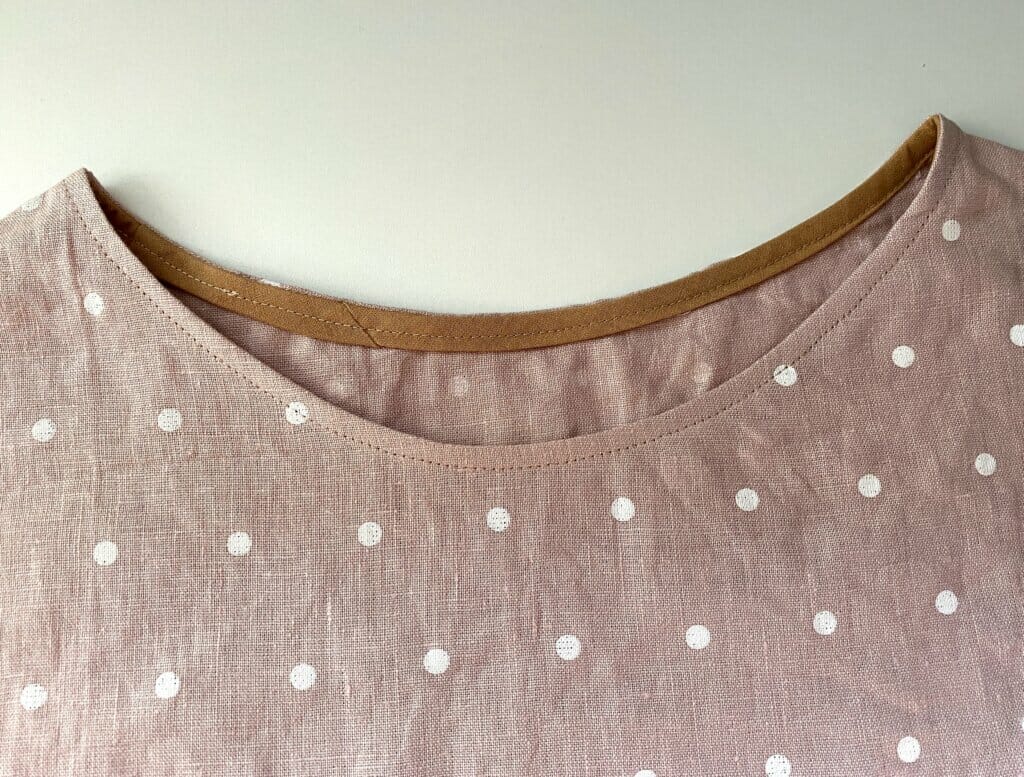
After that, I trimmed any excess seam allowance, pressed the tape to the inside of the dress, pinned it in place, and topstitched it down.
Try to keep your stitching line the same distance from the edge all the way around – it’ll give your neckline a neat, clean finish.
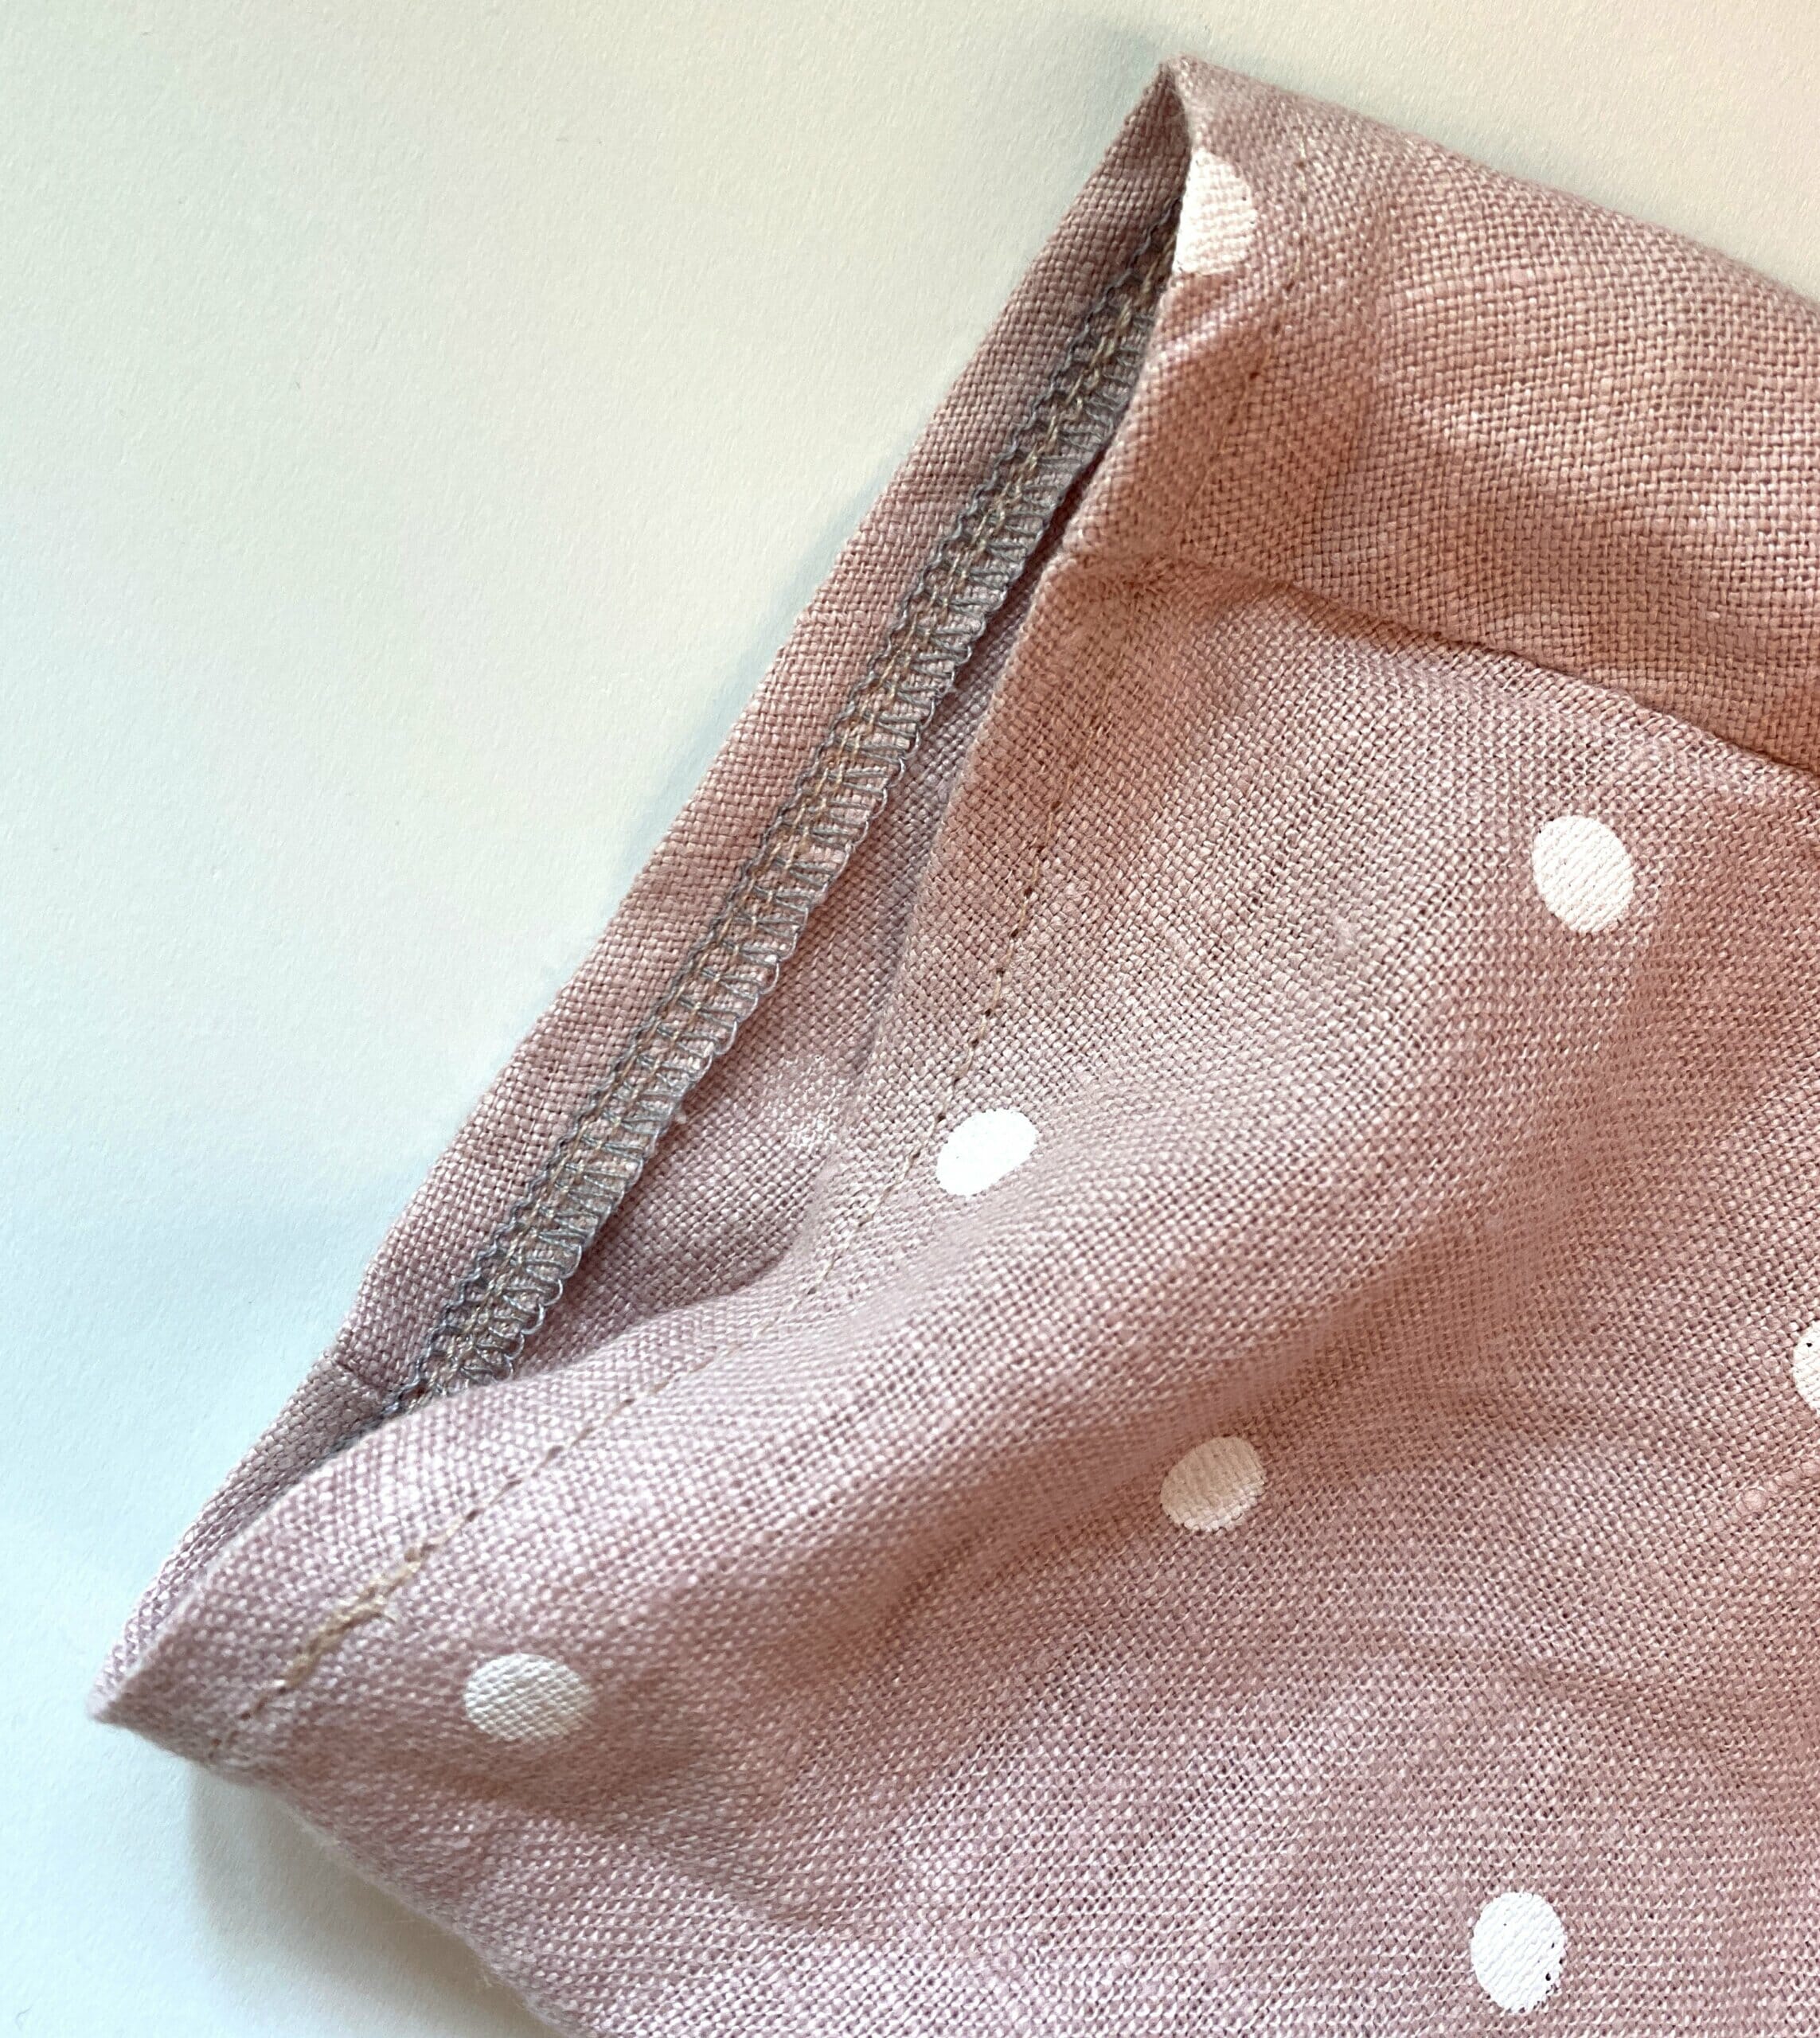
Now let’s finish the sleeves and the hem. I serged the raw edges, then folded them up once for a simple narrow hem. You could double-fold if you like, but I went with a quick turned hem and stitched close to the edge.
Almost done!
Add a fabric belt for that easy tunic look
To complete the look, I made a matching fabric belt from the leftover linen. It pulls the dress in at the waist and gives it a flattering shape without making it too tight. You could also add side belt loops if you want to keep the belt in place – totally optional!
This dress is loose, breathable, and perfect for layering. You can wear it as a summer dress, a tunic over leggings, or even as a beach cover-up. And linen gets softer with every wash, so this one’s only going to get better with time.

I love how this DIY tunic linen dress turned out, and I know I’ll be wearing it on repeat! It’s proof that a few simple sewing tweaks can totally change the look and feel of a handmade garment.
Try this easy linen tunic dress pattern for yourself!
Whether you’re a beginner looking for your first dress project or just in the mood to sew something quick and wearable, this linen tunic dress is a great choice. It’s forgiving, flattering, and fun to make.
Did this DIY tunic dress sewing tutorial help you? I’d love to hear your thoughts, and if you make one, please send pics – I’d be thrilled to see your version!
Let’s keep in touch! You can find me on Facebook, Instagram, and Pinterest.


Wow! Thank you so much for generously sharing this sweet tutorial. I’m a real beginner and have searched high and low for just the right first garment project. I can’t wait to get started because not only is this easy enough for me, but the dress itself is just goshdarn adorable! ?
I actually meant to post this on your frayed original version, but got so excited I clicked on this finished version too. I will make this one for my second project!
So glad to hear this, Josie! Thank you for your kind words!
This is exactly why I made this tutorial – I wanted to show that even a beginner can make a dress – without a pattern, without taking a lot of body measurements, in a relaxed manner, and super fast as well. I’ve worn this dress a lot and cannot wait to wear it again – spring is finally around the corner.
When I was a beginner I doubted myself so much, so often. I let so many limiting beliefs hold me back – for example I thought that there is a magic ratio for the front & back neck width, where to place the pockets, ok but how wide to cut the sleeves? Etc. It was so silly actually… Sometimes it’s better to just do it.