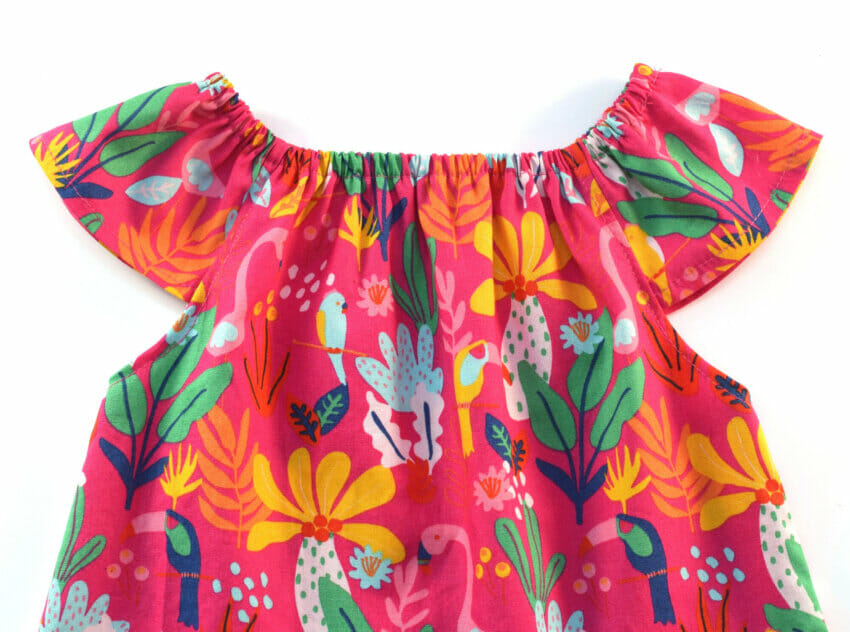
Want to make something sweet and super easy for your little one? This flutter sleeve peasant top sewing tutorial is just the thing! With a relaxed fit, no tricky fastenings, and a free printable pattern in size 3T, this beginner-friendly project is a great way to sew a cute summer top (or dress!) for your girl.
Sewing a flutter sleeve peasant top might sound fancy, but trust me – it’s totally doable even if you’re new to sewing. No zippers, no buttons, no snaps. Just a stretchy elastic neckline and some fluttery sleeves that give the whole top that adorable, breezy look. This is one of those quick wins – you can finish it in about 30 minutes if you’ve got some experience, or within an hour if you’re just starting out.
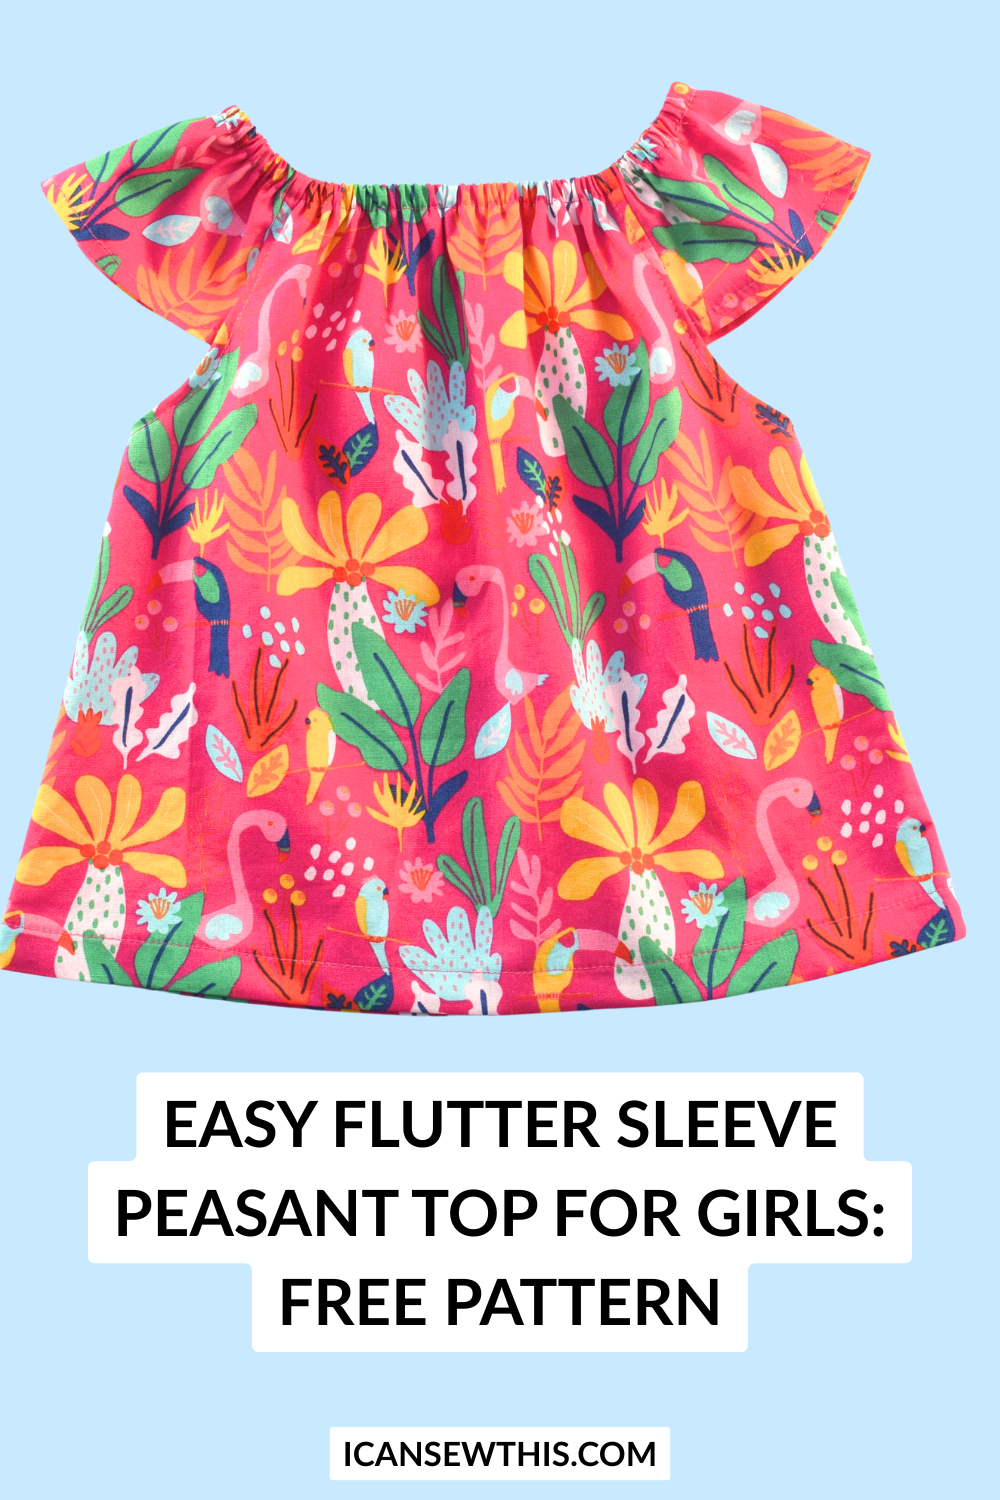
I made this for my nearly 3-year-old daughter, and she’s obsessed! She can pull it on by herself (yay for independence), and it’s super comfy to wear. It looks adorable with anything – denim shorts, leggings, or even layered over a long-sleeve tee when it’s cooler out. You can sew it as a top or add a bit more length and turn it into a flutter sleeve peasant dress – above the knee or even mid-calf. It’s such a flexible pattern.
This DIY peasant top with flutter sleeves is perfect for summer sewing. It works best in lightweight cotton – go for solids, florals, or quirky prints to match your kid’s personality. Bright colors really make the flutter sleeves pop!
Easy DIY flutter sleeve peasant top
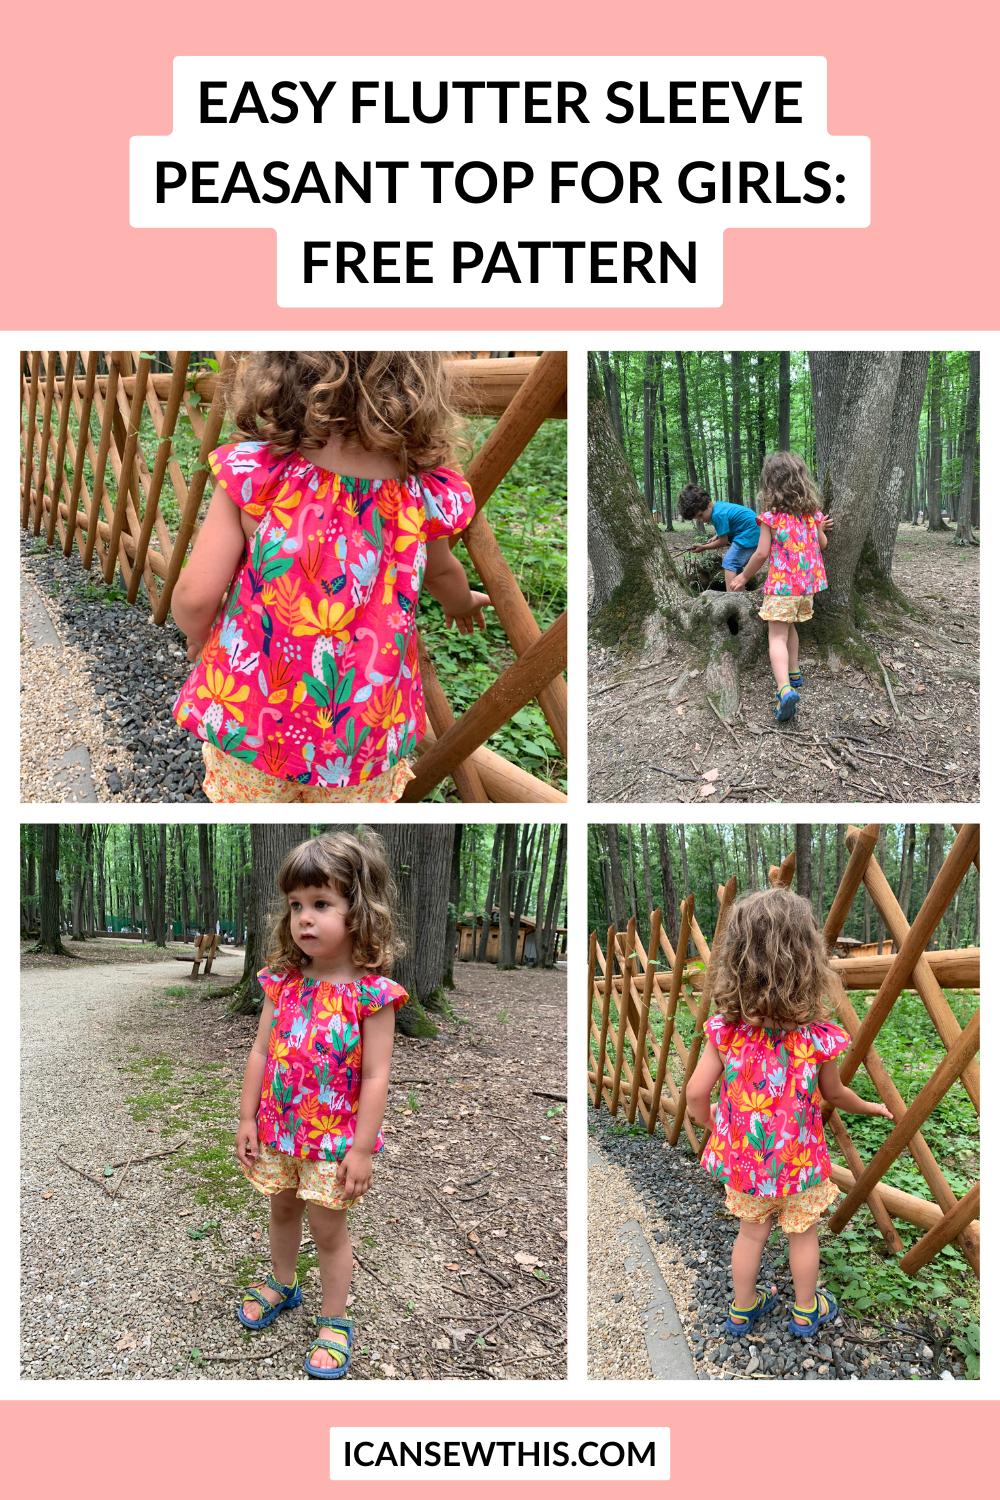
The free peasant top pattern for toddlers is hand-drafted and available in size 3T. It fits my daughter (she’s about 36.5 inches tall), and the loose fit means she’ll get lots of wear out of it – probably all through the warm season and maybe even into next year.
Just a heads-up: this pattern is for personal use only, and while I’m not a pro pattern maker, I made sure everything is easy to follow, and the finished top looks great (you can check out the photos or my video for proof).
So if you’re looking for a free sewing pattern for a toddler girl top, or want to try your hand at a homemade peasant blouse for kids, give this one a go! It’s fun, quick, and totally adorable. You might end up making a few – because once you see how cute it turns out, you’ll want one in every color!
Related: Looking for a fun and educational activity for your little ones? Try this free maze generator for kids – customizable mazes that will entertain and engage young minds!
Sewing supplies – easy girls’ peasant top with flutter sleeves
- free PDF pattern available below – size 3T. Make sure you print it at 100% or “actual size”.
- ½ yard of fabric – cotton, linen, muslin
- ¼” elastic (I used 18″ for a 3T size)
- sewing machine
- needle
- matching thread
- sewing pins
- fabric scissors
- safety pin
How to Make a Peasant Top with Flutter Sleeves (Step-by-Step Tutorial)
Ready to sew a super cute and comfy flutter sleeve top for your little one? You’re in the right place! This step-by-step guide will walk you through how to sew a peasant top with flutter sleeves using a free printable pattern. It’s perfect for toddlers and young girls, and you can easily turn it into a dress too!
Let’s sew!
Step 1 – Cut Your Fabric
Start by laying out the pattern pieces, then prepare and fold your fabric. The bodice is composed of three pieces – part 1, part 2, and part 3. Here’s how to assemble the pattern:
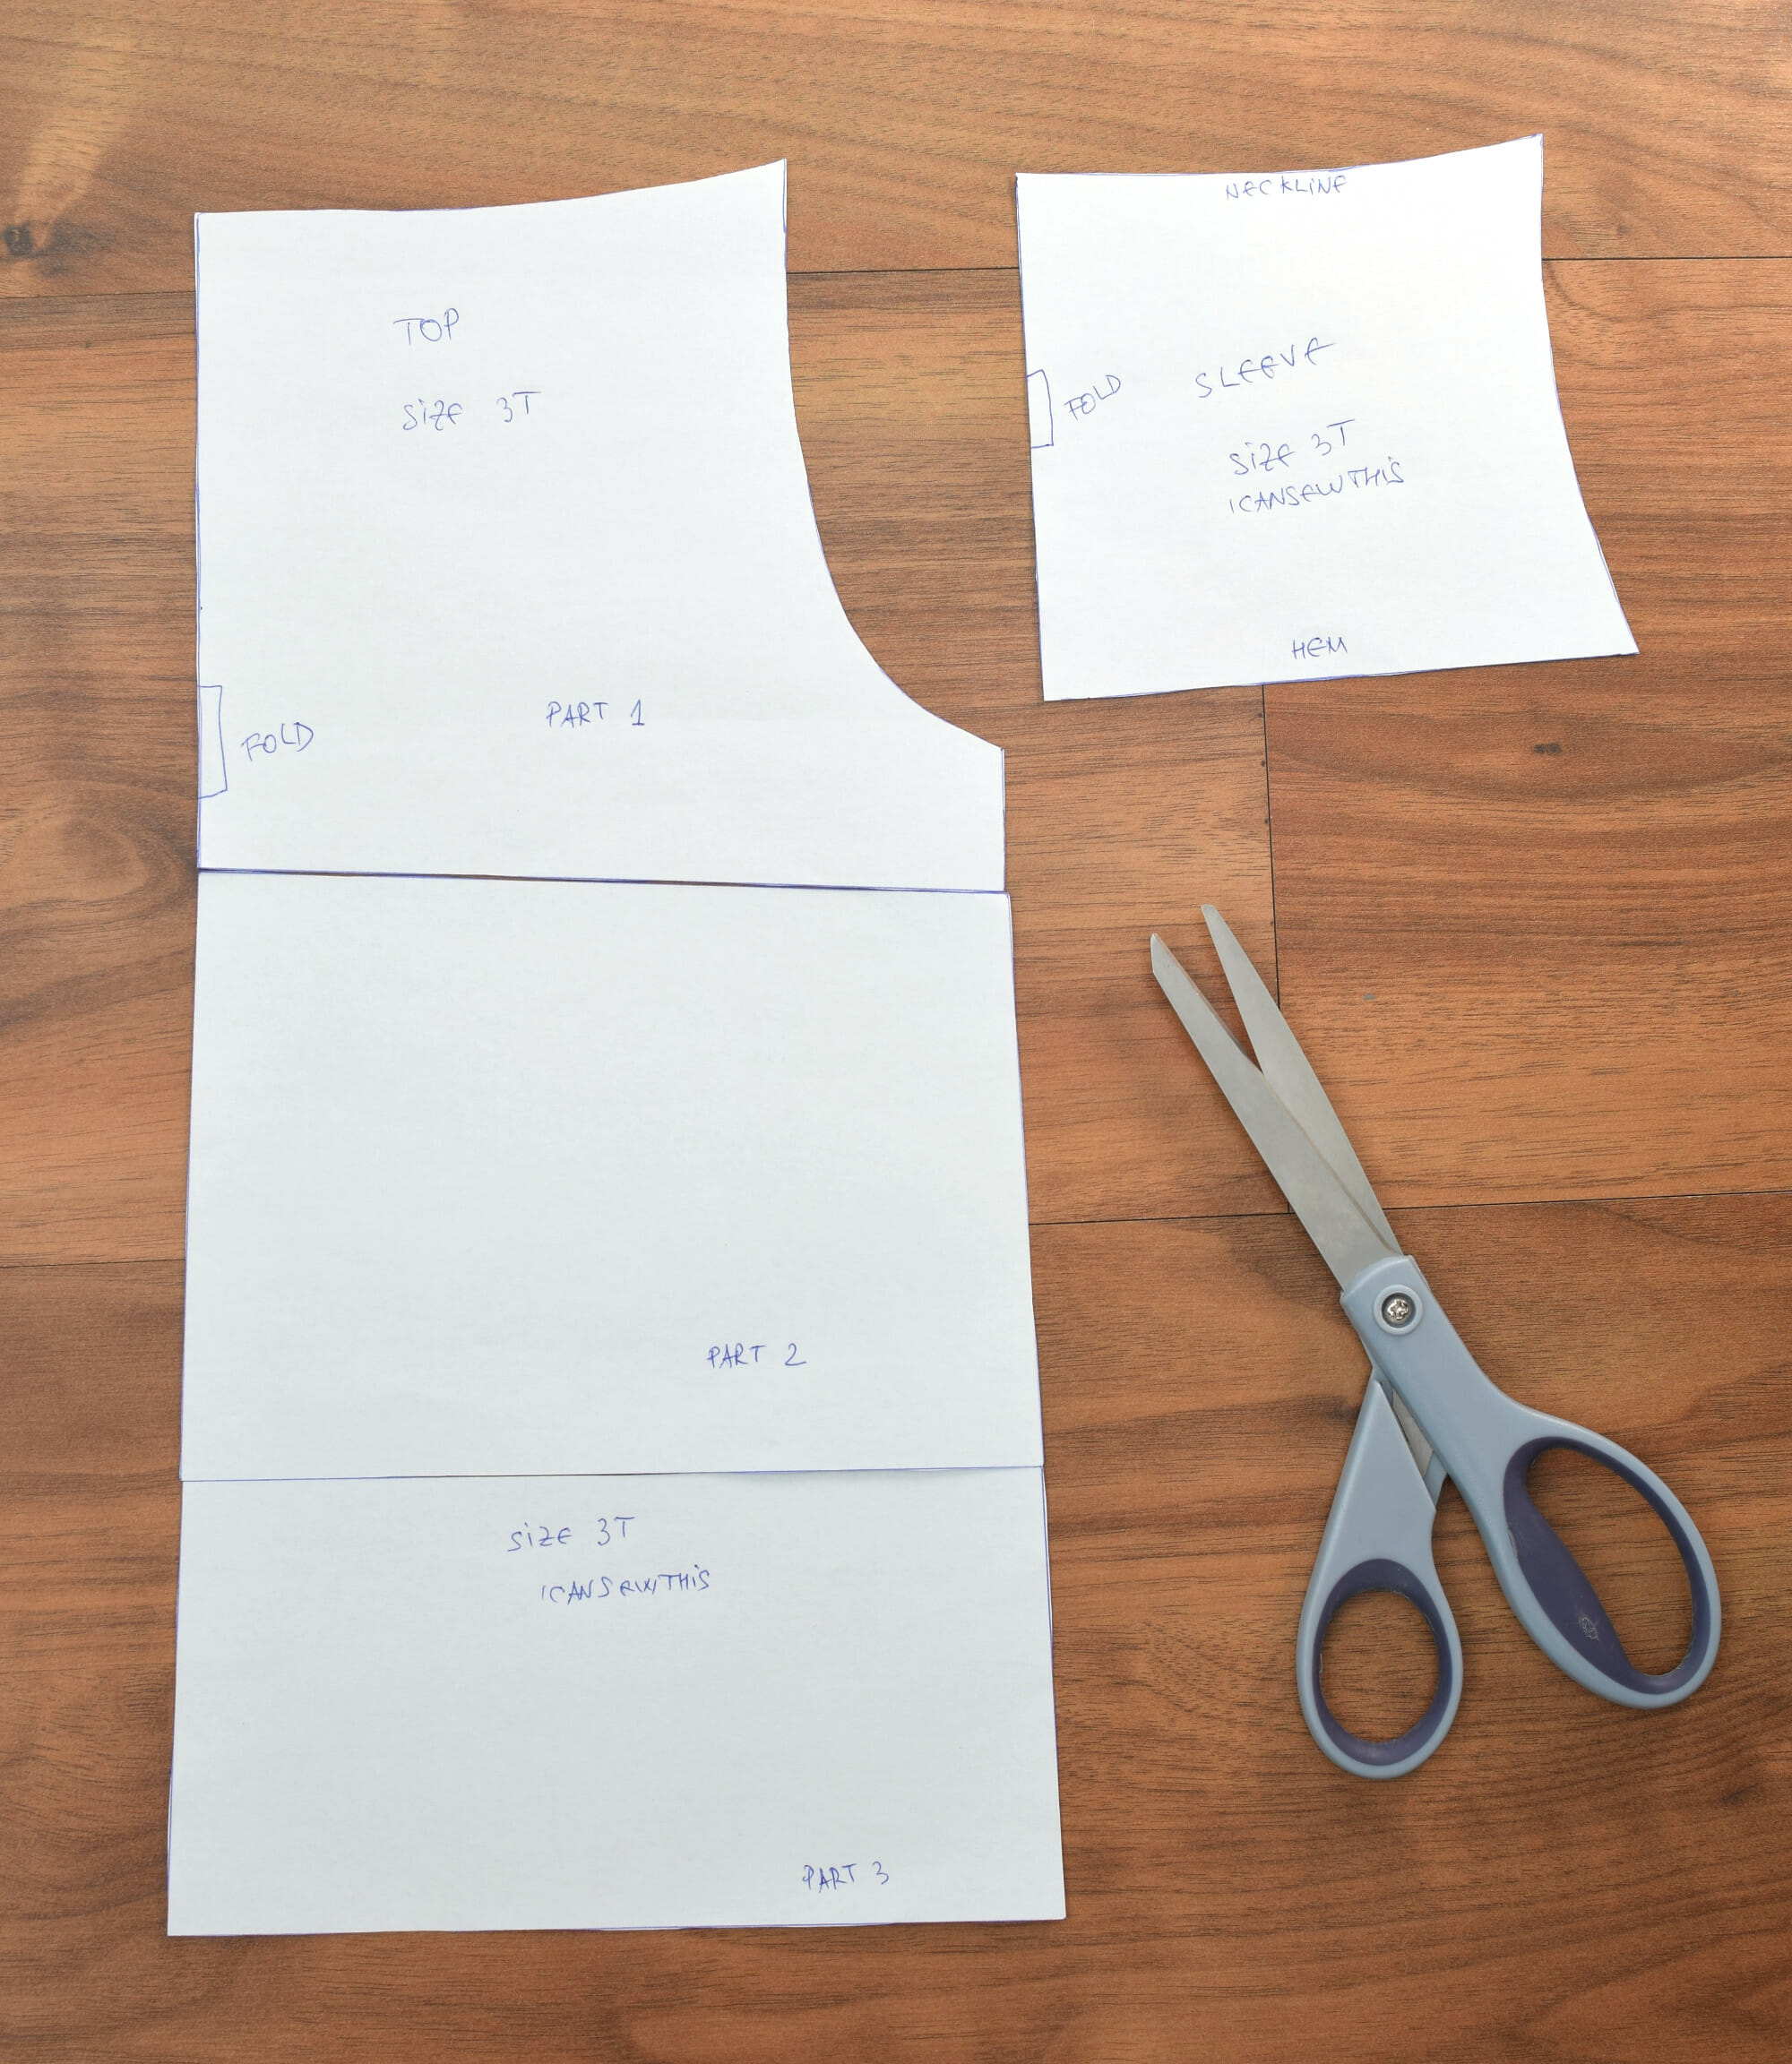
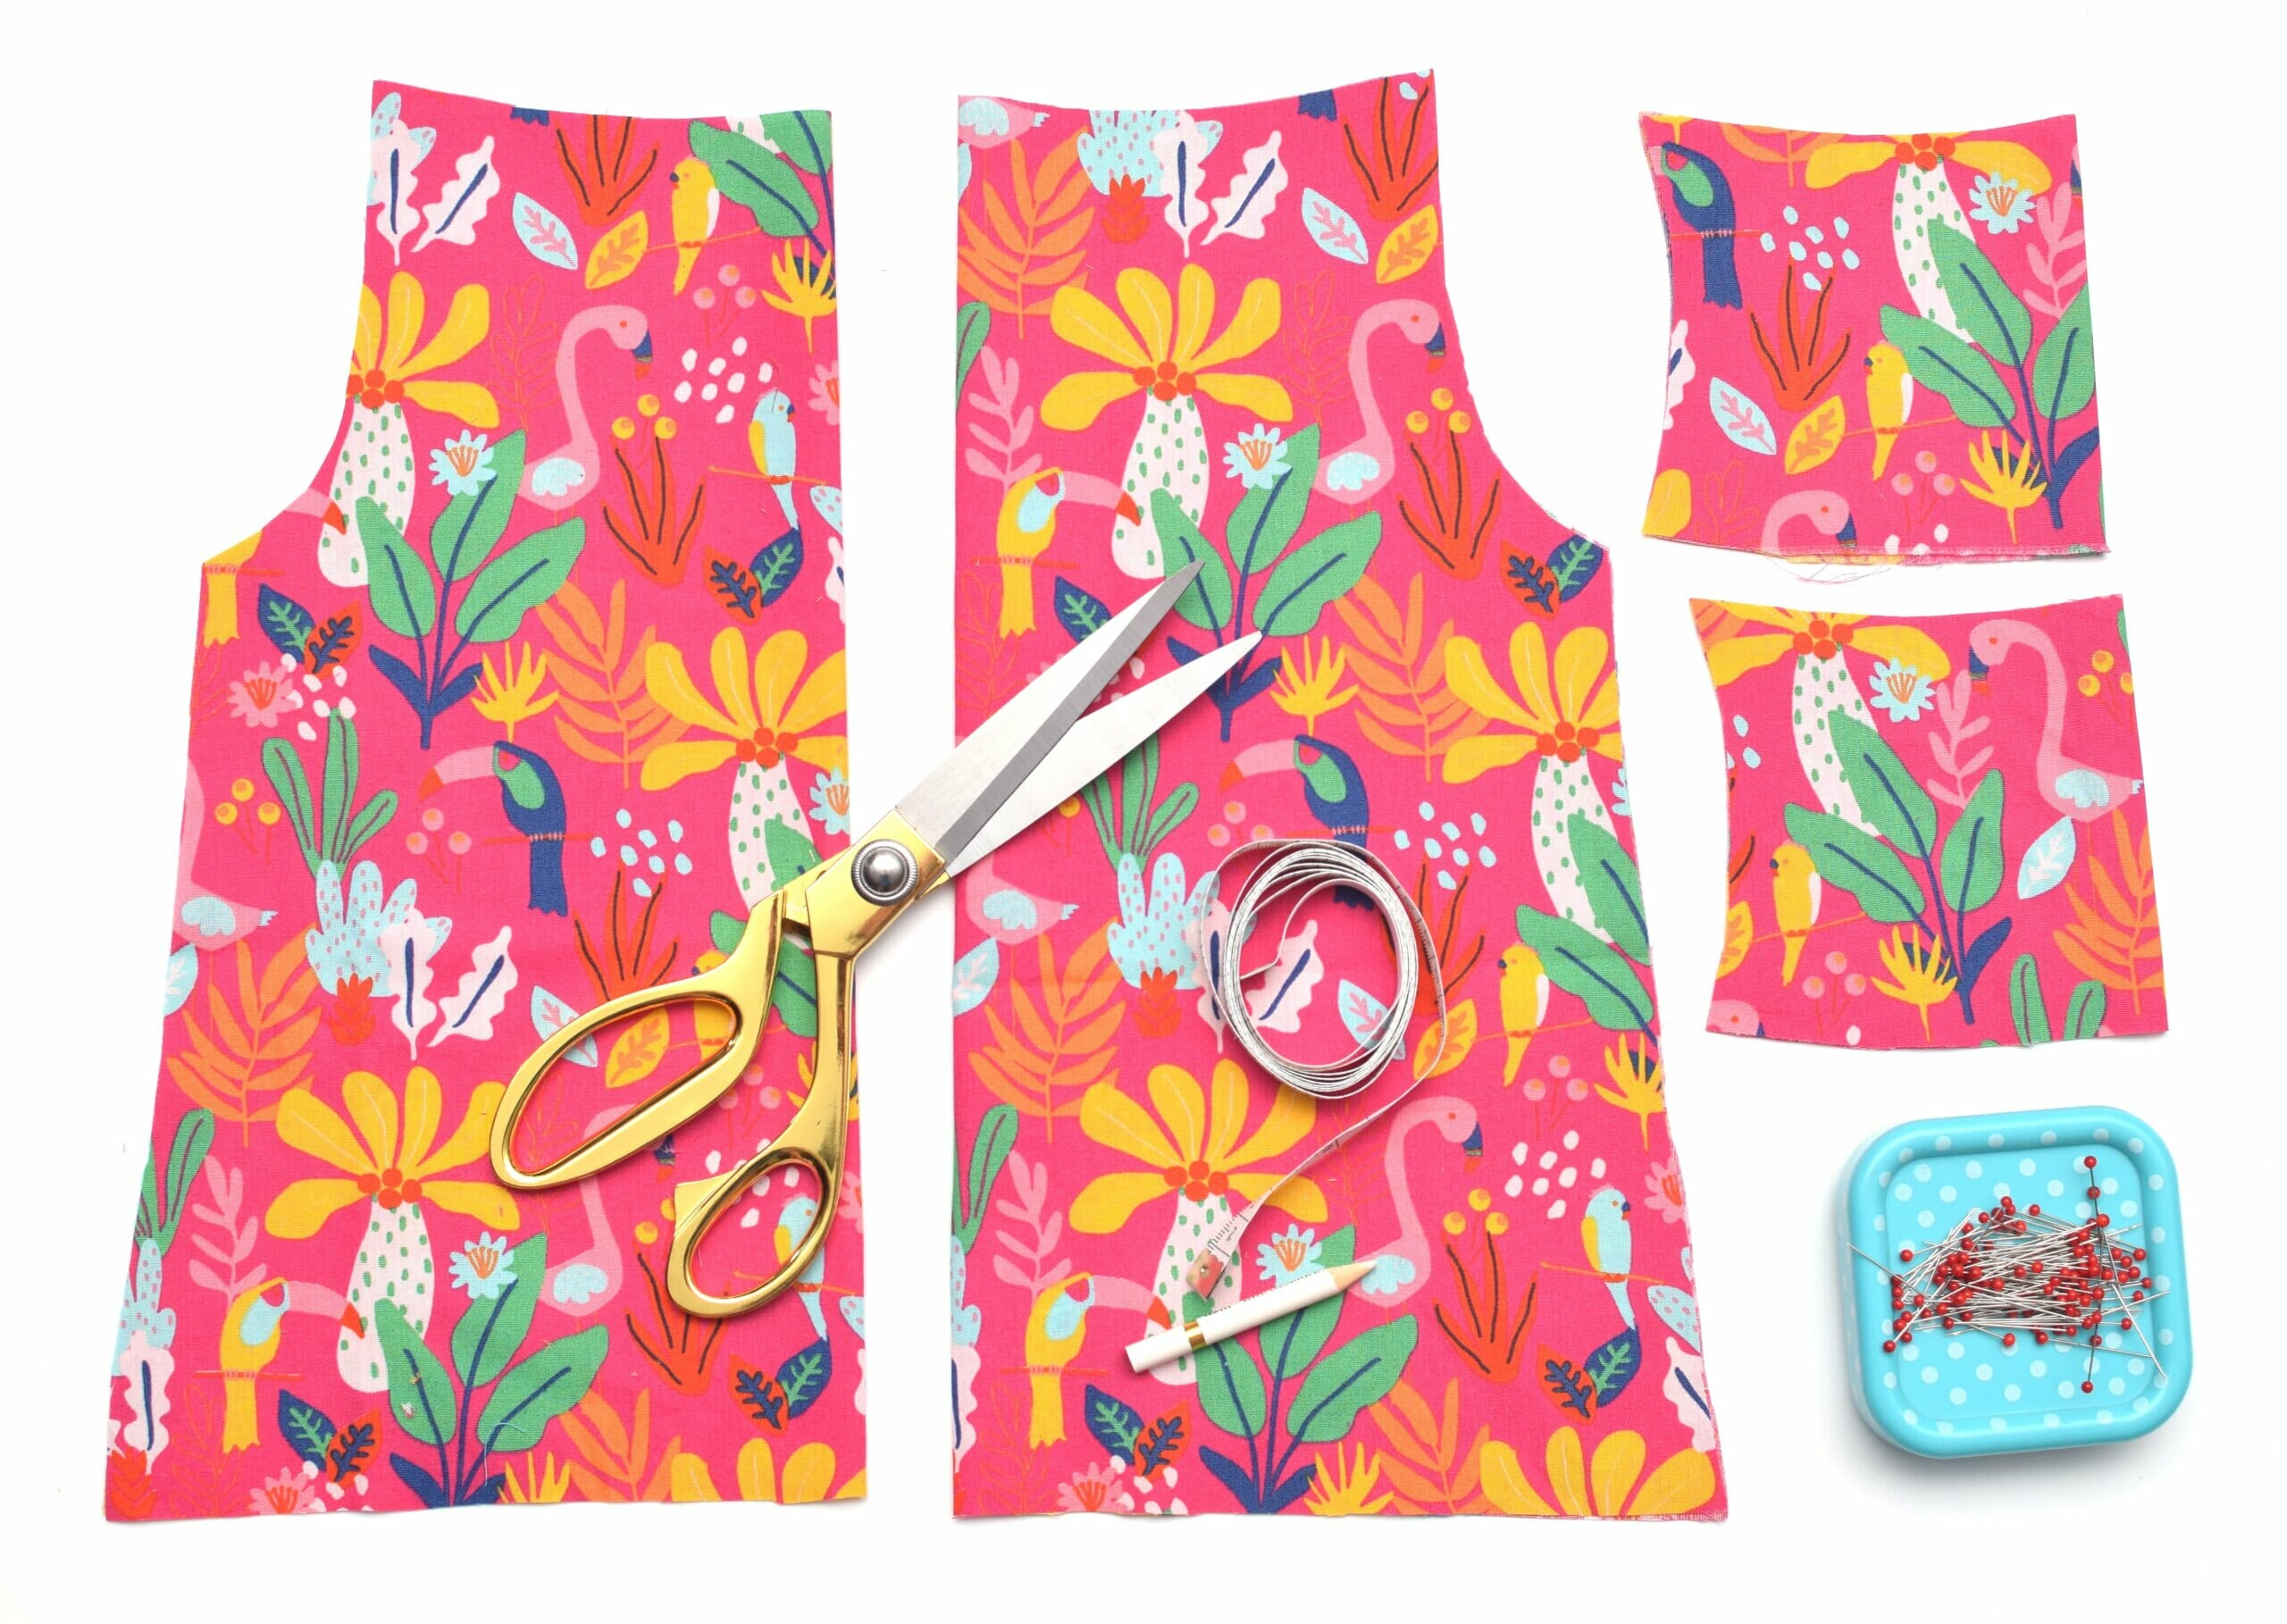
Make sure you’re cutting on the fold where needed. Once you’ve cut everything out, you should have two bodice pieces and two sleeve pieces. That’s it!
Want to turn this into a peasant dress with flutter sleeves?
Just measure your child from the bottom of her armpit down to where you want the dress to end. Add an extra inch for the hem. Then, extend your pattern piece to that length, following the original shape to keep that nice A-line silhouette.
This is an easy way to make a custom peasant dress for toddlers that fits just right!
Step 2 – Hem the Sleeves
Now it’s time to prep those flutter sleeves.
Serge (or zigzag stitch) the bottom edge of each sleeve.
Fold the edge under by 1/4″, press it flat, and sew across to hem. Repeat this for the second sleeve.
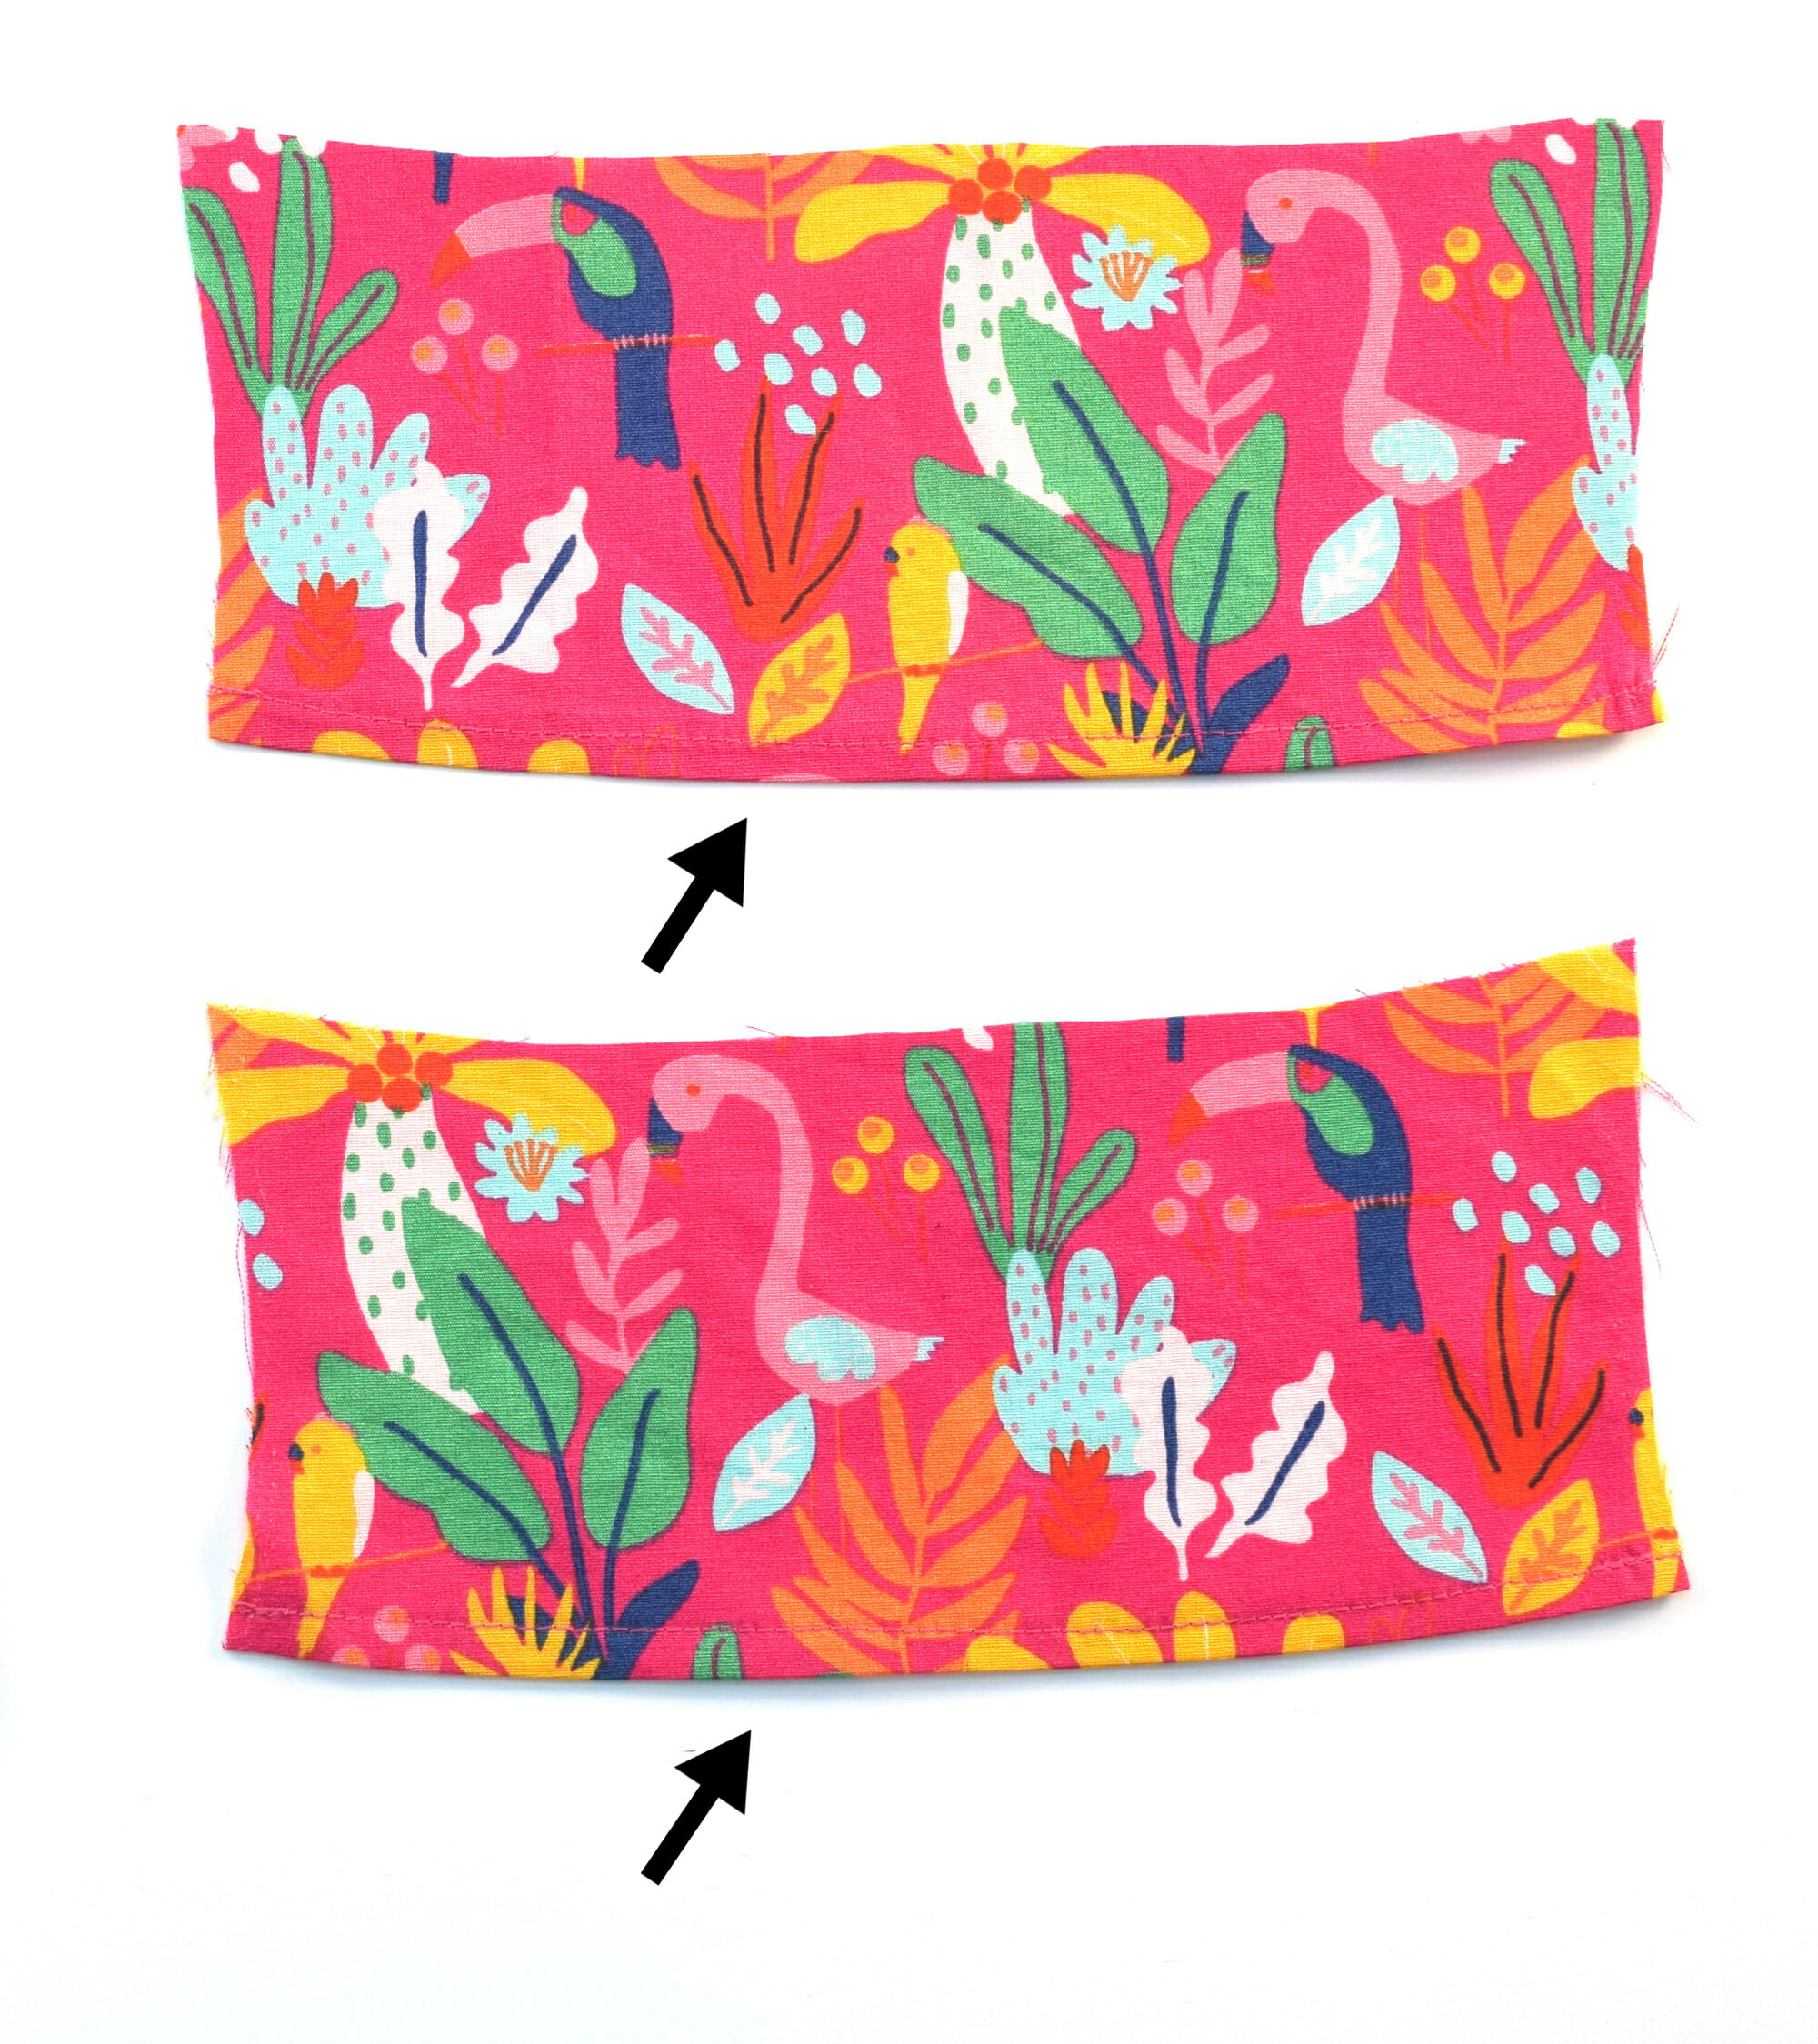
This step gives your sleeves a clean, finished look – no fraying, and it helps them flutter just right.
Step 3 – Attach the Sleeves to the Bodice
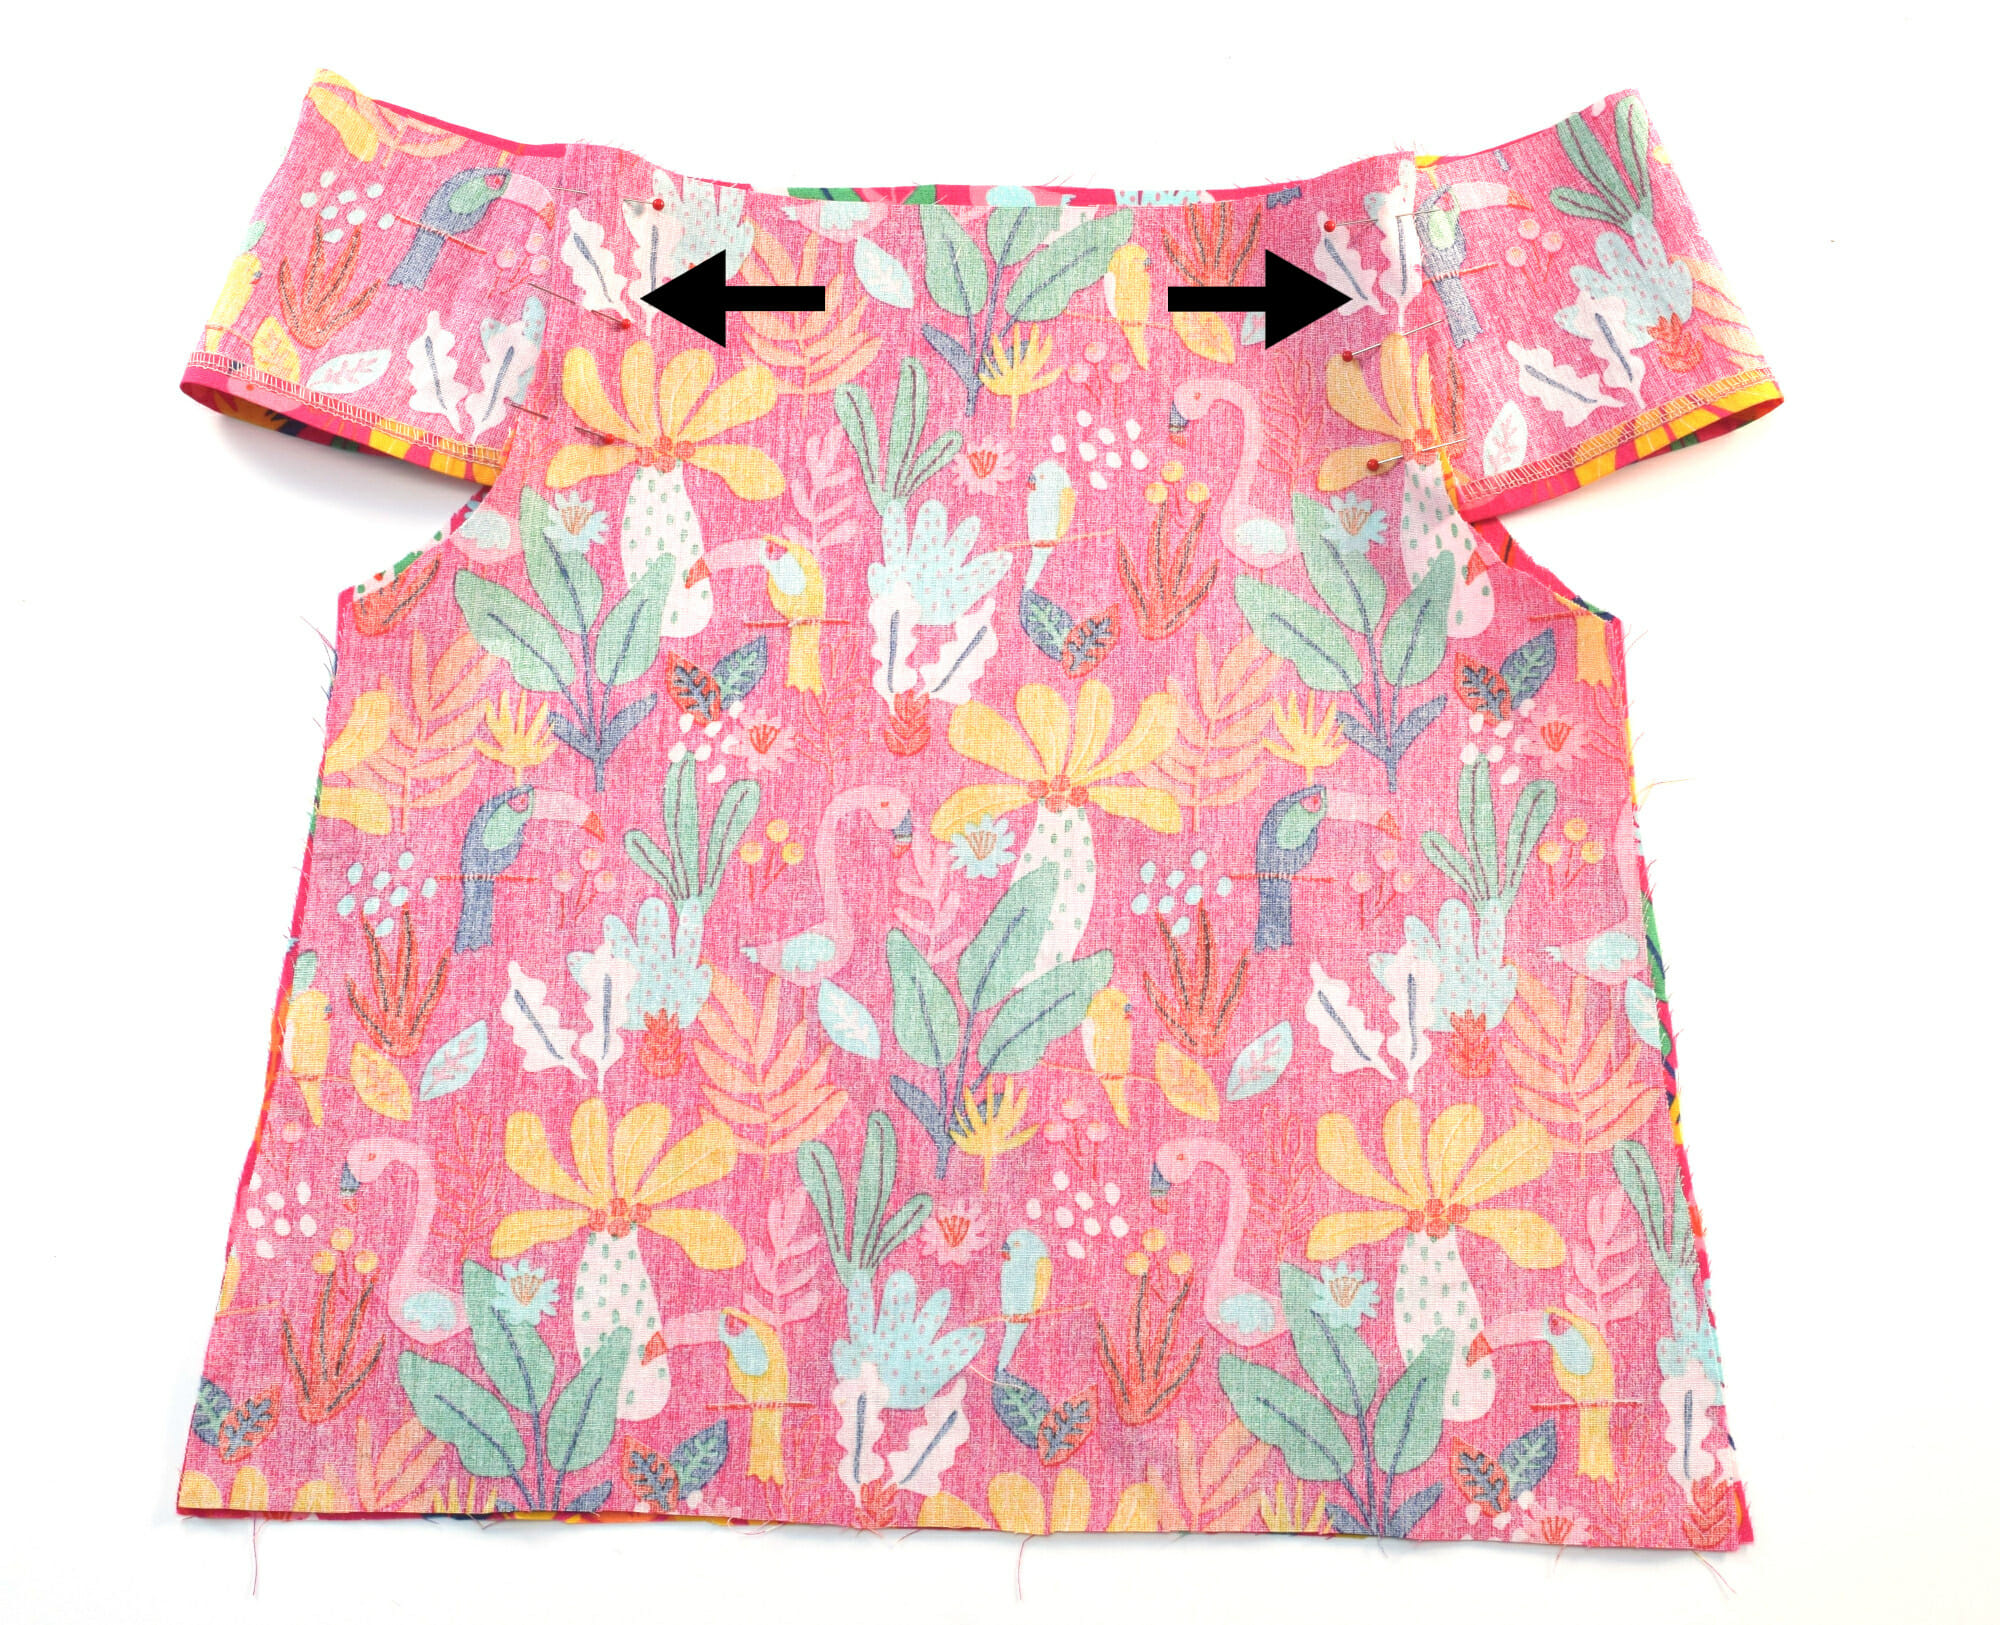
With right sides facing together, line up one sleeve with the back bodice piece. Match up the top edges – raw sides should be pointing up, toward the neckline. Sew it in place using a 3/8″ seam allowance.
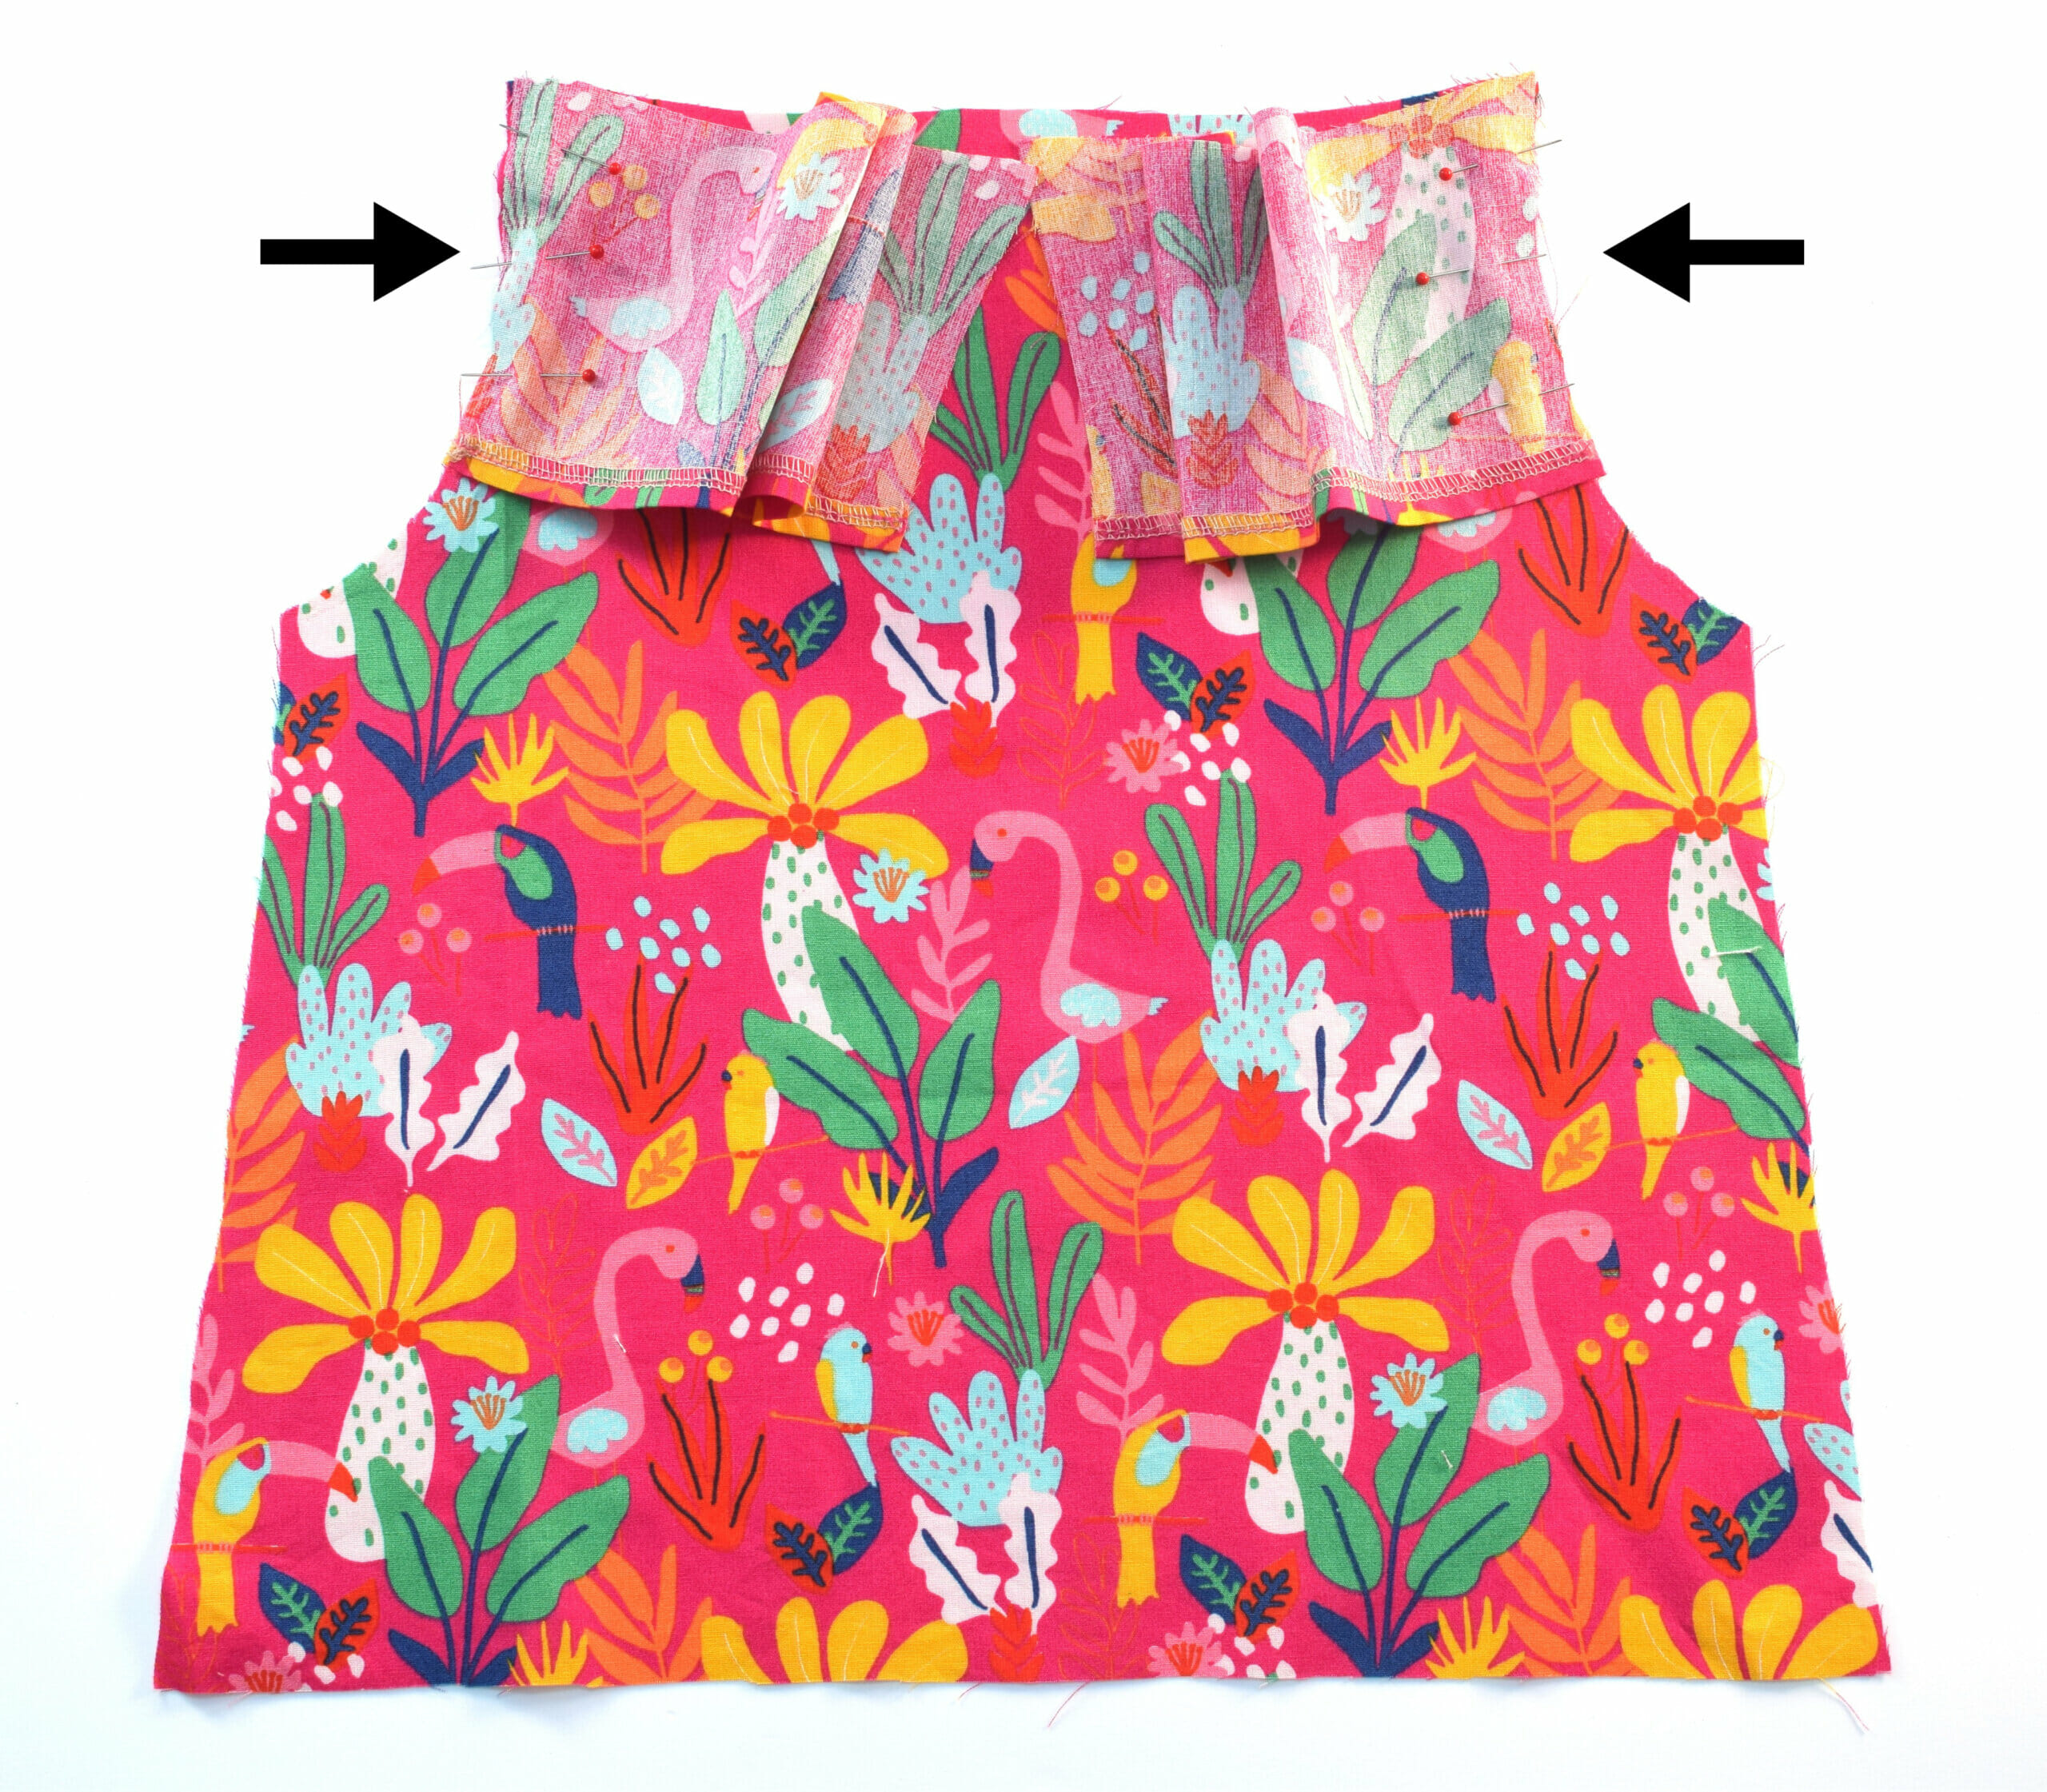
Do the same thing for the second sleeve and the front bodice piece.
Once that’s done, you can already see your DIY peasant top for girls starting to take shape! Lay it flat and match up the sleeve edges with the bodice front, just like in the picture below. This is where the magic happens – it’s coming together!
Step 4 – Finish the Armholes
Let’s tidy up those armholes!
Go ahead and serge all four armhole edges to keep the fabric from fraying. No serger? No worries – a zigzag stitch will work just fine.
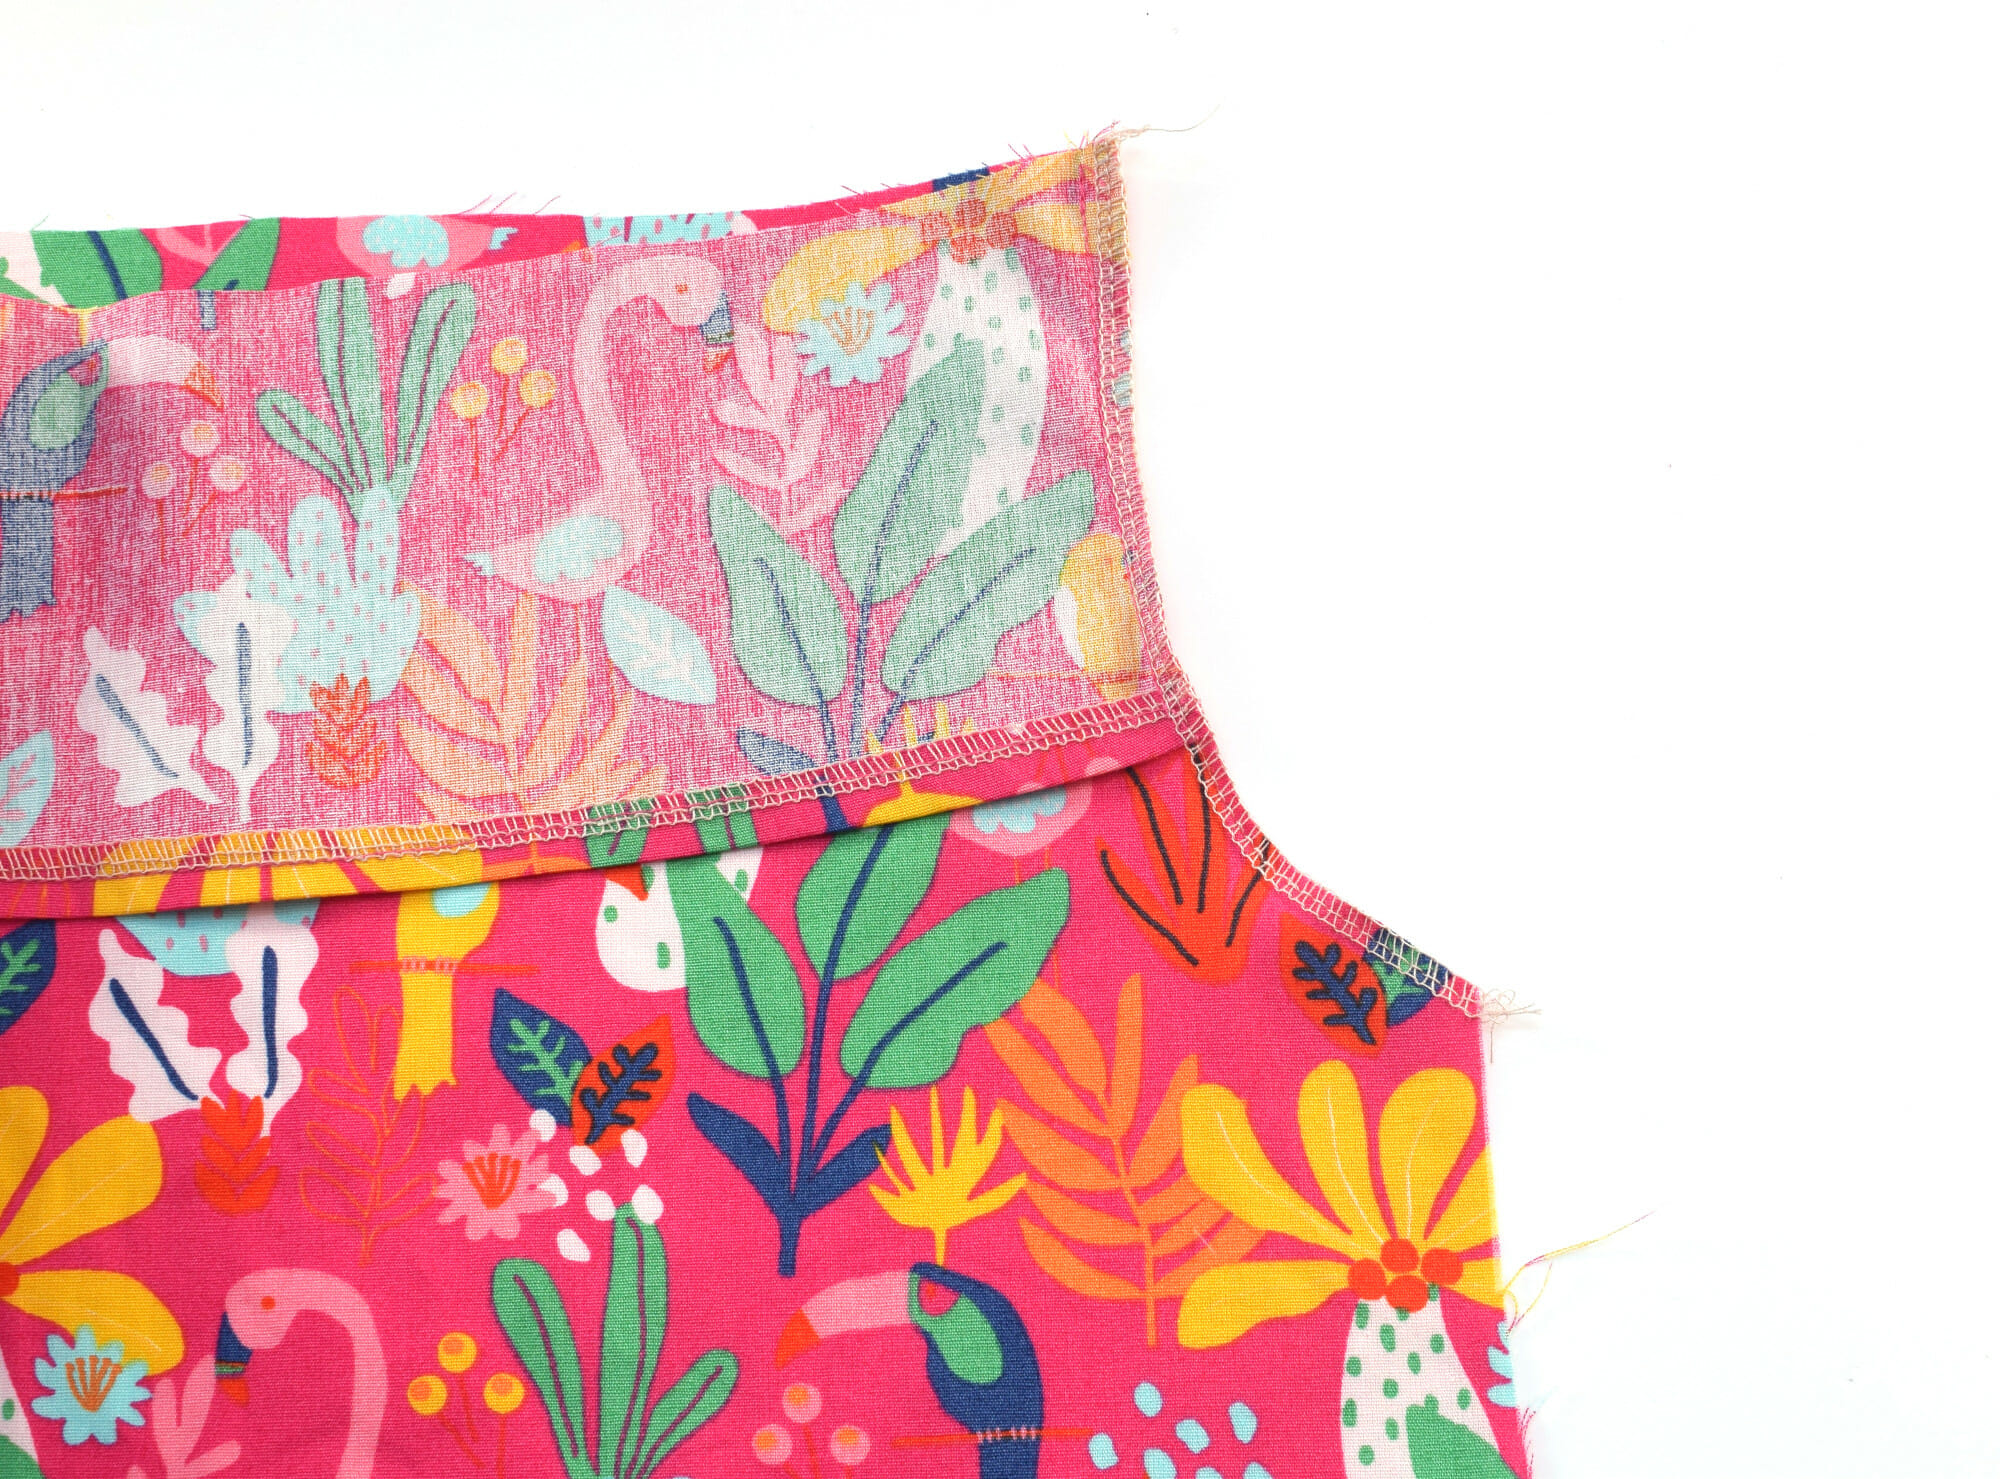
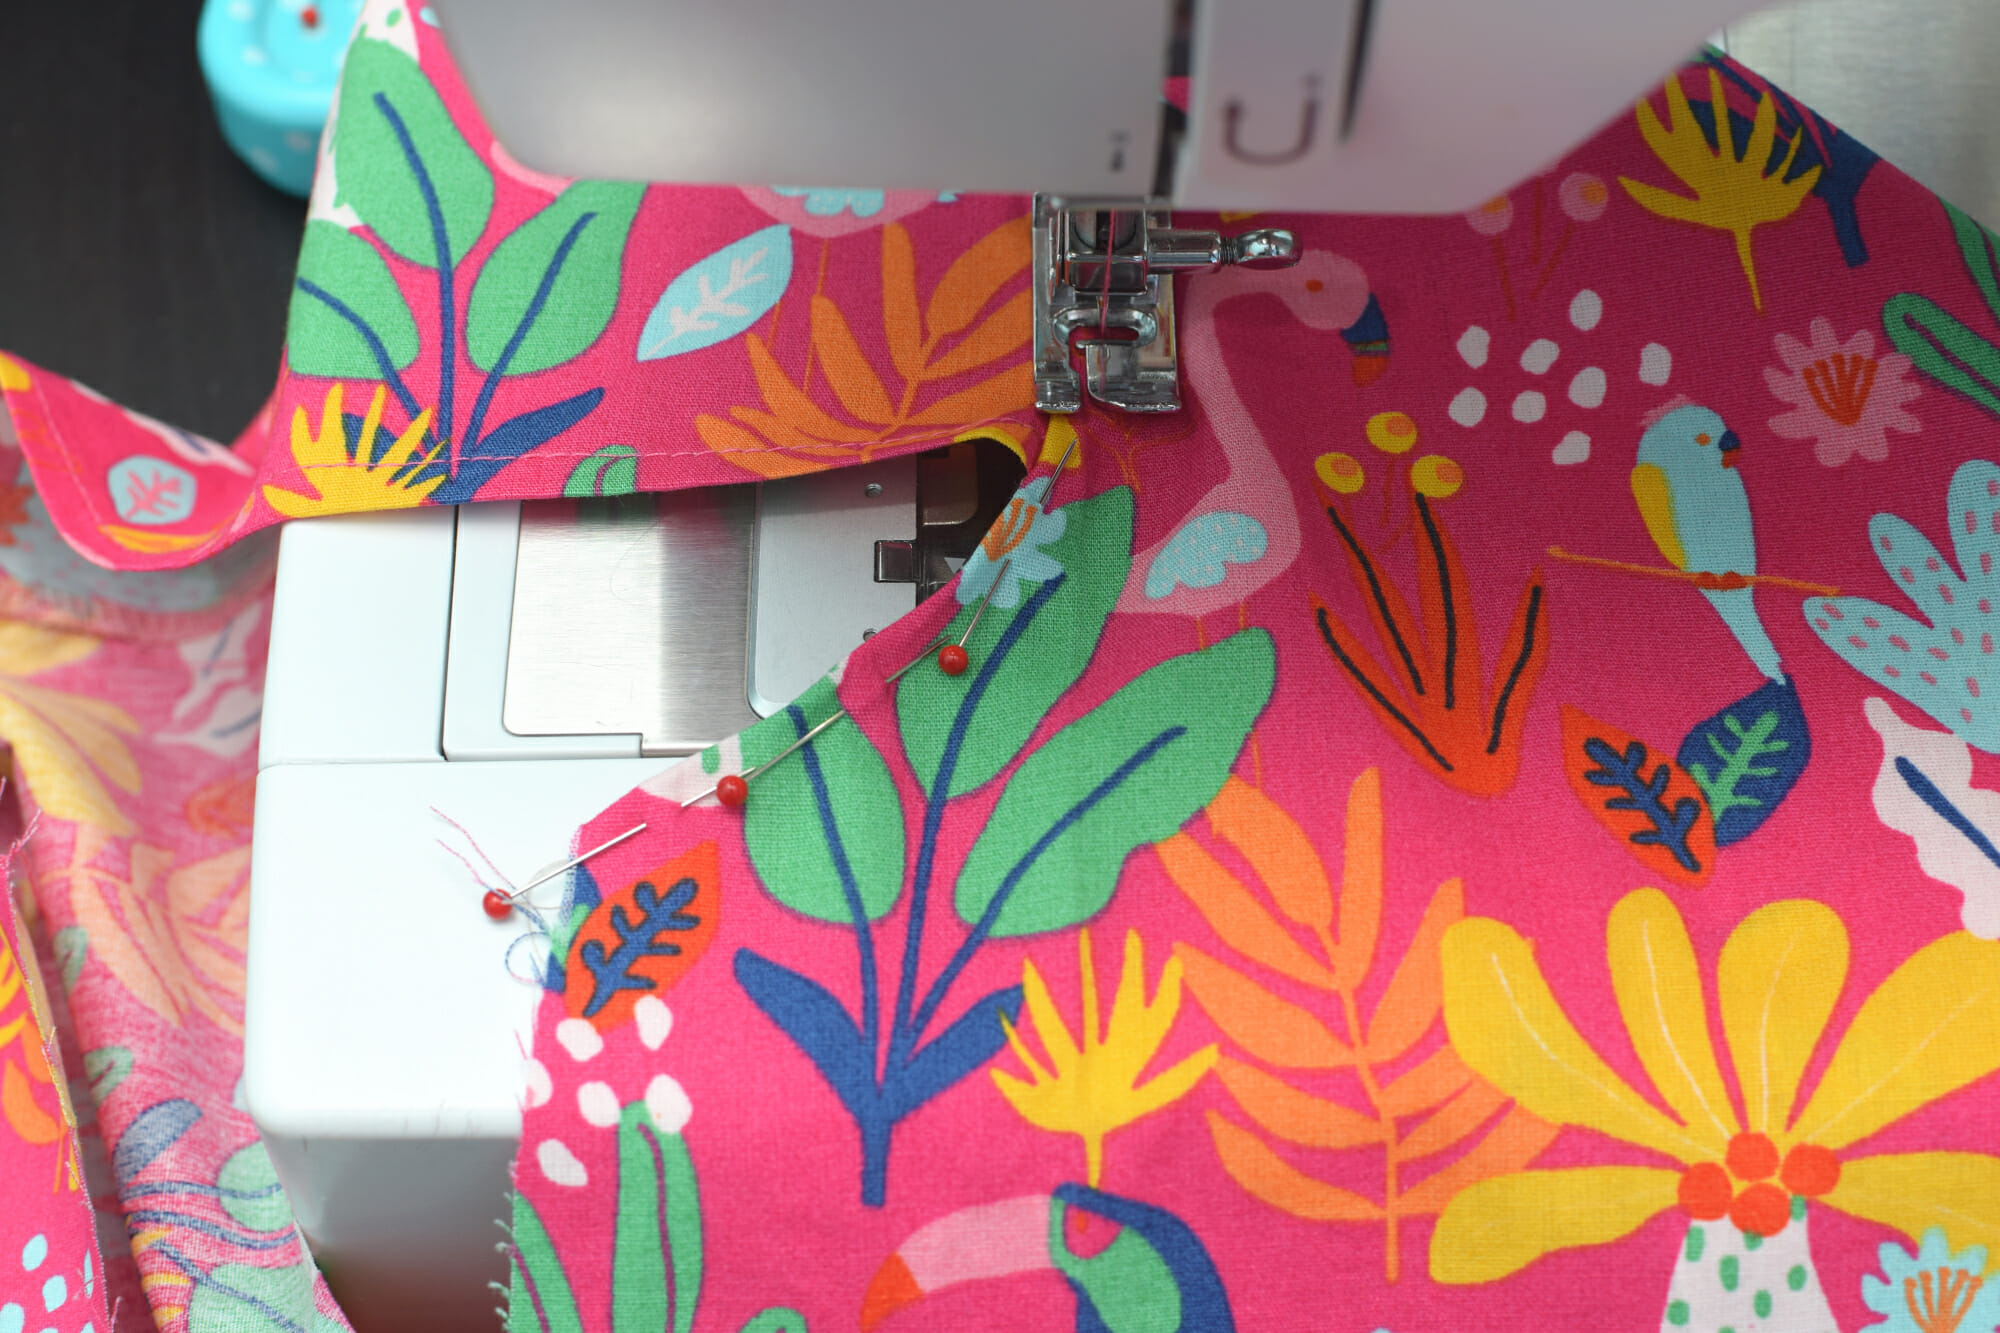
Next, fold each armhole edge to the wrong side of the fabric and sew it down. Don’t forget to backstitch at the start and end so it stays put!
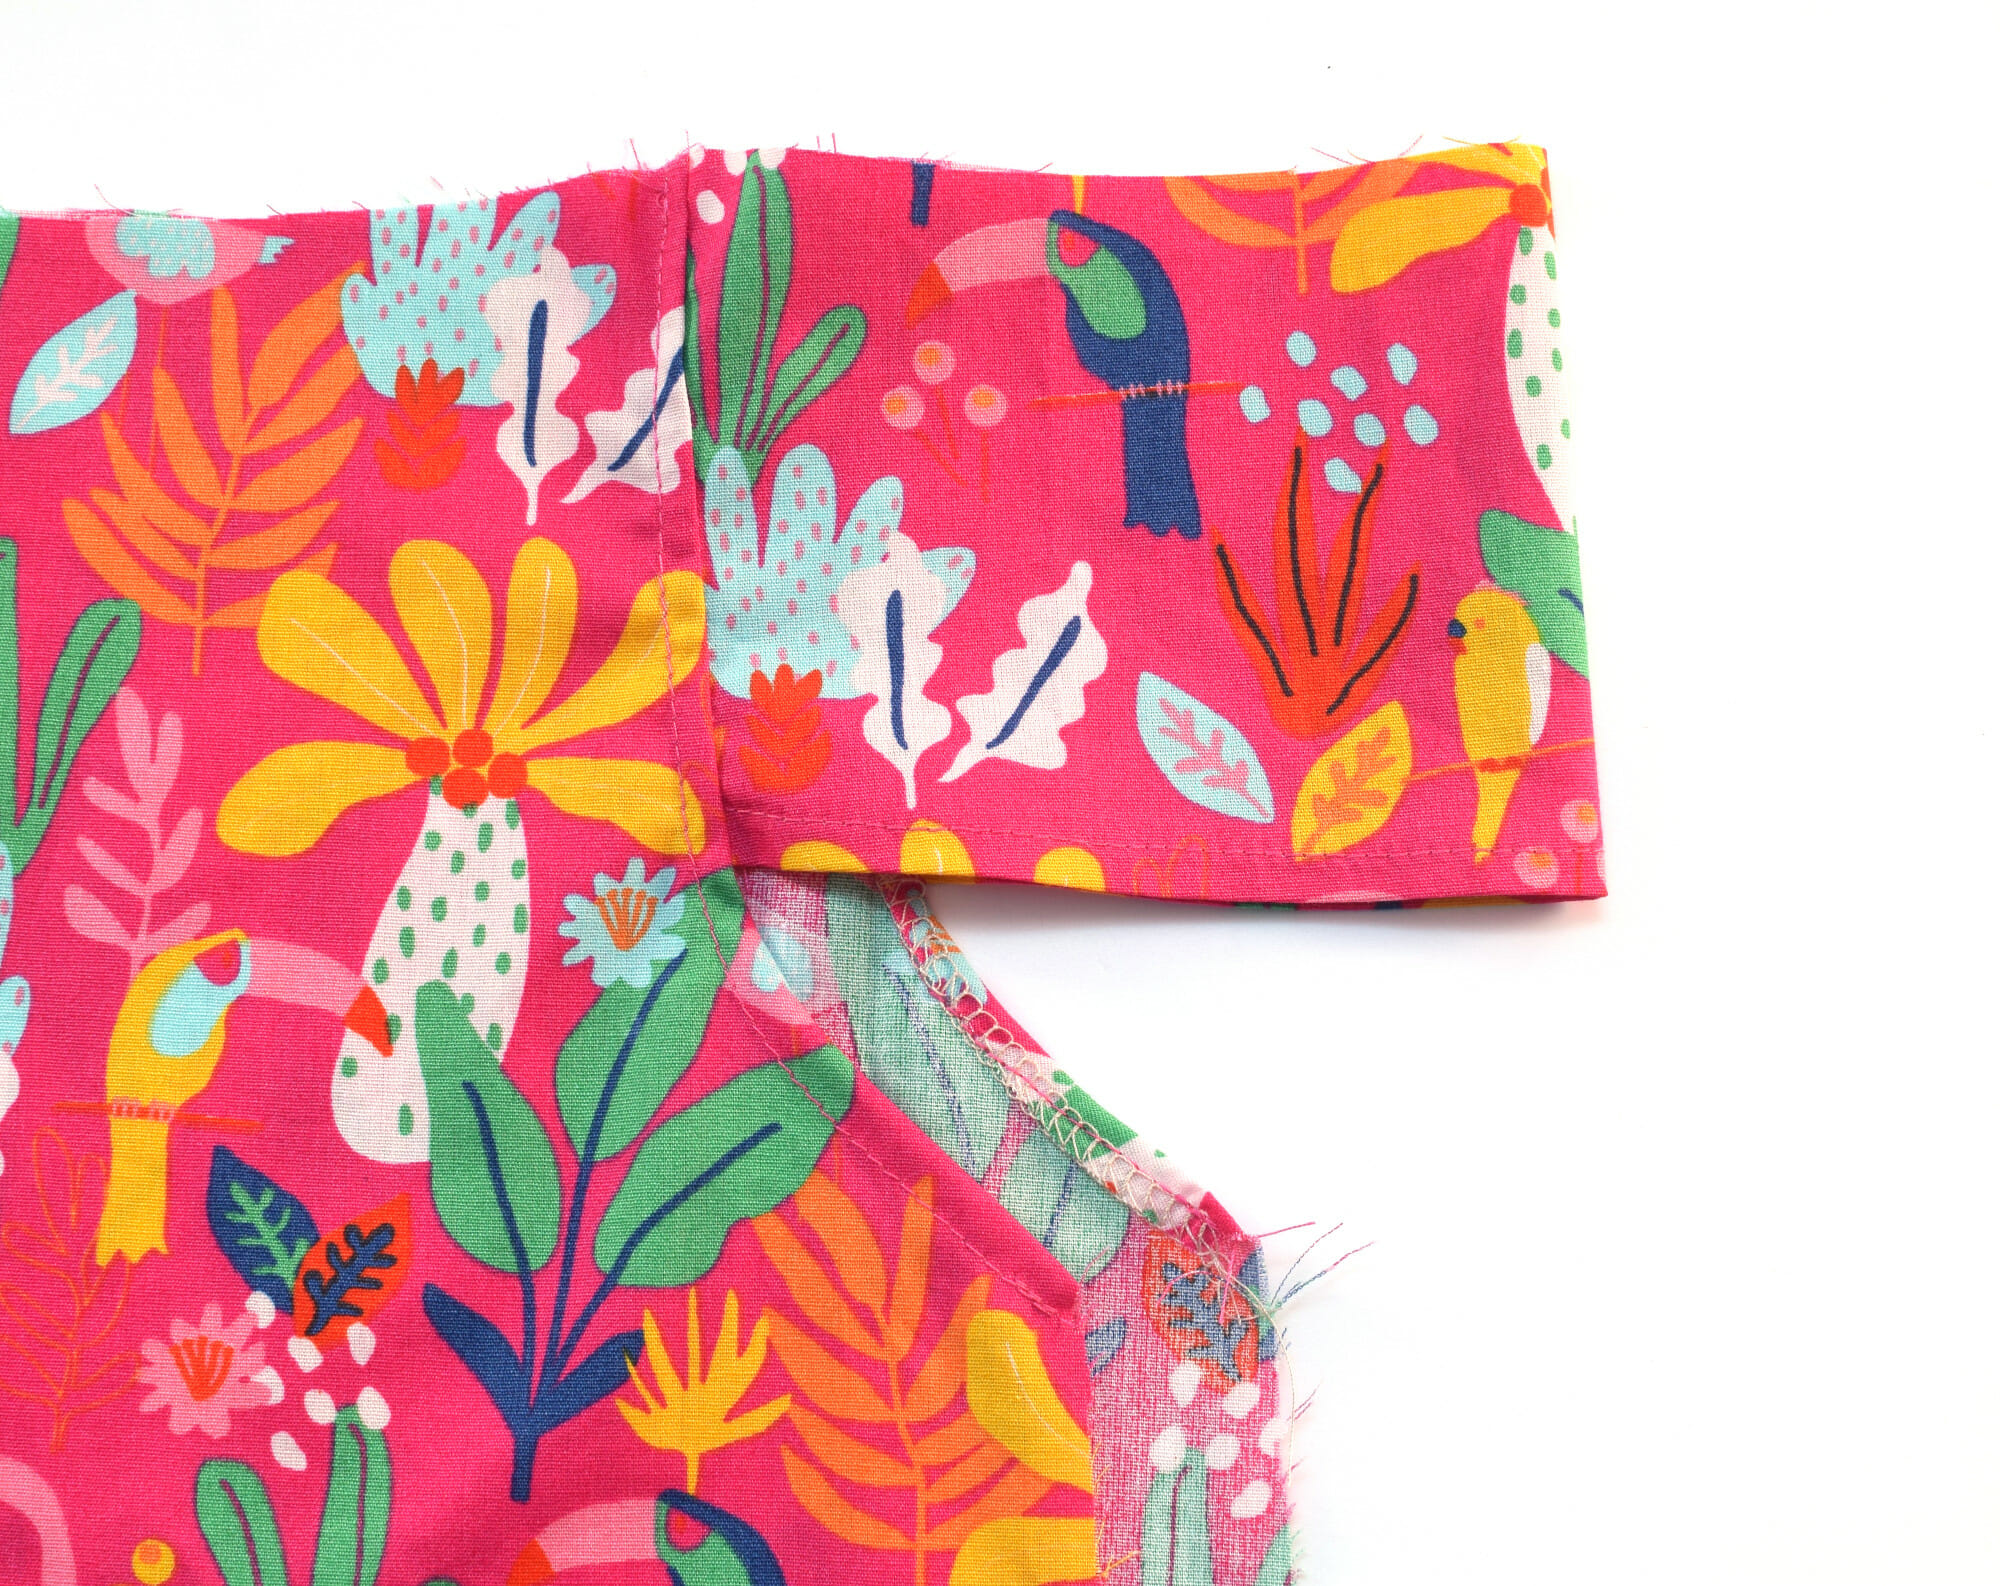
Boom – your flutter sleeve armholes are now finished, and they look so neat and clean!
Step 5 – Sew the Side Seams
Now place the front and back bodice pieces right sides together. Line everything up, then sew down each side – starting at the bottom hem and stopping at the bottom of the armhole.
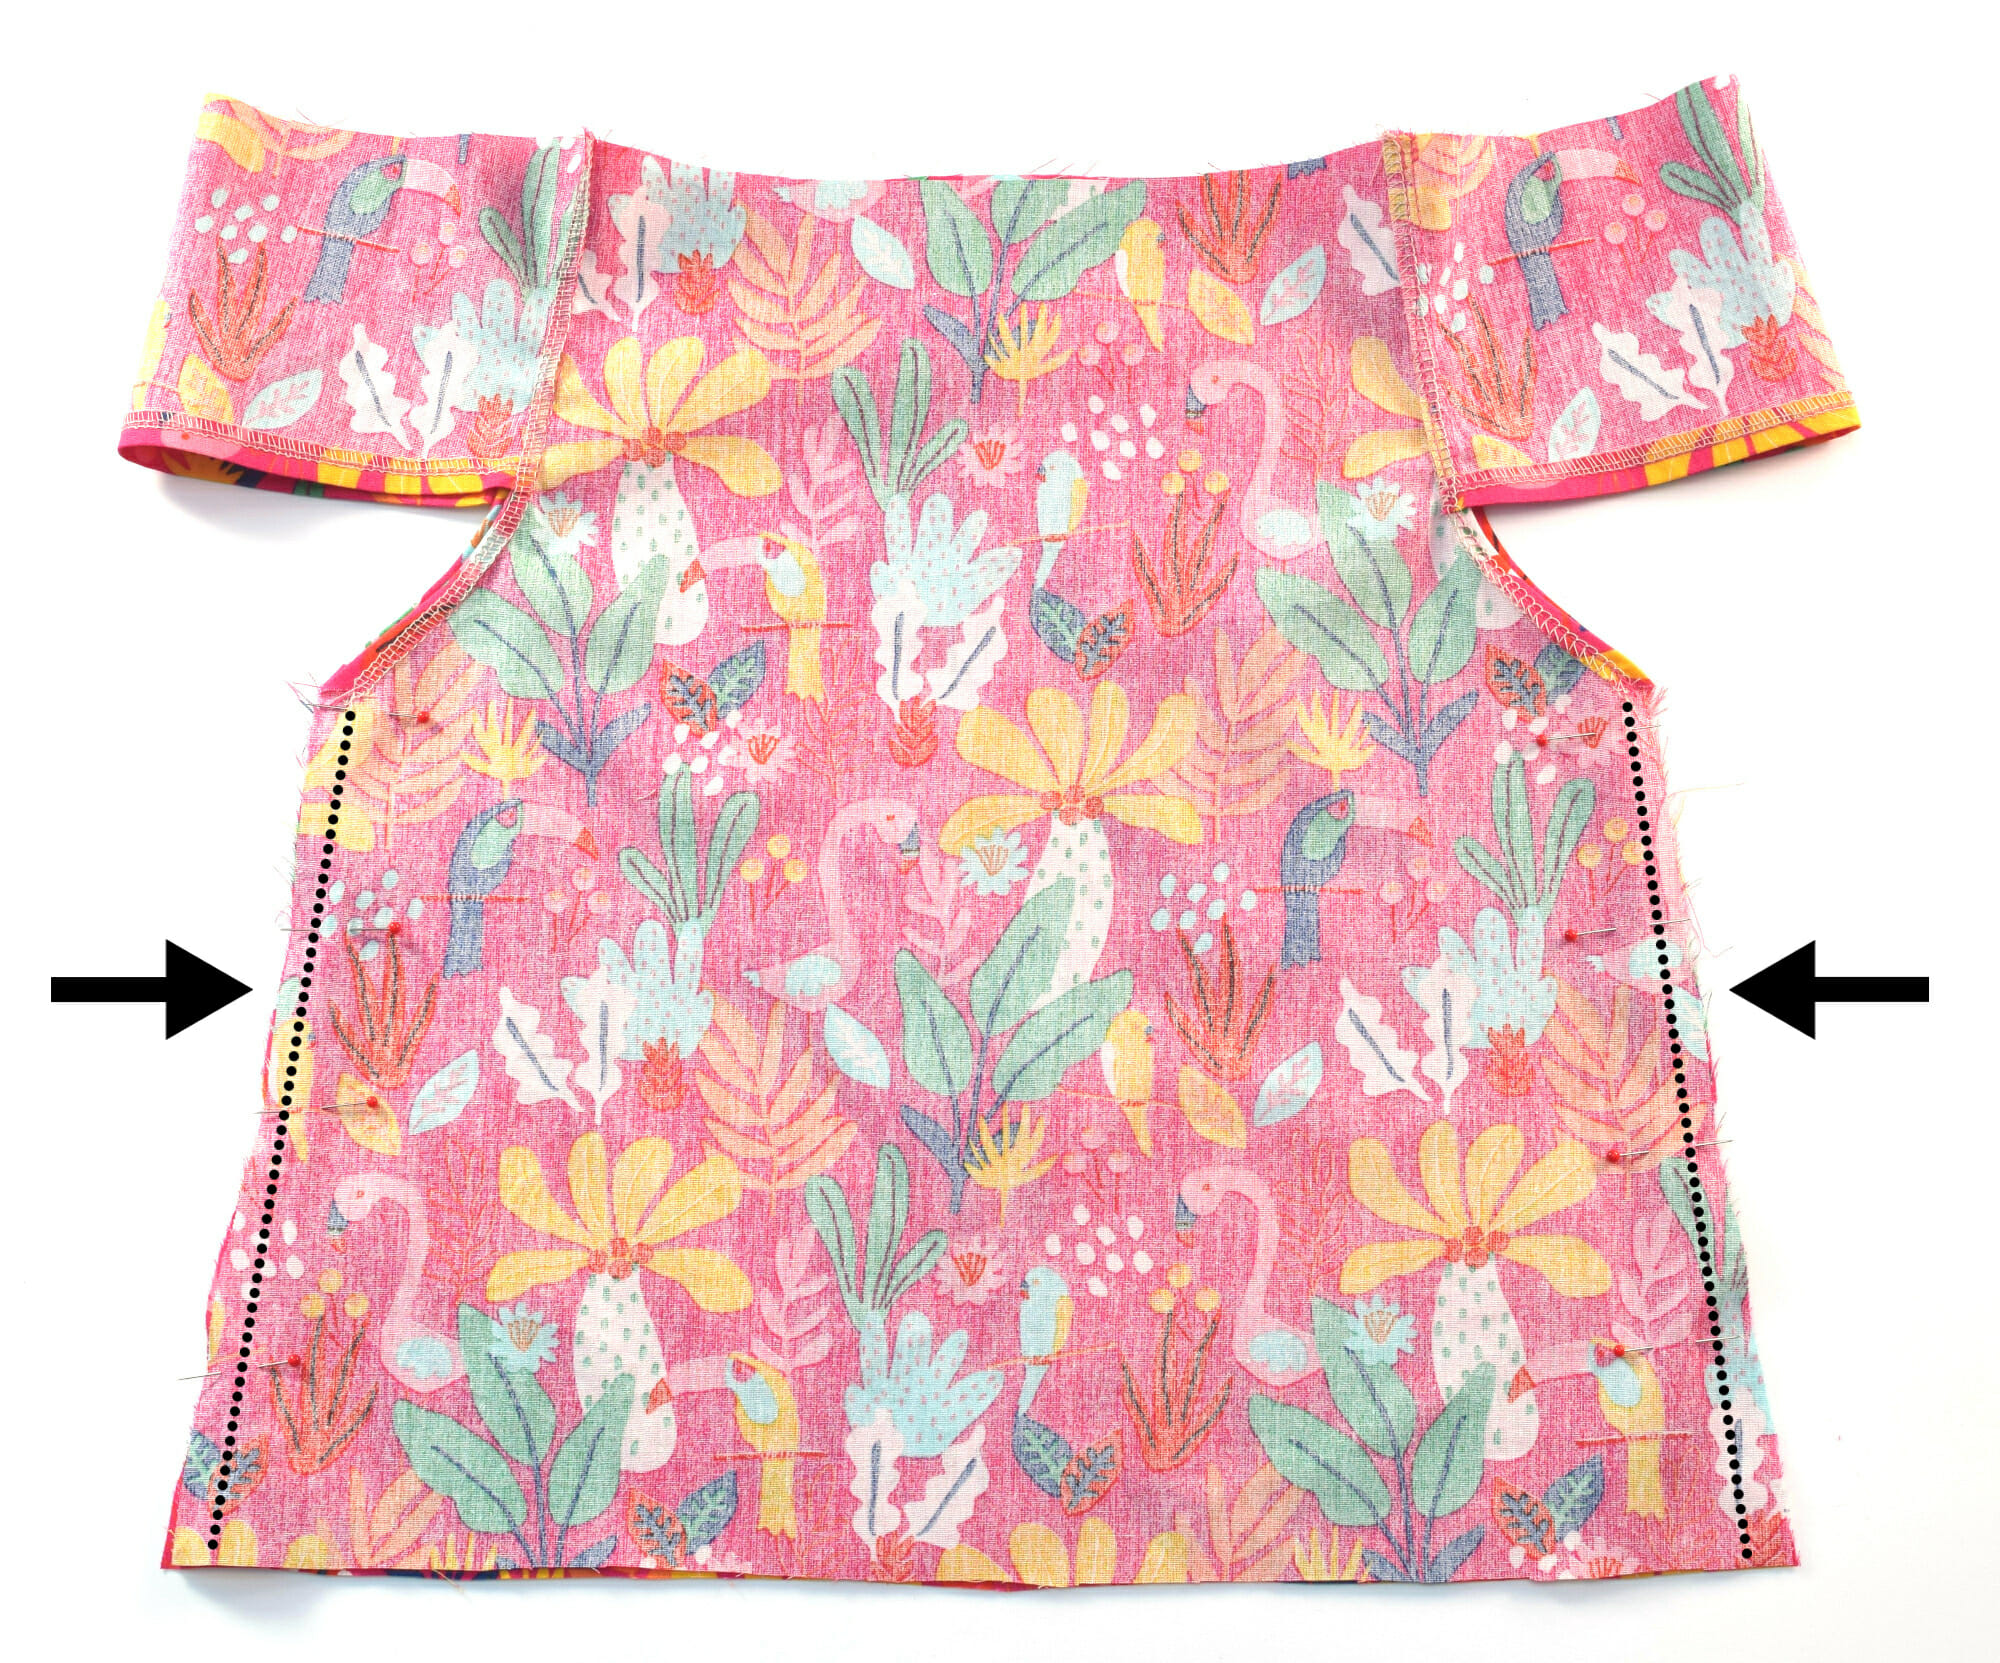
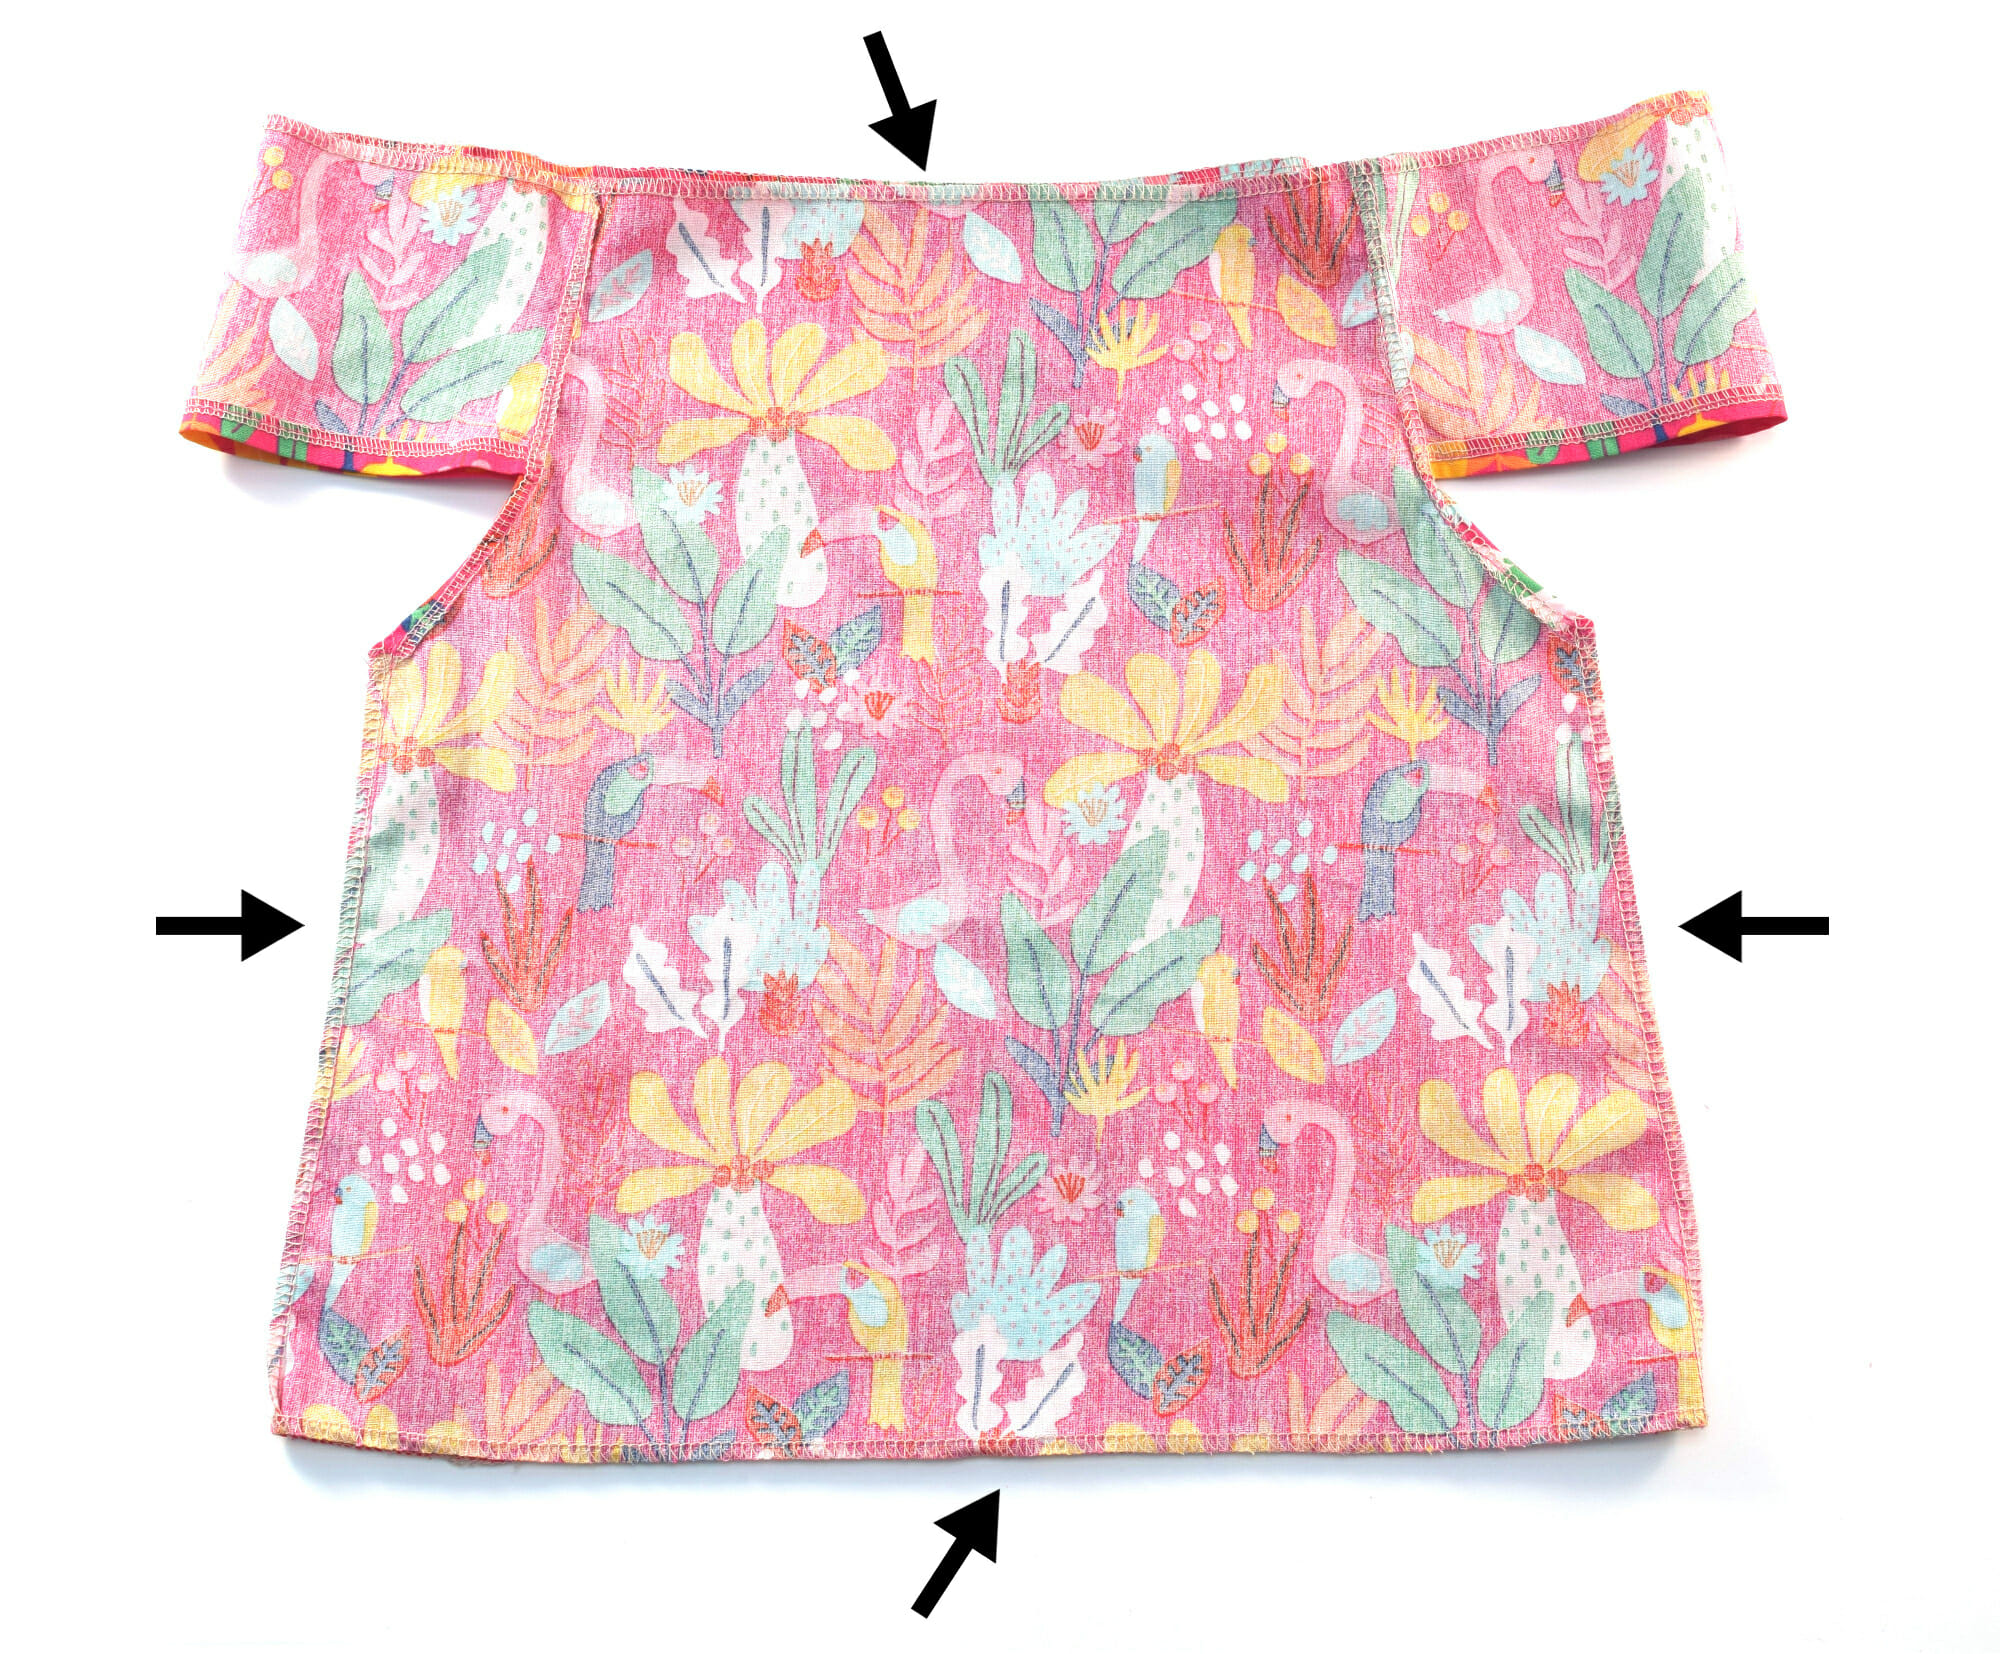
After that, serge (or zigzag) the side seams to finish them nicely.
While you’re at it, go ahead and serge the top and bottom edges of the peasant top too – this will prep everything for the casing and hem.
Step 6 – Make the Casing for the Neckline
This is where the peasant magic happens!
Fold the top edge of the top down by 1/2″, press it flat, and pin it in place. Sew about 3/8″ from the folded edge, making sure to leave a 1/2″ opening so you can insert your elastic.
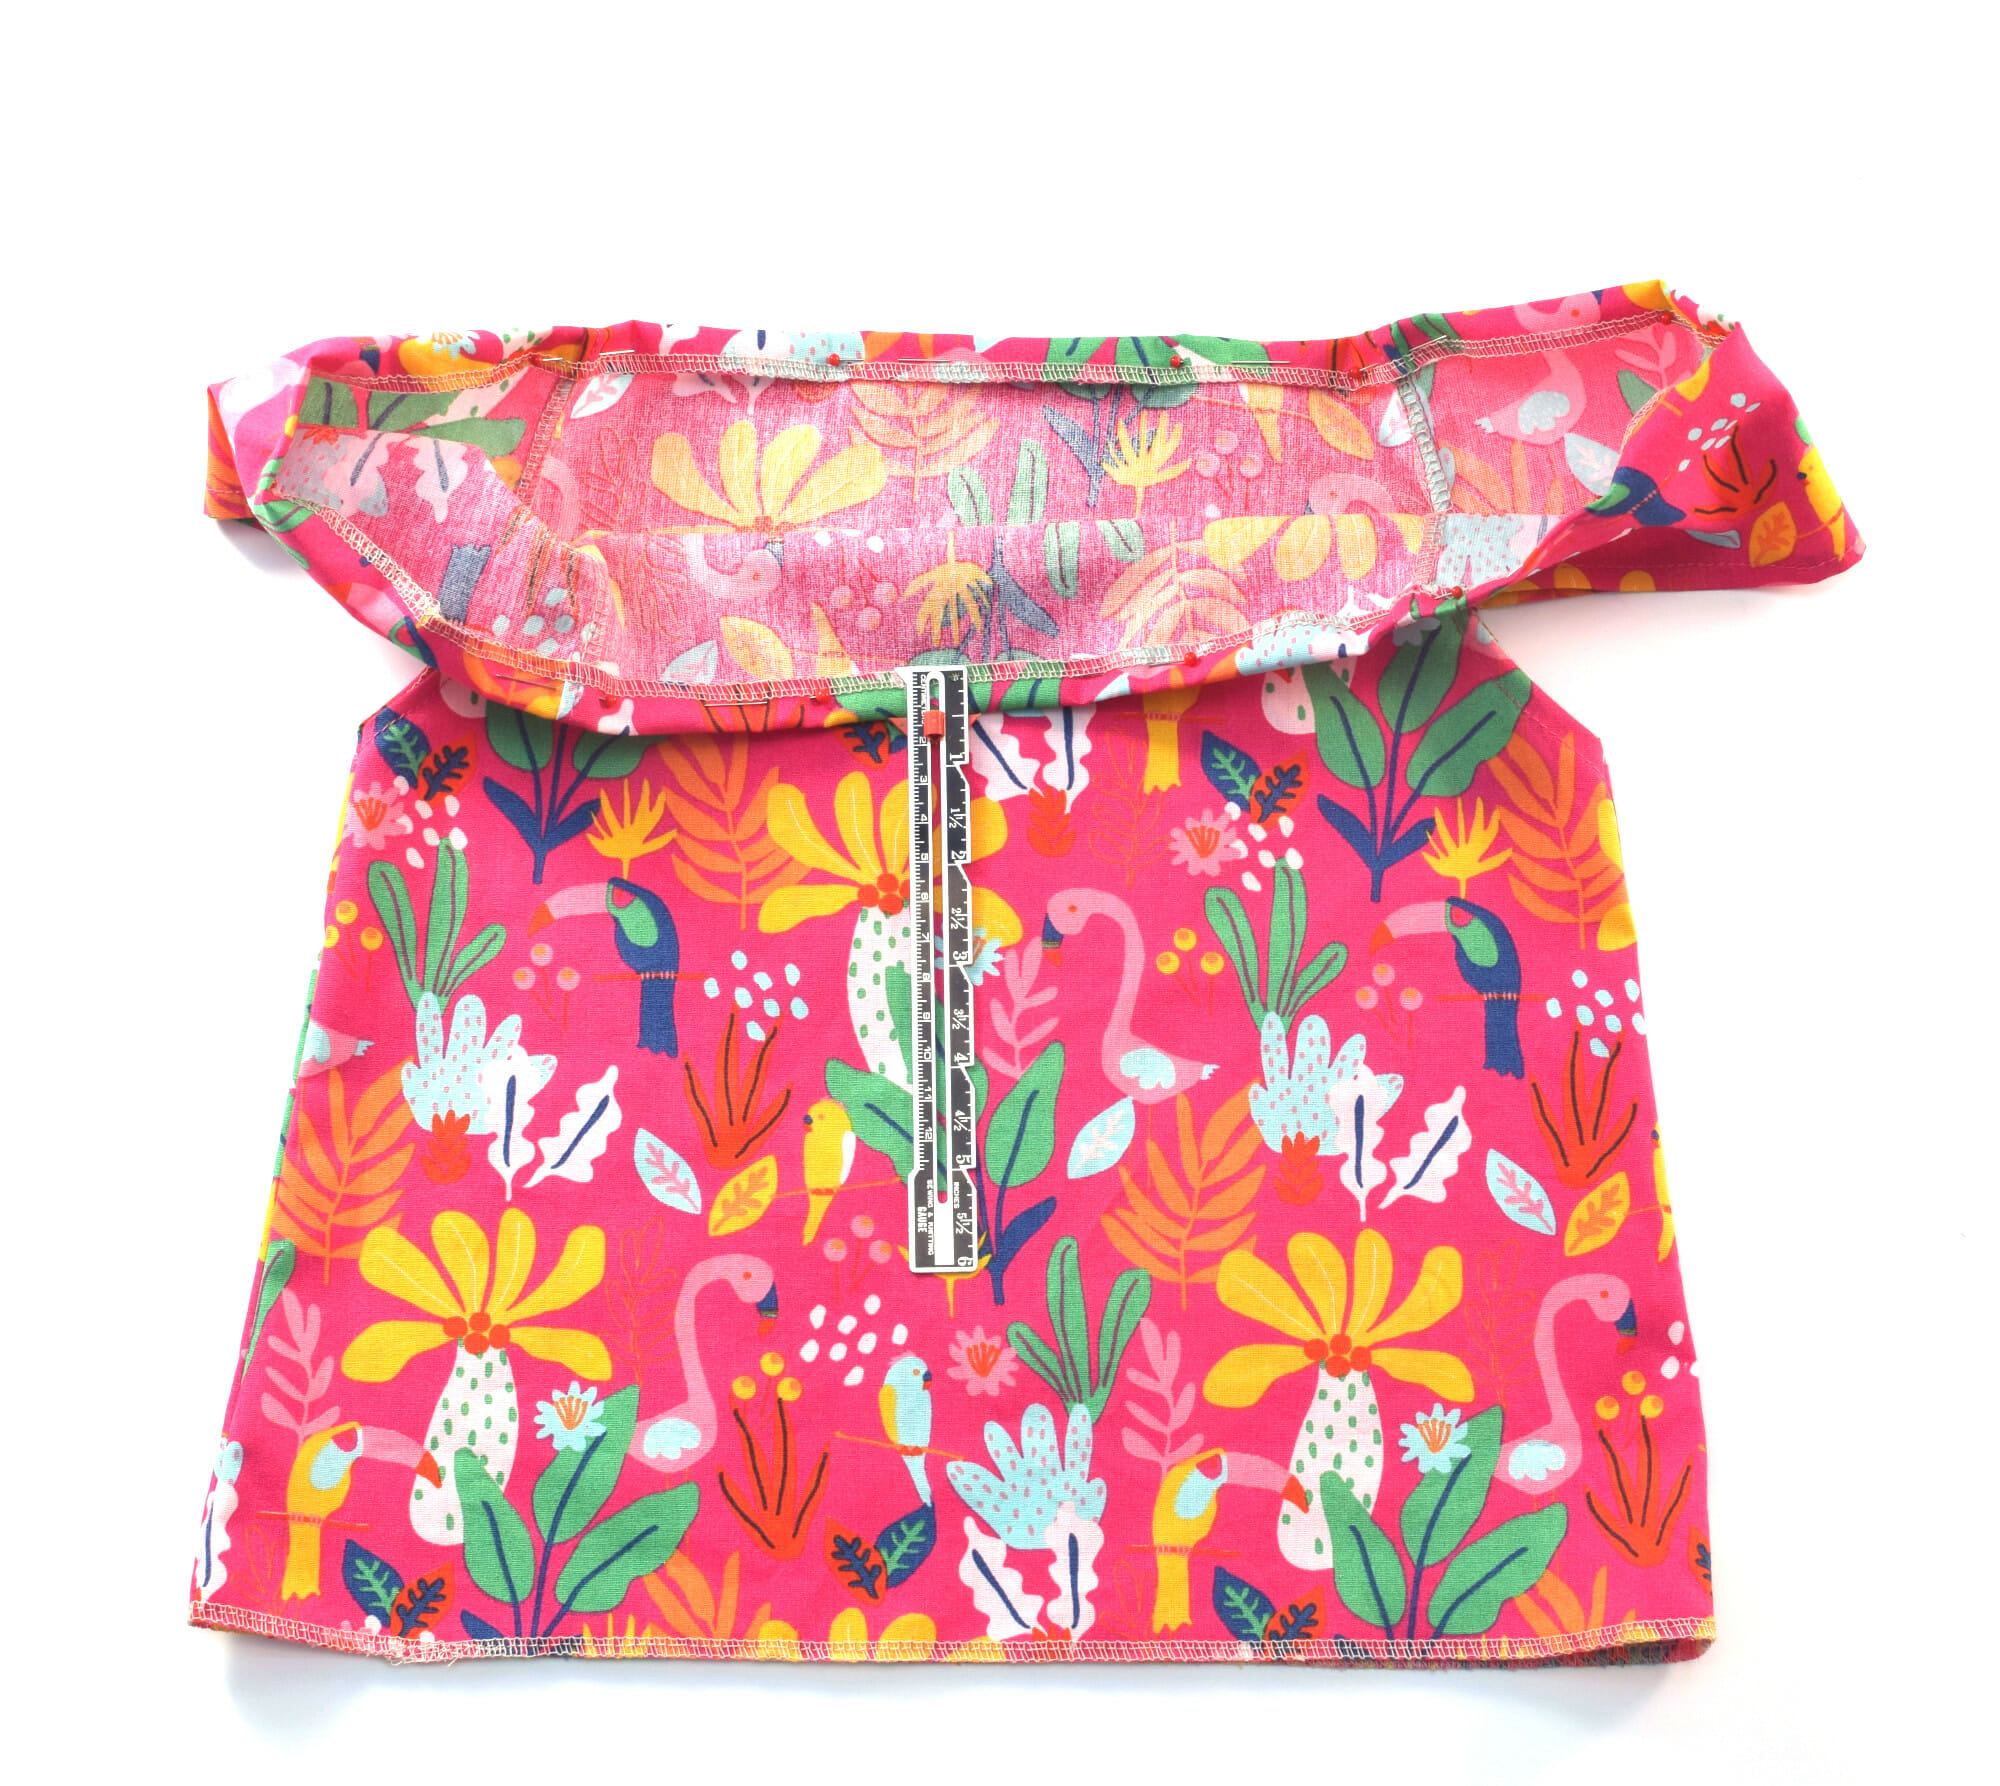
This casing wraps all the way around the neckline and over the shoulders. Use a safety pin to guide your 1/4″ elastic for the peasant top neckline through the casing.
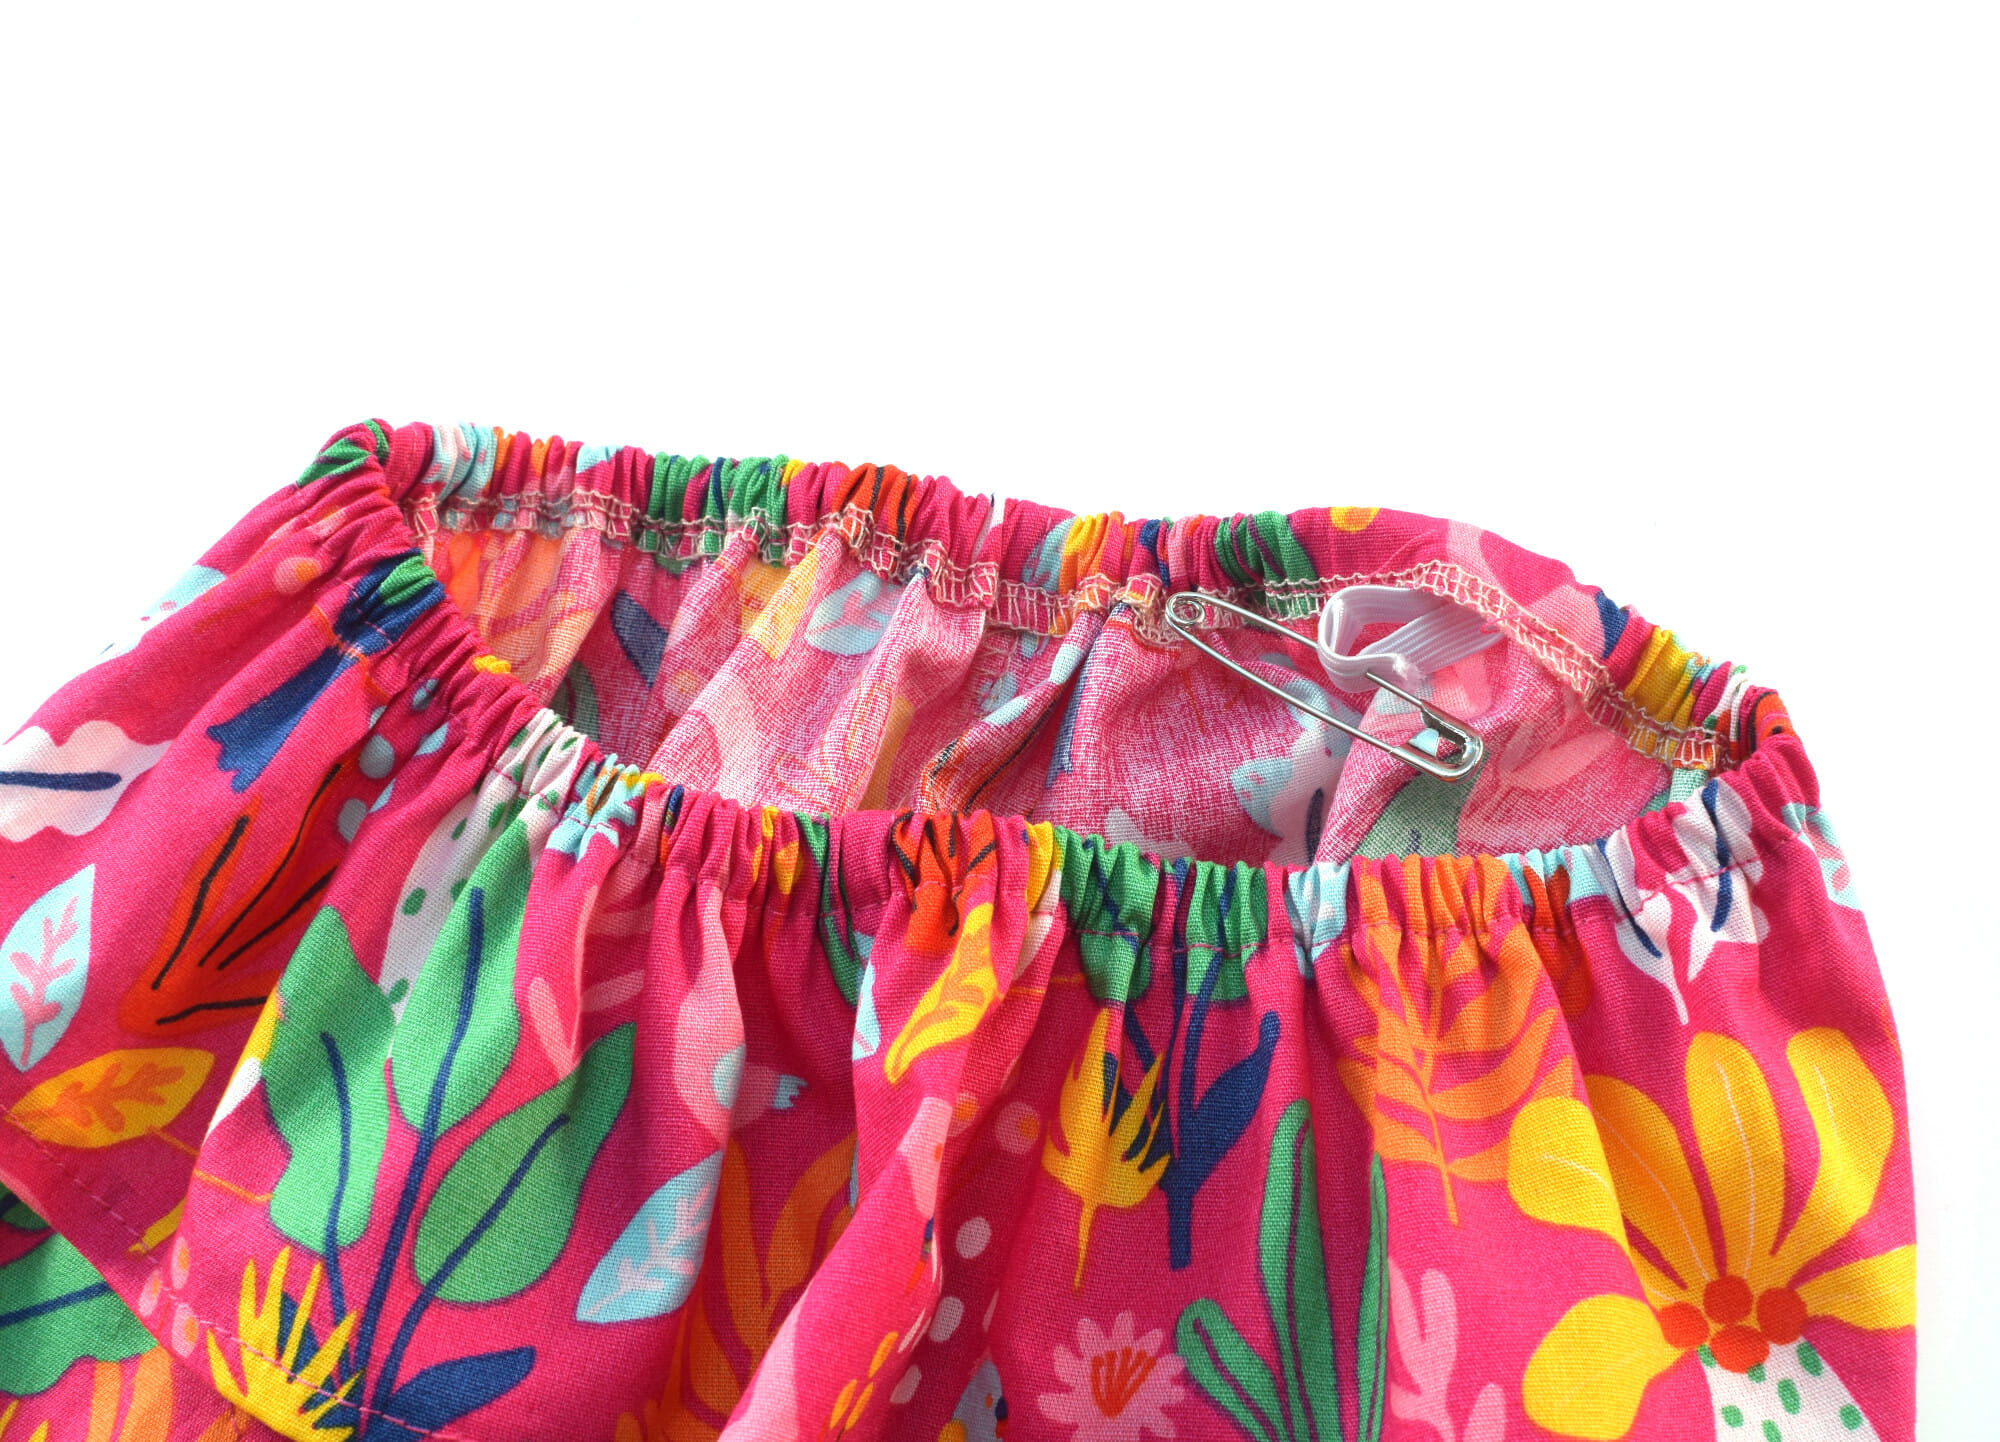
Once it’s all the way through, overlap the elastic ends and stitch them securely together. Then tuck the elastic inside and close up the opening with a few more stitches.
Now your elastic neckline is done – stretchy, comfy, and easy to pull on!
Step 7 – Hem the Bottom
Almost there!
Fold the bottom edge of the top up by about 1″, press it, and pin in place. I like using a wide hem for a little extra weight and shape at the bottom, but you can totally go with a narrower hem if you prefer.
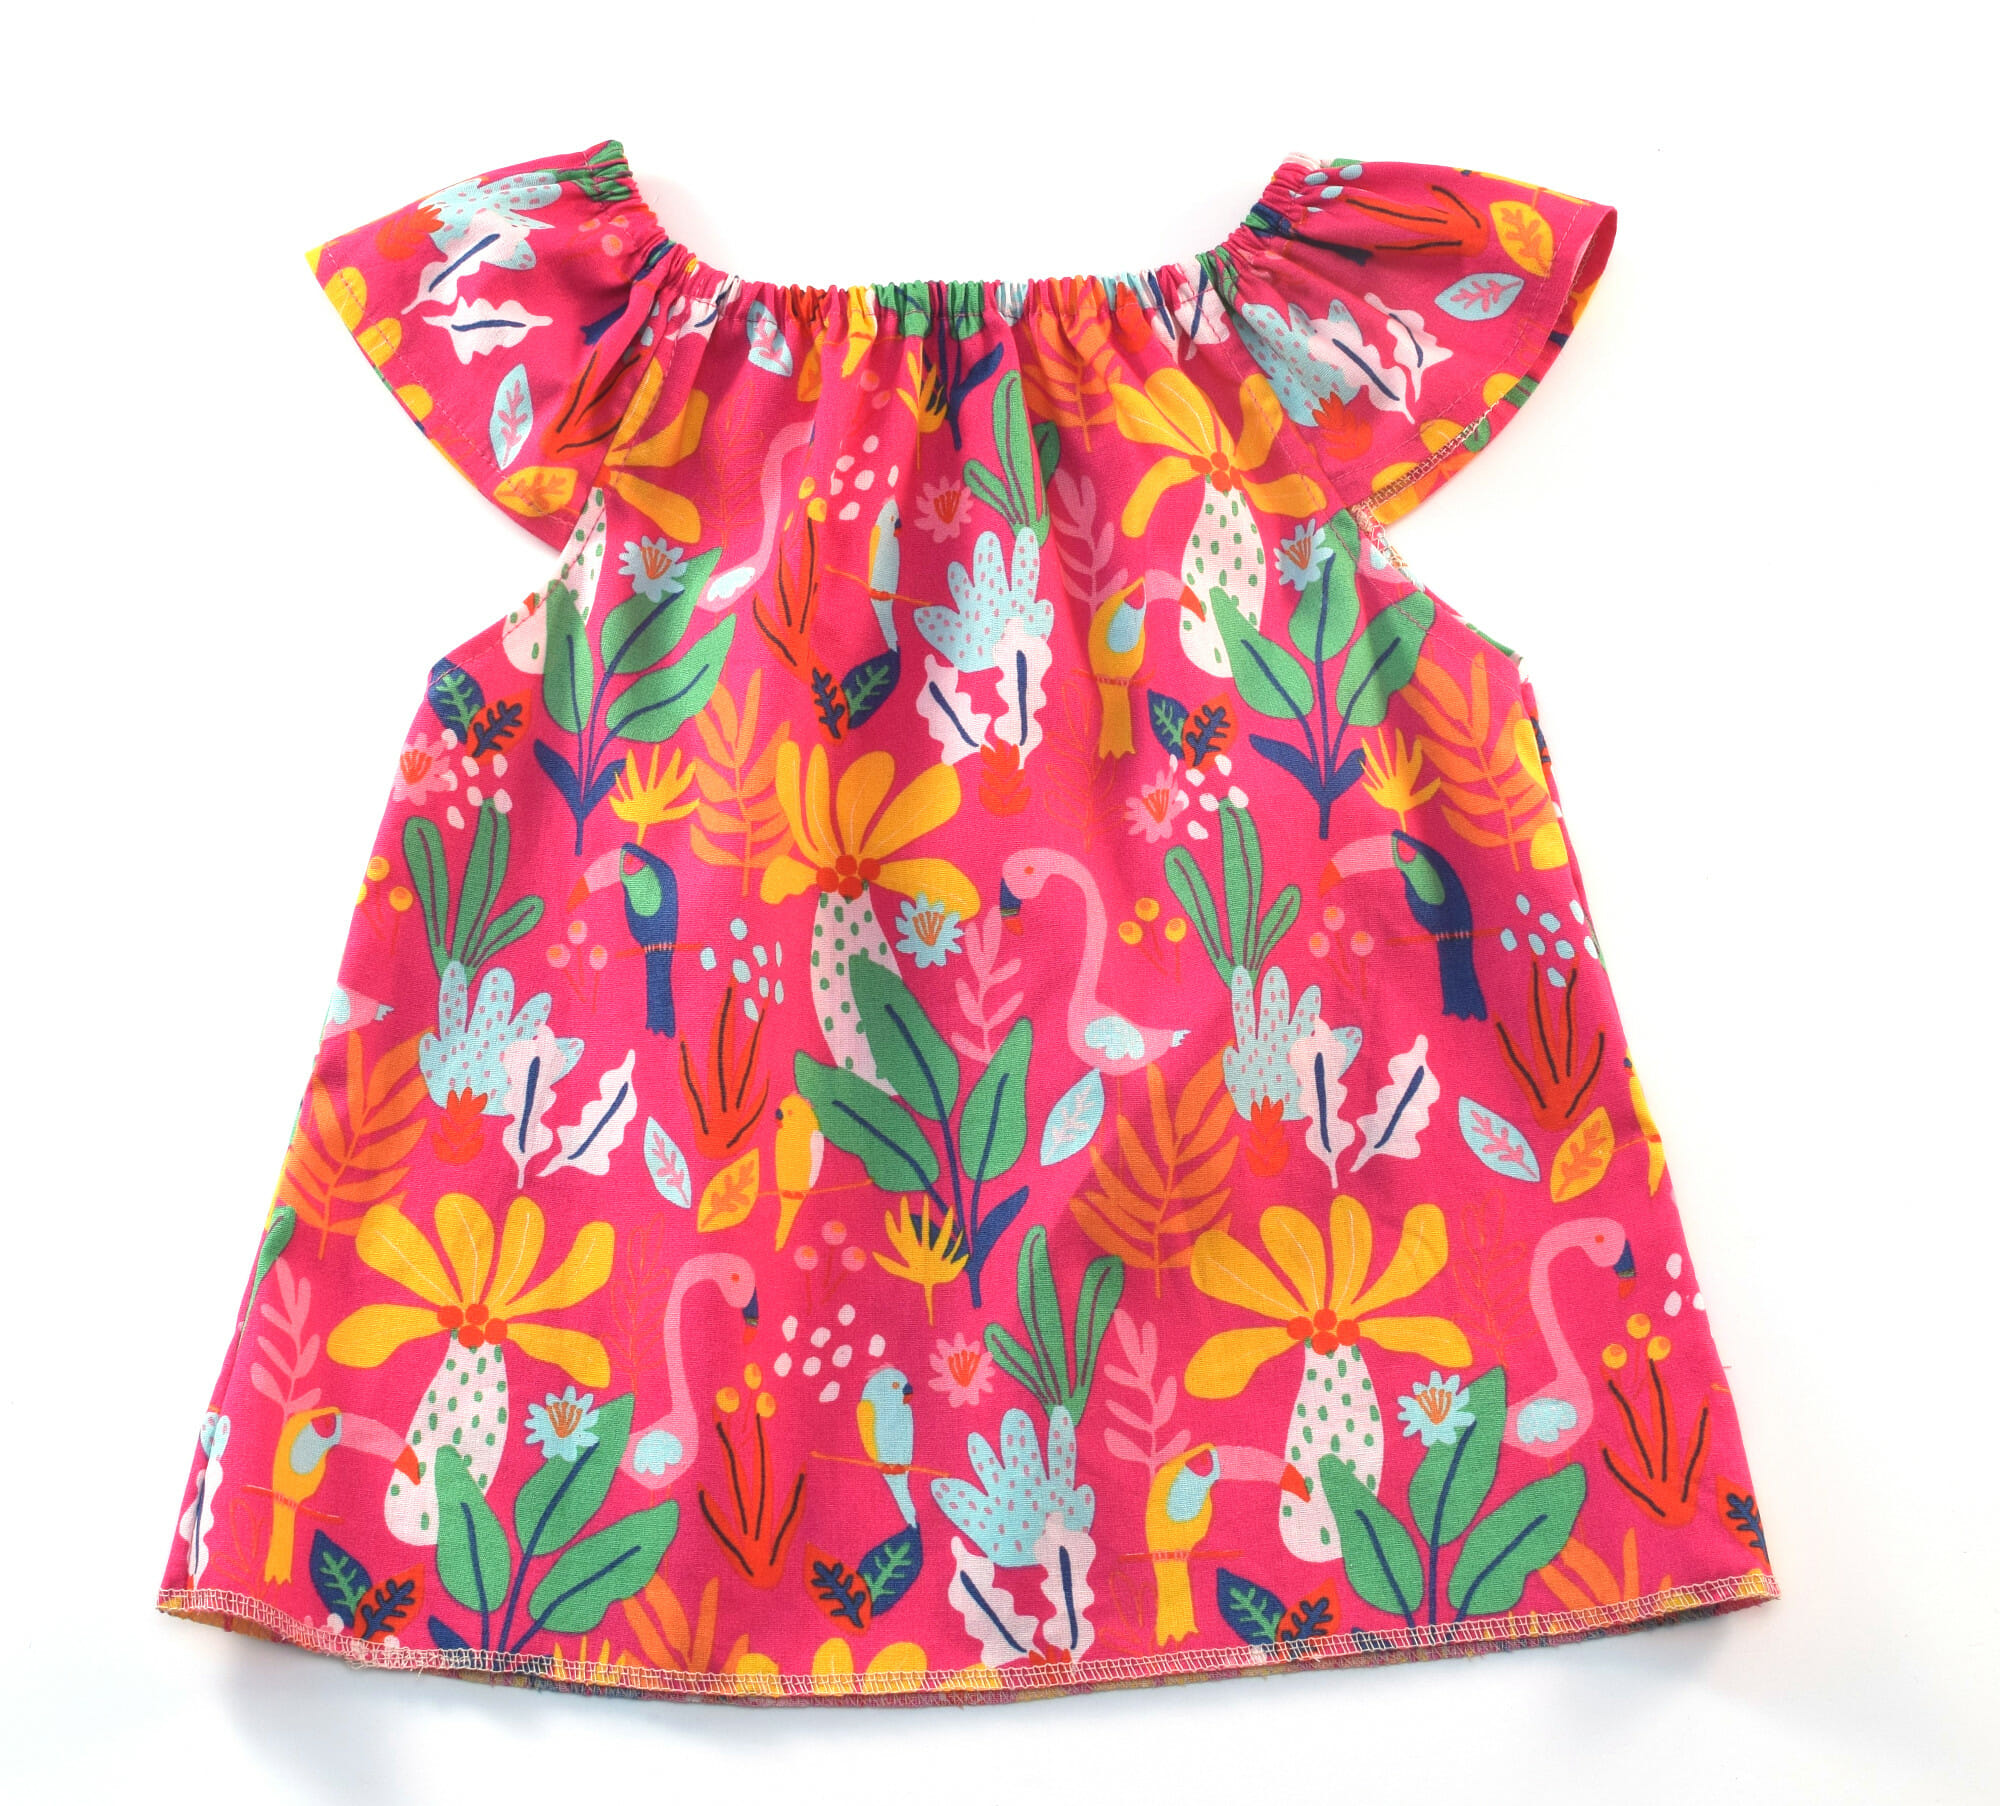
Make sure the hem is even all the way around. Then stitch it down, sewing close to the serged edge.
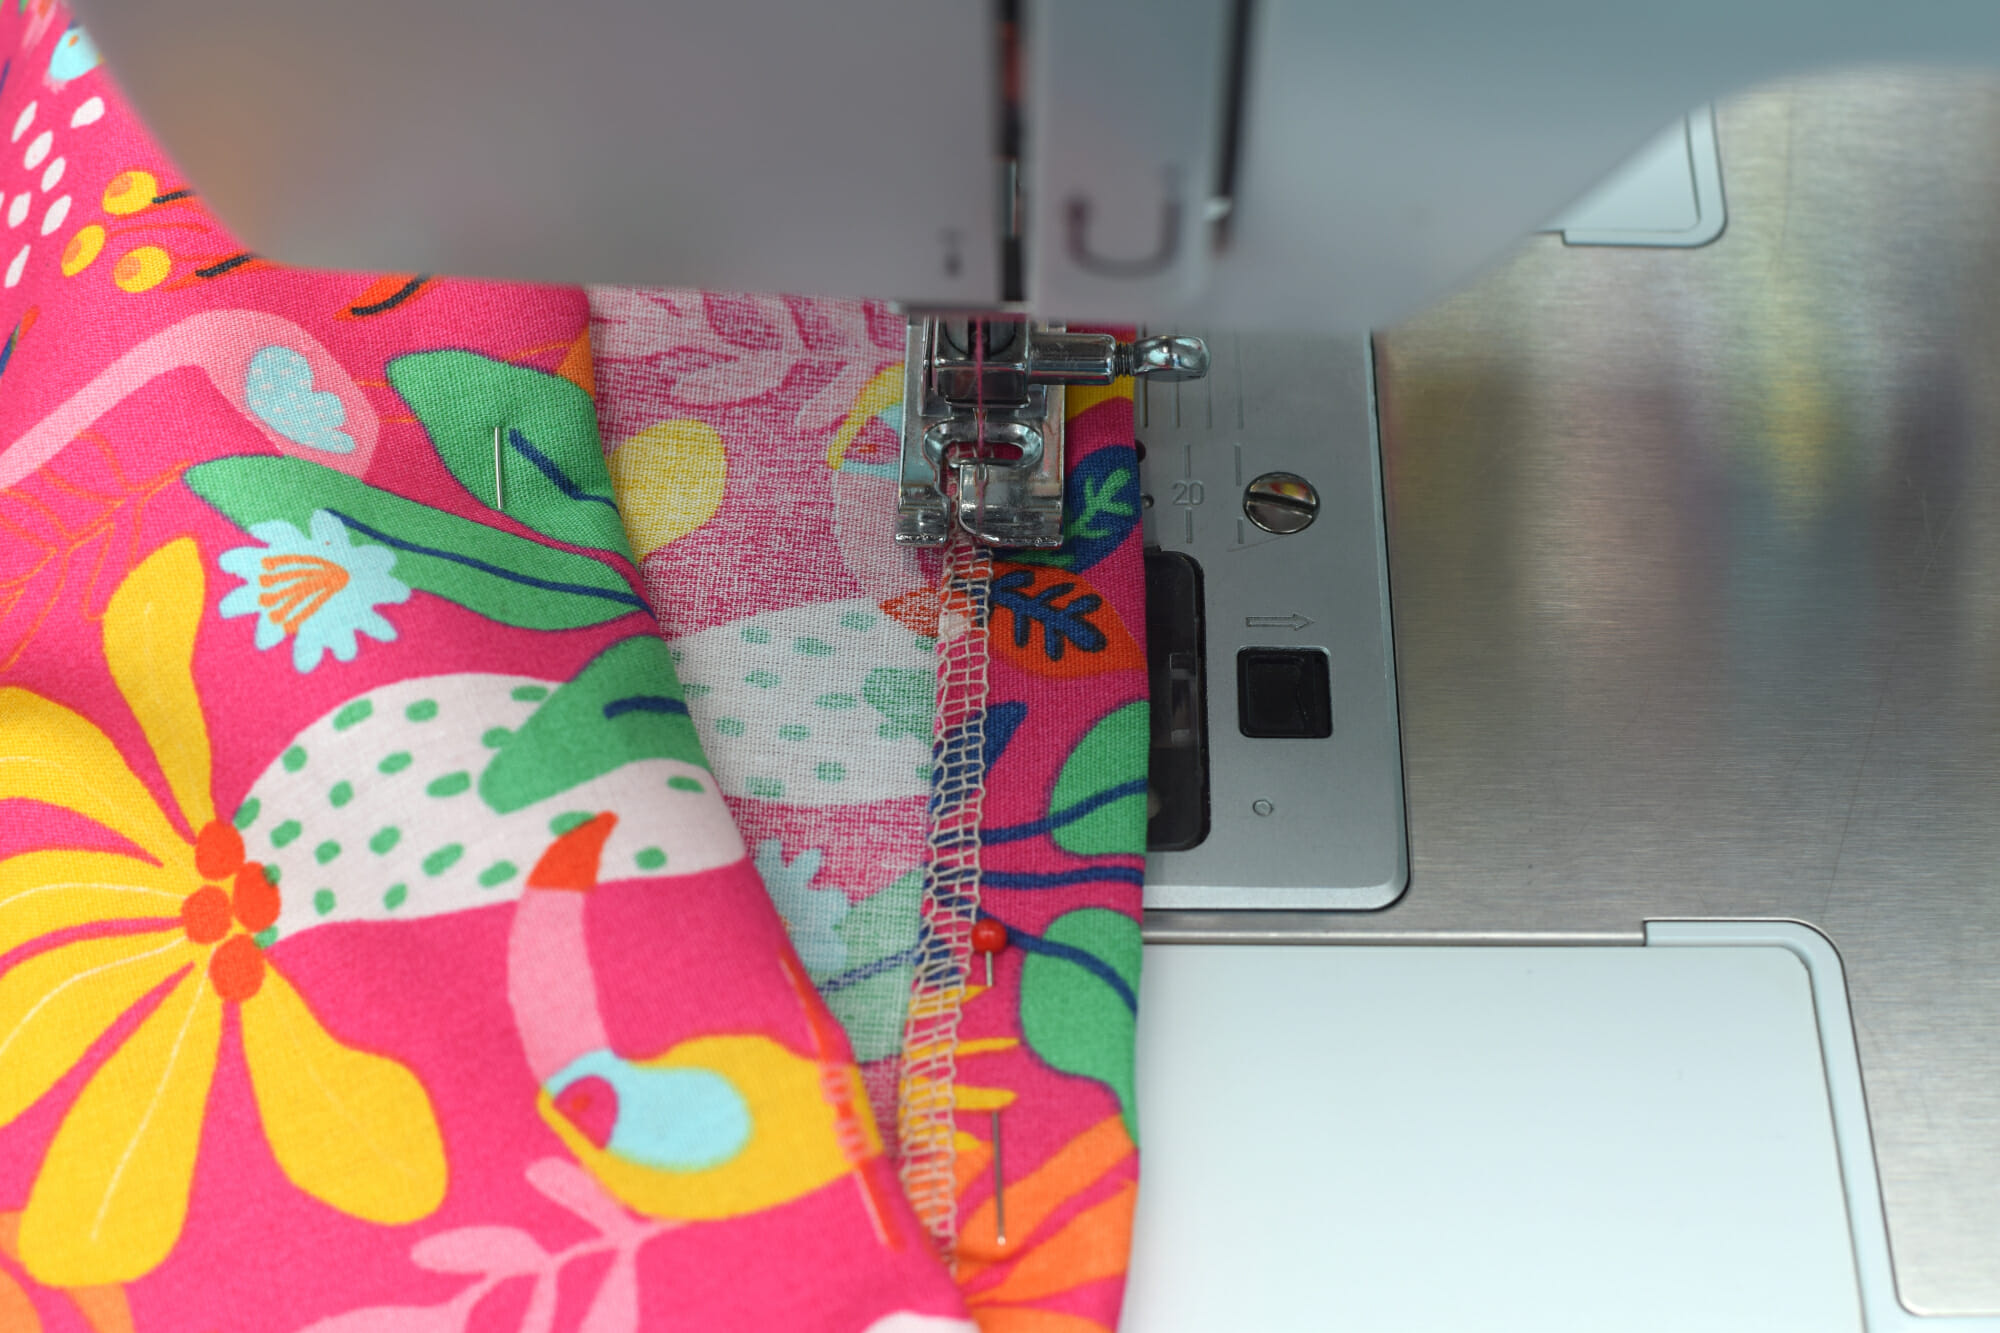
That’s it – your flutter sleeve peasant top is done!
Give the whole thing a good press, and you’re ready to dress your little one in a handmade top that’s as cute as it is comfy!
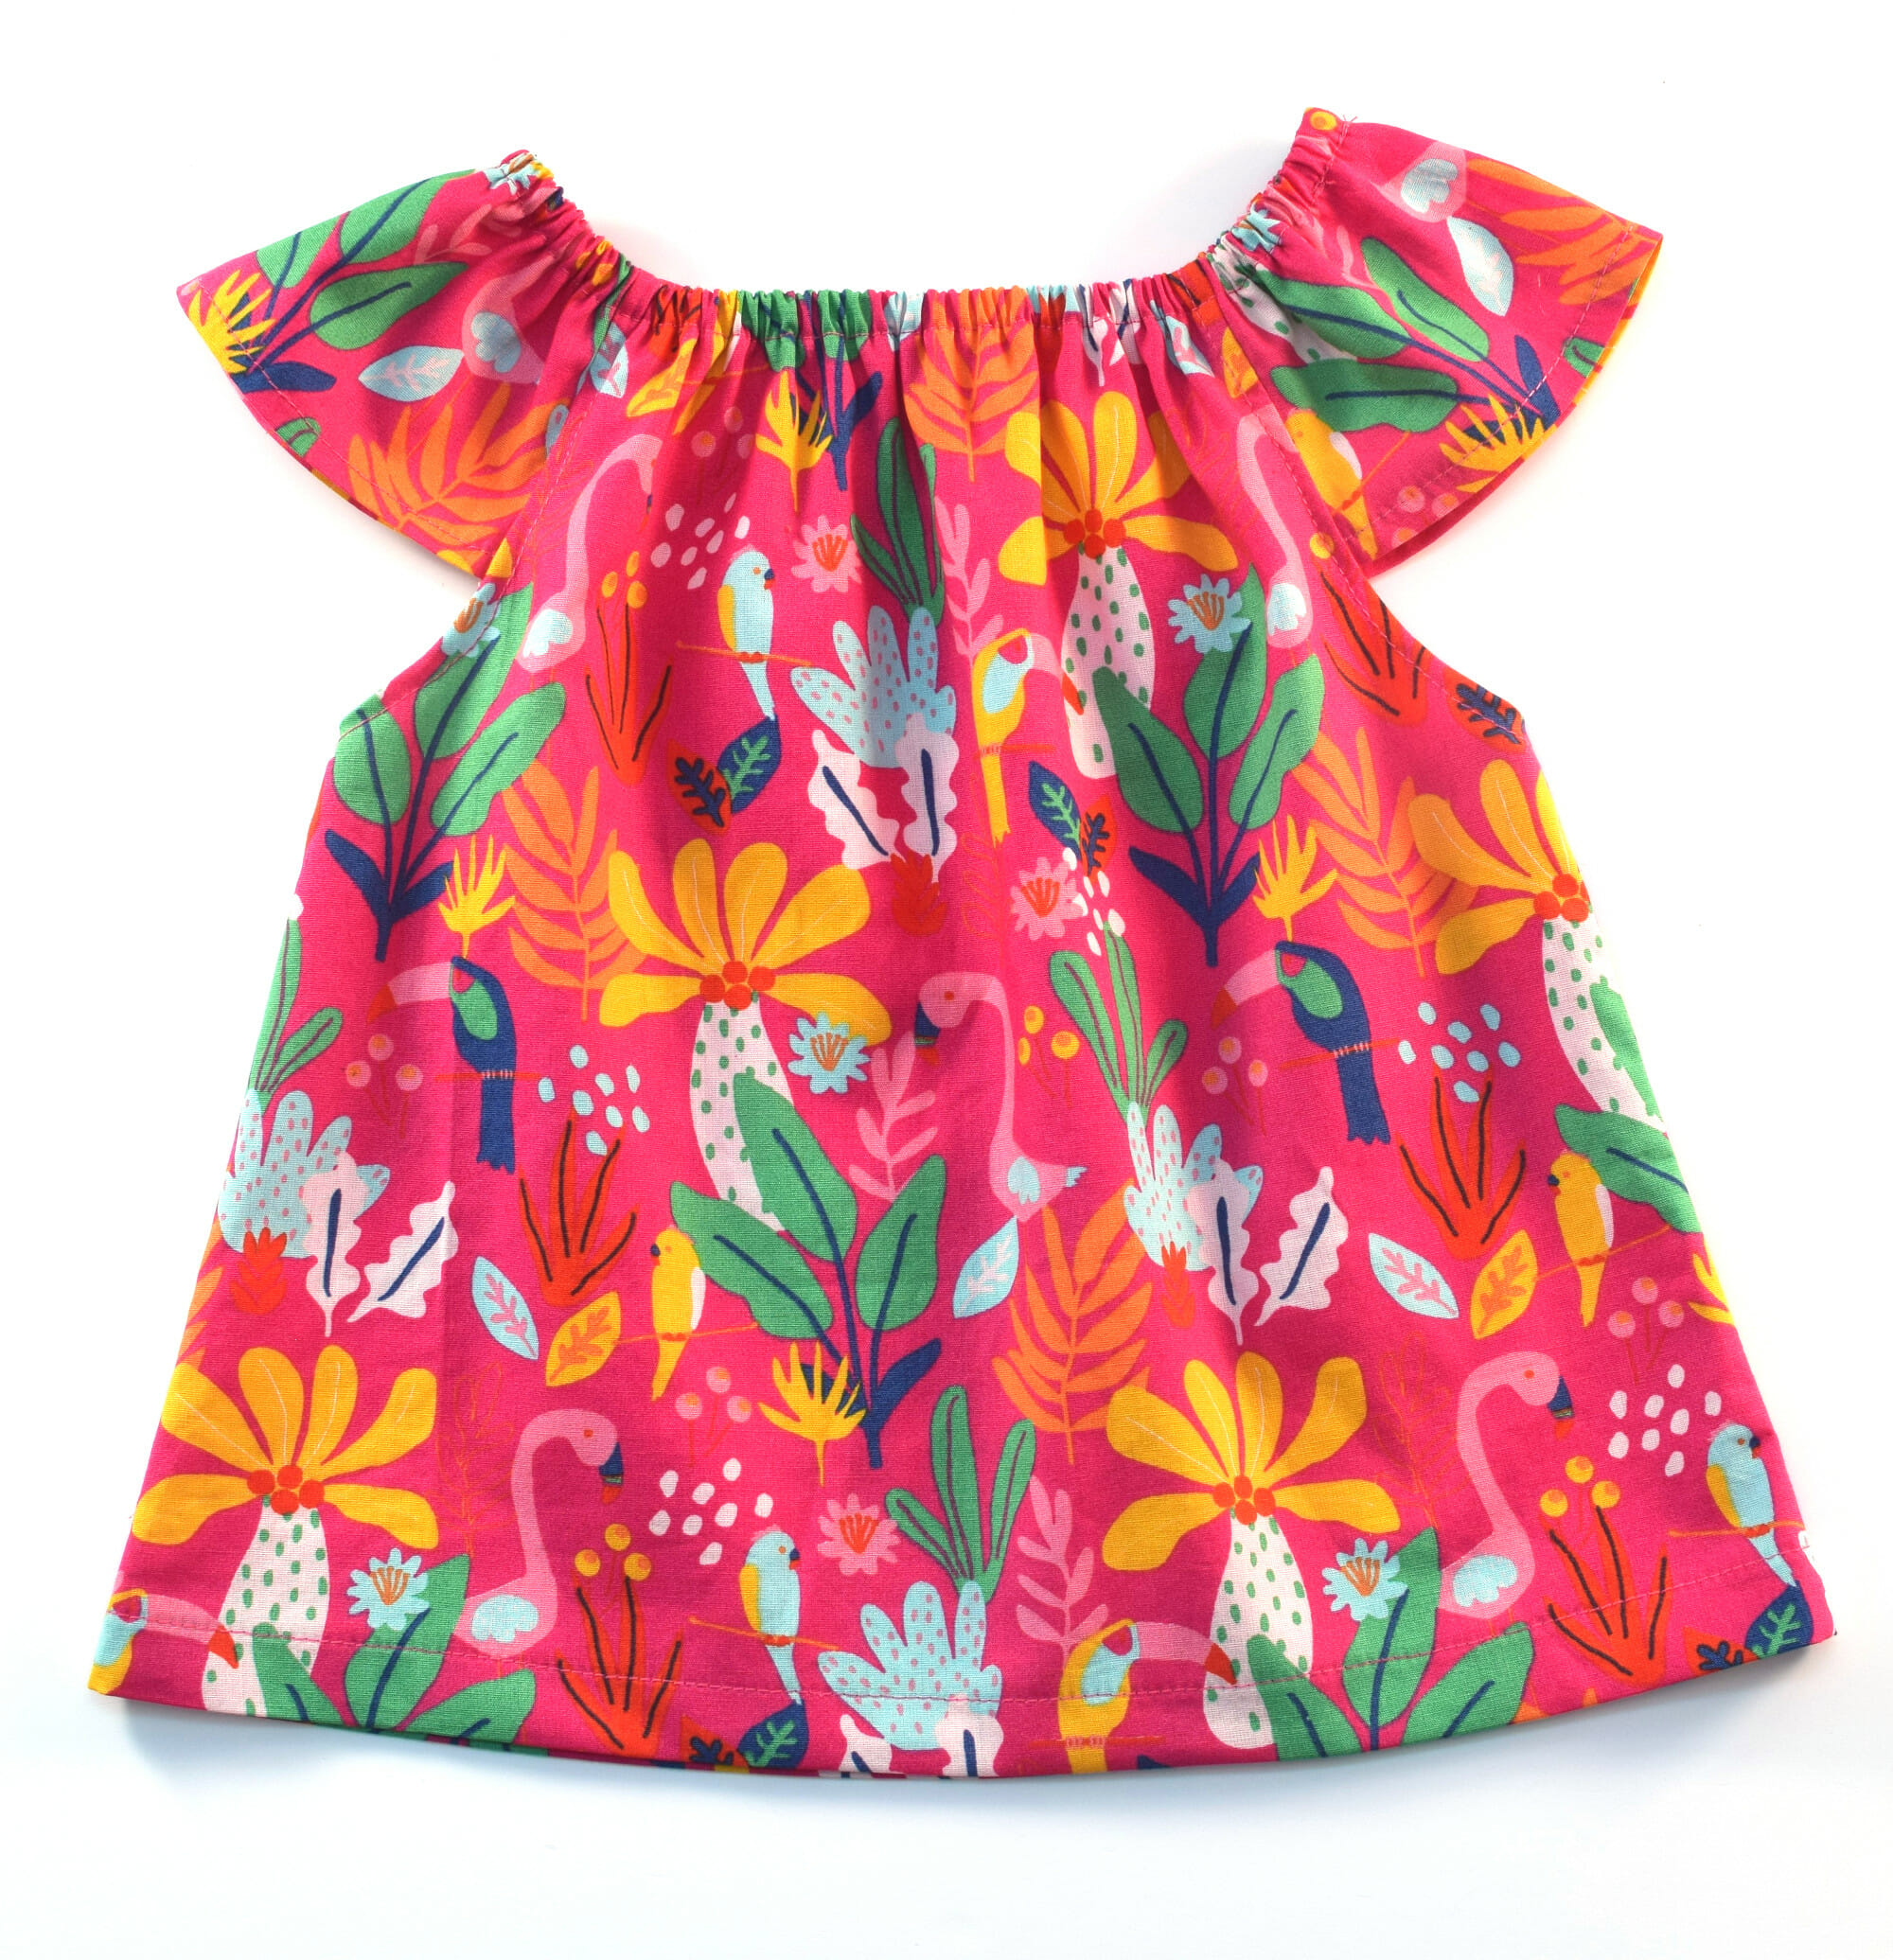
This is honestly one of the easiest tops to make for girls, and it’s so fun to customize. Try different fabric prints, or make it longer for a DIY flutter sleeve peasant dress. Once you make one, you’ll be hooked!
Show Off Your Flutter Sleeve Creations!
I hope you have a blast making lots of flutter sleeve peasant tops and dresses for your little ones! This is such a fun and easy sewing project for beginners, and once you’ve made one, it’s hard to stop. These sweet tops are perfect for sunny days, park adventures, or just comfy everyday wear.
If you use any of my free sewing patterns for kids, I’d love to see what you make! Feel free to share a photo on my Facebook page or tag me on Instagram – it seriously makes my day seeing your creations out in the wild.
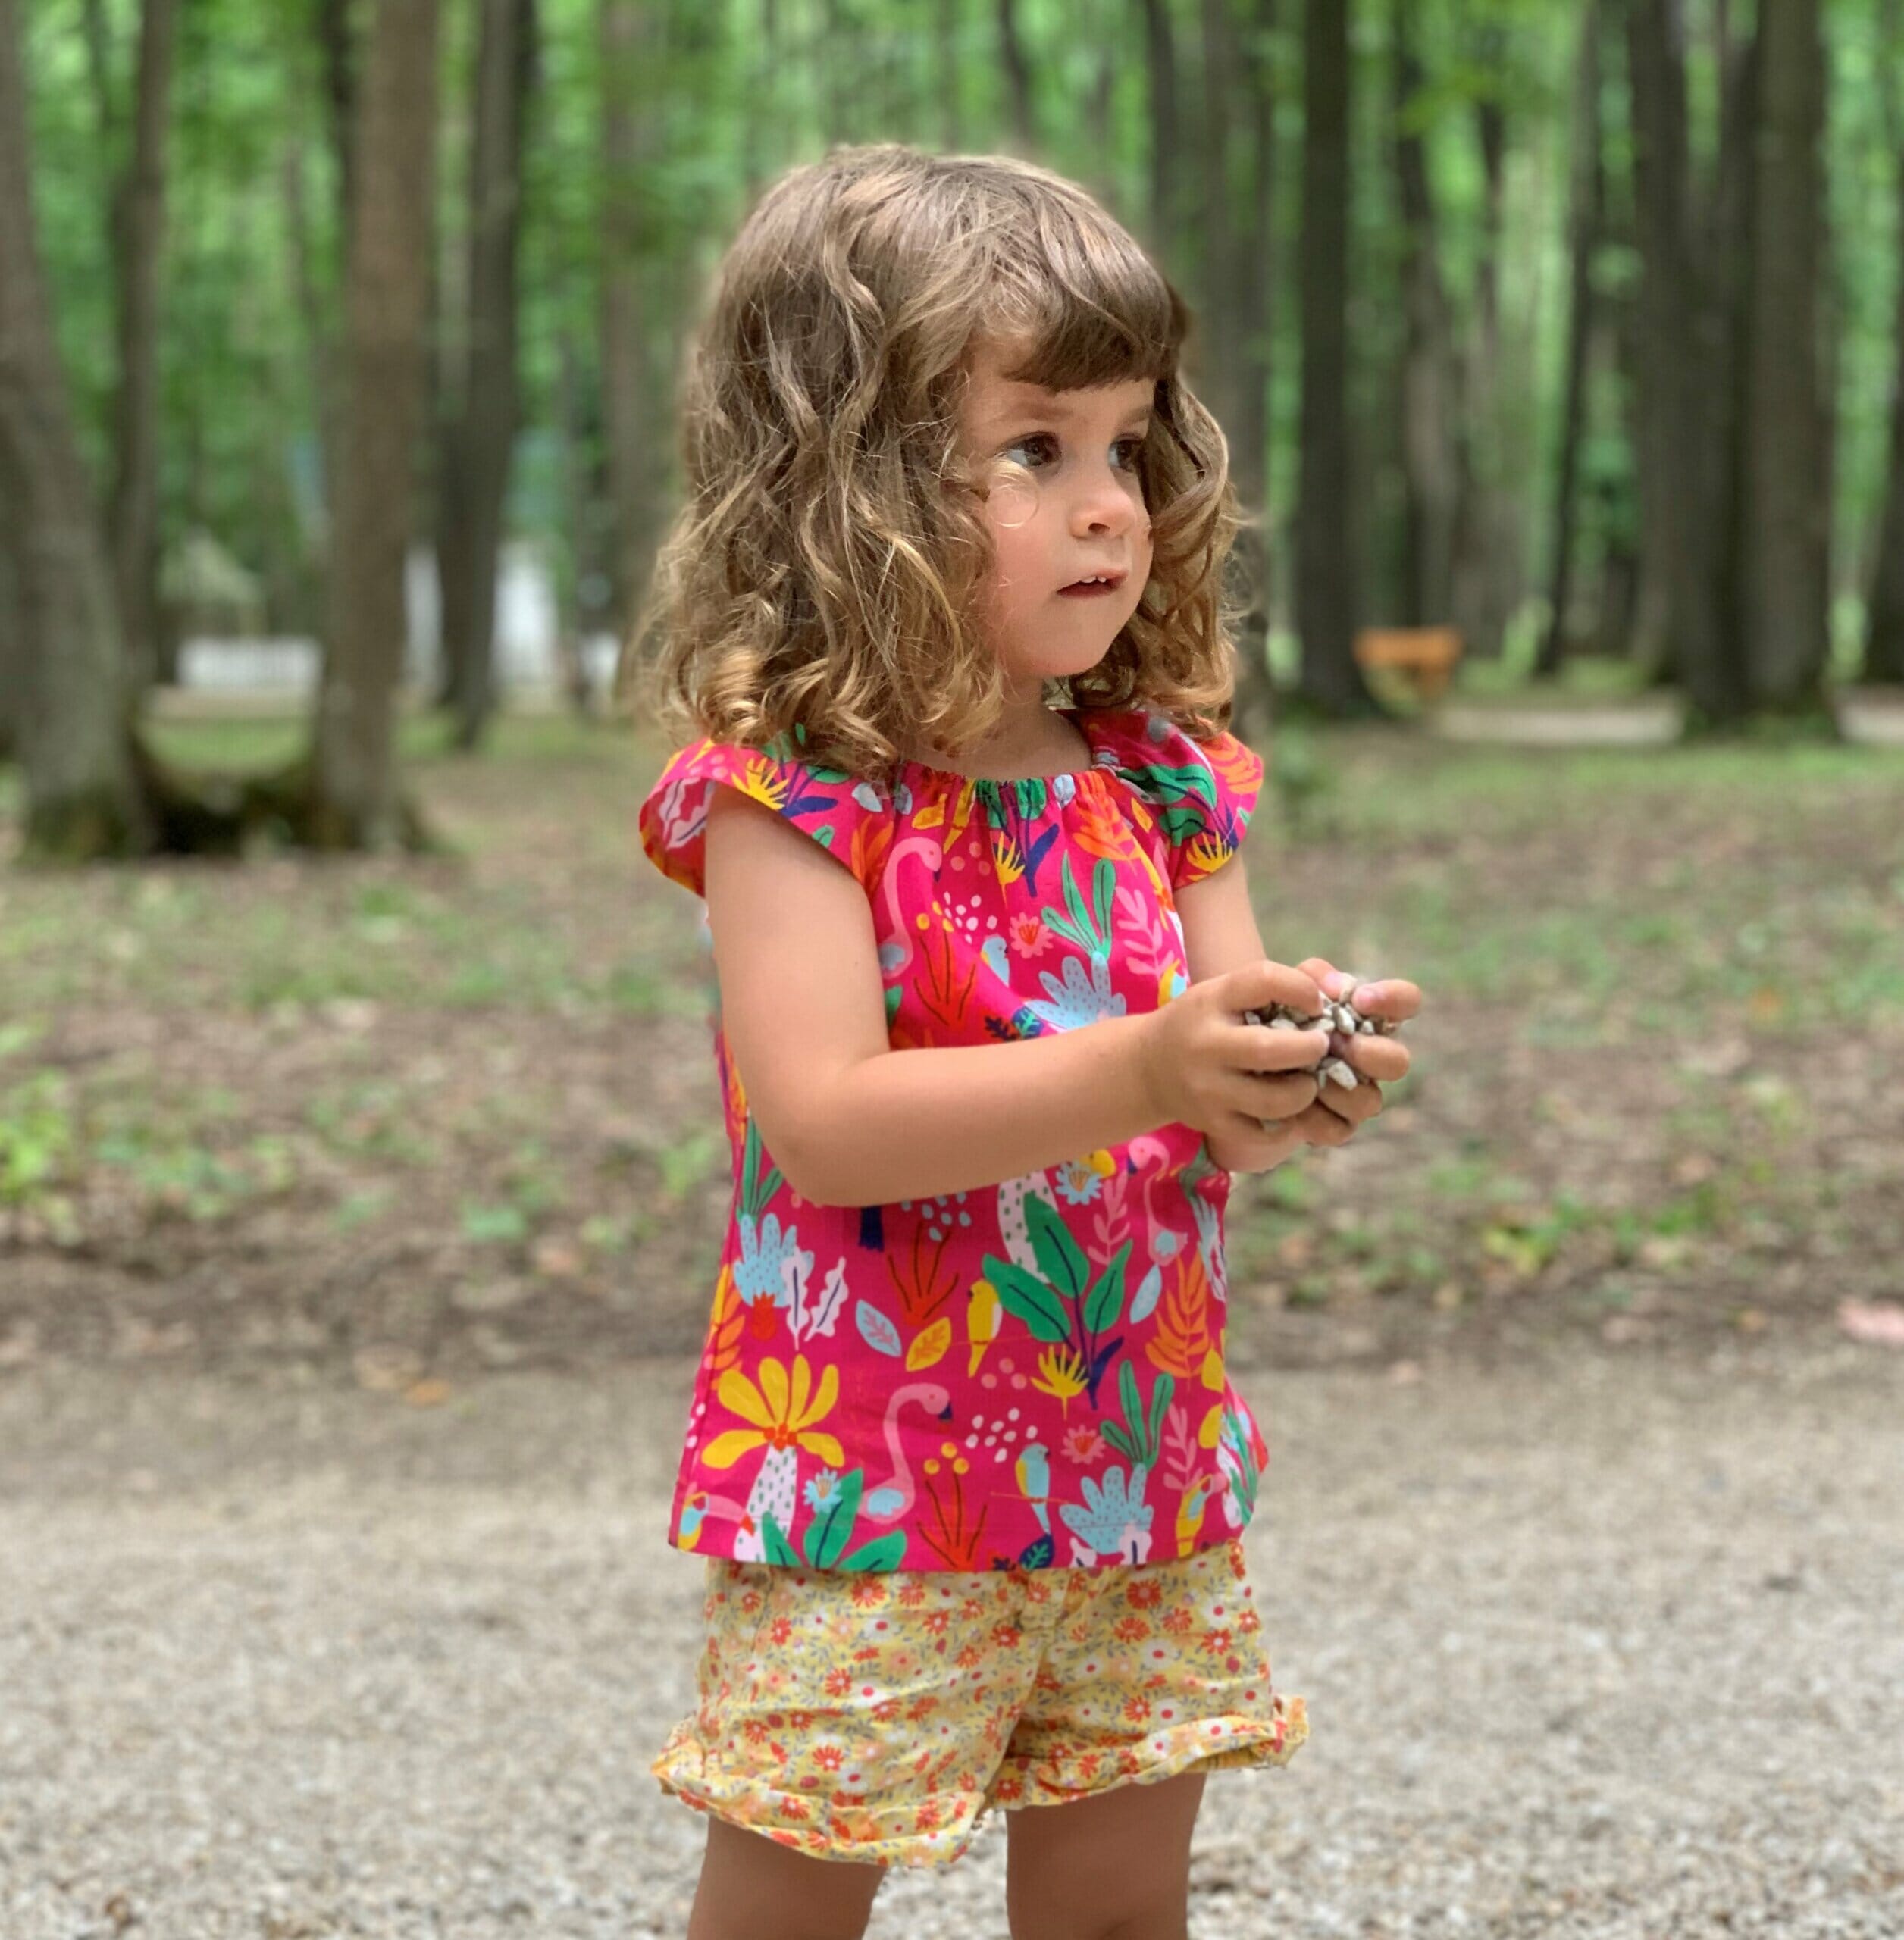
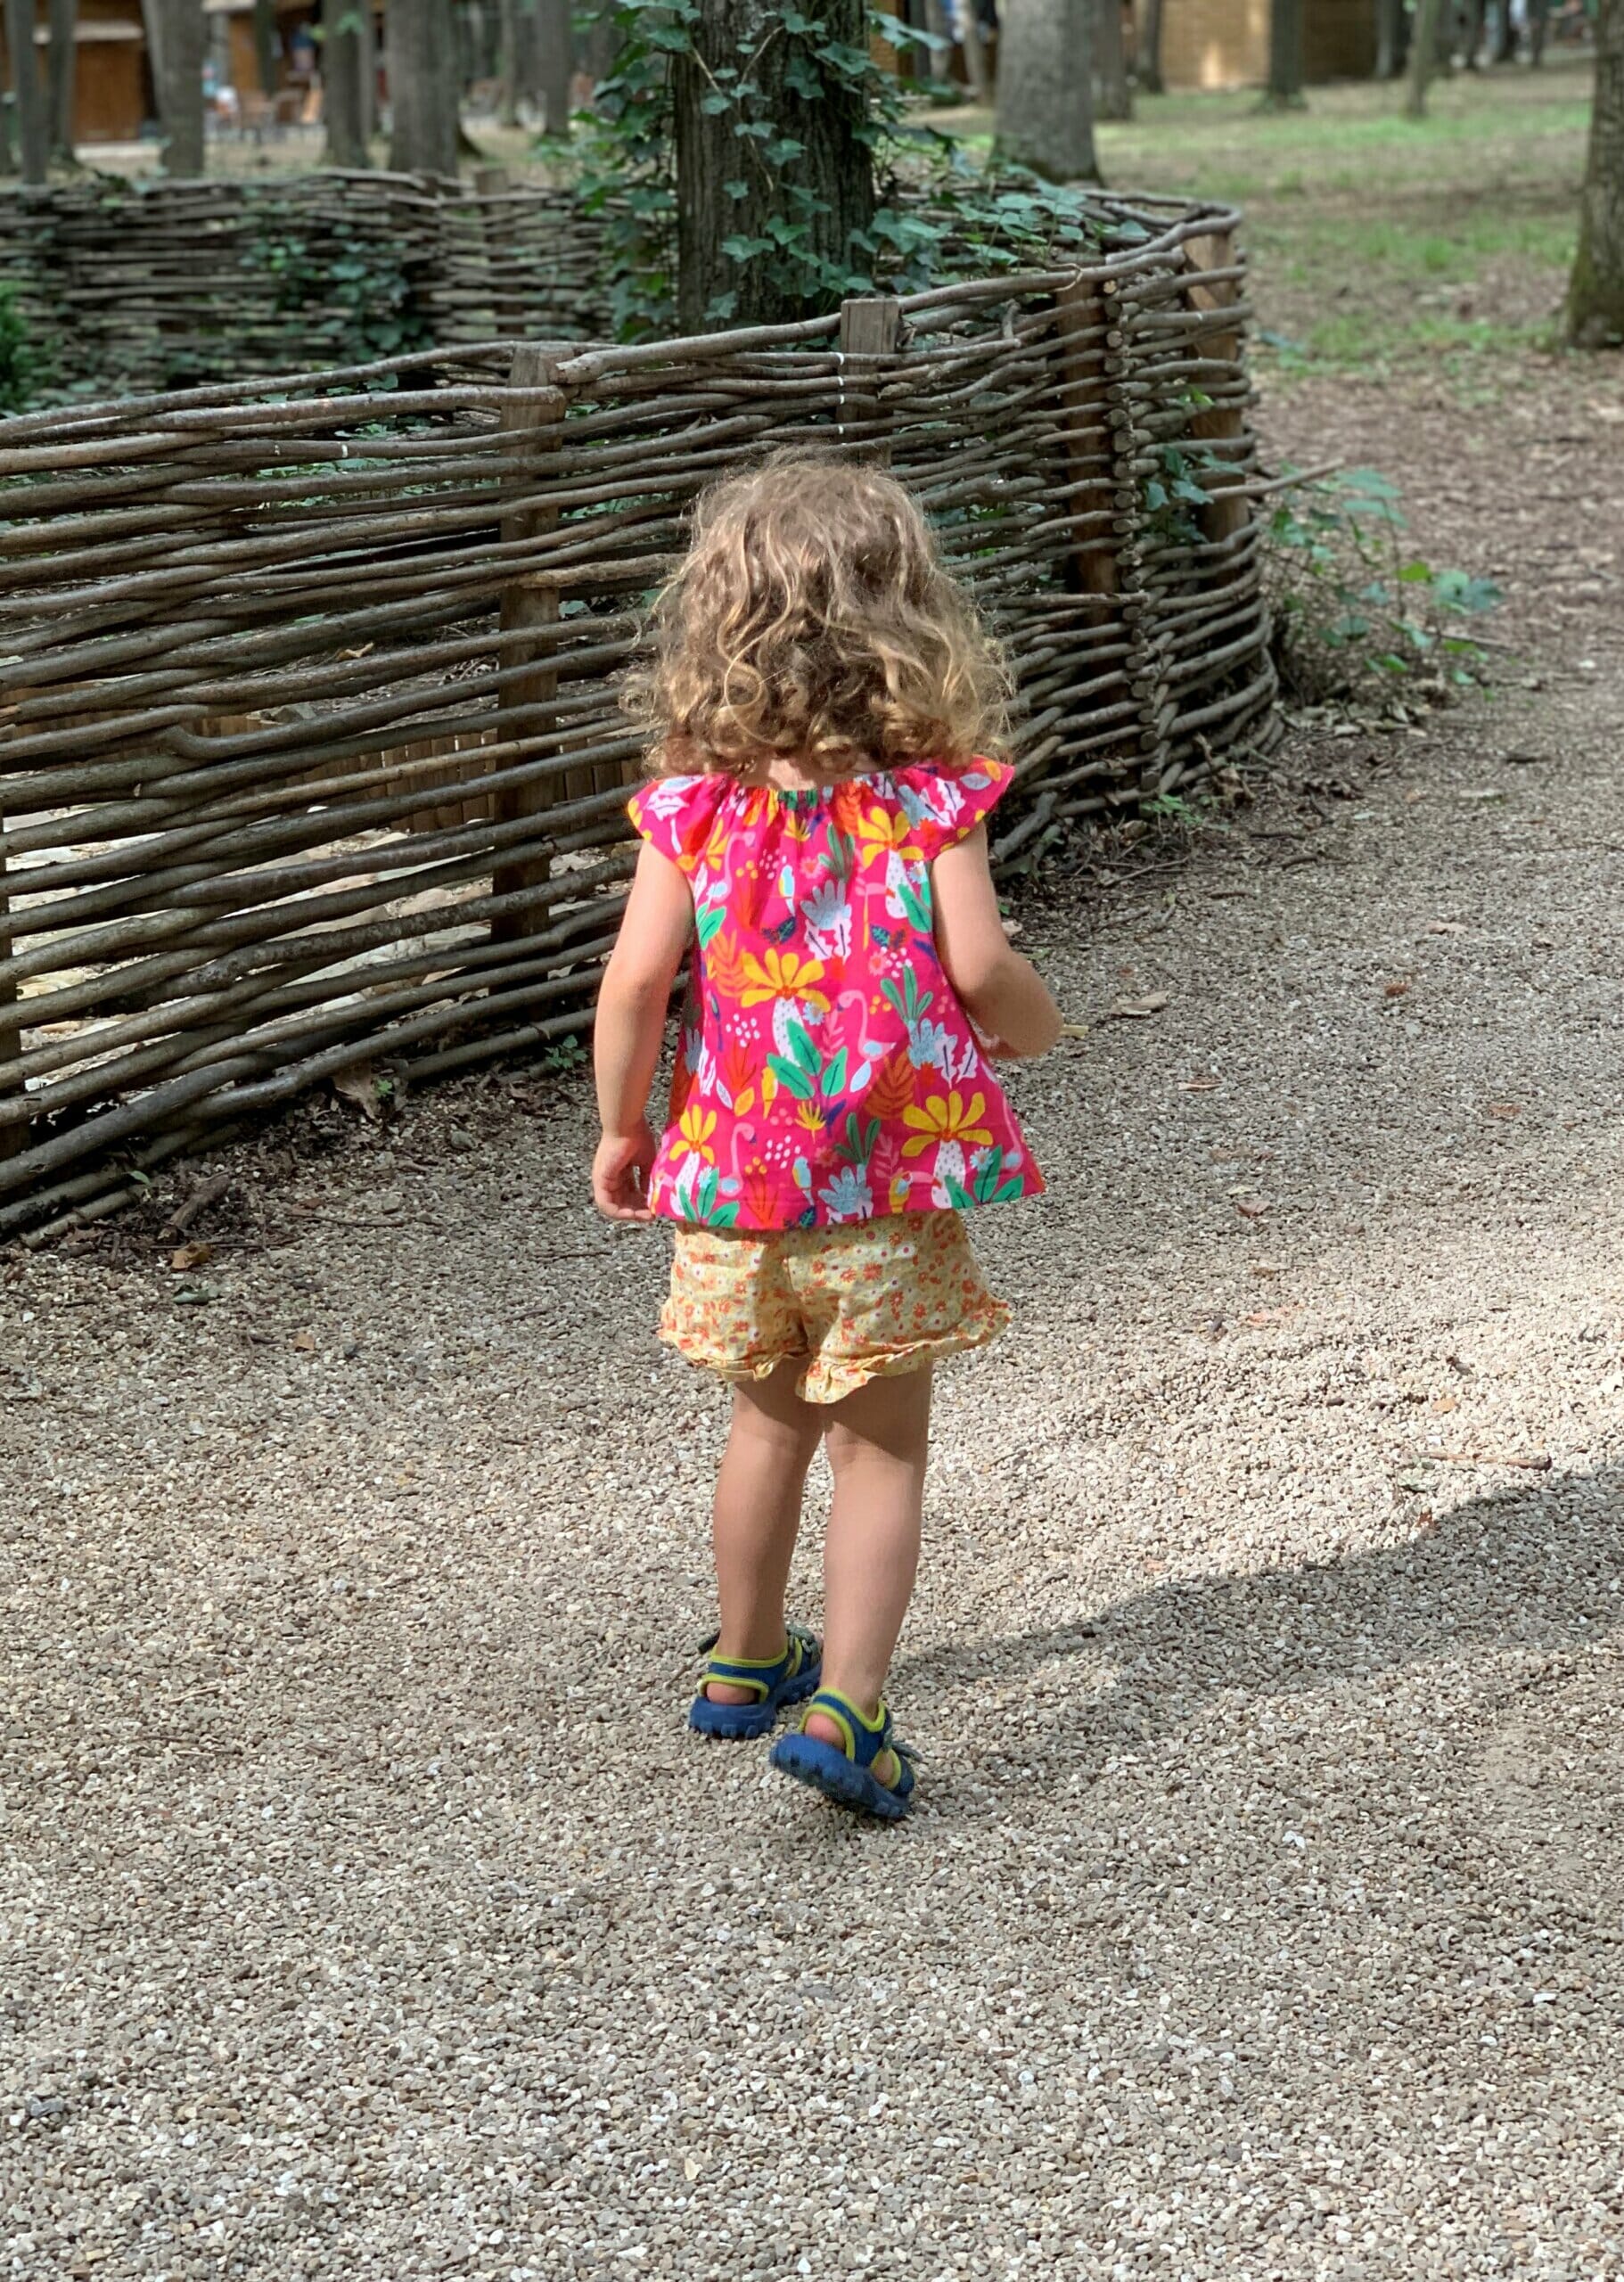
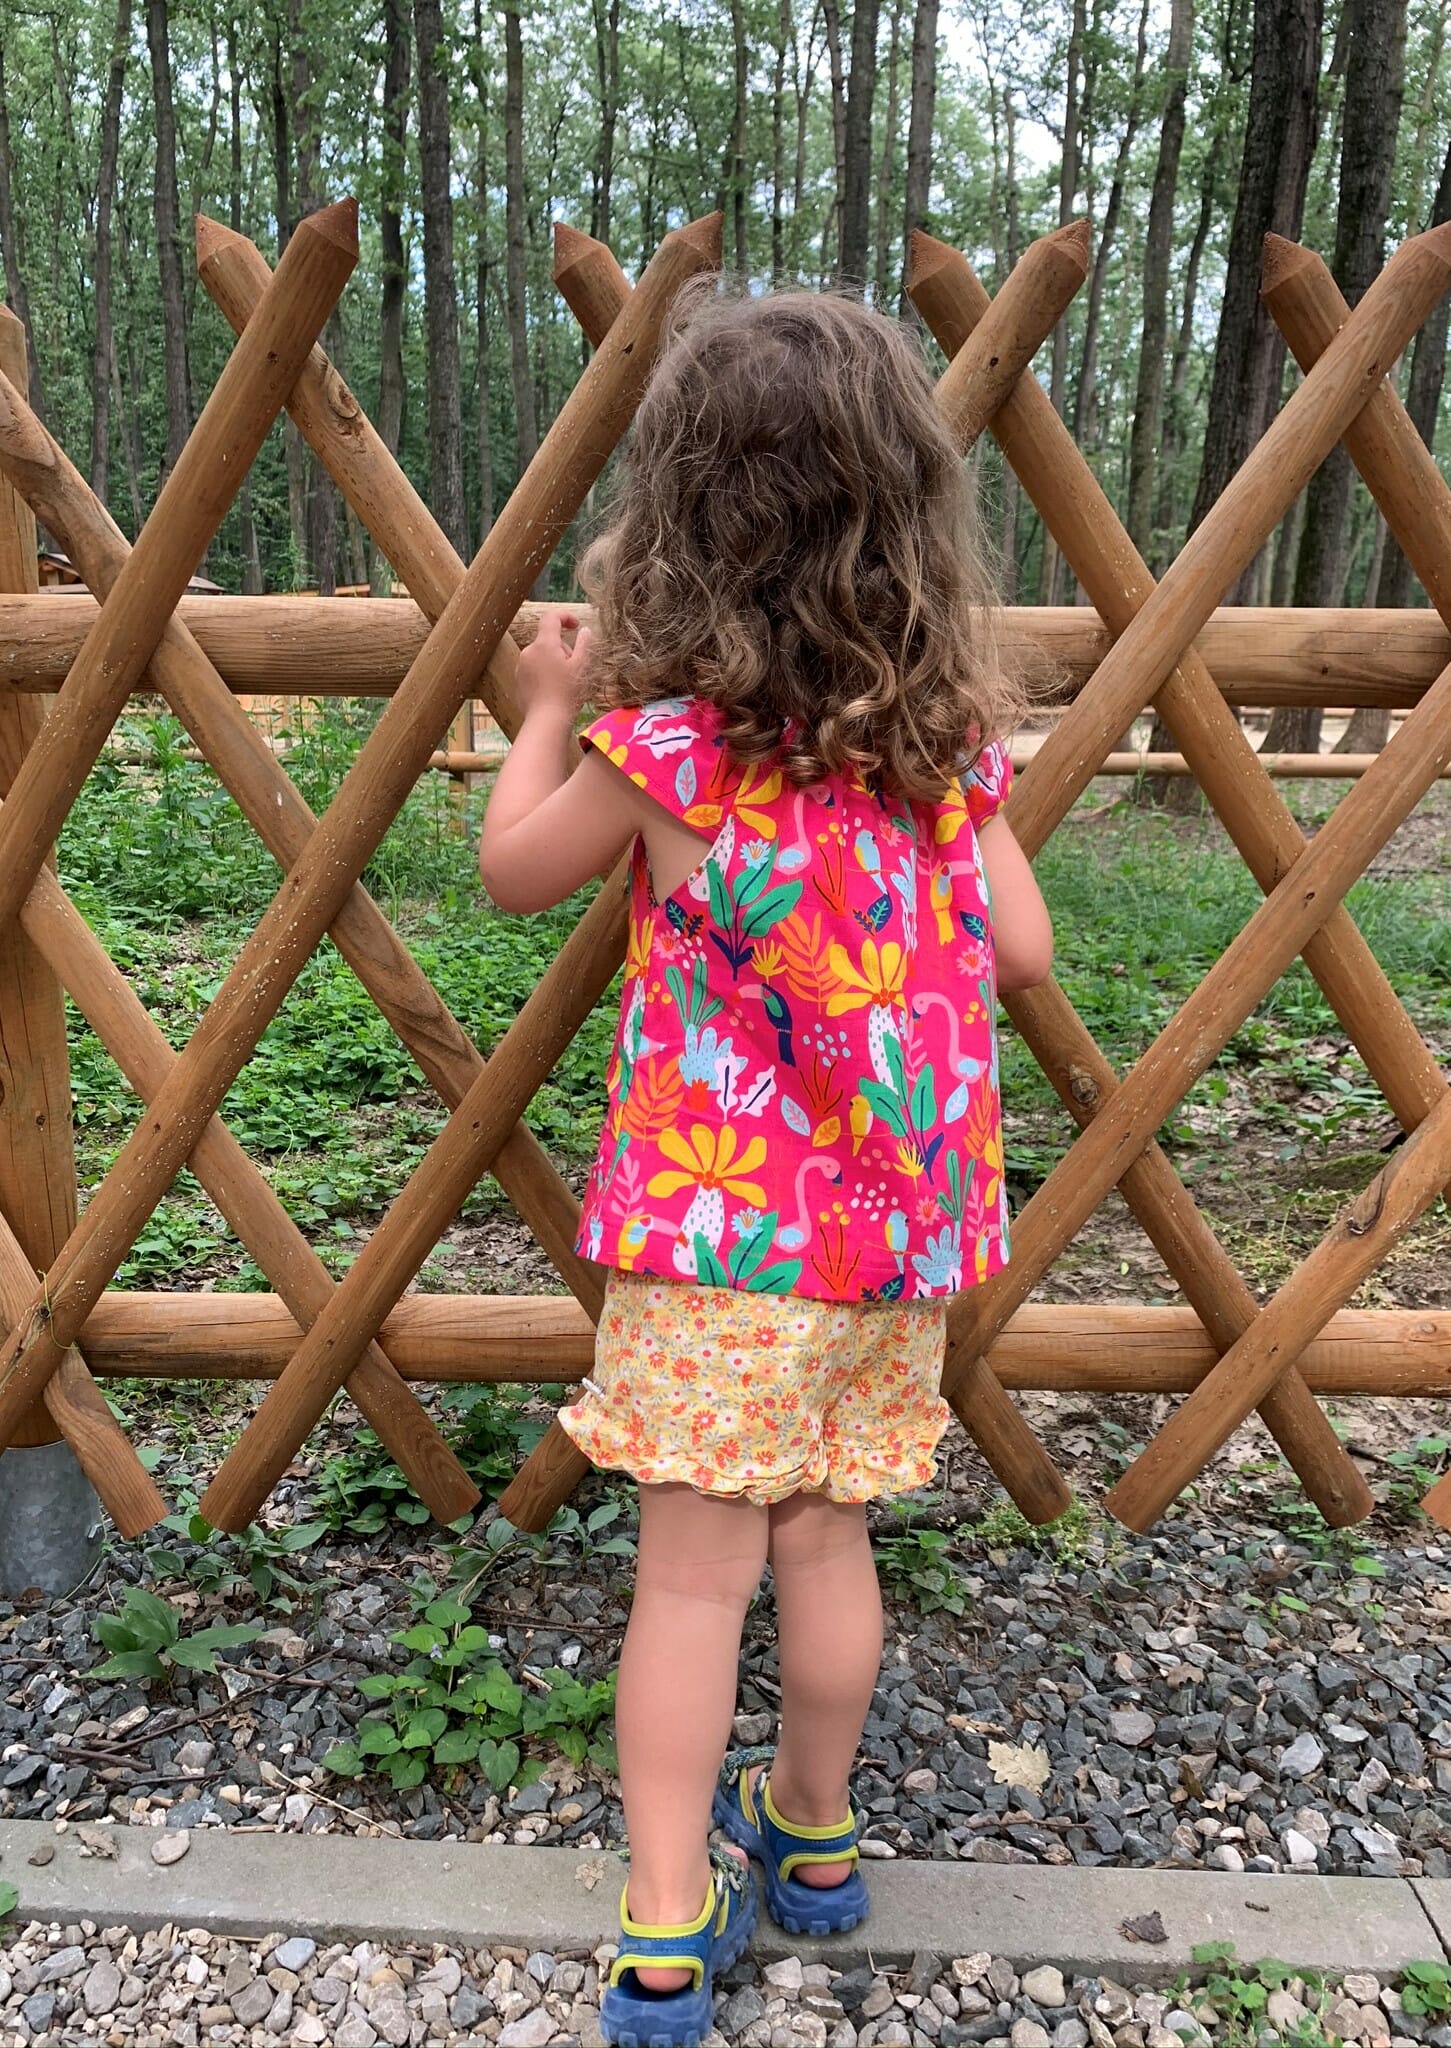
And speaking of wild… here’s how my own flutter sleeve top turned out! I took my little girl on a fun day out at a forest adventure park, and she wore her new peasant top the whole time – comfy and totally adorable.
How to modify the flutter sleeve peasant top pattern to make it bigger
A lot of you have asked how to resize this pattern for older kids, and it’s not something I can easily explain in a quick comment – so here’s a simple drawing to help you out! Just a heads-up: the pattern piece is meant to be cut on the fold, which means the piece you’re looking at is only 1/4 of the full top.
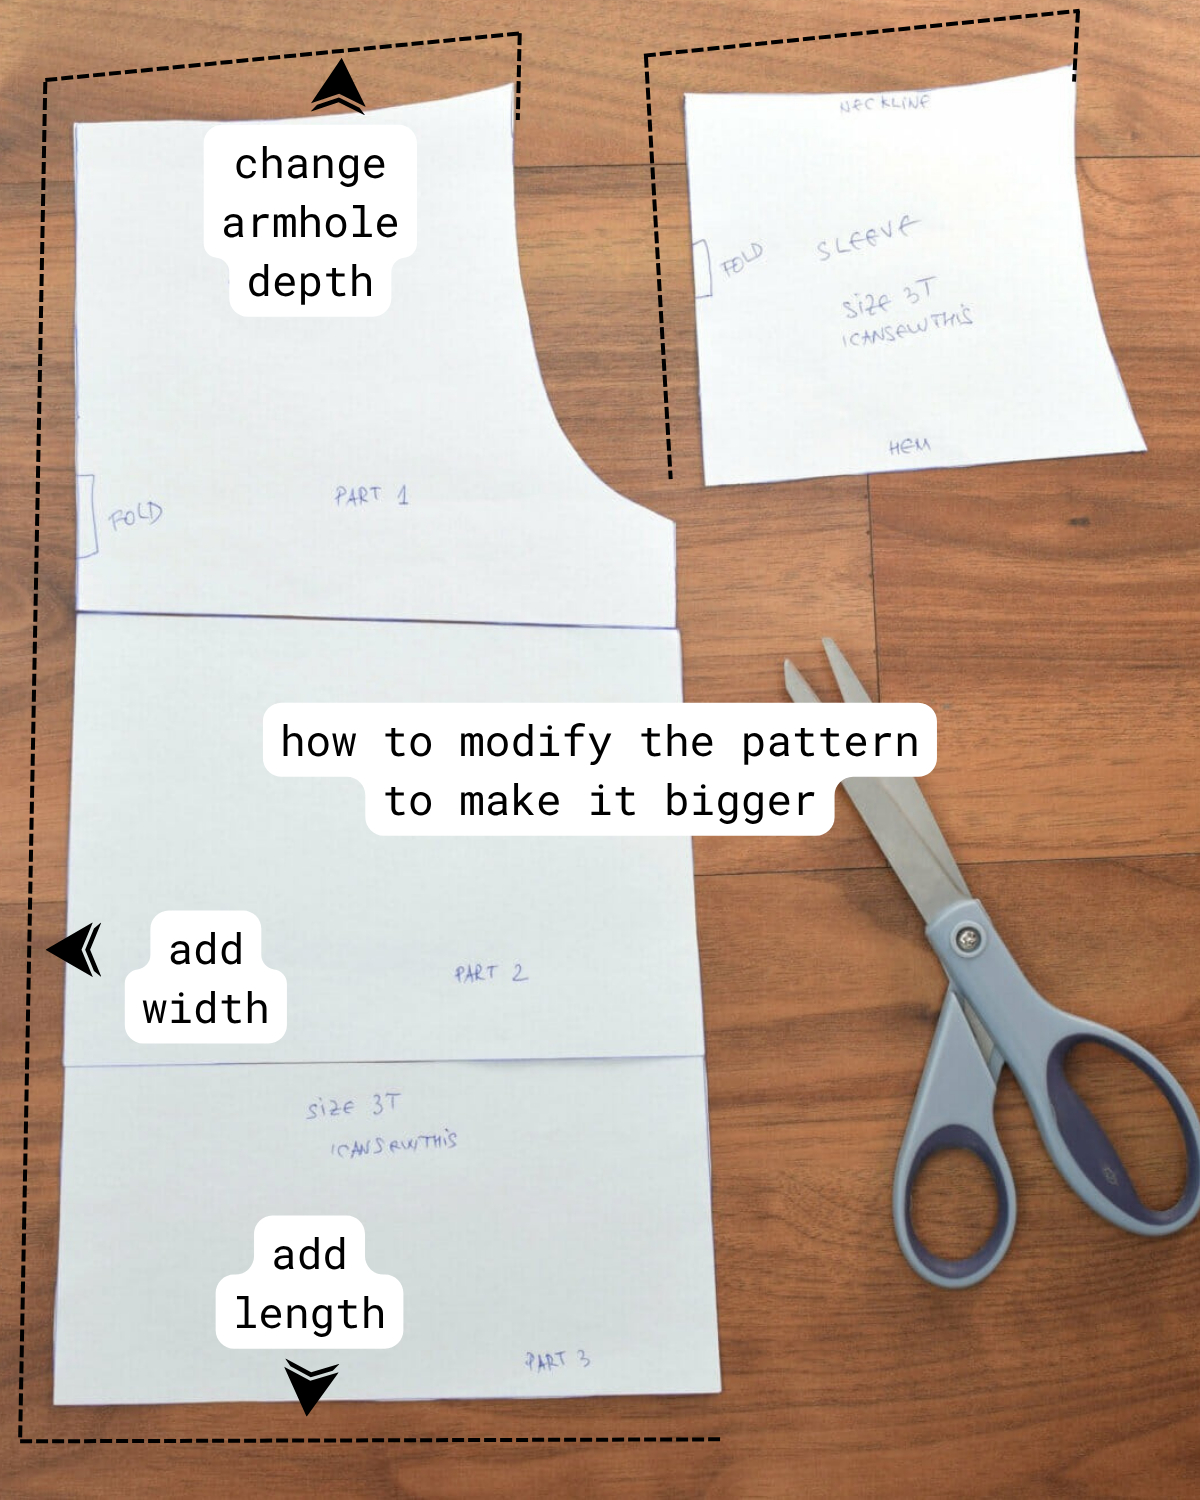
To size it up, you can simply add width along the leftmost edge. For example, if you add 1/2″, the total width of the top increases by 2″. Add 1″, and it’s 4″ wider overall. You don’t need to add as much to the armhole length as you do to the width – just a little extra height is enough.
Make sure the finished top is at least 4″ bigger than your child’s chest for comfort, or even 5-6″ if you want some growing room. You can also compare it to a top that already fits well.
Want it cropped? It’s super easy to change the length. Want to turn it into a dress? Go for it! If you’re turning the top into a dress, make sure there’s about 6″ of ease around the chest for comfort. That means your pattern piece (measured straight across under the arm) should be 1/4 of the chest measurement plus 1.5″.
And if you’re making this for a baby, modify the same variables – but in reverse to size it down.
You Might Also Like:
- The easiest way to draft a peasant top pattern – this shortcut will save you so much time!
- Adorable DIY patchwork skirt for girls (any size)
- Free girls’ tulle dress pattern and tutorial – no zippers, no buttons, just soft layers and twirl factor.
- How to sew a stylish double gauze peasant top for girls – lightweight, breathable, and perfect for summer.
- Make a long sleeve peasant top for little girls – great for cooler days, and yes, there’s a free pattern too!
Hello, I am fairly new to sewing so my question is Do you cut 2 of the Top part of the pattern on the fold? Same question for the sleeve part, 2 on the fold?
Thank you
Hi Janet,
That’ right! This is all you need to sew this top, and all 4 pieces are cut on the fold – https://static.icansewthis.com/2020/06/flutter-sleeve-peasant-top-for-girls-with-free-pattern-2-2048×1455.jpg
Hi! Thanks for the super cute FREE pattern! I so appreciate you sharing it with us. Quick question: would you be open to putting a one-inch test square on the patterns so I can make sure it printed correctly? Thanks for considering!
Je me suis inscrite pour télécharger le PDF gratuit, mais je ne le trouve pas. Comment puis-je obtenir ce modèle pour l’imprimer et le réaliser ? Merci !
Hi!
Thank you for sharing this pattern and tutorial. They are both very easy to follow and clear.
I made the top for my three-and-a-half-year-old daughter, but unfortunately it turned out to be a little short and slightly narrow (fortunately it fits her younger sister, so this is not a problem).
How can I modify the pattern to make it fit the older one?
Thank you,
Elena
Hi Elena, thank you so much for giving this pattern a try and for your kind words! I’ve just added a new paragraph to the post, along with a simple drawing to help explain the sizing. Hope it makes things clearer!
Thank you very much!
Elena
Very sweet top, thank you! I have the instructions, but where do I download the pattern? I did register.
I keep signing up to get the free pdf download but it doesn’t work. Please tell me how do I get this pattern so I can print it and make it? Thank you! Cathy
Does this pattern have seams and turn down for neck elastic included or do you add on wnen cutting out.
..if included..how much have you allowed. Thank you
Hey Dizee,
Yes, the pattern has a 3/8″ seam allowance included, I forgot to mention it in the post, sorry!
This is an adorable top. I love it!
I was wondering if there is a way to figure out how to make this larger (for up to size 8-10 or smaller like a 18mos?
Thank you
Thank you, Shannon!
Yes, there is! You just have to use the armhole curve of an existing t-shirt. Please see my latest blog posts – this is the method I used, explained in detail https://icansewthis.com/peasant-top-pattern/ and here I show exactly how I made 4 different tops https://icansewthis.com/peasant-top-pattern-ideas/
Hope this helps!
Honey your tutorial is by far the best darn one yet! And believe me I have started several and couldn’t understand their directions so had to rig the project up best I could. Obviously I’m a beginner besides a high school class 20 years ago. Lol so thank you for the visual and great instructions and the time u put in !!!xoxo
Amber, thank you so much! Your amazing comment made my day! Much love to you!
Also, have you seen my latest posts? I think I’ve finally cracked the code – a cute little shortcut to make peasant tops (with flutter sleeves, off-shoulder, or any style, really) in any size you want! I’m so excited about this finding! I can only hope I managed to explain things clearly there as well.
Thanks for the pattern . I haven’t sewn in years . This was easy and it has inspired me to do more with my old hobby. Made this one for my youngest granddaughter.
Hey Susie,
Sorry I missed your comment, somehow… Thank you so much for the kind words! Sewing really is a great hobby. <3
Thank you so much for this amazing pattern and tutorial! It’s so simple I’ve made 3 different dresses for my little two year old already! I’ve even made one with ruffles at the bottom of a dress! I’m so excited to make more and get even more creative with your pattern. Thanks so much again!
Thank you very much , it is just what I am looking for. THANKS. Have a beautiful day
??❤️
I wish this was a size 2 and measurements for a dress.
Hi Barbara,
So, this pattern is for size 3, and you want a size 2. I would simply try to scale down and print the pattern at maybe 98%. 🙂 Take this with a grain of salt, of course, but I tried this method many times with different patterns when my kids were smaller (I didn’t make spectacular changes to any pattern, as in going from 100% to 73%, but a difference of (+/-) 2-3% is sometimes all you need).
I don’t know how to professionally grade patterns, I’m sorry – I simply draw mine the old-fashion way, the pencil on a paper sheet. I’m just winging it, most of the time. The peasant top pattern is very forgiving anyway. Also, the approx. length for a 2yo toddler dress is 19 inches from shoulder to hem (you can look for size charts on Google). I hope you make that dress – I’m keeping my fingers crossed for you. 🙂
Very lovely and I love the fabric. What was your source for the fabric. Adorable
Hi Karin,
Thank you! 🙂 I’m from Romania and I usually buy from local fabric stores, albeit online. I searched for this particular fabric, and I can’t find it online anymore – this is the only place where it appears https://www.mapetitemercerie.com/en/poppy/82970-poppy-poplin-cotton-fabric-fuchsia-pink-tropical-x-10cm.html but it’s no longer in stock. It’s made by a fabric designer named Poppy.
Thank you so much for this pattern it is simply gorgeous, easy as Thank again
just wondering how much elastic do you put into the neck. I love this pattern how do you downsize love to make it for my 18month granddaughter. I’ve only just starting sewing
I forgot to ask you if you know how to resize it like from a 3 to a 5 or7
I took one of my daughter’s size 7 shirts with a similar silhouette and extended the bodice pattern out to that s
hirt’s seams and added a couple of inches to the flutter sleeves. I added 1 inch of elastic for every size up (and I think I could have addes 2 inches for every size up). It turned out really well and it was very easy. Good luck!
Hi, I love the pattern. I don’t have any little girls & my granddaughter is 3o years old so because I love to sew & I have all kinds of material because i sew for a dance group but since I am quarantined I am not making costumes so I have been downloading little girls dress patterns and sewing them up & giving them away to anybody that has a child that it will fit. It is really good for me as it keeps me busy & I like to create things. So thank you for your pattern.
Hi all! Thank you so much for your comments.
I made this top for my 3-years-old daughter – she is 36 ½ inches (93 cm) tall right now.
Unfortunately, I don’t know how to make digital patterns, at least not yet. I usually draw my patterns on A3 size sheets (that’s my oldest daughter’s drawing block) then I transfer them to A4 sheets using a simple pen, then I scan the pages in one document so that you can download and print them at home. It is pretty rudimentary, I’m fully aware, and I’m working on it.
I’ll check the armhole line, and I promise to update the pattern ASAP.
What size is the cute top for. Also there is no pattern measurements to cut out for the top.
Hi Dolores,
I updated the pattern, this is how it should look like once assembled:
https://static.icansewthis.com/2020/07/flutter-sleeve-top-pattern-aseembly-889×1024.jpg
It’s for 3-years-old girls, my daughter is exactly 36 1/2″ / 93cm tall right now.
I downloaded the pattern, but it does not match the pictures. The bodice pieces do not have the curve cut out for the armholes. It is really cute; would love to make one for my niece, but I don’t know how to cut out a curve for the armhole.
Hi Barbara,
I updated the pattern, this is how it should look like once assembled:
https://static.icansewthis.com/2020/07/flutter-sleeve-top-pattern-aseembly-889×1024.jpg
I love that top. I’m sure Mom made some of these for me, long, long ago. Approximately how much would I need to increase for a 5 or 6-year old? She definitely needs breezy tops in the South.
I just love this little top. I would like to make it for my granddaughter . I am having trouble with the PDF file. The sleeve come out ok, but the body is just a small rectangle . Could you send me the dimensions for the body with cut out for the arm holes?
Thank you
Laurie Pangborn
Hi Laurie,
I updated the pattern and the article. This is how the pattern should look like once assembled. https://static.icansewthis.com/2020/07/flutter-sleeve-top-pattern-aseembly-889×1024.jpg
I don’t know how to give you those dimensions, I’m sorry… I usually just draw by hand and place my pattern against existing items of clothing. Then I do some basic measurements on my kids, like chest size, shirt length etc., to make sure they won’t outgrow my handmade clothes too fast, otherwise I’d feel like I wasted beautiful fabric and I would hate that.
What a cute top! And I adore your fabric choice. Will have to make one of these for my little girl!