
Sewing with stretch fabric can feel intimidating when you are used to woven cottons. One wrong move and your seam looks like a wavy rollercoaster, the hem tunnels into a tight tube, or the stitches pop the first time you pull the shirt over your head.
Knits do not have to be a headache. Once you understand how elastic fibers behave under a needle, sewing stretch fabrics is faster and more forgiving than sewing wovens because knits do not fray. You can easily whip up comfortable t-shirts, loungewear, leggings, and cozy dresses right on your regular sewing machine.
Here are the best tips, tools, and essential stitches to help you conquer stretch fabrics and make your DIY garments look clean and professional.
Machine setup and needle essentials
Ballpoint vs stretch needles for knit fabrics
Never sew stretch fabrics with a standard universal needle. Universal needles have sharp points that slice straight through delicate knit loops, causing tiny holes, runs, and skipped stitches.
- Ballpoint needles (Jersey): Use these for standard knits like cotton jersey, french terry, interlock, and sweater knits. The rounded tip gently slides between yarn loops rather than puncturing them.
- Stretch needles: Use these for high-elasticity fabrics containing spandex, elastane, lycra, power mesh, or scuba. Stretch needles feature a specially shaped eye and scarf that prevent skipped stitches on slippery, elastic fibers.
Why polyester thread is essential for sewing knits
Skip standard 100% cotton thread when working on stretch garments. Cotton thread has zero natural give, which means your seams will snap the moment the fabric stretches over your body.
Always use high-quality all-purpose polyester thread. Polyester offers built-in tensile strength and natural elasticity, allowing the thread to flex and recover alongside your fabric without breaking.
How a walking foot prevents wavy seams
Knit fabrics tend to drag under a standard presser foot. When the feed dogs pull the bottom layer faster than the top layer moves, your seam stretches out permanently into an unsightly wave.
A walking foot (or even-feed foot) solves this problem by pulling the top fabric layer at the exact same speed as the lower feed dogs. It eliminates dragging, prevents puckering, and keeps matching stripes or hems perfectly aligned.
Stabilization and fabric control
Using stay tape and interfacing on stretchy seams
Stretchy fabrics need extra support in areas that handle body weight and movement, like shoulder seams, necklines, pocket openings, and waistbands.
Iron a narrow strip of fusible knit stay tape or lightweight fusible knit interfacing along your seam allowances before stitching. Knit stay tape stabilizes the seam so it holds its shape permanently without restricting movement.
Stabilizing rolling knit hems before you sew
Lightweight jersey edges love to curl up tightly toward the right side. Trying to fold and pin a rolling hem can drive any sewist crazy.
Use a light mist of spray starch or a strip of wash-away double-sided basting tape along the hem edge before stitching. The tape flattens the curl, stabilizes the fabric under the needle, and washes away completely in water.
Why you must test stitches on fabric scraps first
Every knit fabric has a different stretch percentage and recovery rate. A stitch setting that works great on heavy ponte roma will cause thin rayon spandex to bunch up.
Always cut a small swatch of your project scrap, fold it in half to mimic your actual seam, and test your stitch length, width, and tension. Grab both ends of your test seam and give it a firm tug. If the thread pops or the fabric ripples, adjust your settings before touching your main garment.
Best stitches for sewing stretch fabric on a regular machine
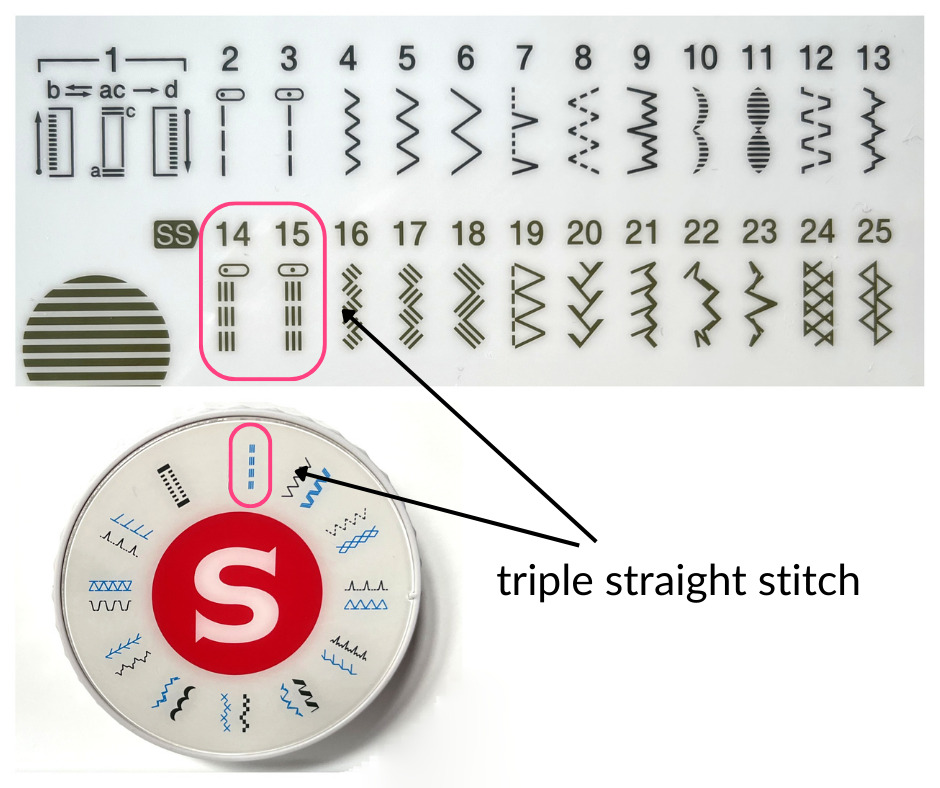
1. Triple straight stretch stitch
If you need maximum strength on tight-fitting seams, the triple straight stitch is your best tool. The machine stitches forward, backward, and forward again, locking three threads into every single point.
This creates an unbreakable seam that stretches with significant negative ease, making it ideal for high-stress areas like crotch seams, athletic wear, and tight armholes. Keep in mind that this stitch uses a lot of thread and is tough to unpick, so double-check your fit before using it.
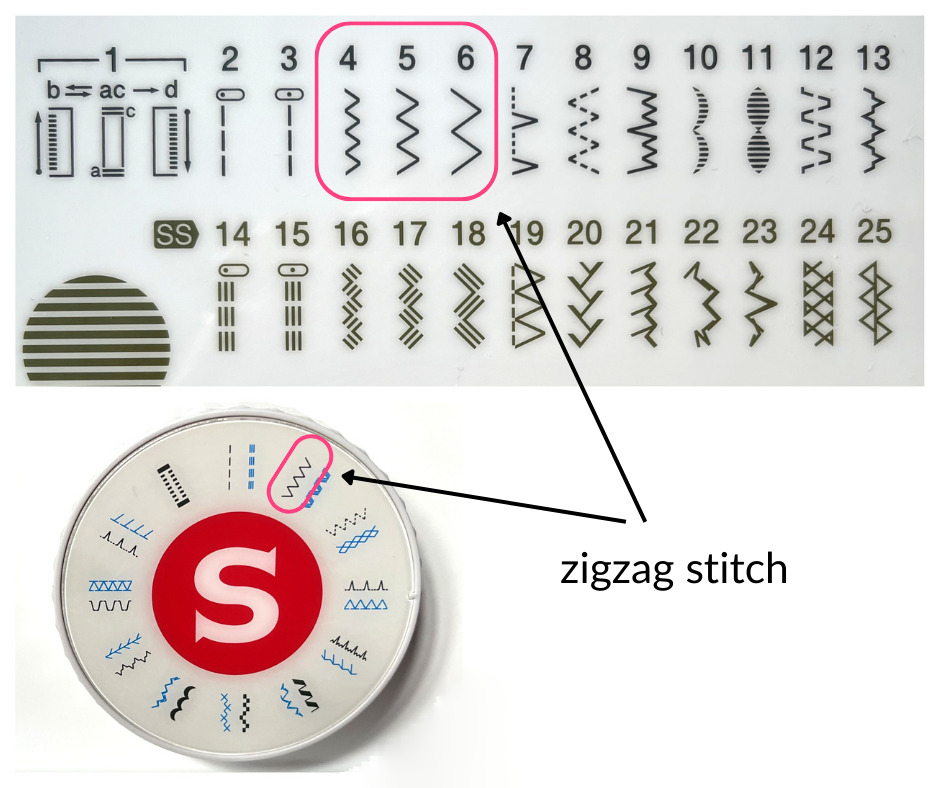
2. Standard zigzag stitch
If your machine does not have fancy stretch settings, the standard zigzag is a reliable, beginner-friendly workhorse.
Set your machine to a narrow zigzag (around 0.5 to 1.0 mm width and 2.5 to 3.0 mm length). This creates a seam that looks almost straight from the outside while leaving enough diagonal zig-zag slack inside to flex when pulled. You can also use a wider zigzag to finish raw seam allowances neatly if you do not have a serger.
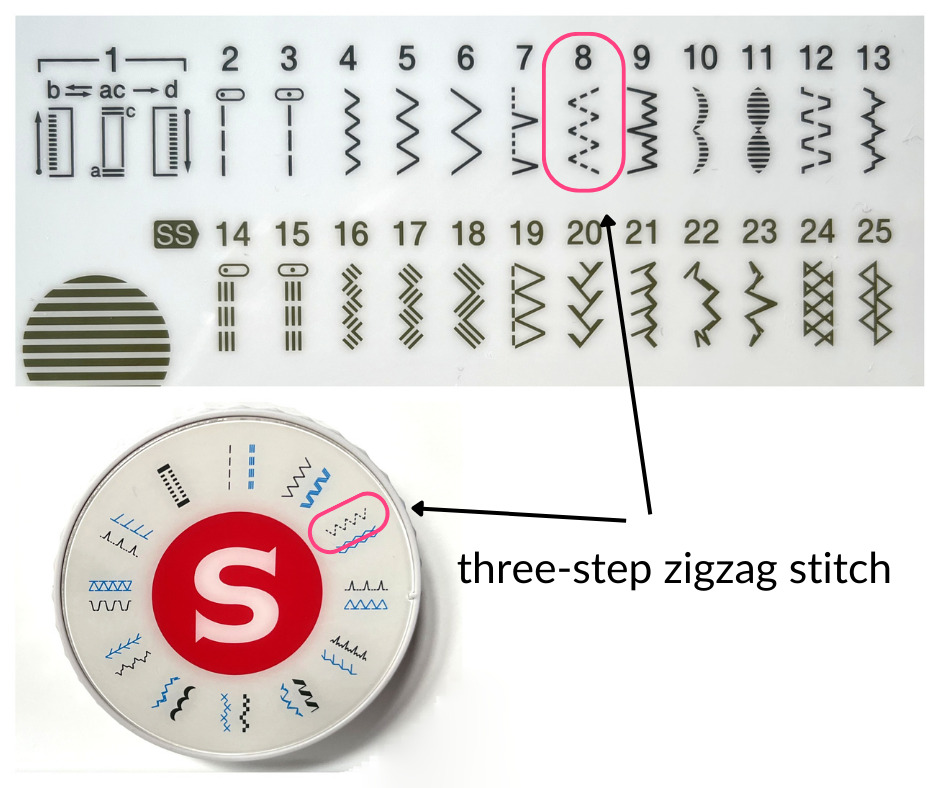
3. Three-step zigzag stitch
When sewing elastic onto waistbands or hemming lightweight knits, a regular zigzag can pull the fabric inward, creating an unsightly ridge called tunneling.
The three-step zigzag stitch fixes this issue. Instead of bouncing back and forth in single long jumps, the needle takes three tiny stitches along each diagonal path. This distributes thread tension evenly, stops fabric tunneling, and keeps the seam laying flat against the body.
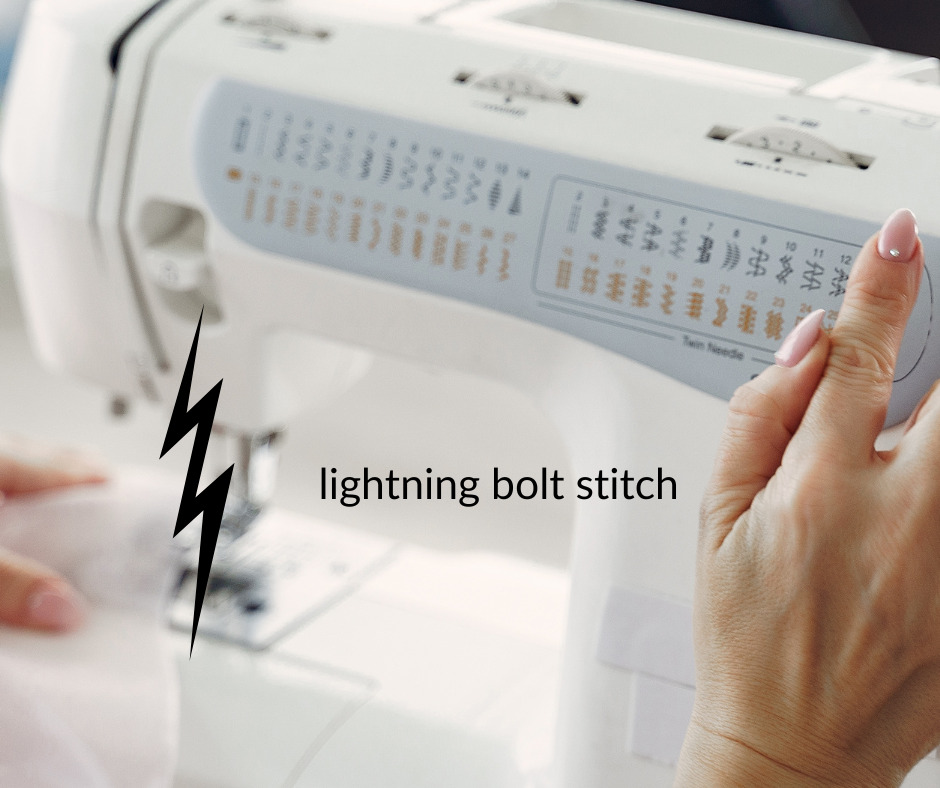
4. Lightning bolt stitch
The lightning stitch (stretch stitch) looks like a very narrow, angled zigzag with a slight forward-and-back motion. It is specifically designed for assembling stretch garment seams.
Because the stitches are angled closely together, the seam looks like a straight line from the outside but retains full elasticity. If your machine features this stitch in its menu, it is one of the cleanest options for assembling knit t-shirts, dresses, and leggings.
When to use a serger or overlocker
A regular sewing machine can handle any knit project with the right stitch selection, but an overlocker or serger speeds up the process significantly.
A serger cuts off raw edges, sews a durable four-thread stretchy seam, and finishes the fabric edge all in one single step. The differential feed dial on a serger also lets you dial in the exact feed rate to prevent wavy edges on tricky knits.
Sewing with stretch fabric opens up a whole new world of comfortable, wearable DIY fashion. By pairing the right stretch needle with durable polyester thread, using a walking foot, and picking the right flexible stitch, you will eliminate popped seams and puckers for good. Grab a scrap piece of knit, test your machine stitches, and start making your next favorite handmade garment today.
You might also love:
- Sewing tips for beginners that will change your life
- 11 best beanie hat sewing patterns for the whole family
- Cute shirred top sewing patterns you can make today
- Quick back-to-school stretchy headband pattern
Let’s keep in touch! You can find me on Facebook, Instagram, and Pinterest.
I’m loving all the tips. It makes you stop and go back to the basics.
Thank you!
Thank you, Susan! I think the difference between our expectations and reality in this situation is quite significant – sewing with stretch fabric is not something one should worry about, it’s actually pretty easy!
hi,
thank you for the tips, I just hope they will change the situation and help me.
This is a great tutorial! I have seen that three step zig zag but I never knew what it was for. I love these kinds of instructions but usually you don’t see this on other websites. I appreciate the fact that you make it simple but explain everything in detail such as needle, thread and even stitches. Thank you so much for the time you take to write these. That’s a lot of work for you. I will bookmark your website for future reference. Thanks again
Thank you so much for the kind words, Mary! All these stitches mentioned here are strong and stretchy, if you use any of them the serger becomes more or less redundant. Buuut, you’ll always want to test your stitches on scrap fabric, because it can take a little bit of practice to master them.