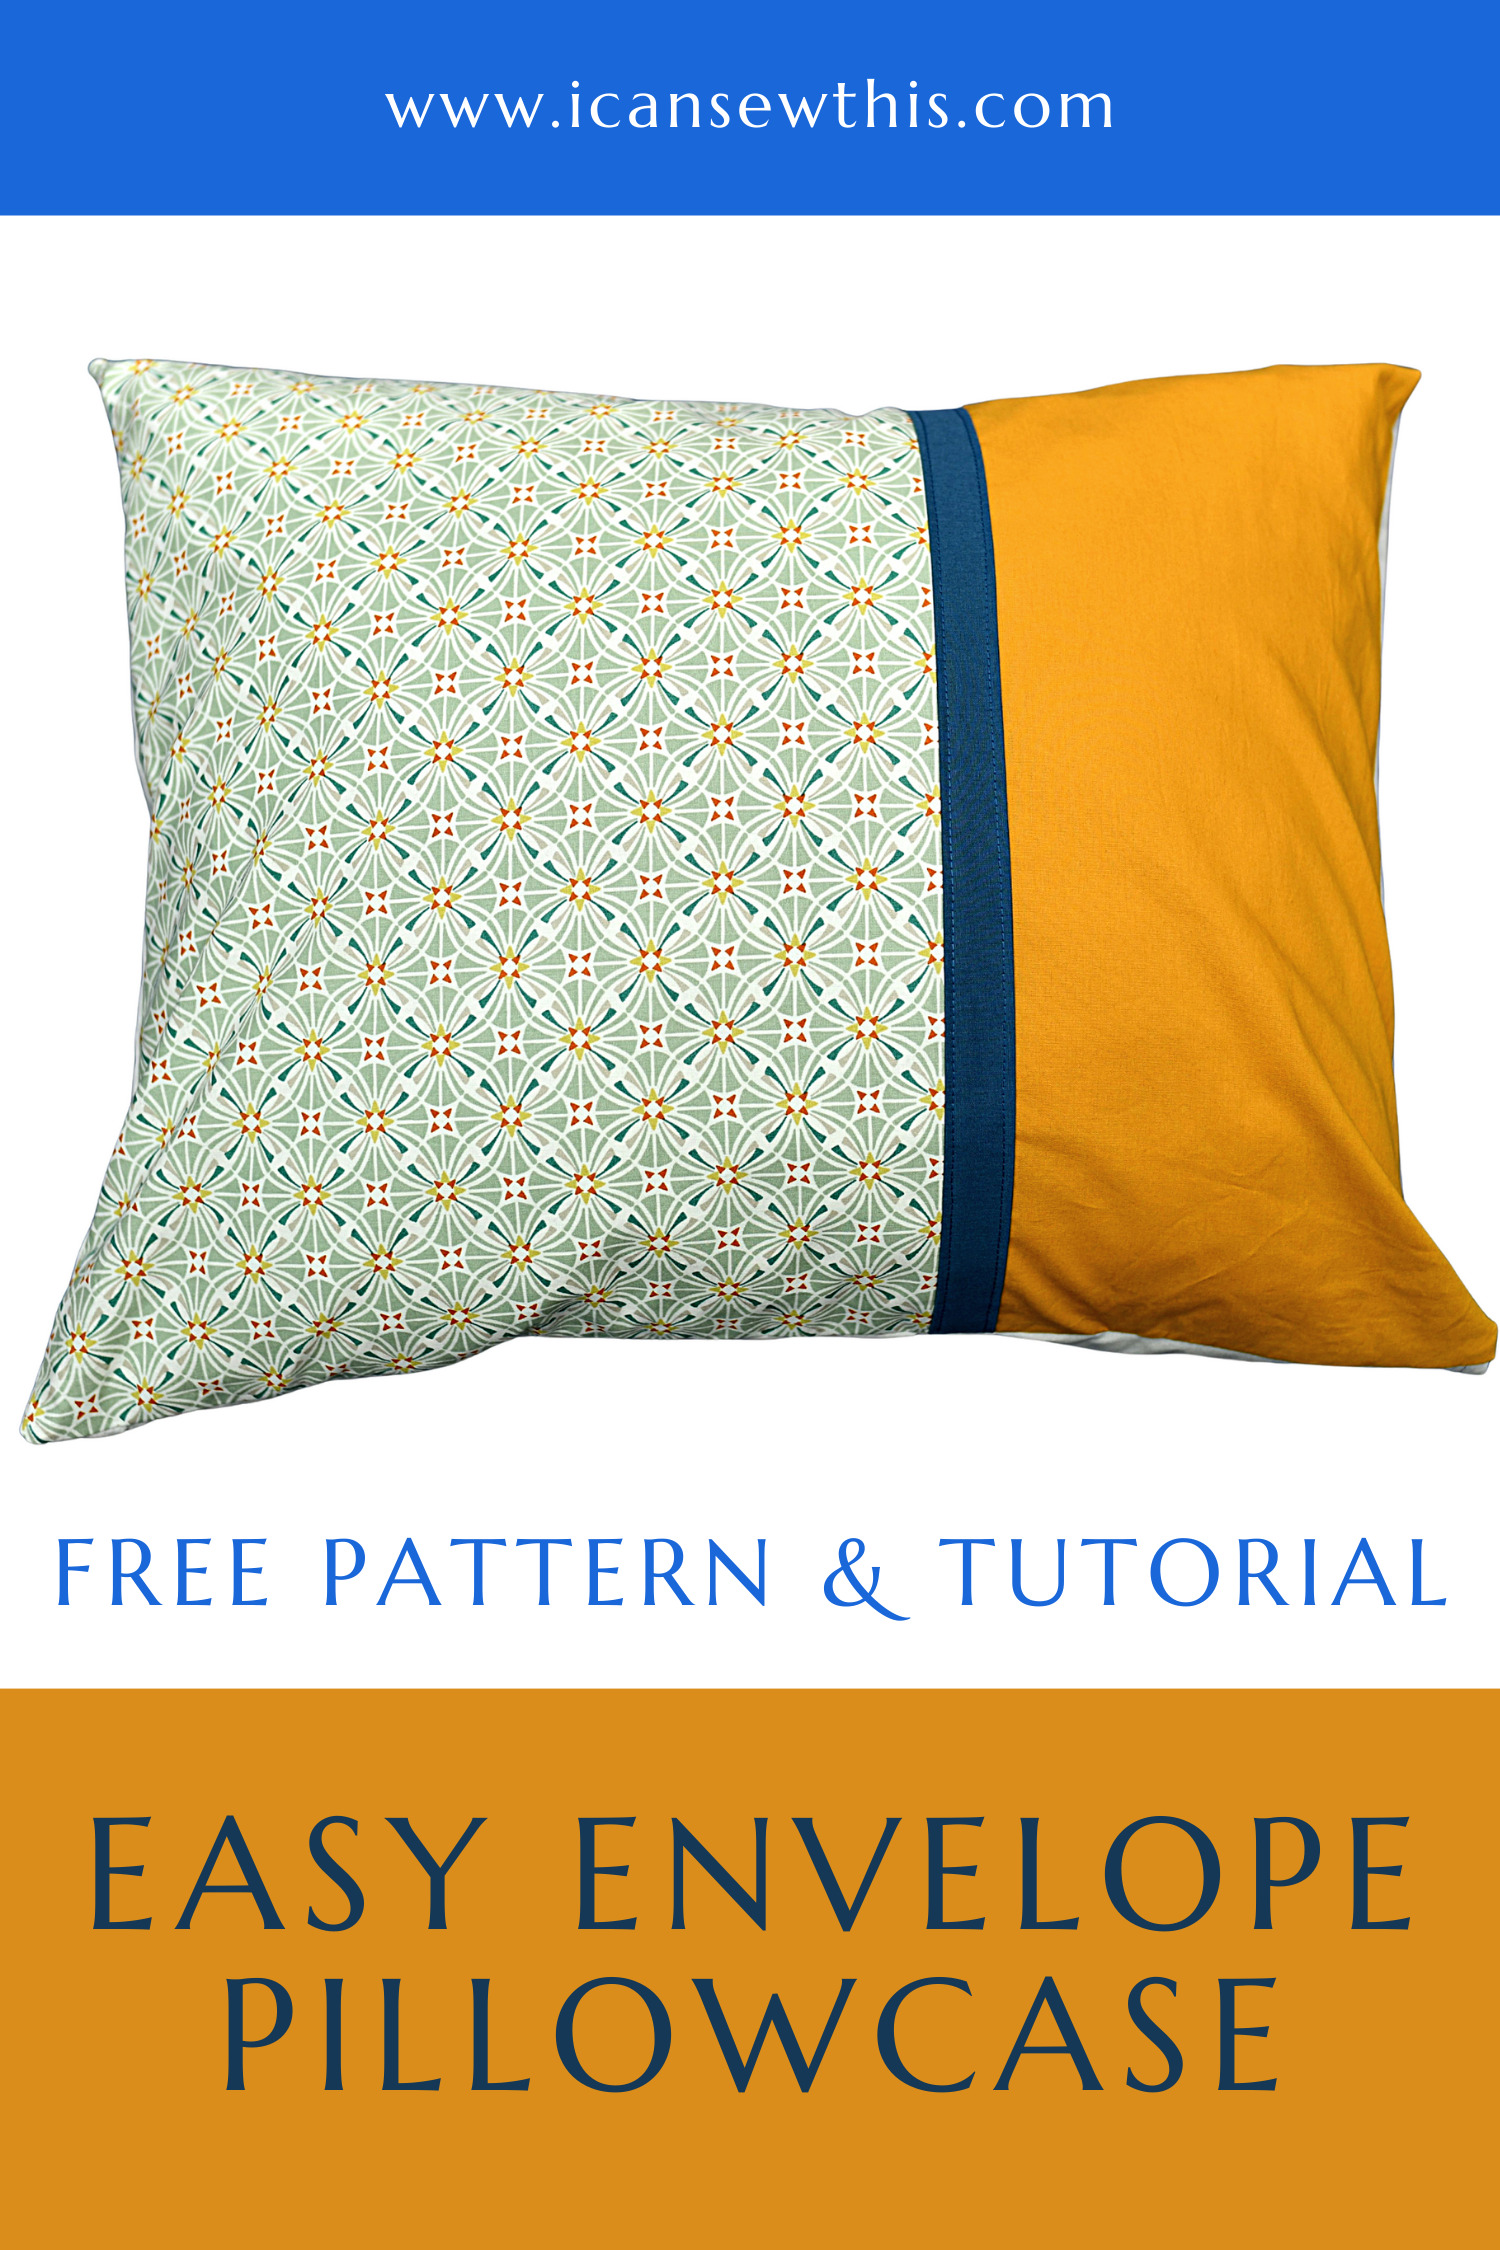
Looking for a fun way to brighten up your space? This easy envelope pillowcase tutorial is just what you need! With a free pattern, you’ll learn how to sew a beautiful pillow cover using French seams and a clever envelope closure. Making a pillowcase is the perfect beginner project!
Whether you’re new to sewing or just looking for a quick win, this project helps you level up your skills. I’ve packed this guide with all the tips and tricks you’ll need to create a beautiful three-color pillowcase.
What makes this pillowcase awesome?
- No raw edges – all seams are neatly tucked away
- Looks just as good on the inside as it does on the outside
- Features a smart envelope closure for a snug fit
- Simple to sew, even for beginners
- Includes a step-by-step tutorial with plenty of pictures
- Easy to adjust for any pillow size
Ready to get started? Follow along and let’s bring some color into your home with this fun DIY pillowcase!
Related: Top 15 best sewing tips for beginners
Why I created this pillowcase tutorial
I made this tutorial because, honestly, most other tutorials out there seem overly complicated, especially for beginners. They can leave you feeling lost and frustrated, and that’s not fun when you’re just starting out.
I’m the kind of person who needs to know why and how each step is done. Why cut the fabric this size? Why not bigger or smaller? Once you understand how the pattern works, everything else – like cutting, sewing, pressing, and trimming – becomes so much easier!
I love keeping things simple, and that’s exactly what this tutorial is all about. So, here’s my take on a beginner-friendly sewing project that’s easy to follow and fun to make!
You might love these sewing project ideas as well: Mini zipper pouch (free pattern) / How to make fitted sheets in any size you want
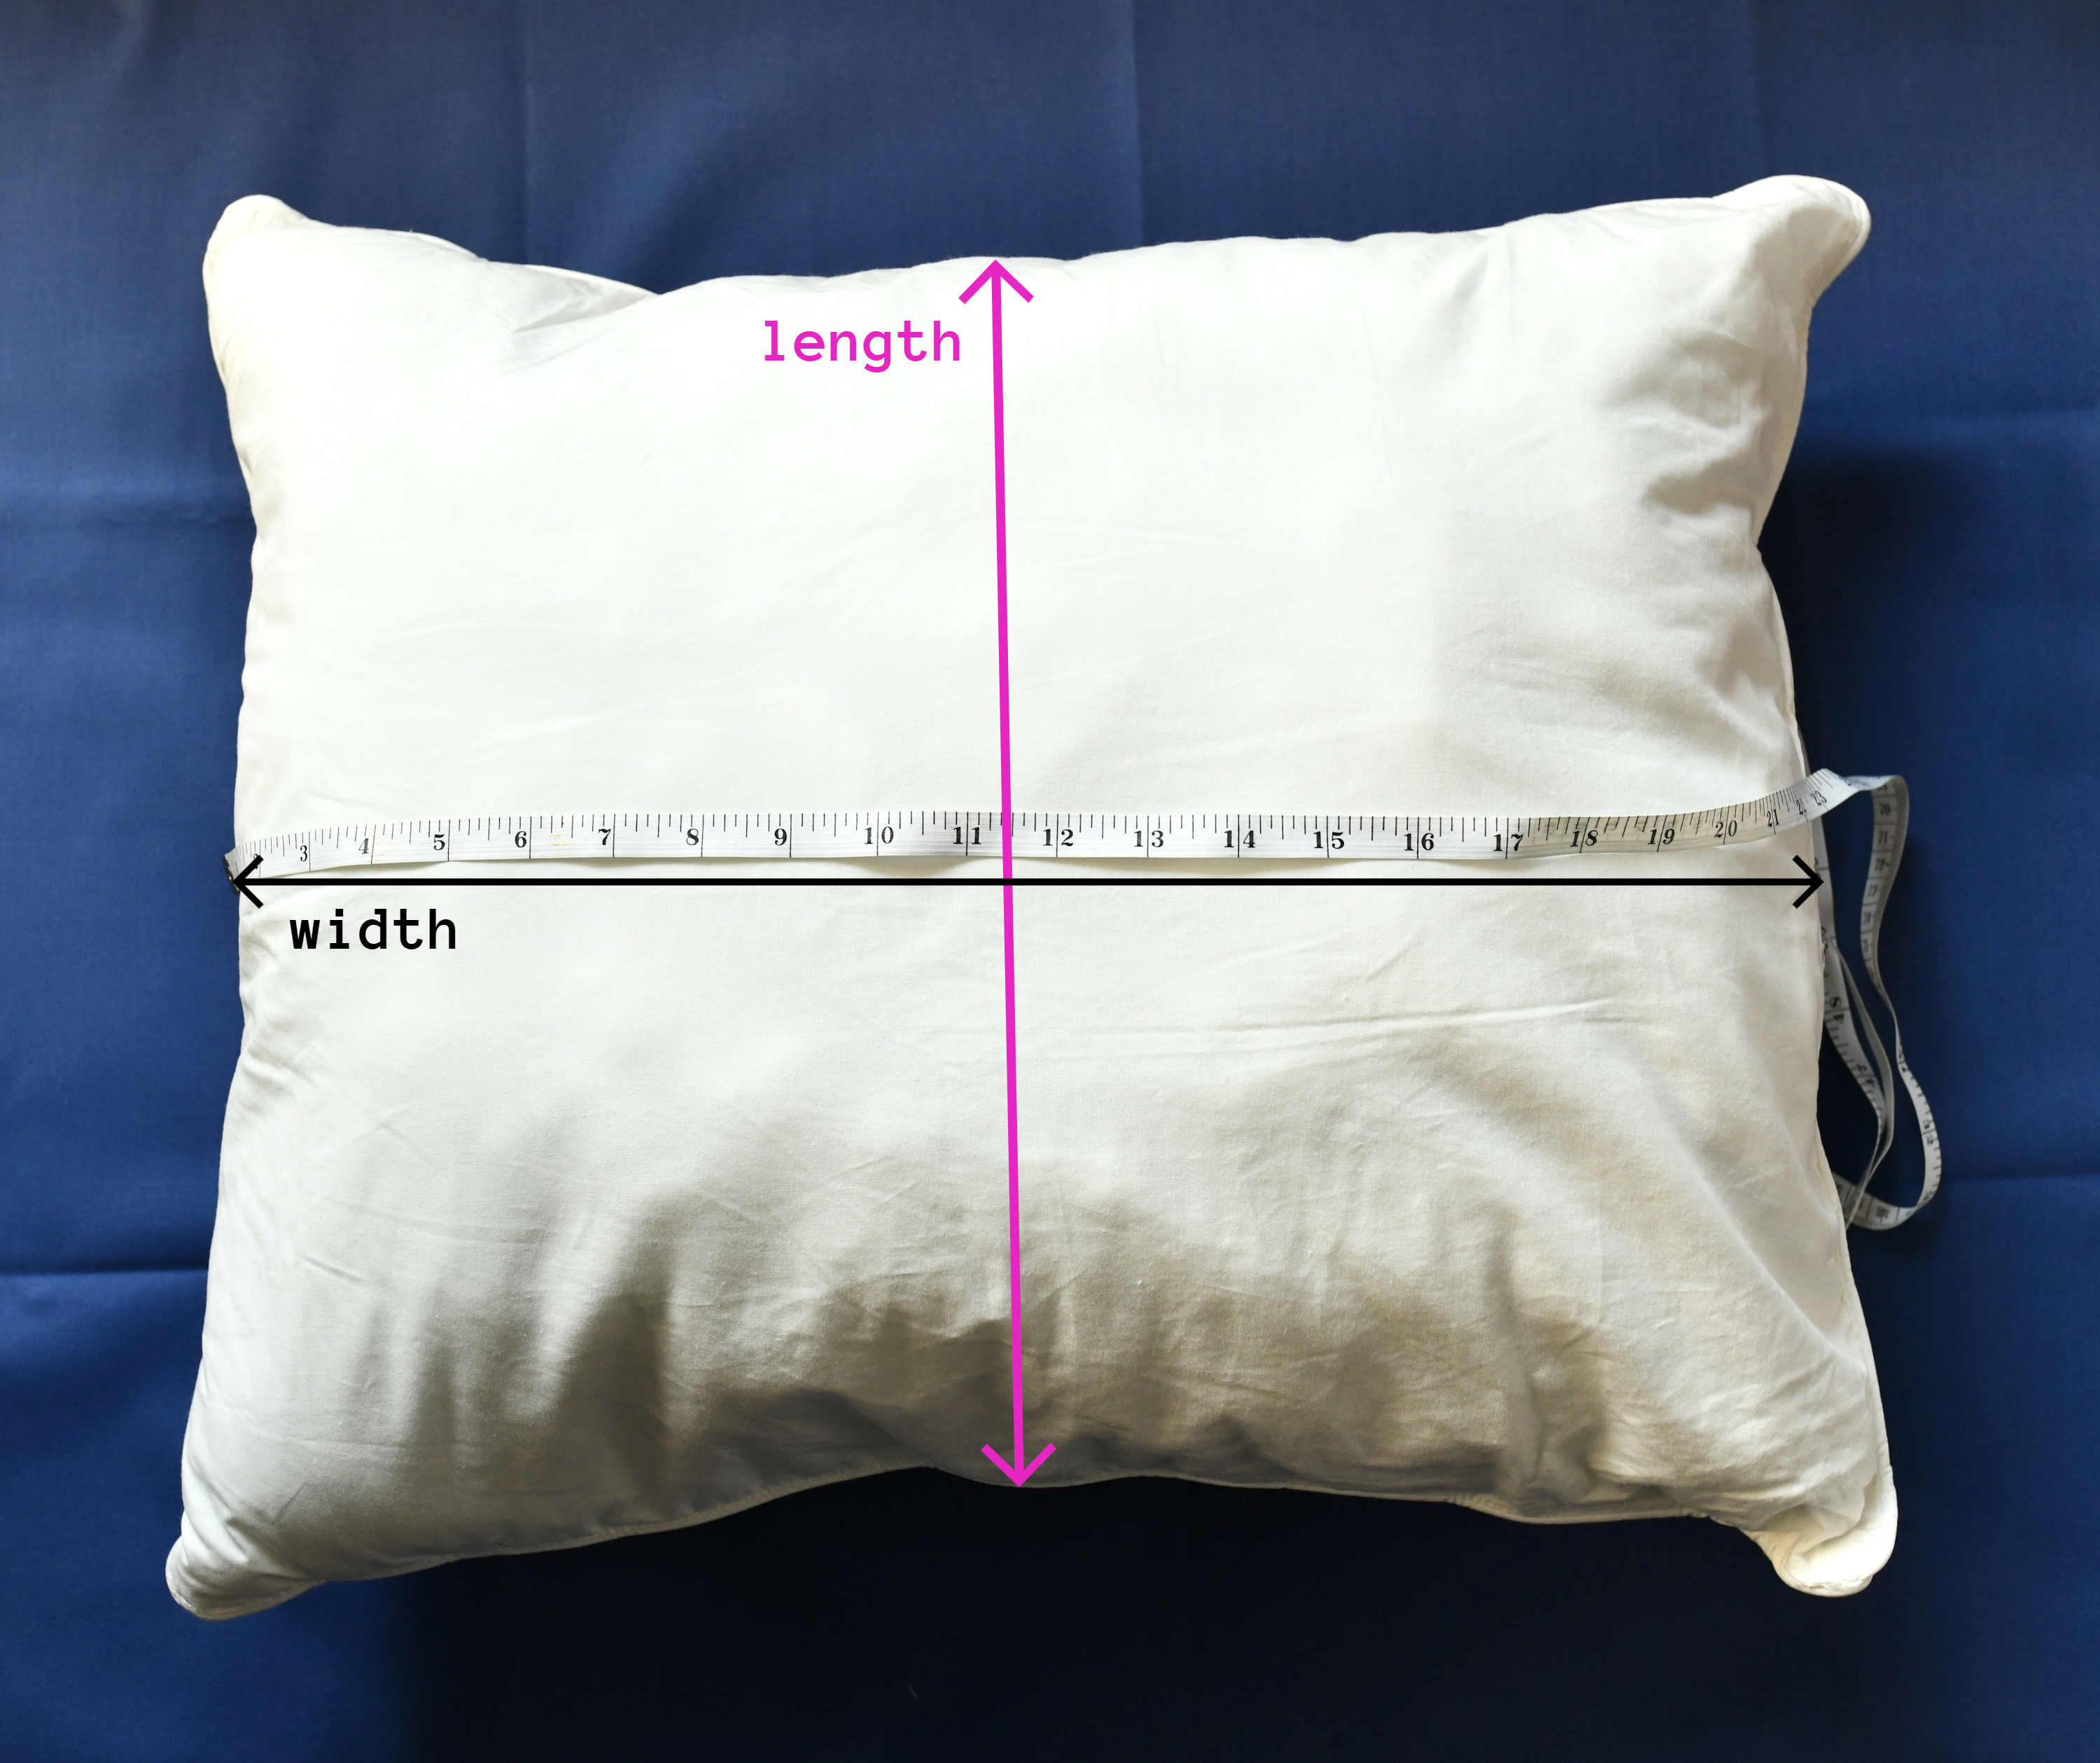
First, measure your pillow from seam to seam – my pillow measures 19 by 23 inches.
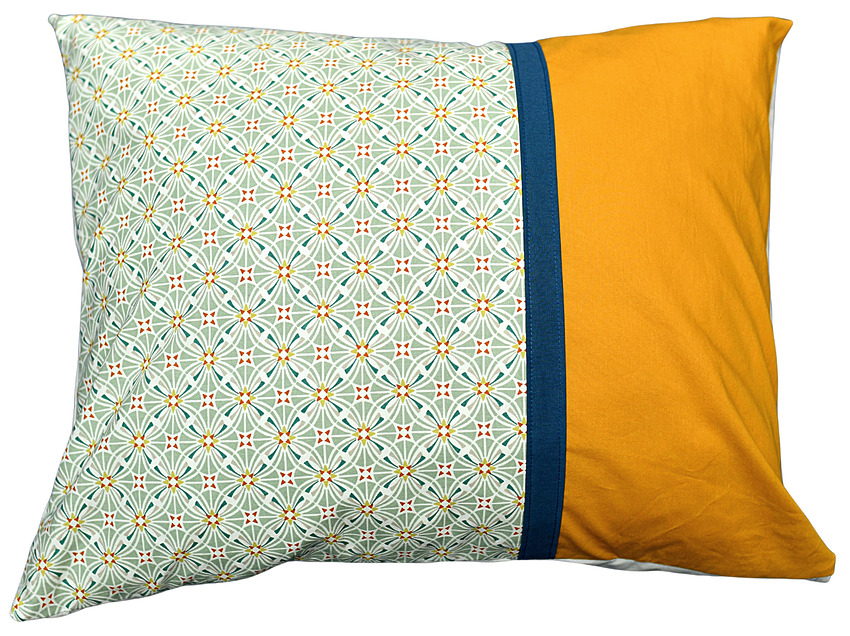
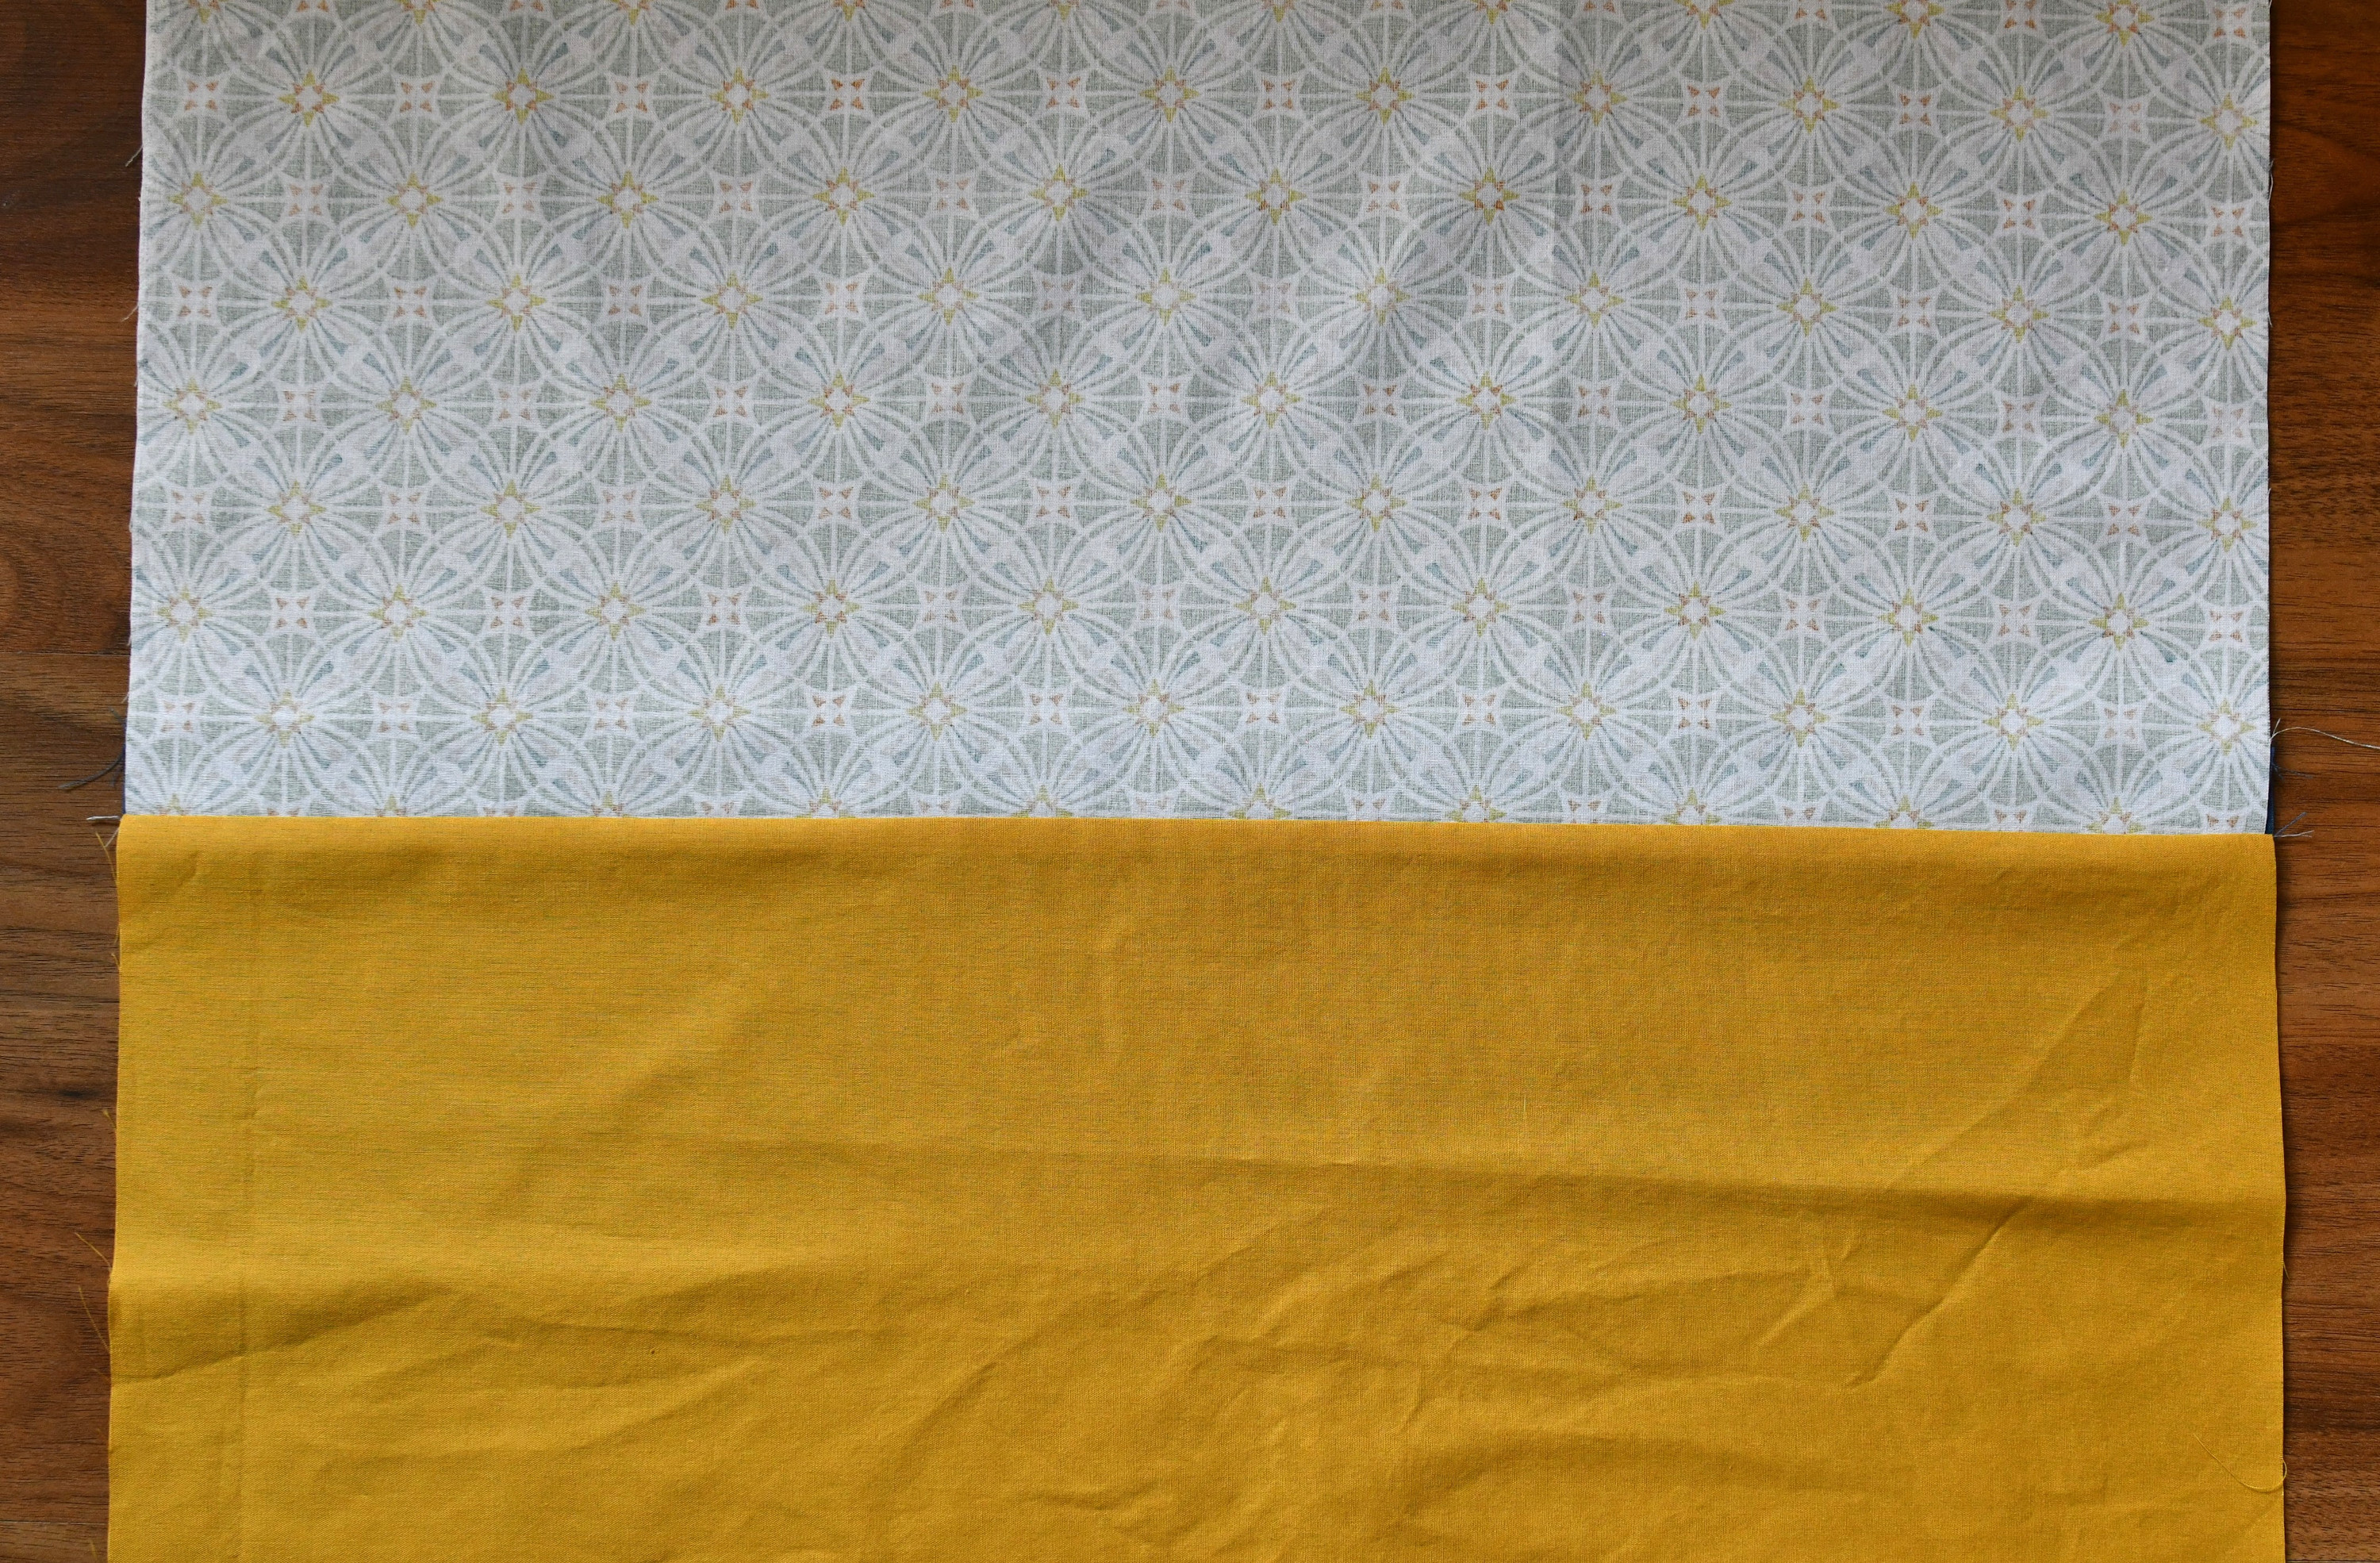
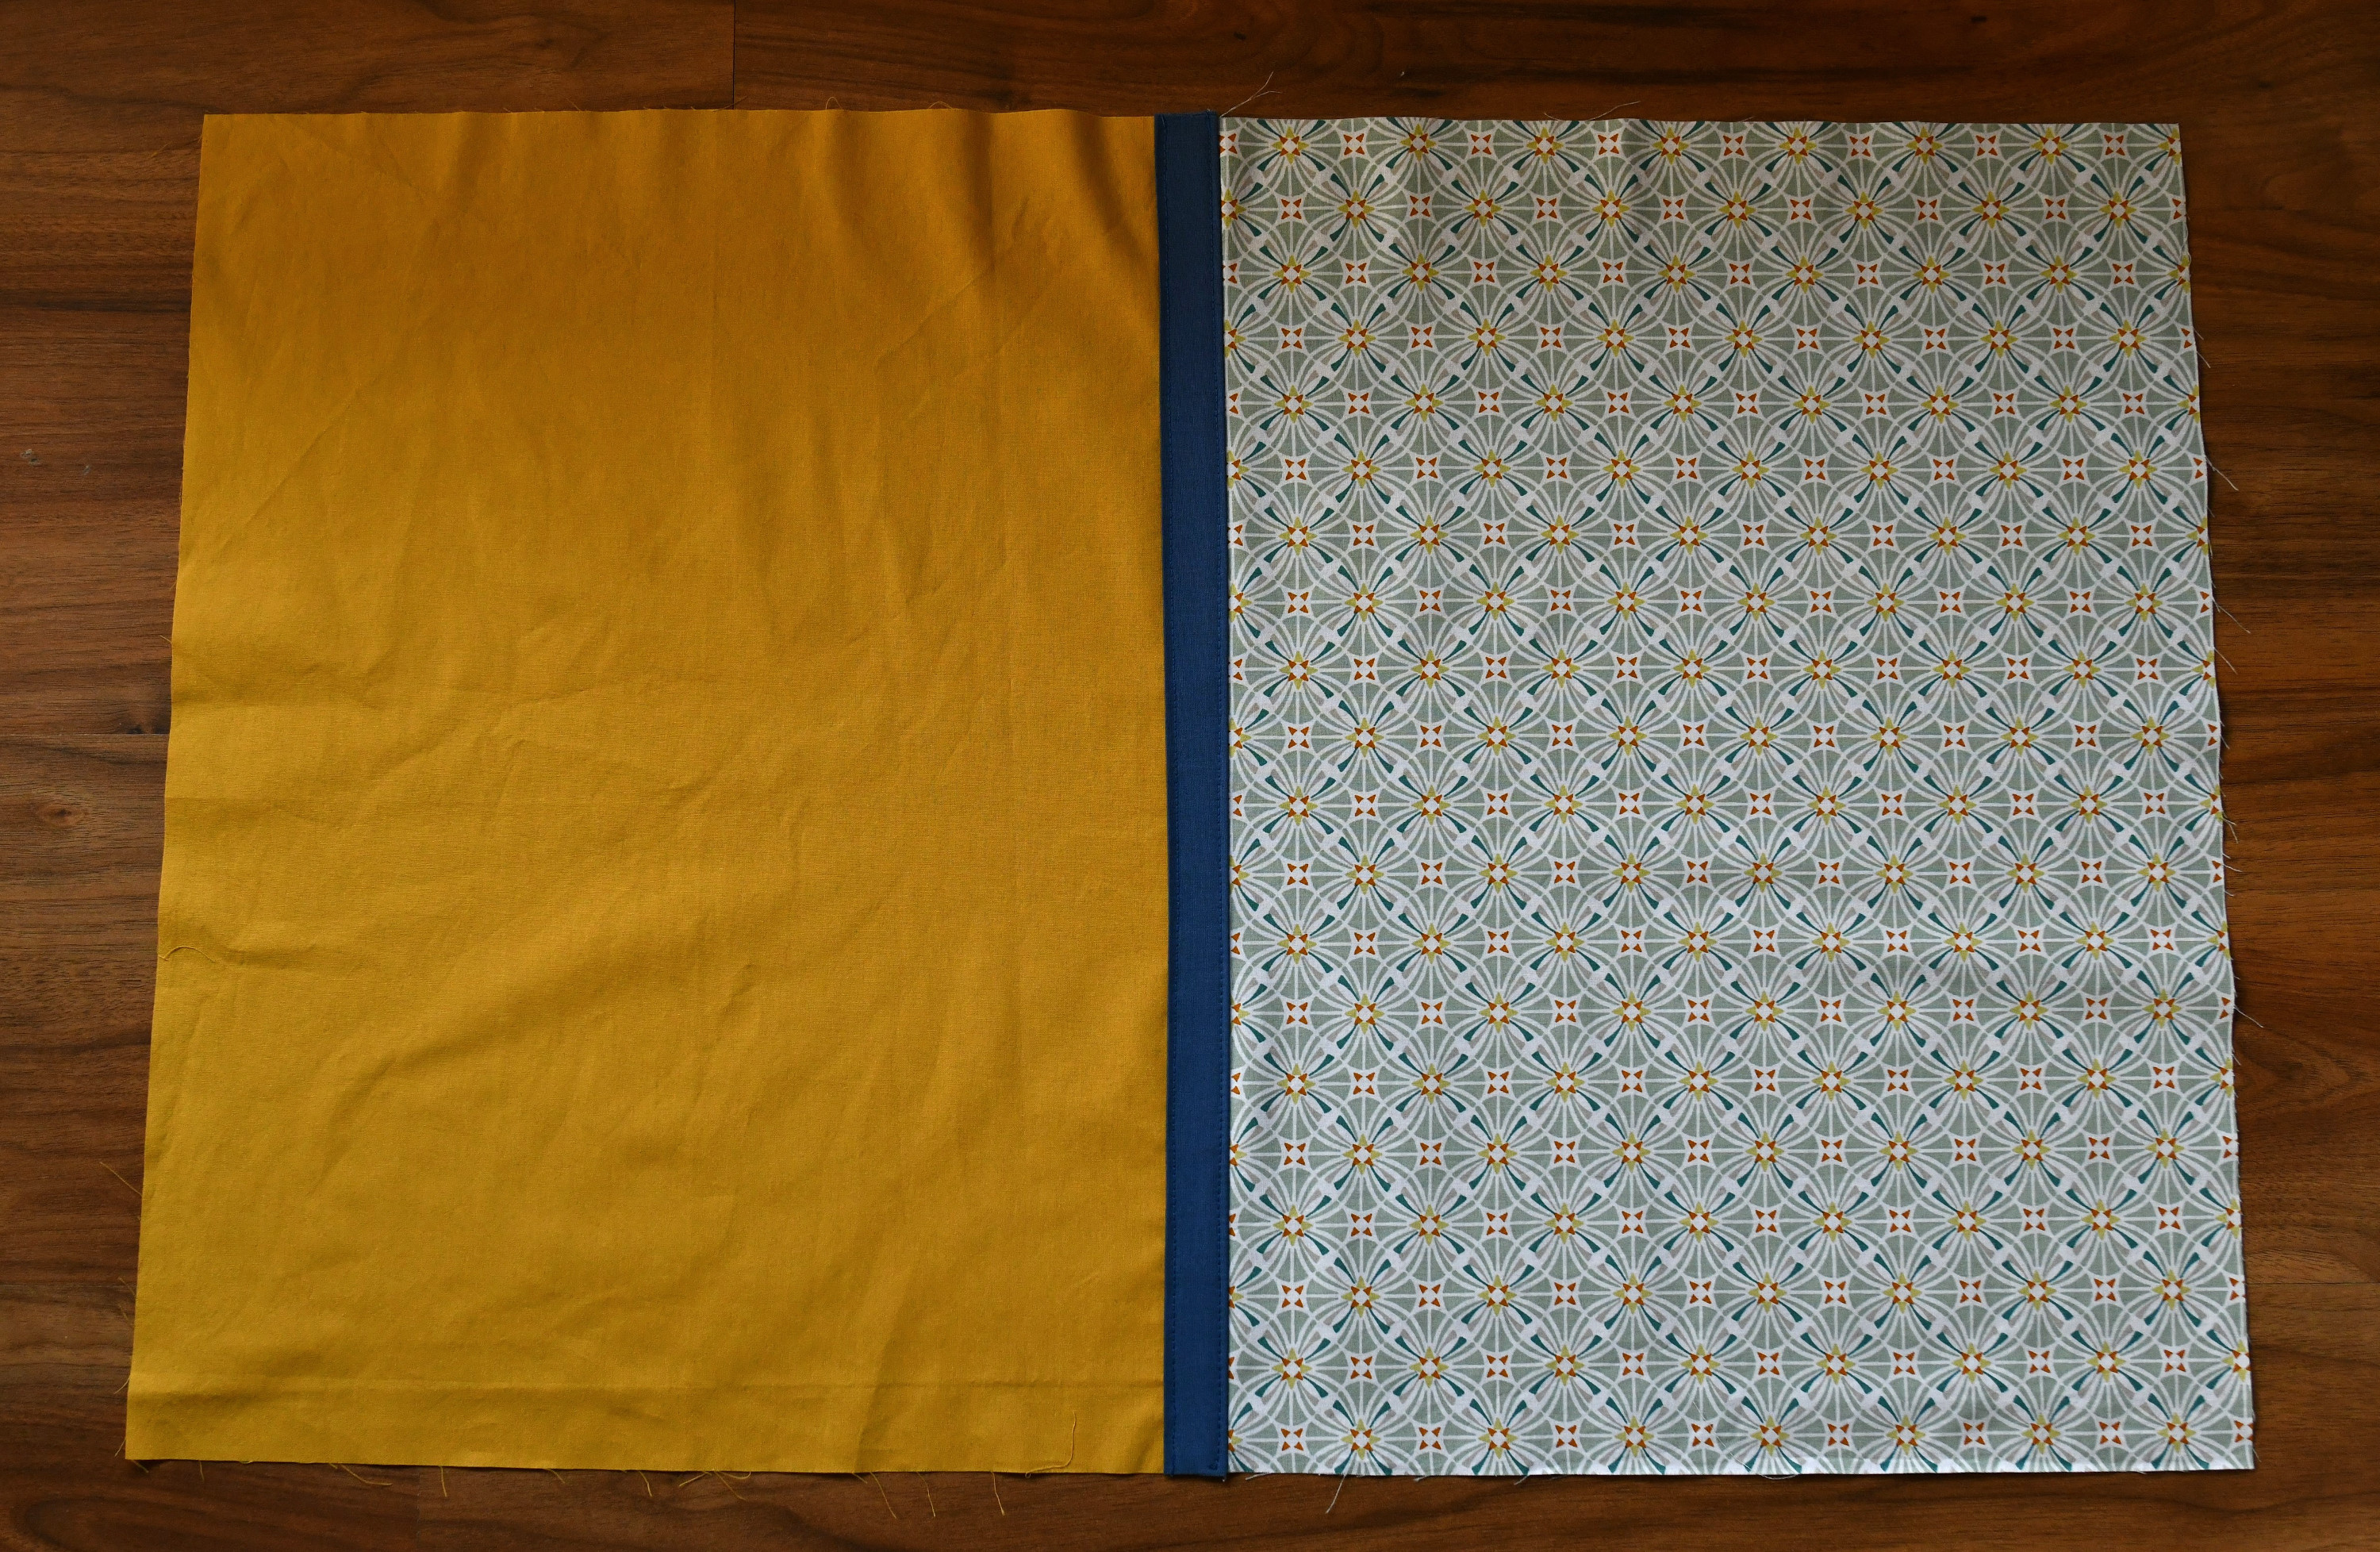
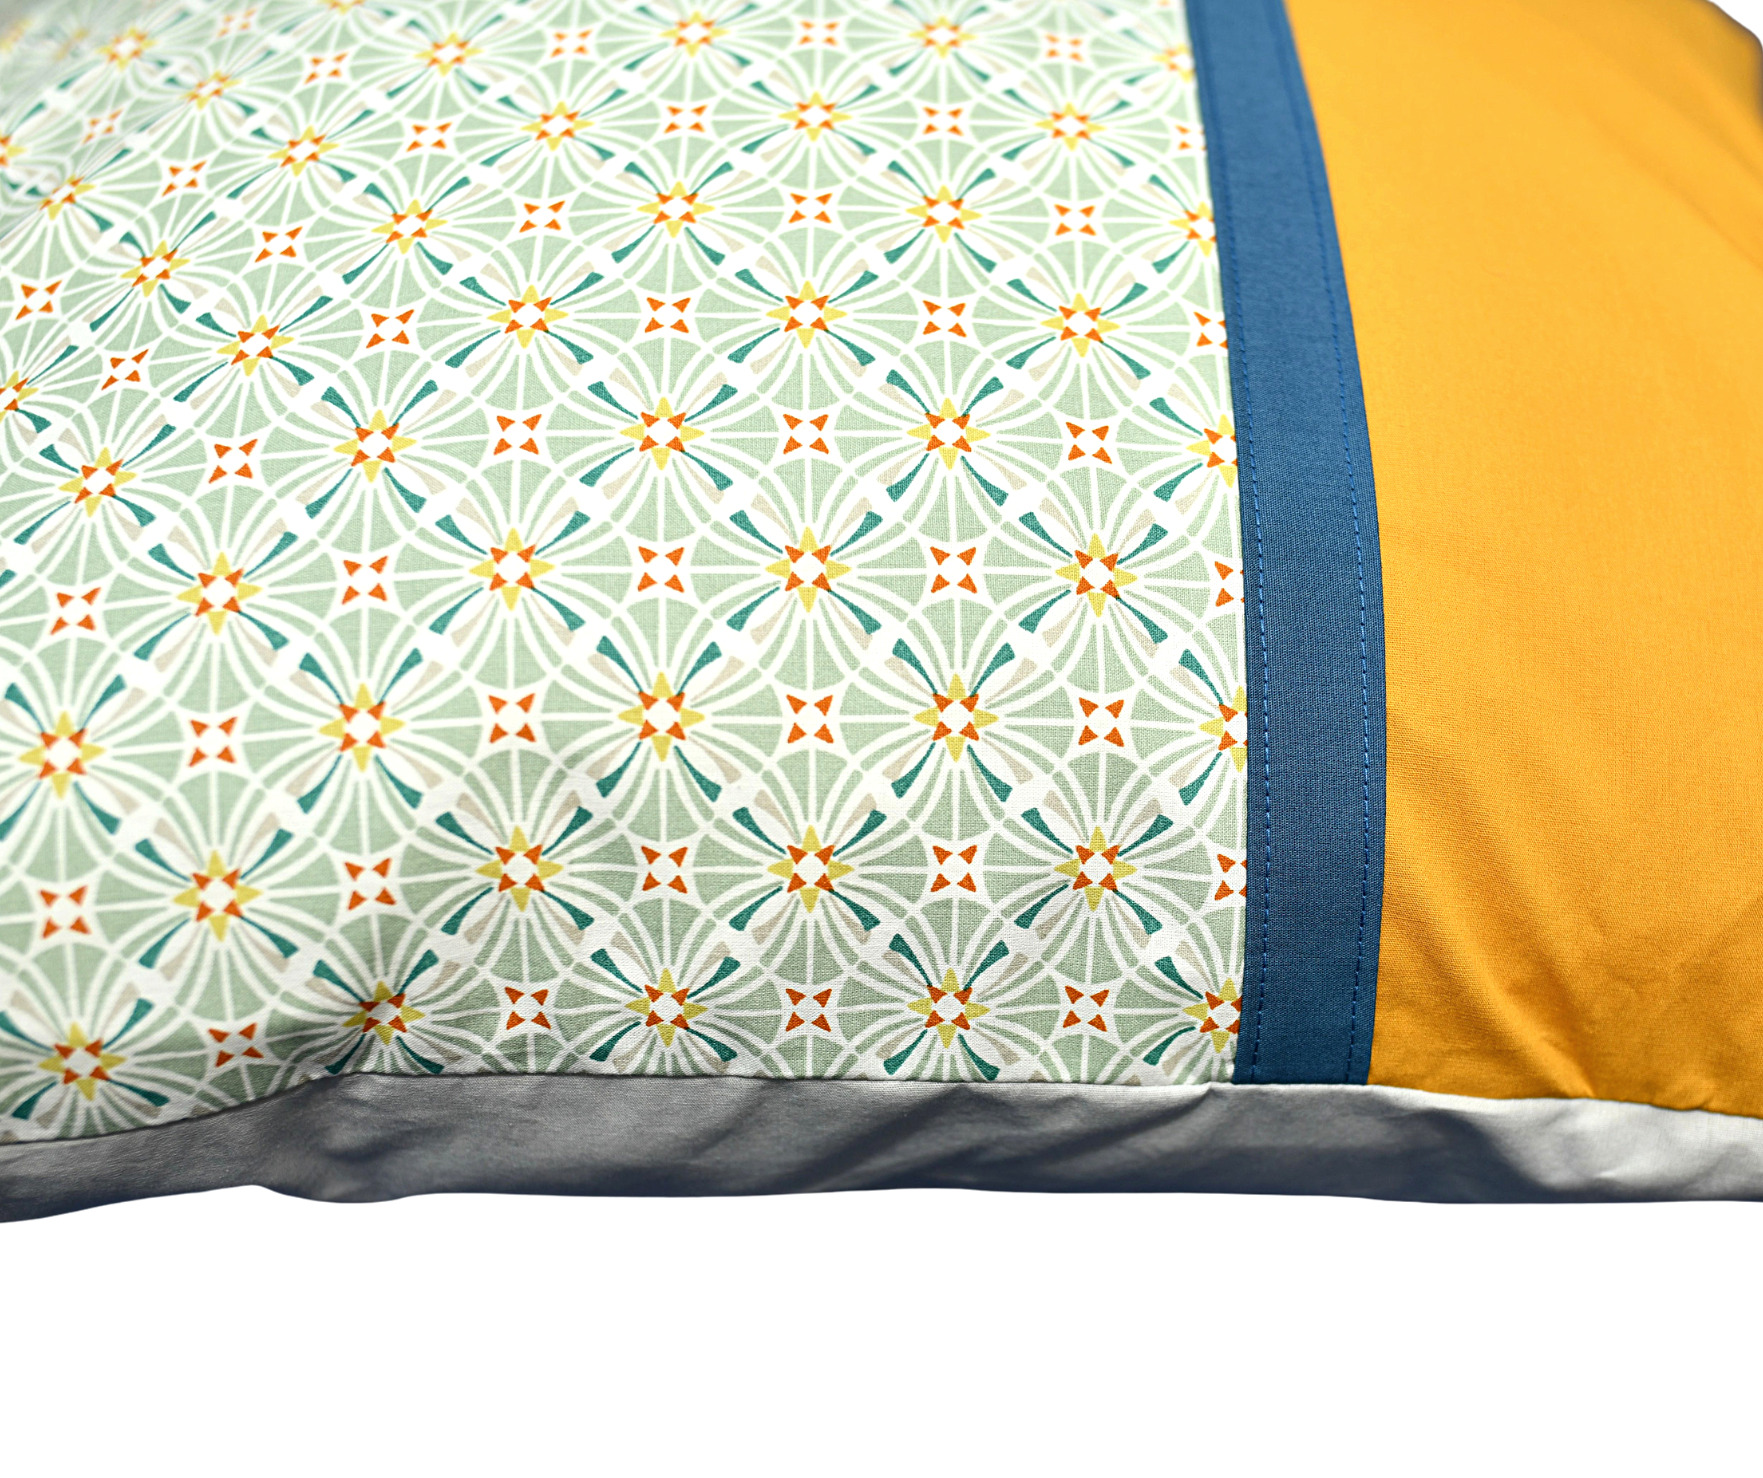
I made this pillowcase using two large fabric pieces. The front piece is made up of three panels: the main fabric, contrast fabric, and trim fabric (check the photo below for reference). Then, there’s one back fabric piece.
The front is slightly larger because it needs to overlap for the envelope closure.

We’ll dive into the exact sizes for the main, contrast, and trim fabric pieces in just a bit – hang tight!

How this envelope pillowcase pattern works
Let me quickly walk you through how this pattern works so you can easily adjust it for any pillow size you want.
Both the front and back fabric pieces should be 1.5 inches bigger than your pillow insert to allow for the seam allowance and hem. The finished pillow cover will be nearly the same size as your pillow, giving it that snug fit we love – no loose, baggy covers here!
For the back piece, just add 1.5 inches to both the length and width of the pillow.
The front piece needs a little extra for the envelope closure. So, you’ll add 1.5 inches to the length and 8.5 inches to the width (1.5” for the seam allowance and 7” for the flap). These measurements are great if you’re using just one main fabric for the pillowcase.
As for the inner flap, you can make it anywhere from 5 to 7 inches long. I went with a 6-inch flap, and it covers the pillow insert perfectly!

Now, let’s talk about the design of this pillow.
How to style your DIY pillowcase
Choosing the right colors is key to making your pillow cover look stunning! Pick a set of three colors that complement each other to add style and beauty to your room.
If you’re like me and don’t have an eye for design, no worries! I usually use color scheme websites for inspiration, and they always help me find the perfect combo.
Easy envelope pillow cover – free sewing pattern
For the back of the pillowcase, I kept things simple by using one continuous piece of fabric. I added 1.5 inches to both the length and width of the pillow insert for the perfect fit.
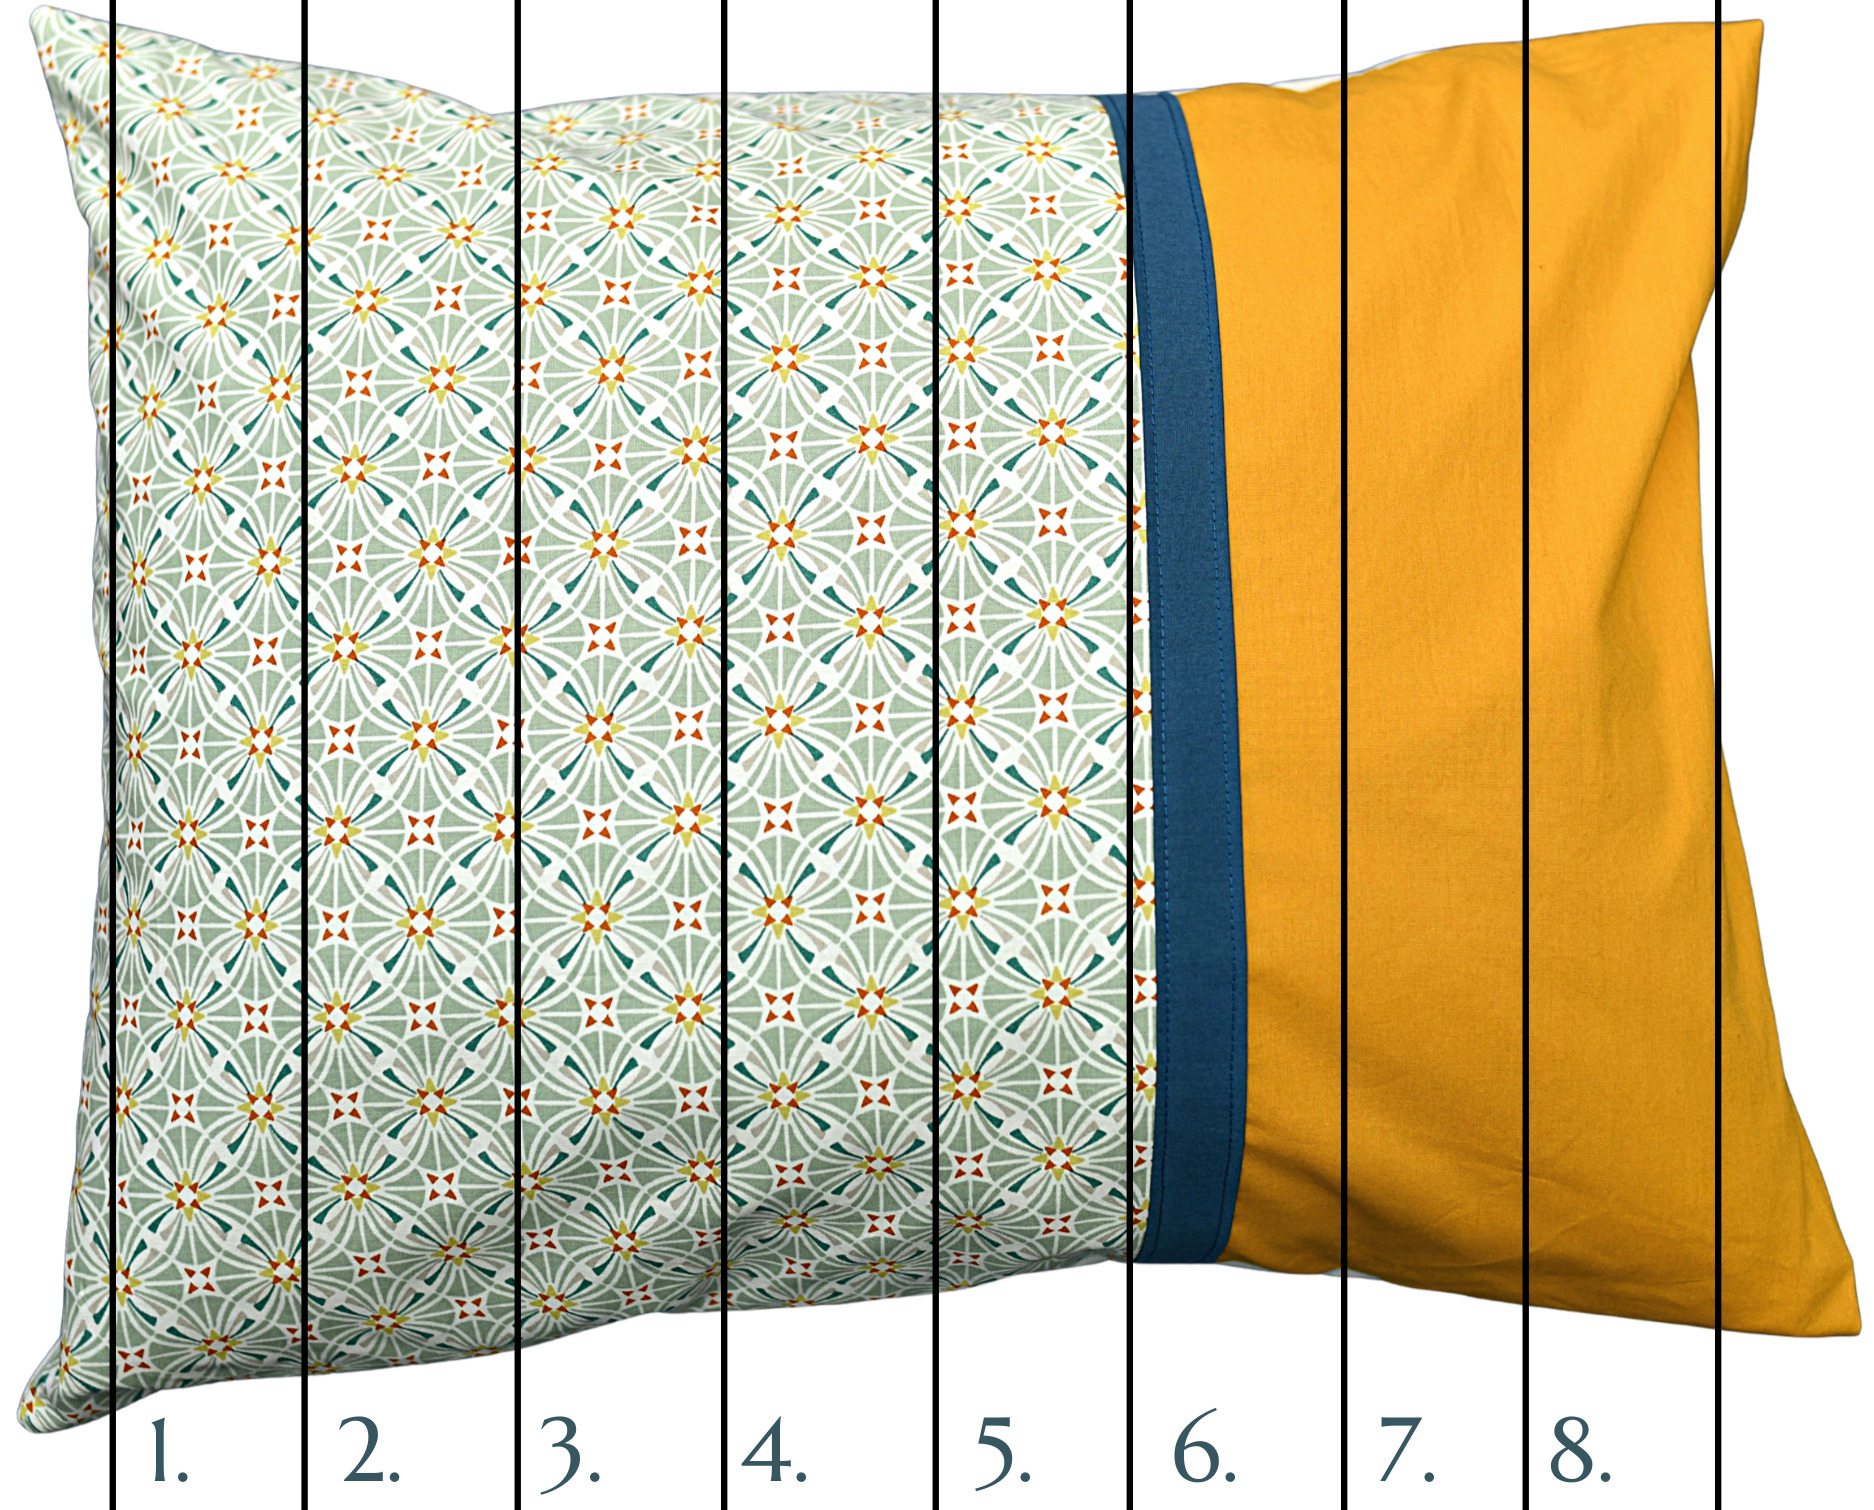
For the front, I wanted to create something balanced and visually pleasing. There’s a design trick called “the golden ratio” that many artists use, where the ideal ratio is about 1 to 1.62. For my pillowcase, I used a 3 to 5 ratio (roughly 1 to 1.66).
To get the right proportions, I divided the total width of my front fabric piece into 8 parts. Then, I cut the contrast fabric 3x that measurement and the main fabric 5x that measurement. This gives it a nice, balanced look!
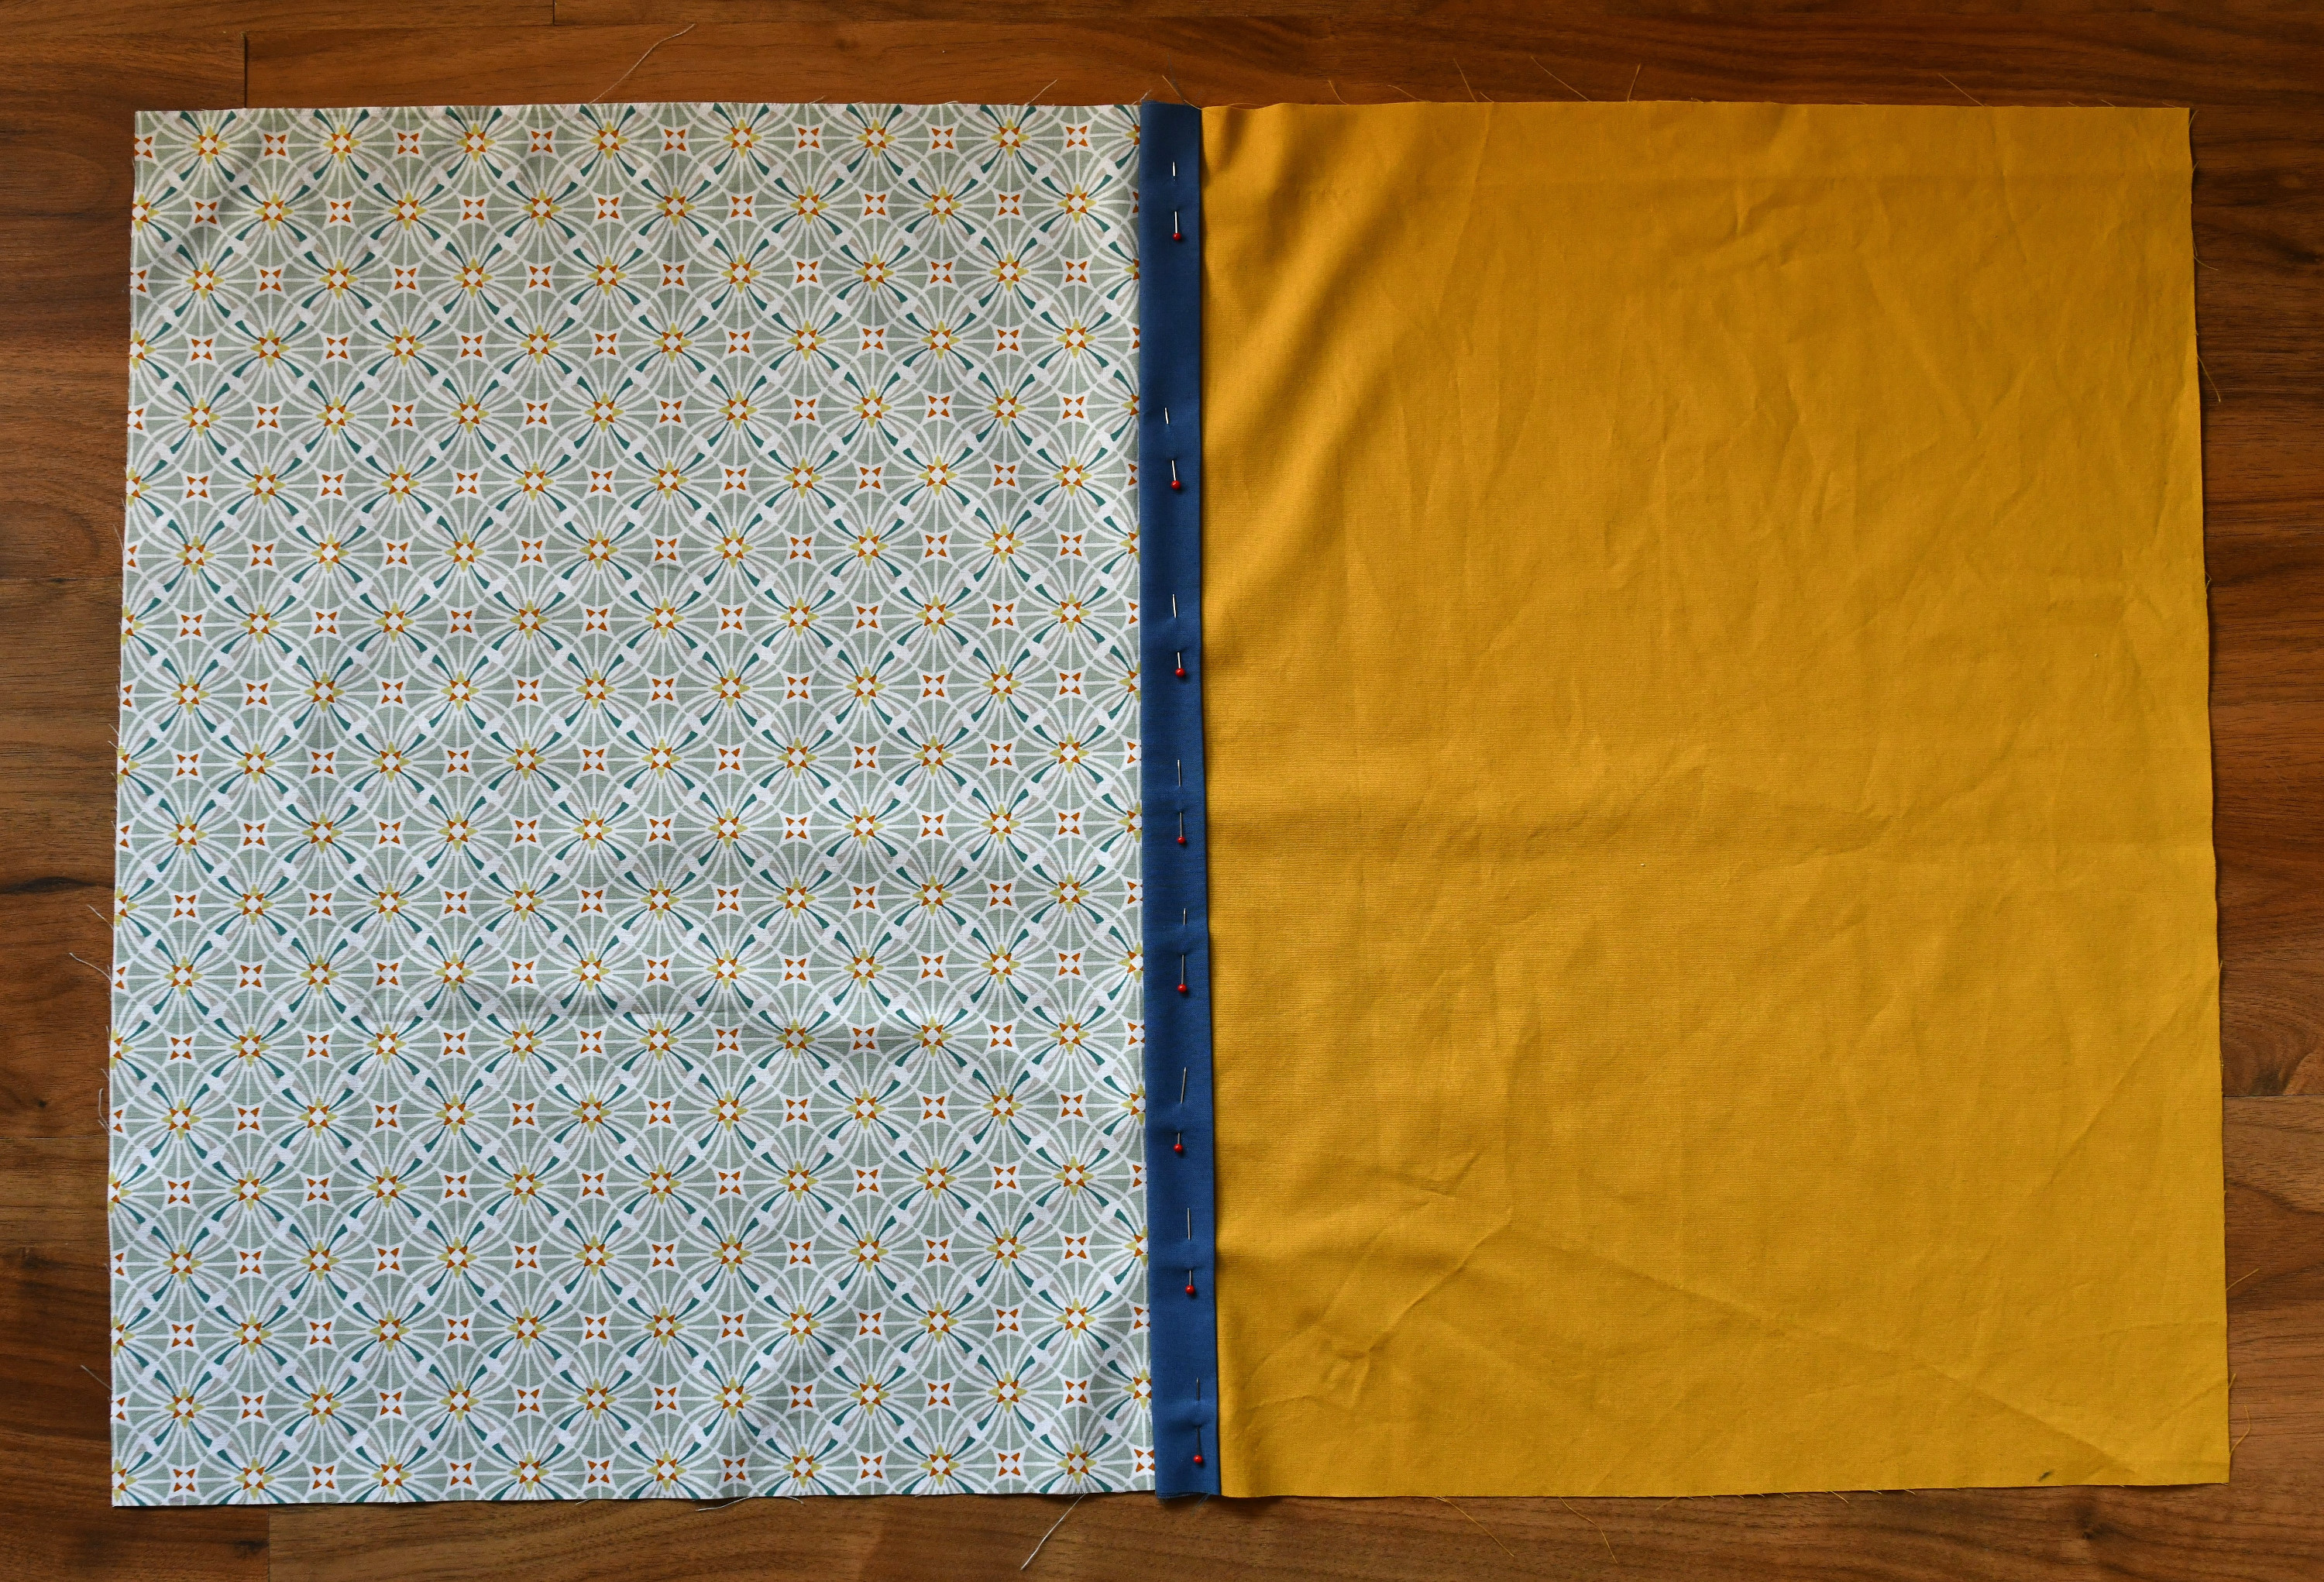
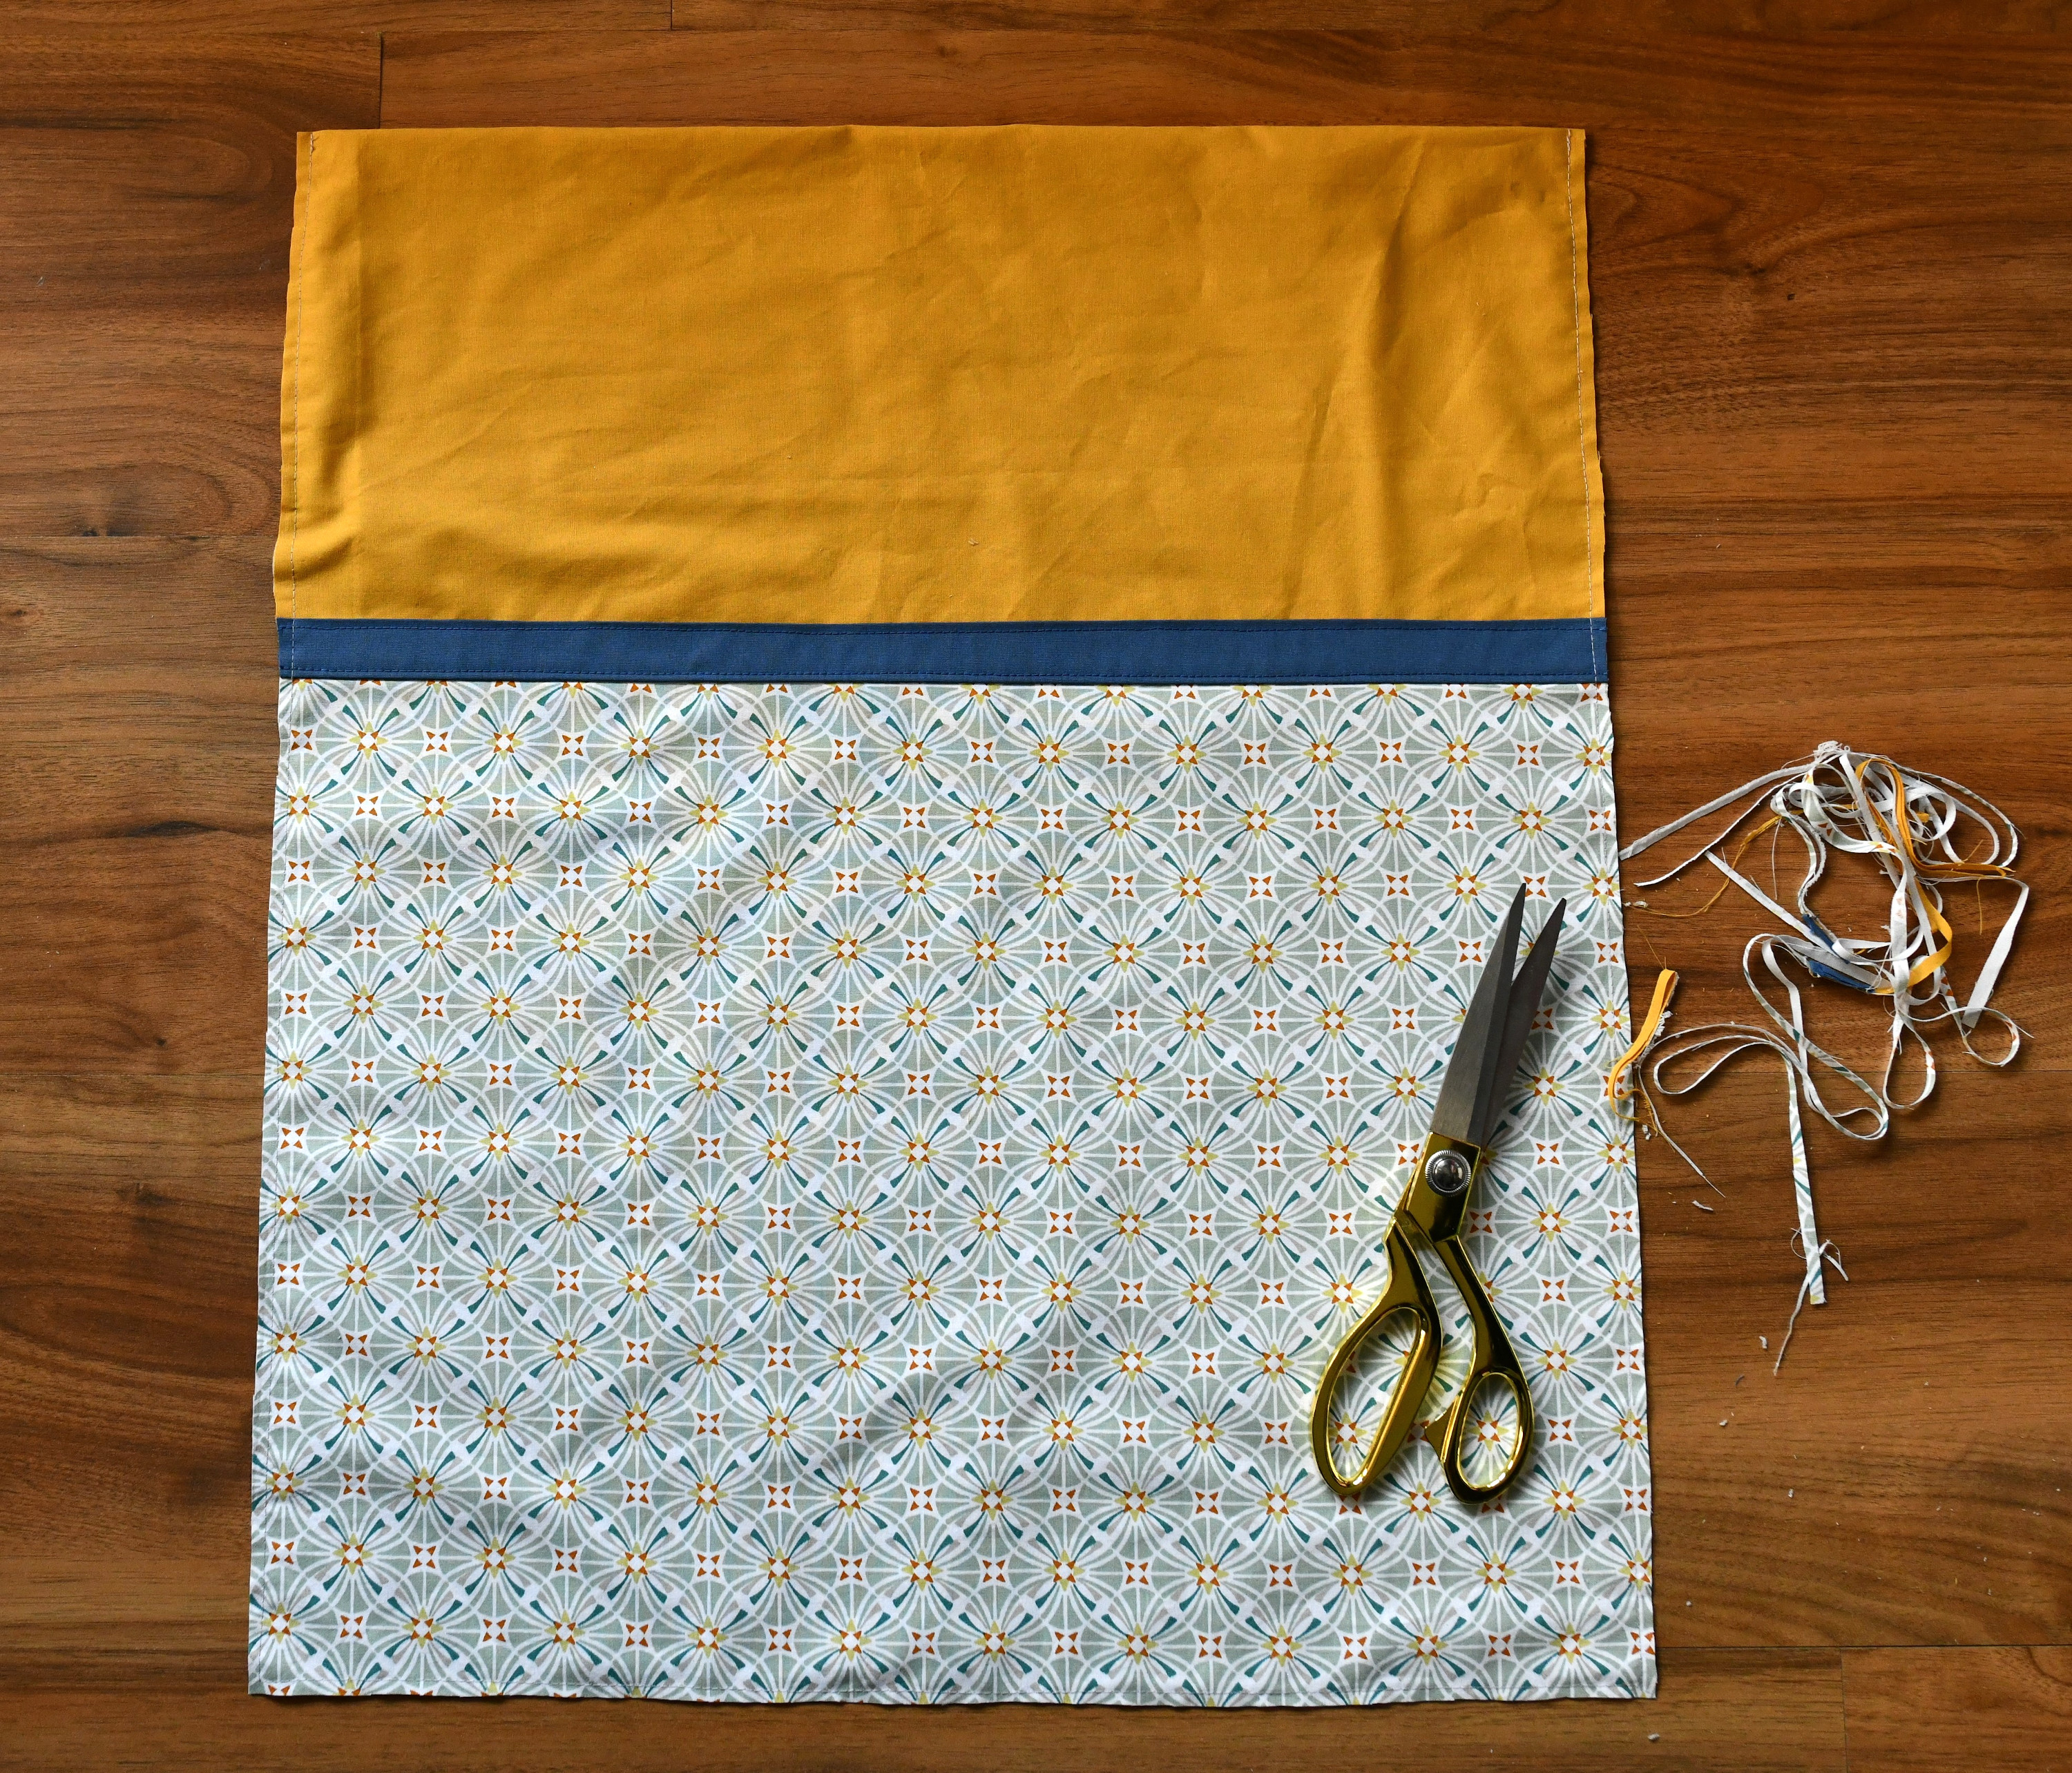
Quick note: The front piece is made of three different parts – main fabric, contrast fabric, and accent trim fabric. Both contrast and main fabric piece will lose approx. 3/8” after being stitched together in Step 2, and that’s been accounted for.
How to measure your pillowcase pieces
The length stays the same for all pattern pieces – it’s the pillow length plus 1.5 inches.
Now, let me show you how I applied the golden ratio for my 19” x 23” pillowcase. Once all the pieces are sewn together, the front piece will end up being 20.5” x 24.5”.
As I mentioned earlier, to get the right proportions, I divide 24.5 by 8, which gives me 3.06. This is one part of the whole. To figure out the size of the contrast fabric (the yellow piece in my case), I multiply that number by 3: 3.06 x 3 = 9.2. So, the yellow fabric measures 9.2” x 20.5”.
For the main fabric piece, I multiply the same number by 5: 3.06 x 5 = 15.3. That makes the main fabric 15.3” x 20.5”.
Now, let’s pause for a second—don’t forget about the envelope flap! You can add it to either the contrast or the main fabric. I added mine to the contrast piece, so the final size of that piece is 16.2” x 20.5” (I added 7 inches to the width).
The trim piece is always the same, no matter the pillow size: 2.5” x (pillow length + 1”). For my pillow, the trim is 2.5” x 20.5”.
For the back, I went with a solid gray color. The back piece is 24.5” x 20.5”.
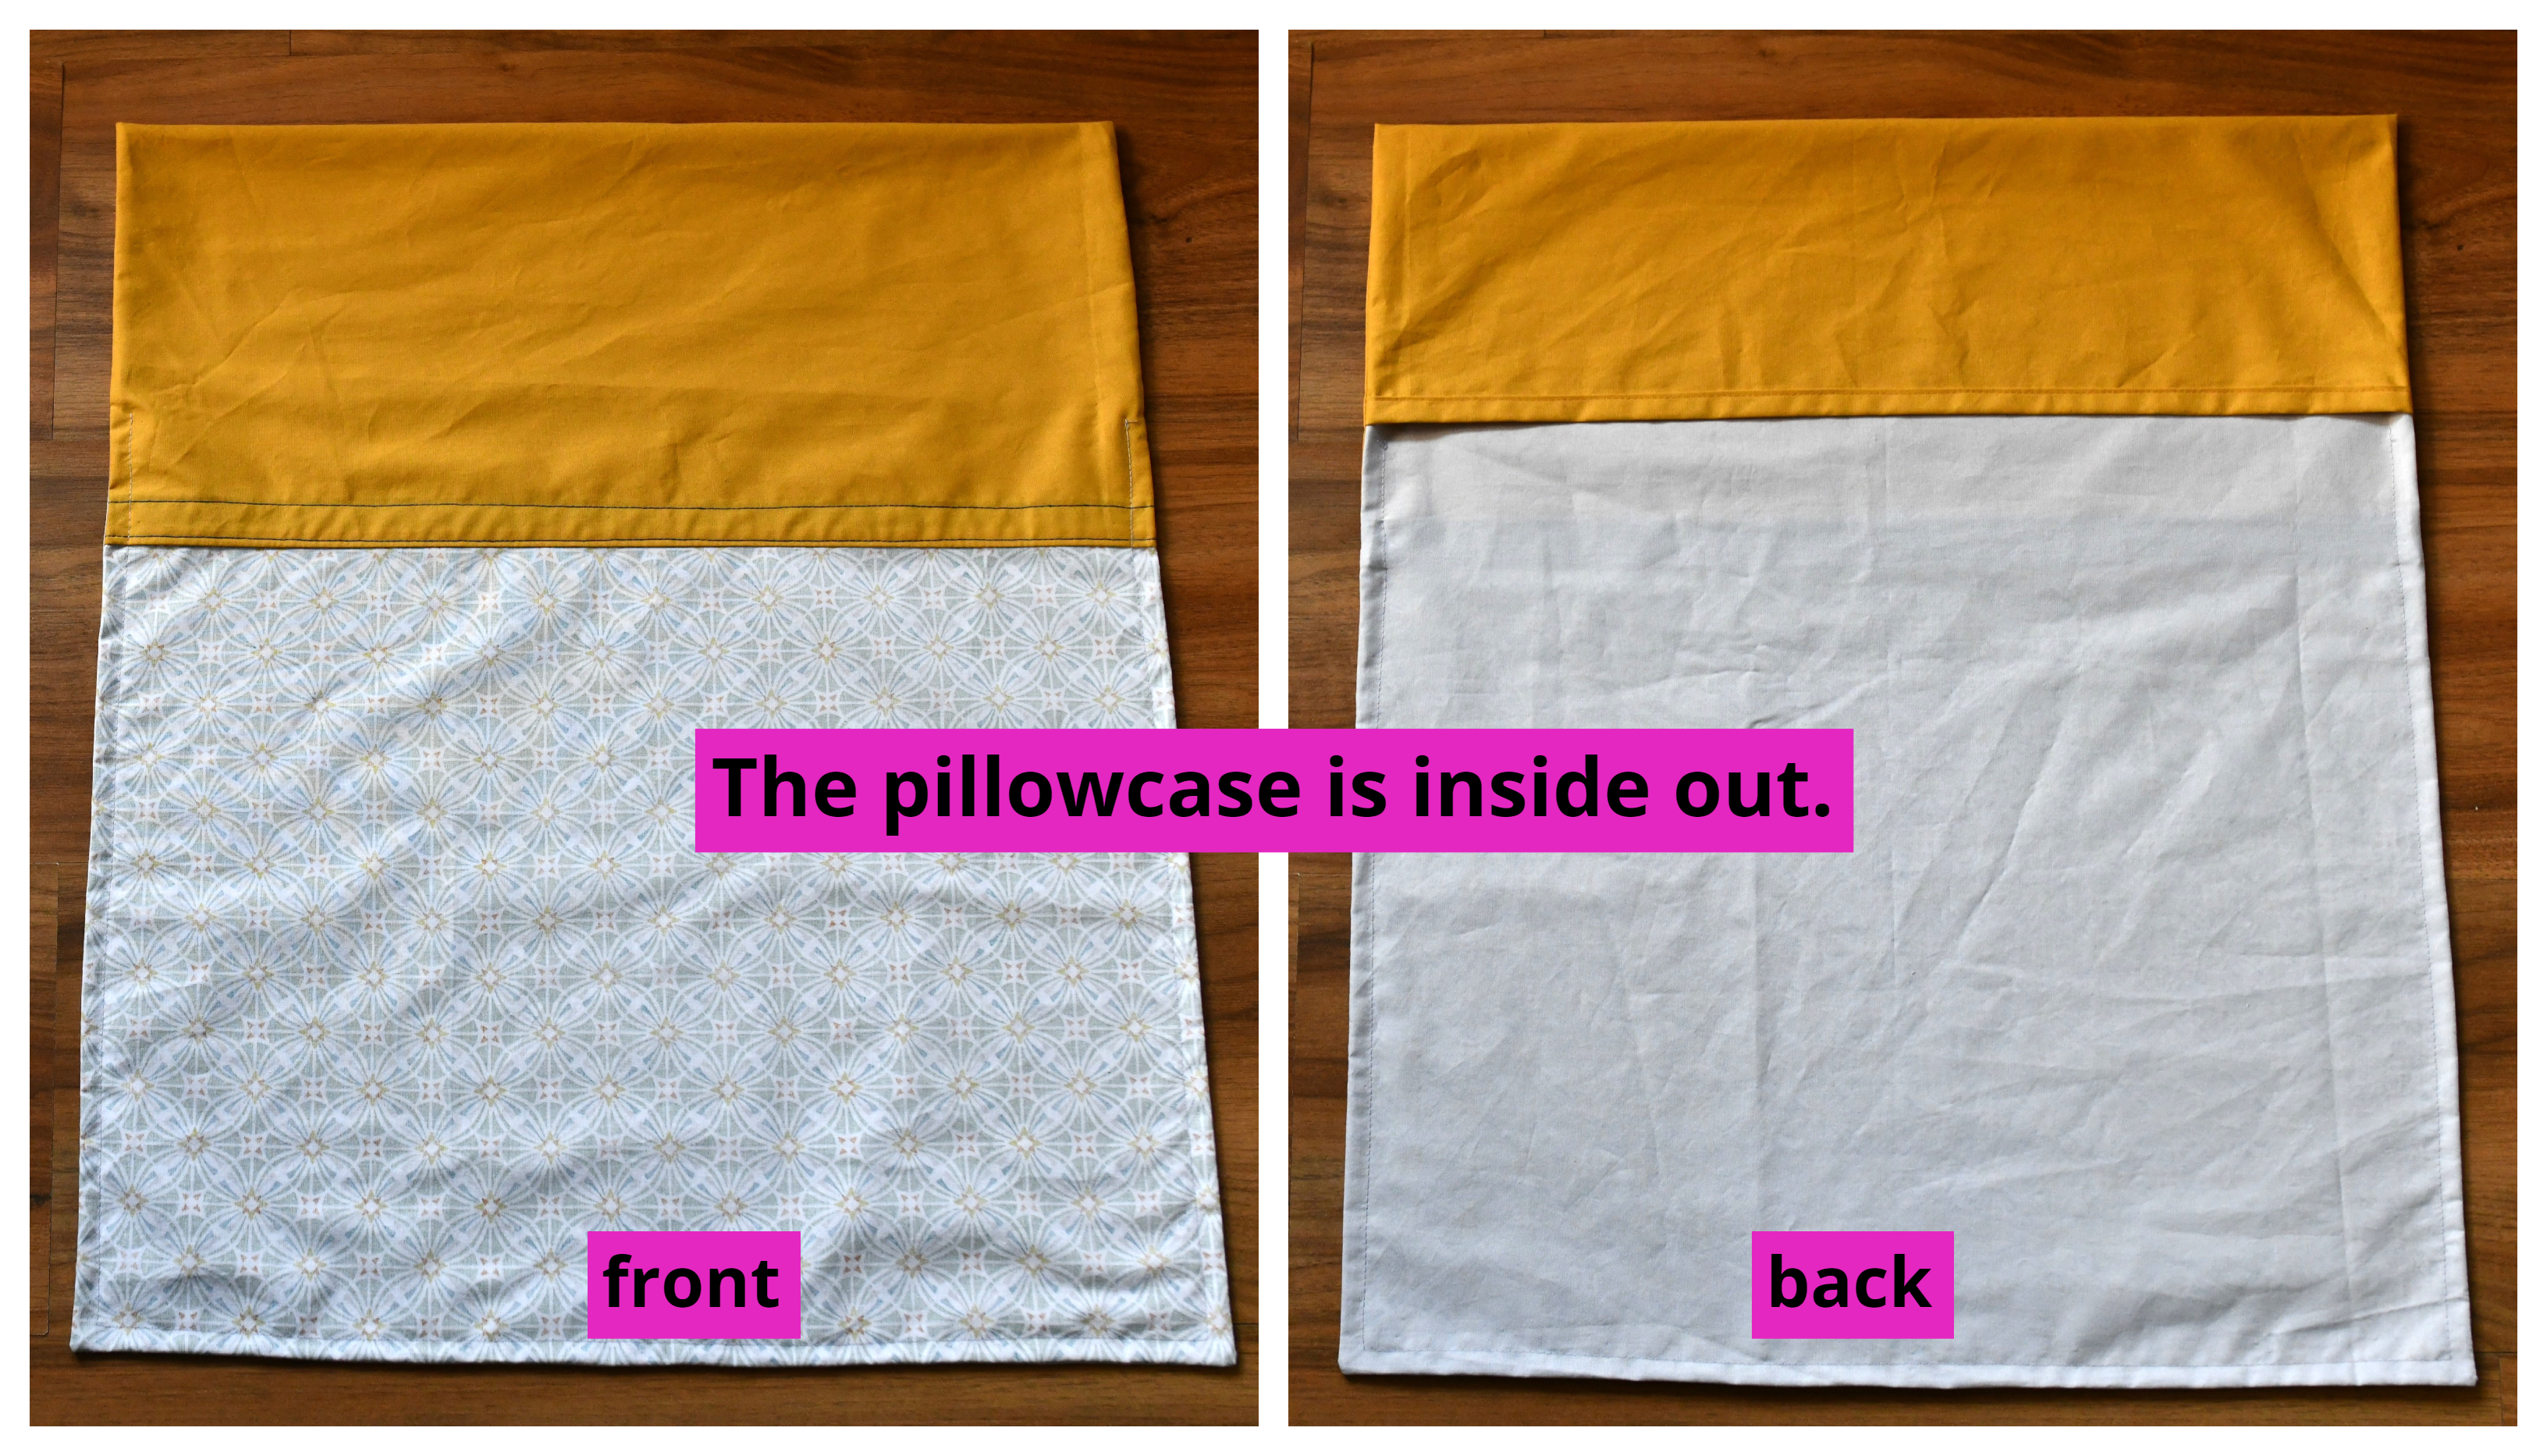
And that’s it! Here’s how my pillowcase looks on the inside:

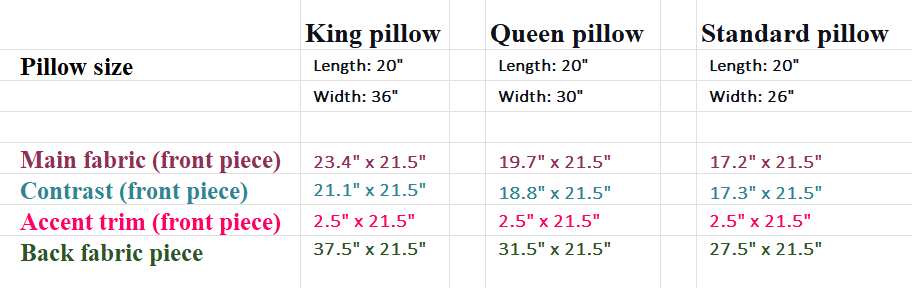
Cutting instructions for different pillow sizes (king, queen, or standard pillow)
Free DIY pillowcase pattern – sewing supplies
- a pillow you want to cover-up
- fabric (how much you need will depend on the size of your pillow)
- sewing machine
- sewing machine needle
- measuring tape
- fabric scissors
- matching thread
- sewing pins
- iron
Step 1 – cut your fabric pieces
You’ll need 1 main front piece, 1 contrasting front piece, 1 accent trim, and 1 back piece. Prewash your fabric before sewing.
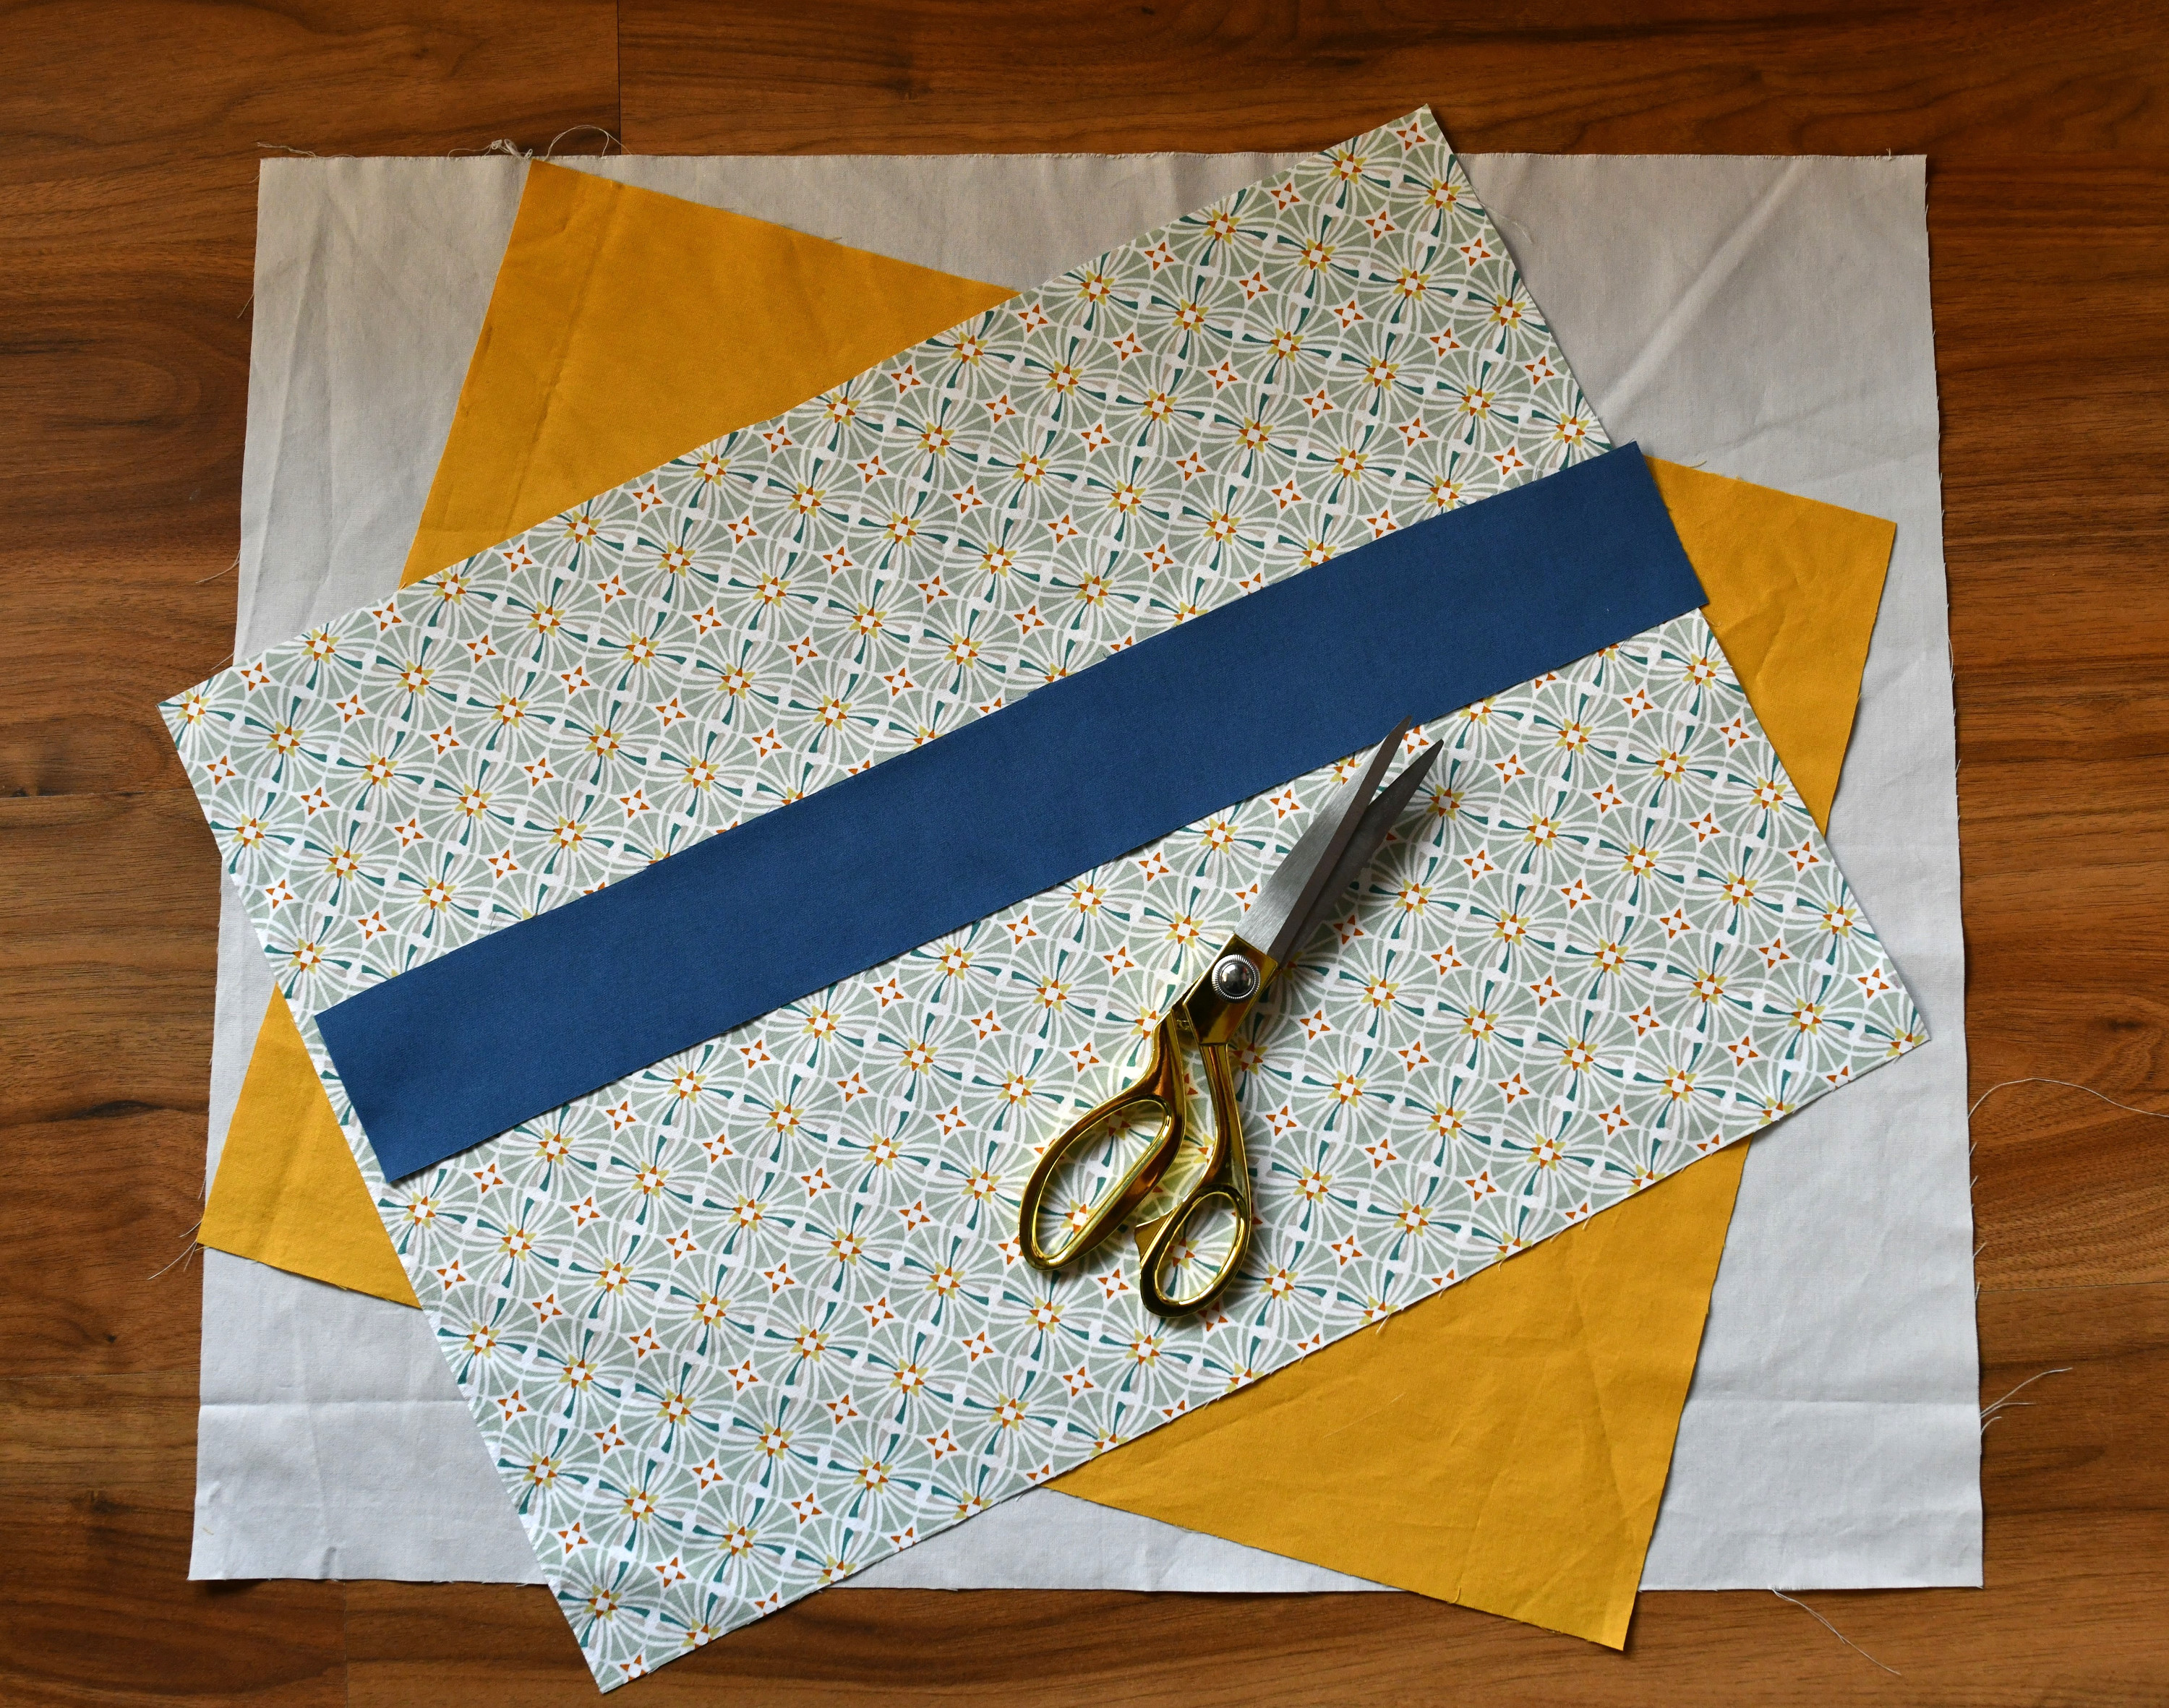
For my pillowcase I cut these pattern pieces:

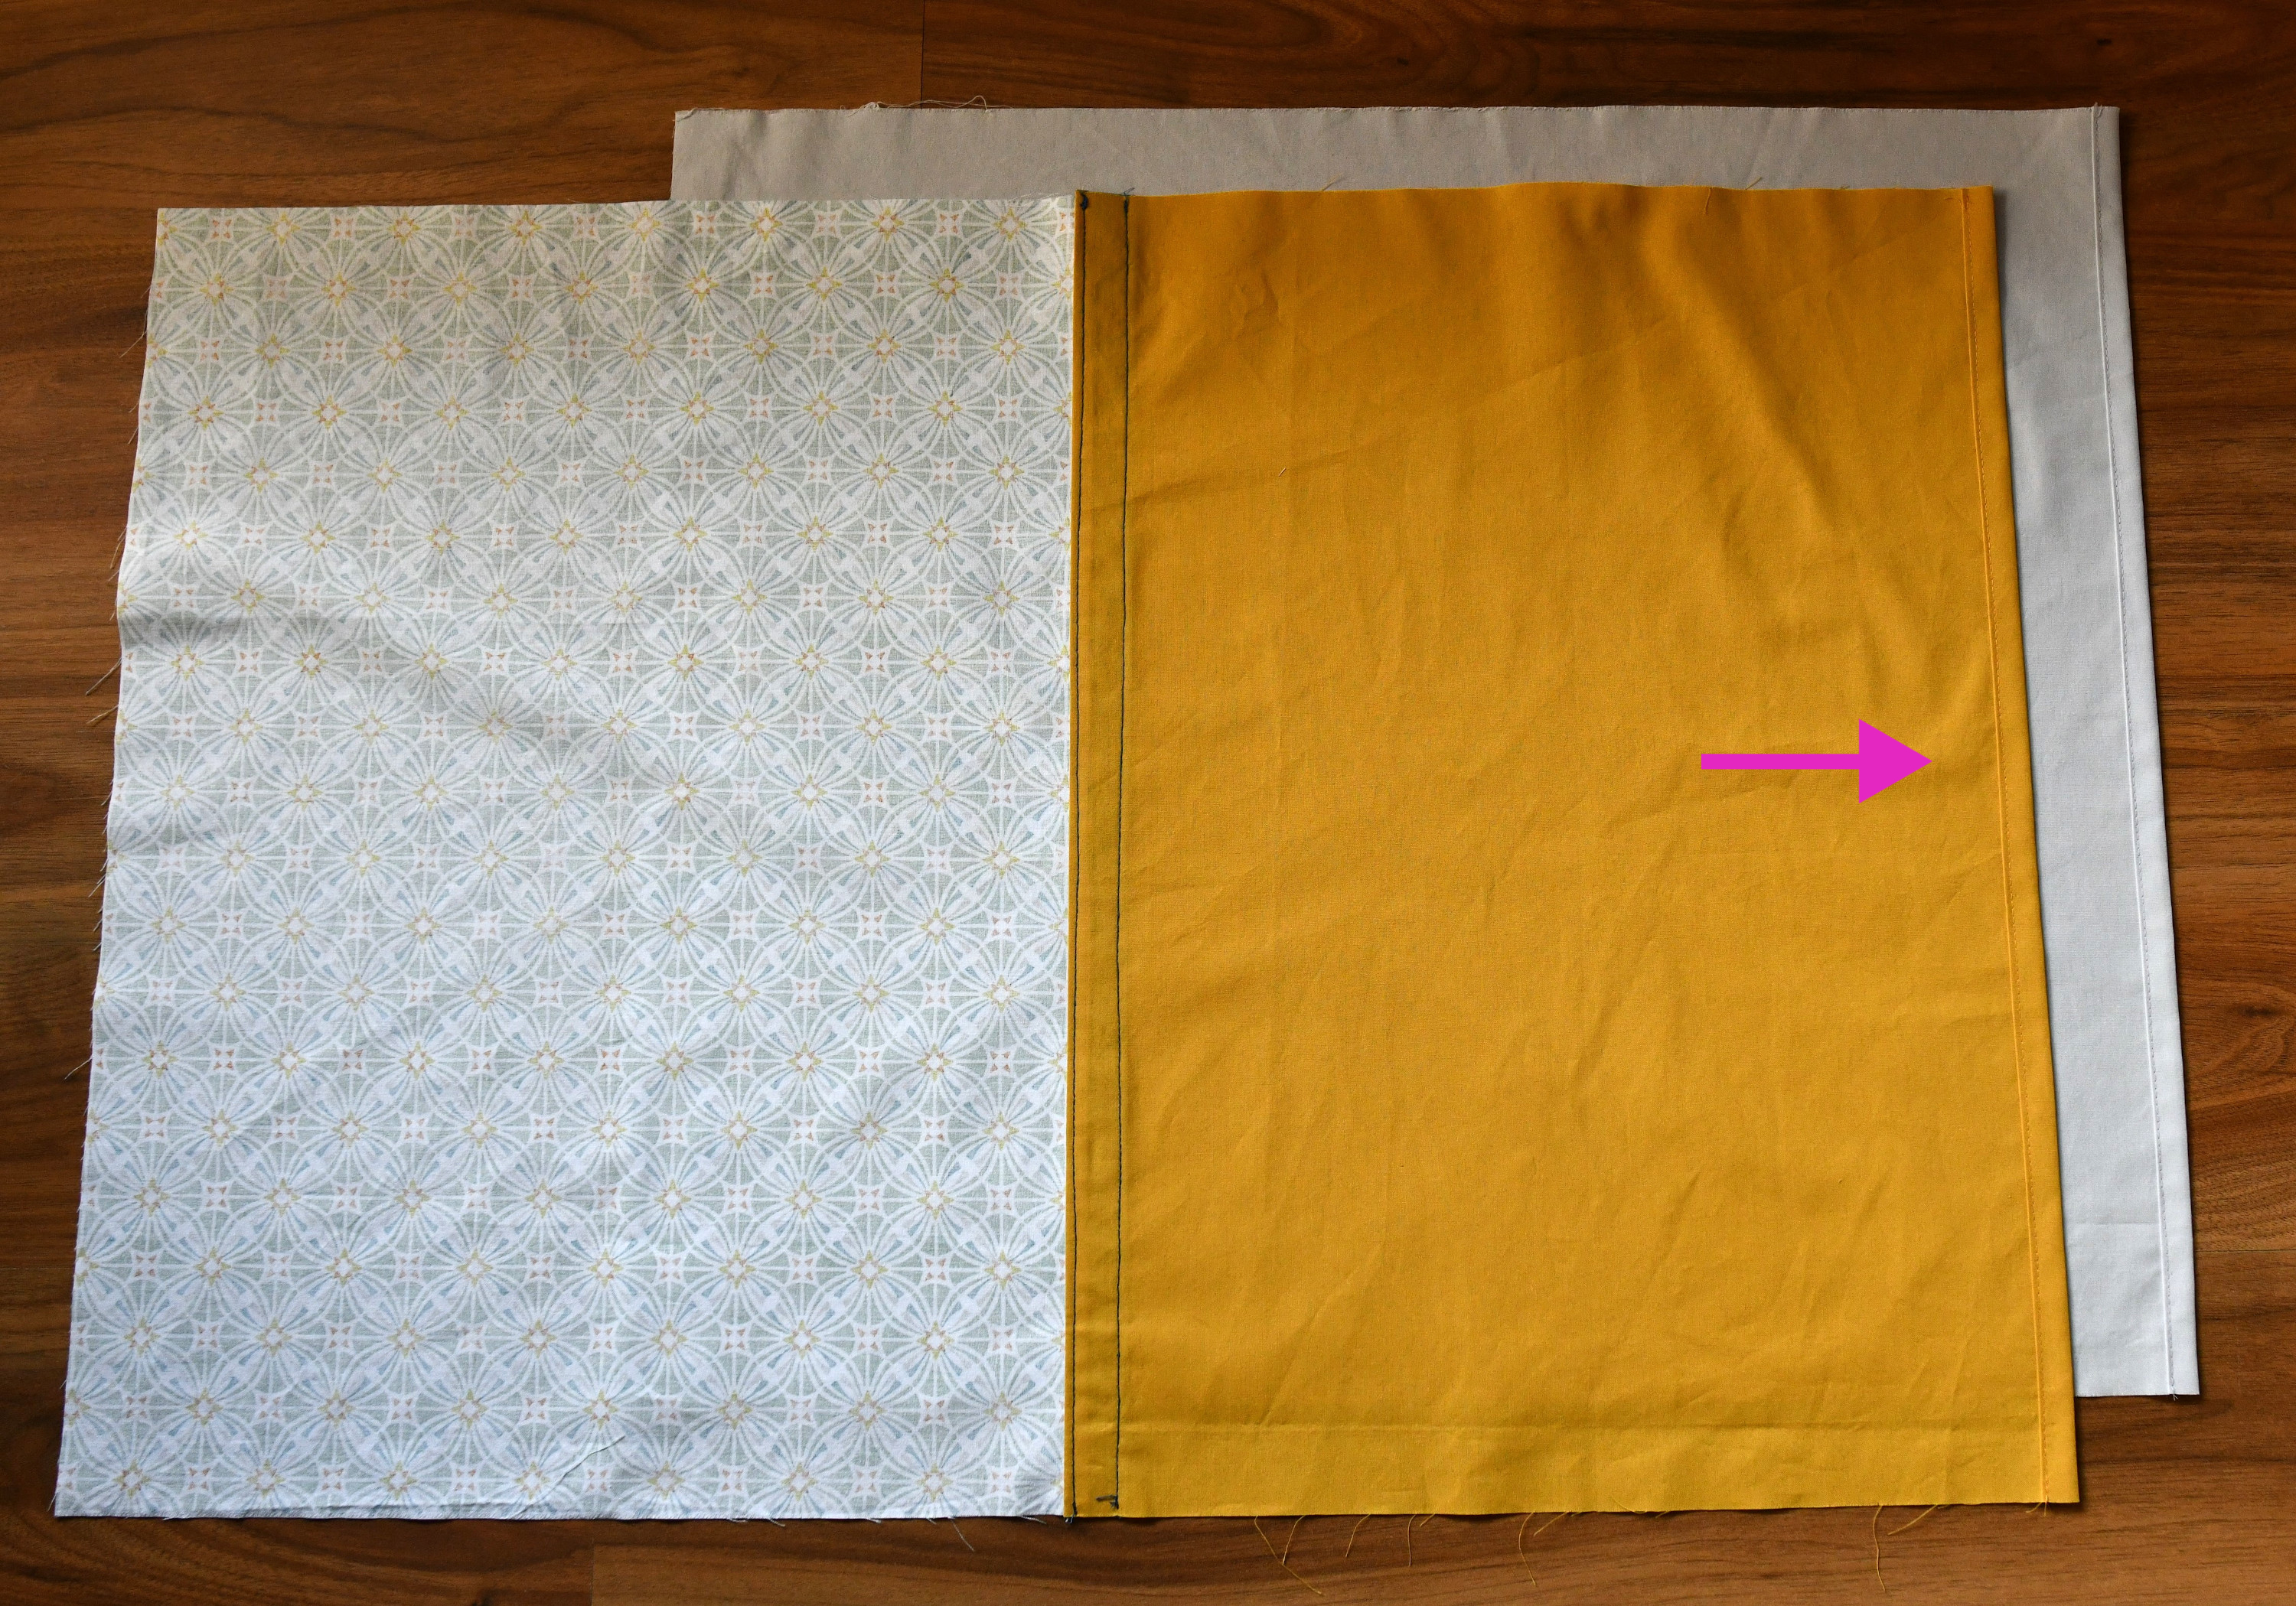
Step 2 – construct the front piece
Press the trim piece in half lengthwise, wrong sides together.
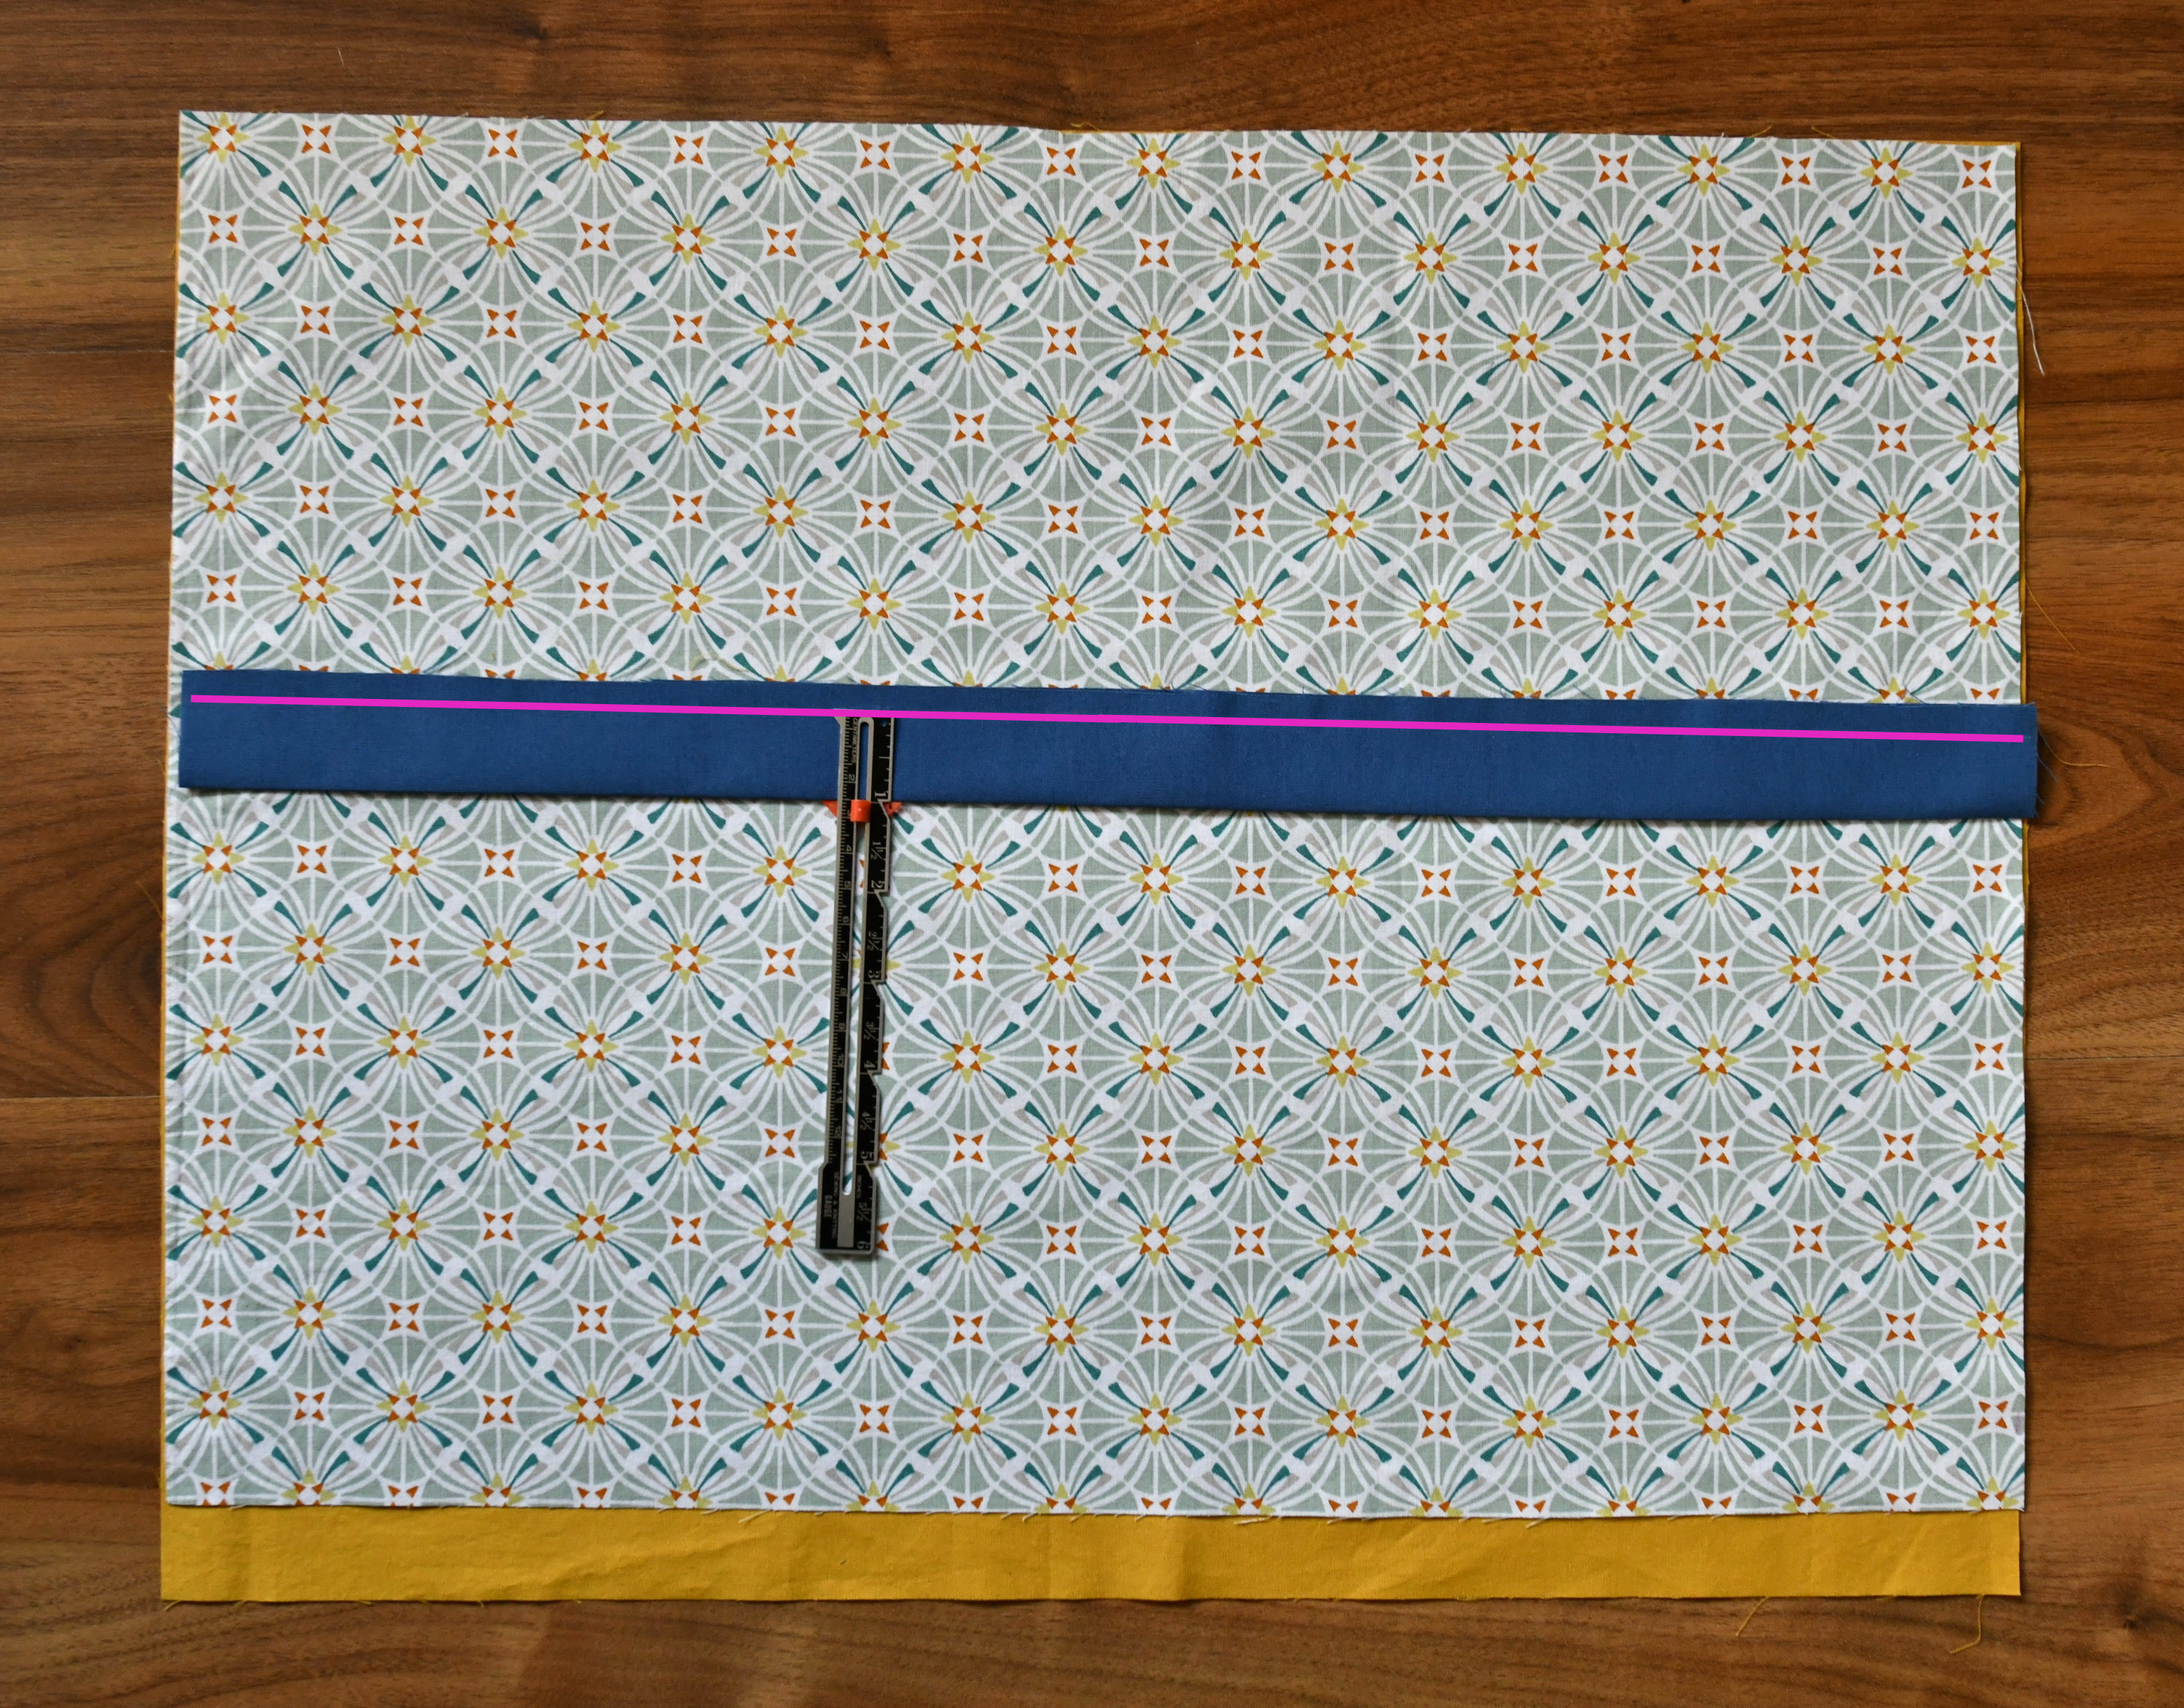
Note: Grab a fabric marking pencil and draw a line 1 inch away from the folded edge. Trust me, if you’re a beginner, every little bit of help makes a difference, so don’t skip this step! Attaching the trim might seem easy, but it can be a little tricky. Don’t worry though, I’ll guide you through it step by step.
Now place the main fabric piece and the contrasting piece wrong sides together. Then, place the folded trim piece on top and align the raw edges.
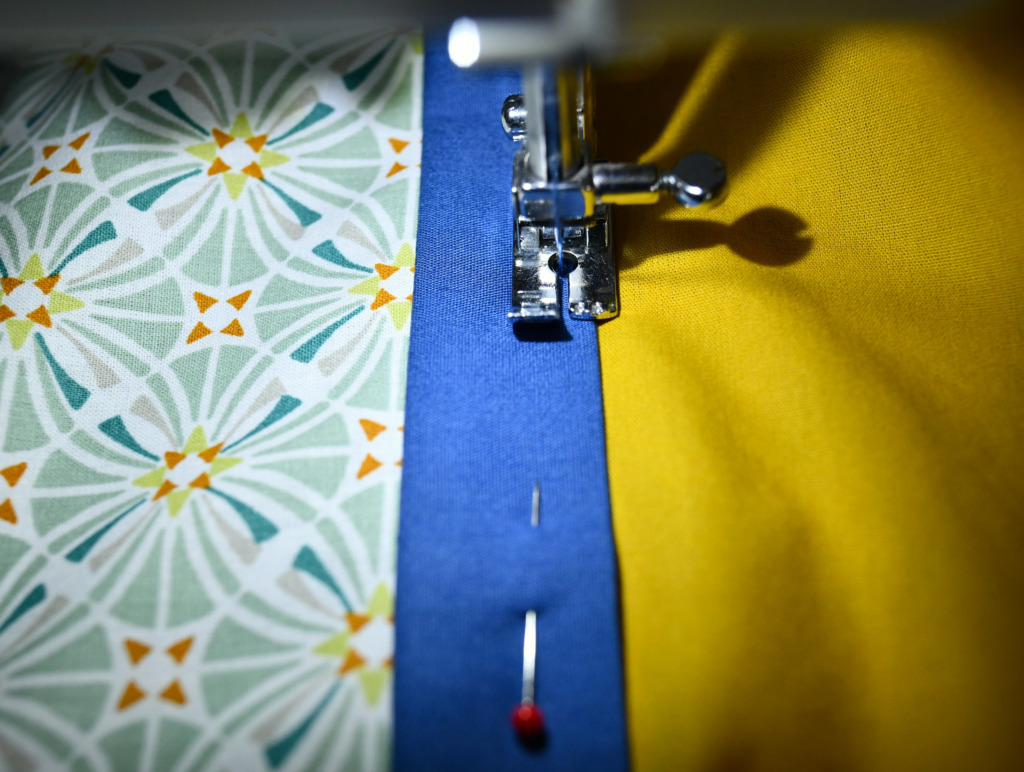
Sew through all layers right along the line you drew earlier – make sure to backstitch at the beginning and end.
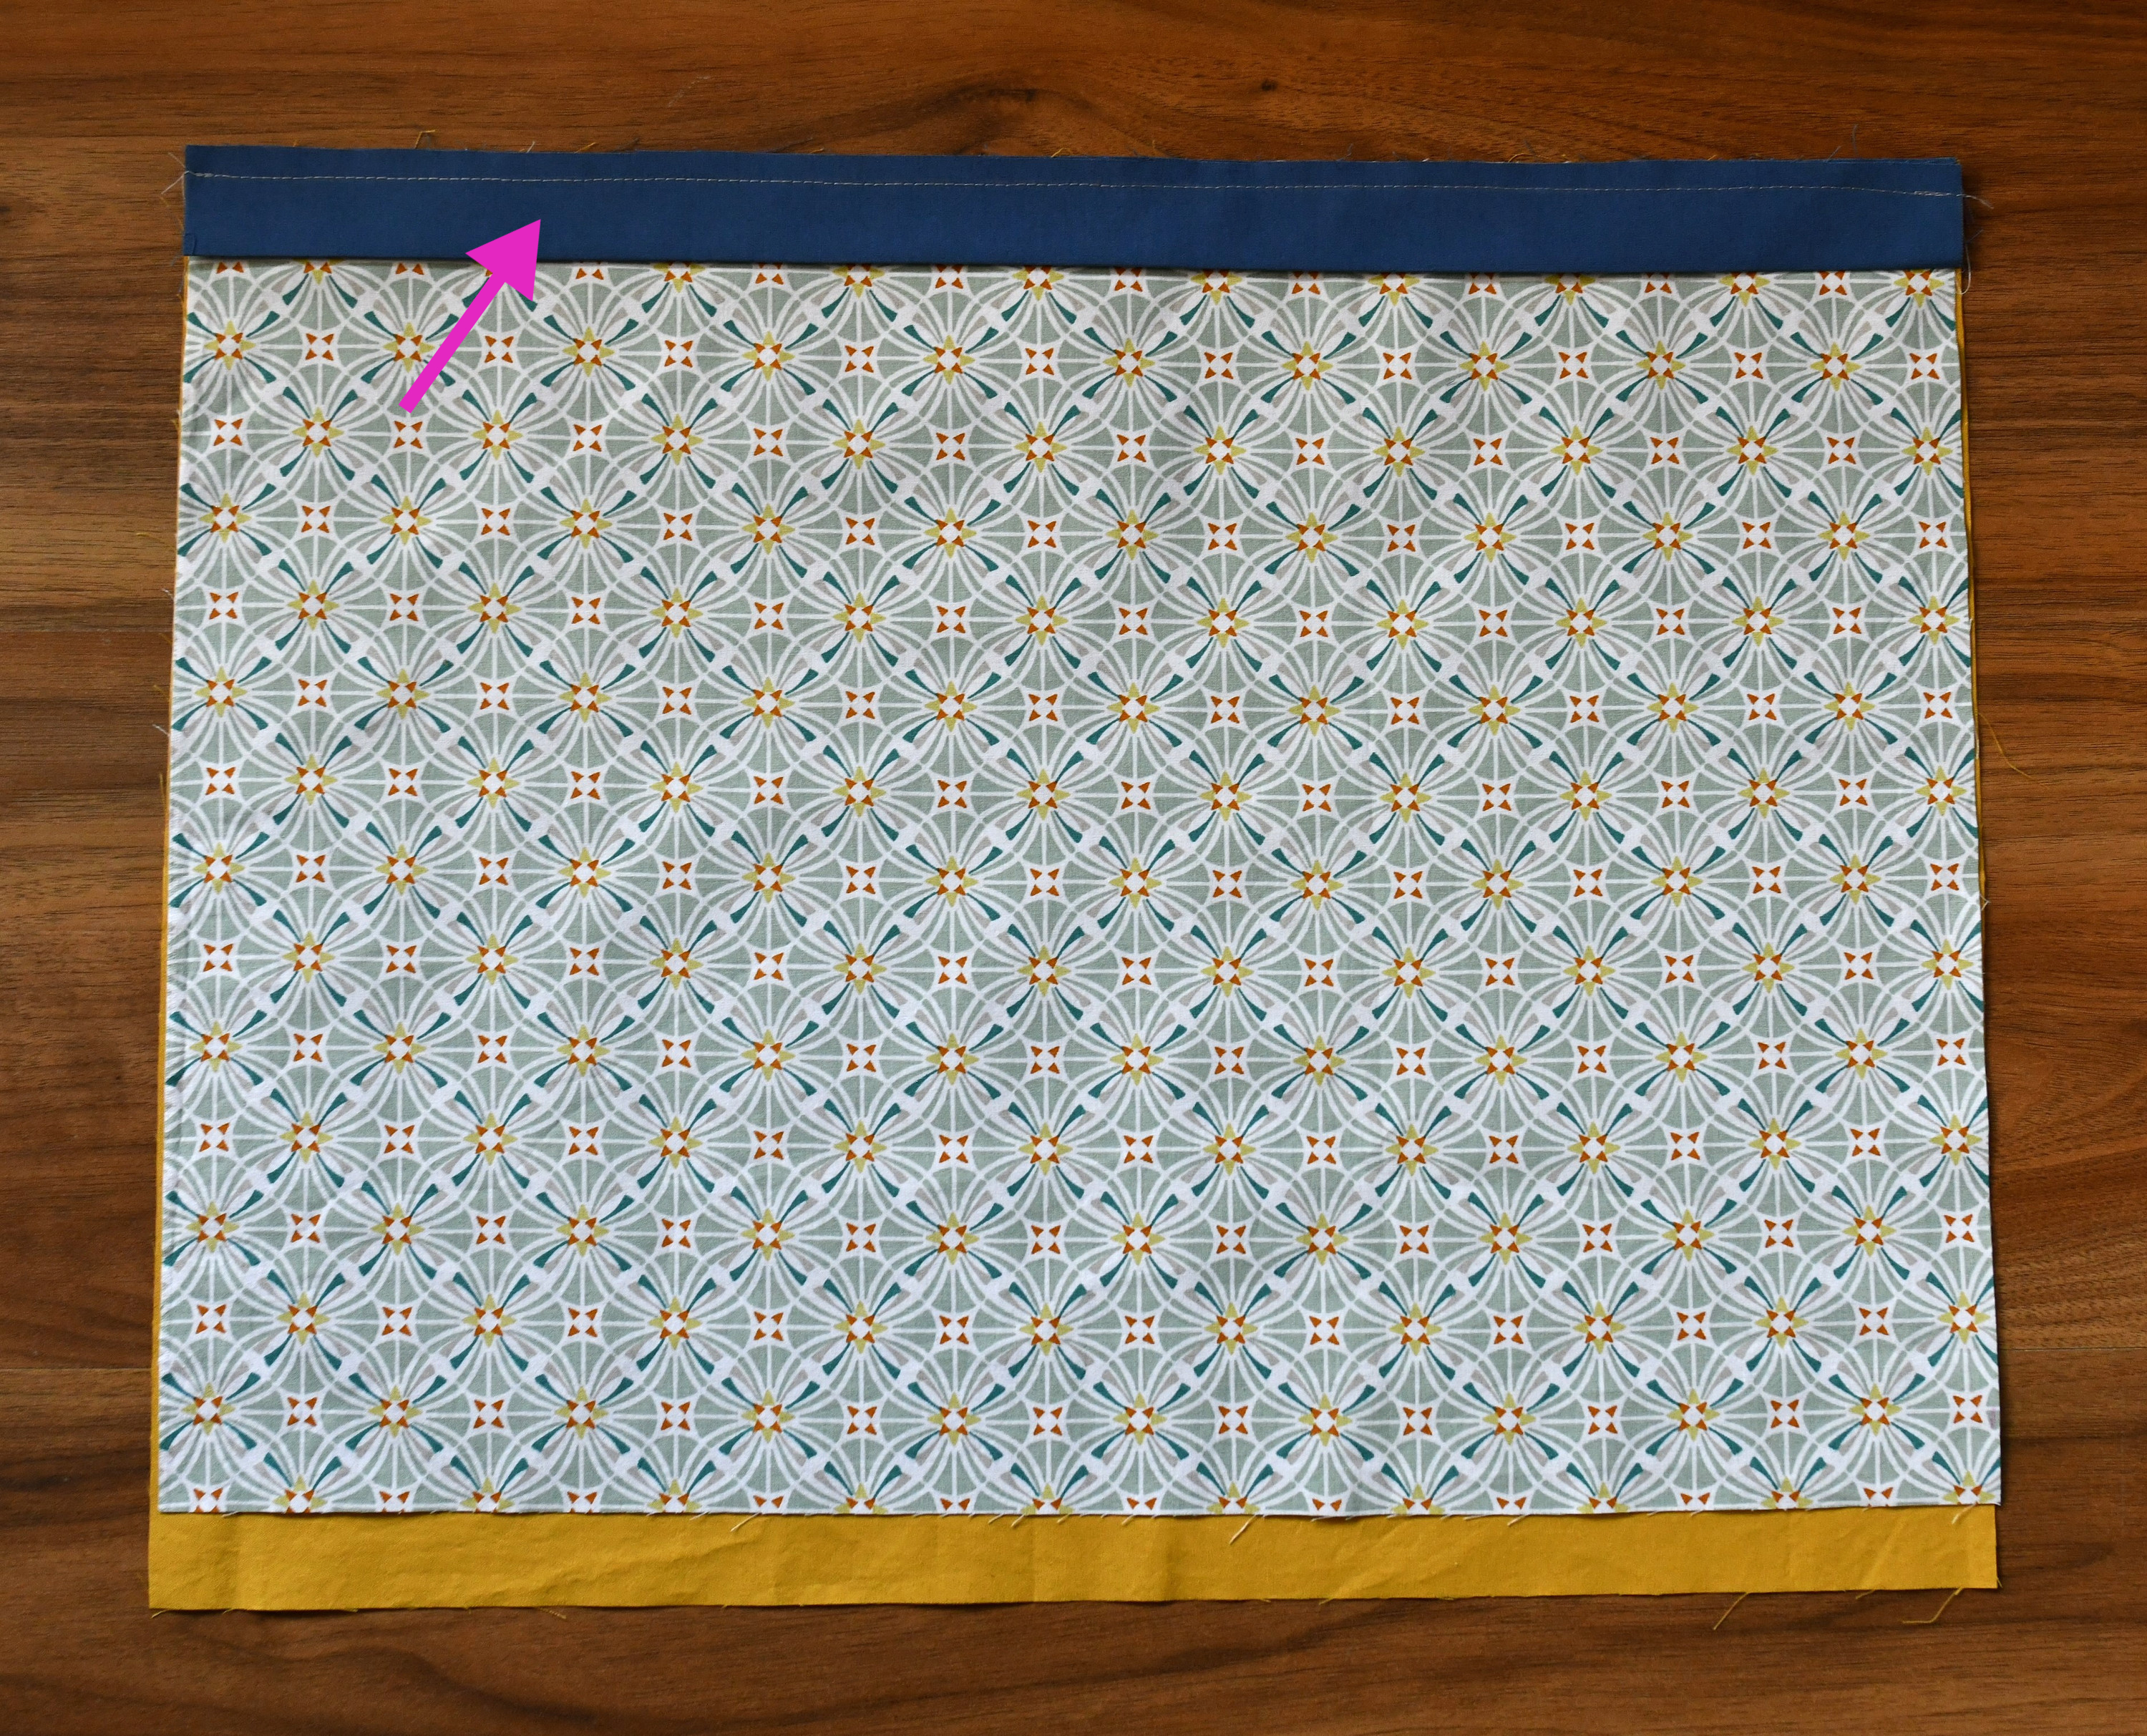
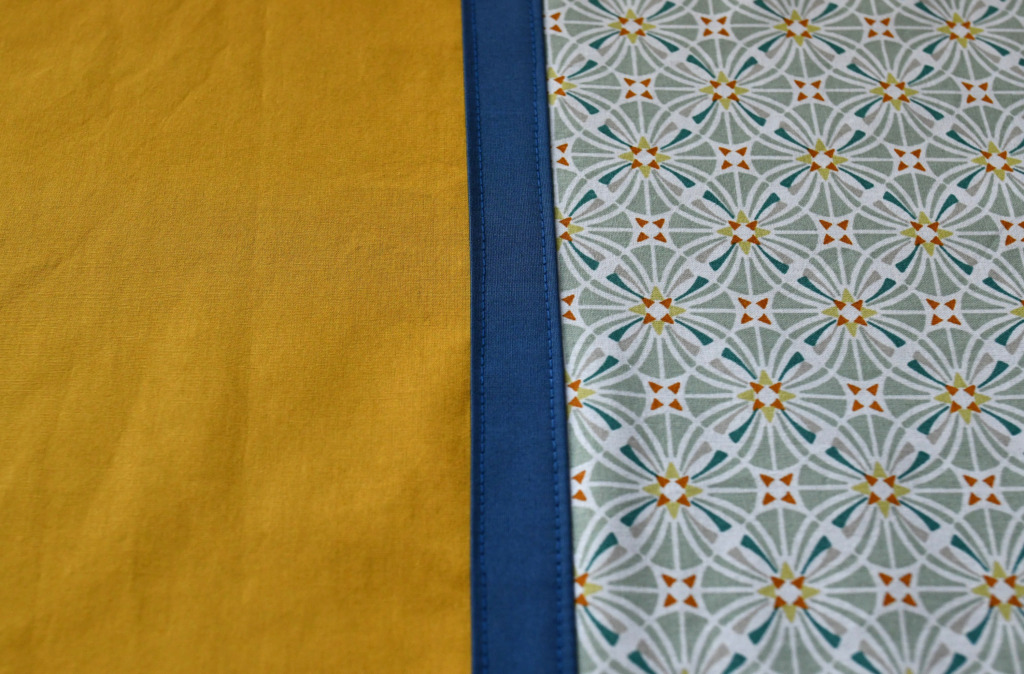
There are no raw edges on the inside – that’s quite clever, right?
After pressing the seam, flip the trim over to cover the raw edges on the right side of your fabric.
Next, pin the trim in place – this step is super important because pressing alone won’t keep the layers stable. Once it’s secure, stitch close to the folded edge of the trim to finish it off.
You may choose to sew two rows – the stitching distance is usually 1/8 inch, or 3 mm, from each edge. These stitches are reinforcing as well as decorative.
Tip: Edgestitching is one of those things you can’t rush - so take your time! And trust me, don’t try to do it if you’re hungry or tired - it’s just a straight line, but it can feel stressful for beginners. Focus on the built-in guide of your presser foot instead of watching the needle. This will help you feed the fabric more evenly. Use plenty of pins and go nice and slow to get the best results.
That’s it – the front piece is finished! Now, let’s move on to the next step.
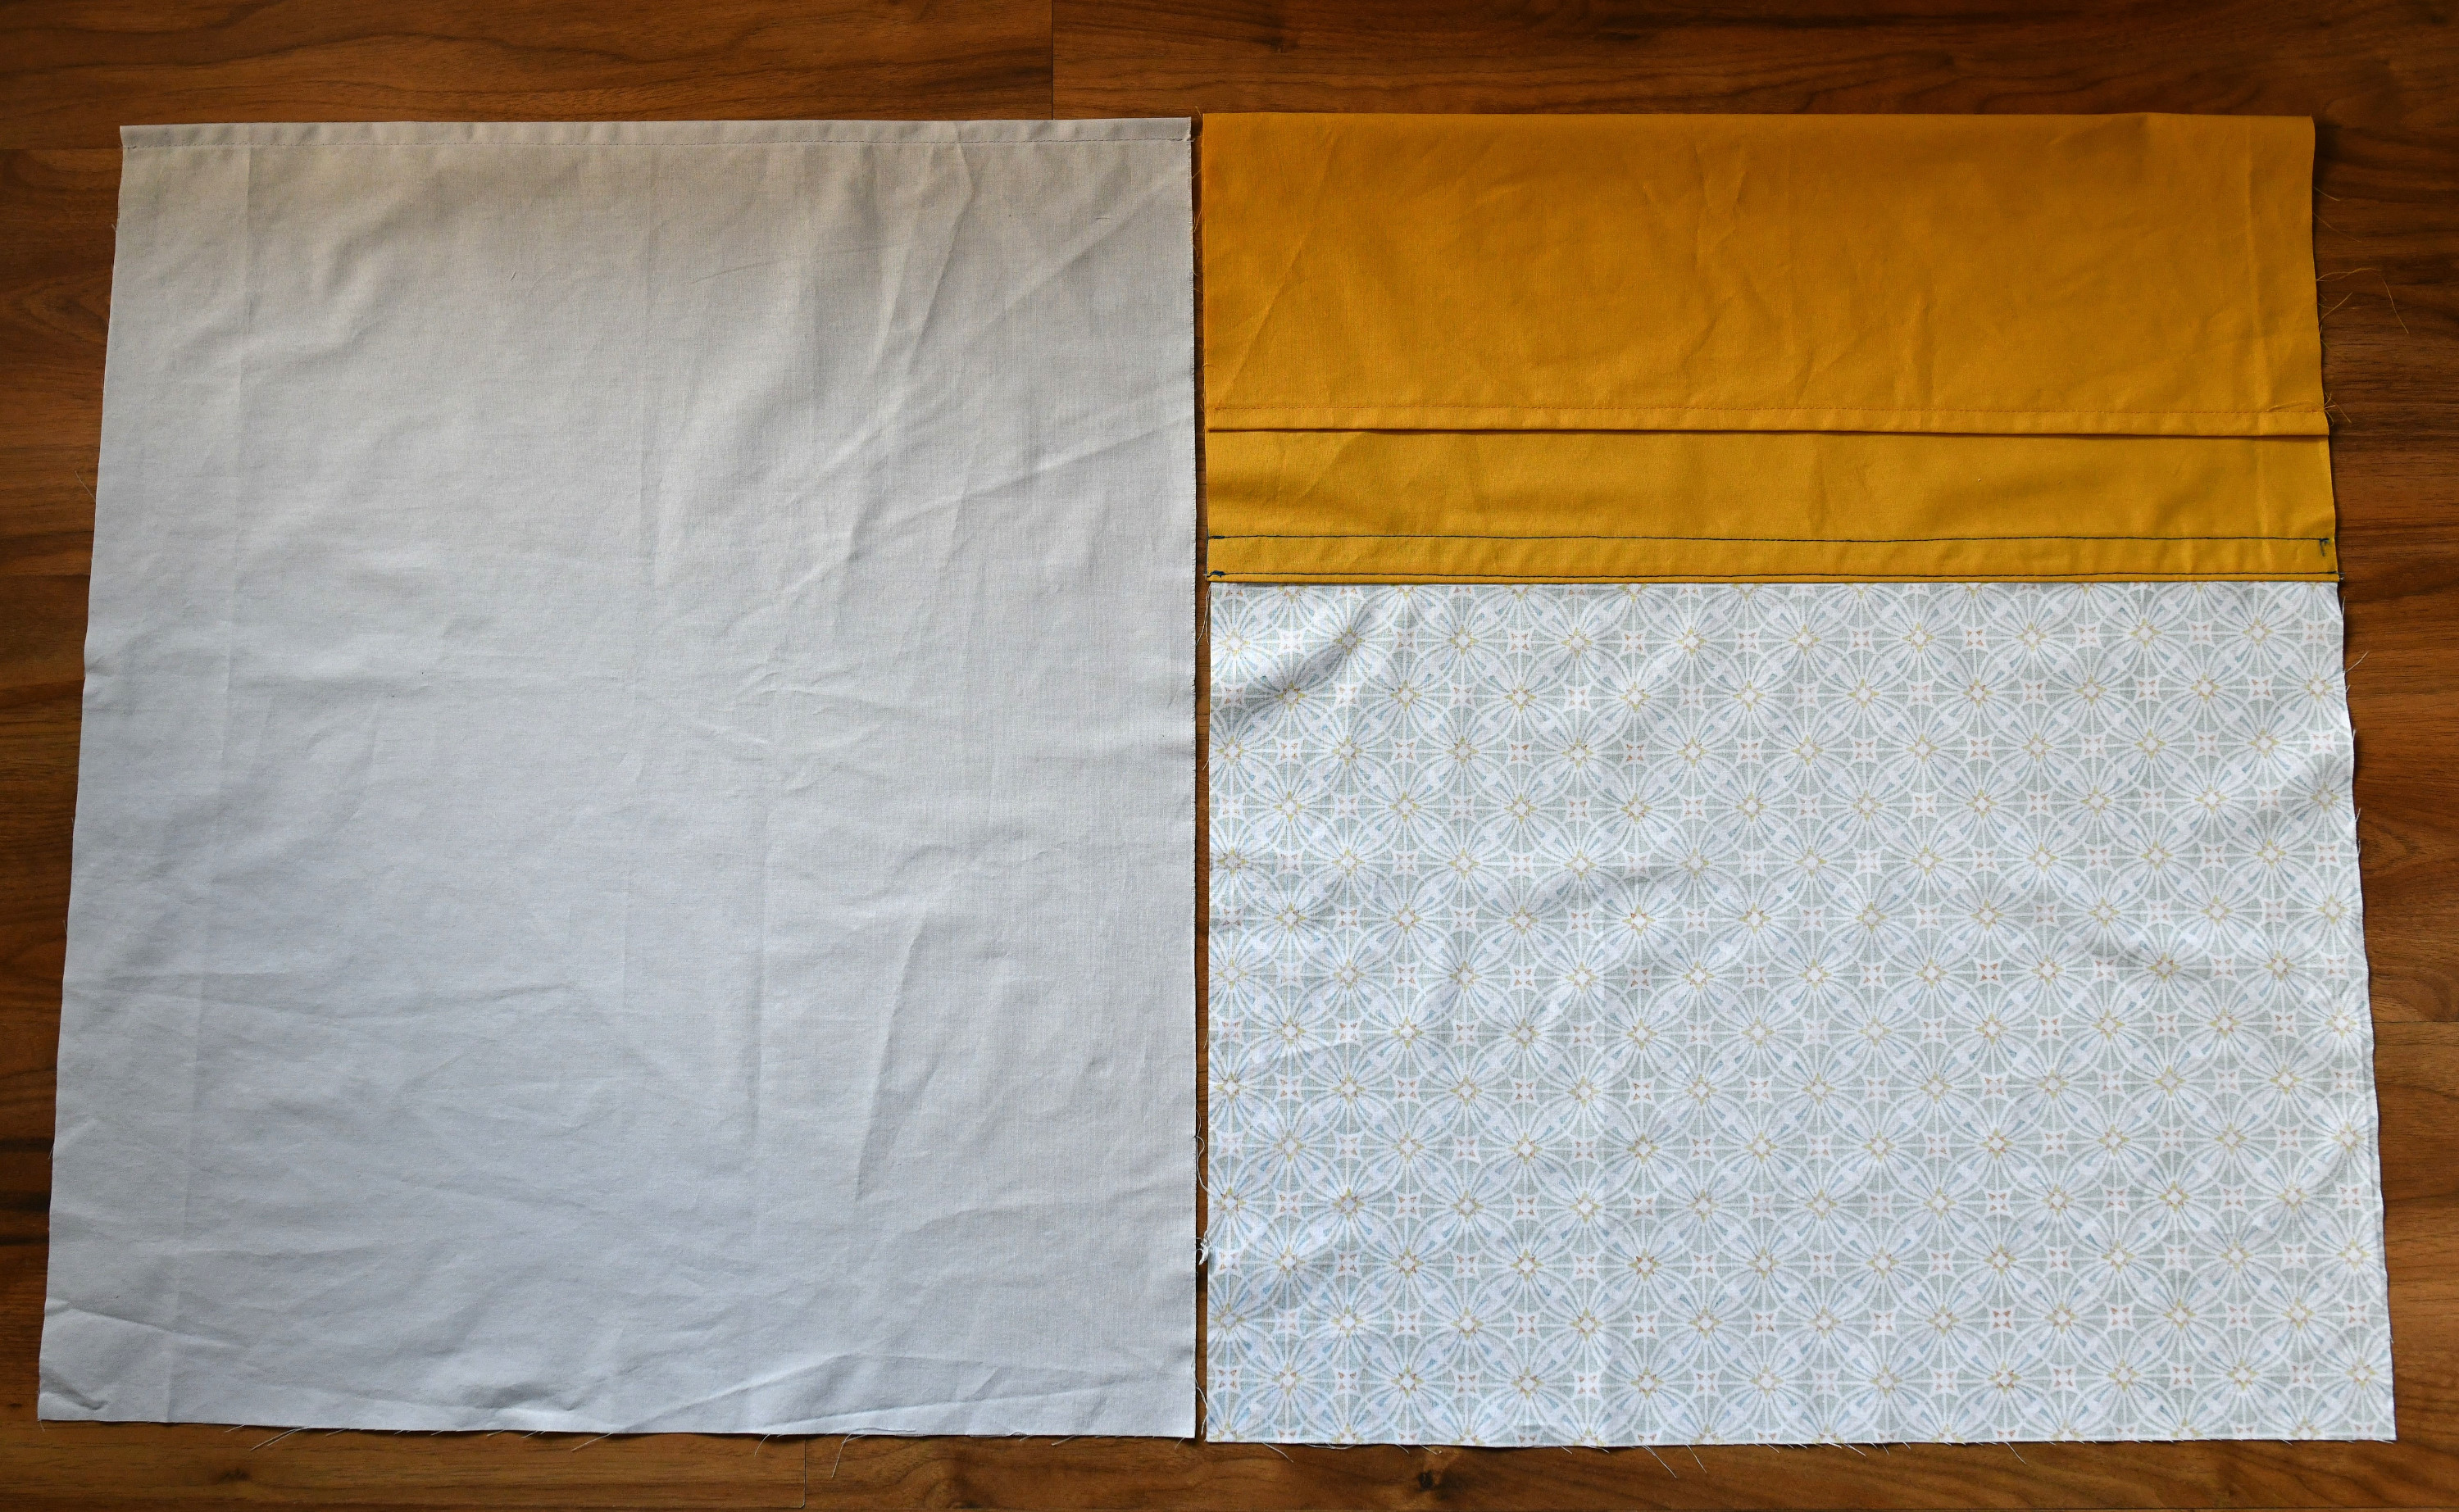
Step 3 – hem the back and the front pieces
In this step, you need to hem the short edge of the back and front fabric pieces. Lay your pieces wrong side up.

Fold over the short edge 3/8 inch and iron, then fold over 5/8 inch again and pin. Stitch into place to create a double hem. Backstitch at the beginning and end of your stitches!
The other short edges of the back & front pieces should be left unhemmed.
Step 4 – fold the flap
Place the front piece with the right side facing down and fold the inner flap, until the front piece is the same size as the back piece.
Then, lay the back piece over the front piece, with the wrong sides together (see photo below).
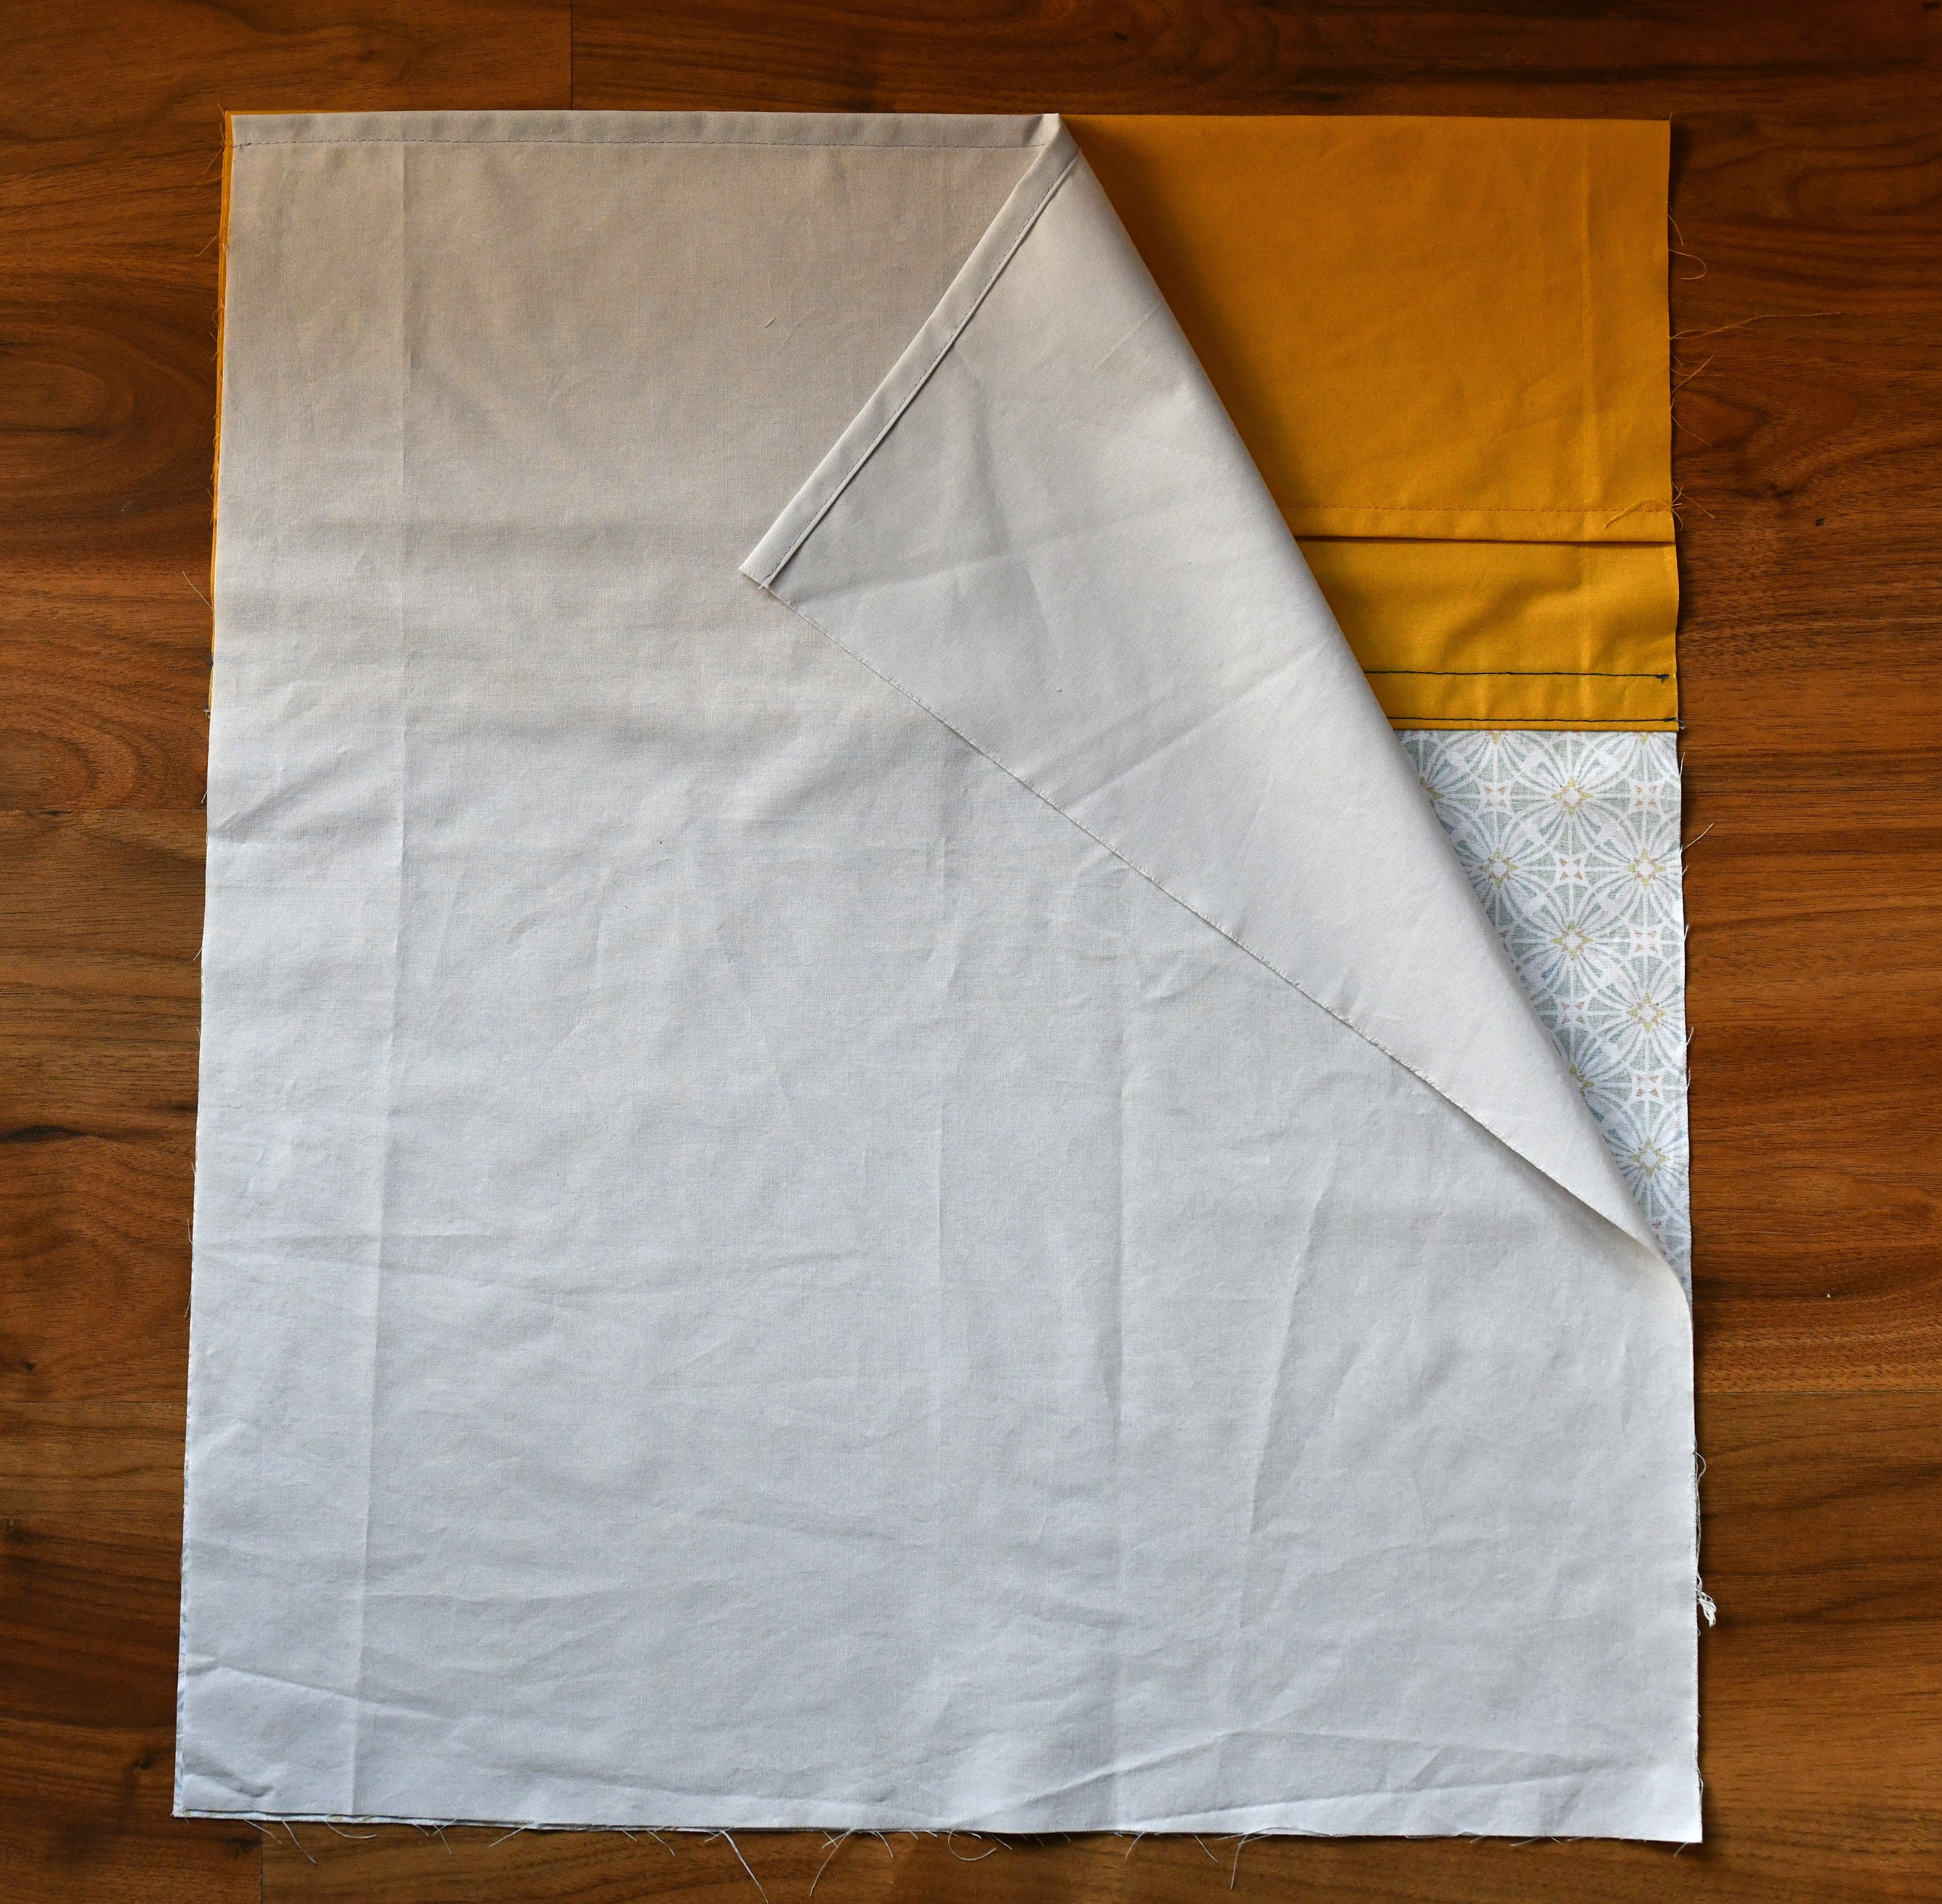
Pin along both sides and the bottom, then stitch using a 3/8″ seam allowance.
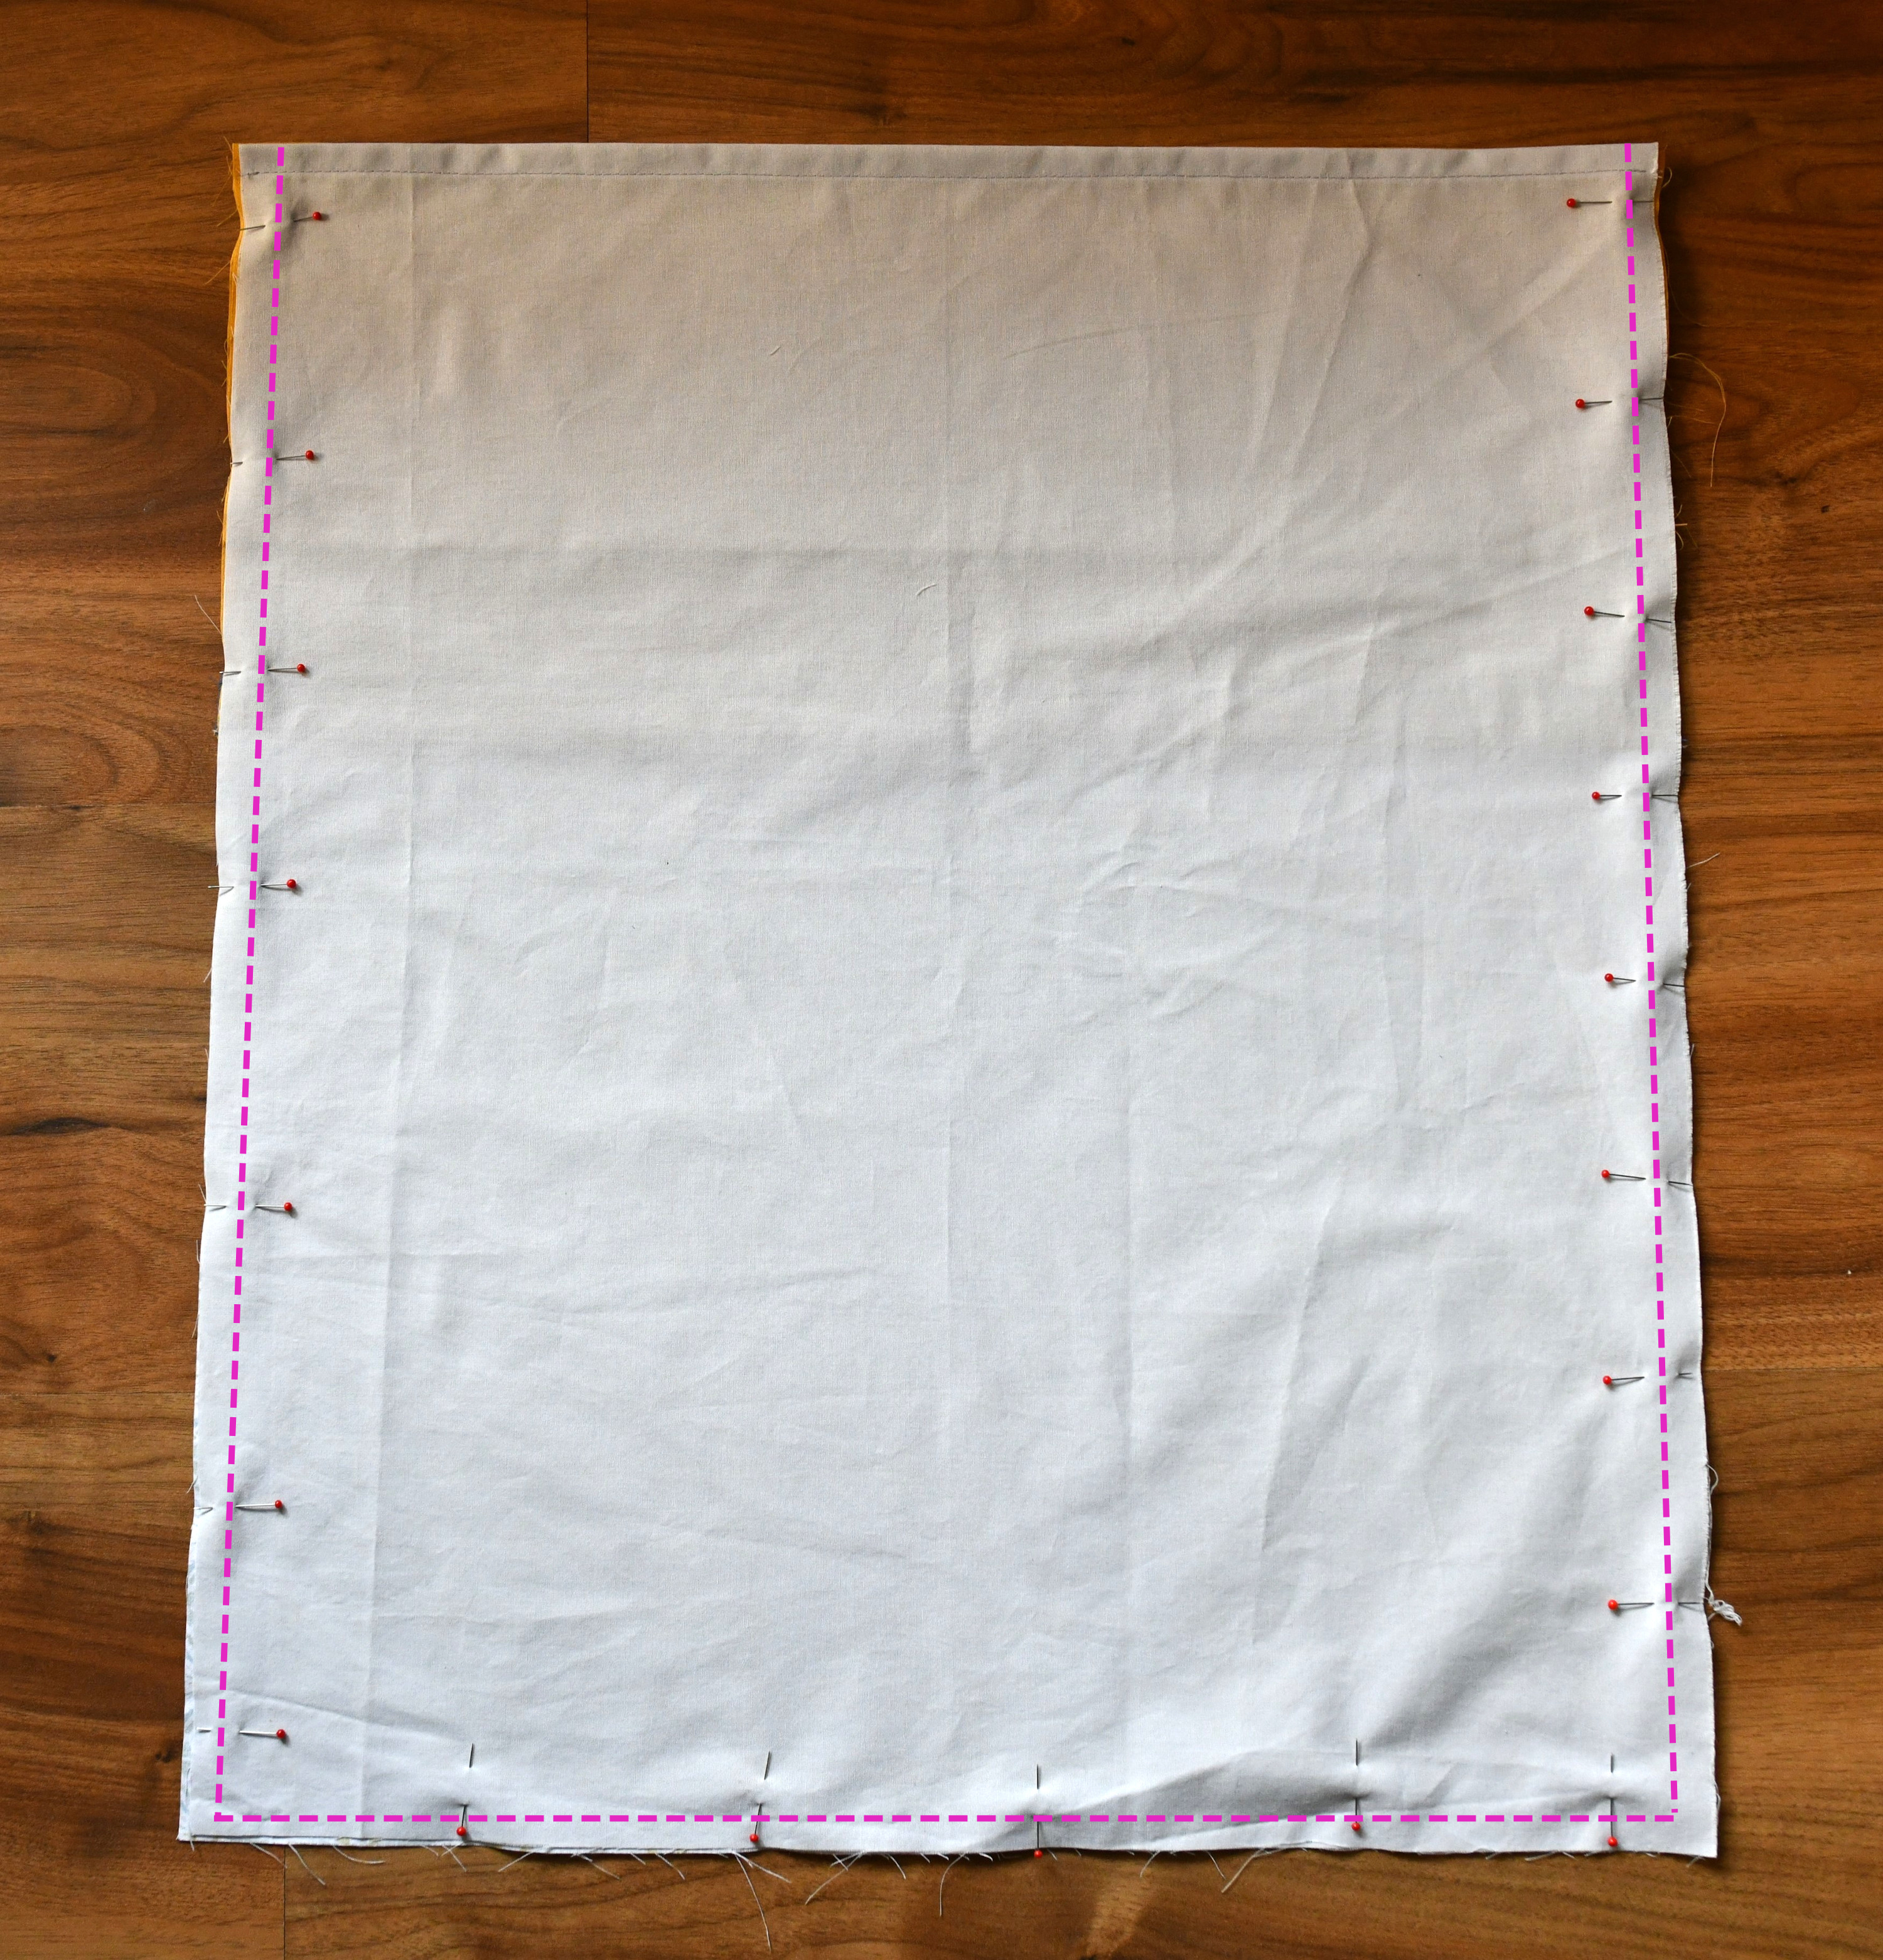
After that, trim the seam allowance on all sewn sides down to about 1/4″.
Now, turn the pillowcase inside out. Use a pencil or chopstick to gently push out the corners.
No need for an iron here – just use your hands. Roll the seams between your fingers to push out the edges (check out the short clip to see what I mean). This will make everything smooth and help you sew those beautiful French seams, without any raw edges sneaking through.
Next, stitch around the three sides of the pillowcase with a 3/8” seam allowance, but stop just before the inner flap. Don’t forget to backstitch!

Step 5 – finish your pillowcase
Now flip the envelope flap over to the other side, then pin and sew along the sides until you meet the previous stitching lines.
At the edges of the envelope flap, backstitch to reinforce the stitches.

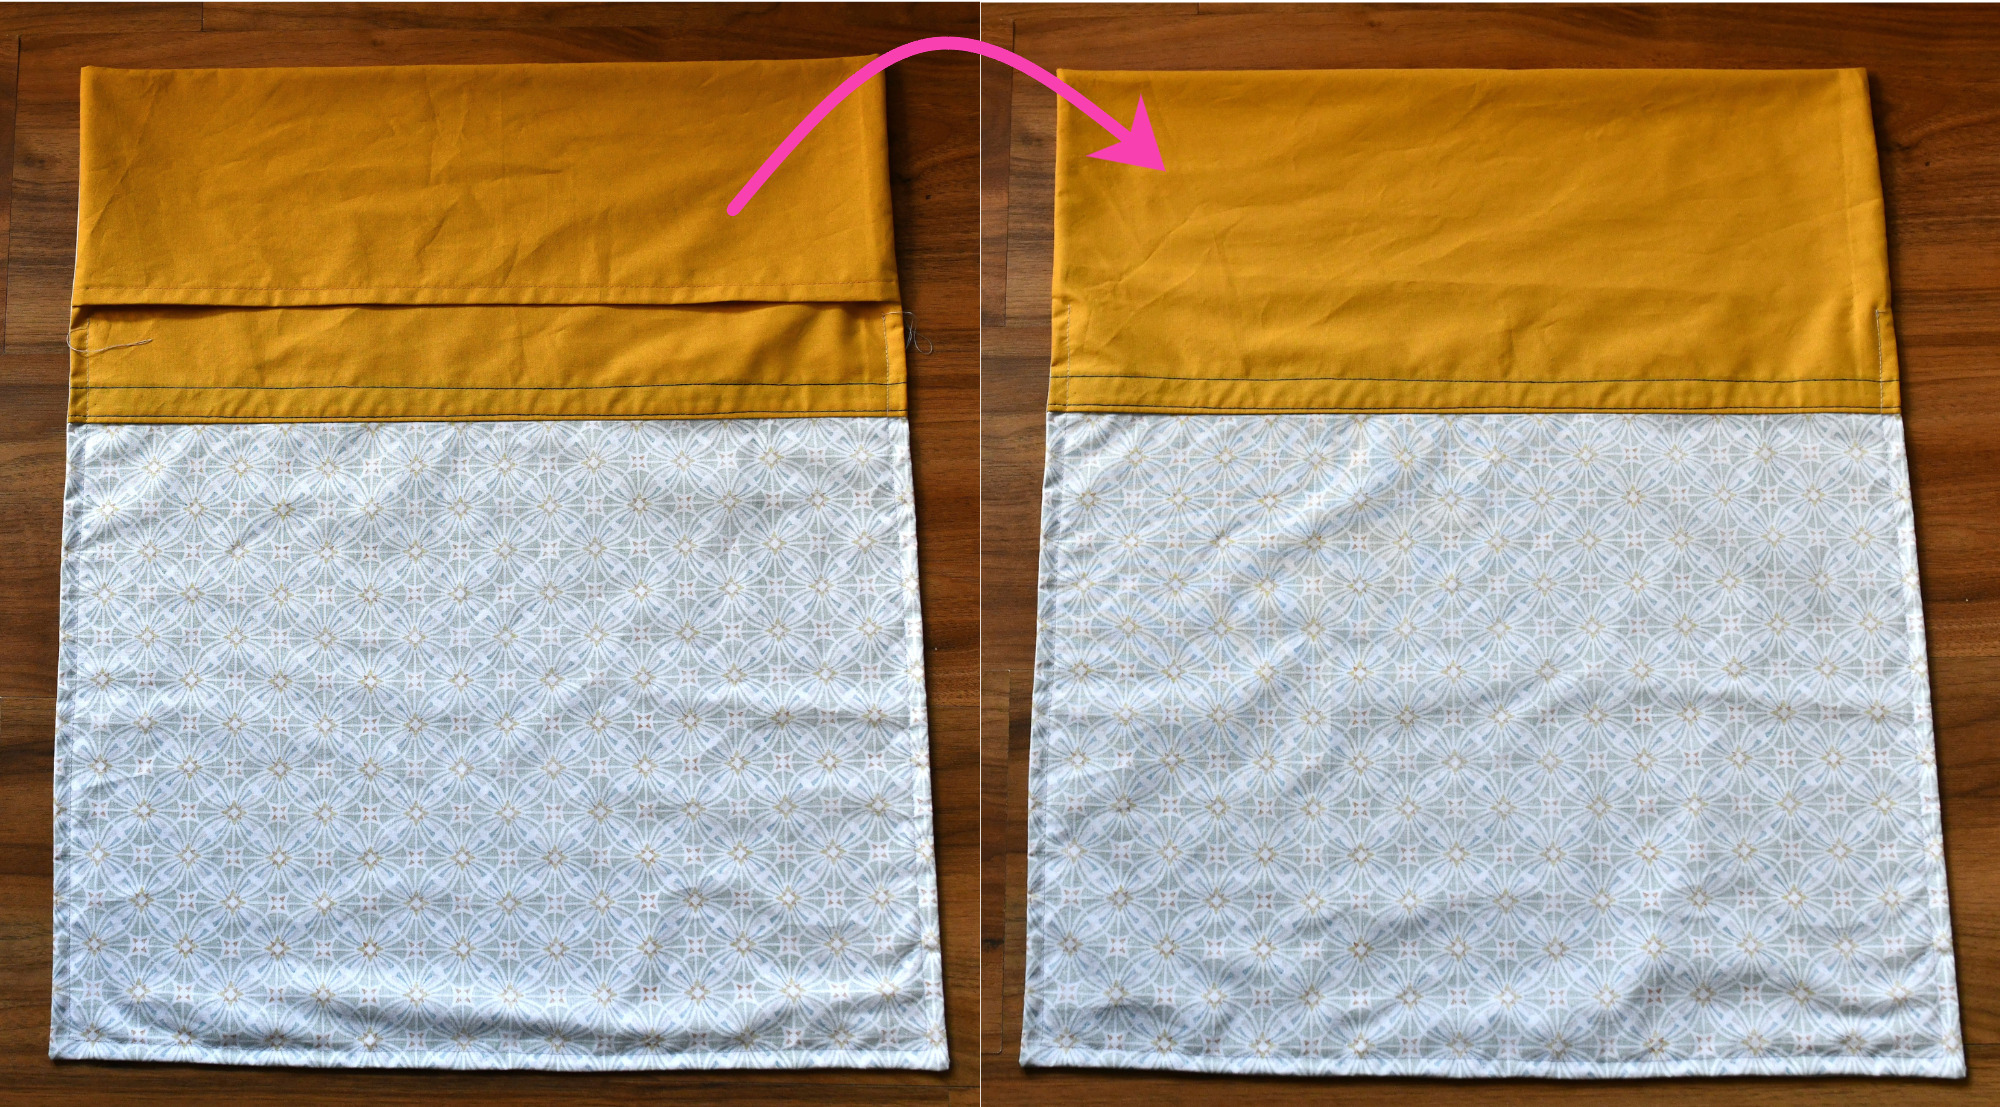
Now, I know this could’ve been done in the previous step, but I always seem to forget exactly when and how to flip the envelope flap! That’s why I save this task for the end – it helps me remember. Hopefully, this little trick will come in handy for other sewing beginners too.
Go ahead and flip the envelope flap over again (check figure 3 above) and take a moment to admire your work. Looks great, right? Now you can turn the pillowcase right side out and slip in your pillow insert!

Did you find this easy pillowcase tutorial and free pattern helpful? I’d like to hear what you think of it! And I would LOVE to see pictures if you give this project a try.
Let’s keep in touch! You can find me on Facebook, Instagram, and Pinterest.
Related posts