
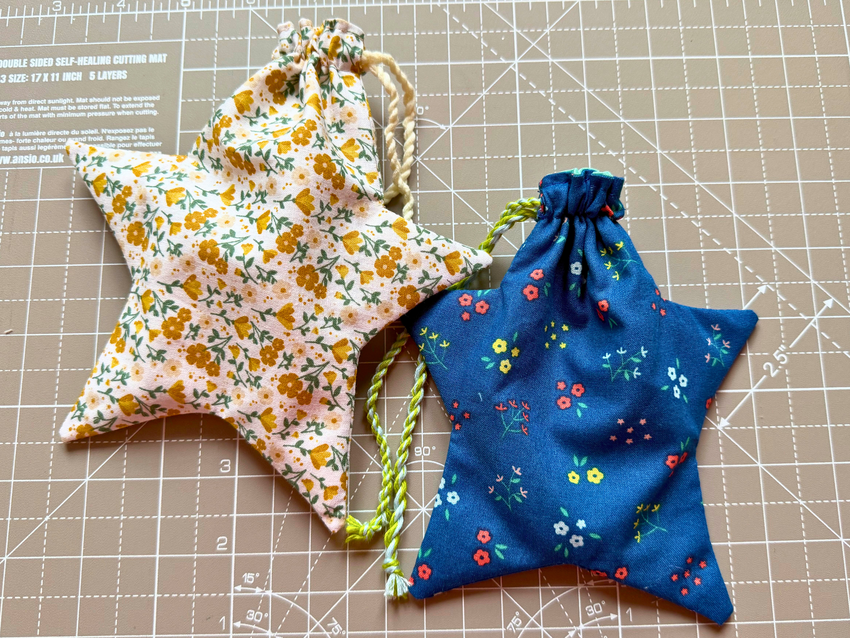
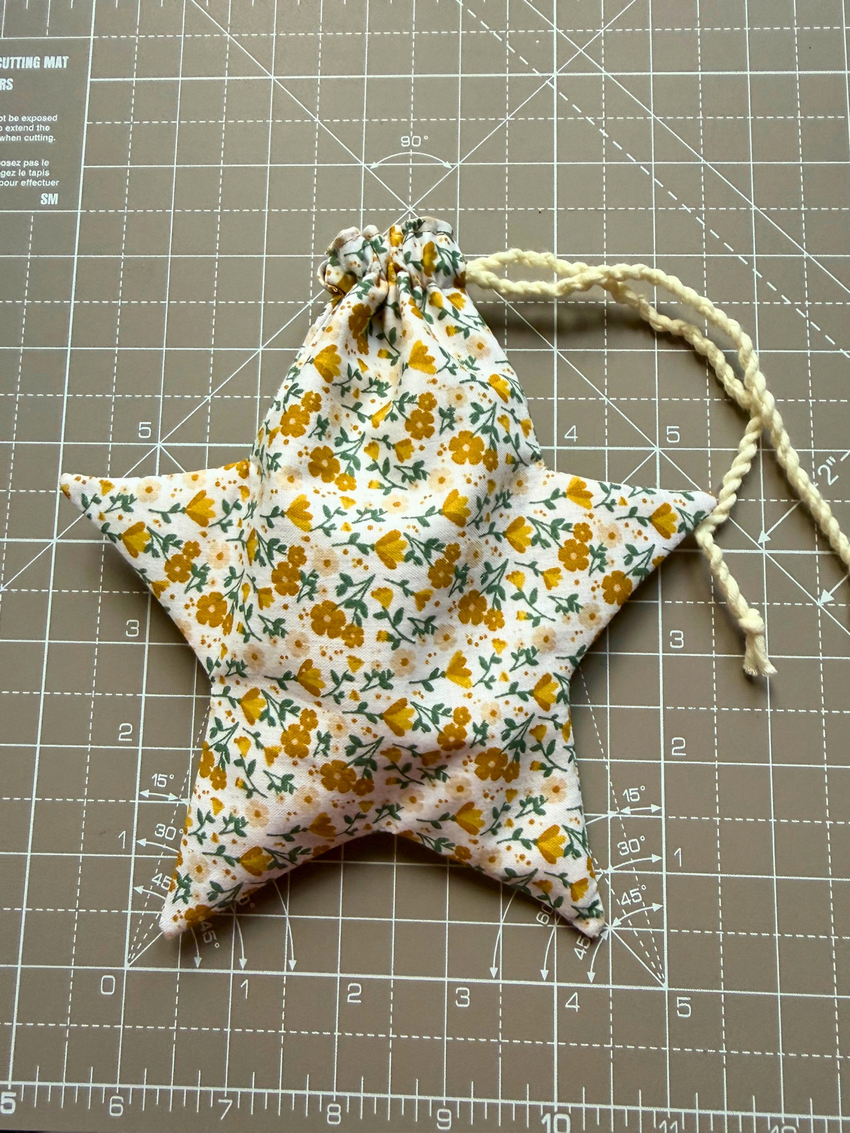
There is something extra special about wrapping small gifts in handmade packaging. This little star drawstring pouch makes a gorgeous reusable gift bag, a handy stocking stuffer, or a sweet ornament to hang right on the Christmas tree.
Making this DIY project is worth every minute because it uses up tiny scraps from your stash, takes under an hour, and teaches you how to sew neat points and clean linings. It’s great for beginner sewists looking to level up their precision, or seasoned crafters batching out quick holiday gifts for friends, teachers, and family.
This free pattern is shaped like a classic five-point star, but with a clever tweak: the top point is widened to create a generous opening. Once you pull the drawstring closed, that top section cinches right back into a neat point, restoring the full star shape!
Fabric picks and scrap ideas
For this project, pick lightweight woven fabrics that press flat and keep sharp points. Quilting cotton is the easiest choice because it holds its shape without stretching. Lightweight linen adds a natural holiday vibe while staying easy to turn.
If you want a soft gather along the casing, cotton lawn or voile pulls together without extra bulk. You can also raid your scrap bin for upcycled cotton shirting to make cute, zero-waste gift bags!
Upsizing your bag
Keep in mind that the usable inside pouch is about 5″ tall by 3″ wide (not counting the star points). It’s meant for small goodies like jewelry, wrapped chocolates, gift cards, or lip balm rather than bulky gifts.
Want a little more room? If you enlarge the template by tracing an extra 3/4″ around all edges, the usable pouch space jumps to about 7″ tall by 5″ wide. And remember, the side and bottom star points do not just sit there looking pretty – they are great for tucking in tiny extras like wrapped candies or chocolates!
Sewing supplies:
- Free star gift bag template (download box below – print at 100% scale).
- sewing machine
- universal sewing machine needles
- matching all-purpose thread
- fabric scissors / rotary cutter & cutting mat
- sewing pins
- Narrow ribbon, cotton twill tape, or baker’s twine.
- Safety pin for threading.
- Point turner (or a wooden chopstick).
Step-by-step sewing instructions
Step 1: Cut your fabric pieces
Download and print the free 5-inch star template – it fits neatly onto just a single sheet of A4 paper. Cut out 4 star pieces total:
- Main fabric: 2 pieces
- Lining fabric: 2 pieces
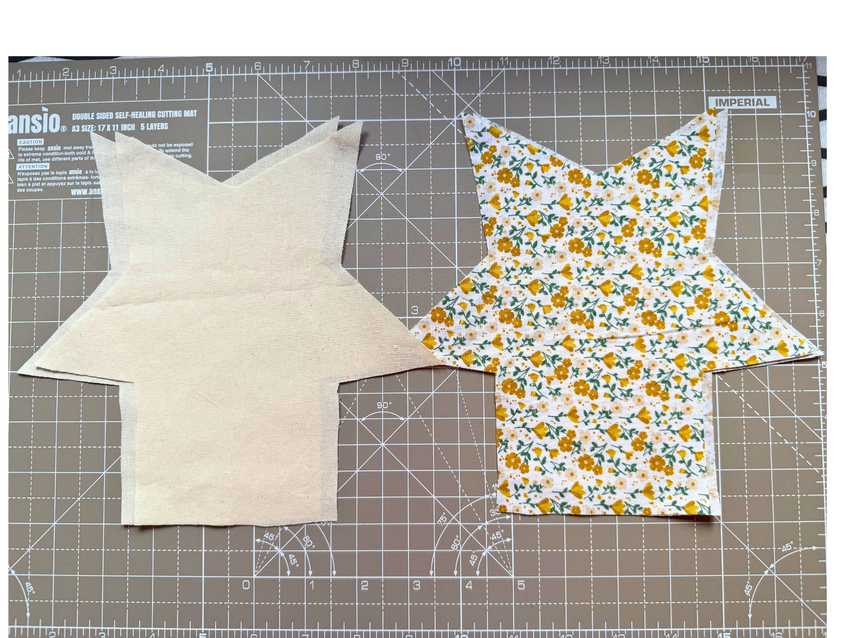
A 1/4″ seam allowance is already built into the pattern pieces. If you’re newer to sewing and finding that tricky, pop on a 1/4″ straight stitch foot to keep it neat and easy.
Step 2: Sew the lining star
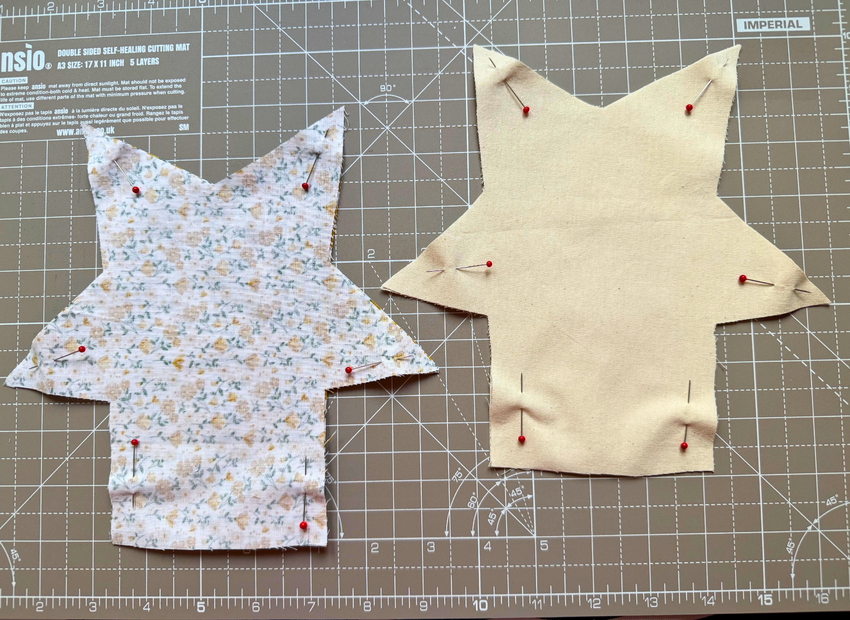
Place the two lining pieces right sides together. Pin the edges to keep them from shifting. Then, sew around the outer edge using a 1/4″ seam allowance, leaving the top edge completely open. Backstitch at the start and finish.
Step 3: Sew the main fabric star
Place the two main fabric pieces right sides together and pin. Now, sew around the star using a 1/4″ seam allowance, but leave a 1/2″ gap unsewn on both side edges, about 1/2″ below the top opening. You will use these side openings later to thread your drawstring cord through the casing. Again, leave the top edge open.
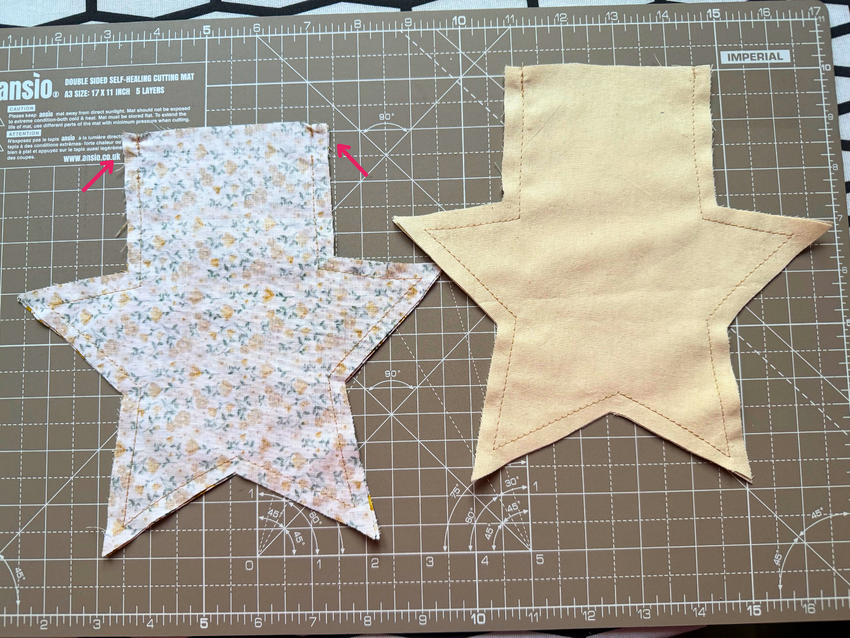
Whenever you reach a star point, stop with your needle down into the fabric, raise the presser foot, pivot, and lower the presser foot. Keep the raw fabric edge flush with the guide on your presser foot for straight, even seams.
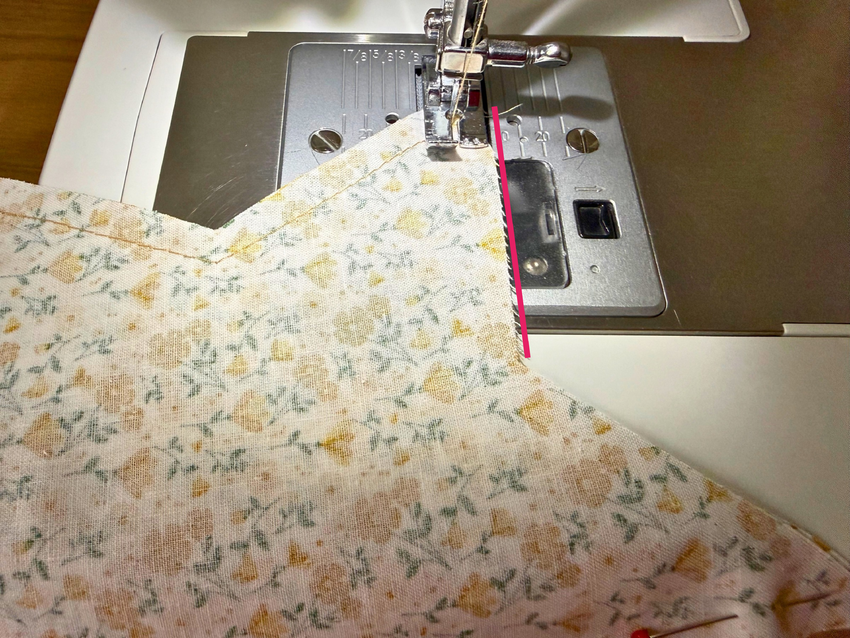
Step 4: Trim seam allowances and reduce bulk
Trimming the bulk is essential for crisp points!
Use small, sharp embroidery scissors. Clip diagonal V-notches into every inner corner (where the points meet), cutting close to the stitching line without snipping through the threads.
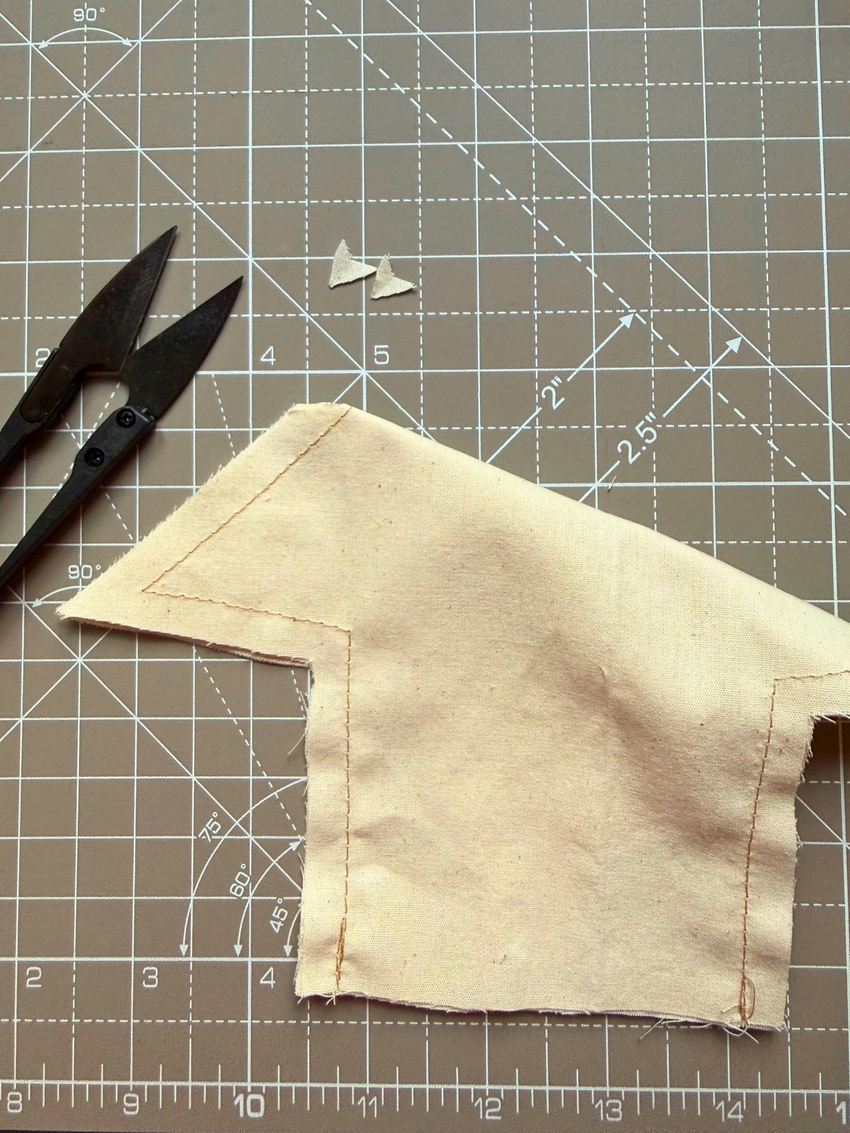
Then, trim the seam allowance down at the tips of the star points to about 1/8″.
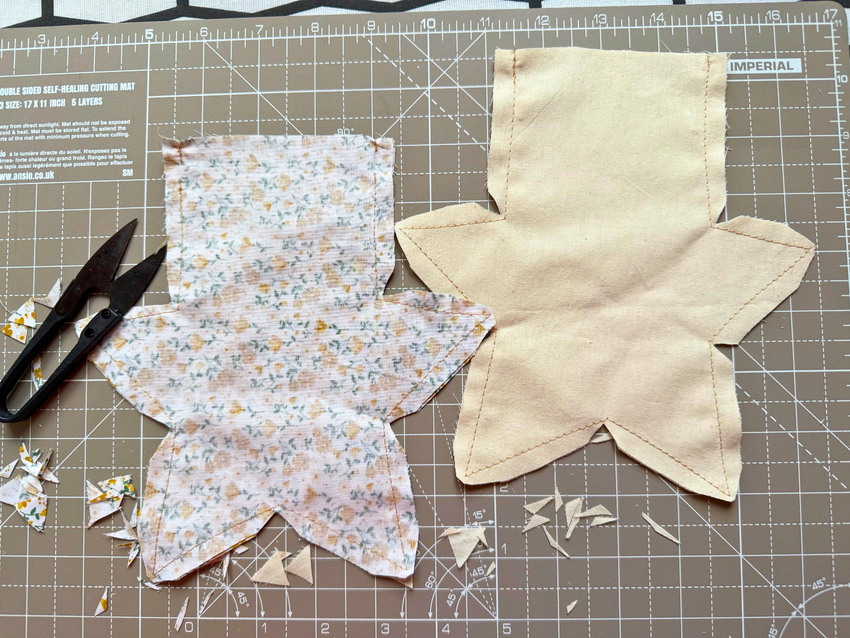
Step 5: Press seam allowances open
Do it on both the main and lining stars. Pressing those seams flat right now is well worth the effort – it stops your safety pin catching when you thread the cord through later.
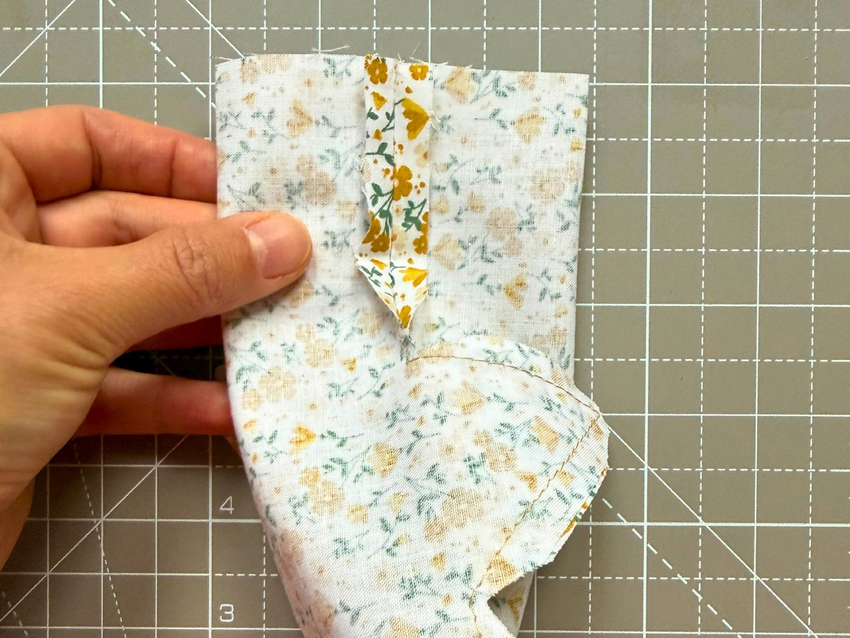
Step 6: Join the main bag and lining
Check that both star bags are identical in size and shape.
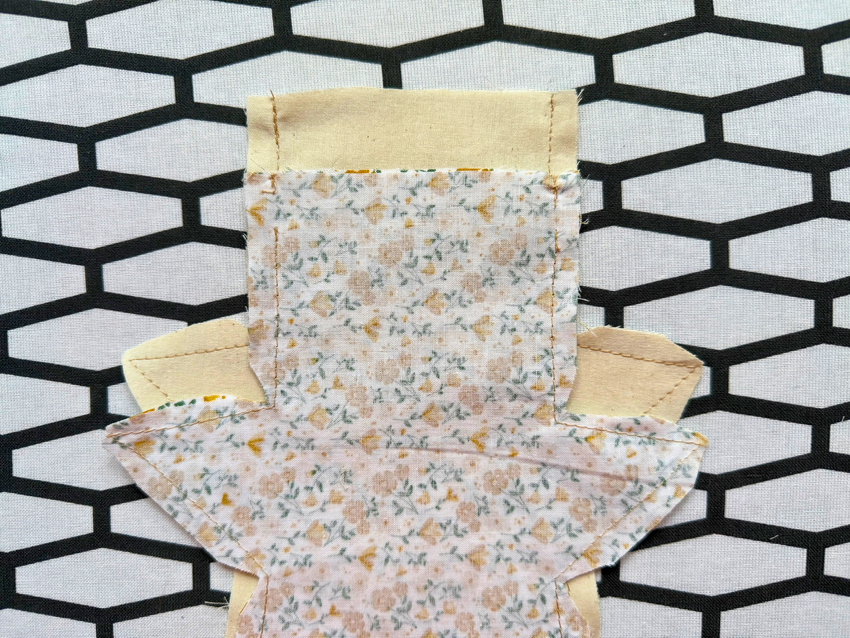
Turn the lining right side out (do not worry about poking out the points yet!). Leave the main bag inside out. Slide the lining inside the main bag so that their right sides are touching.
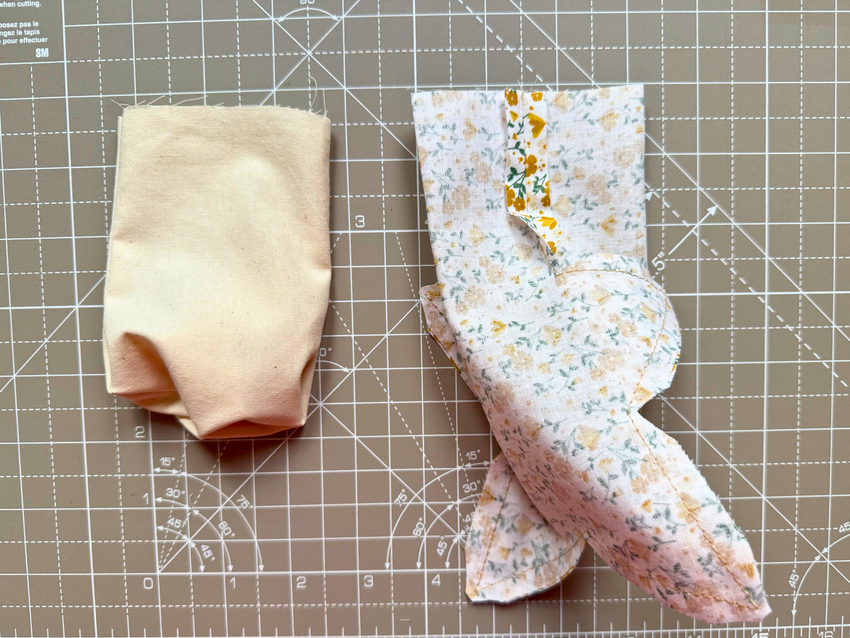
Then, align the side seams and pin along the top raw edge.
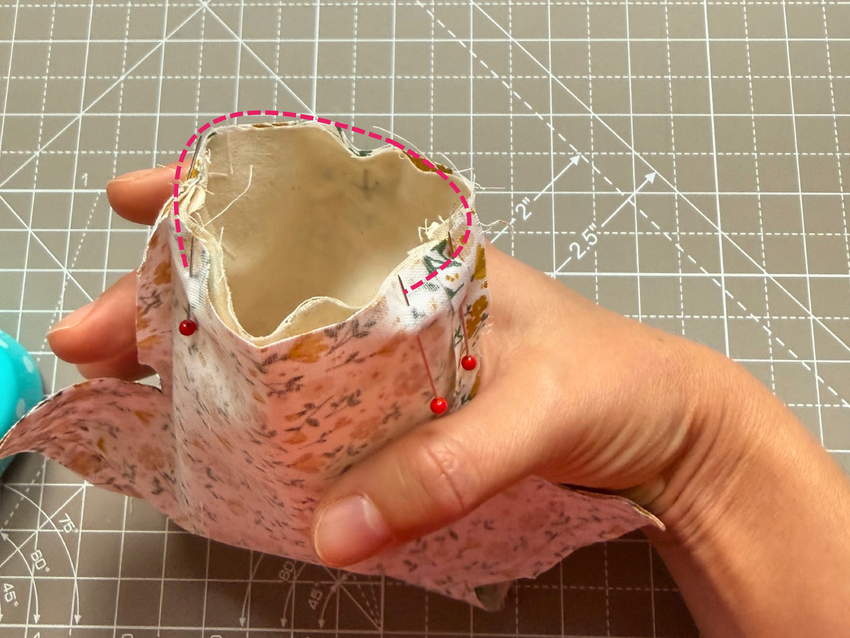
Sew around the top edge with a 1/4″ seam allowance, leaving a 2.5″ opening along one side of the top edge for turning.
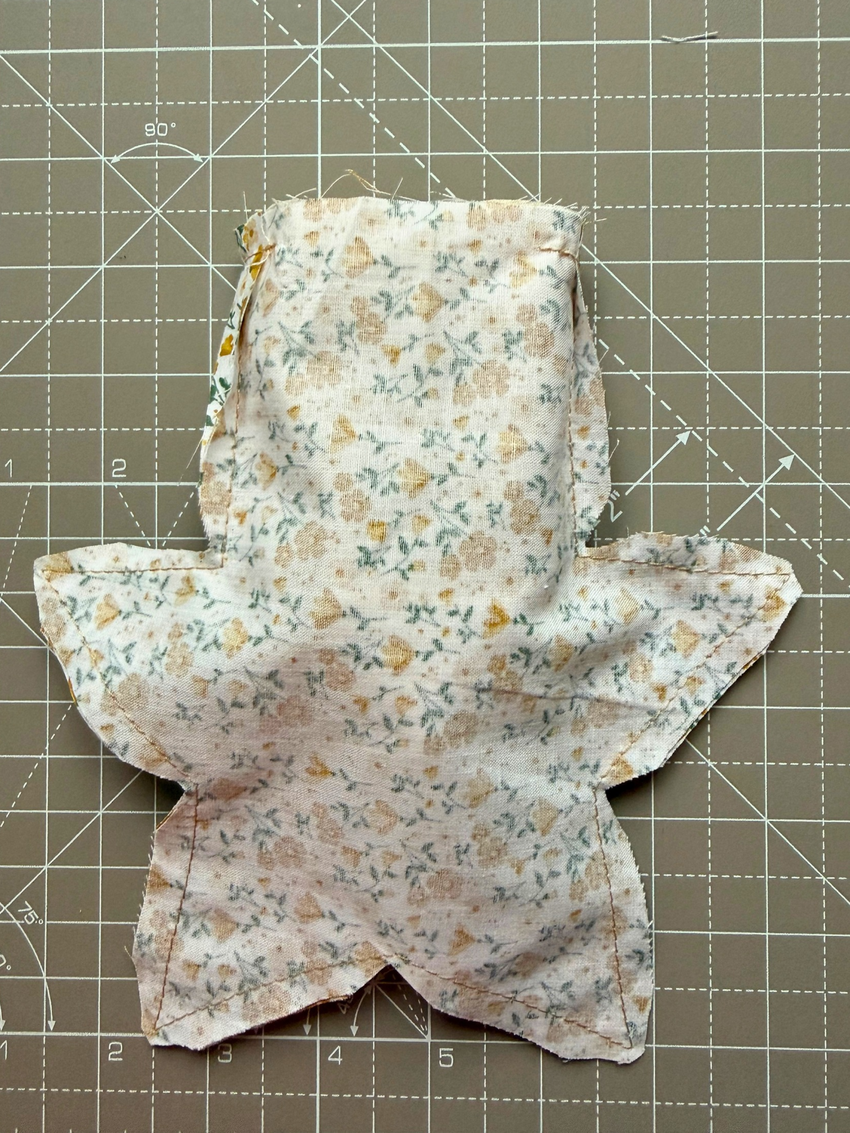
Step 7: Turn and shape the star
Reach through the 2.5″ opening at the top and gently pull the entire bag right side out. Now’s the time to grab a point turner or a wooden chopstick and gently poke out those star points – just stick to the main bag for now. Work gently so you do not poke through the seams!
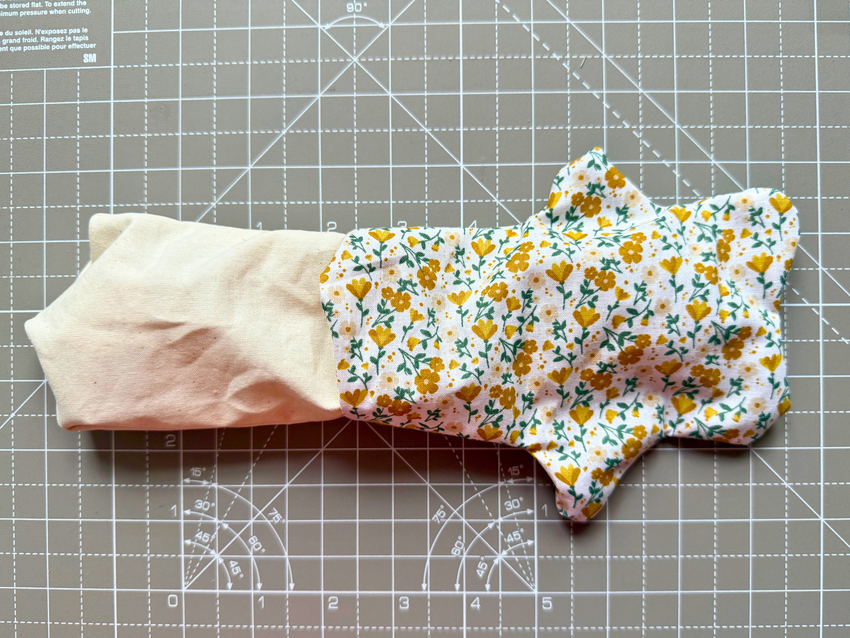
Tuck the lining bag down inside the main bag. Next, use your fingers to align the star points of the lining with the star points of the outer bag.
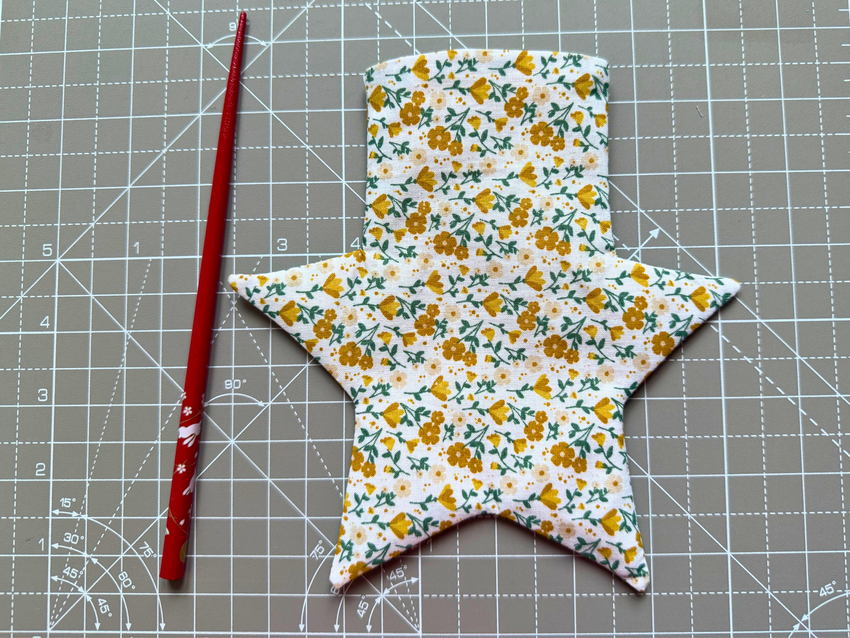
Press the entire star flat with an iron, tucking the raw edges of the top turning opening neatly inside.
Step 8: Topstitch and create the casing
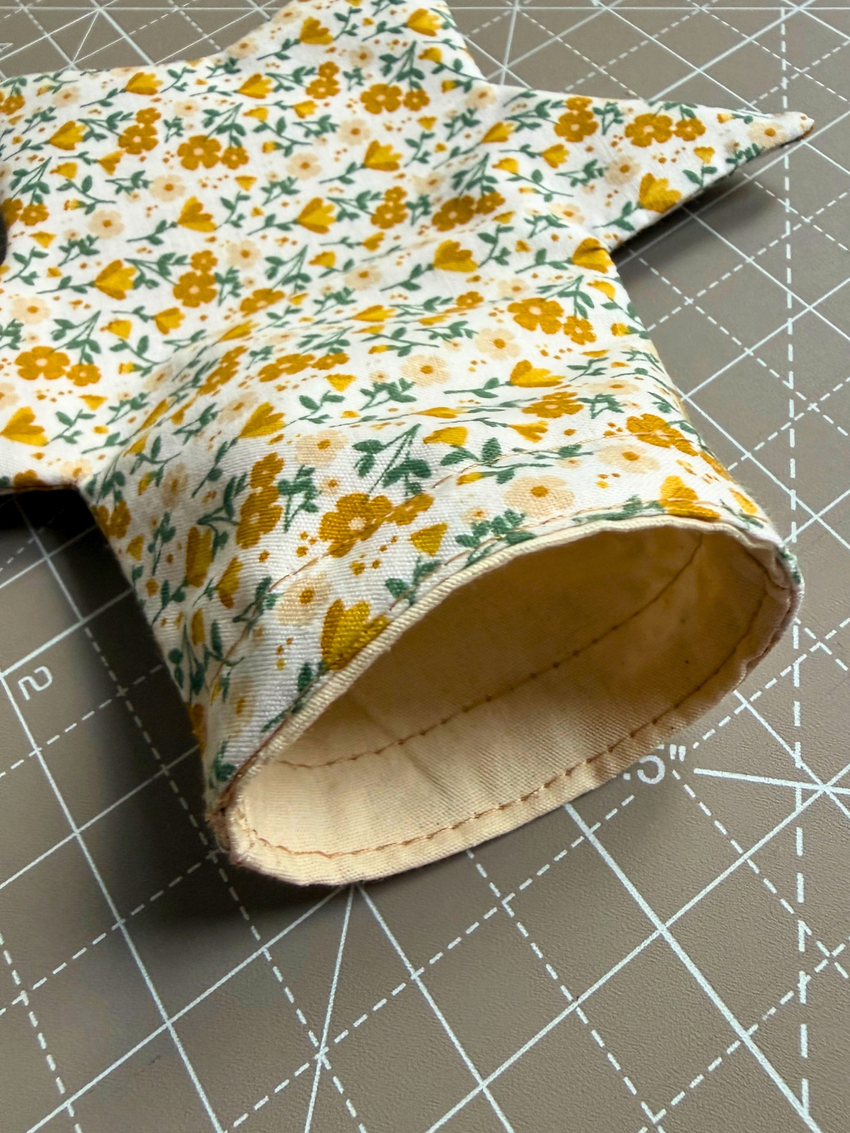
Topstitch 1/8″ away from the top edge around the entire opening. This closes the turning hole and gives the rim a clean finish.
Run a second line of stitches 1/2″ down from the first, circling the whole bag. Boom – drawstring casing done and dusted!
The top opening has a circumference of around 6″, so creating the casing is totally manageable on your machine. It can feel just a tiny bit fiddly because of the smaller opening, but as long as you take it slow, you’ll breeze right through it!
Step 9: Thread the drawstring
Attach a safety pin to one end of your ribbon or cord.
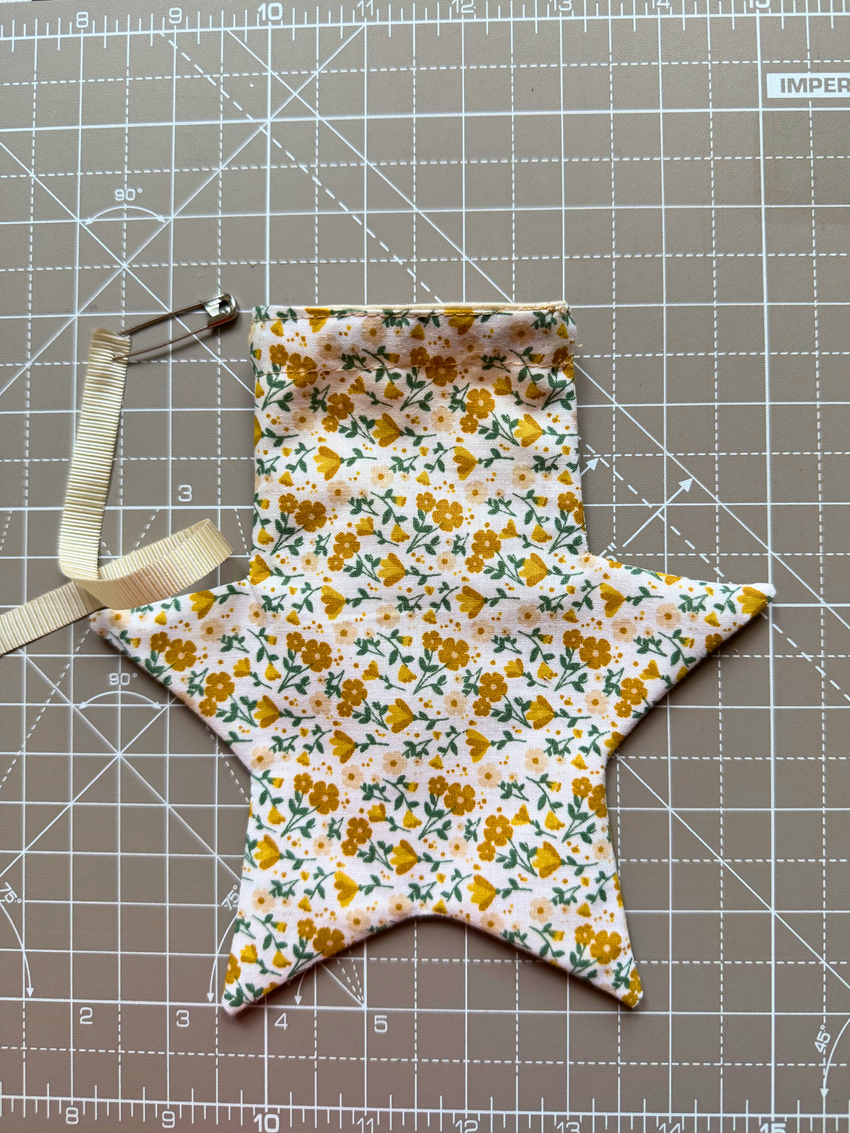
Insert the pin into one of the side openings in the casing and feed it all the way through until it exits on the other side.
For a single-tie pouch, just knot the cord ends together and tie a neat bow. If you prefer a double drawstring, thread a second cord from the opposite side and knot each pair together.
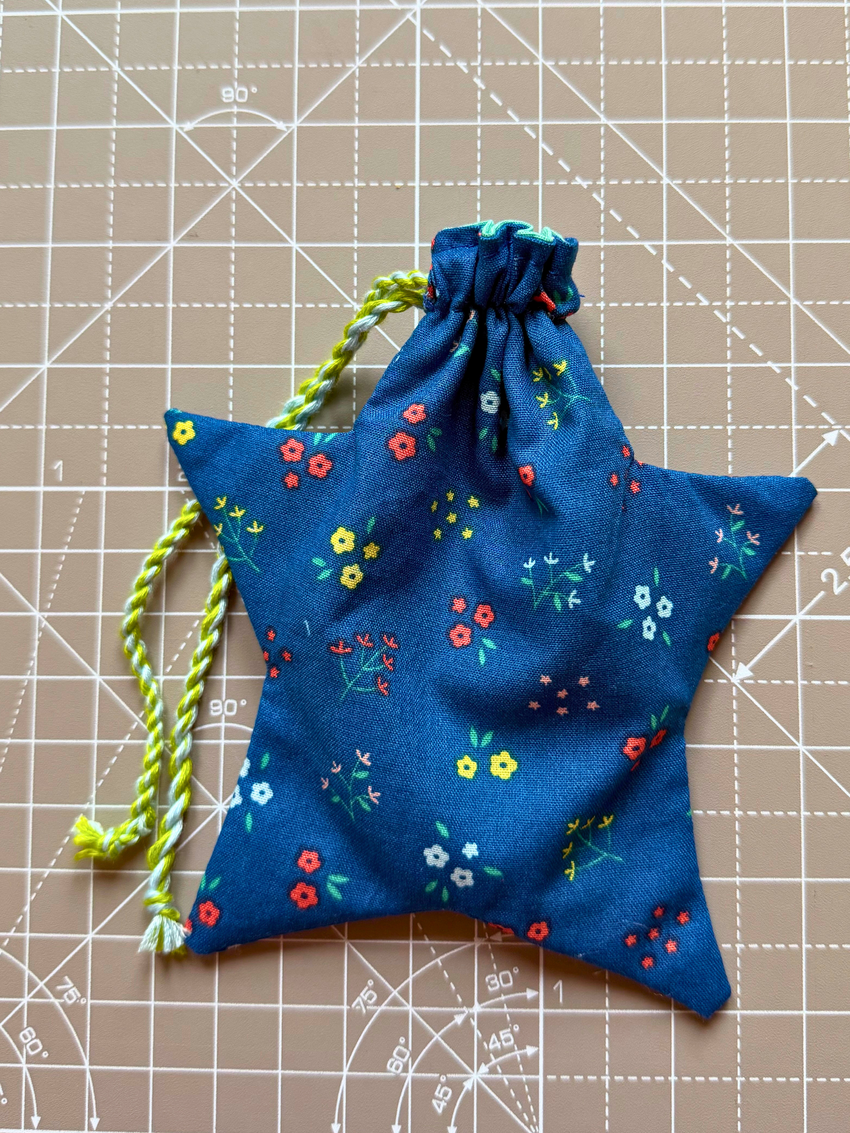
PS: Made a custom cord from embroidery thread for this blue cotton star drawstring bag. Pretty neat, right?
If you notice the blue star bag looks slightly smaller in the photos than the yellow floral one, your eyes are not playing tricks on you! I accidentally used a 3/8″ seam allowance instead of 1/4″ on that first try, which took away a bit of width.
Practical tips & troubleshooting
- Mind the pivot points: Slow and steady! Count your machine stitches as you approach each outer point so you nail that sharp point every time.
- Avoid bulky fabrics: Heavy materials like denim or thick canvas are fine for an unlined star pouch, but crisp, lightweight cotton is definitely your best bet for a fully lined version.
- Safety pin hang-ups: If your safety pin gets stuck inside the casing, wiggle the pin sideways. The pre-pressed seam allowances should stay flat, but keeping the pin head small ensures an easy pass through the channel.
Frequently asked questions
What is the actual finished size of the bag? While the outer shape measures about 7 inches from tip to tip, the usable pouch space inside is roughly 5 inches tall by 3 inches wide (not counting the star points). It’s designed for small treats, jewelry, folded cash, lip balm, or tiny trinkets.
How much fabric do I need for this project? Very little! All you need are four 8.5-inch fabric squares – two for the outside and two for the lining. This makes it an ideal scrap-busting project.
Can I scale the pattern up or down? Yes, absolutely! You can easily make a larger bag using the exact same template. Just place your pattern on a bigger sheet of paper and pretend you are adding extra seam allowance all the way around. Use a ruler to trace an even border 1/2″ or 1″ out from the original lines to sketch your new, larger star. Scaling down smaller than 5 inches is not recommended, though, because sewing the casing around the tiny top opening gets tricky.
Why are my star points rounded instead of sharp? Rounded points usually mean too much fabric bulk was left inside the tips, or the seams were not clipped closely enough. Be sure to trim the seam allowance down at the tips and snip deep V-notches into the inner angles before turning.
Have you made your own star gift pouch, or are you planning to hang a few on the tree this year? Drop a comment below and share which fabric combinations you’re using.
You might also like:
- Best oven mitt patterns to make for gifts
- 10 stylish wine bag sewing patterns for easy holiday gifting
- Easy quilted hot water bottle sleeve tutorial
Let’s keep in touch! You can find me on Facebook, Instagram, and Pinterest.
Related posts