
Summer is officially here, and if your Pinterest feed looks anything like mine right now, it is absolutely packed with gorgeous, breezy linen sun hats. There is just something about a wide-brim linen hat that screams European holiday. But when you look at the price tags on those designer versions, it is easy to choke on your coffee/tea.
Here is the good news: you do not need to drop a fortune at a high-end boutique. You can totally make your own this weekend! Even if you are a complete beginner sewist who just unboxed your sewing machine, you can create a stunning, professional-looking sun hat.
A lot of first-time hat makers end up with a sad, floppy bucket hat that droops right into their eyes. That happens because hats require specific structured fabrics and stabilizing notions that people rarely just have sitting in their fabric stash.
In this DIY guide, I’m going to break down everything you need to know to ensure your first hat-making project is a massive success. Grab a cold drink, and let’s get into it!
The Secret to Designer Structure: Good Interfacing
Let’s talk about the number one mistake beginner sewists make with DIY hats: skipping or using the wrong interfacing. If you take away only one piece of advice from this post, let it be this: your hat brim needs serious structural support.
Without the right stabilizing notions, your gorgeous linen will flop down and block your view. To get that sharp, boutique-bought look, you need a good fusible woven interfacing.
- My Holy Grail: Pellon SF101 (Shape-Flex). It is a cotton woven fusible stabilizer that fuses beautifully to linen, adding incredible body and crispness without making the fabric feel like stiff cardboard.
Top 4 Beginner-Friendly Sun Hat Sewing Patterns on Etsy
You do not need to draft a hat pattern from scratch. The indie sewing community on Etsy has some of the absolute best, most detailed digital patterns. Here are four incredible options that are perfect for a beginner sewist:
1. The Floppy Bucket Hat by Thesewclubpatterns
- A gorgeous, classic choice for a beautiful, reversible sun hat. Instant printable PDF download; includes sizes S, M, and L.
- Fabric Recommendations: Best with heavyweight fabric. If you use light or medium-weight linen, you will definitely need a medium to heavy-weight interfacing for structure.
- Beginner Friendly: Very quick and easy. It includes a free video tutorial alongside the written instructions, which is a massive help for visual learners.
Get the Floppy Bucket Hat pattern on Etsy
2. The Serpentine Hat by ElbeTextiles
- A dramatic, high-fashion silhouette with a generous, protective 4.7-inch finished brim width. Available in four sizes, ranging from XS to L.
- Fabric Recommendations: Specifically designed for heavyweight woven fabrics that hold their structure beautifully – the perfect match for a rustic European linen.
- Beginner Friendly: Rated for advanced beginners and above; quick and straightforward to sew.
Grab the beautiful Serpentine Hat Pattern on Etsy
3. The Reversible Bucket Hat by Jobuko
- An easy, highly versatile utility pattern that you can cut and complete in just 1 to 2 hours. Features an incredible range of 14 sizes, making it a fantastic unisex option for both kids and adults.
- Fabric Recommendations: Handles a wide variety of fabrics beautifully – including cotton, canvas, denim, and linen.
- Beginner Friendly: Fully lined, completely reversible, and includes detailed written instructions with step-by-step photos so you never feel lost.
Check out the ultra-versatile Reversible Bucket Hat Pattern on Etsy
4. The Juniper Bucket Hat by BuckandBloomPatterns
- Packed with amazing custom features for the brave and adventurous beginner looking to build new skills. Sizes run all the way from XXSmall (up to 17.5″) up to Large (24″ – 25″). It features an adjustable back closure for a “grow-with-me” or perfectly tailored fit.
- Standout Features: Fully reversible, offers both Visor Brim and Wide Brim options, and includes a brilliant ponytail hole that opens and closes easily so it won’t mess up your hair style.
- Beginner Friendly: The instant download PDF tutorial is exceptionally detailed and caters to all skill levels.
- To make that genius open-and-close ponytail hole function properly without ruining your hair, you will need a reliable closure. Depending on your preference and sewing style, you can grab a pack of quick-and-easy Iron-on Velcro, classic Sew-on Velcro, or secure Plastic Kam Snaps to give the back closure a clean and adjustable finish.
Find the Juniper Bucket Hat on Etsy to try out the unique adjustable ponytail option.
The Best Heavyweight Linen Fabrics for Extra Structure
When you are planning a DIY summer hat, fabric choice is everything. Linen is the absolute queen of warm-weather textiles – it is incredibly breathable, naturally thermoregulating, and has a gorgeous, rustic texture that looks effortlessly expensive.
However, light dress-weight linen will simply collapse. To give your hat real boutique quality and a brim that keeps its shape, you need to invest in substantial, heavyweight fabrics.
For the ultimate designer look, pick up two different colors – one striking shade for the exterior and a complementary contrast color for the lining. Because these beginner patterns are completely reversible, you are essentially getting two premium designer hats for the price of one!
Here are two incredible, heavy-duty linen fabrics on Etsy that are perfect for this project:
- Organic 100% Flax Heavyweight Linen (320 GSM): This extra-heavy, unwashed fabric features a visible natural slub and a matte surface. At 320 GSM, it stays thick and highly structured, giving real body and a solid fabric hand to wide brims. Available in 8 colors.
- Premium European Flax Soft-Washed Linen (300 GSM): Crafted from premium European flax, this material is pre-washed for a soft touch and excellent workability, while still maintaining a heavy-duty, highly durable profile. Available in 12 deep tones.
Essential Tools for a Fantastic Sewing Experience
Before you sit down at your machine this weekend, let’s make sure your sewing space is set up for success:
- The Right Needle: Heavyweight linen combined with layers of dense woven interfacing can get quite thick. Swap your standard universal needle for a heavy-duty Jeans/Denim needle (size 90/14 or 100/16) or a sharp Microtex needle to prevent skipped stitches.
- Fabric Marking Pen: Precision is key when sewing curves. You will want clear, erasable marks for matching up your alignment notches.
- Sewing Clips: When dealing with multiple layers of stiffened fabric, pins can bend and distort your pieces. Clips hold everything perfectly flat and secure without stabbing your fingers.
- A Good Steam Iron: Never underestimate the power of your iron! Pressing every single seam as you sew is the ultimate secret to a professional, crisp designer finish.
Step-by-Step: From Fabric Pieces to Finished Hat
Hat construction looks like a puzzle, but it follows a very logical order. Here is how to approach the assembly line for the best results:
Print and Measure:
Take a flexible measuring tape and measure around the widest part of your head, just above your ears. Compare this to the pattern size chart. If you are between sizes, always size up. You can easily add an adjustable drawstring, but a tight hat is unwearable. Print your PDF at 100% scale and check the test square first.
Cut with Care:
Cut your fabric pieces slowly (top crown circle, side crown panels, and brim pieces). Transfer every single notch and alignment mark from the paper pattern onto your fabric. These marks are your best friends when matching up curved edges later on!
Fuse the Stabilizer:
Follow the manufacturer instructions for your Pellon SF101. Place your linen brim pieces wrong-side up, lay the fusible side of the interfacing on top, and press firmly with a hot, damp iron. Do not glide the iron back and forth – press down firmly in one spot for several seconds, lift, and move to the next. Let the pieces cool completely before moving them.
Assemble the Crown & Lining:
Sew your side crown pieces into a loop, then pin and stitch that loop to the top circle. Repeat this exact process for your contrast lining fabric. Take your time pinning the curves – use plenty of sewing clips!
Build the Brim:
Sew your inner and outer brim pieces together. To get those beautiful, concentric rows of topstitching seen on designer sun hats, use the edge of your presser foot as a guide. Start at the outer edge of the brim and stitch all the way around, then align your foot with that fresh line of stitching and sew the next row. It takes a little patience, but it adds incredible structure.
Join It All Together:
Place your outer hat and lining hat right sides together, sandwiching the brim in between according to your pattern instructions. Stitch around the opening, leaving a small gap for turning. Turn the hat right-side out through the gap, give it a beautiful press, and topstitch the edge closed.
Sewing Tips for Working with Heavyweight Linen
- Tame the Fray: Because linen has a loose, beautiful weave, it loves to shed threads the moment it is cut. To keep your seam allowances intact, consider finishing the edges with a zigzag stitch, a serger, or using pinking shears right after cutting. (Since these hats are fully lined, your raw edges will be cleanly hidden inside anyway, but minimizing fraying during assembly makes the process much cleaner!)
- Grade Your Seams: Joining a structured brim to a crown means sewing through multiple layers of fabric and interfacing. This creates bulk. Cut down the inner seam allowance layers to different widths – for example, trim the interfacing layer very close to the stitch line, and leave the main fabric slightly longer. This removes the bulk so your hat seams sit completely flat and crisp.
How to Style and Care for Your New Sun Hat
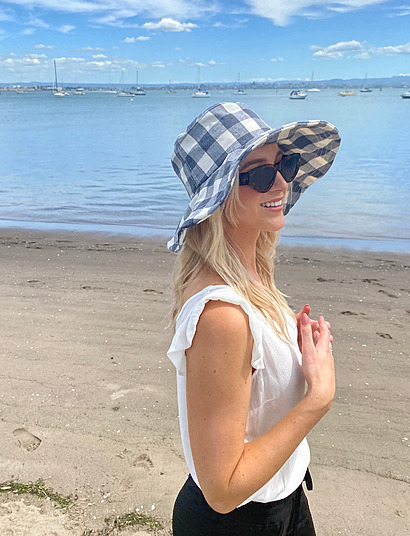
- Styling: A wide-brim linen sun hat looks incredible paired with a breezy white linen button-down shirt, oversized sunglasses, and classic denim shorts for a relaxed weekend look. You can also pair it with a beautiful floral sundress for an elevated summer event.
- Cleaning: Because of the structured interfacing inside the brim, avoid throwing your hat into the washing machine. It can warp the shape and cause the stabilizer to detach. Instead, spot clean any dirt or sweat stains with a damp cloth and mild detergent.
- Reshaping: If your hat gets squished in your beach bag, don’t panic! Simply stuff the crown with a rolled-up towel to hold its shape, and give the brim a good steam with your iron. The heavyweight linen and premium interfacing will snap right back to their crisp glory in seconds.
Are you ready to create your own ultimate summer accessory? Head over to Etsy, pick out your favorite pattern, grab some gorgeous linen fabric, and have the best time sewing your very own pretty sun hat this weekend!
You might also like:
- Cute and practical sunglasses case sewing patterns
- 10 beginner-friendly summer skirt sewing patterns
- 12 beautiful wide leg pants sewing patterns
- Free patterns for summer tops: 17 gorgeous designs
Let’s keep in touch! You can find me on Facebook, Instagram, and Pinterest.
Related posts