Whether you just brought home your very first sewing machine or you have a dedicated sewing room with a fabric stash that could rival a local boutique, we all face the exact same nemesis: pattern chaos.
Once you open that pristine, factory-folded paper envelope or piece together a chunky home-printed PDF pattern, it never quite goes back the same way. Before you know it, your creative sanctuary looks like a tissue paper tornado hit it.
An organized sewing space means you spend less time hunting for lost sleeve pieces and more time actually creating. Let’s dive into the absolute best ways to organize, index, and protect your printed sewing patterns, whether you are just starting out or managing a massive, ever-growing collection.
Why pattern organization matters
When you are new to sewing, keeping things organized prevents frustration and keeps the hobby fun. For experienced sewists, a solid system is pure survival. As indie pattern companies release gorgeous new designs every month, a small stash can easily balloon into an unmanageable mountain.
A smart, functional filing system helps you:
- Stop buying duplicates: Know exactly what you own so you don’t purchase the same dress pattern twice.
- Protect rare and vintage finds: Keep delicate tissue paper and vintage paper envelopes safe from tearing, dust, and moisture.
- Streamline your creative workflow: Finding your go-to t-shirt or trouser sloper in seconds makes batch sewing a breeze.
- Maximize your space: Get total control over your home environment, whether you sew at the kitchen table or in a custom studio.
Step 1: The great pattern audit
Before buying bins or binders, you need to know exactly what you are working with. Gather every single pattern from around your space and group them into broad categories.
Category breakdowns
The most intuitive way to sort is by garment type. Group your pile into clear, distinct sections:
- Tops and blouses
- Dresses, jumpsuits, and overalls
- Pants, jeans, and shorts
- Skirts
- Outerwear (jackets, blazers, heavy coats)
- Accessories and home DIY projects (bags, quilts, aprons)
Assess and repair
For beginners, this is a great time to iron your pattern pieces flat on low, dry heat (no steam!) so they are easier to fold. For experienced makers, use this step to check the structural integrity of your frequently used patterns. Apply archival tape to torn tissue seams, and make sure any custom alterations or adjustment notes are securely attached to the master pattern pieces.
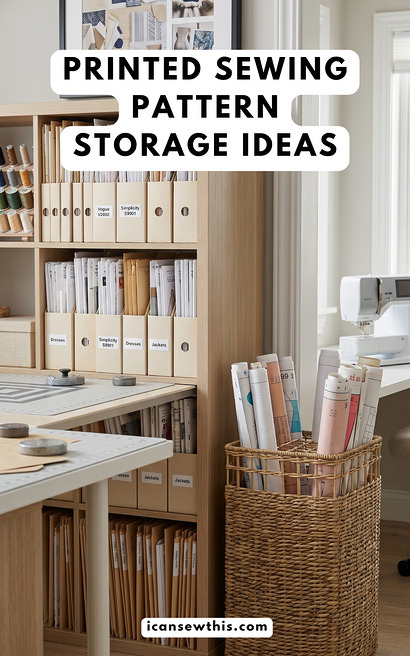
Step 2: Choose your printed sewing pattern storage method
There is no single “right” way to store patterns. The best method depends on your available space, your budget, and the size of your collection. Here are the four most popular, field-tested methods used by the sewing community.
Method A: The comic book sleeve system
This method is uniform, looks stunning on a shelf, and incredibly protective. It works beautifully for a beginner collection but easily scales up to thousands of patterns.
- How it works: Fold your pattern pieces and slide them into a clear plastic comic book sleeve along with a rigid comic book backing board to keep the package flat and sturdy.
- Why it’s great: You can slide the original pattern envelope right into the front so the technical drawings, size charts, and fabric requirements are completely visible without opening the sleeve. Store the completed sleeves upright in comic book short boxes or stylish fabric baskets.
Method B: The heavy-duty 3-ring binder method
If you love flipping through your options like a lookbook while sitting on the couch, binders are your best bet.
- How it works: Organize your patterns into heavy-duty 3-ring binders using clear plastic sheet protectors or expandable plastic binder pockets.
- Why it’s great: It keeps everything incredibly compact and portable. You can dedicate one binder to tops, one to dresses, and one to bottoms. It sits beautifully on a standard bookshelf and grows with you. Just add another binder when one fills up!
Method C: The filing cabinet or plastic tote system
If you prefer a clean, corporate-level organization system that tucks away into a closet or an office corner, go with a traditional filing system.
- How it works: Store your patterns inside 9×12 inch manila envelopes or standard hanging file folders placed inside a filing cabinet or a clear, stackable plastic filing box.
- Why it’s great: It handles a massive volume of patterns and can easily support the weight of heavy-duty copy shop prints and thick indie pattern instruction booklets.
Method D: The hanging pattern rack (for heavy users and designers)
If you prefer to trace your patterns onto medical paper, Swedish tracing paper, or heavy cardstock to preserve multiple sizes, folding them up can introduce annoying creases.
- How it works: Use specialized pattern hooks or adjustable skirt hangers with clips to hold your pattern pieces together. Hang them up on a dedicated rolling garment rack or a pegboard wall.
- Why it’s great: Your patterns stay perfectly flat and ready to use at a moment’s notice. No more ironing out creases before you lay your pattern onto your fabric.
Step 3: Implement an efficient indexing system
An amazing storage box is only useful if you know exactly what is inside it. Avoid digging through envelopes by creating a quick-reference system.
The front-of-pack cheat sheet
If you use manila envelopes or plain pockets, write or print a quick template on the front containing these essential details:
- Pattern Company & Name/Number (e.g., Closet Core – Ginger Jeans)
- Garment Description (e.g., High-rise skinny jeans)
- Size Range available in the packet
- Fabric Requirements (Yardage required for your typical size)
- Required Notions (Zippers, buttons, interfacing, special needles)
Pro sewing tip: Always take a quick photo of the back of your pattern envelope with your phone before you file it away. When you are browsing the aisles at your local fabric store, you can quickly check your phone to see exactly how much fabric and what notions you need to buy for your next DIY project.
Go digital to save time
If your collection is growing past 50 patterns, a digital inventory is a game-changer. You don’t need complicated software. A simple, free Google Sheet, a Trello board, or a private Pinterest board sorted by garment type works perfectly. Whenever you buy a new pattern, log the line art and fabric requirements. This allows you to “shop your stash” and plan future projects directly from your phone or laptop.
Mastering the bulky PDF pattern problem
The explosion of PDF sewing patterns is amazing for instant gratification, but printing them presents unique storage challenges. Whether you print at home on standard paper or get large-format A0 copy shop prints, they take up a lot of physical space.
- For home-printed patterns: Cut or fold the extra paper margins cleanly. Because standard printer paper is much thicker than factory tissue, use larger 10×13 inch heavy-duty envelopes or expandable binder pockets to prevent the seams of your storage containers from bursting.
- For A0 copy shop prints: If you hate folding large sheets because of the permanent creases, roll them up instead. Use empty cardboard shipping tubes or large elastic bands to keep them rolled, and store them upright in a tall decorative basket or umbrella stand.
Maintenance tips for an organized sewing space
Keeping a tidy home while managing a highly creative, messy hobby takes a bit of strategy. Keep these pro habits in mind:
- The “one project at a time” rule: It is tempting to cut out multiple projects at once, but resist the urge. Keep only your current active pattern on your cutting table. File the rest away immediately.
- Document your alterations: If you make fit adjustments (like a full bust adjustment, swayback adjustment, or lengthening a hem), write those changes directly on the pattern pieces. Keep a small notepad inside the pattern sleeve detailing the exact adjustments made and the date you made them.
- Separate your muslins/toiles: If you keep a library of fitting muslins, label them clearly with a fabric marker and store them on hangers or in a separate tote box so they don’t get mixed up with your fashion fabric garments.
Start where you are!
You do not need to spend a fortune on custom craft room cabinetry to have a functional, inspiring sewing space. Start with what you have – a simple sturdy box, some plastic folders, and a good marker.
The goal is simply to build a consistent habit of putting your patterns back in their designated spot as soon as a project is finished. By keeping your printed sewing patterns protected and organized, you will save time, cut down on clutter, and make your sewing time pure, stress-free fun.
What storage system fits your current sewing style best? Are you team binder or team comic book box? Let me know in the comments below!
You might also like:
- Everything you need to sew your own linen sun hat this weekend
- Best beginner summer top sewing patterns
- 15 free wrap dress sewing patterns
Let’s keep in touch! You can find me on Facebook, Instagram, and Pinterest.
Related posts