
Learn how to sew a super cute patchwork skirt for girls – it’s an easy, beginner-friendly sewing project that makes a perfect handmade gift for daughters, nieces, or the sweet little neighbors down the road. I picked the brightest, happiest fabric scraps I could find because I wanted to make a child-size version of the dopamine dressing trend you’ve probably seen everywhere online.
Fun patchwork skirt tutorial
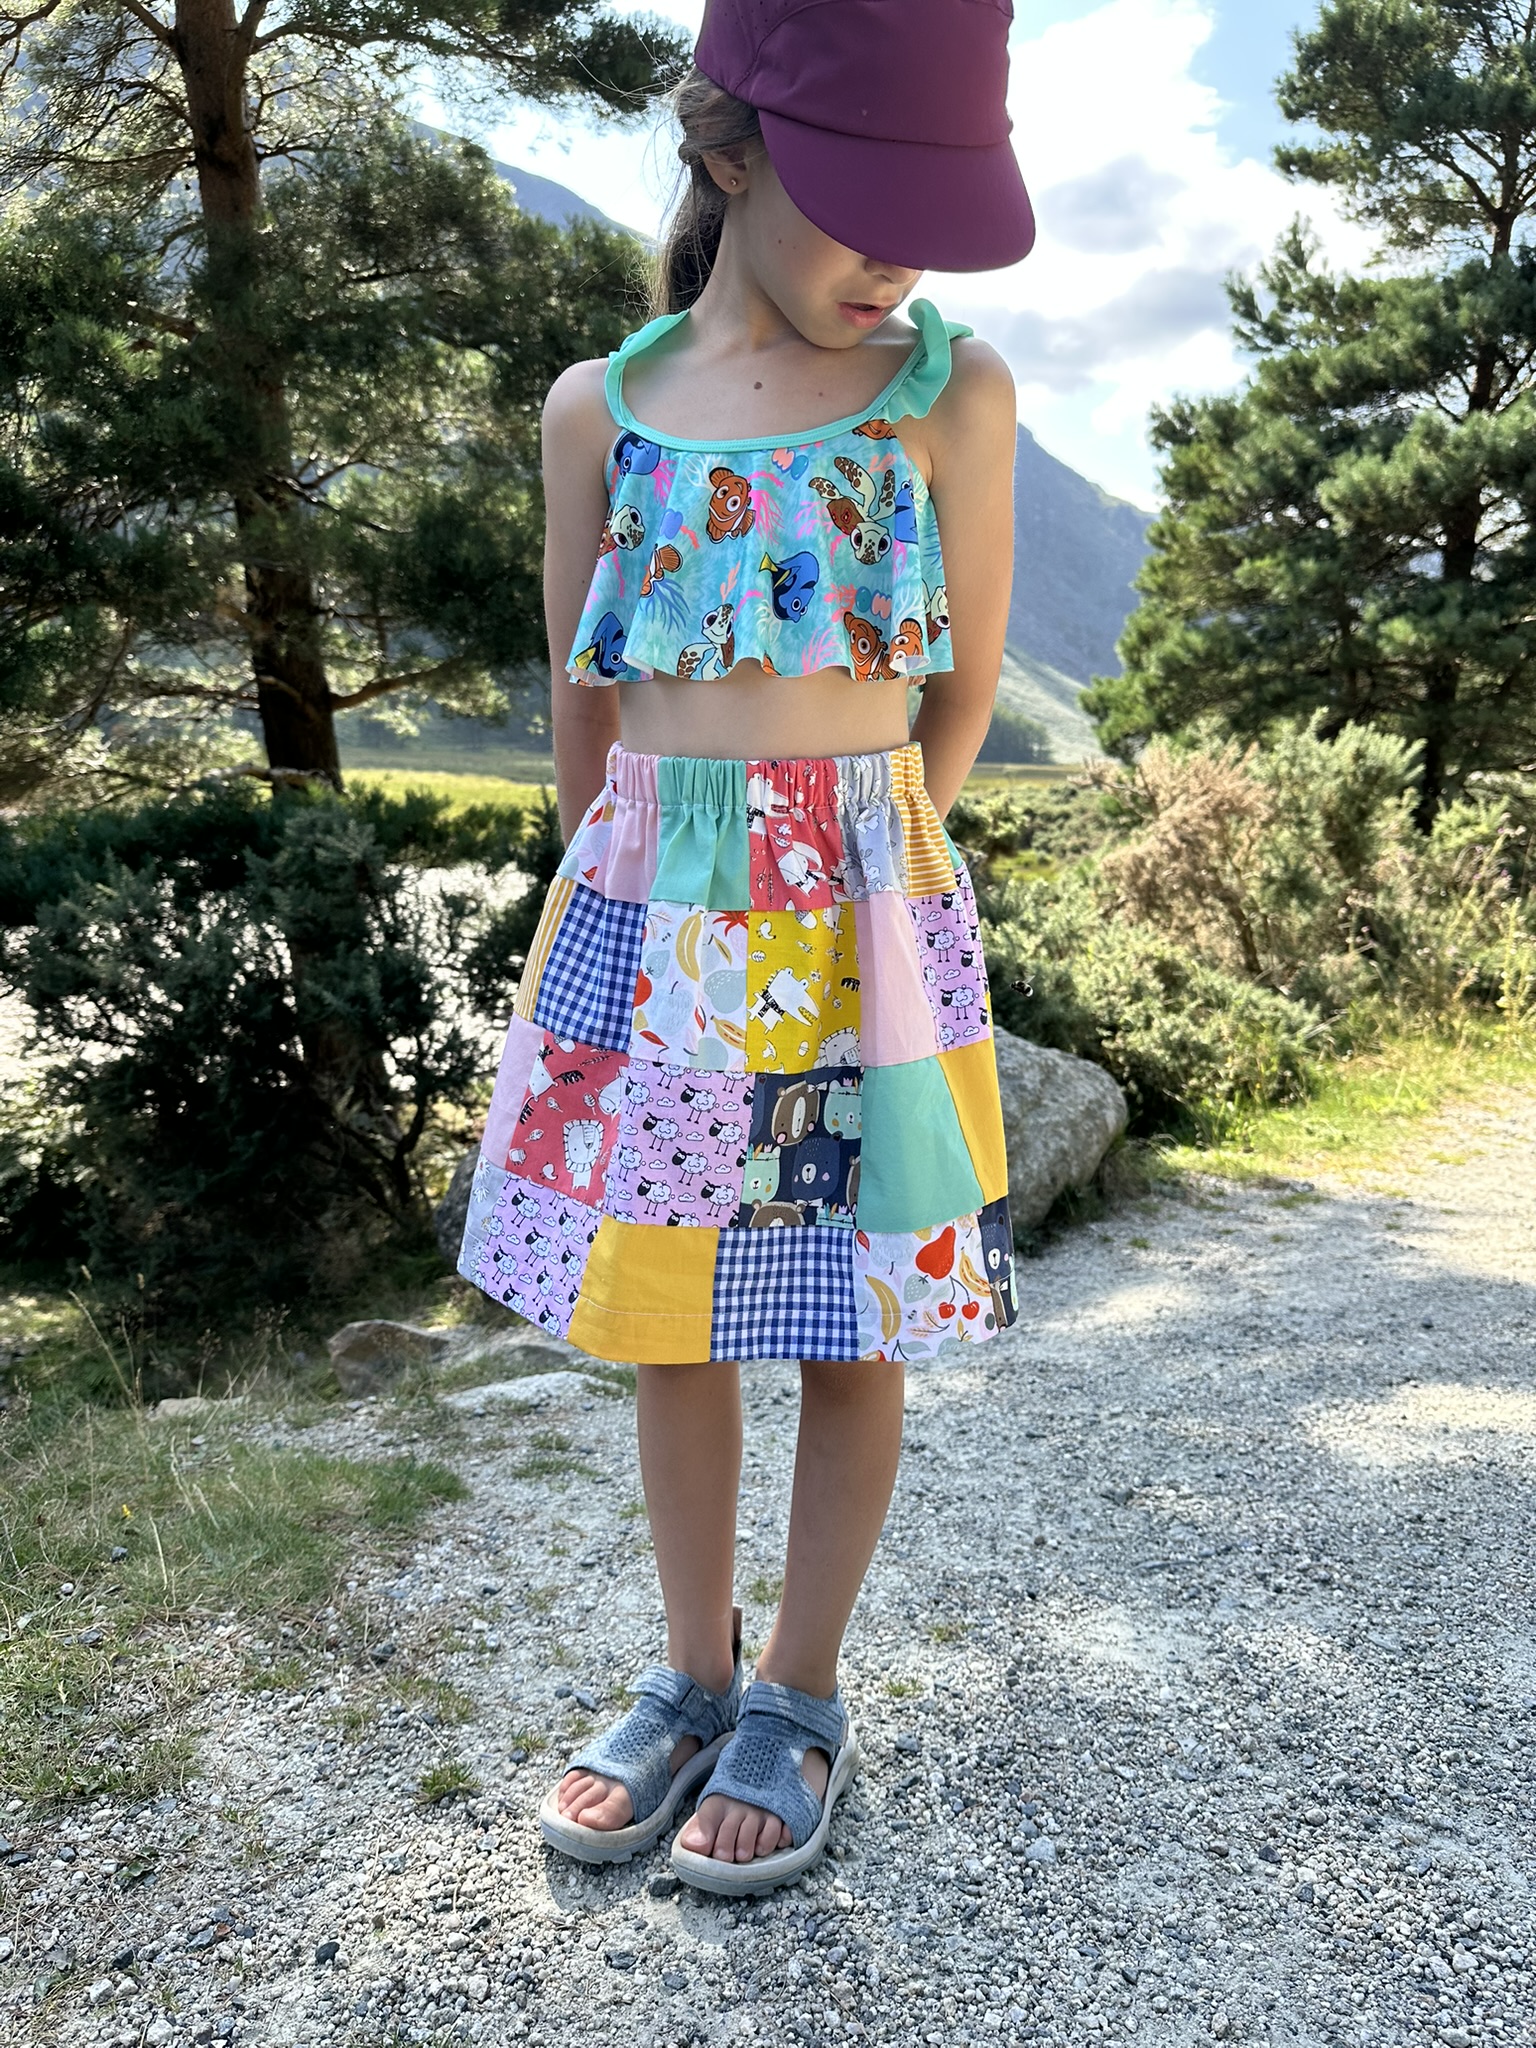
When my youngest was about four, I asked her why she loves dressing up so much. Her answer? “Because I like making people happy.” That really stuck with me. And you know what? Wearing joyful, colorful clothes does lift spirits – hers and mine! She absolutely loves this patchwork skirt, and I hope your little one will too.
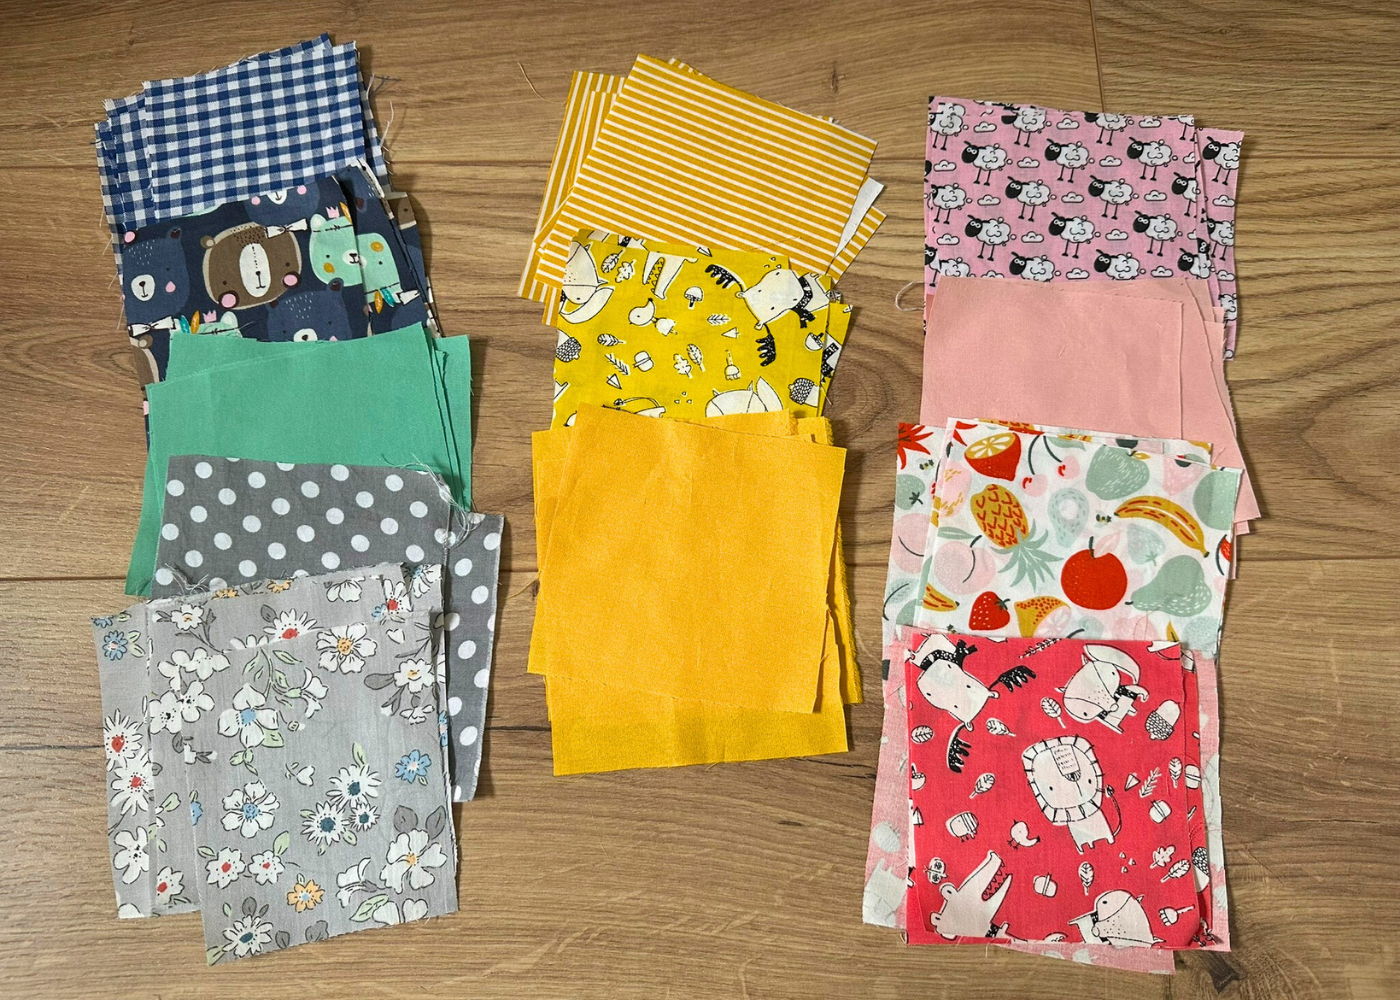
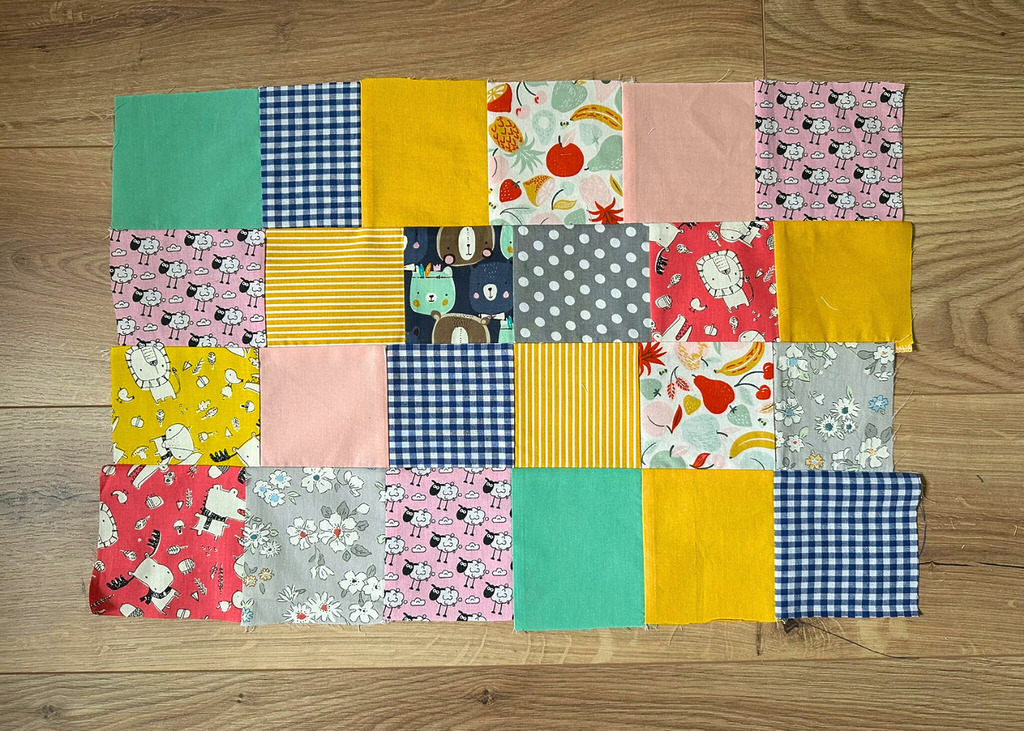
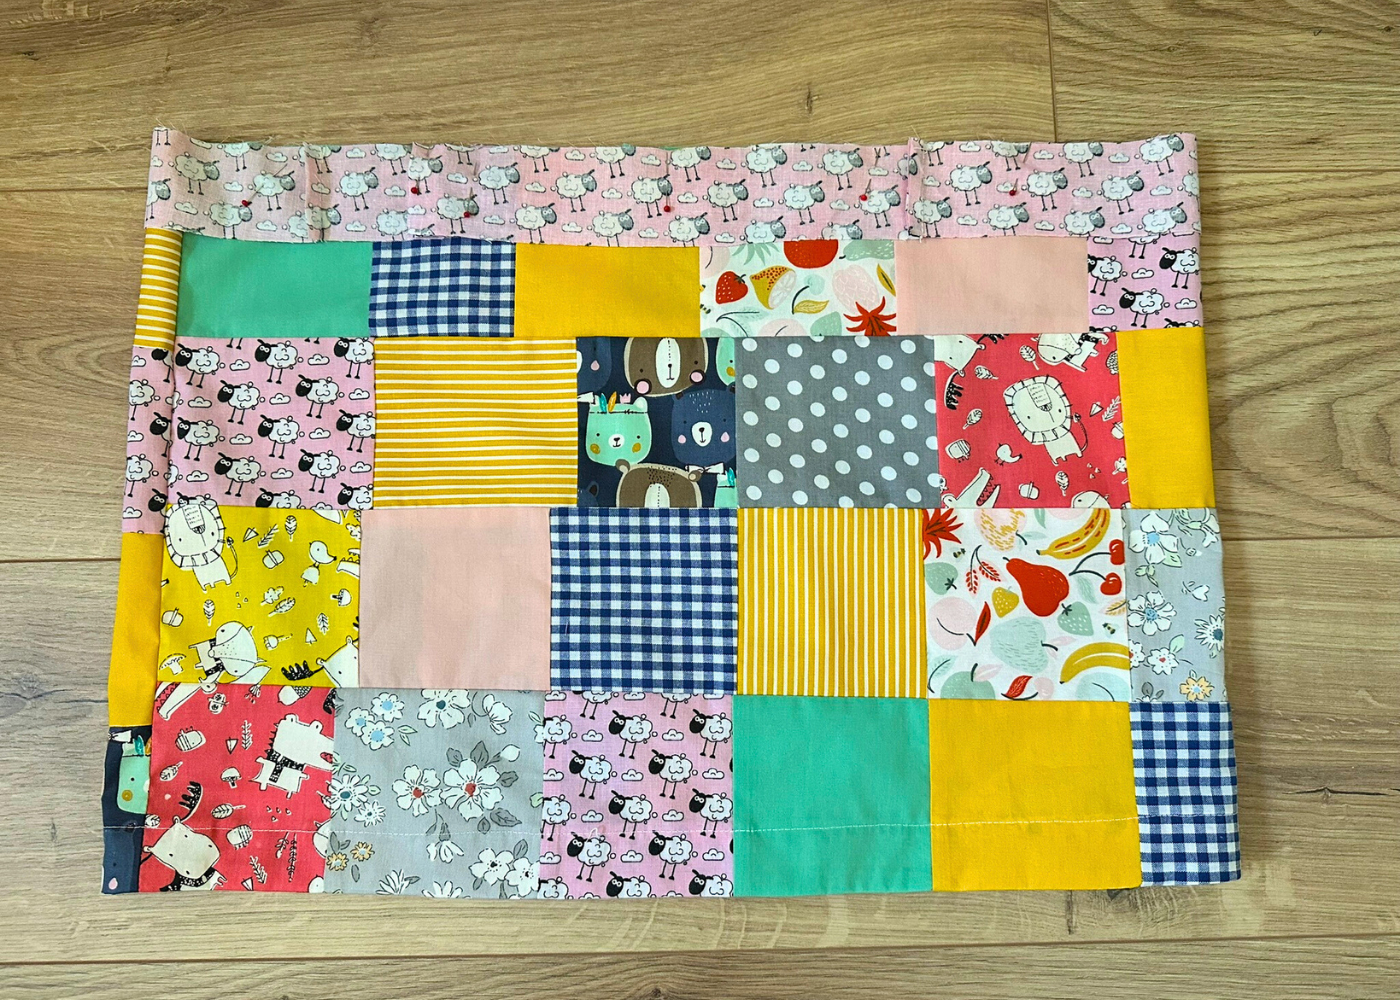
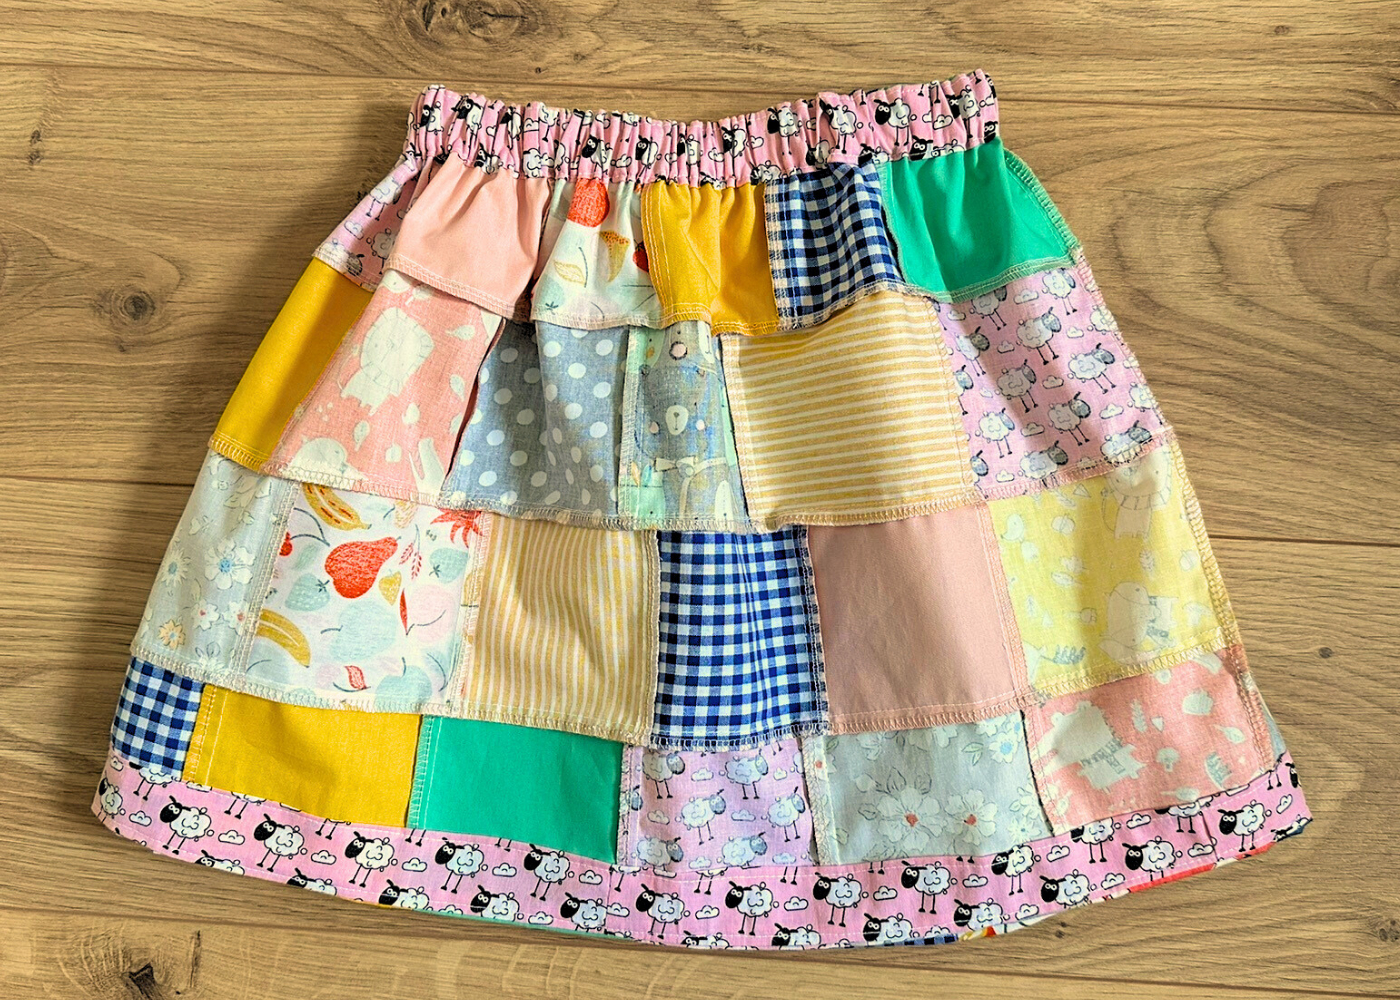
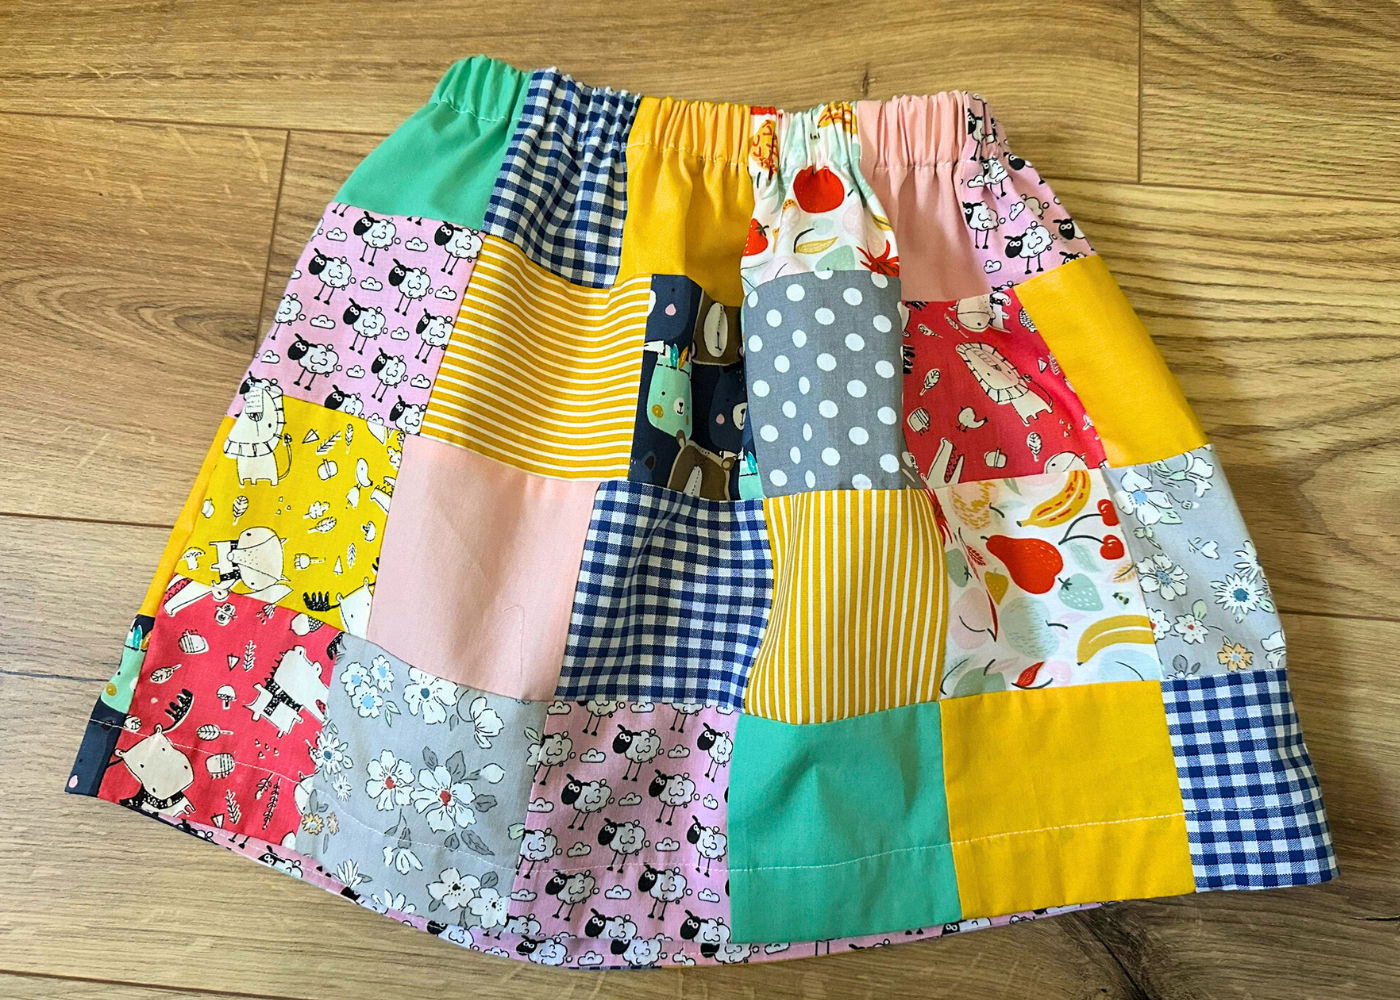
This is a very simple cotton skirt made by sewing together two rectangular patchwork panels – one for the front and one for the back. Each panel has 24 fabric squares, so I used 48 squares in total. Choosing how to arrange the colors takes more time than sewing it!
You don’t need perfect seams to make something beautiful
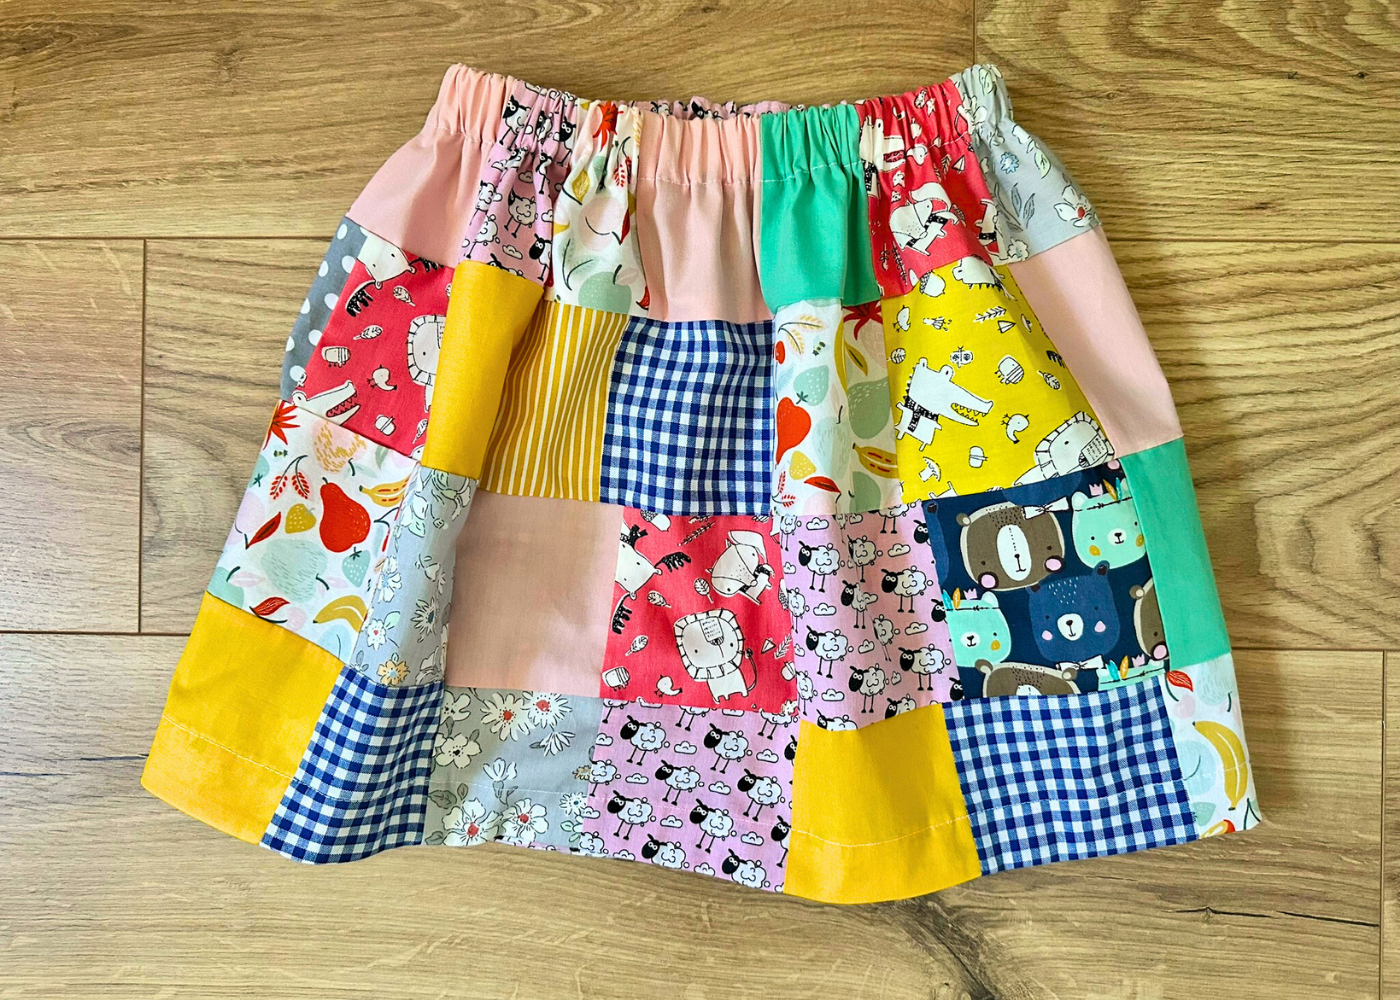
You don’t need to be a quilter or sew perfect straight lines. I cut my squares with fabric scissors, not a rotary cutter, and didn’t worry about getting the measurements perfect. Some squares are a bit bigger, some a bit wonky – but the finished skirt still looks absolutely adorable. You can’t even tell it’s not precise.
I finished the seams with my serger, but pinking shears would work just fine too. I also added a wide fabric facing at the waistband and hem, so each full row of patchwork shows clearly on the outside – no fabric lost in the elastic casing or hem fold. This tiny detail makes the skirt feel more special, even though it’s such a quick and easy sew.
The joy of making something just because
To be honest, this is my first sewing project I’m sharing in nearly two years. We moved to Ireland, brought all my sewing machines with us, then moved house again, started a renovation, and… life just got busy. With three kids, sewing took a back seat for a while. I spent more time walking, listening to audiobooks while cooking and cleaning, and exploring Dublin than sitting at my machine.
But I missed creating. So when I finally got the urge to sew again, I didn’t want to make something complicated. I wanted a feel-good project that would actually be worn and loved – and this little patchwork skirt hit all the right notes.
It’s colorful, quick, and forgiving. If you’re also in a busy season of life but craving a bit of creative joy, give it a try – even if your seams aren’t perfect. It’s still worth it.
PS – If you’re feeling even lazier than I was, you can totally cheat and grab some adorable patchwork-style fabric by the yard on Etsy. There are so many gorgeous prints ready to sew! Next, you’ll just need to follow this easy tutorial for making a simple skirt with an elastic waistband.
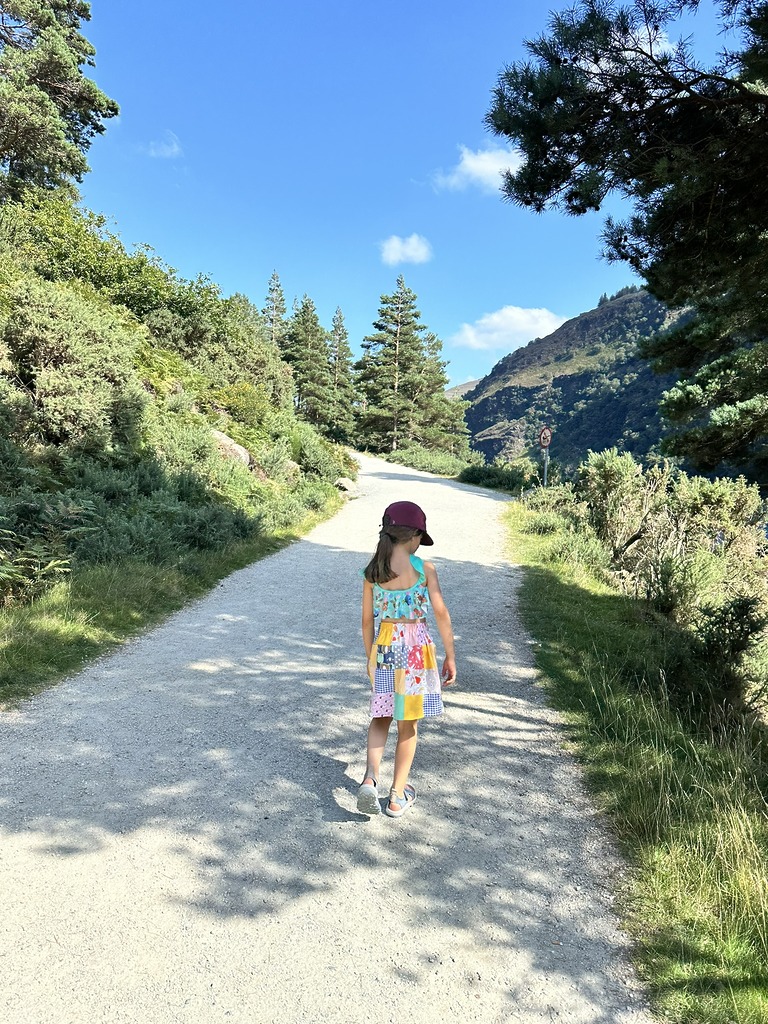
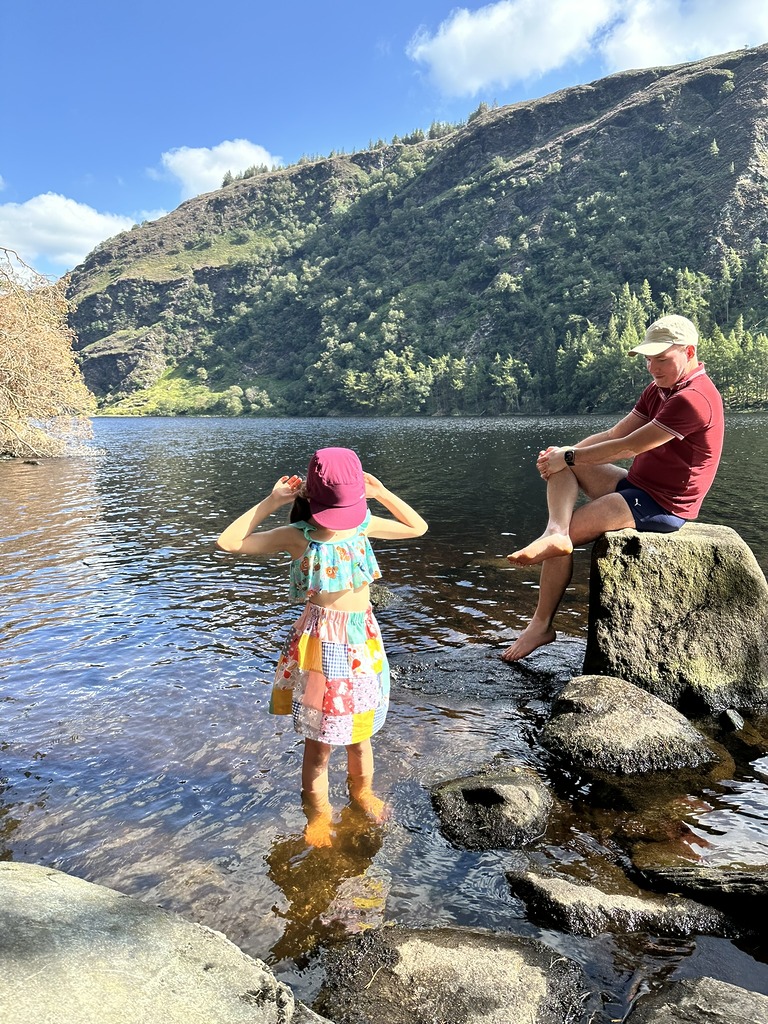
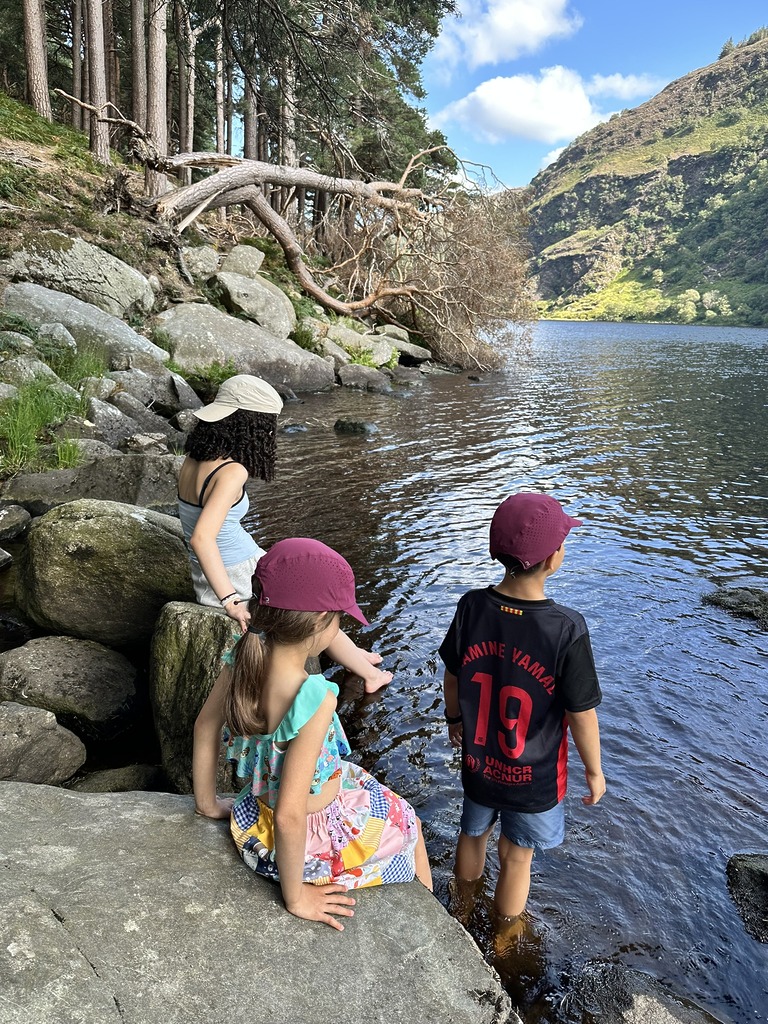
A magical day in Glendalough
We recently visited Glendalough in the Wicklow Mountains, and my little girl was thrilled to wear her cute skirt.
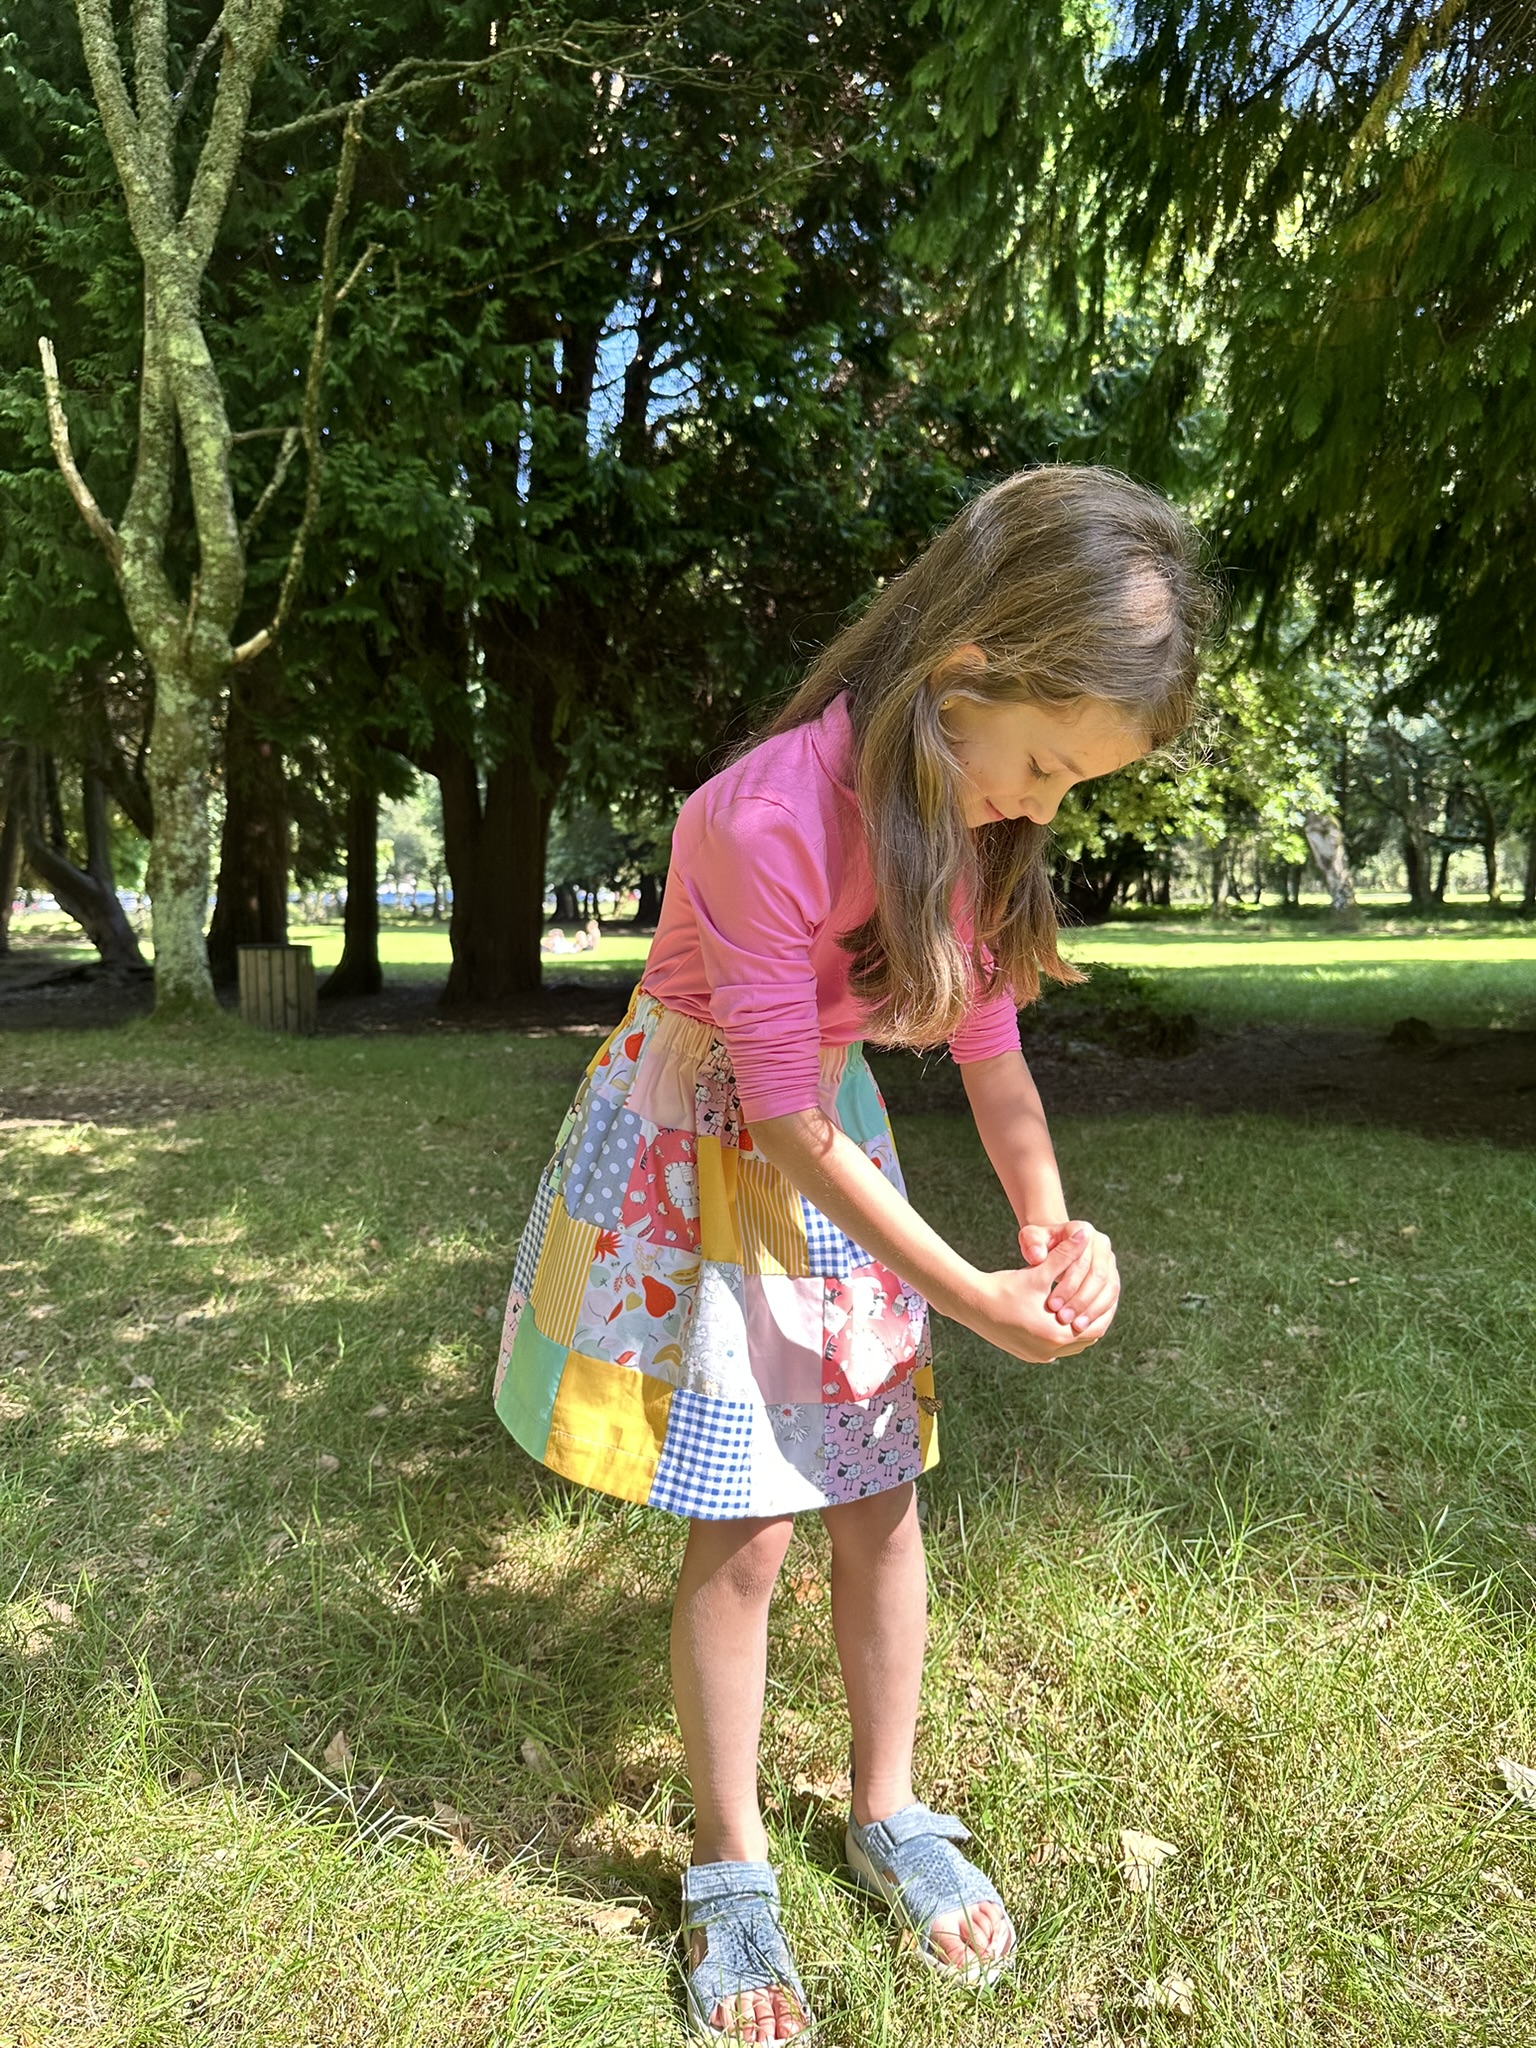
It’s now officially her favorite – apparently, it attracts butterflies! She’s had the best adventures in it, and we even caught two little tadpoles, which we brought home – they’re doing great up so far!
Step-by-step: cute DIY patchwork skirt for girls
Step 1 – plan your patchwork panels
First things first – check a girls’ skirt length chart and decide how long you want your skirt to be.
My daughter is turning 8 soon, and her finished skirt is 14 inches long – it hits just above the knee. Her waist is 23 inches, and the final skirt circumference is 44 inches.
That gives it a nice, full 1.9x gather – almost 2x. For a cotton patchwork skirt like this, I wouldn’t go past 2x. This amount of gathering is comfy and cute!
Once you’ve figured out your desired skirt length and width, divide the width by 2 – that gives you the size of your front and back fabric panels. Both will be the same size.
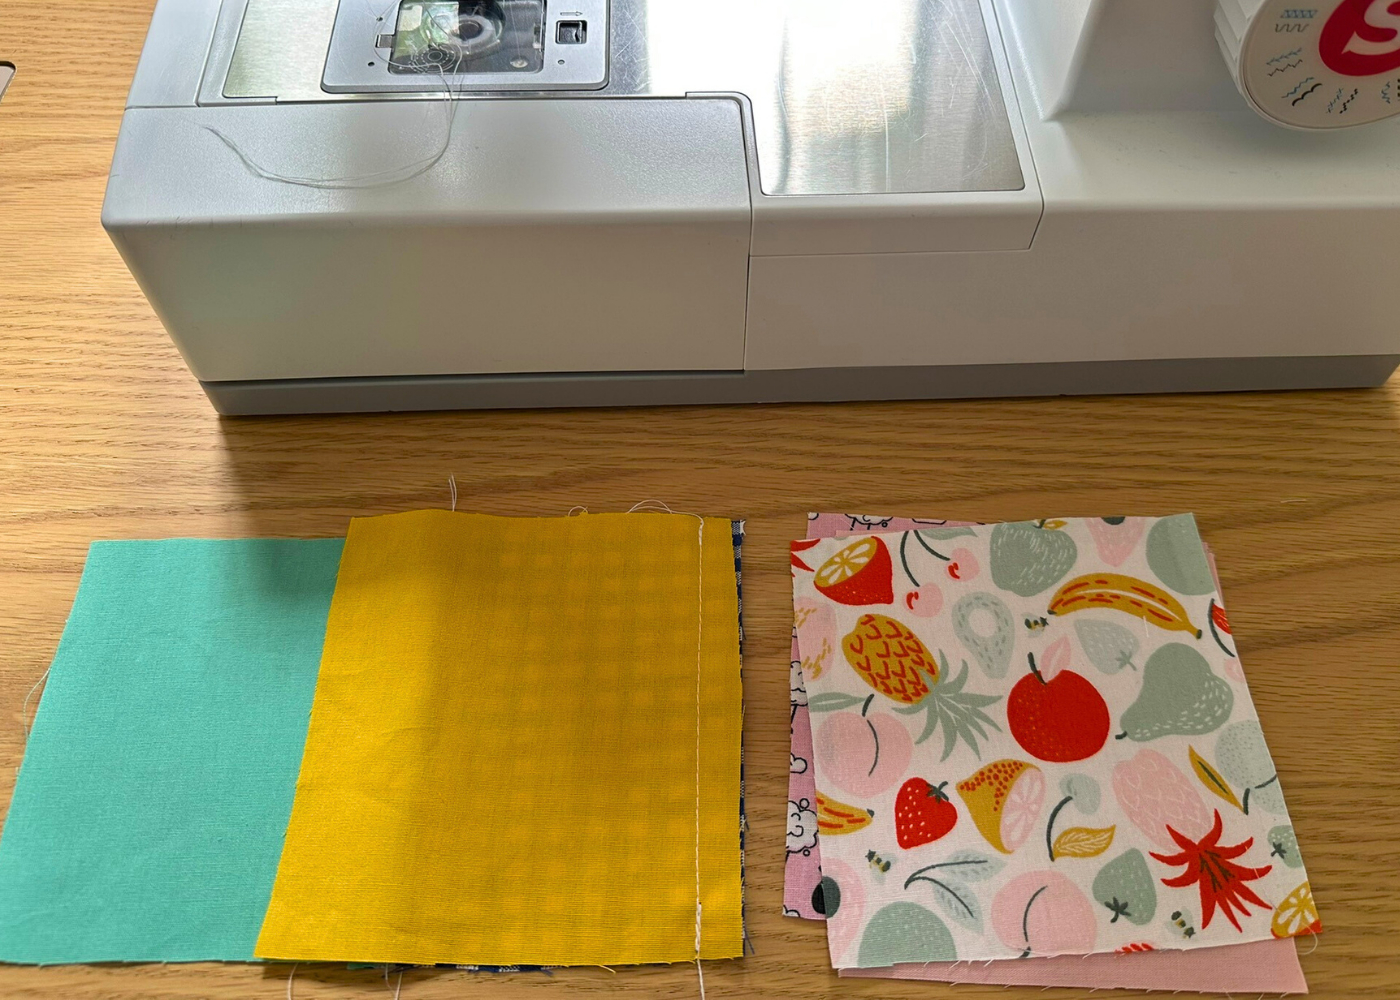
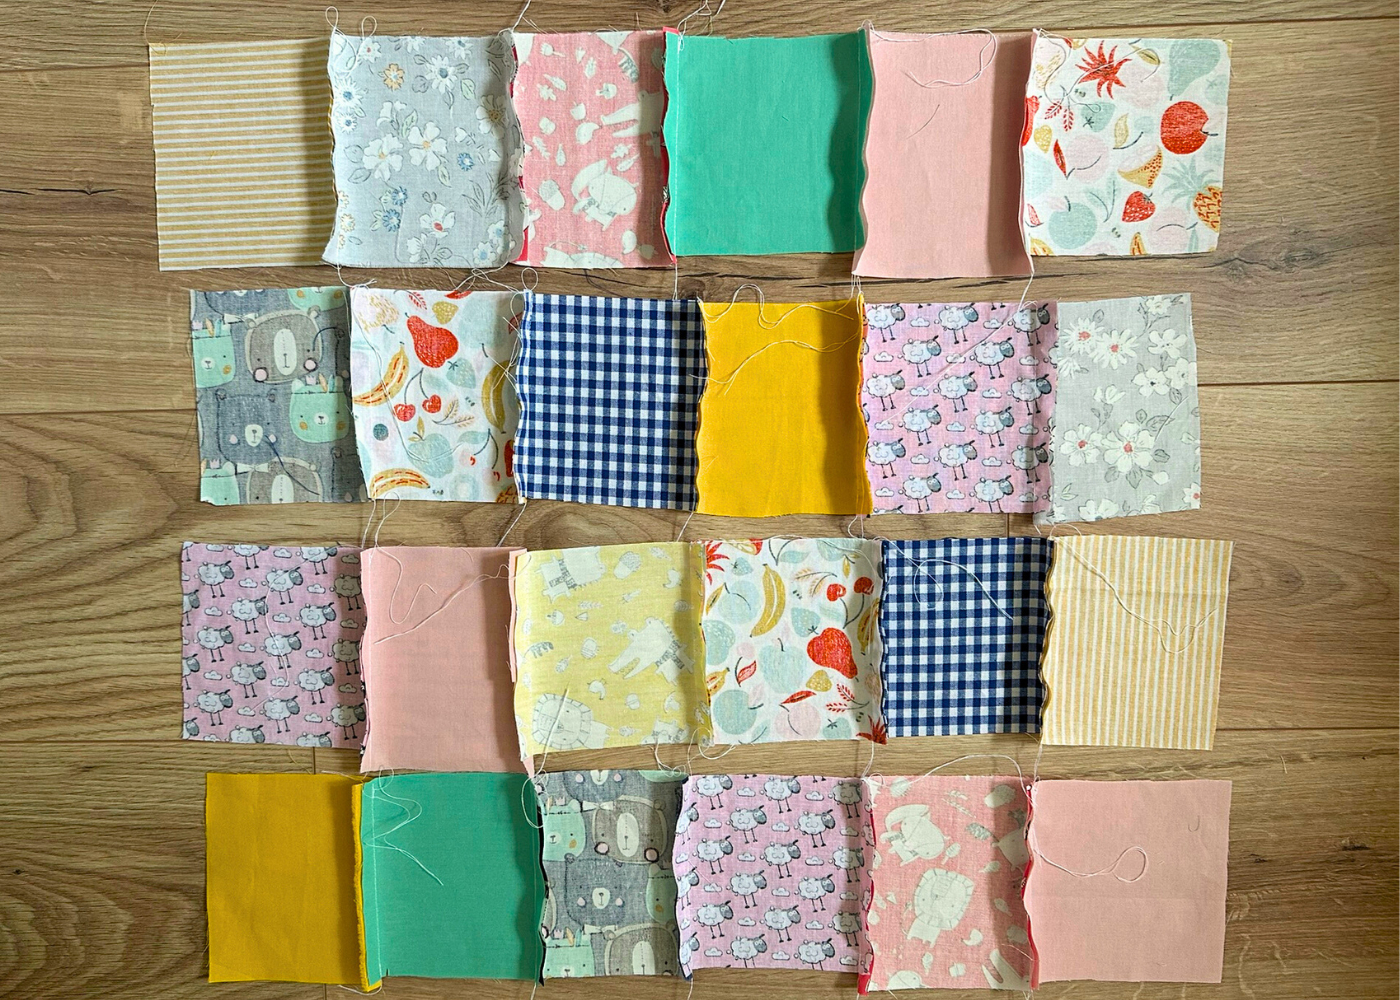
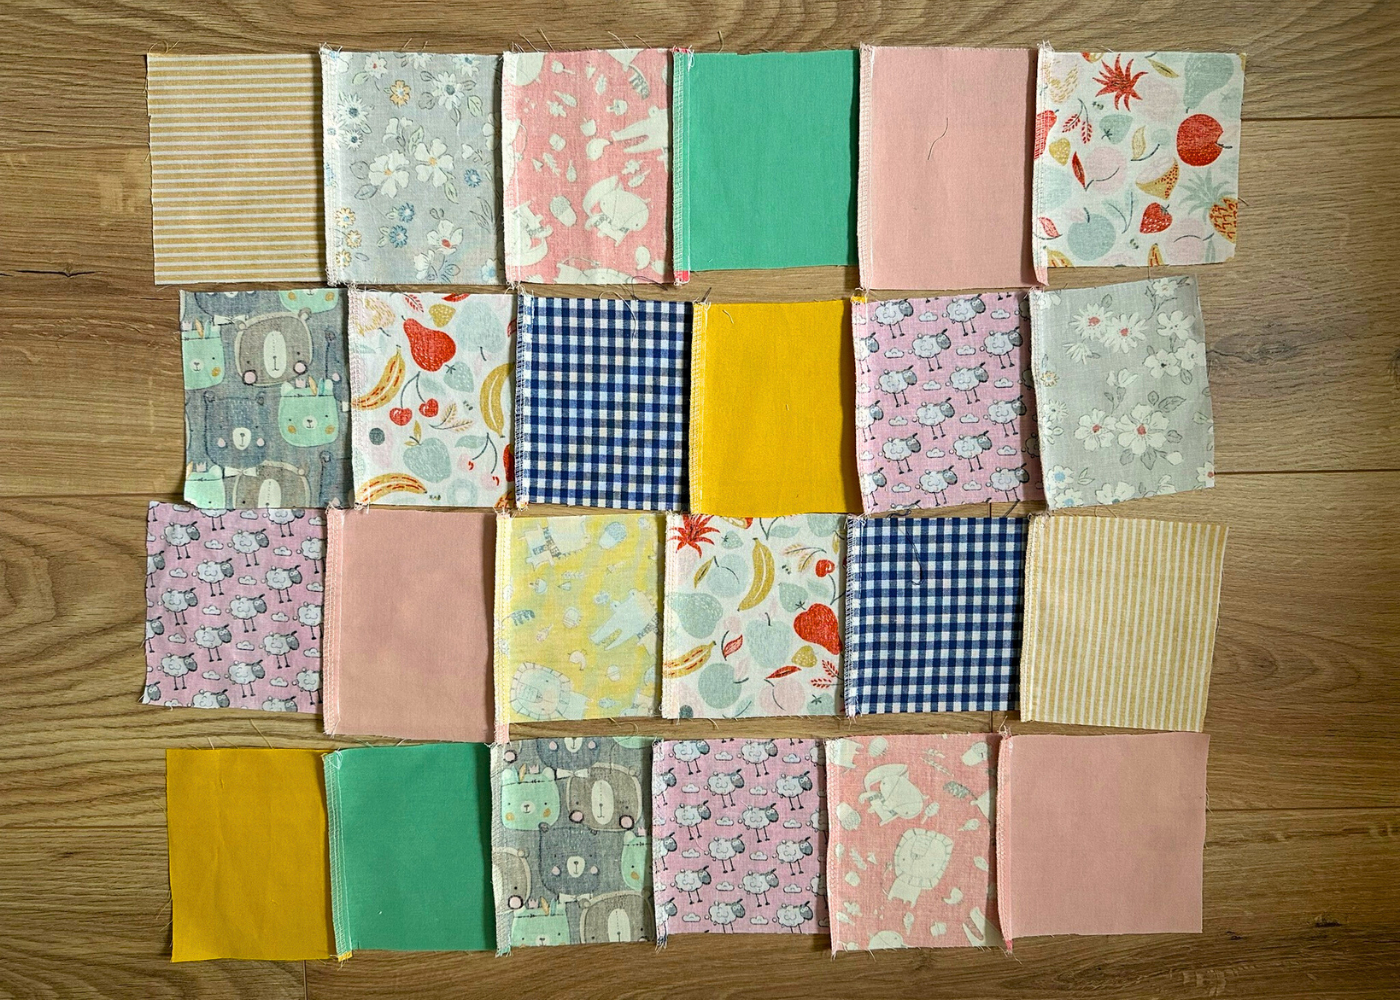
You might notice I tried to mix and match fabrics that “vibe” together, pulling from three color groups: gray/green/blue (stripes, dots, solids), sunny yellow (stripes, a cute animal print, and solid), and pink in different shades (fun prints and solids). It really helps to have a color plan so your fabrics work well together – then cut several squares from each to keep the look cohesive.
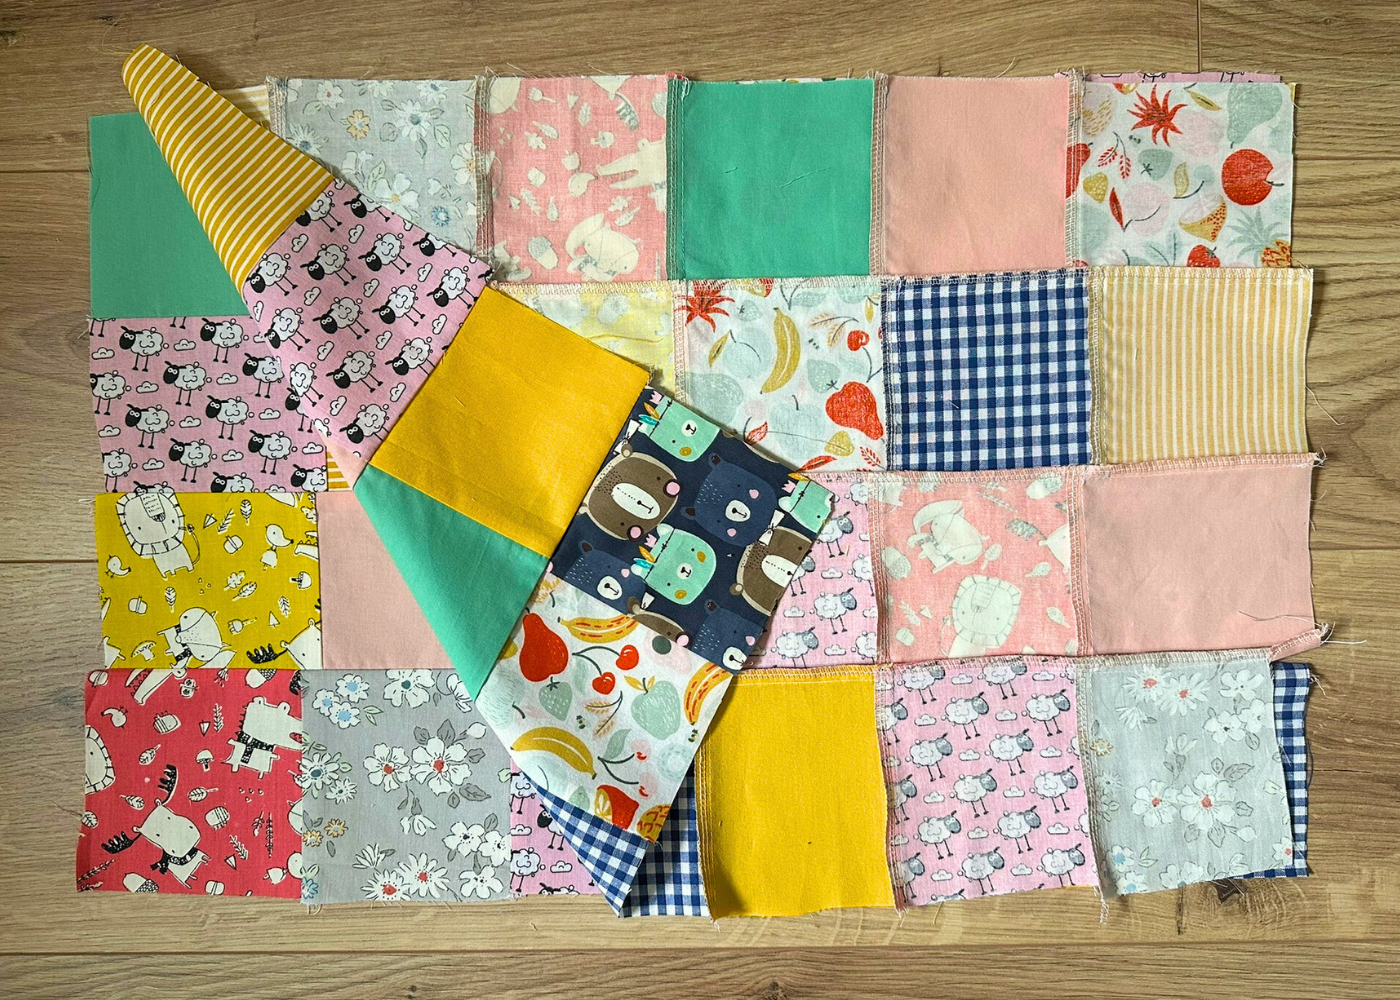
Playing with patchwork: layout & design
My patchwork panels were about 22 inches wide and 15 inches tall before sewing. Honestly, I didn’t stress about perfection – I eyeballed my squares and didn’t use a rotary cutter. Some are a little off, and that’s totally fine. This is not the project to get hung up on perfect corners.
Now decide how big you want your squares (or rectangles) to be and how many rows and columns you’ll need. I cut mine around 4.5″, but again – very loosely measured. After seam allowances, it worked out, and if it hadn’t, I could’ve added another row or changed up the hem. You’ve got options!
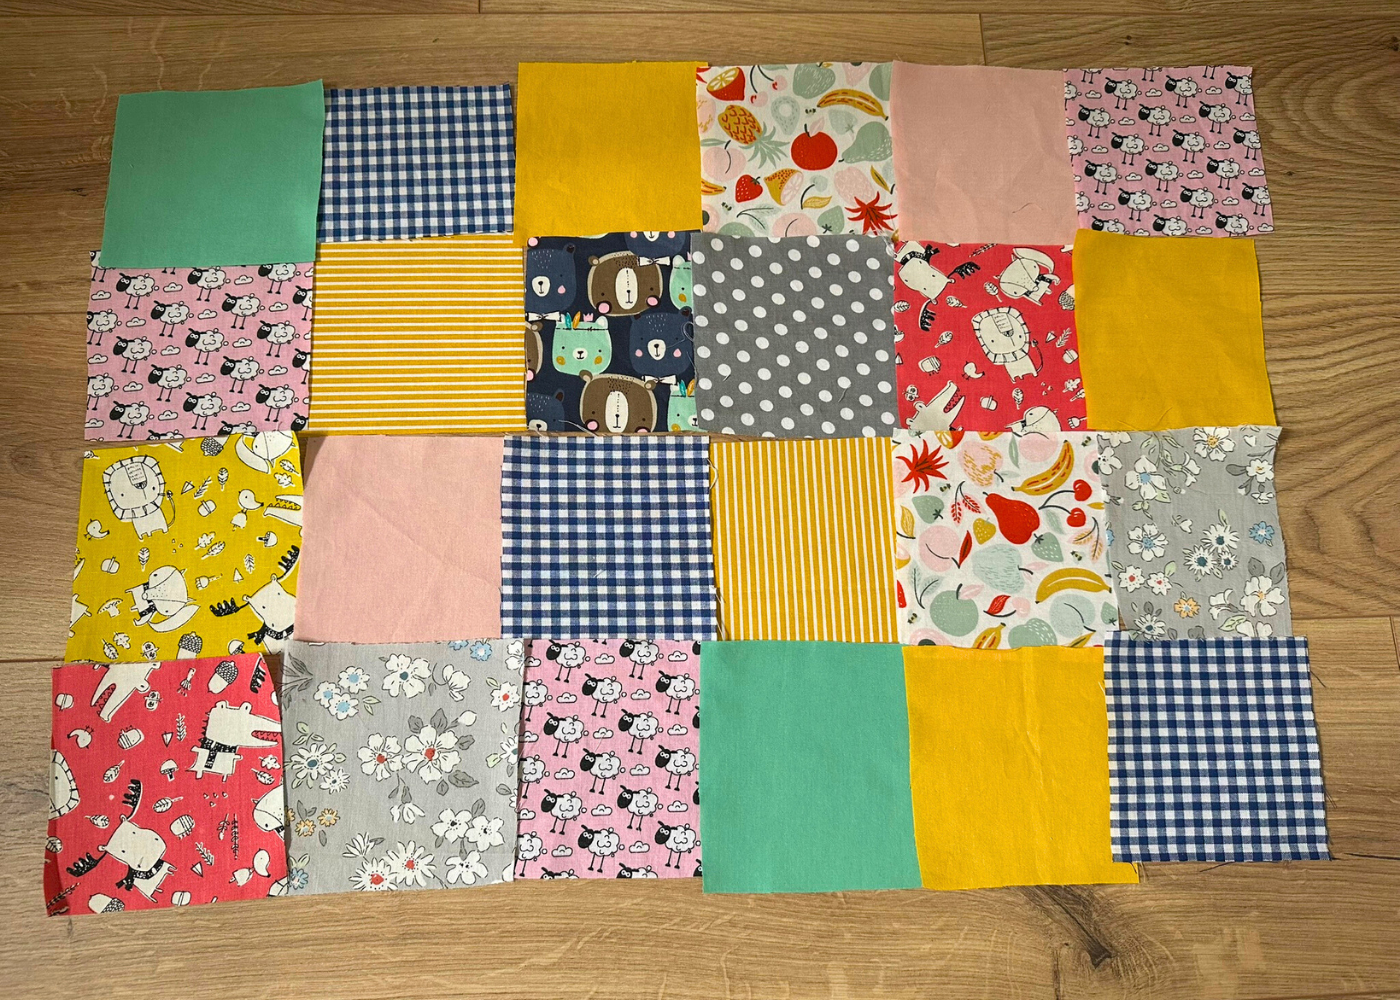
Most importantly – spend some time playing with the fabric layout. This is the fun part! Mix and match colors until you’re happy with the patchwork design.
Step 2 – sew your patchwork panels
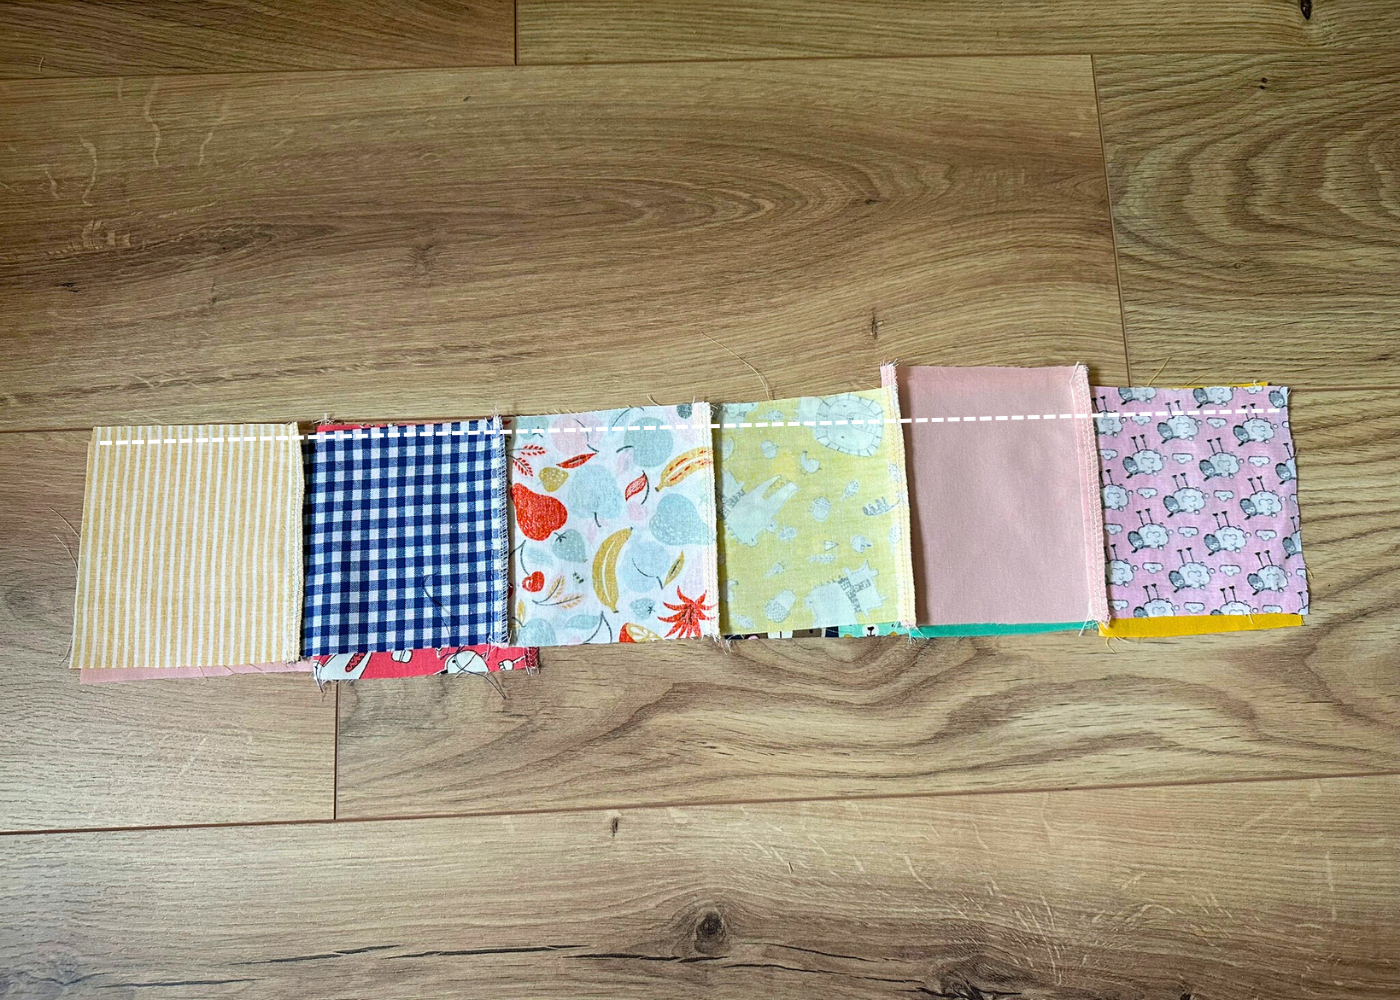
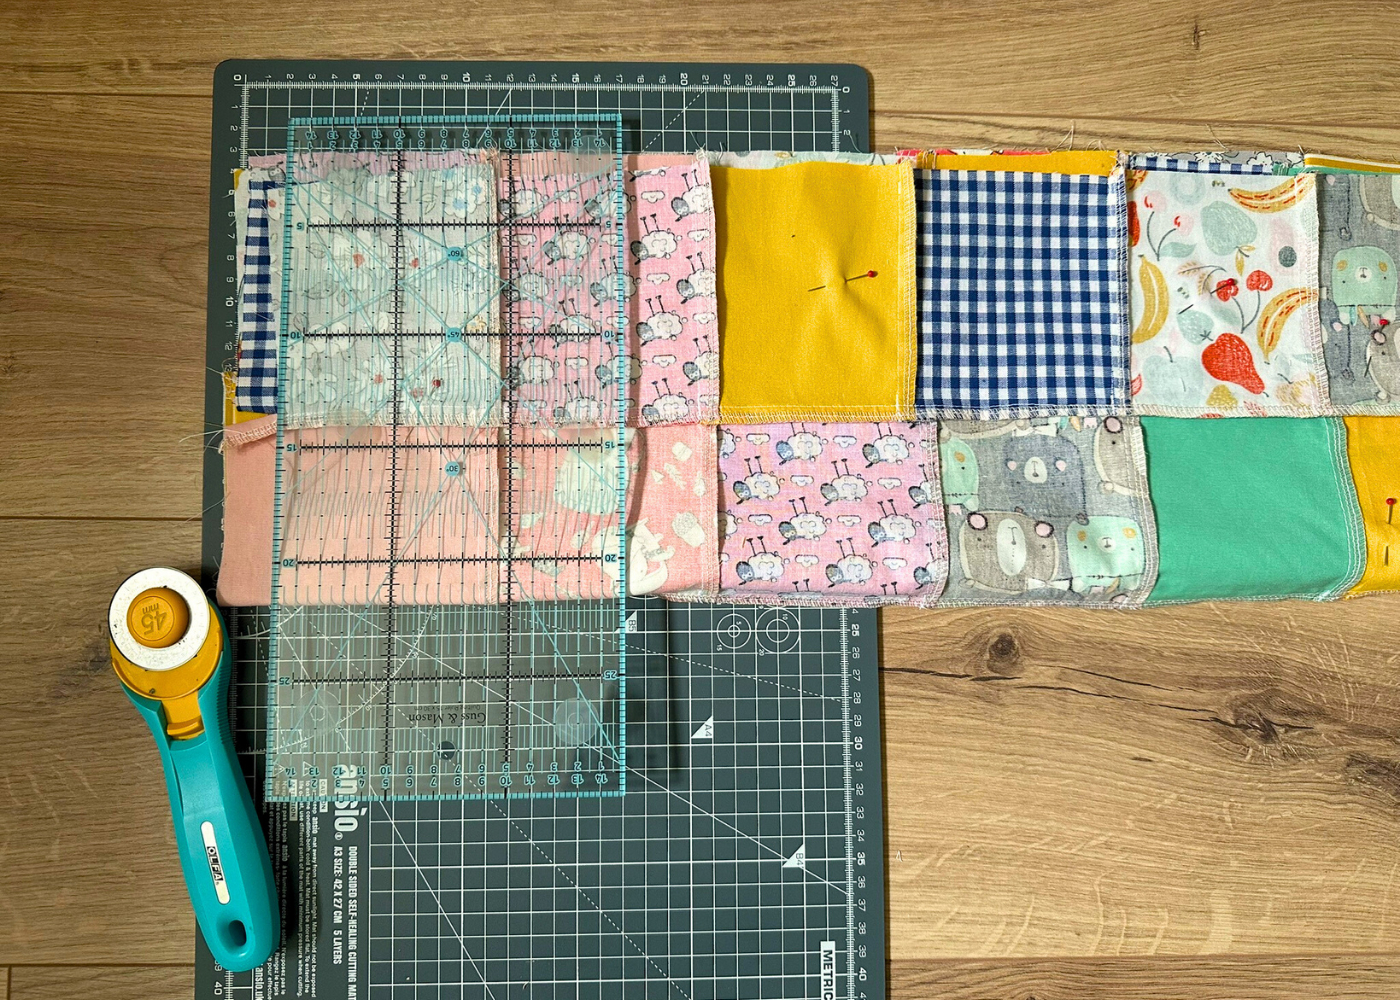
Once you’ve got your layout, it’s time to sew! Start by joining the fabric squares for each row.
Here’s how I did it: place your first square (top left of your panel) wrong side down, then place the next square right sides together (RST) with it. Try to line up two edges – I aimed for the top and right sides. Keep going down the row, adding squares one by one.
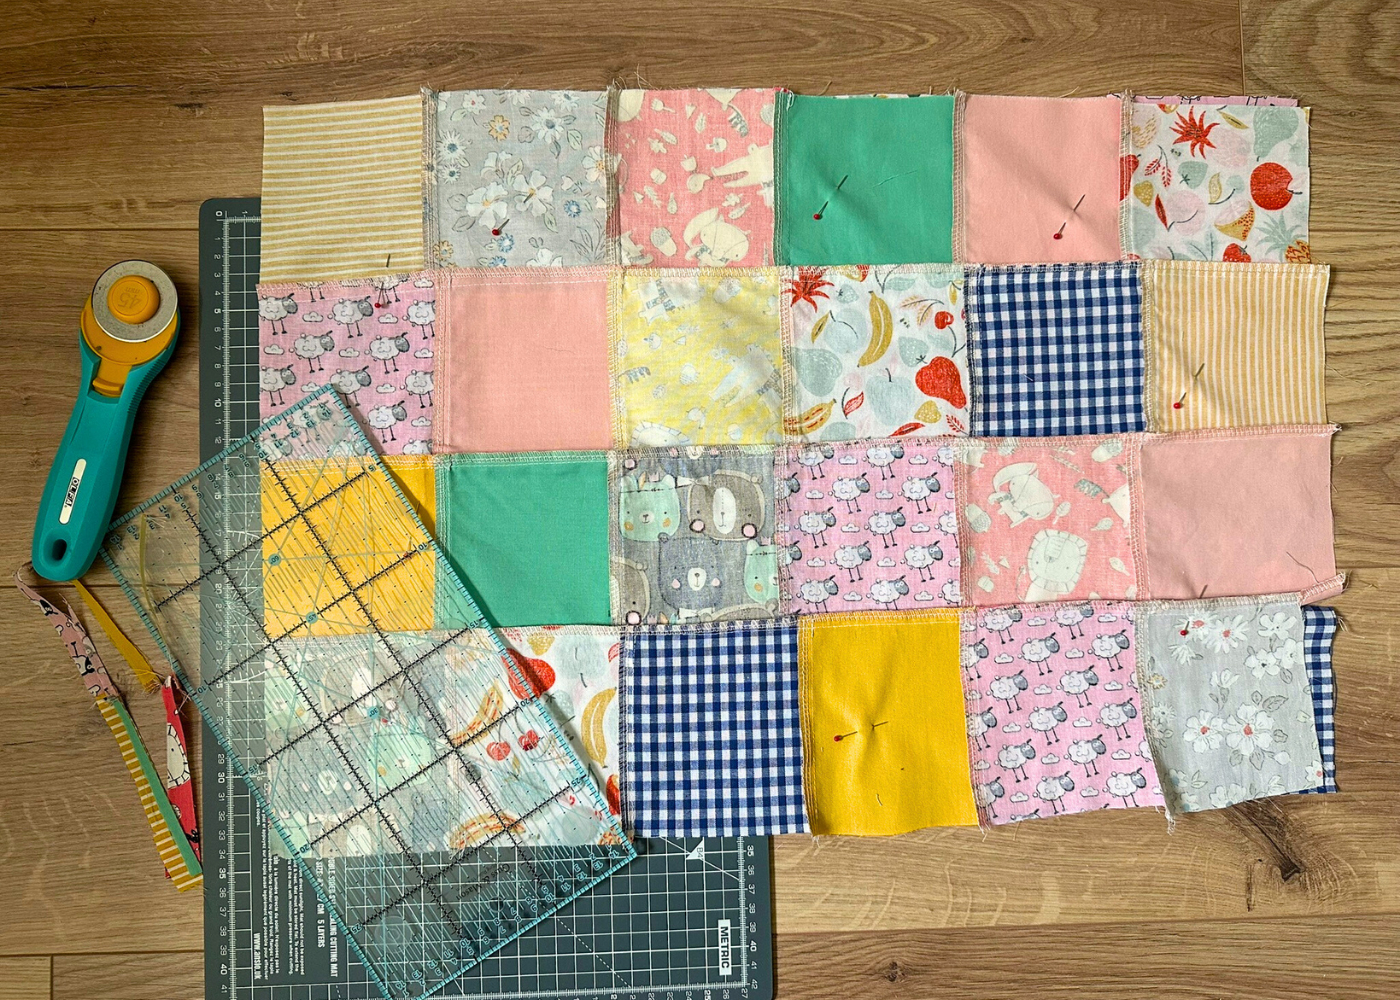
I batch-sewed all the rows first, then serged the seams.
Hot tip: press your seams in the same direction after every stitch line. It makes everything look cleaner and helps the patchwork lay flat.
After that, I joined the rows to complete the front panel and finished those horizontal seams with my serger too. Make sure all the seams are aligned – pay attention to the point where they connect.
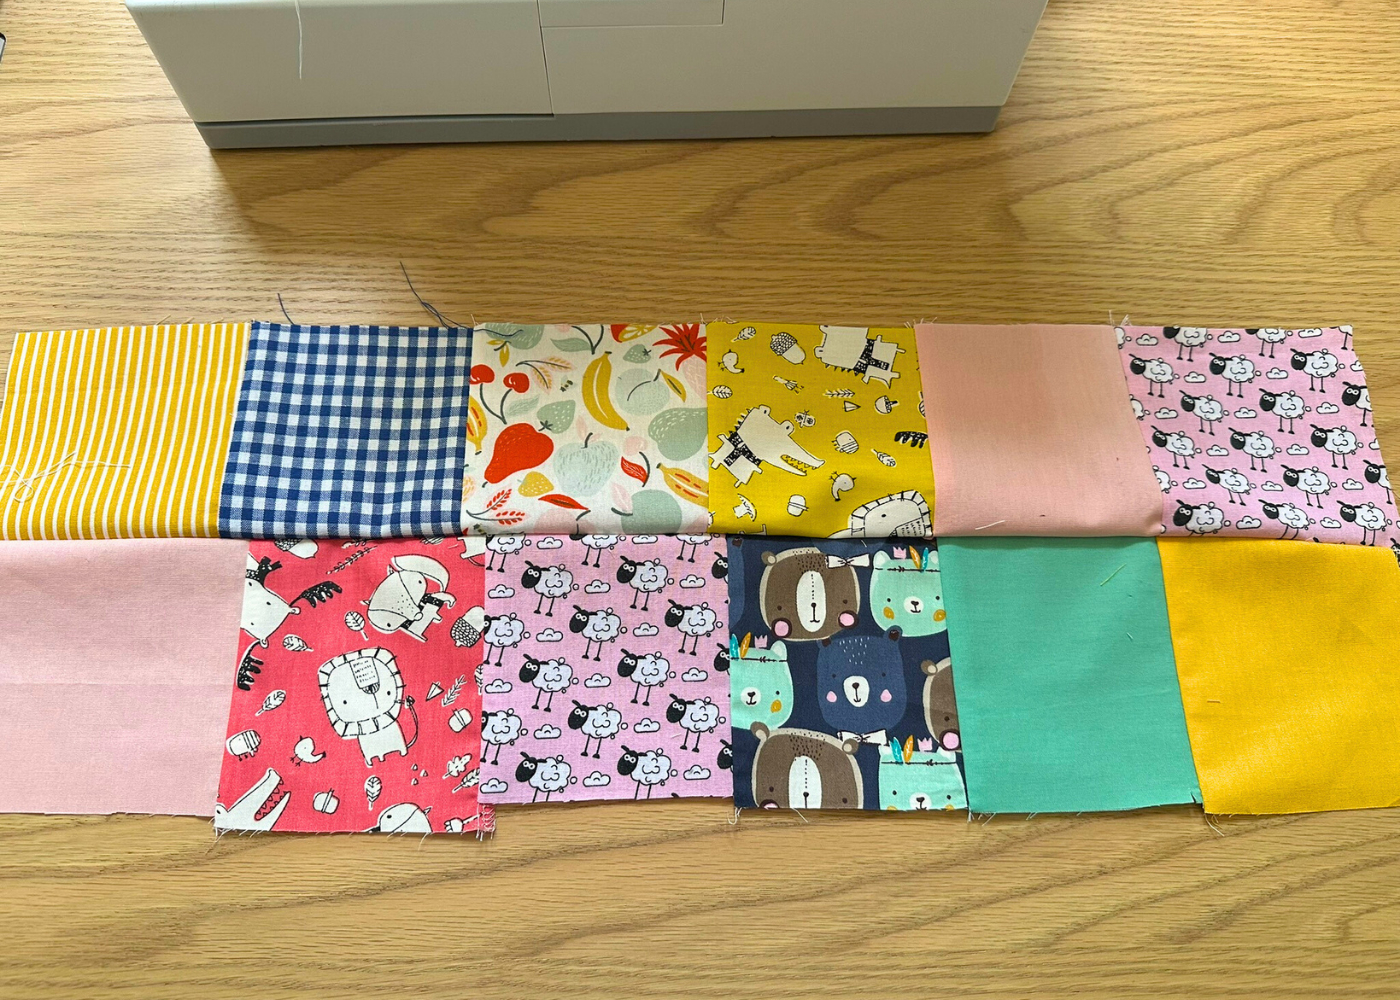
Repeat the same process for the back panel.
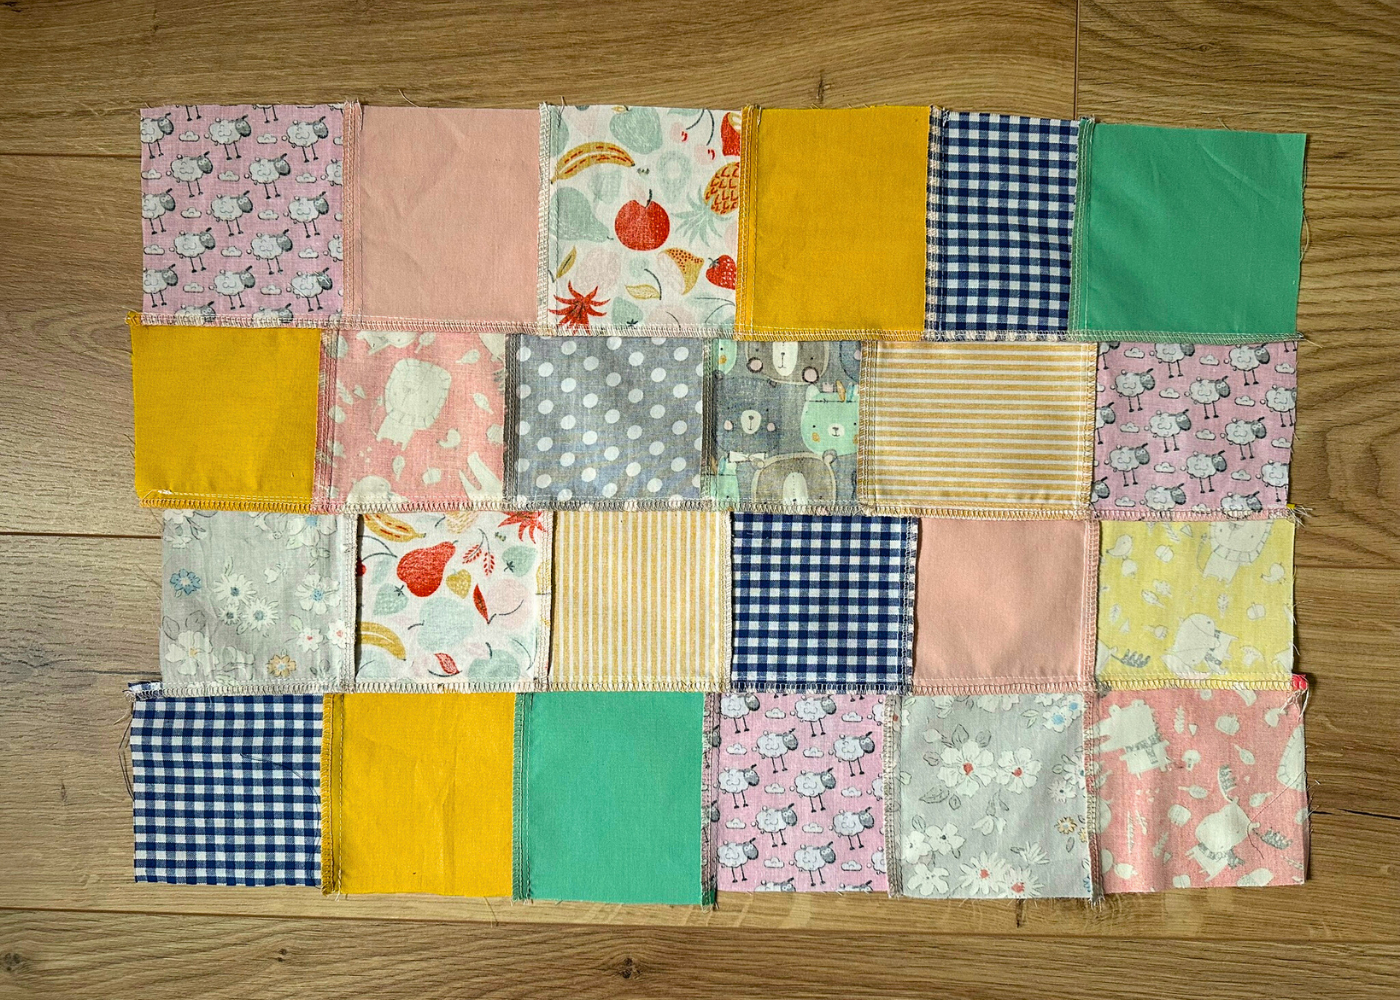
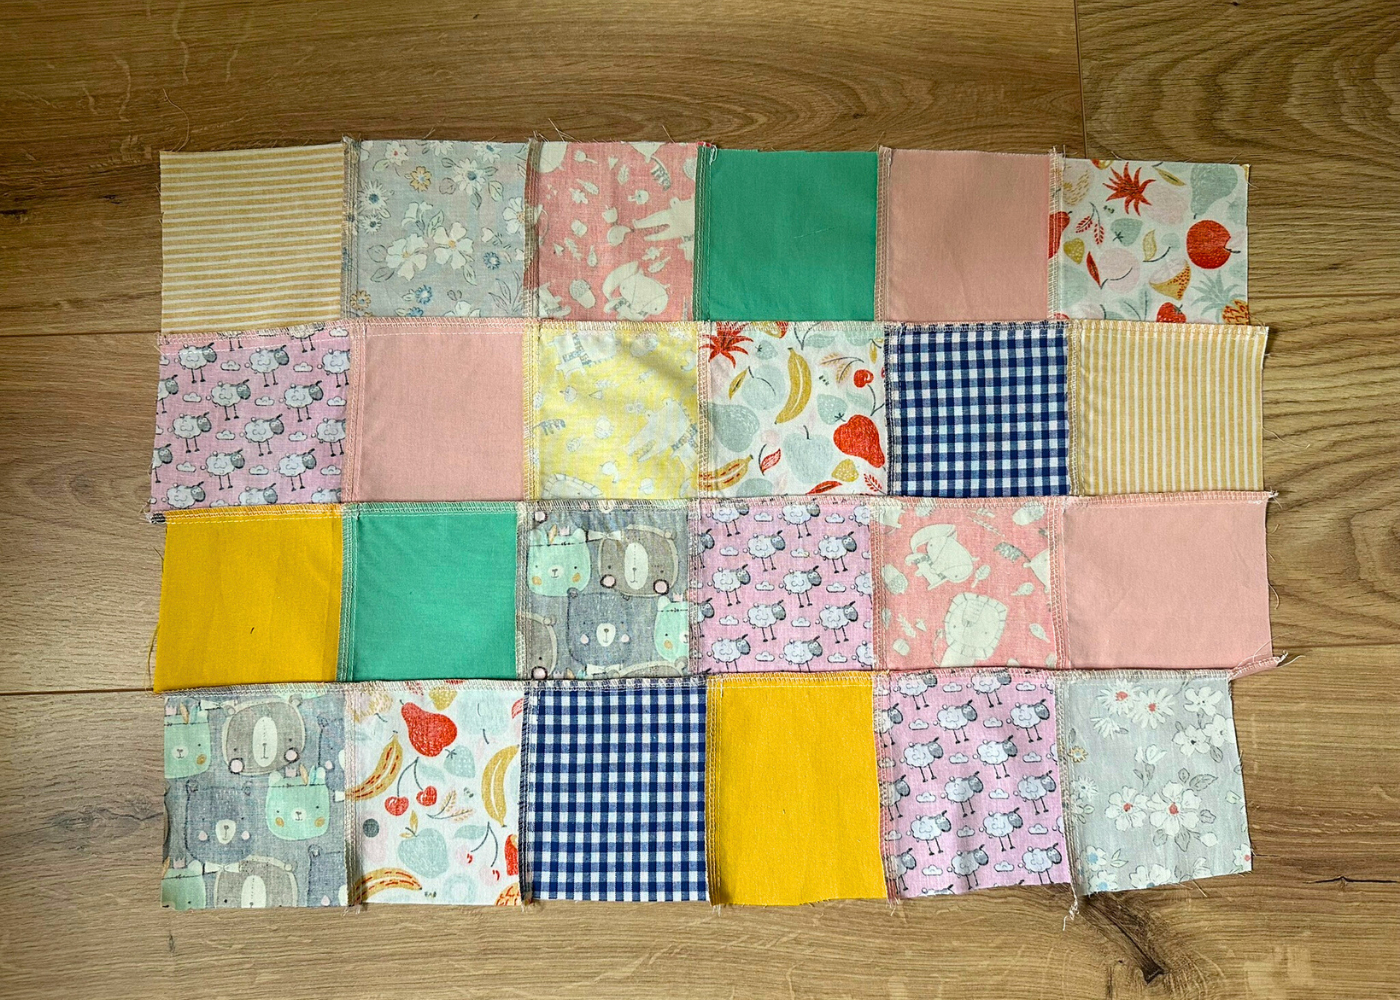
Step 3 – join front and back panels
Your skirt might look like a bit of a mess now – mine sure did!
Try to trim everything a bit before sewing the side seams, just align the panels as best you can. At this point, take out your rotary cutter and cutting mat and straighten the top and bottom edges of the skirt. Now’s your chance to tidy it up a bit.

Sew the side seams, then finish them with a serger or zigzag stitch.
Step 4 – add the hem and waistband facing
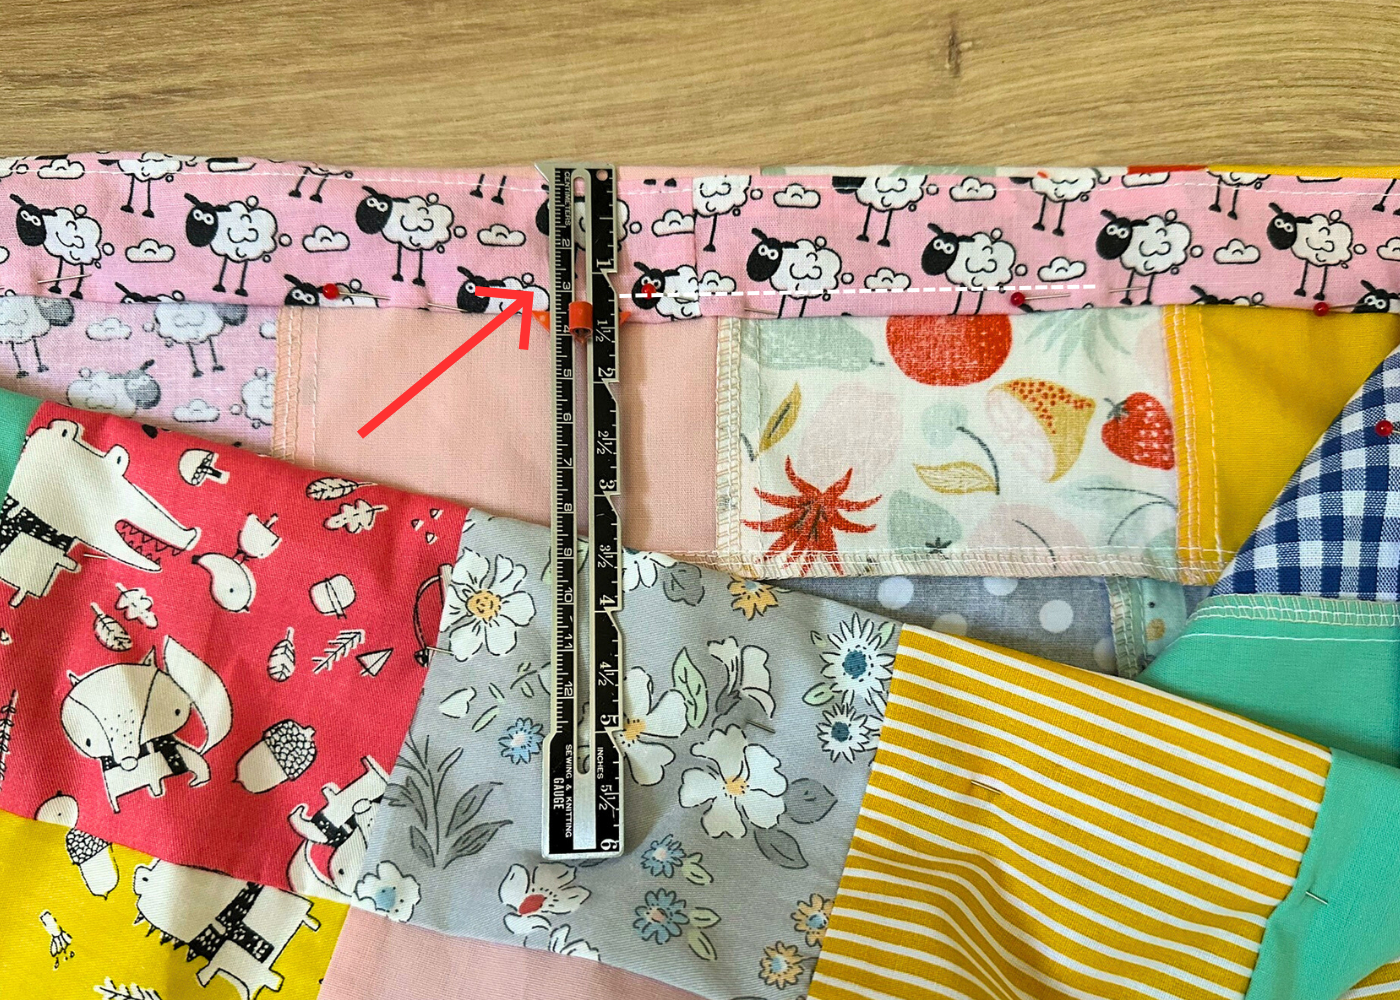
To finish the skirt, I used fabric strips as a facing for both the hem and the waistband. This helps preserve the full height of your patchwork squares and adds a nice clean finish.

Cut two fabric strips slightly wider than your skirt panels and about 2″ tall. One will be your hem, the other your waistband.
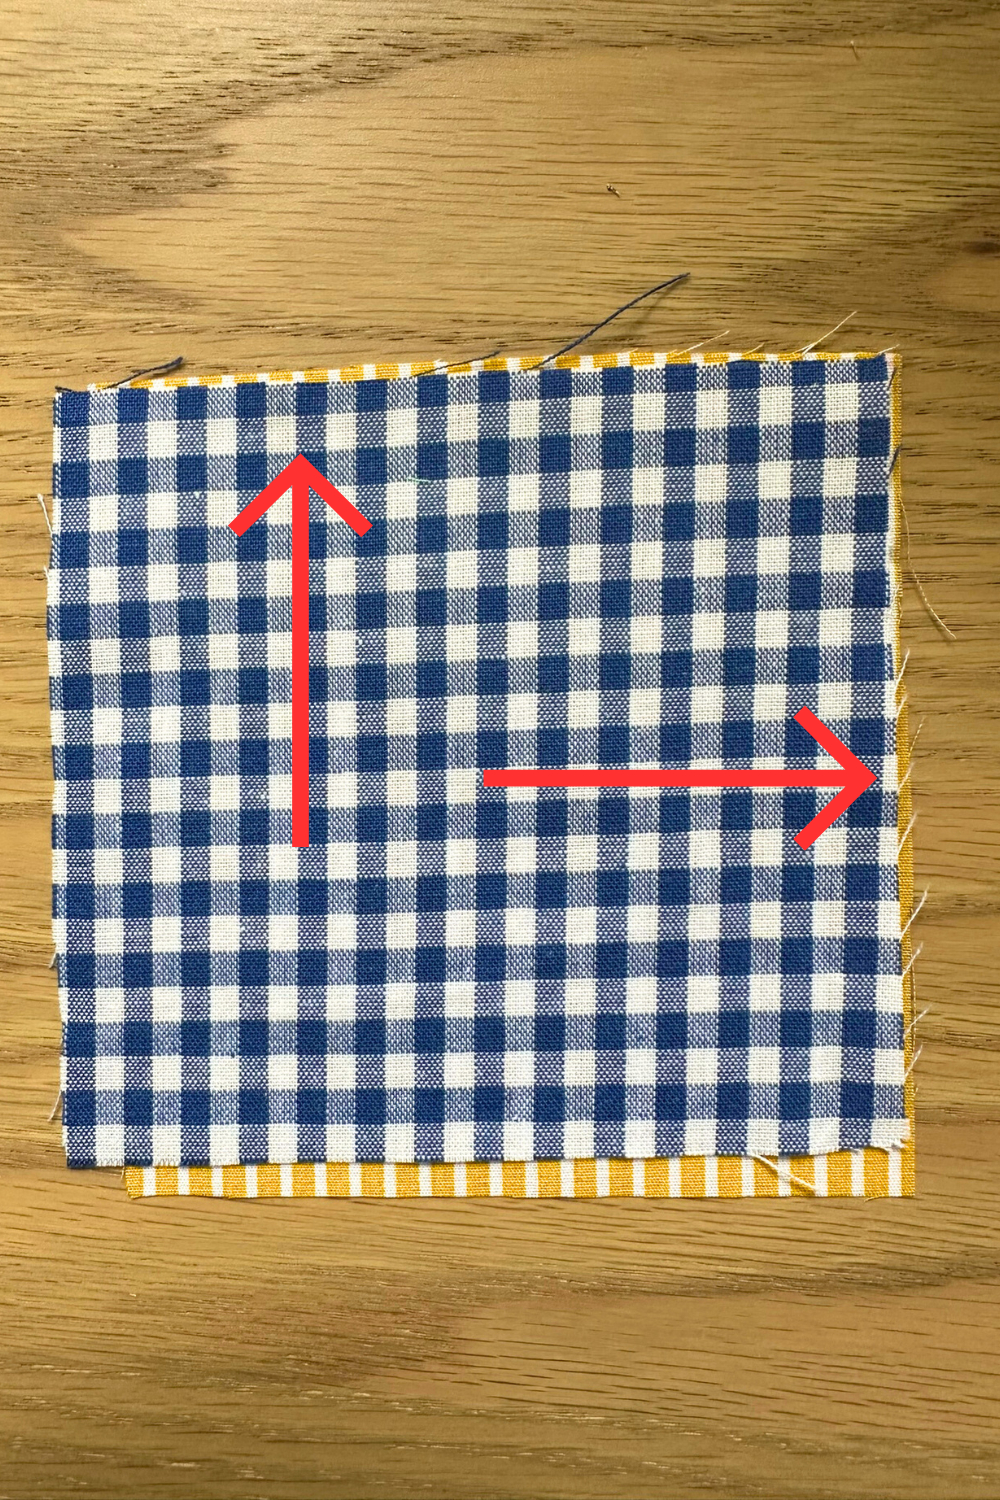
Pin the first fabric strip to the bottom edge of the skirt, right sides together. Now take a close look at the fabric print — see those little sheep?
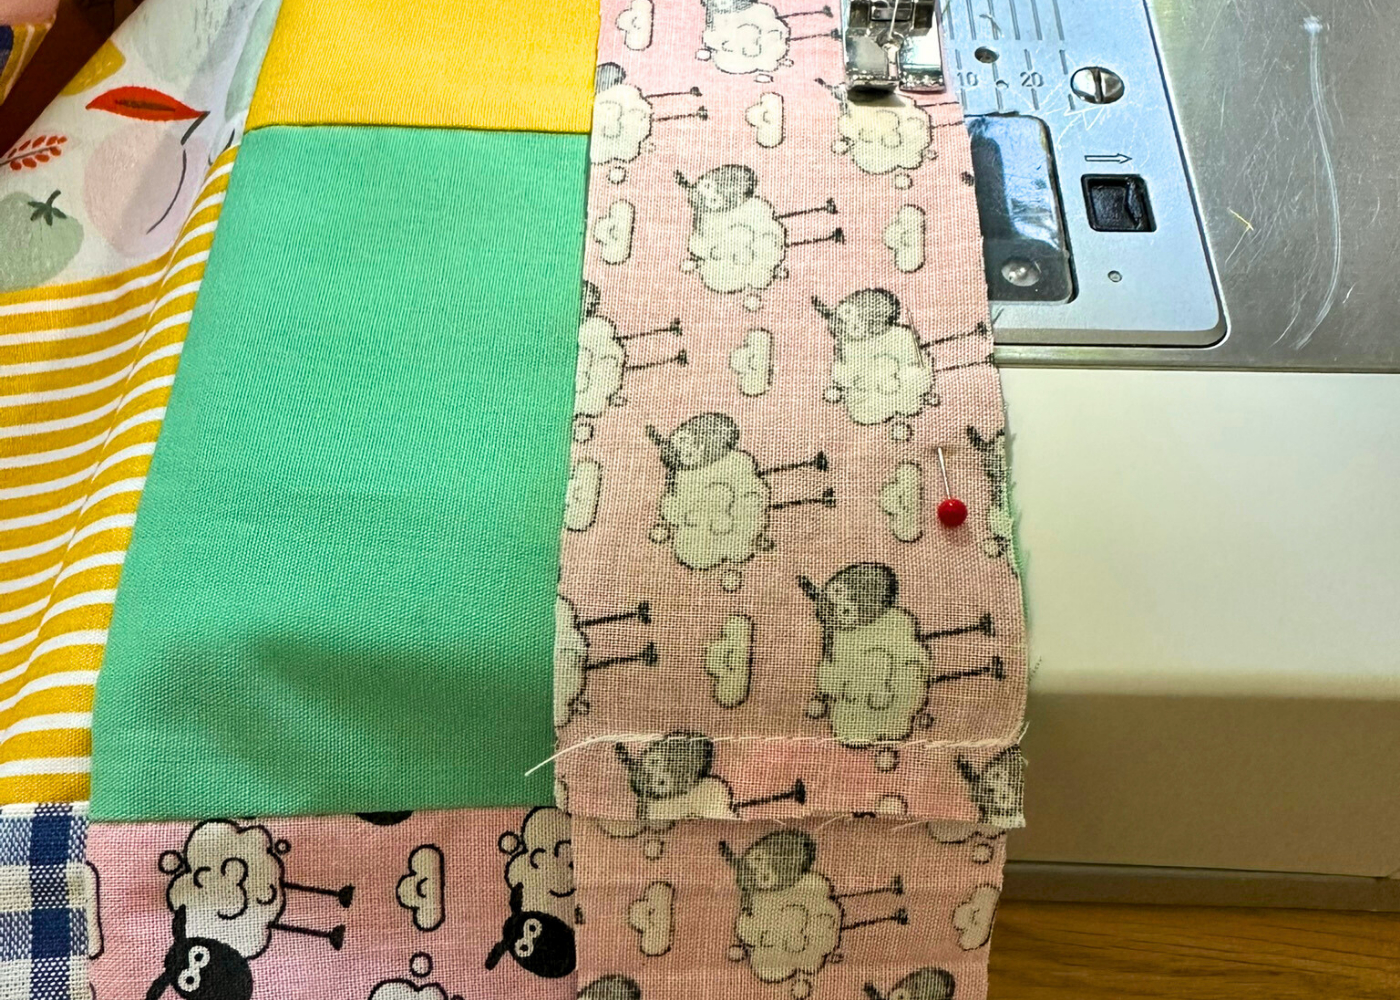
Make sure they’re standing upright, even though the strip will be flipped up later. This helps you place the hem facing correctly, so all your sheep stay standing and not upside down in the final skirt!
Once stitched, press the seam allowance down toward the facing and understitch along the seam — this helps keep the finished edge lying nice and flat.
Now fold the facing to the wrong side of the skirt. Tuck in the raw edge at the top of the strip, then topstitch all the way around. This way, all the raw edges are hidden, and your hem looks neat inside and out — with those sheep perfectly upright!


You’ll follow the same method for the waistband facing. Again, double-check the direction of the print so the design doesn’t end up upside down.
I wanted the waistband to fit a 1″ elastic, so I made sure the finished casing had about 1¼” of space inside.

I also like folding the bottom edge of the strip before sewing — it gives a super tidy finish and creates a little built-in opening to slide the elastic through. Easy and neat!
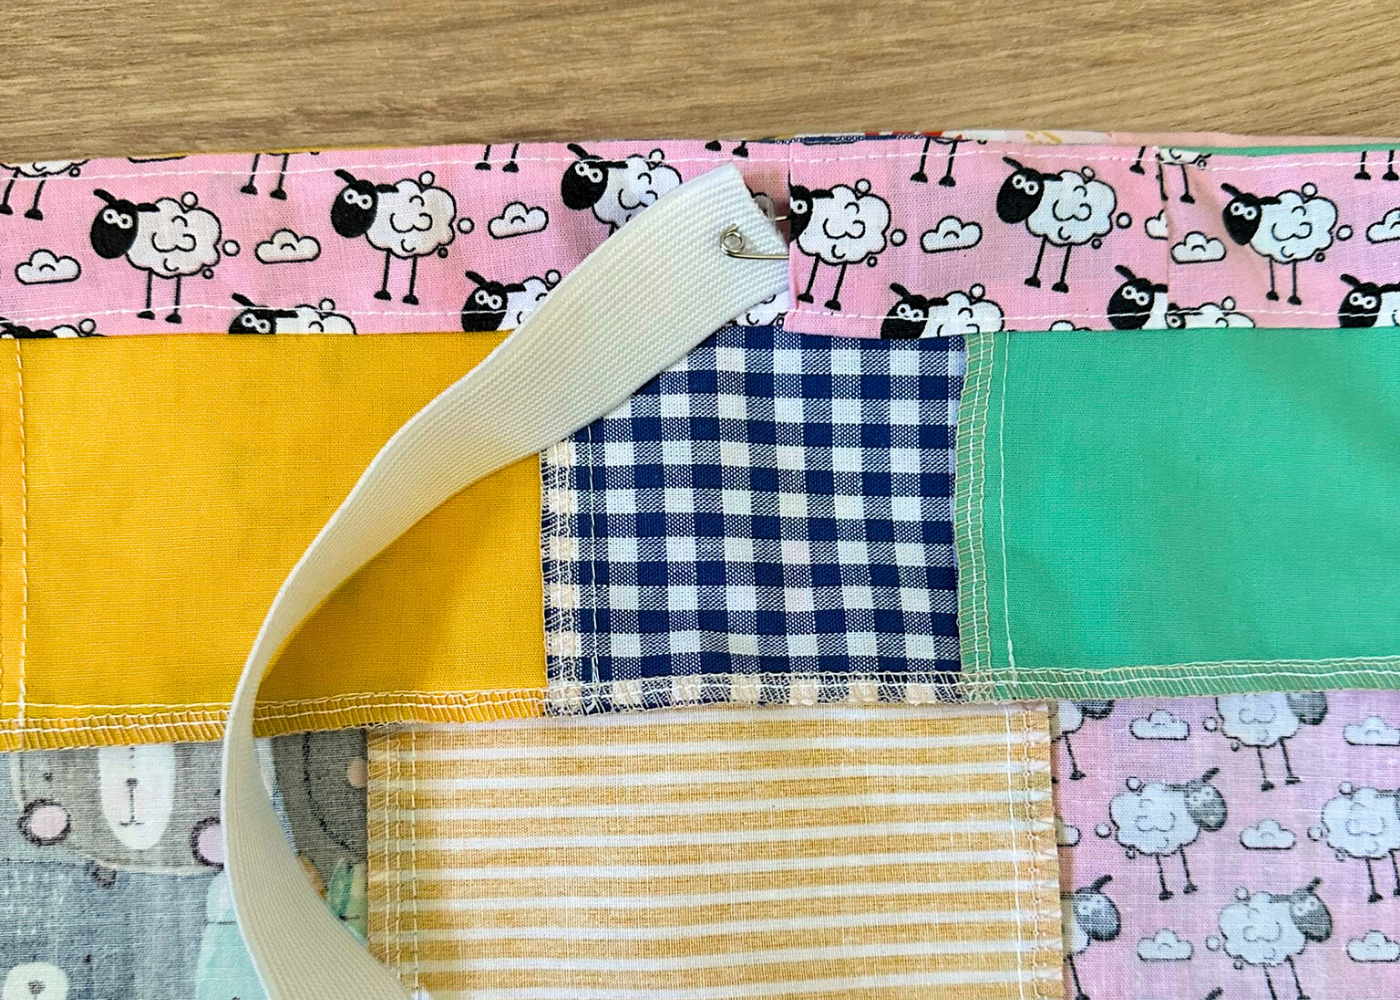
And that’s it! I love the little sheep print I used for the waistband facing – it’s such a fun little detail.
The skirt looks great inside and out, and my daughter absolutely loves wearing it. Her friends think it’s adorable too. Honestly, no one notices (or cares about) the wobbly seams. All they see is a bright, happy, handmade skirt.
You might also like:
- Sew a lovely flutter sleeve peasant top in just 30 minutes – free pattern
- How to make a mini zipper pouch from fabric scraps – free pattern
- Browse a huge collection of free sewing patterns and tutorials for kids, adults, and home
Let’s keep in touch! You can find me on Facebook, Instagram, and Pinterest.
Related posts