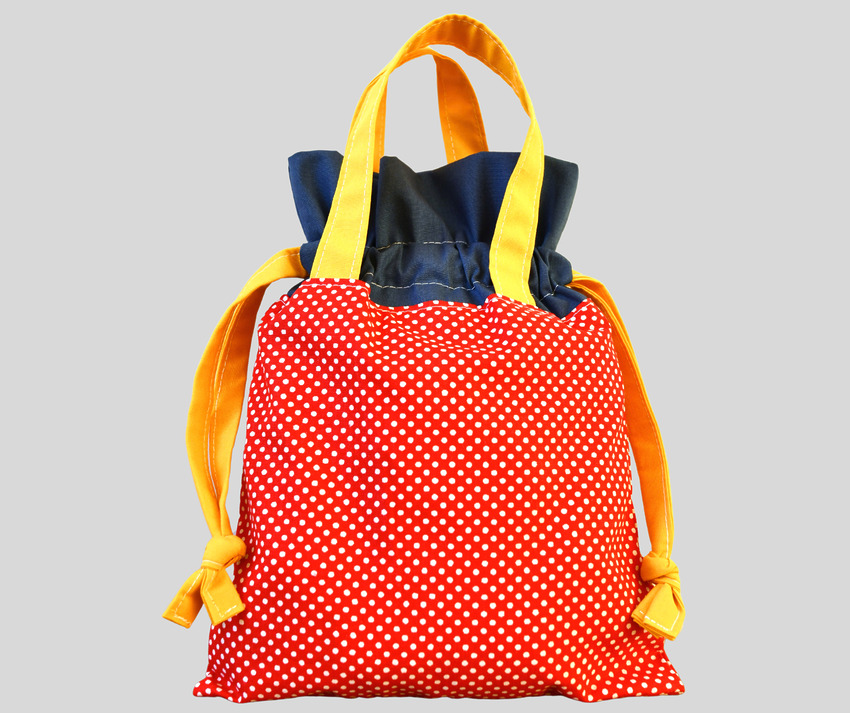
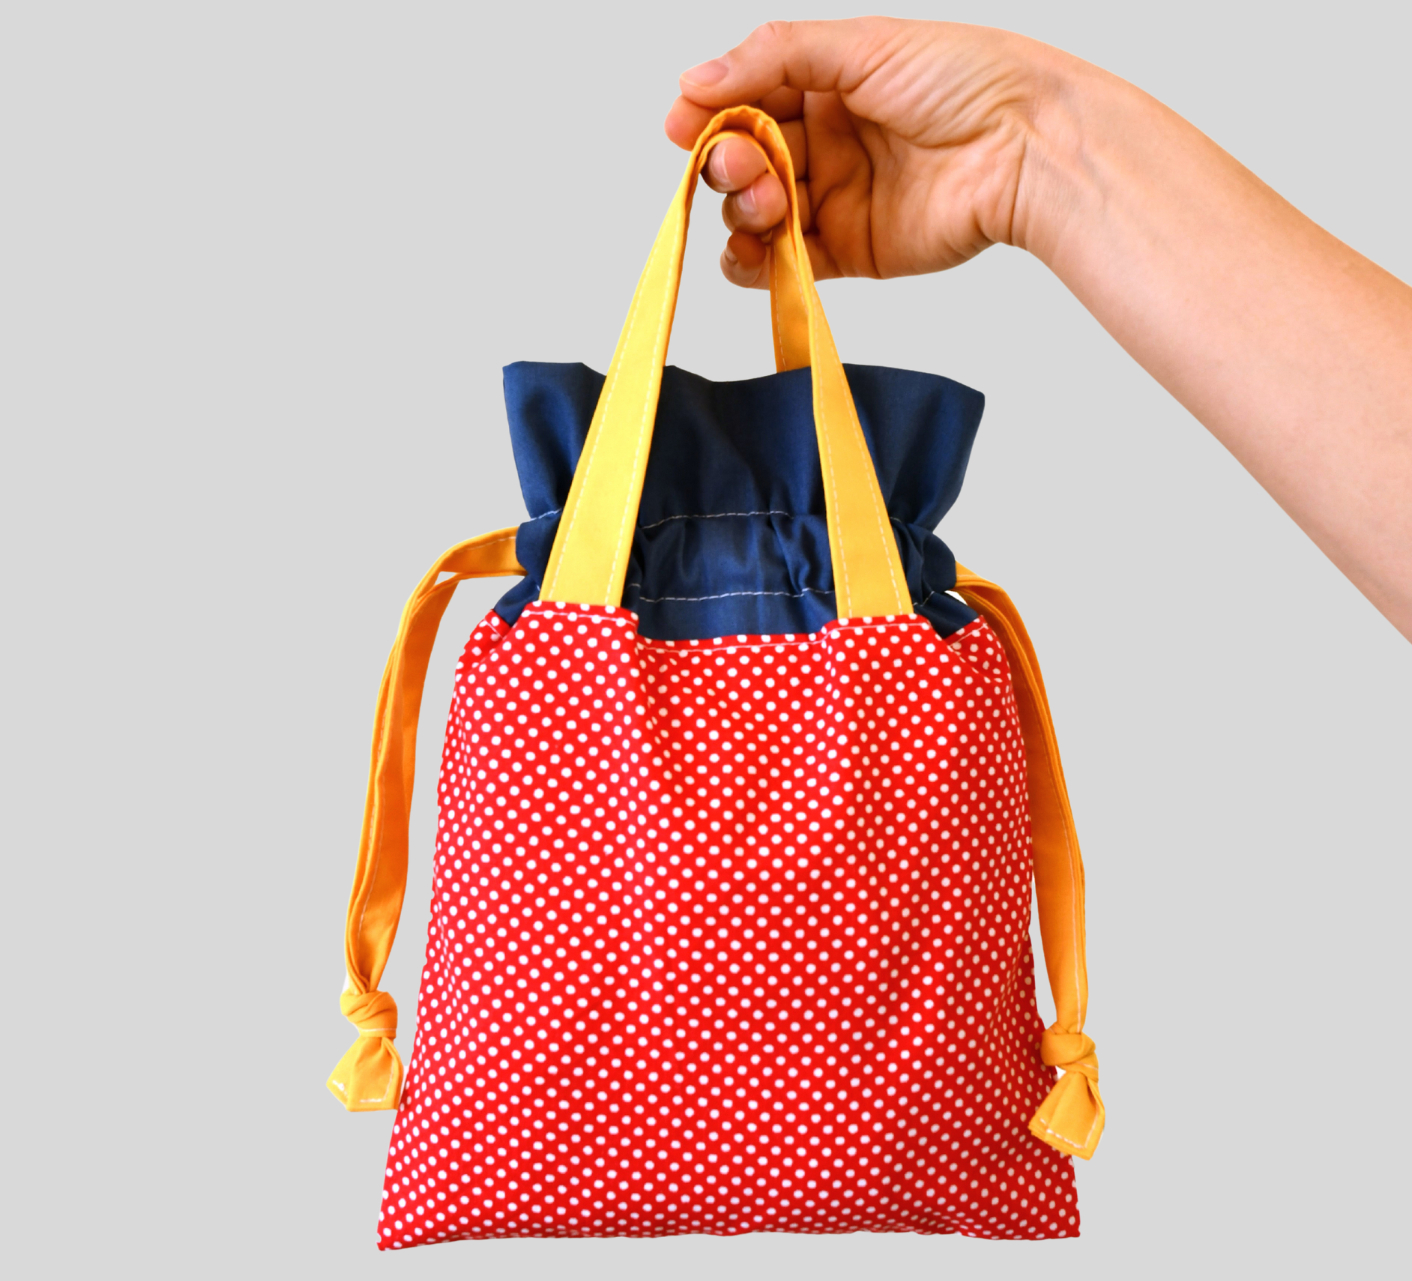
Learn how to create an easy drawstring gift bag with handles using this free pattern and tutorial. You’ll never need to buy a gift bag from the store again! This adorable tote is entirely reusable, and you can make it in any print you want. Consider upcycling old clothes or fabrics you have lying around for an eco-friendly option. This project is beginner-friendly, involving only straight lines, so even those with little sewing experience can complete their first fabric gift bag in under an hour. The satisfaction you’ll feel afterward is priceless!

This drawstring tote is perfect for various occasions. I made one for a child’s birthday party a few months ago, and it was a hit! My youngest daughter was so disappointed when we returned home without it – she had hoped to use the cute tote for her toys. She half-expected me to give the birthday girl her present in the bag, then ask for the bag back, LOL. Naturally, I ended up making another one!
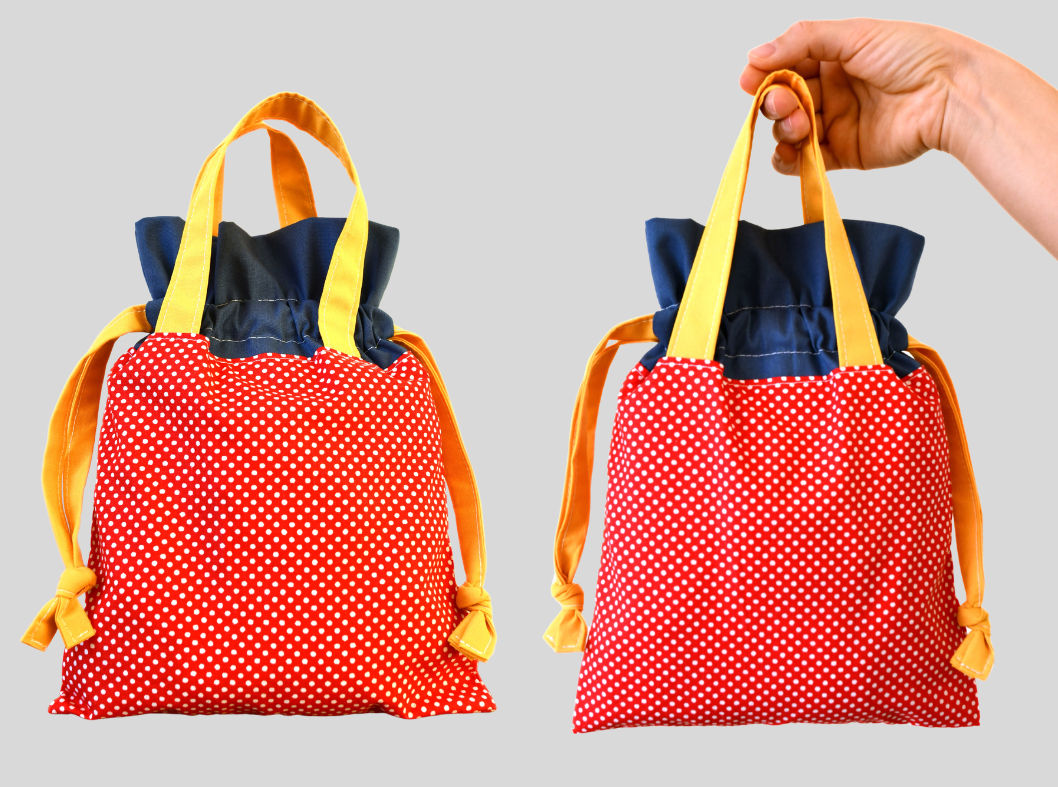
What’s fantastic about this bag is its versatility. You can adjust the size according to your needs, making it suitable for everything from a small gift bag for toys to a larger tote for bigger items.
You might love these sewing project ideas as well: Mini zipper pouch / Lined drawstring dice bag (free pattern)
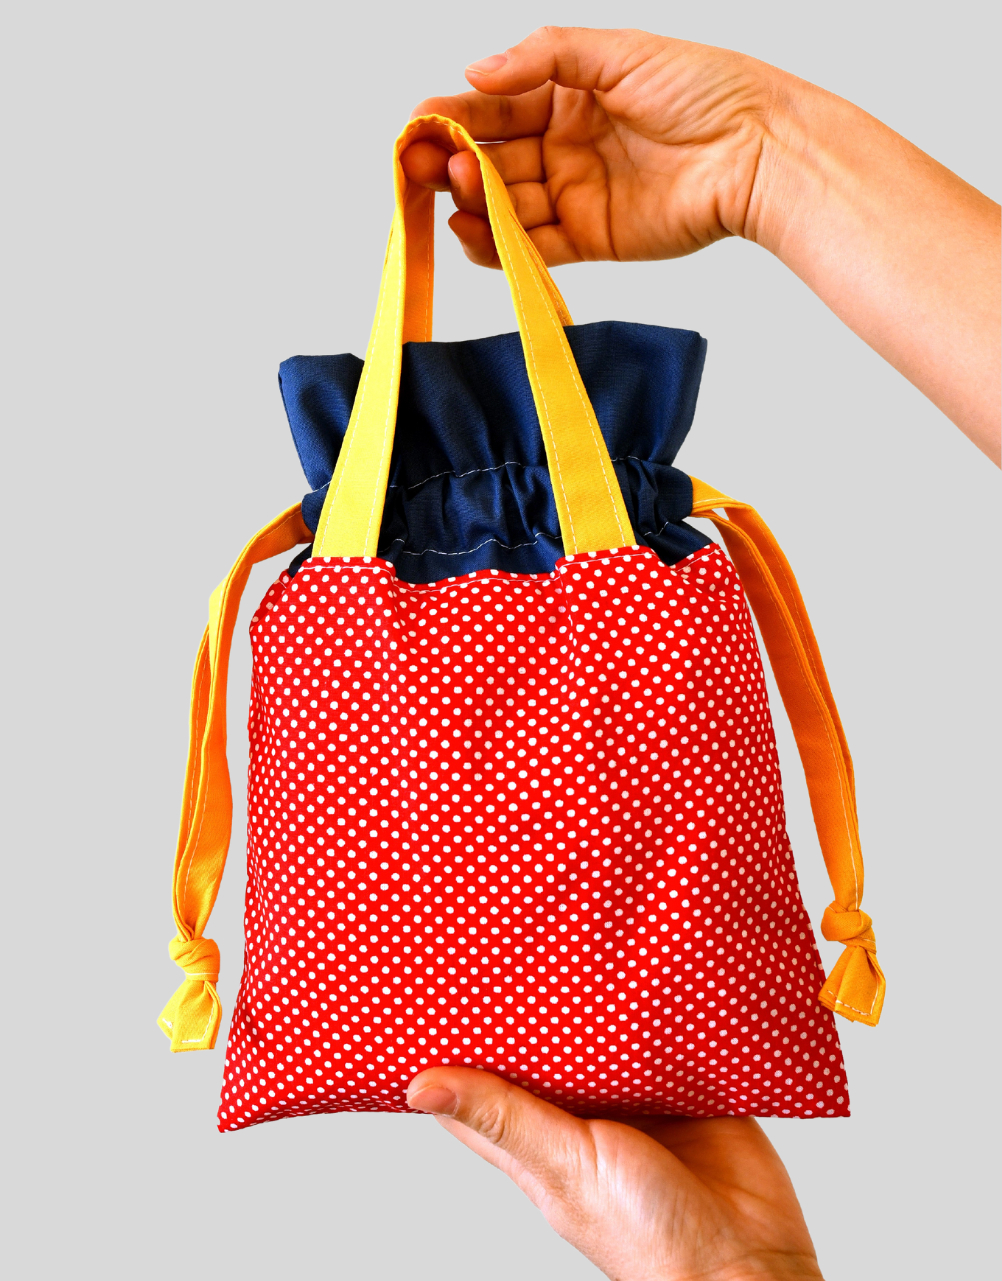
It also acts as a secret keeper. Carry it like a regular tote, but the drawstring closure ensures everything stays secure. It’s ideal for surprises or keeping your belongings safe while on the go.
If you’re looking for a fun sewing project, I highly recommend this simple drawstring tote bag with handles. It’s simple to make, incredibly useful, and offers a wonderful solution for gift-giving.
Sewing supplies needed for drawstring gift bag with handles (free pattern)
- Sewing machine
- Universal sewing machine needle
- Fabric marking pencil
- Cutting mat and rotary cutter
- Sewing pins or sewing clips
- Seam gauge
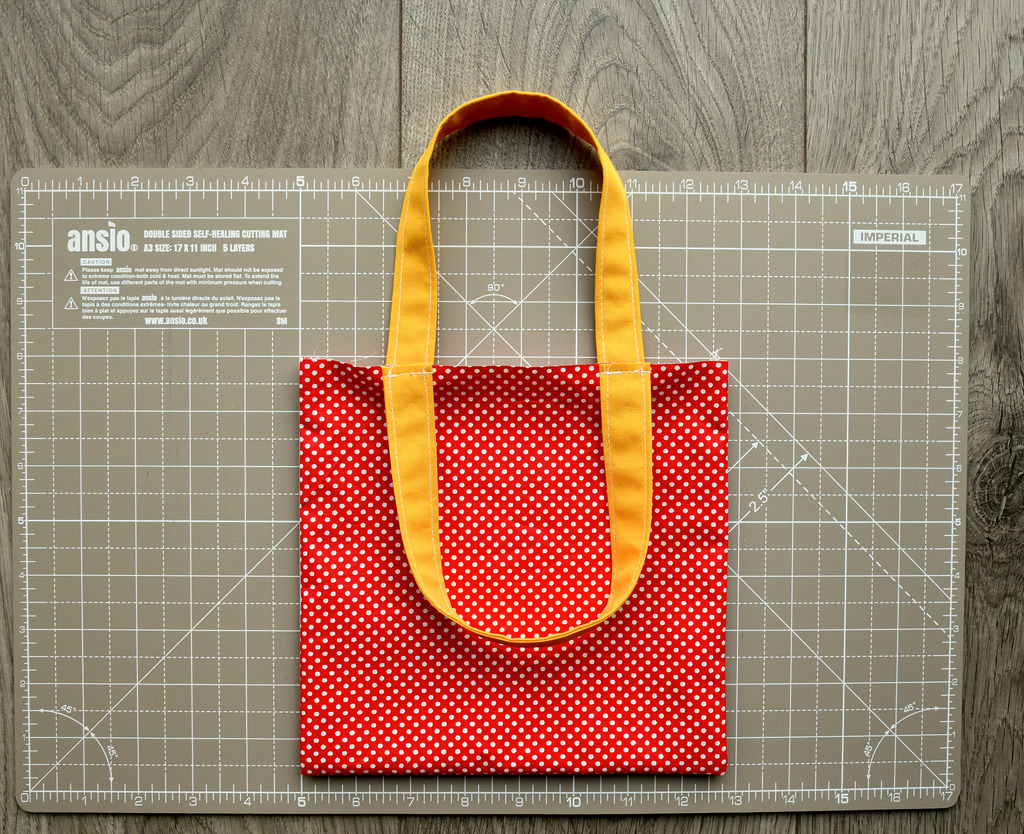
My finished fabric gift bag measures 7.5 inches wide and 10 inches tall, excluding the handles. There is no pattern you need to download and print, as this tote bag is made from 8 simple fabric rectangles. Follow the step-by-step instructions below to make your own.
Note: What you won’t see in this tutorial are the iron and the ironing board, but these items play a crucial role in creating a nicely finished gift bag. Skipping the ironing step may result in a frumpy, wrinkled fabric bag. For this project, it’s essential to have the iron readily available so you can use it after each small step!
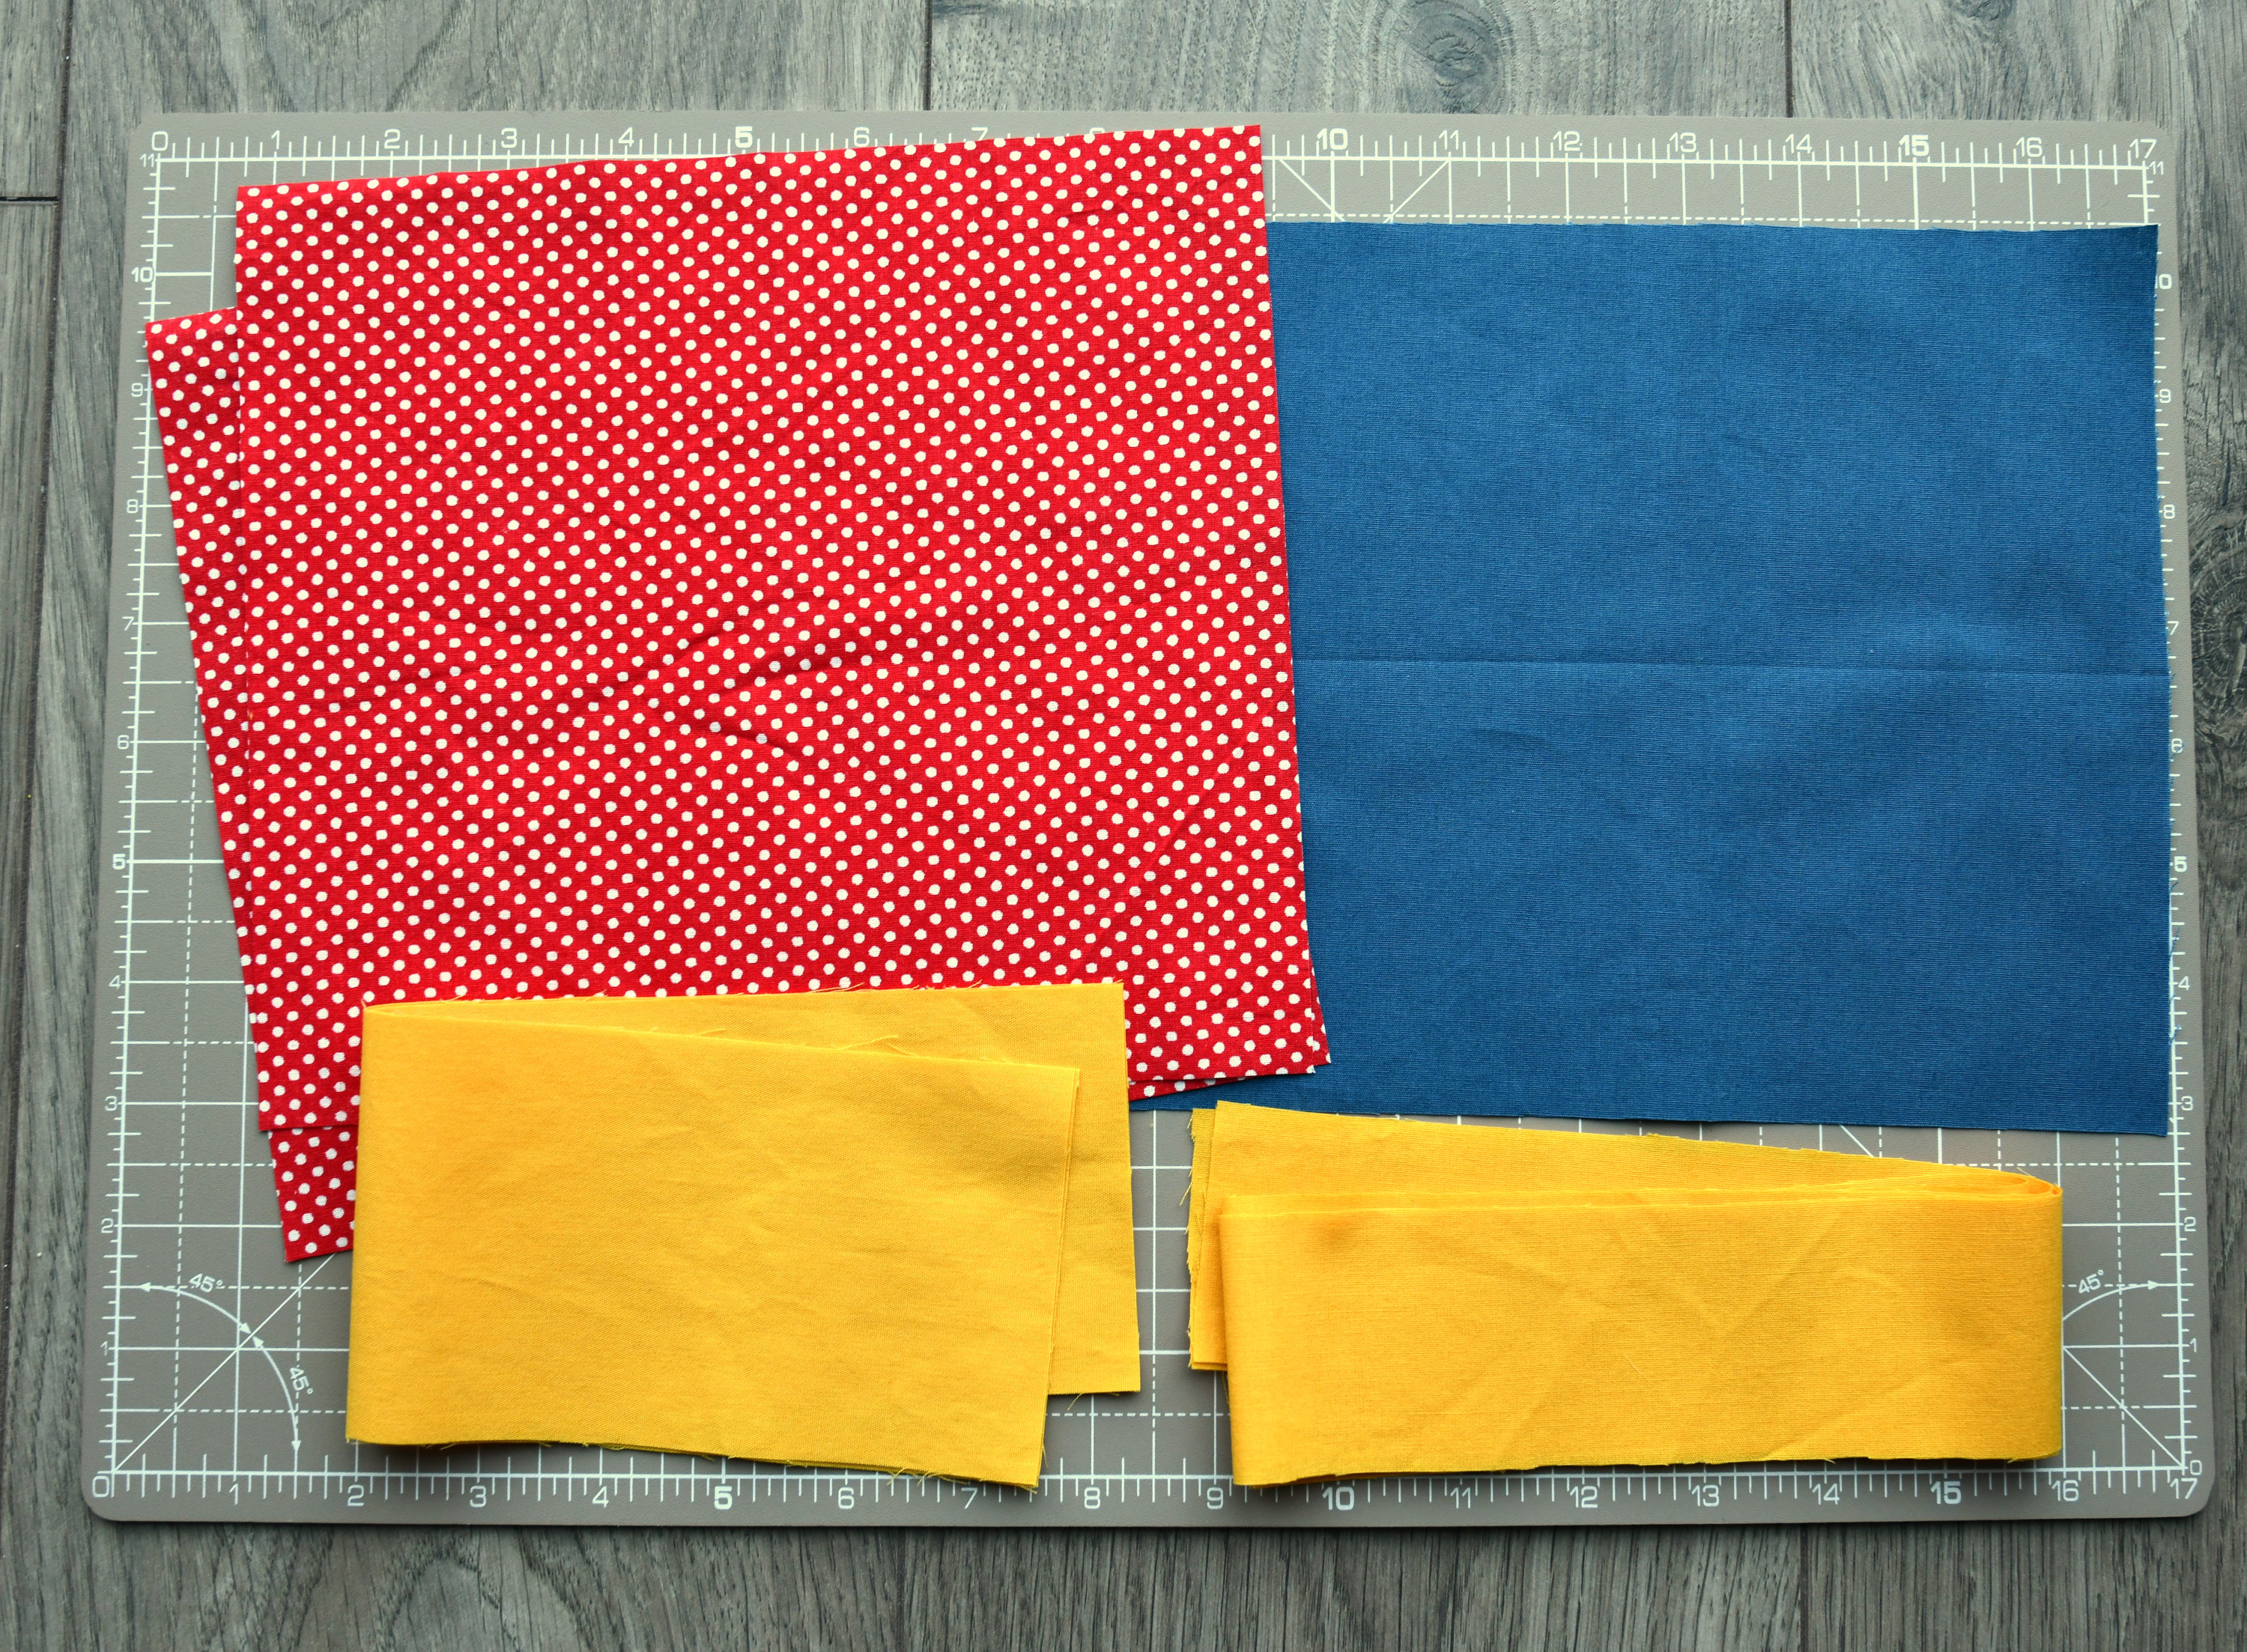
Step 1 – Prepare your fabric pieces
Bottom piece: 8.5″ wide x 8″ tall – you’ll need 2 fabric pieces.
Accent piece: 8.5″ wide x 8″ tall – you’ll need 2 fabric pieces.
Handles: 12″ x 3″ – you’ll need 2 such fabric pieces.
Fabric ties for the drawstring channel: 27″ x 2″.
Continue to the end of the article for instructions on cutting fabric pieces for a larger (or smaller) drawstring tote bag.
Step 2 – Prepping the handles
First, prepare the tote handles. Take your two long rectangles, fold them in half lengthwise, then fold the raw edges towards the center and fold again.
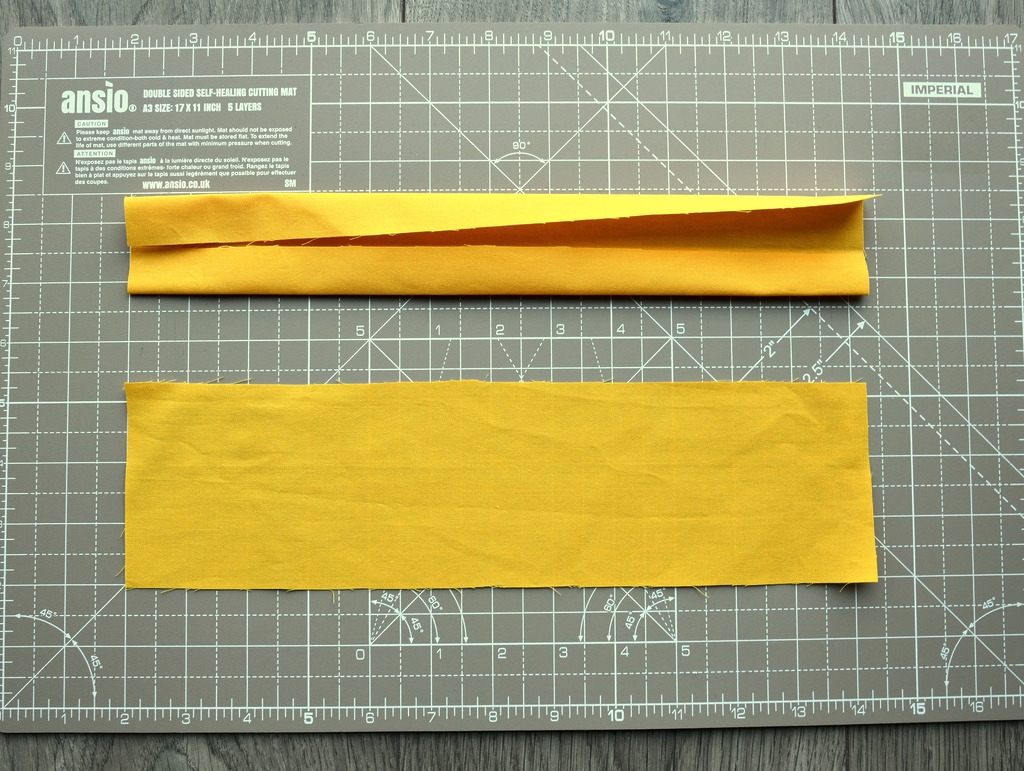


Stitch along both edges to secure and give a nice finish.

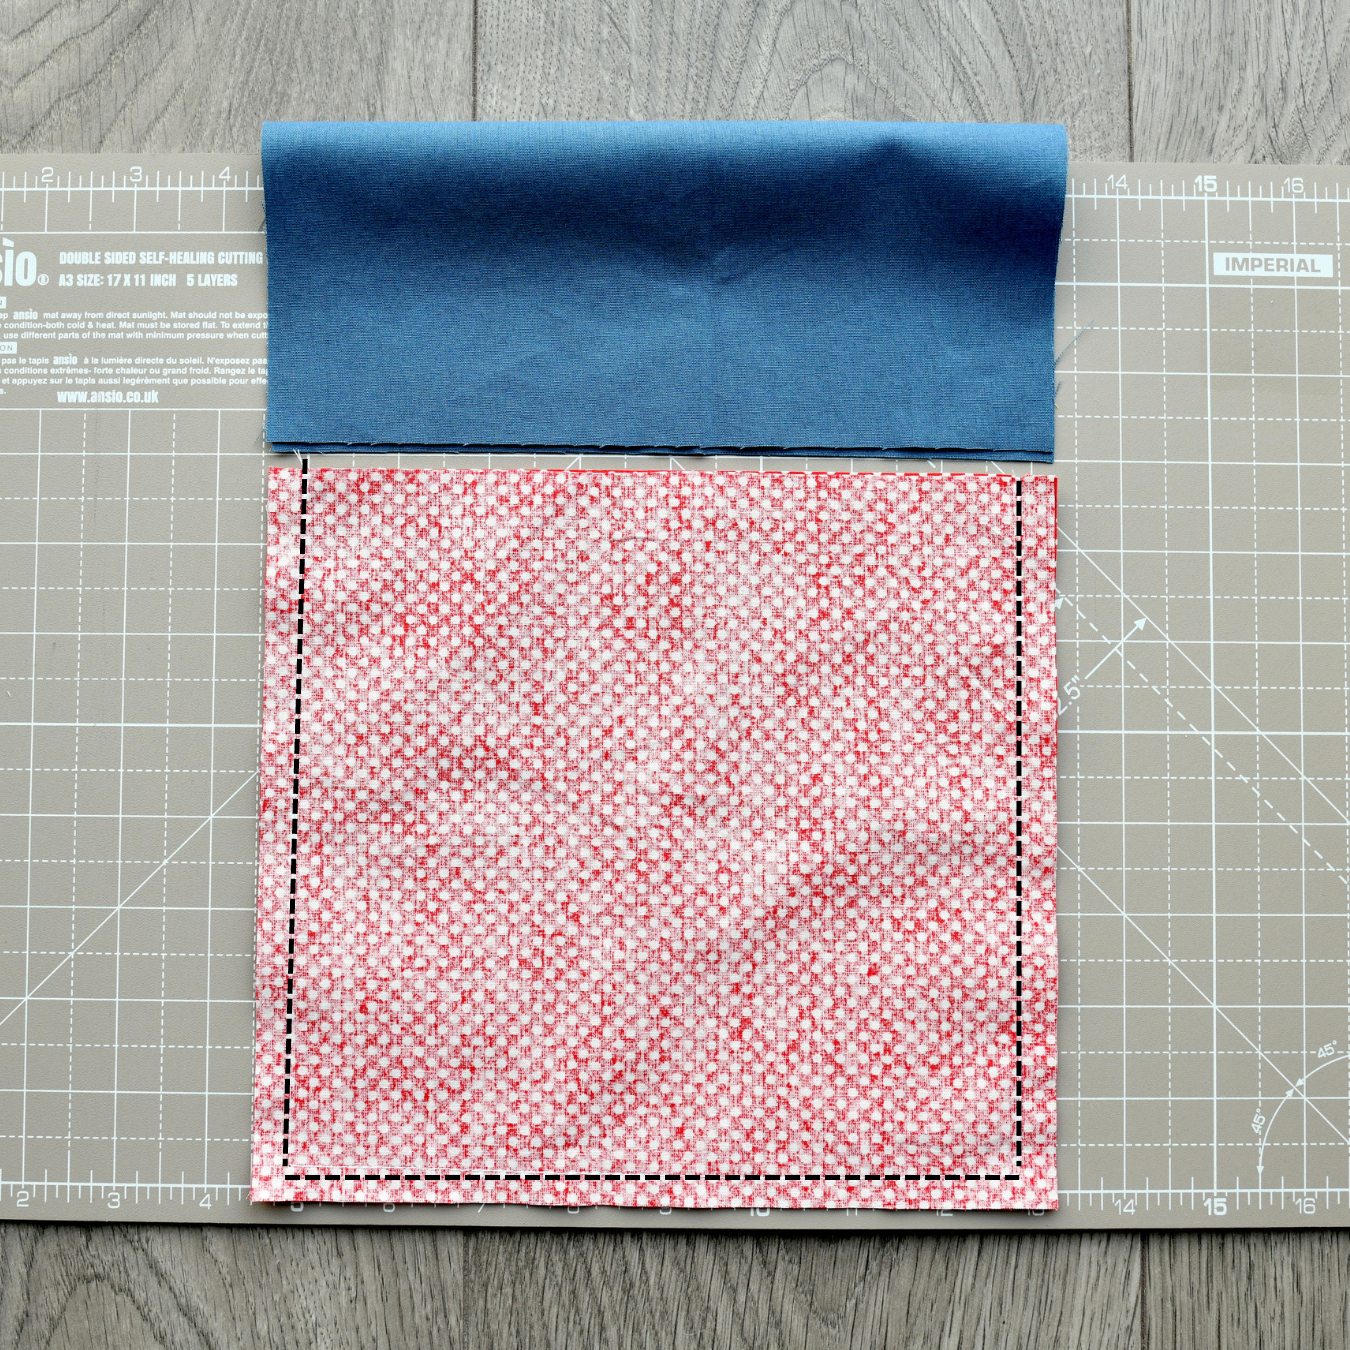
Step 3 – Bringing the bottom pieces together
Take your bottom pieces and place them right sides together. Sew the side seams and the bottom seam using a 3/8” seam allowance to provide a sturdy base.
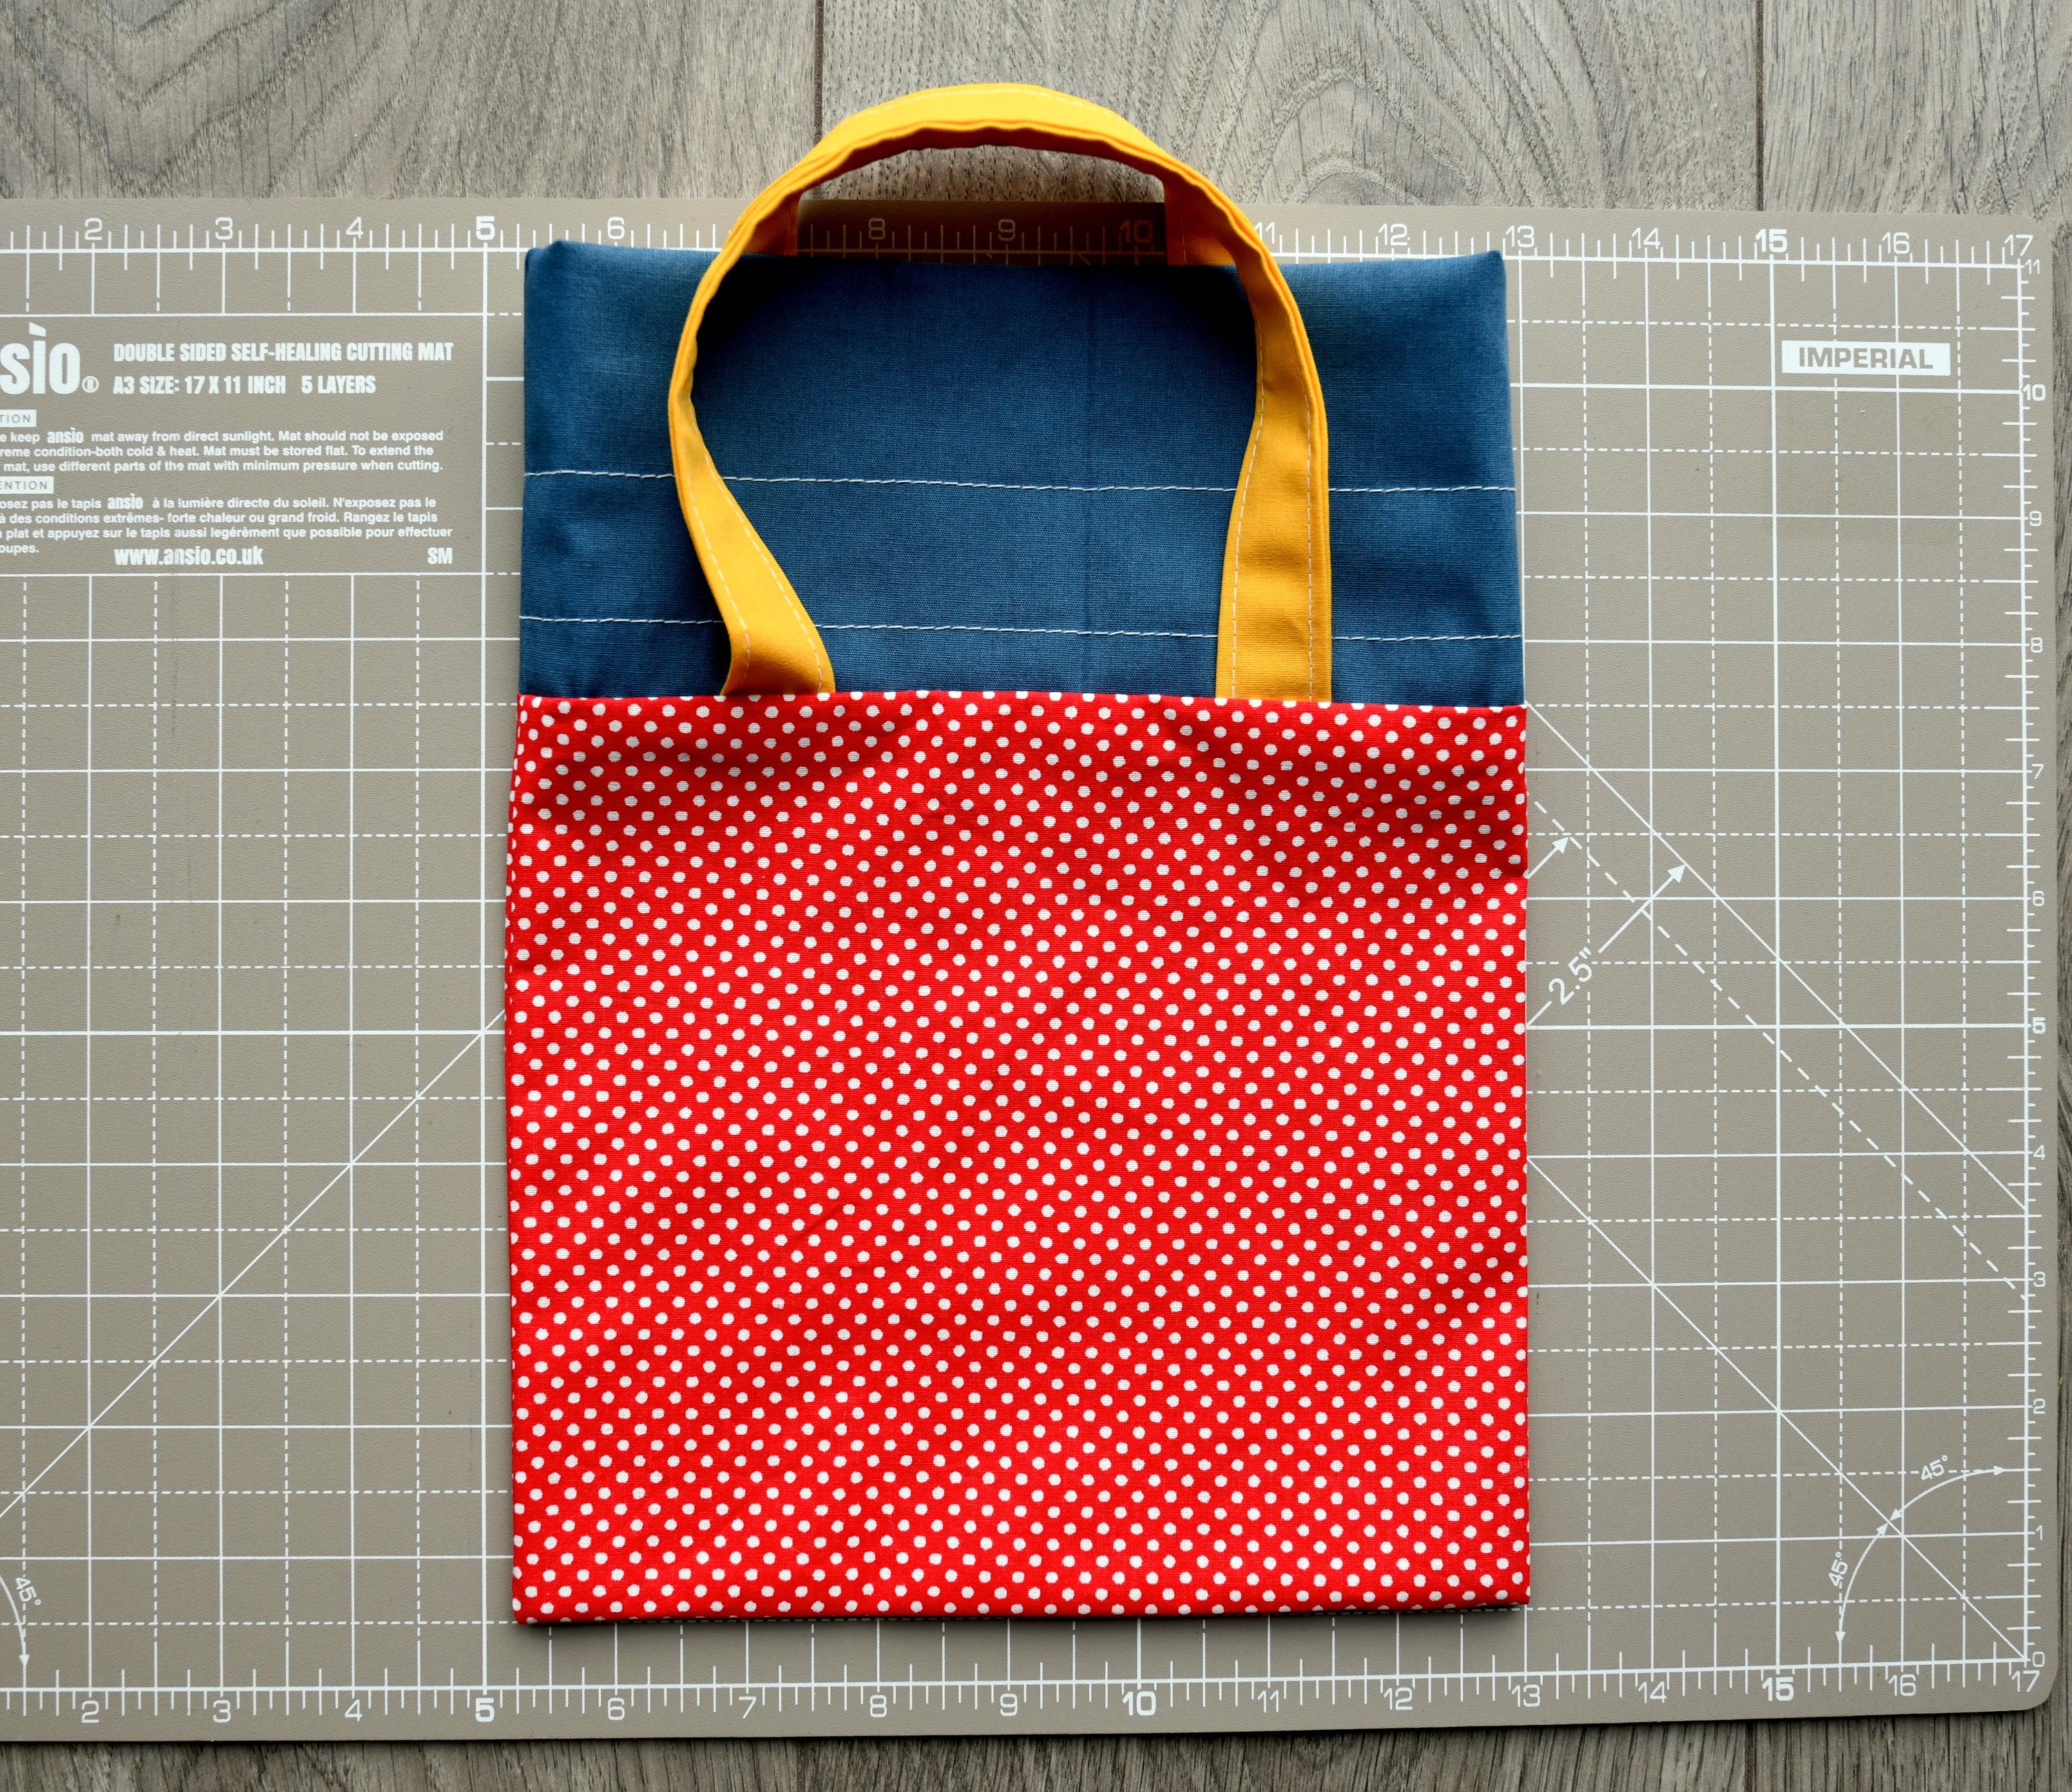
Step 4 – Placing the handles
Attach the handles to the top edge of the bottom piece, ensuring right sides together. Space them about 1.5 inches apart from the side seams, and sew in place.
The unsewn top part appears wider than the bag because the bag is shown right side out, and its side seams are sewn.

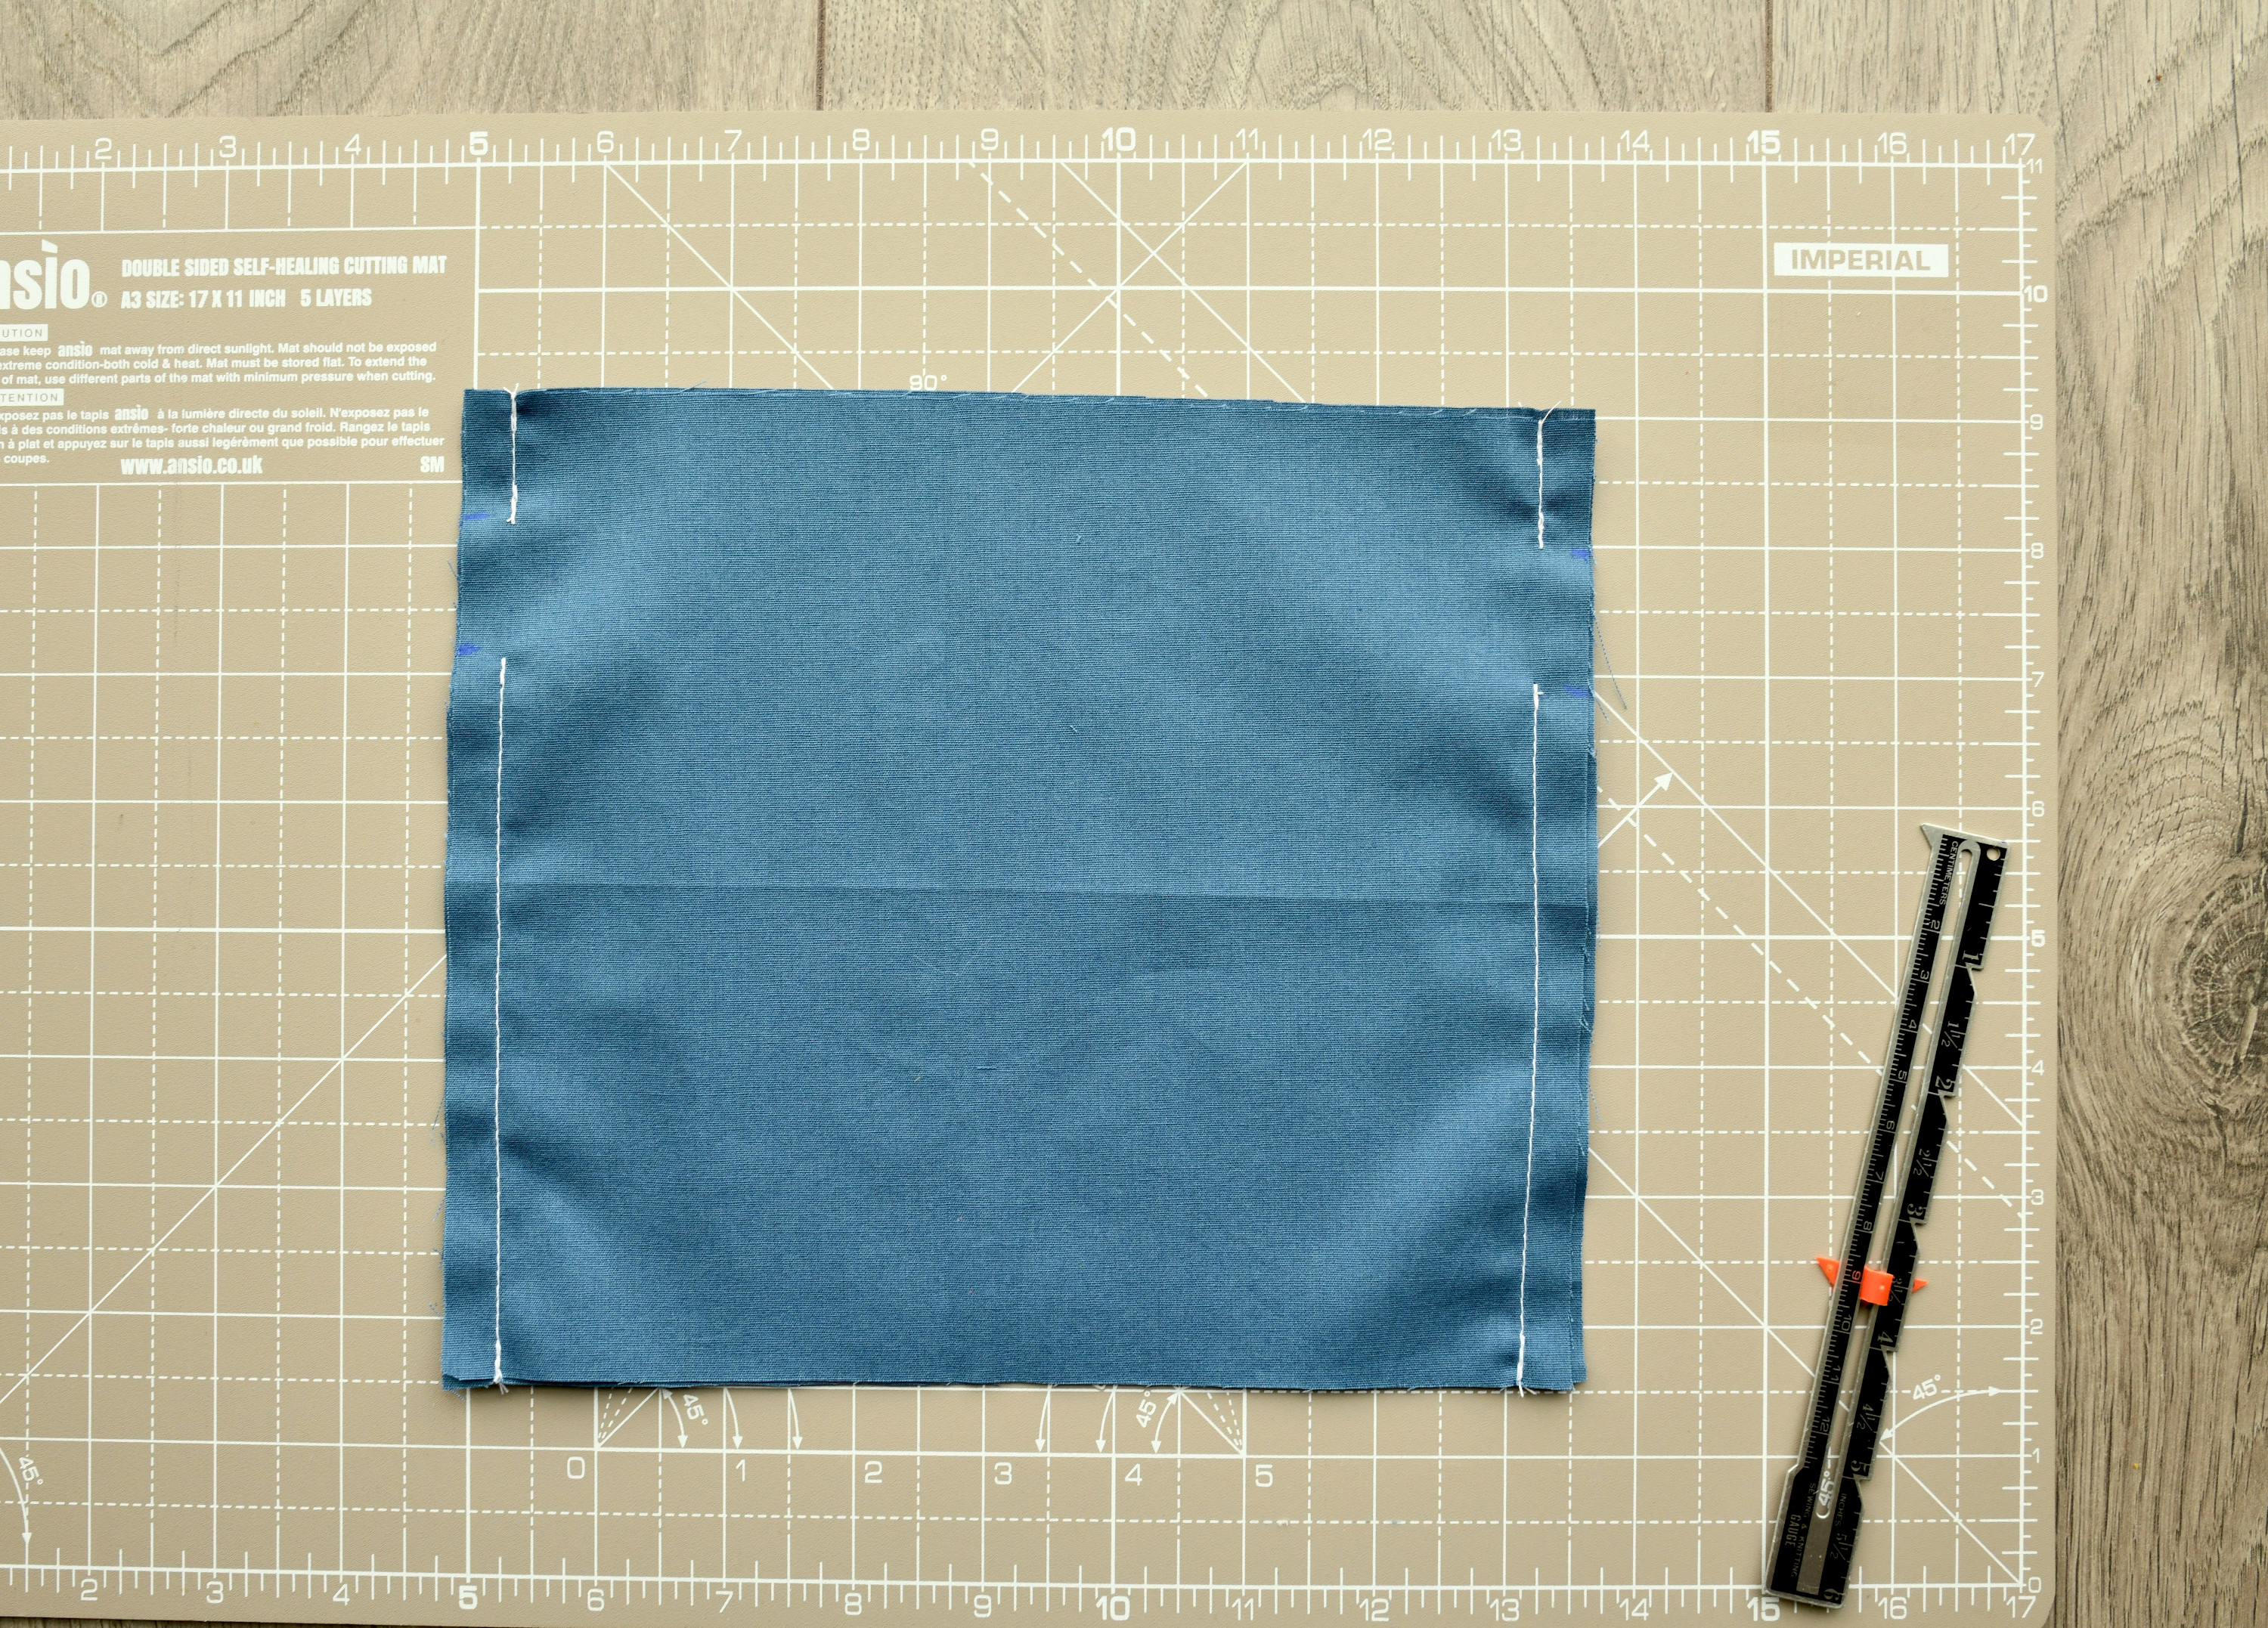
Step 5 – Preparing the accent piece
Sew the accent piece’s side seams, leaving about 1 inch unsewn on each side, approximately 1 inch close to one of the edges. Sewing the side seams makes the top part now the same width as the bag.
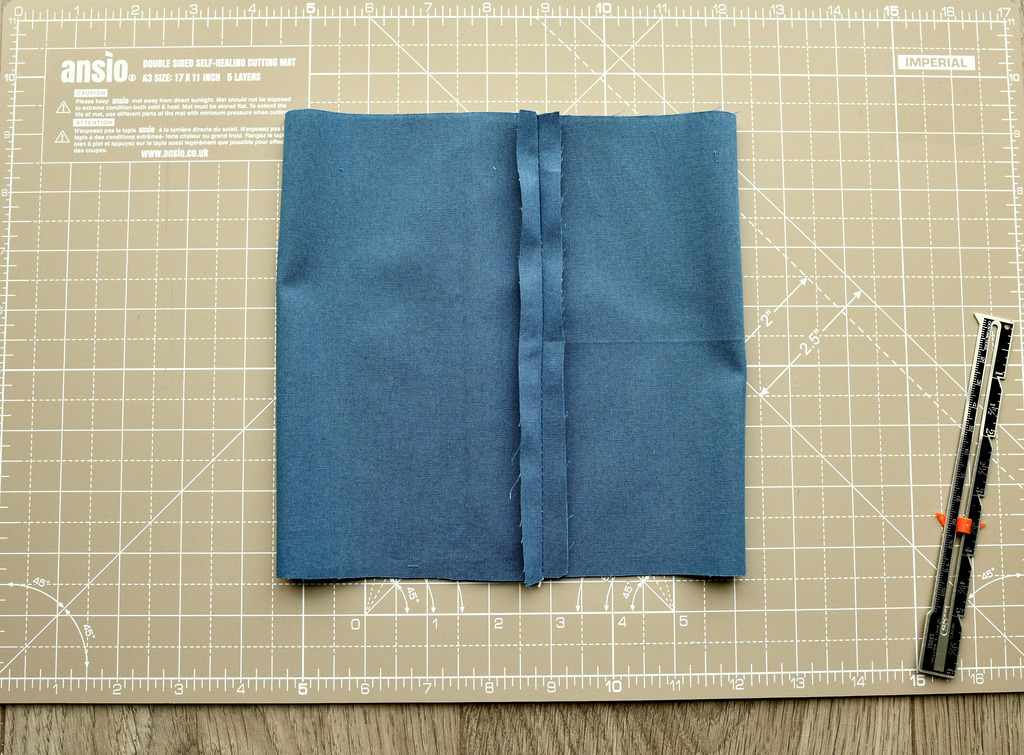
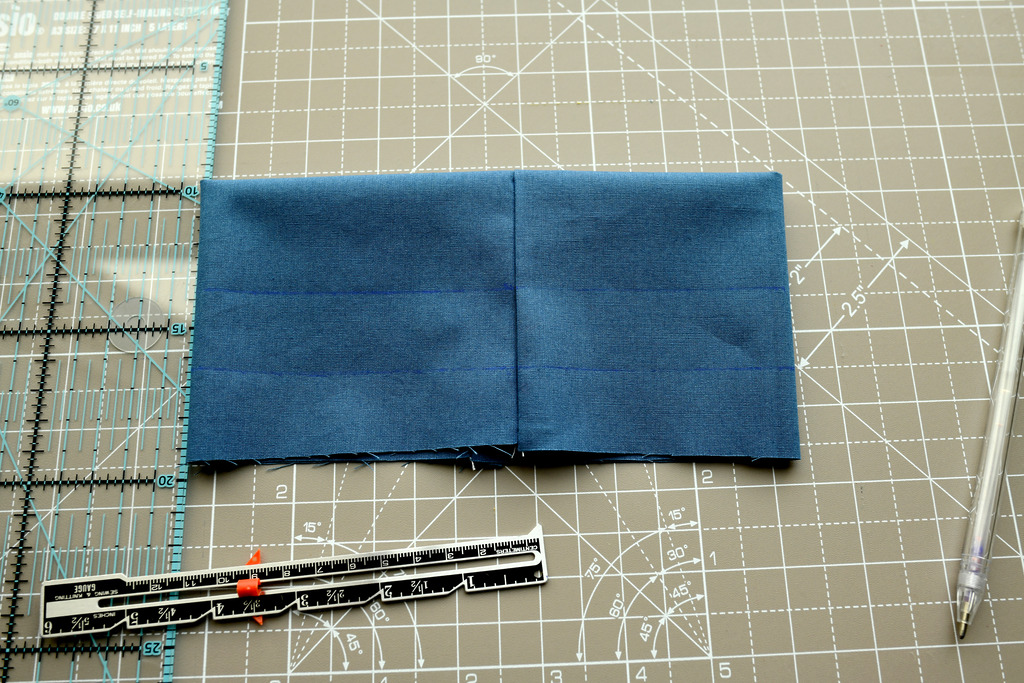
Step 6 – Creating the drawstring channel
Press the side seams open with an iron – do not skip this step! Fold the accent piece in half and mark two parallel lines along the fold for the drawstring channel with a fabric marking pencil.
Sew around these lines to secure. Adjust the width of the channel based on the drawstring cord used; mine is 1 inch wide.
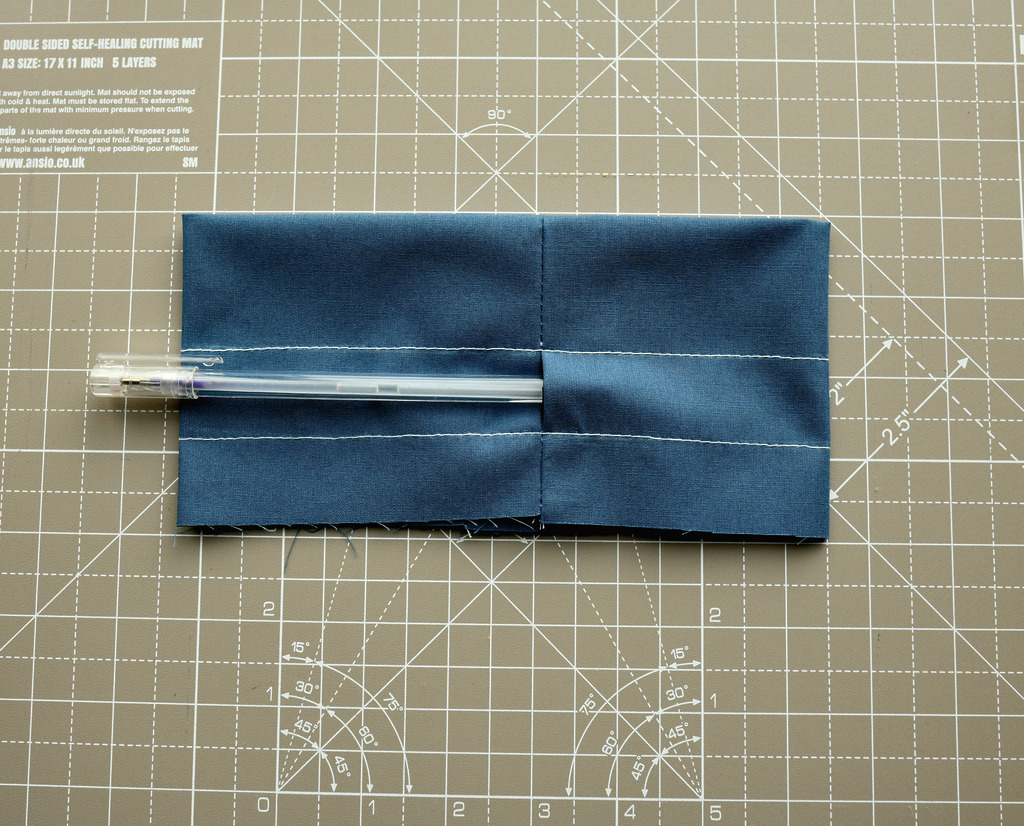
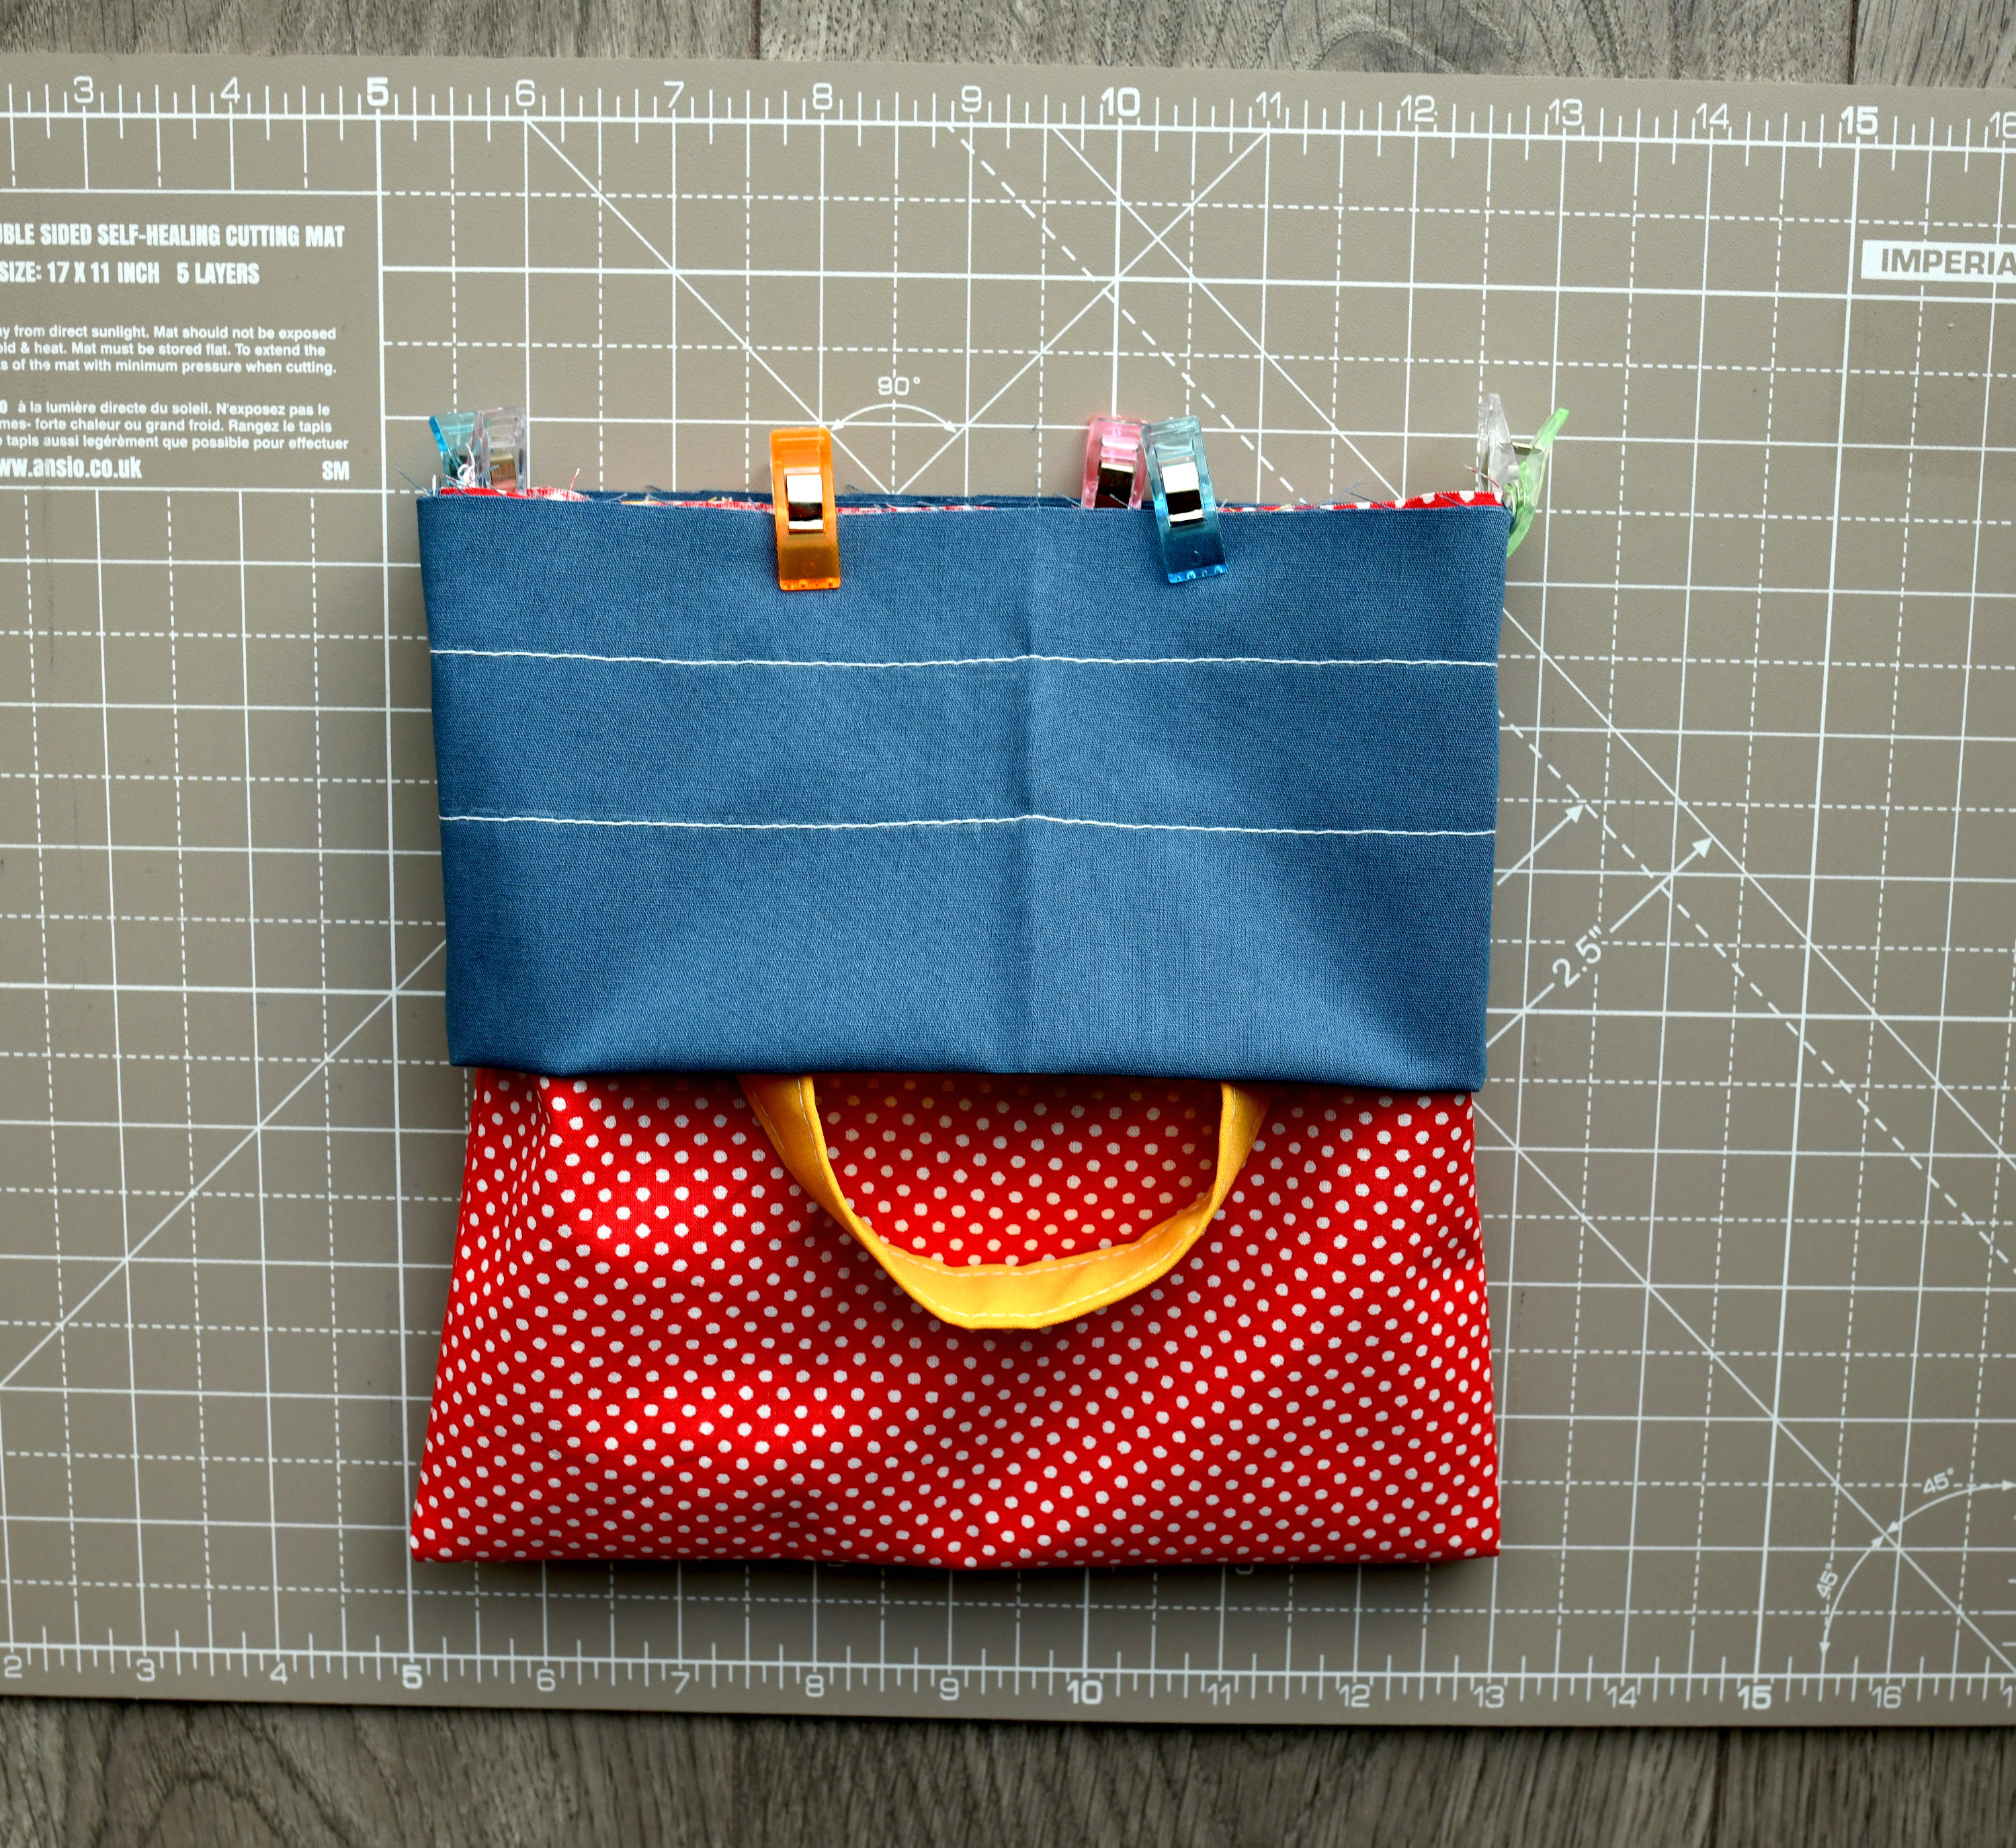
Step 7 – Drawstring gift bag assembly
Place the accent piece right sides together over the bottom piece, aligning the side seams. Ensure the handles are not caught before stitching everything together.
For this step, use the free arm on your sewing machine, it makes things much easier!
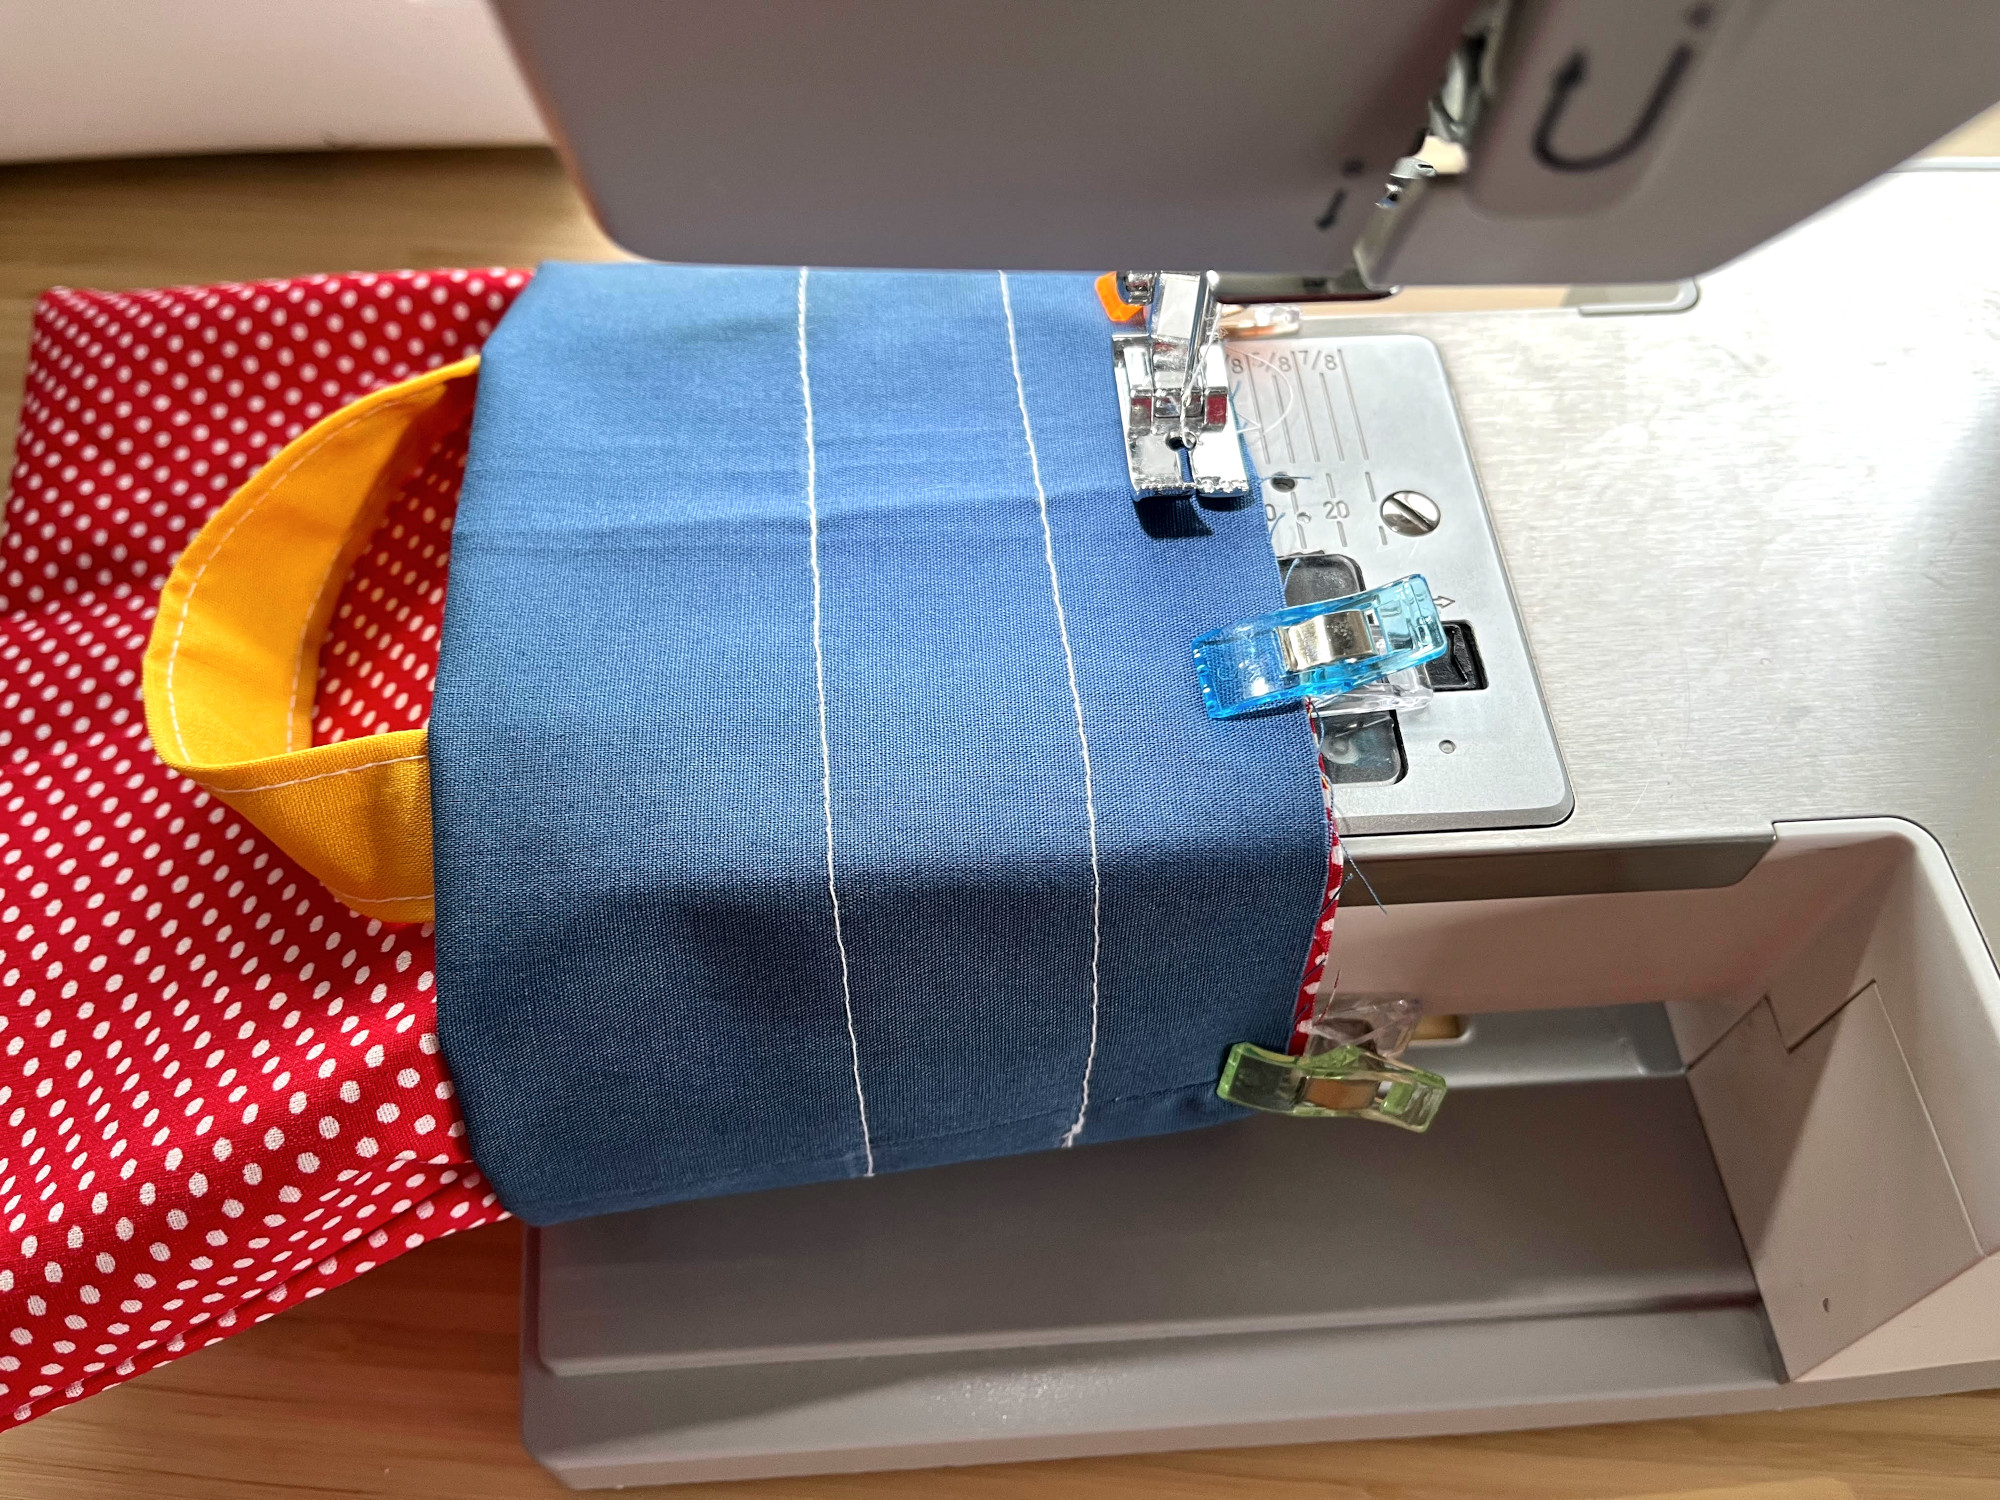
Sew around the edges of the tote with a 3/8-inch seam allowance. If you have a serger, feel free to serge the edges for added durability.
If you want to give your bag a bit more depth, consider cutting off a 1 inch square from the corners. This will give it more room to hold all your goodies. My first gift bag has boxed corners (see the second photo in this article and this Instagram post). For more details, see Step 8 & 9 in this zipper pouch tutorial – it’s the same technique.
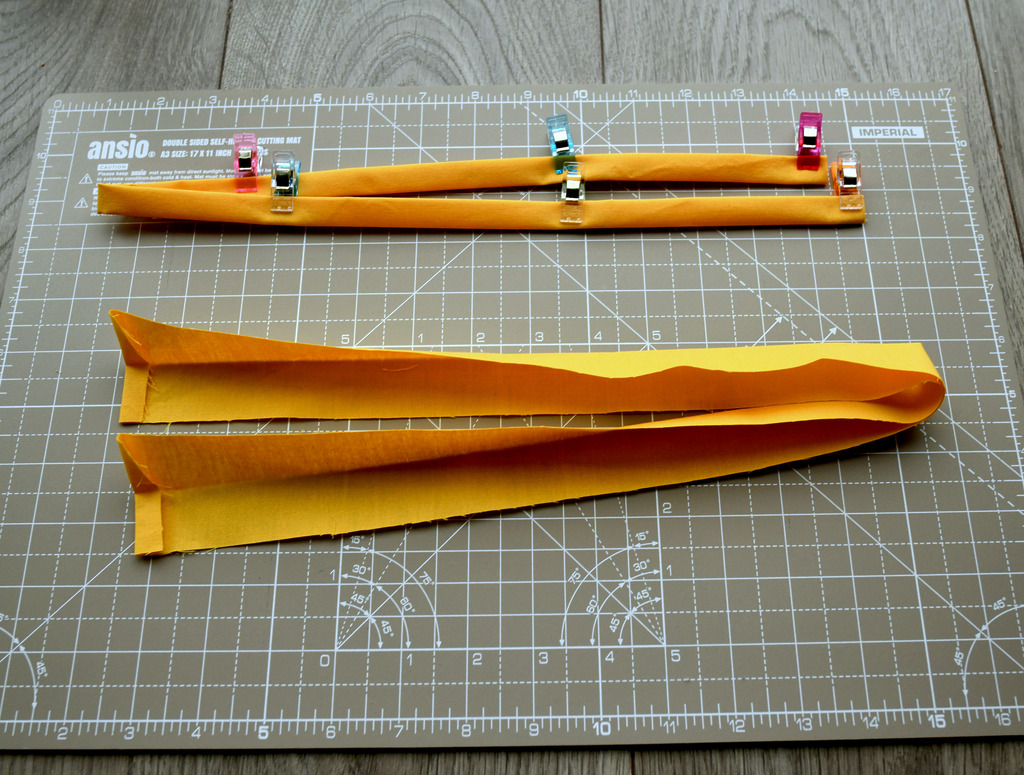
Step 8 – Preparing the fabric ties
Now, it’s time to prepare the fabric ties. You’ll need two long rectangles, each about twice the width of your bag plus at least 10 inches.
For each fabric strip, fold both raw edges towards the center, then fold the strip in half, aligning the folded edges together. Give it a quick edge stitch to keep everything in place. Also fold in each end of your fabric strips as shown in the first photo below for a nice, clean finish.
By the way, I also decided to topstitch the seam where the accent and main fabric join to make the bag more sturdy and durable (see 2nd pic below).
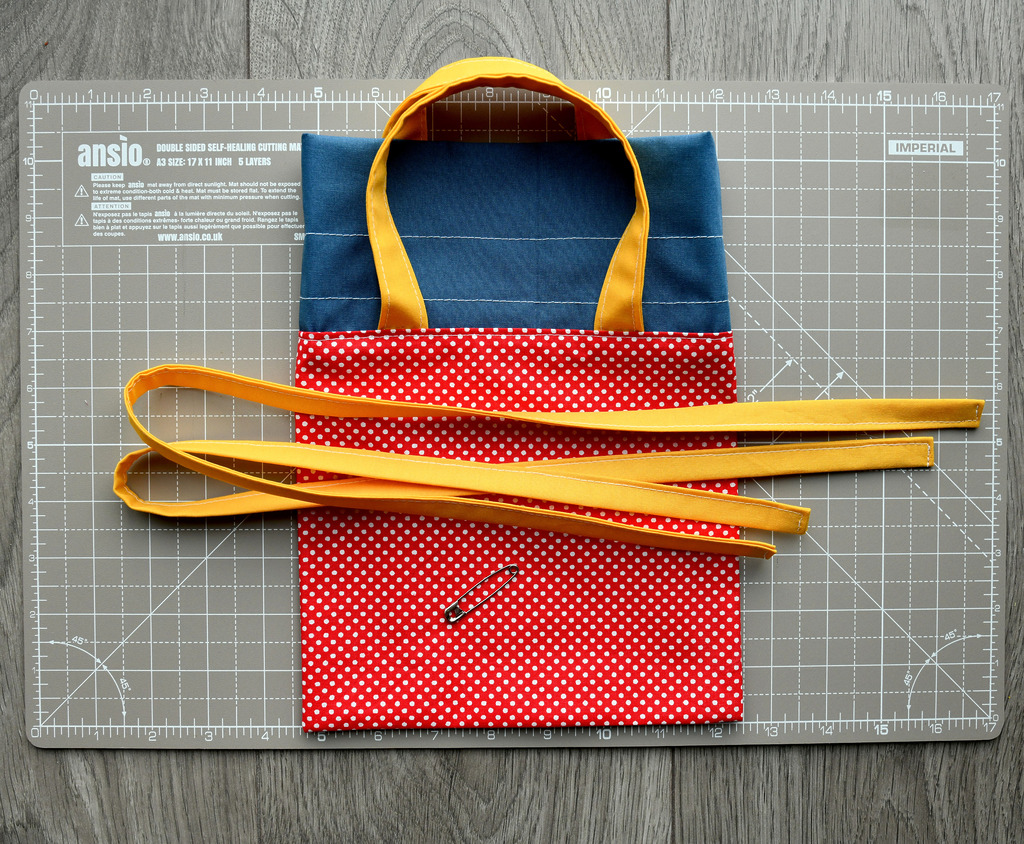
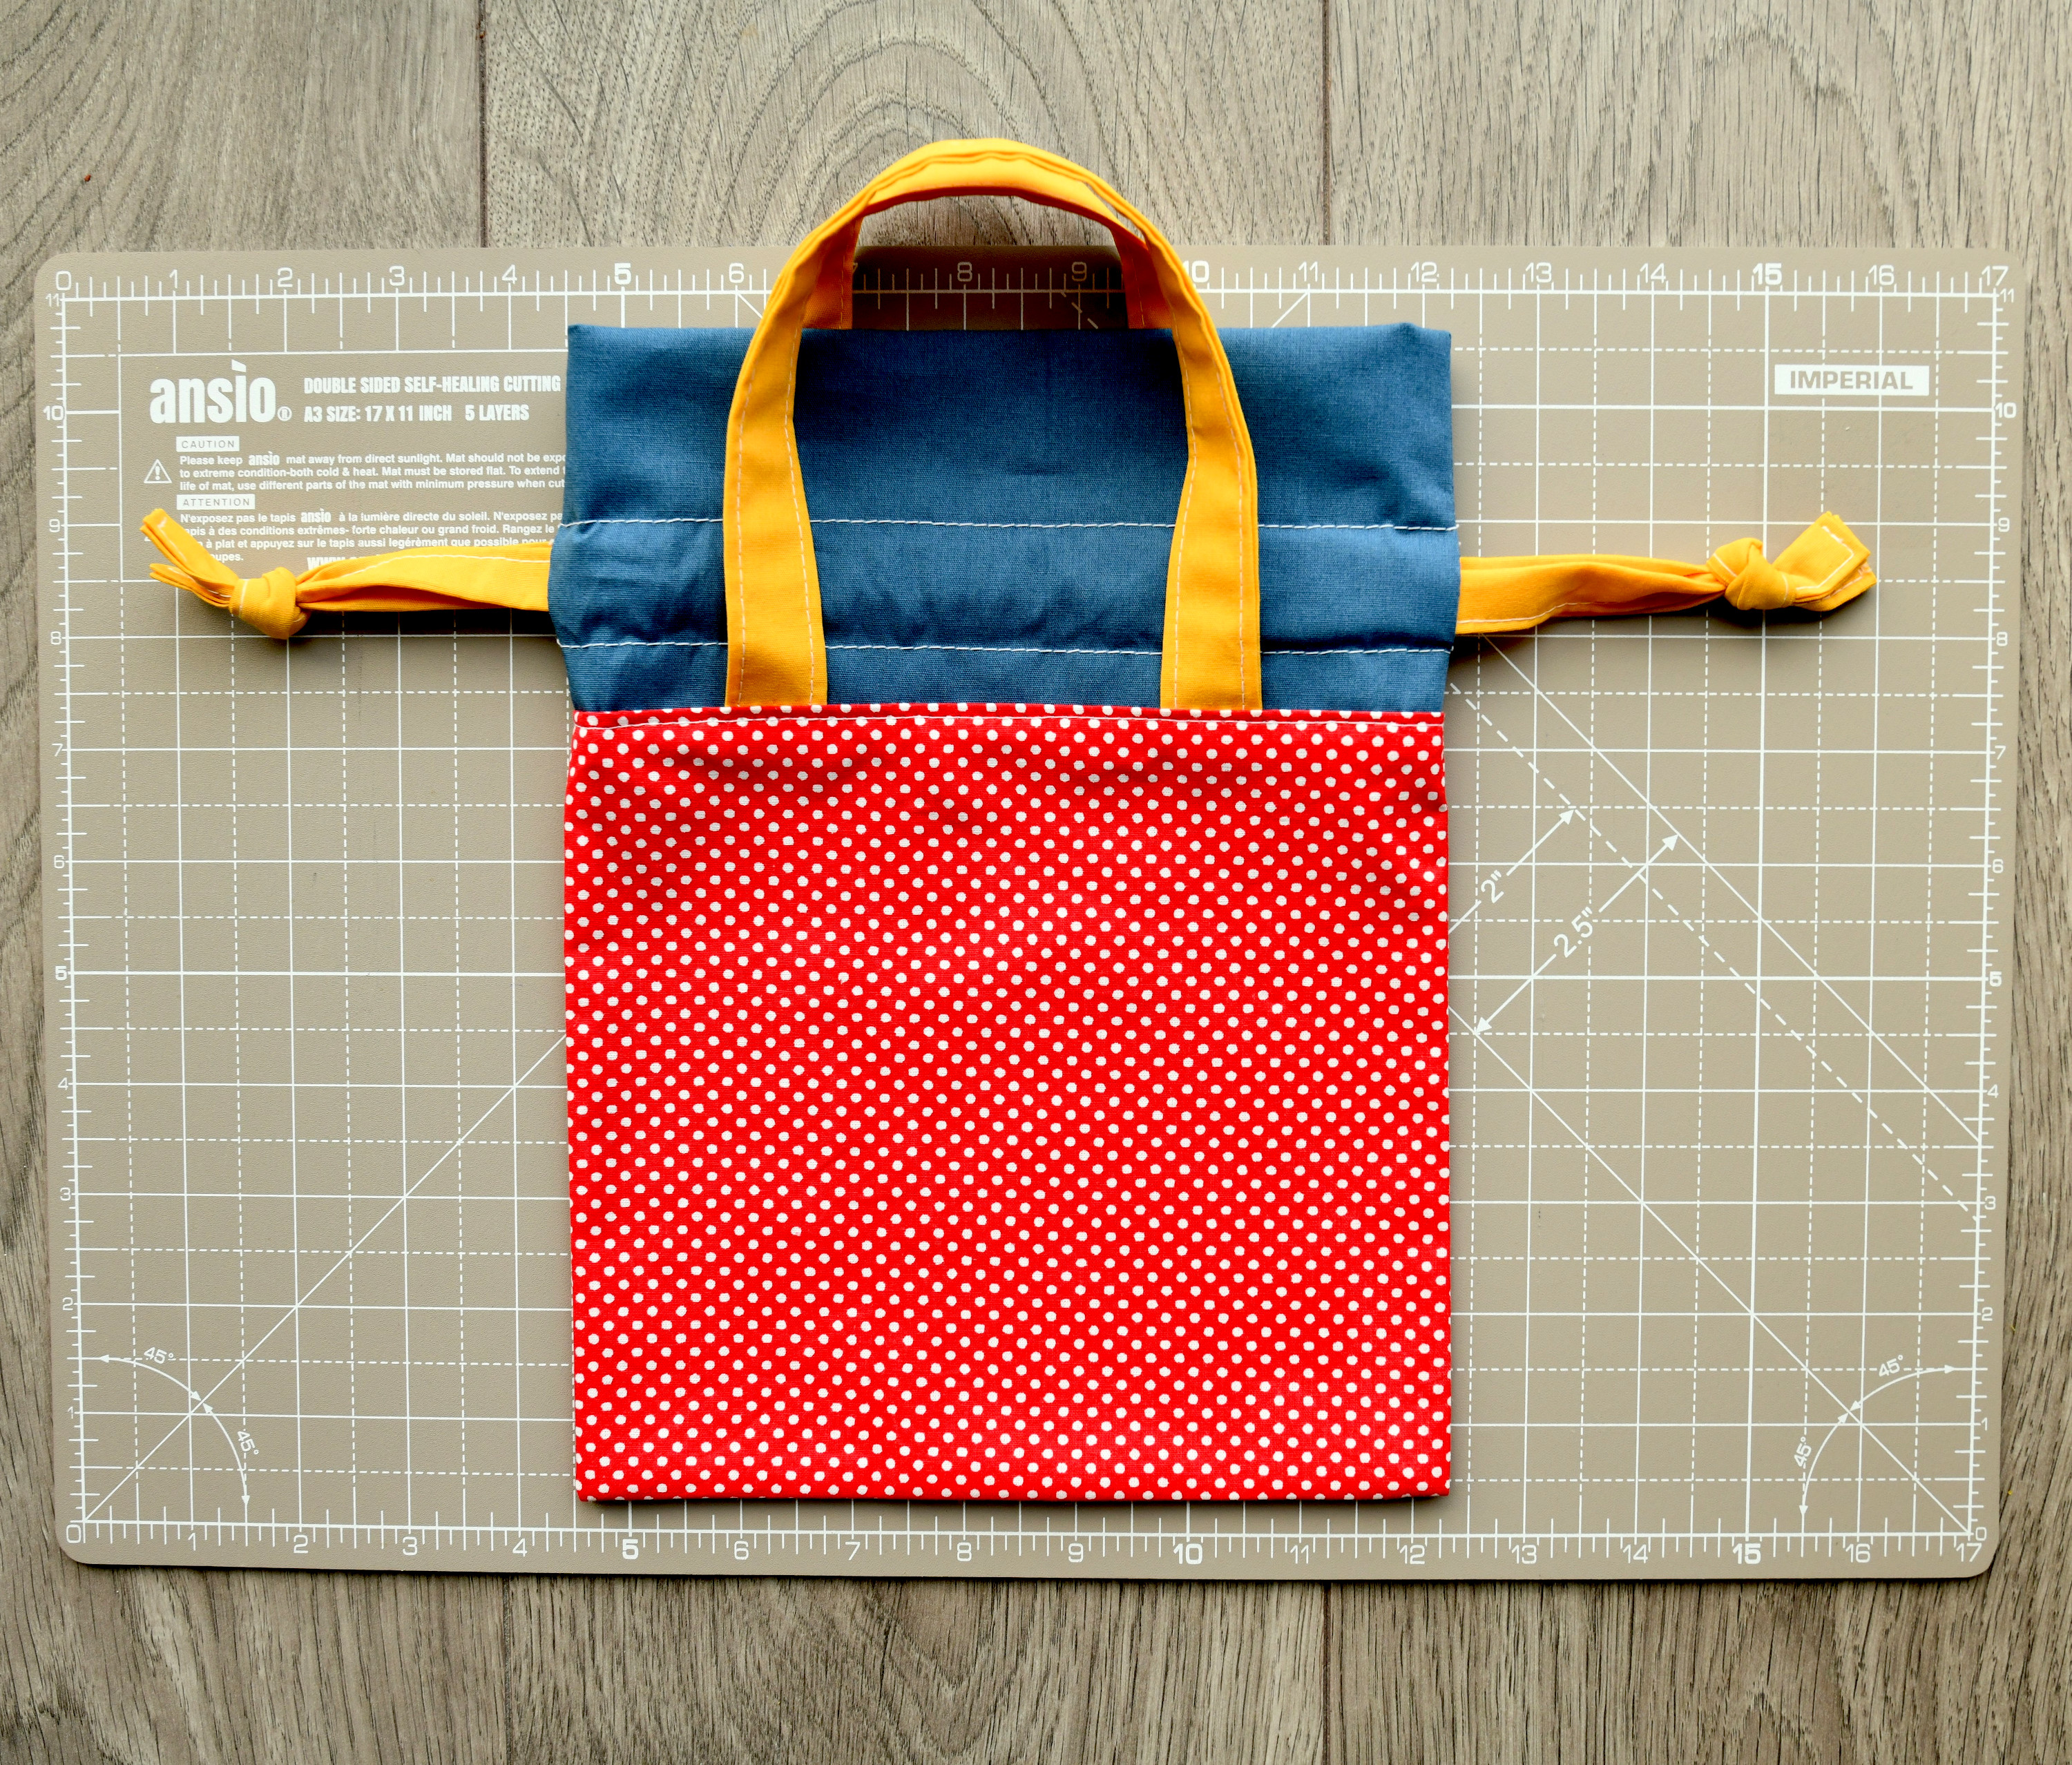
Step 9 – Inserting the ties
You’re almost there! Insert the ties into the drawstring channel, one on each side. Once they’re in place, tie them together in a knot, and voila! Your drawstring gift bag with handles is all set and ready to go – hope you enjoyed this free pattern!
General guidelines to customize the size of your fabric gift bag
Decide on the finished dimensions for your drawstring gift bag. Suppose it will be A inches wide and B inches tall. Make sure both the bottom and accent fabric pieces are the same width.
The proportion between the bottom fabric and the accent piece can vary – it’s flexible. The bottom piece should be spacious enough to hold your items, and you’ll need to include a 1-inch allowance for the drawstring channel in the accent piece.
The positioning of the two parallel lines of stitching for the drawstring channel can be adjusted closer or farther from the top folded edge as desired. Please refer to the main photo in this tutorial to see what I mean.
Deciding on the length of the handles is a matter of design preference. They should be easy to grasp when picking up the tote bag and comfortable to hold. Not too long so as to avoid wasting fabric, but not too short as to be impractical. Do not cut your fabric pieces for the handles narrower than 3 inches to allow room for topstitching after folding the raw edges inside.
Each fabric tie should be about twice the width of your bag plus at least 10 inches extra. Avoid cutting your fabric pieces for the ties narrower than 2 inches, or you may find it challenging to fold and sew them.
Let’s keep in touch! You can find me on Facebook, Instagram, and Pinterest.


I’m a little confused. It looks like you sewed the long edge of the bag, so it is slightly taller than wide. But the accent piece is sewn on the short edge. And the pieces still turn out the same width. I may be misinterpreting the pictures. Would you please clarify?
Hi zekesmom10,
If you take a look at the pictures, this is the order in which I’m sewing:
pic #1 https://static.icansewthis.com/2024/01/drawstring-gift-bag-with-handles-1-1.jpg
pic #2 https://static.icansewthis.com/2024/01/drawstring-gift-bag-with-handles-8-2048×1460.jpg (the unsewn top part appears wider than the bag because the bag is shown right side out, and its seams are sewn)
pic #3 https://static.icansewthis.com/2024/01/drawstring-gift-bag-with-handles-10-2048×1470.jpg (sewing the side seams makes the top part now the same width as the bag)
I’ll also make sure to clarify this in the tutorial – thanks for pointing it out!