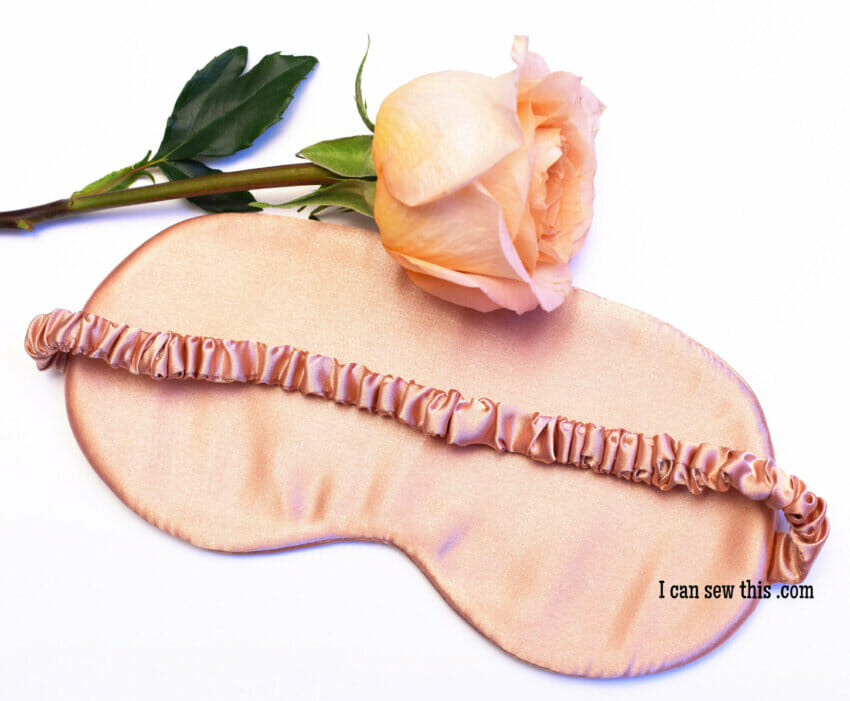
Ready for the best sleep ever? You can learn to sew your own luxurious and super comfortable satin eye mask today! This project is perfect for total beginners and anyone who wants a quick, rewarding make.
Grab your supplies – I’ll show you exactly how to sew a beautiful satin eye mask in less than 30 minutes! There’s even a free PDF pattern to make cutting a breeze.
Making your own sleep gear is so much better than buying it. It’s cheap, it’s fast, and you get to pick the perfect color or print! A handmade eye mask is also a fantastic, thoughtful gift for friends and family. Let’s get started!
Why Choose Satin for Your Eye Mask?
I first fell in love with those super expensive silk eye masks online. They looked gorgeous, soft, and totally luxurious! The price tag, though? Not so dreamy.
That’s why I went for the next best thing: silky satin fabric.
- Soft and Gentle: Satin is incredibly smooth and feels amazing against your delicate skin.
- Budget-Friendly: You get that high-end, silky feel without the high cost of real silk.
- Blocks Light: A quality satin eye mask is 100% functional – it truly blocks out unwanted light to help you get deep, restful sleep.
I was so happy with my finished satin eye mask that I knew I had to share this simple tutorial with you!
Gather Your Supplies and Tools
Before you start, make sure you have everything ready to go.
Supplies You’ll Need:
- Satin Fabric: Choose a beautiful, soft silky satin.
- Fusible Interfacing: This is a must-have! It makes slippery satin easy to sew.
- Fleece/Batting: A small piece to give your eye mask a soft, puffy shape.
- 1/2″ wide Elastic: About 12 to 15 inches (we’ll measure for the perfect fit later!).
- Matching Thread
Tools to Set Up:
- Free Eye Mask PDF Pattern – download below
- Sewing Machine
- Iron and Ironing Board
- Safety Pin (This is for turning the tube!)
- Fabric Scissors or Rotary Cutter
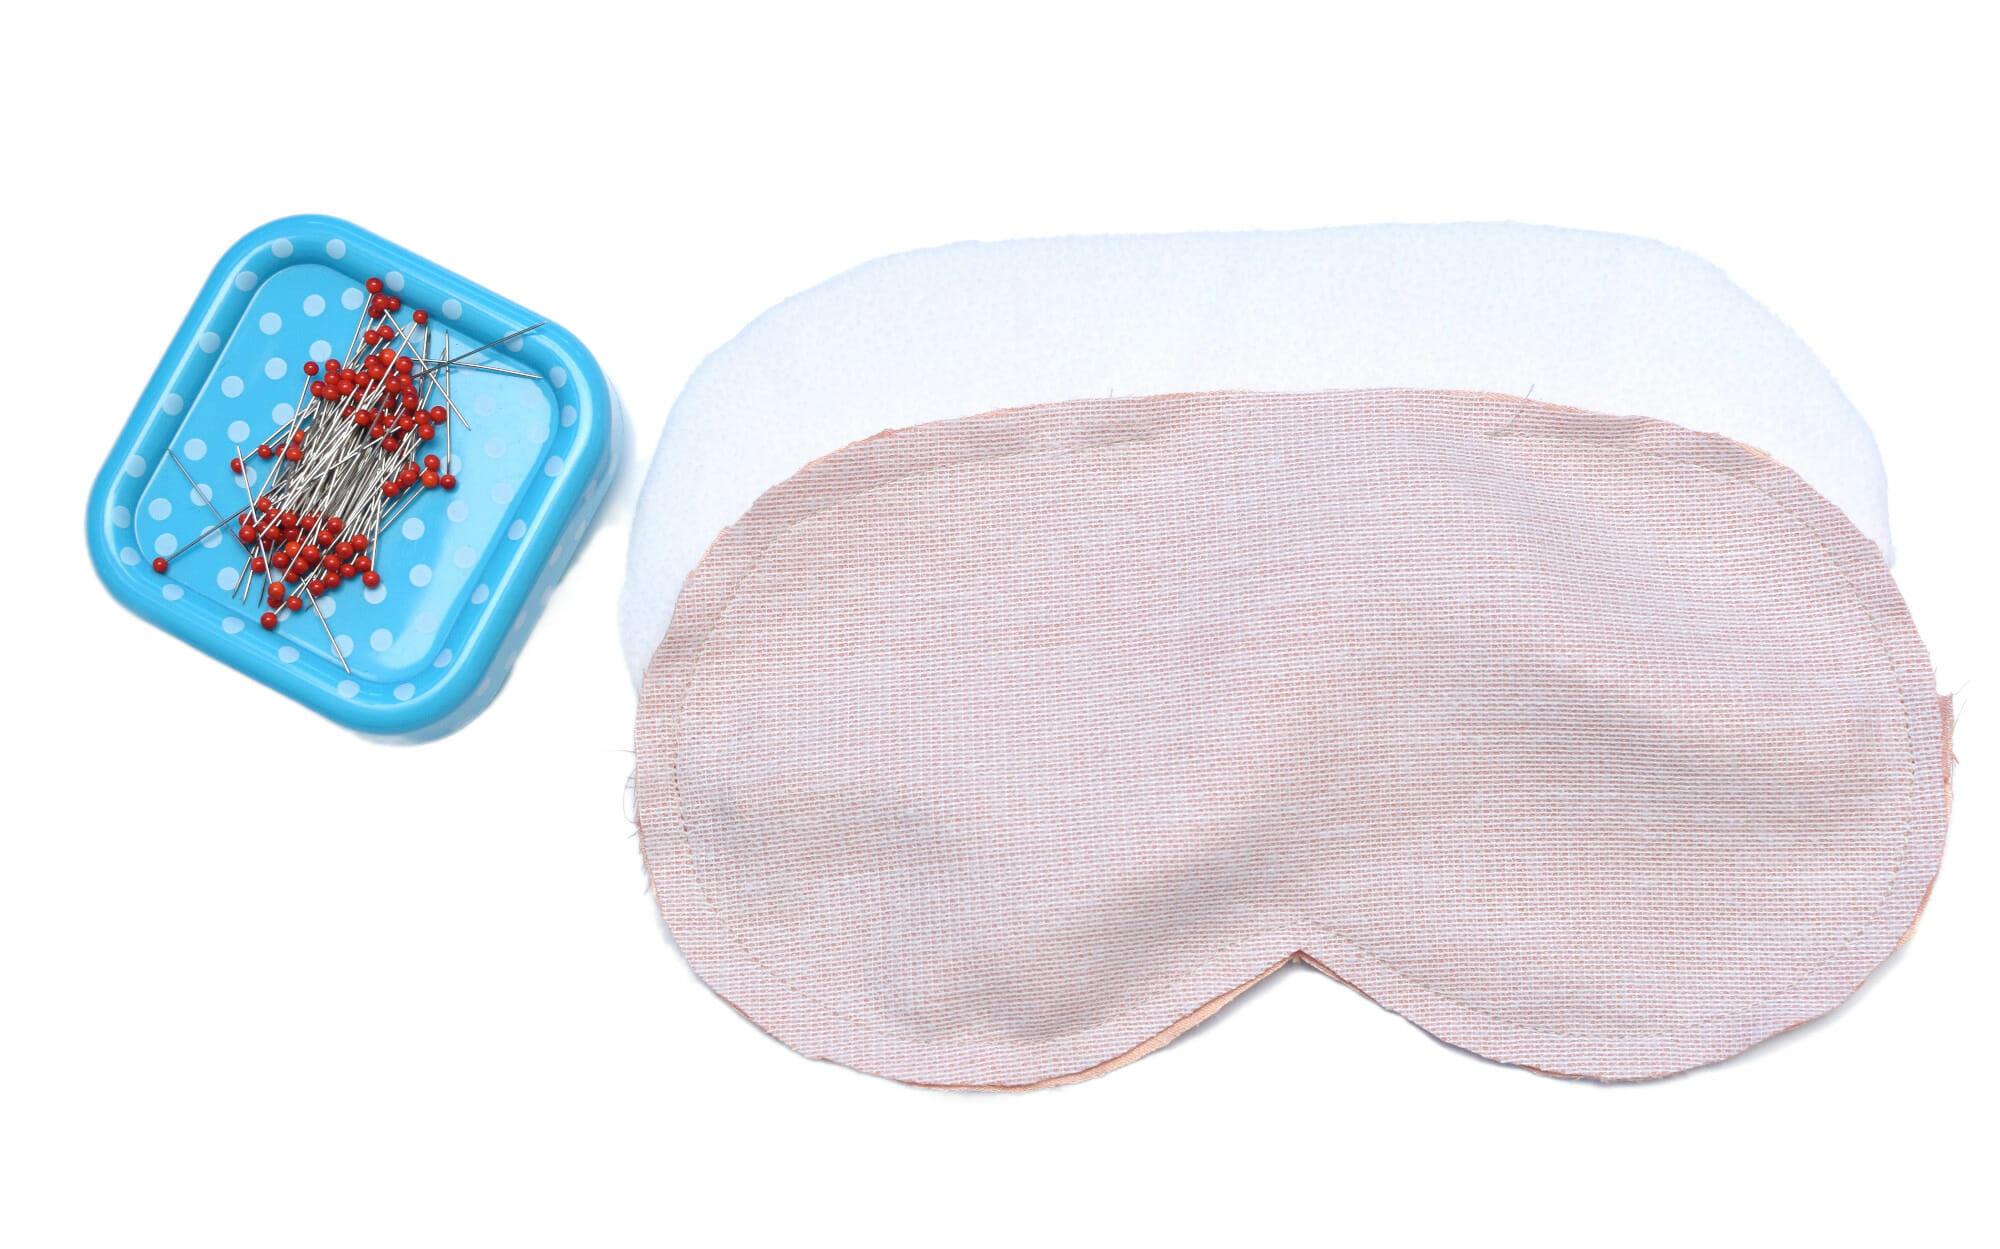
- Sewing Clips: Use these instead of pins on your satin.
- Hand Sewing Needle (For closing the final gap)
Pro Tip: Satin is notoriously slippery! Be careful when using regular pins, as they can snag the delicate fabric. It would be better to use fabric clips instead. We’ll use fusible interfacing to make the actual sewing much easier!
Step-by-step – DIY satin eye mask
Let’s prepare the pattern pieces for sewing.
Step 1 – Fuse the Interfacing
This is the key to sewing with satin!
- Place the Interfacing: Lay the bumpy, sticky side of your fusible interfacing onto the wrong side of your satin fabric.
- Press: Use your iron to press down. The heat melts the adhesive dots, sticking the interfacing right to the satin. Now your satin is much more stable!
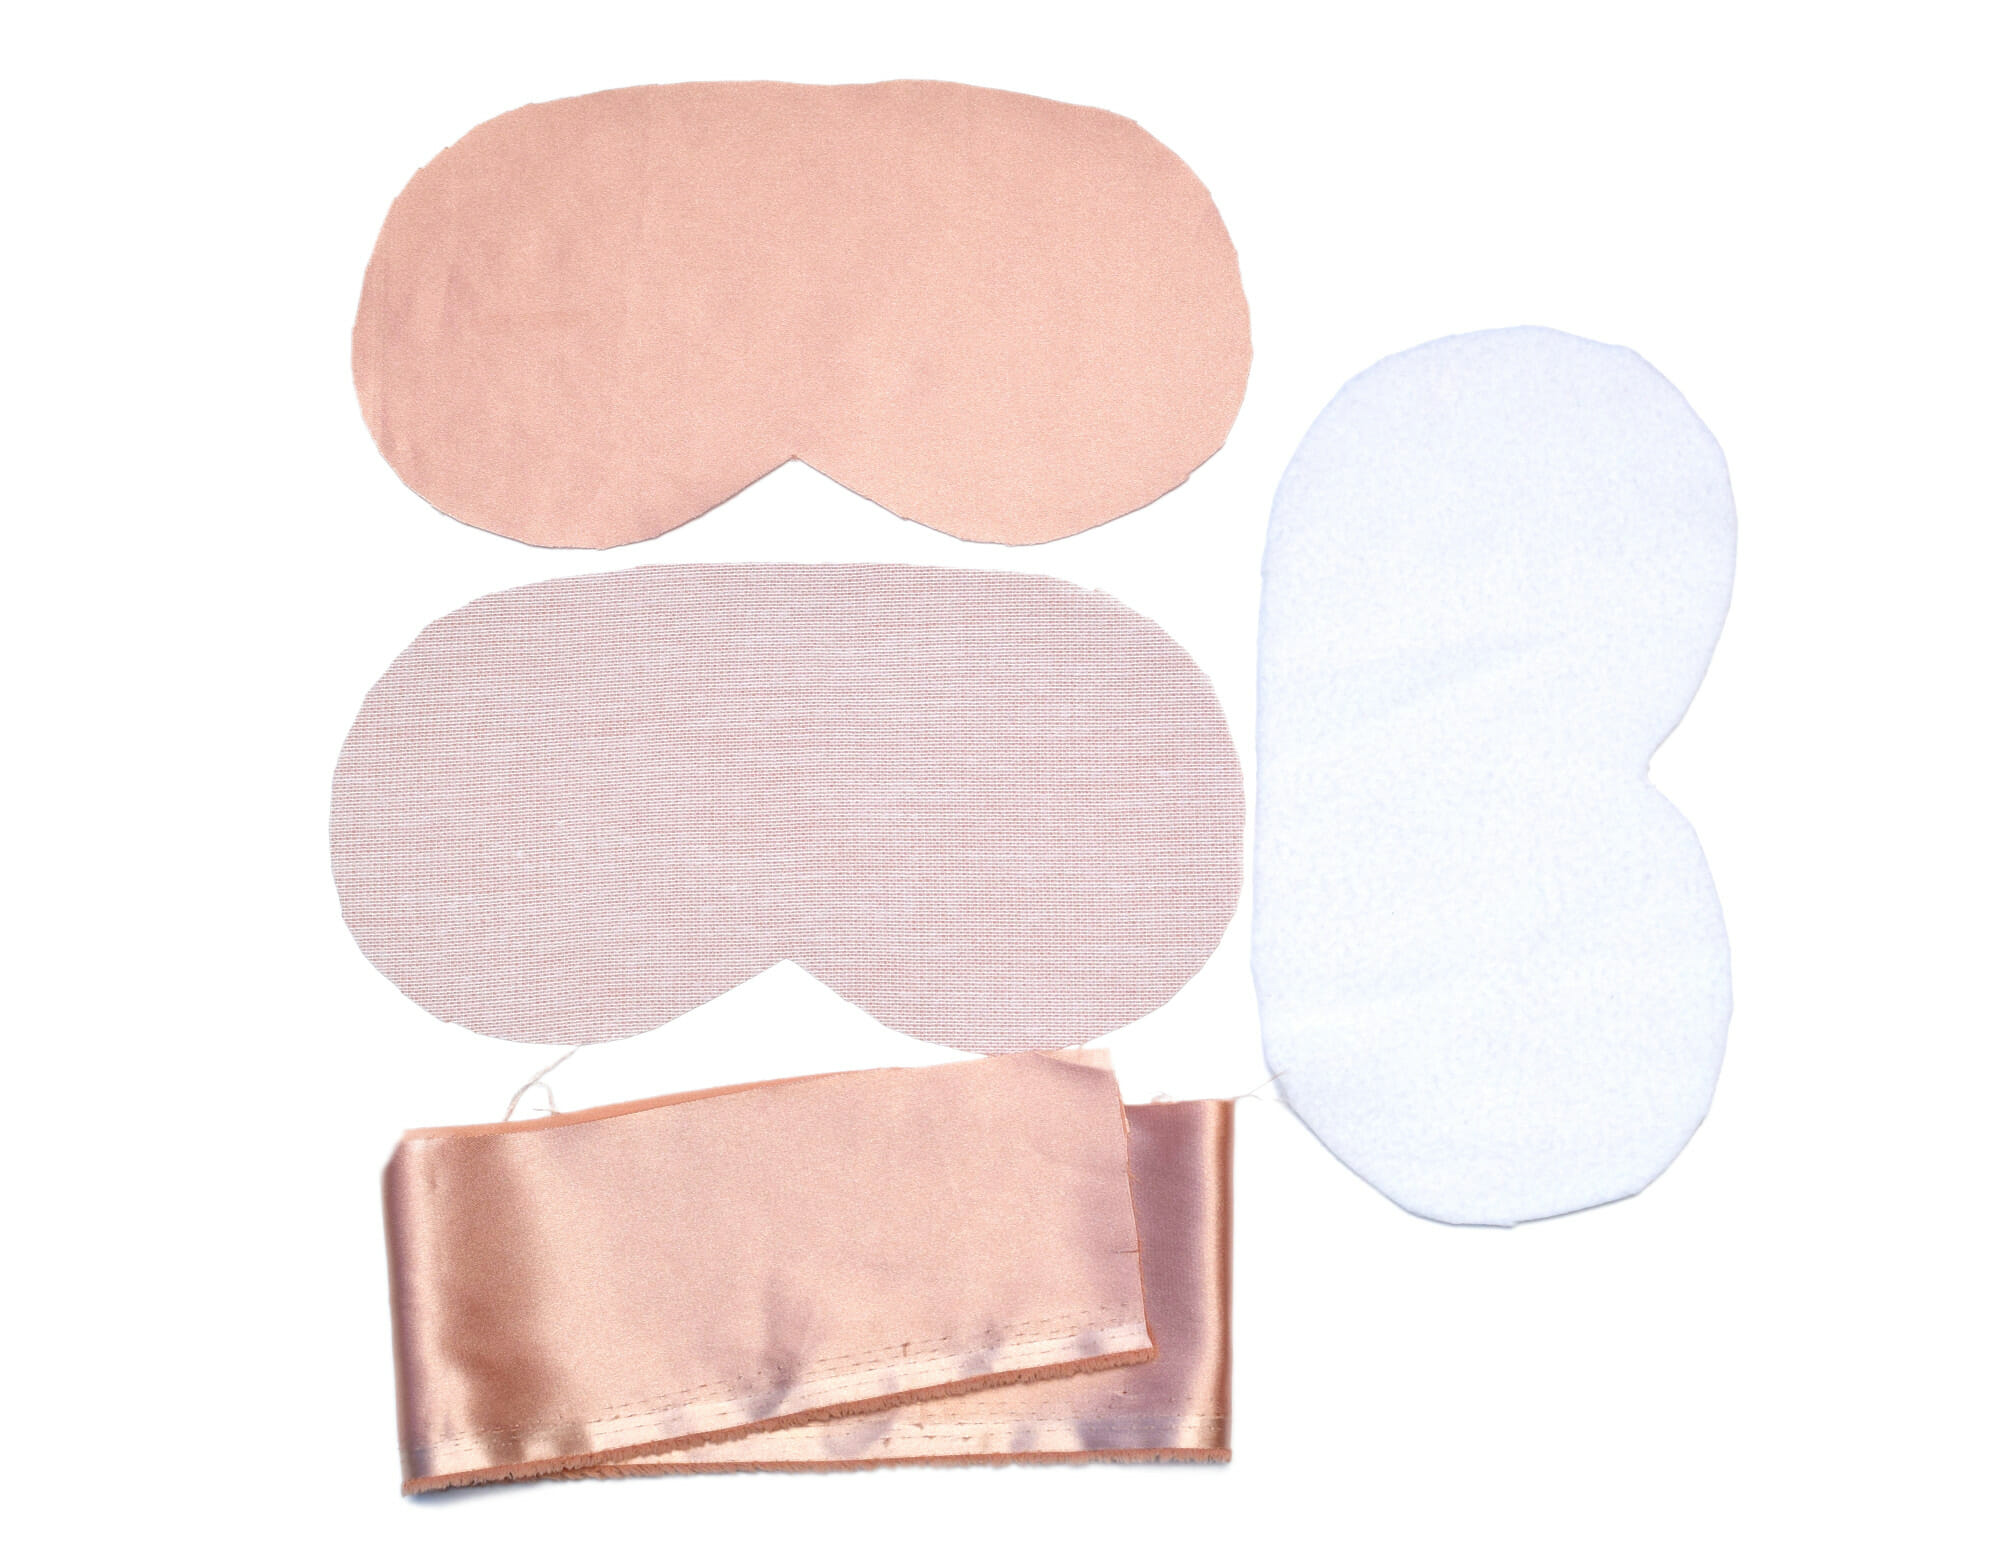
Step 2 – Cut the Pattern Pieces
Use your free PDF pattern to cut your fabric pieces.
- Two eye mask pieces from the interfaced satin fabric.
- One eye mask piece from the fleece or batting.
- A long, rectangular strip of satin for the elastic casing: 30 inches long by 1.5 inches wide.
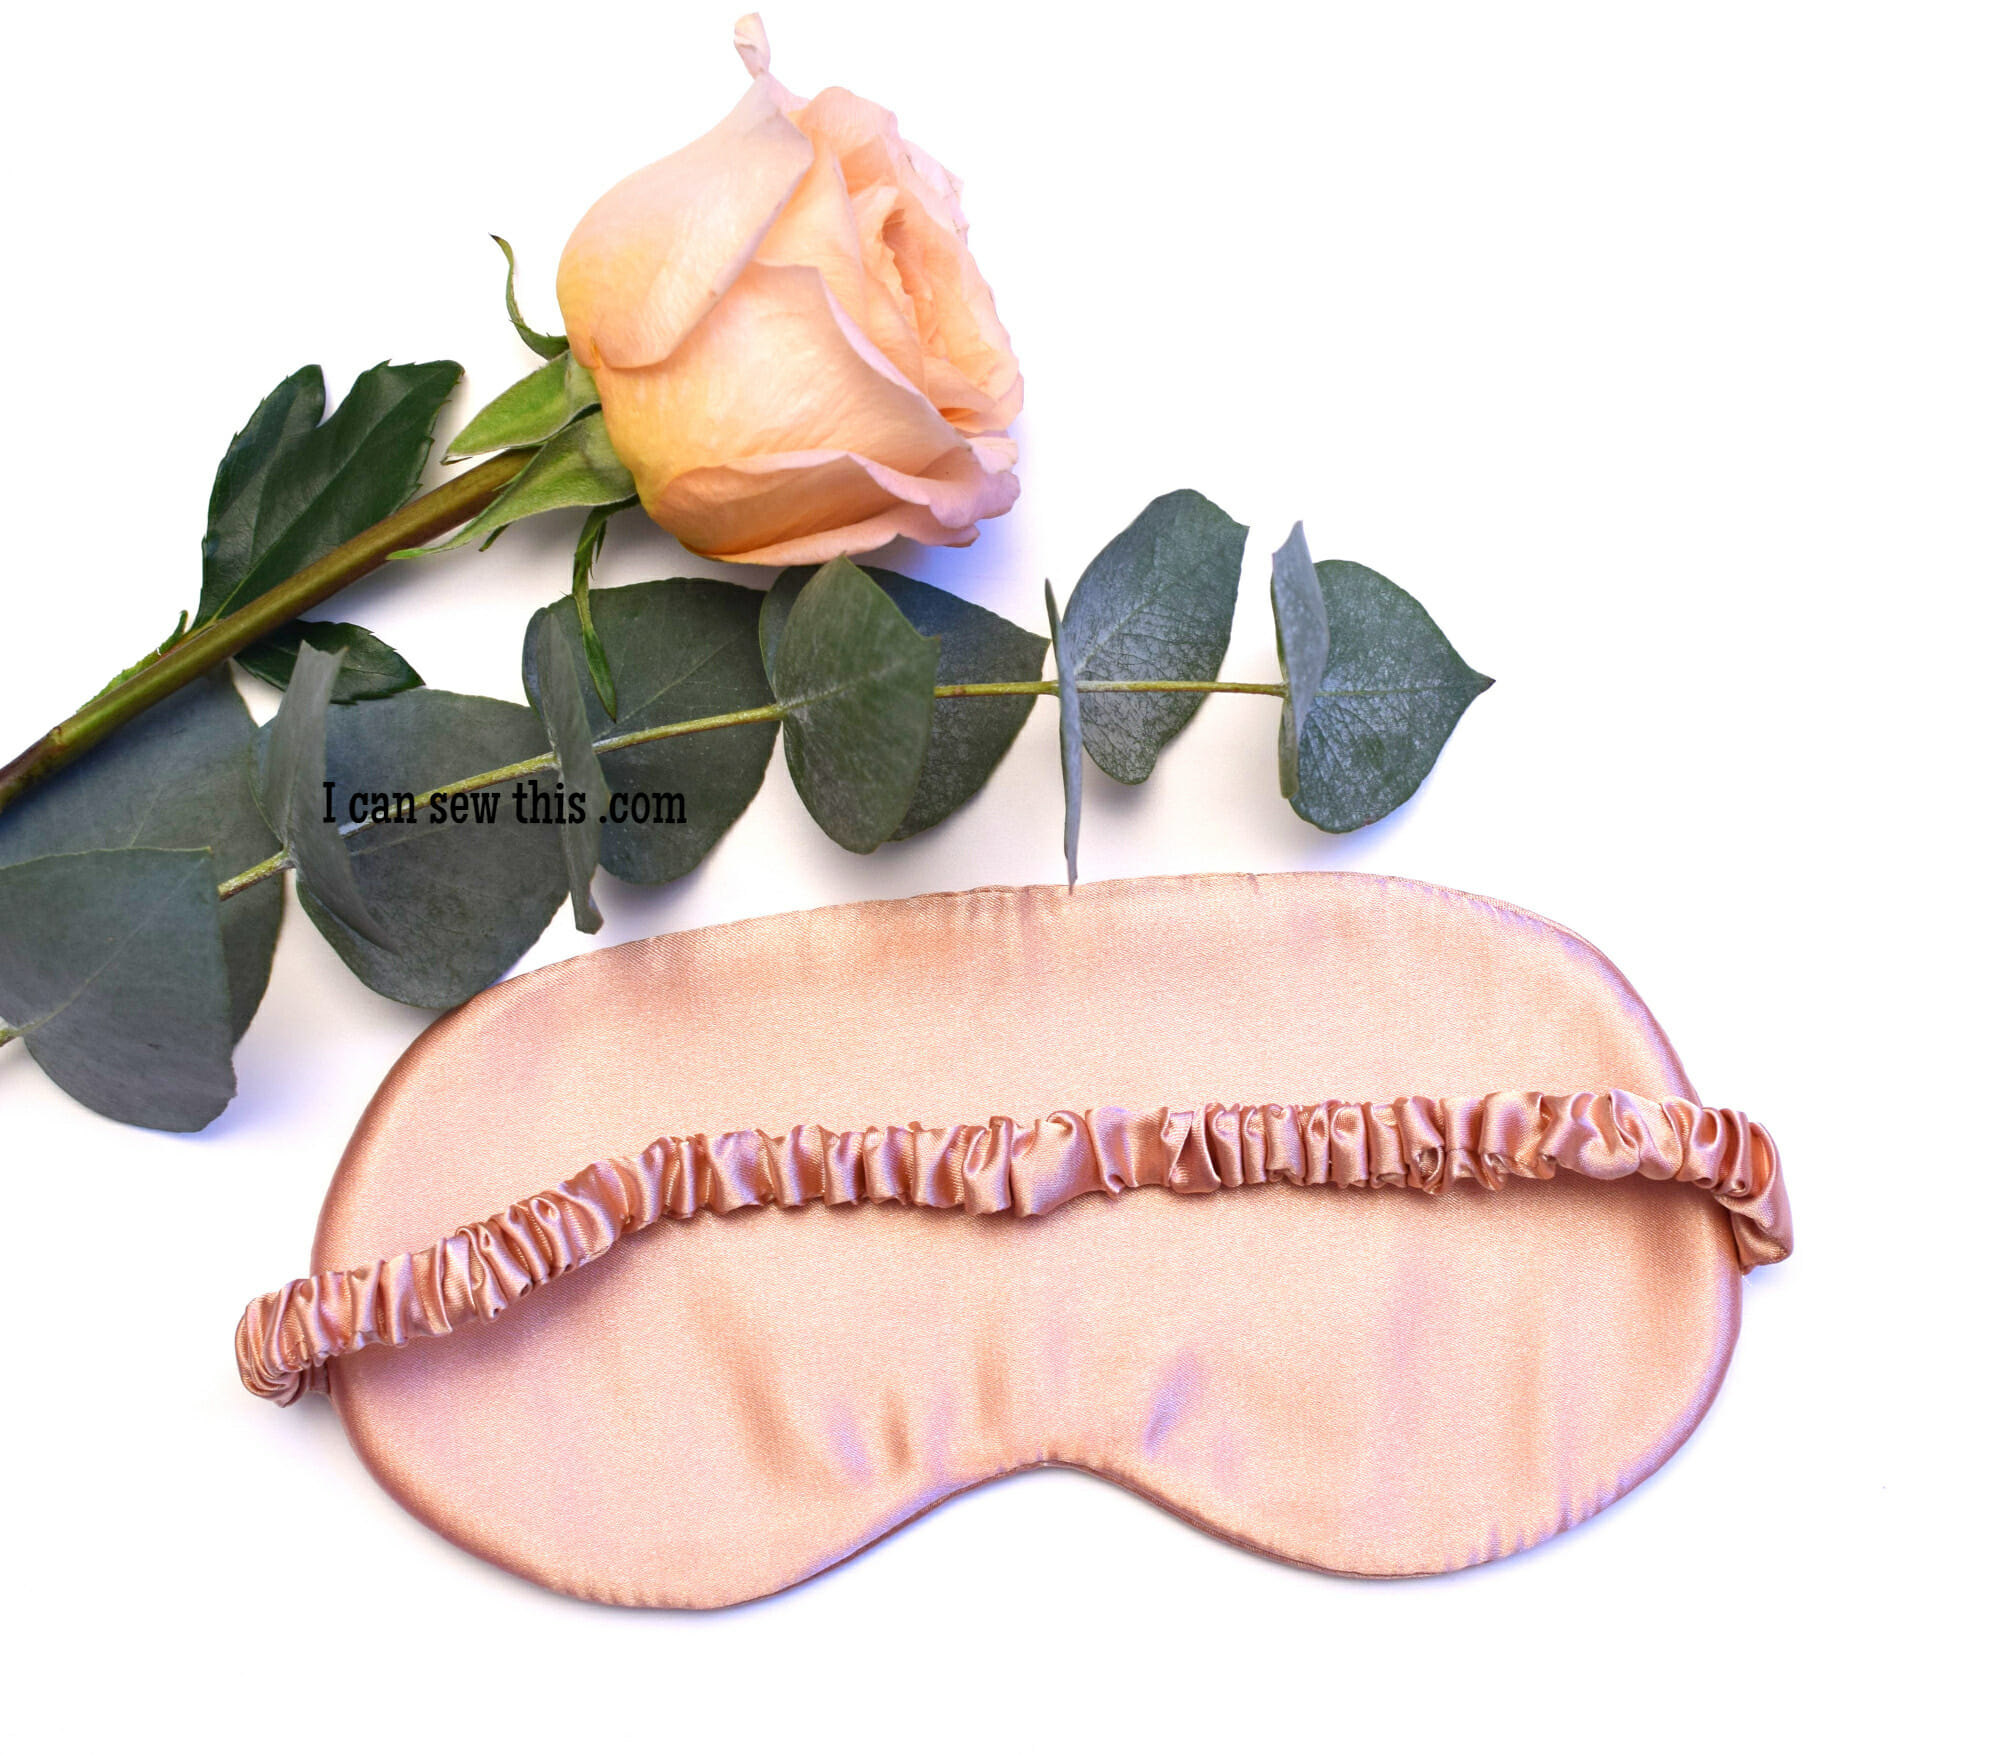
Note: The finished eye mask will be about 8.5 inches long and 3.5 inches wide, a comfortably oversized fit!
Sew the Elastic Casing
We need a channel to thread the elastic through. This part becomes the band that holds the mask on your head.
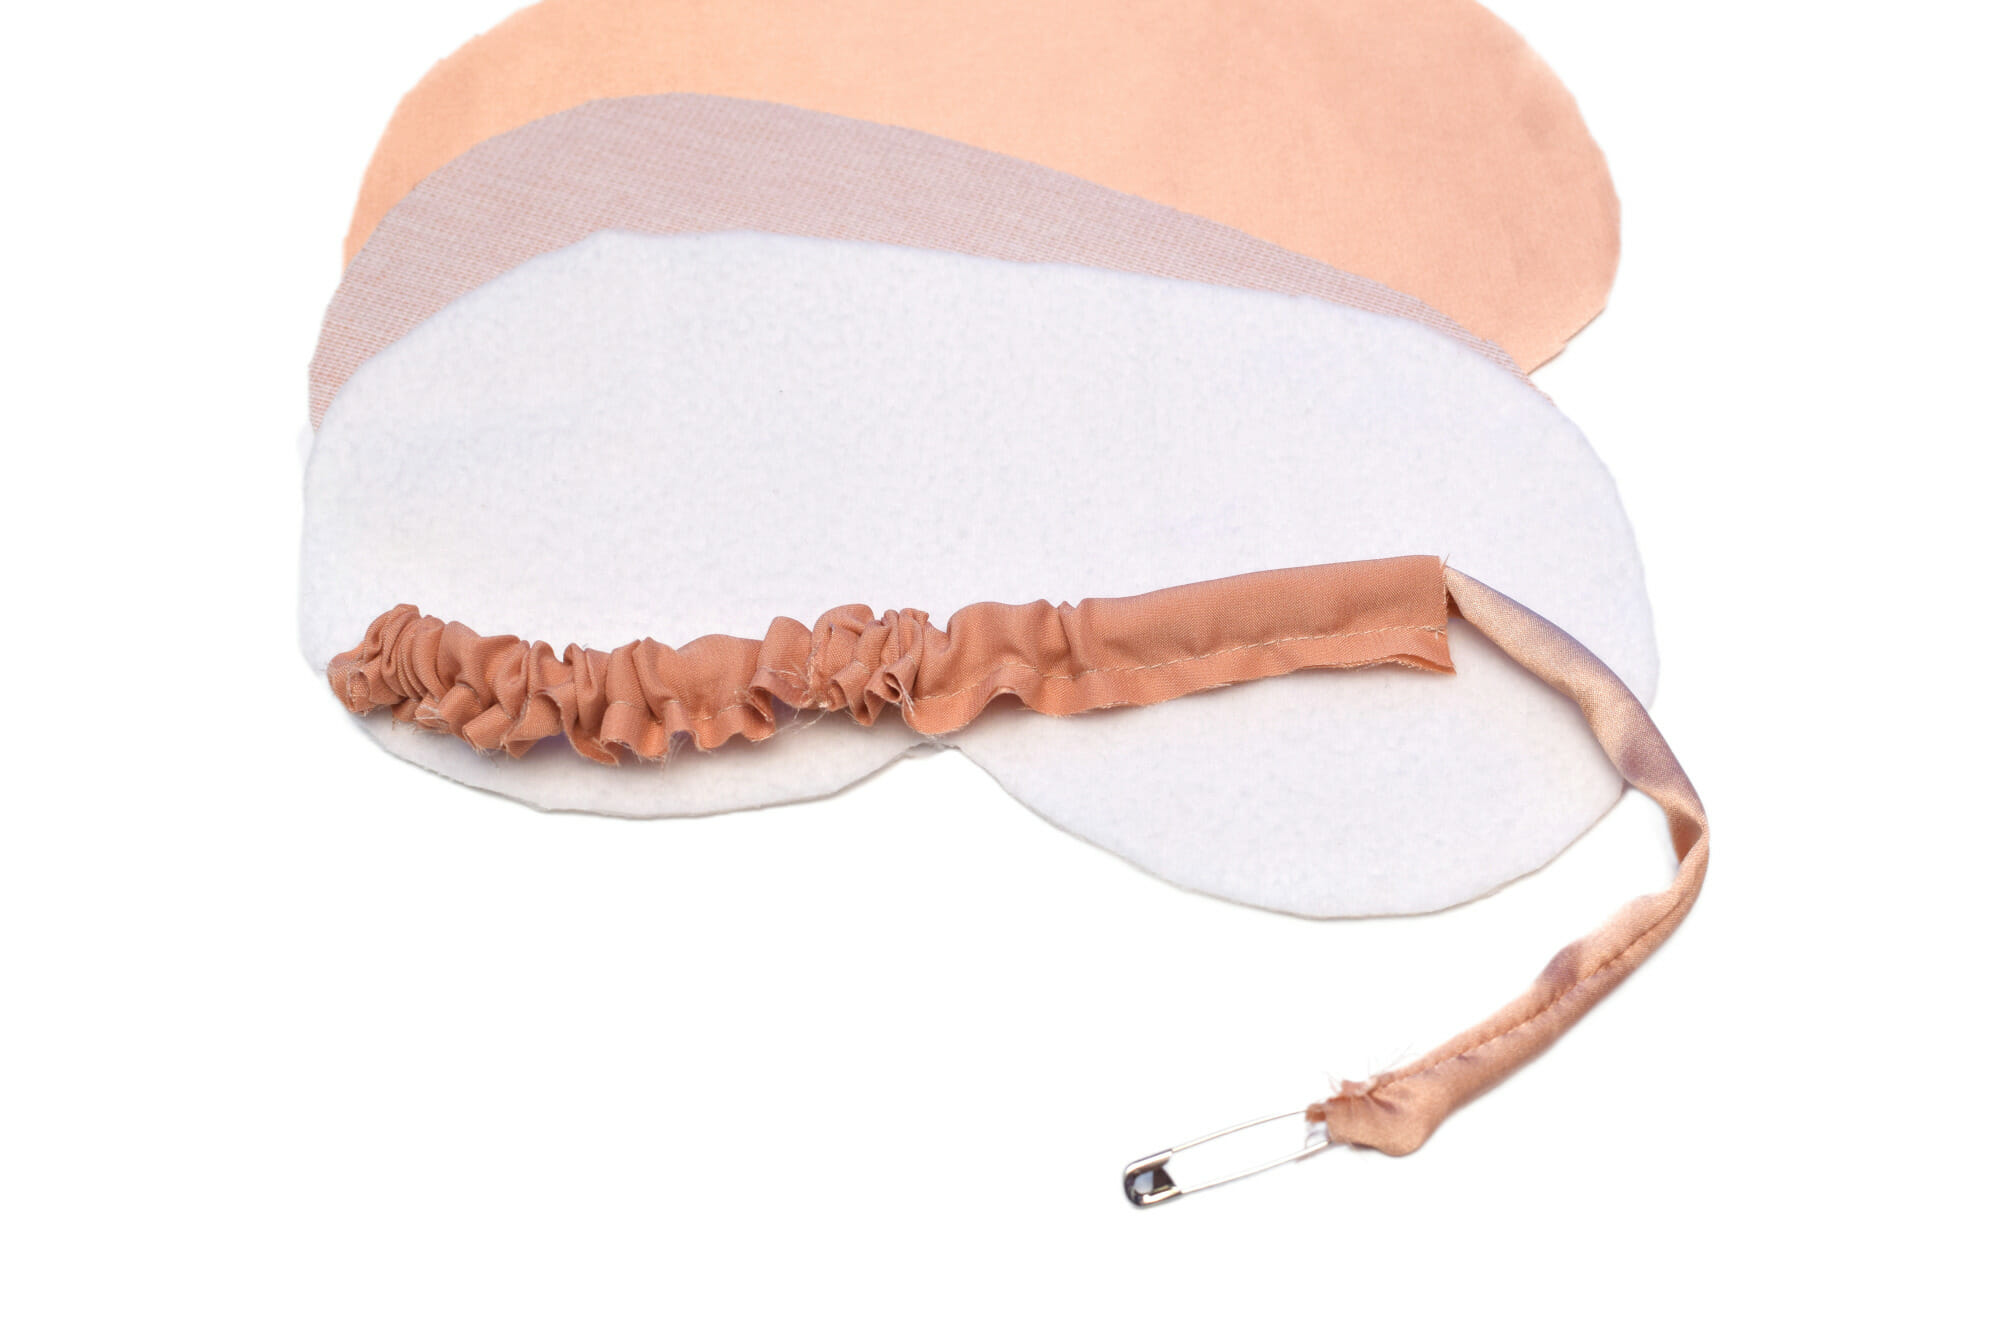
Step 3: Sew the Satin Tube
- Fold and Stitch: Now fold the long satin strip in half lengthwise, making sure the right sides of the fabric are together.
- Sew the Seam: Stitch a straight line along the long open edge. Use a 1/4 inch seam allowance.
Step 4: Turn the Tube Right Side Out
- Attach the Pin: Secure a safety pin to one end of the fabric tube.
- Push It Through: Guide the safety pin back into the tube opening and push it all the way through until it pops out the other end. You just turned your tube right side out!
Step 5: Insert and Secure the Elastic
- Measure and Cut Elastic: Find the perfect length for your head. Wrap a piece of 1/2″ wide elastic around your head from ear to ear (approximately) to check the fit. Aim for 12 to 15 inches. It should feel snug enough to hold the mask, but not too tight.
- Thread the Elastic: Attach the safety pin to one end of your cut elastic and thread it through the satin tube.
- Secure It: Sew across each end of the tube opening to securely trap the elastic inside. You’re now done with the strap!
Assemble the Satin Eye Mask
Now for the main event – assembling the mask itself.
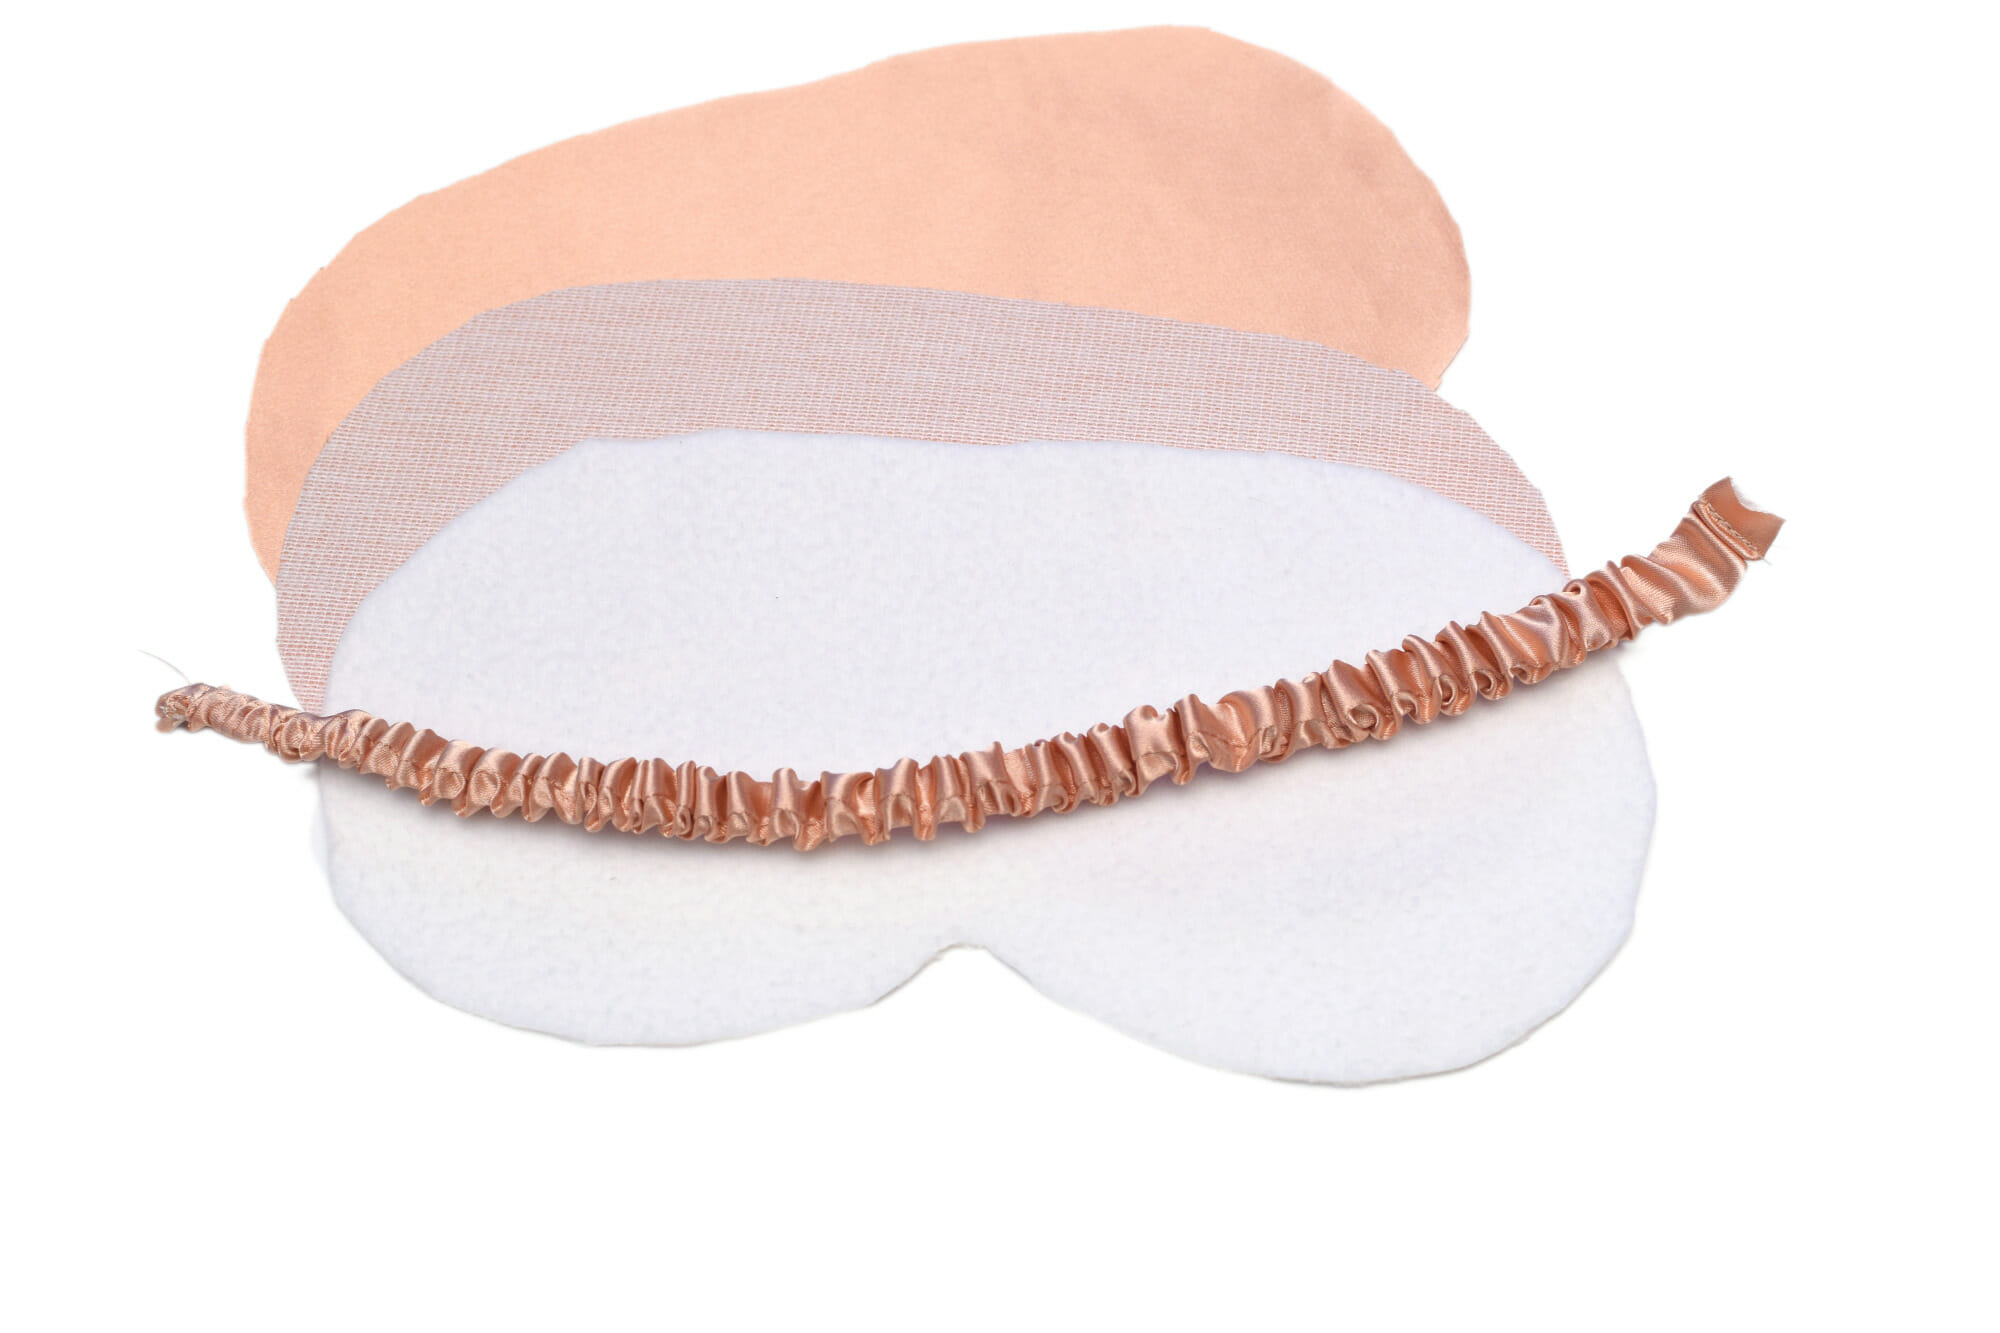
Step 6: Attach the Elastic Strap
- Position the Strap: Lay one of your satin eye mask pieces right side up.
- Sew It Down: Place the ends of the elastic strap onto the sides of the mask piece. Then, sew across the ends to baste or secure them in place. Double-check that the strap is NOT twisted!
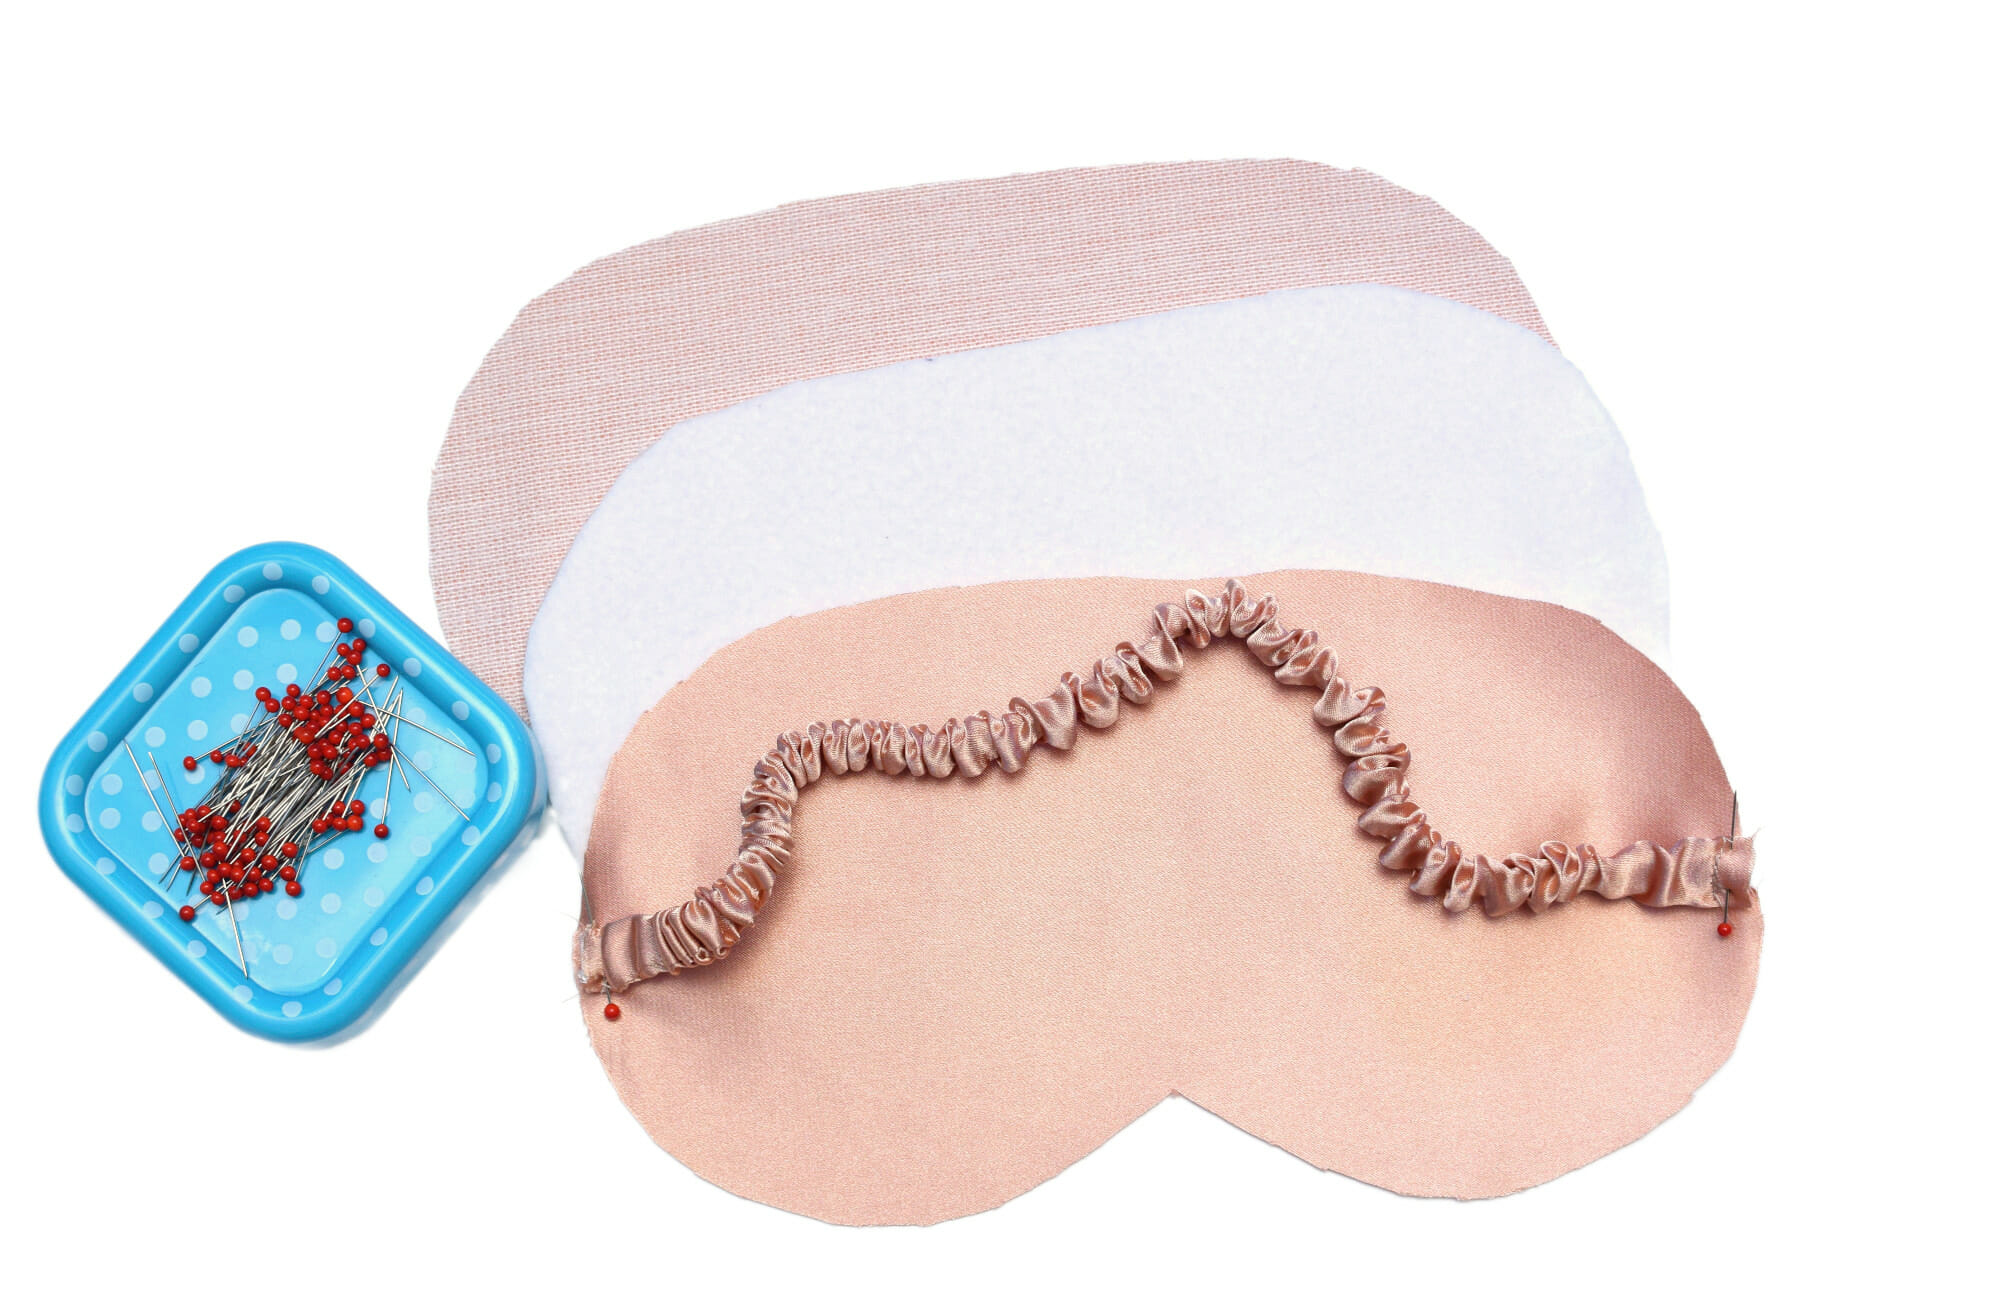
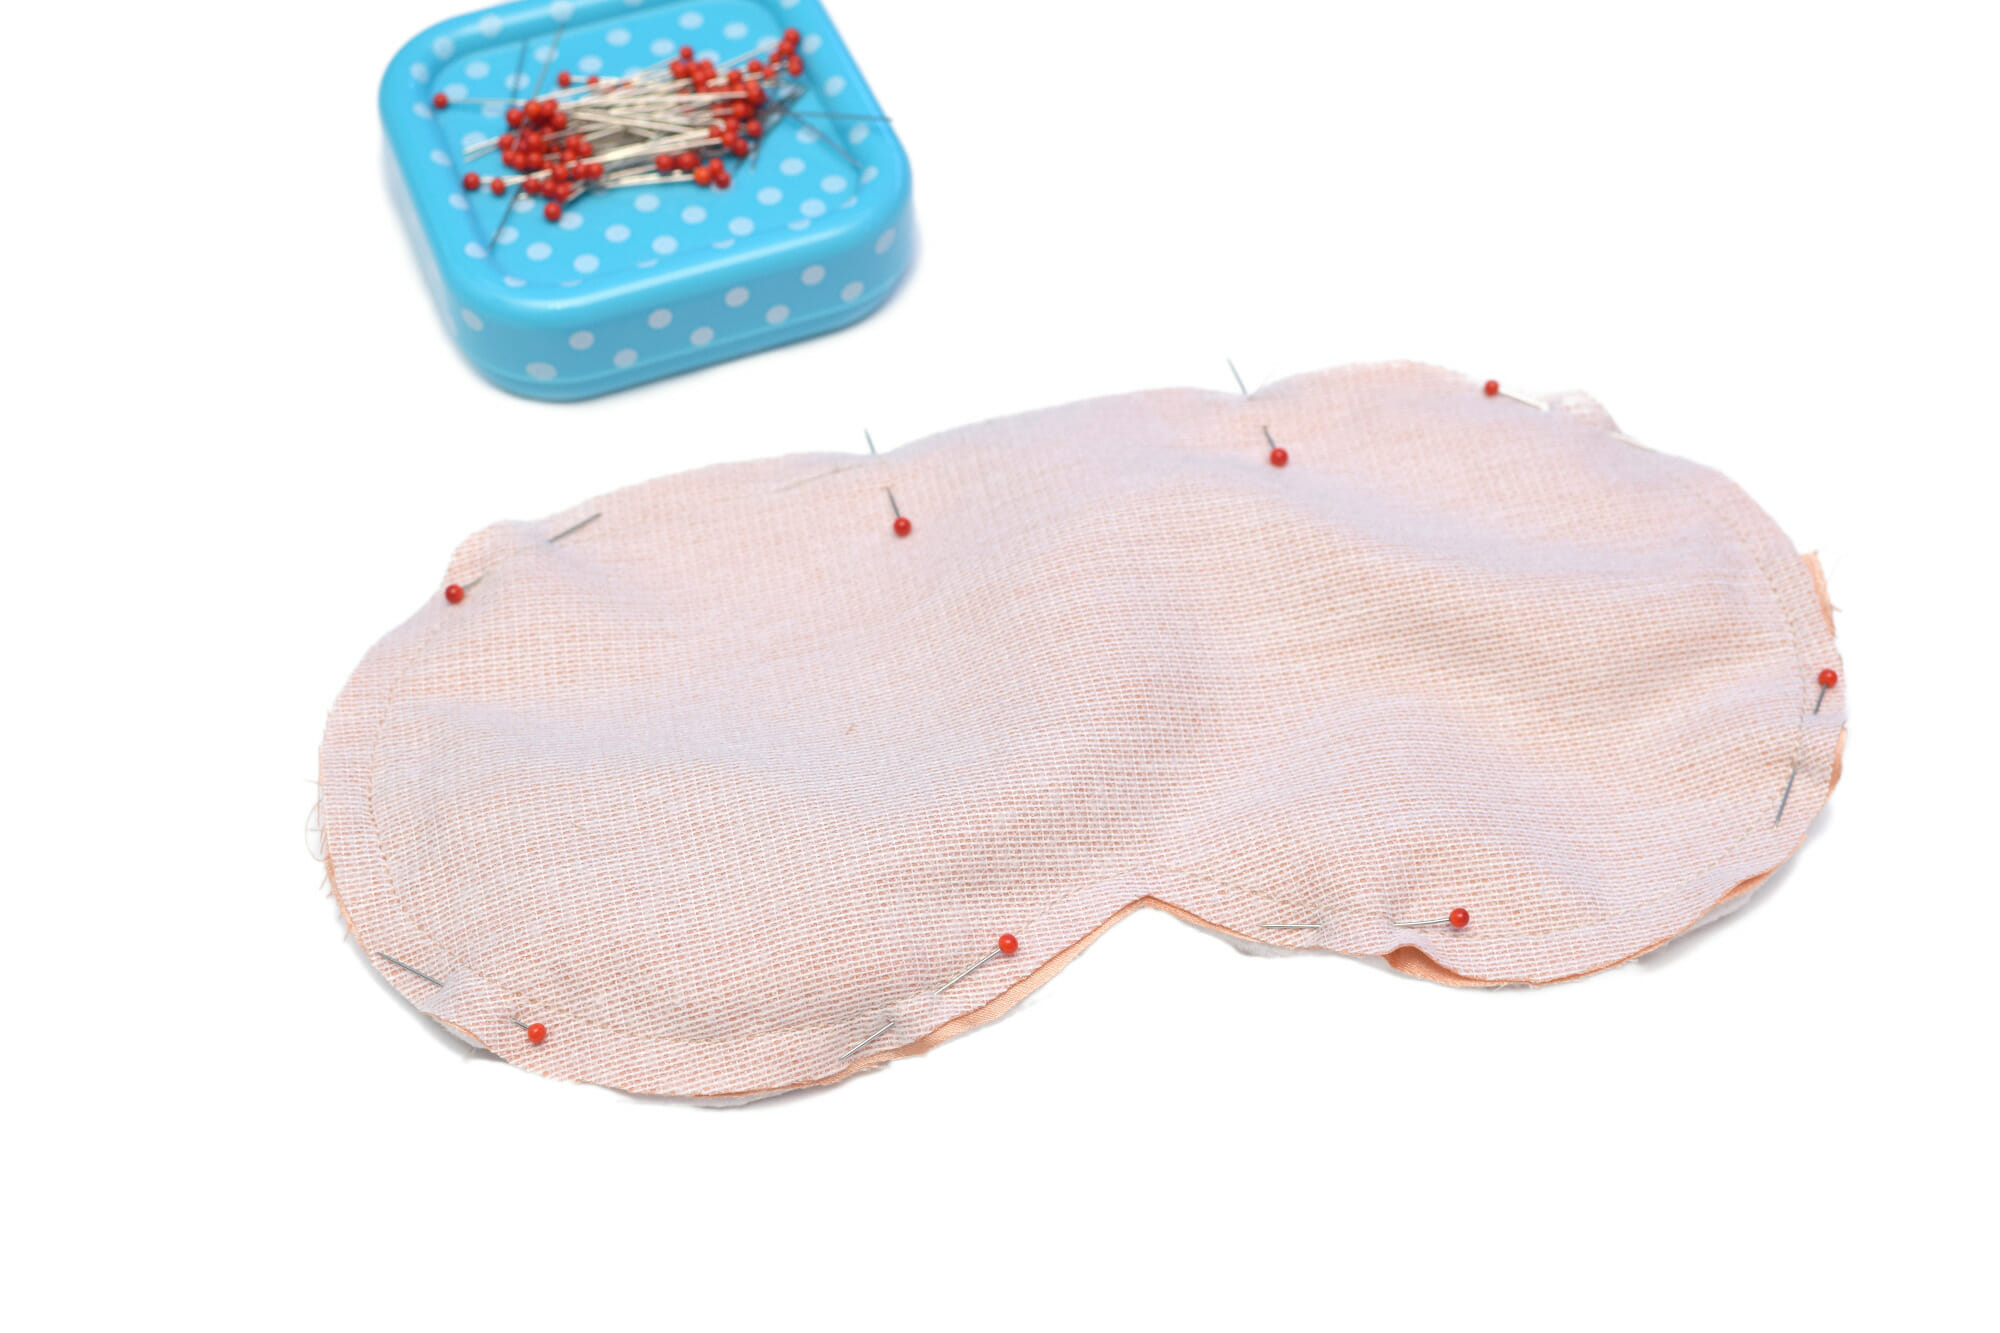
Step 7: Sew the Layers Together
- Pin the Satin: Take your two satin pieces and place them right sides together. The elastic strap should be tucked inside the layers.
- Stitch the Perimeter: Sew all the way around the edge using a 1/4 inch seam allowance.
- Leave an Opening: STOP and leave an opening of about two inches at the top edge of the eye mask. Since the top is the only straight part, it’s the easiest spot to close later.
- Secure: Remember to backstitch at the start and end of your seam!
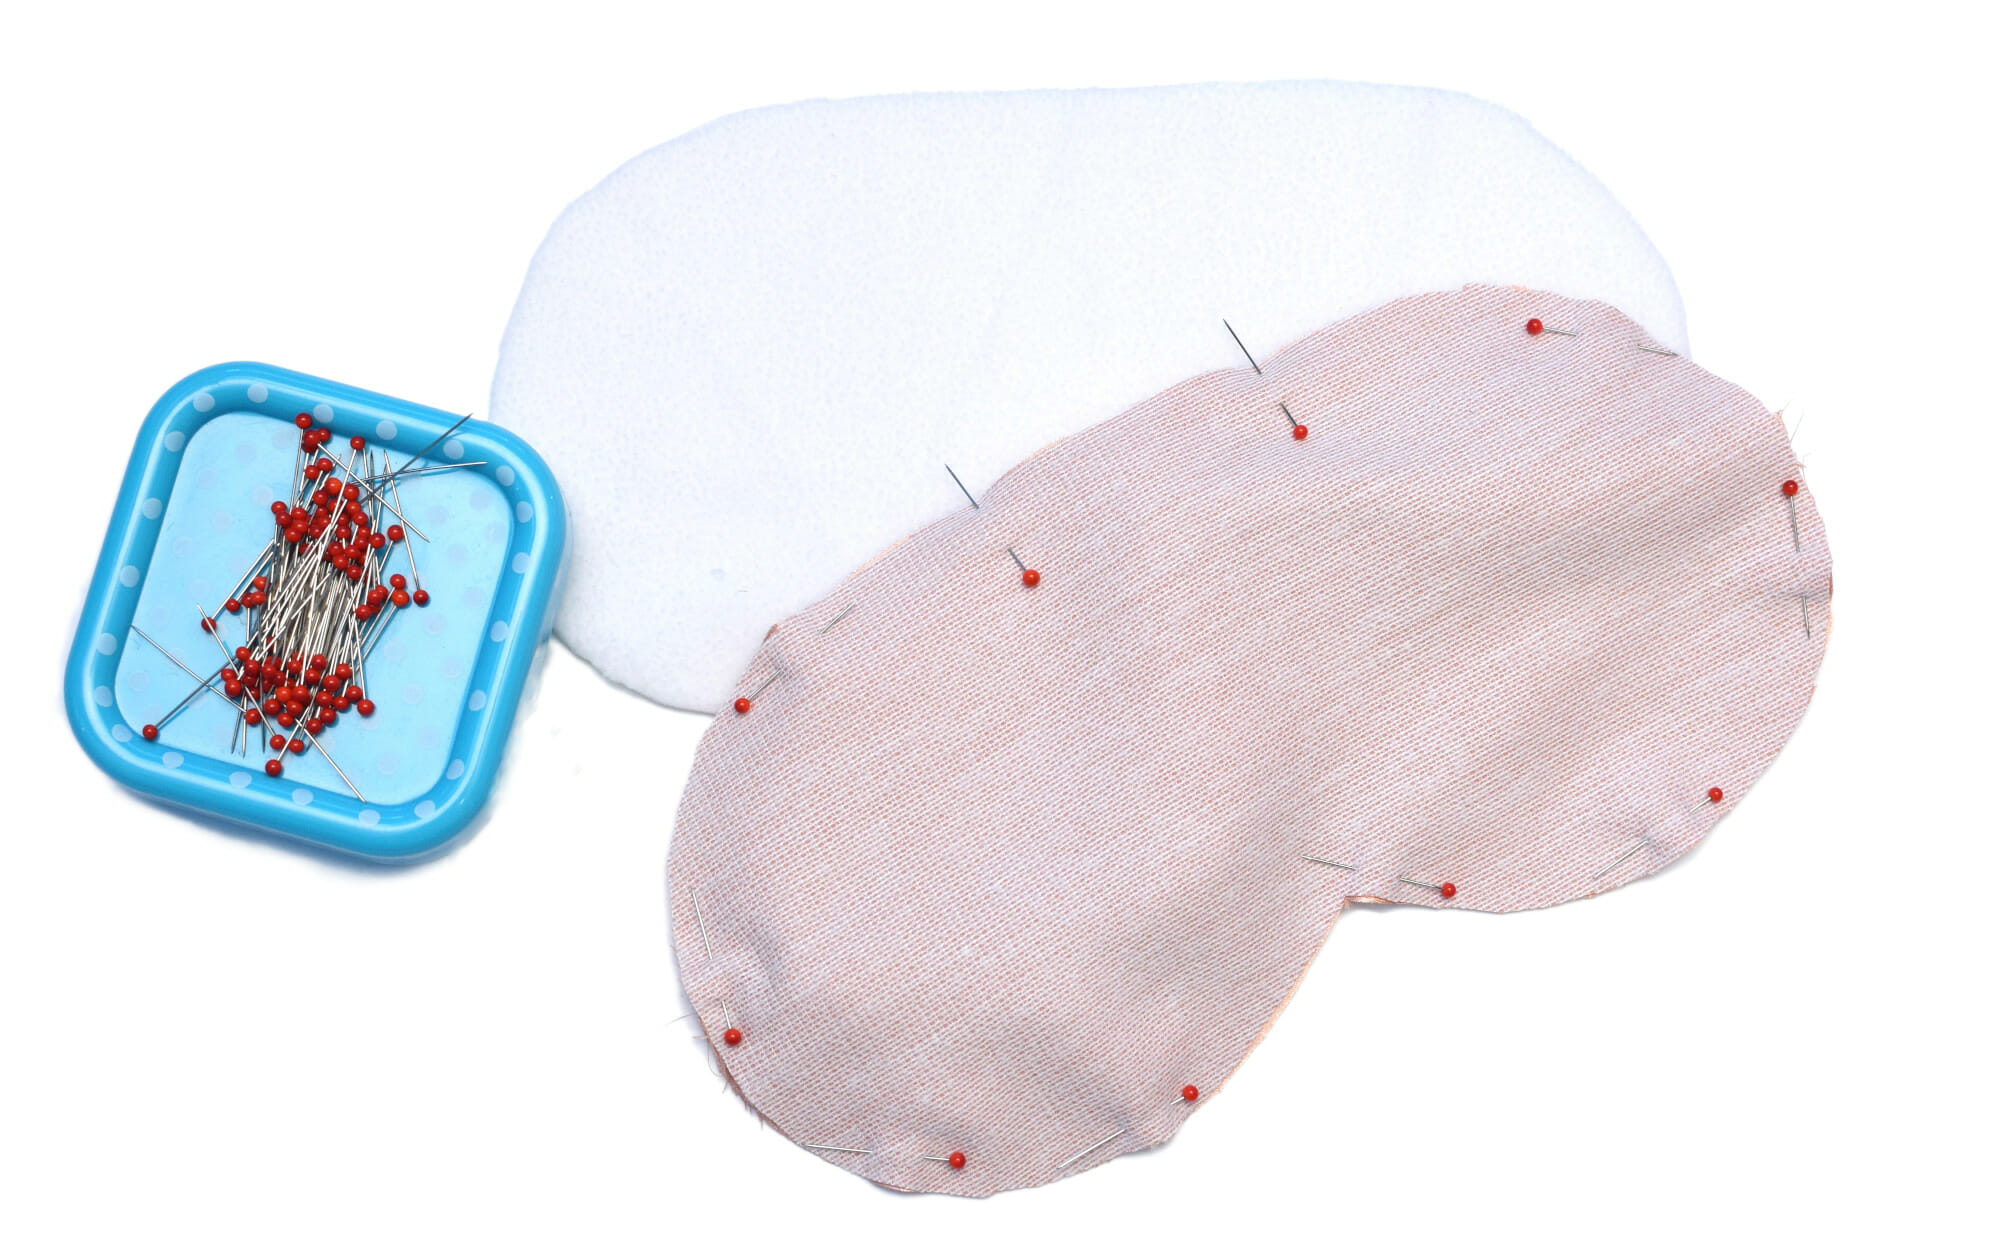
Step 8: Add the Fleece
- Pin the Batting: Pin the fleece/batting piece to the outside of the mask.
- Stitch Again: Now sew along the same stitch line you just made. This gives your eye mask its final plump shape!
Step 9: Trim, Turn, and Finish!
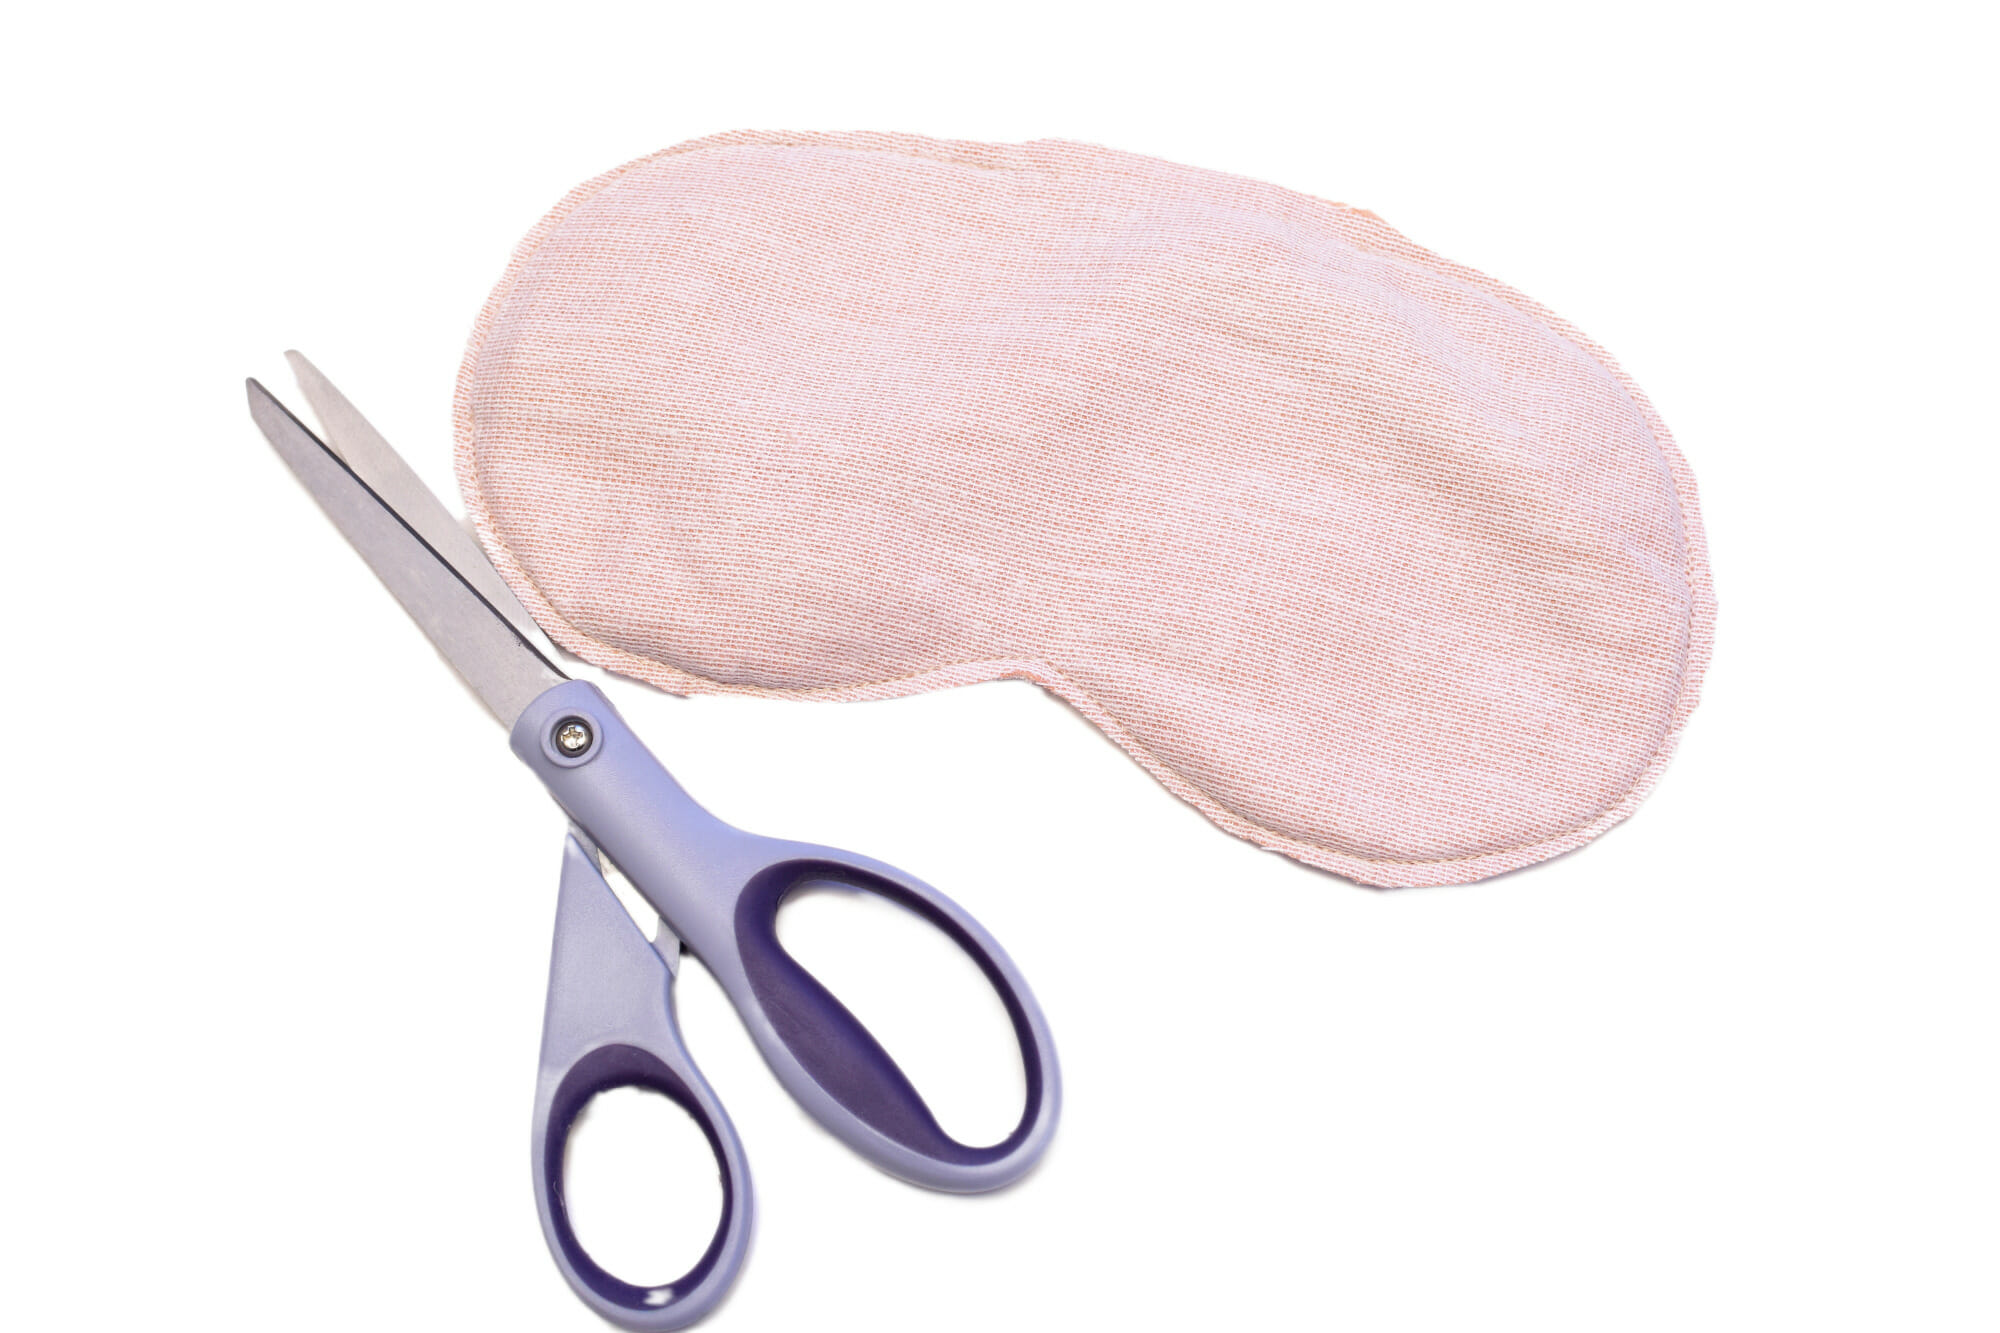
- Clip and Trim: Trim the seam allowance down to 1/8 inch all around the curves. This helps the curves look smooth! Do not trim the seam allowance at the two-inch opening.
- Turn It Out: Gently turn the entire eye mask right side out through the two-inch gap. Use your fingers or a chopstick to carefully push out and smoothen all the curved edges.
- Close the Gap: Fold the raw edges of the seam allowance inside the mask at the opening. Use a matching thread to hand-sew the opening closed using an invisible slip stitch.
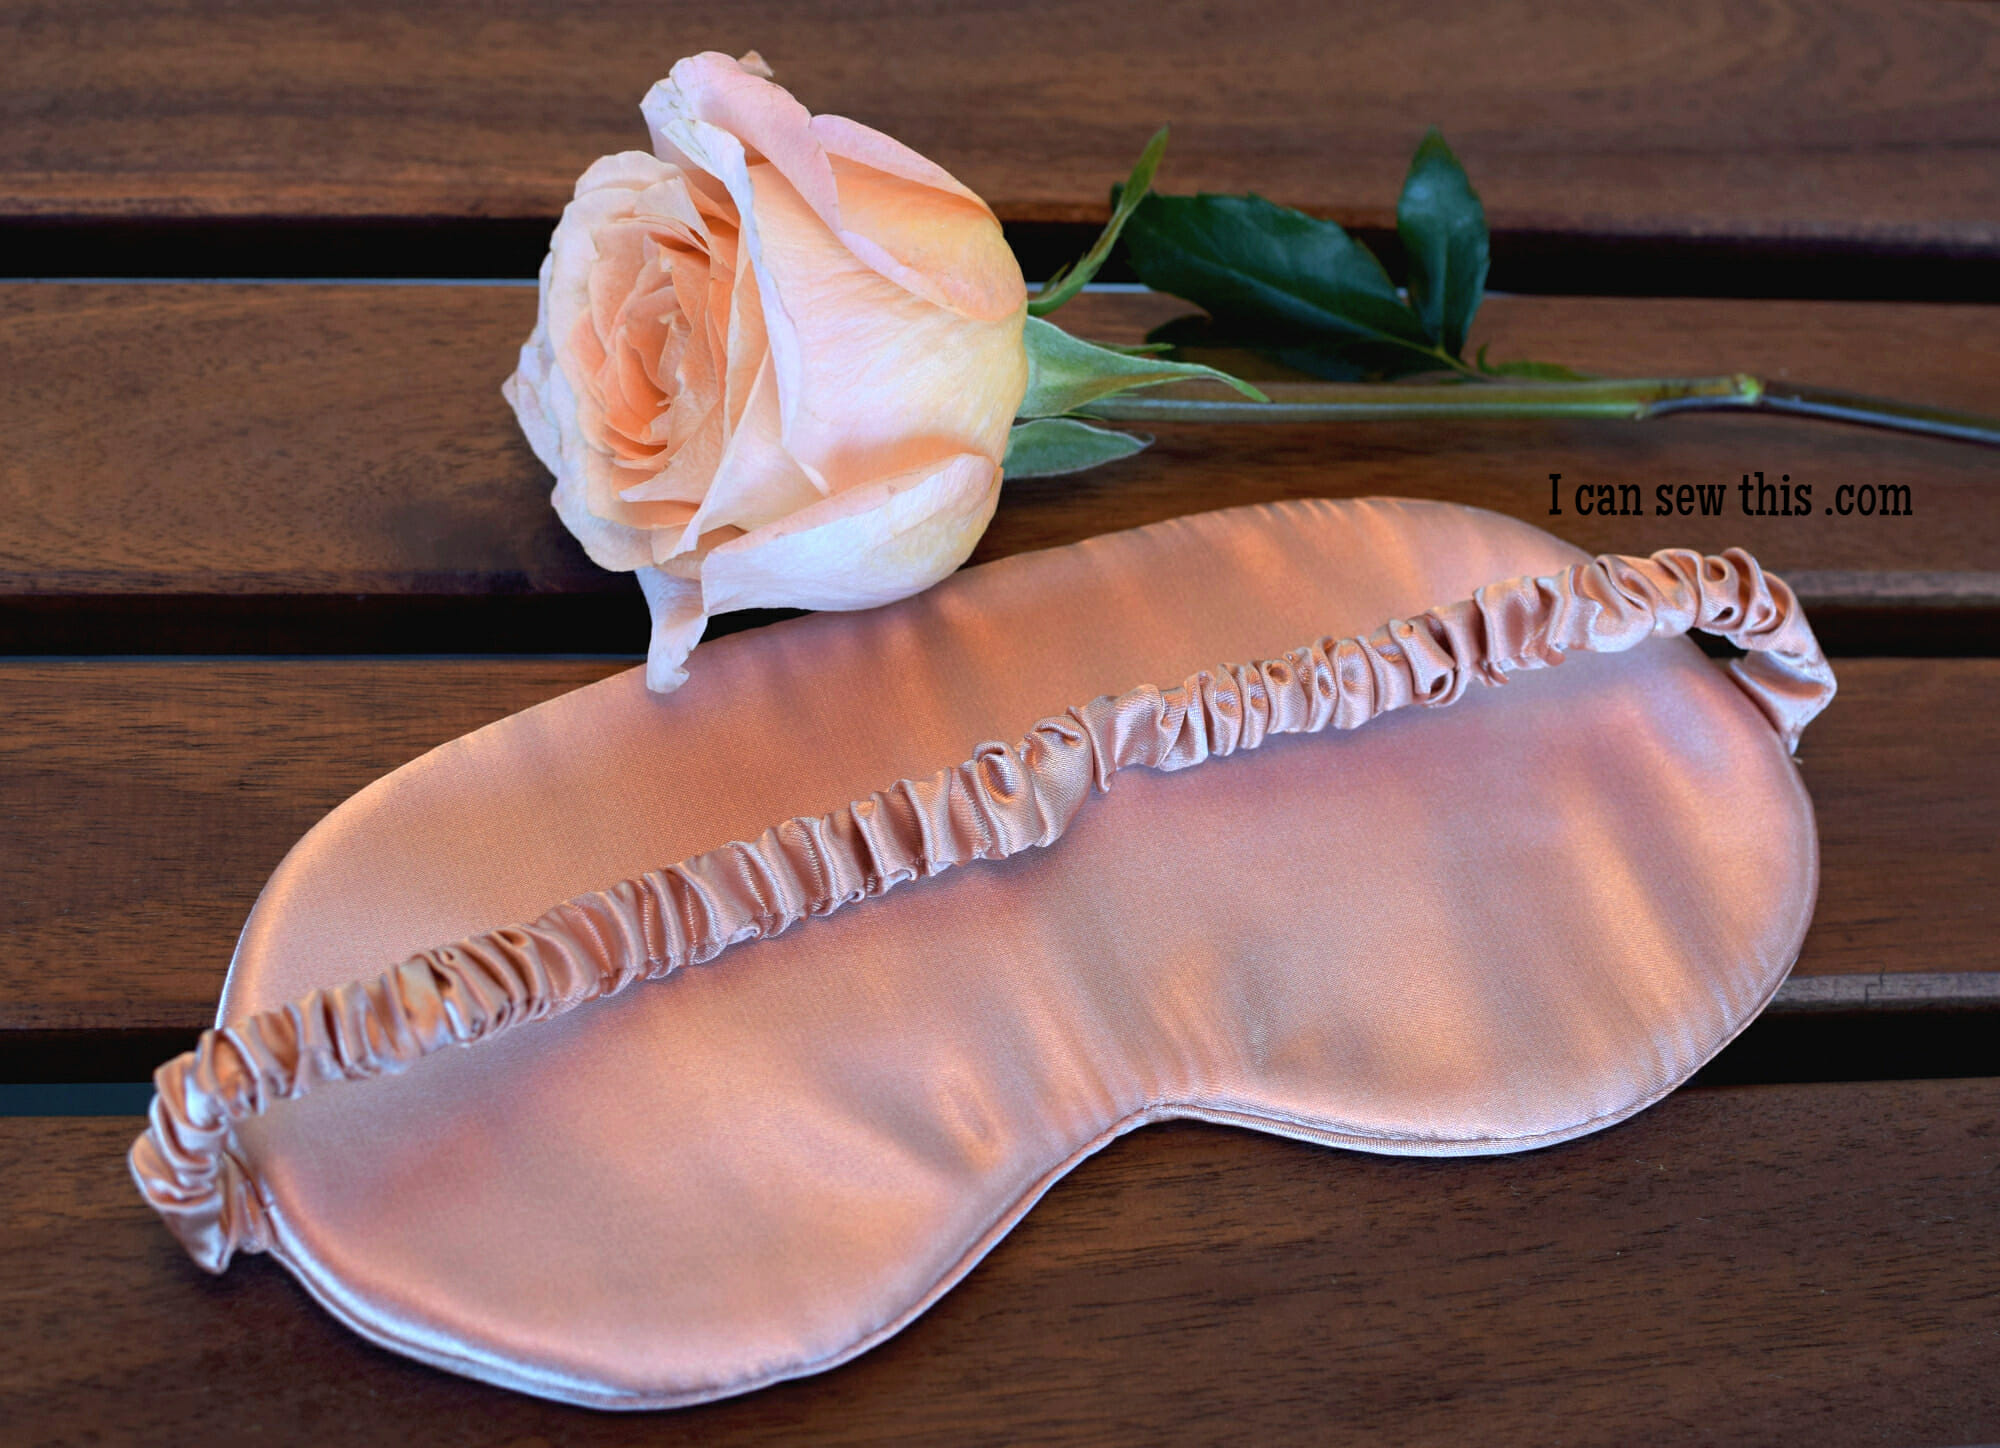
Enjoy Your Deepest Sleep Yet!
You did it! Take a moment to admire your beautiful, handmade satin creation. Isn’t it amazing what you can whip up in just a short amount of time?
Now, the only thing left to do is put on your super soft satin eye mask, lie back, and take a quick nap. You deserve it!
If you loved this project, please share a picture of your finished mask by tagging me on Instagram @icansewthis! And don’t forget to pin this tutorial so you can easily find it the next time you need a quick gift idea.

You might also like:
- 40 easy sewing projects
- Tons of free sewing patterns, perfect for all skill levels
- The best sewing machines for beginners
Let’s keep in touch! You can find me on Facebook, Instagram, and Pinterest.


I just found your pattern and instructions. I can’t wait to make one. Thank you for sharing!?
Thank you for the easy to follow tutorial – my mask fits perfectly.
Some improvisations for anyone reading –
I used 1/4 inch elastic as it’s all I had, still works fine – though I imagine it would be a tad better with the thicker elastic.
Fabric:
Bronze silk from an old cushion cover (mask)
Hot pink polyester satin from an old dress (elastic band)
Old towel (batting)
I’m very glad to hear that, Nikki! You’re welcome 🙂
A very easy to follow forward tutorial. Thank you Violet.
I am very pleased with how my fat quarter eye mask turned out. I made a slight change by modifying the elastic to fit around my ears rather than my head.
You’re very welcome, Shez! I’m so glad to hear that you liked it.
I made this with a baby pink colored silky fabric and it turned out perfect! Thanks for this tutorial.
Hi Eva,
Thank you for the kind words and for taking the time to write me, I’m so glad you find my tutorial useful. 🙂