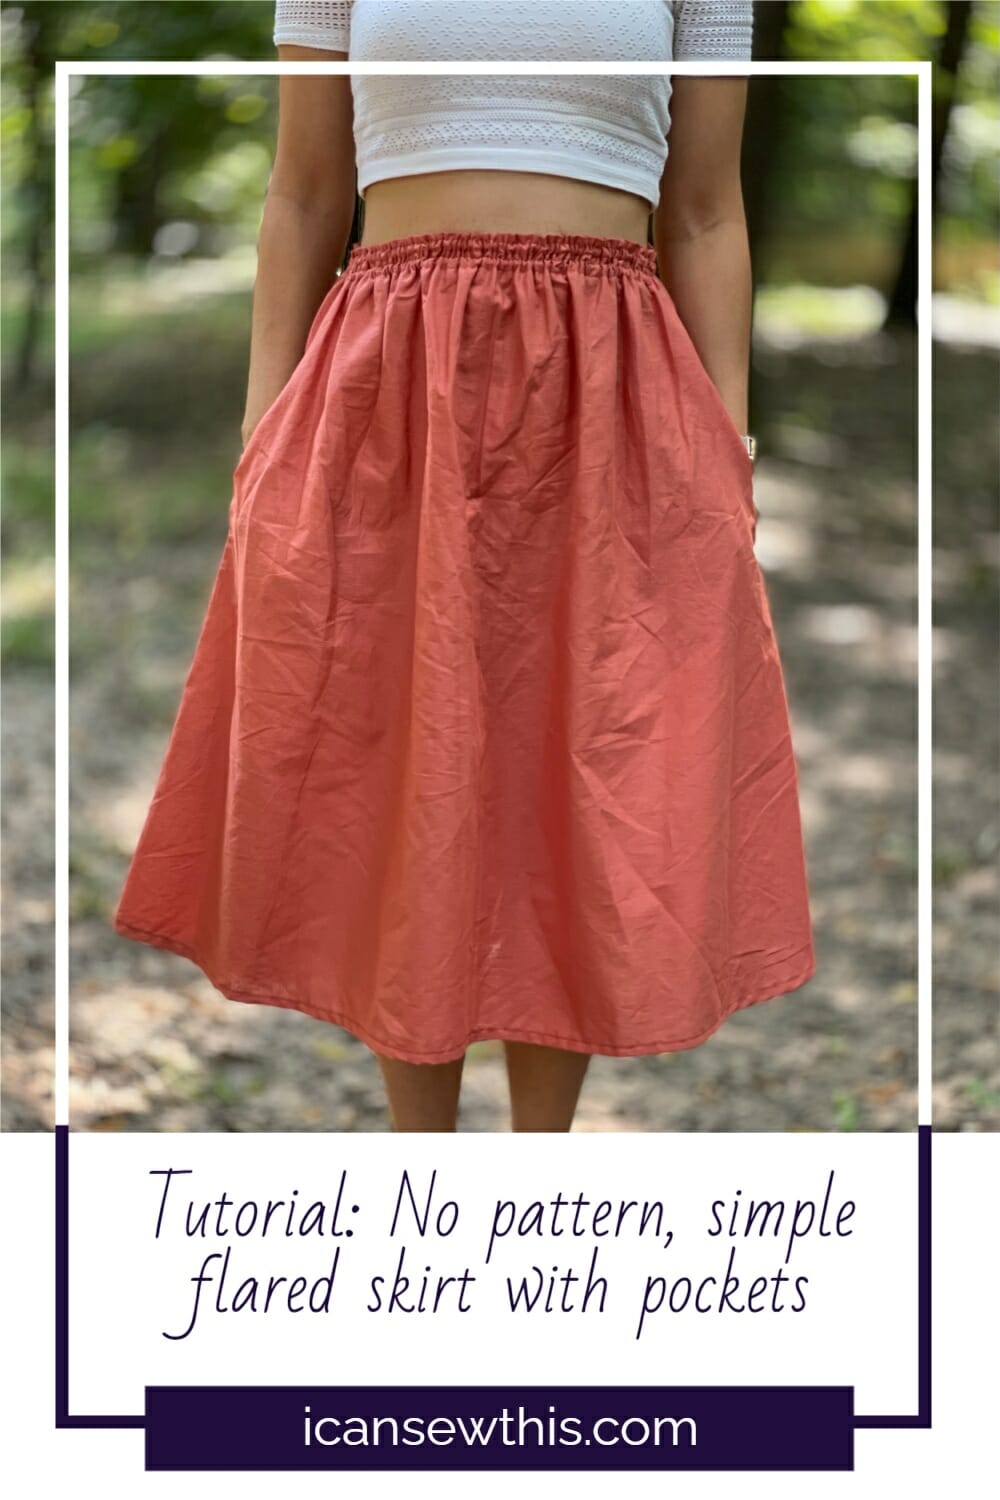
Want to make your own cute and comfy summer skirt without dealing with fussy patterns or zippers? You’re in the right place! This DIY summer skirt with an elastic waistband and in-seam pockets is a breeze to sew, beginner-friendly, and perfect for warm weather. It’s light, breezy, and has pockets – what more could you want?
This easy summer skirt pattern for beginners doesn’t actually use a real pattern – you just take a couple of measurements (your waist and desired skirt length), cut two fabric pieces, and start sewing.
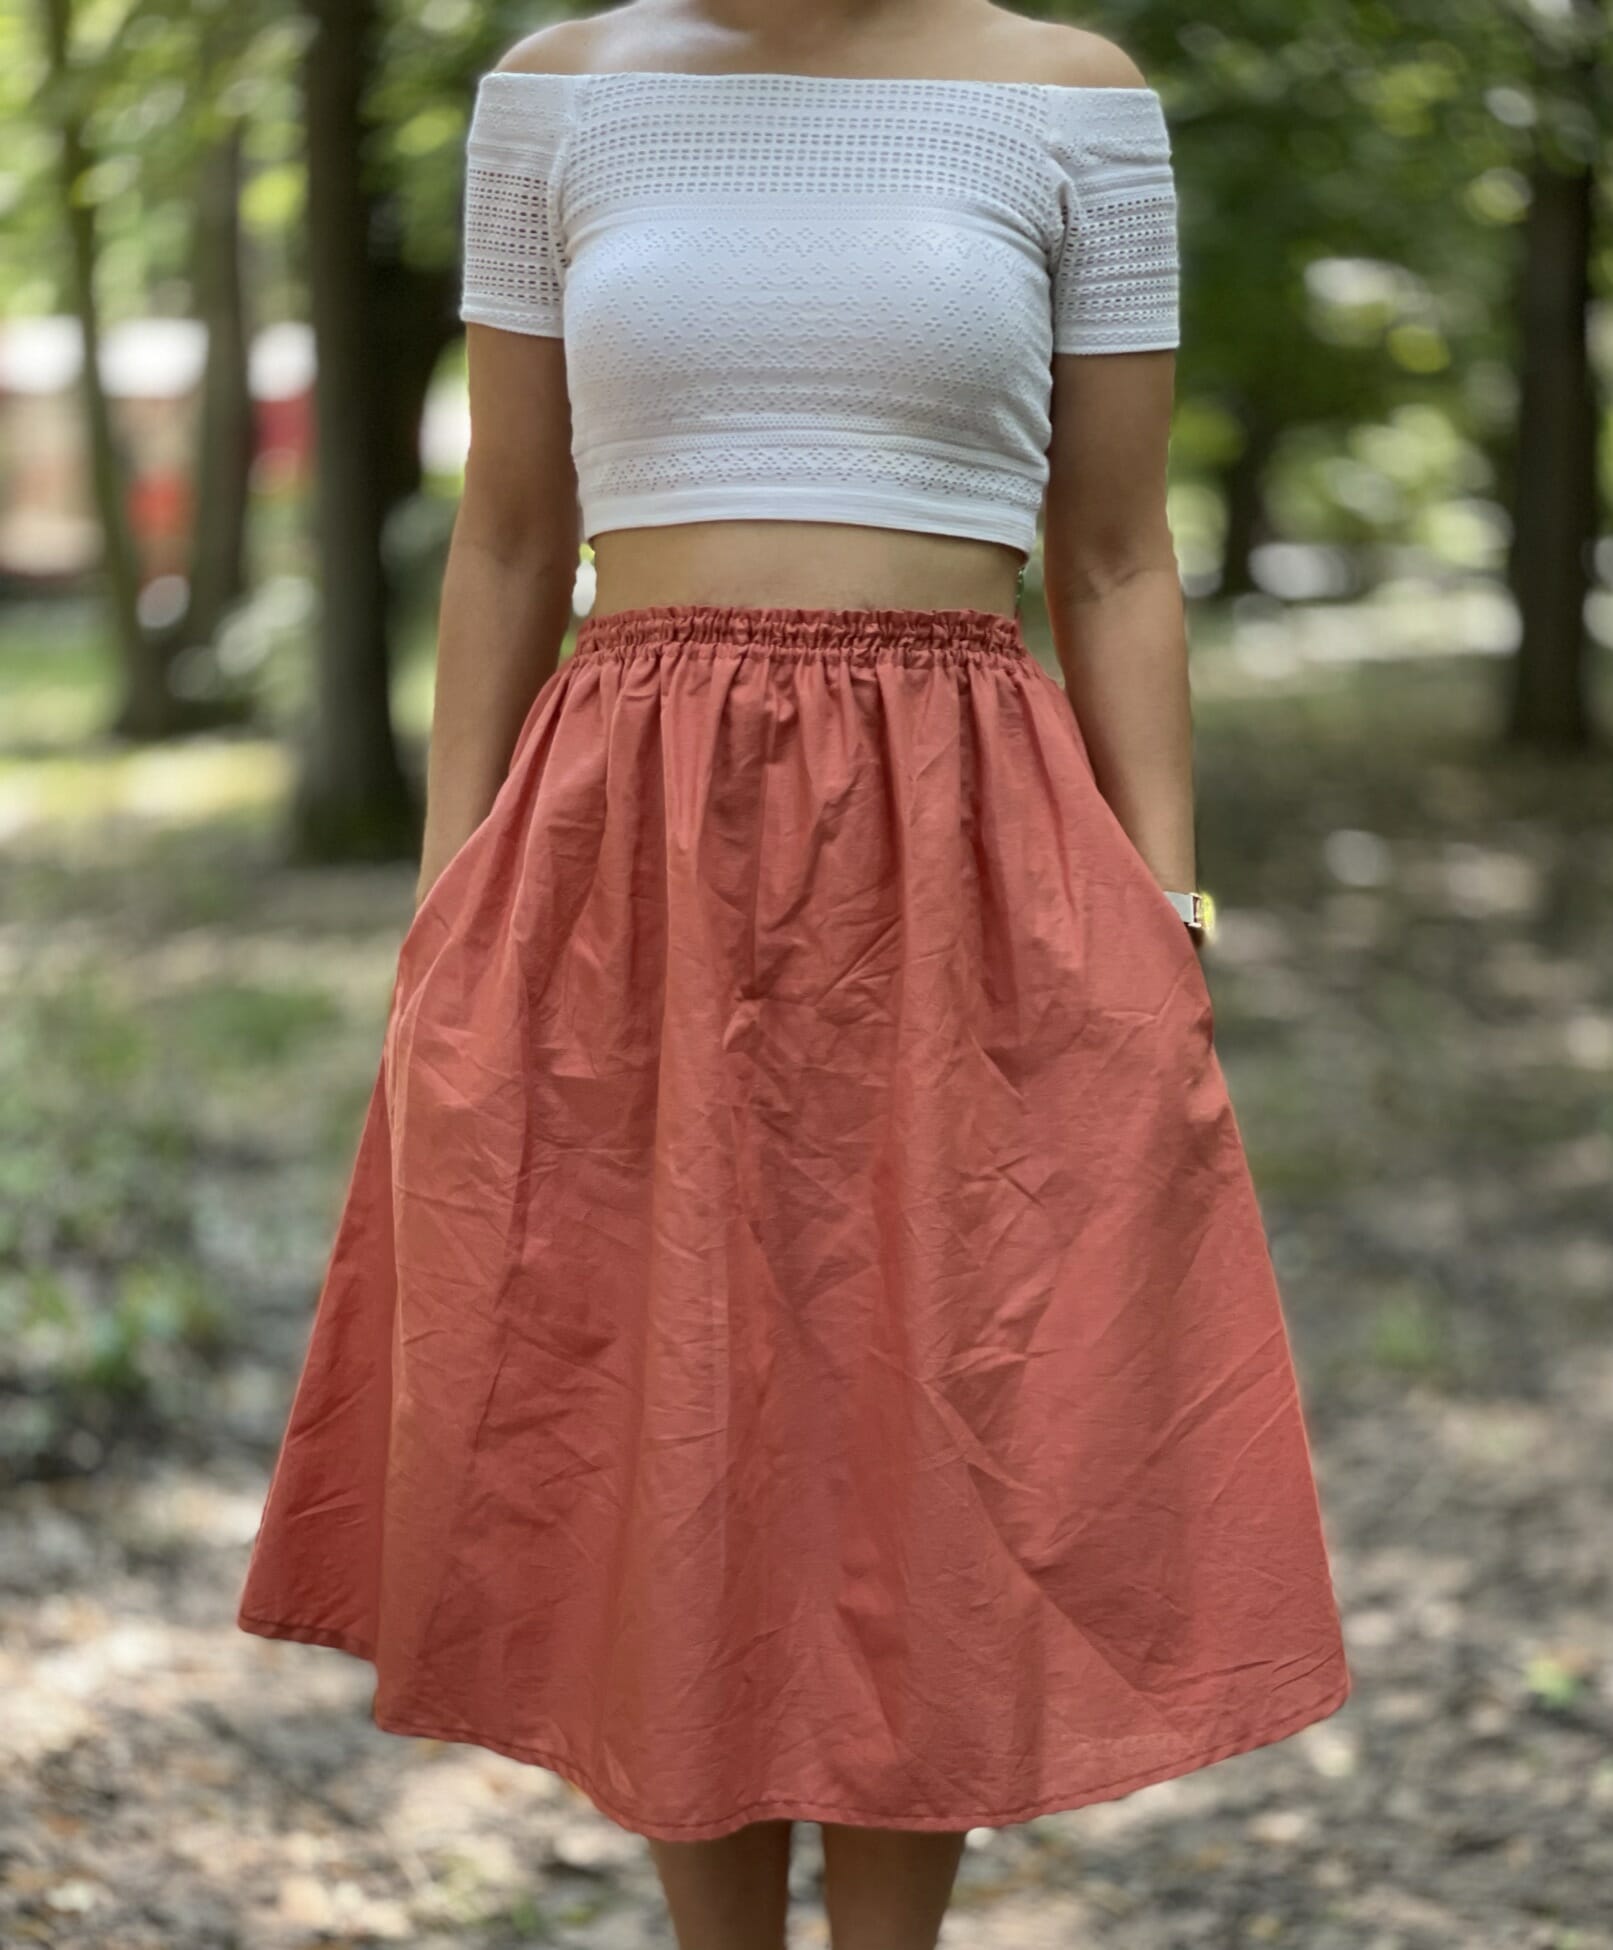
The skirt has a relaxed, flared shape that looks great on everyone and feels super comfy. Plus, those in-seam pockets? Game changers. You’ll want to add them to all your skirts from now on.
I made mine in under an hour – including the time I stopped to take photos for the step-by-step tutorial. So if you’re short on time but want something cute to wear, this project is a winner. It’s a great quick sew for lazy summer afternoons.
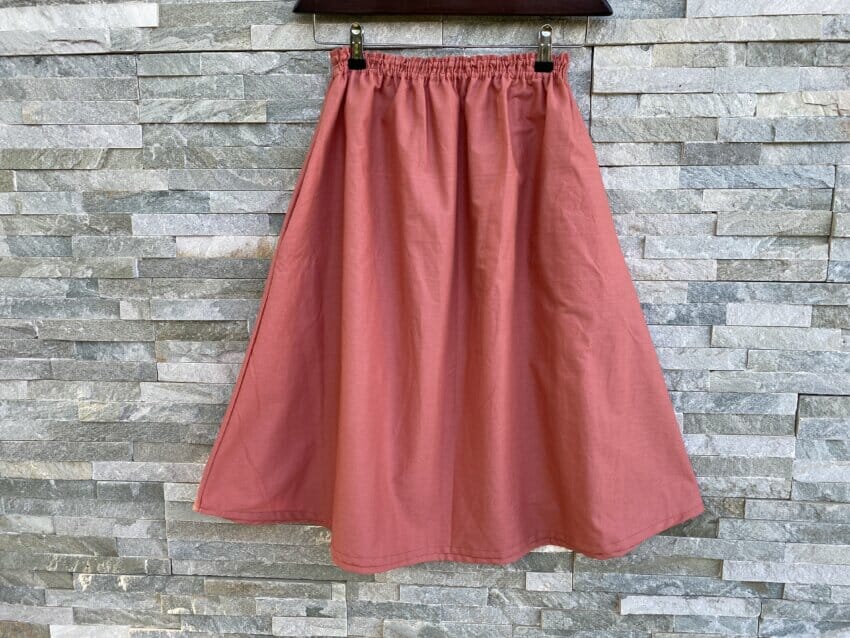
DIY flared skirt with elastic waistband and pockets
This skirt is made from just two main fabric pieces – one for the front and one for the back.
The waistband is built right in, so there’s no need to cut or attach extra pieces. There’s a simple fold-over trick that turns the top edge into a casing for the elastic, making the whole thing quicker and easier to put together.
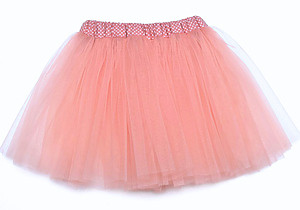
The shape is kind of a trapezoid, but with a straight top edge (like a rectangle) so you can fold it over neatly to make the waistband. The skirt flares gently, giving it a nice drape and movement without being too full or frilly. It’s flattering and totally wearable – perfect for everyday summer outfits.
You might also like:
- Tiered ruffle skirt tutorial – super cute and twirly!
- DIY simple woven top – an easy pattern hack you’ll love
- How to make a tulle skirt in 10 simple steps – lightweight, fun, and perfect for dressing up
- DIY double gauze skirt with side slit – breezy, comfy, and great for summer days
What kind of fabric should I use for my summer skirt?
For this handmade skirt with elastic waistband, I used a lightweight cotton fabric – it’s breathable, easy to work with, and comes in endless fun prints.
You can also use linen, viscose, rayon, double gauze, or any other lightweight fabric that has a nice drape. Just make sure it’s not too thick, or the waistband might get bulky.
For the waistband, I used 1/8″ wide elastic, but you can easily size that up if you want a bit more hold or comfort.
So, if you’re looking for an easy sewing project for summer, grab your favorite fabric and get started on this DIY flared skirt with pockets. No pattern, no fuss, just a super cute skirt you’ll want to wear every sunny day!
Sewing supplies – flared skirt with an elastic waistband and pockets
- free PDF pattern for the in-seam pockets – download below
- cotton/linen/viscose fabric of your choice
- sewing machine
- sewing machine needle
- matching thread
- sewing pins
- fabric scissors
- 1/4” wide (or 1/8” wide) elastic
How to sew an easy summer skirt (step-by-step instructions)
Step 1 – Draft your skirt pieces (no pattern needed!)
Let’s start by drafting the pieces for your summer skirt. Don’t worry – there’s no need to print or trace a pattern. We’re just using some simple measurements and a bit of fabric-folding magic. You’ll need two identical skirt pieces: one for the front and one for the back.
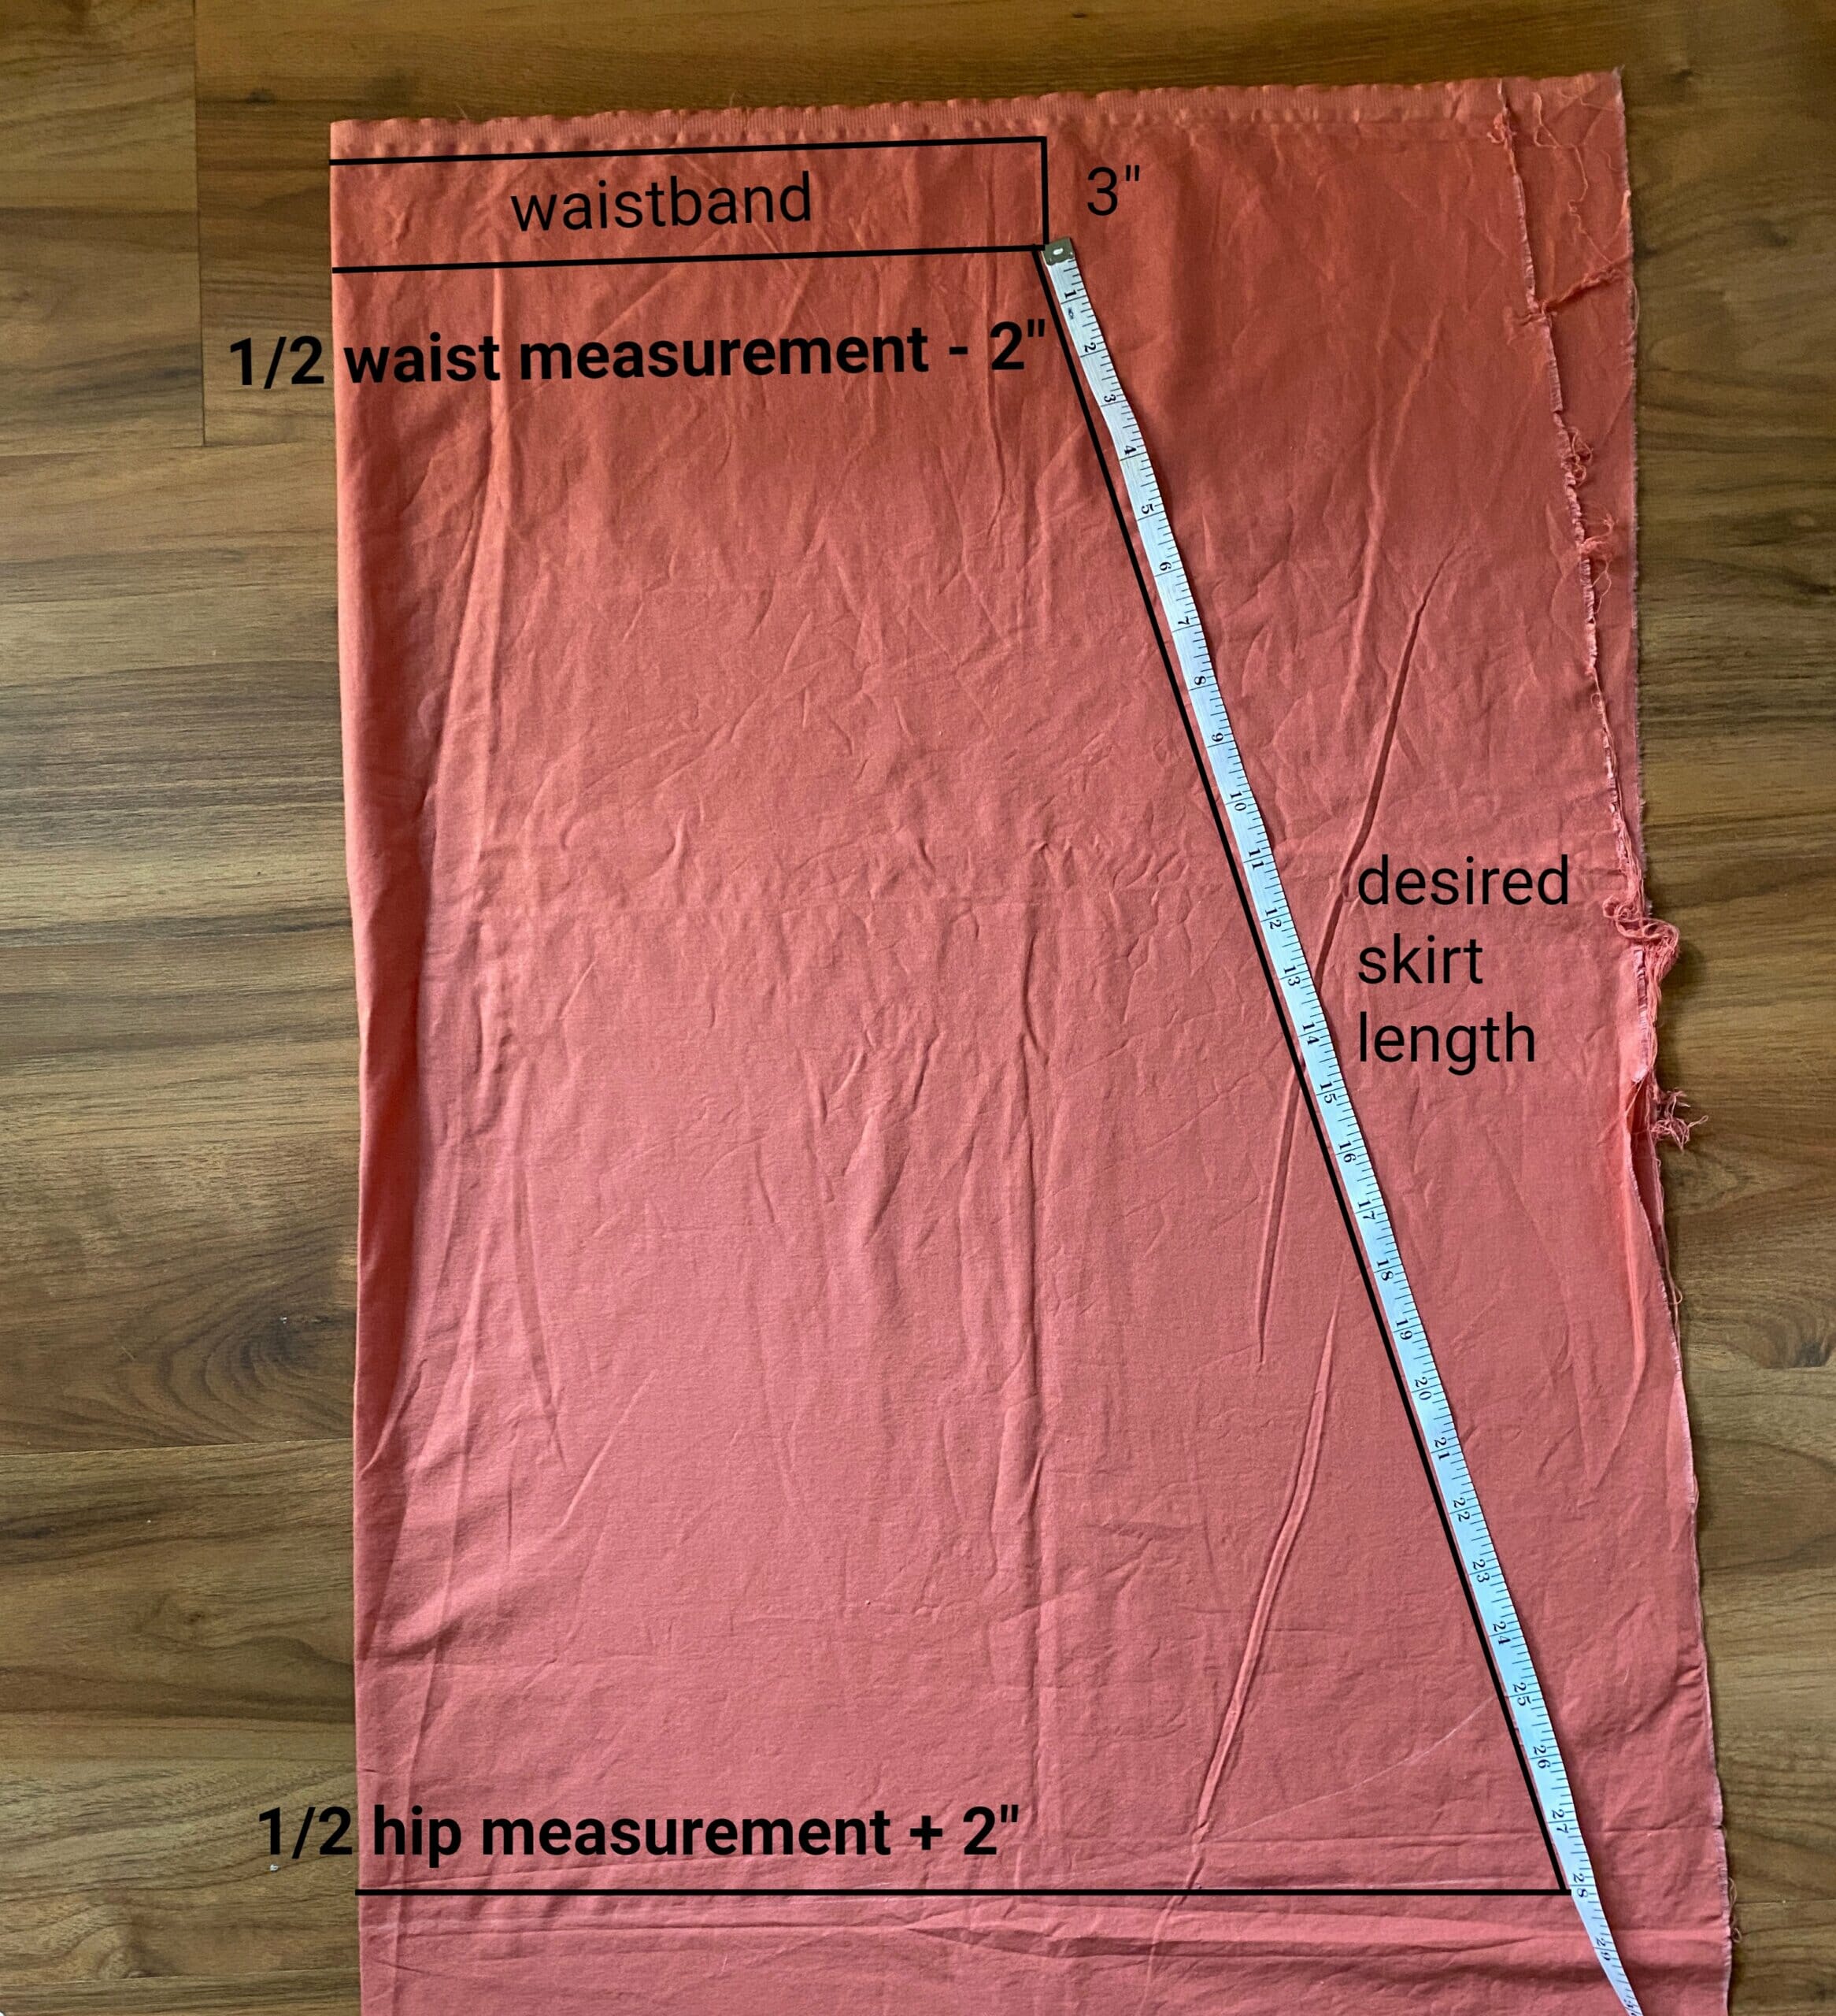
First, fold your fabric in half. Now, from the folded edge, measure out half of your waist measurement, minus about 2 inches. This will be the top edge of your skirt piece. Since you’re cutting on the fold, this gives you half of the total width – do this twice and you’ll have the full width for the skirt.
This method creates a nicely flared skirt without too much bulk at the waist. In the end, your skirt will be about 1.7 times your waist measurement, which gives you a flowy, flattering shape without feeling too gathered.
DIY trapezoid skirt – shaping and measurements
Here’s how I shaped my simple elastic waist skirt with pockets. Both the front and back are cut from the same pattern, which makes things super easy.
At the top of the skirt, I measured 12 inches (my waist is about 27.5 inches).
At the bottom of the skirt, I went wider – 19 inches. That’s half my hip measurement plus a couple of inches for extra ease and twirl factor. That makes the bottom about 7 inches wider than the top.

This flare means that when the two pieces are sewn together, the top of the skirt will measure around (2 × waist – 8 inches), and the hem will end up about (2 × hip + 8 inches). That’s just enough fullness to feel comfy and flowy, without being too puffy at the waist.
Want your skirt more flared or less flared? Just adjust how far you angle the bottom edge from the top – totally up to you! Use your tape measure to experiment and draw a slightly curved hemline so it hangs nicely when worn.
Decide your skirt length
Now it’s time to decide how long you want your skirt to be. I went with a midi length, so I measured 27 inches from the top edge, including 1 inch for hemming. You can make yours knee-length, maxi, or anywhere in between. That’s the beauty of a made-to-measure skirt!
Add the waistband directly onto your pieces
No separate waistband needed! Just extend the top of your skirt pieces upward by 3 inches to create a built-in casing for the elastic. This makes your project faster and easier, and it gives the waistband a clean finish. Just fold it over and stitch it down later when you’re assembling the skirt.
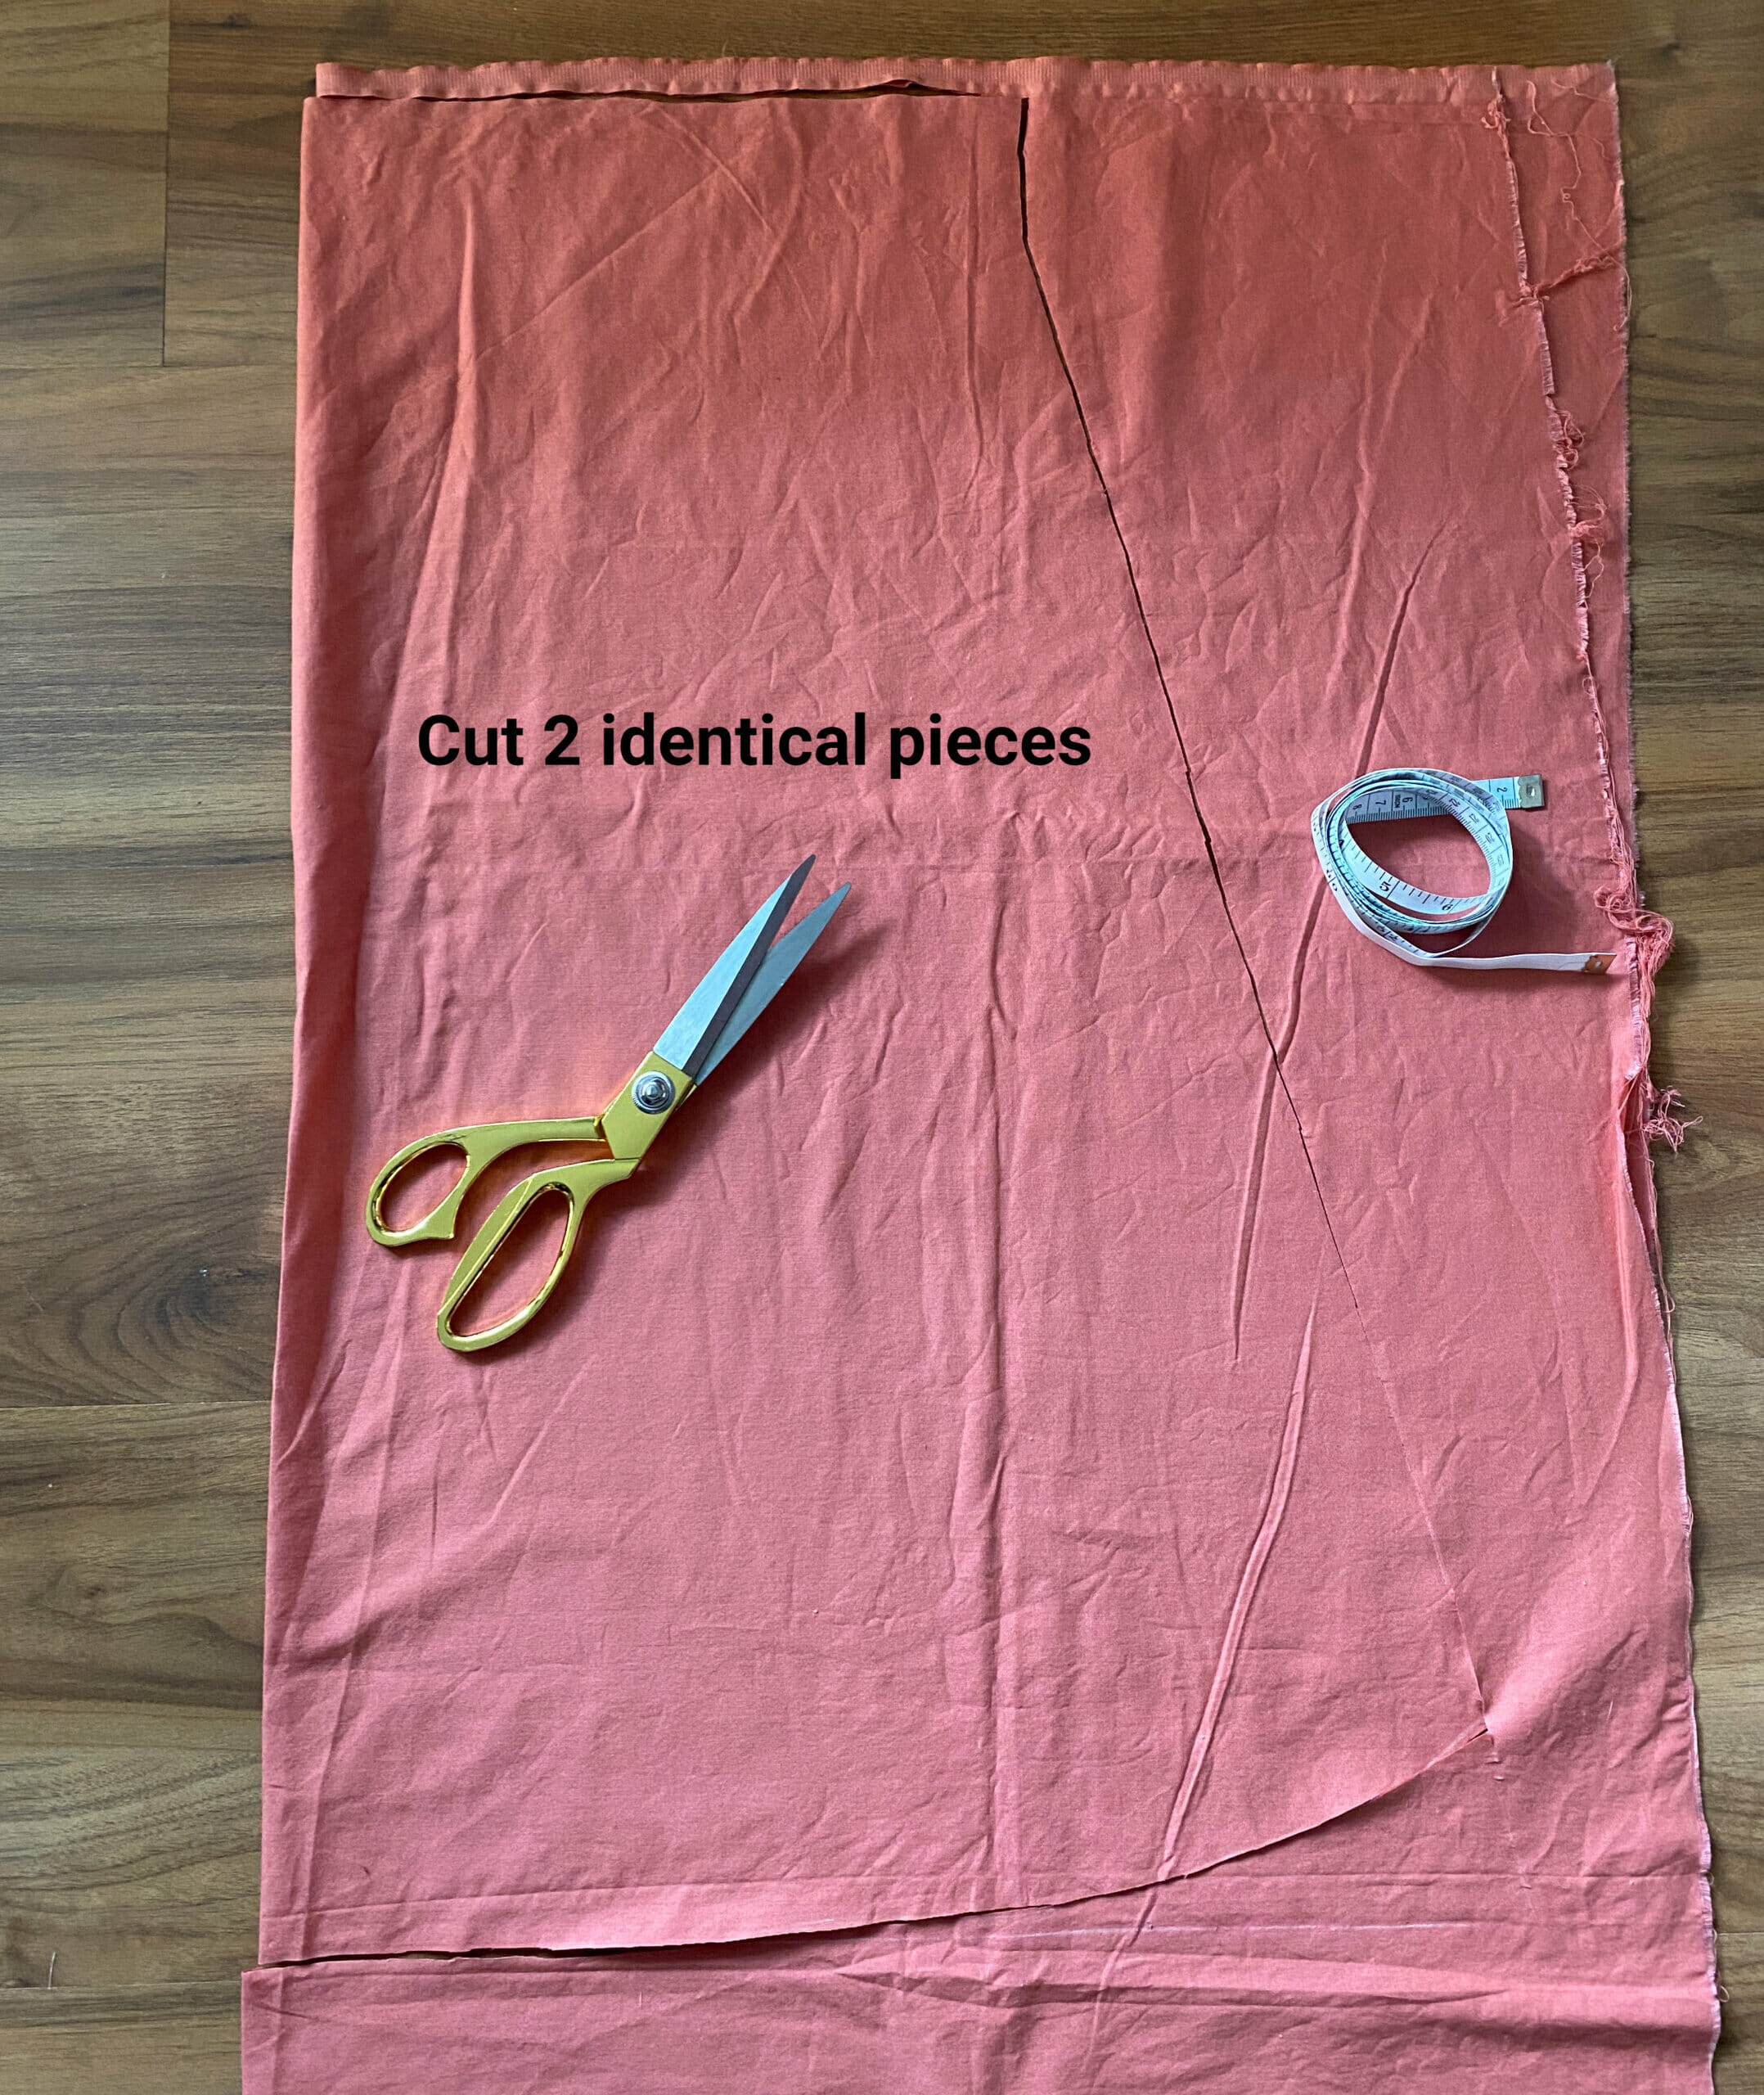
Cut out your fabric
Now that you’ve drafted your skirt shape and added the waistband height, go ahead and cut out two identical trapezoid-shaped pieces from your fabric. These will become the front and back of your flared summer skirt.
Step 2 – Let’s prep and attach the pockets
Now it’s time to add the best part—pockets! Seriously, once you learn how to sew in-seam pockets, you’ll want to add them to every skirt and dress you make.
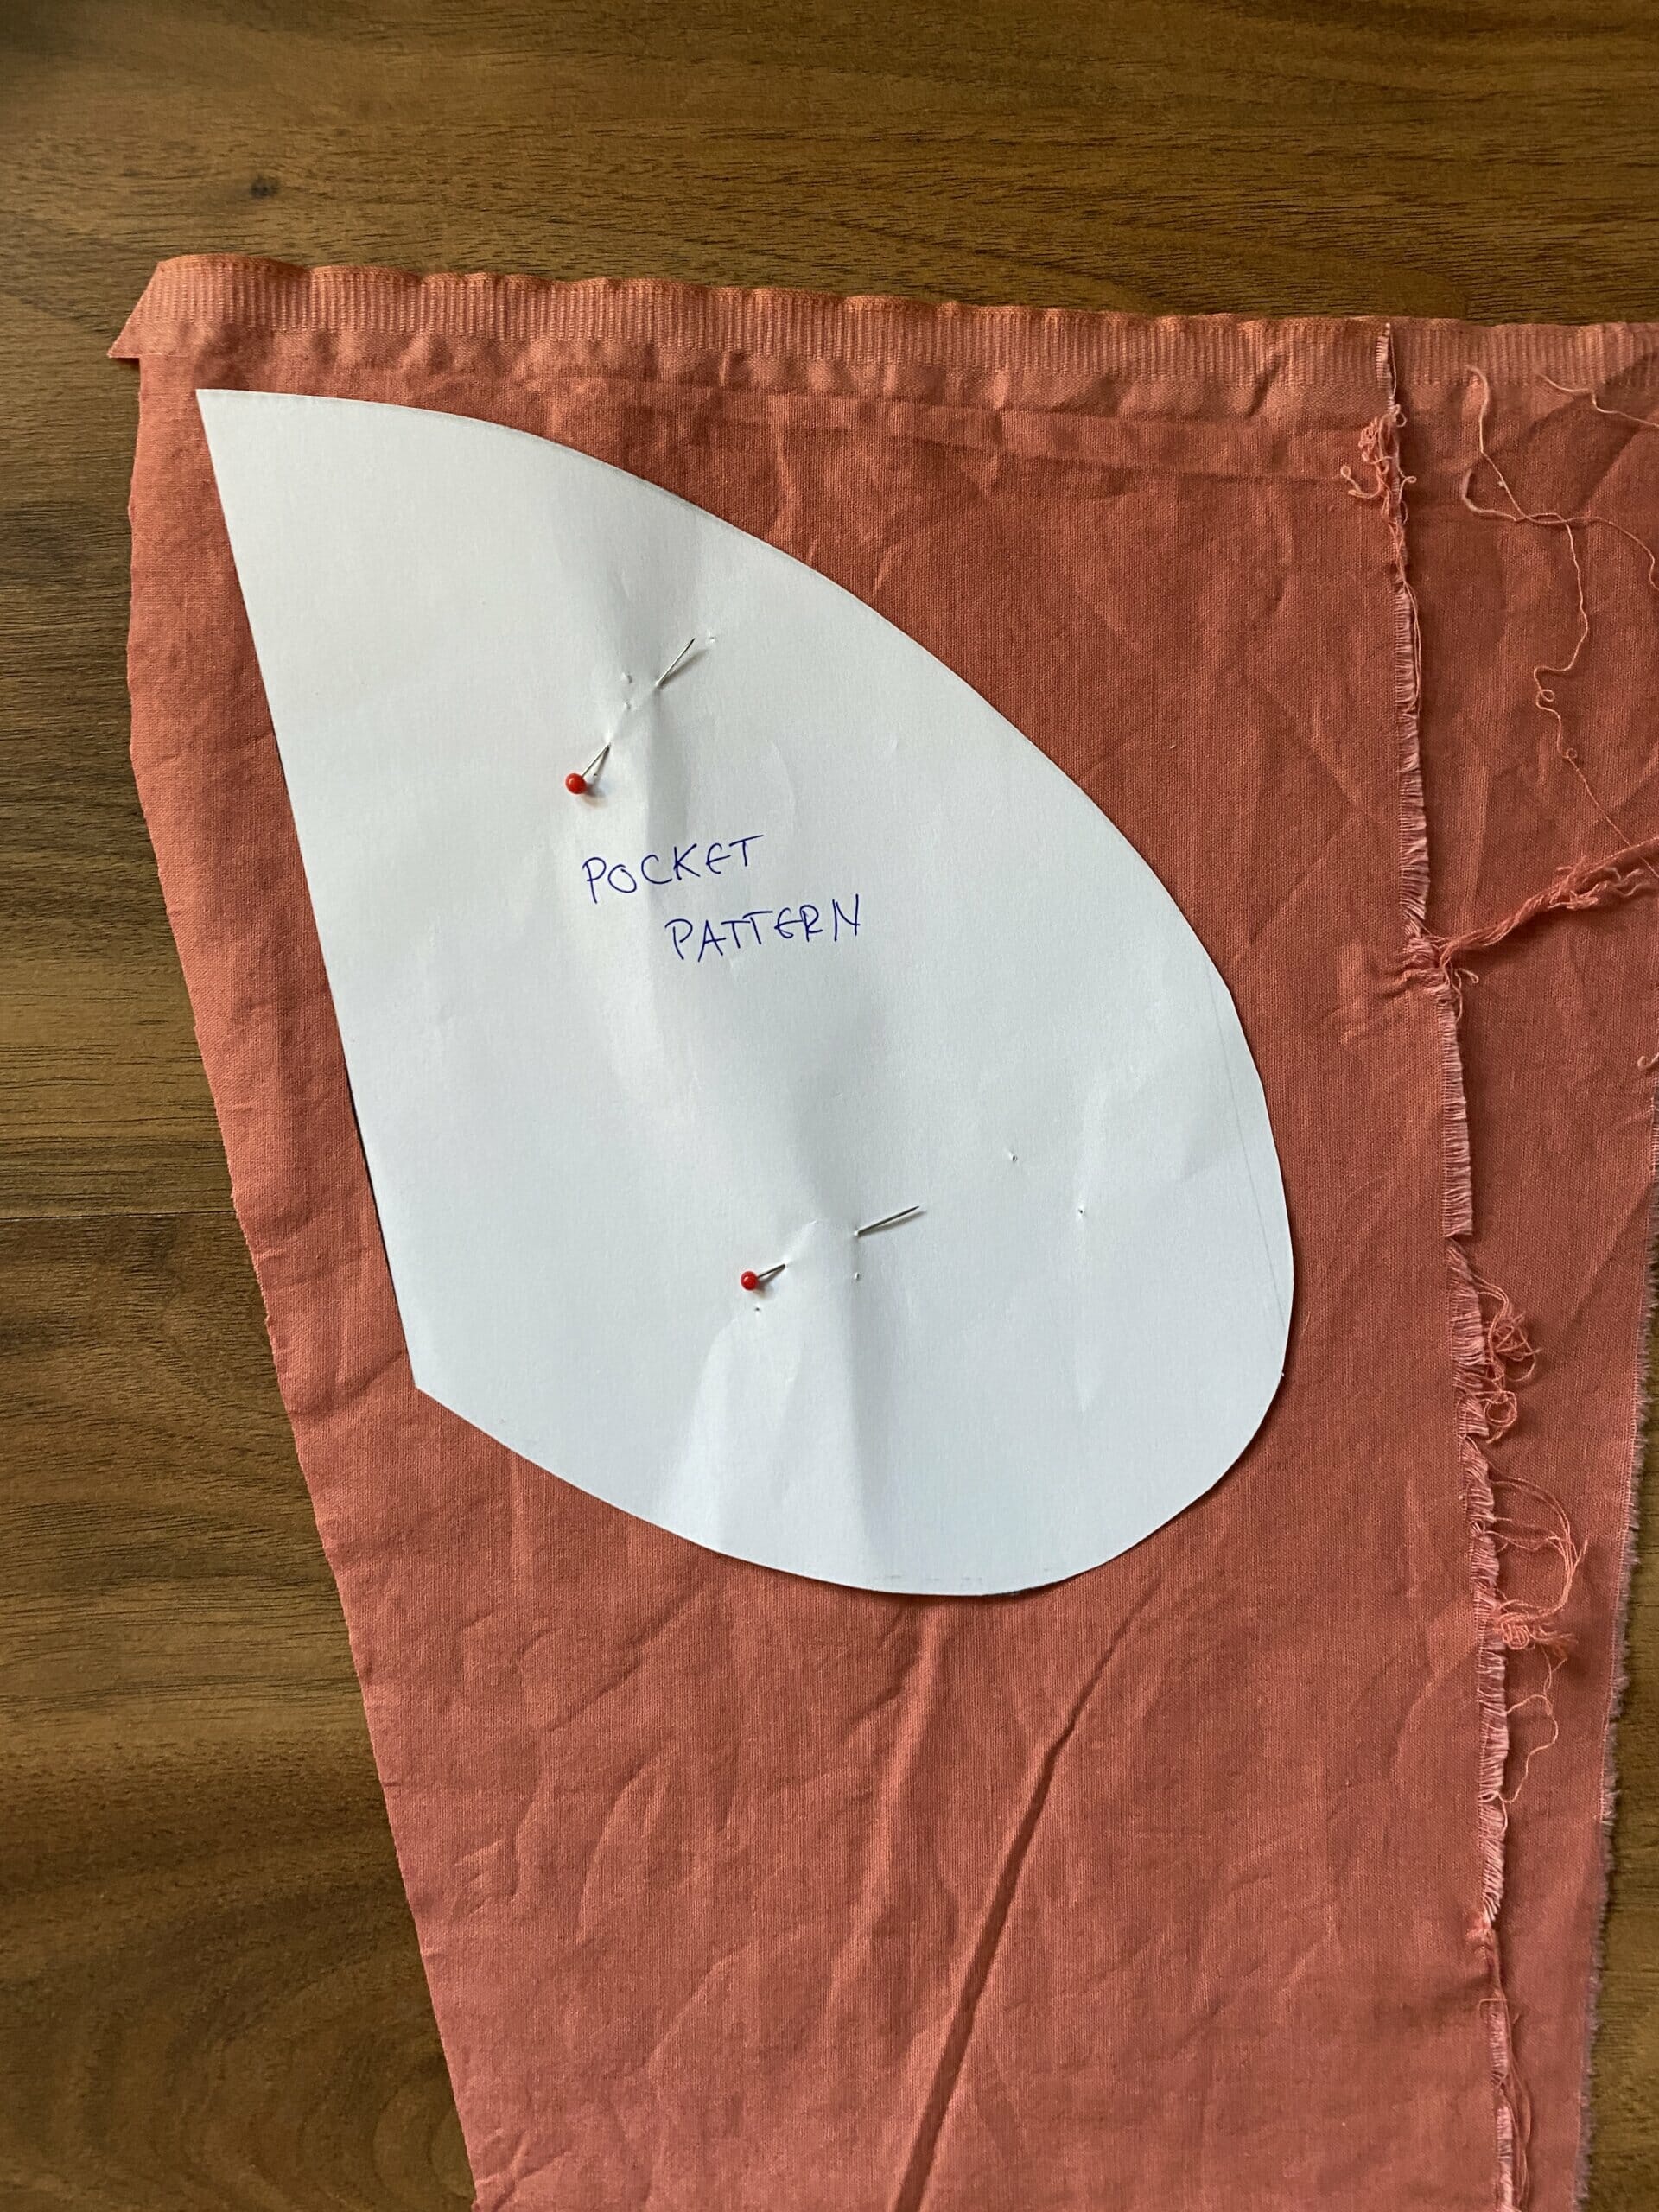
Start by printing and cutting out your pocket pattern. You’ll need four pieces total – two for each side. Make sure you cut two pairs of mirror images, so the pockets curve in the right direction on both sides of the skirt.
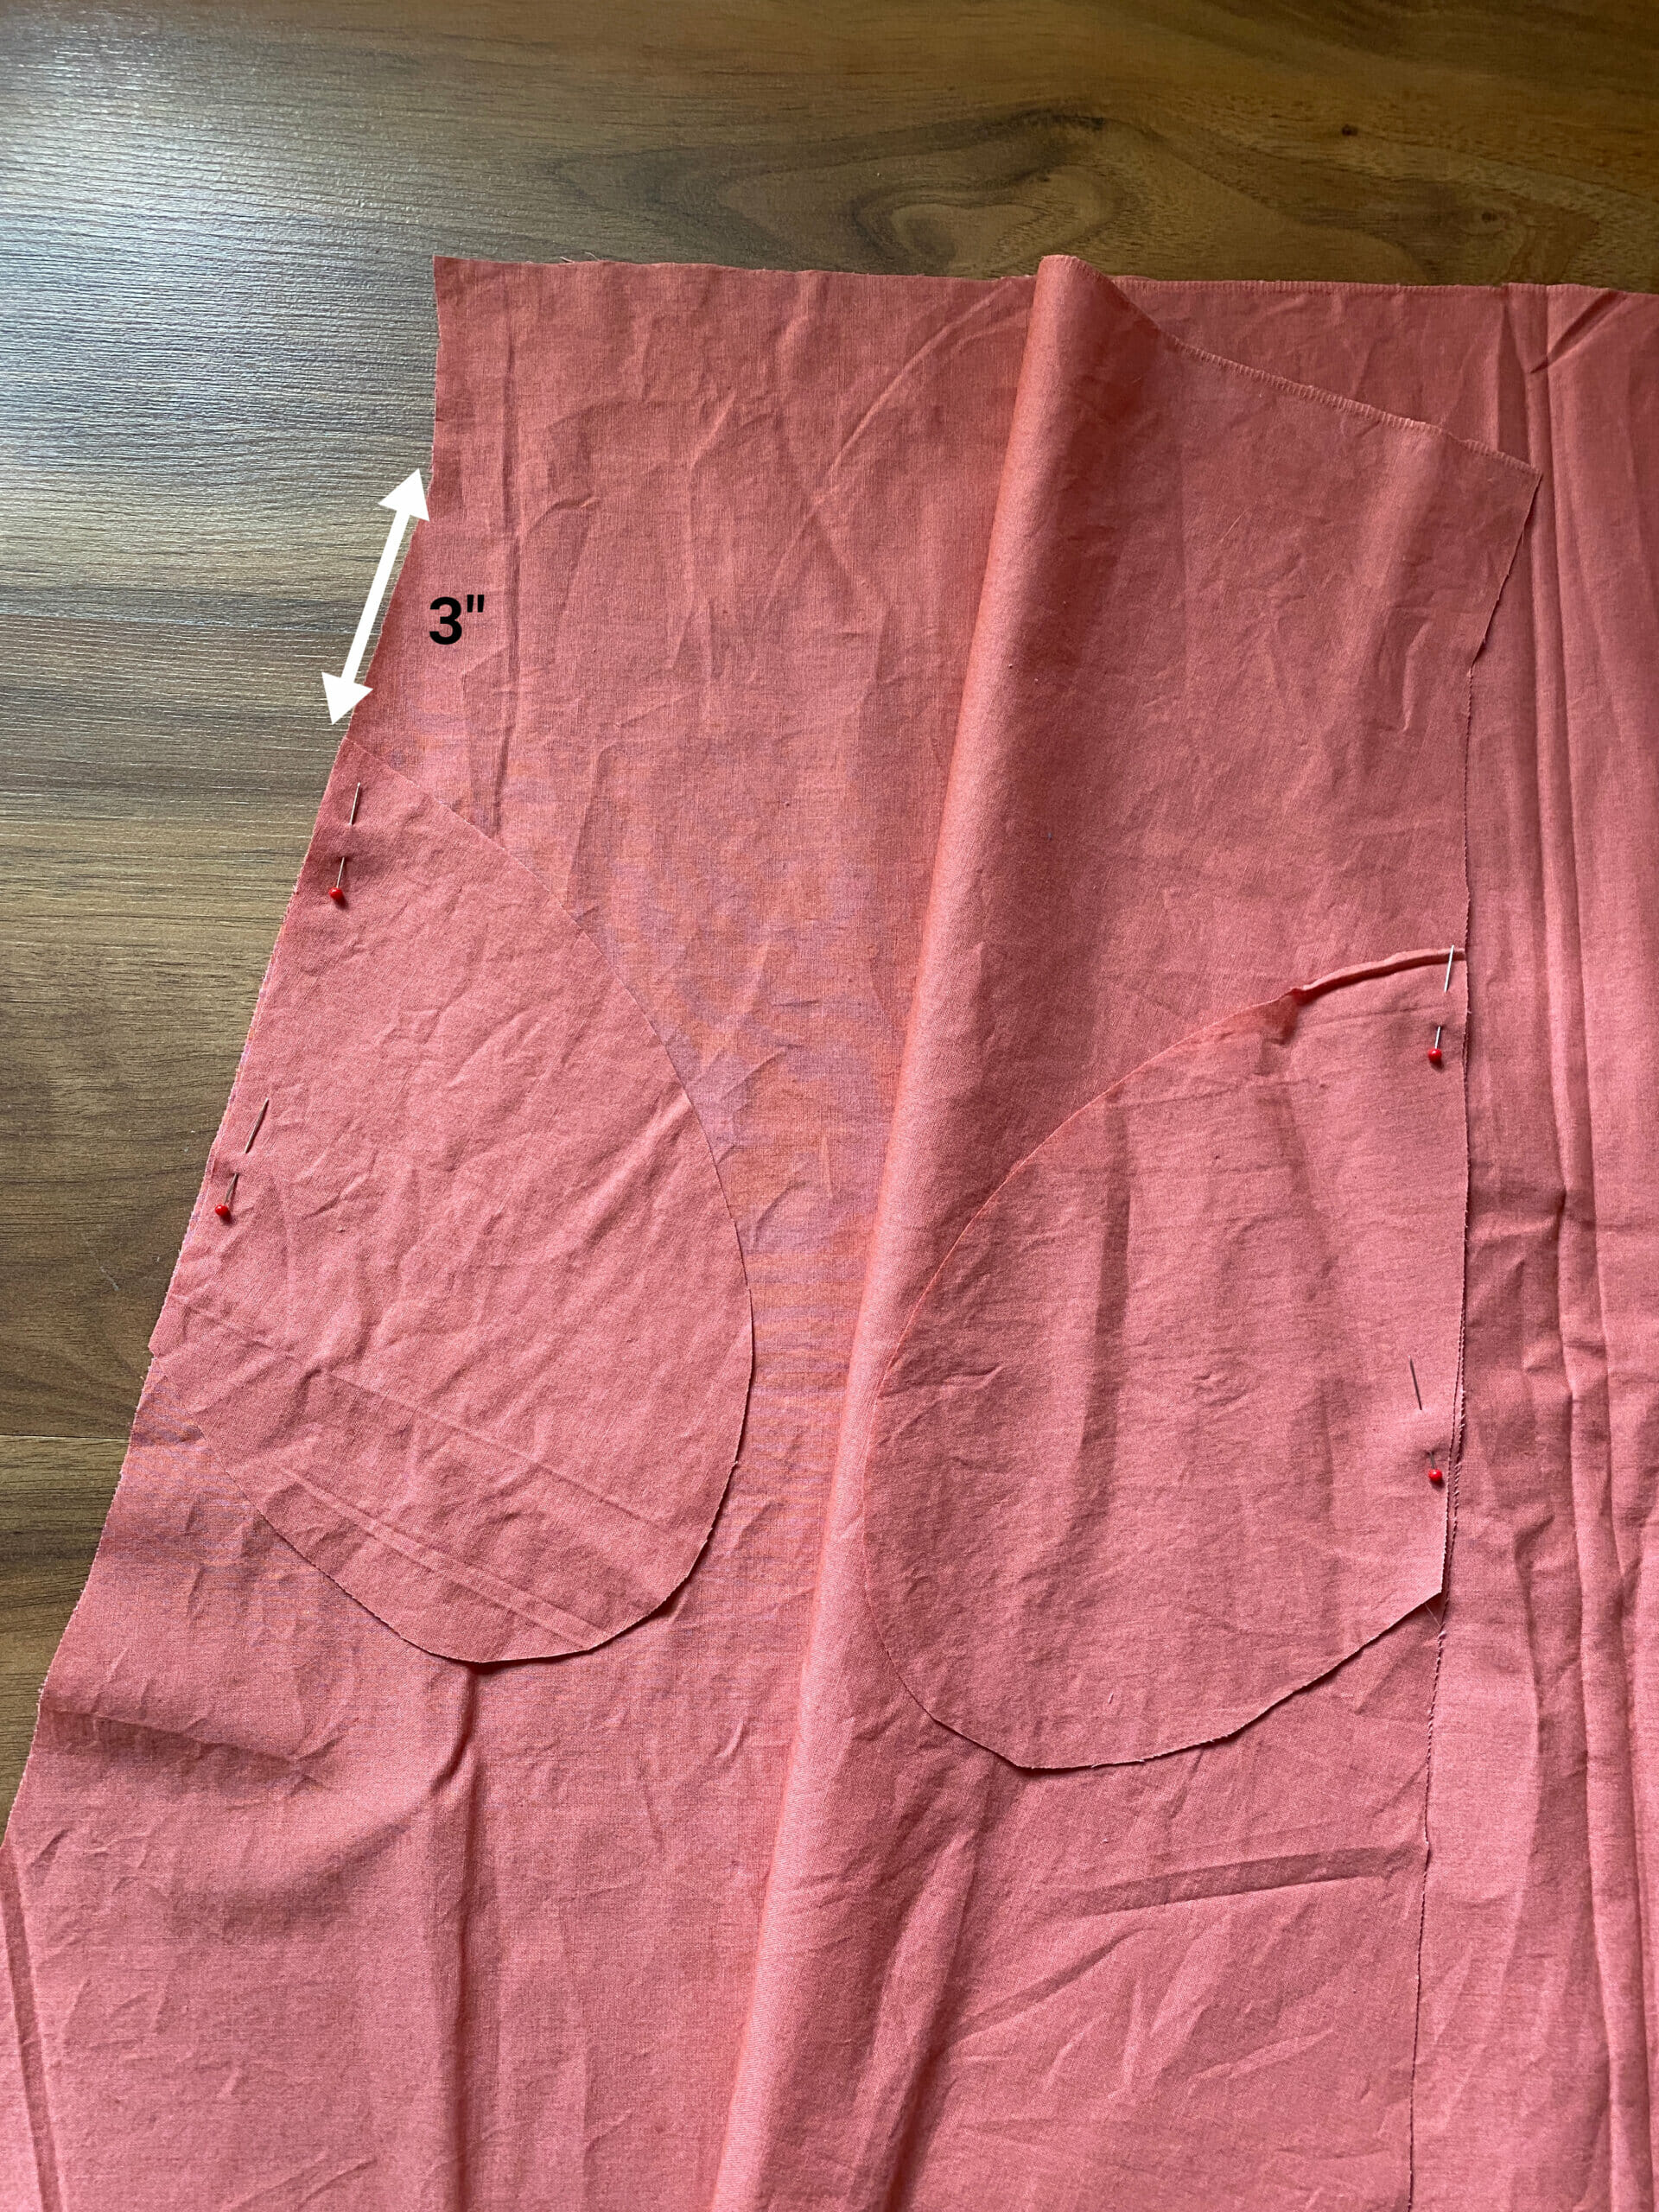
Take one of your skirt panels and measure down about 3 inches from the top edge (not including the waistband part – that’ll be folded later). This is where the top of your pocket will go.
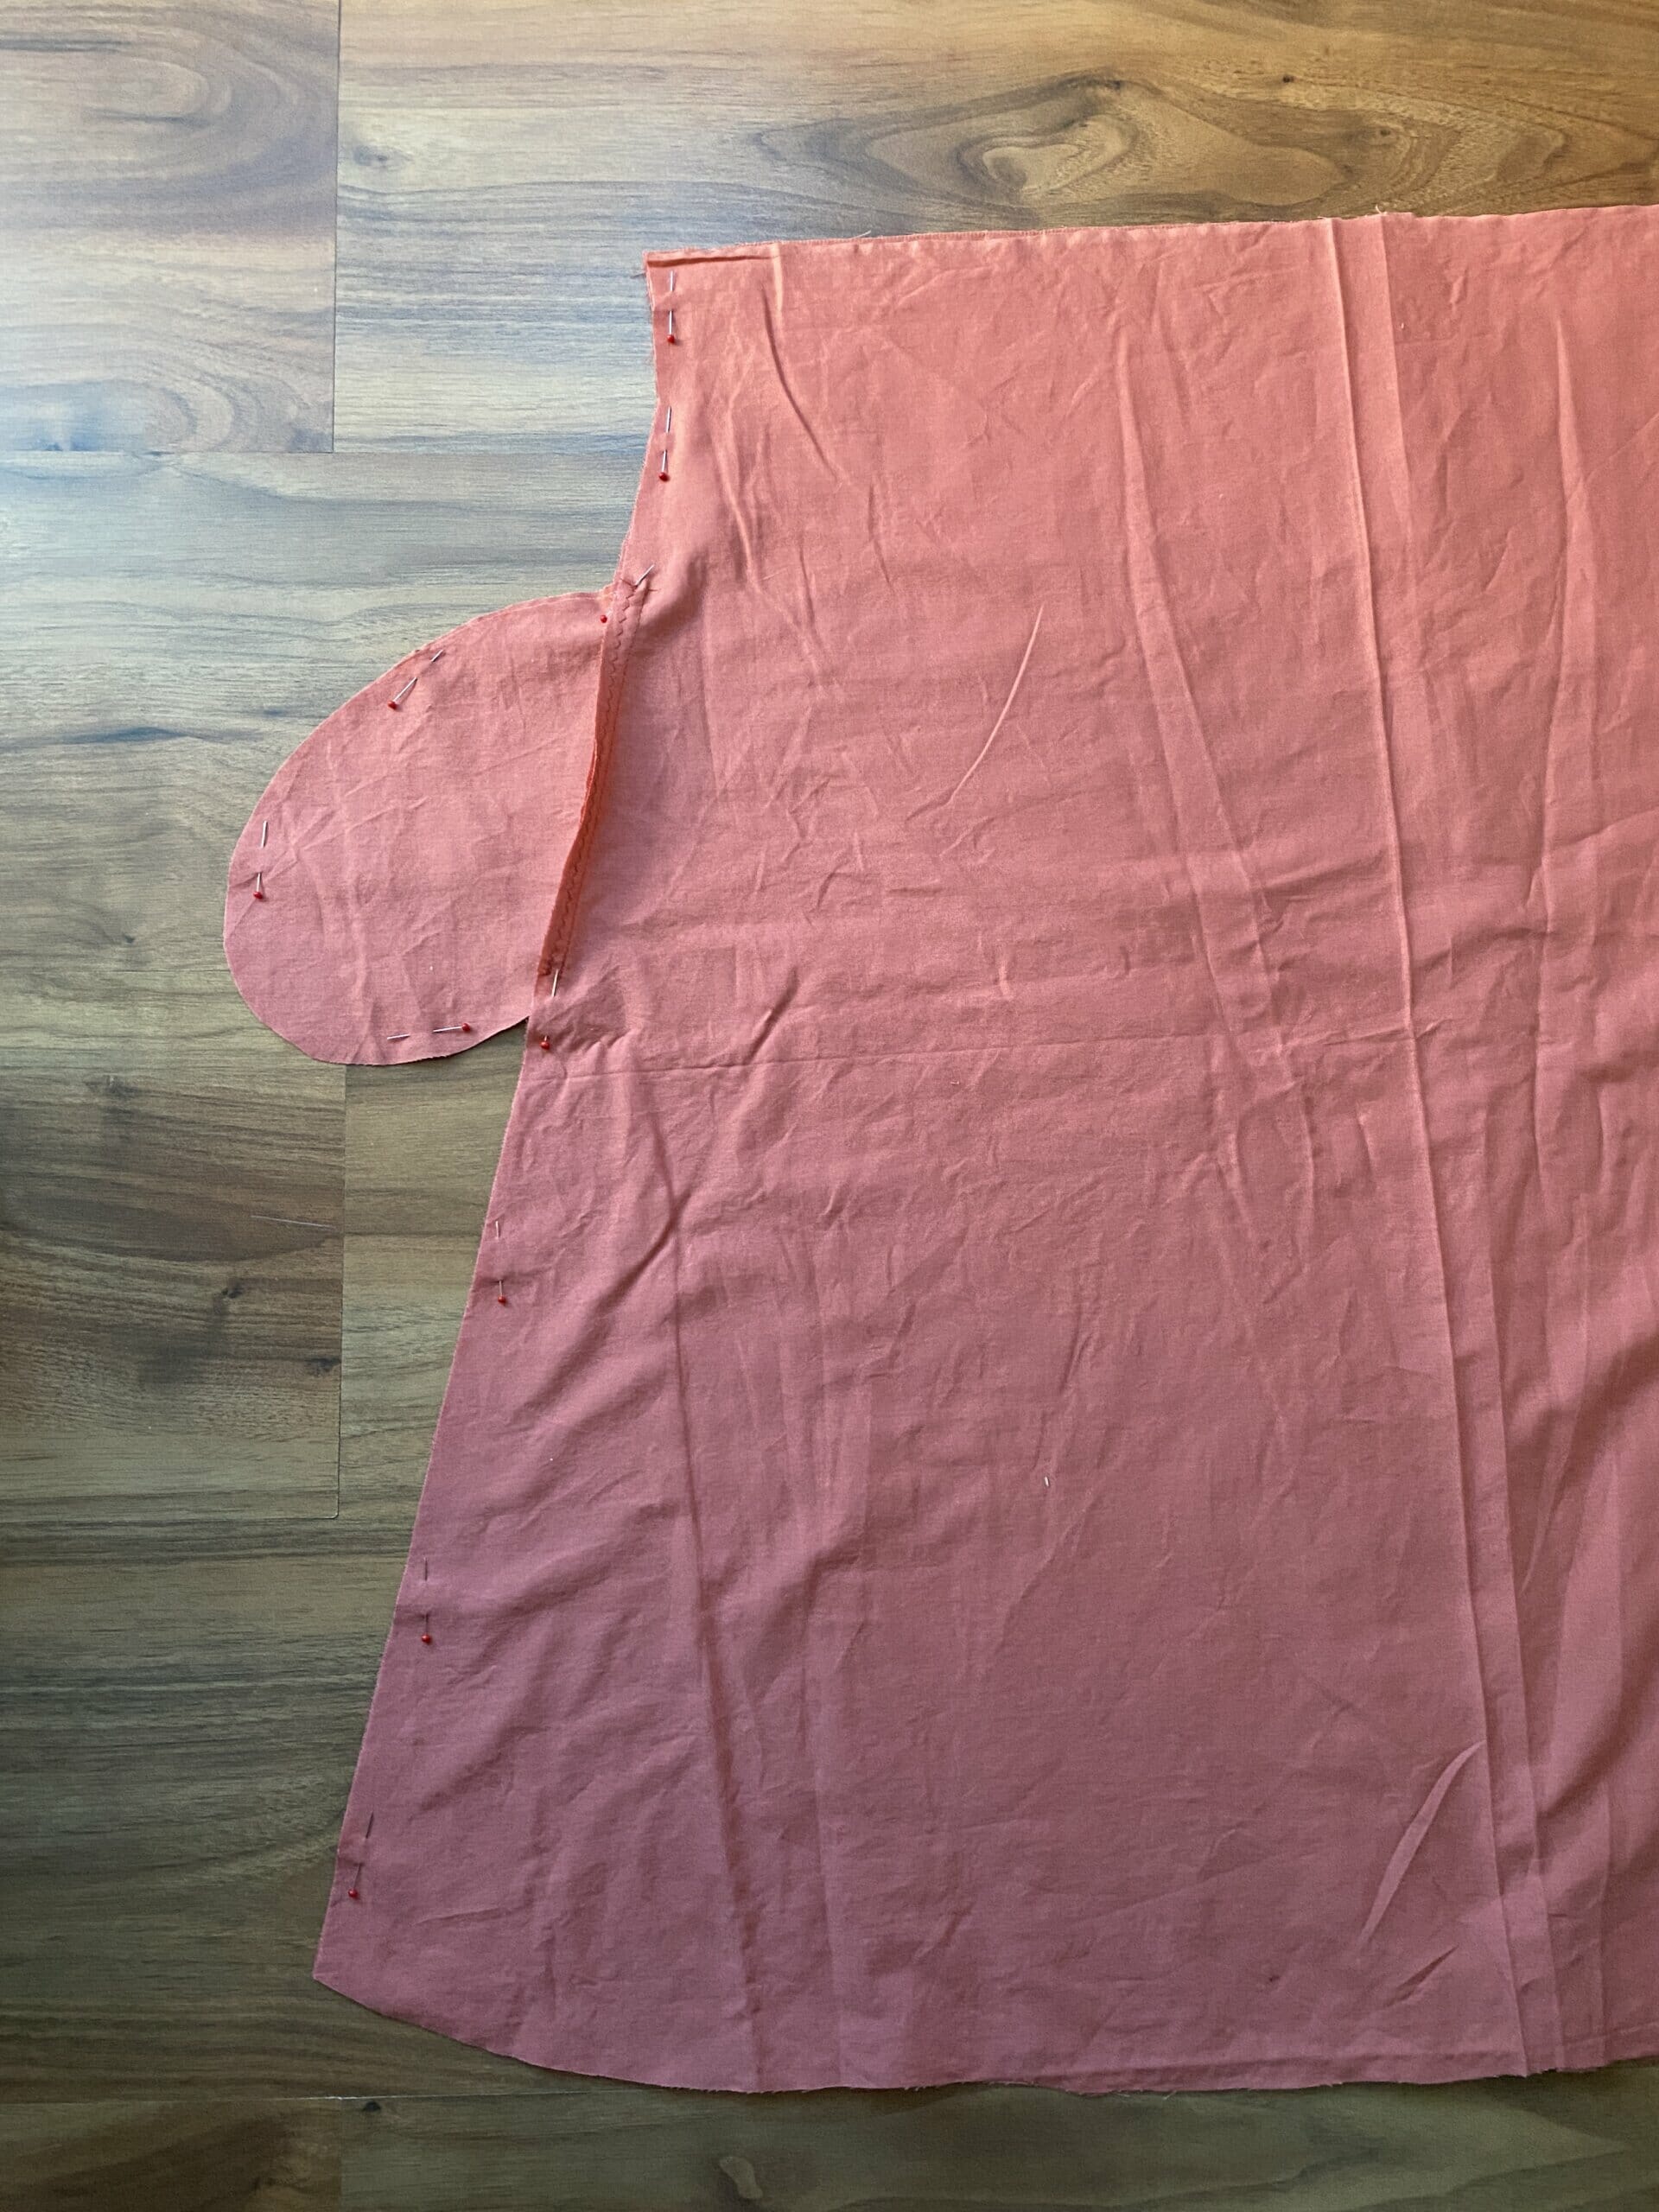
Now grab your pocket pieces and pin them, right sides together, to the skirt edges. Line up the straight edge of the pocket with the side edge of the skirt. Do this on both sides, and double-check that they’re sitting at the same height on each panel.
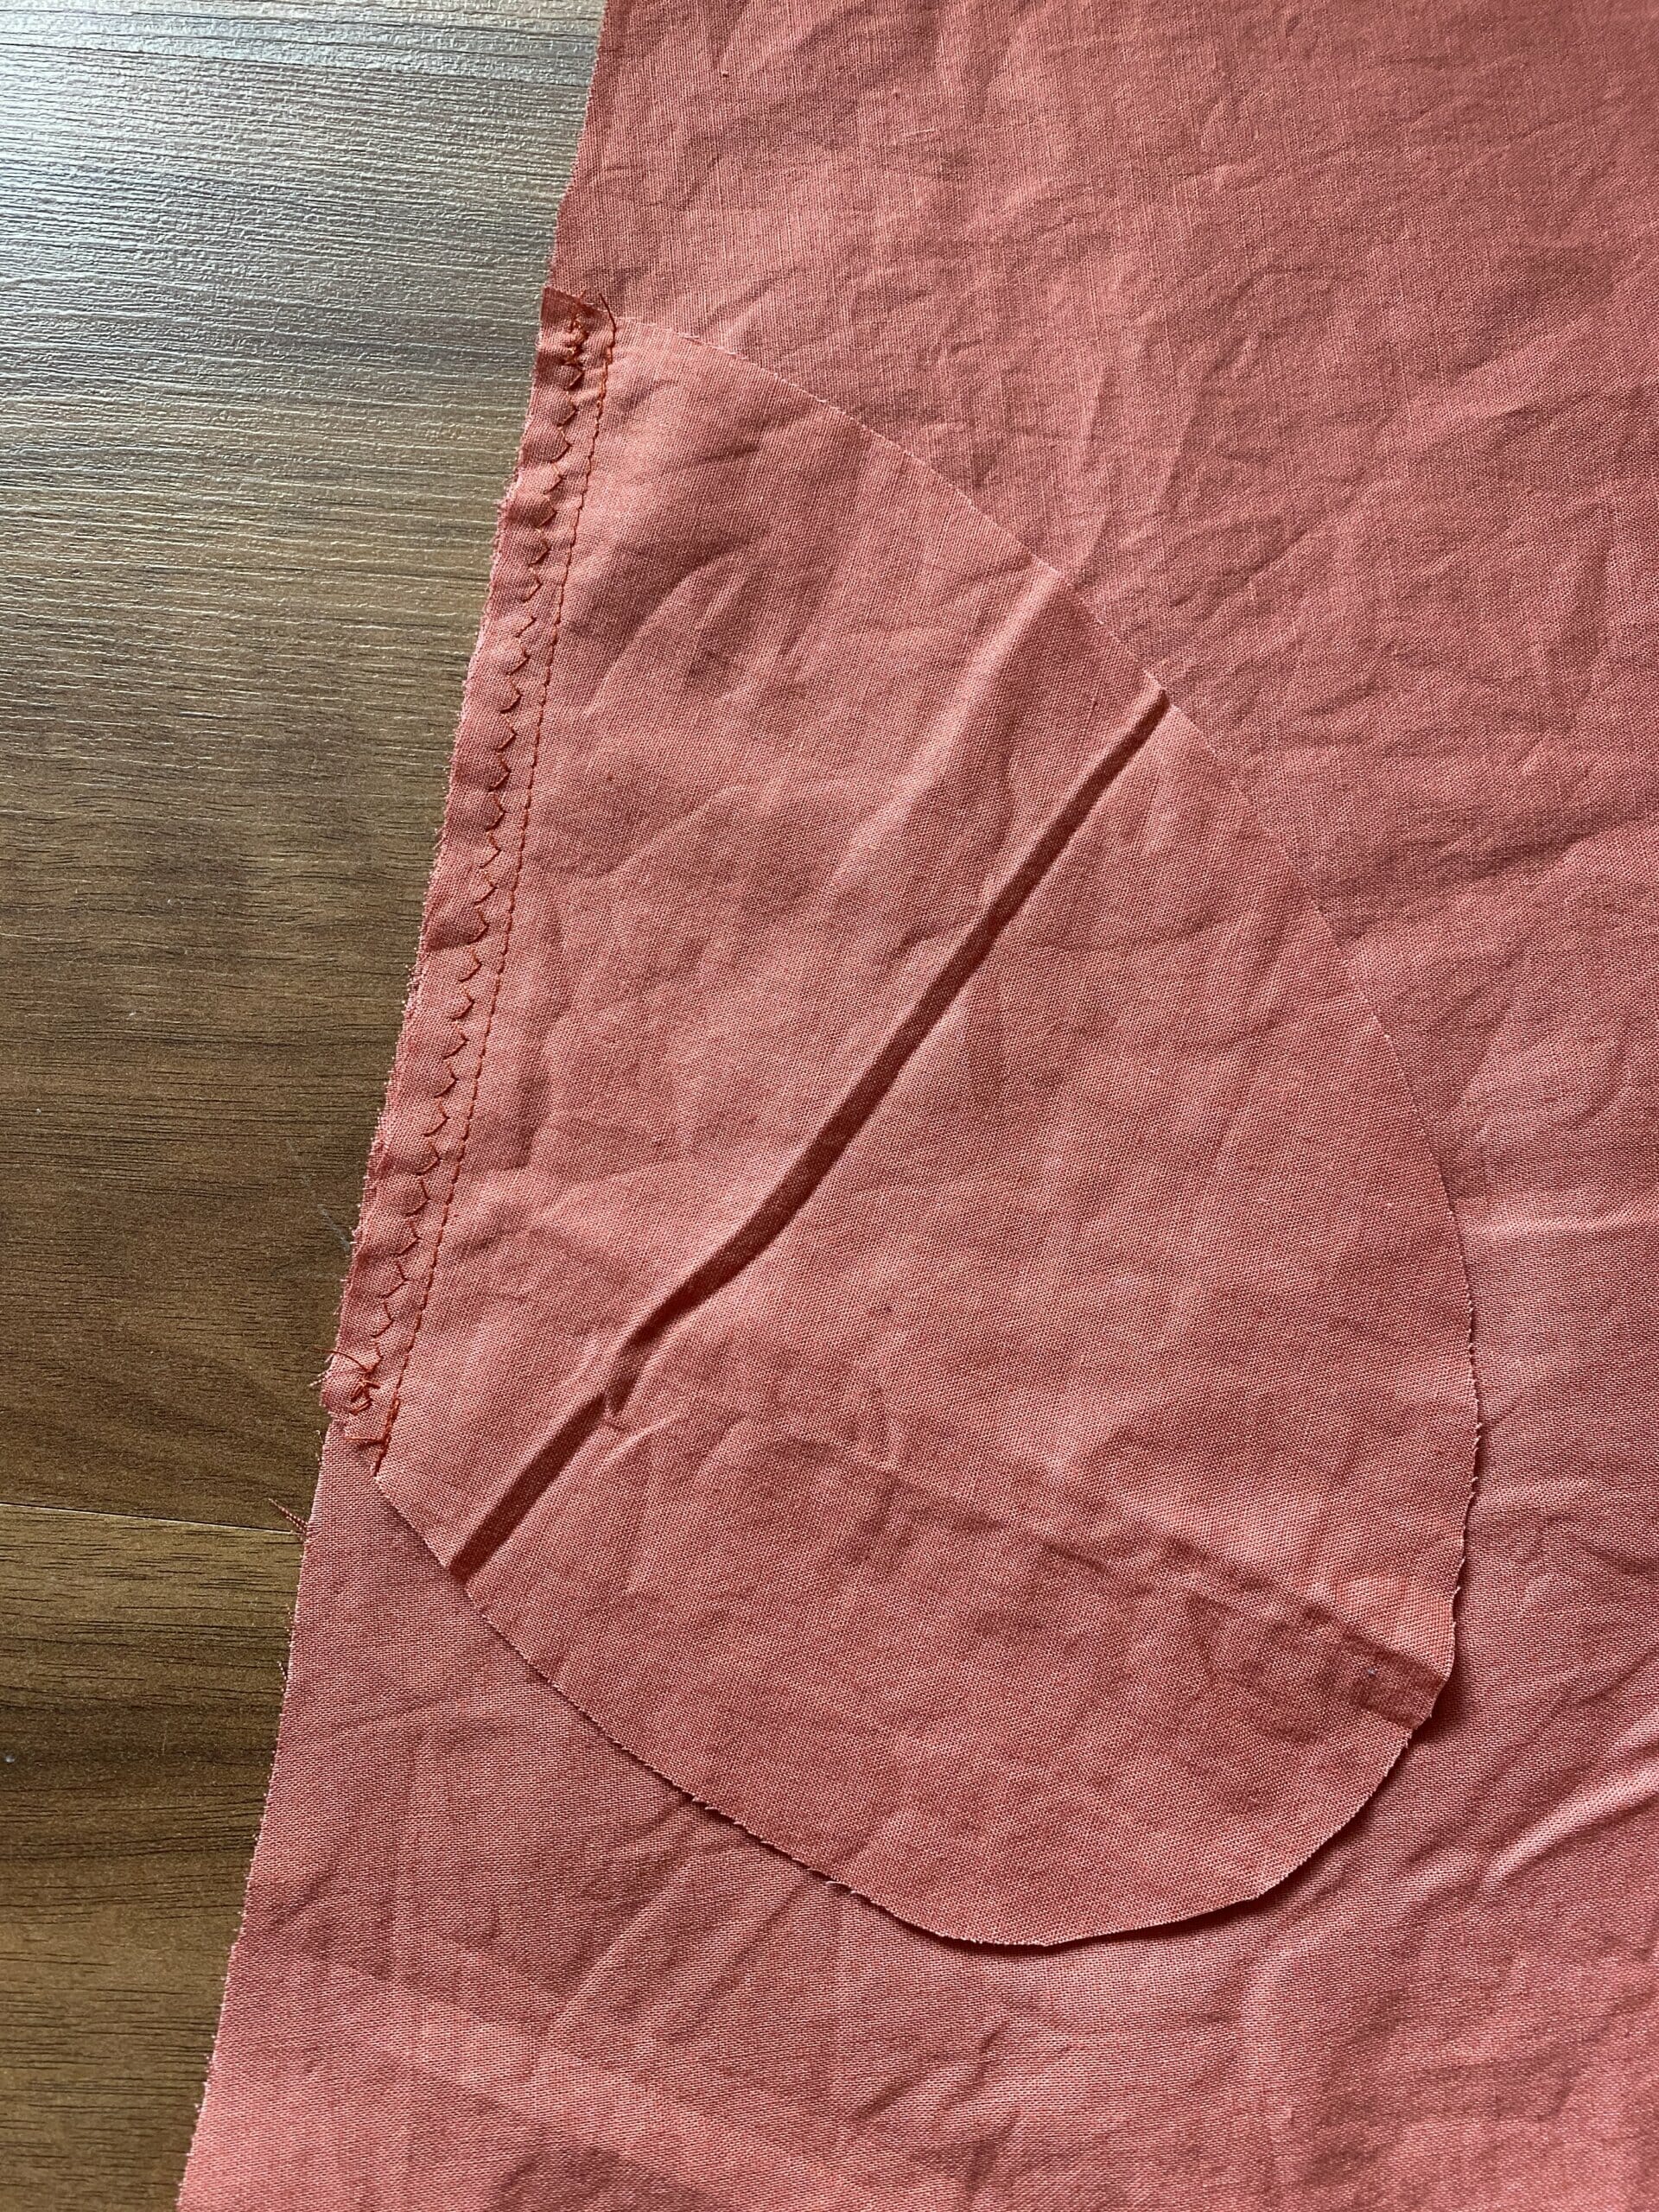
Sew the pocket pieces to the skirt, using a regular straight stitch. Then finish the raw edges with a zigzag stitch or a serger to keep everything neat and fray-free. That’s it – your pockets are in place!
Step 3 – Sew the skirt side seams (with pockets!)
Next up, we’re putting the whole skirt together. Take your front and back skirt panels, place them right sides together, and pin along both side edges—going around the pocket curves as well.
Now sew along each side, following the shape of the pocket. So you’ll start at the top edge, go down to the pocket, around the curve, and then continue down to the hem. This creates fully enclosed, in-seam pockets that are hidden but super functional!

Once both side seams are done, go ahead and zigzag or serge all the raw edges to stop fraying.
While you’re at it, it’s a good idea to finish the top edge of the skirt (the waistband area) with a quick zigzag or serge too. This will make it easier to fold and sew the elastic casing in the next step.
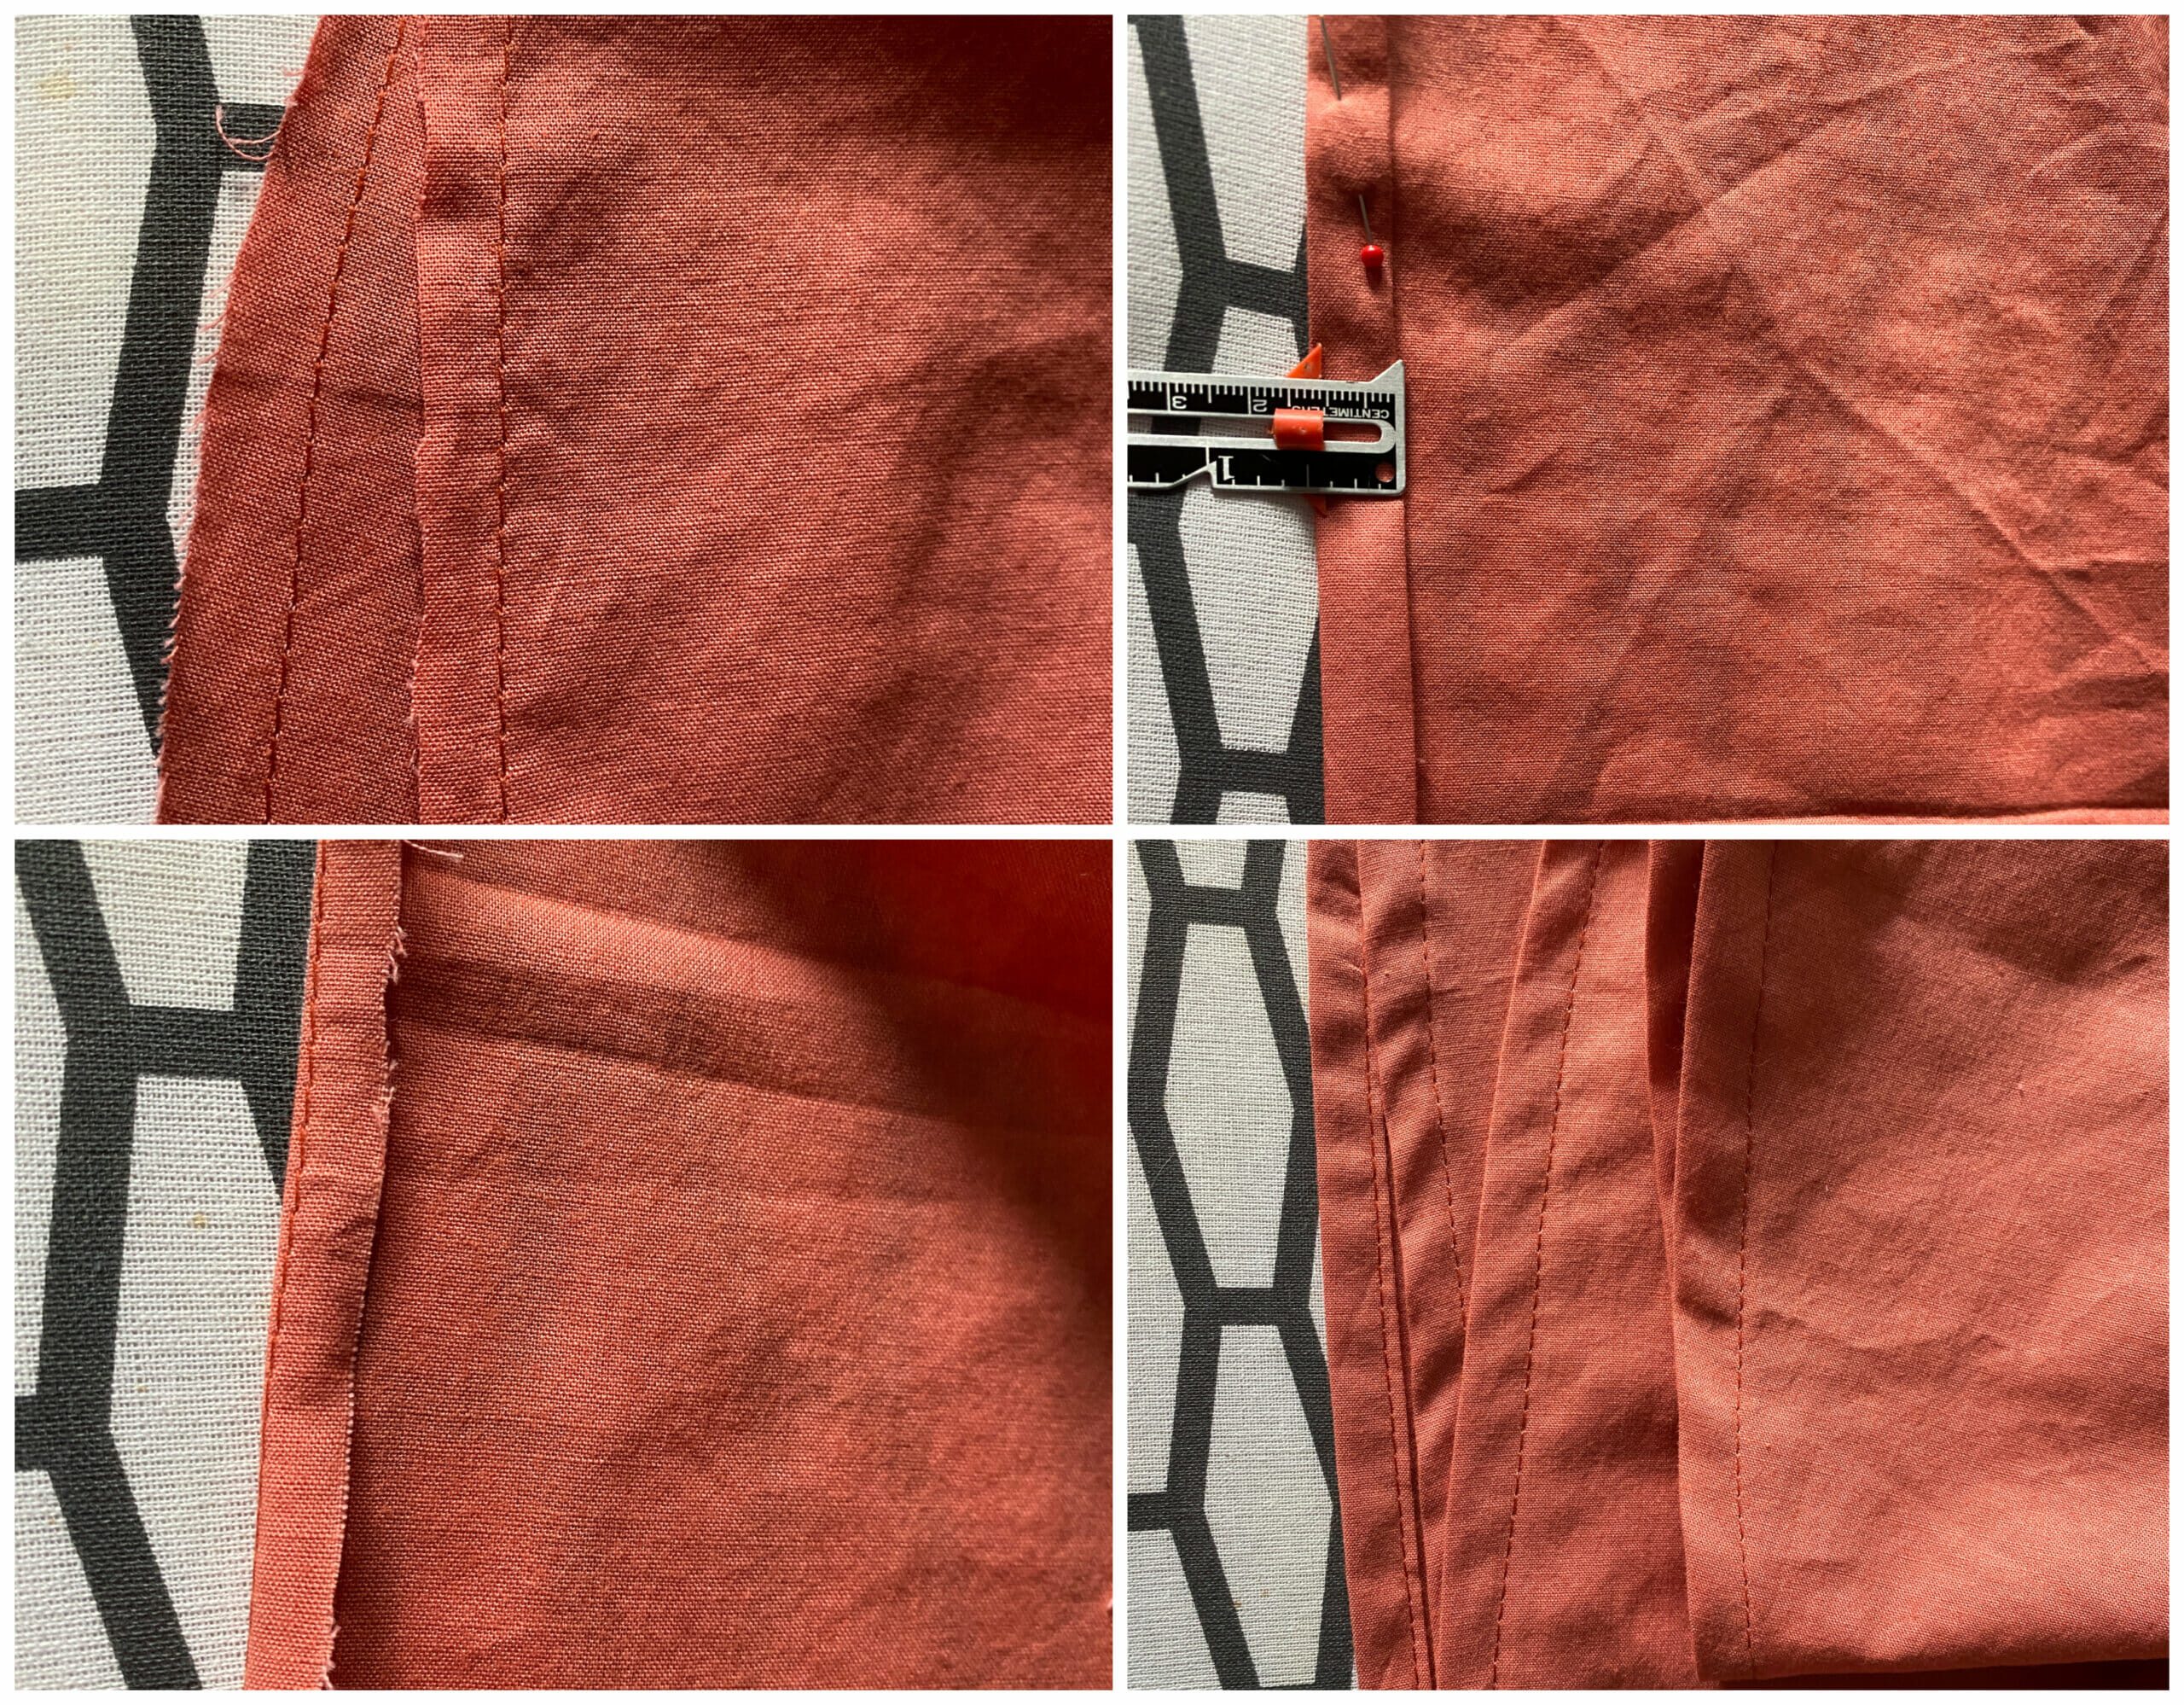
Step 4 – Create the waistband with rows of elastic
Now let’s make that comfy waistband! This skirt uses a clever trick – a built-in waistband with multiple rows of elastic – which makes it stretchy and cute without needing a separate waistband piece.
Start by folding the top of your skirt down 1.5 inches toward the wrong side (the inside of the skirt). Press it flat with an iron to help keep it in place.
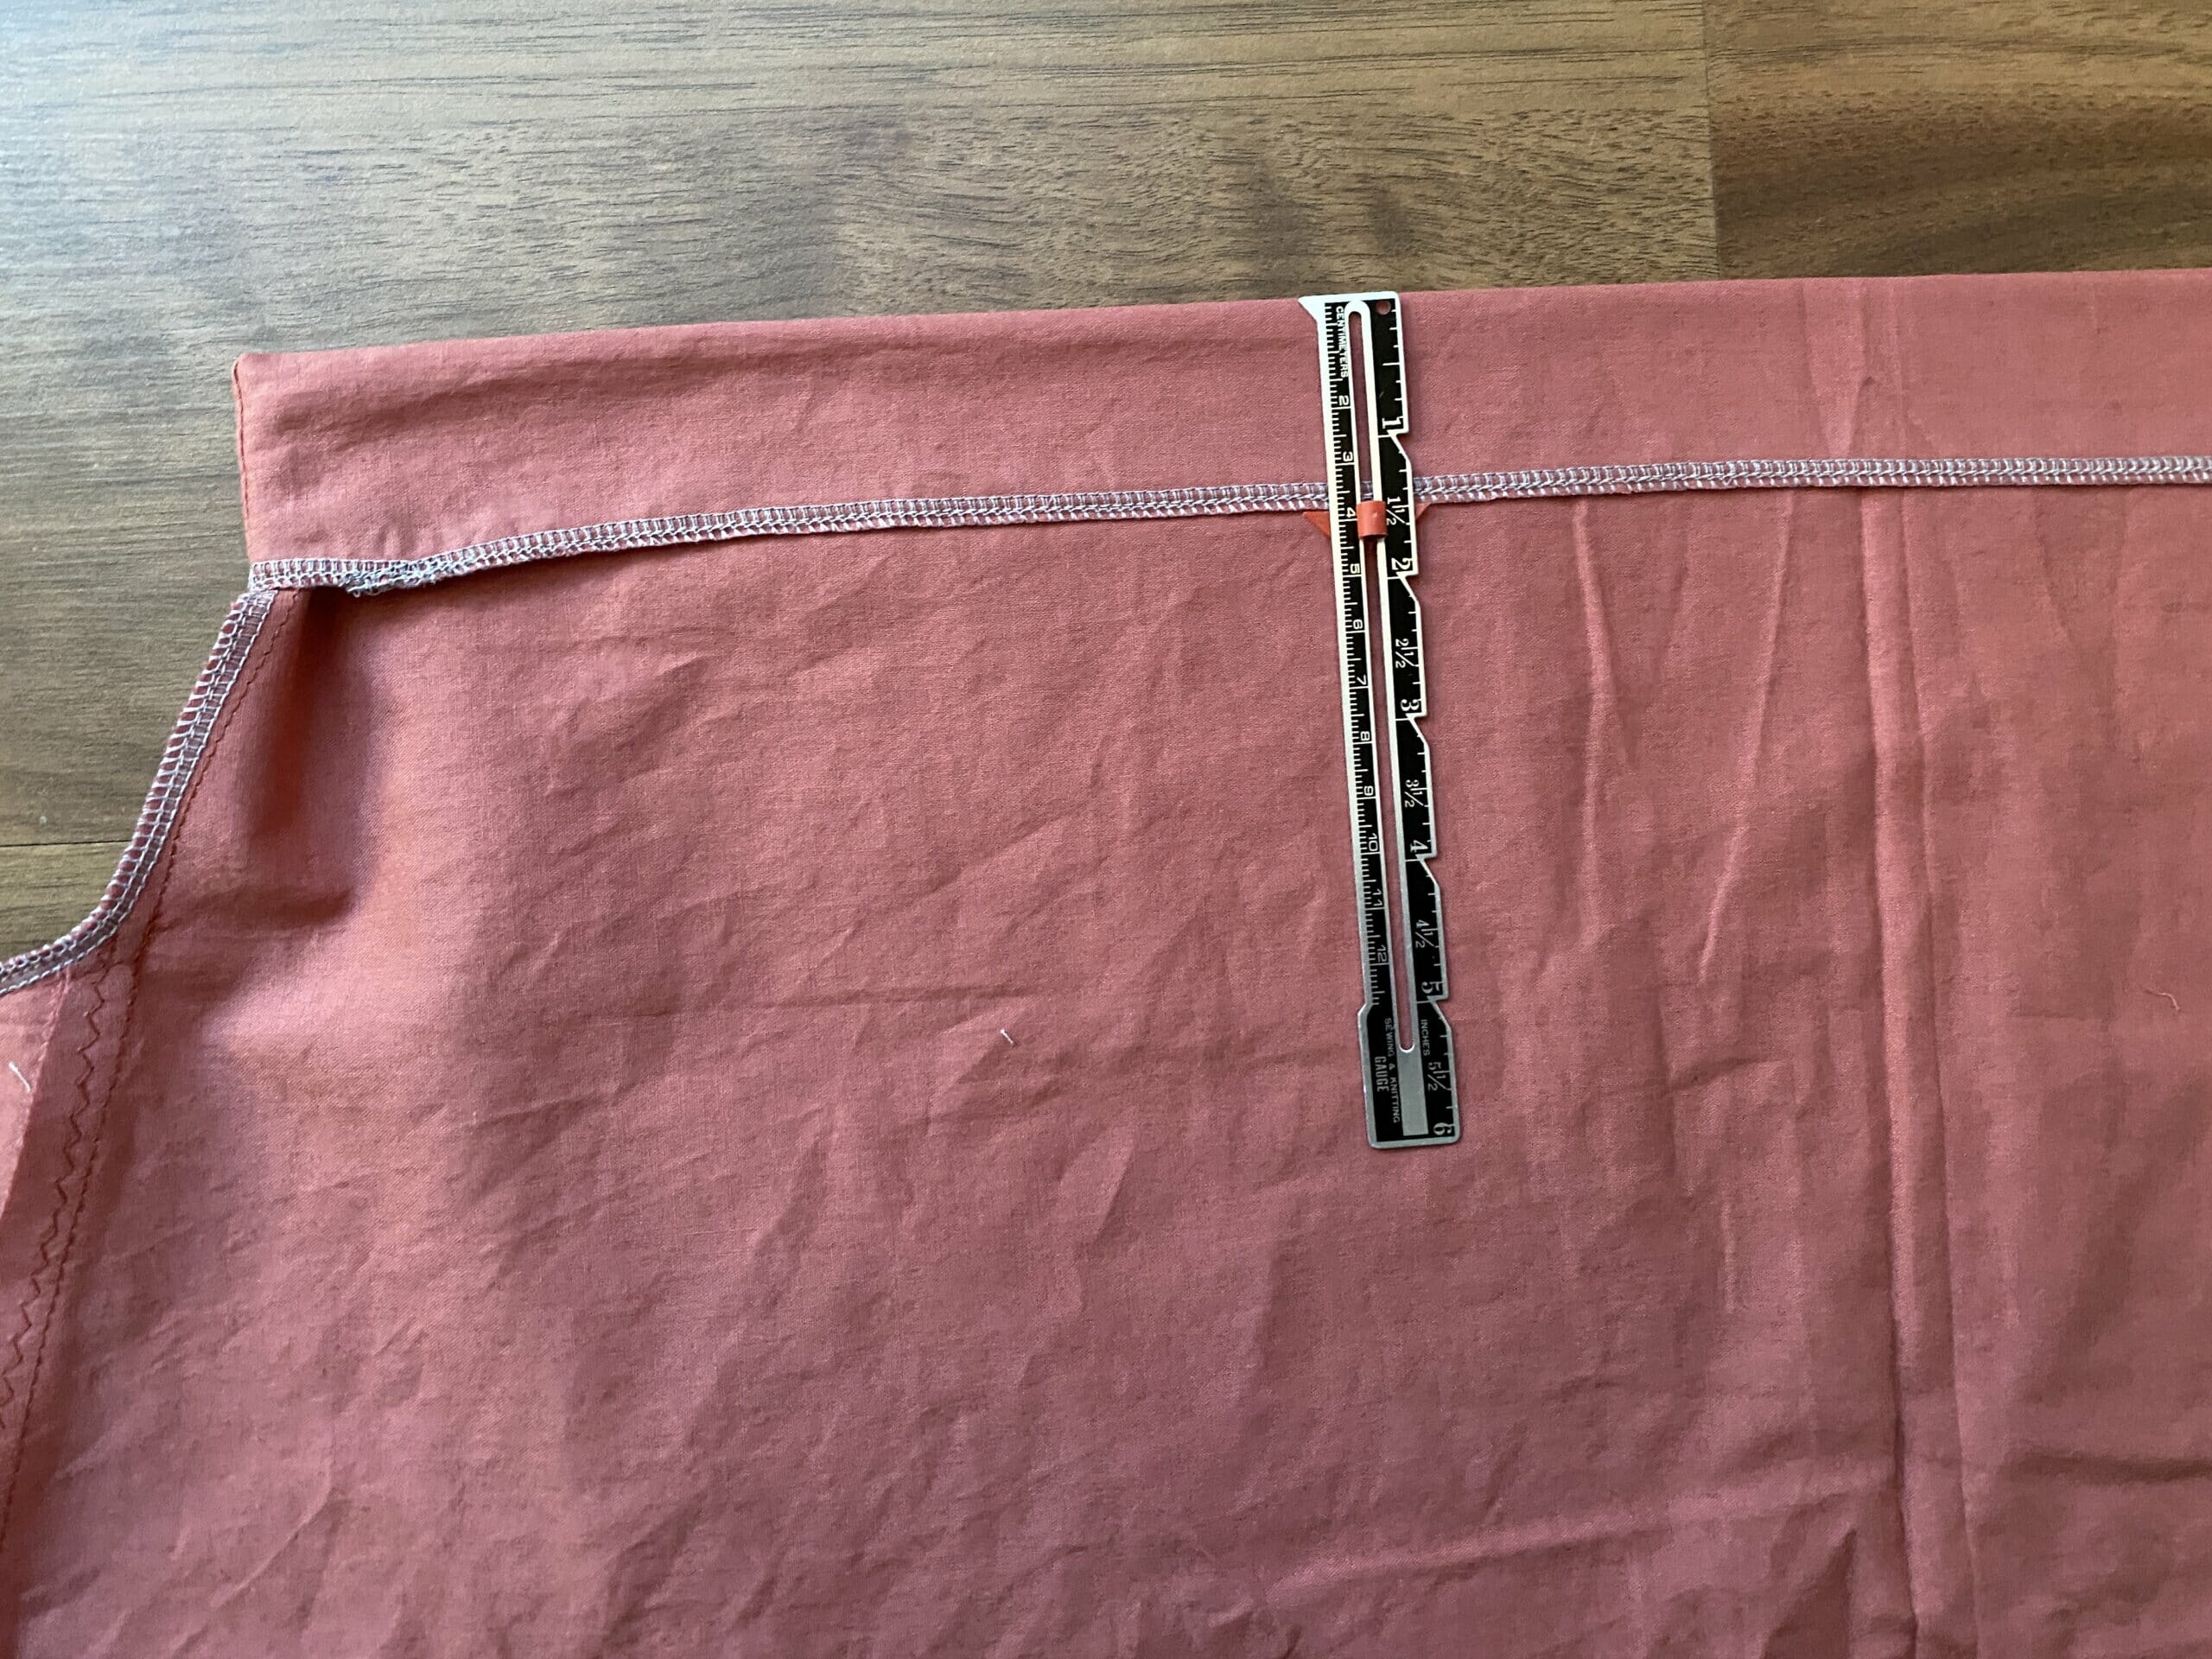
First, stitch close to the folded edge, about 1/8″ from the top, all the way around. This row doesn’t need an opening – it’s just to hold the top nice and flat.
Next, you’re going to sew three more horizontal rows to create the elastic channels. Here’s how:
- Sew the second row about 3/8″ below the first.
- The third row goes just 1/8″ under the second.
- Then the fourth row is 3/8″ below the third.
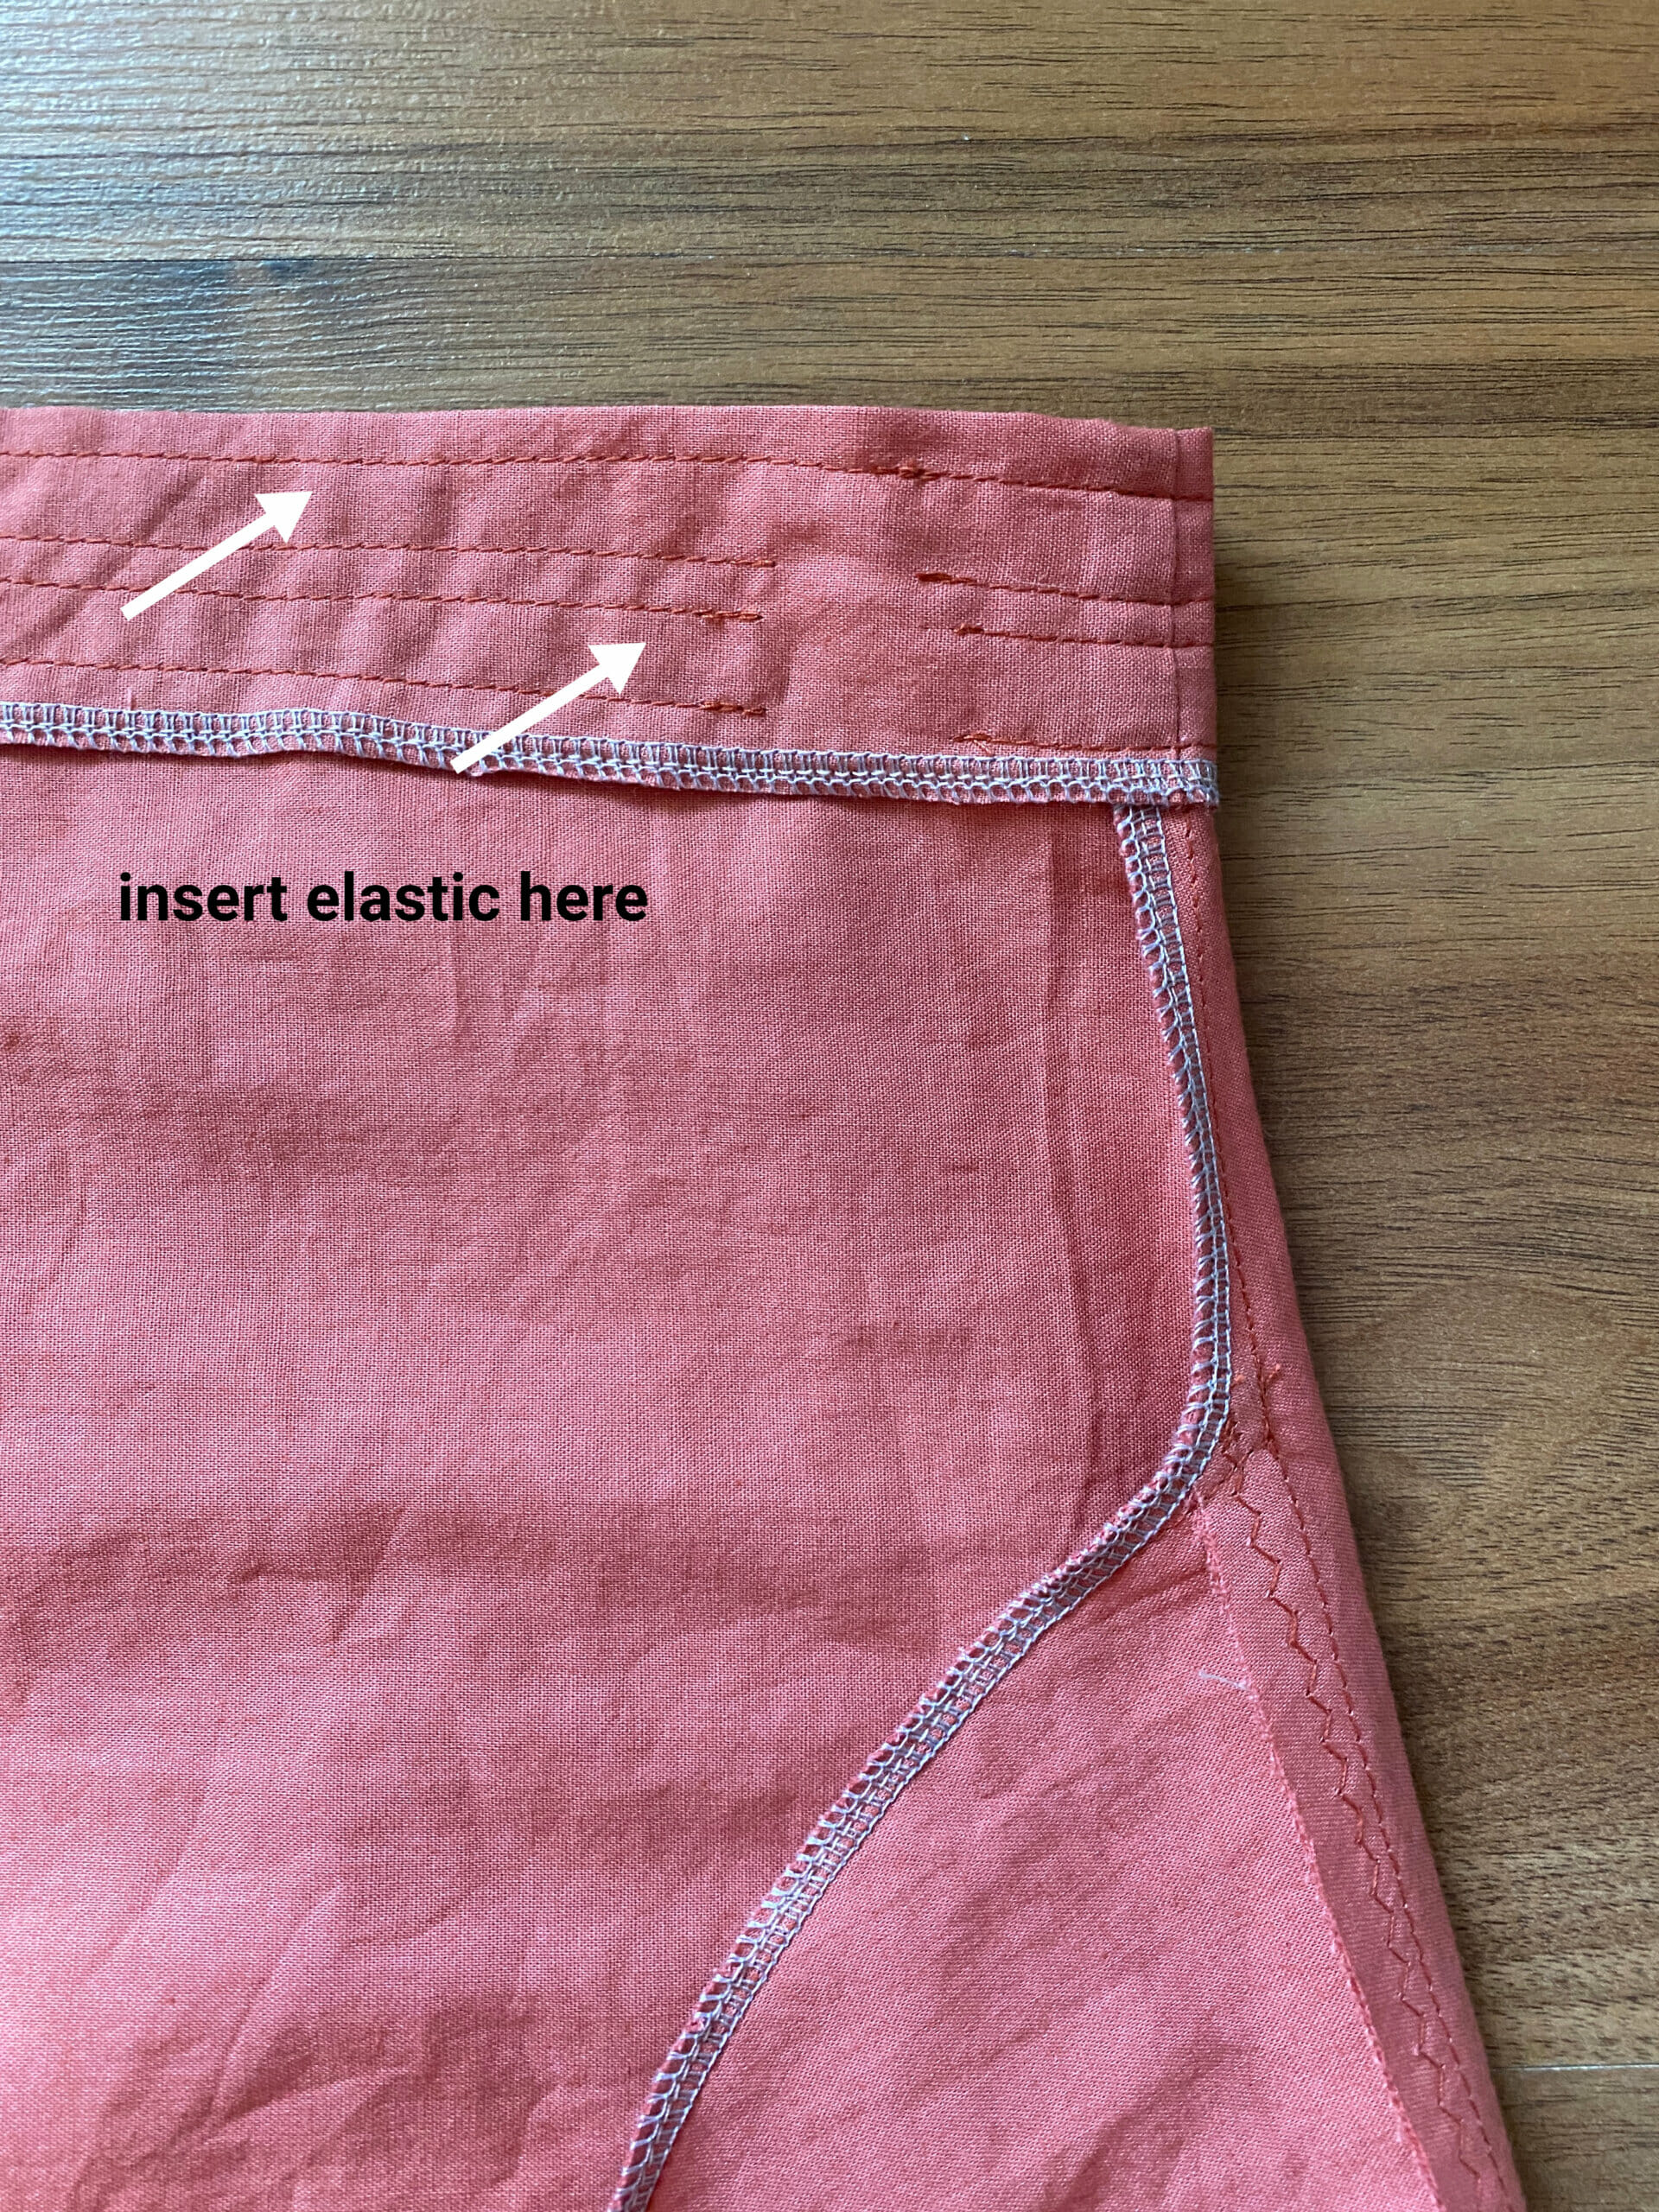
Leave a small opening in each of the two wider channels (the 3/8″ ones), so you can slide the elastic in later. The tiny middle row in between is just for looks – it creates that cute gathered effect you see on ready-to-wear skirts!
Now cut two pieces of 1/8″ wide elastic, each one about 4 inches shorter than your waist measurement (adjust if you want it tighter or looser). Use a safety pin or bodkin to feed the elastic through each casing, then overlap the ends and sew them securely.
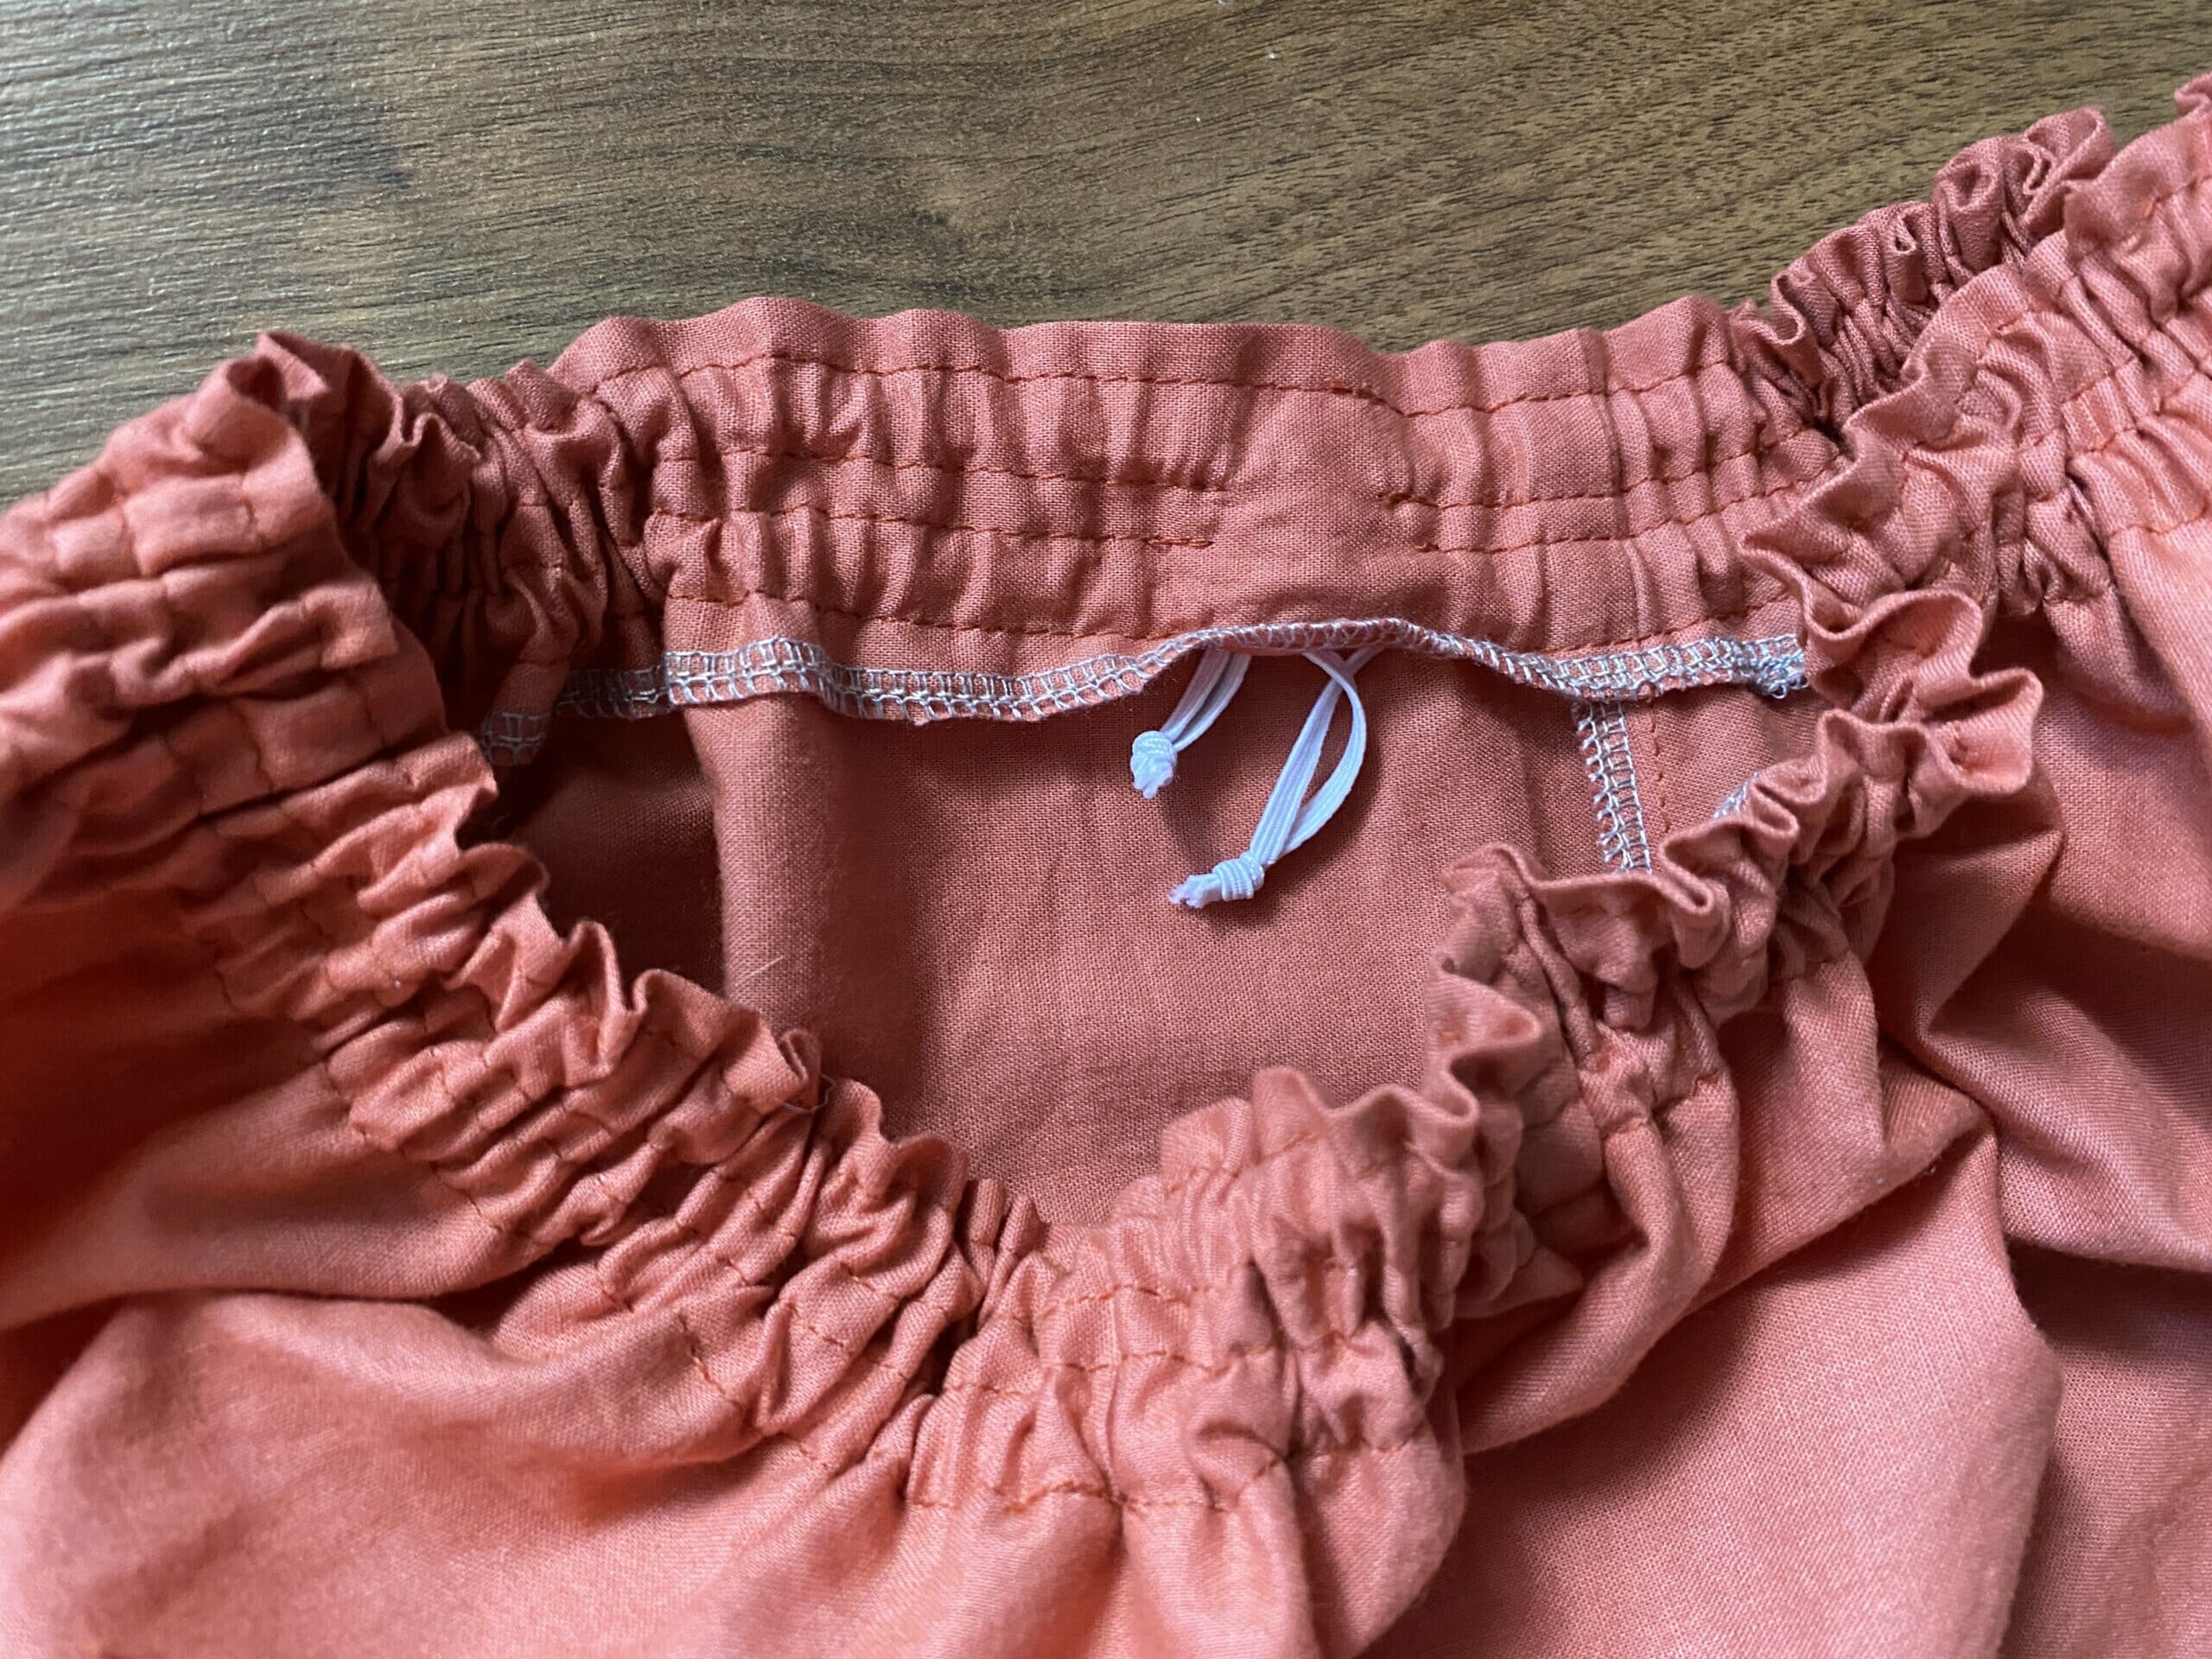
Once both pieces of elastic are in place and adjusted, go back and stitch the openings closed.
Boom! You’ve got a comfy, stretchy, professional-looking waistband – no fuss, no separate pattern pieces.
Step 5 – Hem the skirt
Last step – let’s hem this beauty so you can wear it right away!
I went with a simple double-fold hem, which is great for lightweight fabrics. Here’s what to do:
First, stitch 1/4” from the raw edge all around the bottom of your skirt. This gives you a guide and helps keep the fold even.
Fold the fabric up along that stitching line, press it with an iron, and then fold it up again by about 1/2 inch. Press again for a crisp edge.
Finish by edge-stitching the folded edge in place all the way around.
You can also use other finishing methods if you prefer – like a serged and turned hem or a narrow rolled hem, depending on the fabric you’re working with.
And that’s it – your DIY summer skirt with pockets and a comfy elastic waistband is done! Lightweight, flowy, and totally wearable, this is the kind of skirt you’ll want to make again and again.
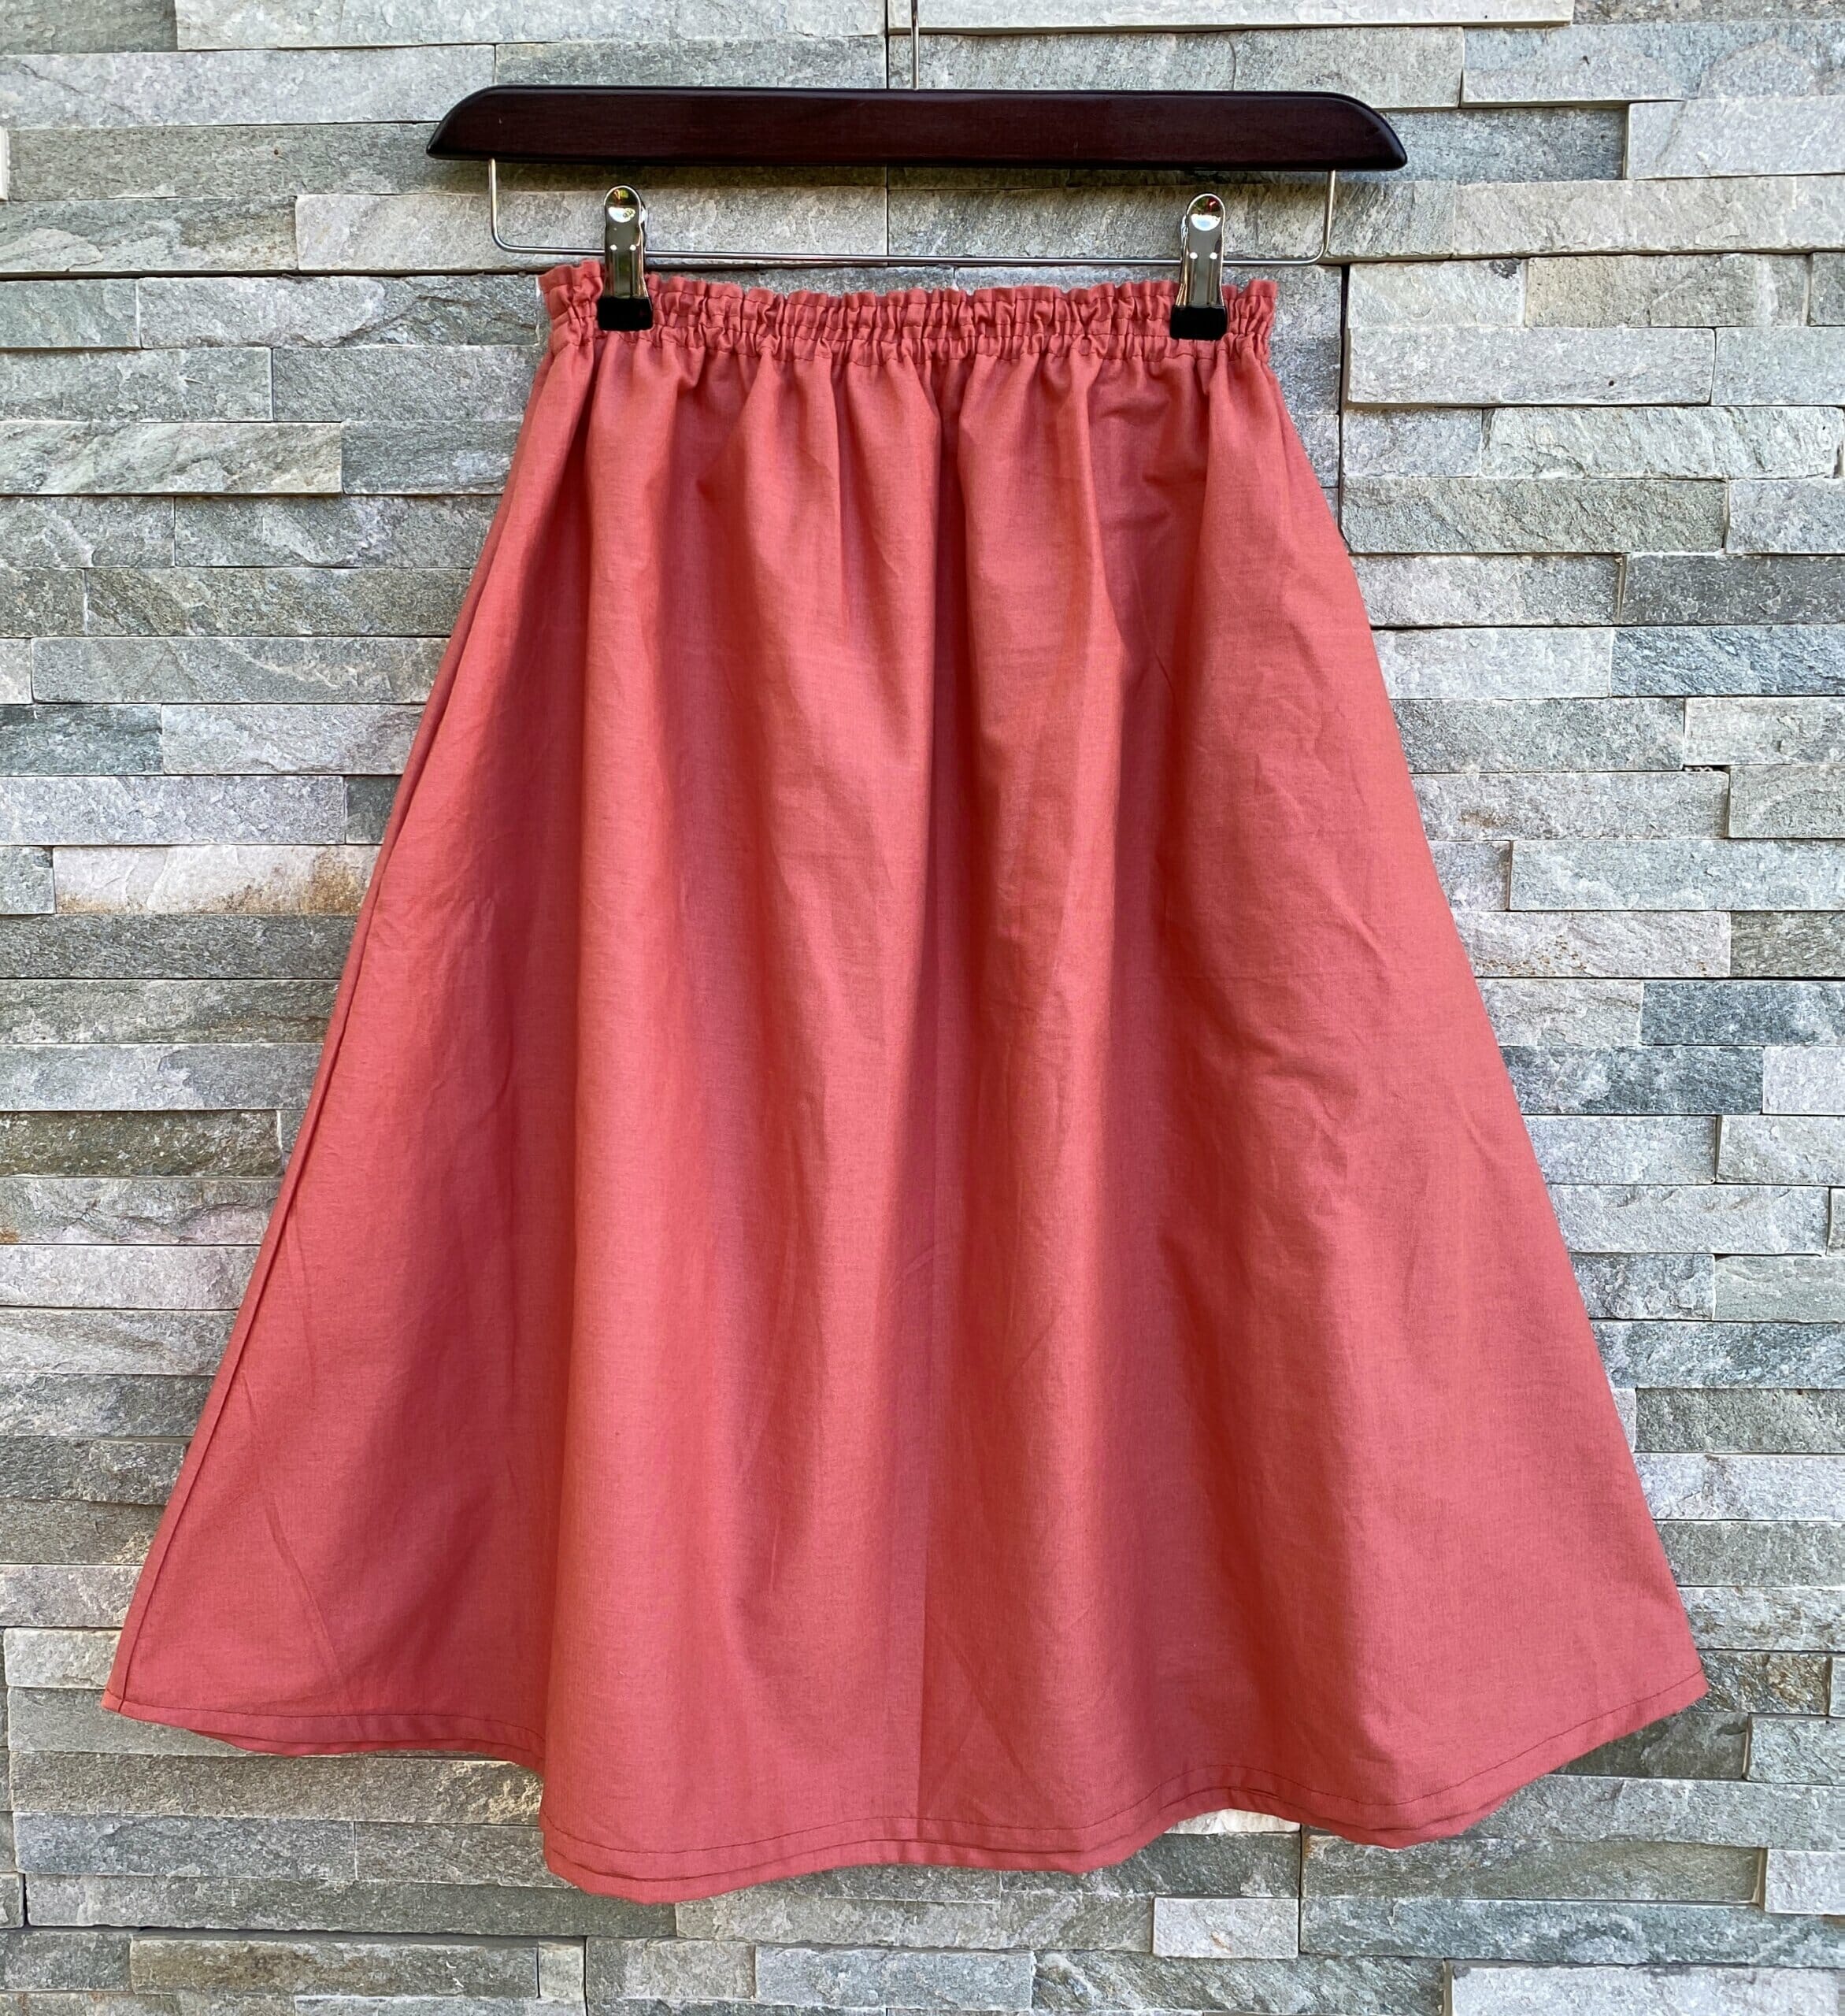
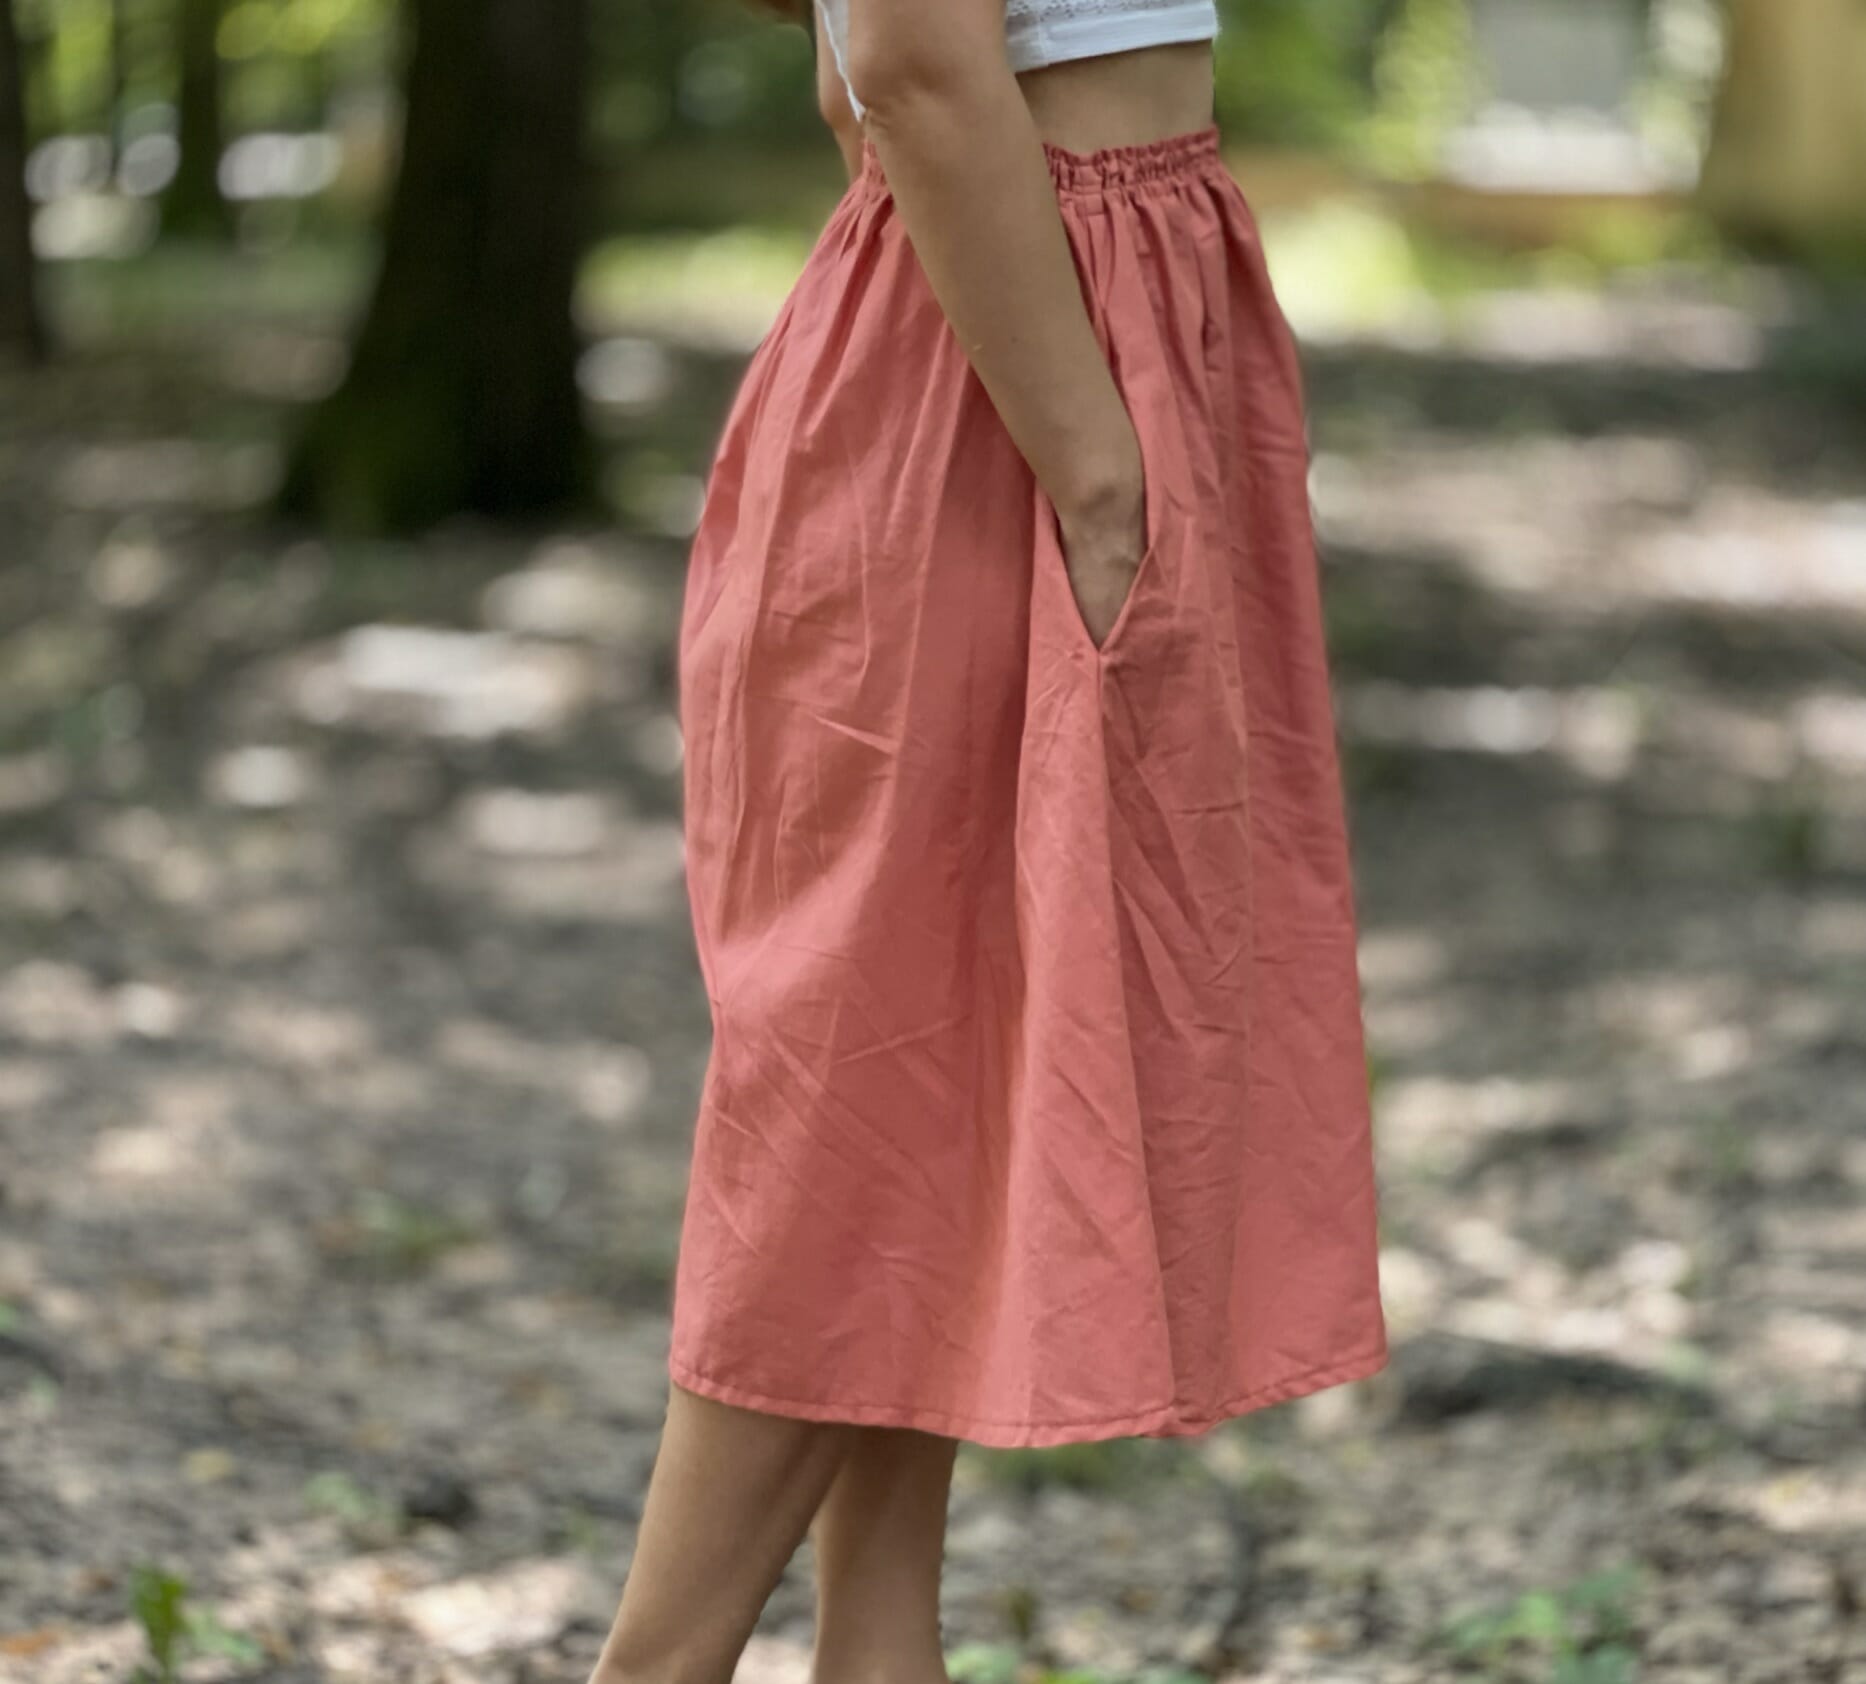
I don’t know about you, but I need pockets in every skirt – gotta have somewhere to put my hands when I’m standing around, right? Honestly, all skirts should come with pockets by default!
I hope you found this summer skirt tutorial helpful and easy to follow. I’d love to hear what you think – drop a comment and let me know! And if you make one of these skirts, please share a photo – I’d be thrilled to see your version!
Let’s keep in touch! You can find me on Facebook, Instagram, and Pinterest.

Violet,
Thank you for sharing your pattern and your process. I plan to use this with the little girls I am teaching to sew. I’m just wondering if you couldn’t easily add the pocket shape to the skirt pattern before you cut it out, so that you could eliminate the step of sewing the pocket to the skirt? Have you ever tried this?
Thank you so much for this fun tutorial! I’m planning to try this, but couldn’t visualize exactly how the waistband was finished. Would you be able to provide photos or drawings of these two steps in making the waistband?
1 – “then overlap the ends and sew them securely.”
2 – “Once both pieces of elastic are in place and adjusted, go back and stitch the openings closed. Boom! You’ve got a comfy, stretchy, professional-looking waistband.”
It would be great to see how the ends of the elastic were sewn together, how the openings were stitched closed, and what the final product looks like in that exact spot on the inside of the skirt. Thanks for any help you can provide!
Hi Kris, I don’t have step-by-step photos of this part, but here’s a picture from another project https://static.icansewthis.com/2020/06/flutter-sleeve-peasant-top-for-girls-with-free-pattern-12-1170×844.jpg – I overlapped the elastic ends like this and stitched over them with a zigzag stitch along the length (starting from one end with both elastic layers under the needle so it doesn’t shift, all the way to the other end). Then I closed the opening with a simple straight stitch, backstitching at the beginning and end. Hope it helps!
This skirt is adorable and seems pretty easy from the directions. I am curious what machine did you use to create that finished edge was it a serger? (I am probably spelling that wrong)
Thanks so much! I used a Brother 1034D serger for most of it, but you’ll notice I zigzagged a few raw edges too – totally fine to do that! Both methods work great.
Is there a live tutorial on YouTube by chance? I could learn it so much better than reading. sorry.
Hi Jayne, there’s no video tutorial yet, but I might do one in the next few weeks. I have a beautiful fabric I’ve been saving for a while that’s just perfect for a summer skirt!
I’m excited to try this skirt! I have a question about the pockets. It looks like in the first pocket step, you are sewing them shut? I’m sorry for my confusion!
Forgive me, but how many yards of fabric did you start with?
I don’t see the pattern for the pocket other than what is shown in the photograph. Am I just not finding it in this post? Thank you.
Hey Eleanor,
It happens to the best of us! 🙂 Under the “Sewing supplies” section, you’ll find a pink box where you can enter your email to subscribe. After confirming your subscription, the pattern will be sent immediately to your inbox.
when you are sewing on the pockets, are you sewing on the right or wrong side of the skirt fabric? I’m making this with a patterned fabric.
It is hard to tell from a picture, each pocket is sewn on with a line of stitching across the opening side . This is done to each piece individually, right side of pocket to right side of skirt. Then the skirt pieces are stacked with right sides together and with the pockets sticking out. Sew up the side seam, but stop before and after the pocket opening. There are many Pinterest and You Tube articles which may give you another view. Just remember, The pocket pieces are sewn on each skirt piece individually, then the dress is finished.
I don’t understand the sewing of the waist band. After serging the sides and pockets it says to do the edge of the waistband but nothing about how it is attached to the skirt.
Never mind I see now that I wasn’t supposed to cut off the waistband. I’ll have to figure that out now.
Just attach it to the piece of fabric you mistakenly cut it from it should be ok just not so wide
I am making this skirt for my daughter to take to Europe in 3 days. What I’m not clear on is the angle for the side of the skirt. Do I measure the length of the skirt at the centre fold, and then go outwards? So in my daughter’s case her waist is 28″, so I get the 12″ for the waistband; then do I measure straight down the fold the 22-1/2″ (she is 5’1″ and wants a 21″ length), and with hips of 38″, do I go straight out, perfectly parallel with the waist, the necessary 21″, and then join up the far right edge of the waistband with the far right edge of the hem? If I do that though the “length” of the skirt down the angled side is not 21″, it’s 22-1/2″. How else will I know what angle to put the sides edges at? Without some kind of direction, I could go straight down from the waistband, I could go out anywhere from 20 degrees to 90 degrees out from the waistband. I think my assumption must be wrong because surely in your diagram you would have indicated that the centre fold is also the length of the skirt? But if the centre fold is the length of the skirt, taht makes the right sides LONGER than the “length” of the skirt. Is that why we round off the corner, to bring the length back to also 21″??? Can you pls clarify??
Thank you for any clarification you can give.
Hi BPym,
You can see here exactly how I cut my pattern pieces https://static.icansewthis.com/2021/06/diy-flared-skirt-tutorial-4-scaled.jpg
As for the process, I measured first my desired length going down the folded edge, then from the far right edge of the waistband (the side seam), then from a few points in between these places. This was enough for me to draw a slightly curved hemline in order to preserve the length of my skirt. With that being said, I think there’s no right or wrong way to make this skirt – differences could easily pass for style/design.
However, if you’re making a 21″ long skirt, you may want to lengthen the back pattern piece a little bit (about 1-2″, I’d say…) to account for the bottom. I would extend the piece from the center fold while the side seams remain the same. I didn’t do this for my midi skirt because I didn’t think it was likely to be noticed. I hope this helps! Happy sewing and I wish your daughter a fantastic vacation!
Love this pattern! I recently started sewing and this was easy and a great learning experience. Thank you!
So happy to hear this, Este! This skirt has a really simple design, but looks pretty cool and it’s one of my favorites in summer. Thank you for the kind words!
I read your comments about the waistband and they just don’t make sense to me. How do you end up with 2X the waist measurement minus 8 inches when you have cut down the waist measurement by 4″ total? I don’t get it. So if my waist measurement is 29″ then half that is 14.5″ minus 2″ equals 12.5″ . Joined to the identical back piece it will be 25″. How is that going to fit my 29″ waist?
Okay, I just realized there are 2 pieces, like you’ve been saying all along. So the front piece would 25″ and the back piece would be 25″. Equals 50″ for the waist.
Yes, JoAnnne, that’s correct. English is not my native language, so if anyone ever comes up with a better description of this skirt, I’d be happy to include it in the tutorial to make it easier to understand. Thank you!
I’m sorry but step one is completely confusing. From what I read you end up with a skirt that is 8 inches shorter than your waist. I think your previous commenter is also confused about this
Hi Dana,
Thank you for your comment! I updated the tutorial with this drawing https://static.icansewthis.com/2022/05/flared-skirt-pattern-1024×712.jpg – I hope it helps.
I can’t quite make out if the bottom is rounded or straight across. Could you clarify please?
Hi Delia,
The bottom is a bit rounded – I realised this only after finishing the drawing. I will upload another sketch asap. Thank you !
Thank you for the tutorial. This looks like a fun skirt to make and wear. I do have a question: it isn’t clear to me what length to cut the waistband. Would you clarify? Thank you.
Hi Jinger,
I’ll try to explain better what happens at Step 1.
Your fabric is on the fold, and now you have to trace the first pattern piece of your skirt. Let’s say it’s the front piece.
You have to measure (1/2 of your waist measurement – 2 inches) from the folded edge. When you’ll unfold the fabric, the front pattern piece will measure (waist measurement – 4 inches).
But. Now you have to cut the back pattern piece – it will be identical to the front.
So, the skirt is made with two pattern pieces that measure (waist measurement – 4 inches) each. In total, you’ll have 2x(waist measurement – 4 inches) at the waist (meaning it’s 2x waist measurement minus 8 inches). I did this to reduce a bit the bulk at the waist.
So, in the end, the fullness of the skirt will be about 1.7 times your waist measurement (instead of 2x).
Hope that helps! 🙂 I’m glad you like this skirt (it’s one of my favorites). Thank you for stopping by!
This was written terribly
I’m sorry for that, Kylie. I’ll try to revisit the tutorial and maybe word it all better. In the meantime, I think the pictures are clear enough – the waistband is basically built-in (see https://static.icansewthis.com/2021/06/diy-flared-skirt-tutorial-4-1725×2048.jpg ). I’ve drafted it as a rectangle rather than a trapezoid like the rest of the skirt because you have to fold down the top edge to create the waistband (see https://static.icansewthis.com/2021/06/diy-flared-skirt-tutorial-10-2048×1536.jpg ). I hope this makes sense.
The readers are correct in that you are saying to cut a waist 8 inches smaller than your actual waist. That won’t fit darling.
Hi Diane,
In the tutorial, you cut two skirt pieces that combined measure (2 × waist – 8 inches). It might seem like a lot of extra fabric, but it’s necessary so the skirt can slide over your hips comfortably. It works really well, even if the calculation looks surprising at first!