Easy t-shirt refashion. Add some cute ruffles to your toddler’s t-shirt and put into good use your fabric scraps. Here’s how to make your own ruffled t-shirt, with step-by-step photos.
This easy and fun sewing project is a great way to upcycle some of your leftover woven or knit fabrics.
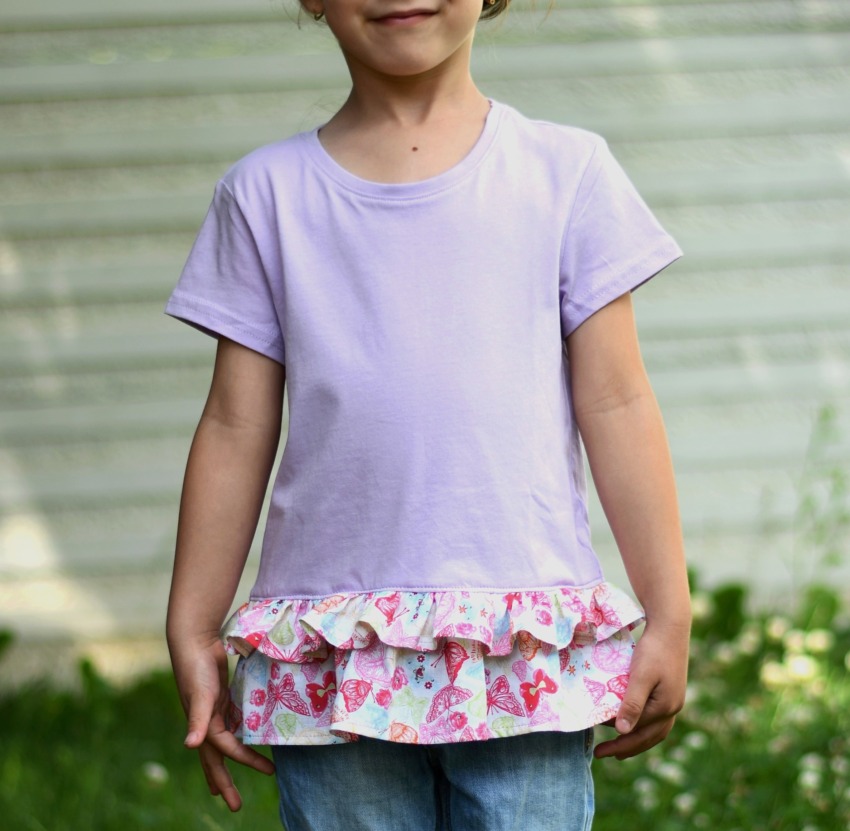
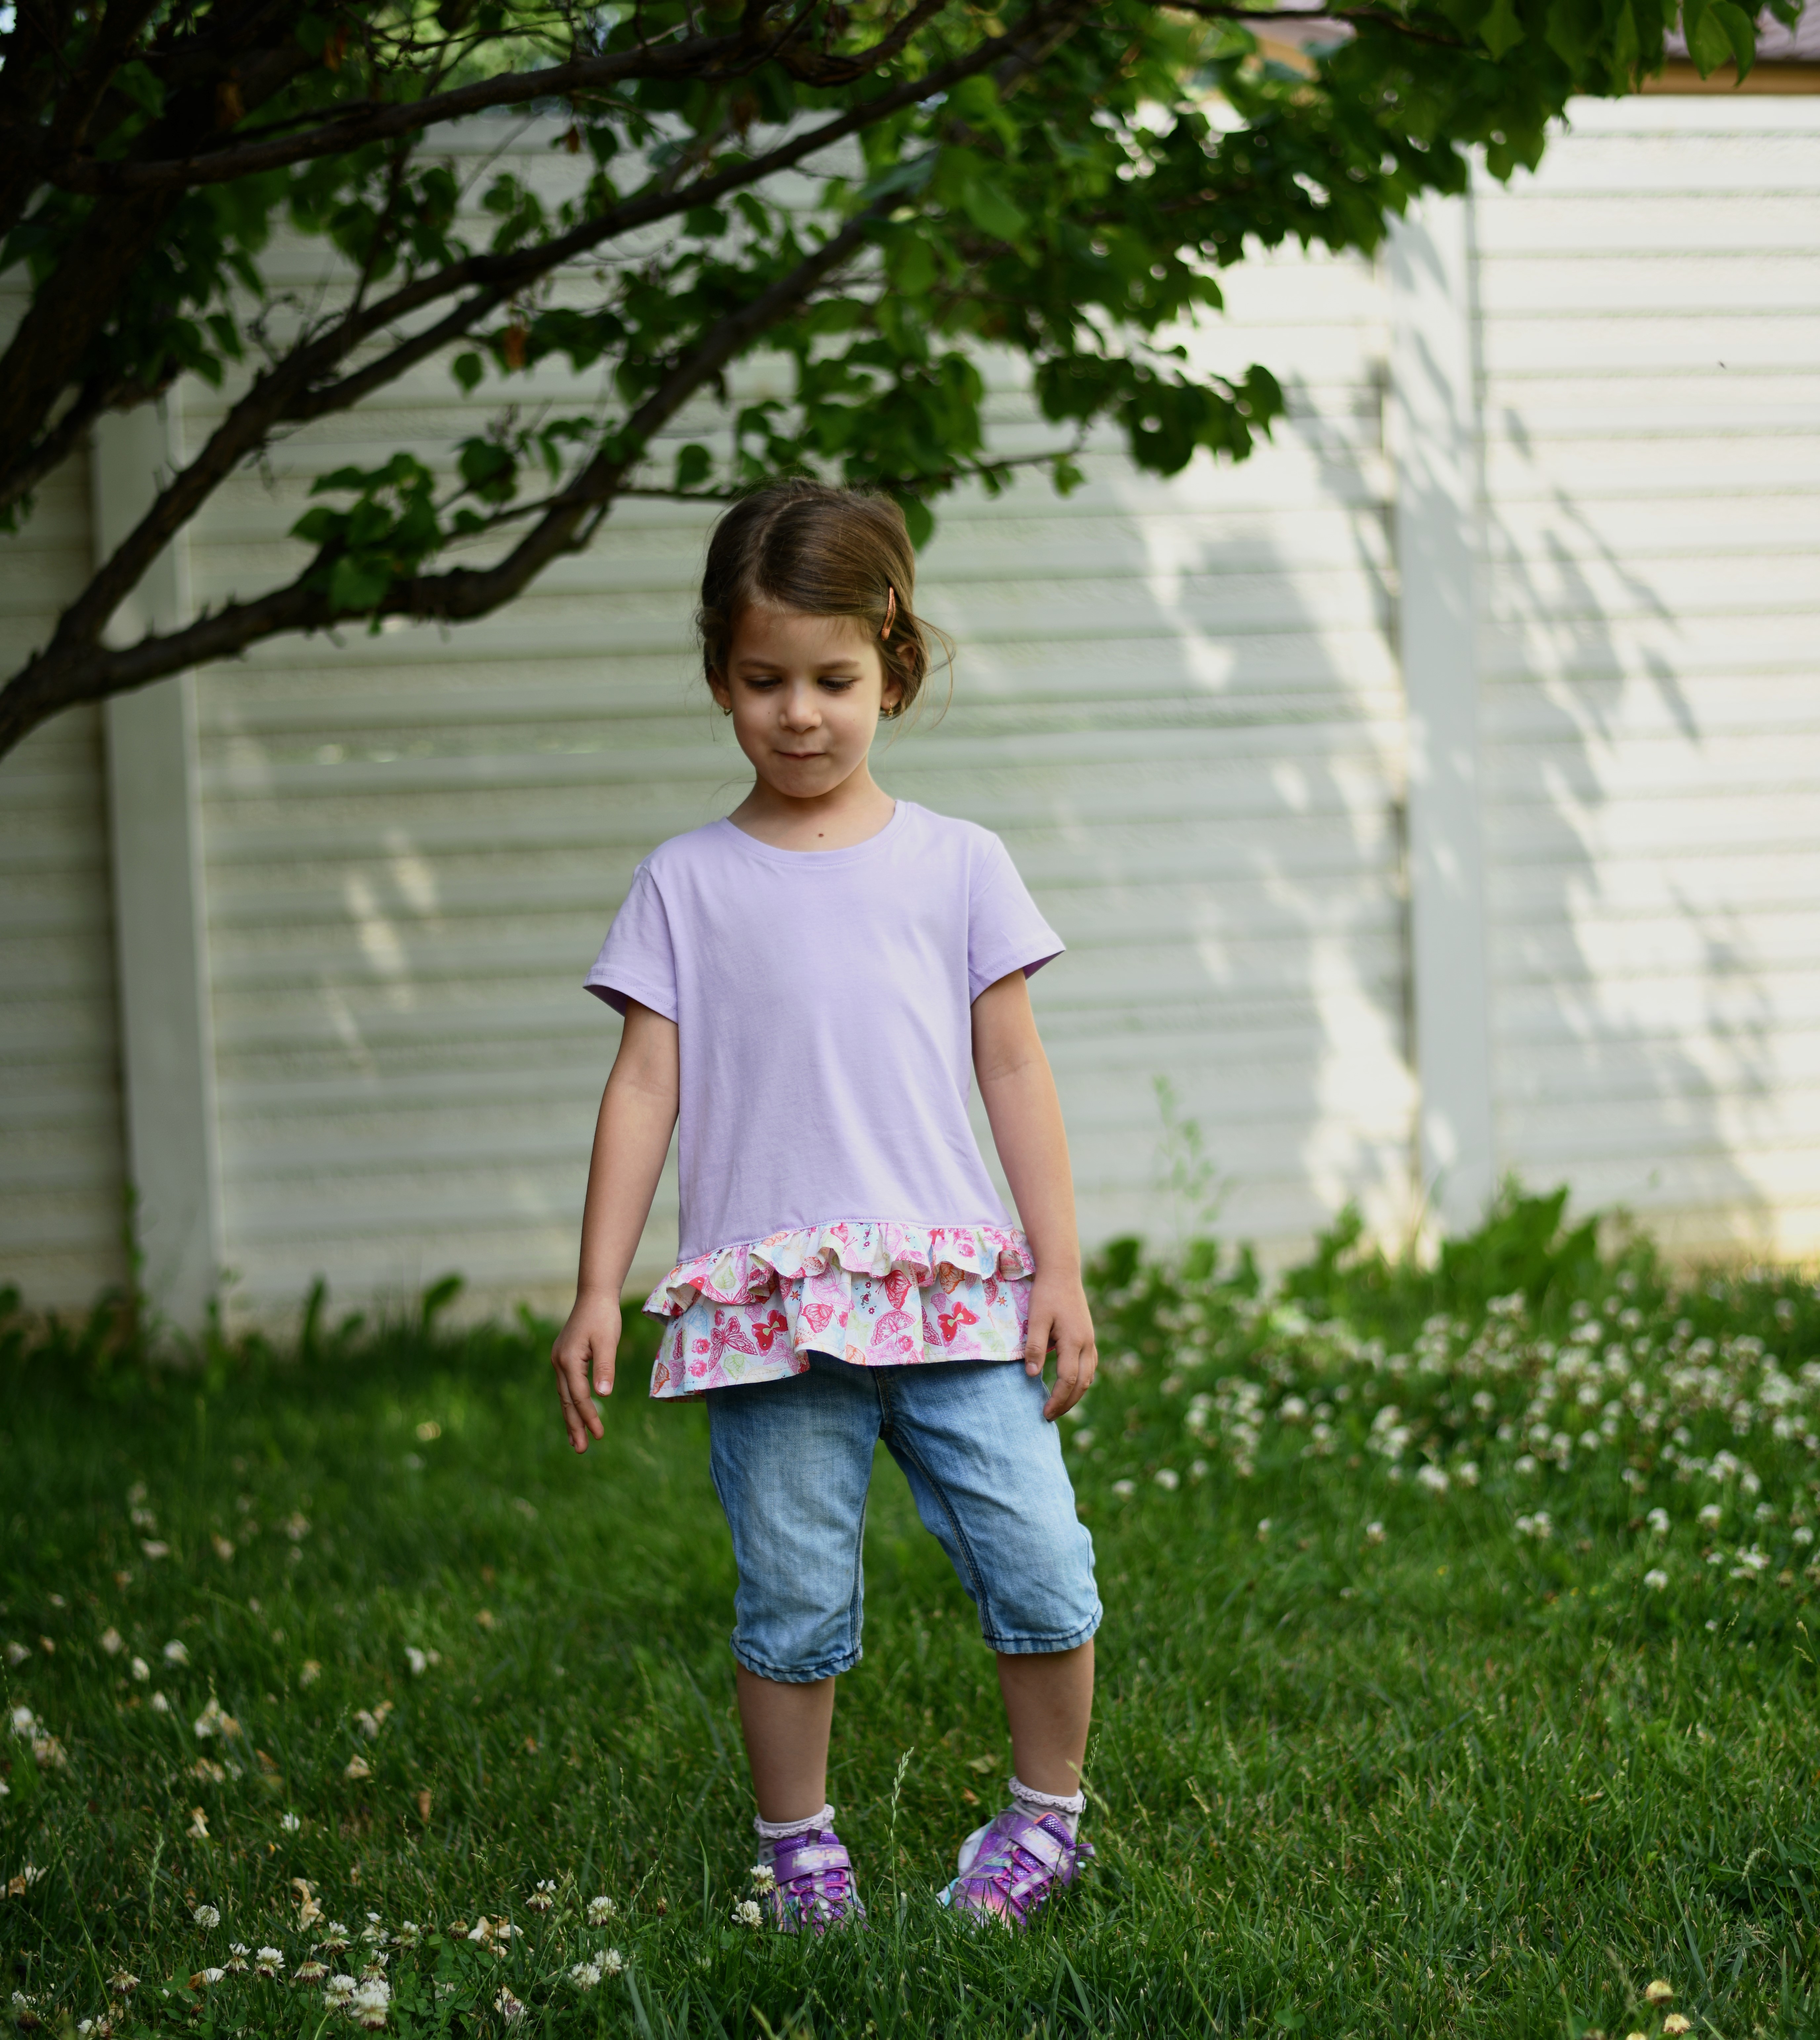
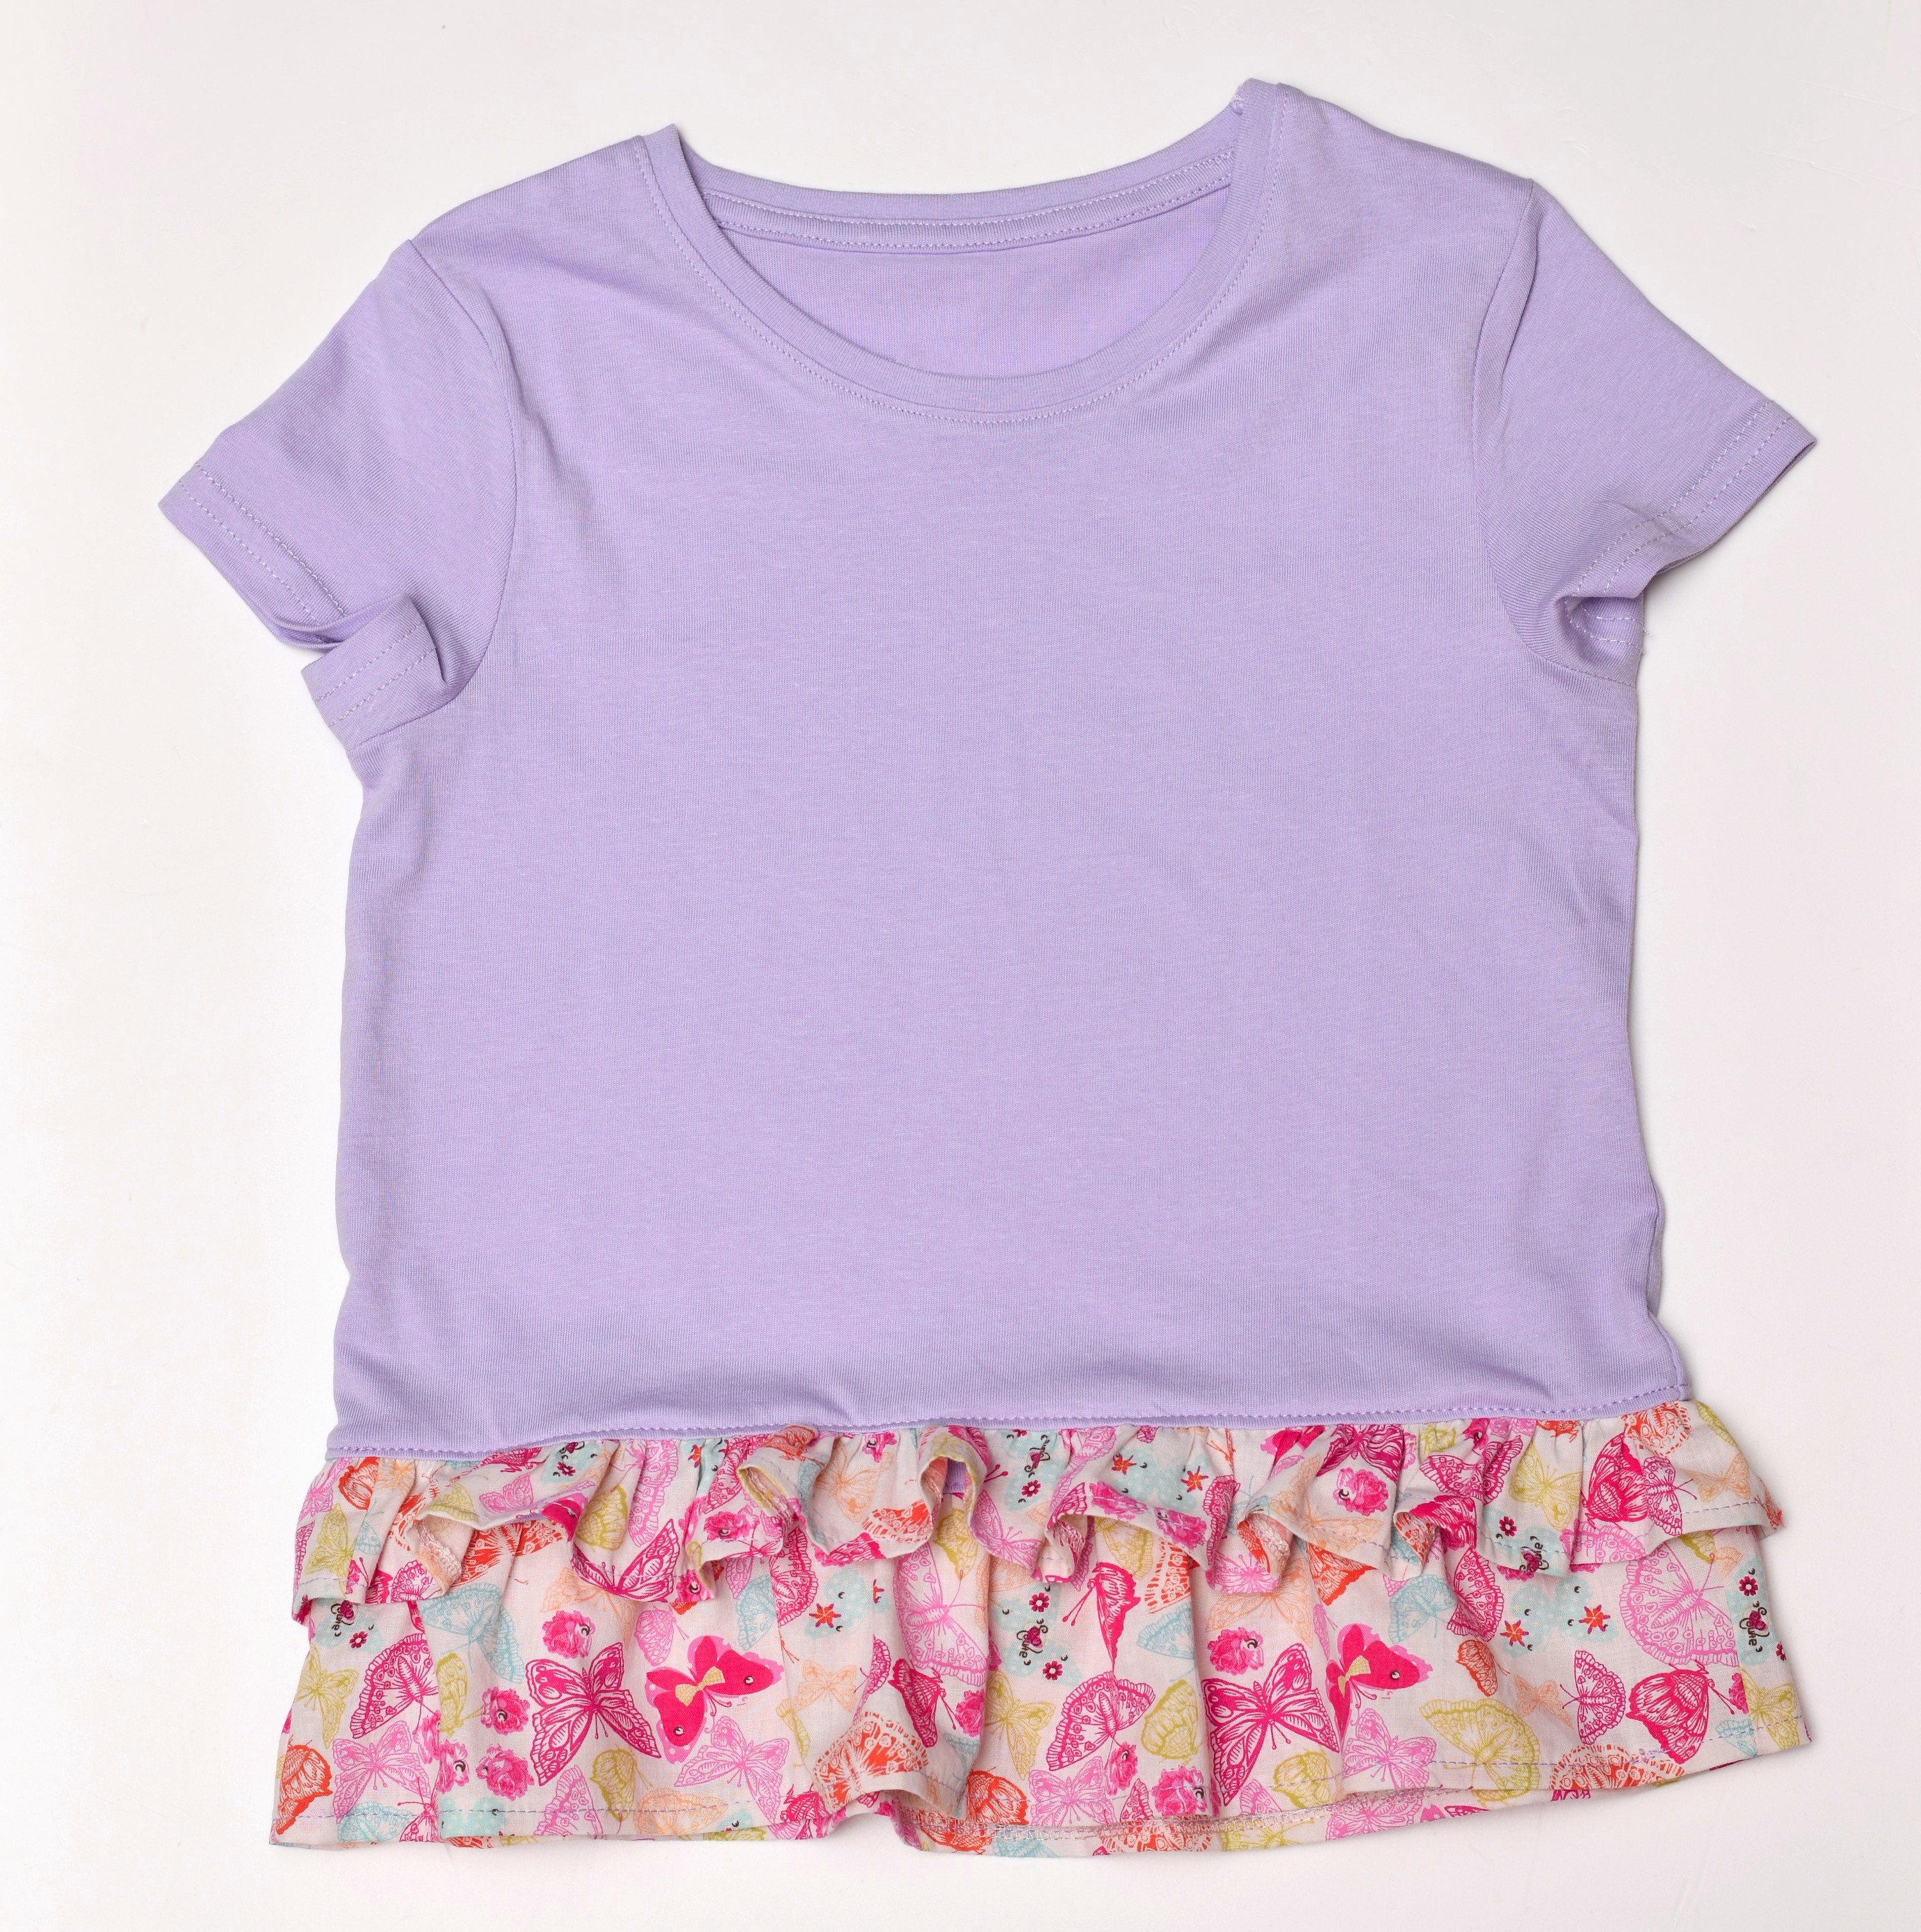
I started with a plain t-shirt that fits my daughter, to which I added two tiered ruffles. My girlie girl loves ruffles and colorful and comfortable clothes.
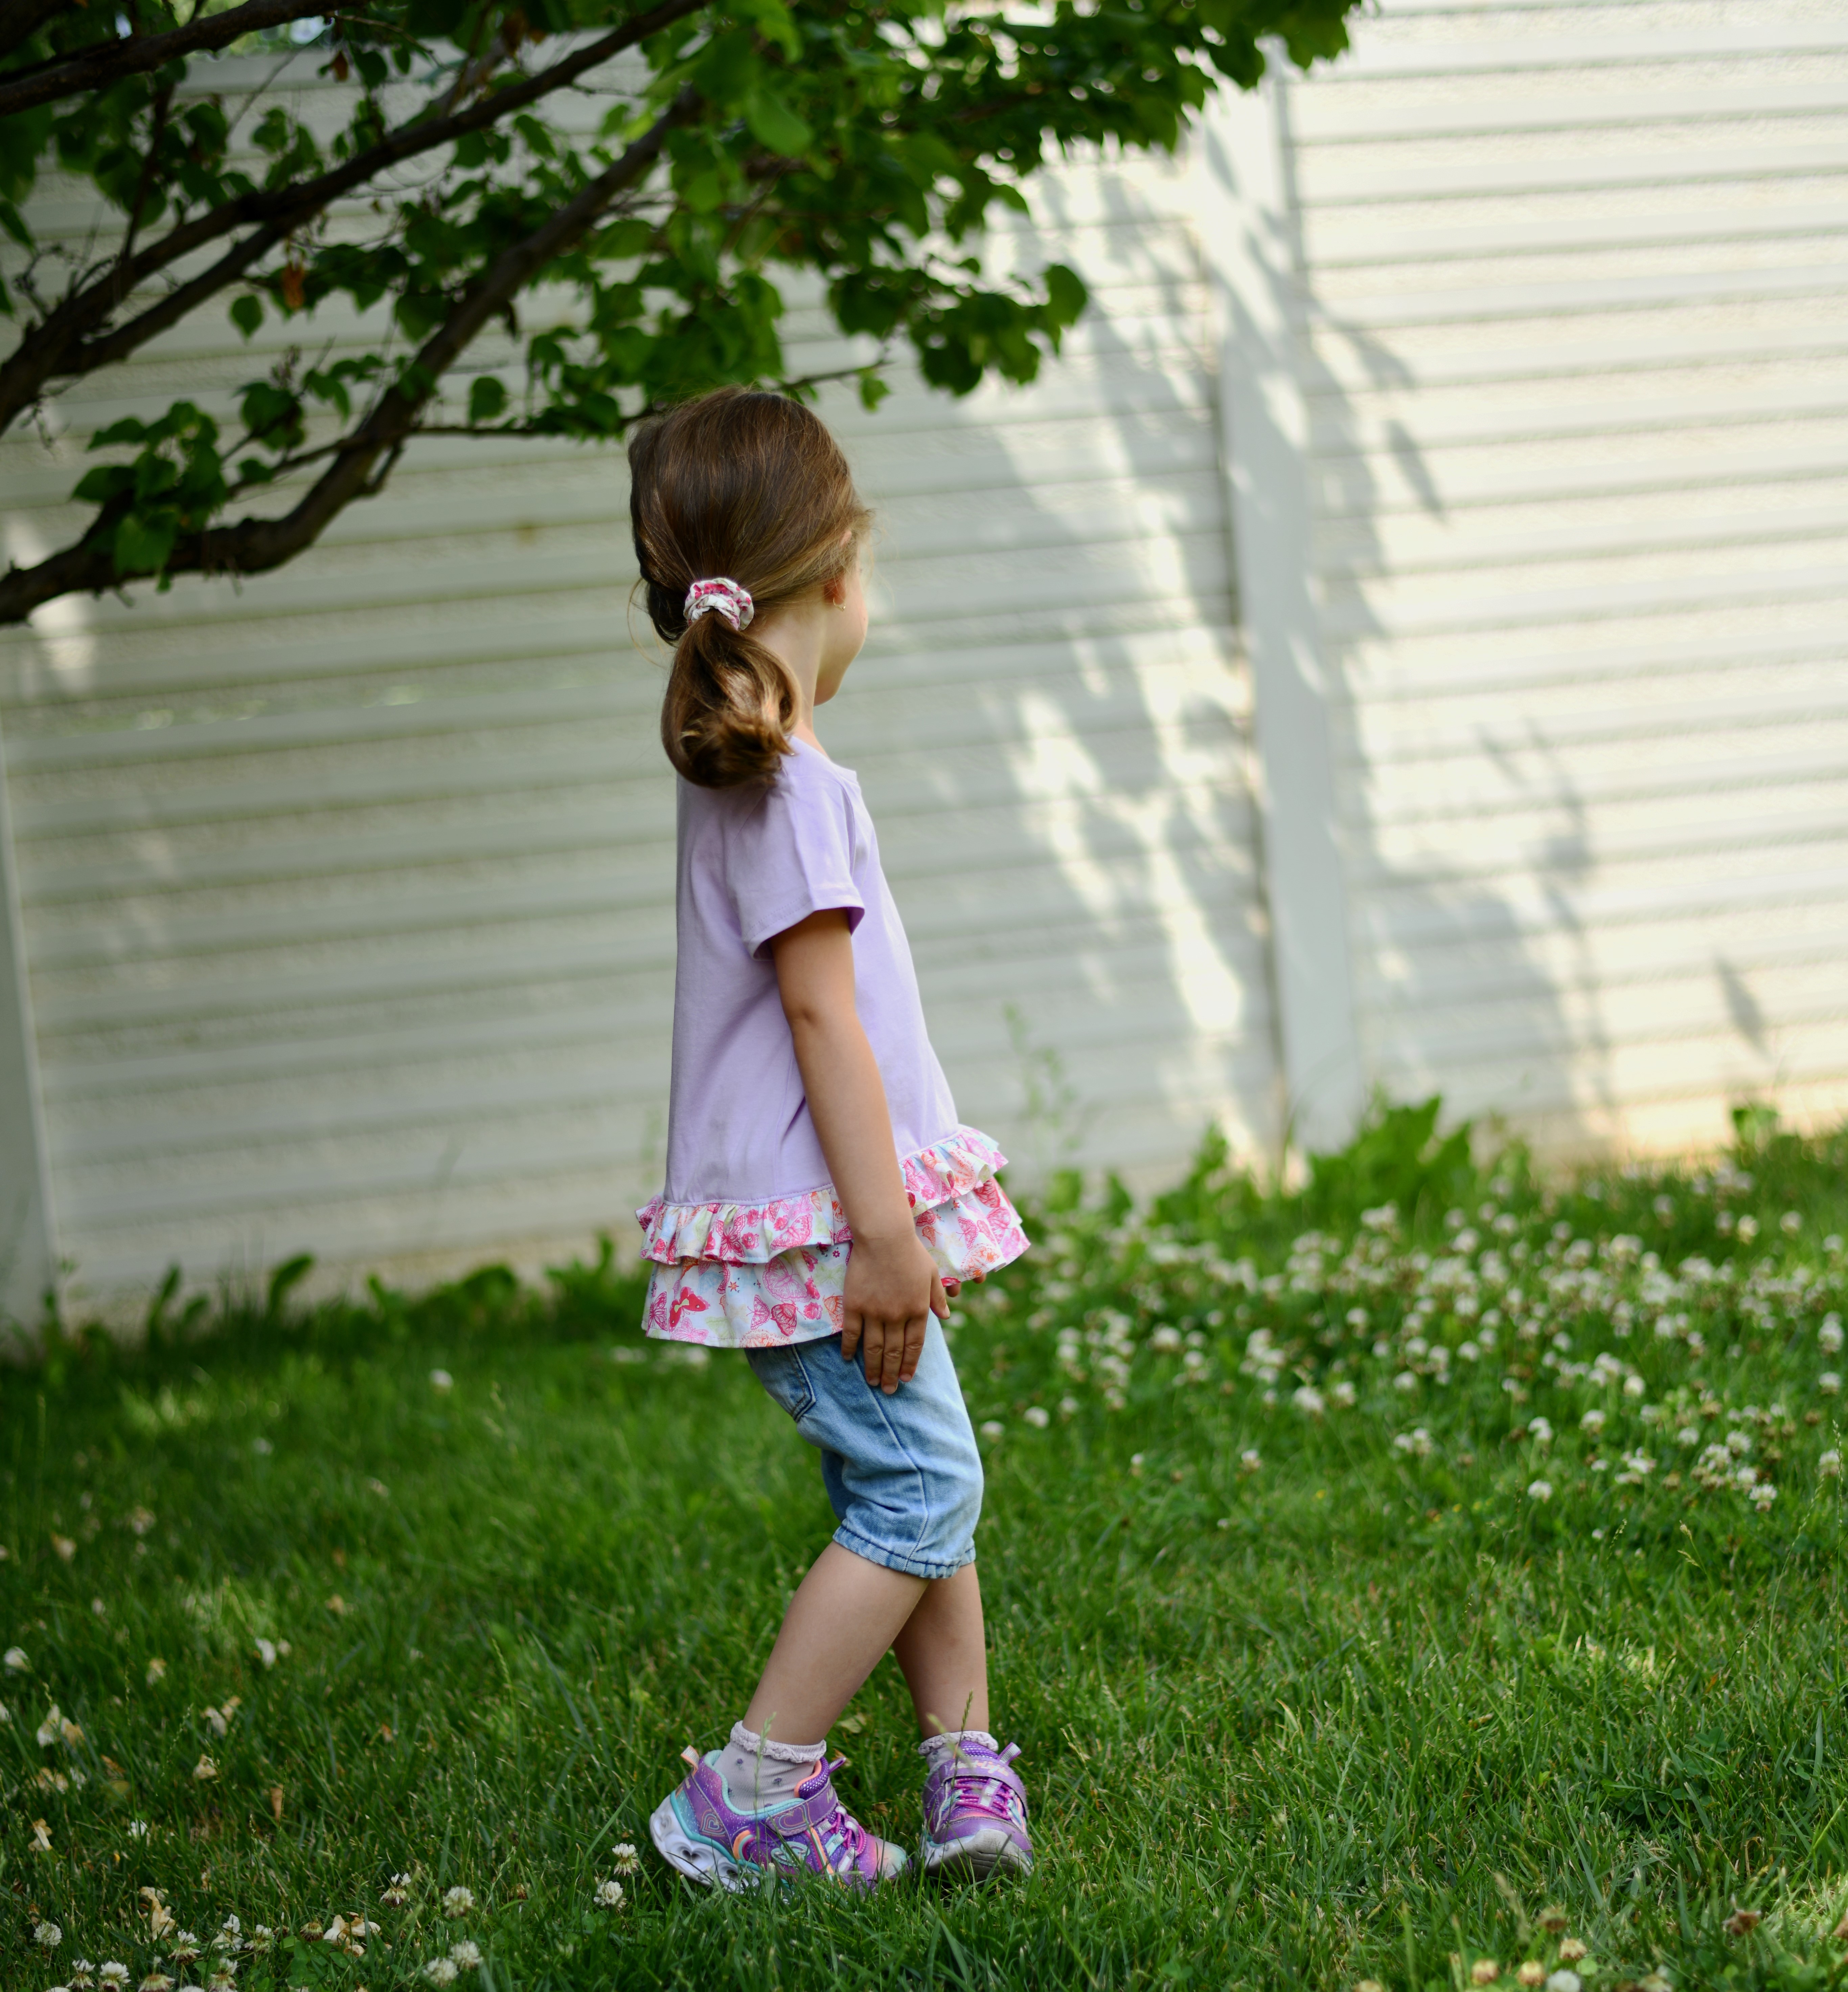
This ruffle t-shirt stops below the hip line and looks great with shorts, leggings or skinny jeans. Depending on how tall you cut your ruffle pieces, you can make your tunic shorter or longer. Read on for all the details.
Related: How to make a ruffle skirt for girls
Easy way to refashion a girls’ t-shirt
This is a practical and cute little thing I made using only straight lines, in one sitting. You can actually finish the entire project in about 15 minutes (maybe more like 30 minutes if you are a complete beginner).
Related: Free knotted headband pattern & tutorial

Sewing supplies – easy t-shirt refashion
- Woven / knit fabric scraps
- Measuring tape
- Scissors
- Sewing pins / sewing clips
Here’s how to make your own ruffle t-shirt
Step 1
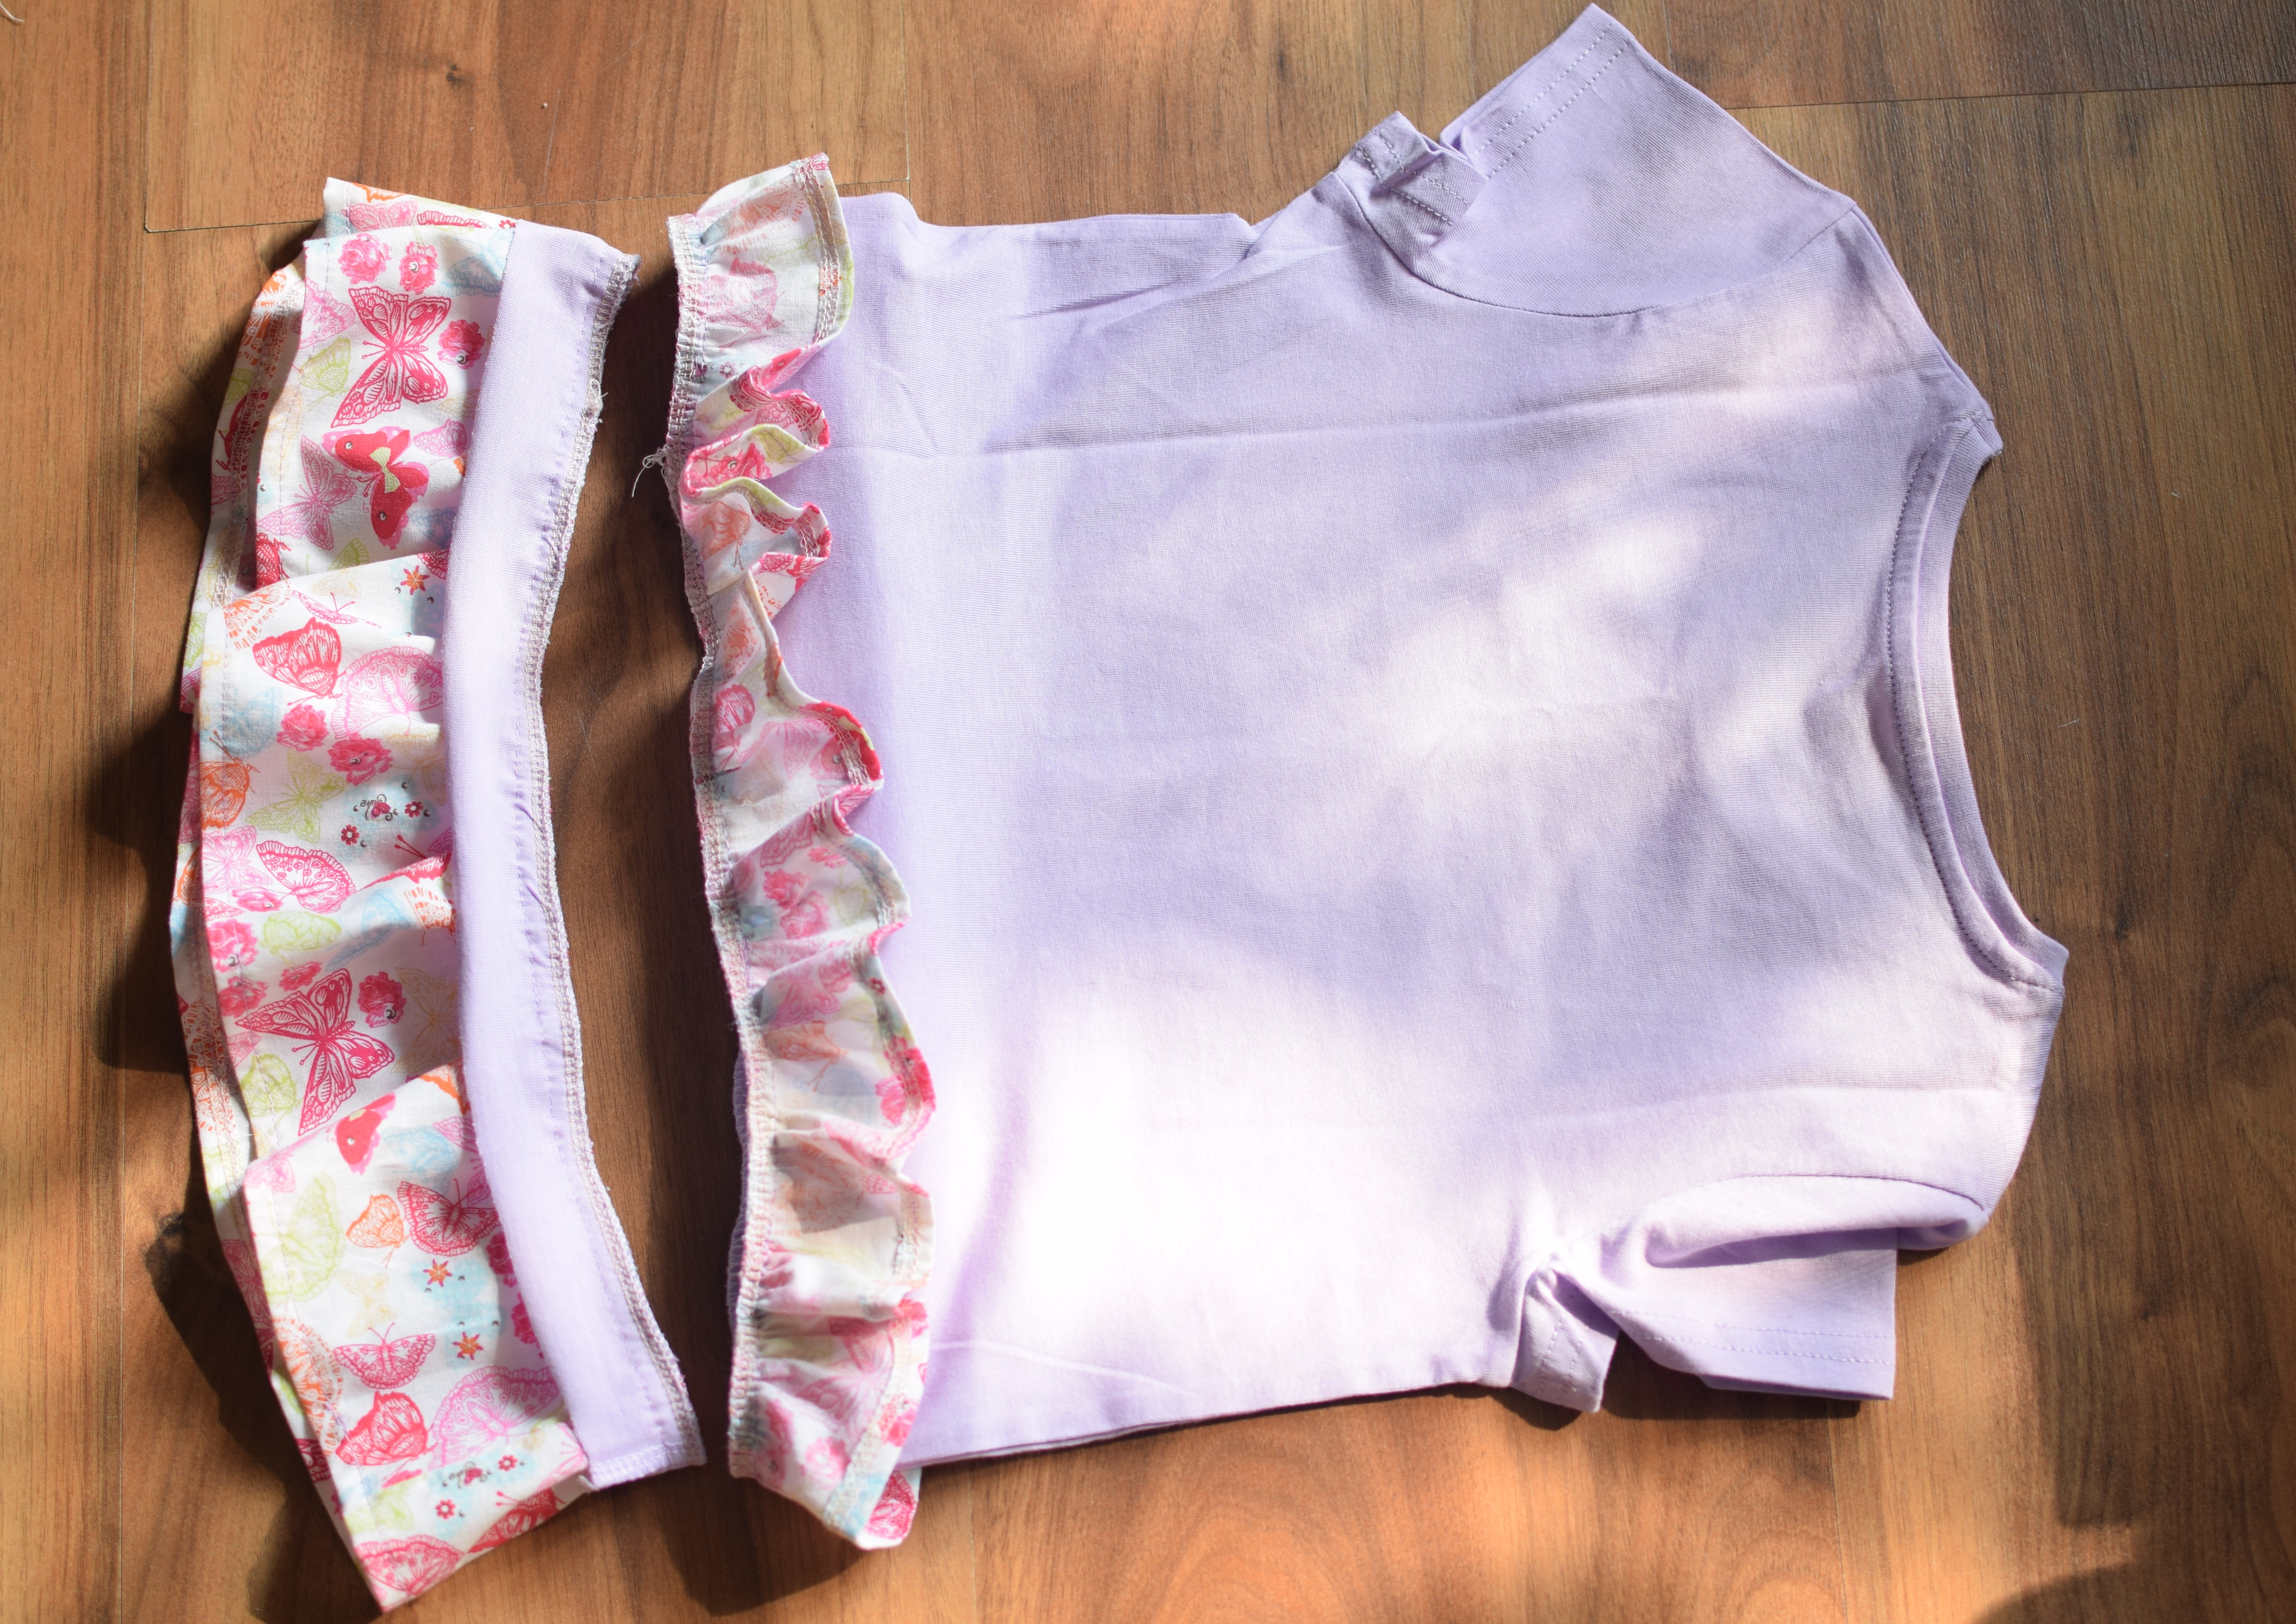
Draw two lines at the bottom of your t-shirt with chalk or a fabric marking pencil.
The distance between these two lines should be about 2.5 inches.
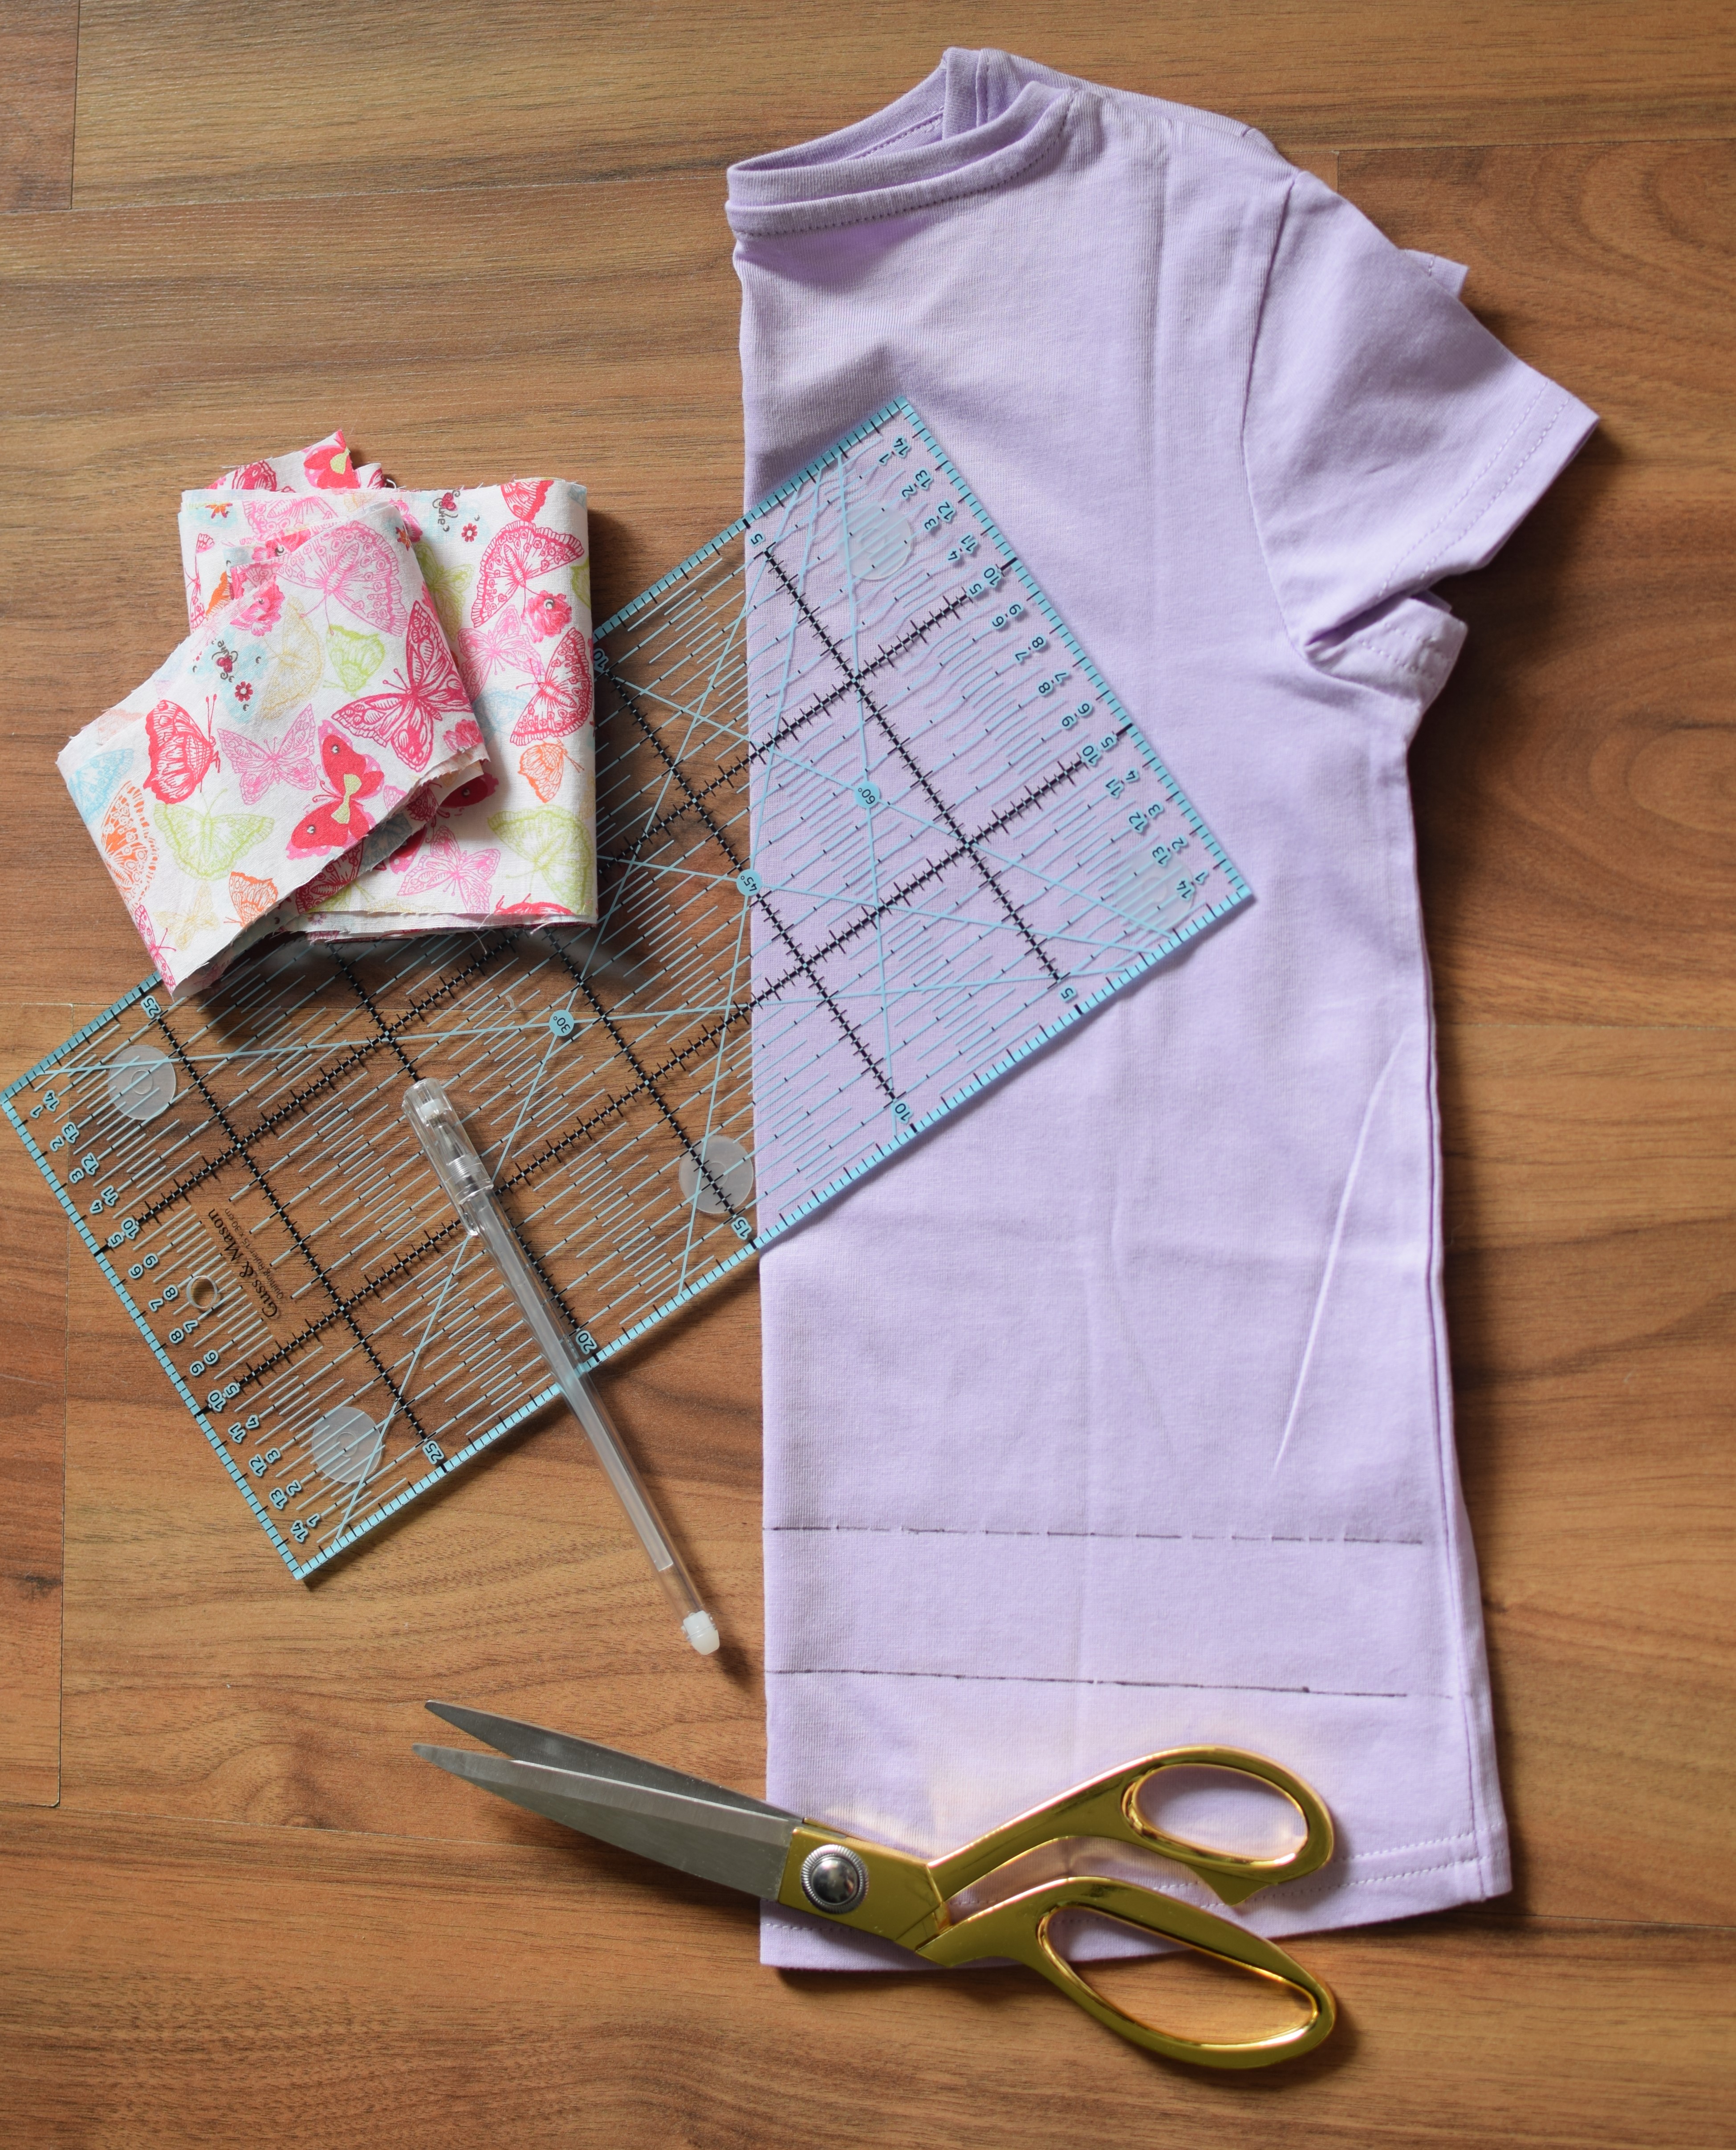
Use your fabric scissors to cut along those lines.
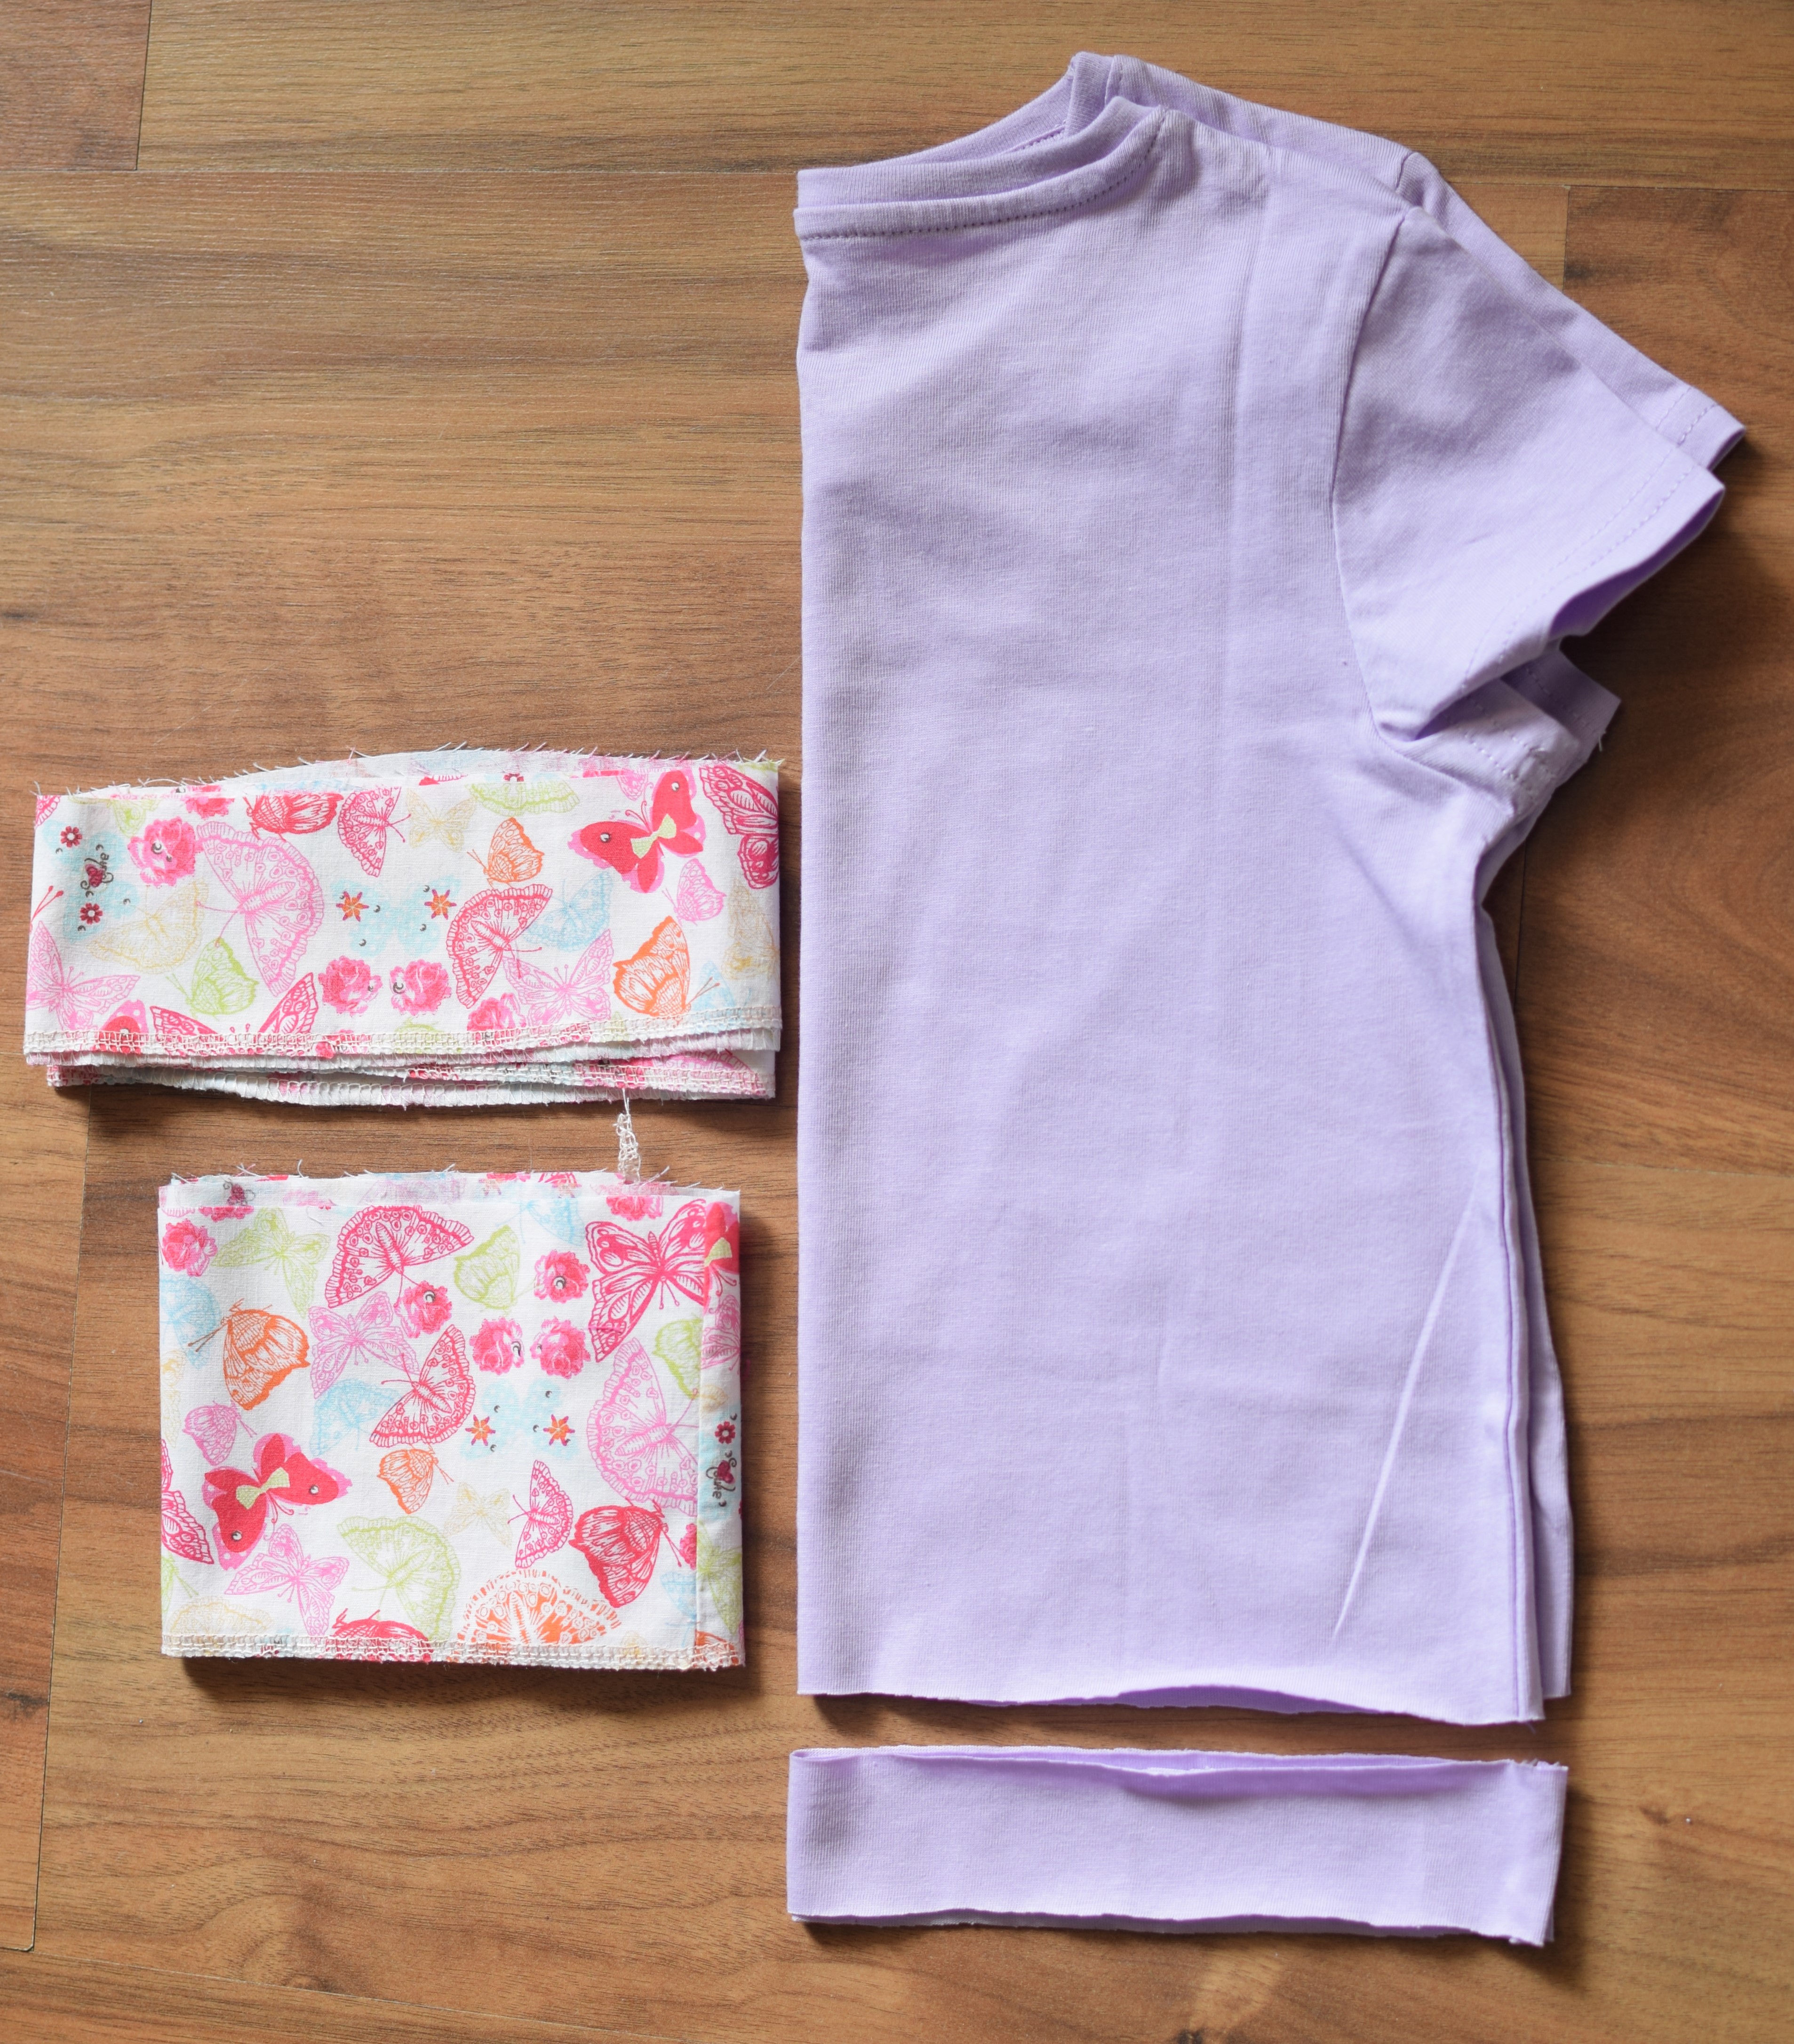
Discard the bottom hem of your t-shirt (or you can keep it for later use) and keep the small connector piece.
Step 2
For the first ruffle piece (the smaller one), you have to multiply the connector length by 2.
Then, for the second ruffle piece (the larger one), you have to multiply the connector length by 1.5.
In other words, the top ruffle is gathered 2 times the final length, while the bottom ruffle is gathered 1.5 times.
Now, decide how tall you want your finished ruffles to be. Keep in mind that after sewing the layers together and hemming, the ruffles will end up about 1 inch shorter.
My connector piece’s length (the circumference of the bottom of the t-shirt) is 26 inches, so my top ruffle piece is 52” by 2.5” and my bottom ruffle piece is 39″ by 4”.
Finished ruffles measurements – 1st ruffle is 1.5” tall, 2nd ruffle is 3” tall.
I used scraps of woven cotton fabric.
Step 3
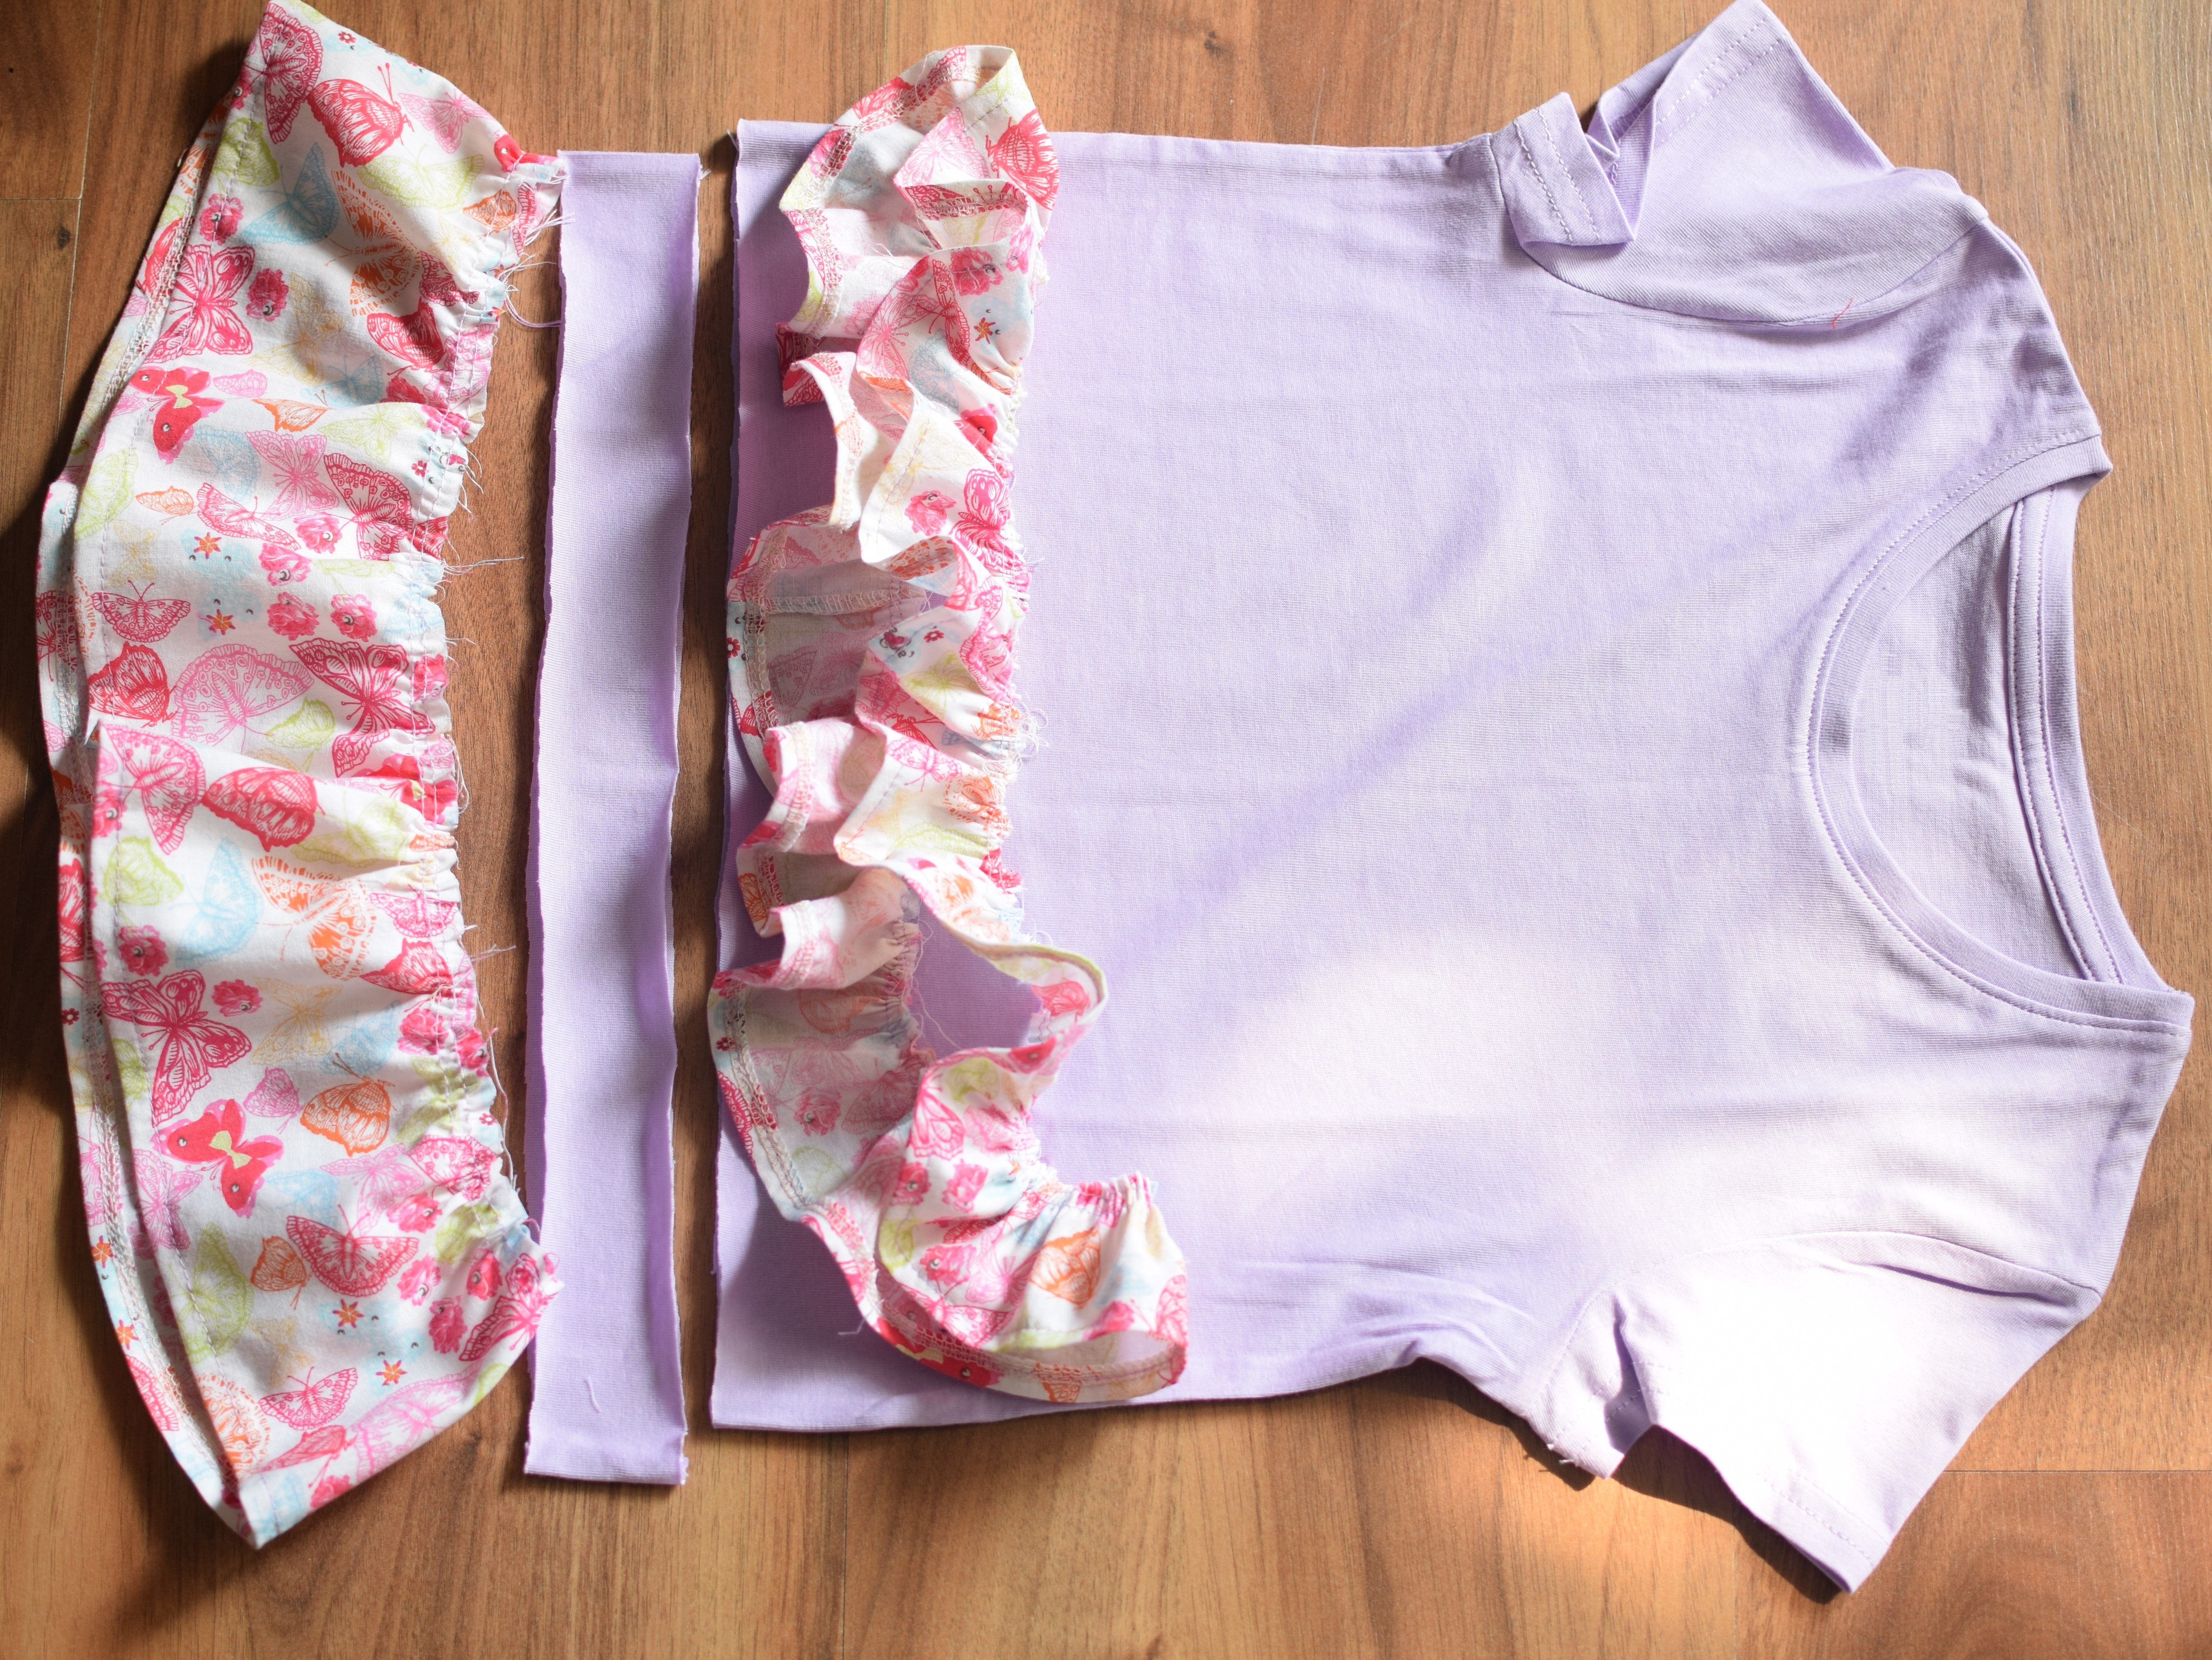
First, sew the short ends of your fabric pieces to form a loop. Finish the seam with a serger or a zigzag stitch.
It’s easier to hem your ruffle pieces before gathering then, so do that next.
After that, baste two lines around the top edge to gather your ruffle, then pull on the basting threads. You should gather both ruffles to the same length as the connector piece.
Step 4
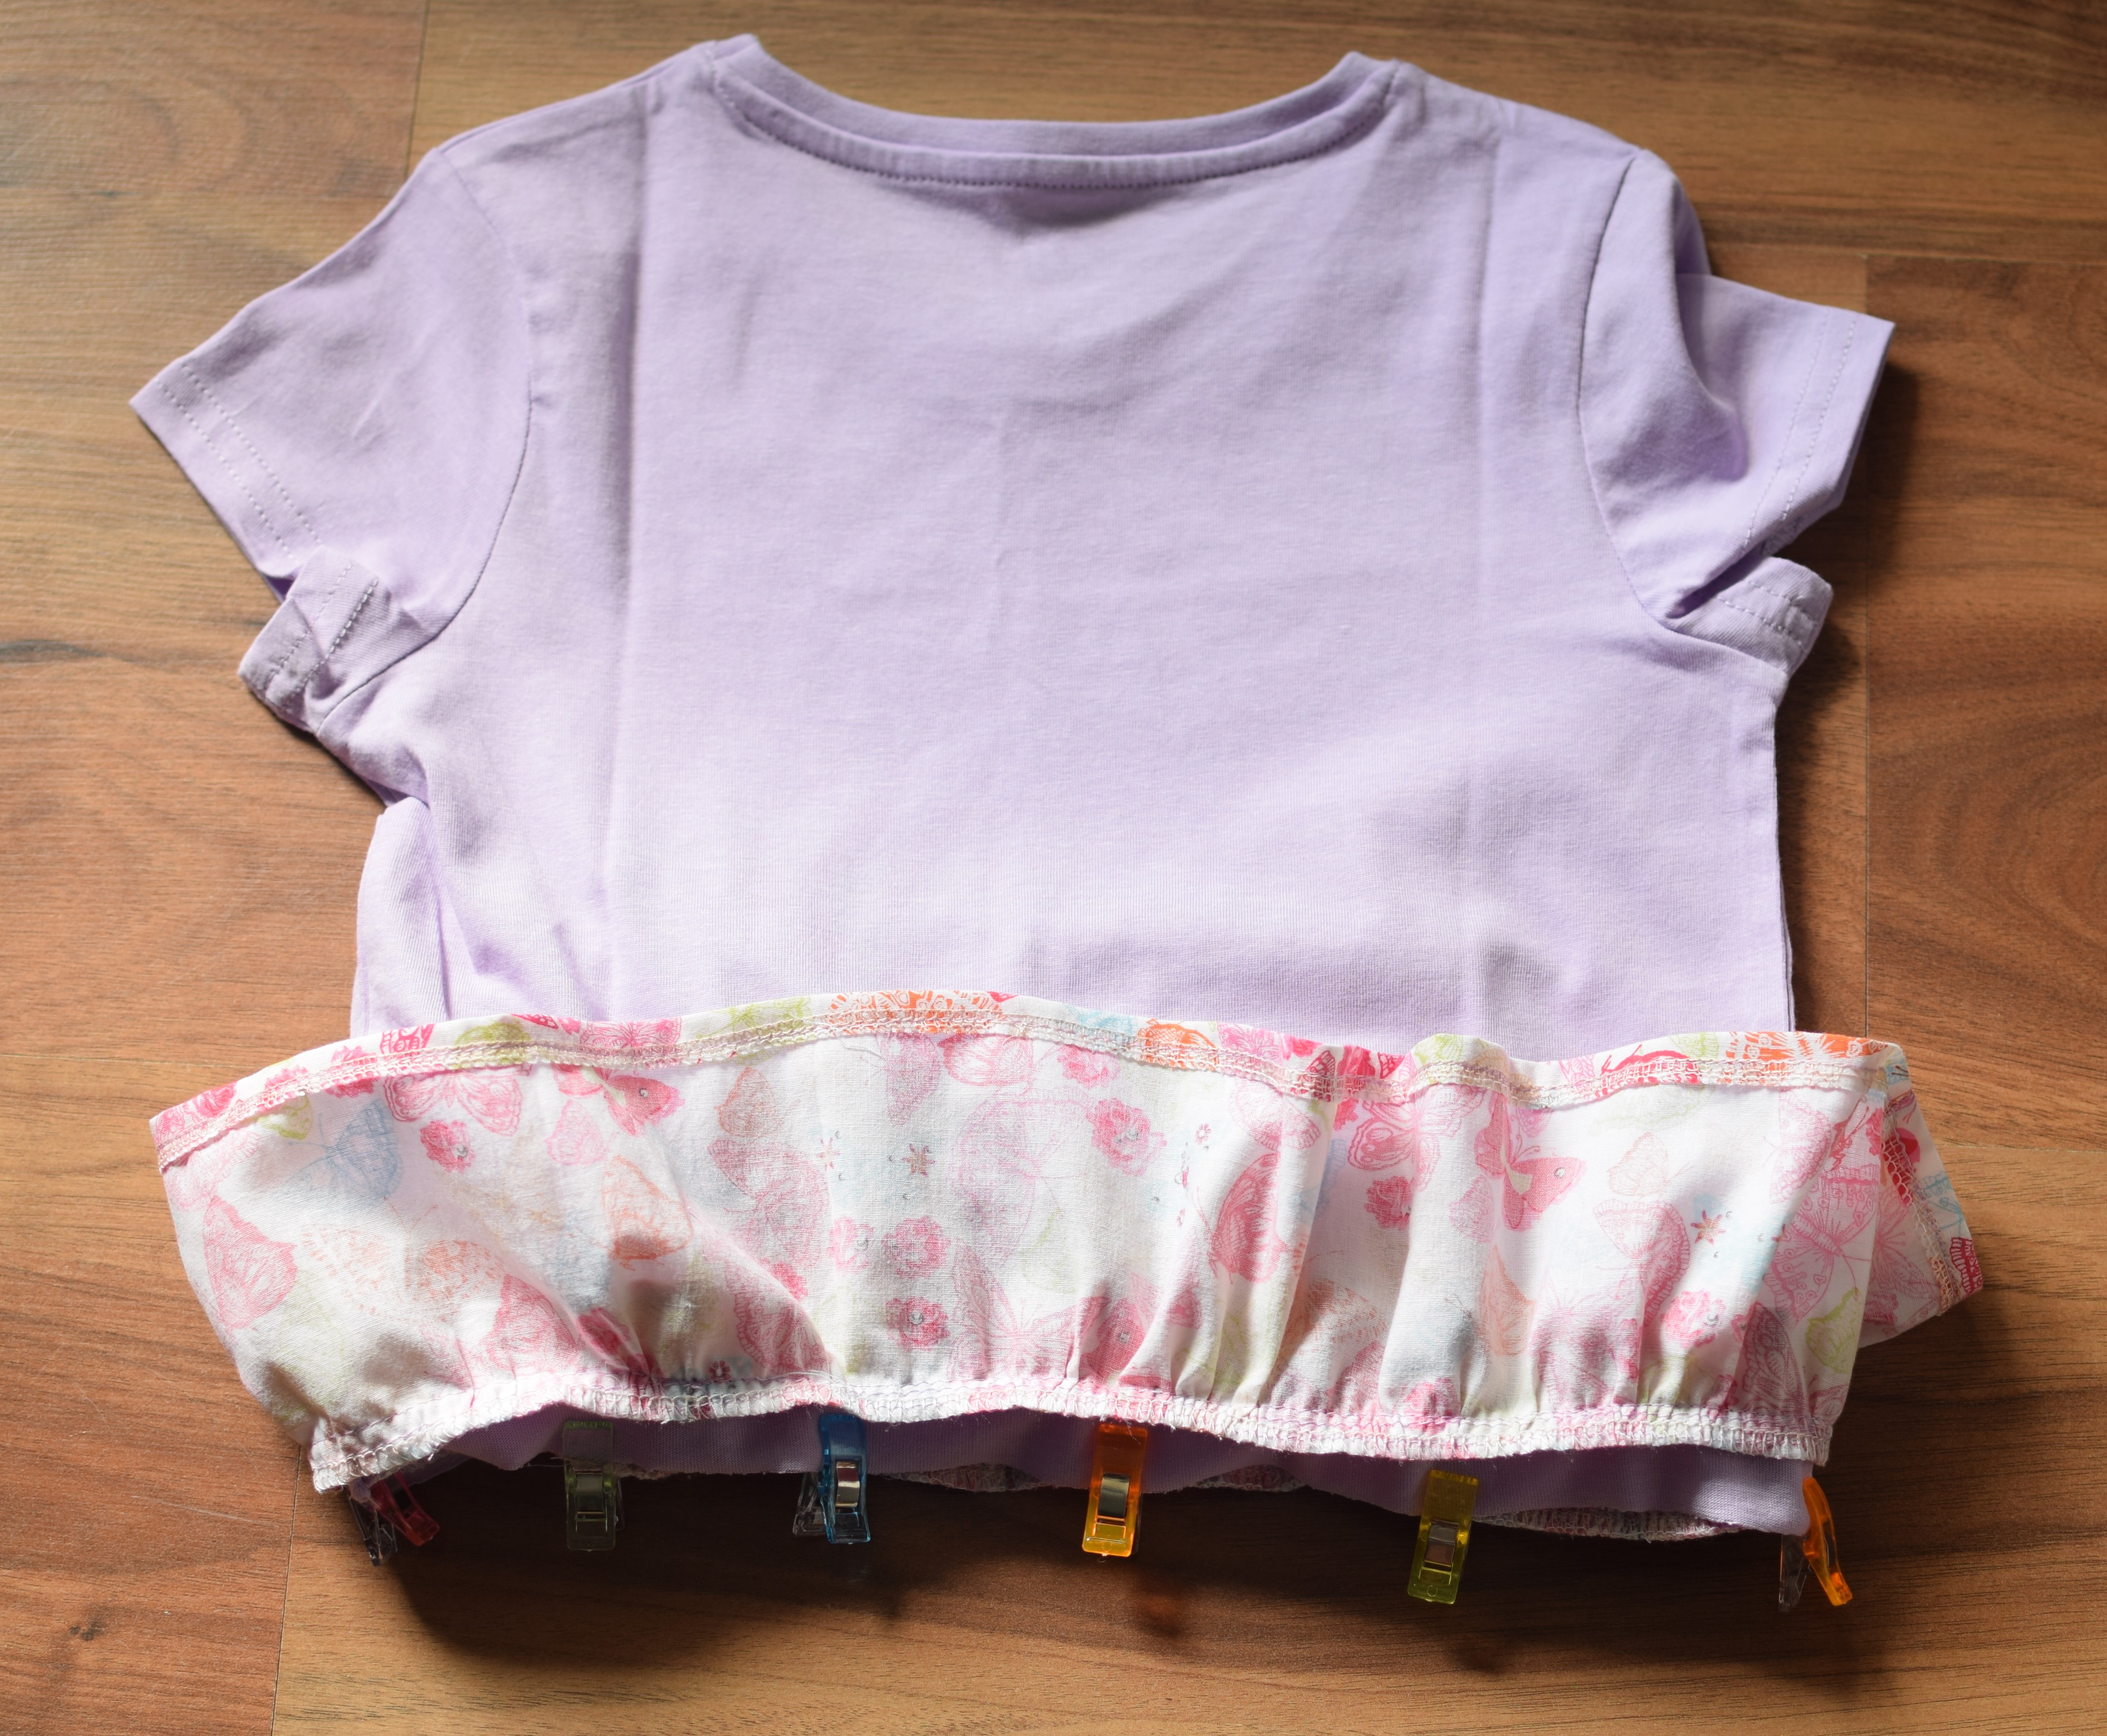
Match the first ruffle to the bottom edge of the t-shirt – right sides together. Stitch, then finish the seam.
Then match the second ruffle (the larger one) to the bottom edge of the connector piece, right sides together, and stitch. Finish the seam.
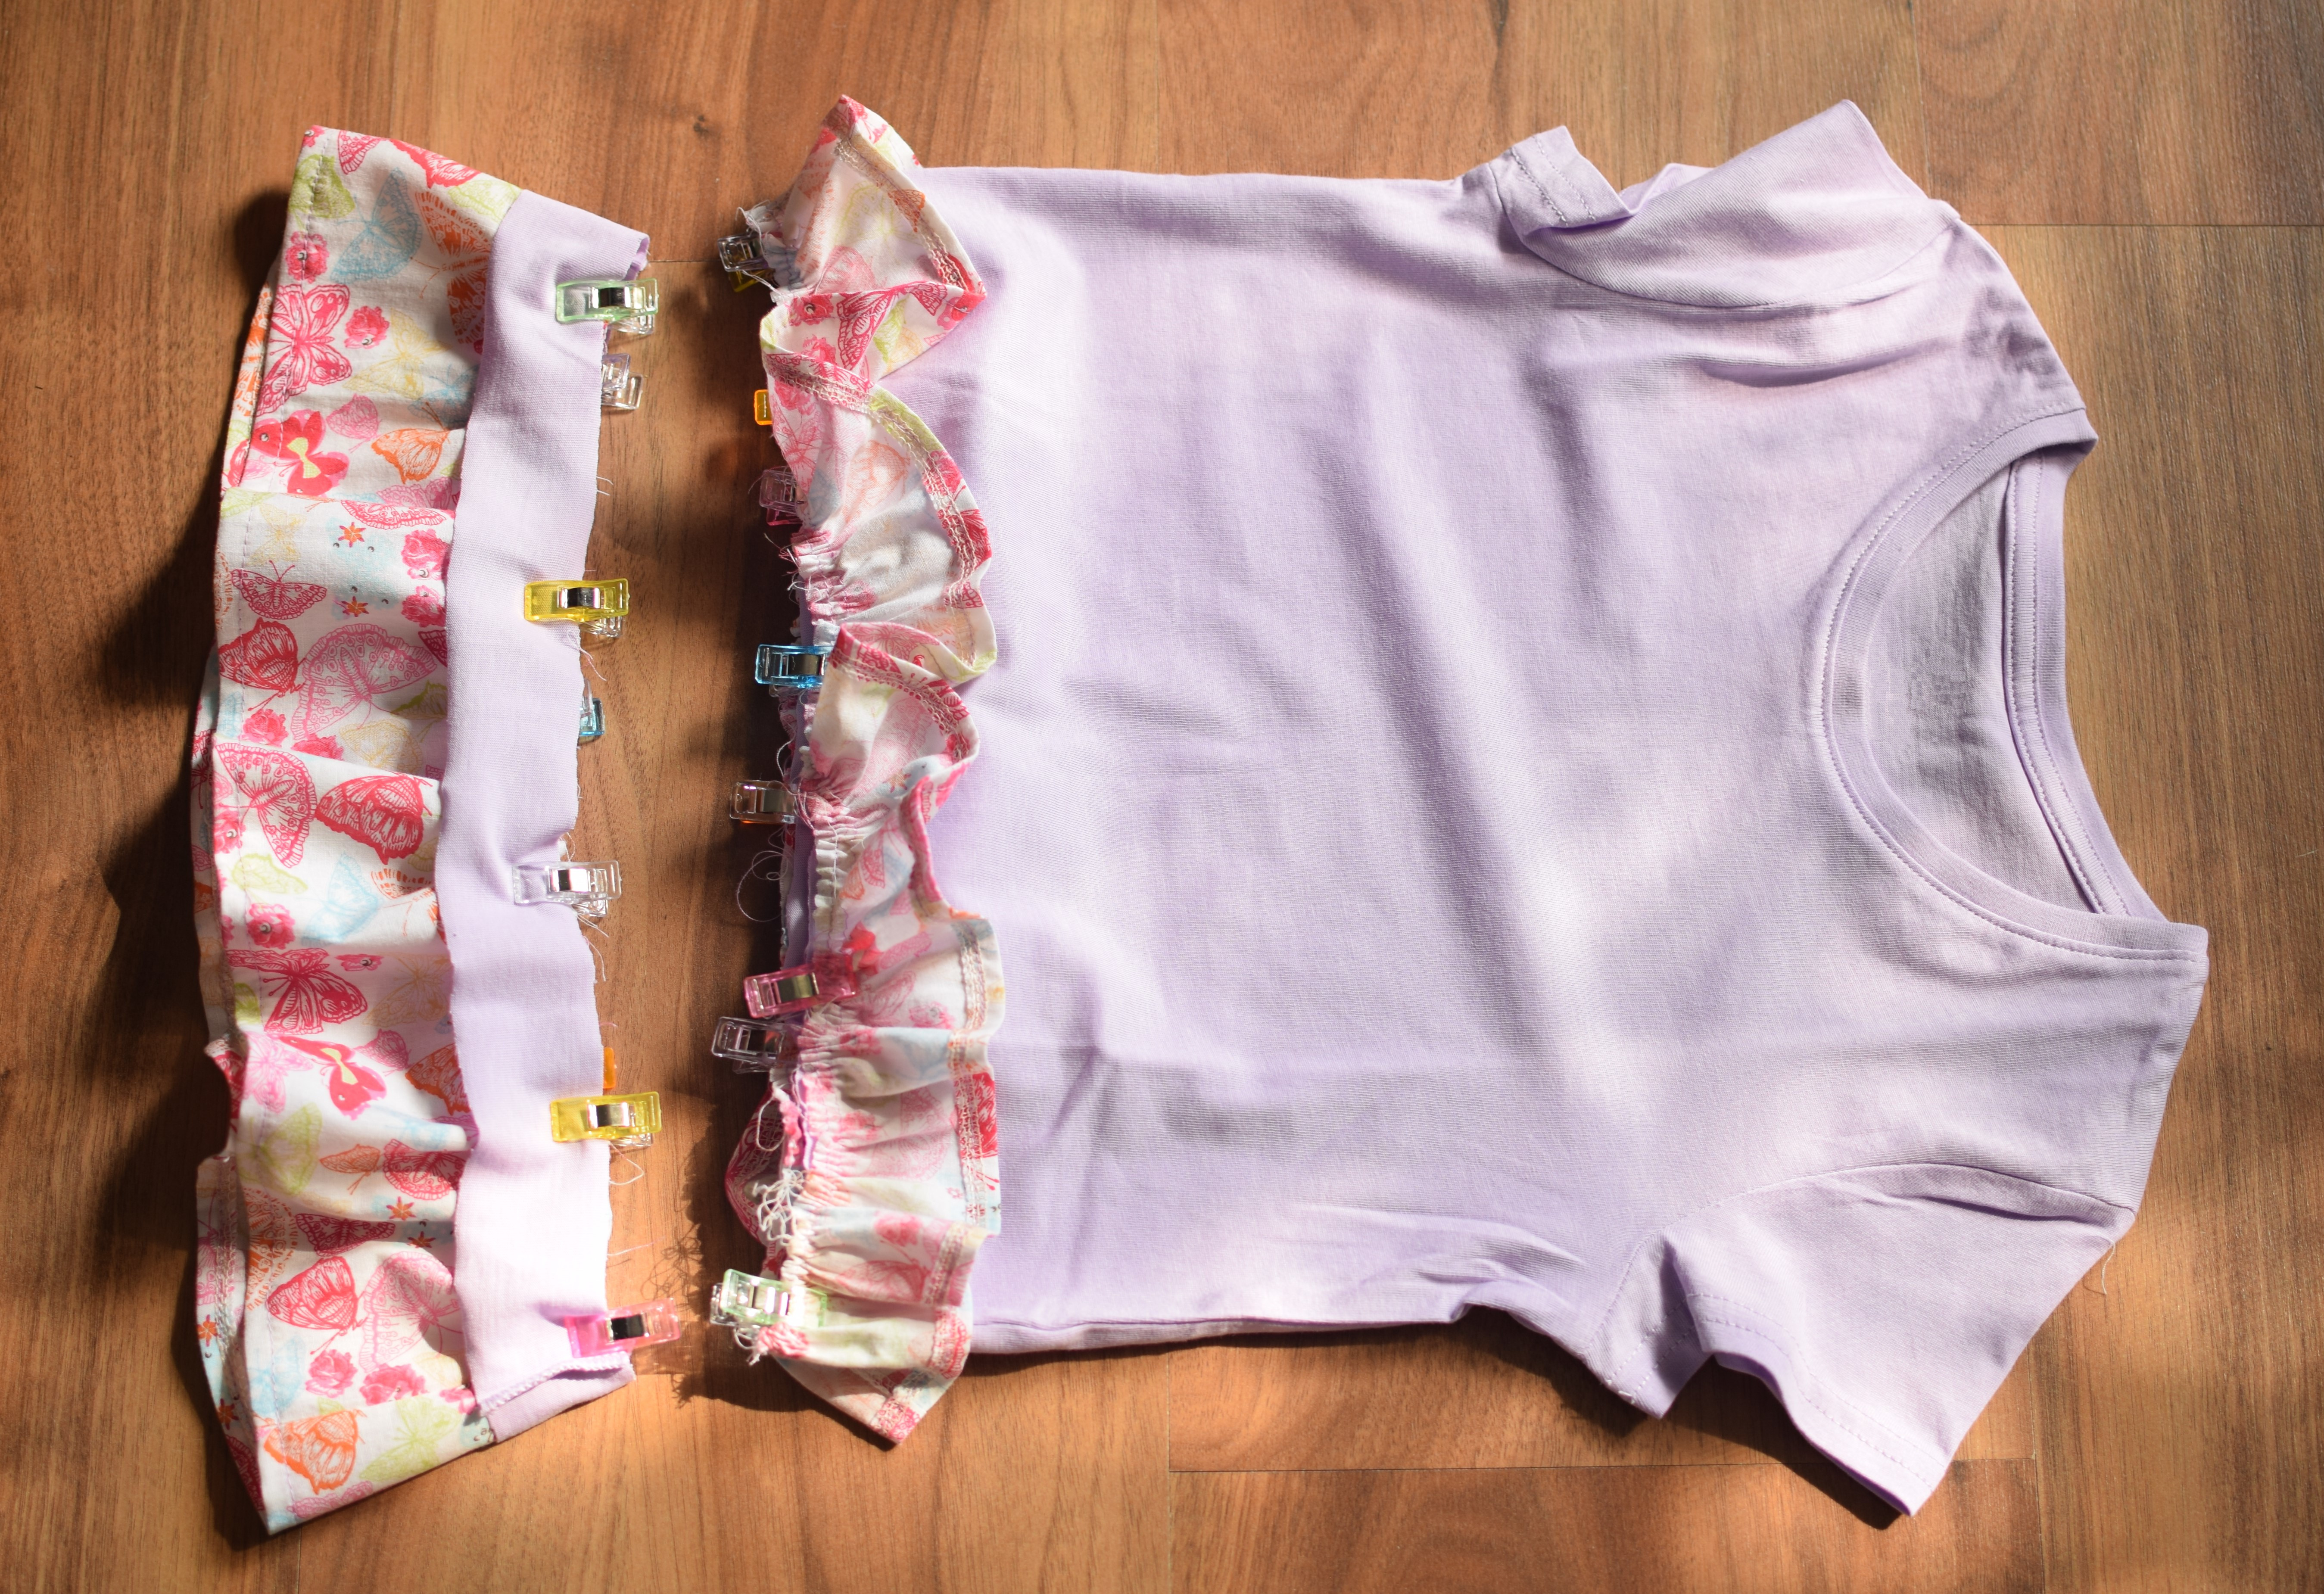
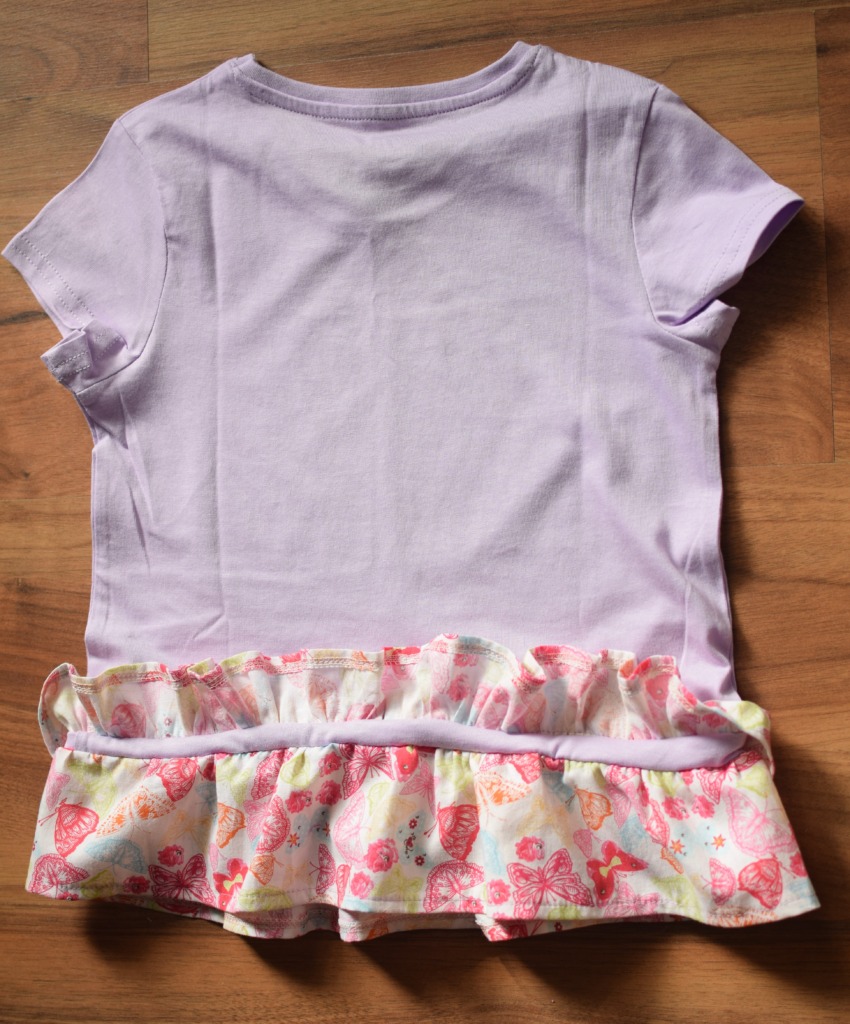
Your ruffles should now look like this:
Step 5
Now you’ll sew the connector piece to the bottom of the t-shirt. To do this, place the connector piece over the first ruffle, right side of the connector piece to the wrong side of the smaller ruffle, and stitch.
The smaller ruffle is now sandwiched between the t-shirt and the connector piece.
Step 6
Press the waist seams up. After that, topstitch from the outside.
I stitched around the circumference of my ruffle t-shirt to reinforce the seams. This is the result:
And that’s all! This cute DIY ruffle t-shirt is so easy to whip up!
I always love seeing what you make, so please don’t forget to tag your projects with @icansewthis when sharing on social media.
Hope you enjoyed this sewing tutorial, see you next time!
Let’s keep in touch! You can find me on Facebook, Instagram, and Pinterest.


I am not sure why you need a connector piece. Why don’t you make the bigger ruffle longer?
Hi,
It’s because if you attach two ruffles directly to the t-shirt, that seam will be too bulky.