
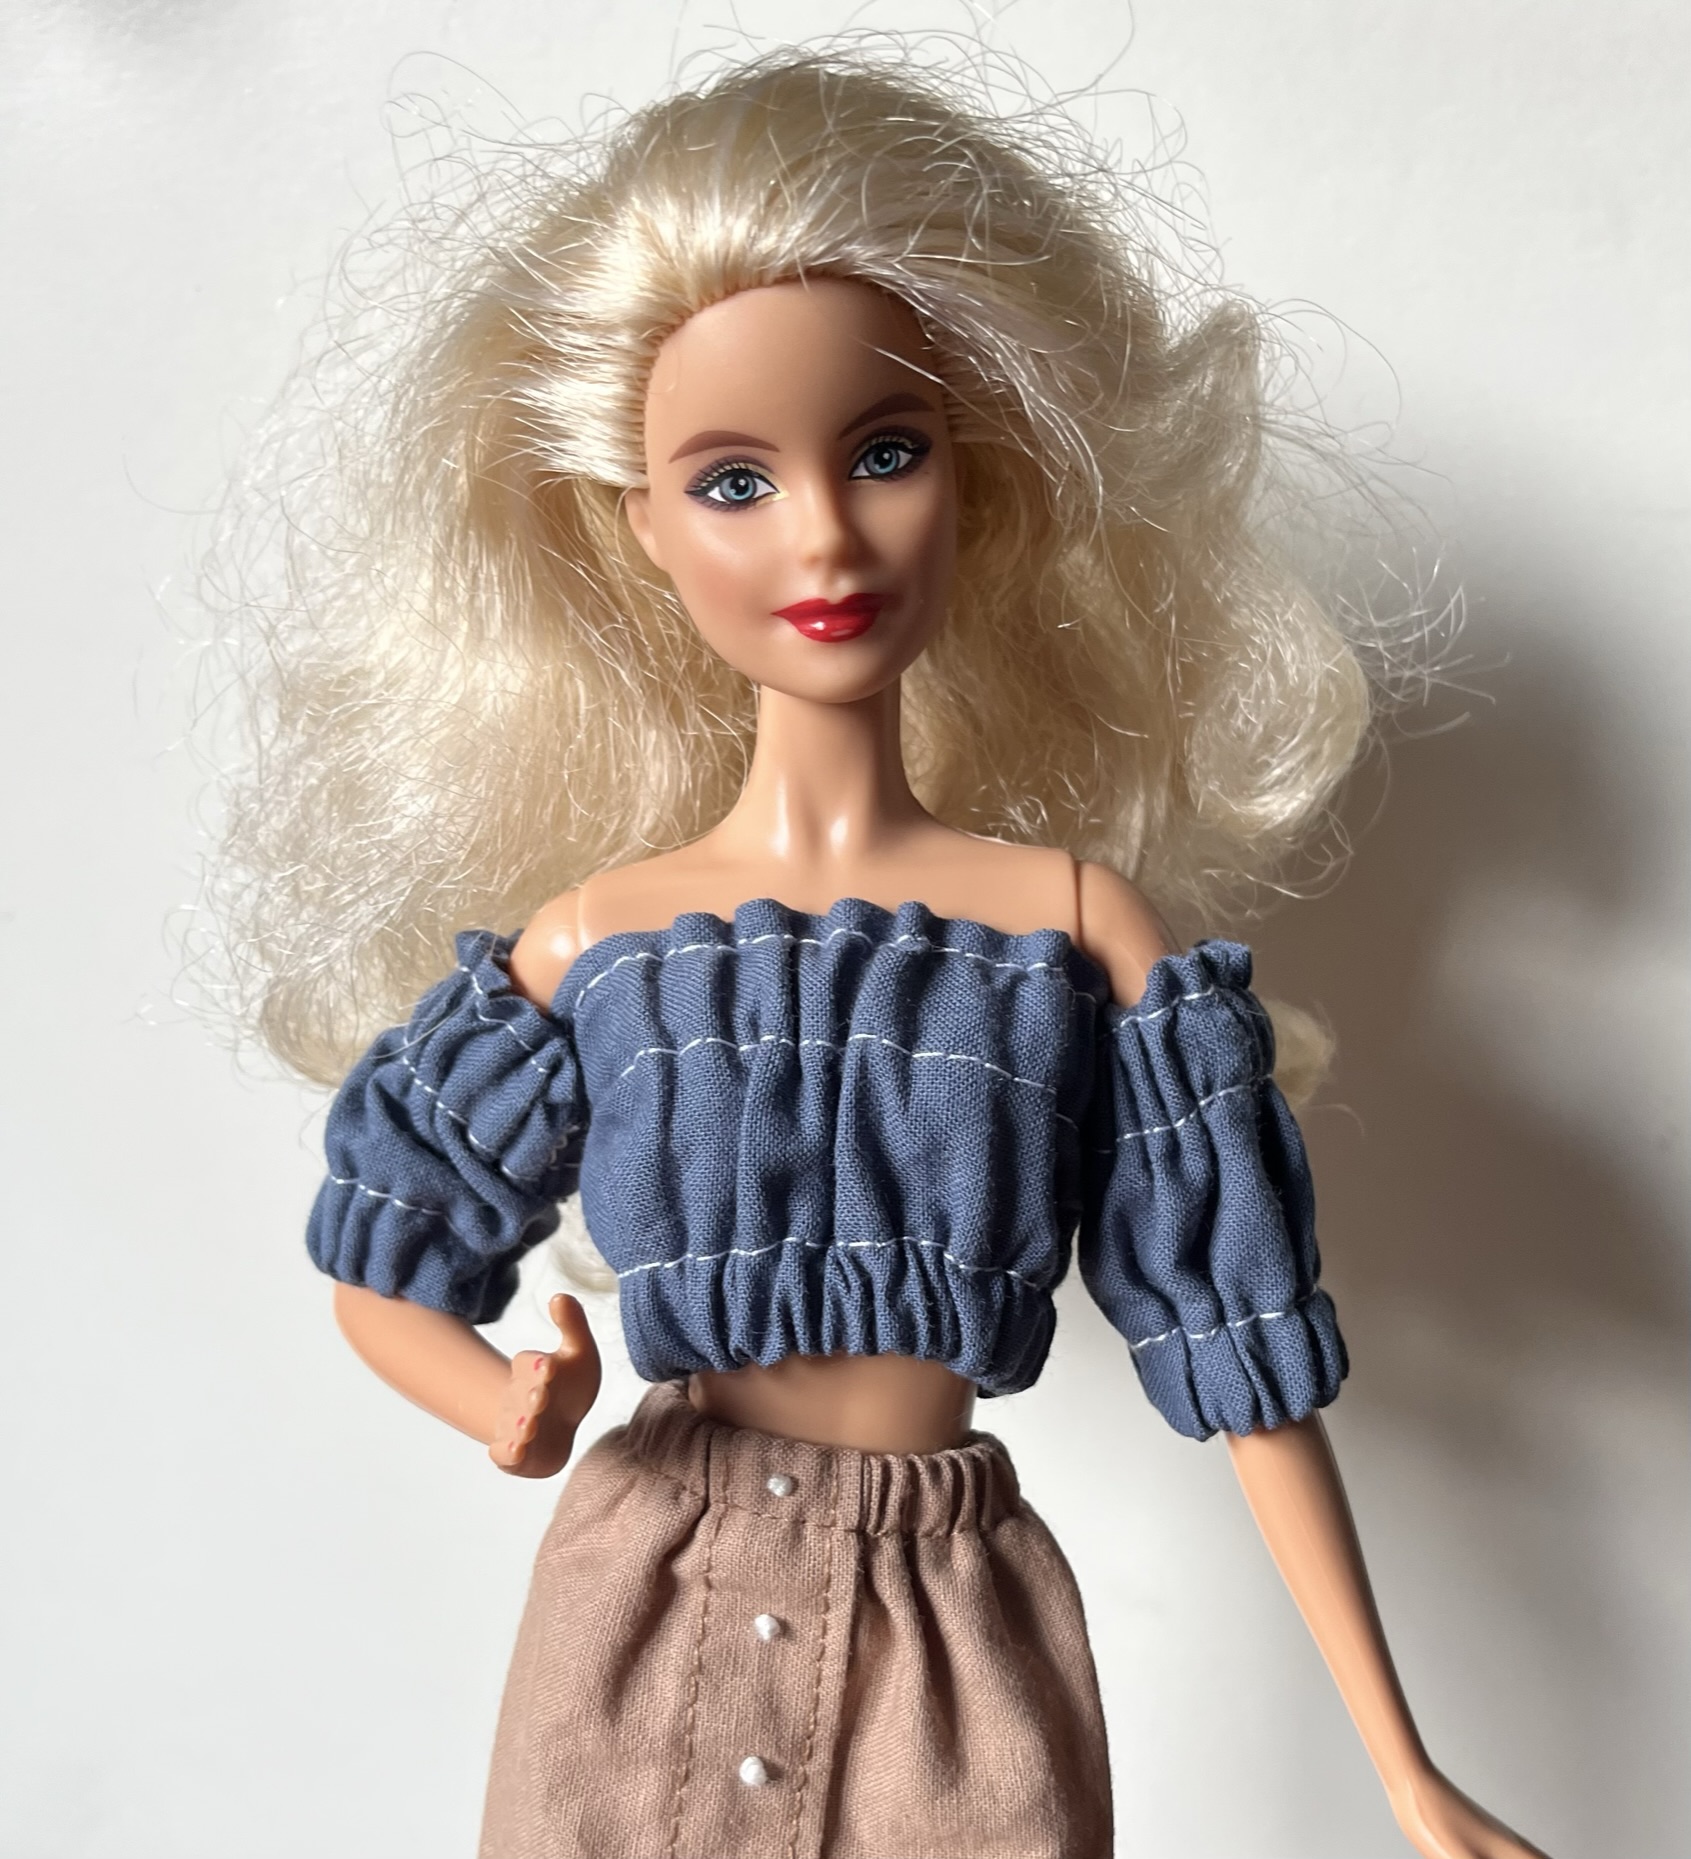
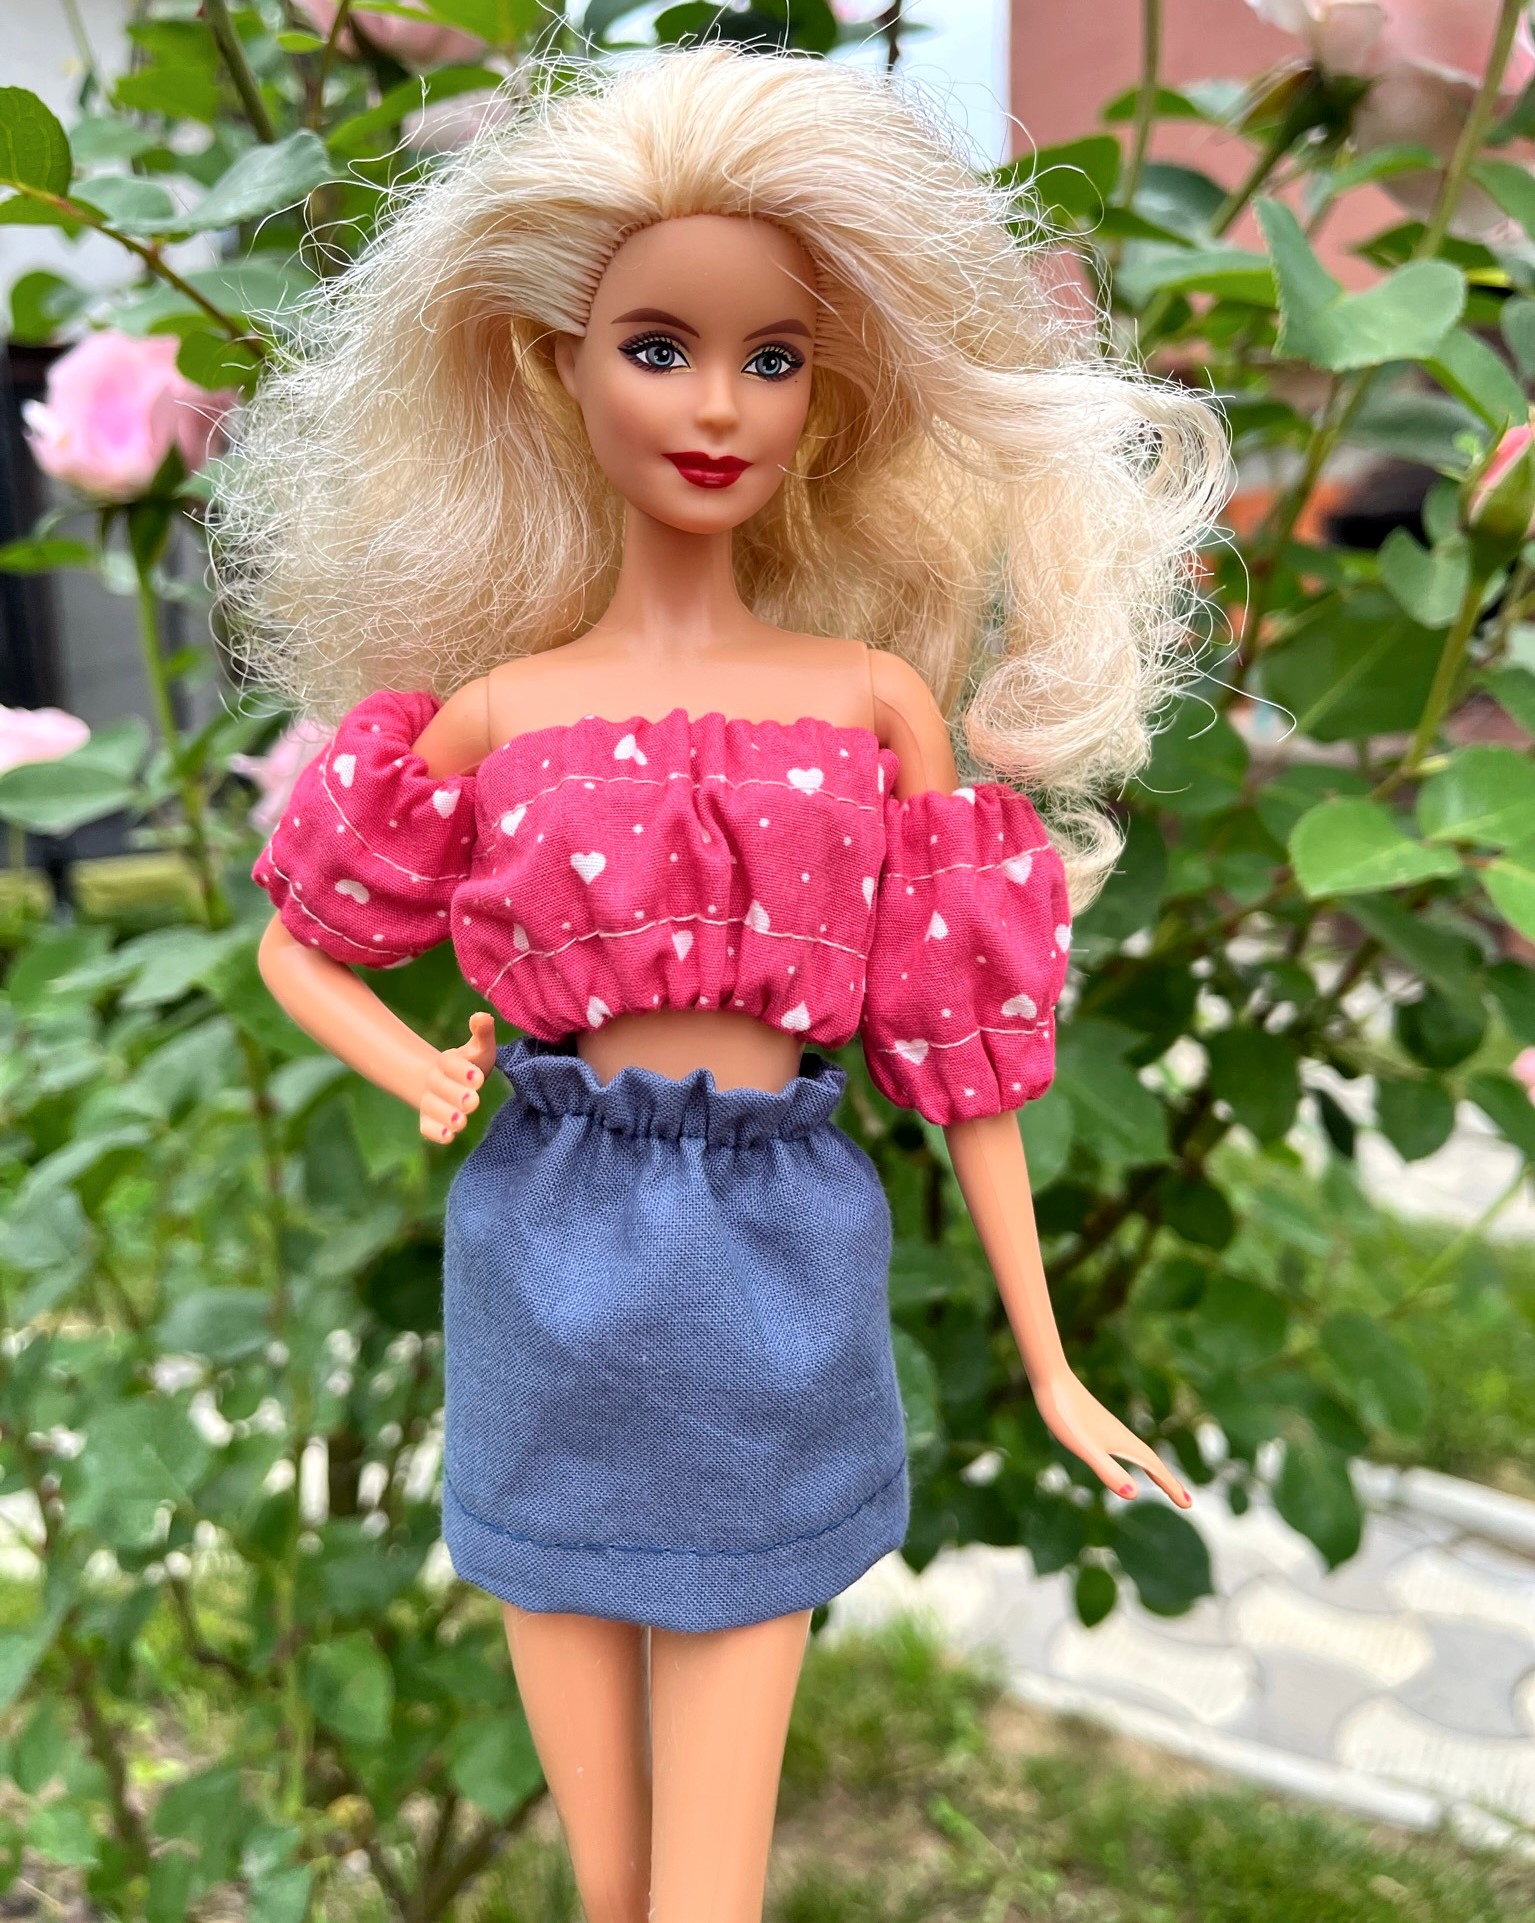
Free Barbie top pattern and sewing tutorial for beginners. You can make your own Barbie peasant top in less than 15 minutes. This is a simple and quick sewing project that doesn’t require advanced sewing skills or special tools.
I made this elasticated top from a woven cotton fabric rectangle and it’s so easy that even a beginner can sew one, hassle-free.

I love the simplicity of this doll crop top. You can build an inexpensive Barbie doll wardrobe and use up fabric scraps from your stash in one fell swoop. Also, this is a great gift idea for all Barbie lovers.
Related: Barbie faux button placket skirt tutorial / How to make a doll sleeping bag
Sewing tiny clothes for small dolls like Barbie is a bit more difficult than sewing for larger dolls, but this is not the case here. This pattern is very simple and doesn’t take long to make.
On top of that, you don’t need any doll sewing tools to finish this elasticated crop top. A sewing machine and some fabric scraps and you’re good to go!
Sewing supplies – Free Barbie peasant top pattern for beginners
- cotton fabric scraps
- 1/4” wide elastic (or 1/8”)
- sewing machine
- needle
- safety pin
- fabric marking pencil / tailor’s chalk
- matching thread
- fabric scissors
Free Barbie peasant top pattern & step-by-step tutorial
Step 1 – cut your fabric piece
Cut a fabric rectangle that measures 17” by 3.5”.
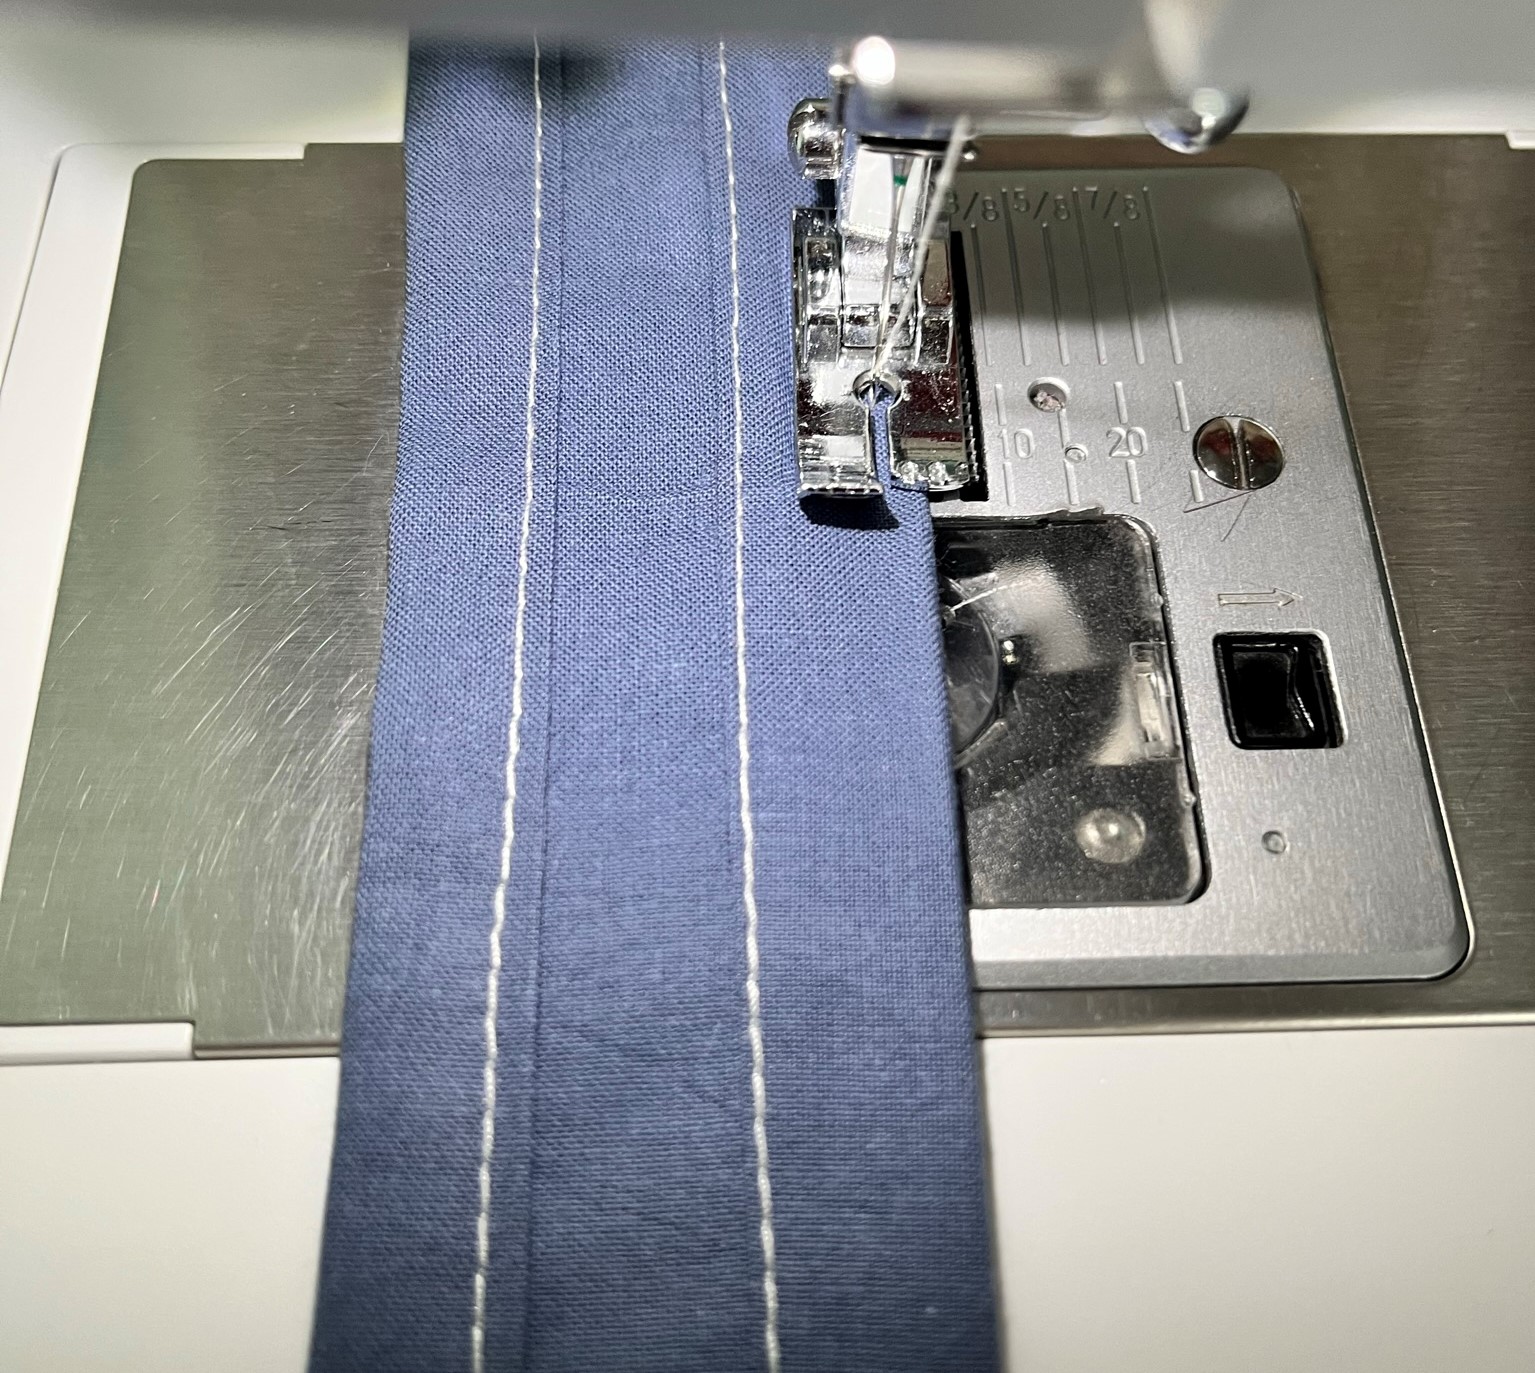
Step 2 – hem both long edges
Fold over both long edges 1/4”, then fold them over again 1/2”, and sew as close to the folded edge as possible.

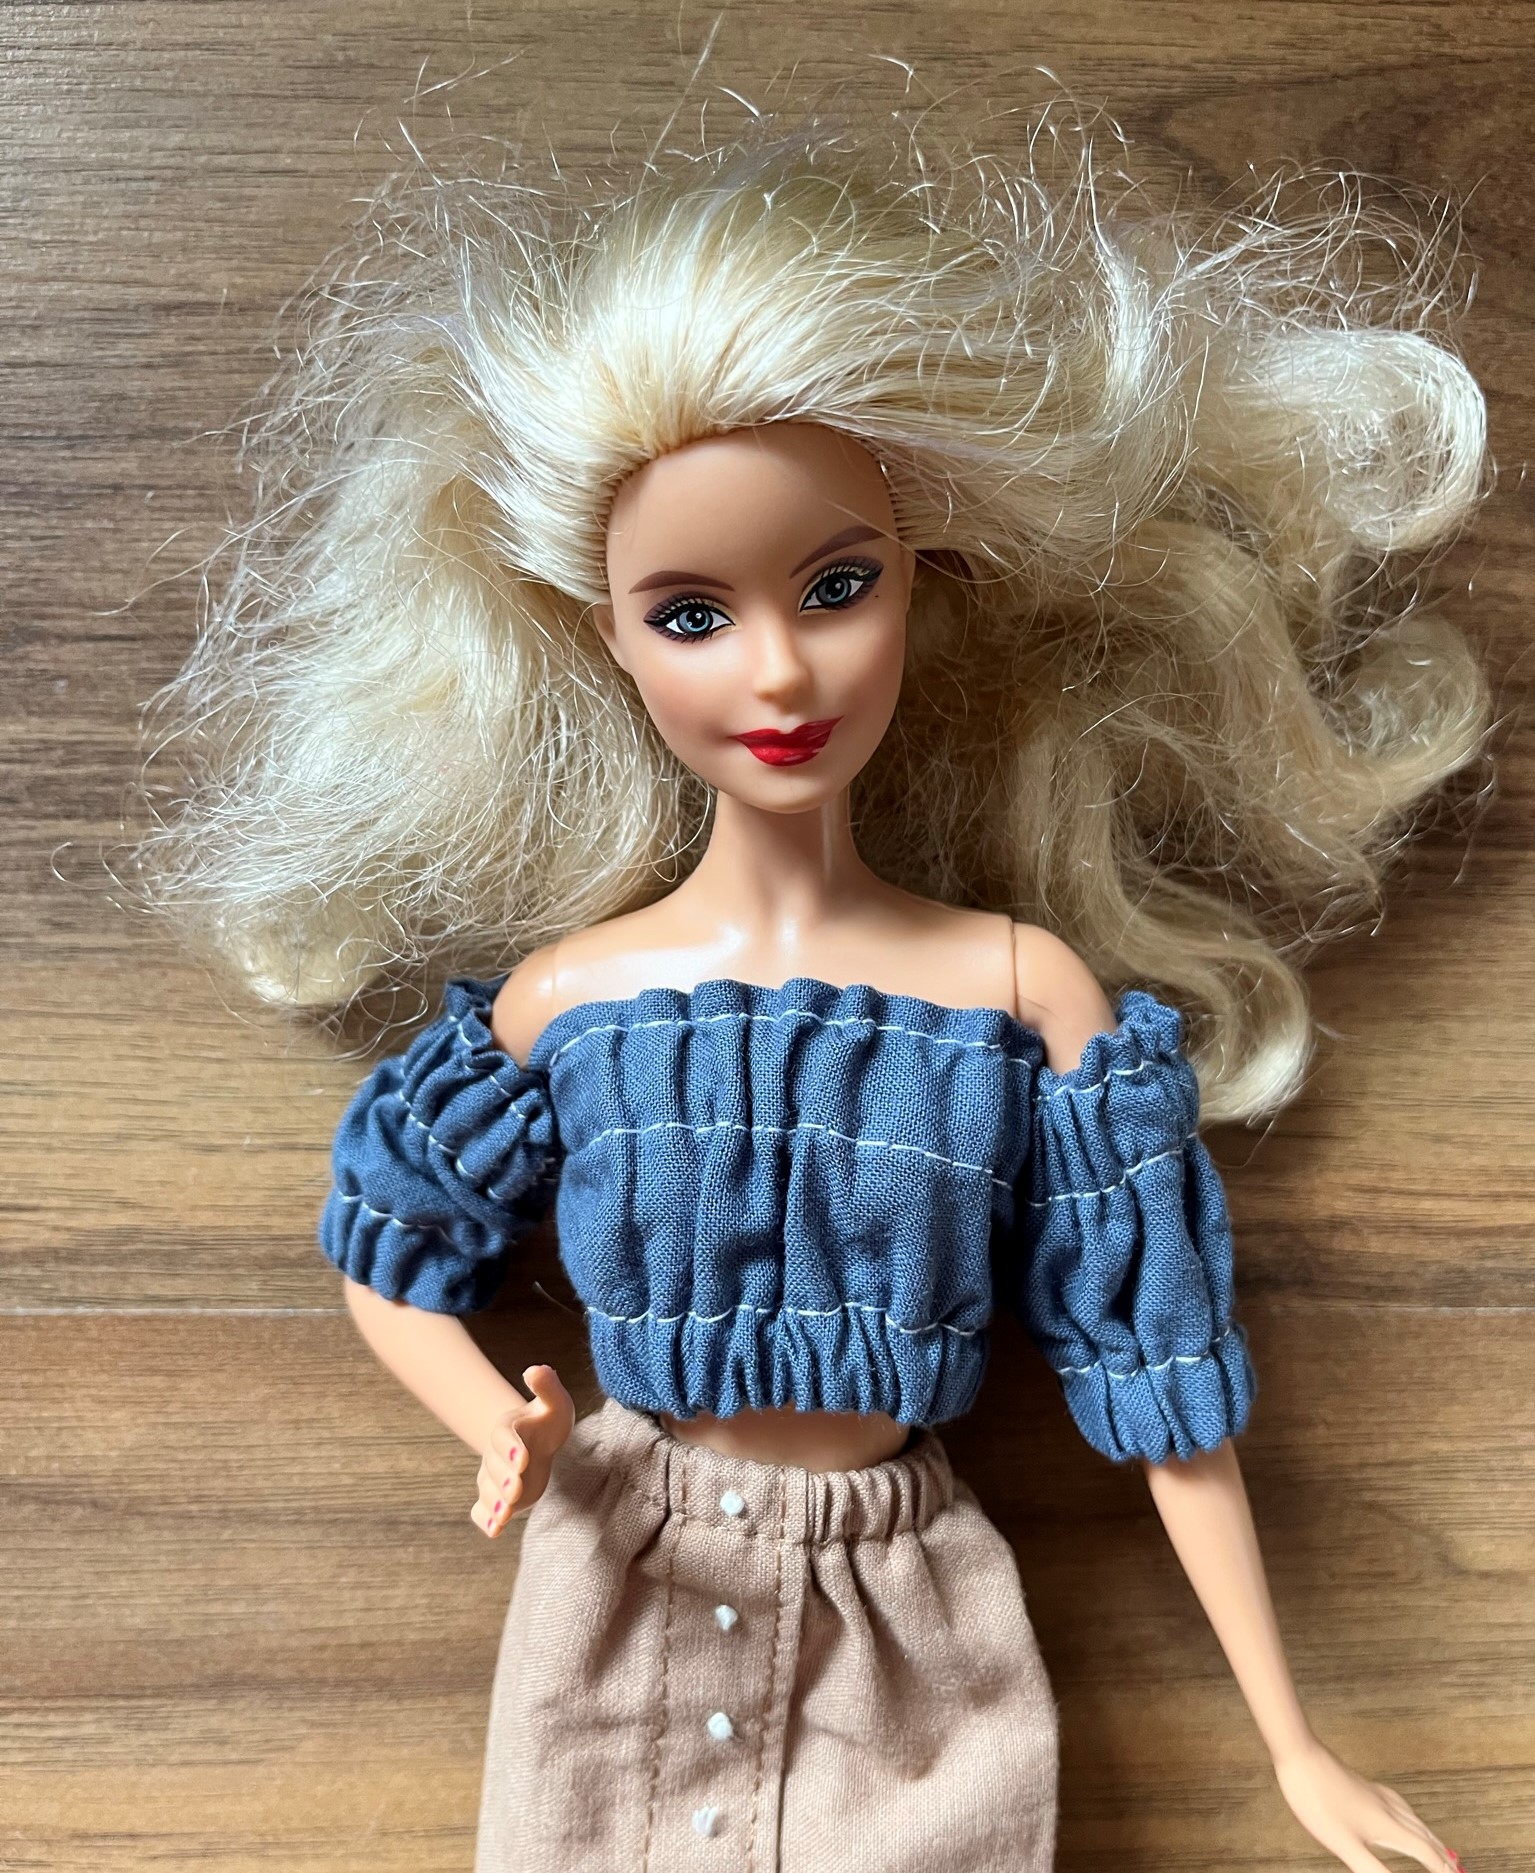
I wanted a ruffled neck, so I made one casing a bit wider and topstitched about 1/8 inch from the top edge.
This is how the fabric piece looks right now.

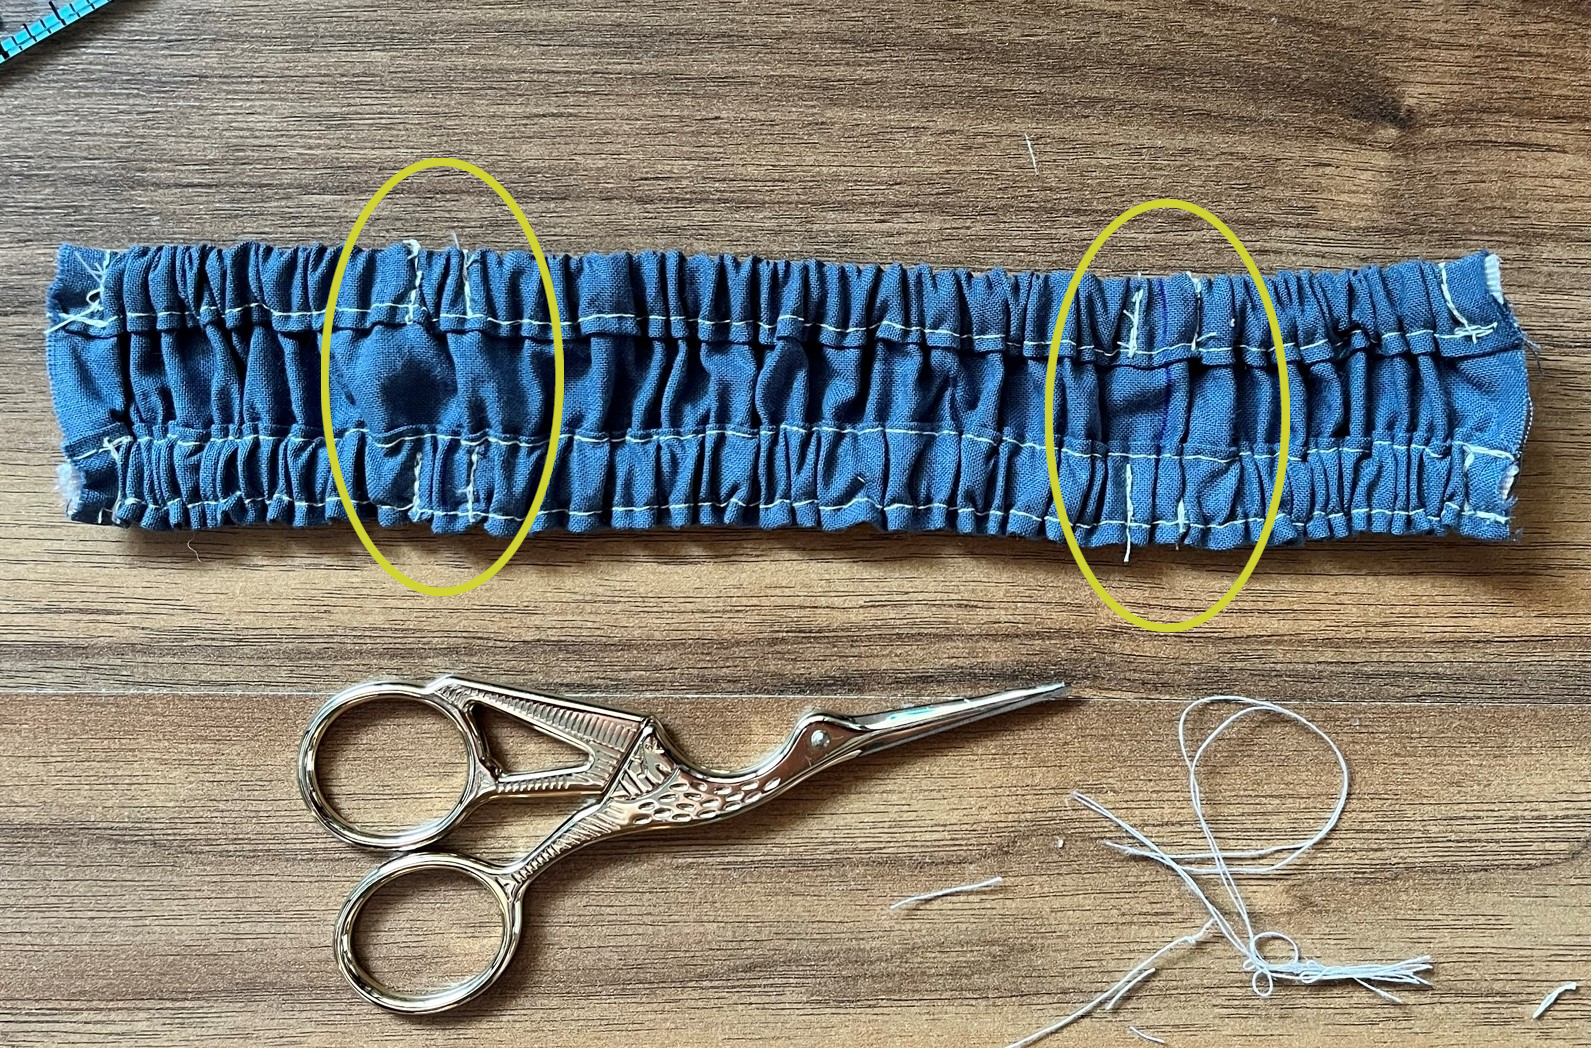
Step 3 – draw 2 lines across the rectangle
Mark a point that is 4.5” away from both edges and draw 2 perpendicular lines with a fabric marking pencil, or chalk, or even a regular pen.
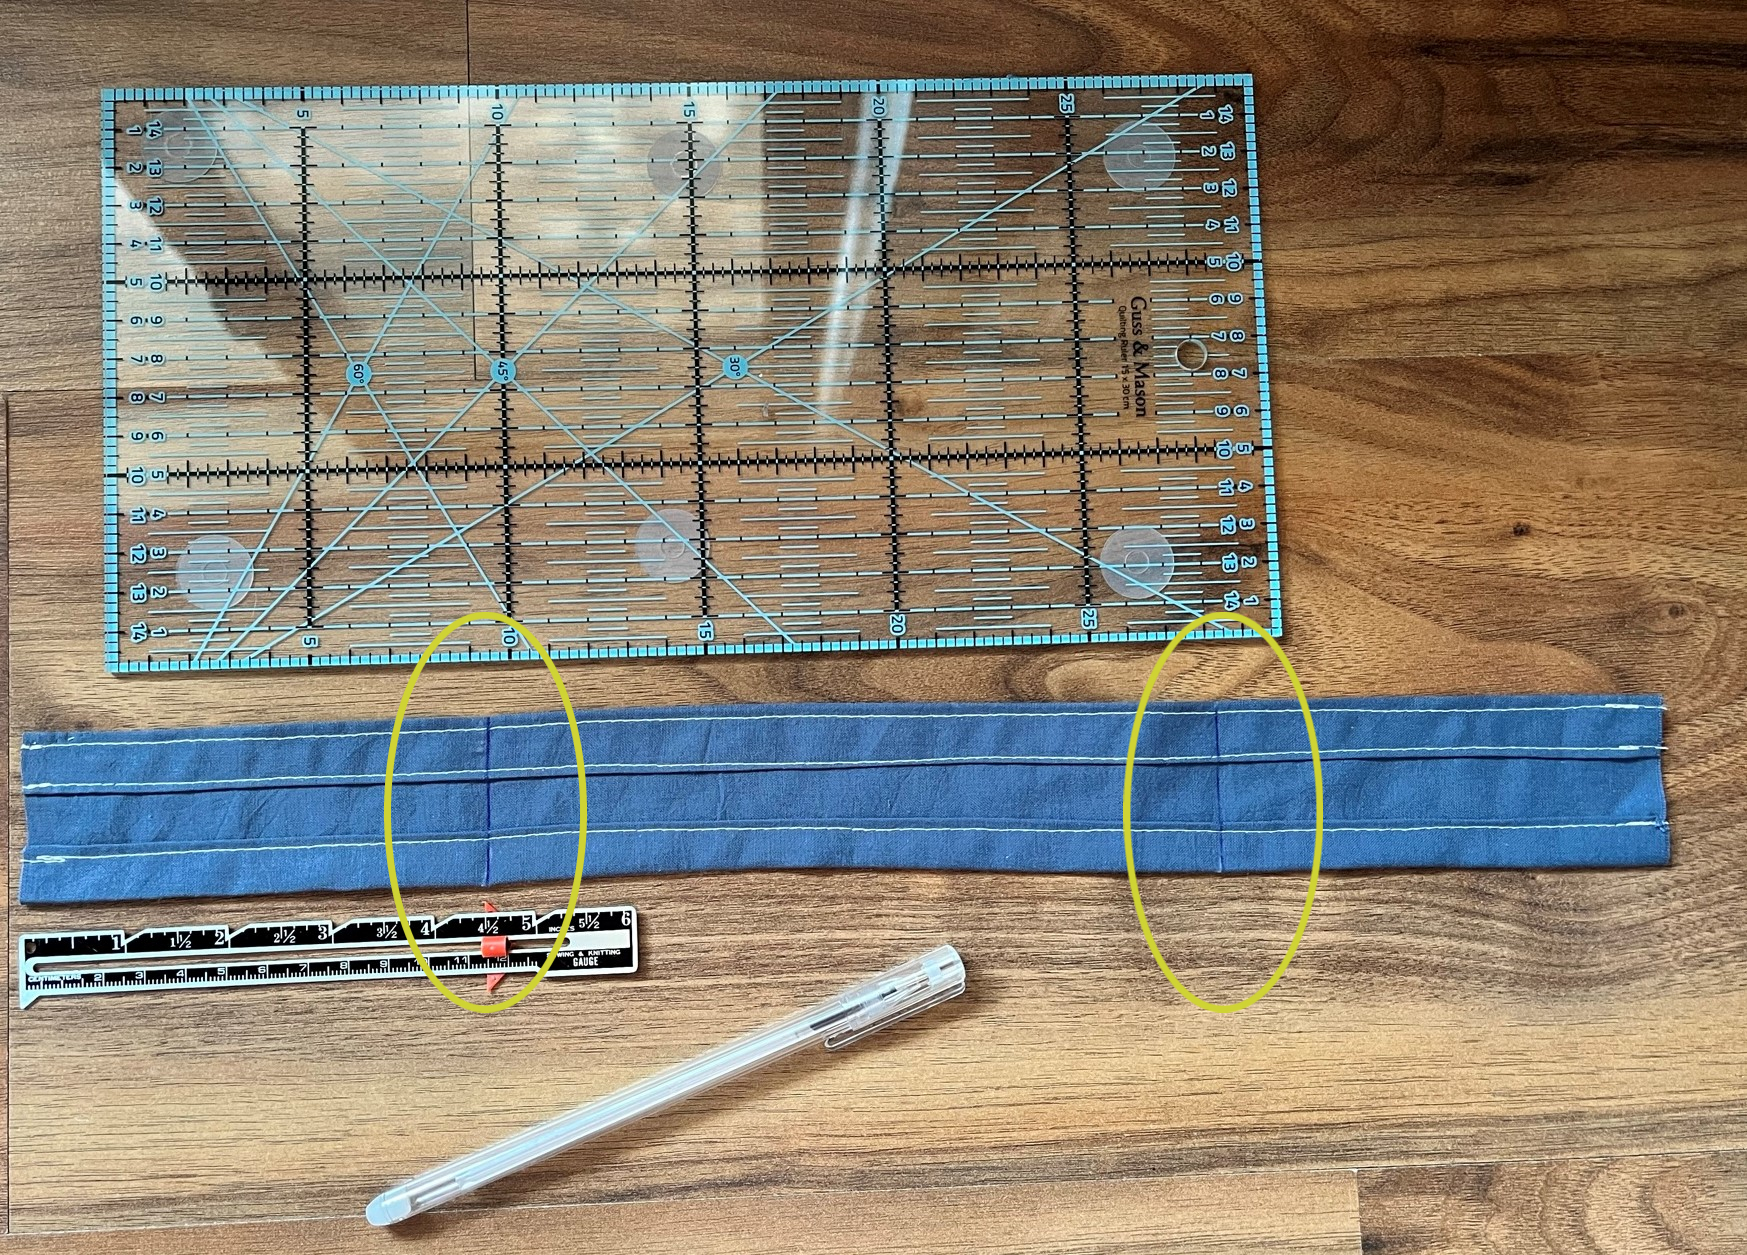
These lines have to be visible because you’ll use them soon as guidelines when cutting up the sleeves.
Step 4 – feed the elastic through the casings
Now cut 2 pieces of 1/4” wide elastic that are each half the length of our original fabric piece.
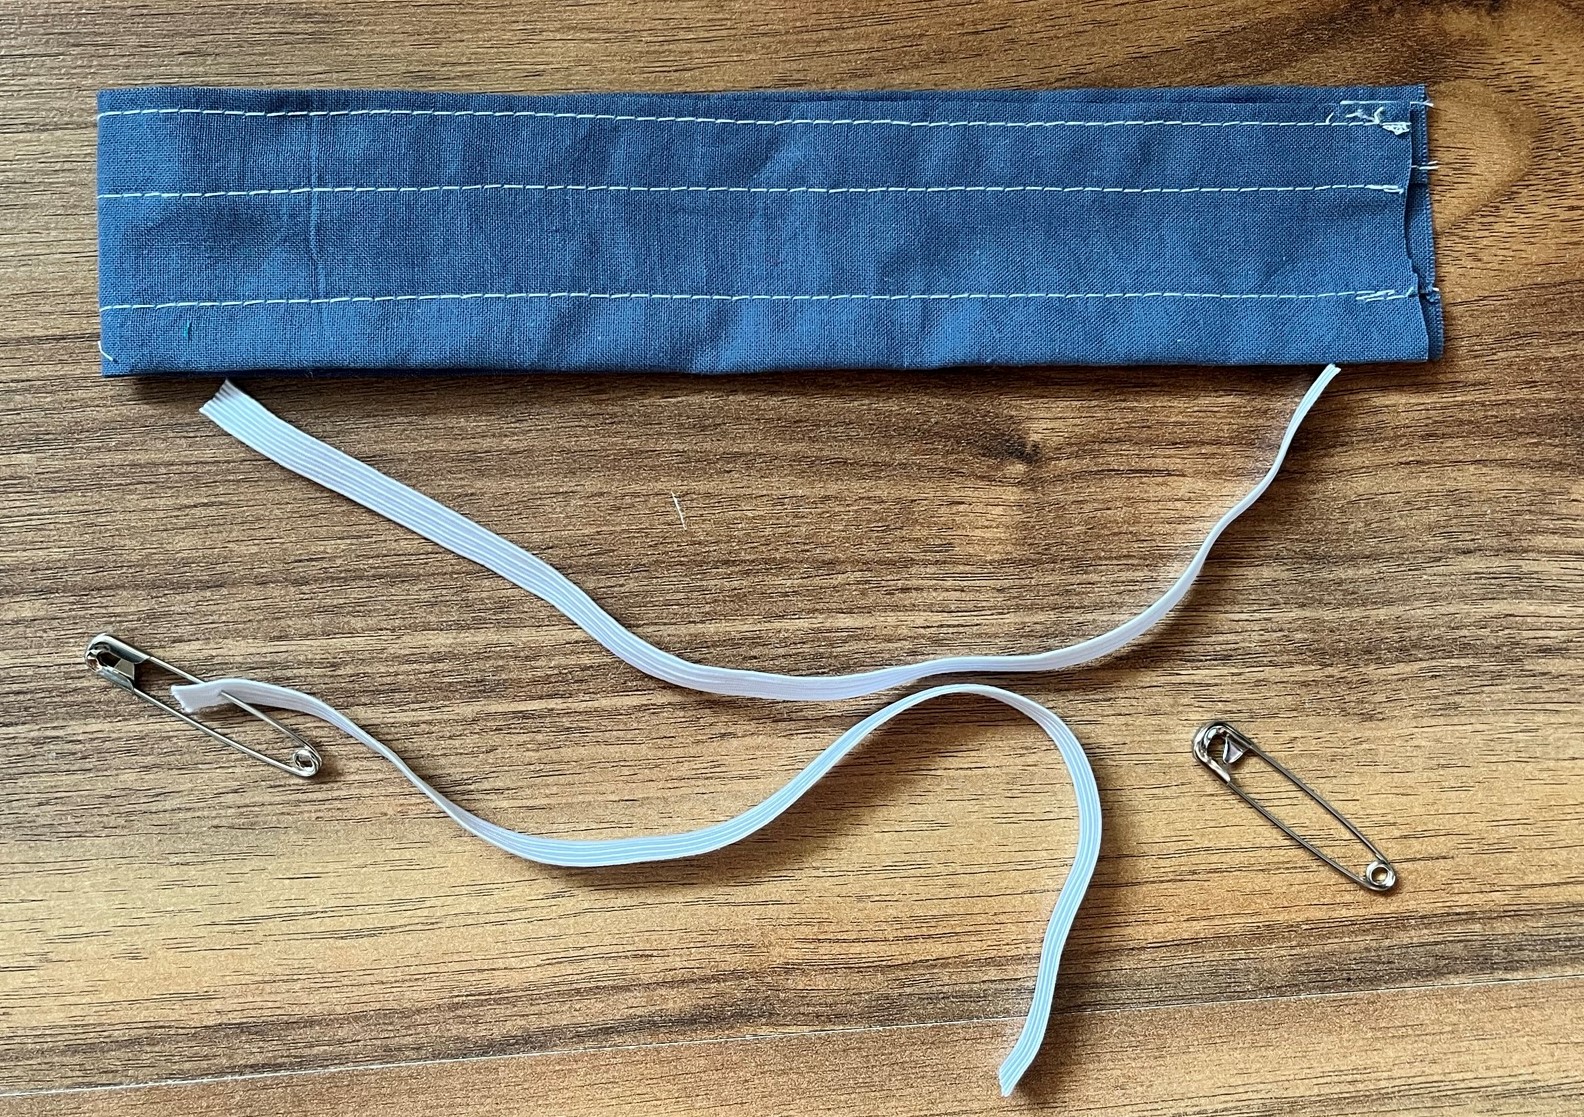
Use a safety pin to feed the first elastic into the first casing. Stitch both ends of the elastic in place. Thread the other elastic piece into the second casing, and again sew both its ends in place. Backstitch.
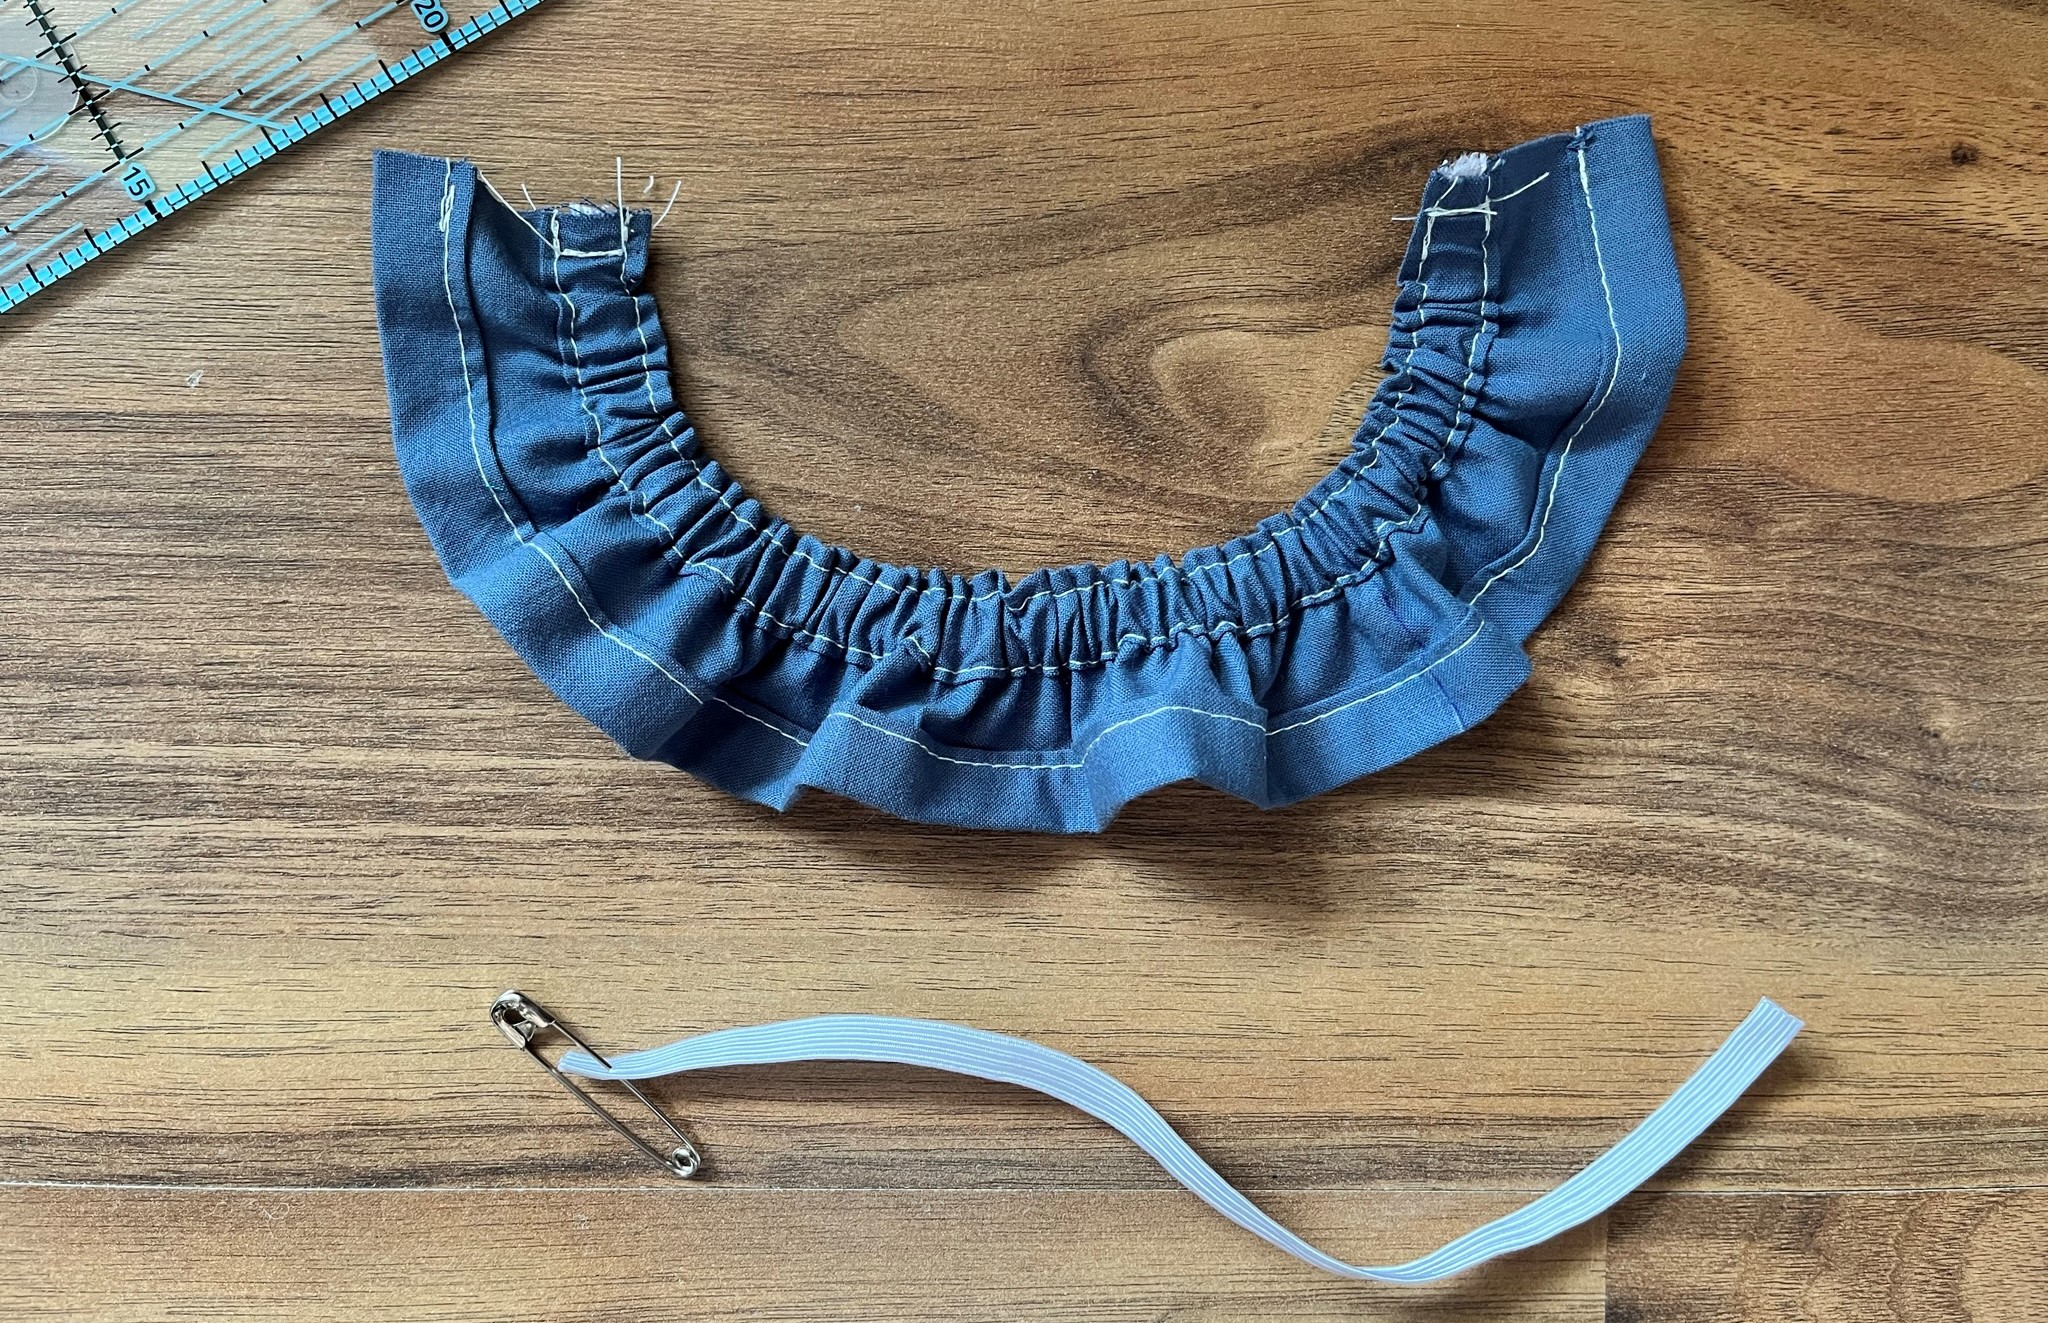
Straighten up the elasticated fabric piece so that the gathers are evenly distributed.
Step 5 – stitch the elastic in place
Do you see the lines you drew in Step 3?
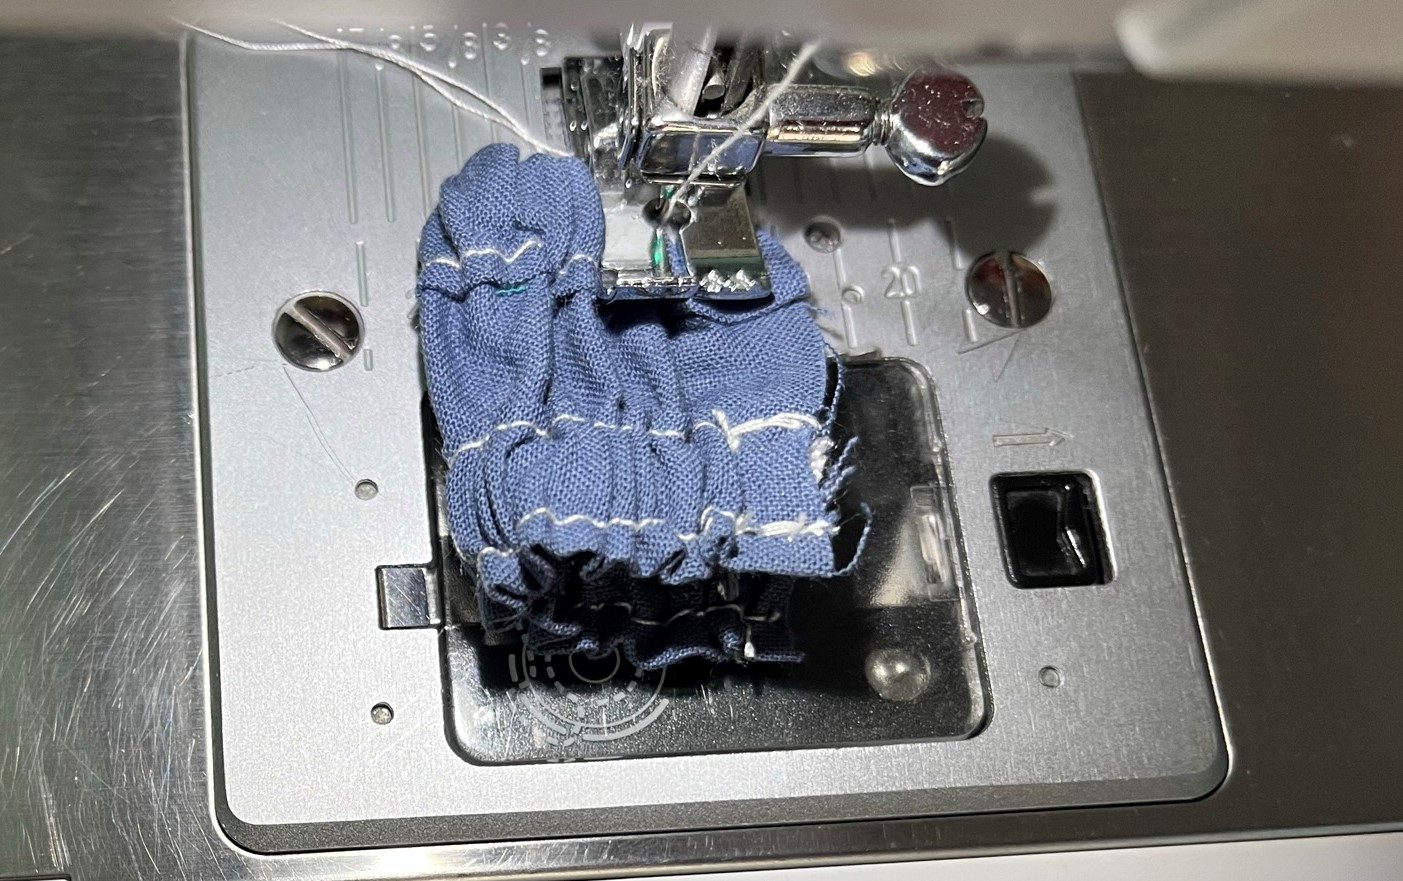
Now you have to stitch the elastic in place in the proximity of those lines – before and after, up and down. Backstitch each time.
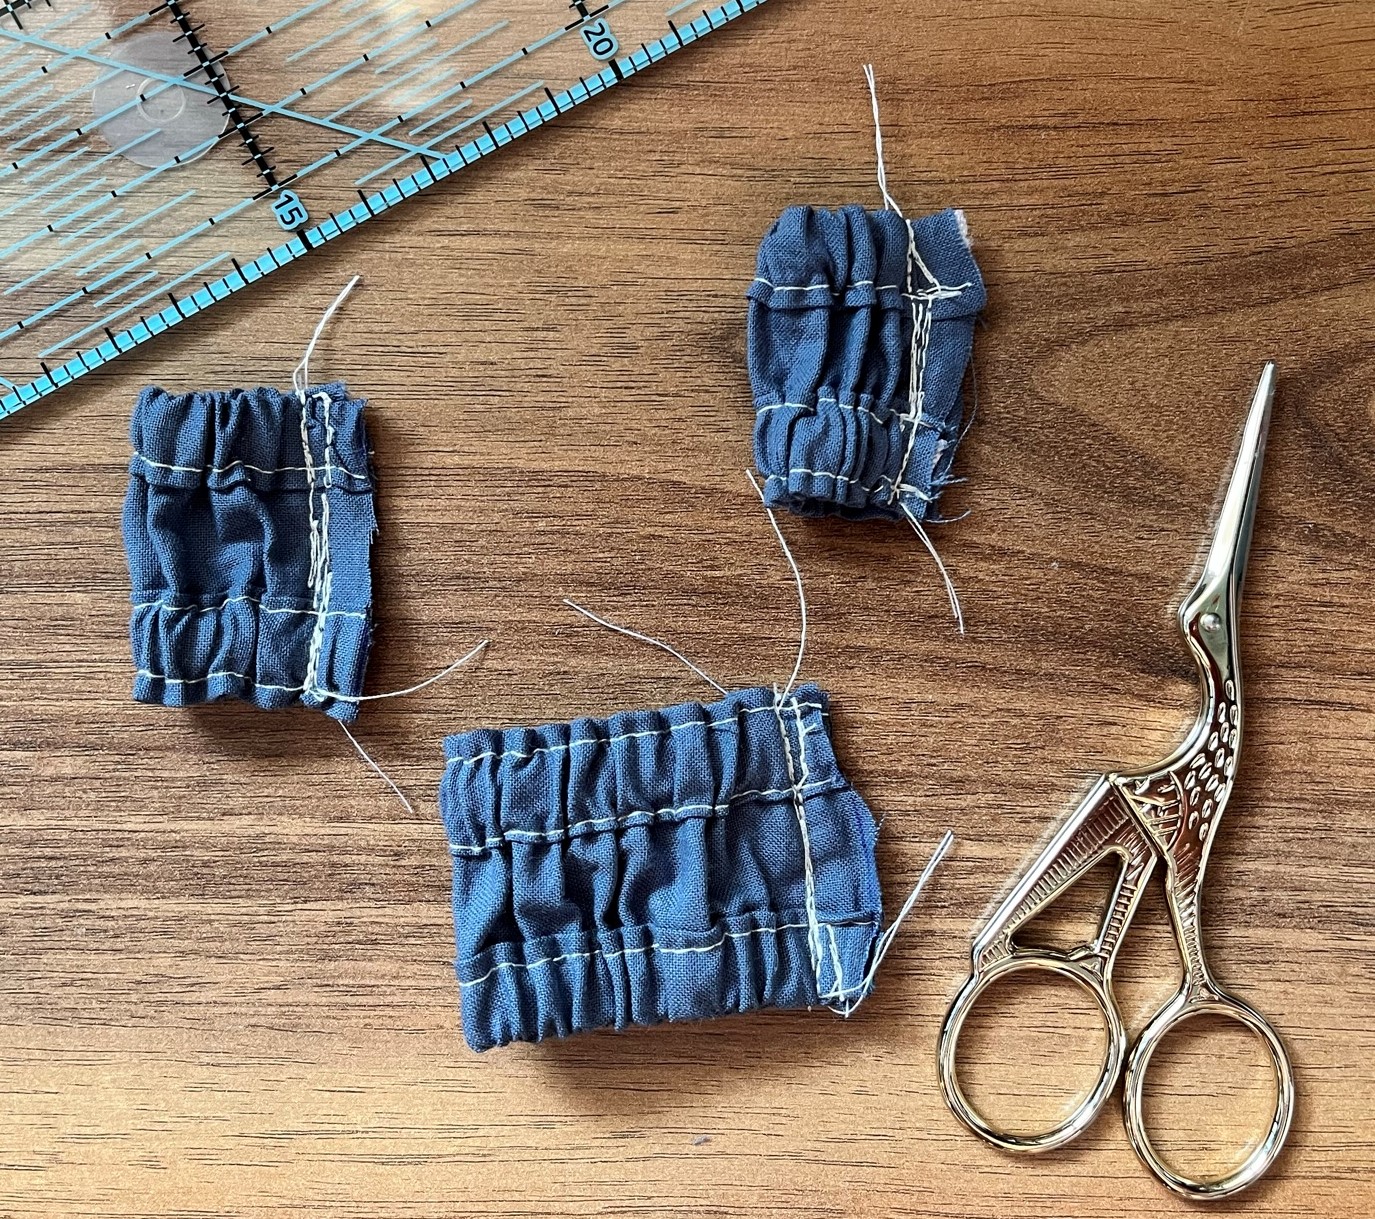
Step 6 – cut the sleeves and the top
Cut the fabric piece along the two lines. It doesn’t have to be perfect, don’t stress about it.

Because you stitched the elastic in place in the previous step, now you have three elasticated fabric pieces. One of them is the doll top, and the other two, the smaller pieces, are the sleeves.
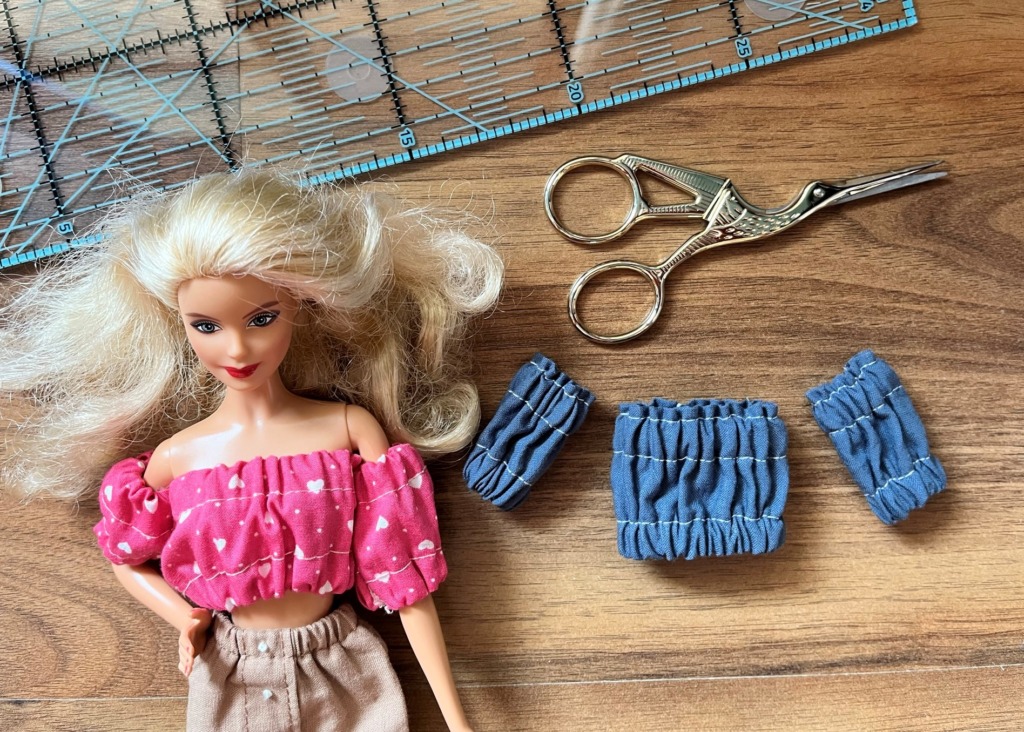
Step 7 – sew the sleeves and the top
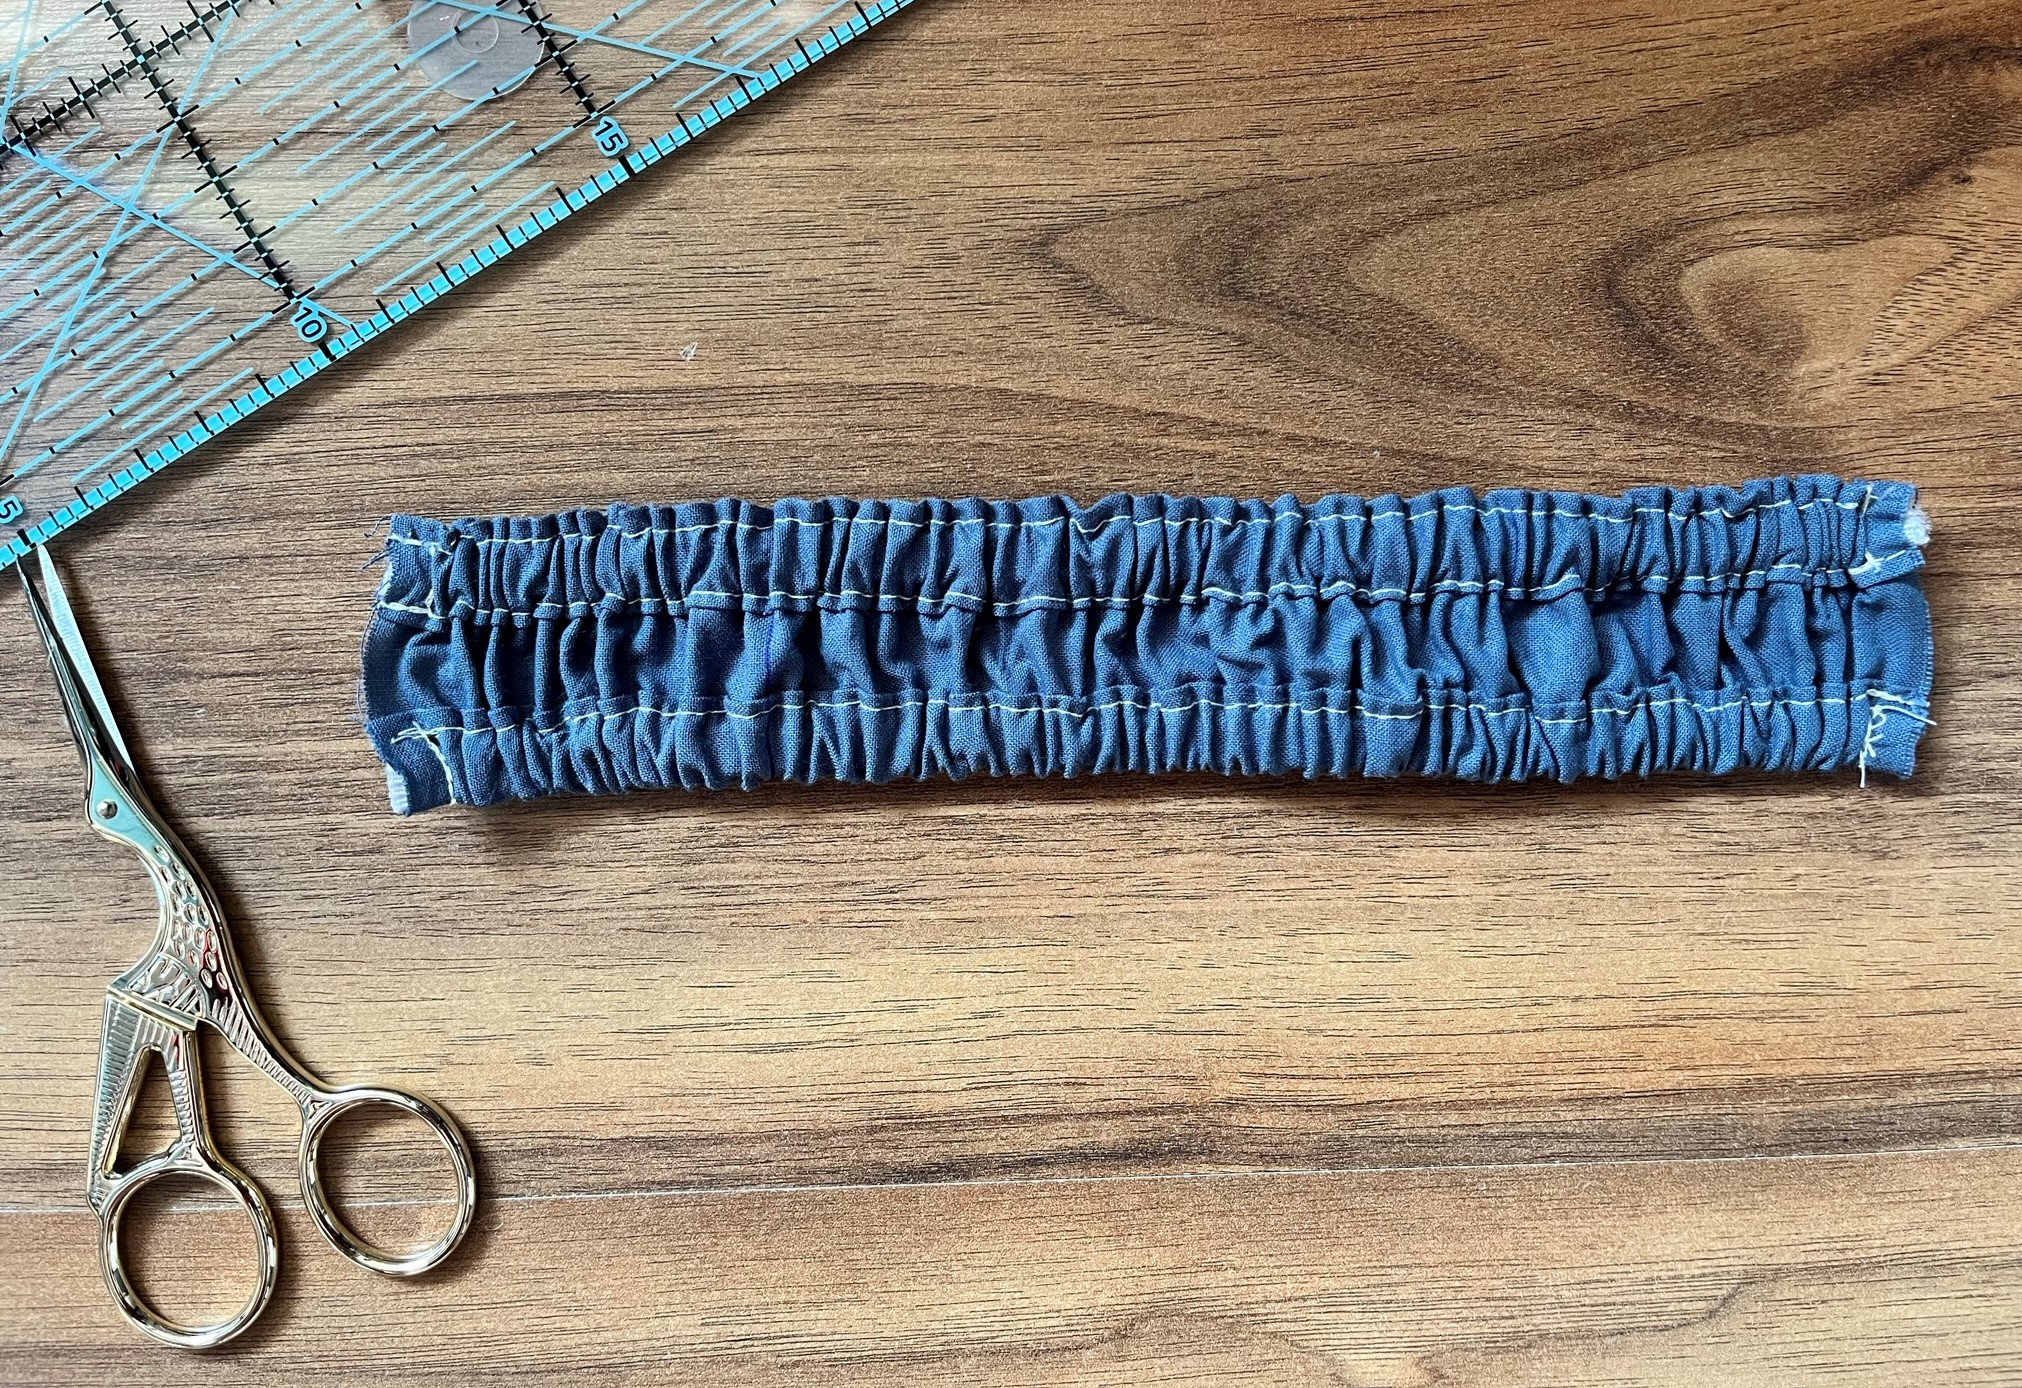
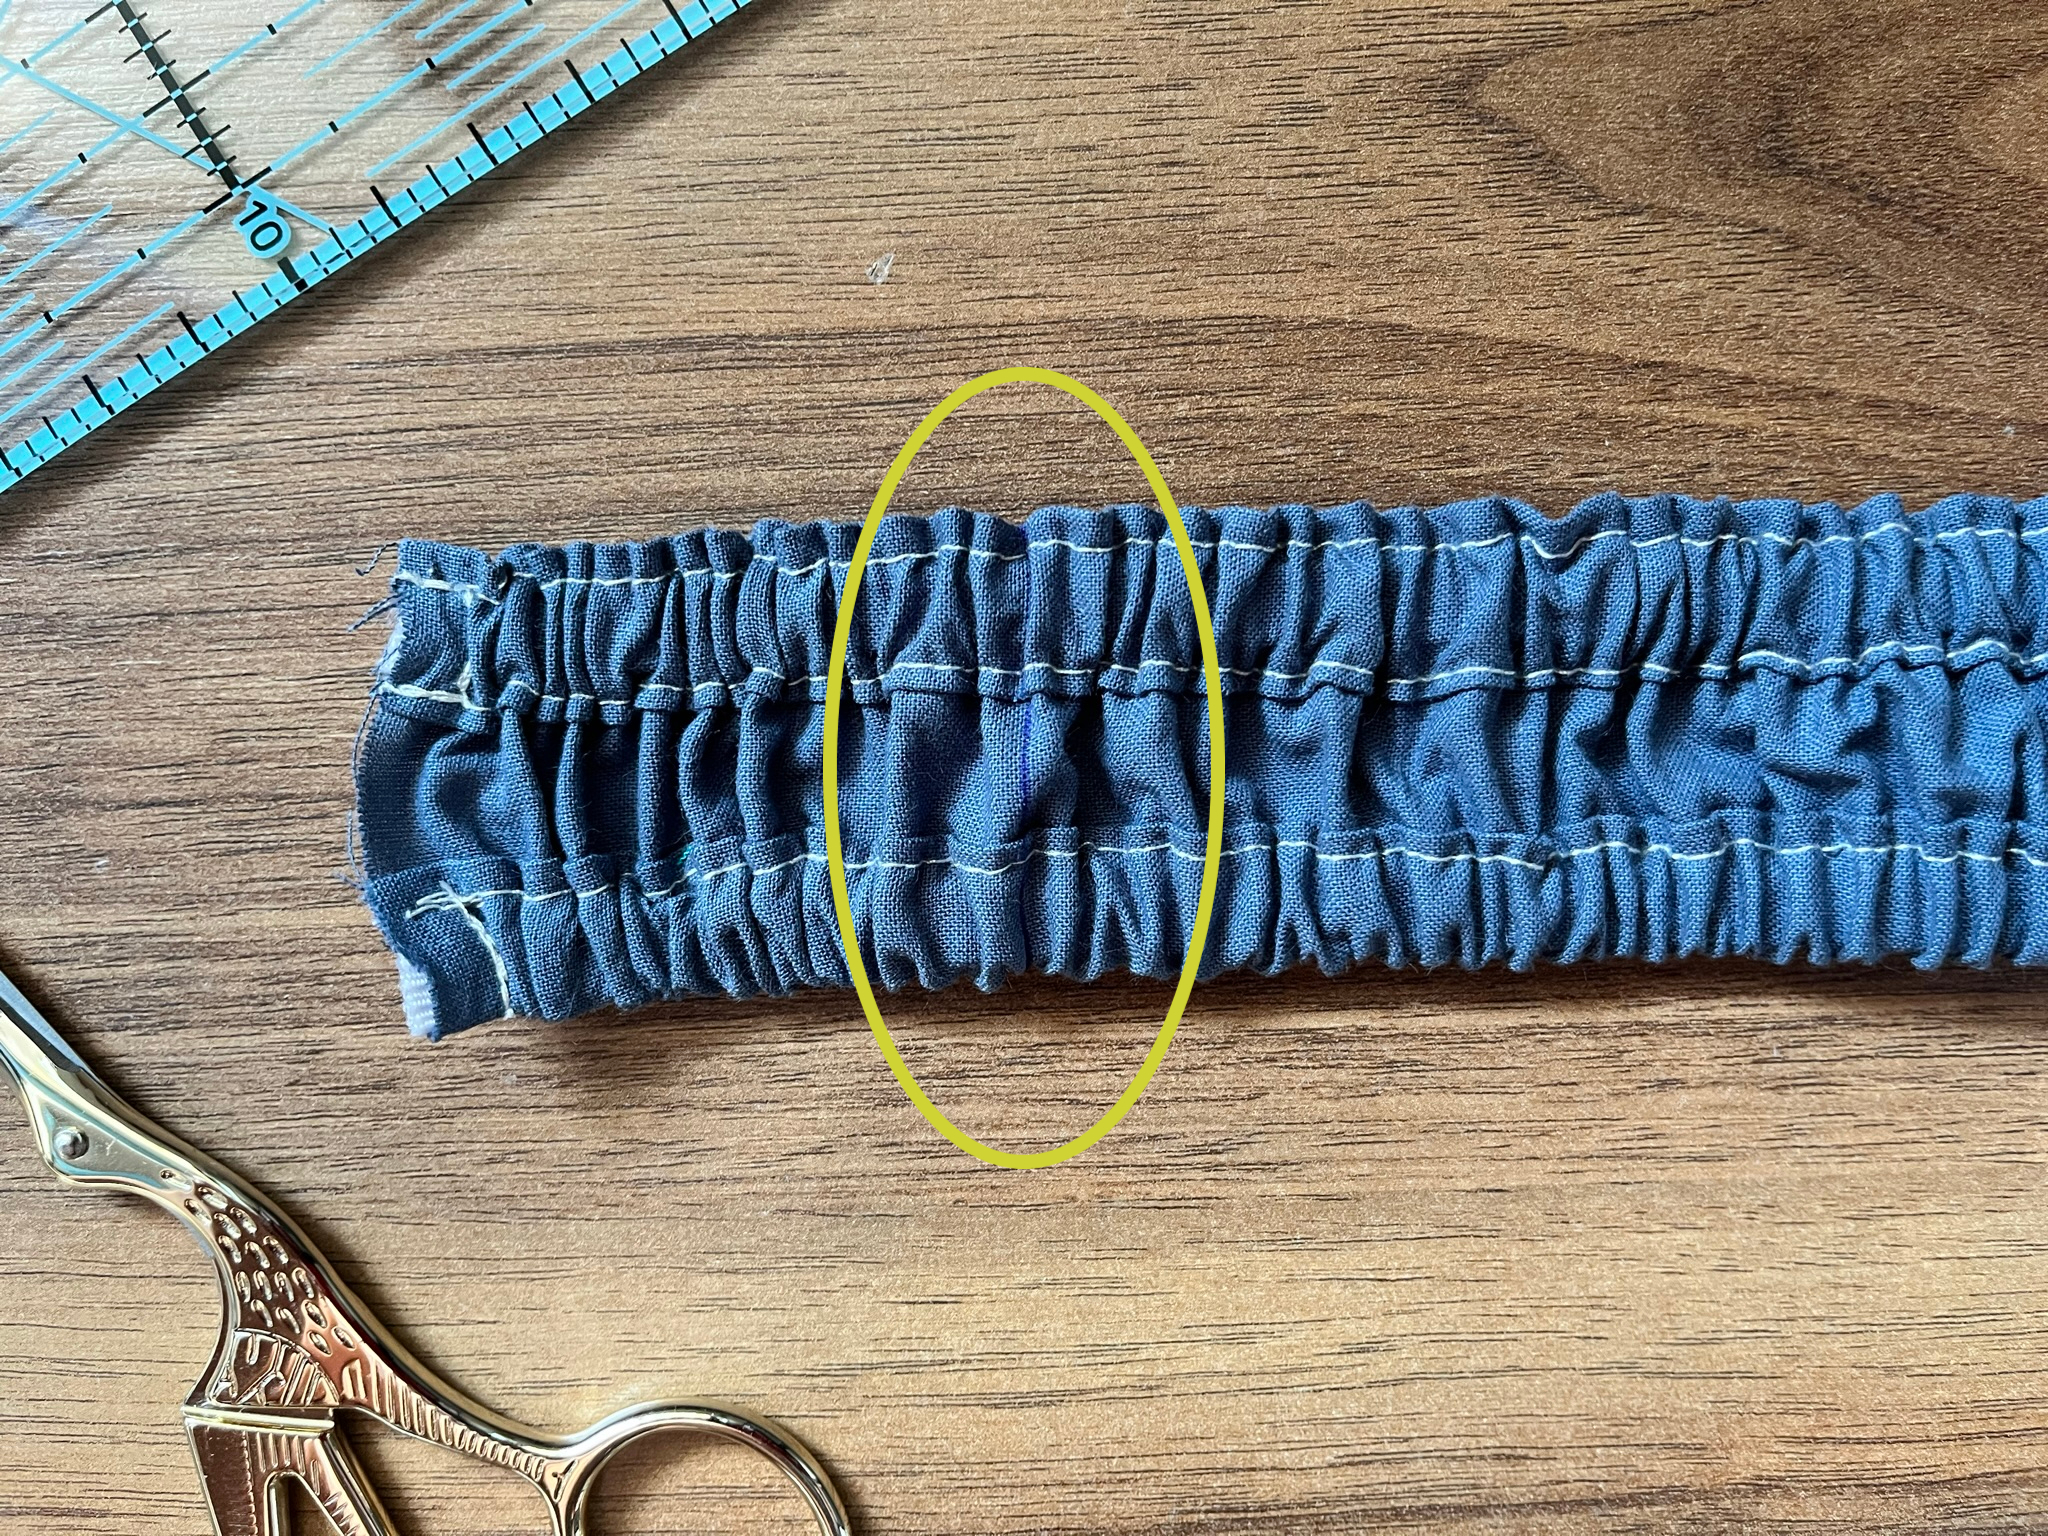
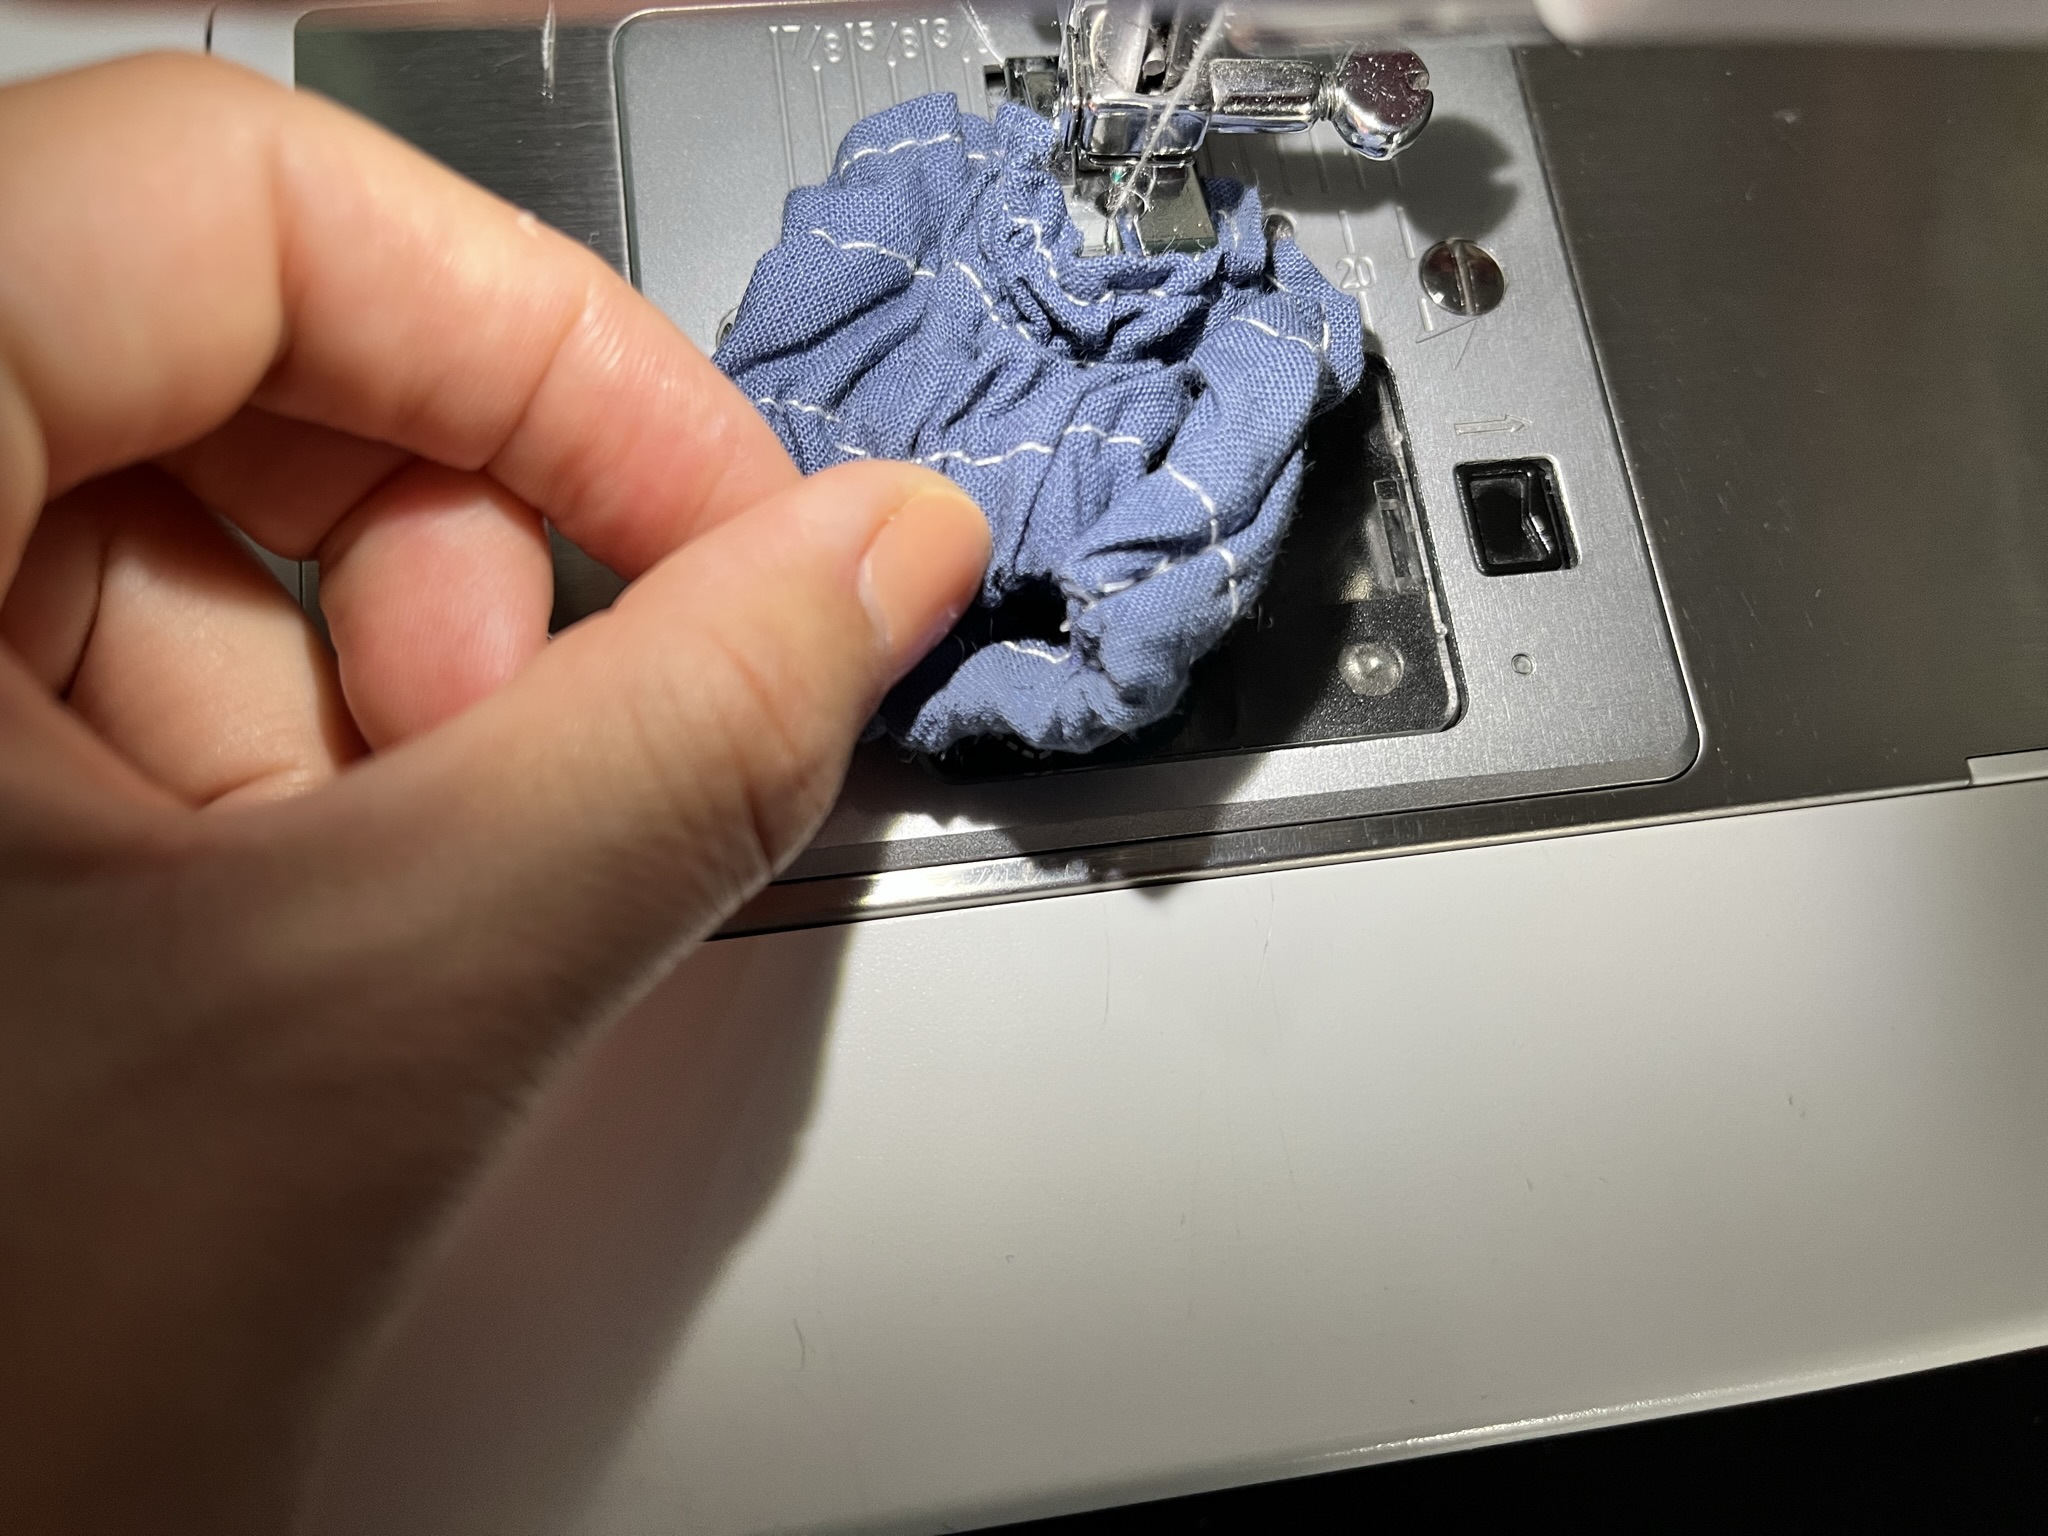
Fold one elasticated piece in half, align the edges, and sew with a 3/8″ seam allowance.
Do not start stitching too close to the edge to avoid fabric getting caught in the sewing machine. Backstitch generously. I actually reinforced all my stitches.
Repeat for the other two pieces.
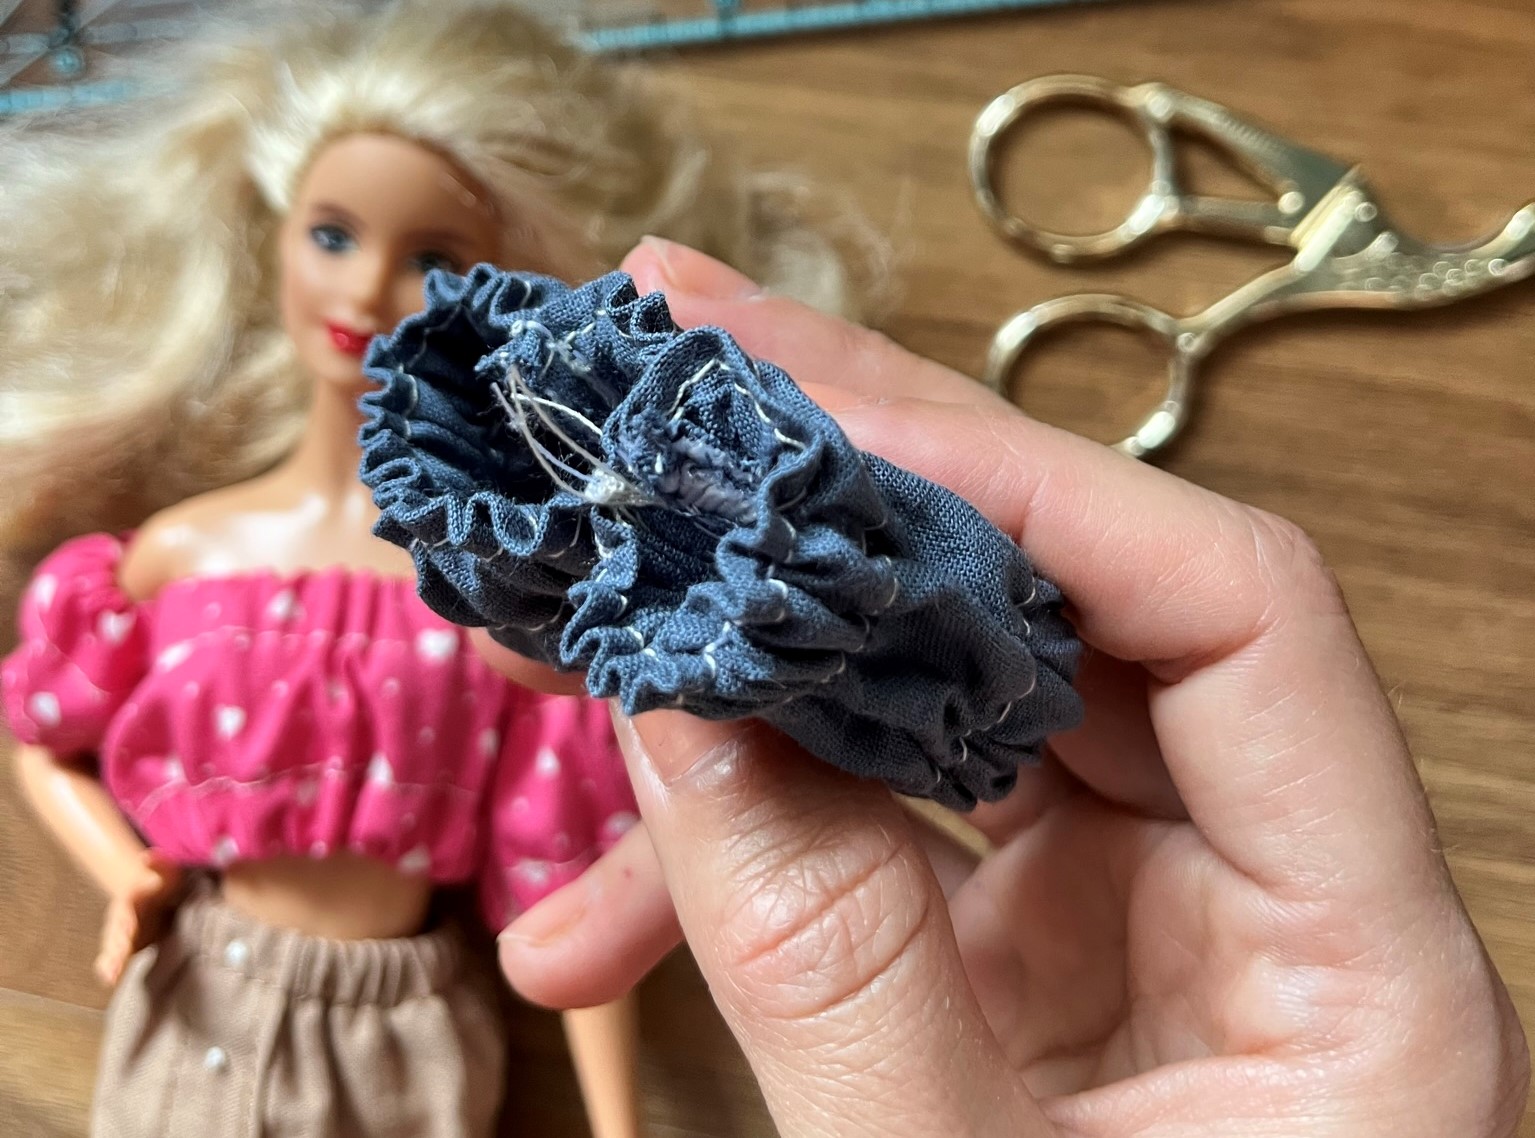
I chose not to finish the seams and I trimmed as close to the stitching line as possible. Neither my daughter nor the Barbie dolls care about the inside of the clothes. Anyway, the seams won’t fray much, but if you want you can use fray check.

Step 8 – attach the sleeves to the top
Turn all pieces right side out. All that is left to do now is attach the sleeves to the top. You can hand stitch them, but it’s equally easy to use the sewing machine.
Fold the top in half and center the back seam to mark the sides – that’s where you’ll attach the sleeves.
If you use the sewing machine, just use your fingers to get the other layers out of the way. You only need to make 2-3 straight stitches (or zigzag) and then backstitch.
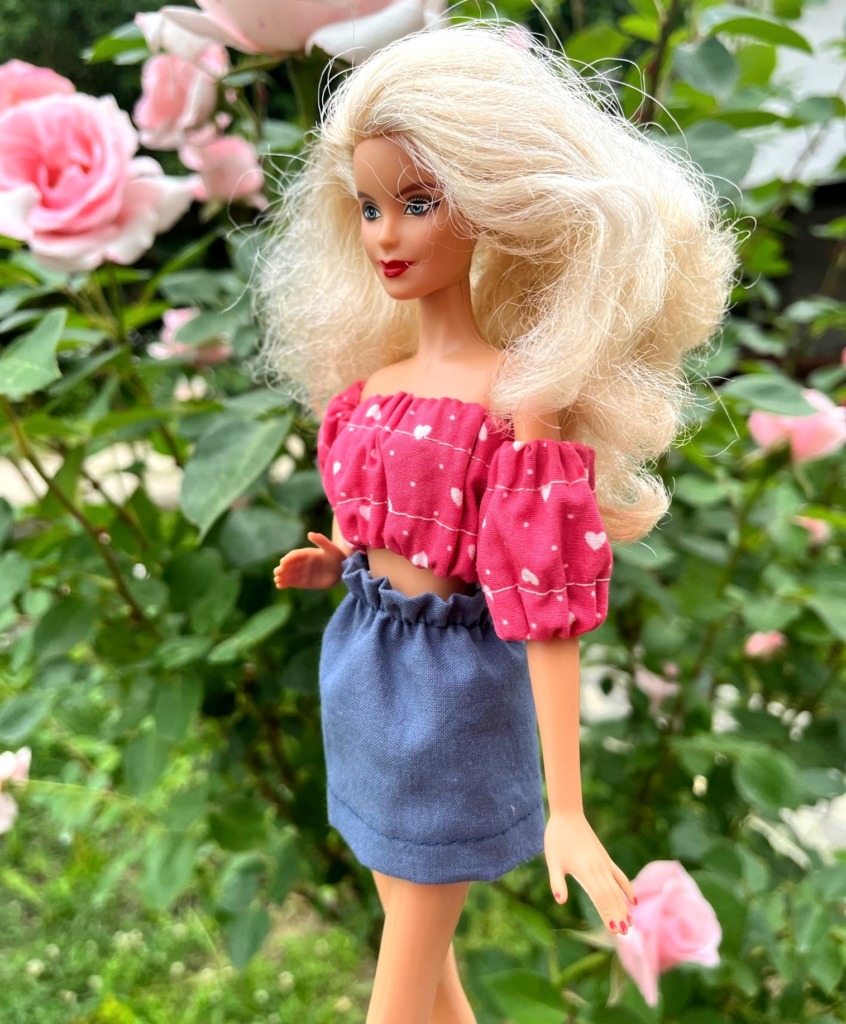
There you have it, a cute Barbie peasant top that you whipped up in no time!
Free Barbie top pattern & tutorial for beginners
Did you find this free Barbie top pattern and tutorial helpful? I’d like to hear what you think of it! And I would love to see pictures if you give this easy DIY project a try.
Let’s keep in touch! You can find me on Facebook, Instagram, and Pinterest.
Related posts