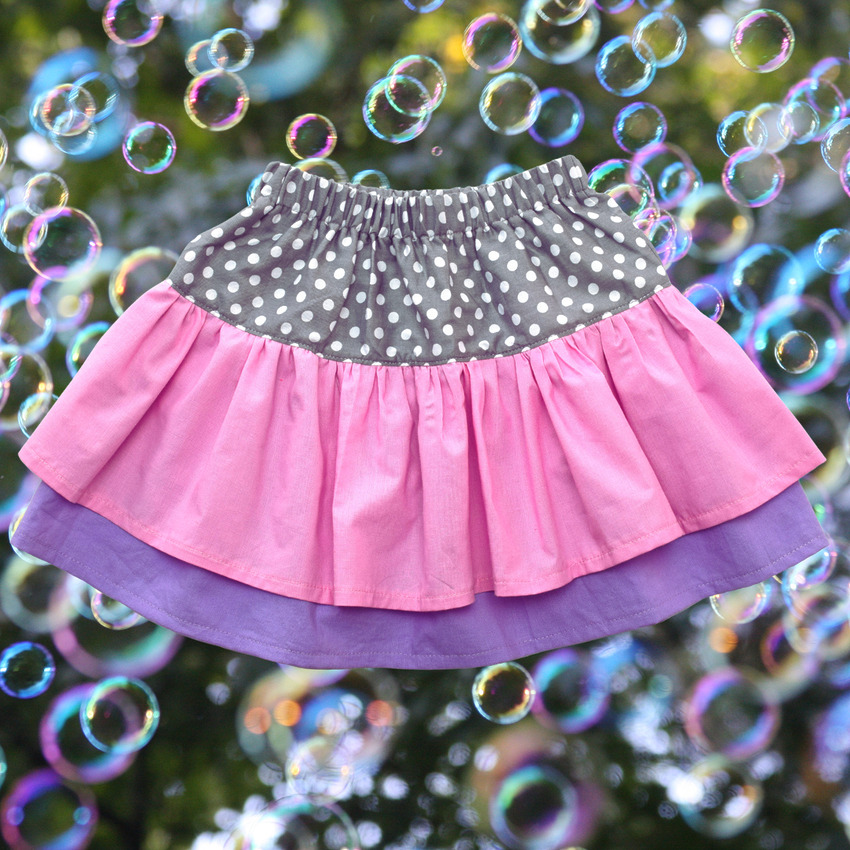
Learn to make a cute, tiered ruffle skirt for girls with this easy pattern and tutorial. This is a beginner-friendly project, with clear instructions and plenty of in-process photos.
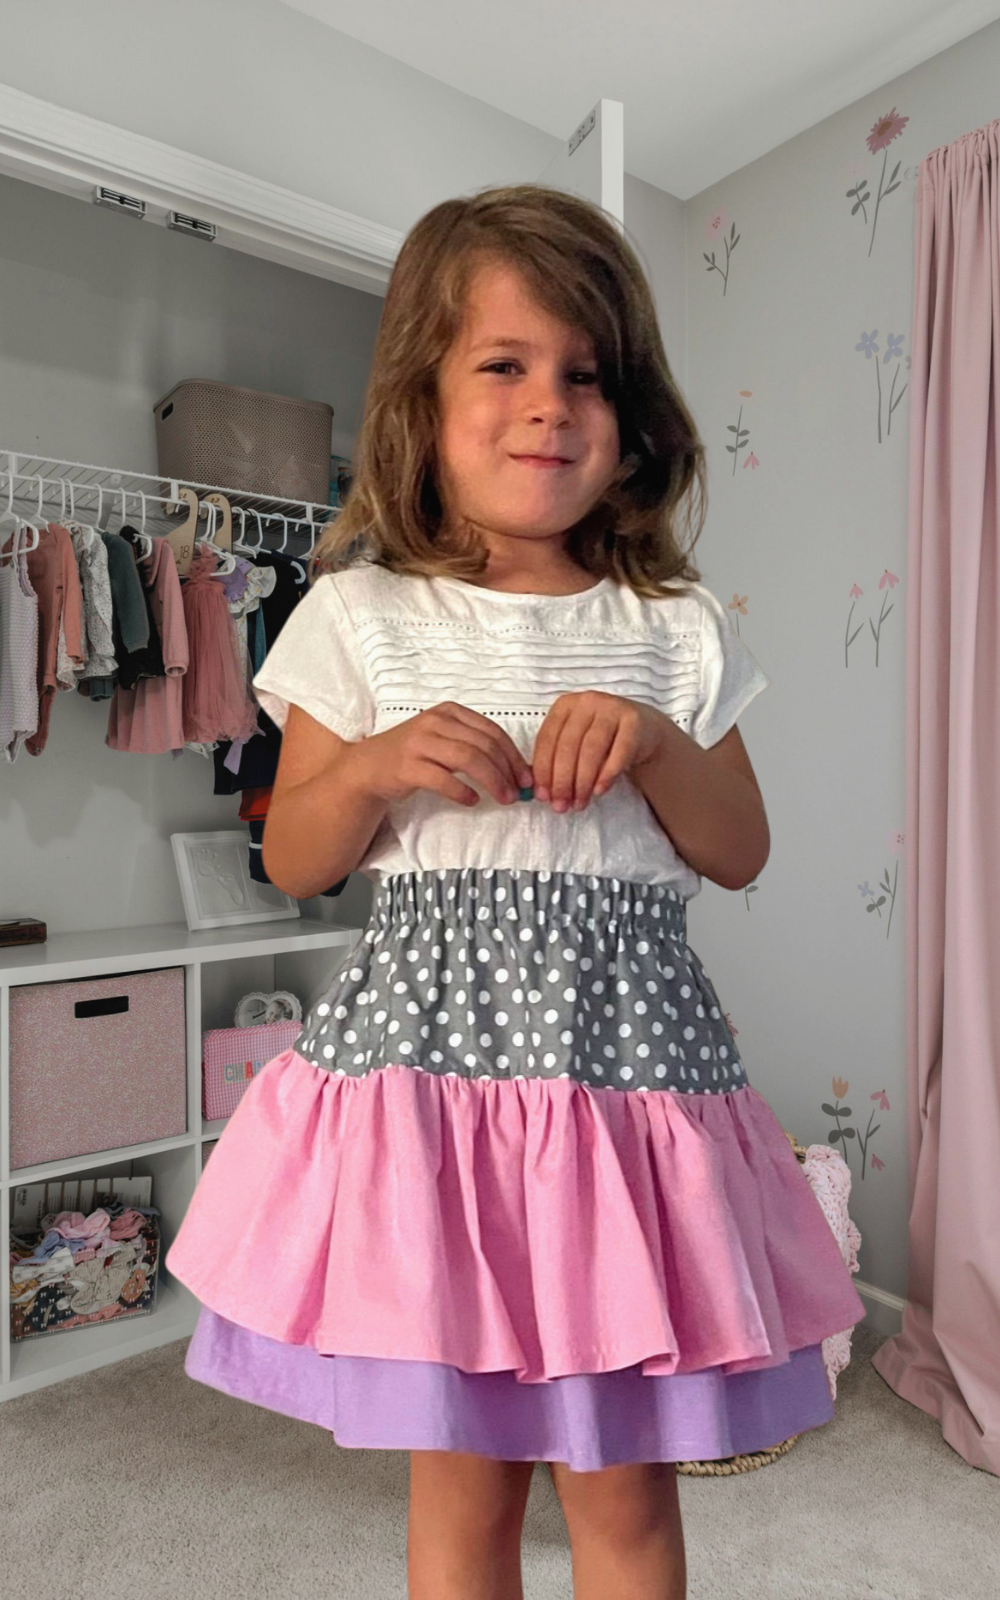
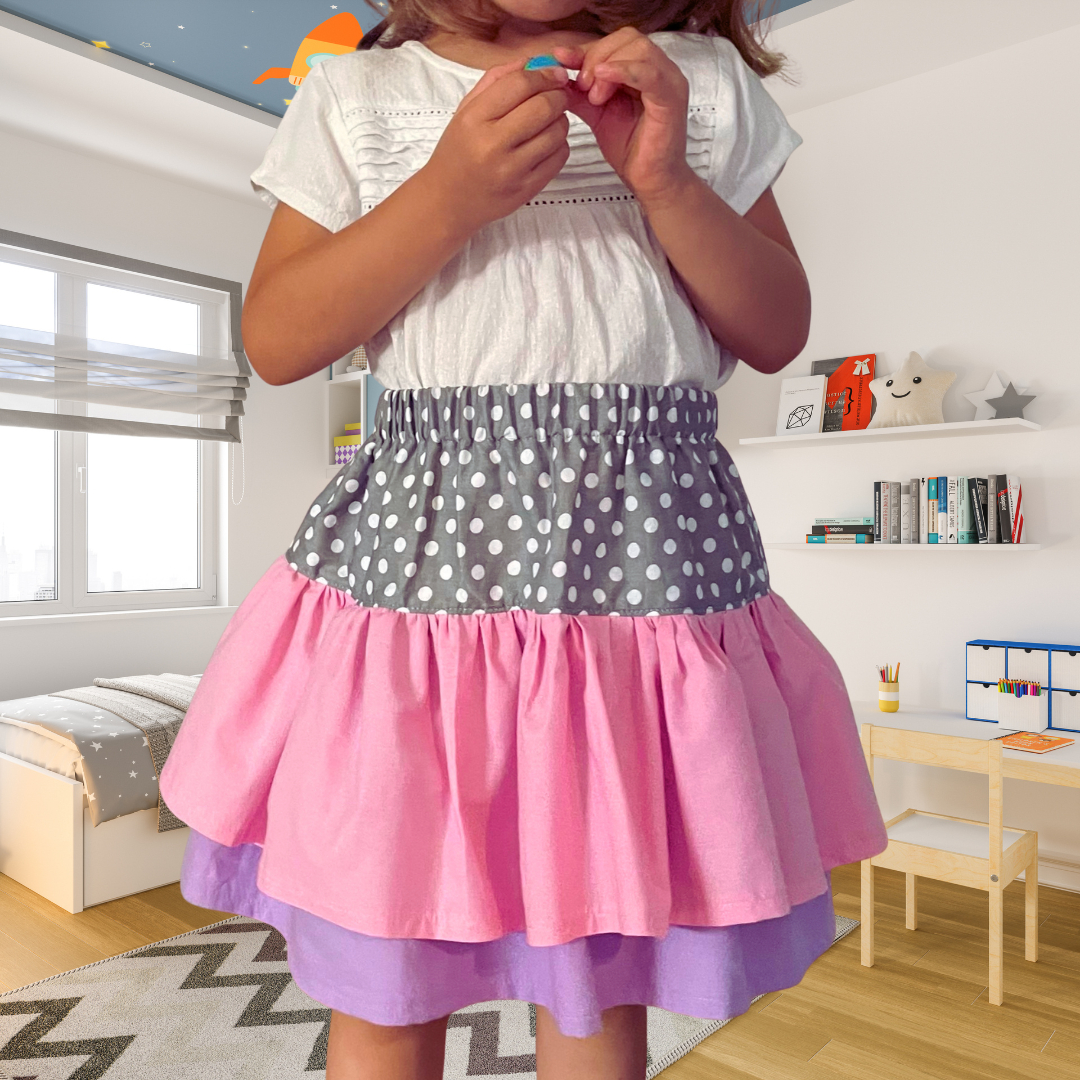
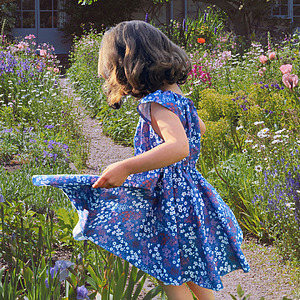
I made this ruffle skirt as a gift for a little girl and it turned out so cute that my daughter wants one for herself, too. She had to try it on, and I took advantage of the opportunity to take a couple of pictures.
Since I’ll most likely need to use the pattern again, I thought it a good idea to share the tutorial here, on the blog. Maybe someone else wants to try it too, I would love that!
How to make a ruffle skirt for girls – free pattern & tutorial
The upper part of the skirt (the grey polka dot fabric) is shorter than the lower part (aka the ruffle part).
This is how I constructed this ruffle skirt:
First, determine your desired skirt length, then add 1½” for the waistband casing, ½” for the seam allowance that runs across the middle of the skirt, and ½” for the hem.
That means that your final number is (desired skirt length + 2 ½”) – let’s call this L from now on.
The next step is to split your skirt in half – L/2.
To determine how tall the upper part of the skirt should be, subtract 1 inch from L/2.
The outer ruffle part (the pink fabric) will also be (L/2 – 1) inches tall, while the height of the inner ruffle (the purple fabric) will be (L/2 + 1) inches.
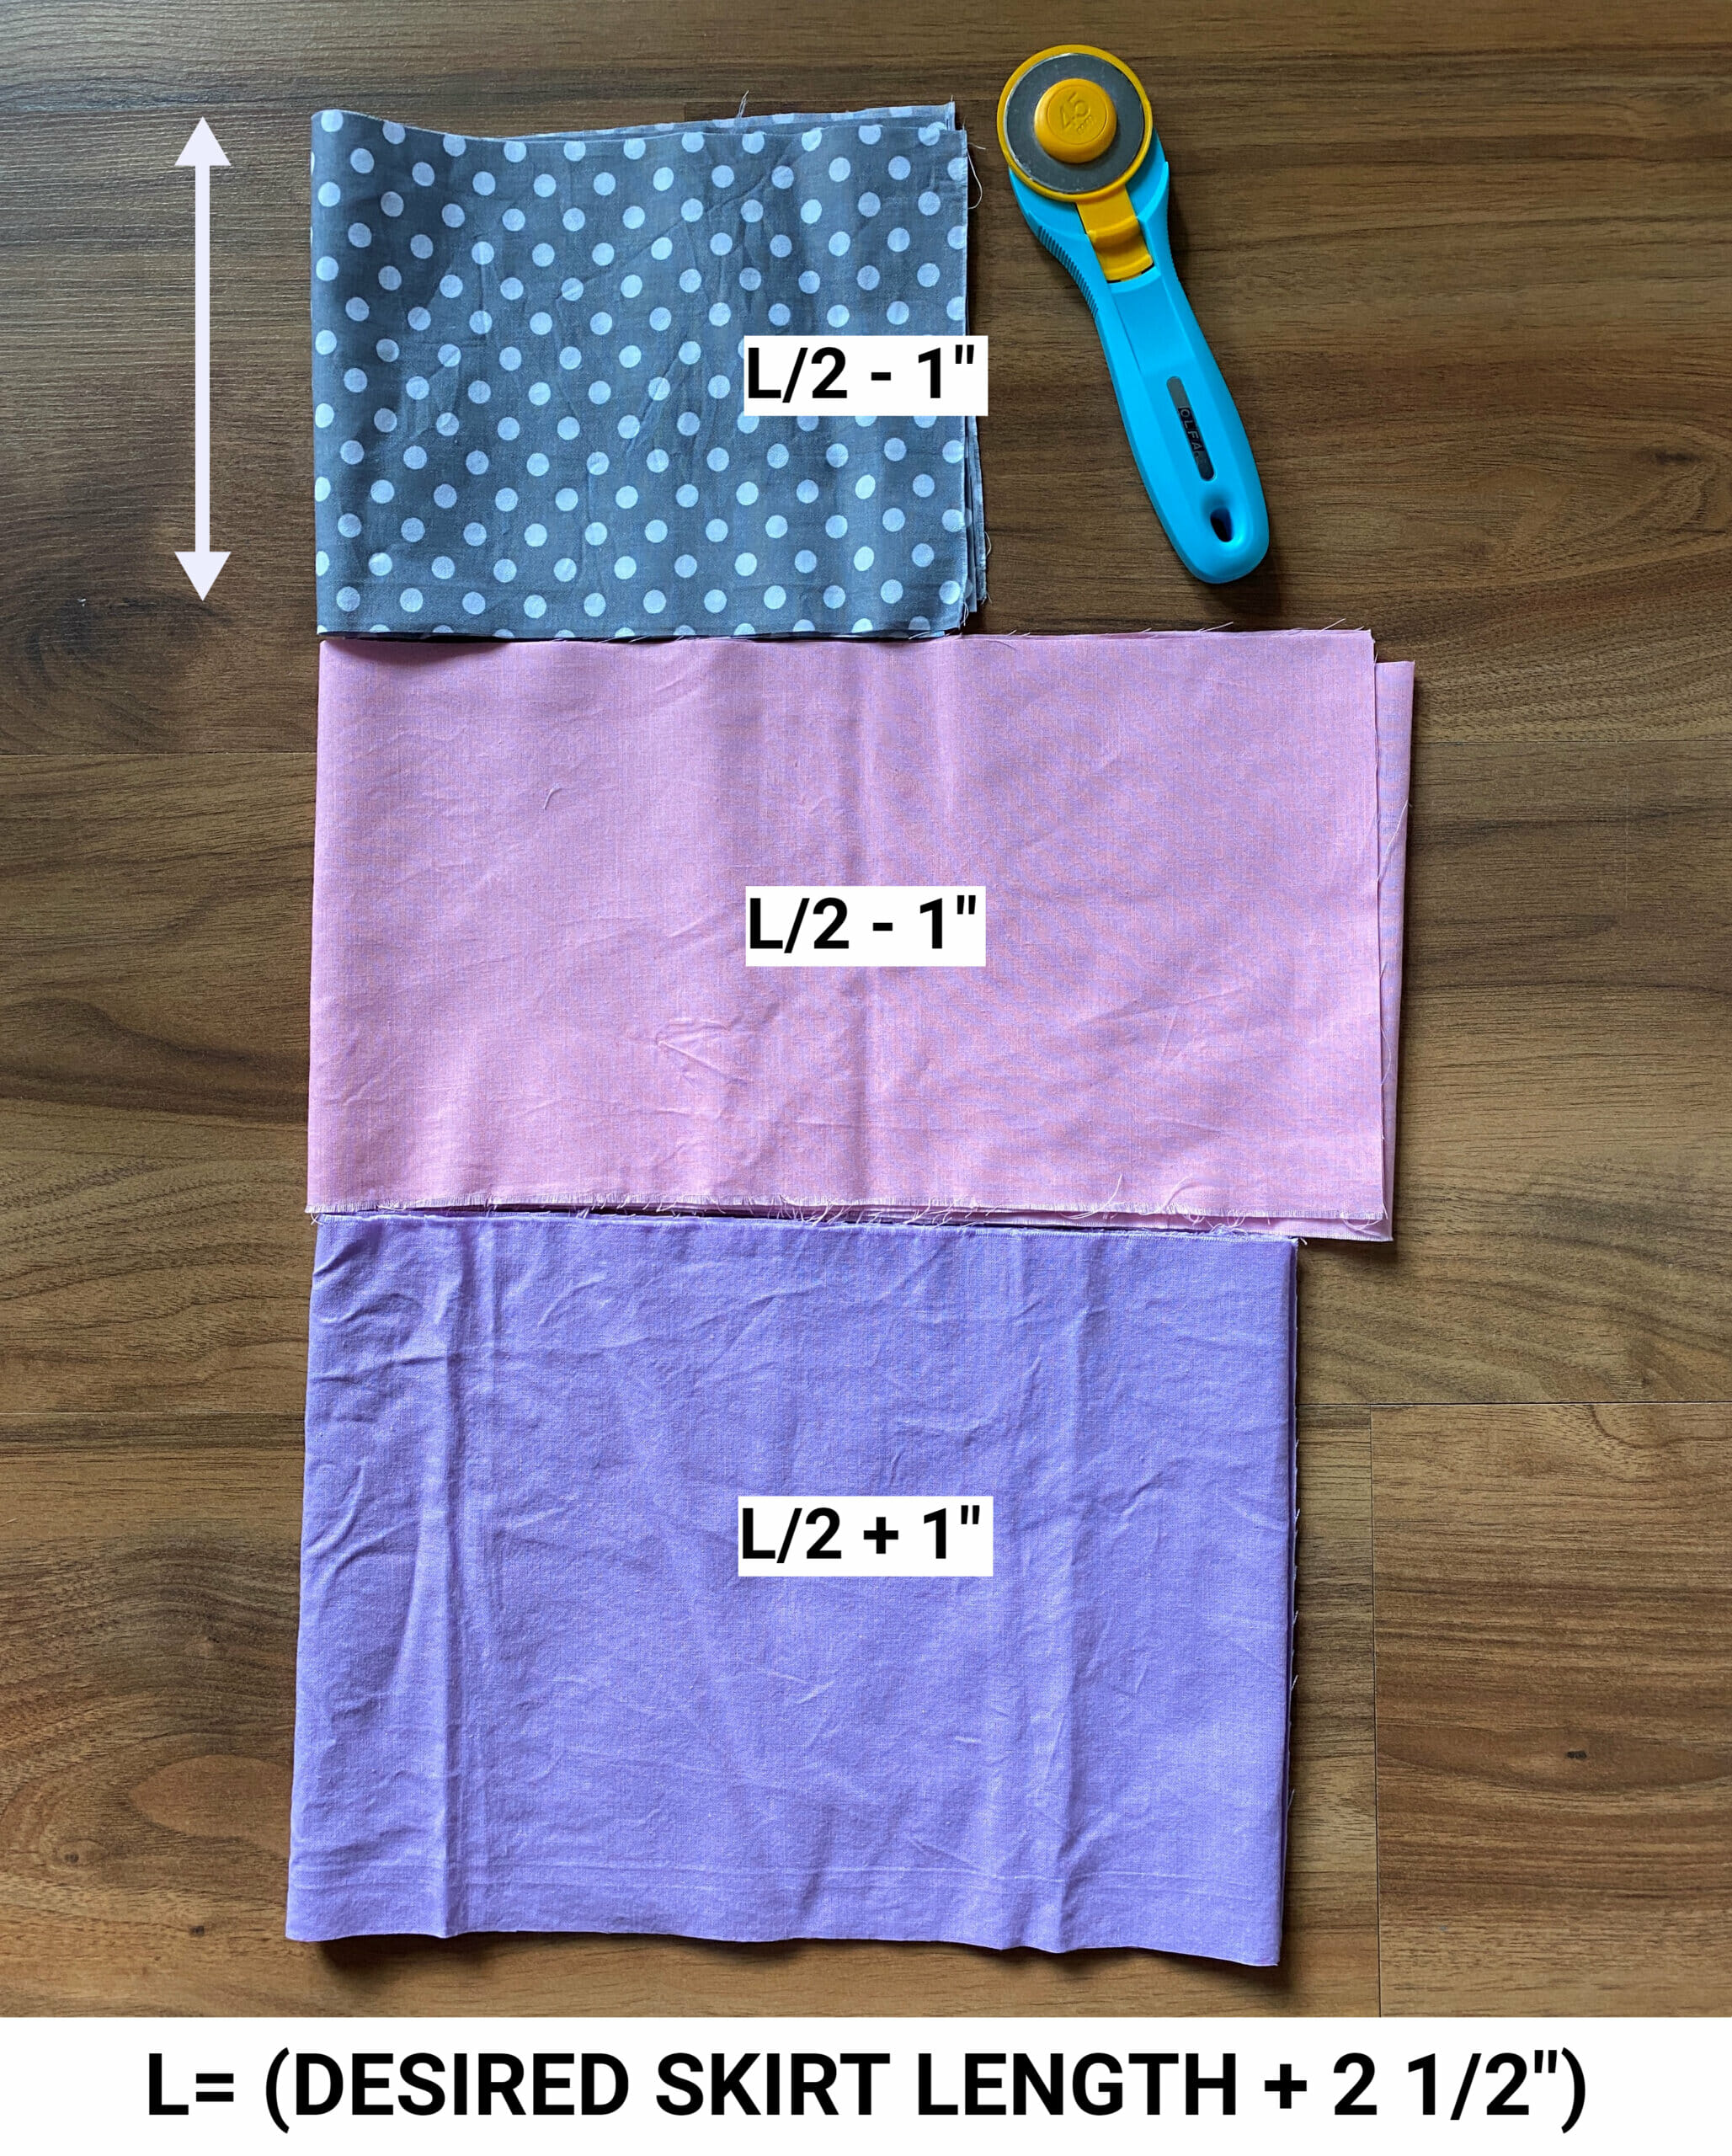
- As you may notice, if you combine the height of the first tier and the inner ruffle, you’ll obtain the final length of the skirt. L/2-1 + L/2+1 equals L.
- From that measurement L, you’ll have to subtract 1 ½” for the elastic casing, ½” for the seam allowance, and ½” for the hem of the skirt.
- At the end of this calculation, what remains is your desired length of the skirt. Pretty cool, right?
Related: How to make a tiered ruffle skirt in any size (adult or child) + a trusty skirt length chart that I always refer to when making girls’ skirts.
If you want one tier or another to be longer or shorter, you’ll be able to play with the height of your fabric pieces – make sure that the height of the first tier and the height of the inner ruffle equals L.
To better illustrate this reasoning, I wanted my ruffle skirt to be 13” tall. I added 2 ½” to this number, and I got 15 ½”.
The first tier (the grey polka dot fabric) is (15.5/2 -1)=6.75 inches tall (6 ¾”).
The pink ruffle is 6 ¾” tall, too.
And the purple ruffle piece is (15.5/2 +1)=8.75 inches tall (8 ¾”).
Now let’s talk about the width of the skirt.
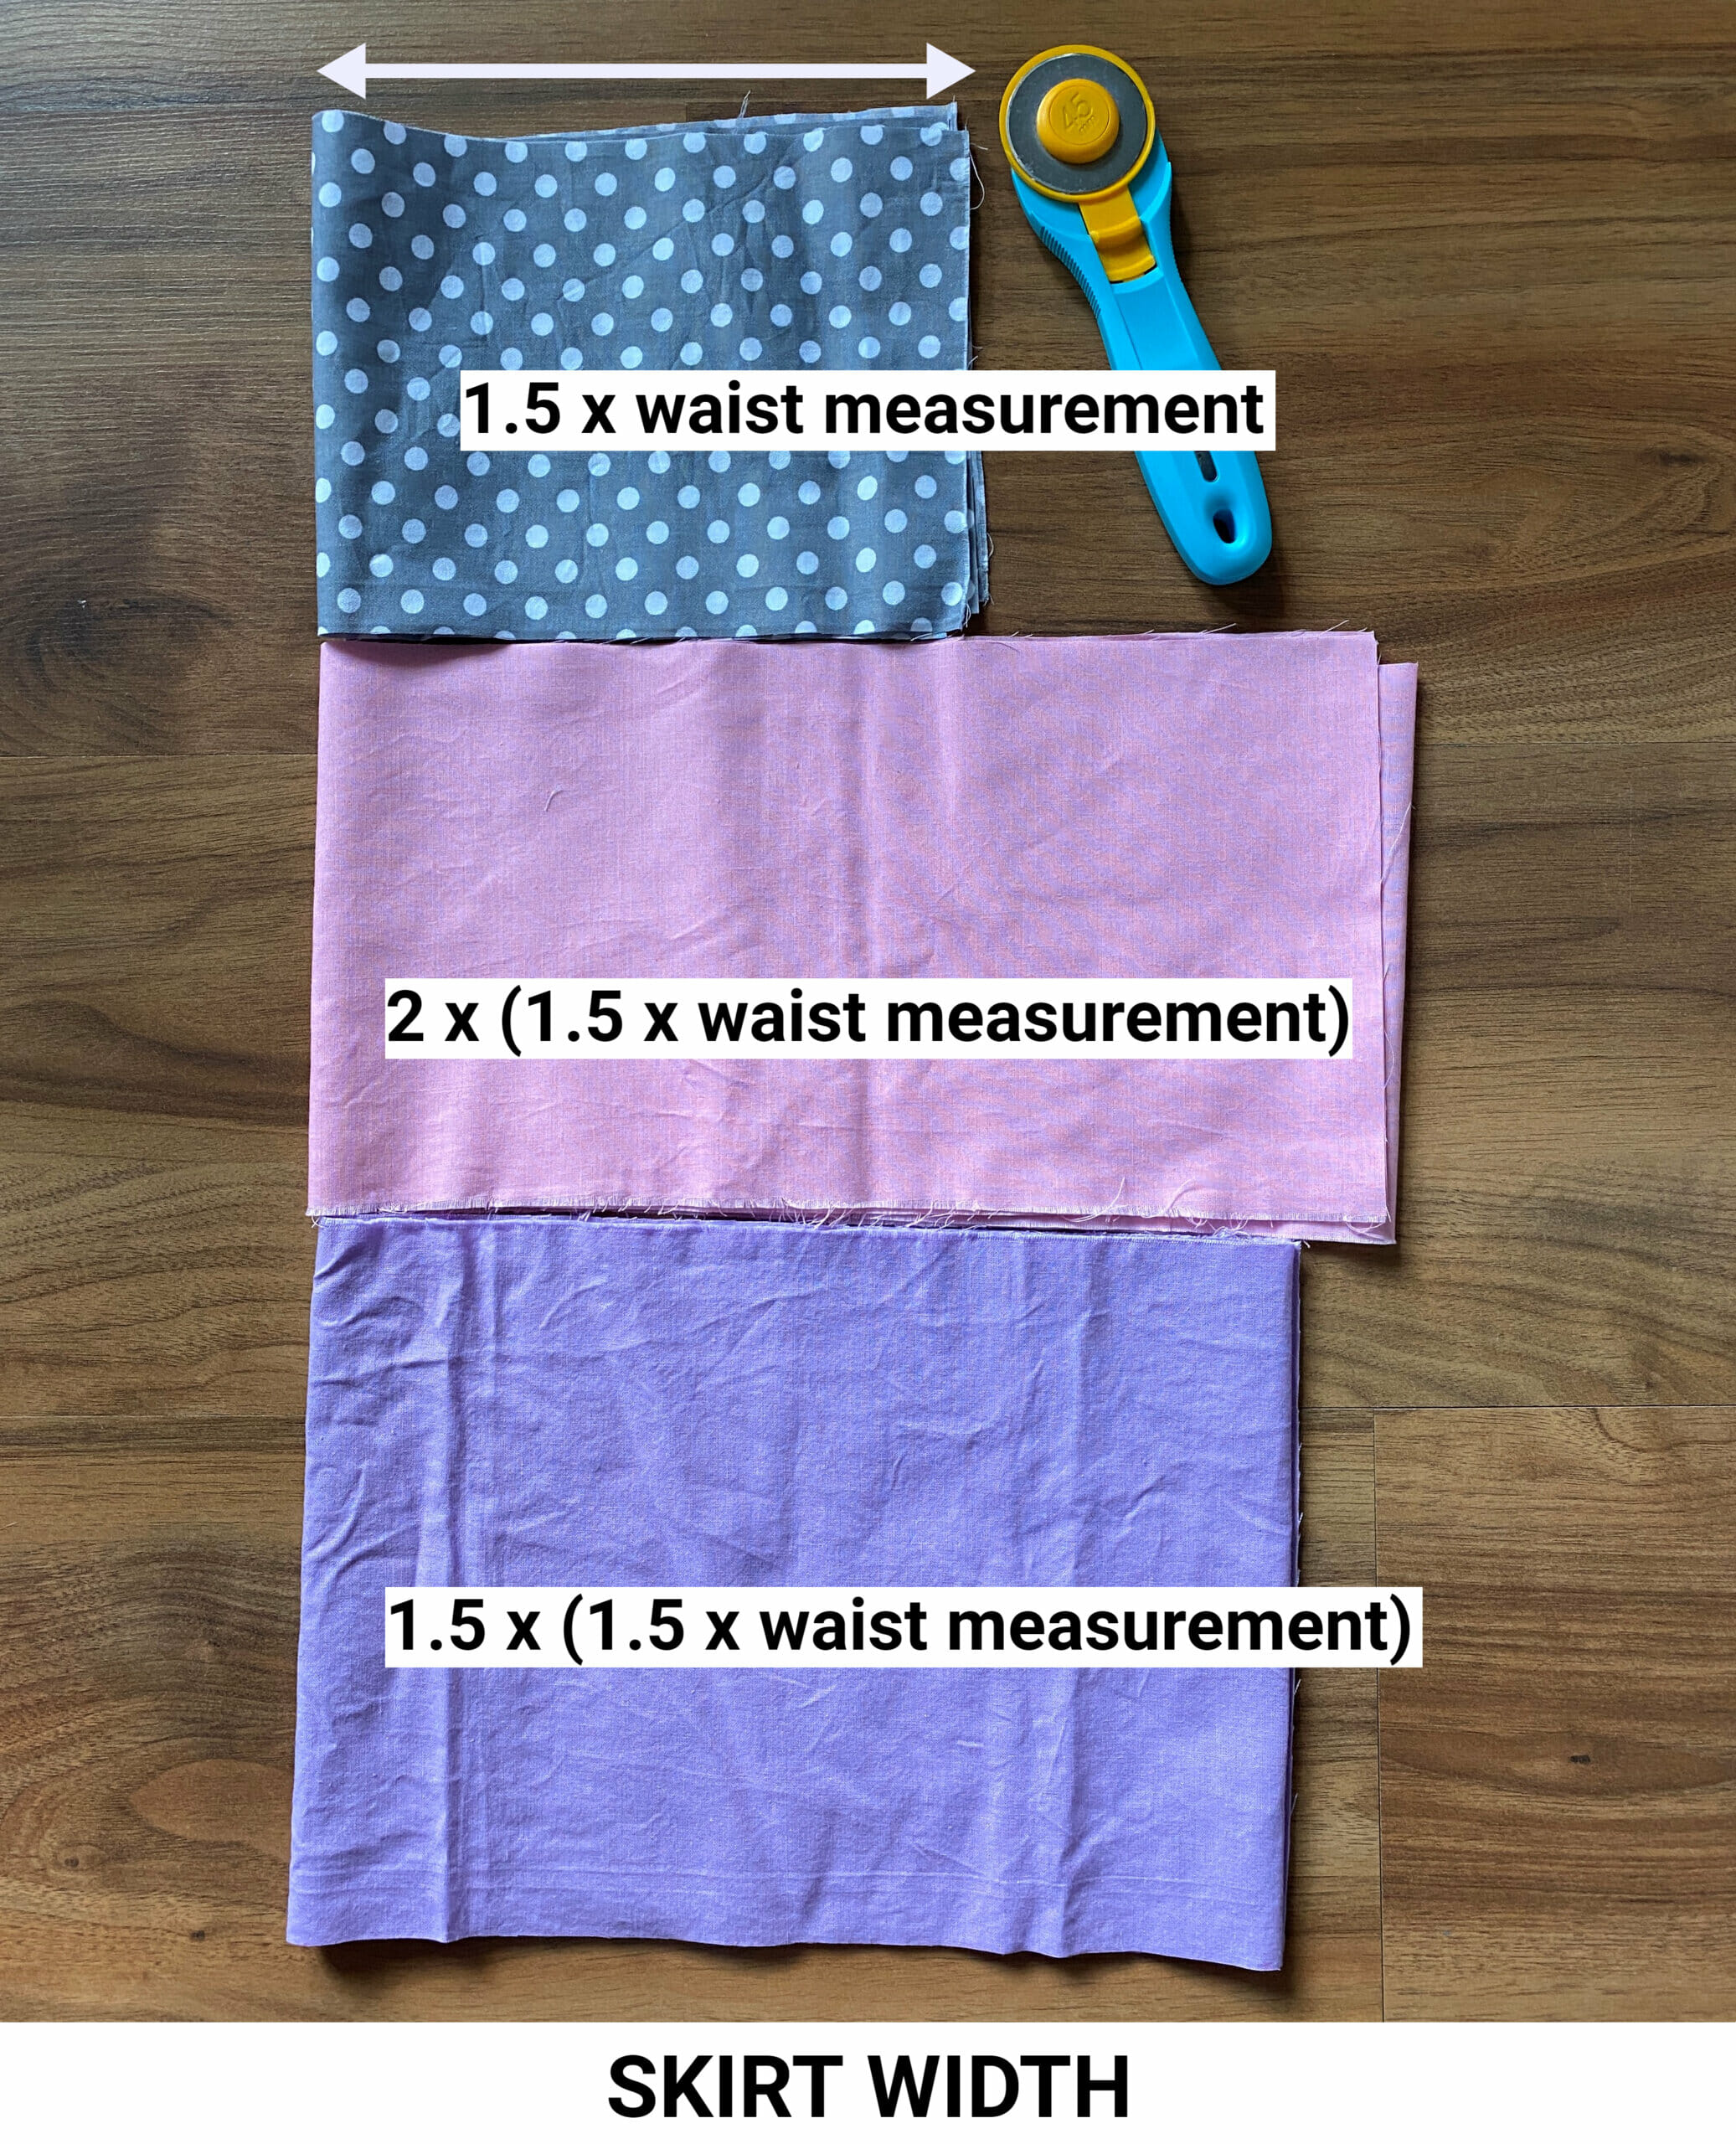
I wanted fewer gathers at the waist, so the upper part of the skirt is (1.5 x the waist measurement) wide.
Because I made the skirt for a 21” inches waist size, the upper part of my skirt is 21×1.5=31.5 inches wide.
Then, to determine the width of the outer ruffle, double the width of the first tier. My pink fabric piece is 31.5 x 2=63 inches wide.
And last, to determine the width of the inner ruffle, multiply by 1.5 the width of the first tier. Consequently, my purple fabric piece is 31.5 x 1.5=47.25 inches wide.
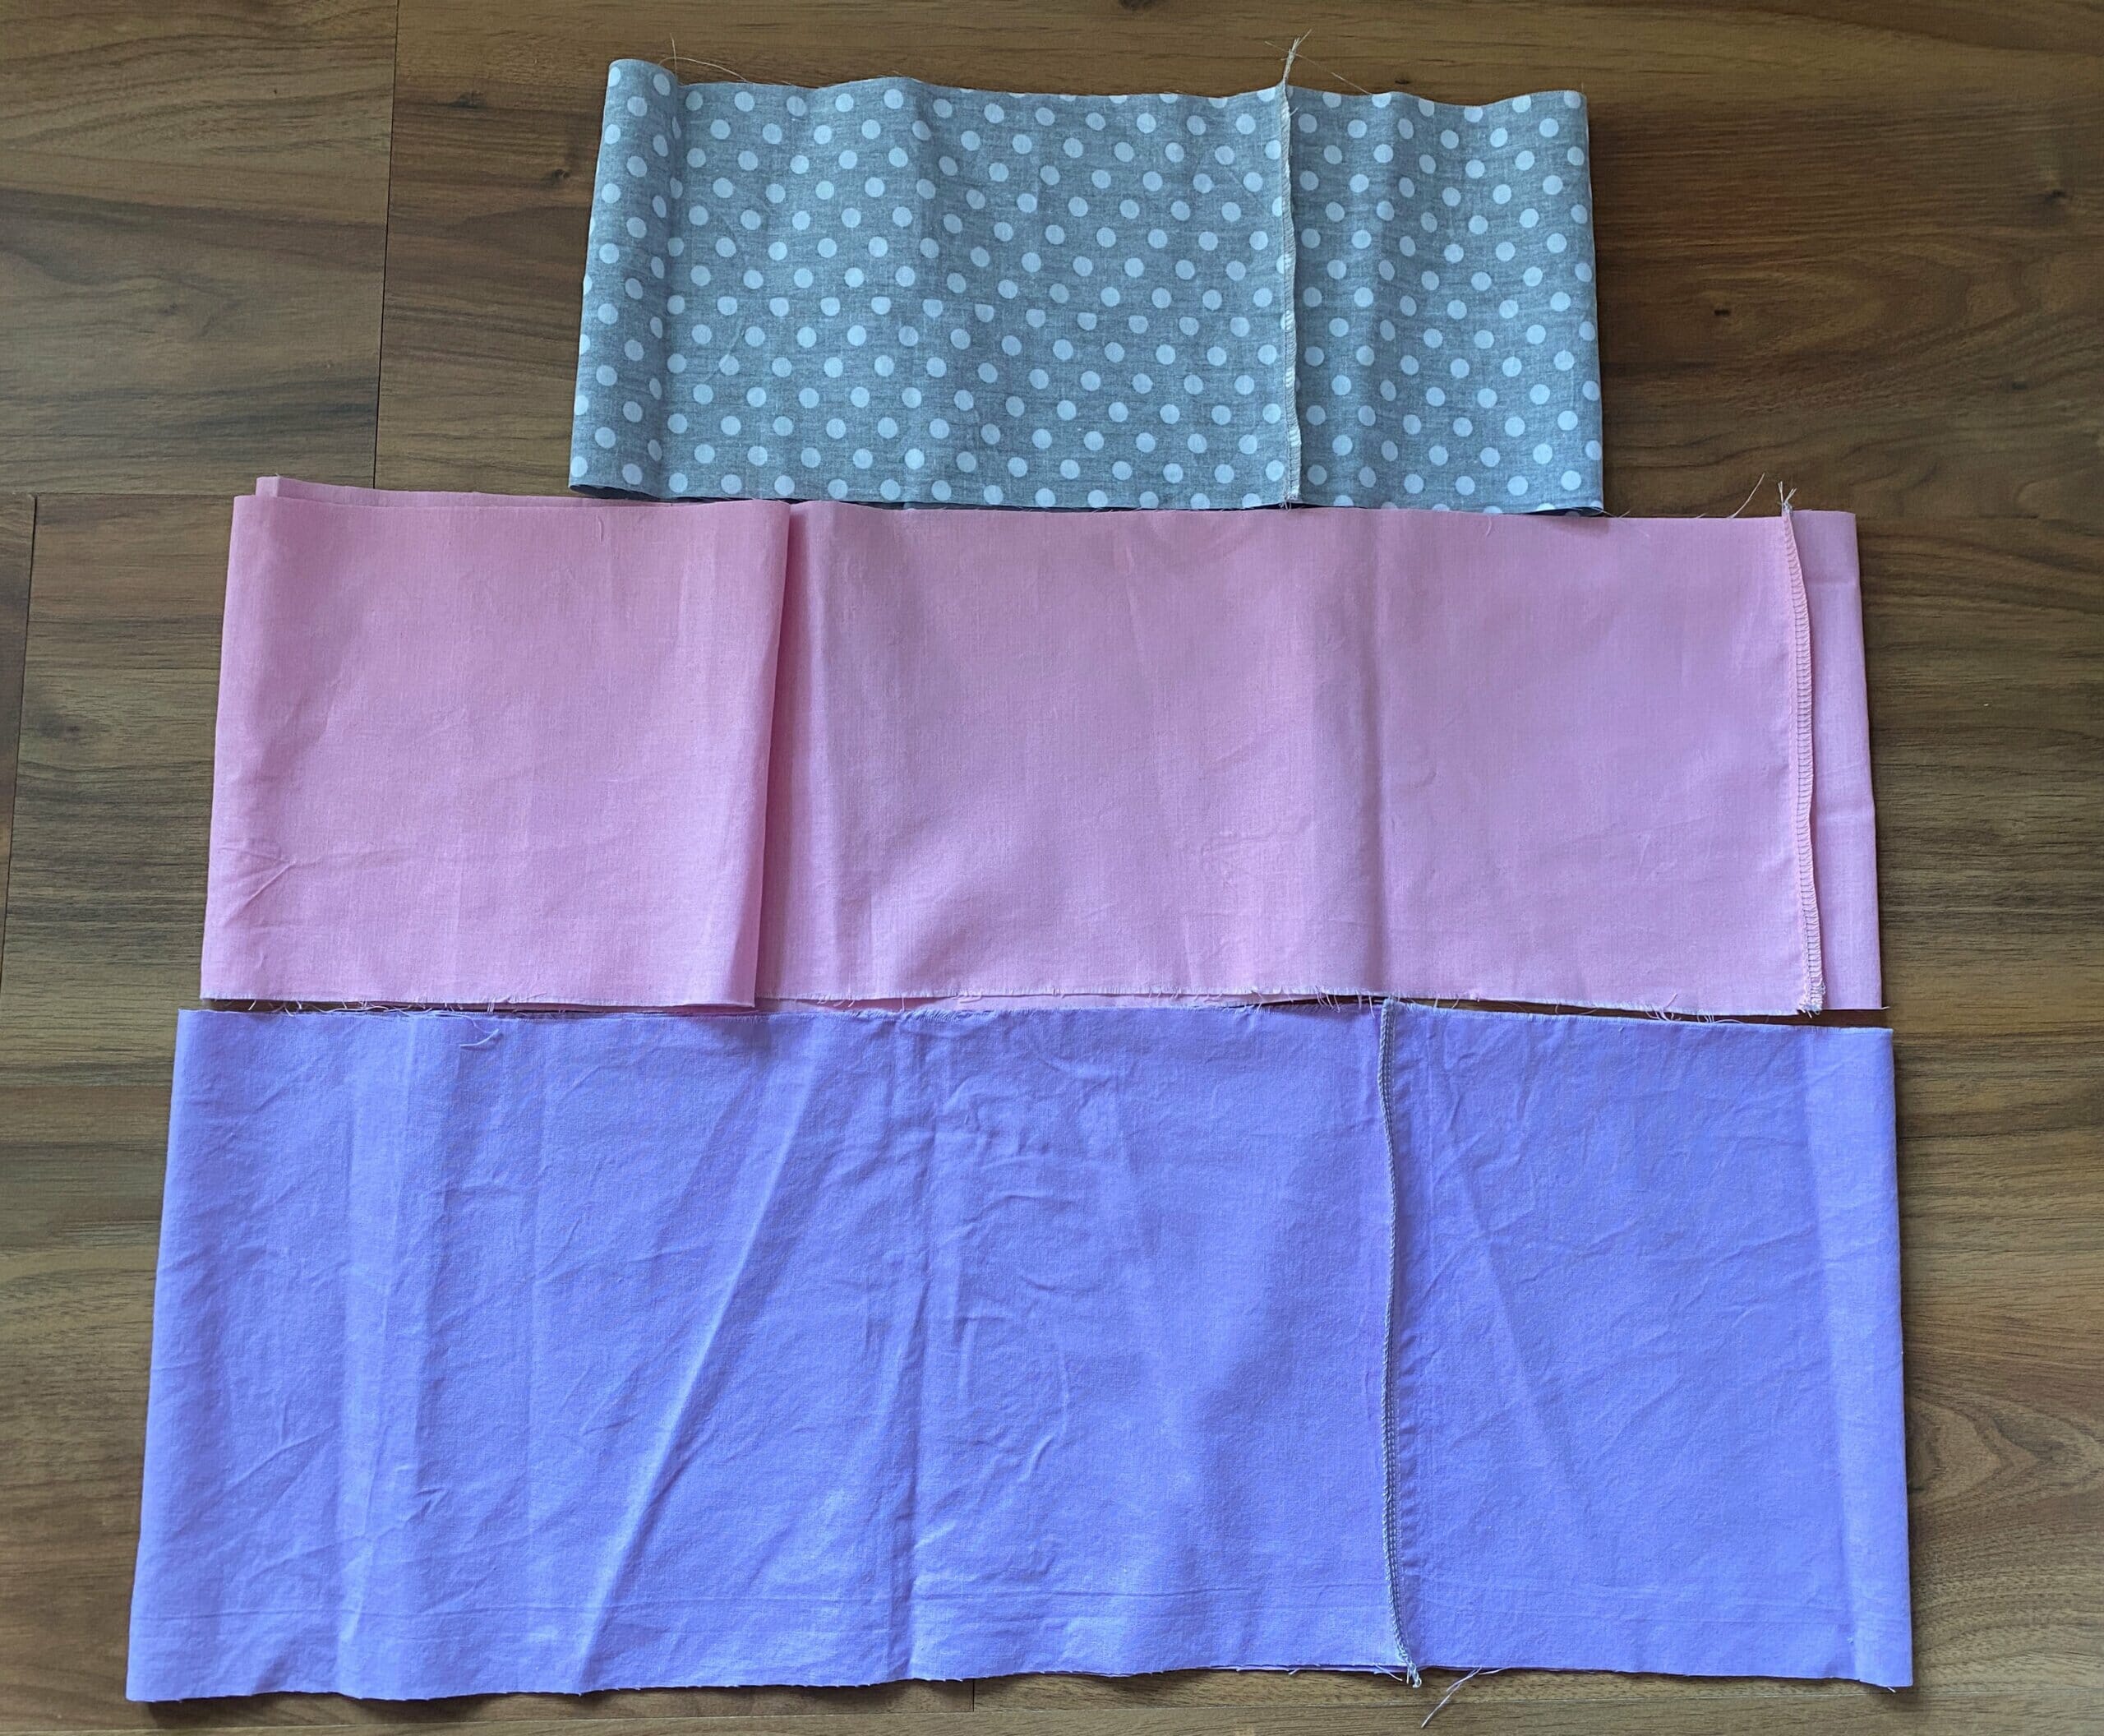
Step 1 – cut the fabric pieces and sew the short ends together
Sew the short ends of your three fabric pieces to form a loop. Finish the seam with a serger or a zigzag stitch.
Step 2 – make the ruffles
First, hem your two fabric pieces that will become ruffles. It’s always easier to hem your ruffle before gathering it.
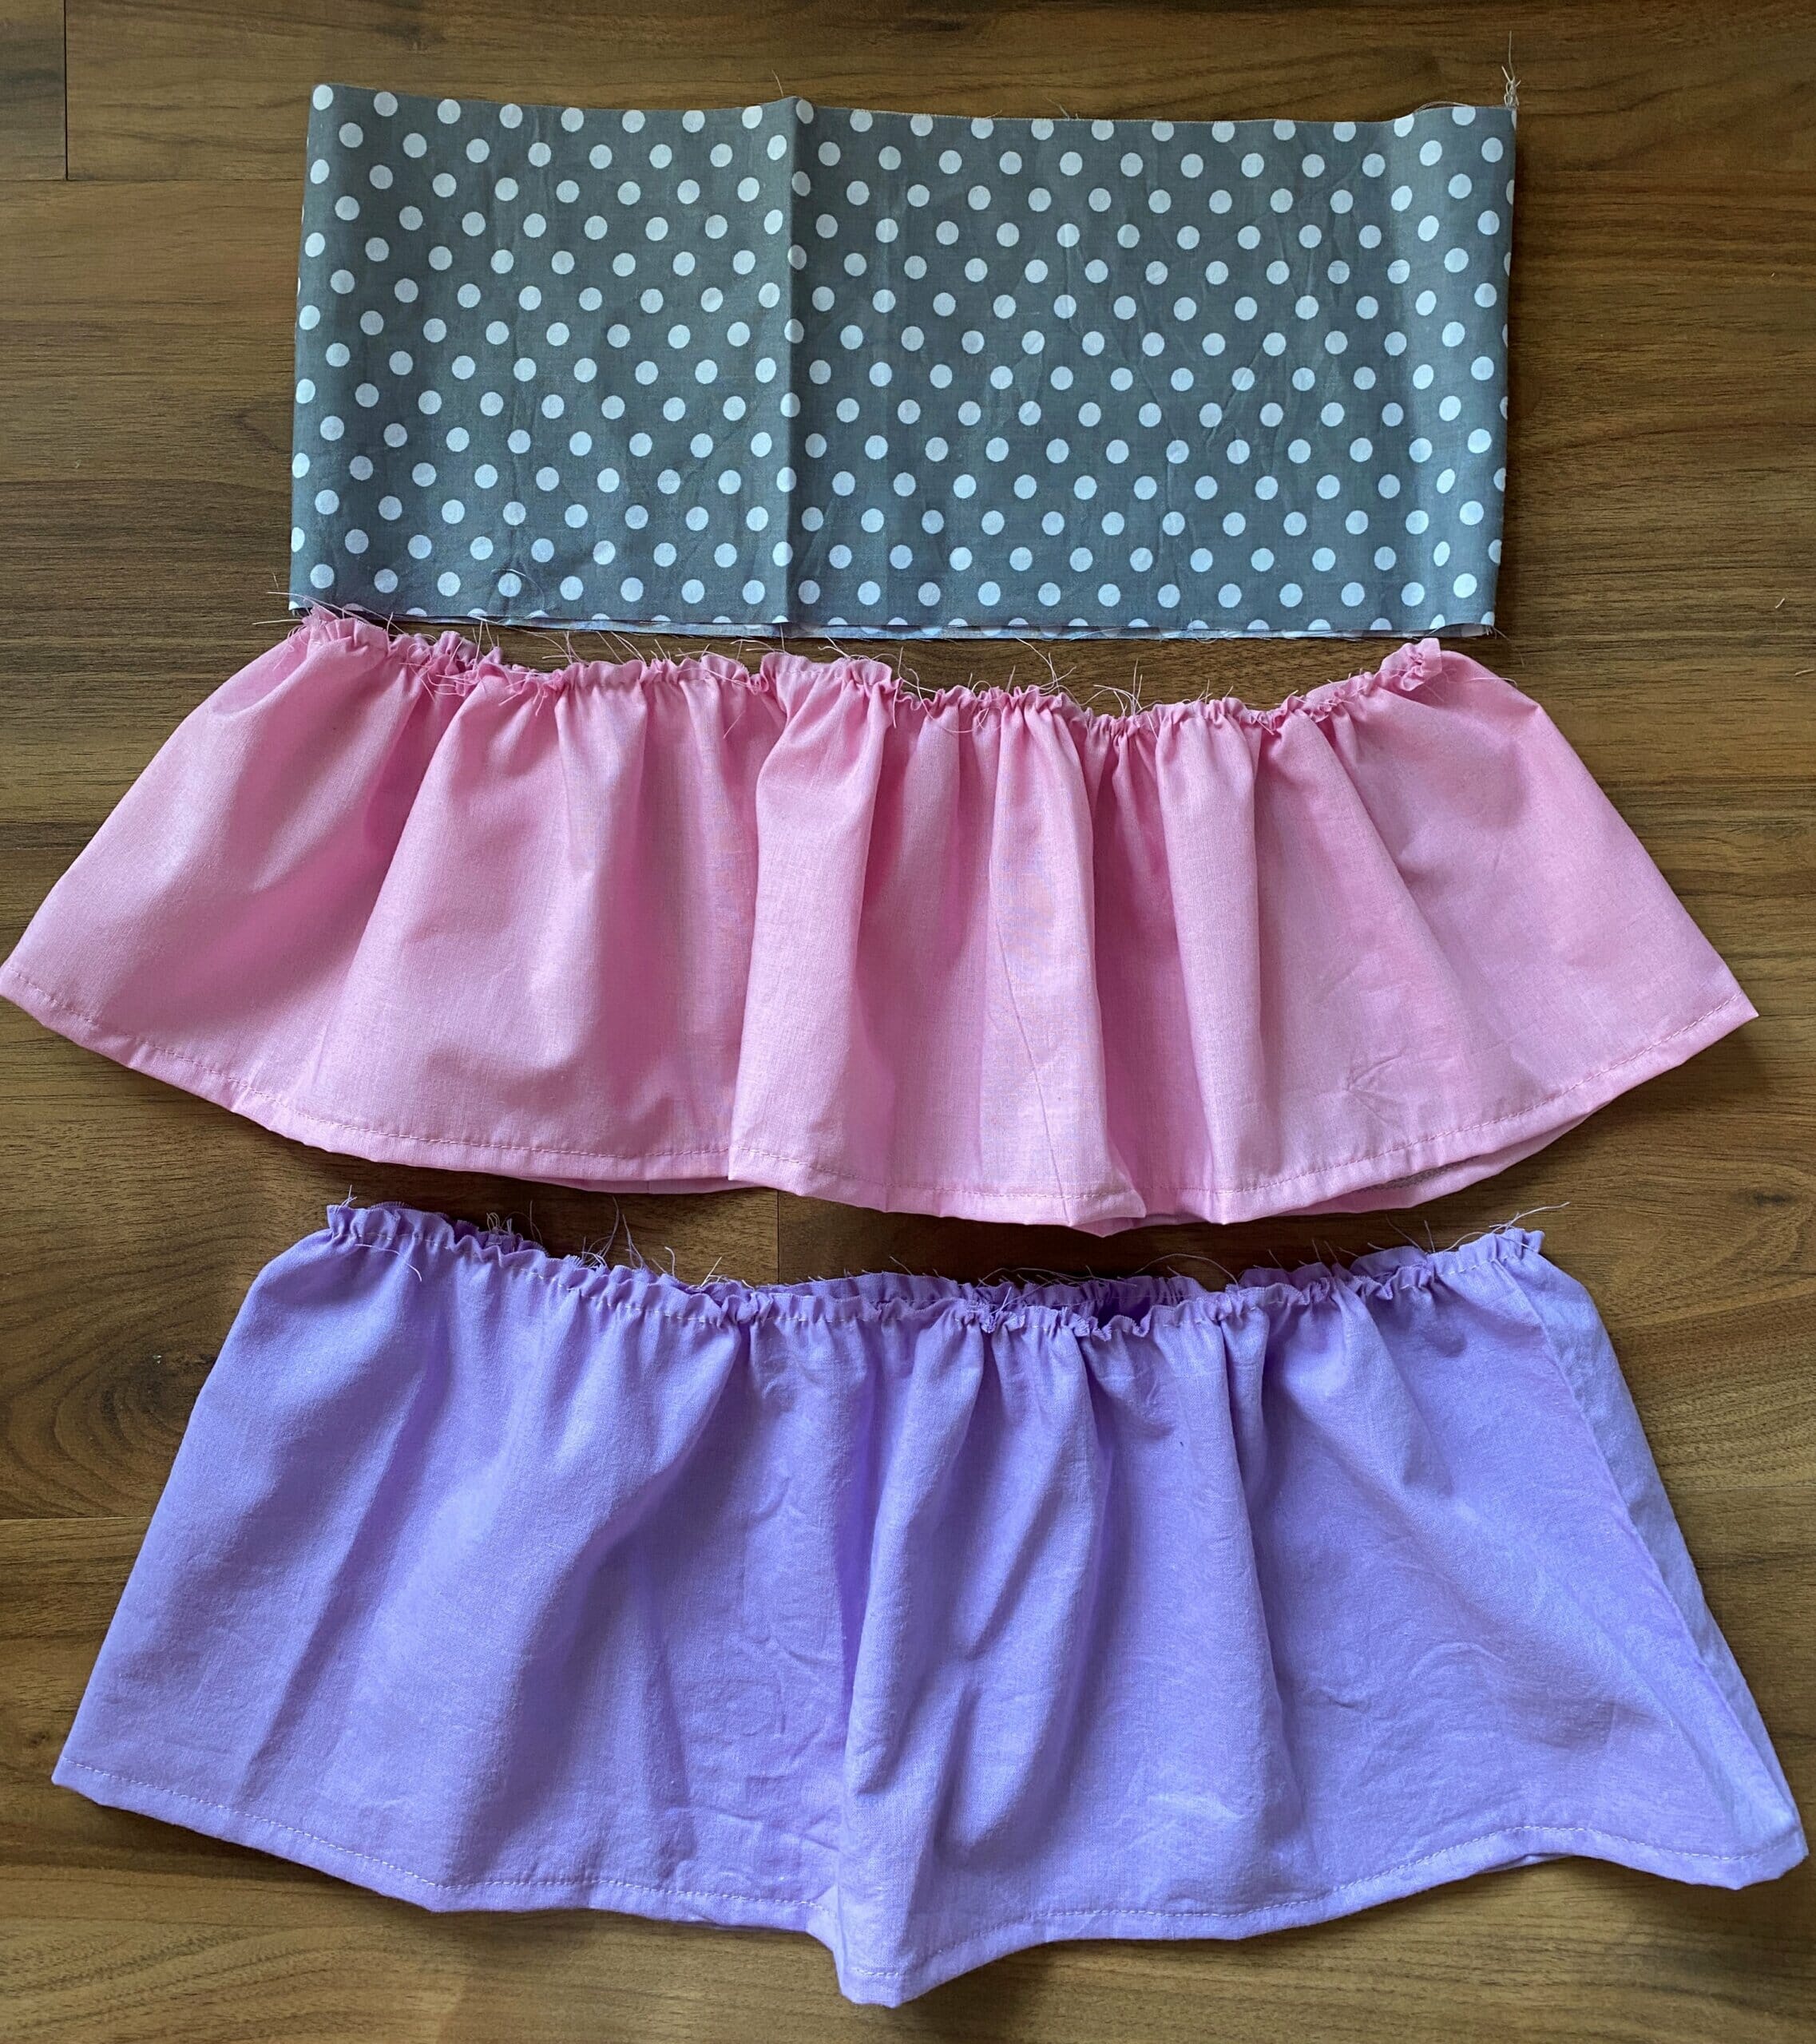
Then, use the longest stitch possible on your sewing machine and make a basting stitch.
Gather both ruffles to match the width of the first tier.
Step 3 – sew the two ruffle pieces together
Pin the two ruffle pieces together – the right side of the inner ruffle with the wrong side of the outer ruffle – and sew.

Make sure to match the back or the side seams (depending on how you cut your fabric pieces).
Related: Circle skirt dress for little girls – free pattern & tutorial
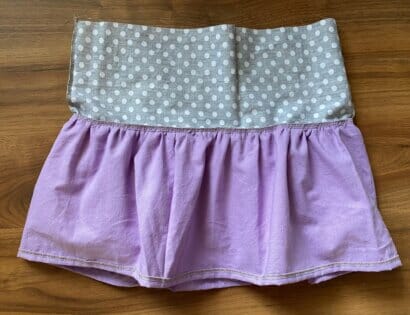
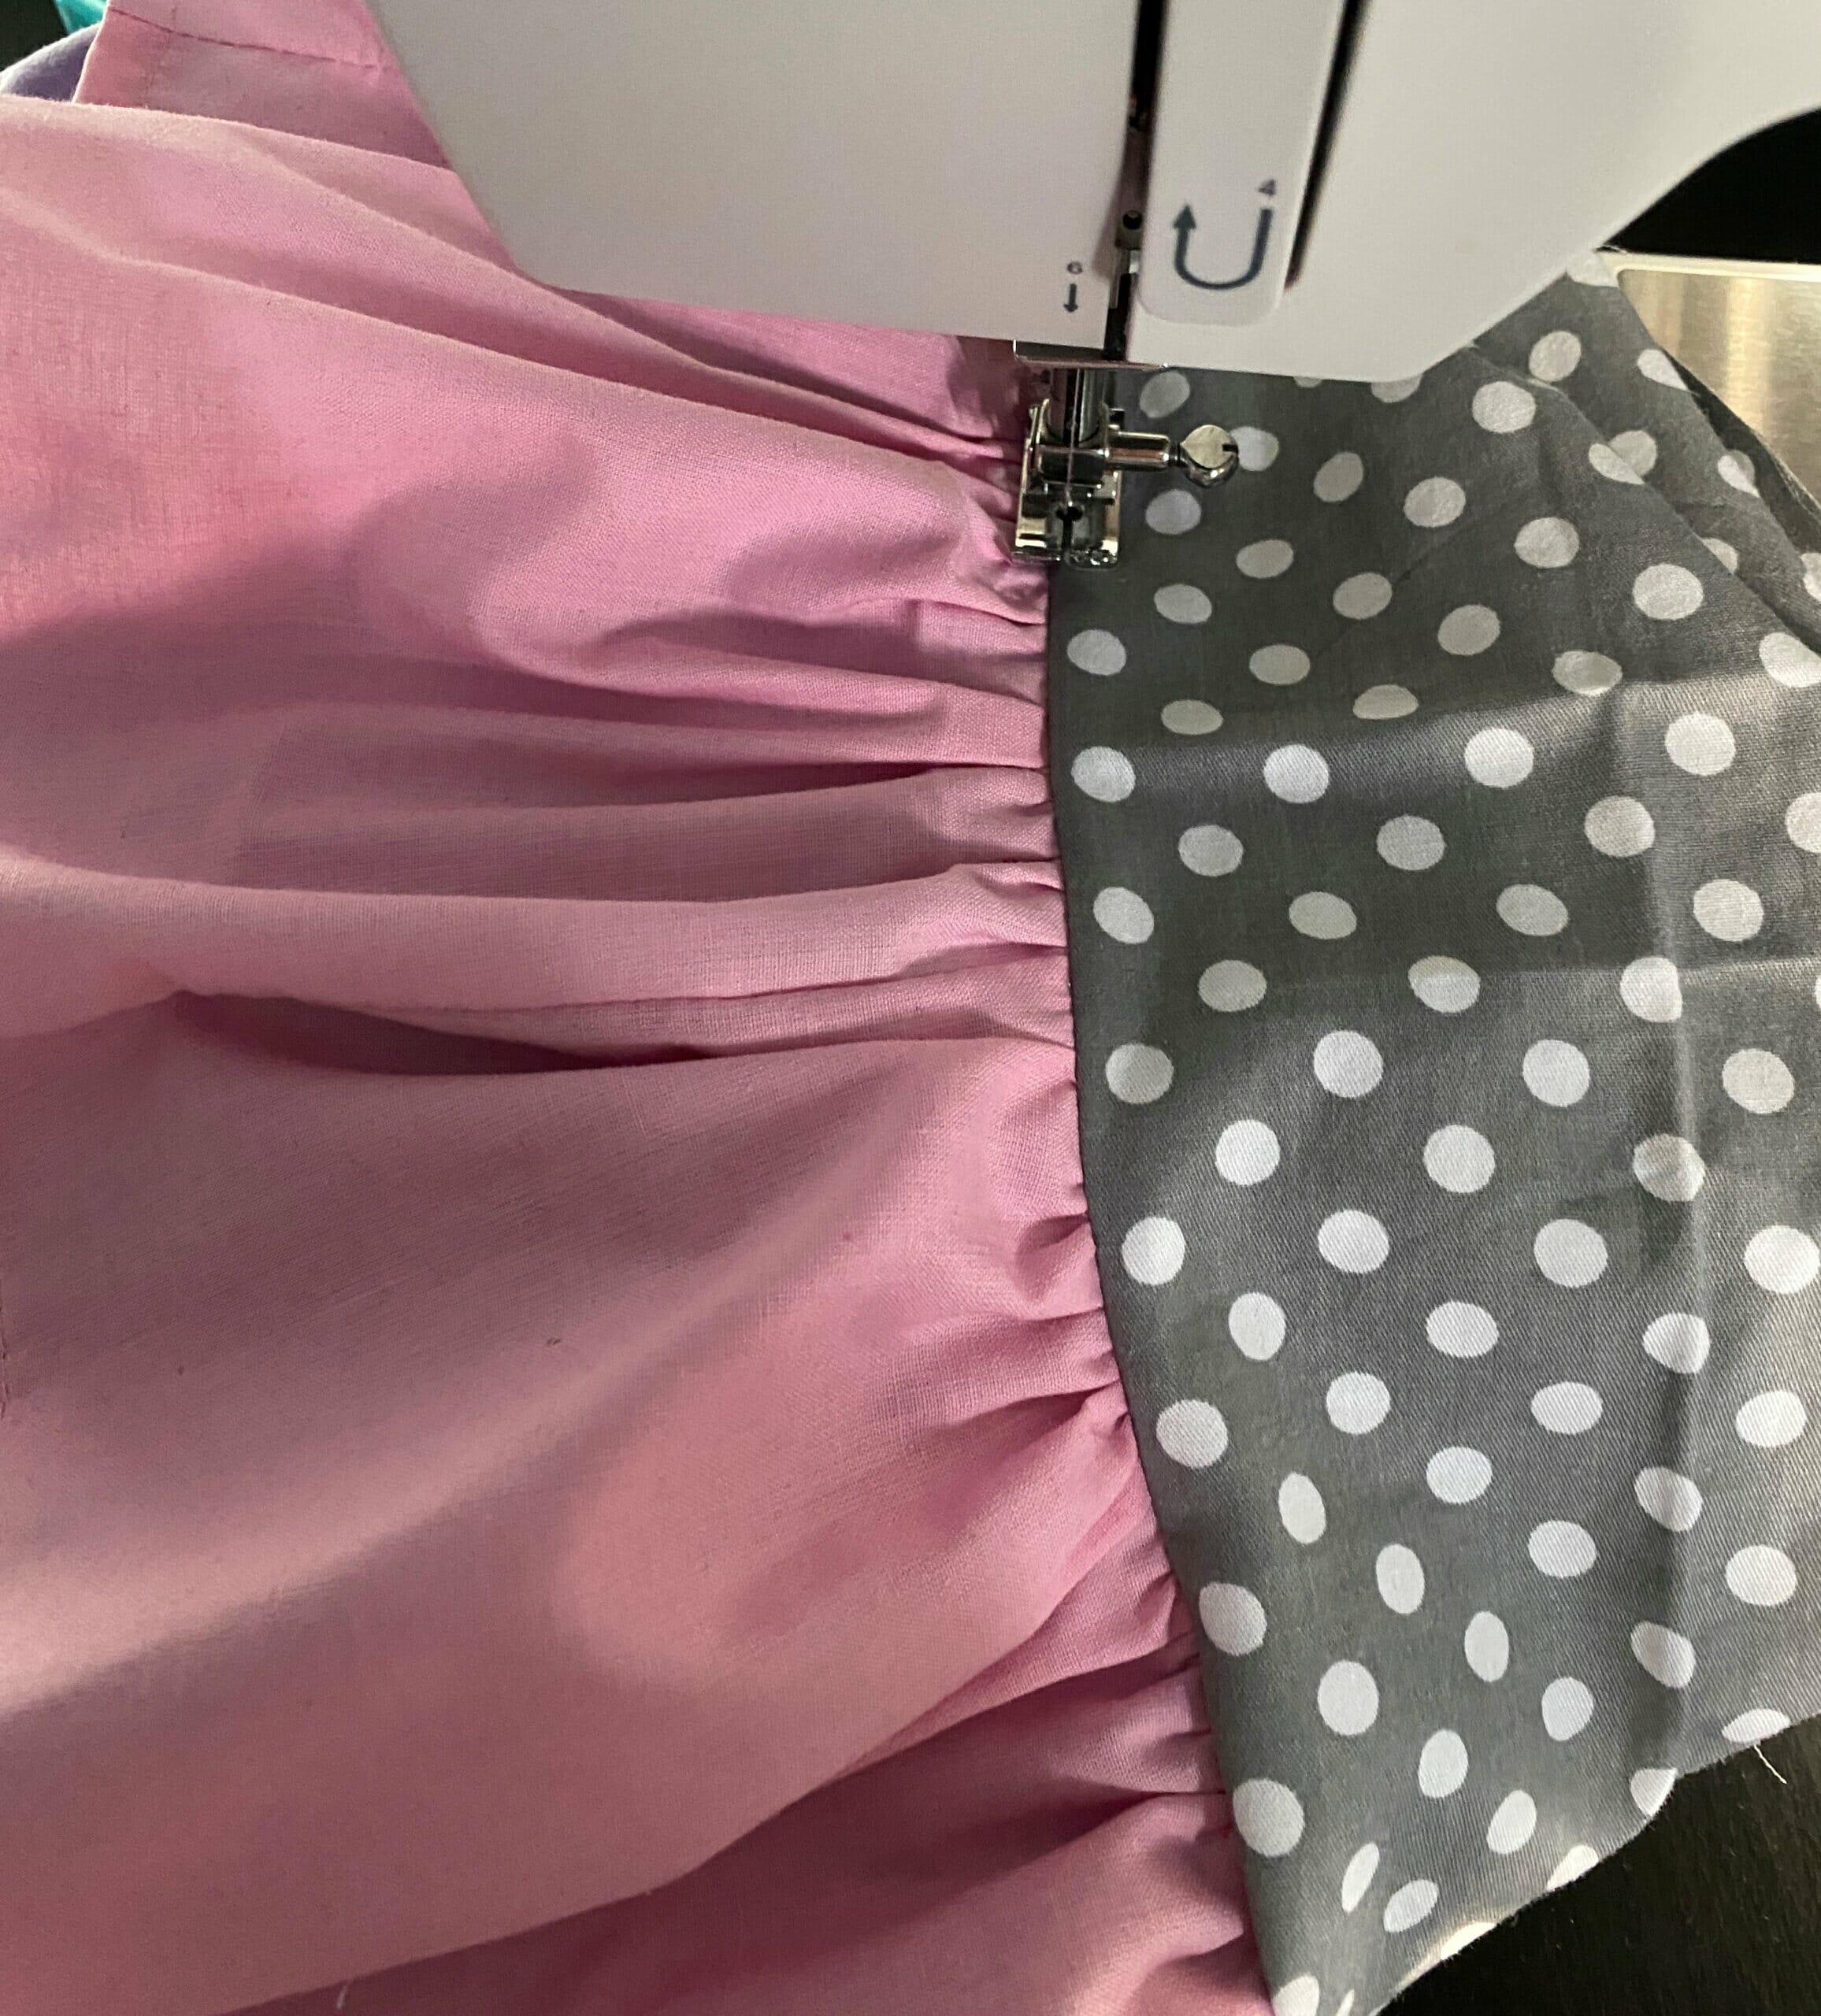
Step 4 – attach the first tier to the ruffles
Pin the right side of the first tier to the right side of the ruffles and sew them together.
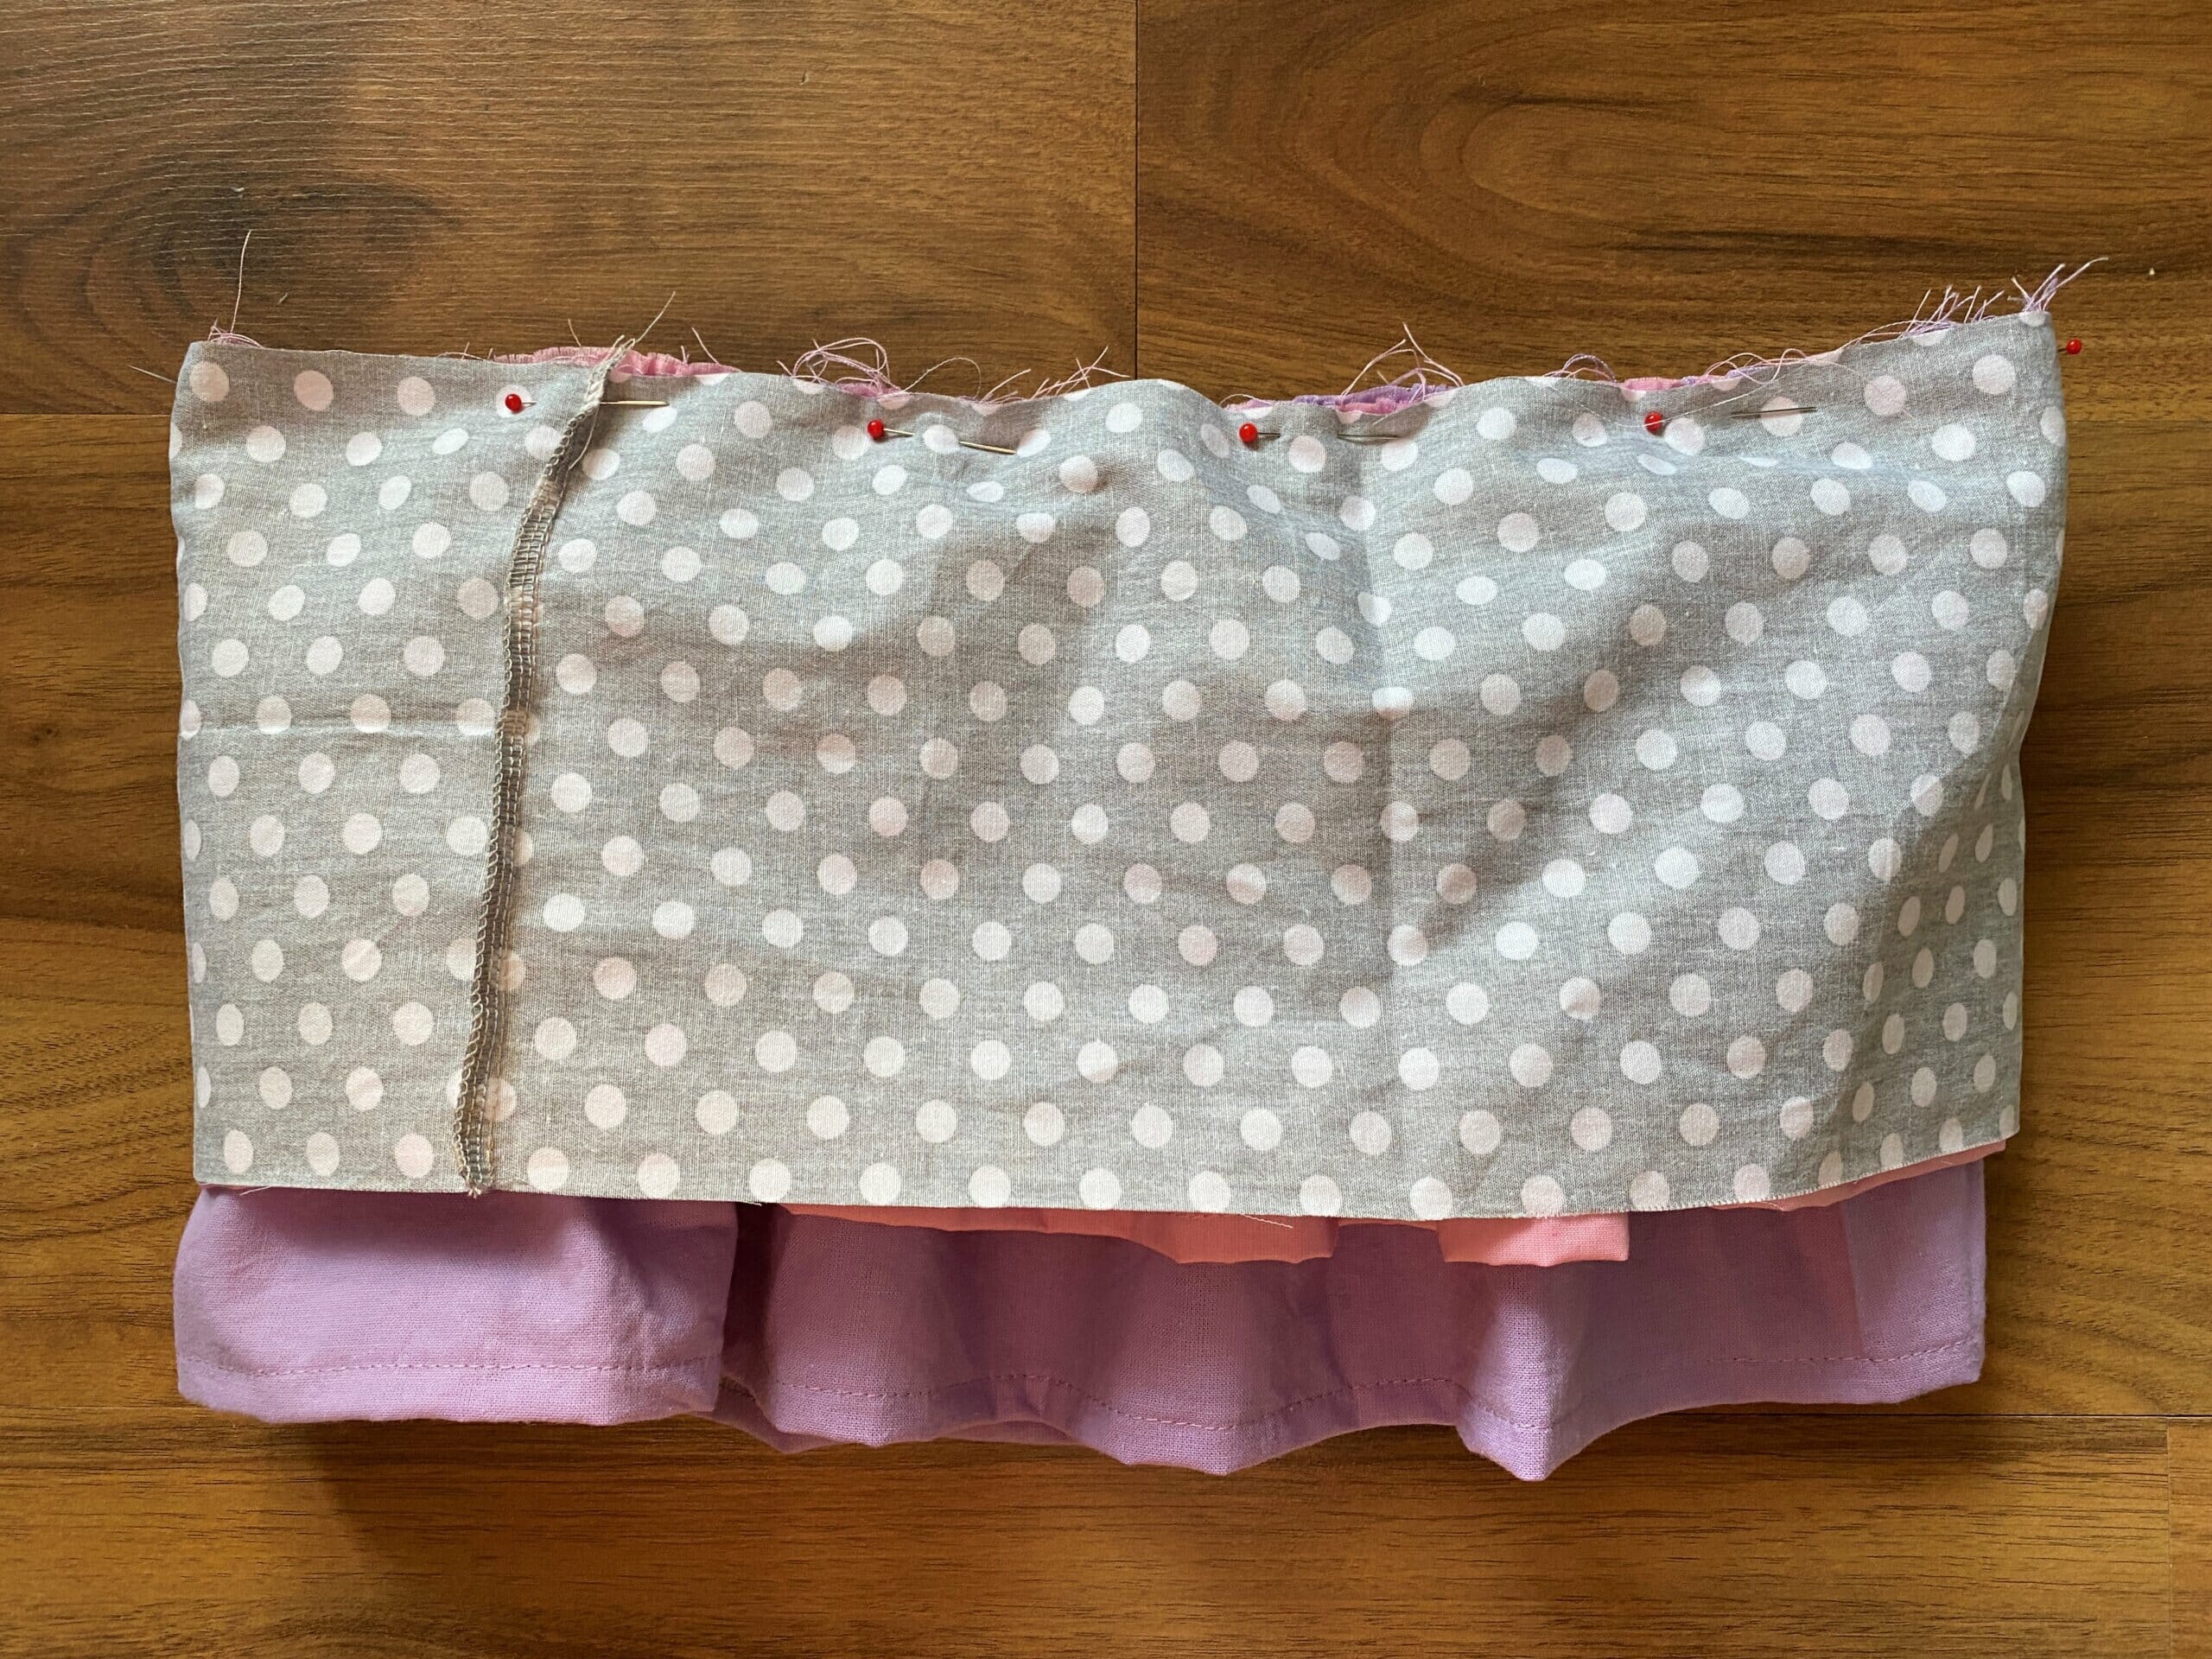
Finish the seam with a serger or a zigzag stitch, then turn the skirt right side out and topstitch 1/8″ away from the seam line.
Step 5 – make the waistband casing
To make a 1″ elastic casing, serge (or zigzag) the top edge of the skirt, then fold down 1 1/2″.
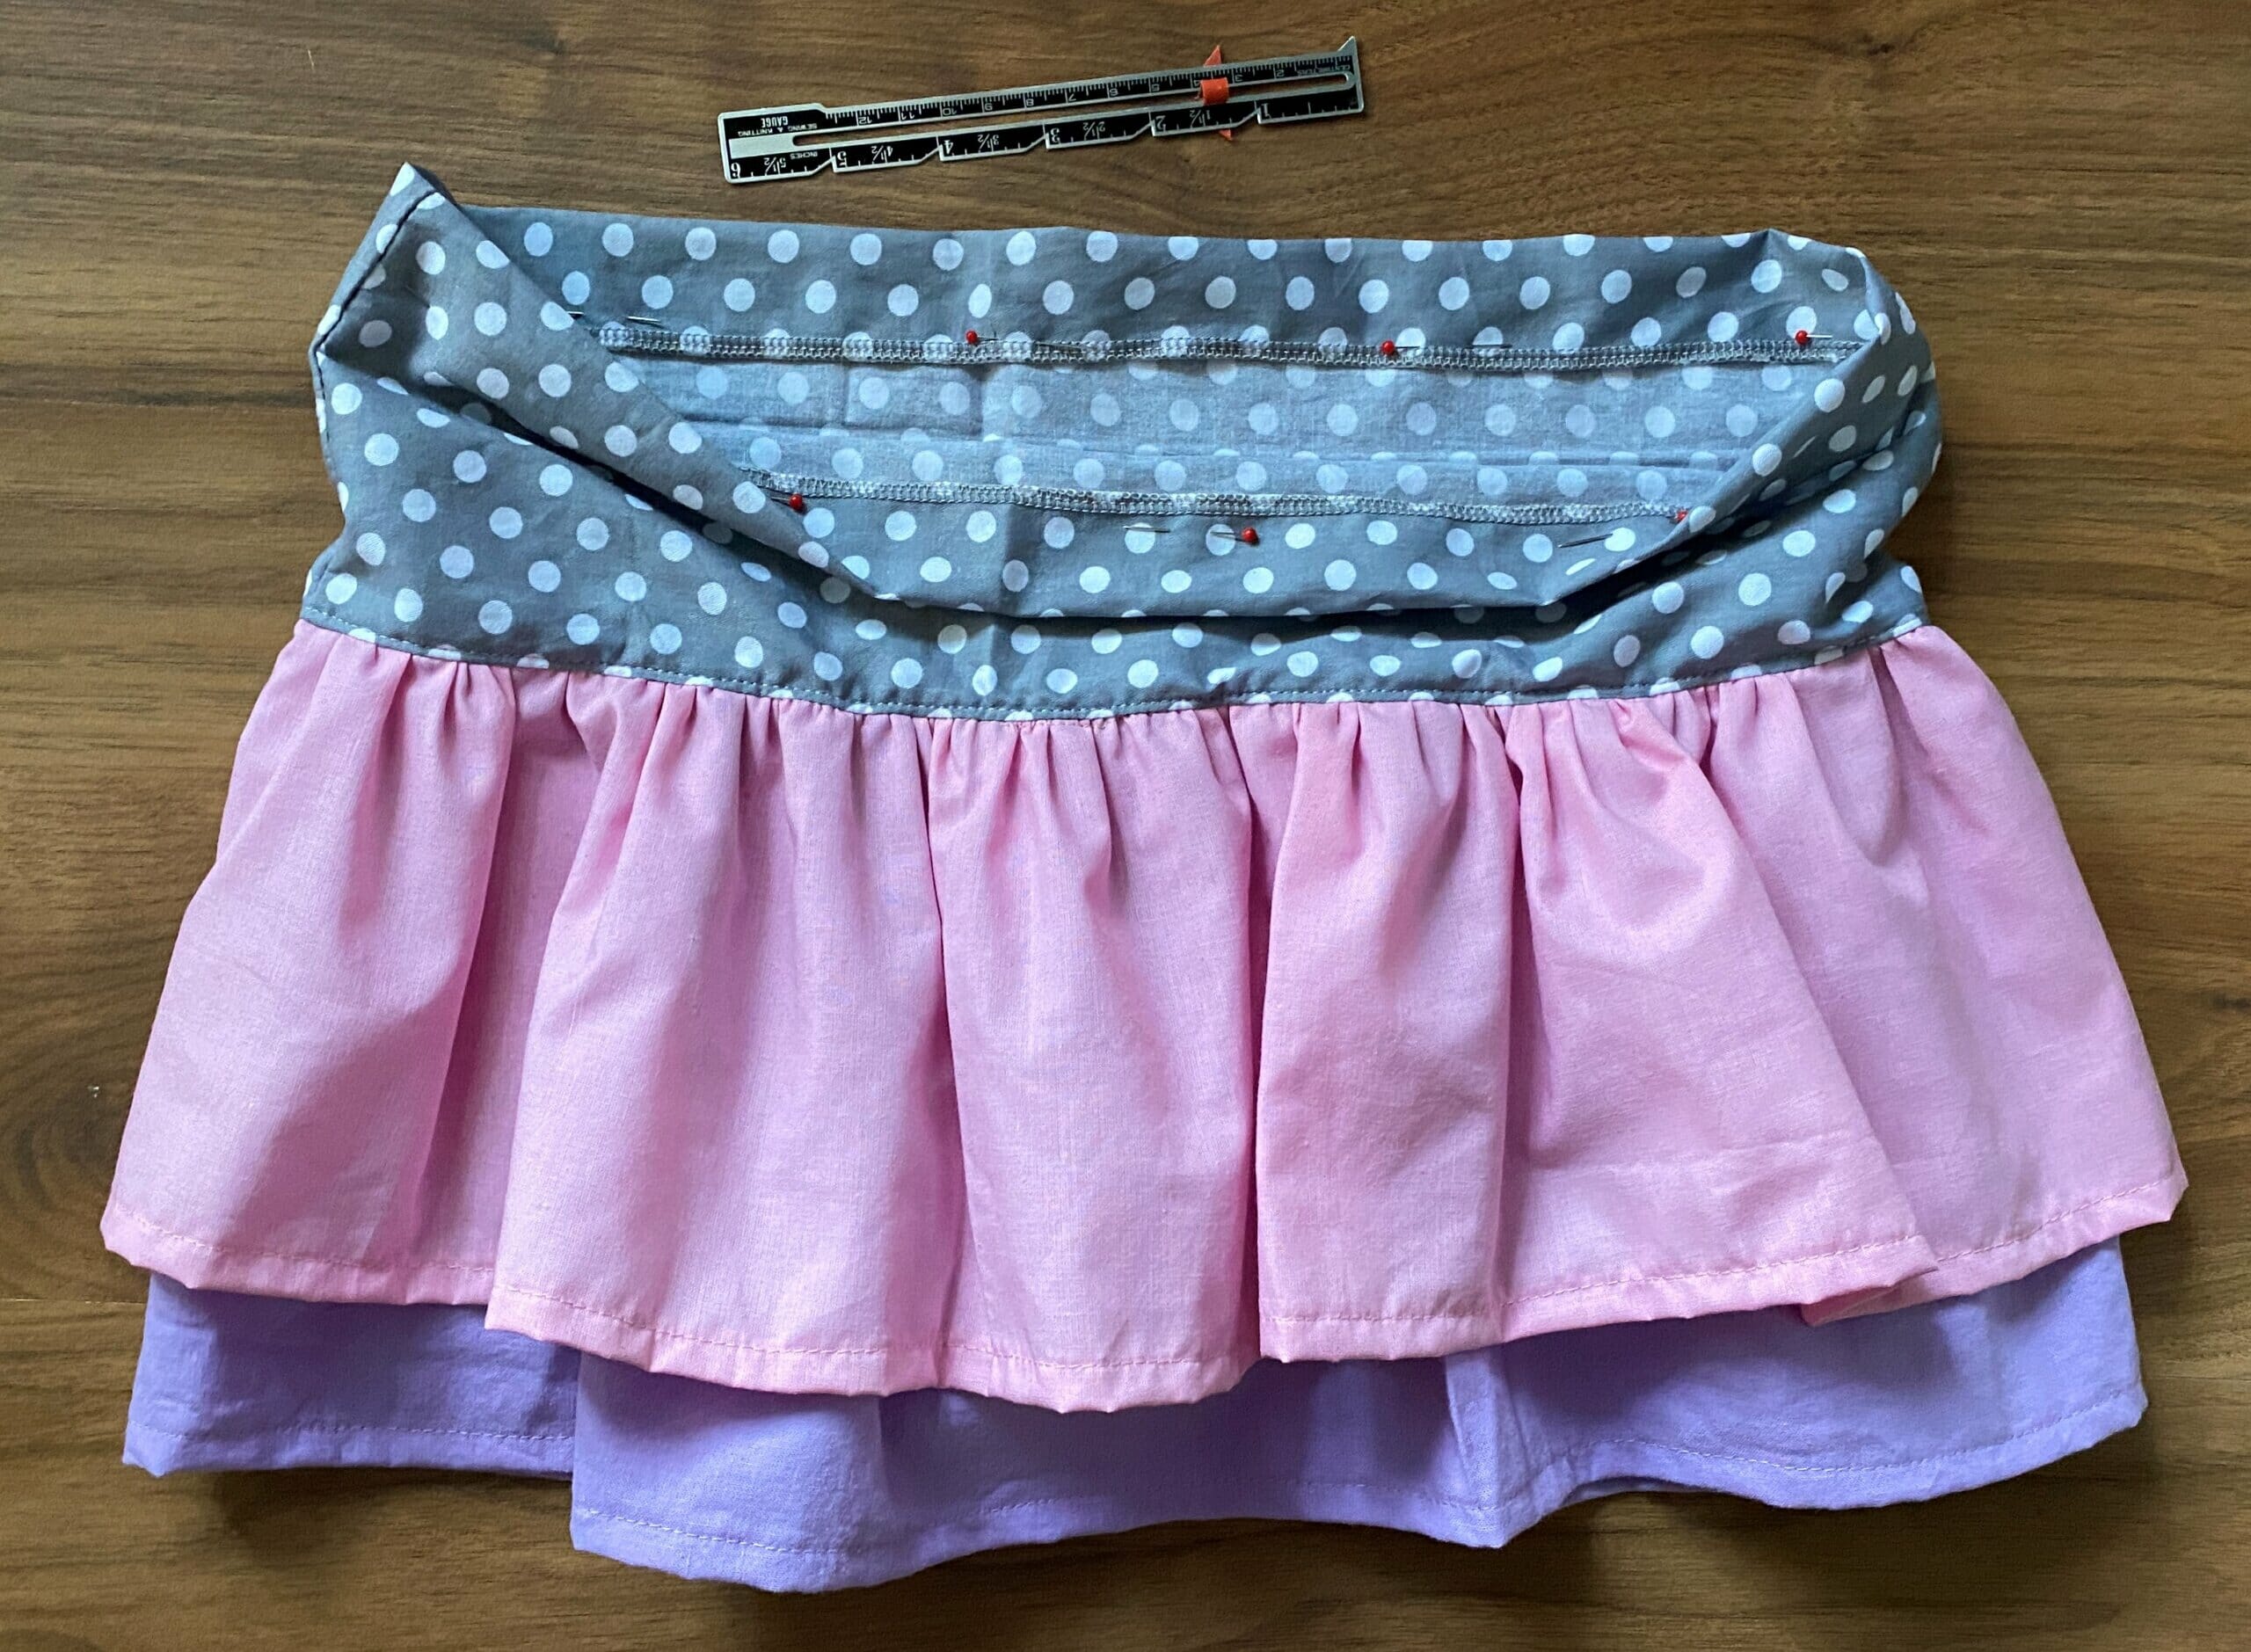
Sew 1 1/4″ from the top edge and leave a small opening for the elastic.
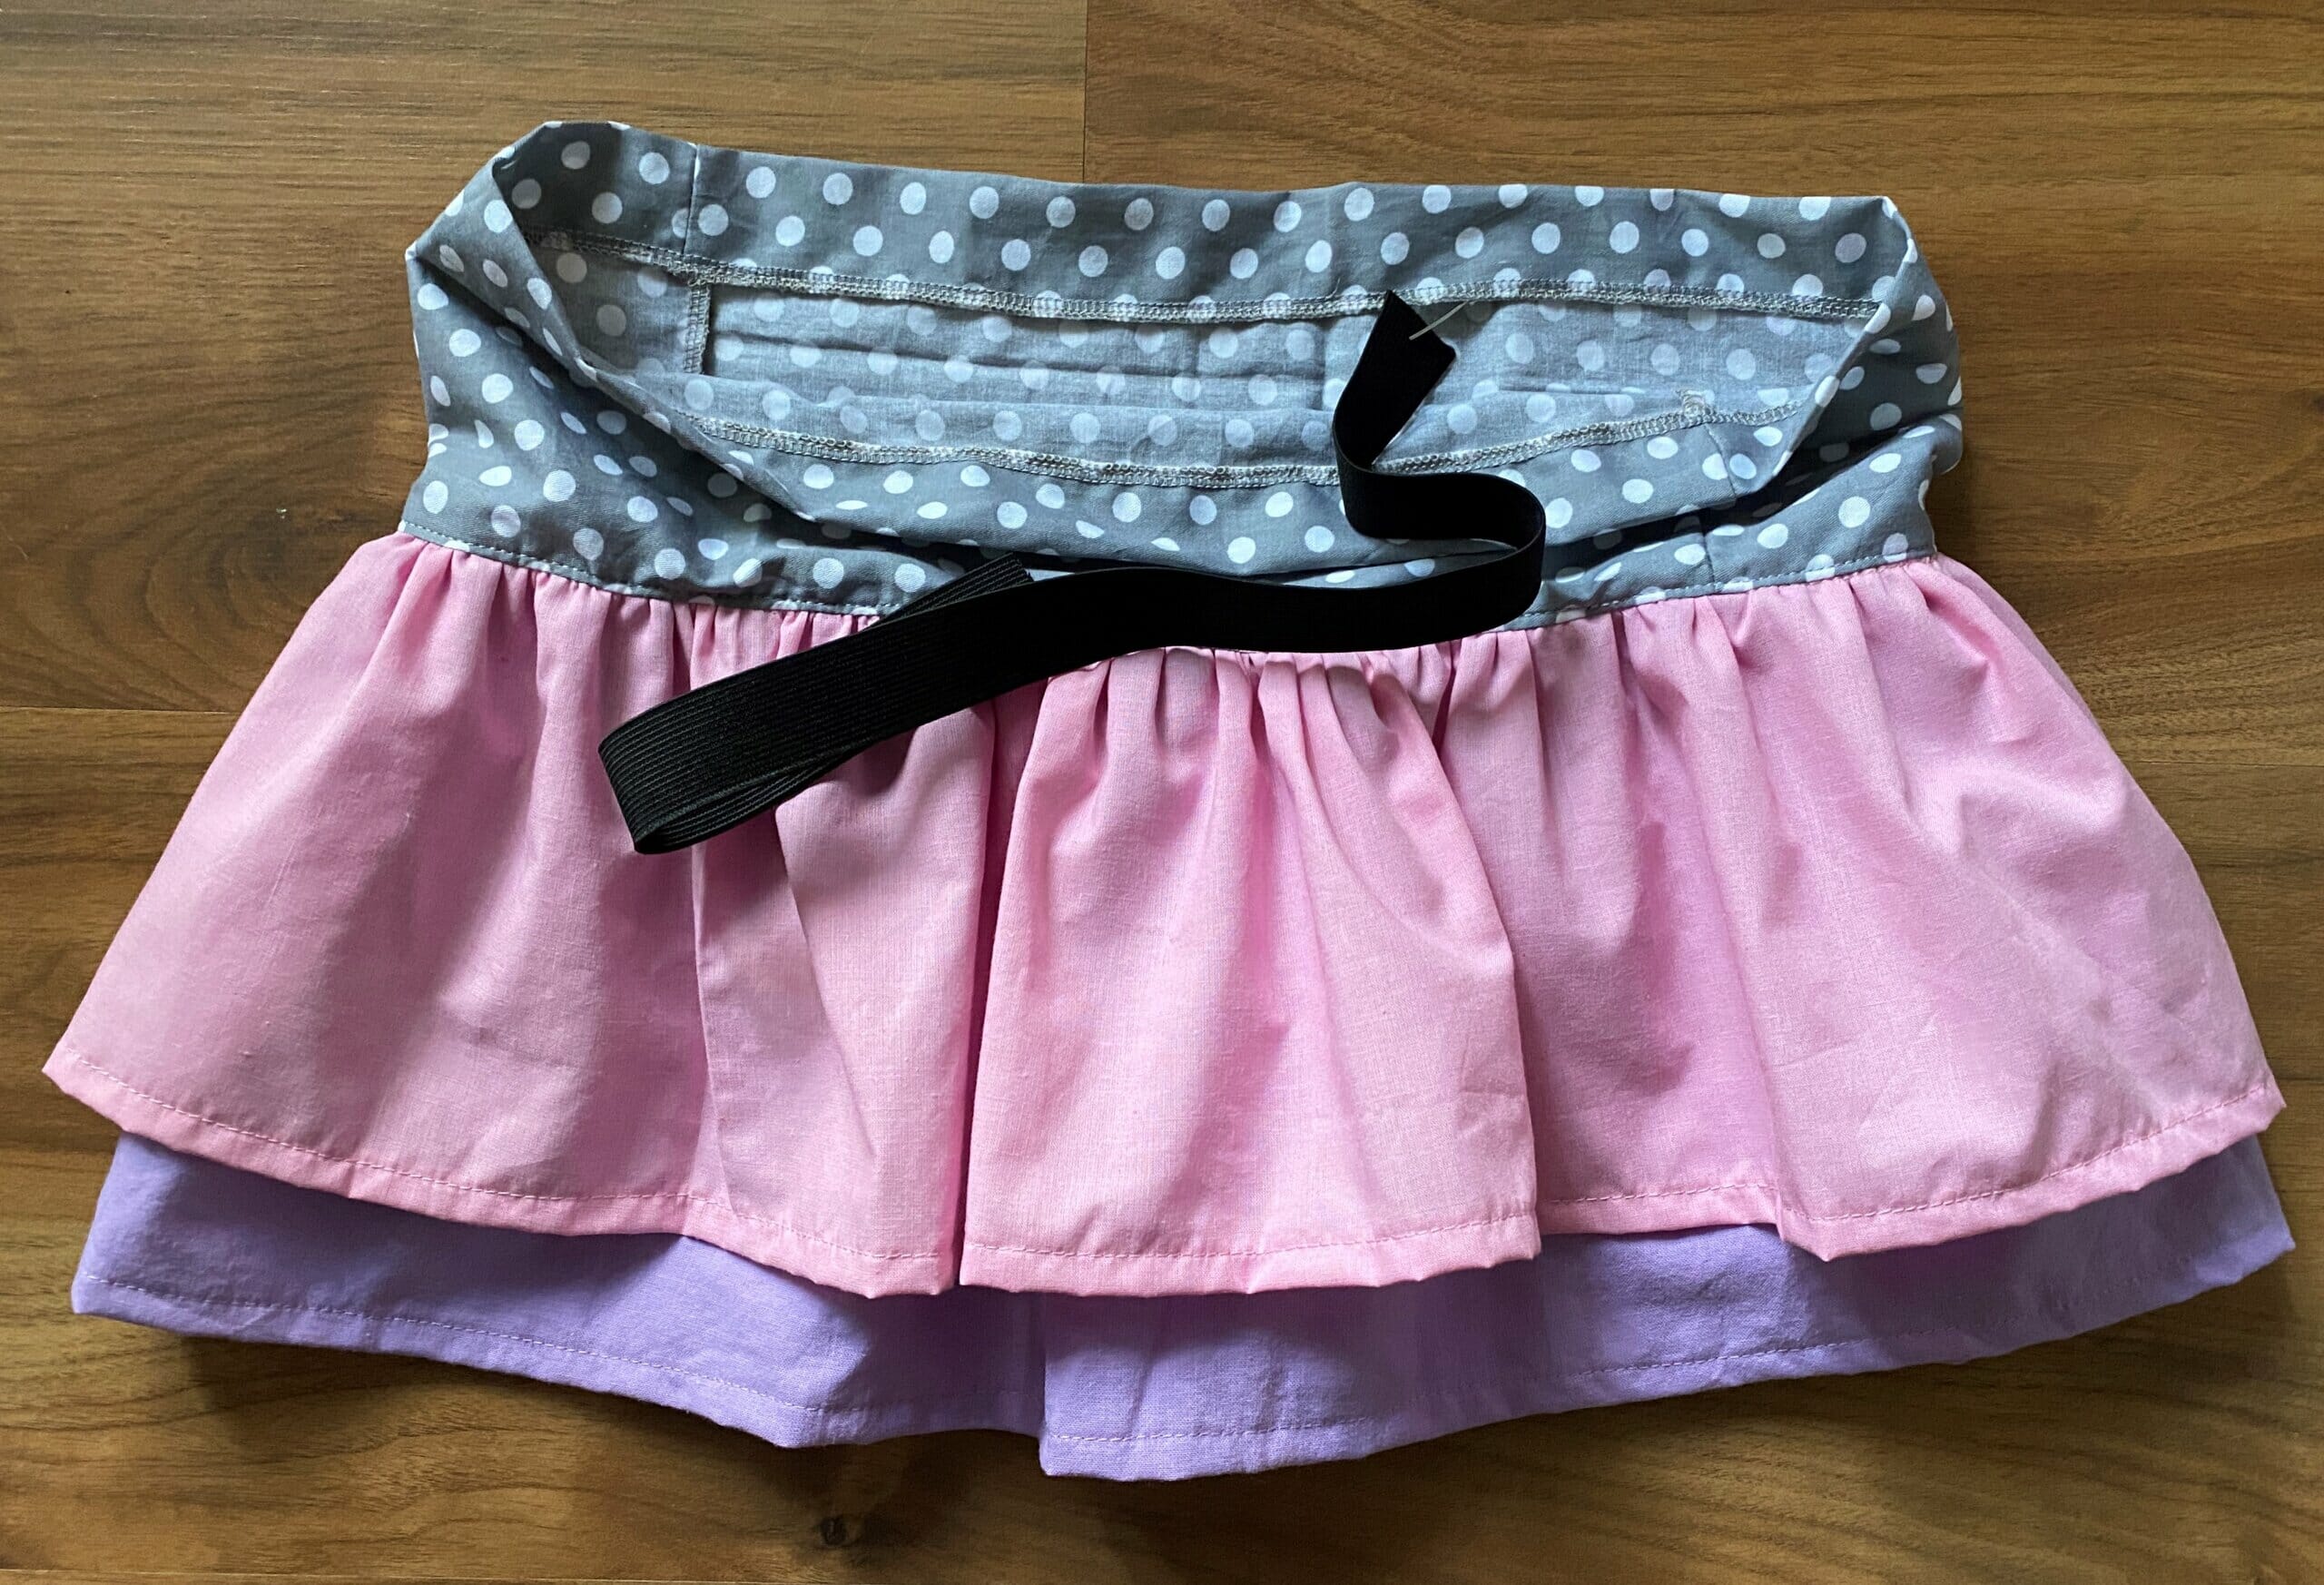
Insert the elastic through the casing using a safety pin. Make sure the elastic does not twist inside the casing. Overlap the ends of the elastic and sew them together, then close the small gap in the waistband.
Now let’s take a look at the inside of my cute little skirt.
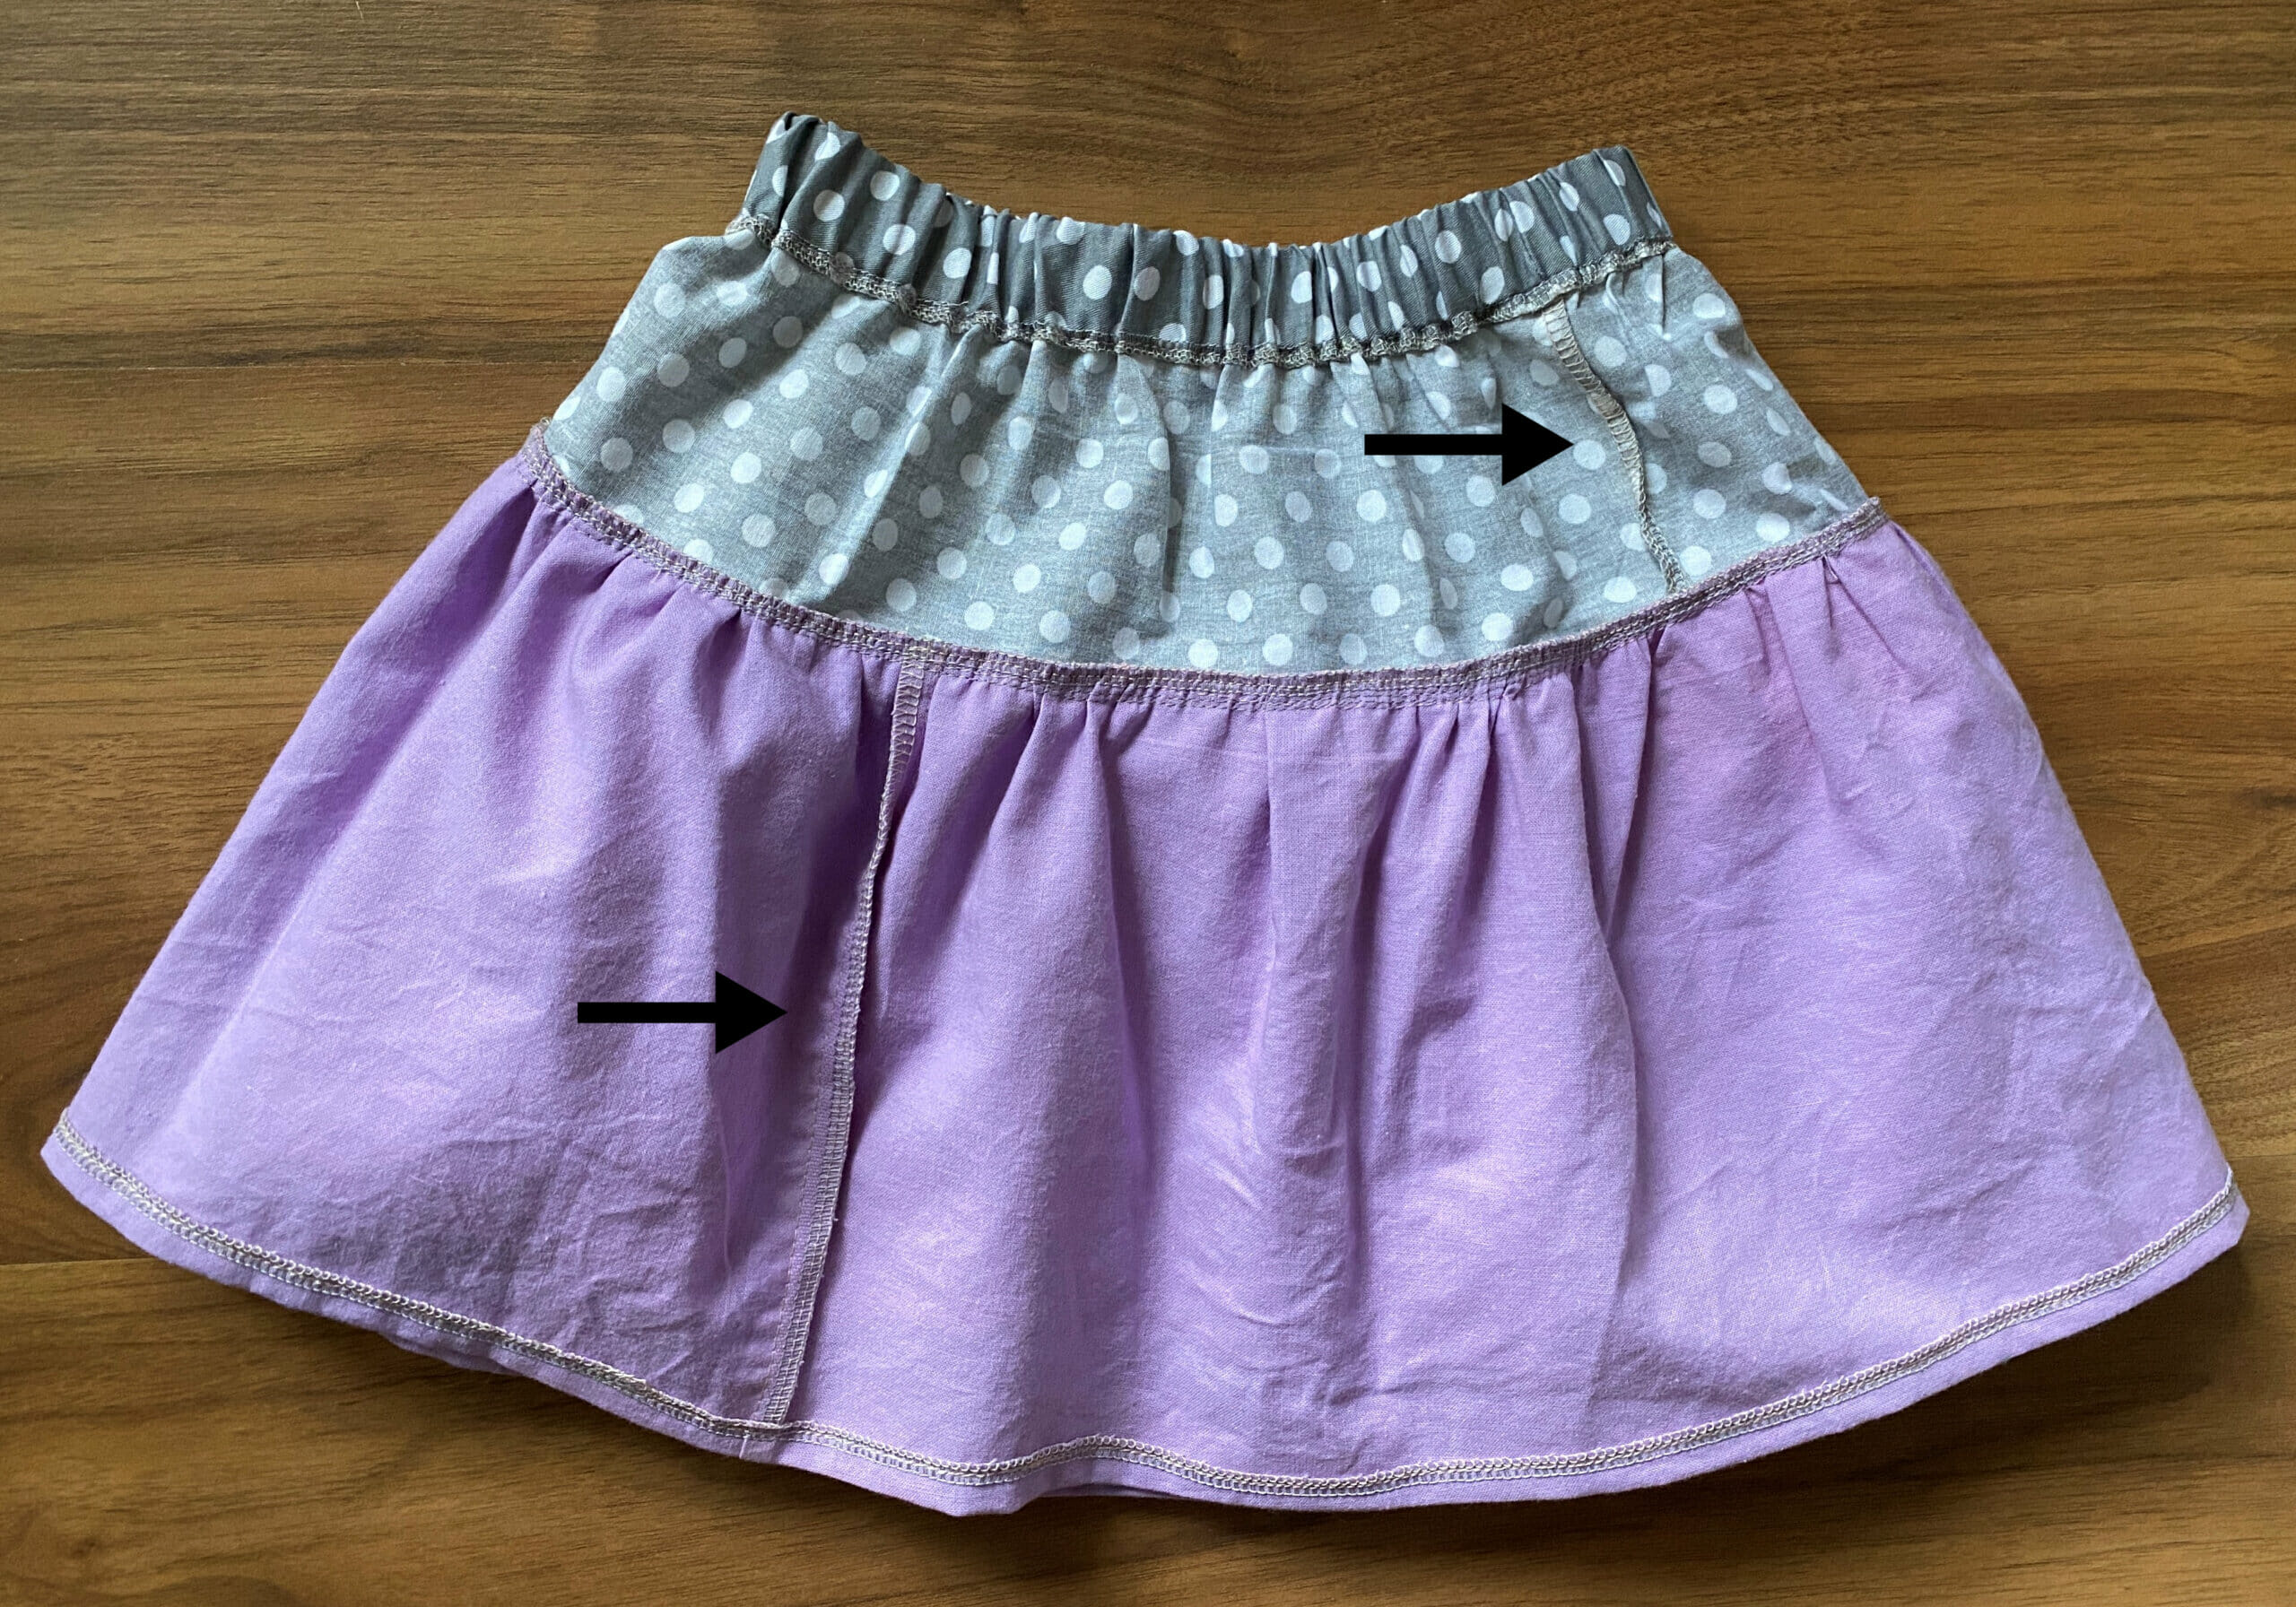
Notice how one seam allowance goes one way, and the other goes the other way? Maybe you’ll remember this and try not to make the same mistake. 🙂
And that’s all, you’re done!
Did you find this tiered ruffle skirt tutorial helpful? I’d like to hear what you think of it!
Let’s keep in touch! You can find me on Facebook, Instagram, and Pinterest.
I think this is fabulous thank you so much for sharing it. I am going to make the skirt three tier for my great grand daughter of 4.. Love your illustrations. Have a wonderful day. Regards Magda.
Thank you so much, Magda! Your kind words made my day 🙂 Best wishes to you and your family!