Learn how to sew a gathered dress for girls in 10 simple steps using cotton fabric with no pattern needed. This easy DIY tutorial shows you how to copy a t-shirt pattern to create a cute dress with a back slit and button loop closure. Perfect for beginners, this gathered dress is quick to sew and can be made in any size by tracing a fitted t-shirt.
Can you simply copy a t-shirt pattern to make it out of woven fabric? At first, I was not so sure.
How could that possibly work? The knit pattern uses the stretch of the fabric to fit on the body, while the woven fabric has basically no stretch.
I imagined seeing the popping stitches while trying to get my daughter into the dress.
However, I recently had a major revelation. I went straight to my closet and compared my knit t-shirts to my woven shirts. Strange enough, it’s something that has never occurred to me before.
That was a major breakthrough for me. The patterns were almost identical!
I learned right away that as long as you include some sort of closure for your woven garment – buttons or zipper – you’re good to go.
Be sure to check out my other tutorials on how to make a flutter sleeve peasant top and an easy tulle dress for little girls! Both come with free PDF sewing patterns.
So the next day I rushed to my sewing room and started drafting, cutting, sewing, and marveling. I documented the whole process with plenty of pictures.
DIY gathered dress for girls sewing tutorial
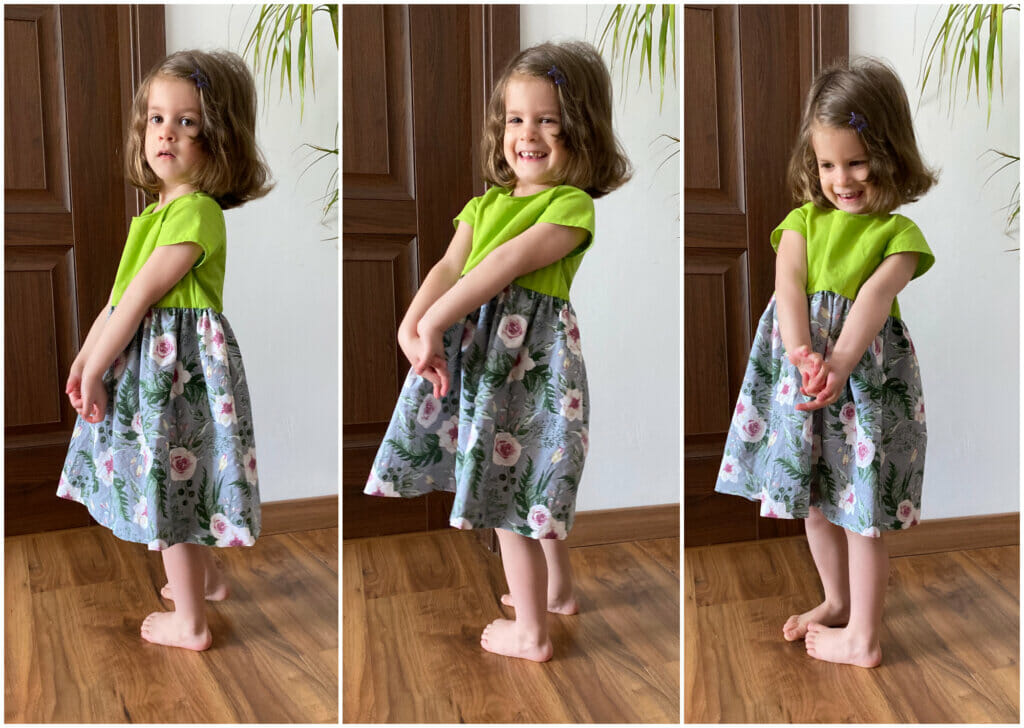
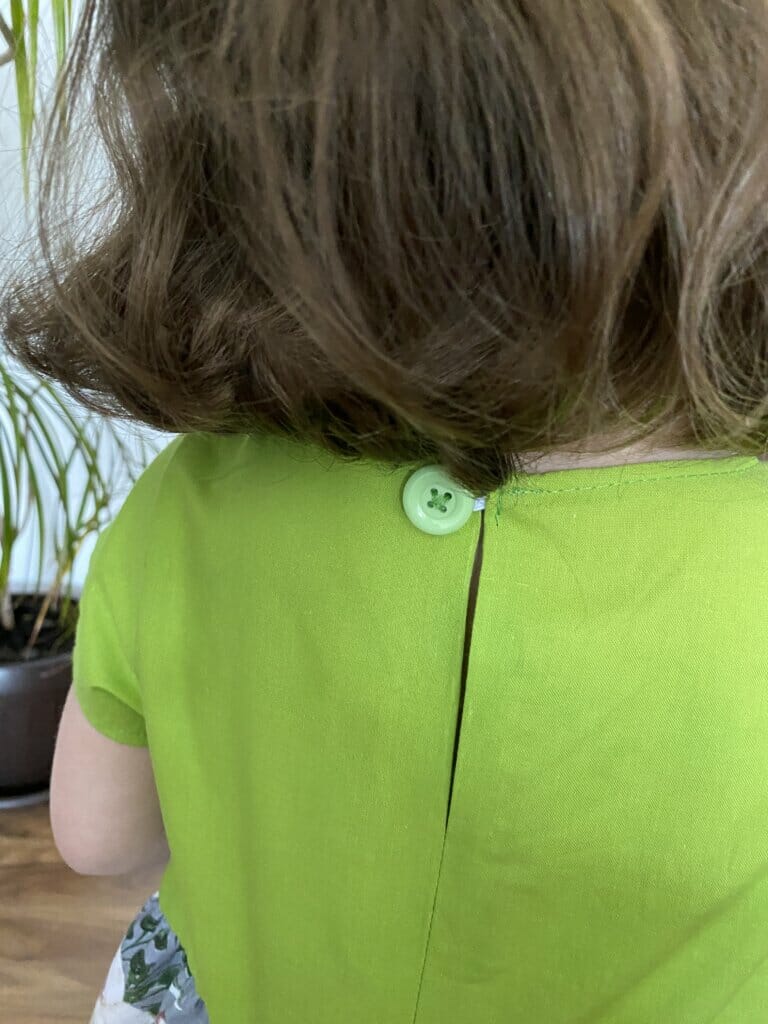
I made a zipper and buttonholes-free gathered dress for my youngest daughter. Instead, I chose a back slit and a button loop closure. Also, I made sure to add seam allowance and ease to my t-shirt pattern.
This is a simple gathered short-sleeve dress. To make it any size you want you only need a t-shirt that fits your daughter (or niece) to trace the pattern.
Here’s how I did it.
Sewing supplies – gathered dress for girls
- A t-shirt that fits
- Woven fabric of your choice
- Fabric marking pens
- Scissors
- Iron
- Matching thread
- Sewing pins
- Universal sewing machine needle
- Sewing machine
- Serger/overlocker
- 1 button
How to sew a cute gathered dress for girls in 10 simple steps:
Step 1 – trace the front piece pattern
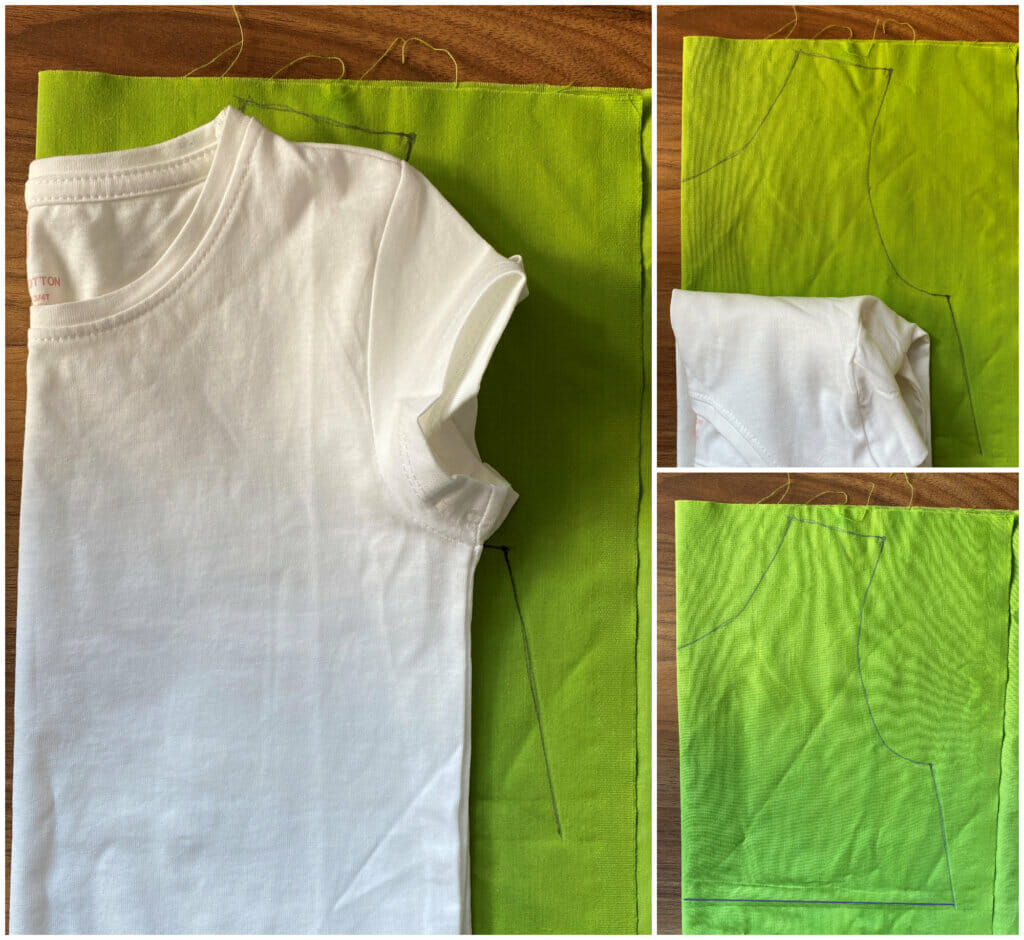
For this step, you need a t-shirt to trace the pattern. Fold the tee in half and lay it on your folded fabric piece, then start making the contour.
Draw the front neckline as-is, but extend the shoulder seam to account for the seam allowance.
Lengthen a bit the armhole in the lower part and as you get to draw the side, make an inclined line to add ease (so the sides of the front piece have an A-line shape). Cut the front piece pattern.
Step 2 – trace the back piece pattern
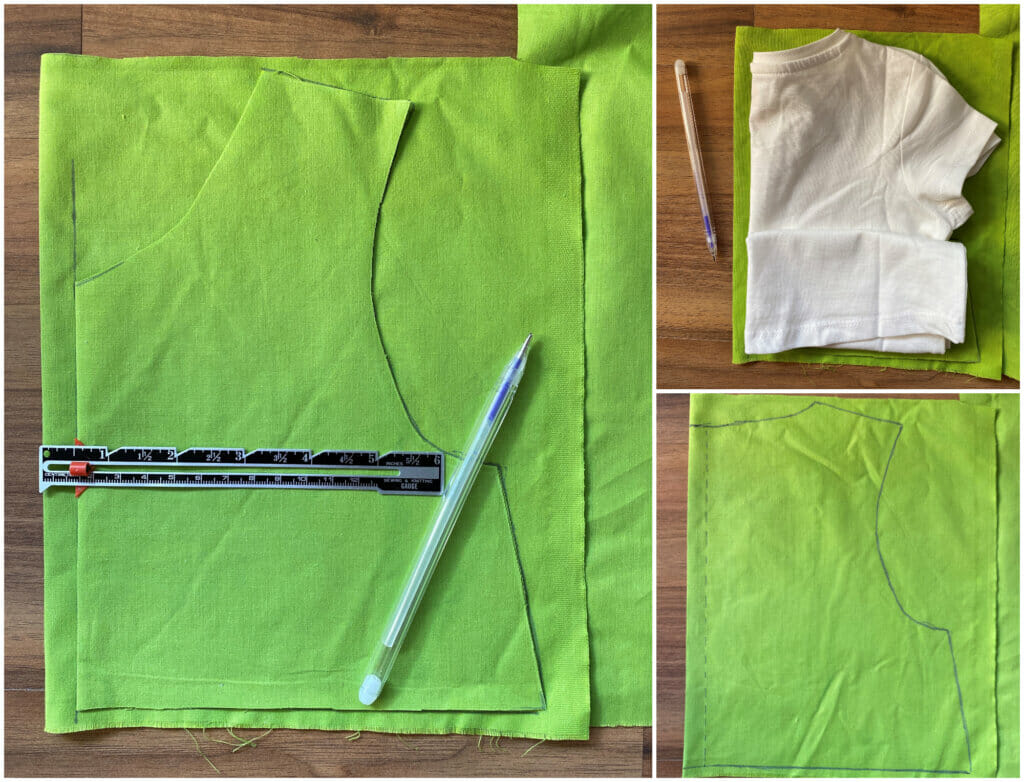
Take the front piece pattern and place it on your fabric piece, 1/2” away from the folded edge.
This is necessary because the back piece will consist of two fabric pieces. That extra 1/2” accounts for the serged edges at the center back and the seam allowance. Copy the t-shirt to draw the back neckline, then outline the rest of the pattern as-is.
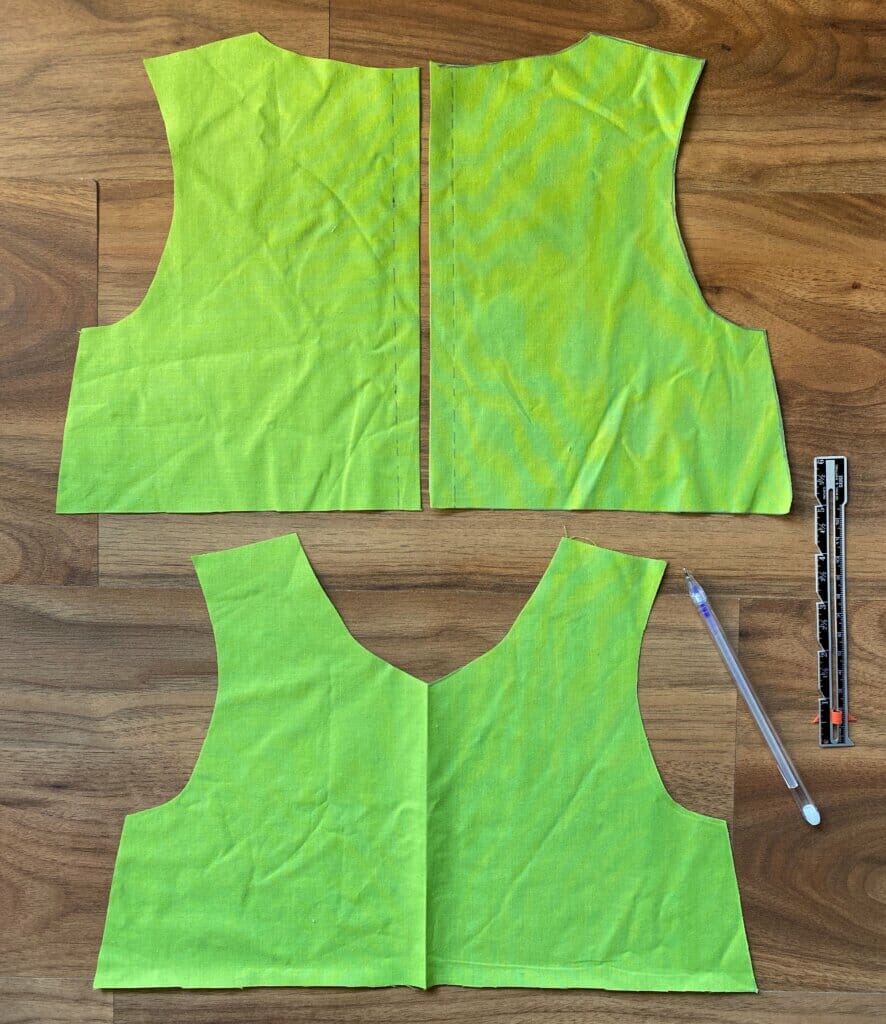
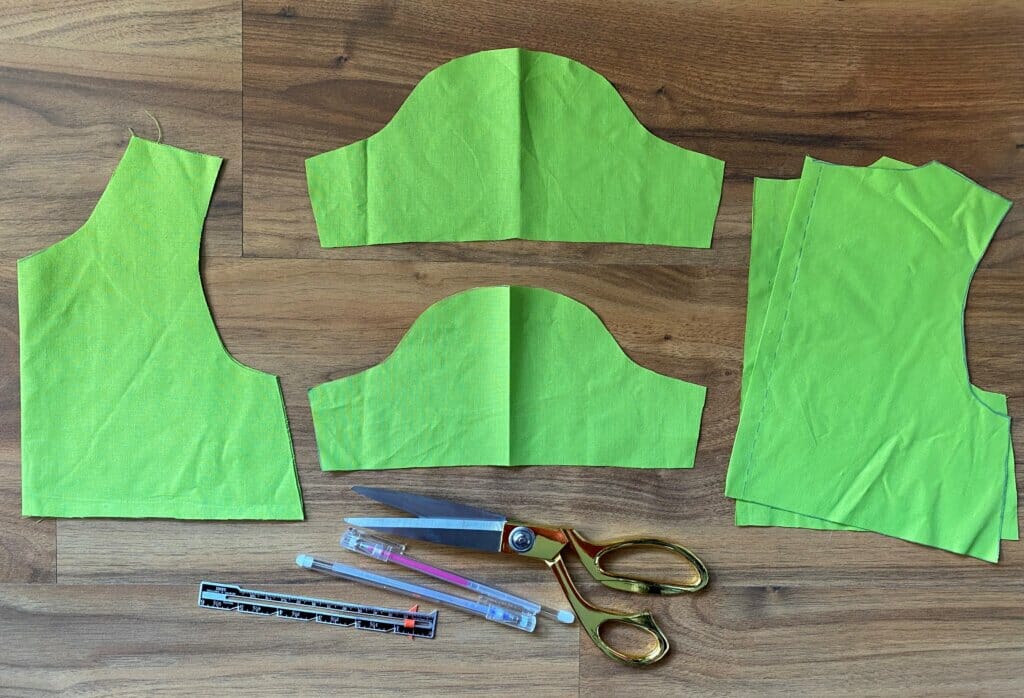
This is what you should have right now – one front piece and two back pieces.
Step 3 – trace the sleeve pattern
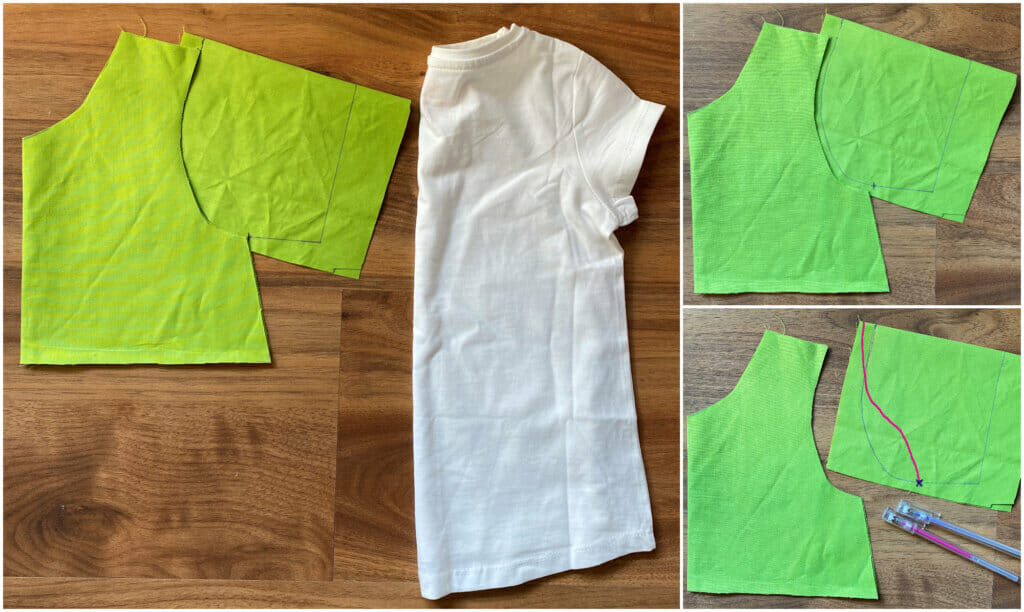
Now take the front piece pattern (again) and place it over a folded fabric piece, as shown in the photo below. Tilt the folded edge of your fabric piece to match the t-shirt sleeve’s folded edge.
Place the front pattern piece approx. 1 ½” – 2″ away from the folded edge so you can lengthen the sleeve’s armhole. Draw the curved line to match the front piece’s armhole.
Then, redo the drawing and take my pink curved line as a model. No need to be super precise.
The whole idea is to make the sleeve’s armhole larger than the bodice’s armhole, I’ll explain why immediately.
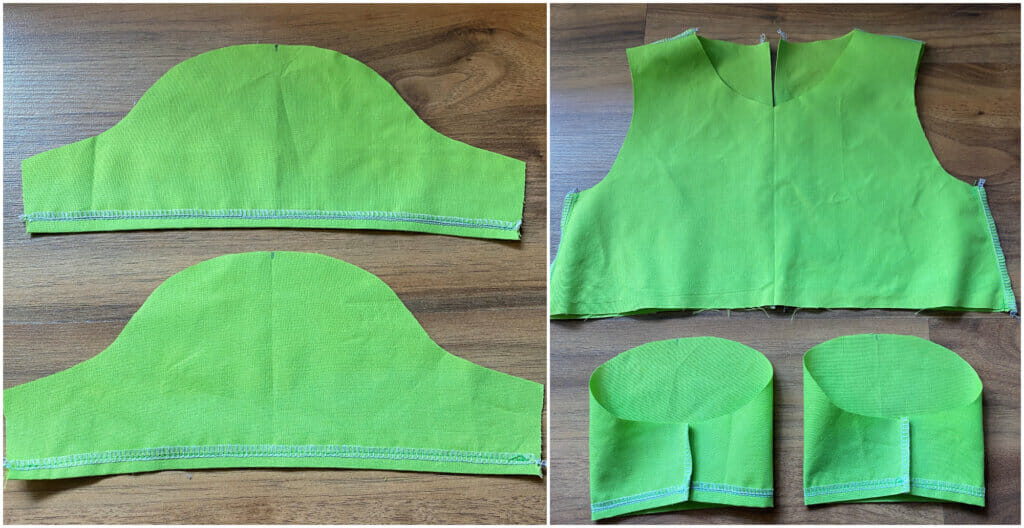
That “X” in the photo collage above is placed in the armpit. Please notice how the sleeve’s side seam is slightly slanted towards the hem of the sleeve.
For now, let’s take a peek at the pattern pieces.
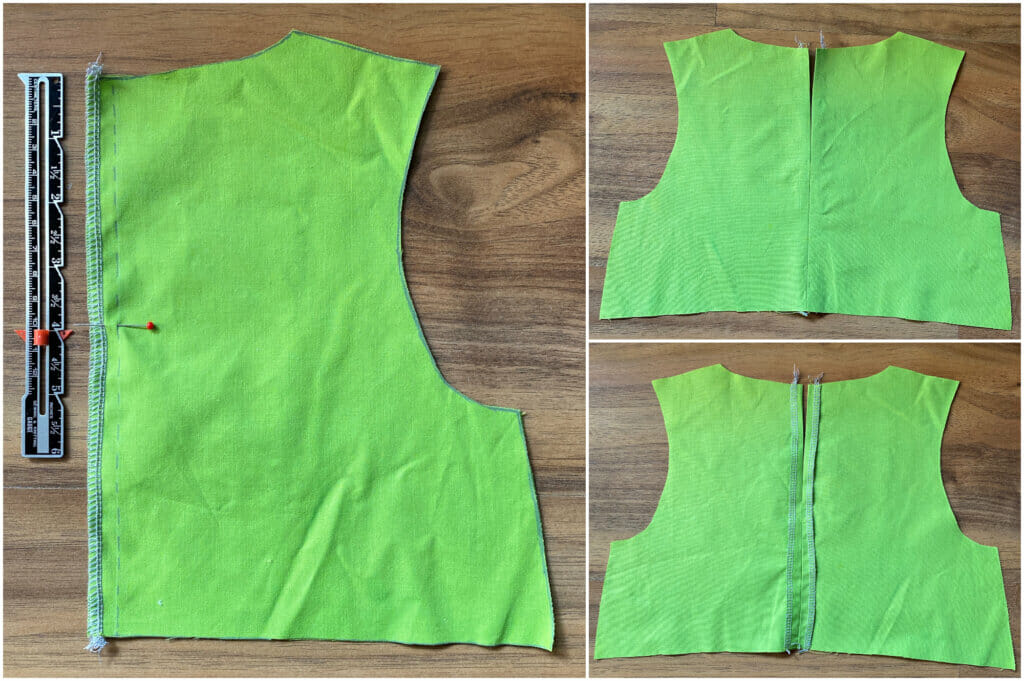
Step 4 – sew the center back seam
But before you sew it, make sure to serge the raw edges of the center-back bodice pieces. Then, start sewing 4″ away from the top edge (this will become the back slit), and press the seam with an iron.
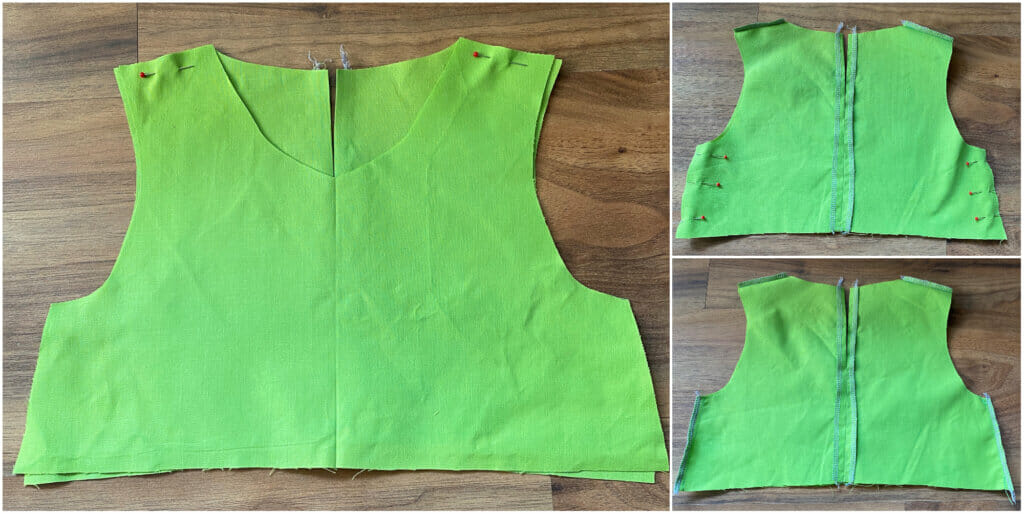
Step 4 – construct the bodice
Place the front and back bodice pieces with the right sides together, and sew the shoulder seams. Then, finish the seams with a serger or zigzag stitch and press well.
The next step is to sew the side seams – again, you have to finish the seams and press.
Step 5 – prepare the sleeves
First, you have to hem the sleeves, then stitch the sleeve seams.
Step 6 – insert the sleeves
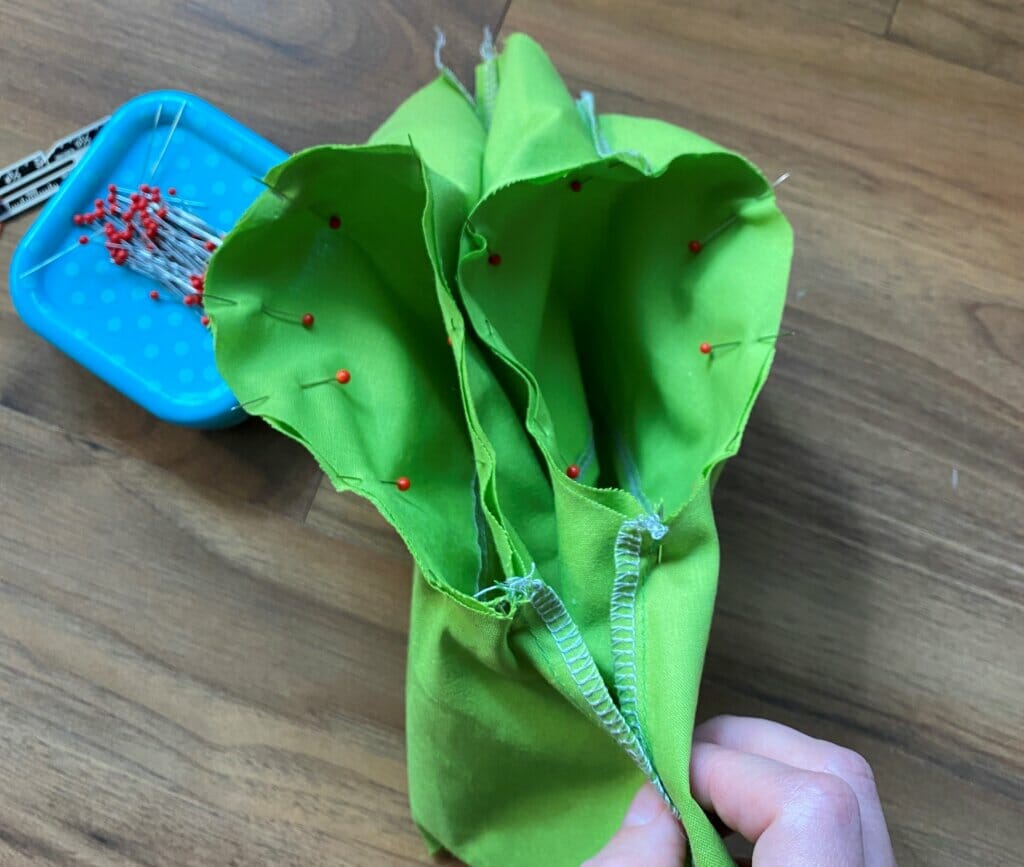
Place the sleeves into the armscye right sides together, and make sure to match up the seams. Then you’ll have to use your fingers to ease in the sleeves in the round and make them fit the armhole.
The sleeve cap is usually a bit larger than the bodice armhole and the reason is very simple – you can have small pleats or gathers around the sleeve, but never around the bodice armhole.
You’ll need a little bit of patience for this step, so do it slowly.
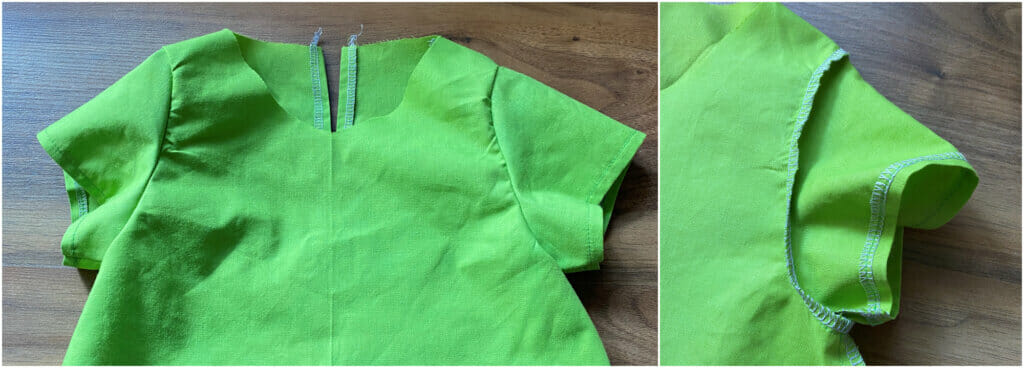
Sew both sleeves to the armhole, then finish the seams. Lightly press the seam allowances towards the sleeve.
Step 7 – stay stitch the neckline
Staystitching is an amazing trick that prevents unnecessary stretching of the fabric on the bias cut of the fabric and is used for curved necklines or armholes.
More specifically, you just have to run a straight stitch around the neckline.
I would also recommend you stay stitch the armholes before inserting the sleeves – I skipped it this time, but it’s something really helpful, especially if you’re a beginner.
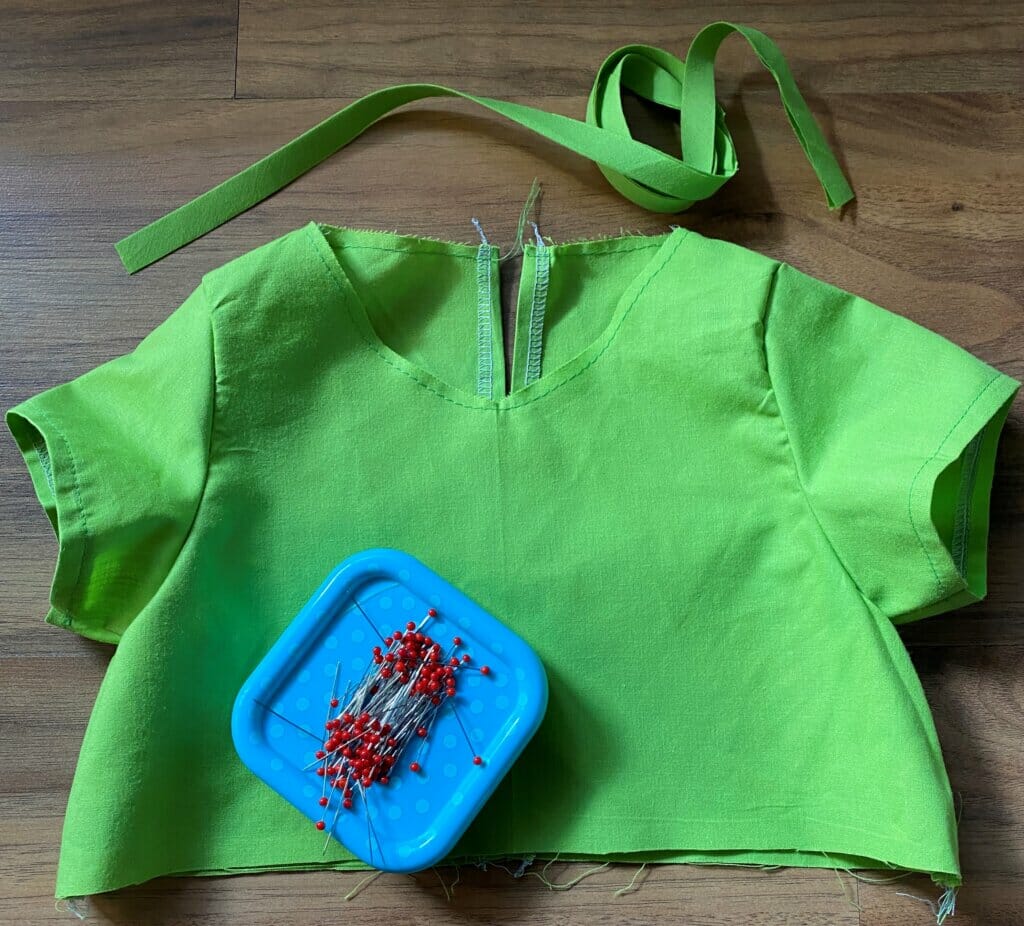
After that, prepare a bias binding tape that you’ll soon use to enclose the raw edge of the neckline.
Step 8 – sew a bias tape neckline
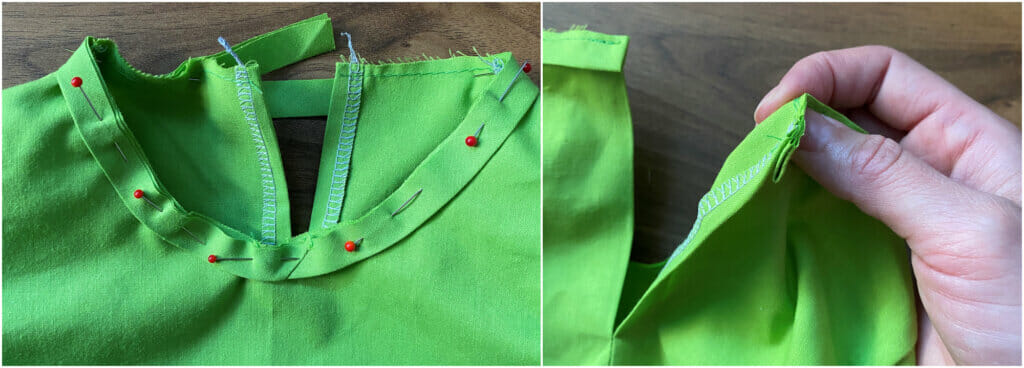
I made my own bias tape, 1″ wide. I just folded it in half, then placed it on the right side of the bodice aligning its raw edges to the neckline edge.
Fold back both short edges by 3/8” and press. Finally, sew the bias tape to the neckline, then trim the seam allowance to approx. 1/8 inch.
Step 9 – finish the neckline and add a button loop
You can make your own button loops (they’re much prettier!), however this time I chose a small 1 ½” strip of narrow elastic.
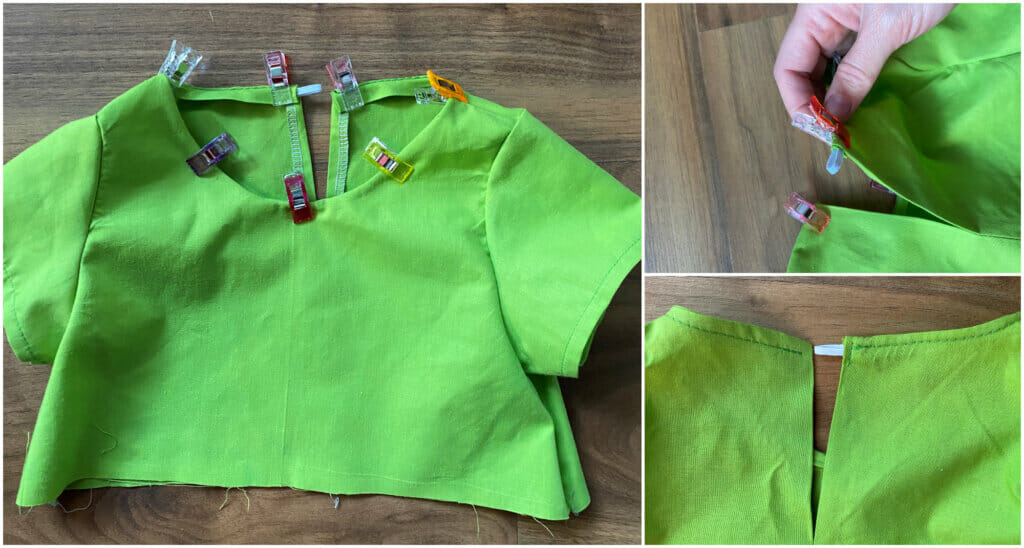
Turn the bias tape to the back of the neckline, then sew it in place – make sure to catch the folded bias tape in the back.
At this point, you can add the button loop – just sandwich it between the bodice and the bias tape. Backstitch over it for extra strength.
Now all you have to do is to attach a button.
Everything’s coming together nicely and we’re very close to having a finished girls’ dress!
Did you notice?
Drafting the pattern and sewing a gathered dress for girls is so simple, really. Anyone with basic sewing skills, a little spare time and some patience can do it.
The only tricky part of making this dress come true is sewing curves – but if you practice on scraps before starting the real project, it will be fine.
Also, remember to cut yourself some slack if this is your first dress. Maybe it won’t turn out perfect in every detail, but you’ll certainly have learned a lot in the process.
Step 10 – attach the skirt to the bodice
For my dress, I chose a gathered skirt.
I made my gathered skirt with a center back seam, so I cut one big rectangle of fabric, that should be 1.5 or 2 times the measurement of the bodice waist.
Of course, you can make the skirt with side seams and then you’ll need two smaller fabric rectangles.
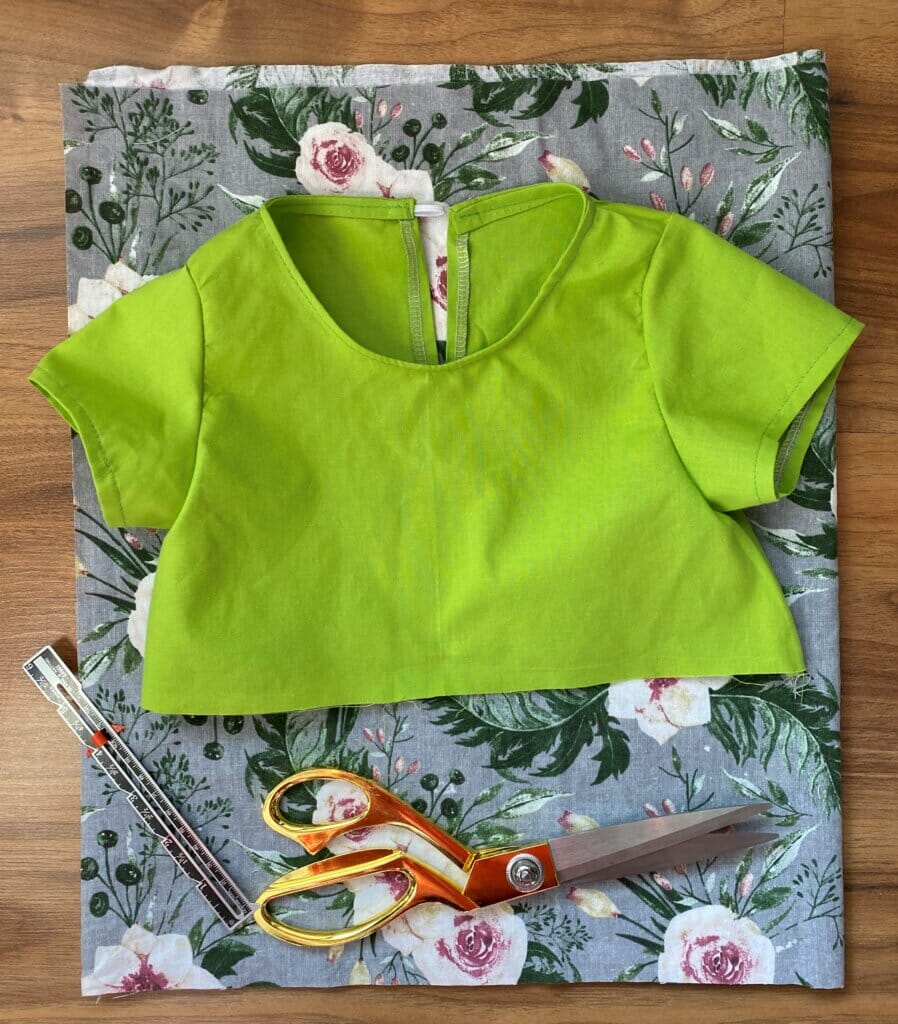
I measured my bodice waist and I got 26 inches. So, the width of my fabric rectangle can be anywhere from 39 to 52 inches.
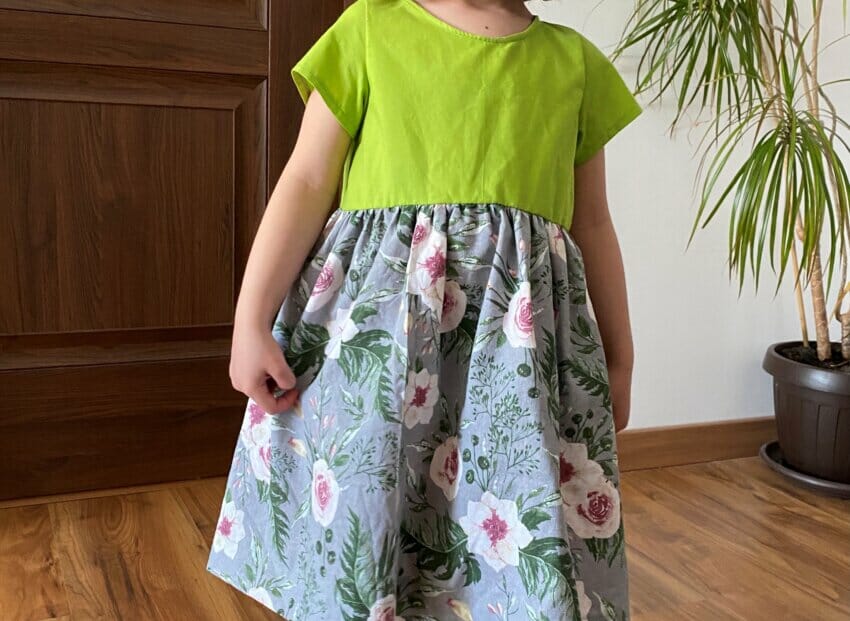
The length of the skirt it’s entirely up to you. For example, I’ve made a 14” long skirt for this green floral dress, with a generous 1 ½” hem (this was my choice, your hem can be as narrow as you want).
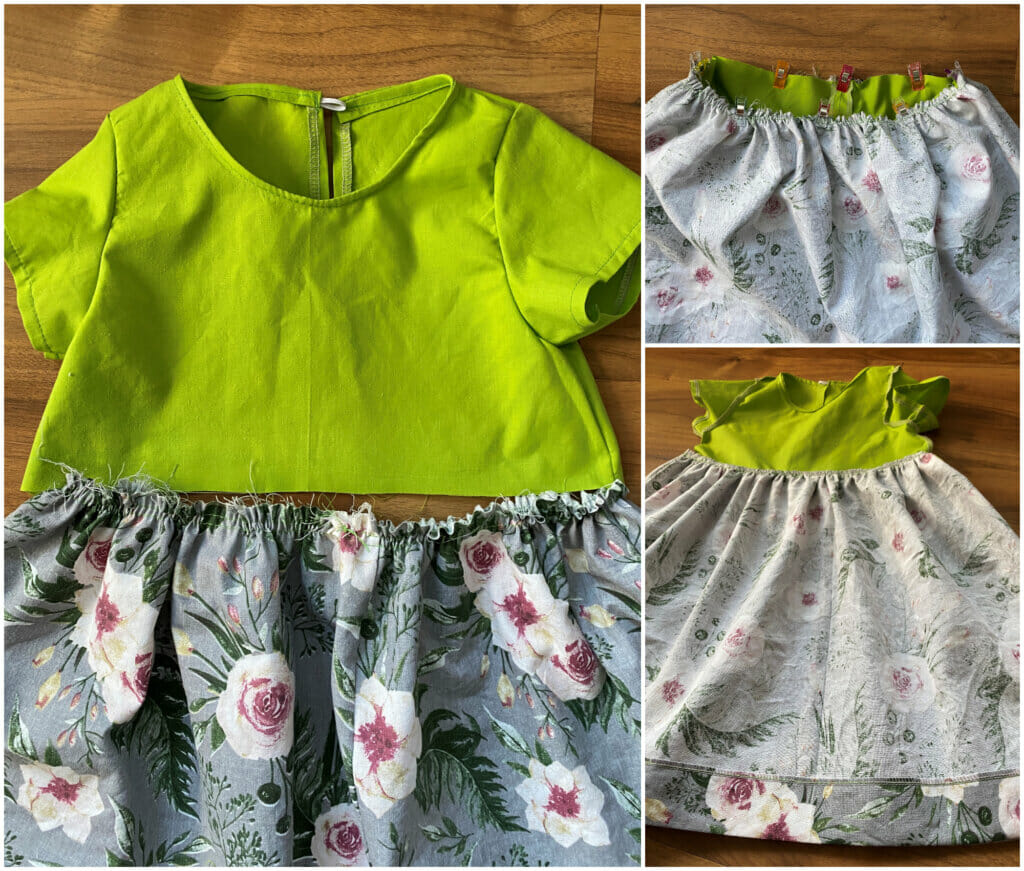
The first step – sew the center back seam of the skirt. Then, sew two basting rows along the top raw edge of the skirt. Grab the two bottom threads with one hand and push the fabric over with the other hand to create gathers until the gathered skirt matches the bodice waist. Aim for evenly spaced gathers.
Then place the bodice inside the skirt, right sides together, and stitch all the way around the waist seam. Finish the raw edge with a serger or zigzag stitch.
Now you have to hem the skirt. I serged the bottom edge, turned 1 1/2” to the wrong side, then stitched the hem.
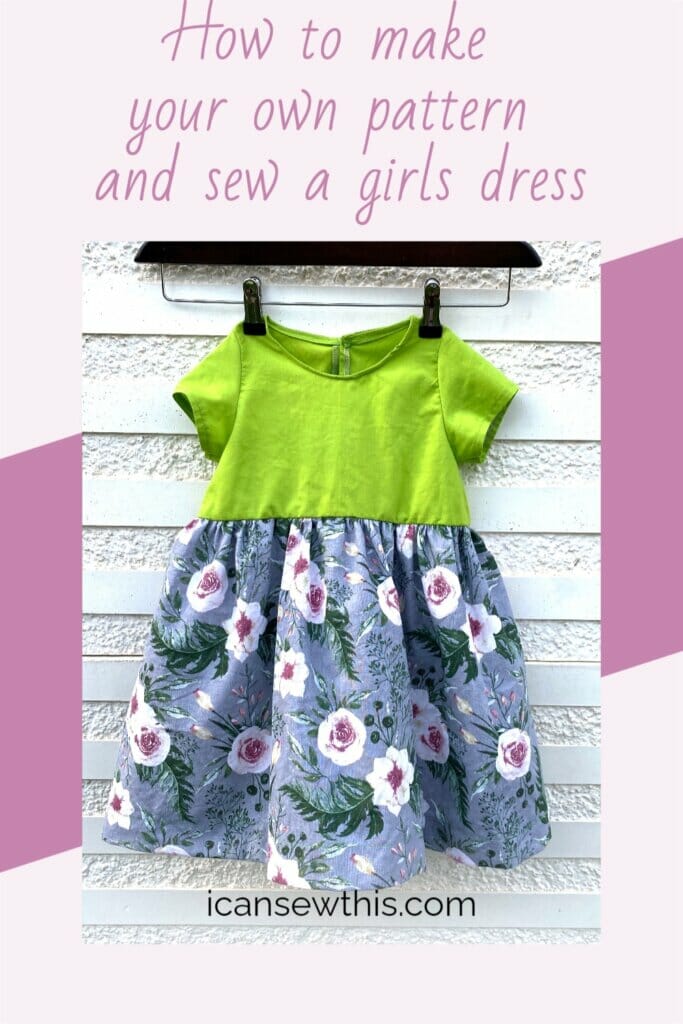
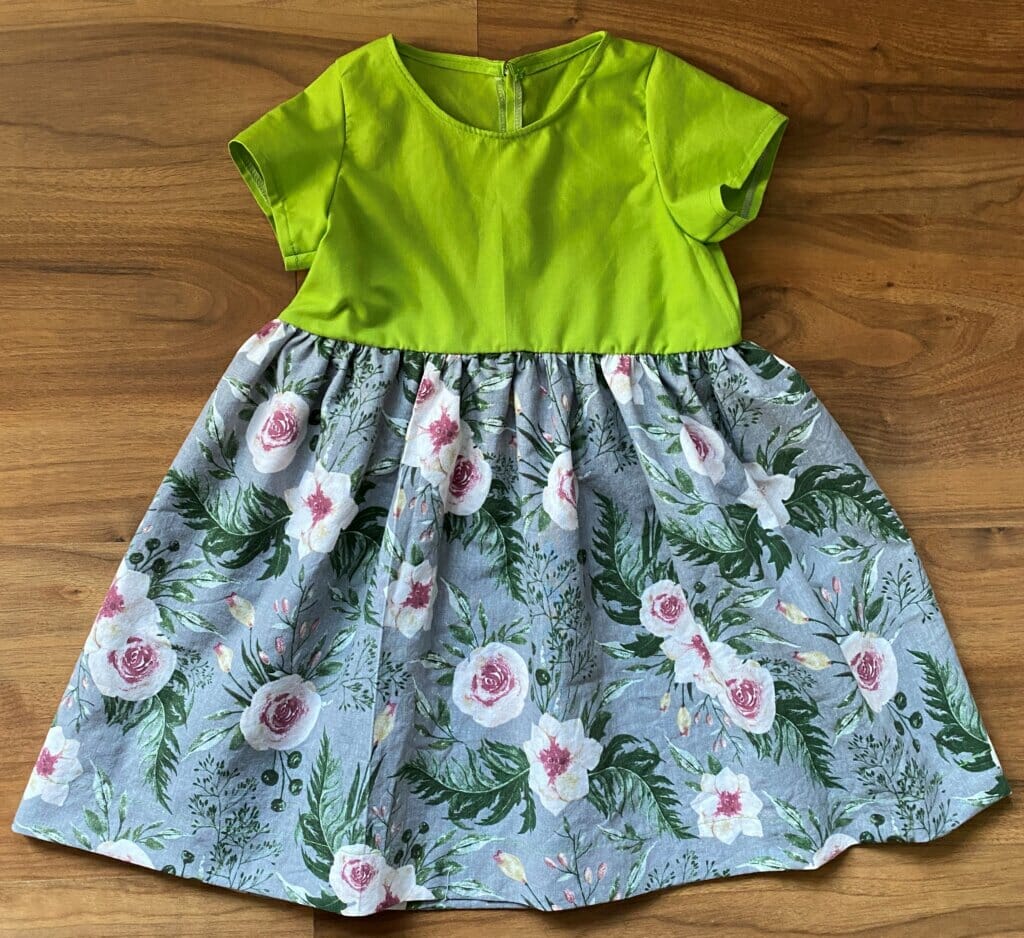
And that’s all! This DIY gathered dress for girls is now finished.
You can embelish yours by adding fabric flowers, bows, or even cute little pockets if you want.
My daughter loves her pretty green floral dress and I’m so happy that it fits her well and is super comfortable. I’m already planning for the next dress sewing project.
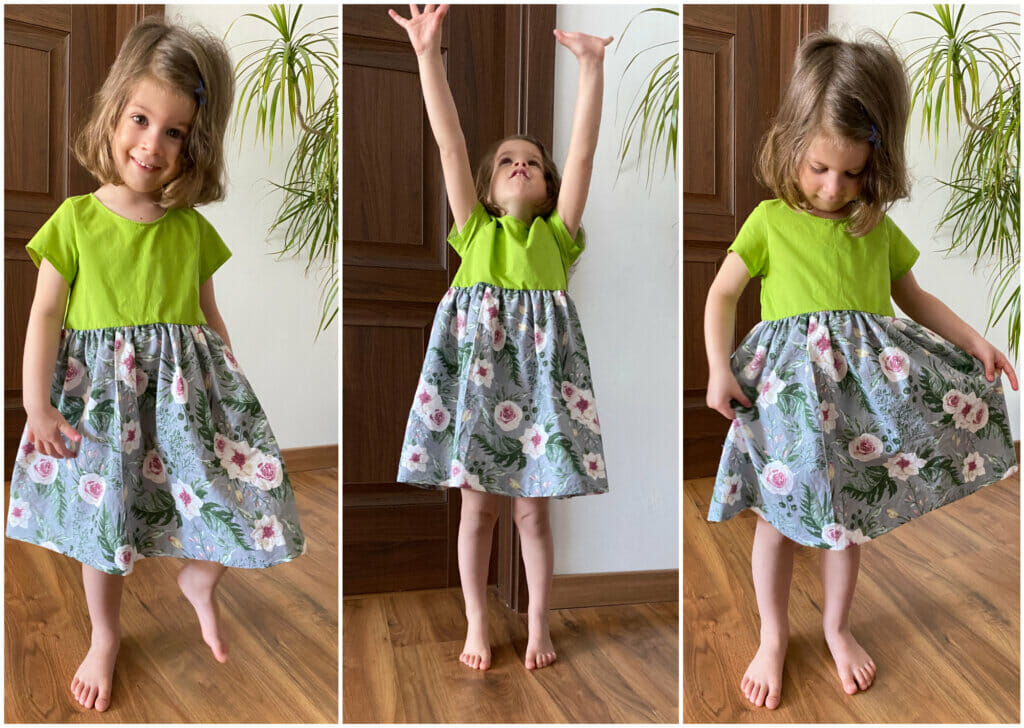
How to make a gathered dress for girls – button loop closure
Related: Free knotted headband pattern and tutorial / DIY baby dress with long sleeves, buttons, collar stand and ruffles
I hope you enjoyed this tutorial for how to make a basic gathered dress for girls. If you make a dress using these instructions, I’d love to hear from you!
Share your finished version on my Facebook page or tag me on Instagram @icansewthis.


I think you would also be able to use a premade tshirt too to save time!!!
Thank you so much. I will definitely try this for my six years old soon.
So cute, I think I will try this also
Thank you, and good luck! I plan to make another self-drafted dress for my little one soon – hopefully, just in time for Christmas.