Learn how to make a cozy, adorable knotted baby hat with this free pattern and step-by-step guide! This quick, beginner-friendly sewing project is perfect for creating cute baby hats that you’ll love to gift at baby showers or add to your own little one’s wardrobe. And the best part? These knotted baby hats take only a short time to sew up!
Sewing baby hats is such a joy – especially since they’re great for batch sewing, so you can make a few at once!
This DIY baby hat pattern is free and sized for 3-6 months, designed to work best with knit fabrics like mid-weight jersey.
Just make sure your fabric has at least 5% Lycra or Spandex, so it stretches well and bounces back to its original shape.
Be sure to check out my other tutorials on how to make a knotted headband (free pattern) / fitted crib sheet / baby girl ruffle romper (free pattern).
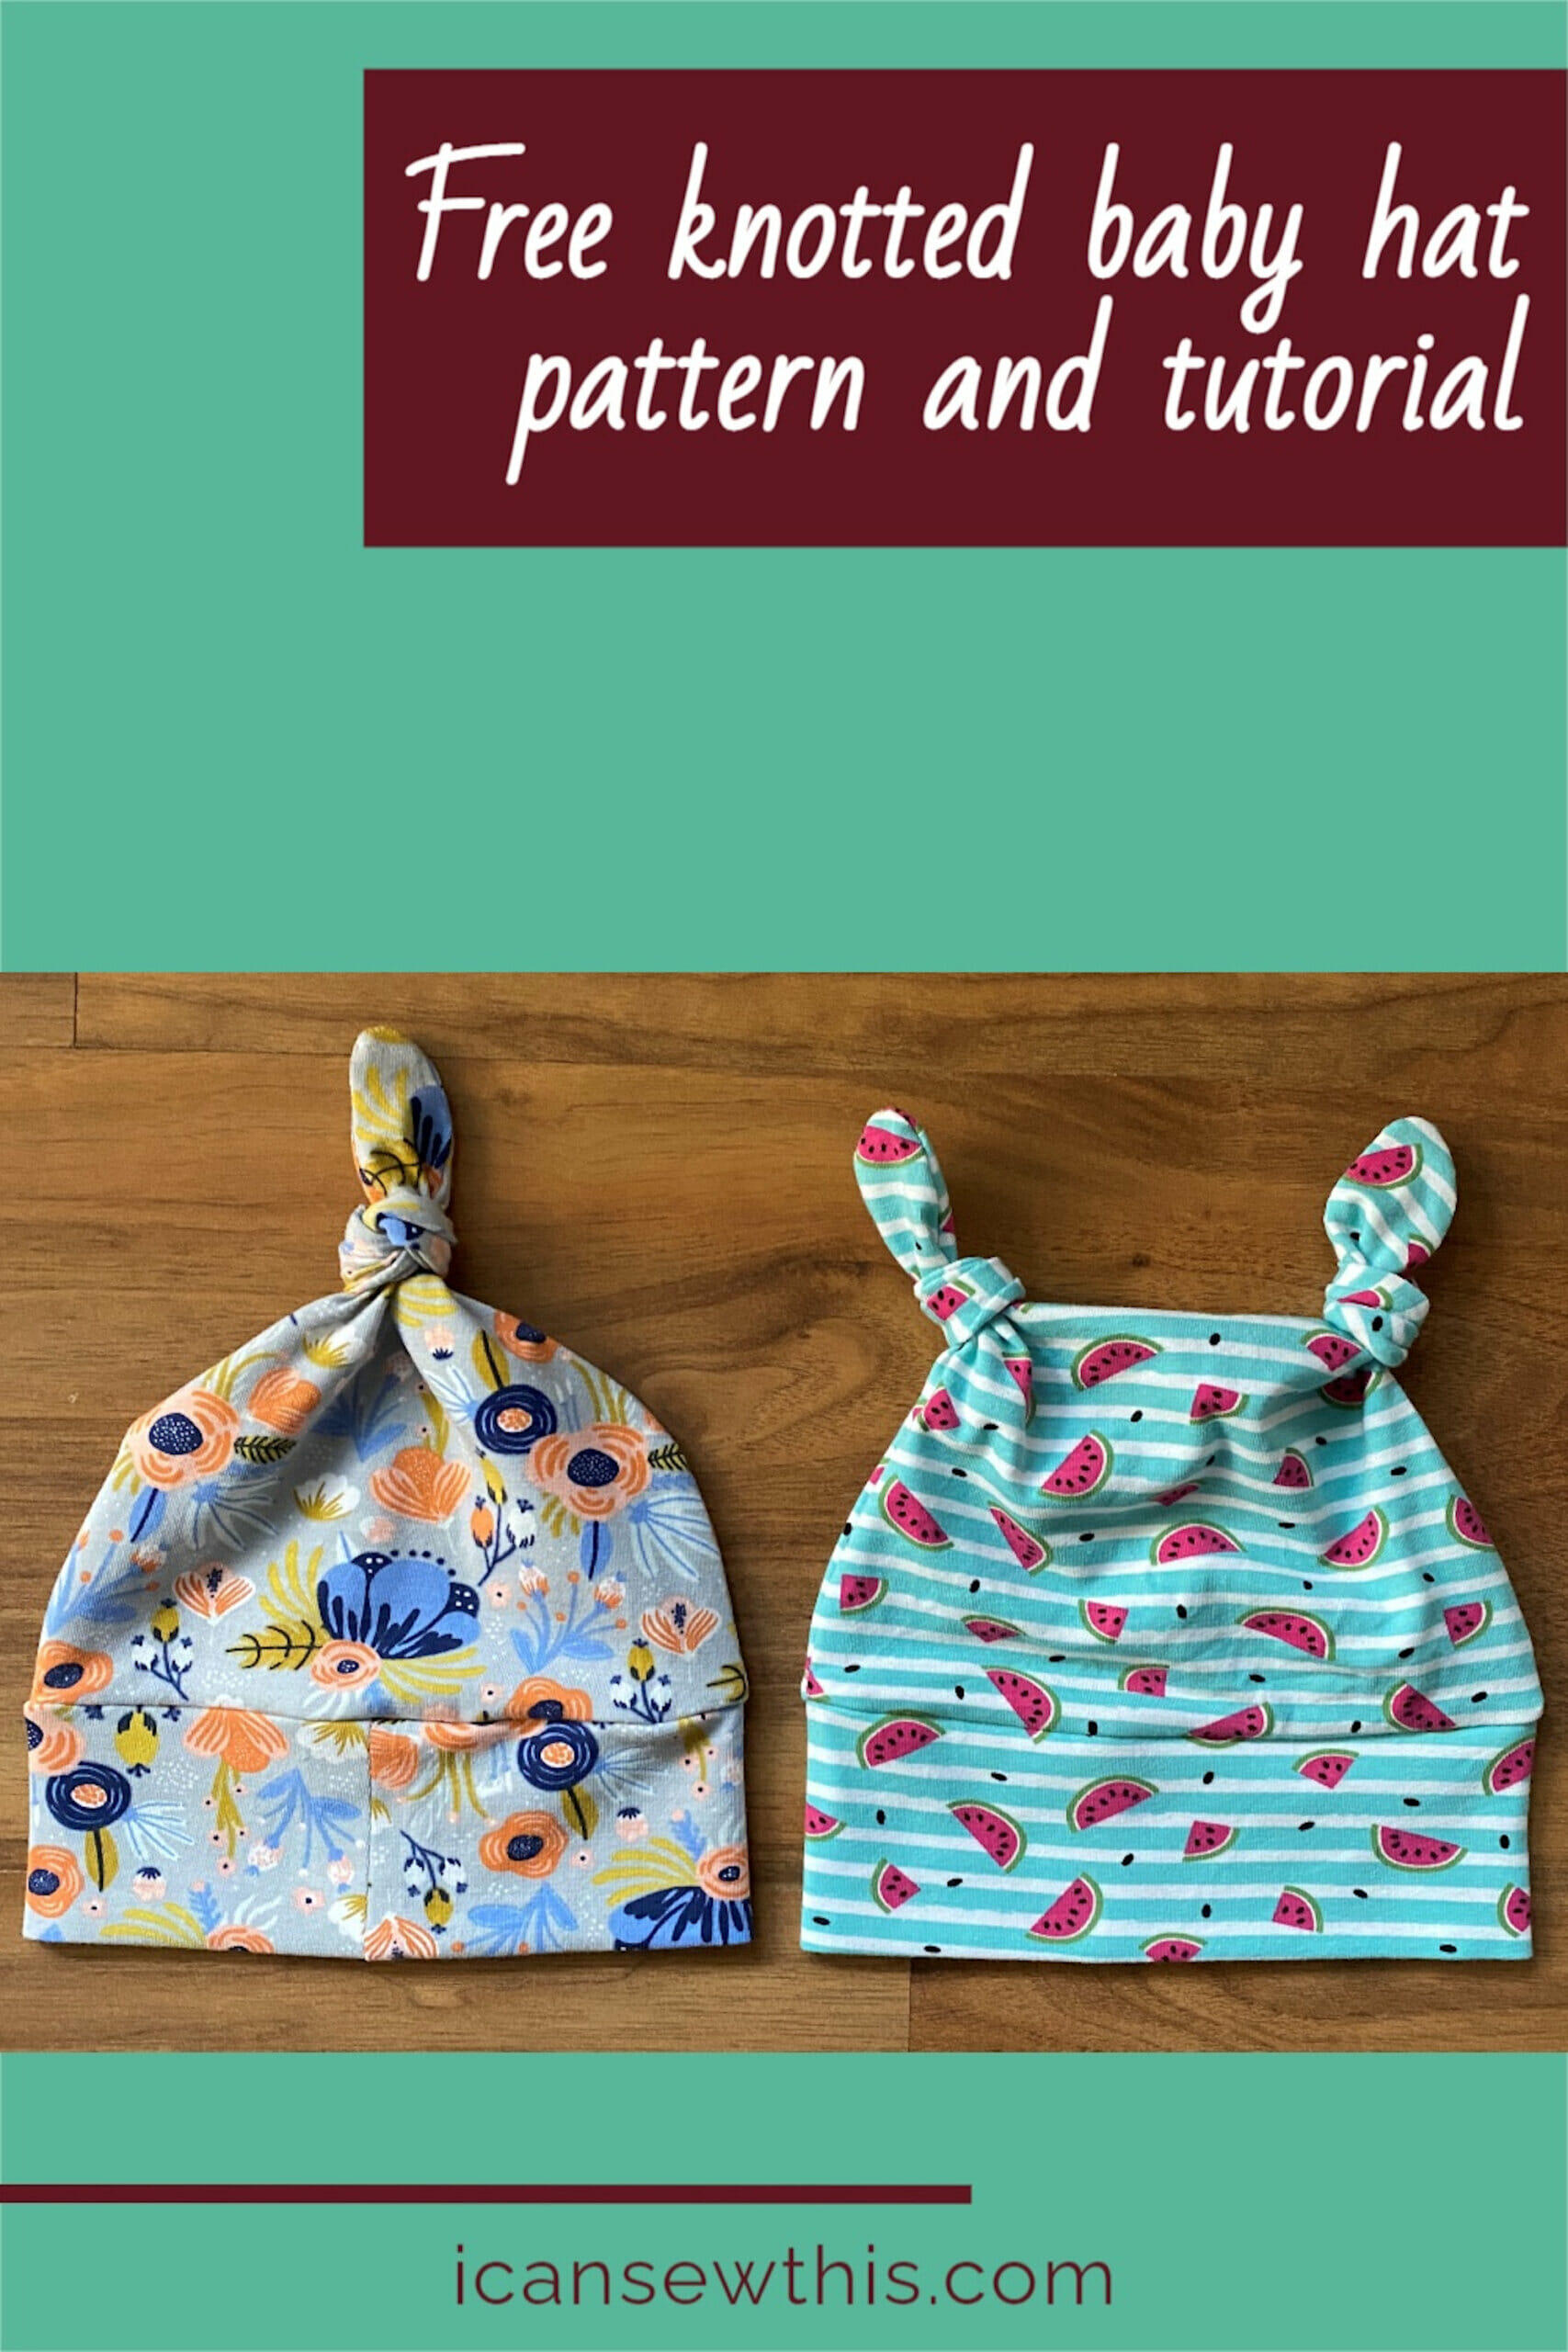
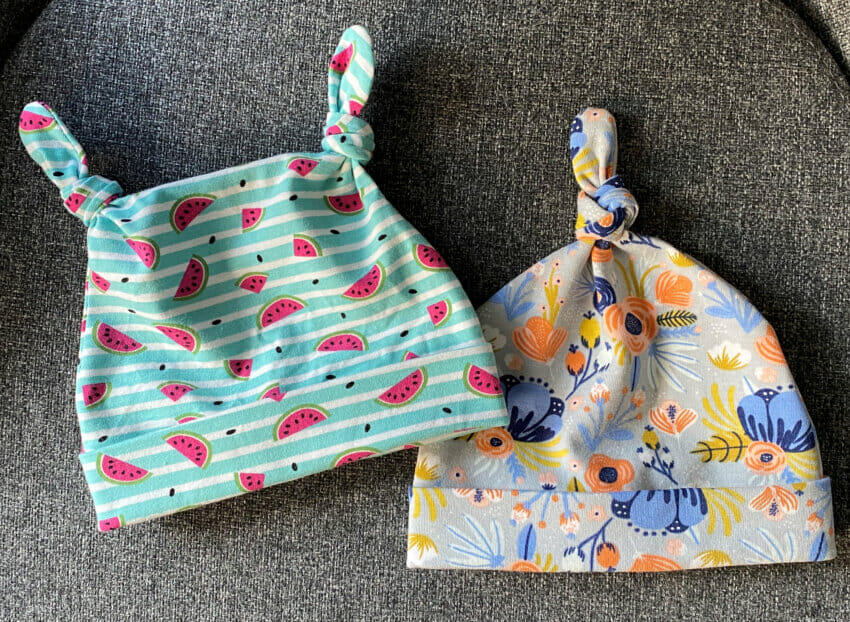
This pattern gives you two fun designs to choose from!
There’s a single-knot beanie style, and another with two little knots that look like adorable “ears.” Pick your favorite, grab some fun, printed fabric, and let’s dive into this quick and easy sewing project!
Sewing supplies – free knotted baby hat pattern
- Knotted baby hat pattern – free PDF download below (size 3-6 months)
- Knit fabric – approx. 1/4 yard
- Ballpoint needle / stretch needle
- Walking foot
- Matching thread
- Scissors
- Sewing Pins
How to make a knotted baby hat in 5 simple steps
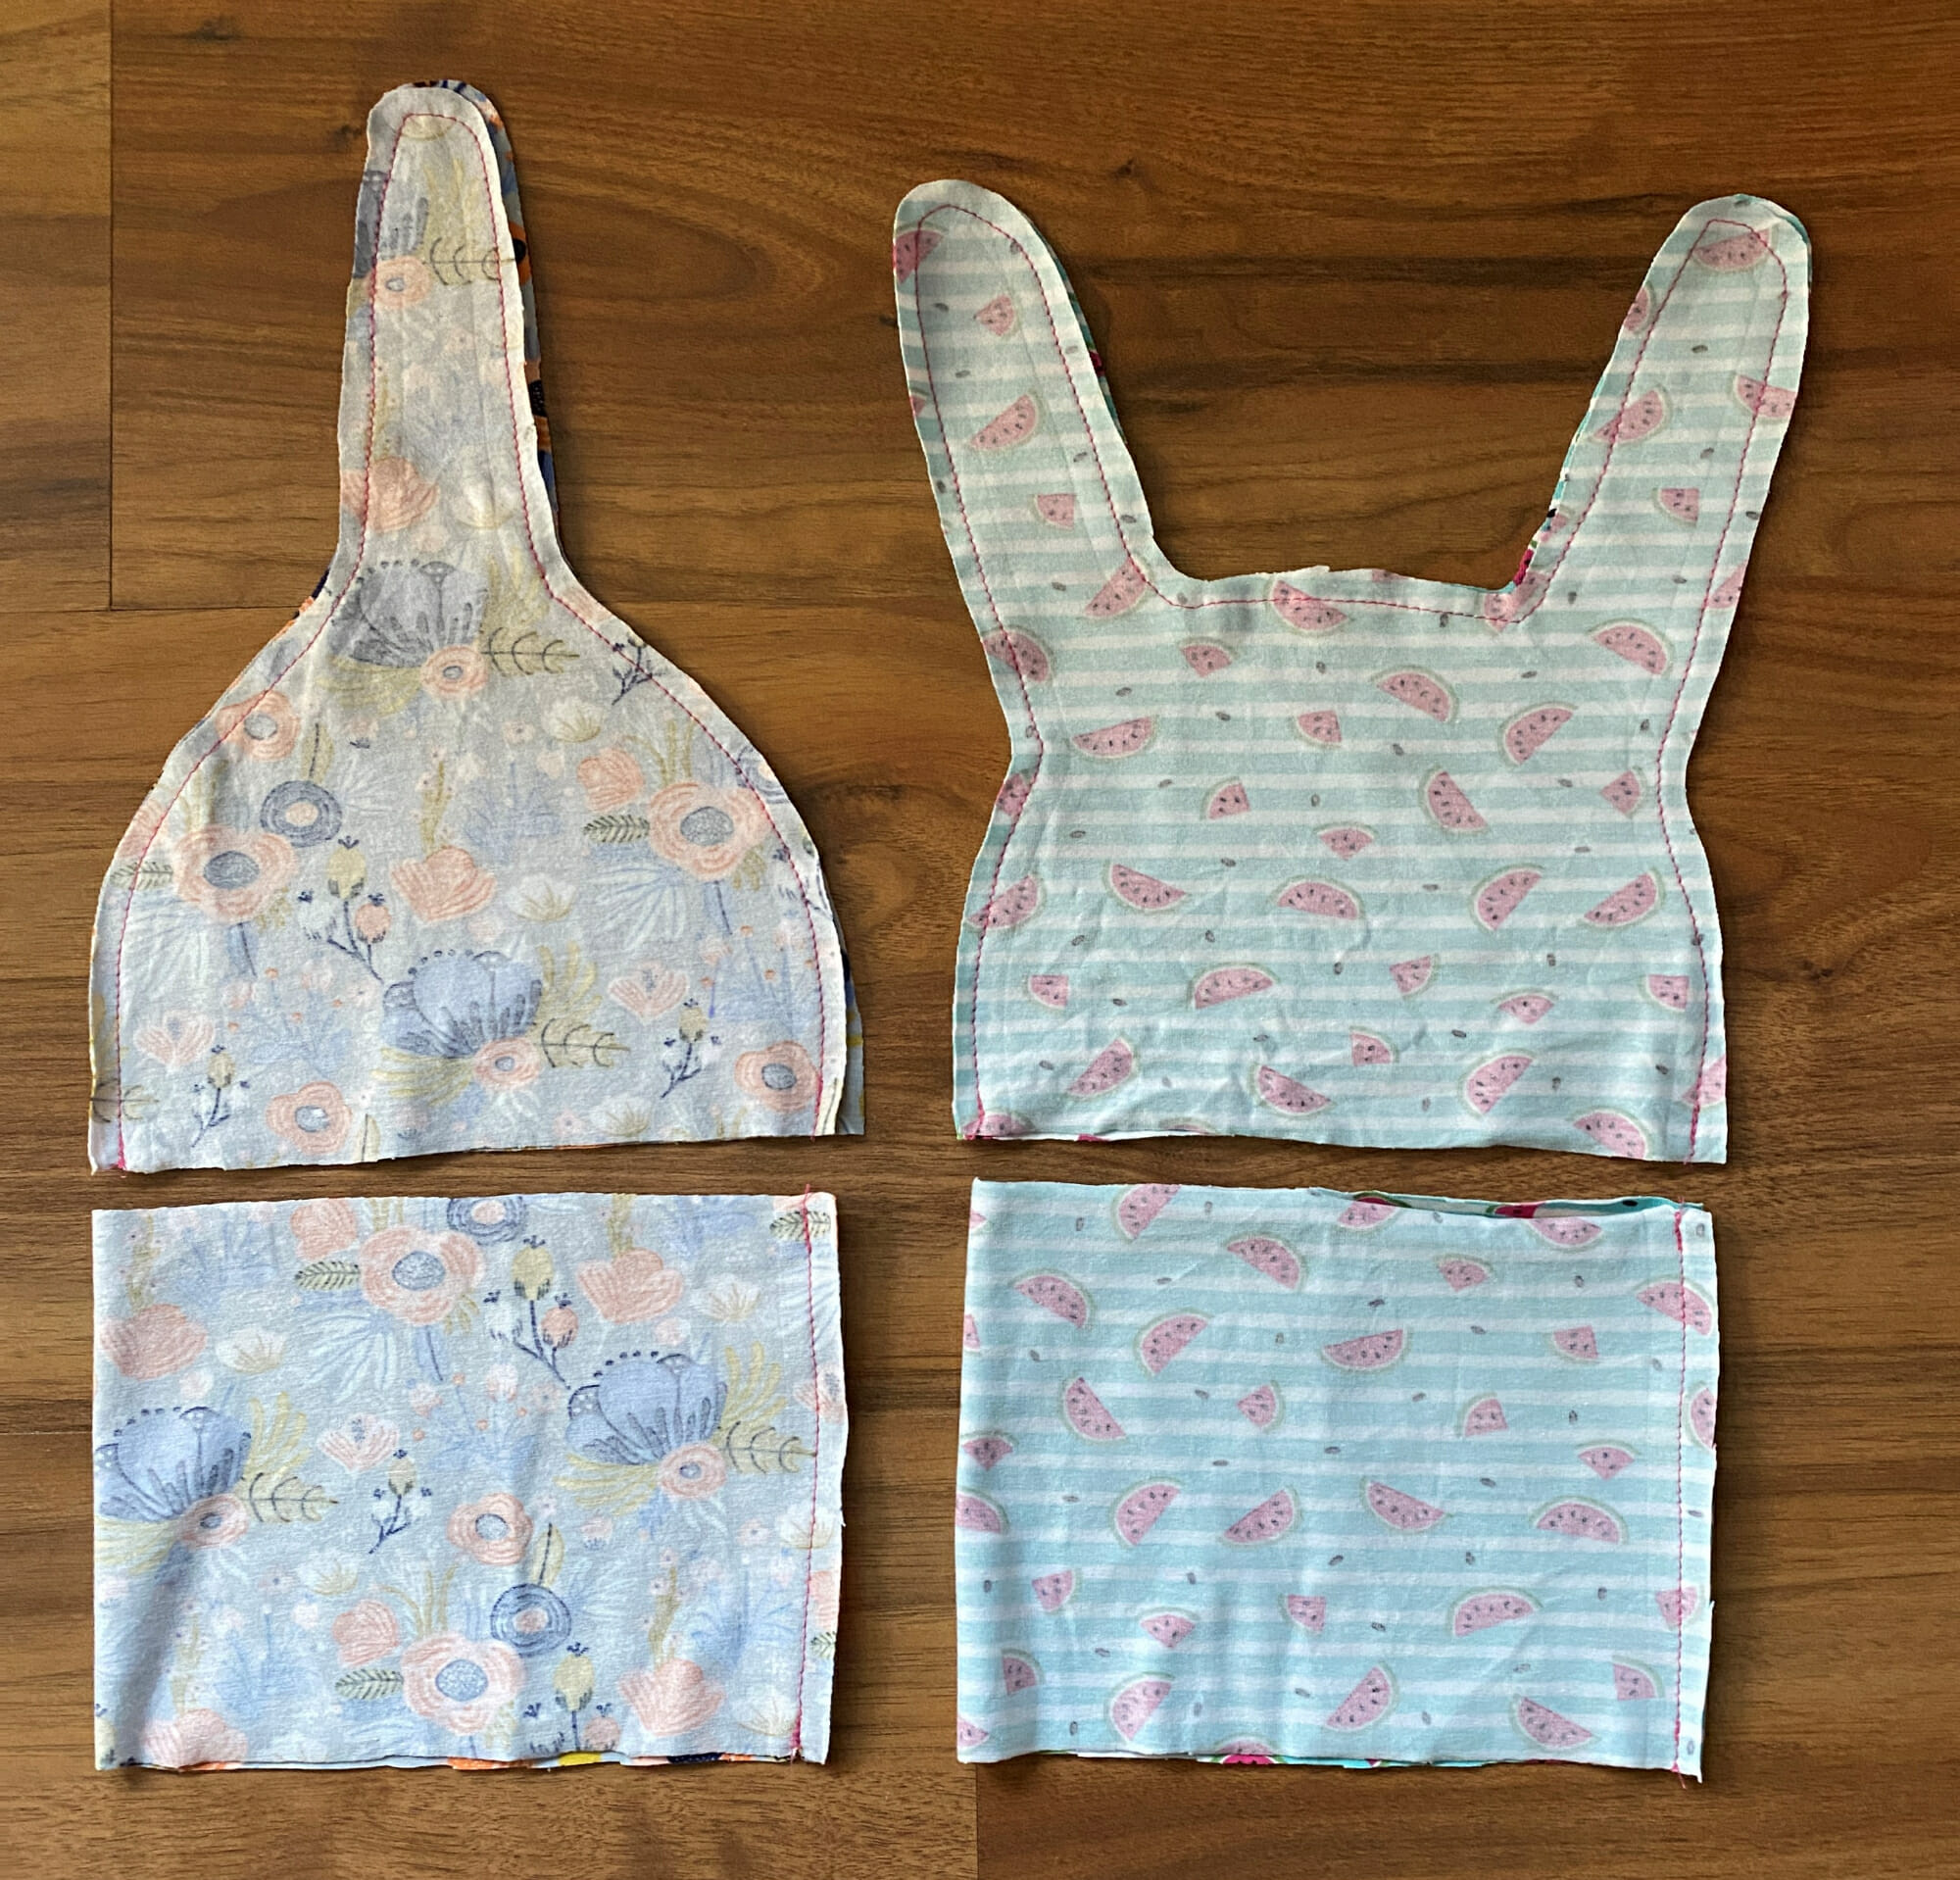
Step 1 – cut the pattern pieces
First, download the free baby hat pattern and print it. Make sure your printer is set to 100% scale so everything stays true to size.
For each hat, you’ll need to cut:
- Two main hat pieces
- One bottom band piece on fold (it should measure 5.3 inches high and 7.3 inches wide)
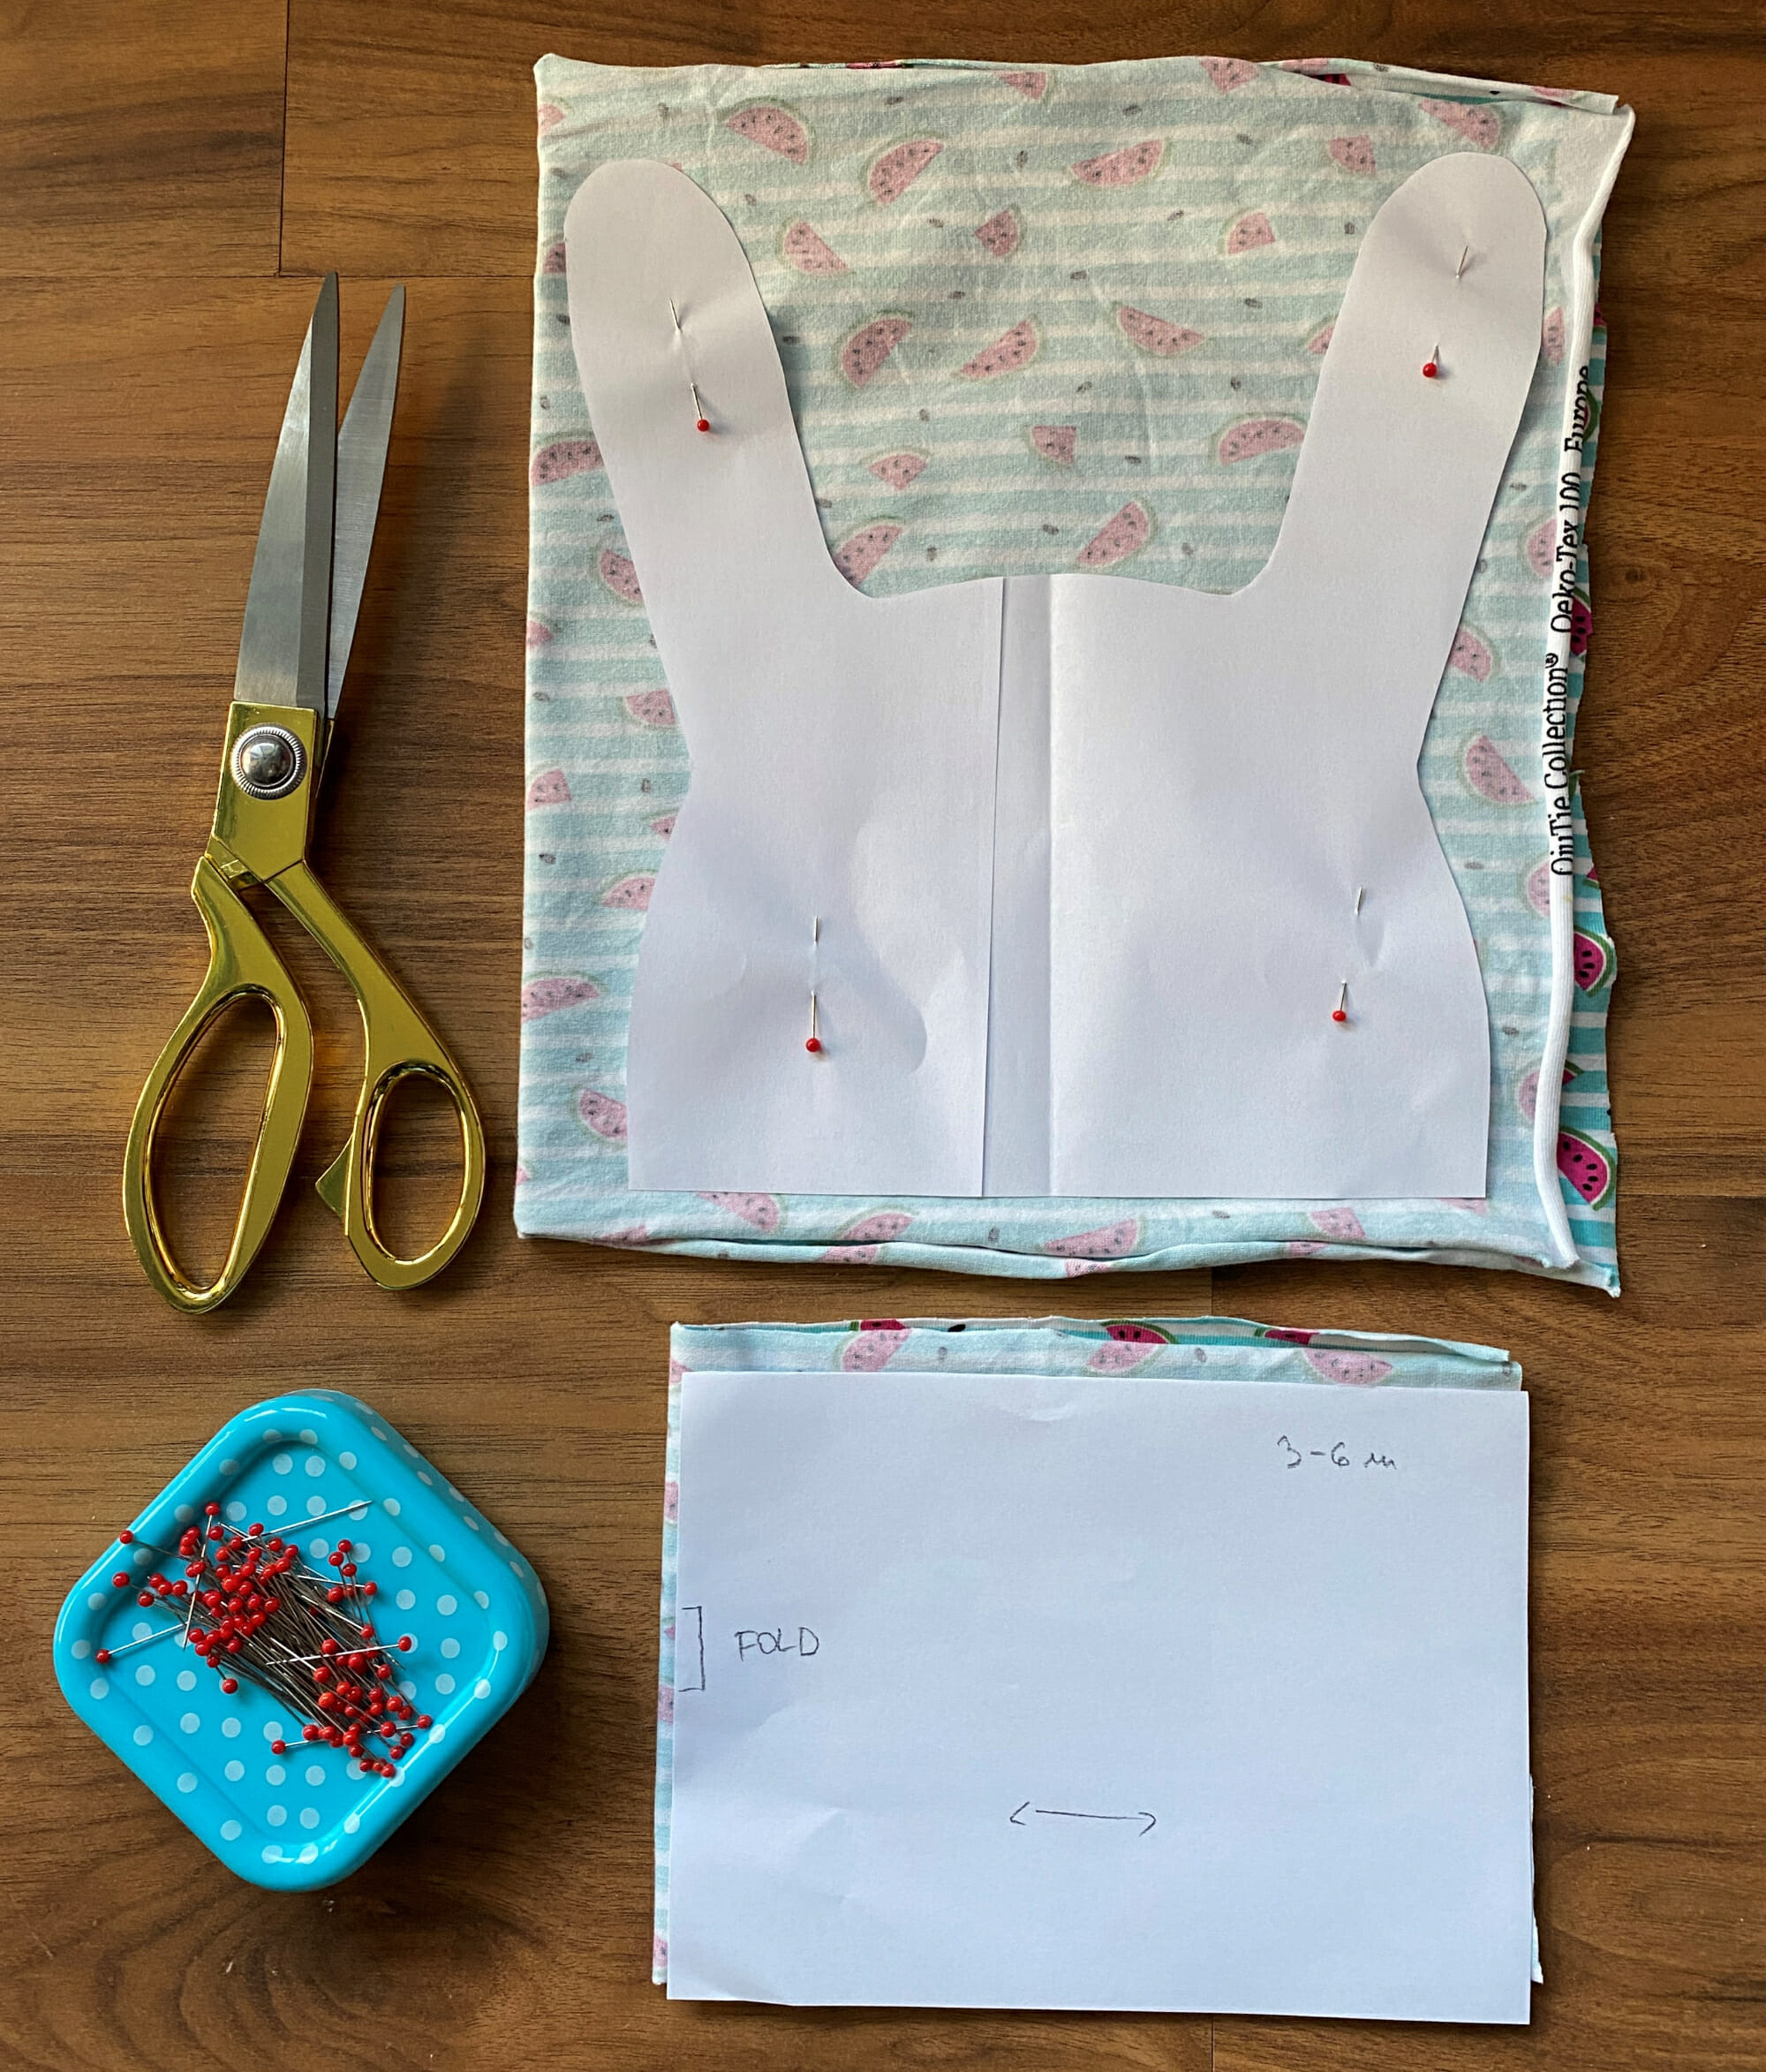
Tip: Pay close attention to the fabric stretch direction!
The stretchiest part should go from side to side, so it comfortably stretches around the baby’s head.
Step 2 – sew the main hat pieces and bottom band
Now we’re ready to start sewing this cute knotted baby hat!
- Place the two main hat pieces with the right sides together (pin them in place if it helps). Sew around the hat using a 1/4-inch seam allowance.
- Needle choice: A ballpoint/jersey needle or stretch needle works best for knit fabrics. If you’re using jersey fabric and it’s tricky to handle, try a walking foot for smoother, flatter seams.
- Stitch choice: A narrow zigzag stitch is ideal for stretchy fabrics, but a straight stitch works too.
- Don’t worry if sewing curves feels a bit tricky at first. Just take it slow! Imagine the curve as a series of small straight stitches, keep your eyes on the line ahead, and gently pivot the fabric as you go. It’s easier than it looks, and these baby hats are very forgiving!
Next, take the bottom band piece, fold it in half with the right sides together, and sew along the short edge.
Be sure to check out my other tutorials on how to make a fleece-lined beanie hat (free pattern) and an envelope pillow cover.
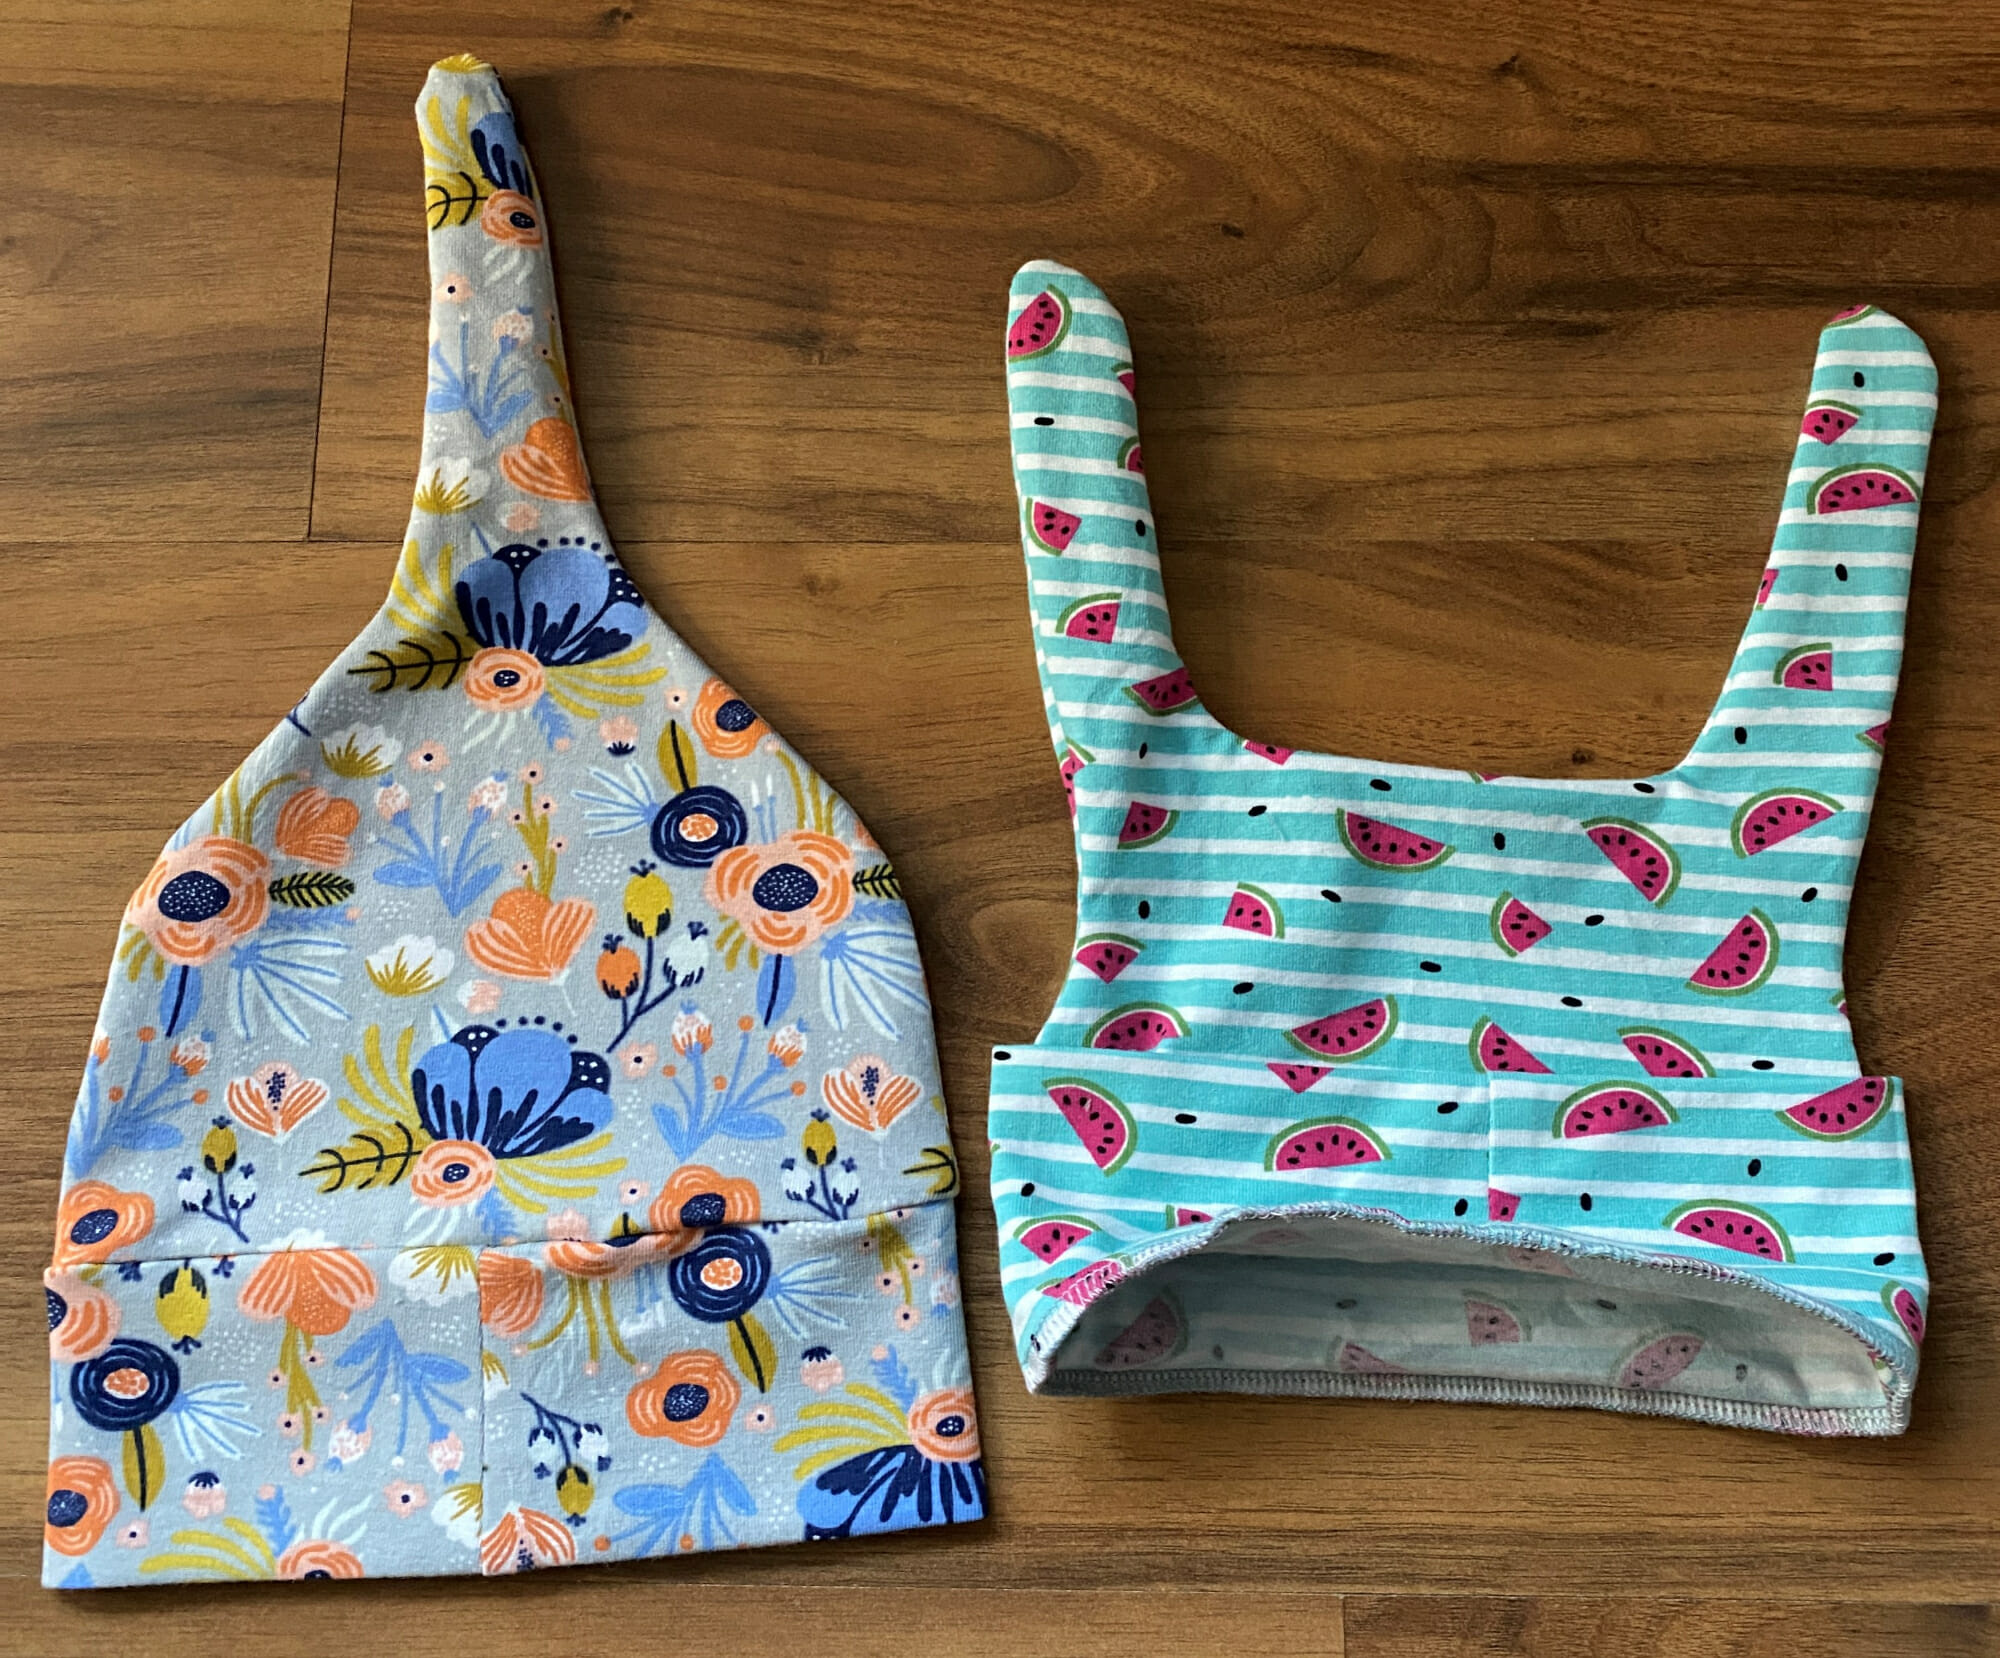
Step 3 – turn the hat piece right side out
First, trim down the seam allowance to reduce any bulk, especially at the top of the hat. This will make your baby hat look nice and neat once it’s turned right side out.
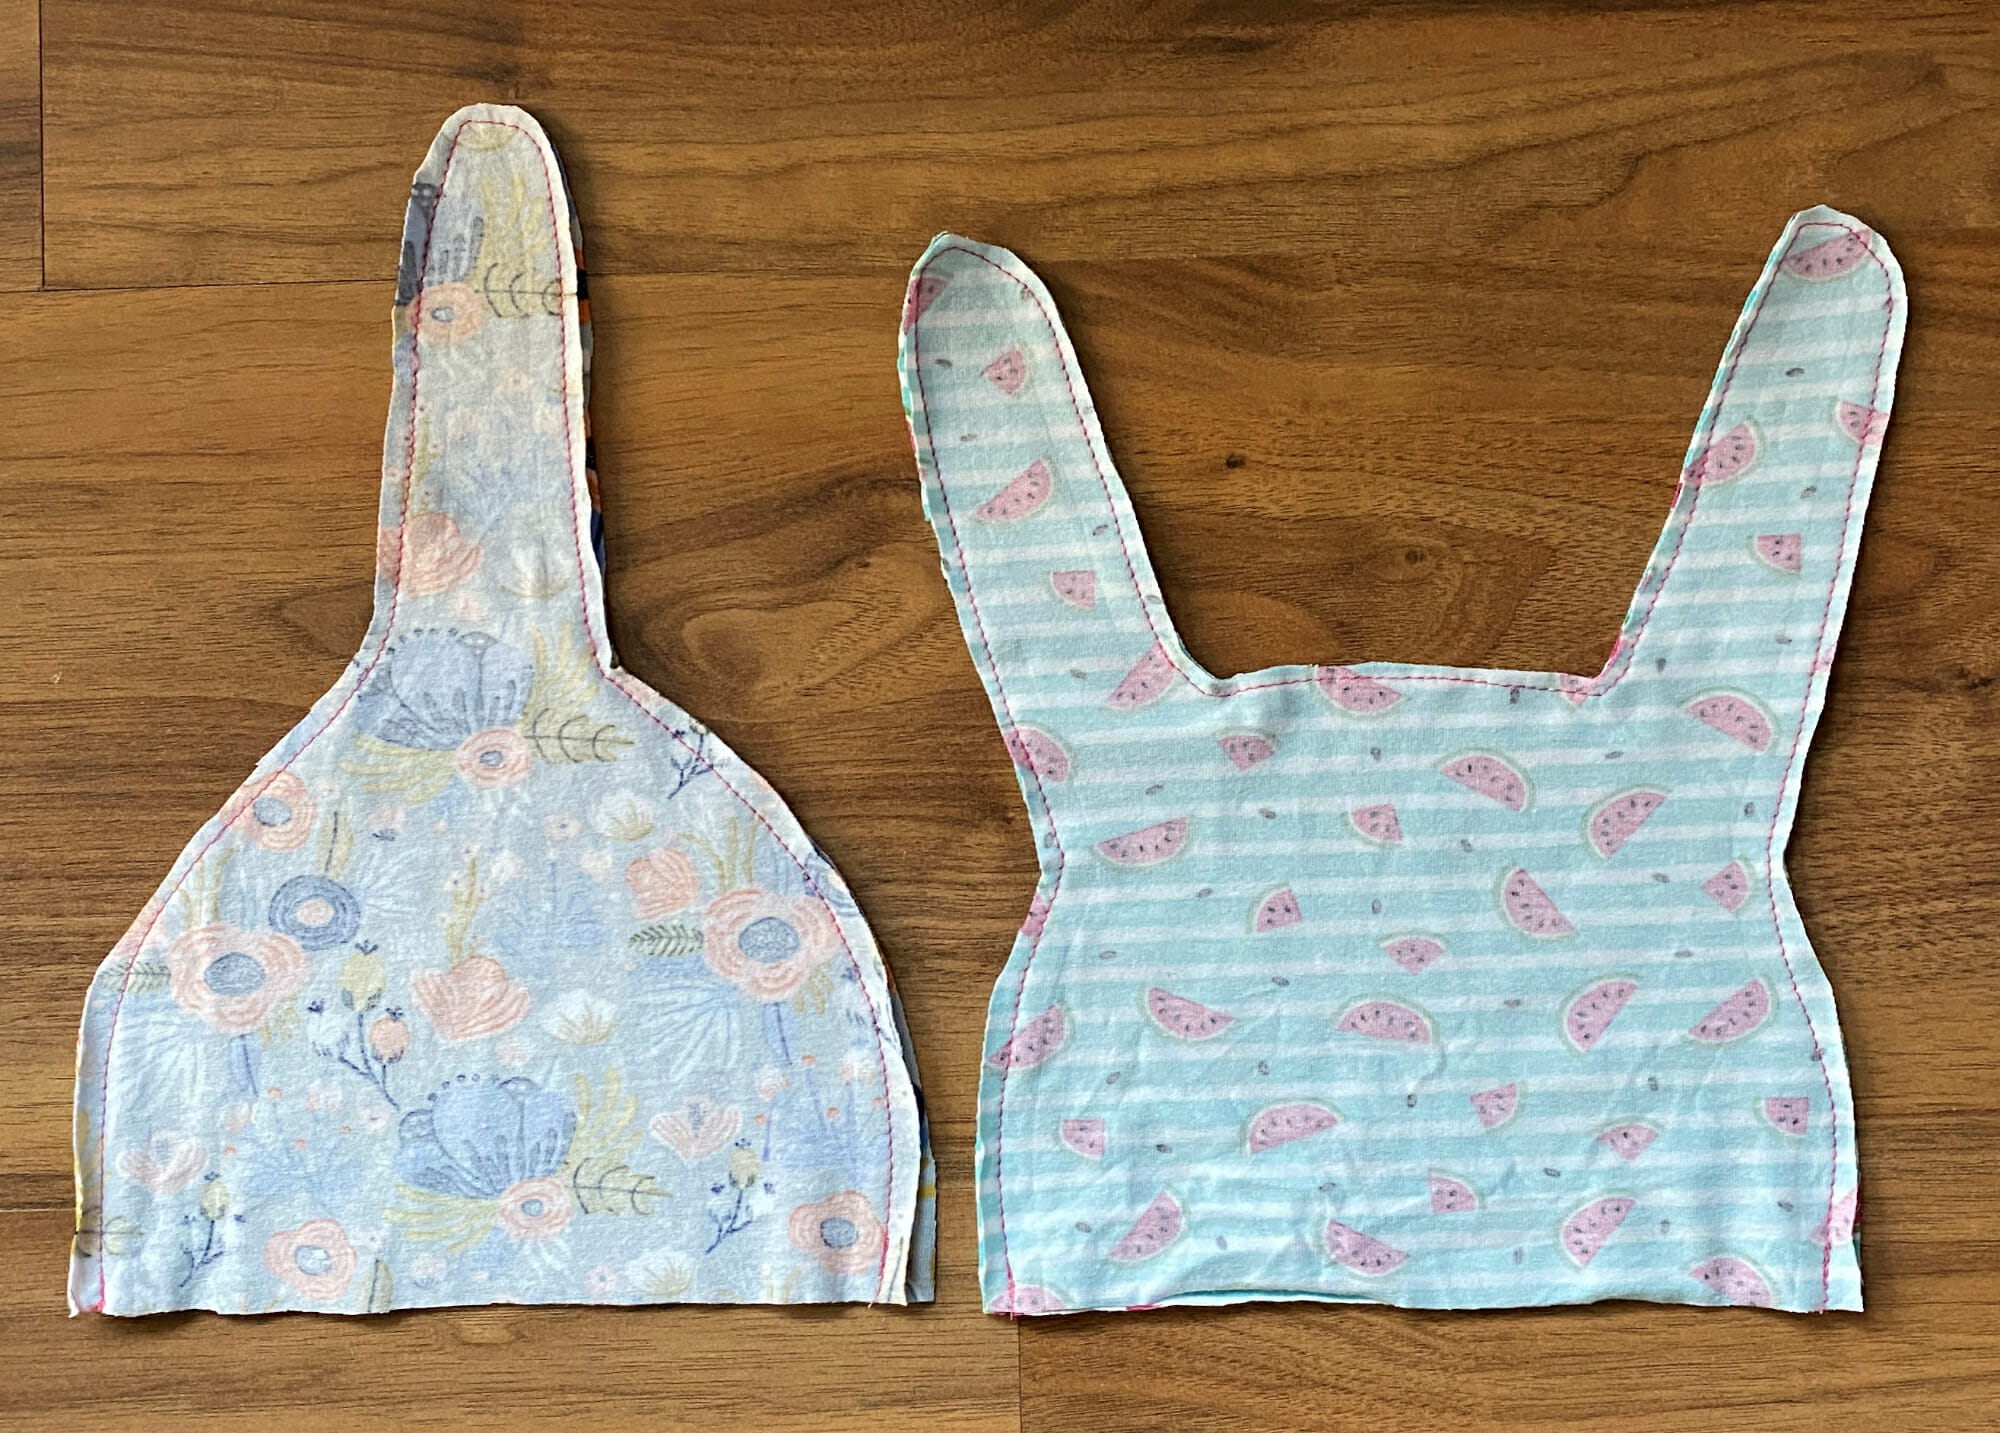
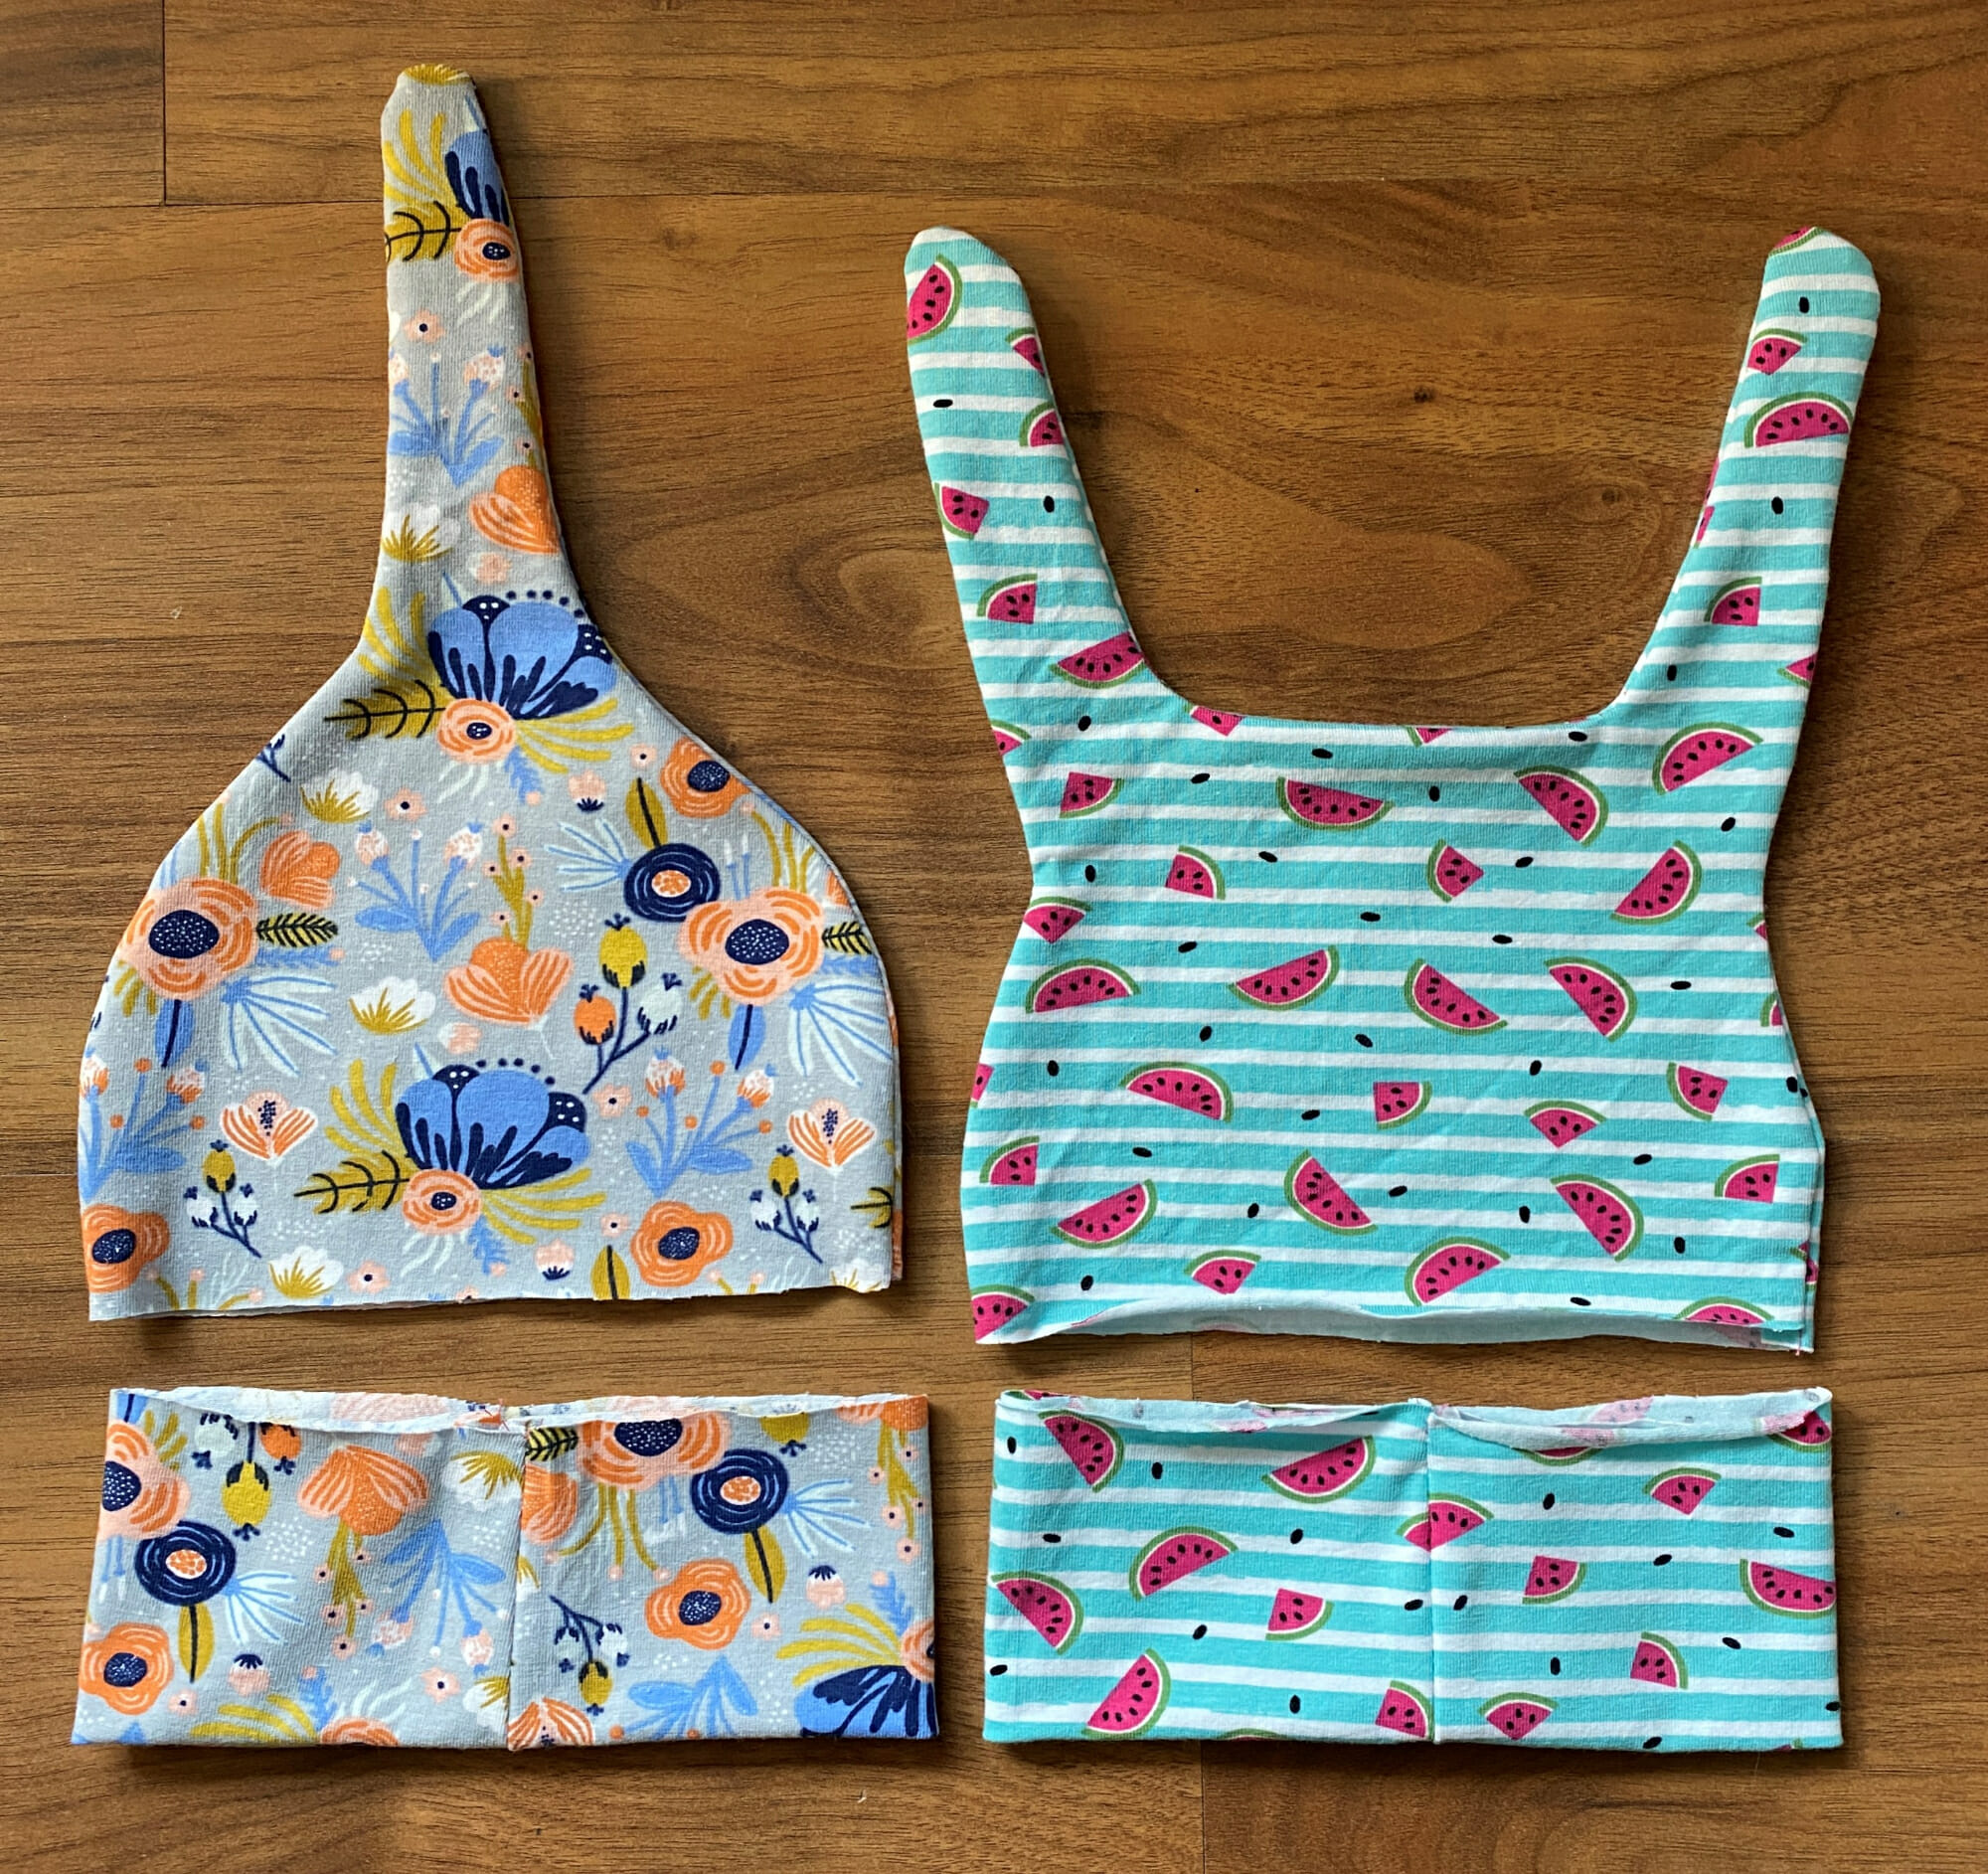
Use your fingers (or a tool like a chopstick or a dull crayon) to gently turn the hat piece right side out.
Next, take the bottom band piece and fold it in half with the wrong sides together, as shown in the picture below.
Step 4 – sew the final seam
You’re almost done – just one more seam to go!
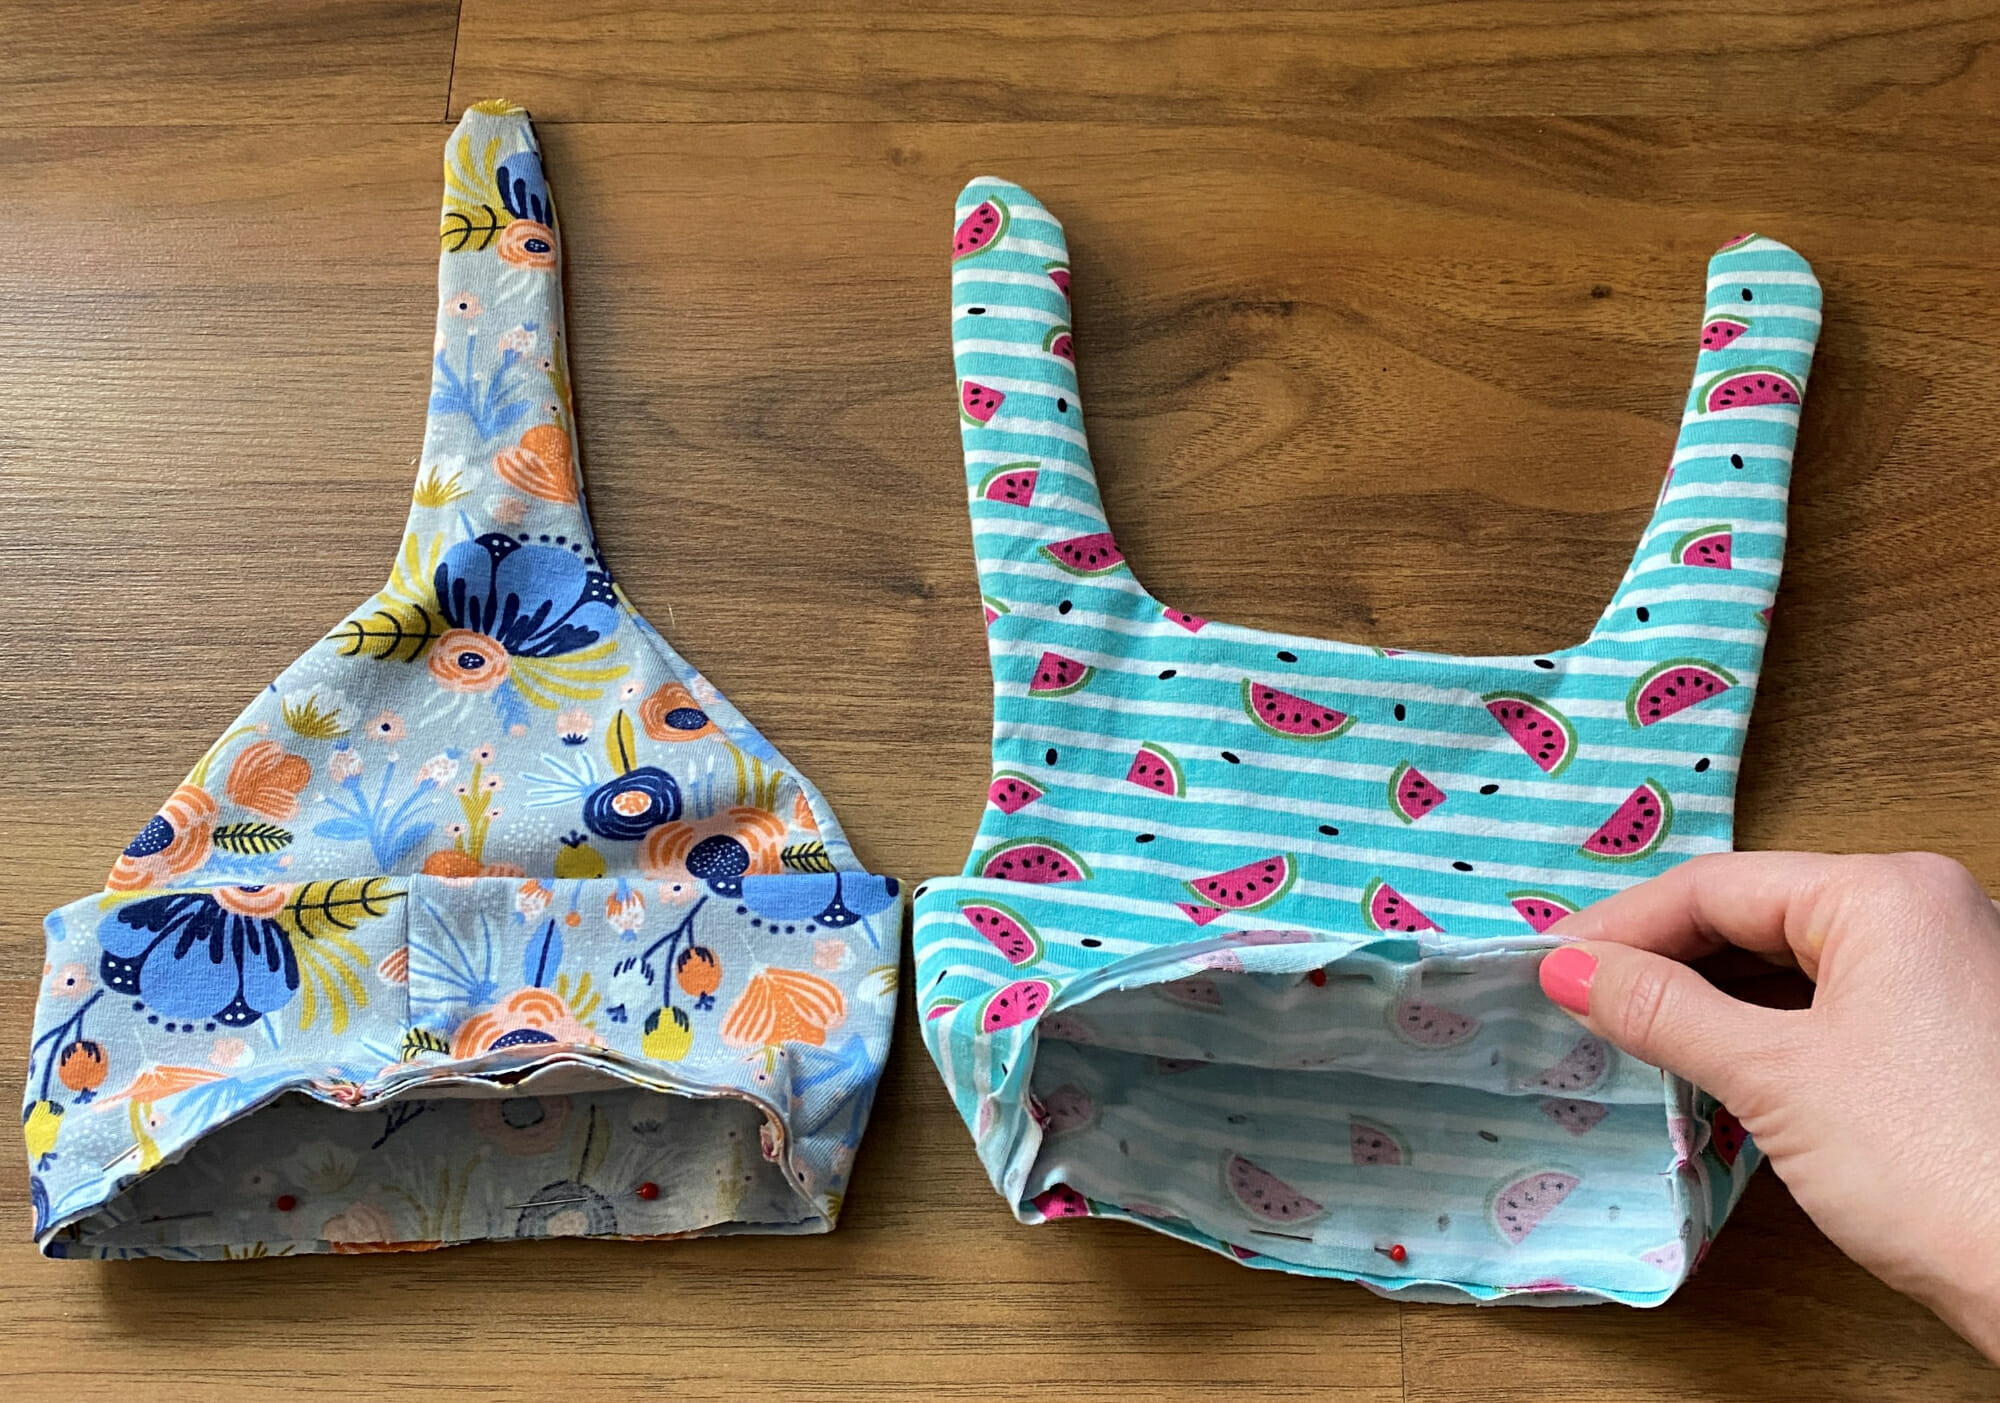
Take the main hat and bottom band and match up the raw edges. Pin them together, then sew all around the edge.
If you have a serger , this step will be super quick! If not, a wide zigzag stitch on your regular machine will work great and catch all three layers securely.
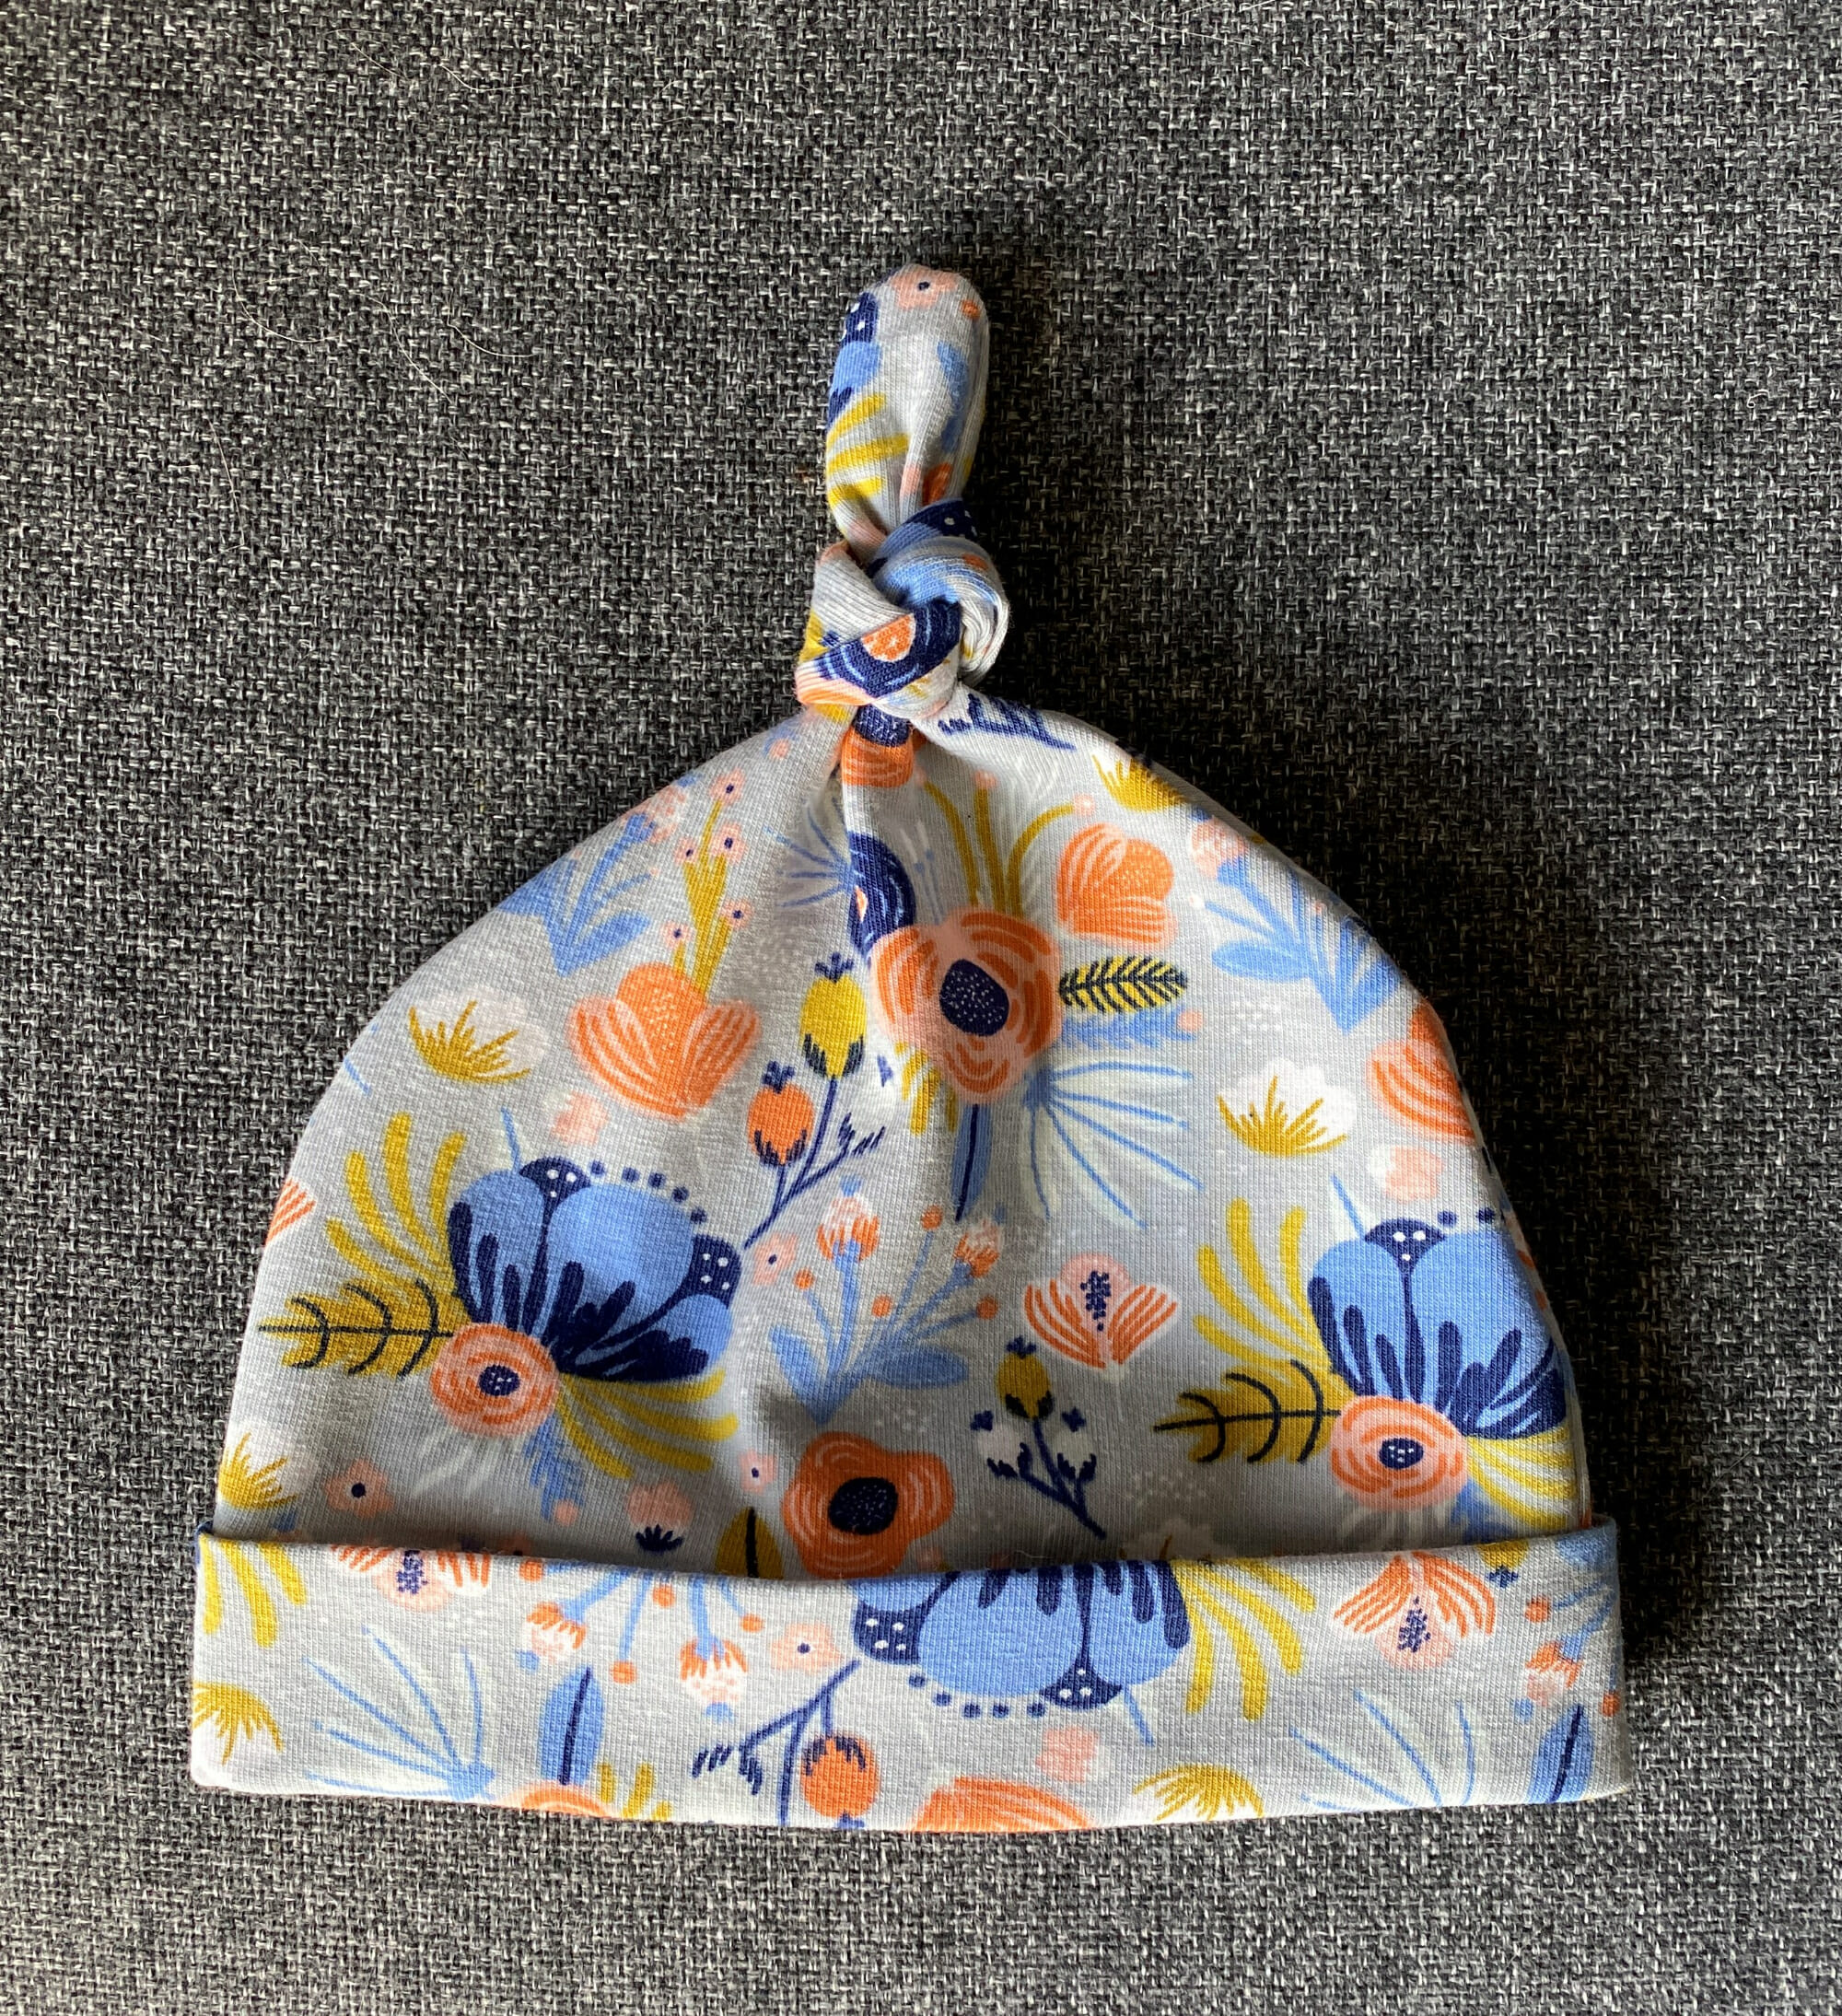
Step 5 – make the knot
Now for the fun part! Tie a little knot at the top of your DIY baby hat, and fold the bottom band up by about an inch. You can leave it unfolded as your baby grows – it’s adjustable! And that’s it!
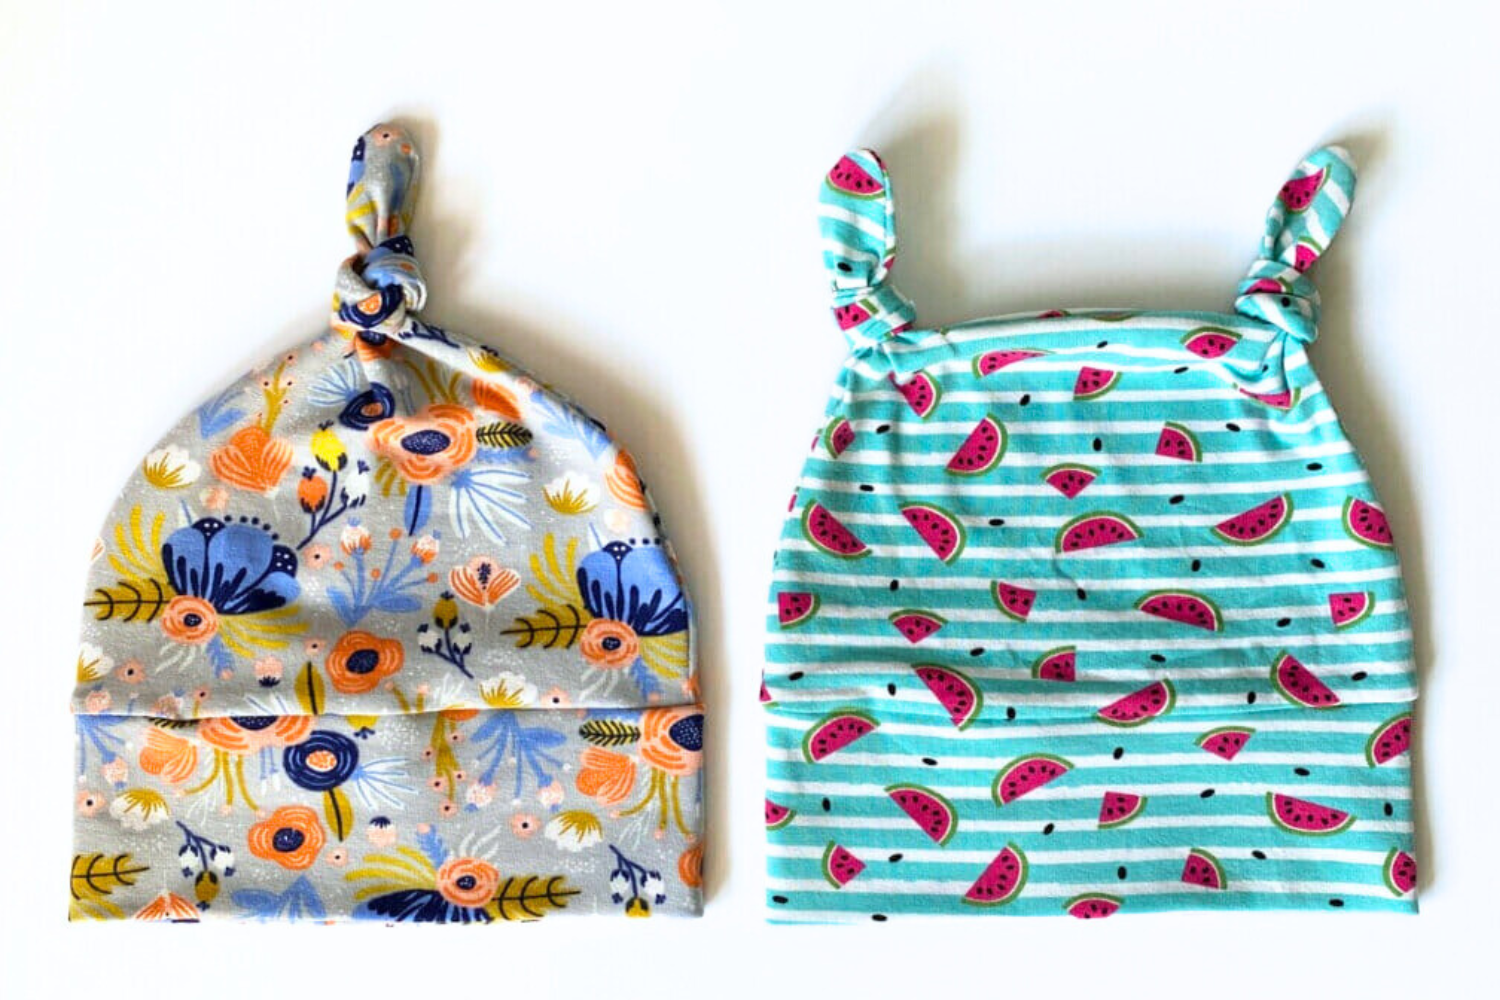
Congratulations! You’ve just made an adorable knotted baby hat with your own hands. Whether you chose the classic top-knot style or went for the playful two-knot “ears,” you now have a cozy, cute baby beanie perfect for your little one or as a thoughtful gift.
Don’t forget to experiment with fun prints and fabrics to make each hat unique! And once you get the hang of it, these hats are great for batch sewing, so you’ll have a stash ready for baby showers or to keep up with a growing baby’s wardrobe.
Happy sewing, and here’s to your next cozy project!
If you try this free knotted baby hat pattern, I’d love to see your creations! Share your finished hats on my Facebook page or tag me on Instagram @icansewthis – seeing your projects always makes my day!


Update, I received the pattern. Just took a while.
I never received my pattern. Someone had the same problem a year ago and it never got fixed.
still unable to access download despite entering my email. nothing sent to my inbox or spam/junk folder.
The hat pattern link is broken, so the pattern is unavailable.
Hi JD,
Yes, you’re right, there was a broken link – I’ve just fixed it. Thank you so much for letting me know! To receive the free pattern you have to subscribe – start by entering your email address in the pink box. Next, check your email to confirm your subscription (it’s a double opt-in). Don’t forget to also check your spam folder, just in case. Once you’ve confirmed your subscription, the pattern will be sent to your inbox right away. Thank you again!