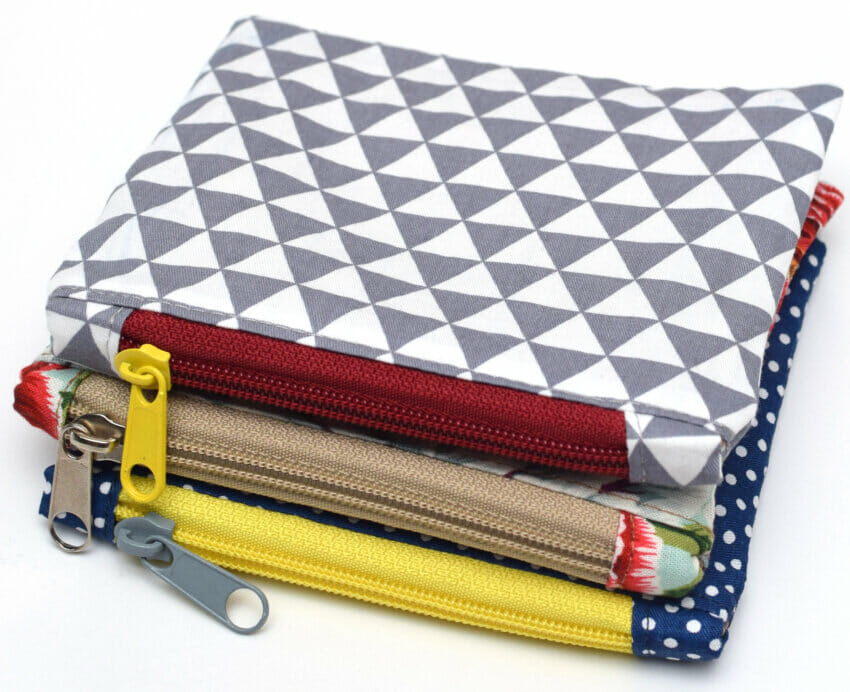
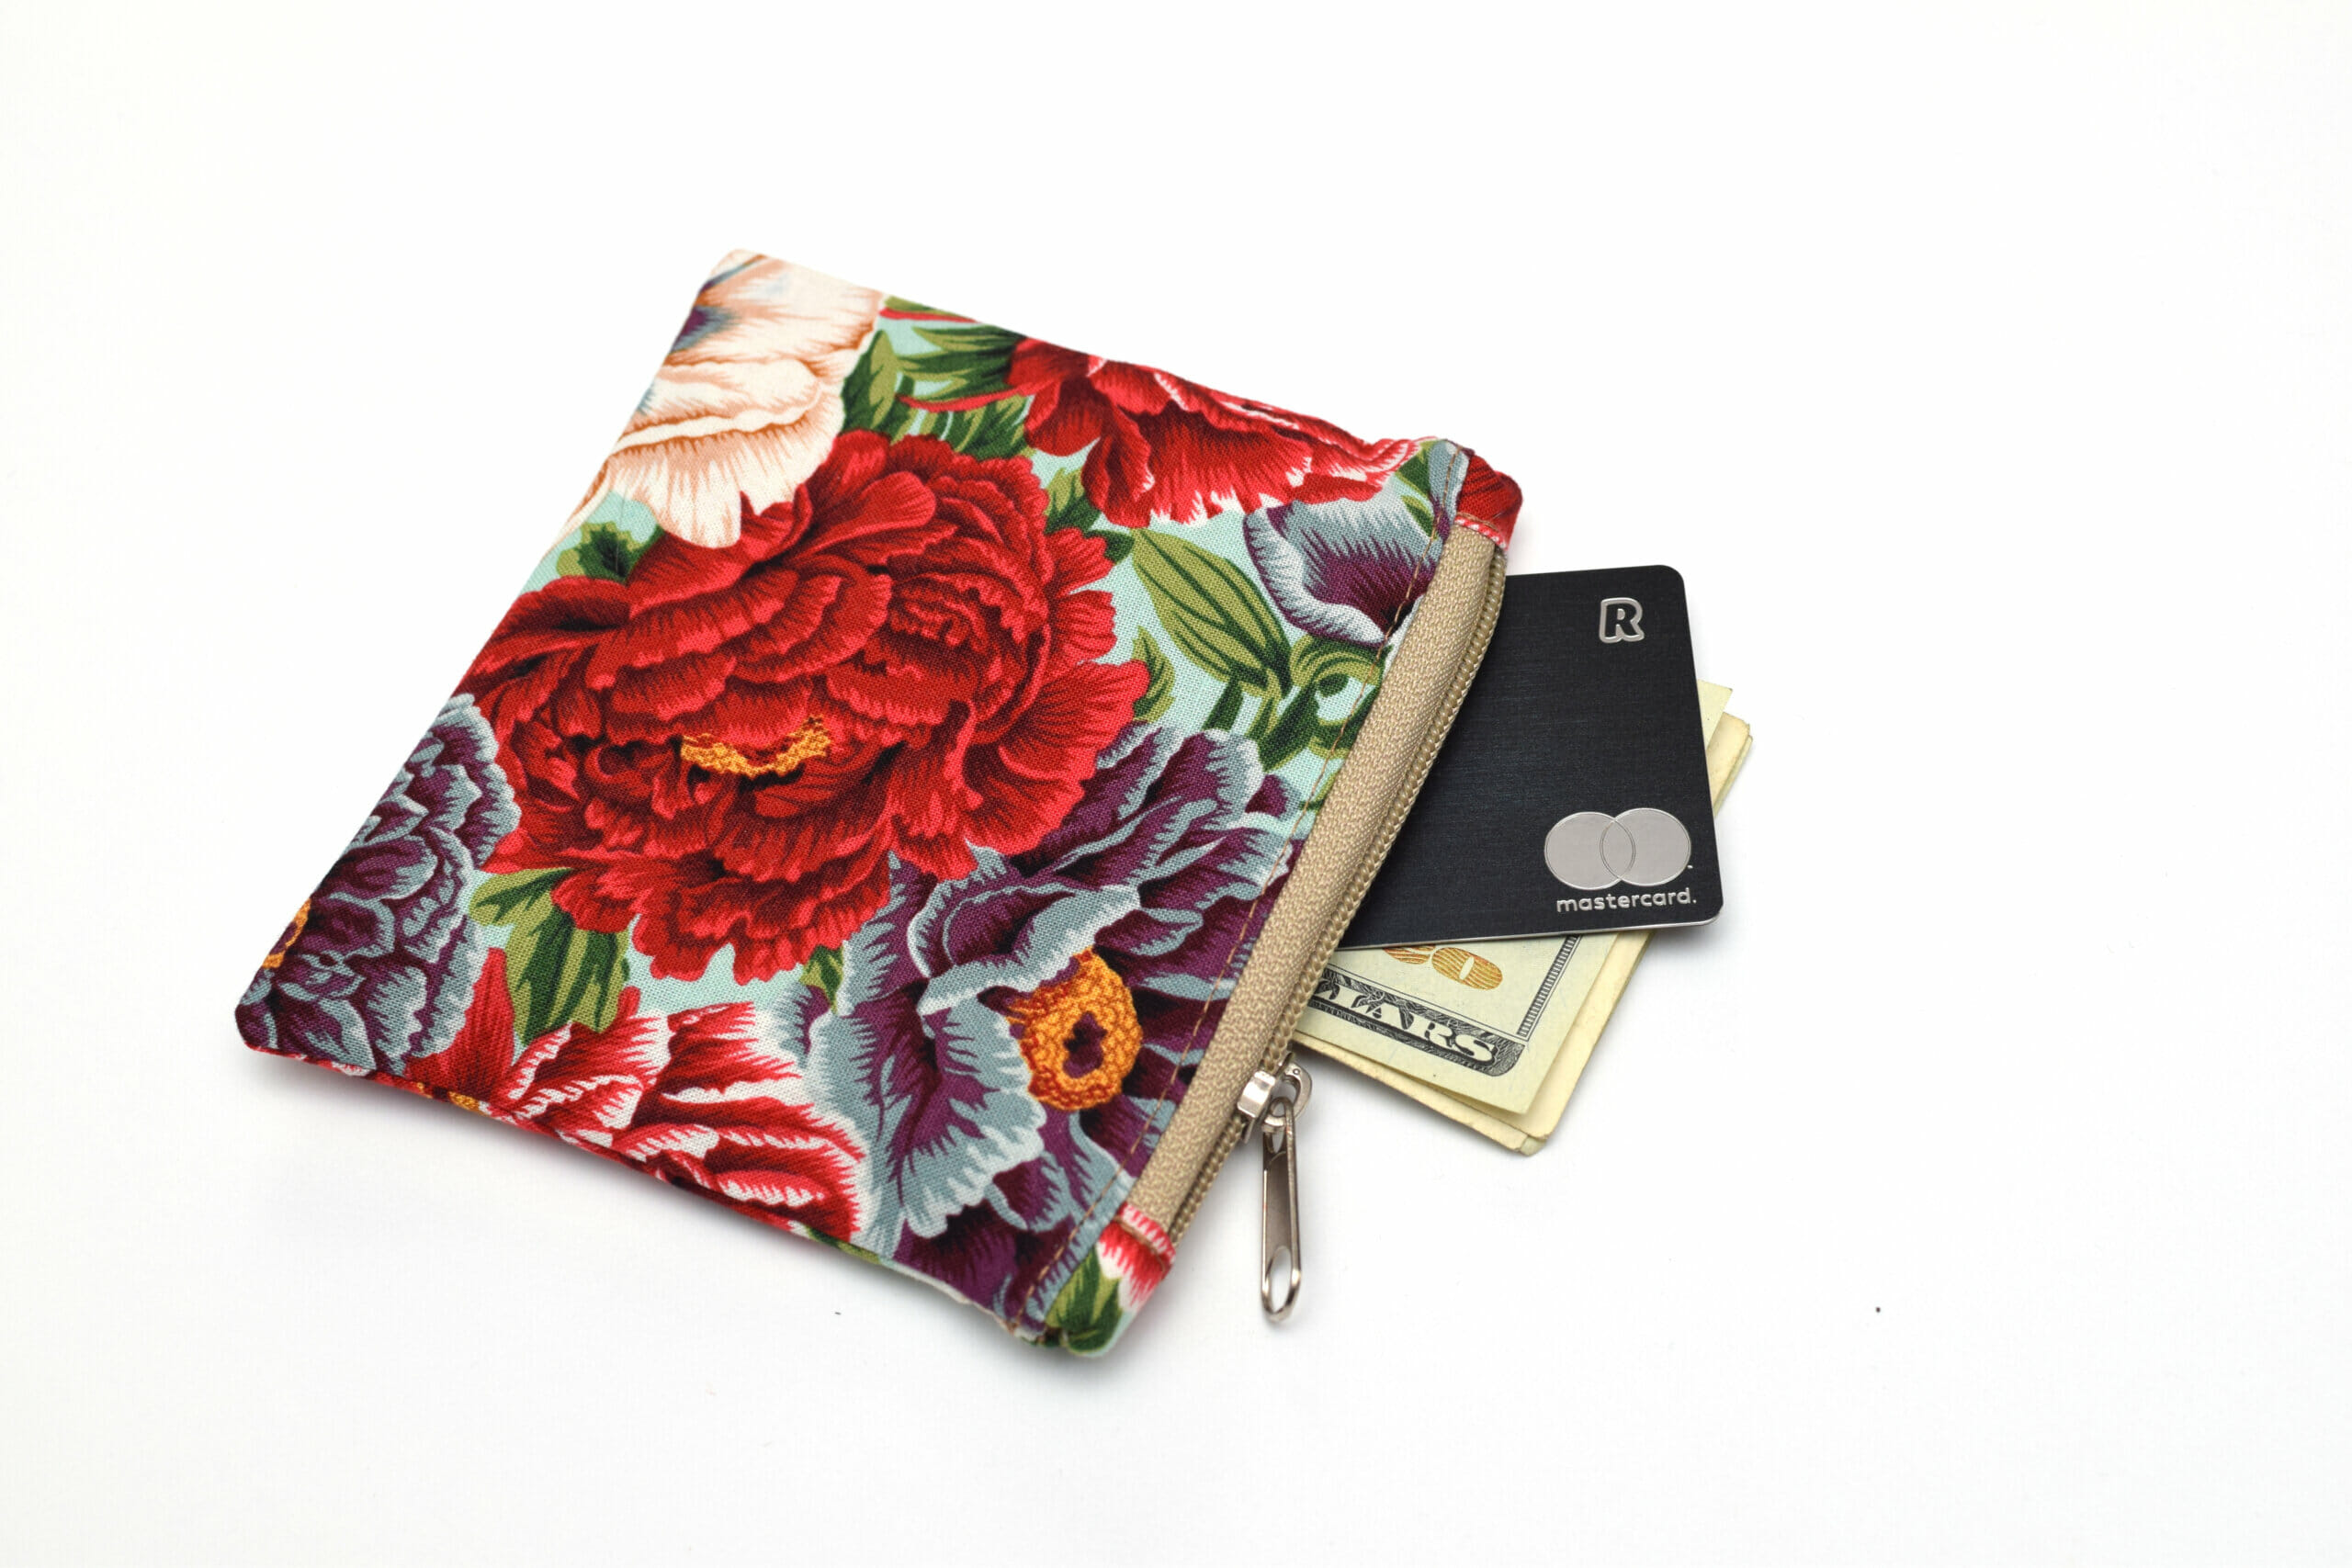
Want to sew a practical, stylish zipper pouch? This beginner-friendly tutorial breaks down each step so you’ll be creating lined zipper pouches with confidence. By the end of this project, sewing zippers won’t feel intimidating at all!
This guide will walk you through all the tips and tricks you need to make a zipper pouch you can be proud of. Let’s dive in!
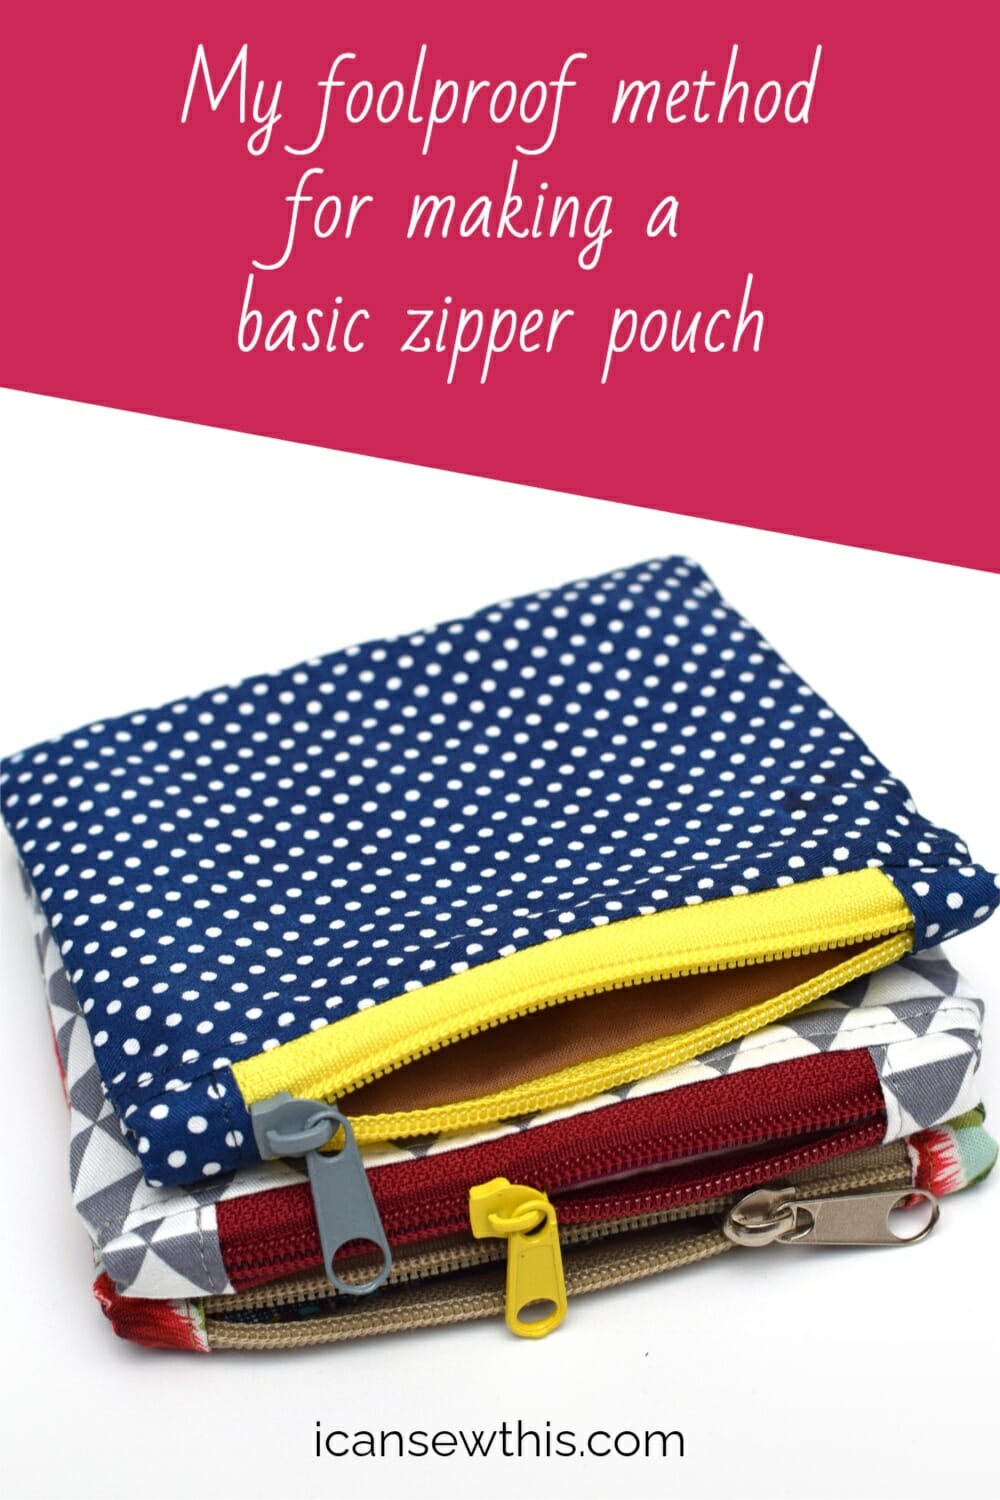
Save this project for later to your Pinterest Sewing board using this link or the image below.
DIY lined zipper pouch – preparing your zipper
When making zipper pouches, sometimes it’s tricky to find the perfect zipper in the right color and length. If you’re like me, you might not always have the exact zipper size on hand, so I used zippers by the yard for this project.
- Cutting the zipper to size: Start by cutting your zipper about 2 inches longer than the length you need. This gives a little room for adjustment. For my zipper pouches, I marked the zipper at exactly 6 inches, which is the length I need.
- Adding the zipper pull: If you’re using zippers by the yard, you’ll need to attach the zipper pull. (If you’re new to this, check out some helpful tutorials on YouTube to get started.)
- Creating thread stops: To keep the zipper from coming undone, sew a few stitches at each end of the zipper and backstitch to secure. This will act as a zipper stopper.
Tip: If you’re using a metal zipper, avoid sewing over the teeth with your machine needle. Slowly turn the handwheel to stitch through the zipper to prevent any damage.
- Cutting the zipper to length: Once your thread stoppers are secure, use regular scissors to cut your zipper on the marked lines. Now, you have a custom-length zipper!
- Using the right presser foot: For this project, I didn’t use a zipper foot since my straight stitch foot was slim enough, and the zippers I used had wider zipper tapes.
Tip for beginners: If you’re using a standard zipper (not an invisible zipper), there’s no need to sew too close to the zipper teeth. Leave a comfortable distance, so you feel more in control while sewing.
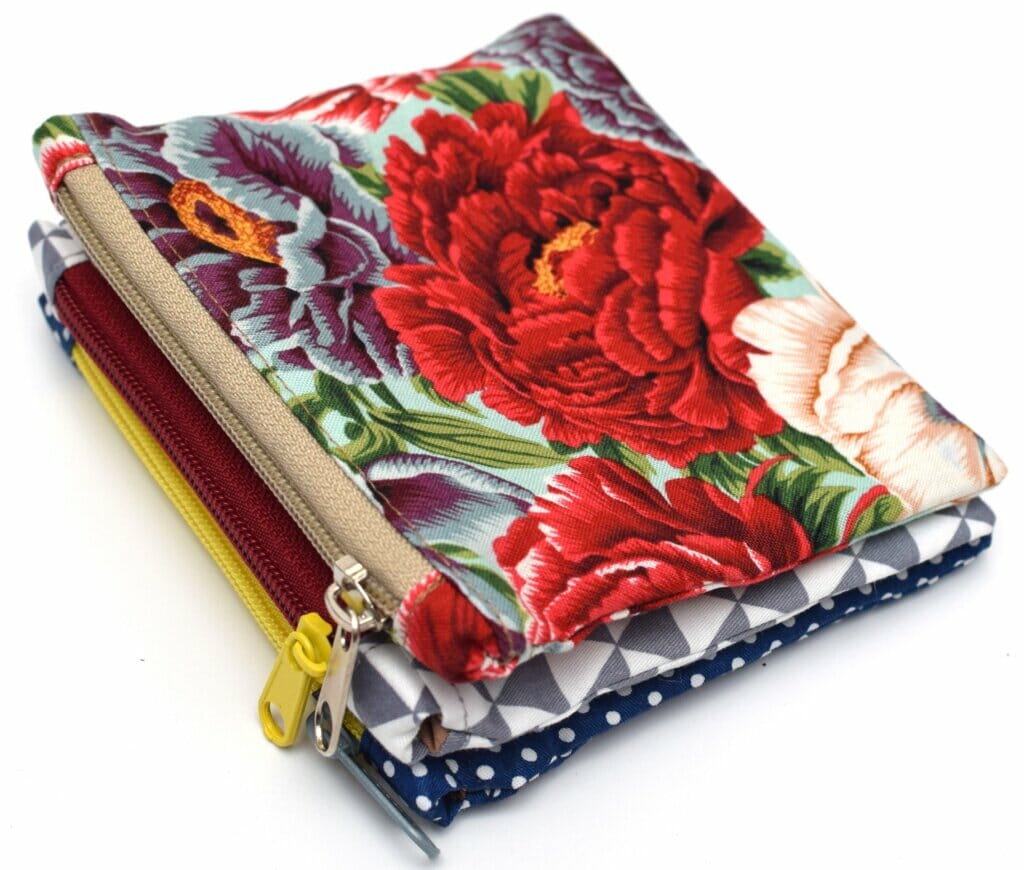
Related: Drawstring dice bag (free pattern) / Mini zipper pouch
Sewing supplies – lined zipper pouch
- Woven fabric of your choice – cotton, denim, canvas
- Zipper
- Scissors
- Matching thread
- Sewing pins or sewing clips
- Universal sewing machine needle
- Sewing machine
How to make a basic zipper pouch: easy 5-step tutorial
Step 1 – prepare your fabric pieces
To make your zipper pouch, you’ll need:
- Two fabric rectangles for the outside of the pouch
- Two fabric rectangles for the lining
- Two small rectangles (1 1/2” x 2”) for the zipper tabs
- A zipper that’s 1 inch shorter than the top edge of your main fabric piece
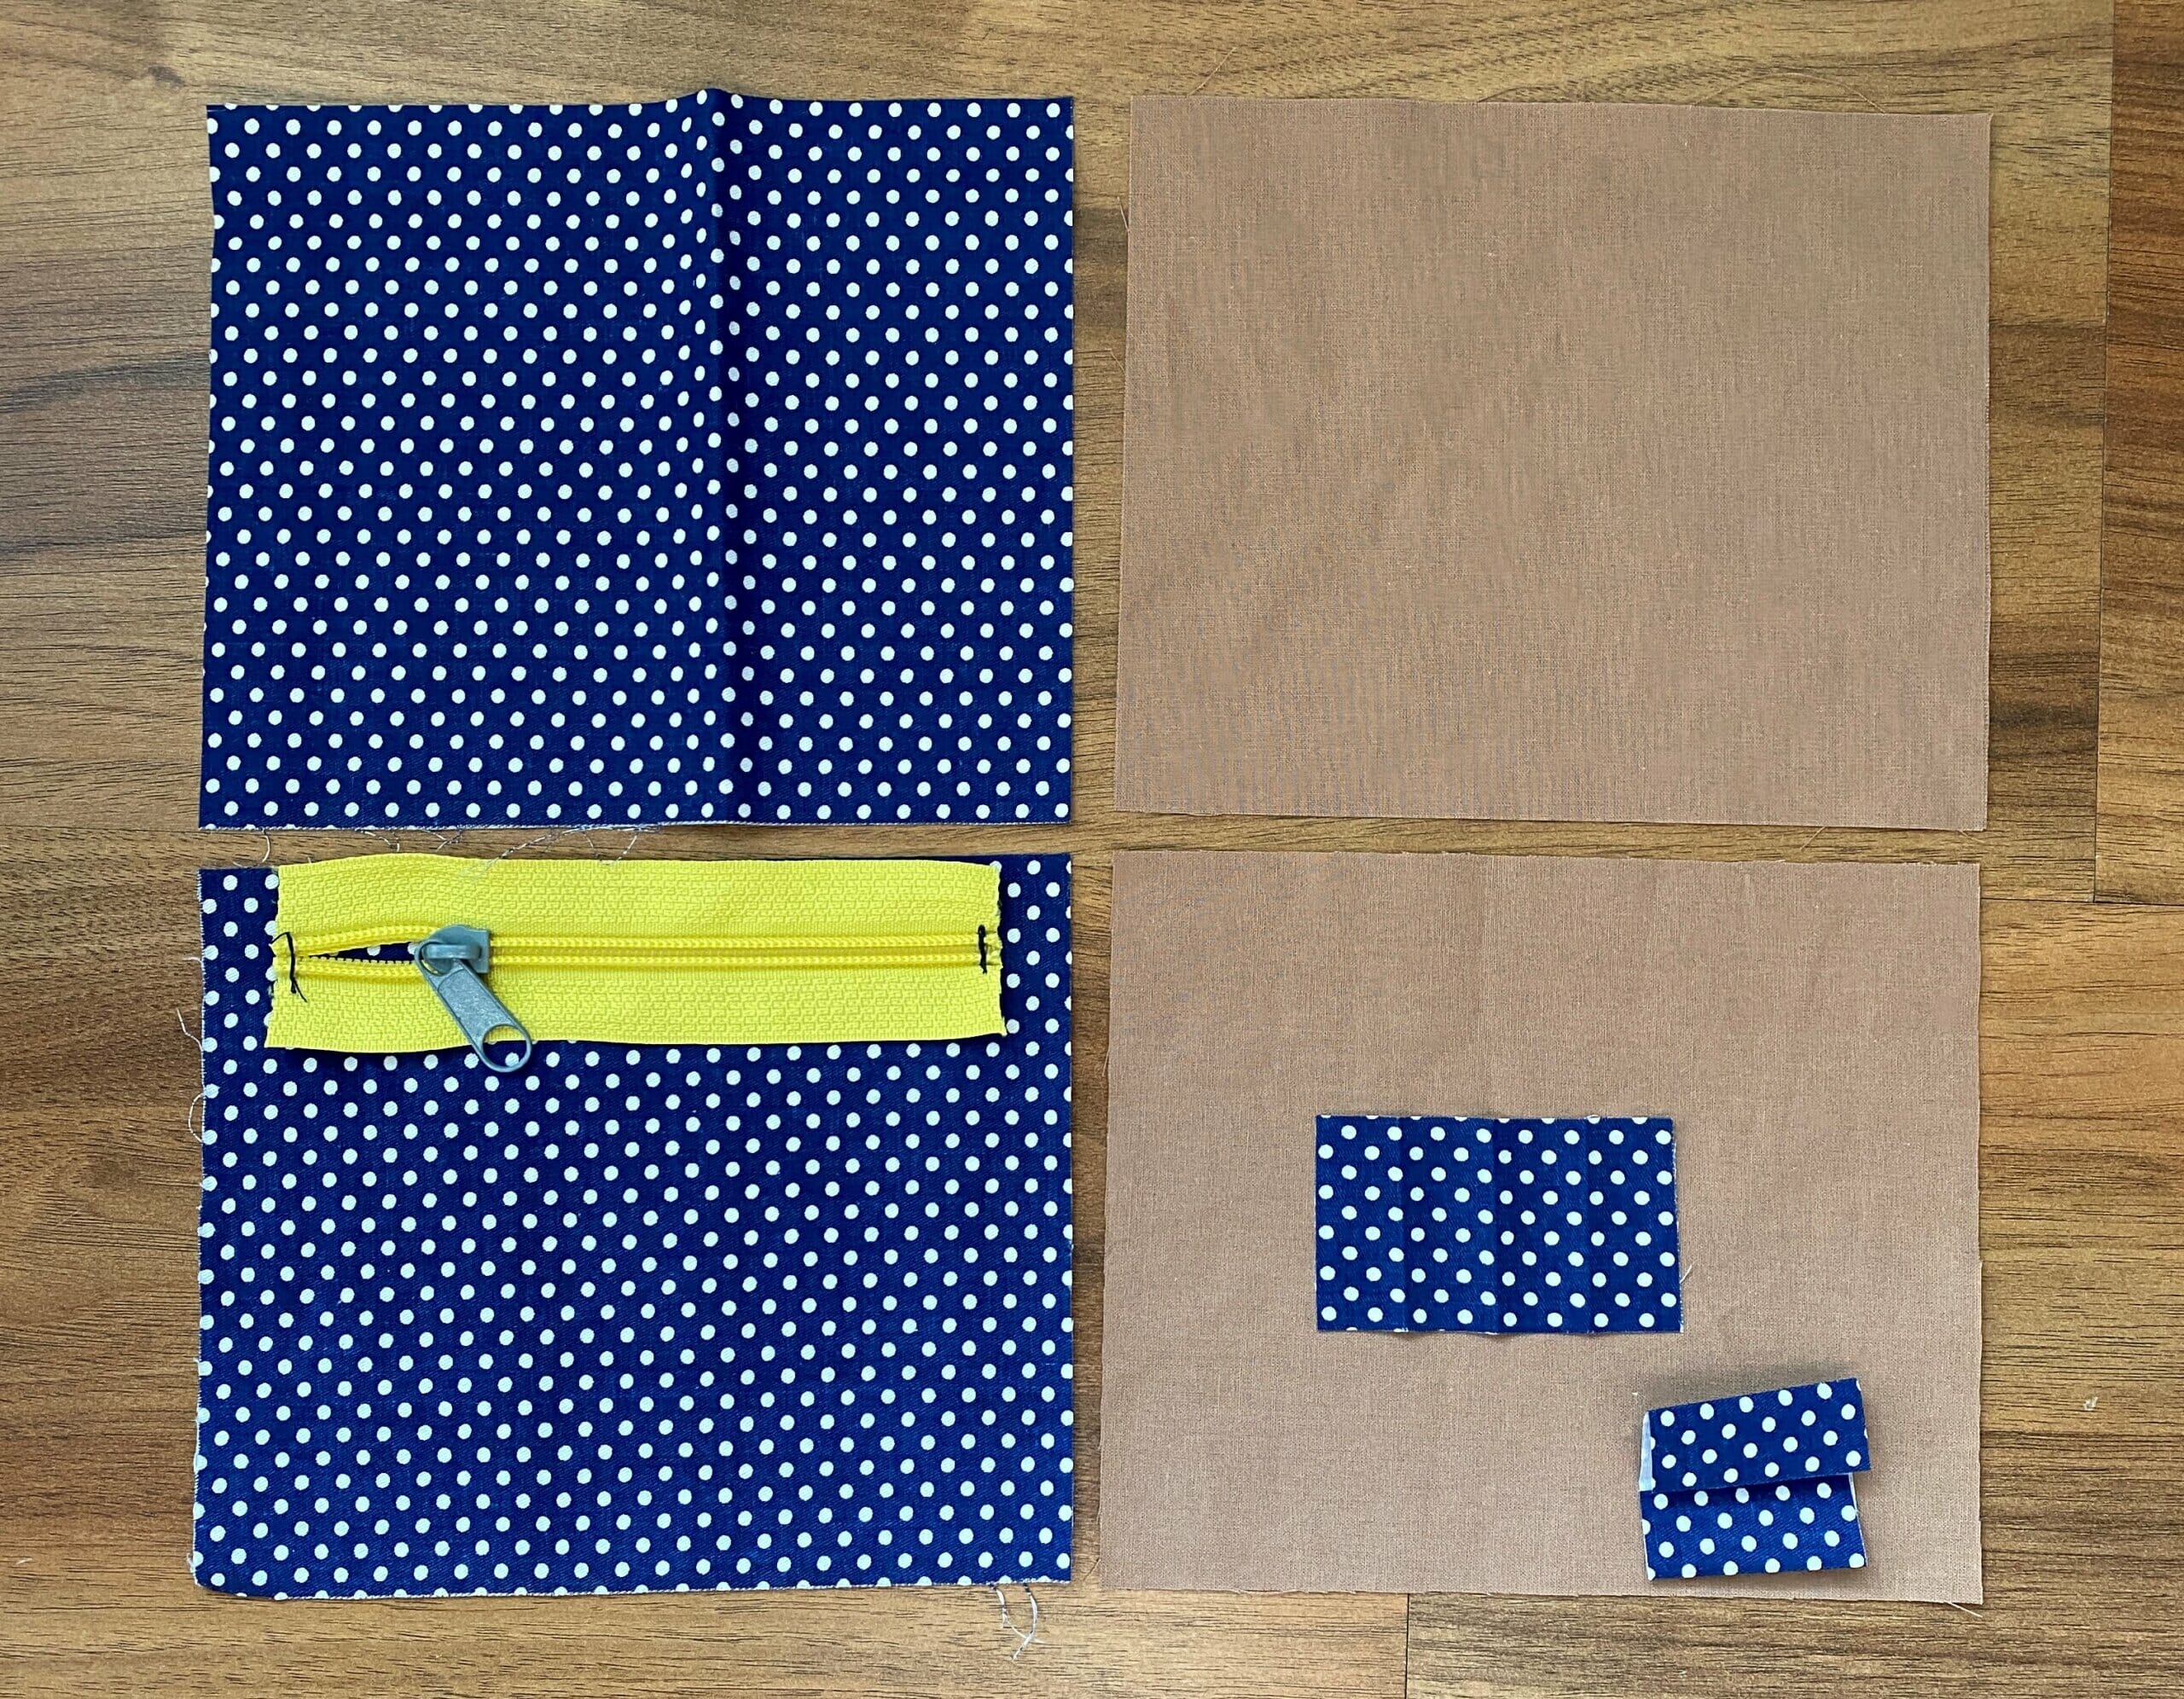
For reference, my fabric pieces are 6 inches wide and 5 inches tall, with a zipper measuring exactly 5 inches. Using these measurements, my finished pouch is 5 1/4 inches wide and 4 3/4 inches tall.
Tip for custom sizes: Want a different size? Just cut your fabric about 3/4 inch wider and 1/4 inch taller than your desired finished measurements. This will give you a little extra seam allowance, making it easier to sew.
Step 2 – prepare and attach the zipper tabs
To create neat zipper ends, grab one of the small fabric rectangles for your zipper tabs:
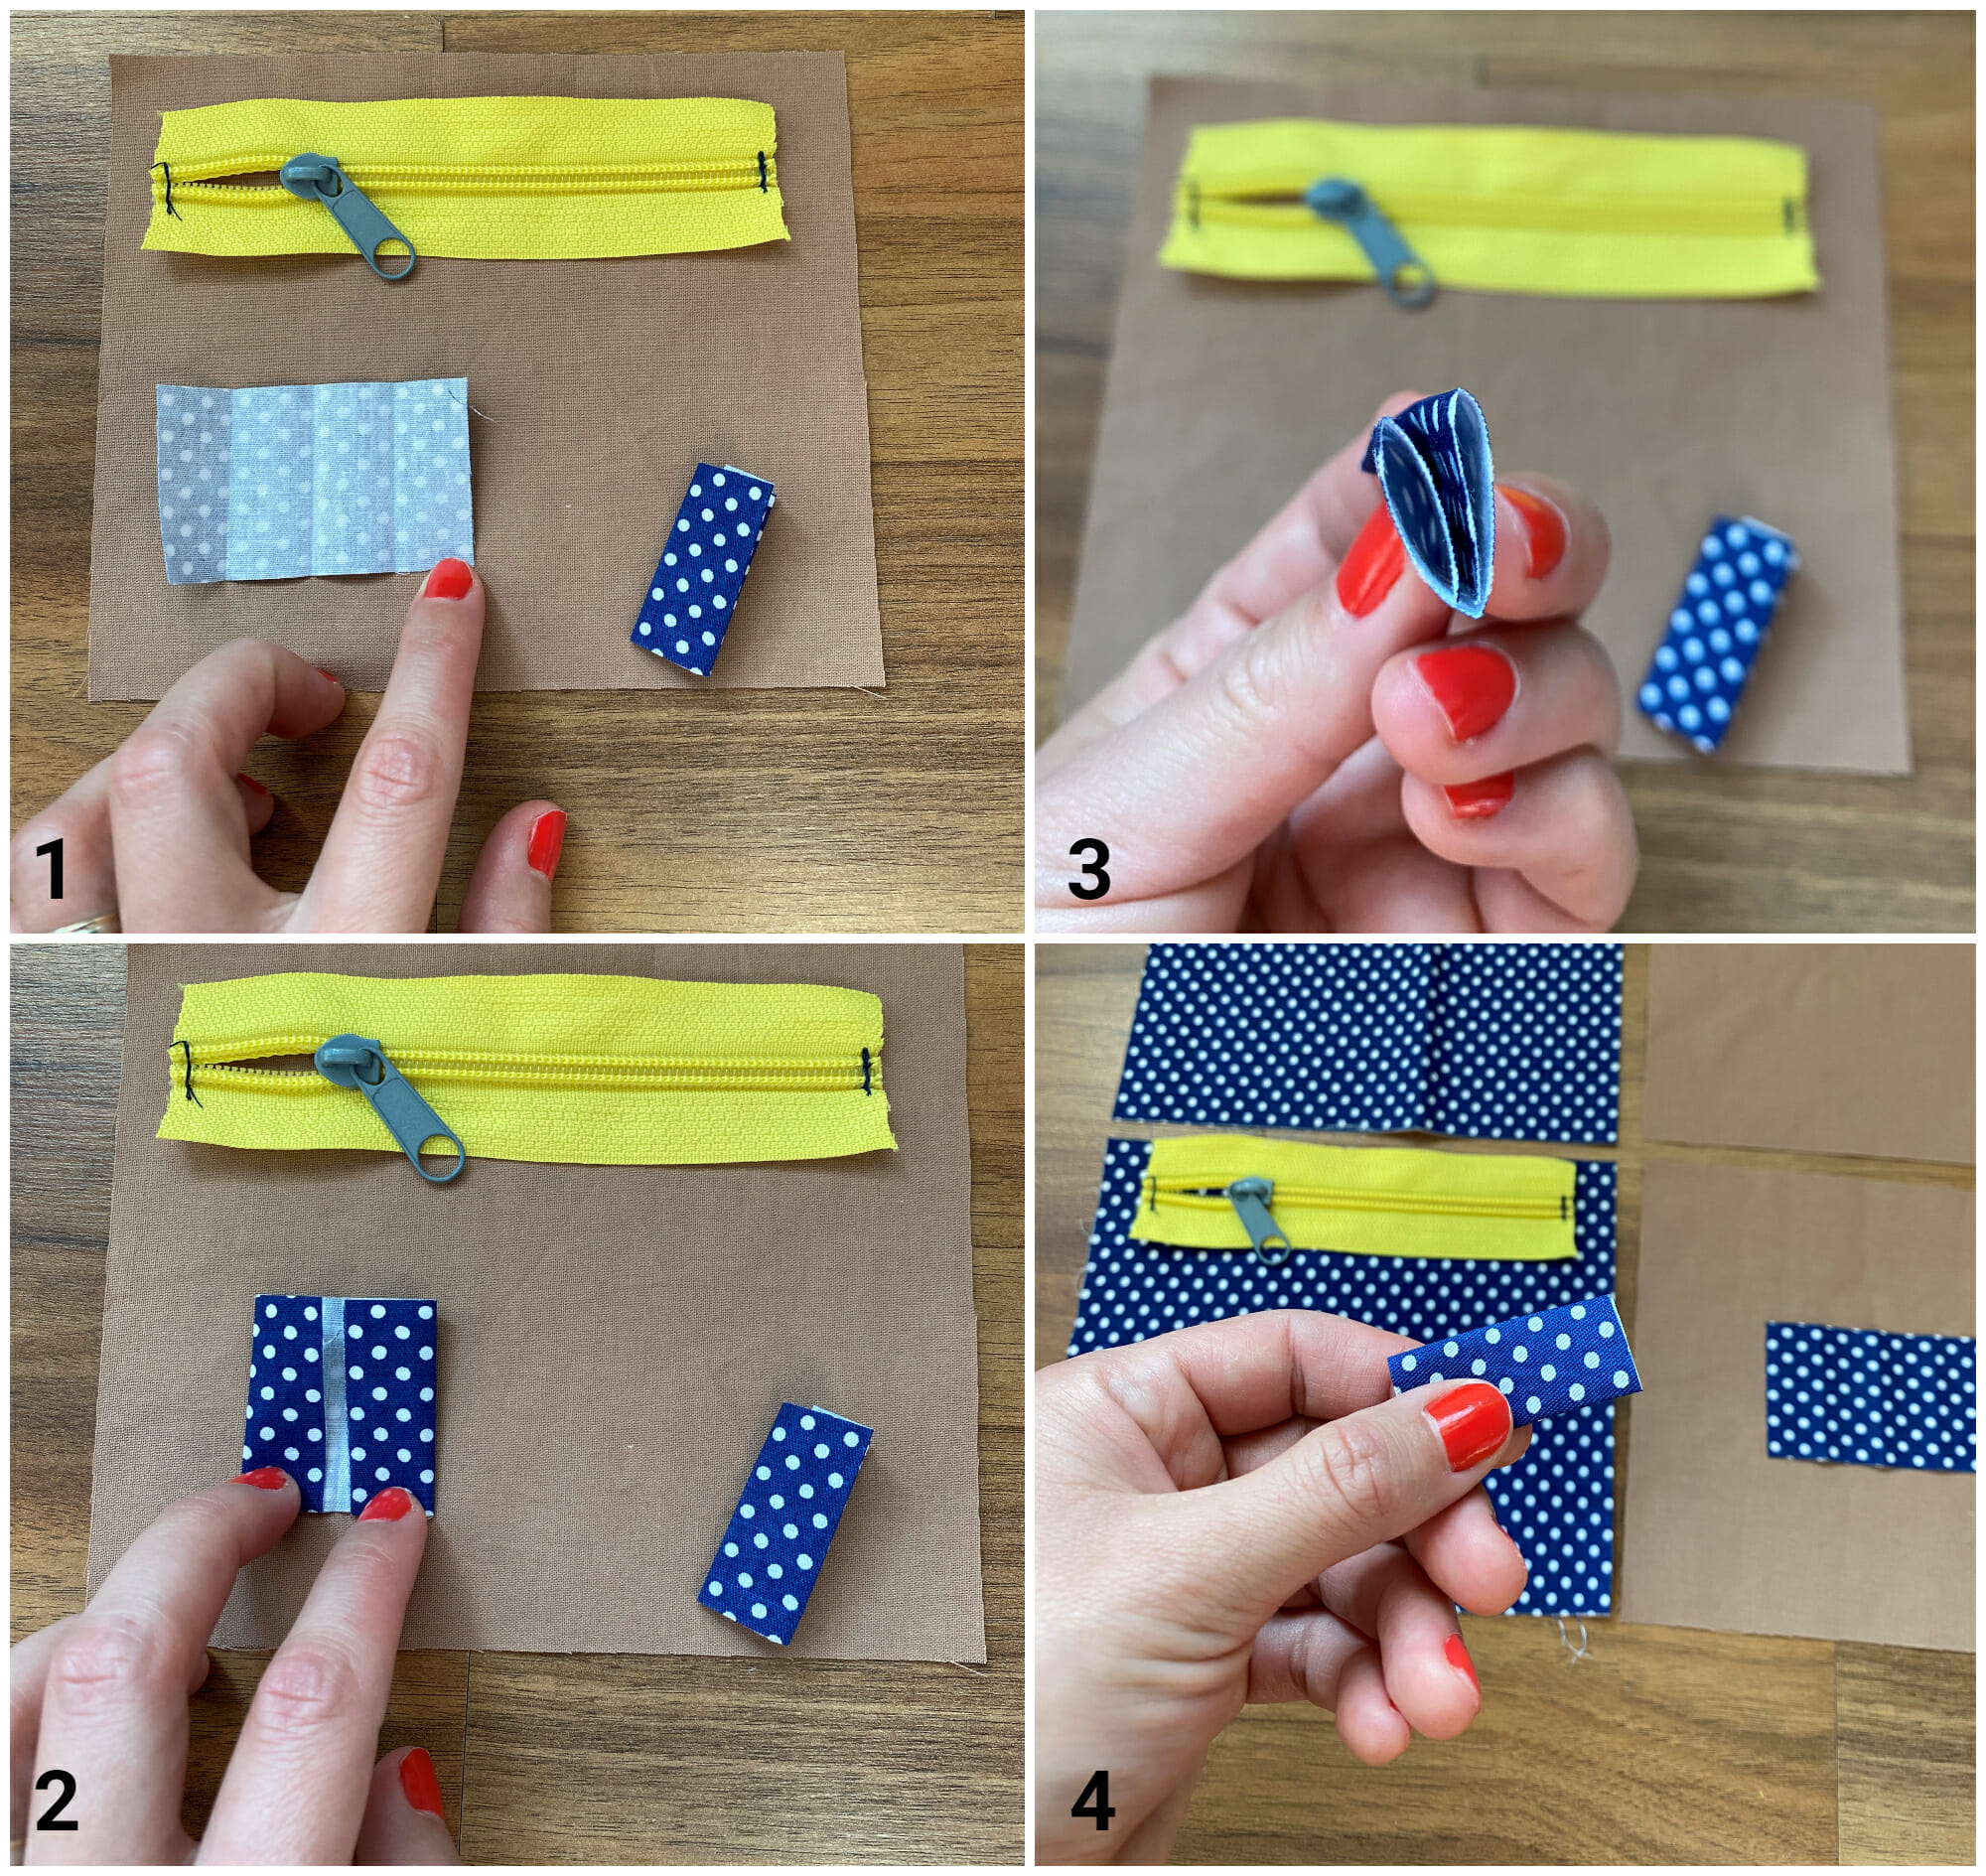
- Fold the rectangle in half along the 2-inch edge.
- Then, fold both short edges inward to meet the center fold, as shown in the image below. Press well to hold the shape.
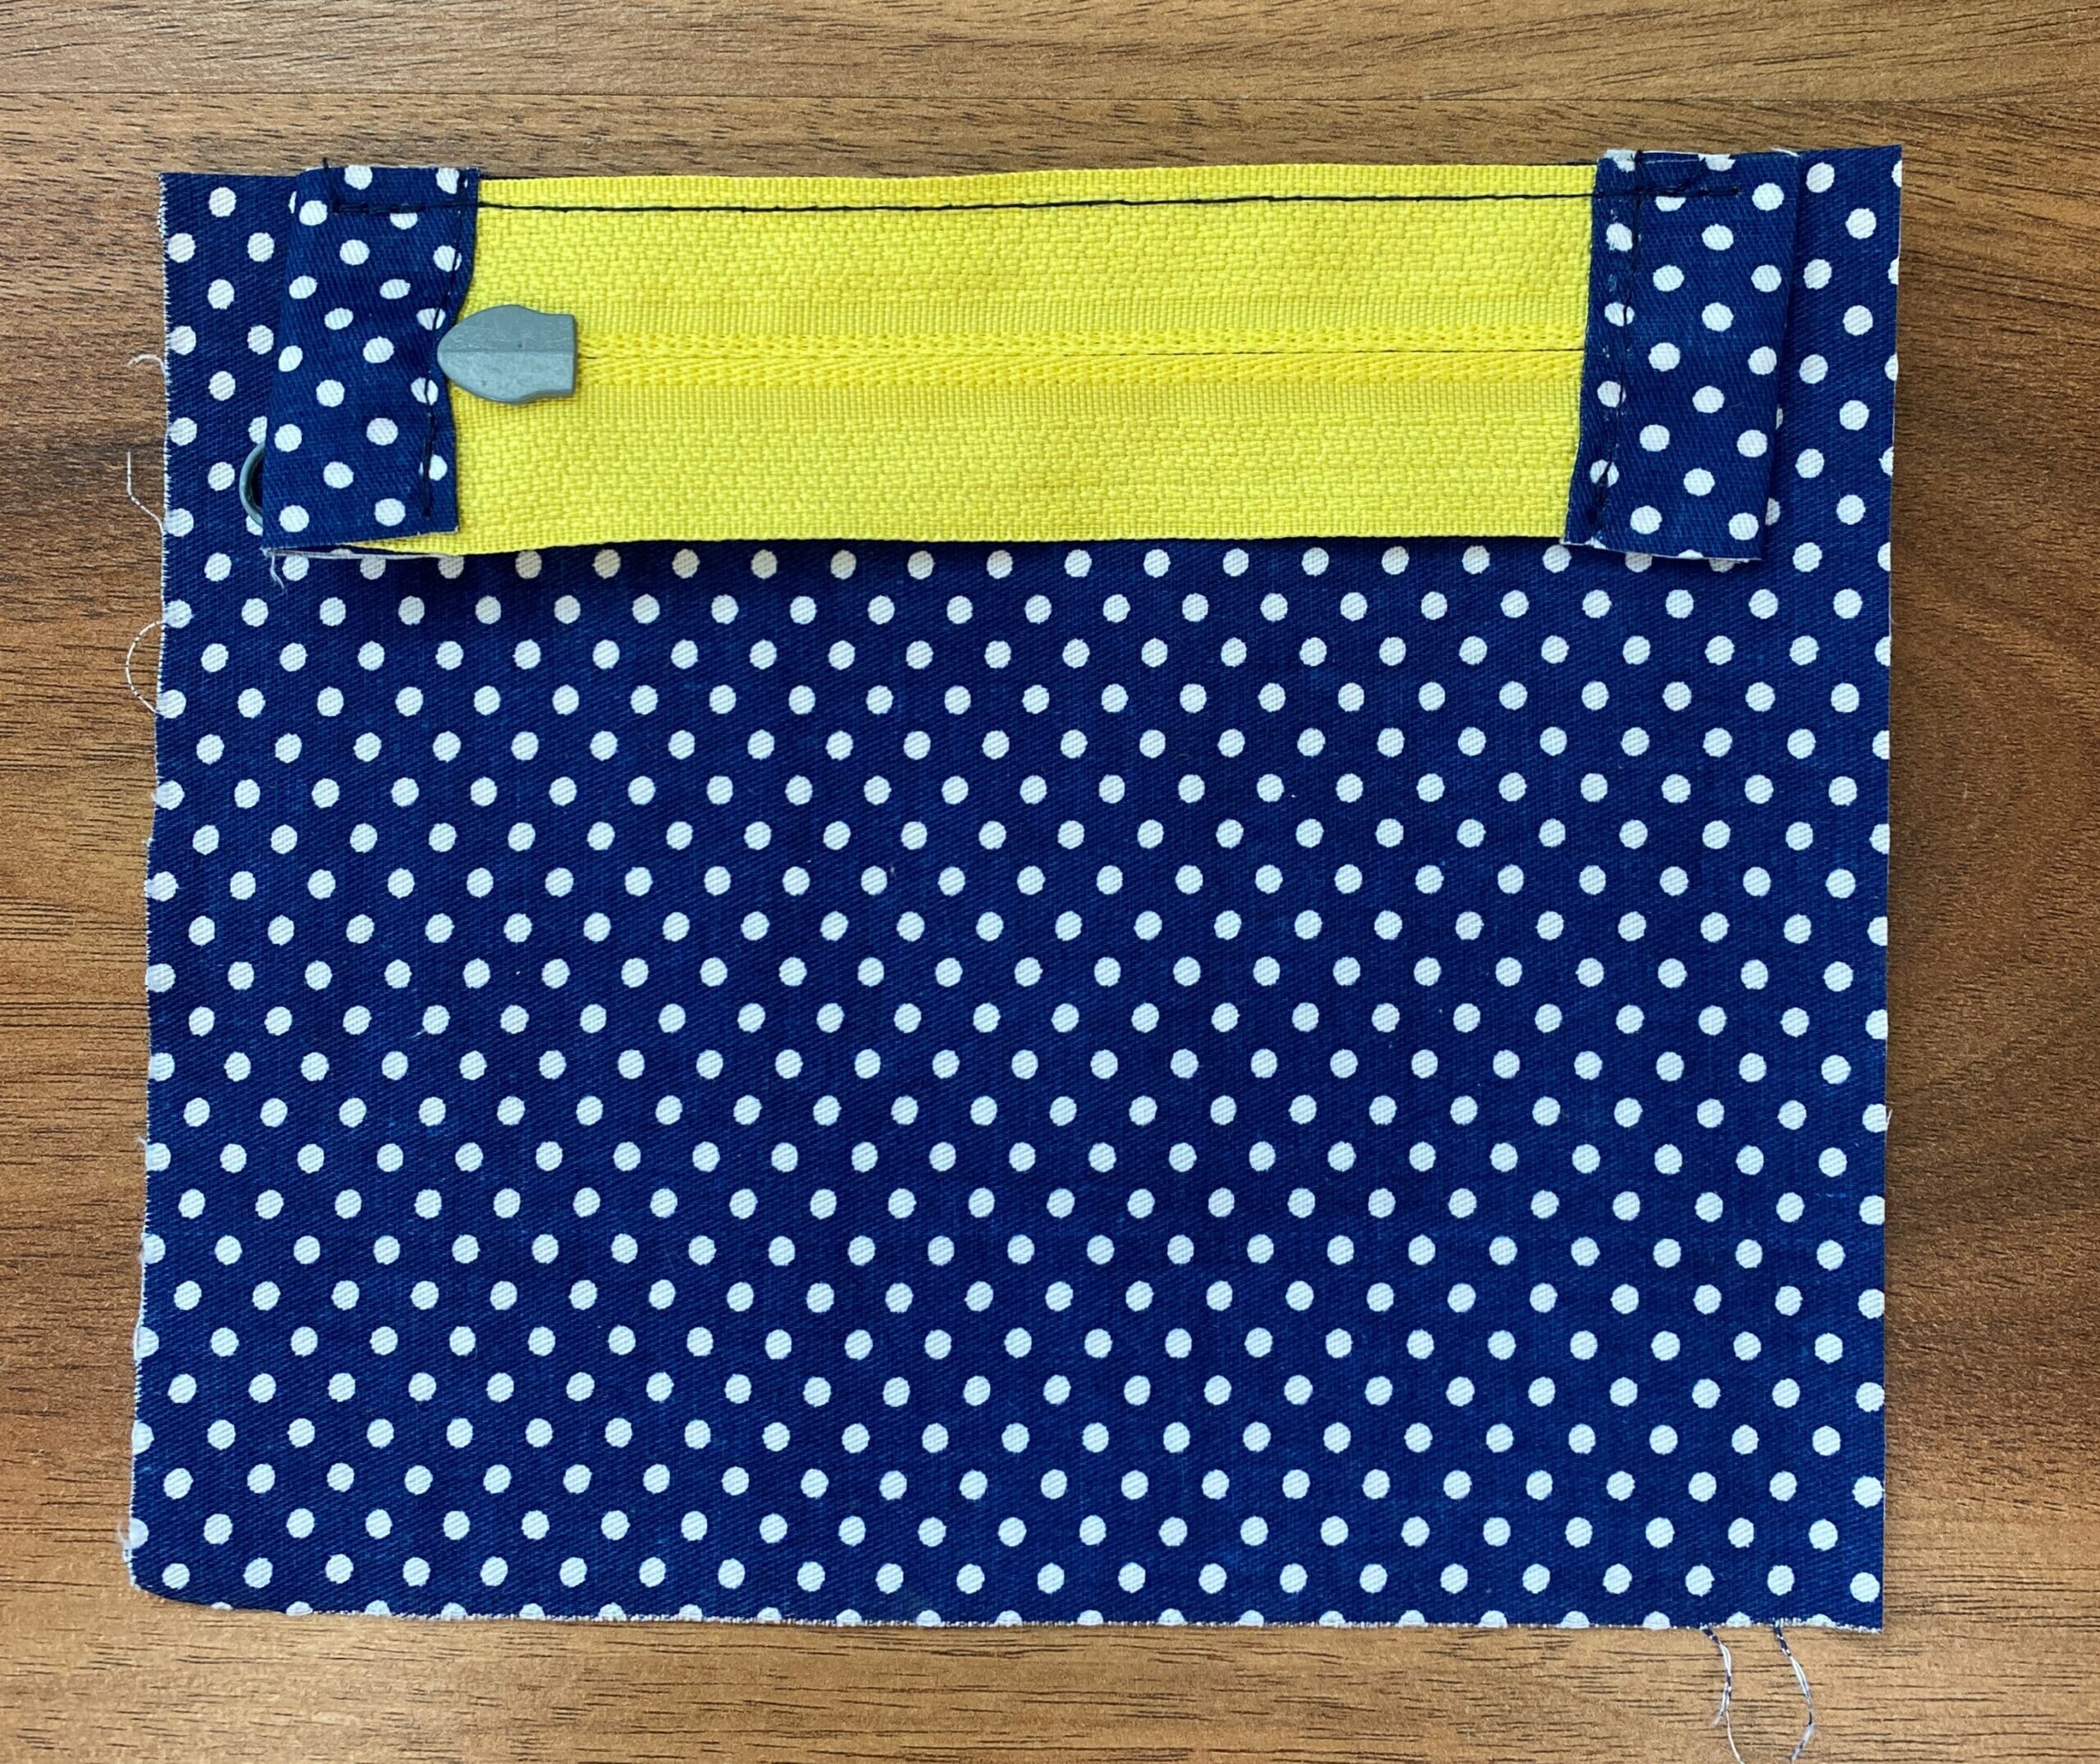
- Place the folded zipper tabs over each end of the zipper and stitch them in place to secure the folds.

These zipper tabs give a tidy look to your pouch and prevent the zipper from going all the way to the edge of your fabric, making it easier to sew around.
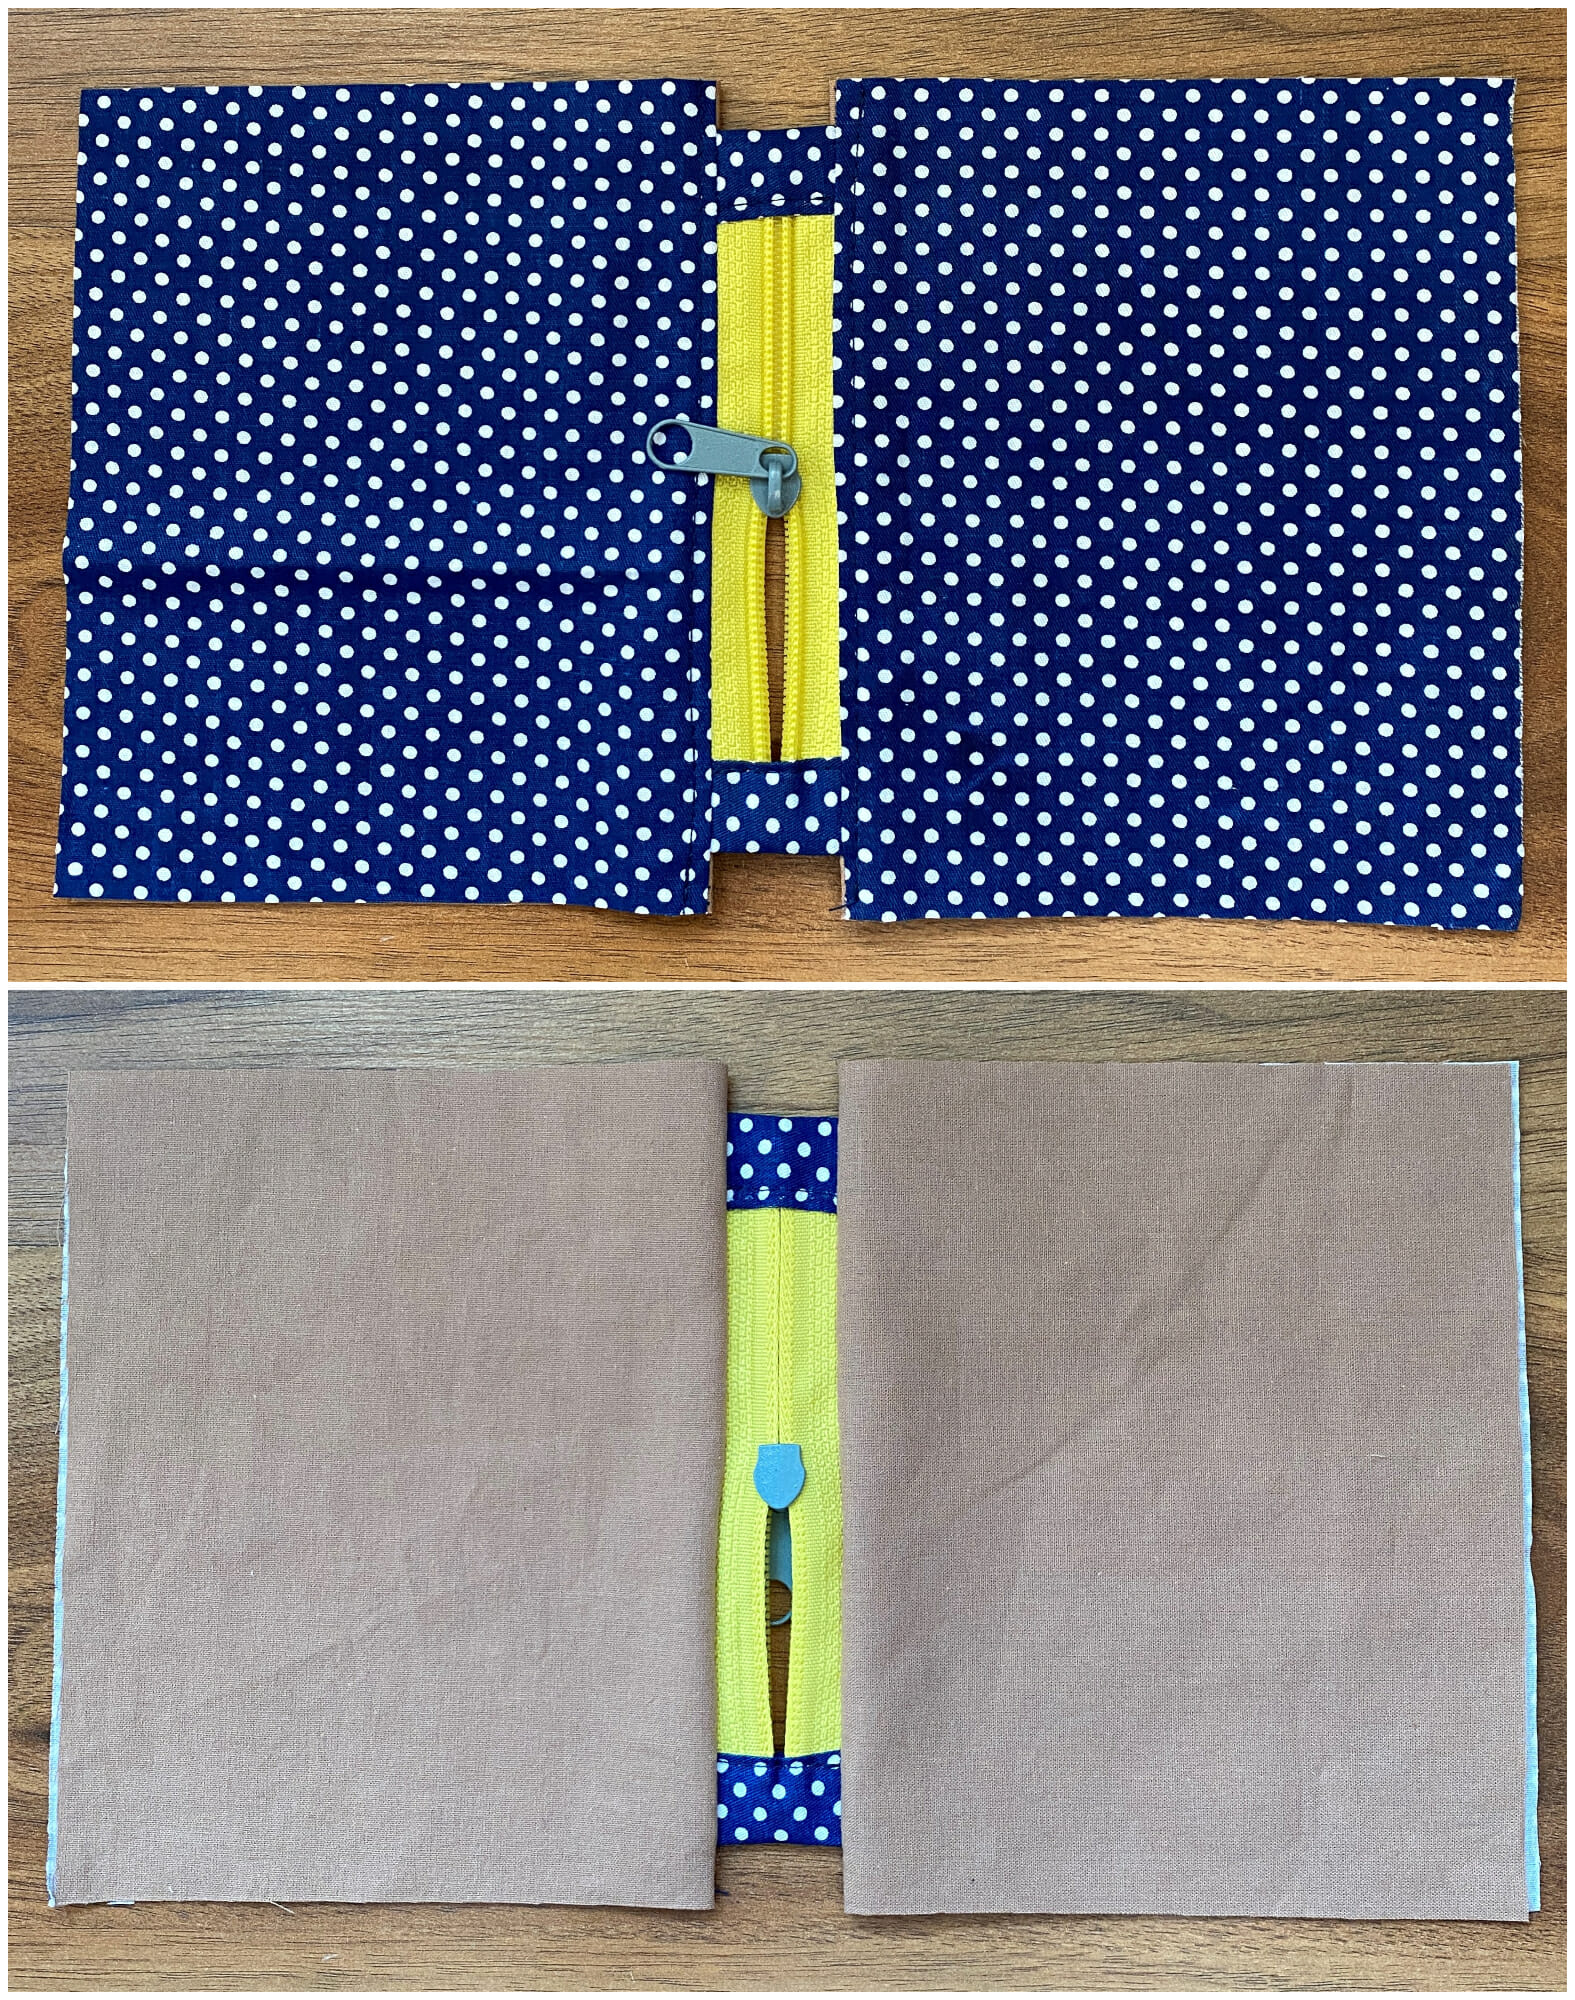
Step 3 – attach the zipper to the fabric panels (1 outer piece and 1 lining piece)
Position the zipper:
Place the zipper along the top edge of one main fabric piece, with the right side of the zipper facing the right side of the fabric. Make sure the zipper is centered along the fabric edge, leaving about 3/8 to 1/2 inch on each side.
Sew the zipper to the main fabric:
Using a small 1/8-inch seam allowance, stitch the zipper to the main fabric.
Tip: When you reach the zipper pull, stop with your needle down, lift the presser foot, and carefully move the zipper pull behind it. This makes it easier to sew without bumps.
Add the lining:
Next, take one lining piece and pin it to the back side of the zipper, so it lines up with the main fabric piece (right side of the lining facing the wrong side of the zipper). Sew this lining piece to the zipper using a slightly larger 1/4-inch seam allowance.
Pro tip: This trick keeps your zipper pouch looking neat and tidy inside and out!
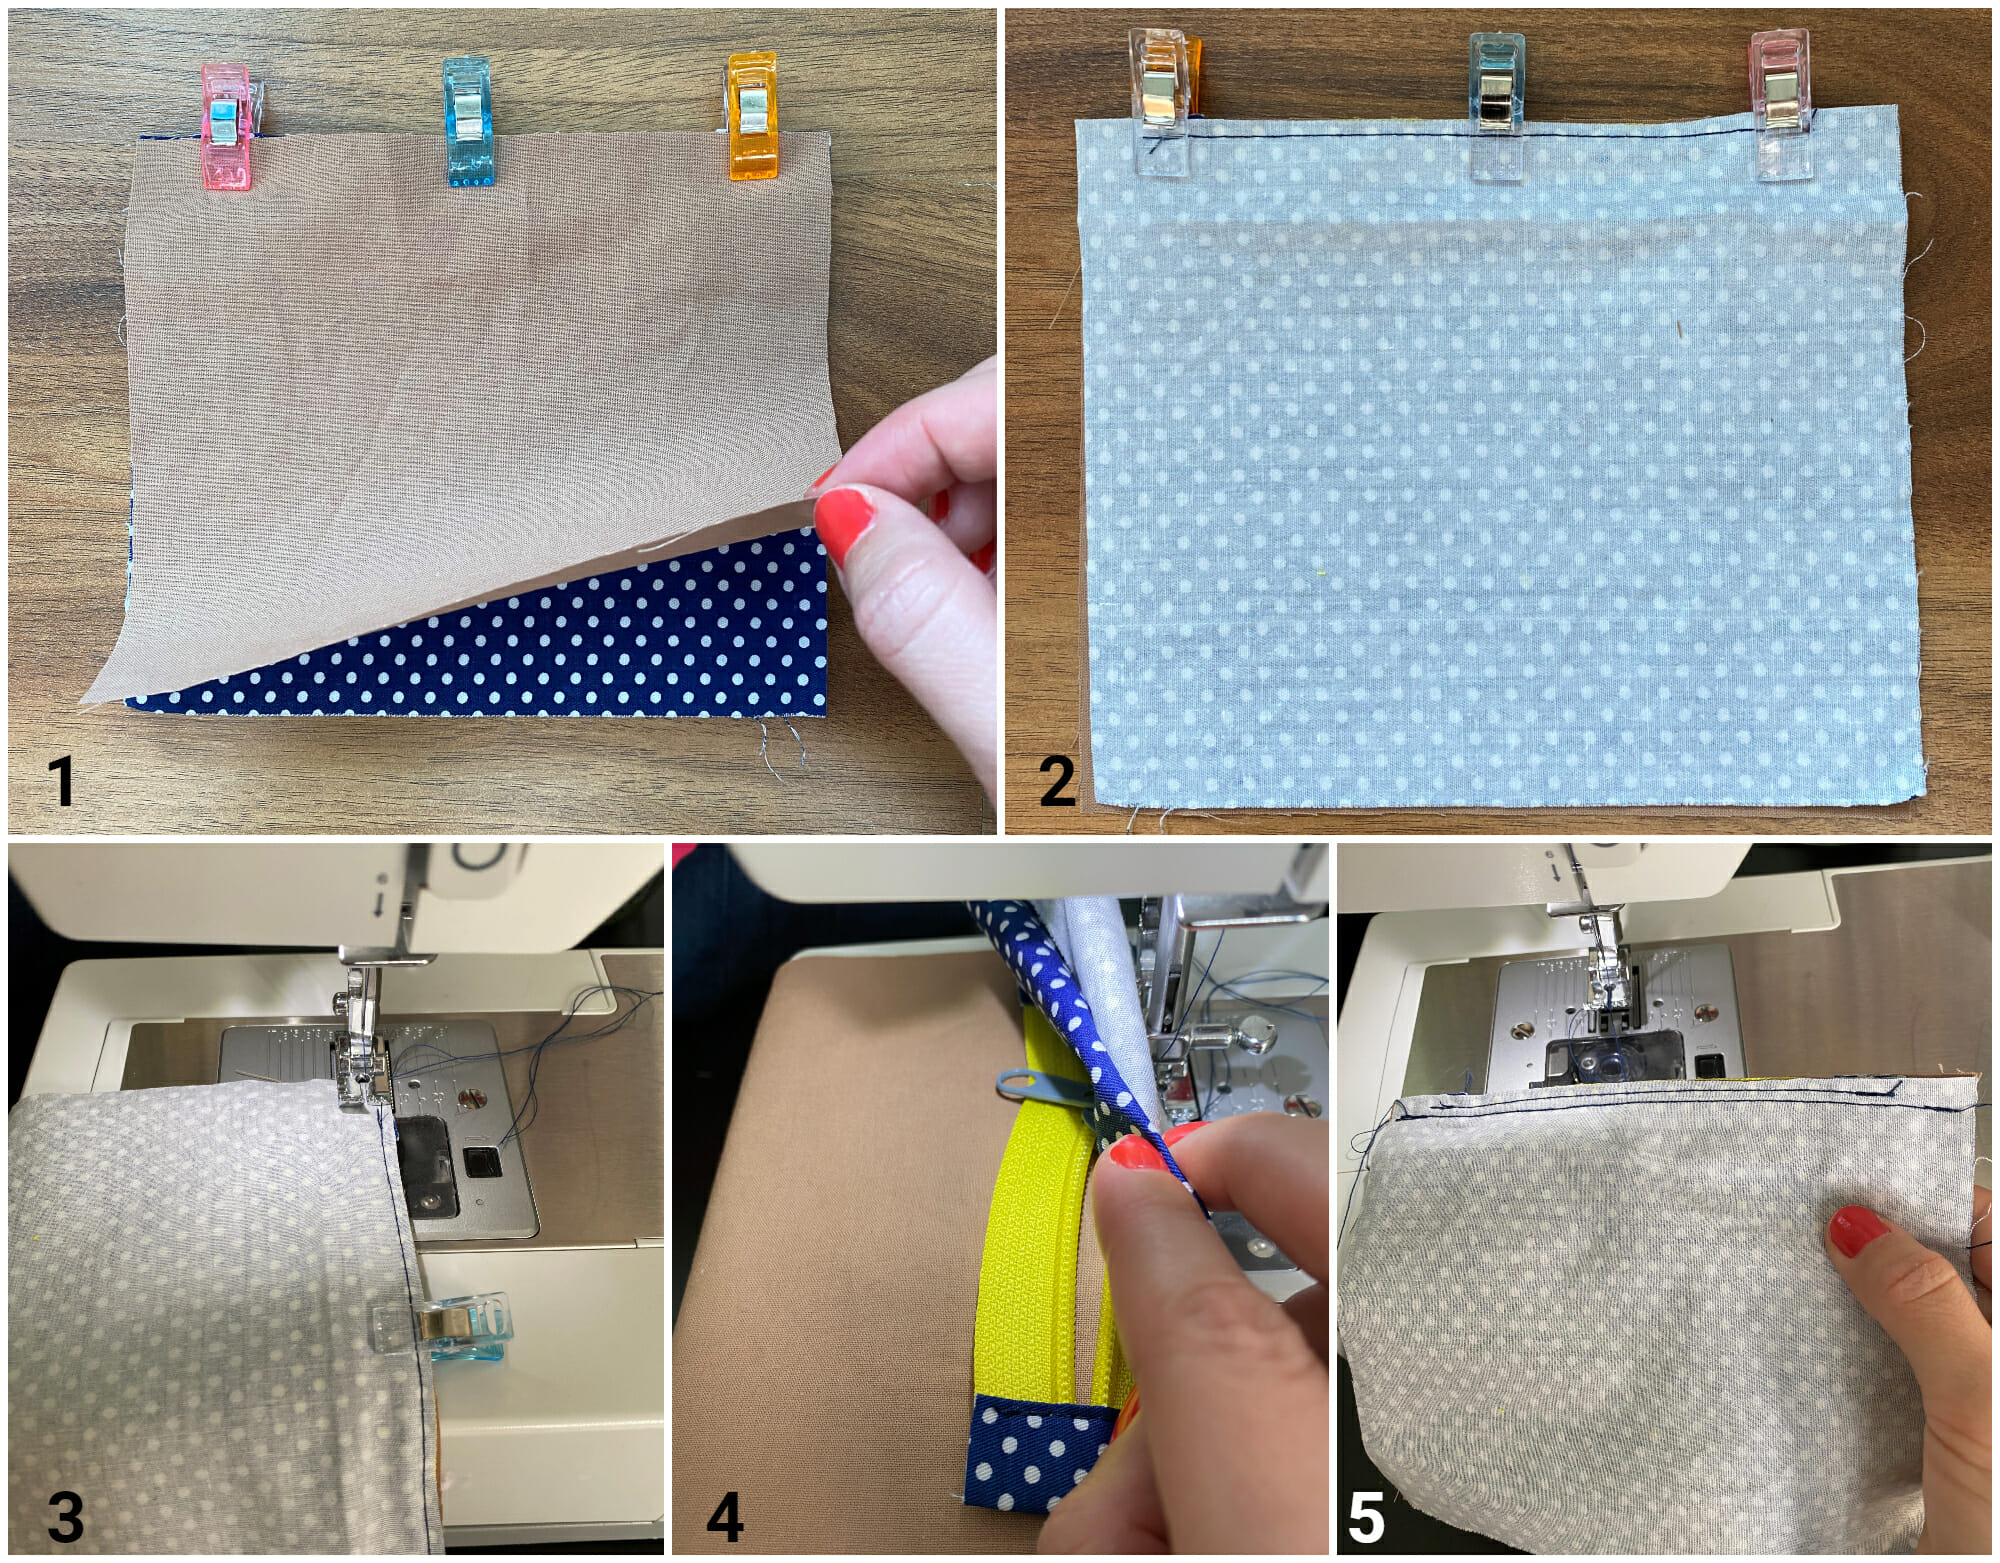
Topstitch for a clean finish:
Fold the lining out of the way and topstitch along the top edge of the main fabric, about 1/8 inch from the zipper. This helps prevent the fabric from getting caught in the zipper when you open and close it. Don’t topstitch the lining.
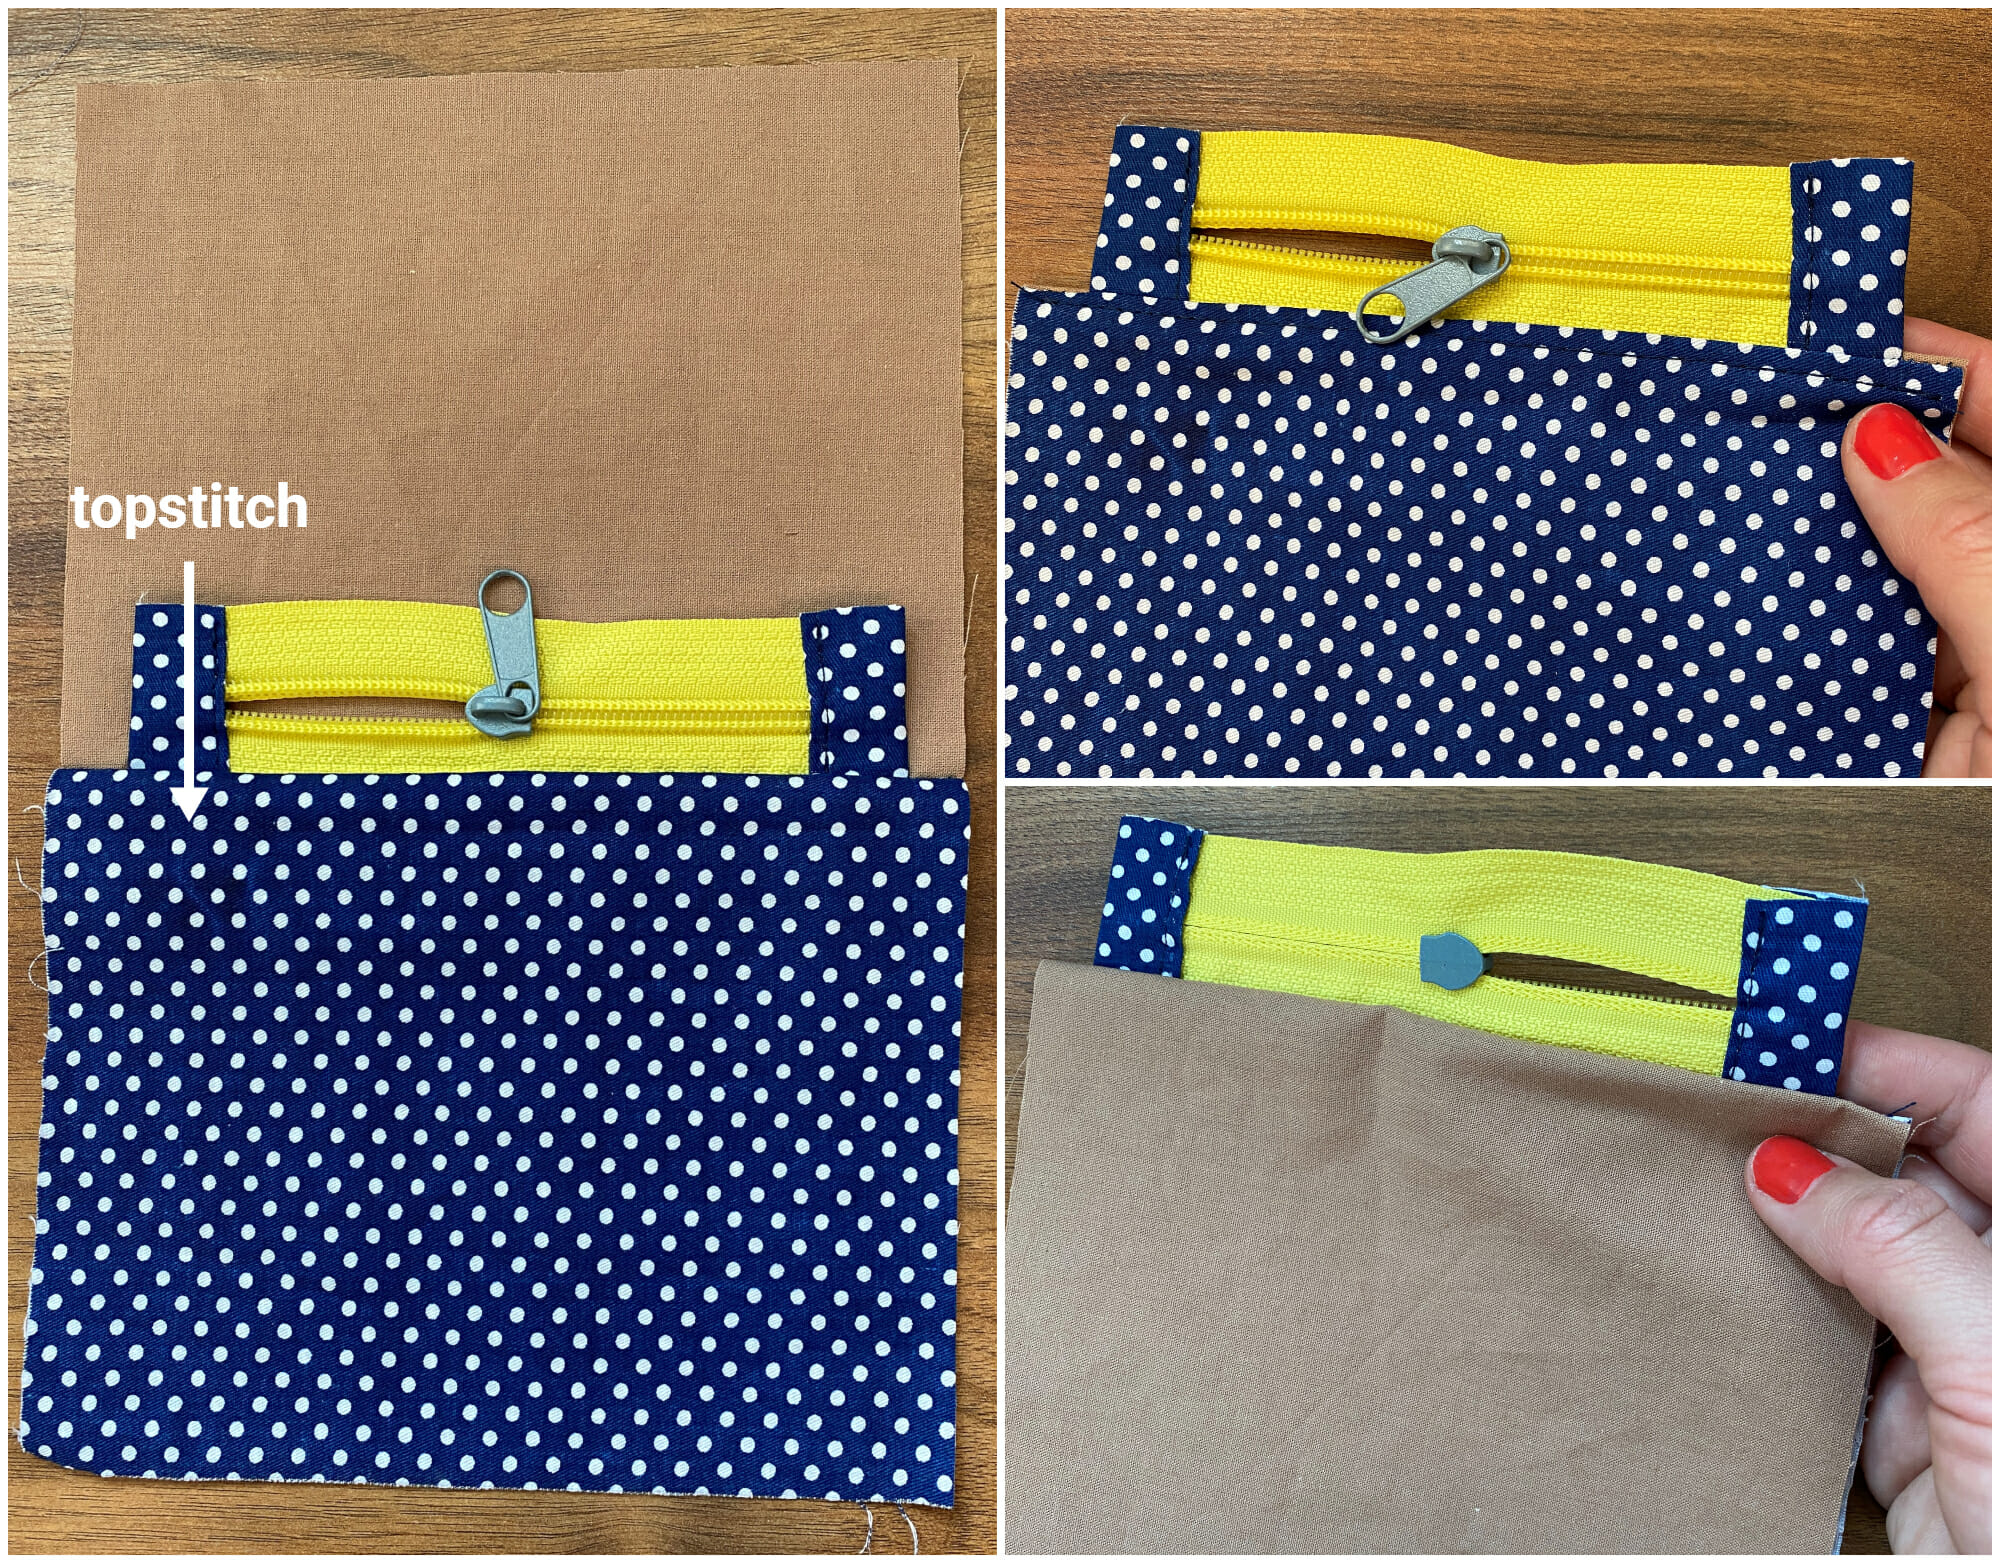
Step 4 – attach the zipper to the second set of fabric panels (1 outer piece and 1 lining piece)
Repeat the same process for the other side:
- Place the remaining main fabric piece and line it up with the other side of the zipper, right sides together.
- Sew the zipper to the main fabric, then add the lining on the back side of the zipper, using the same seam allowances.
- Finally, topstitch the main fabric piece to keep everything in place.
By now, you should have your zipper sandwiched neatly between the main fabric and the lining on both sides. The outer fabric pieces are topstitched, while the lining pieces are not. Your pouch is taking shape!
Step 5 – sew around the zipper pouch
Now we’re ready to sew the pouch together!
Unzip the zipper partway:
Make sure the zipper is at least halfway open. This step is important because you’ll need it open to turn the pouch right side out once it’s sewn.
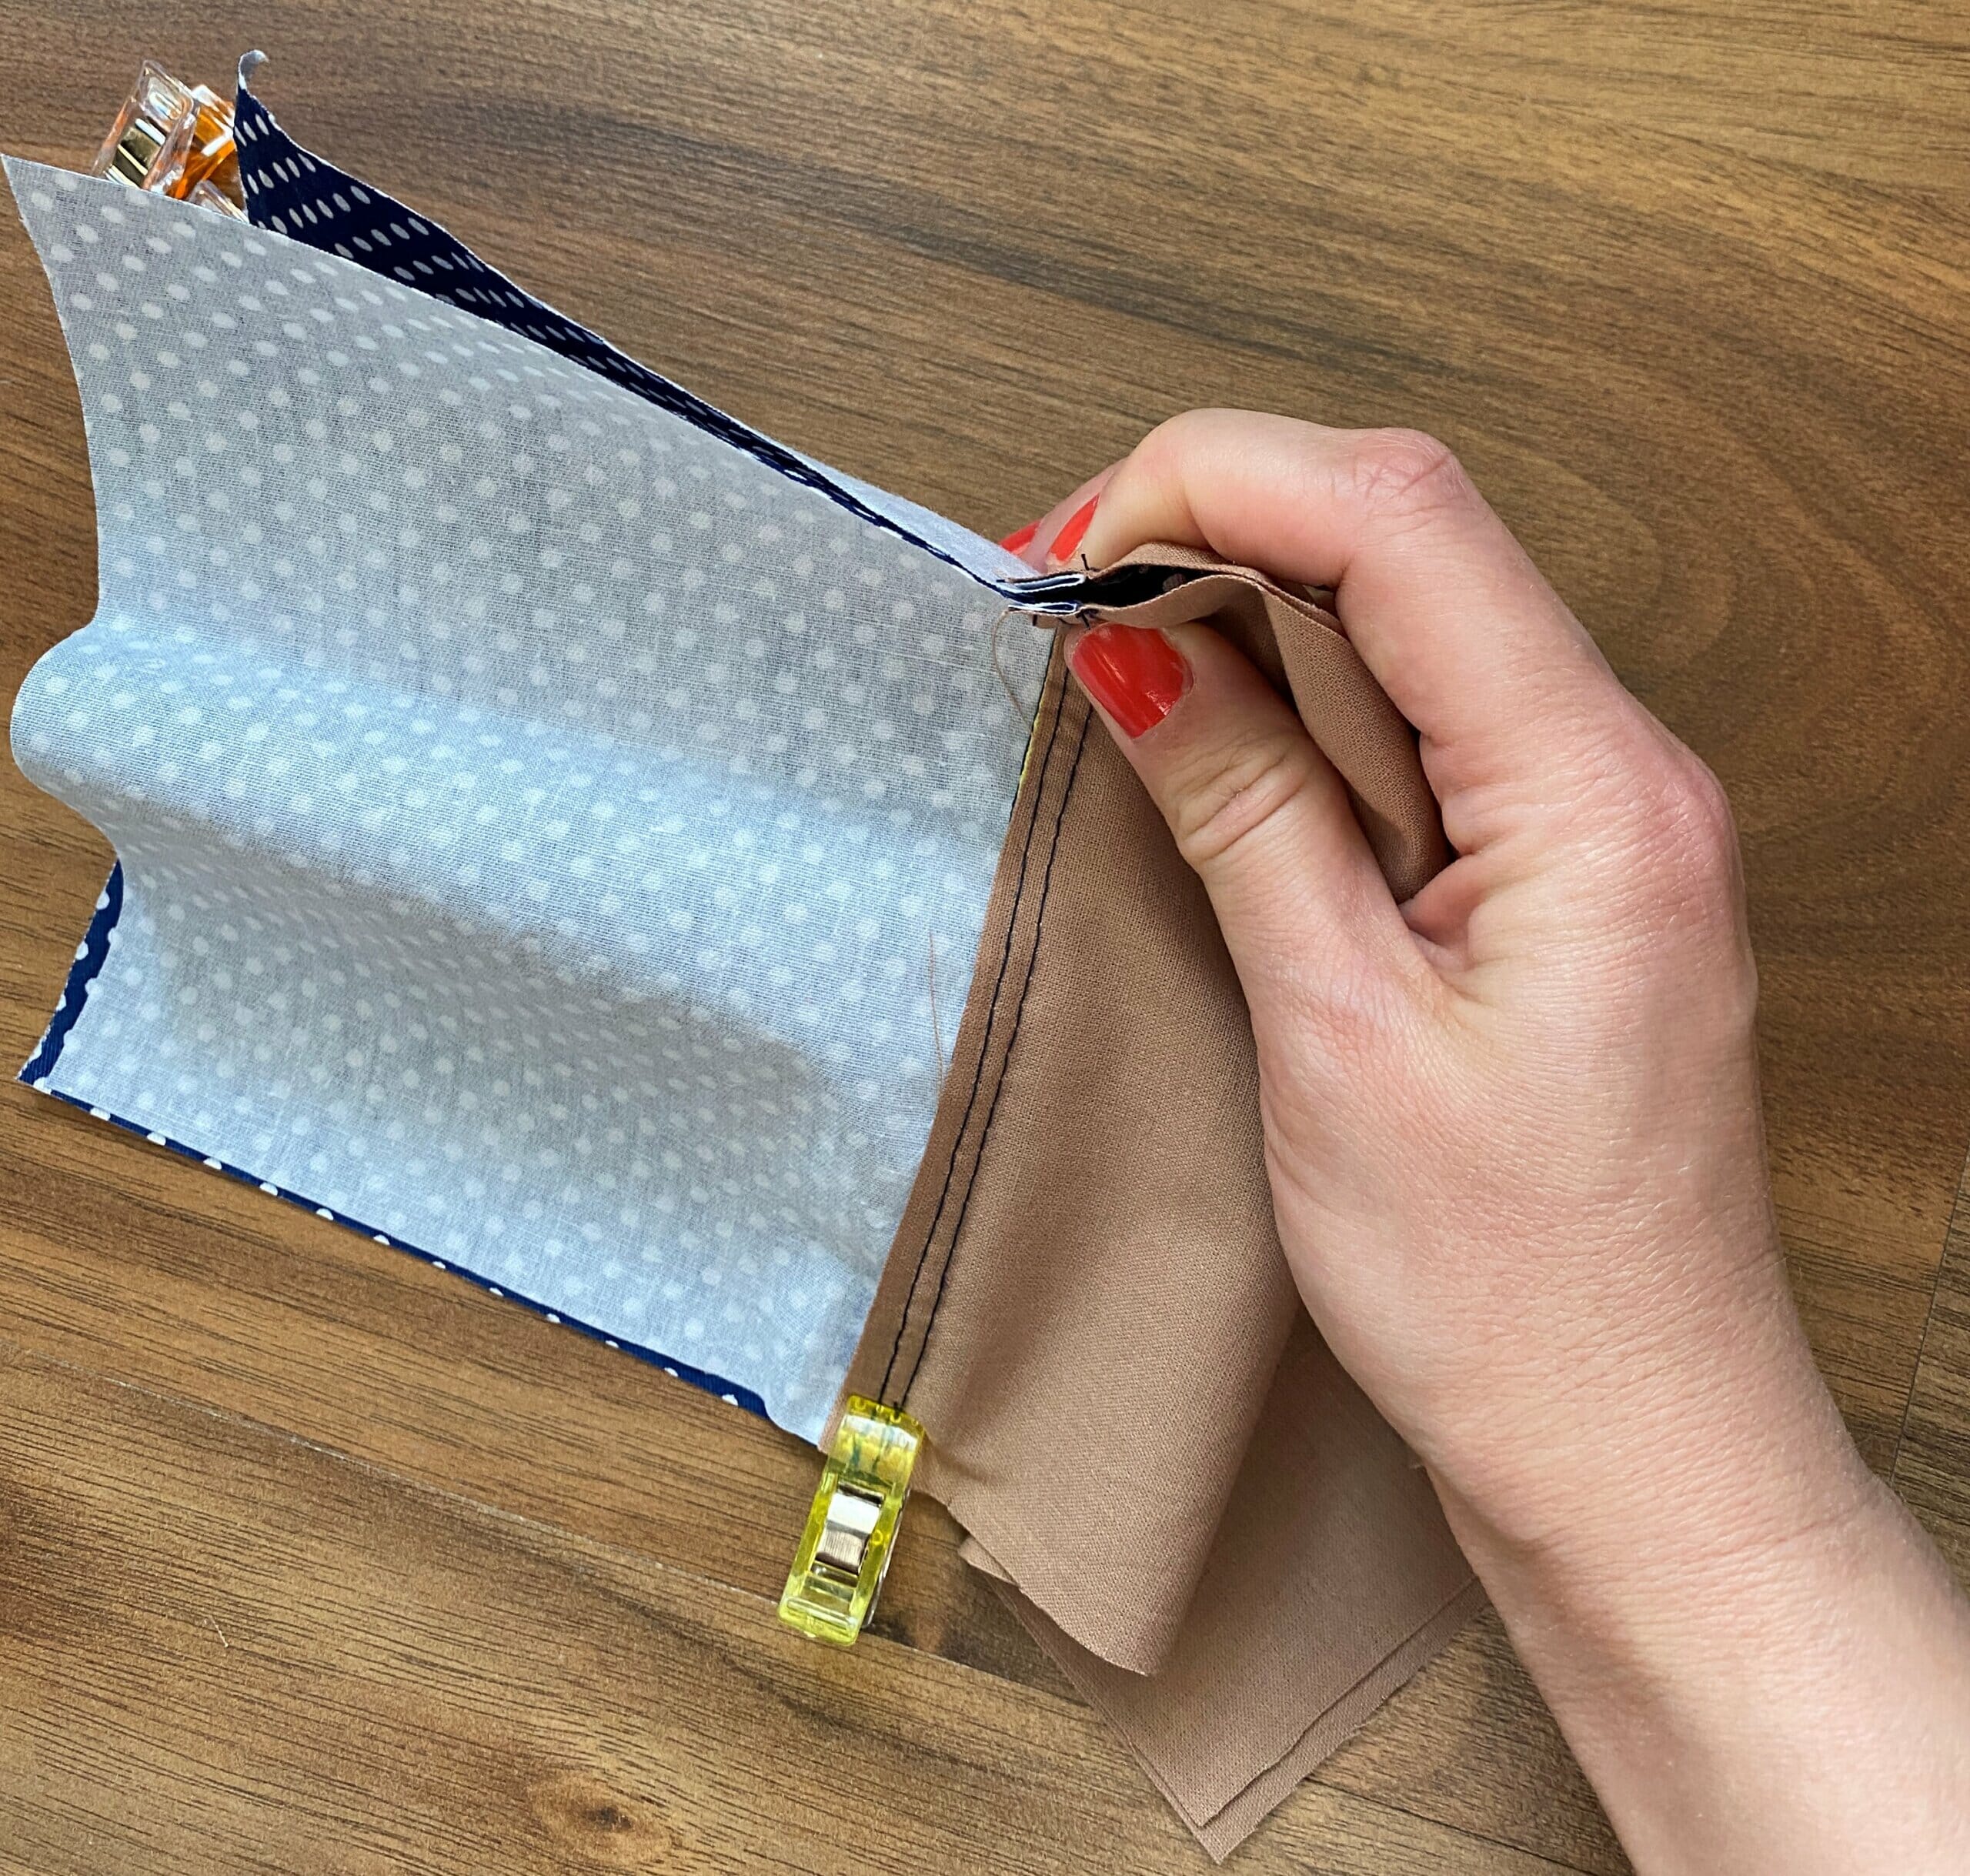
Pin everything in place:
- Fold the pouch so the two outer fabric pieces (front and back) are right sides together.
- Do the same for the lining pieces, placing them right sides together.
- Align all edges carefully, especially at the zipper seam where the outer fabric meets the lining.
Tip: Make sure the zipper tabs are pointing toward the lining to keep everything neat.
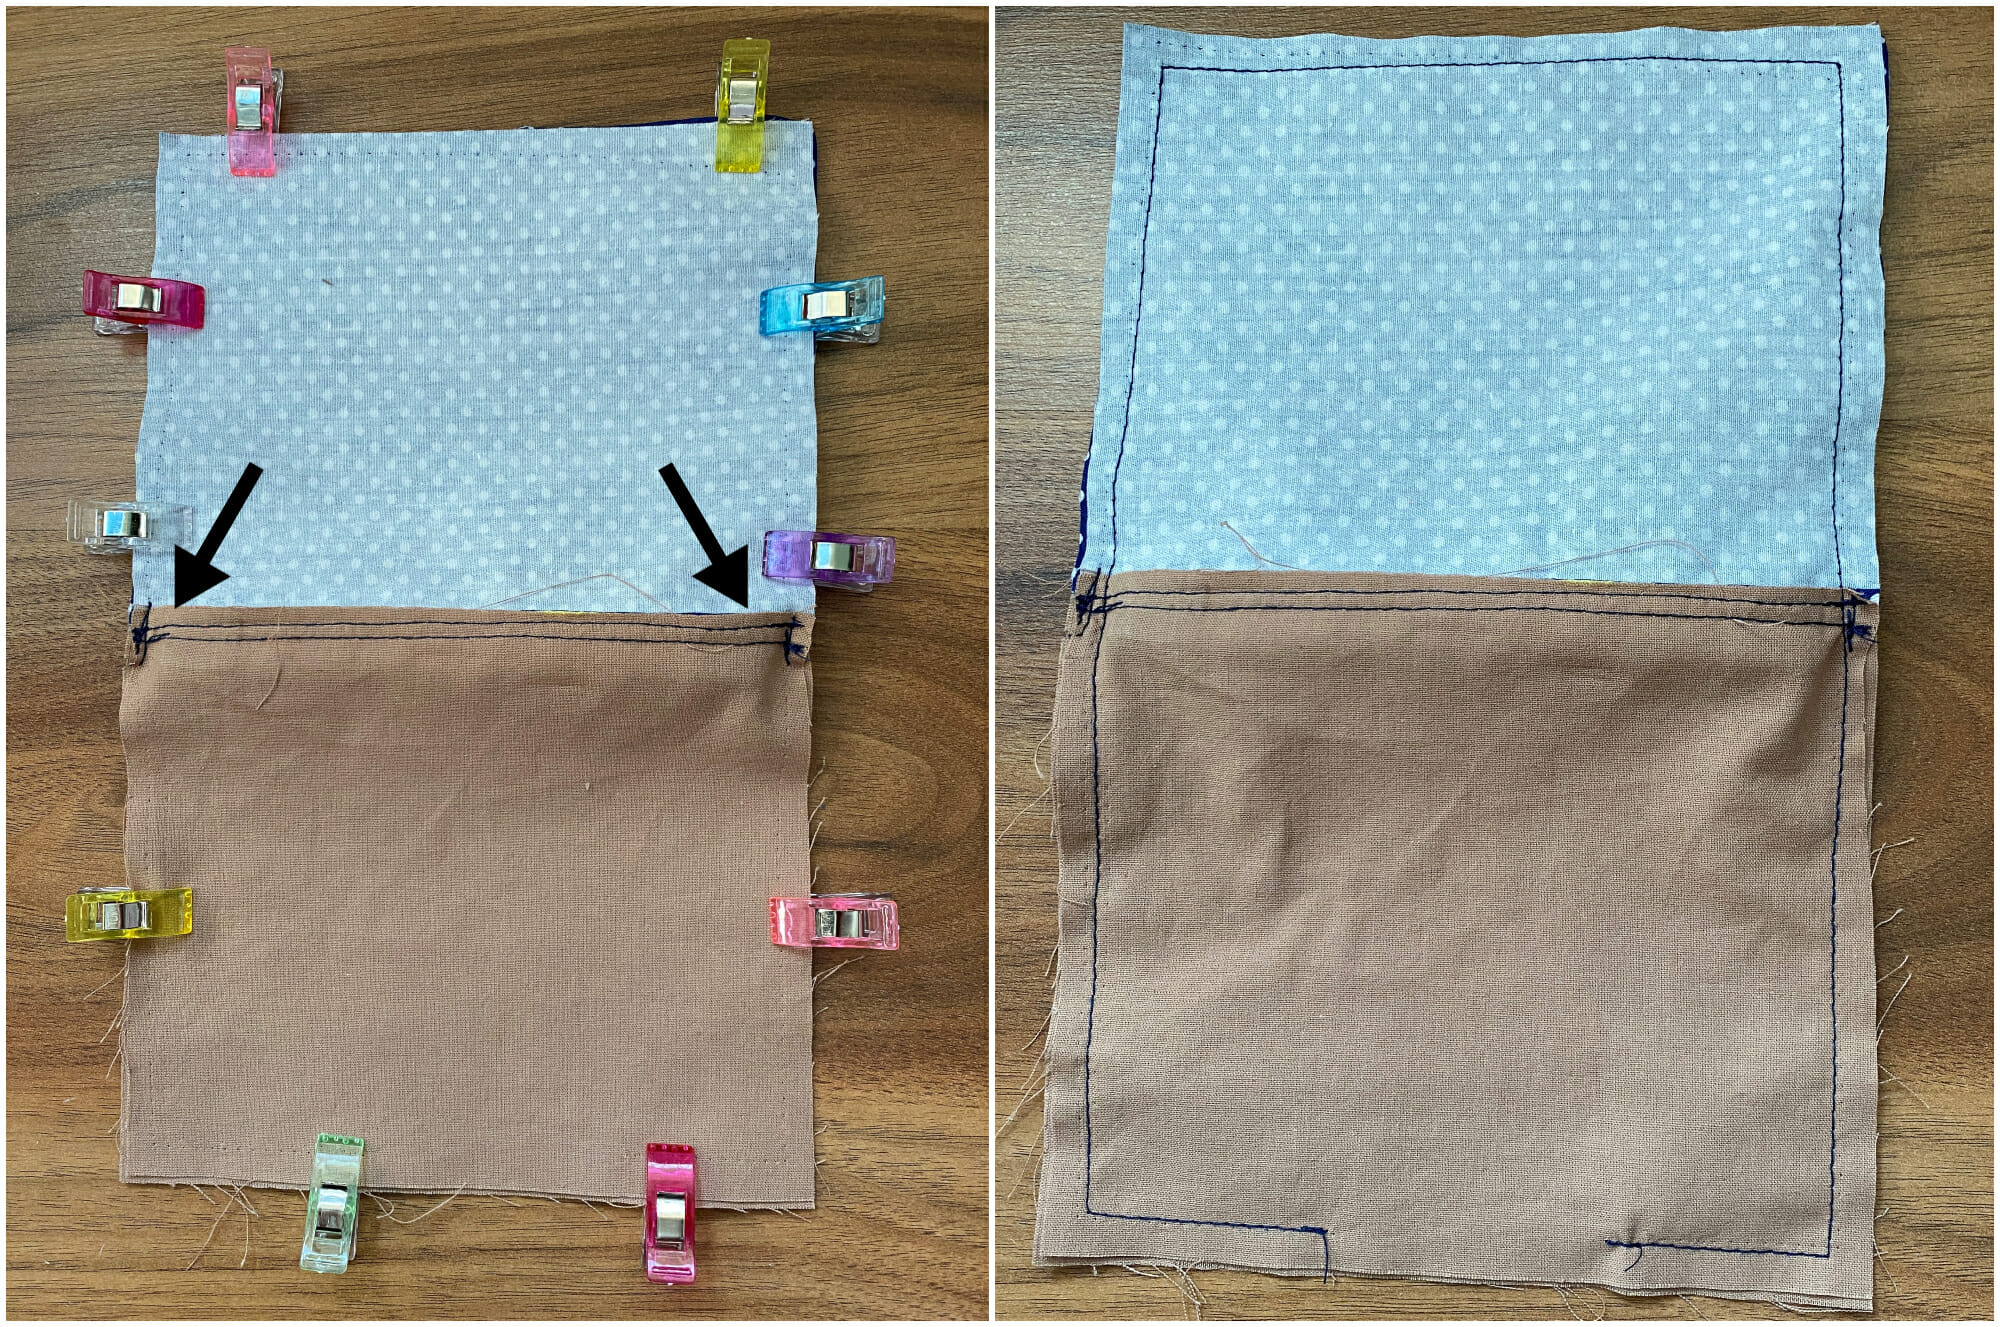
Secure the zipper seam:
Start by stitching across the zipper seam to lock everything in place, using a small 1/4-inch seam allowance. This will keep your fabric from shifting as you sew around the pouch.
Sew around the edges:
- With a 3/8-inch seam allowance, sew around the entire rectangle, leaving a 2-3 inch gap along the bottom of the lining. This opening will let you turn the pouch right side out.
- You’ll feel the zipper tabs through the fabric as you sew. Don’t sew over them, but get as close as you can to keep the corners looking crisp.
Turn the pouch right side out:
- Carefully turn the pouch right side out through the opening in the lining.
- Use your fingers to push out the corners for a neat finish.
- Stitch the opening in the lining closed, then tuck the lining inside the pouch.
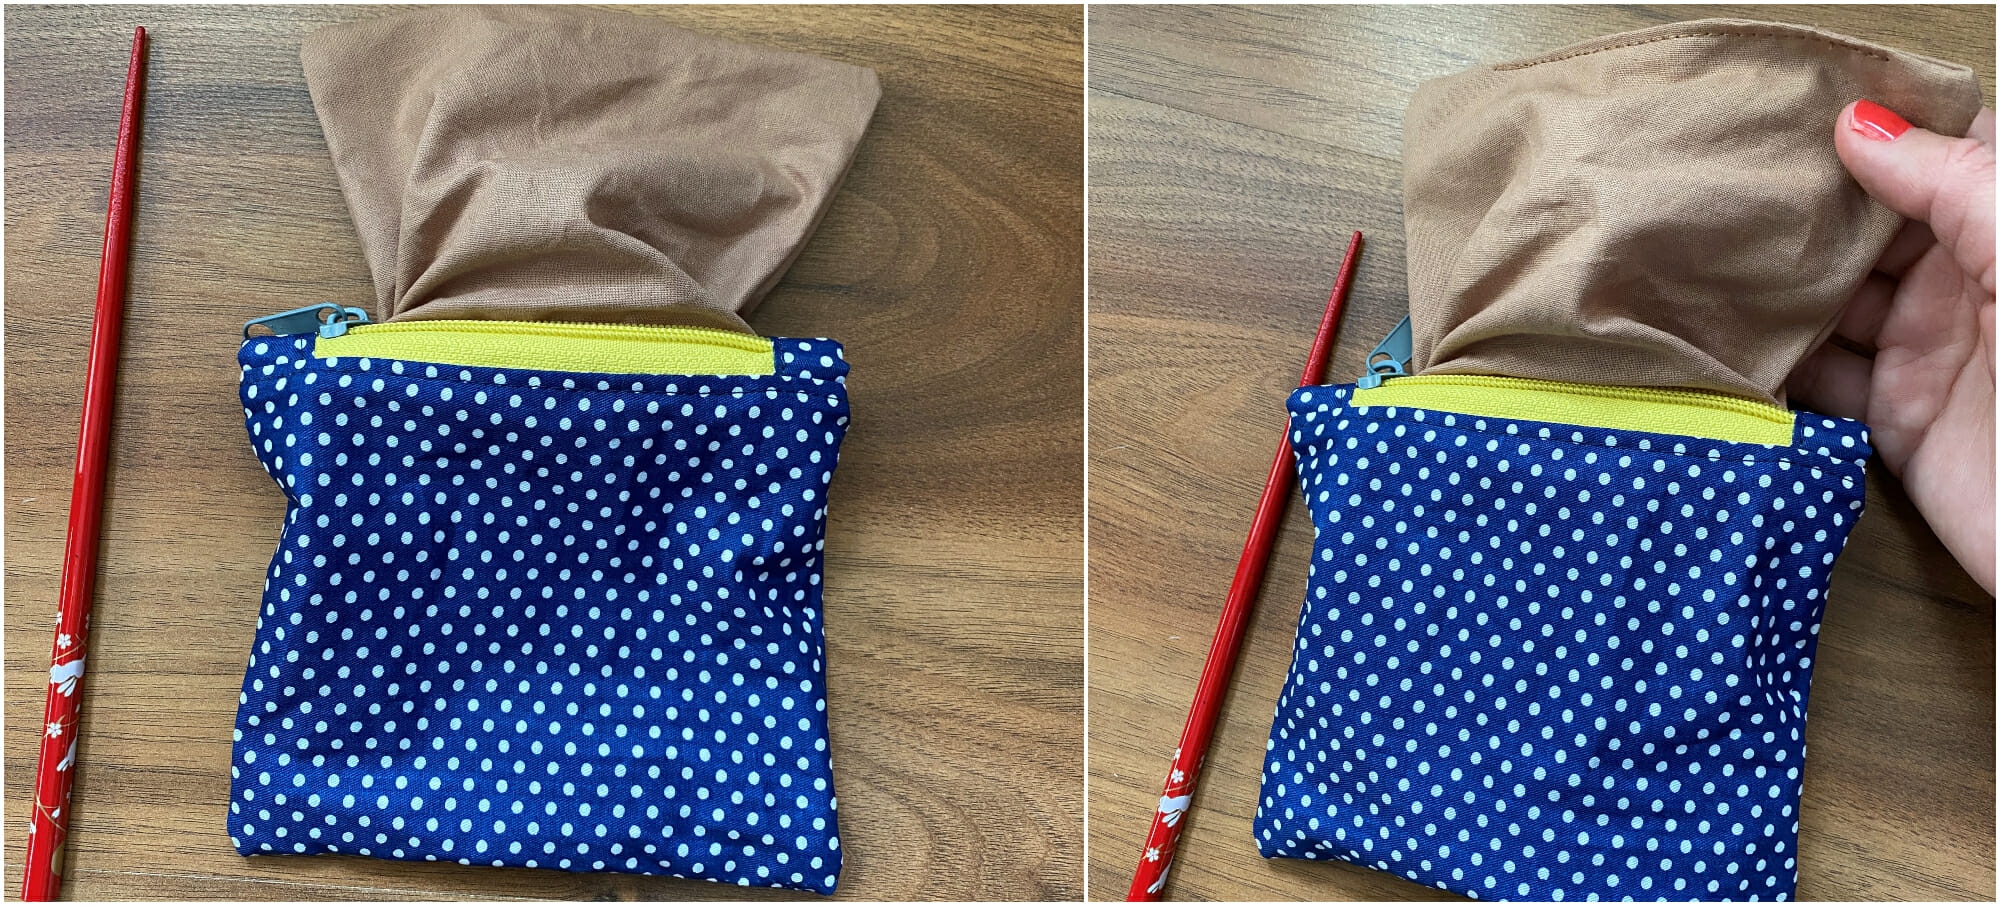
And that’s it! You’ve made a lined zipper pouch!
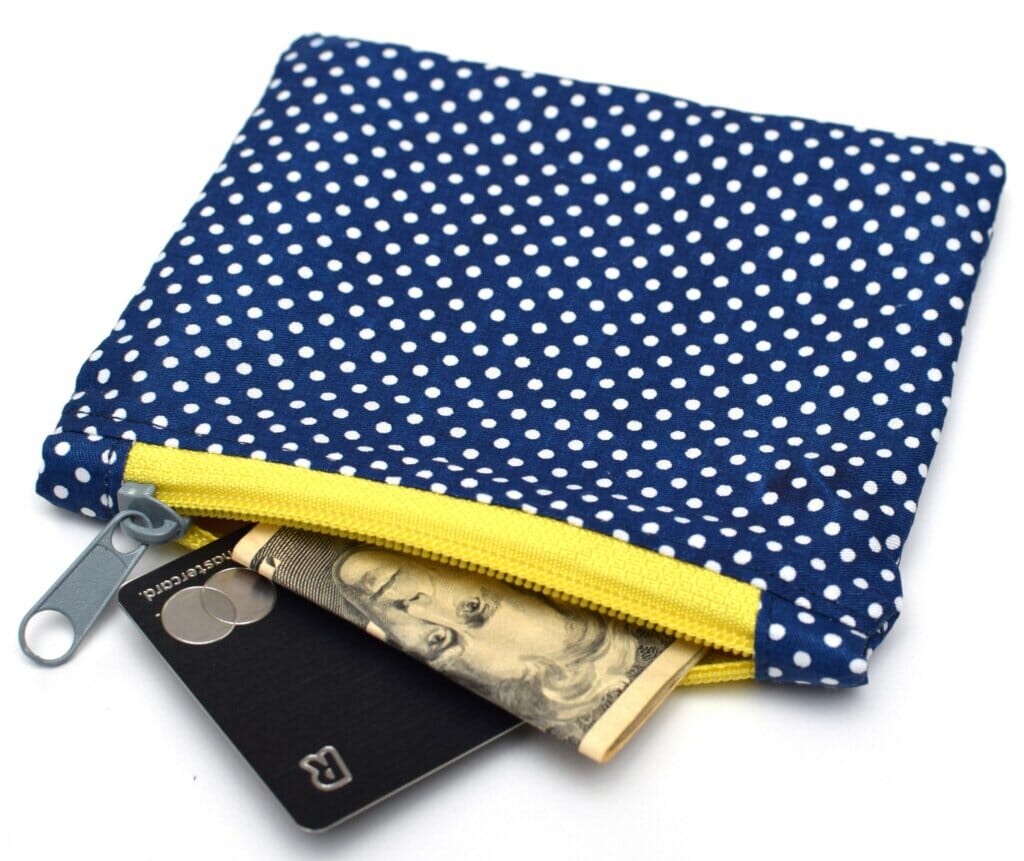
This project was quick, fun, and now you have a practical, handmade pouch to use or gift.
If you tried this simple zipper pouch tutorial, I’d love to hear how it turned out for you. Happy sewing!
Share your finished version on my Facebook page or tag me on Instagram @icansewthis.

Question. Why don’t you top stitch both the outside and lining when doing so on each side of the zipper? Seems to me you should stitch through both to keep both sides of the fabric from getting caught in the zipper.
Hey Duraye,
To understand why, take a look at the last photo before “Step 5 – sew around the zipper pouch”, and the first photo right after. If you topstitched both the main fabric and the lining, you wouldn’t be able to line them together properly.
thank you. I thought I was doing a decent job but your tips have upped my game! This is the best method of doing the tabs and the lining trick that I’ve seen. I’m a beginner and appreciate the step by step tutorial.Martin
great directions, thank you. one question, if the tabs are not sewn into the pouch seam, is there a hole or opening at the edges or corners? thank you very much.
Hi Barbara,
Indeed, you don’t sew the tabs into the side seam. You can see in this pic here https://static.icansewthis.com/2021/04/basic-zipper-pouch-4-1024×870.jpg that there’s a small gap where the zipper tab folds. However, it’s so tiny that you’ll never need to worry about losing a coin or anything through that opening.
Wow, thank you for this free tutorial. My bags & zippered pouches are pretty good – but now every good now that I followed your instructions! The tabs for the zipper, and your tip for the 1/4” and 1/8” zipper seams to eliminate lining bulk have changed my way of making zippered pouches & bags. Thanks again. PS I just posted my IG story and tagged you.
Thank you so much Violet- so easy to do and such a great finish! xx
Thank you for the kind words, Carly!
Hi!
Thank you so very much for this tutorial; however, I just started sewing about a week ago, so I’ma little lost. Would you be willing and able to create a YouTube video showing how you made this adorable, zippered pouch? The pictures are great, but a video would be super helpful if possible.
Hey Sunny,
Thank you for your lovely words and for taking the time to leave a comment! I really appreciate it. I have to be honest, making YouTube videos isn’t something I’m currently into. I’ve got a lot on my plate with everything else I’m working on. However, I don’t rule out the possibility of filming some video tutorials in the future, maybe around a year from now. In the meantime, my advice to you is to just dive into sewing! Making mistakes is completely normal and expected. There will come a day when you’ll stop and reflect on how far you’ve come. That’s exactly what happened to me. I wish you all the best!
I found your tutorial after ripping out the zipper twice in a pouch I was trying to make. Thanks to you, the third time was the charm. The key was your trick of sewing it in twice, once with 1/8″ seam and then again with 1/4″ seam. Perfection! Thank you so much!
An excellent tutorial with clear pictures and descriptions! I am starting to sew again and this is all helpful. The tabs are perfect to get a refined finish. Thank you!
I’m so glad to hear that! Thank you, Patty!
I’ve only been sewing for six months on a machine and this description was easy to follow and produced a great little gift for a friend of mine. Thank you!
Your comment makes me so happy, Sonia! Thank you! You’re on the right track, best wishes to you!
Great tutorial. One question…why doesn’t one top stitch the lining?
Thanks for this pattern, I love the tabs idea! I prefer this look than the sad “zipper fabric scrunched up in a corner” look I usually end up with 🙂 However, I don’t understand why you sew the outer and lining fabric to the zip separately in step 3? Is this just to make it easier to get good alignment when you do them one at a time? Or am I missing something about the final construction?
Thank you so much Jo, really kind words of you! I also ended up with weird looking zipper pouches many times before – I think it’s plain hard to make them look good if you have to use a shortened zipper.
To answer your question – no, you’re not missing anything. :)) It’s just that I personally thought that it’s easier and safer for a beginner to sew the layers separately. A little bit of prudence helps, sometimes. If you find that the opposite is even more true, you can go ahead with it. Thank you again for taking the time to write this comment. Best wishes to you!
I always have a hard time at the edges where the zippers are. Are you saying that regardless of if you are using tabs or not, you aren’t supposed to sew the ends?!? I have been doing that, and it’s so difficult
I like your method. I had been adding tabs, but not setting them away from the edge. Your method is better. Thank you.
Love how you use the tabs! This is a much more polished look than those I’ve seen (and made) without the tabs. I’ll be making some of these today for sure! Thank you for the great tutorial.