Learn how to sew knee patches to jeans with this simple and fast method. This technique works well even on kids’ jeans in hard-to-reach areas.
Kids love to crawl, or run and then drop to their knees on a slide. This is how they manage to get holes even in brand-new pairs of trousers.
The problem with kids’ pants is that the legs are way too skinny to maneuver patches under a sewing machine. However, there’s a clever workaround to that.
Open the side seam that is not topstitched!
I’m not sure at what age kids stop getting holes in their trousers. Until then, I made this easy tutorial for all of you who need an easy DIY idea. Here’s how to quickly fix a hole in jeans with some basic supplies and a regular sewing machine.
Jeans can last a long time, but they sometimes need a little help to stay in good shape. Fixing ripped knees is not difficult at all!
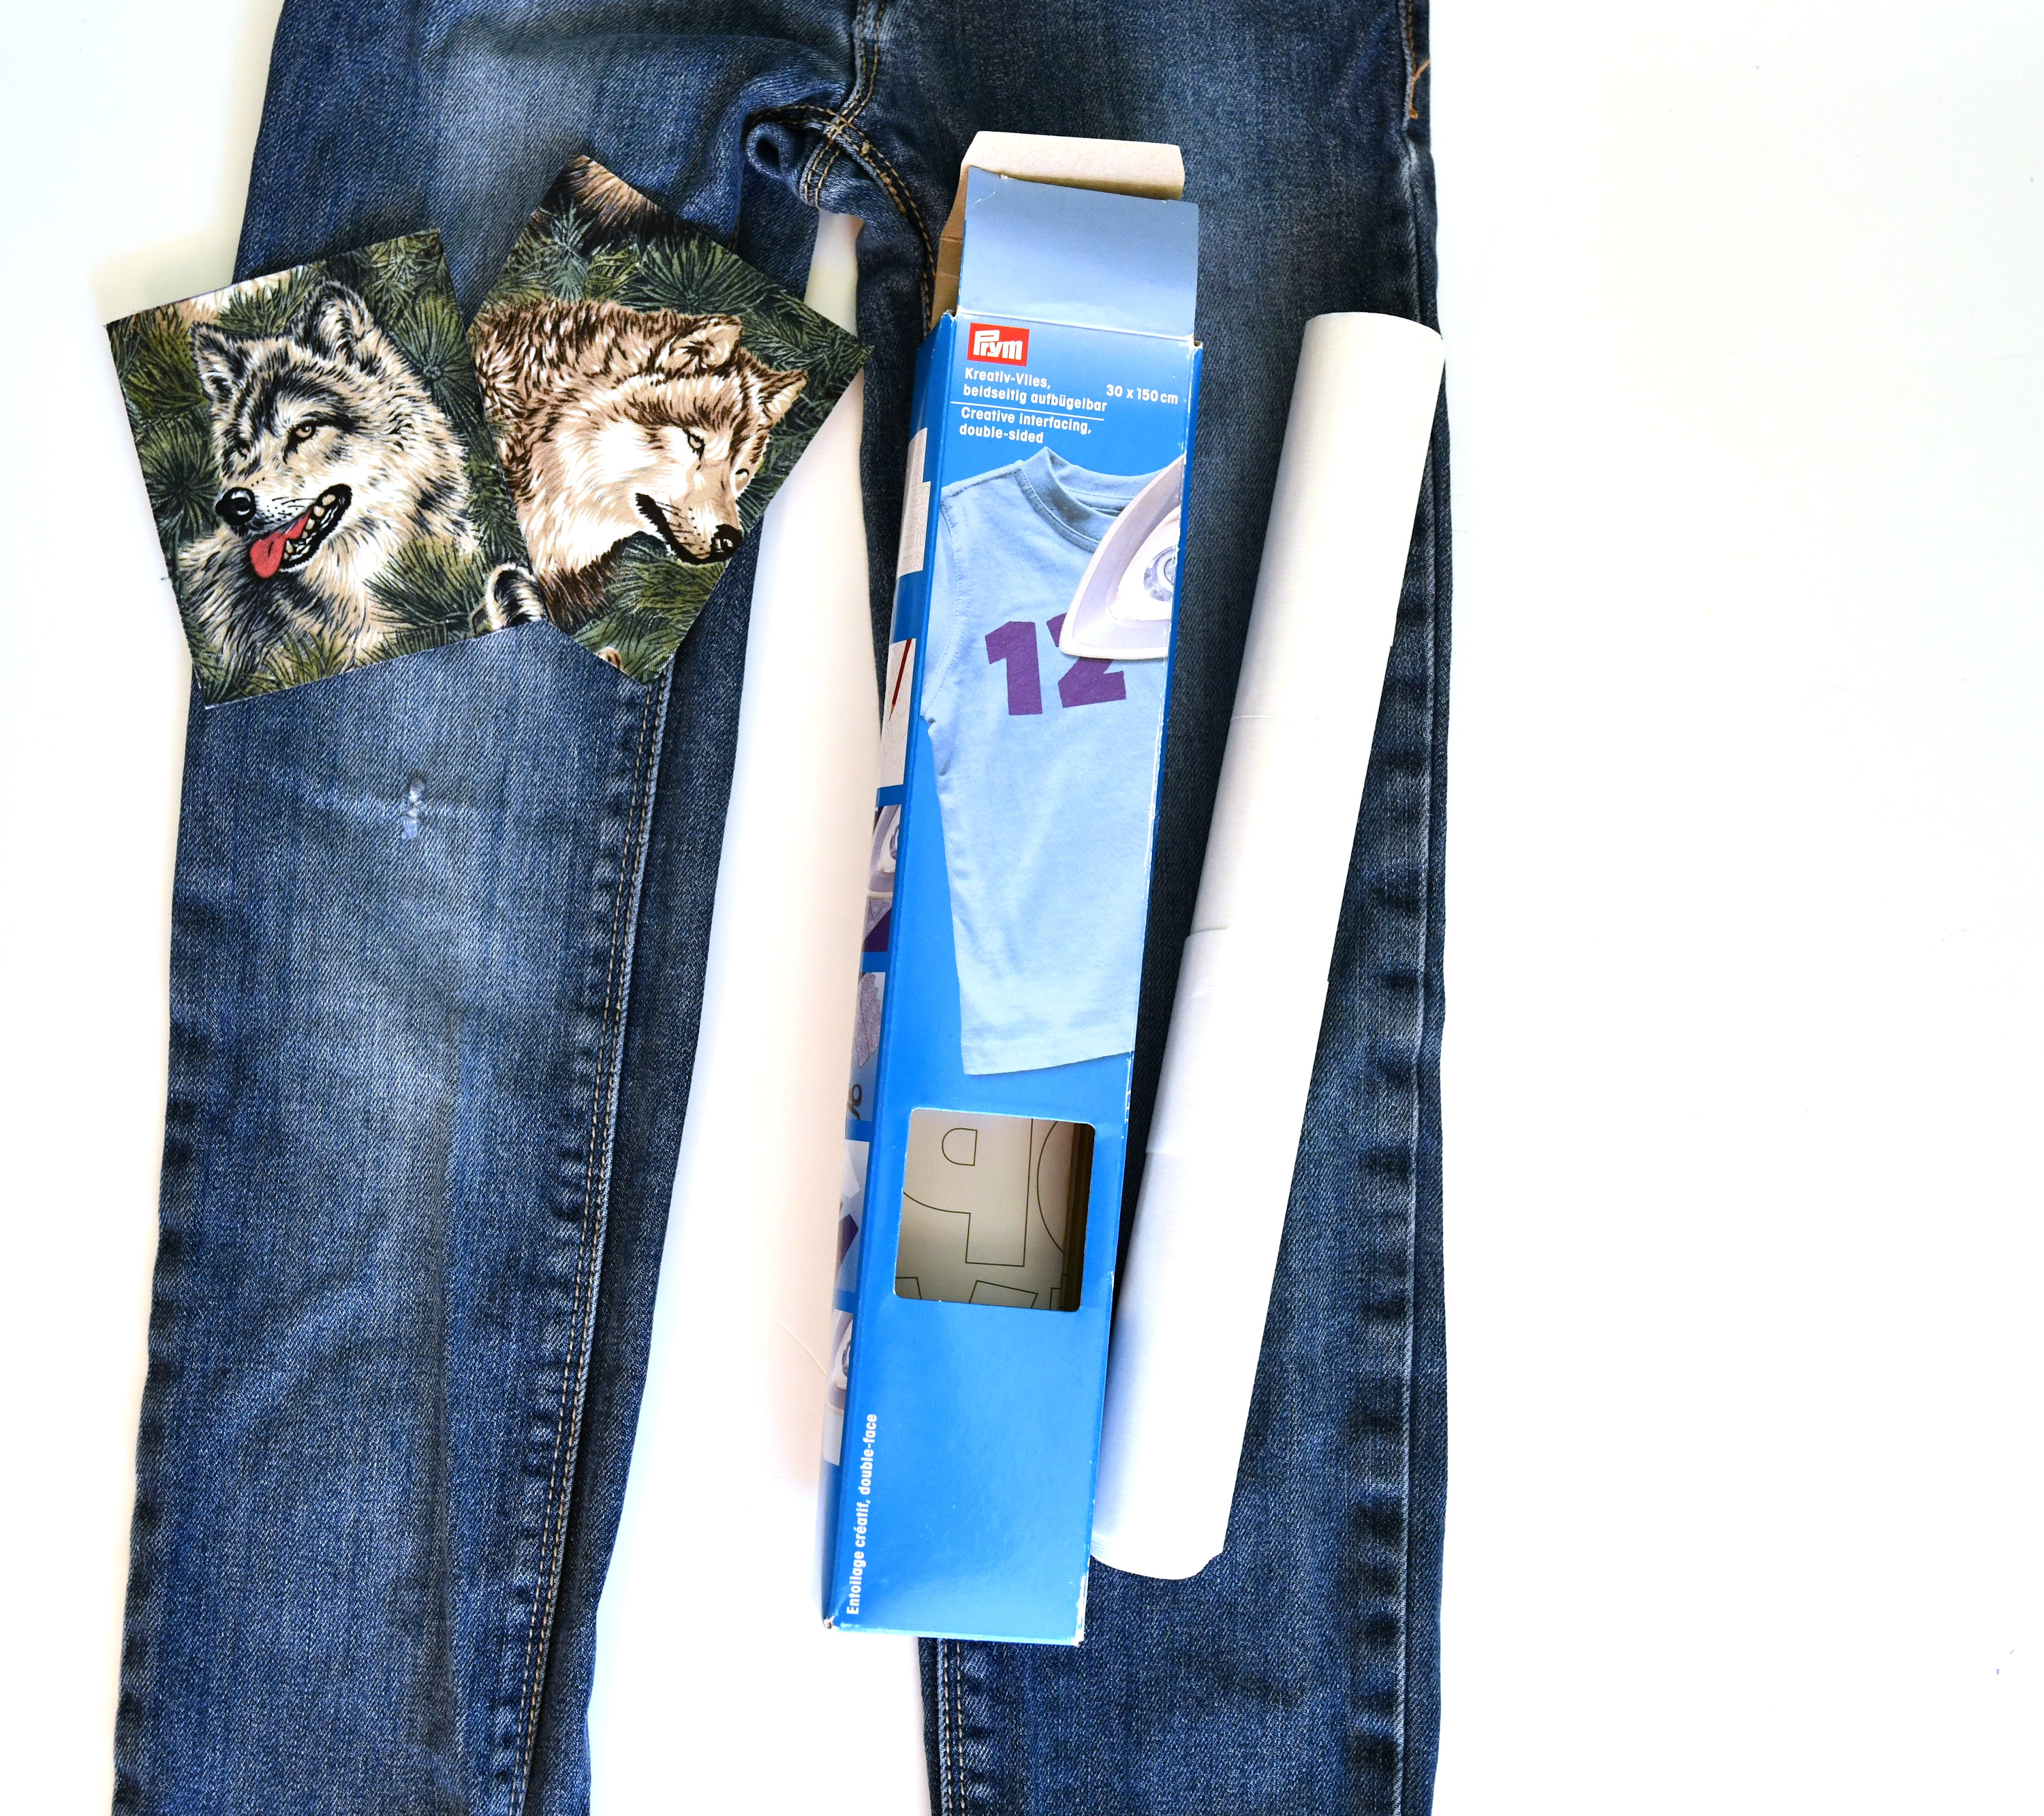
All you need is some fabric scraps, fusible interfacing, and double-sided interfacing. That’s right, you read that right – I used two types of interfacing.
The first type, the fusible one, is for giving some structure to my quilting cotton fabric scraps. The second one, the double-sided interfacing, is like a thin sheet of glue that will melt between the patch and the jeans when you iron it. It has adhesive on both sides with a paper backing you have to peel before you fuse the patch to the jeans.
Related: DIY knot bow hair ties tutorial / How to make an envelope pillow cover
The interfaced iron-on patch can be stitched with a standard sewing machine needle.
If your double-sided interfacing is already stiff, you won’t need the fusible interfacing. Also, you won’t need the fusible interfacing if you’re using a sturdier fabric like canvas, corduroy, or denim for your patches.
Note: Every child is different, and all parents know best the needs of their children. While your safest bet is to go with sturdier fabrics for knee patches so you create the toughest play pants, sometimes you can also use quilting cotton. It comes in a lot of amazing prints, so you get a multitude of options.
Adding these cute patches to jeans is a little experiment I’m willing to do with my kids. I’m curious to see whether they will try and land less on their knees to maybe protect their new patches. Time will tell! In the worst-case scenario, I’ll have to repair the jeans again, this time with a denim patch.
Sewing supplies
- Fabric scraps – cotton, linen, denim, canvas, corduroy
- Sewing machine
- Seam ripper
- Fabric scissors
- Thread
- Iron
- Fusible interfacing (one-sided)
- Double-sided interfacing
How to sew on knee patches to jeans – a quick and effective method
Step 1
Prepare your trousers by ironing them in the area that needs patching.
Step 2
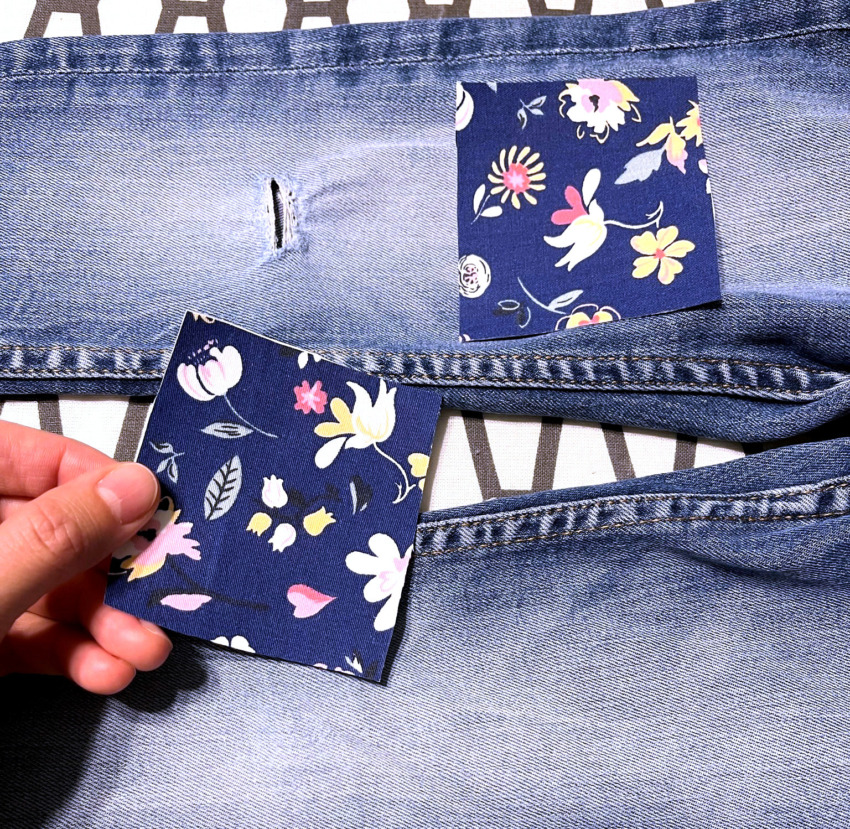
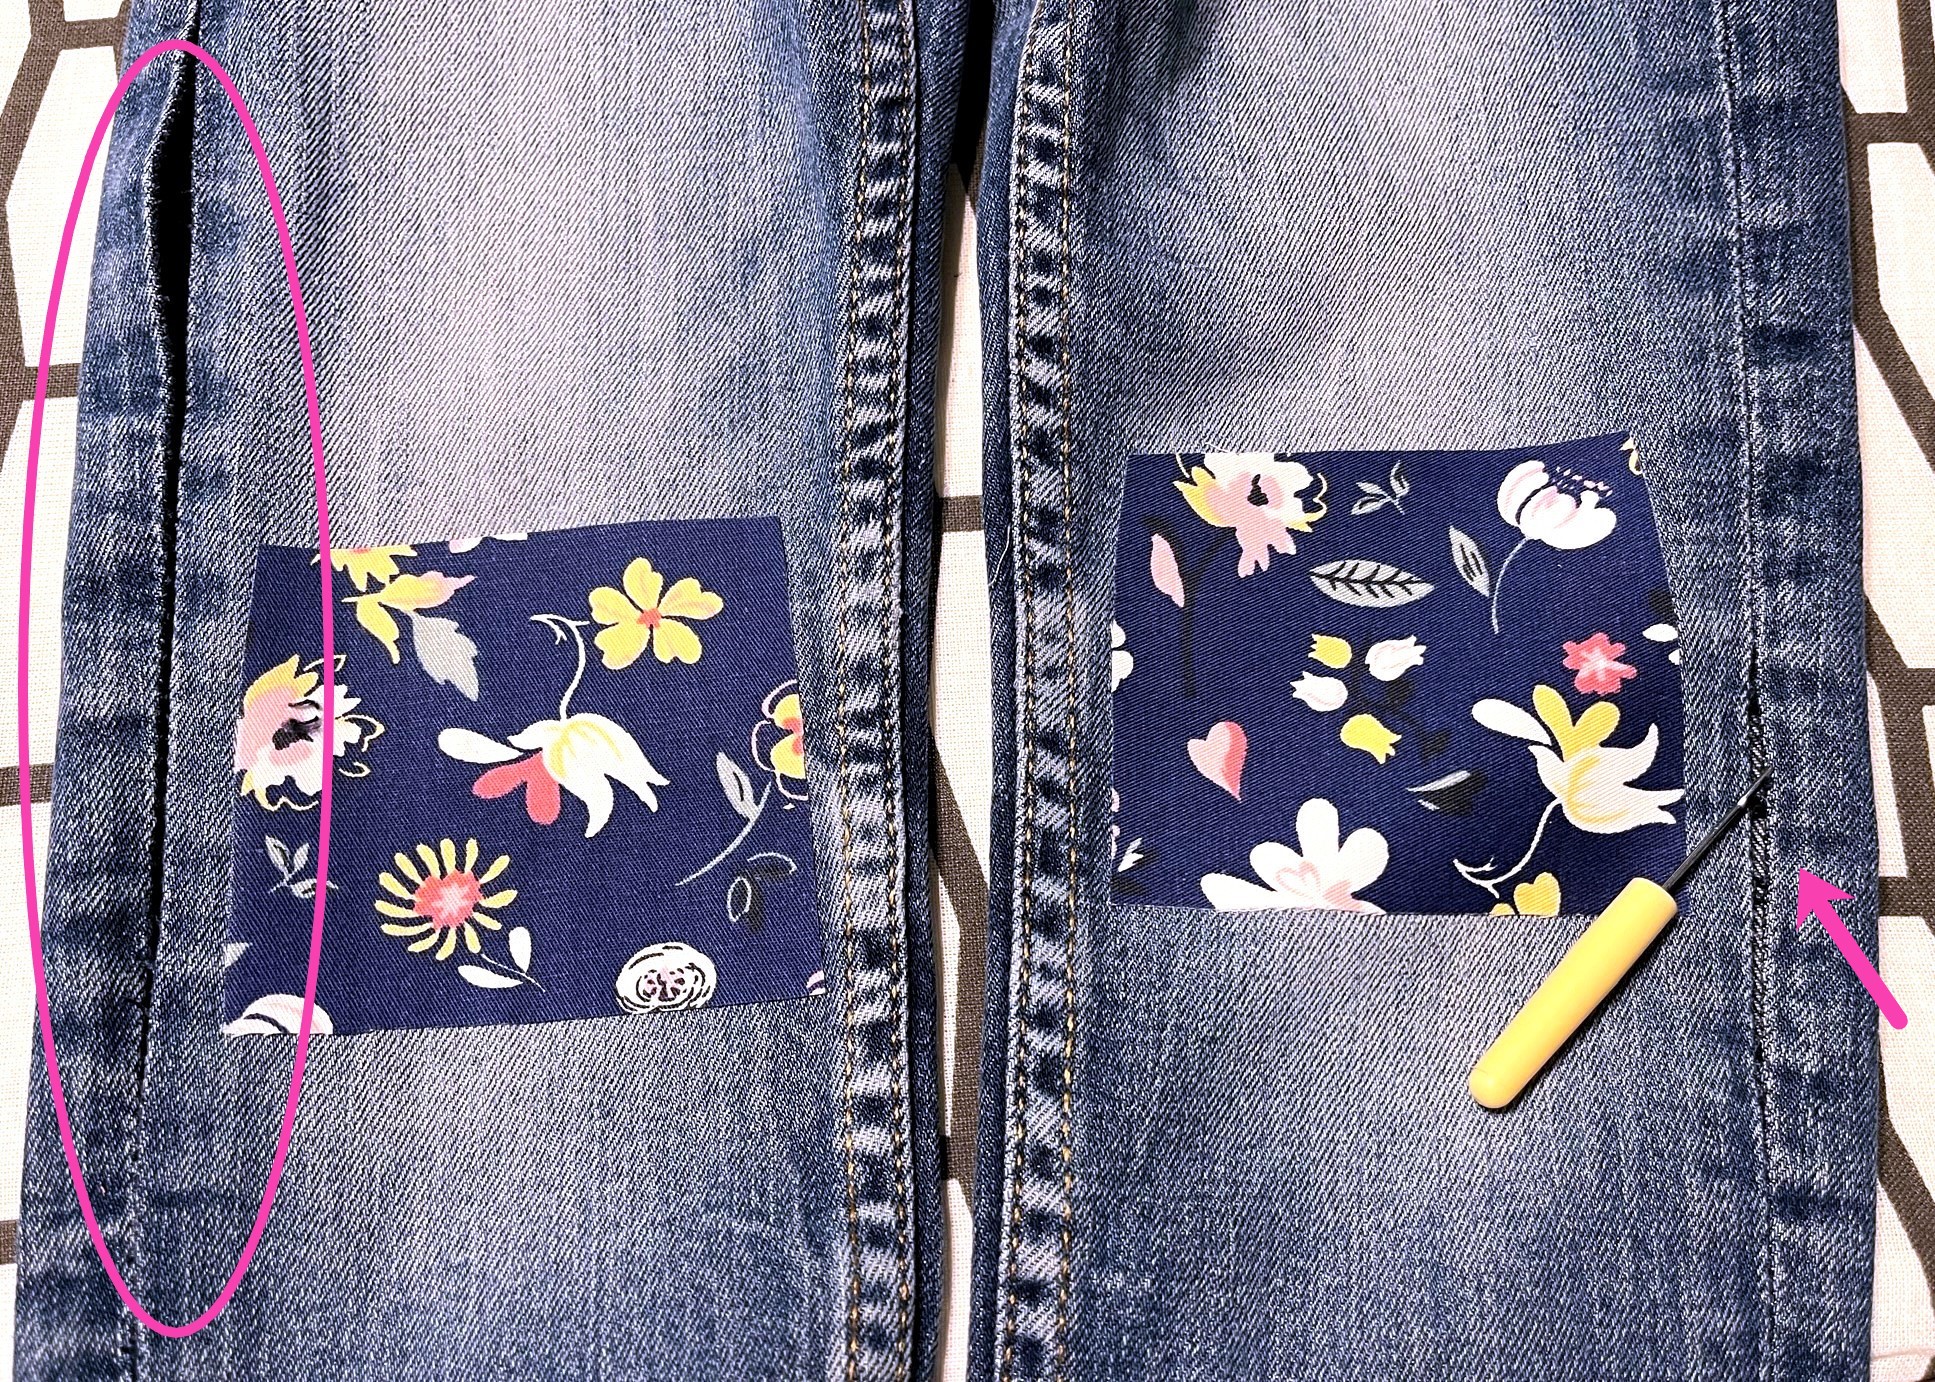
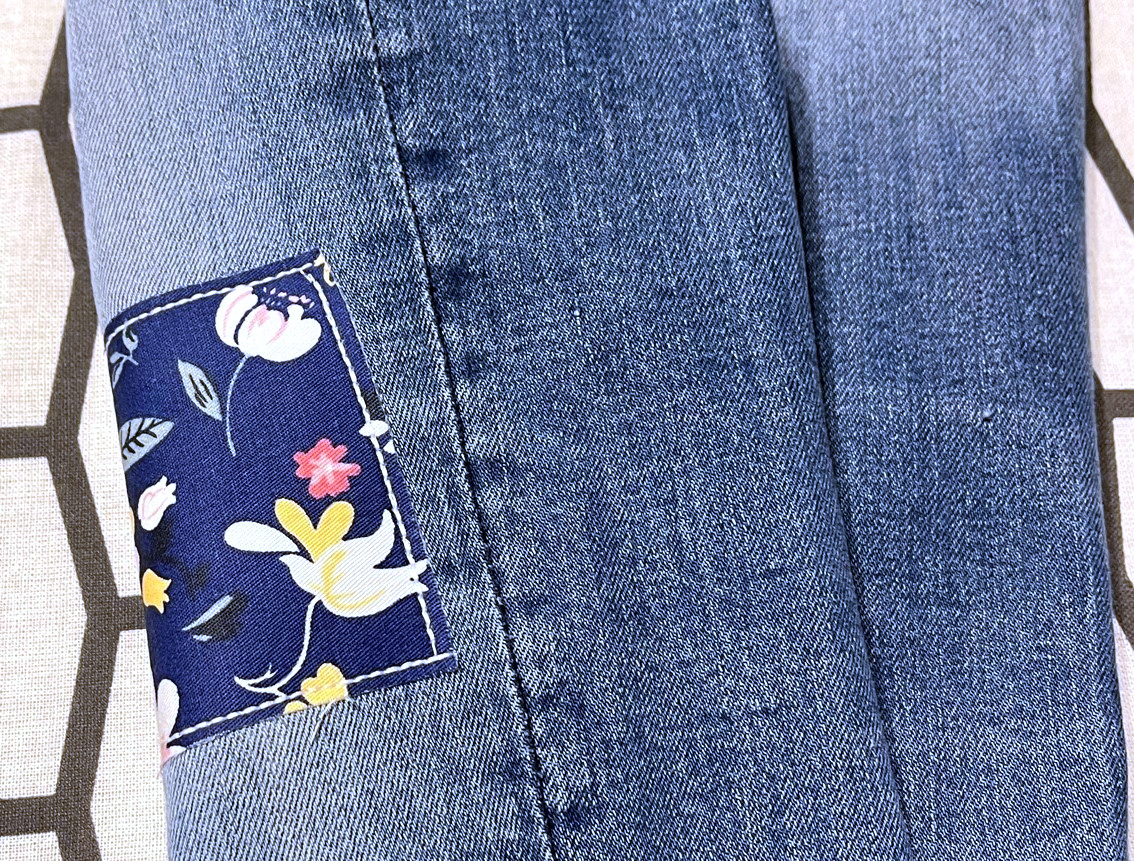
Cut out two matching fabric patches. They can be rectangular, oval, or any shape you like. Place them over the knees to check their size and position.

After that, cut two similar shapes from fusible interfacing. Then, place your interfacing on your fabric patch like this: the wrong side of the fabric to the right side of the interfacing. The right side of the interfacing is the sticky one, with raised bumps that will melt. The wrong side is smoother and does not have any adhesive.
Place a pressing cloth on top of both pieces, then iron well, so the interfacing will fuse to the patch. This is to give body to your iron-on patch. If you use a canvas or denim patch, you don’t need this step.
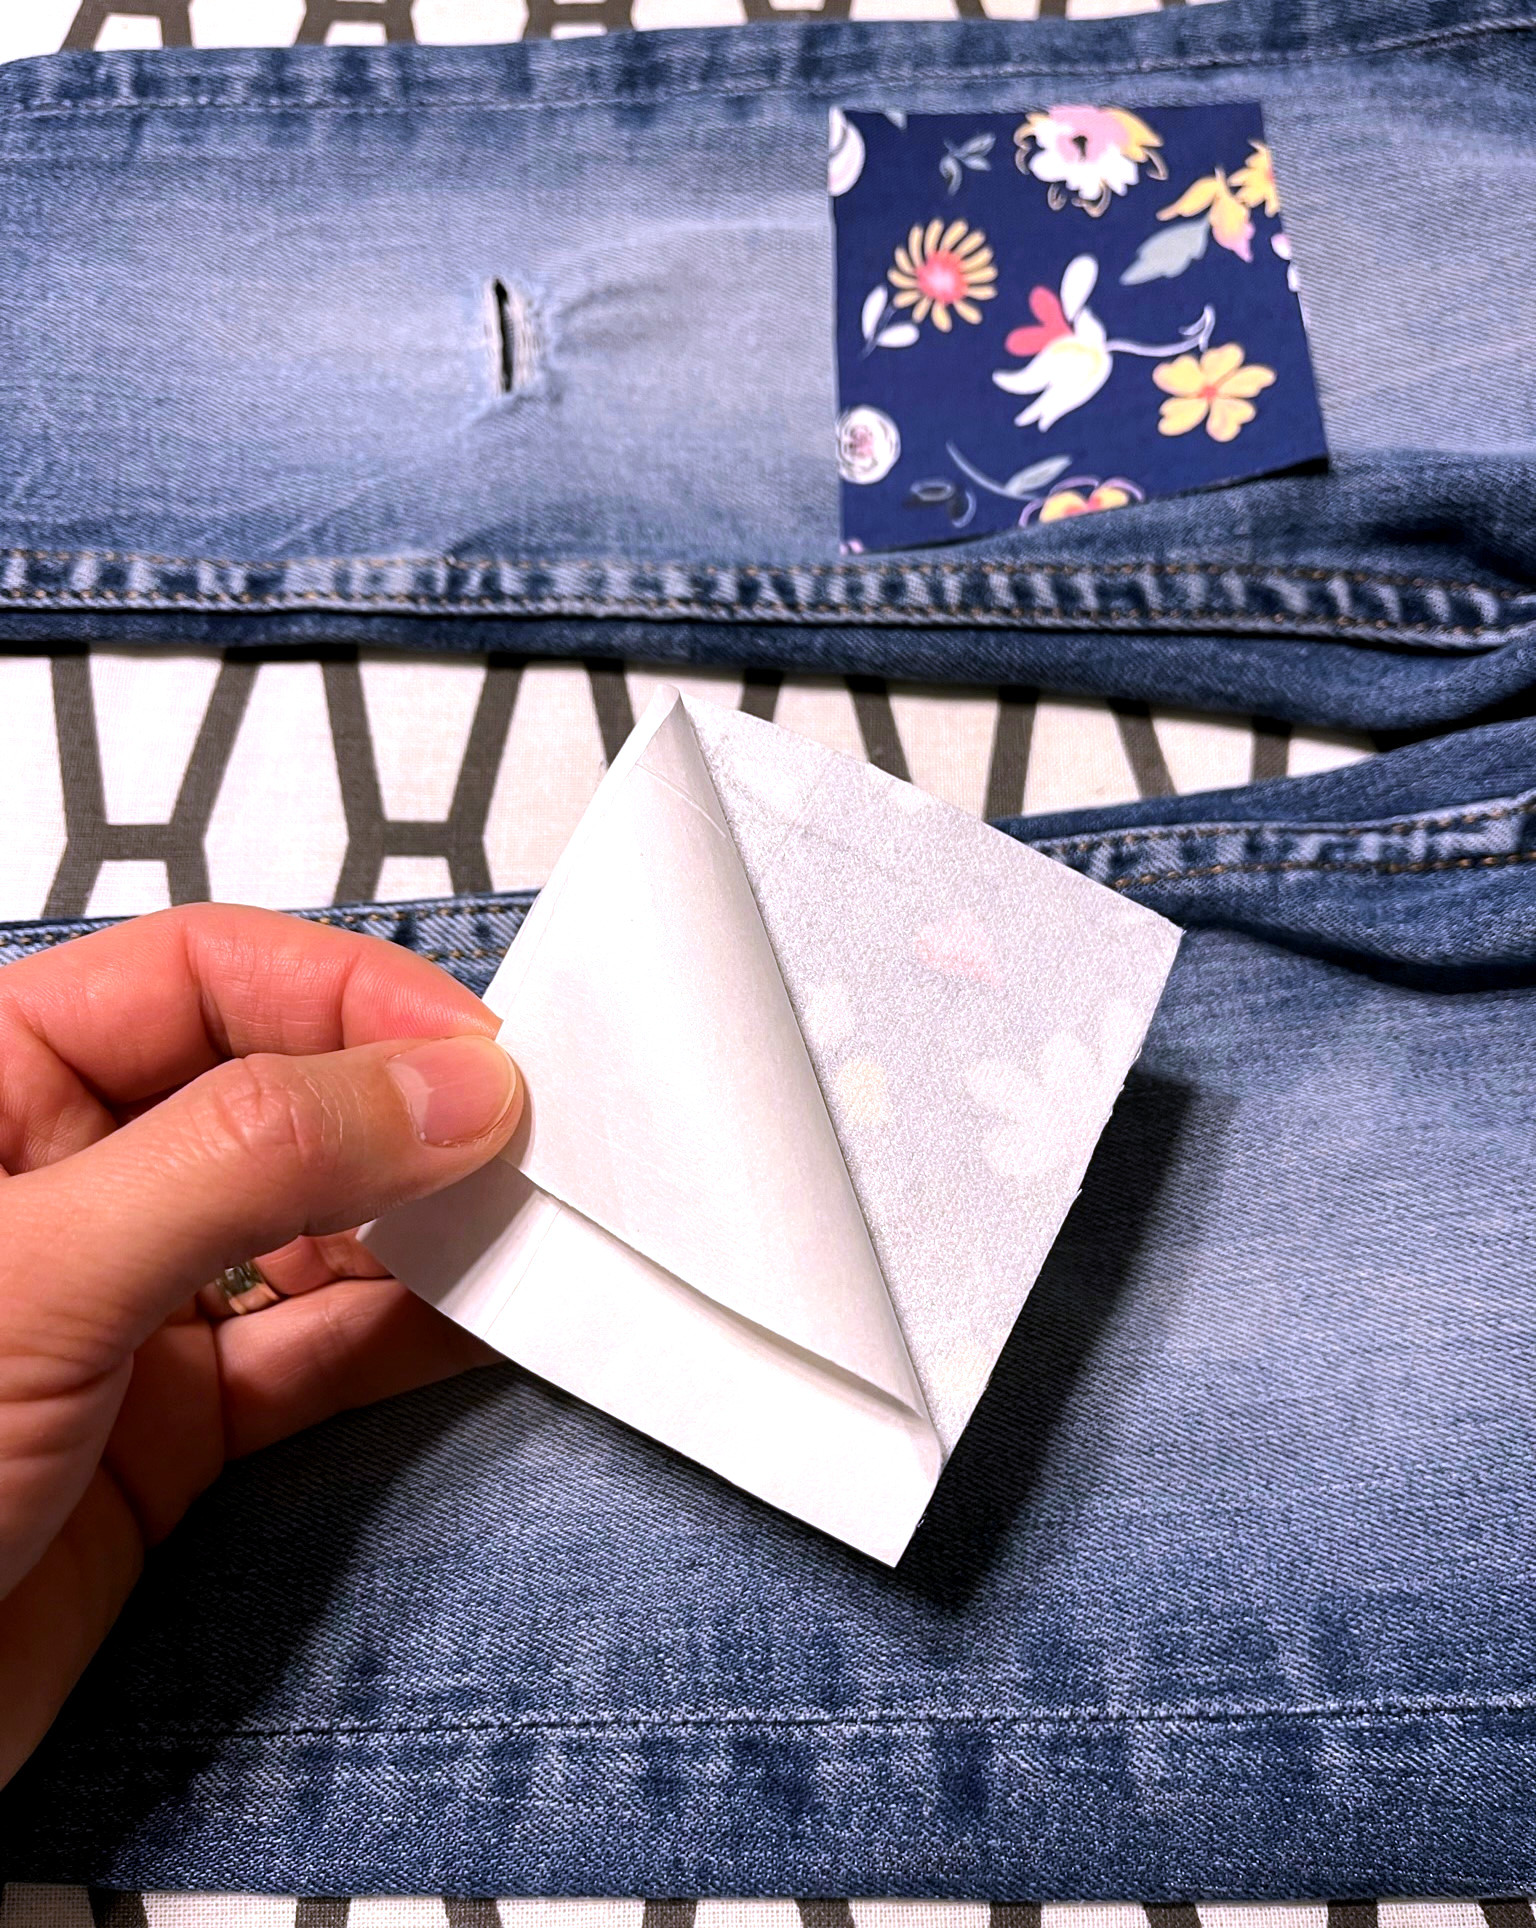
Again, cut two similar shapes from the double-sided interfacing. You’ll place the fusible side to the back of the patch, iron on, then peel off the backing paper.
Now place your patches over the knees and check their position. Set your iron on the patch and leave it there for a good few seconds, until the adhesive has melted.
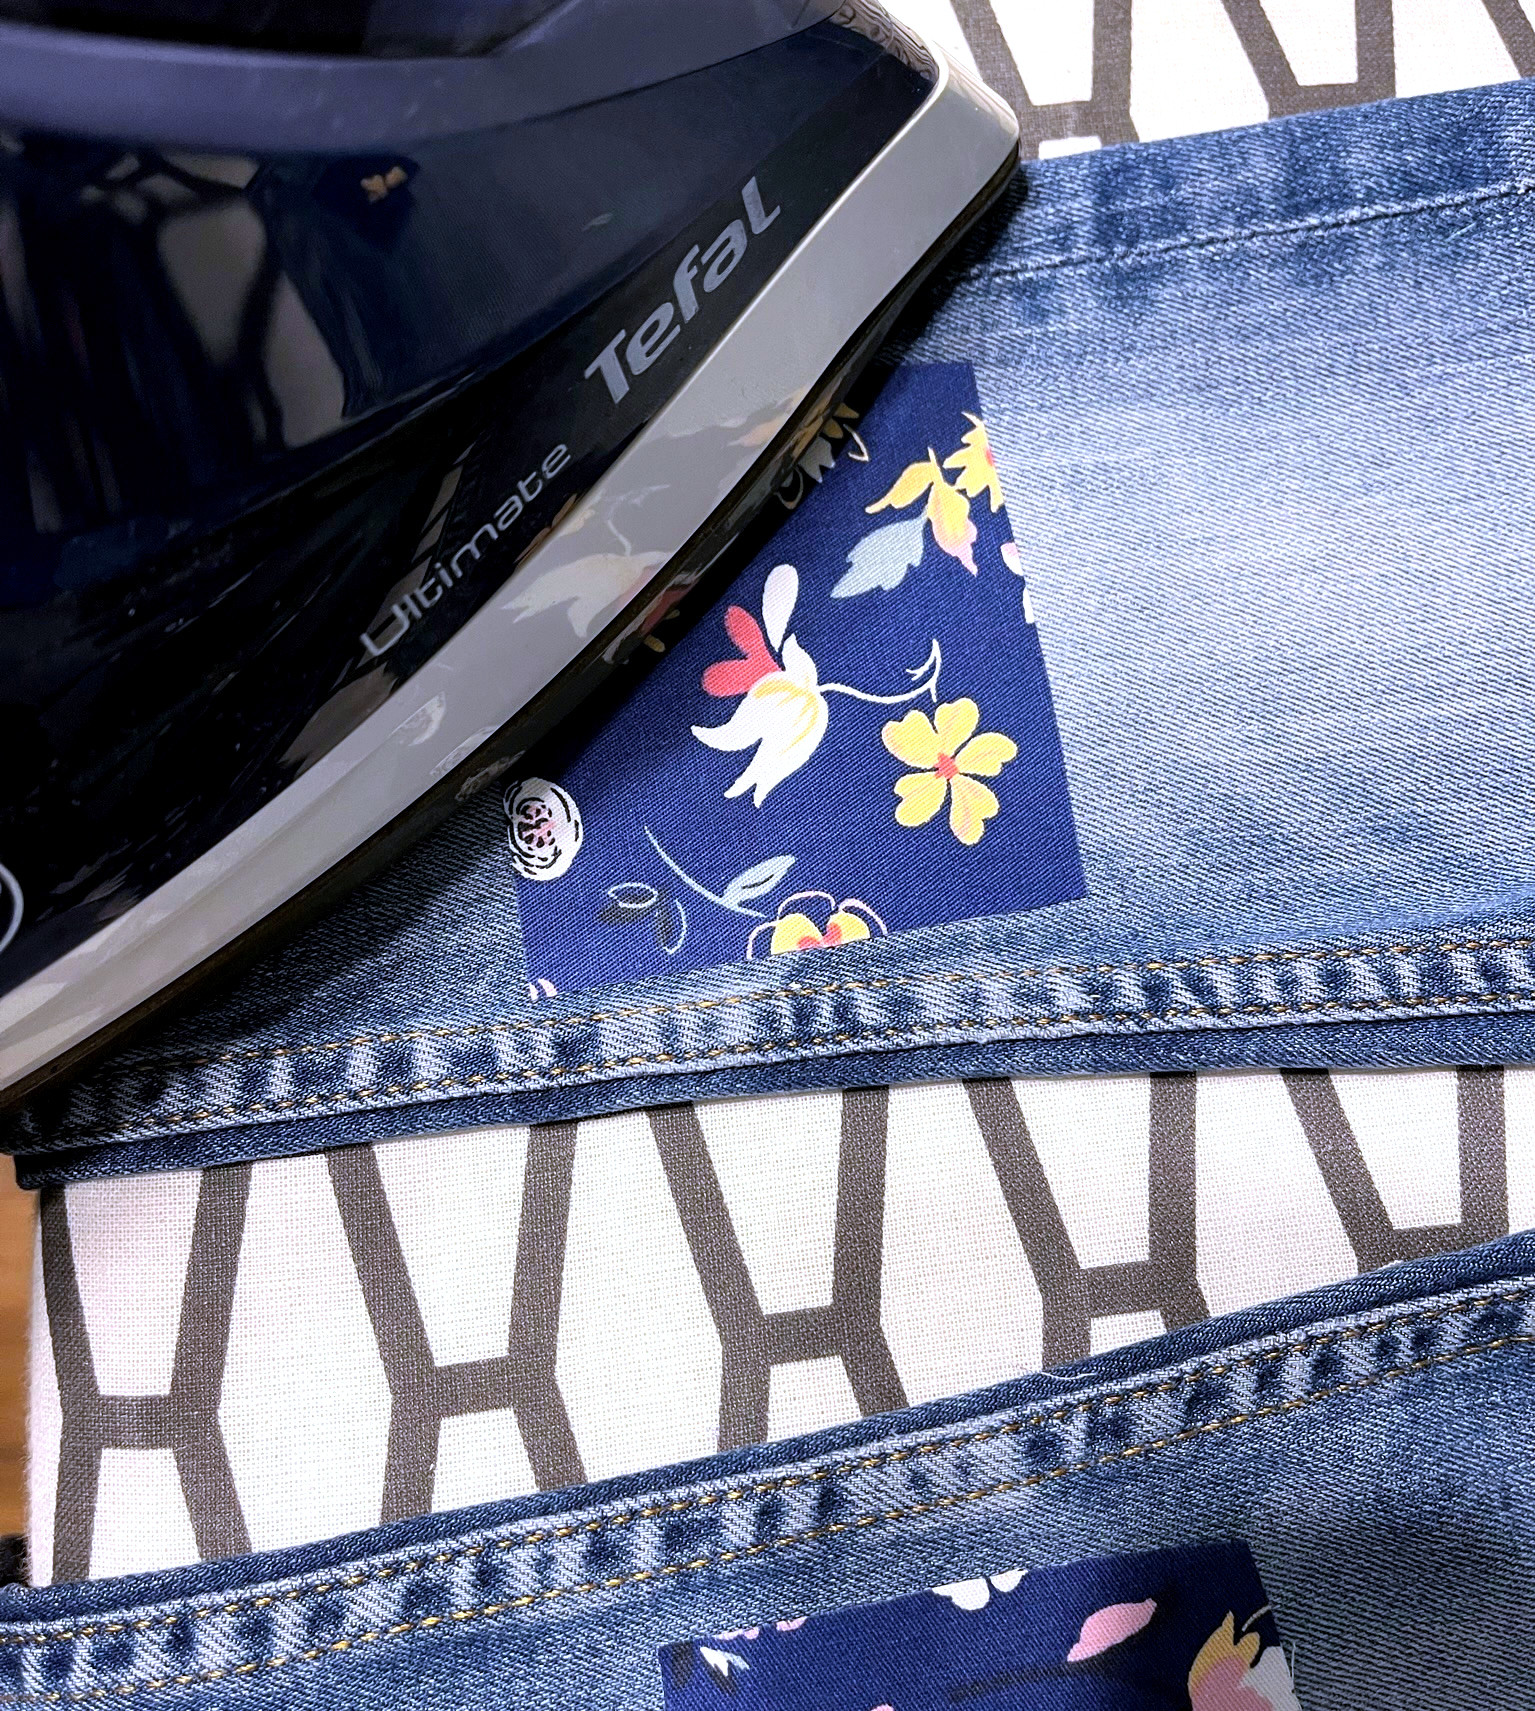
Let the fabric sit and cool completely before moving on to the next step.
Step 3
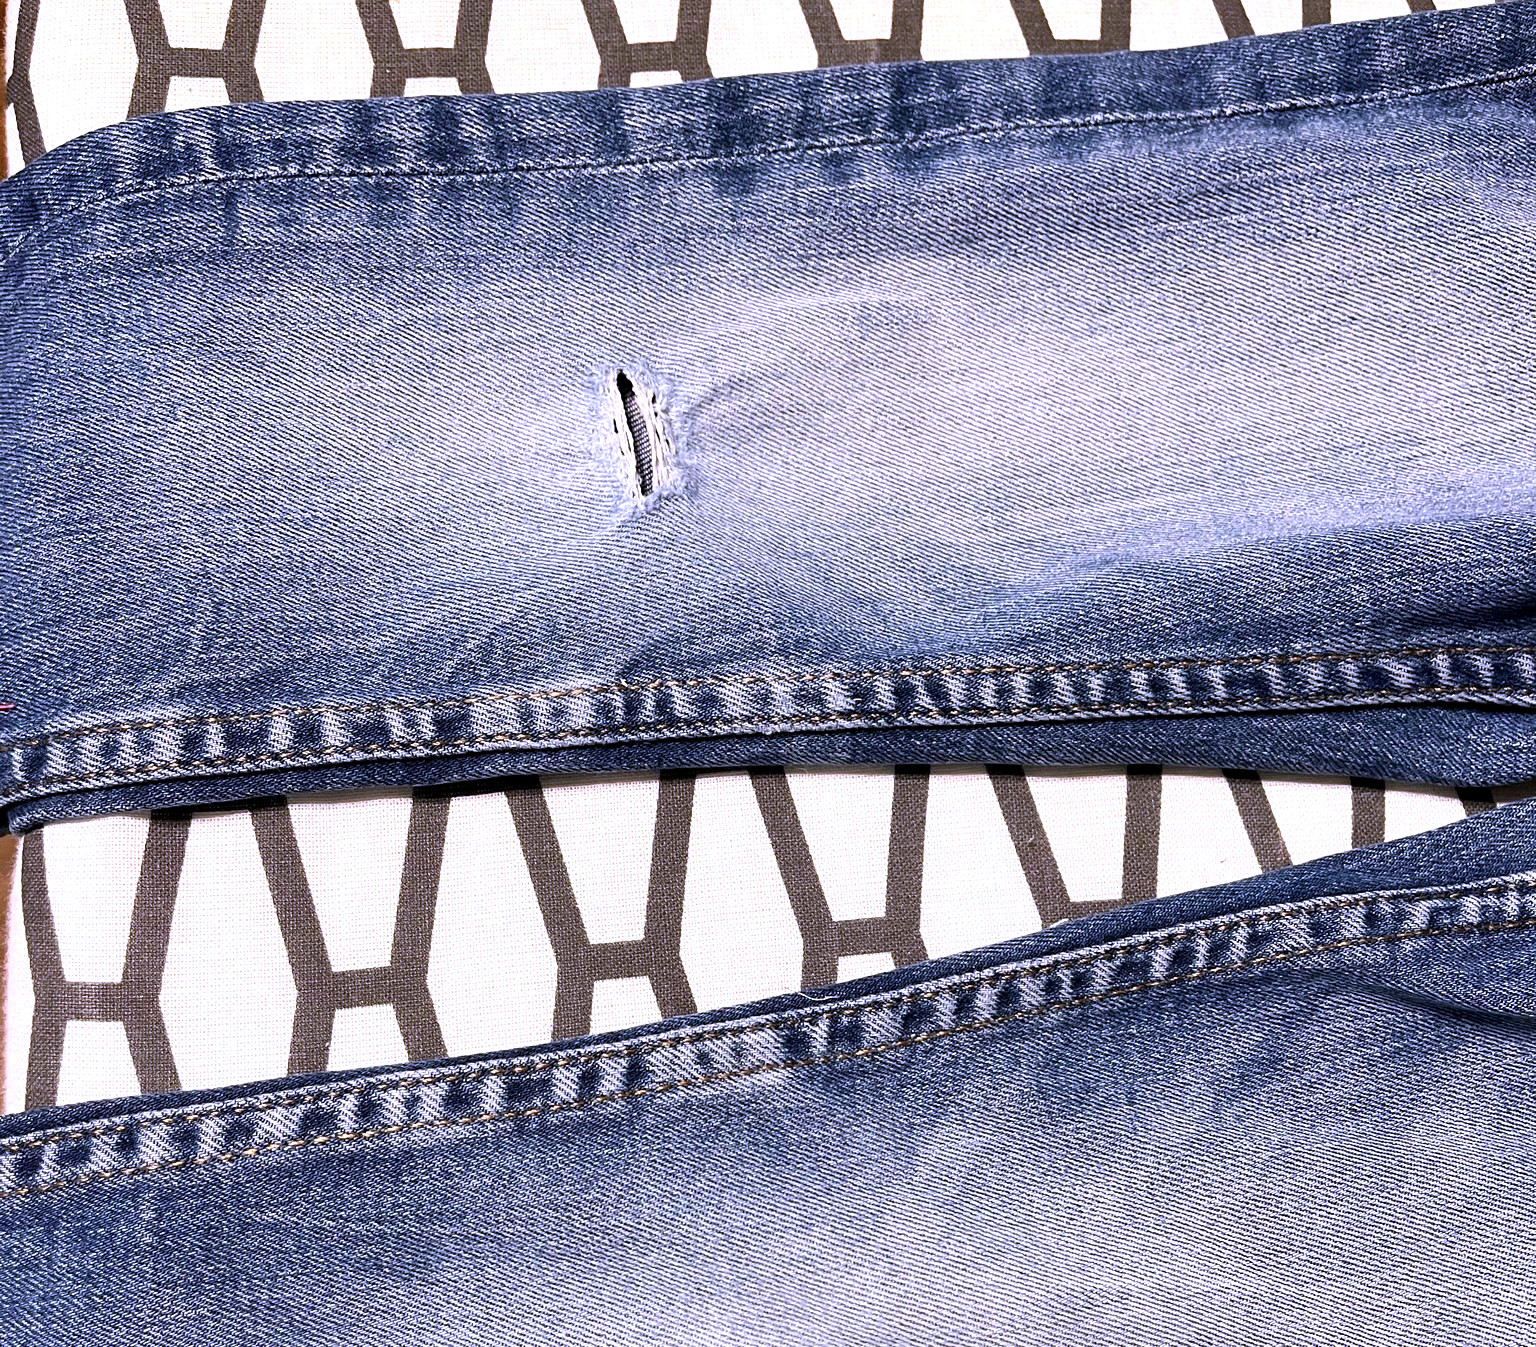
Now, unpick the side seam of the leg that is not double stitched, using the seam ripper. Unpick as far as you want (but stop before you reach the jeans cuff). You need to be able to open the leg out flat so that the patch is easy to maneuver under your sewing machine.
Step 4
Honestly, most iron-on patches will barely last through the first wearing and wash cycle, so it’s a good idea to reinforce them by sewing – either by hand or with a sewing machine.
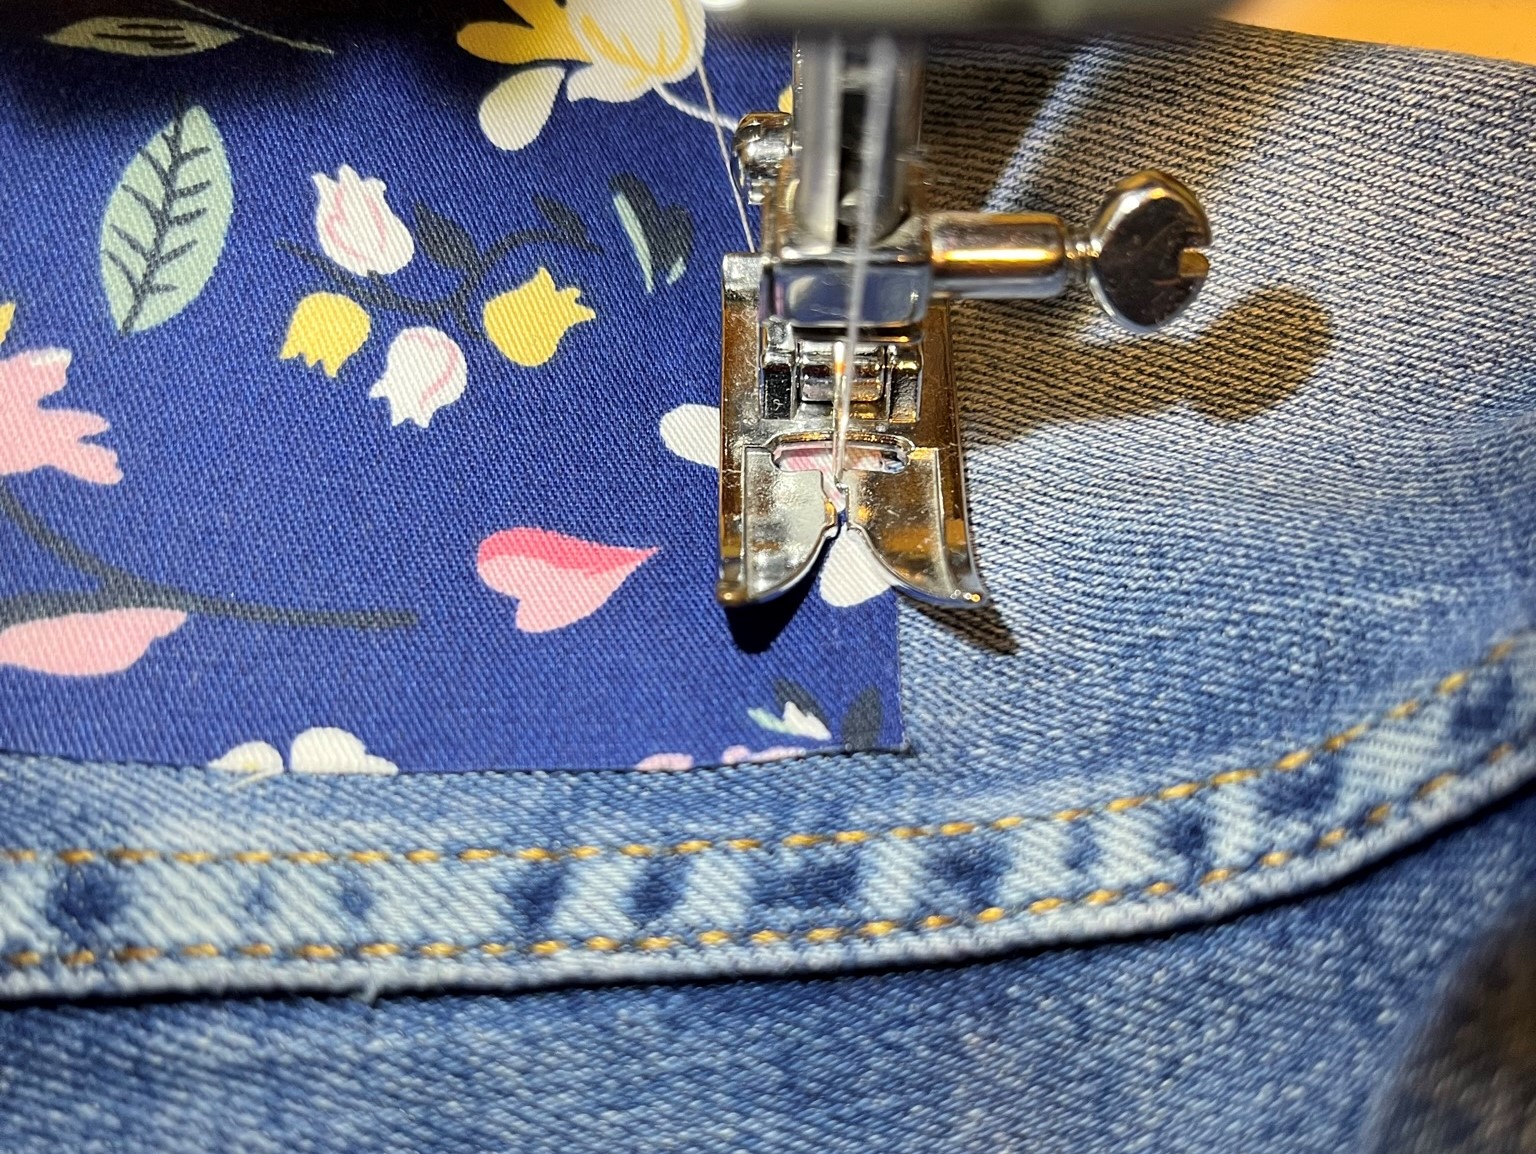
I chose to use the triple stitch on my sewing machine, but you can also use a zigzag stitch. It will reinforce the patch and also help reduce any fraying.

This is a very strong stitch because it locks three times. I also like how it looks, I think it’s a pretty cool decorative stitch.
This is how my jeans look on the inside.

Step 5
Turn your jeans inside out and re-stitch the seam that you unpicked in Step 3. You’ll want to come up through where the previous stitch was, as precisely as you can.
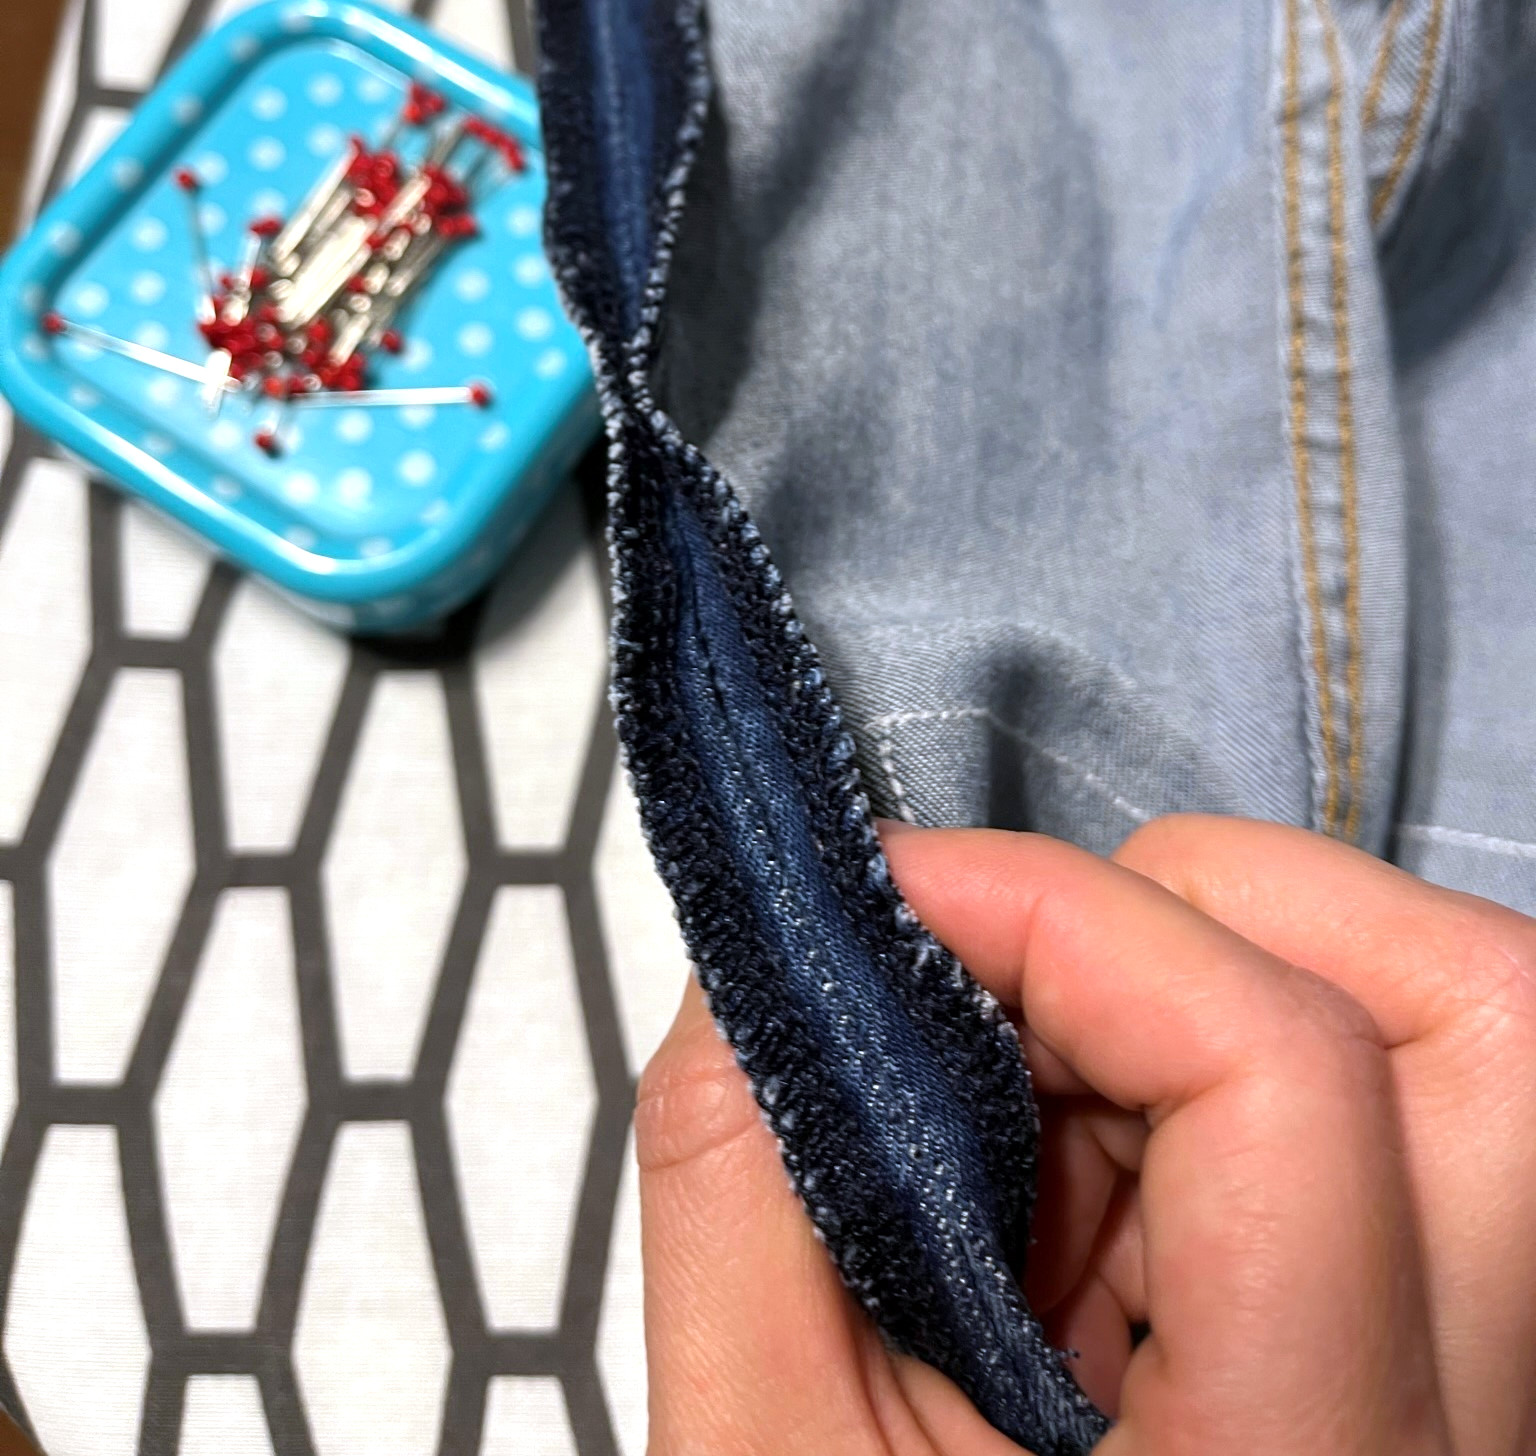
To err on the safe side, it’s better to stitch a bit to the left side of the earlier seam (see photo below).
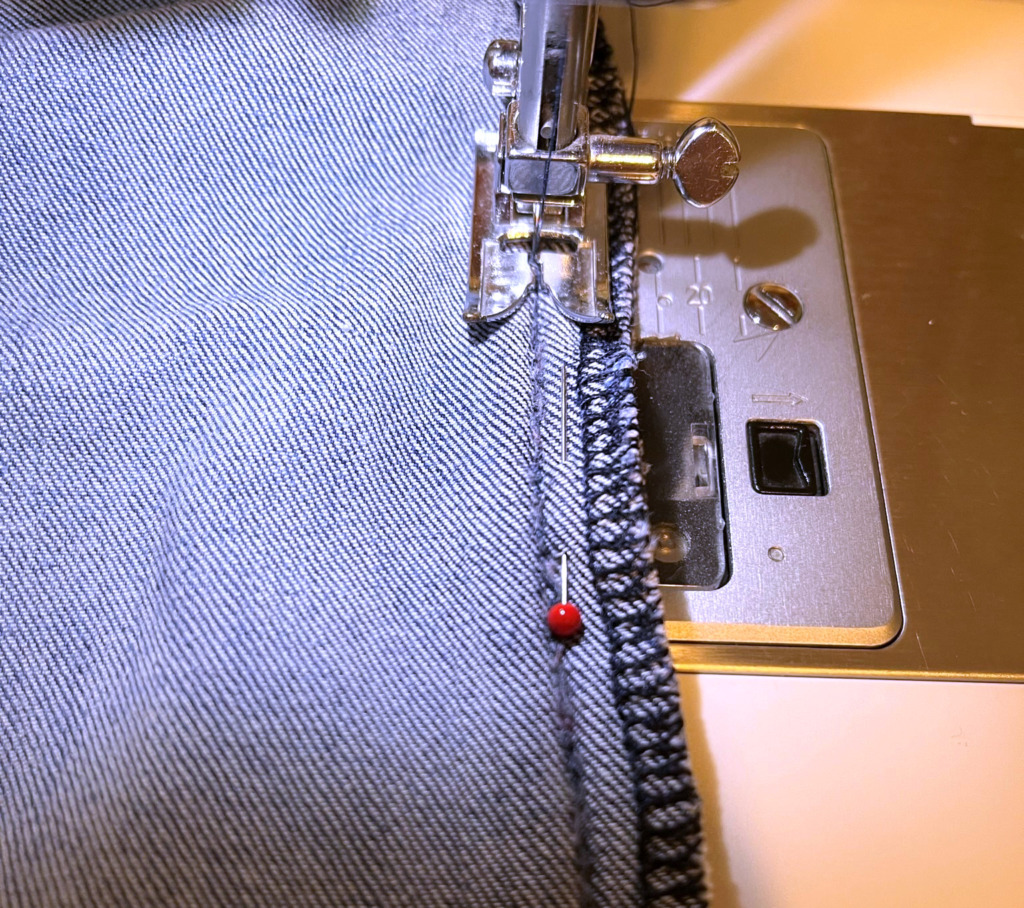
Use a good quality thread that matches your garment. A simple straight stitch is enough; don’t forget to backstitch at the beginning and end.
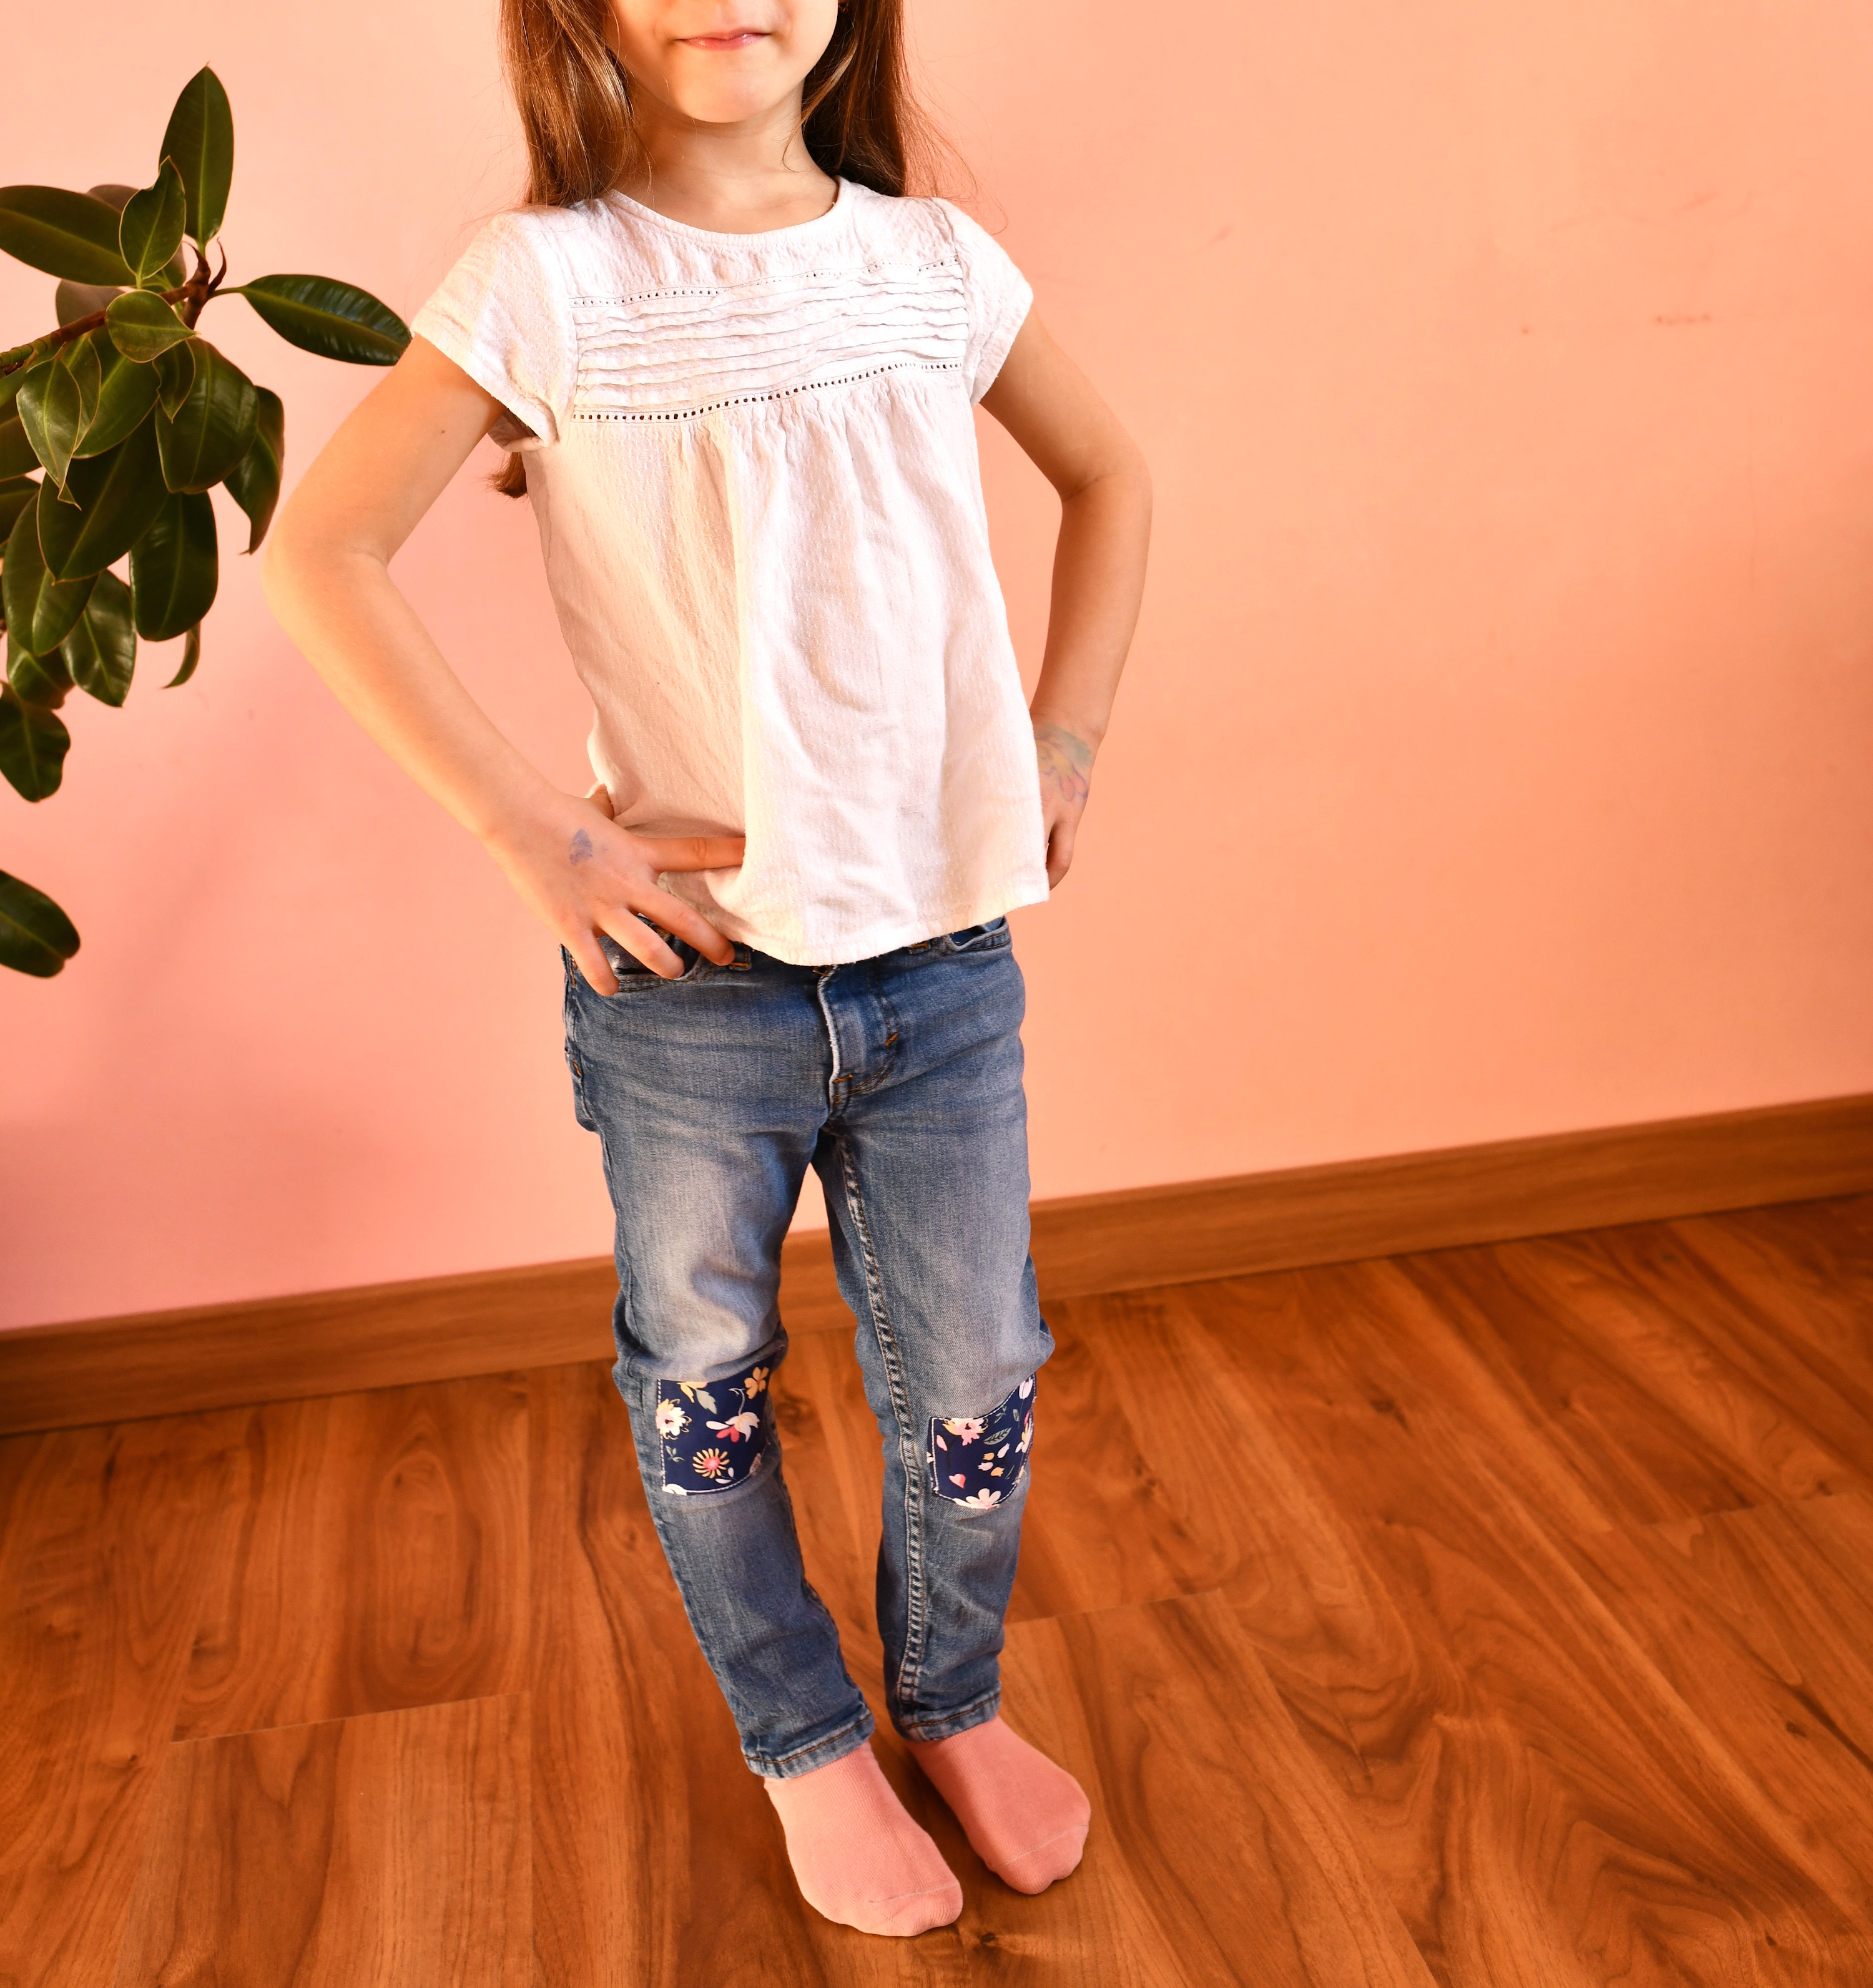
Now turn your jeans right side out and admire your work! You can get creative and use cool patches in fun prints or shapes – that will definitely impress the kids!
This is the double-sided interfacing I used for my iron-on patches.
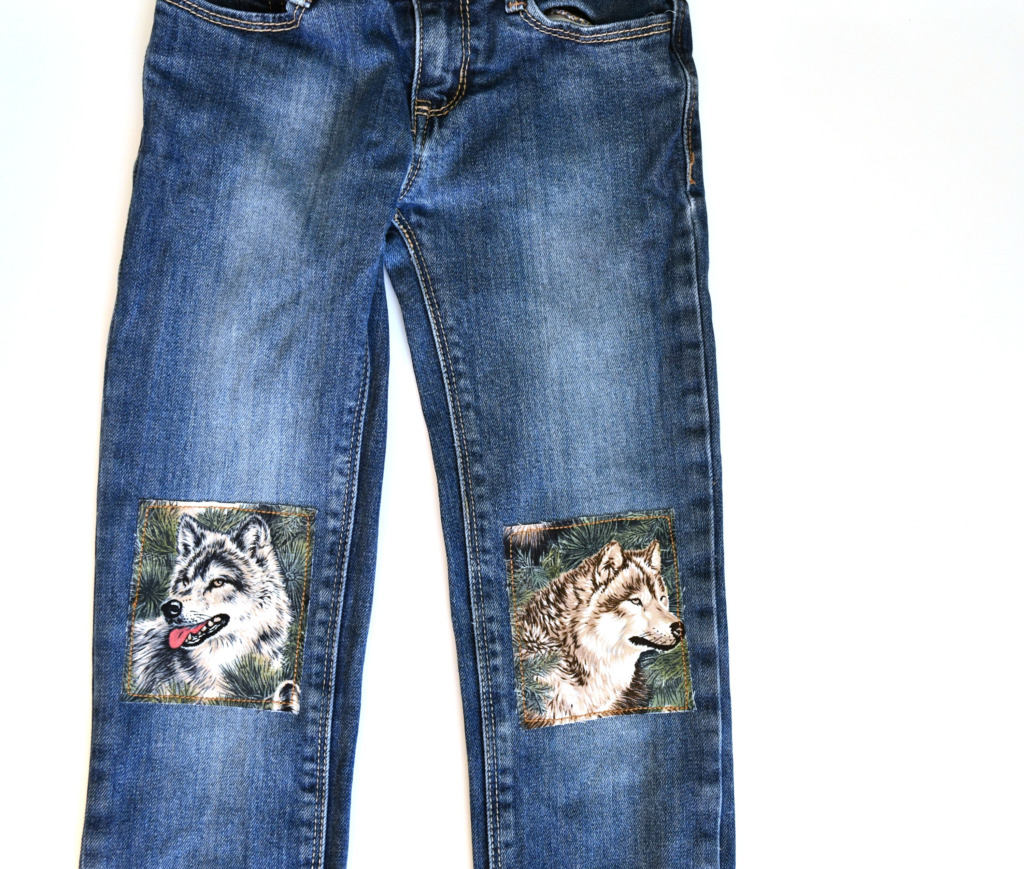
My 8-year-old son loves the wolf patches on his jeans! You can imagine the pride he’ll be wearing them with at school.
Let’s keep in touch! You can find me on Facebook, Instagram, and Pinterest.
Related posts