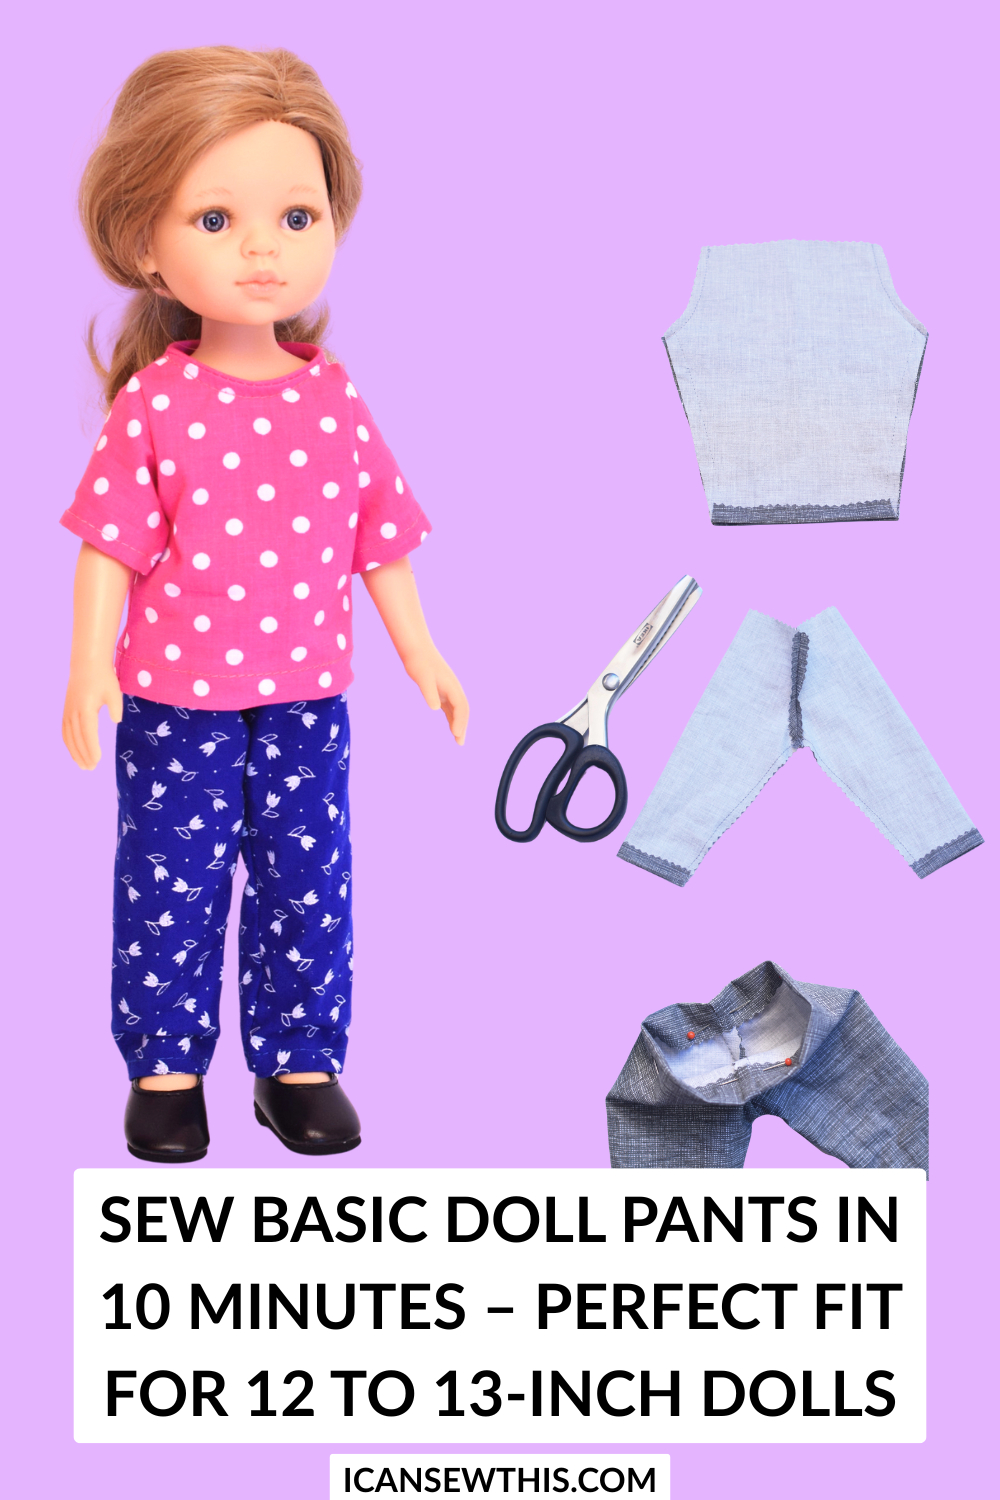
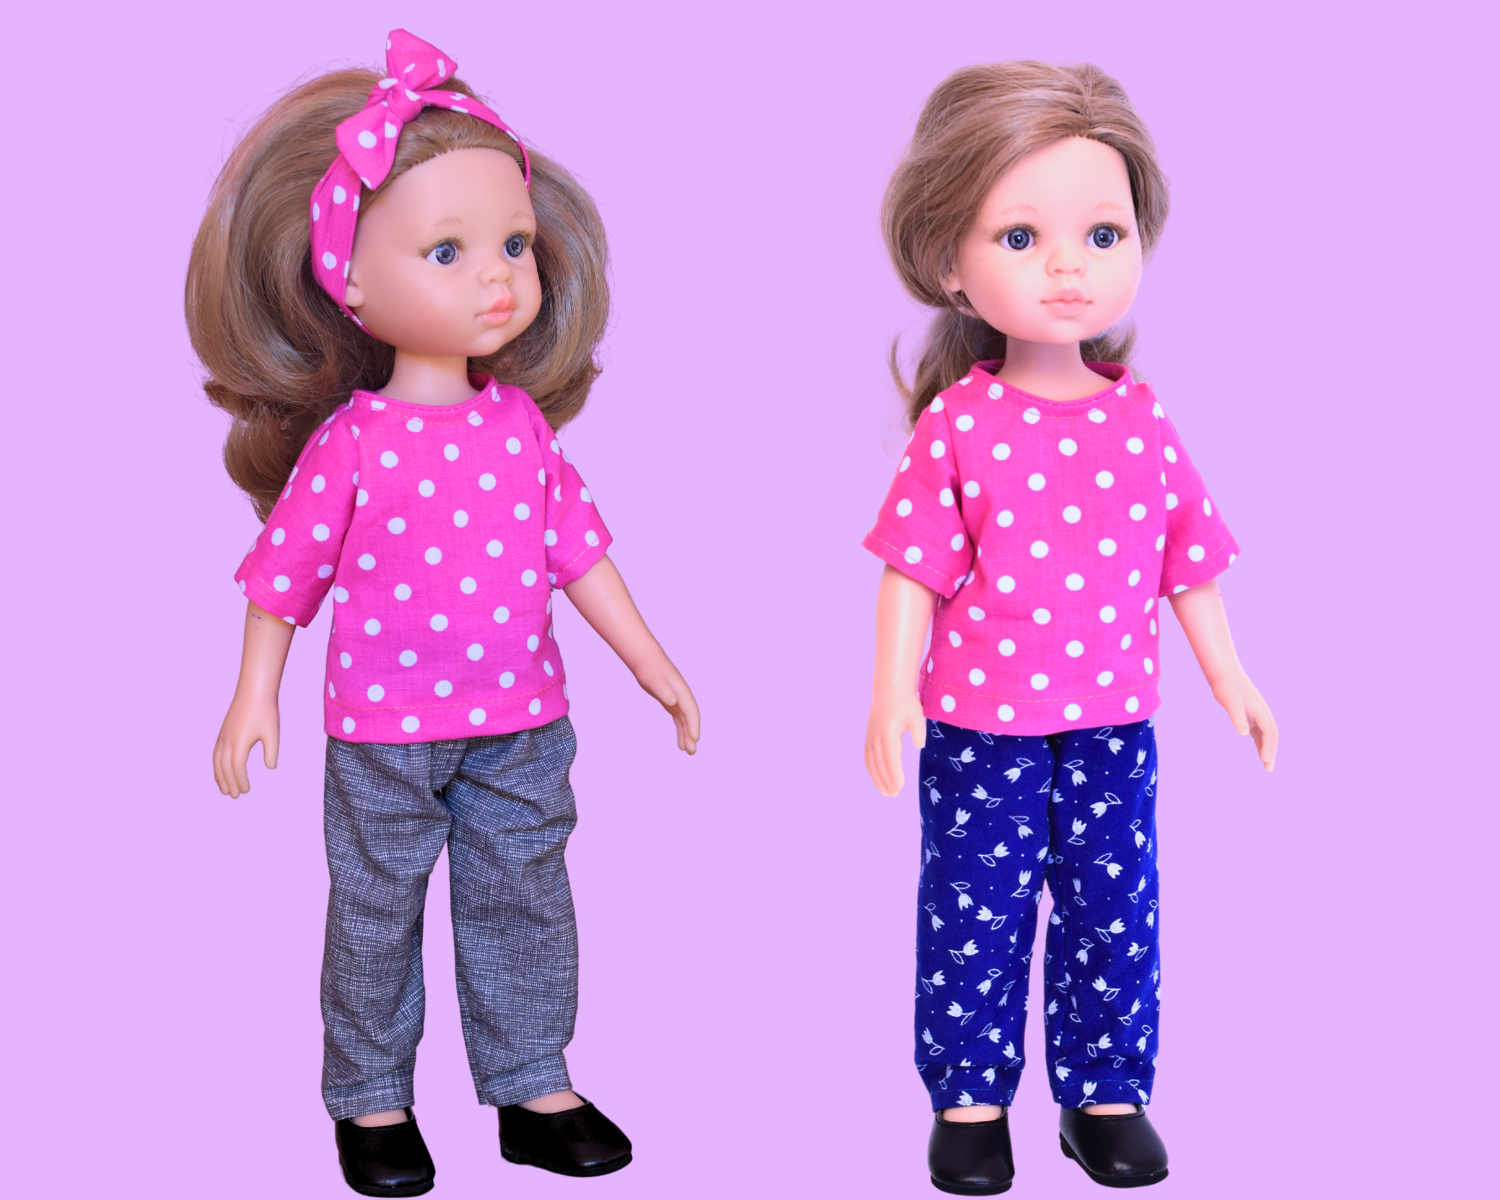
If you’re looking for a quick and easy sewing project, these simple cotton pants for dolls are a total win. I made them for our Paola Reina doll, but they’ll fit most 12 to 13-inch dolls like a glove – think Minikane, Les Cheries, even some Baby Alive dolls!
This is one of those fast, feel-good projects – just grab the free printable PDF pattern, follow the step-by-step instructions, and boom, you’ve got a cute pair of doll pants in under 10 minutes. It’s perfect if you’re a beginner and want to sew doll clothes without stress or fuss.
Simple Elastic Waist Doll Pants Tutorial
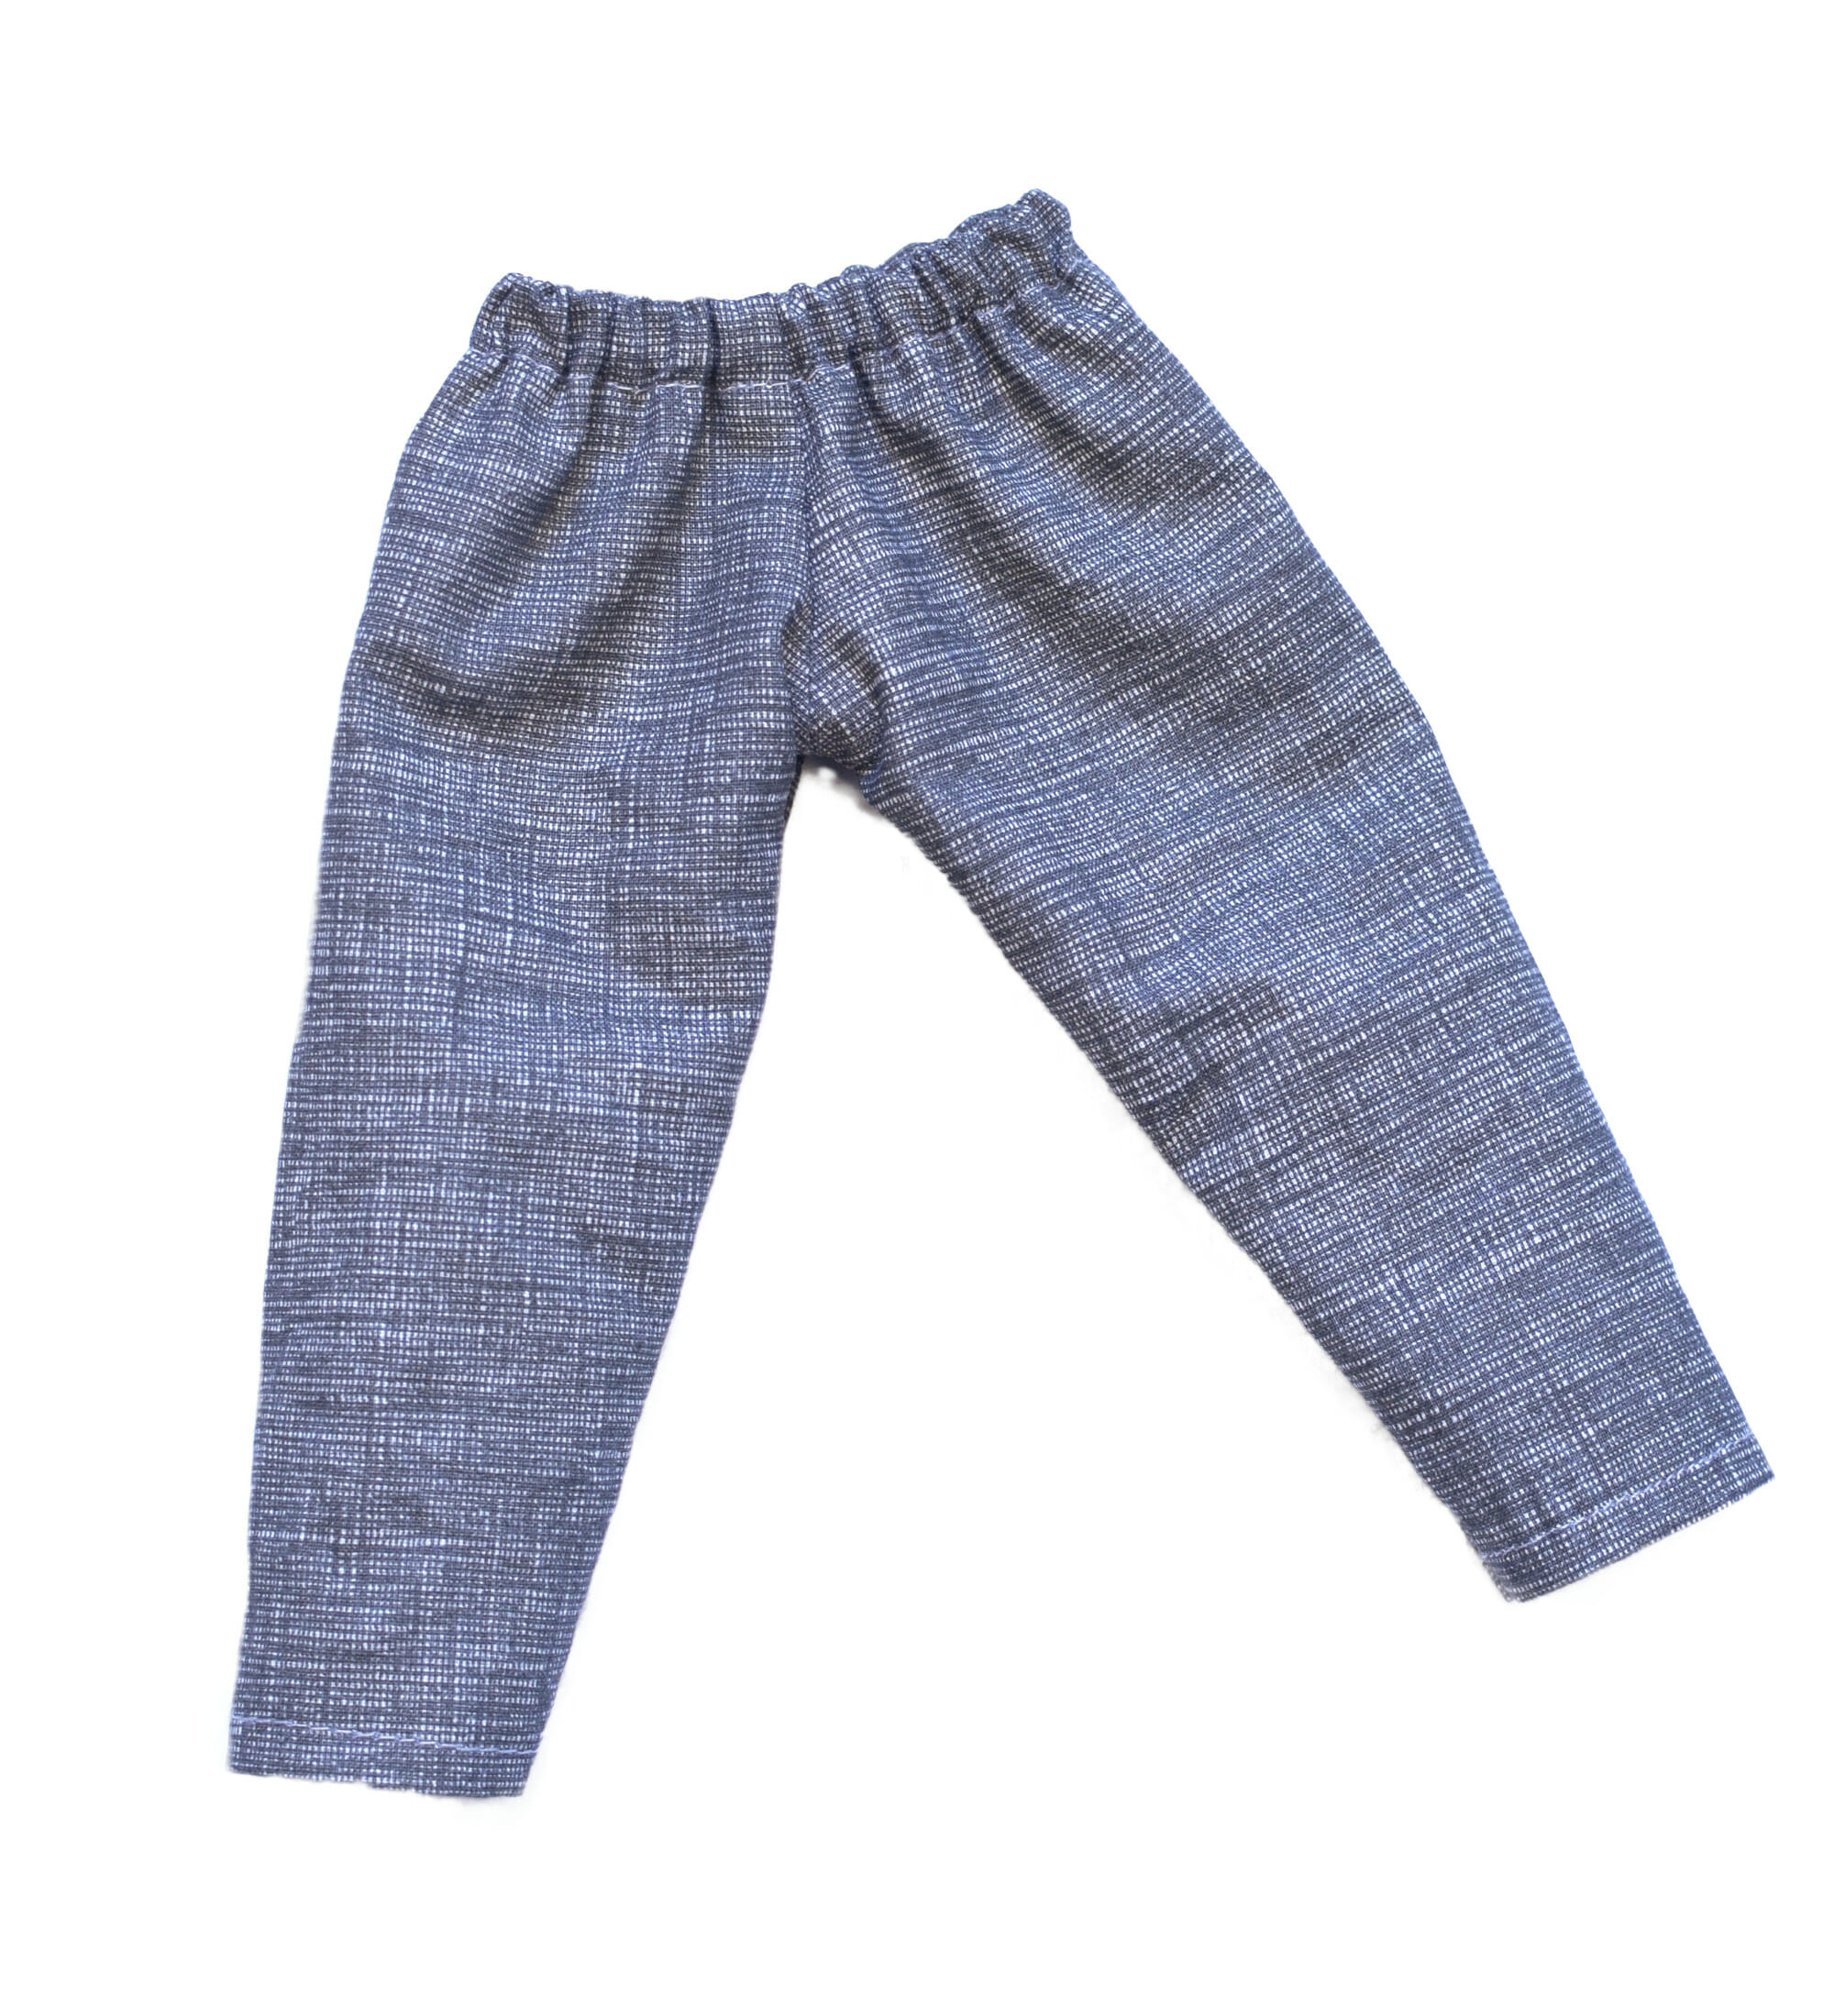
I used a soft woven cotton fabric for these doll pants, but you could also try lightweight linen or even flannel for cozy doll pajamas. The relaxed fit and elastic waistband make them super easy to pull on and off, which is perfect for little hands during pretend play.
Want to sew matching clothes for your child and their doll? This is a great starting point. These DIY doll pants are quick to whip up, and once you’ve made one pair, you’ll probably want to make more in every fabric scrap you have. (Ask me how I know!)
You can also easily turn this free doll pants sewing pattern into capris or doll shorts – just trim the legs to the desired length before cutting your fabric. The clean-finished seams are a small touch that make a big difference – I don’t know about you, but messy seams kind of drive me nuts. So yes, I always take the extra minute to make sure they look nice, even on tiny doll clothes.
Sewing pants for dolls might seem a bit tricky because of the small size, but honestly? It’s way easier than it looks. You don’t need a fancy sewing machine or any special tools – just a straight stitch, some cotton fabric, and a bit of elastic.
These simple elastic waist doll pants are perfect for beginners learning how to sew doll clothes, and they make a cute handmade gift for kids who love dolls. My daughters love changing their dolls’ outfits, and I love that I can sew up a new look during nap time or while dinner’s in the oven.
RELATED: Want to sew more cute outfits for your doll?
Check out my free sewing patterns for a simple doll shirt, a basic doll skirt, or an easy doll dress – perfect for beginners and designed to fit 12 to 13-inch dolls like Paola Reina and Minikane.
For more inspiration, be sure to explore this collection of free patterns and tutorials. It’s packed with creative and useful sewing projects for every occasion!
Sewing supplies – DIY cotton pants for dolls
- Cotton fabric scraps
- Matching thread
- Fabric scissors
- Pinking shears
- Approx. 6 inches of ¼ inch wide elastic
- 12 / 13-inch doll pants – free PDF sewing pattern below (seam allowance is included)
How to make basic doll pants for a 12 to 13-inch doll – step-by-step
Ready to sew some adorable doll clothes? These basic elastic waist pants are perfect for 12 to 13-inch dolls like Paola Reina, Minikane, and others in that size range. This is a great beginner-friendly sewing project that uses just two fabric pieces and a few simple steps.
Let’s get started!
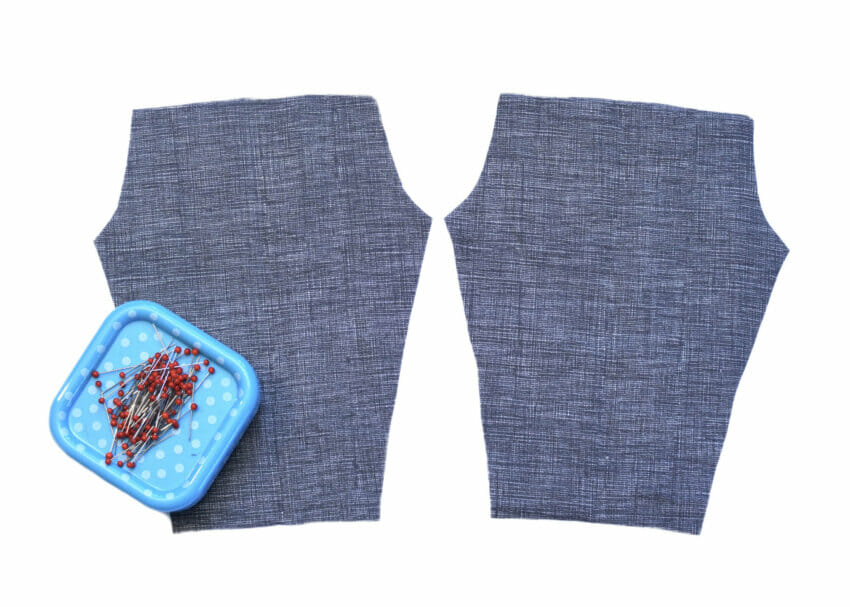
Step 1 – Cut out your fabric pieces
Start by printing and cutting out the free doll pants sewing pattern (you’ll find the download link in the pink box above). Use the pattern to cut two mirrored pieces from your cotton fabric. Woven fabric like cotton or lightweight linen works best for this project.

Make sure your fabric is ironed and smooth before cutting—your doll pants will turn out neater that way!
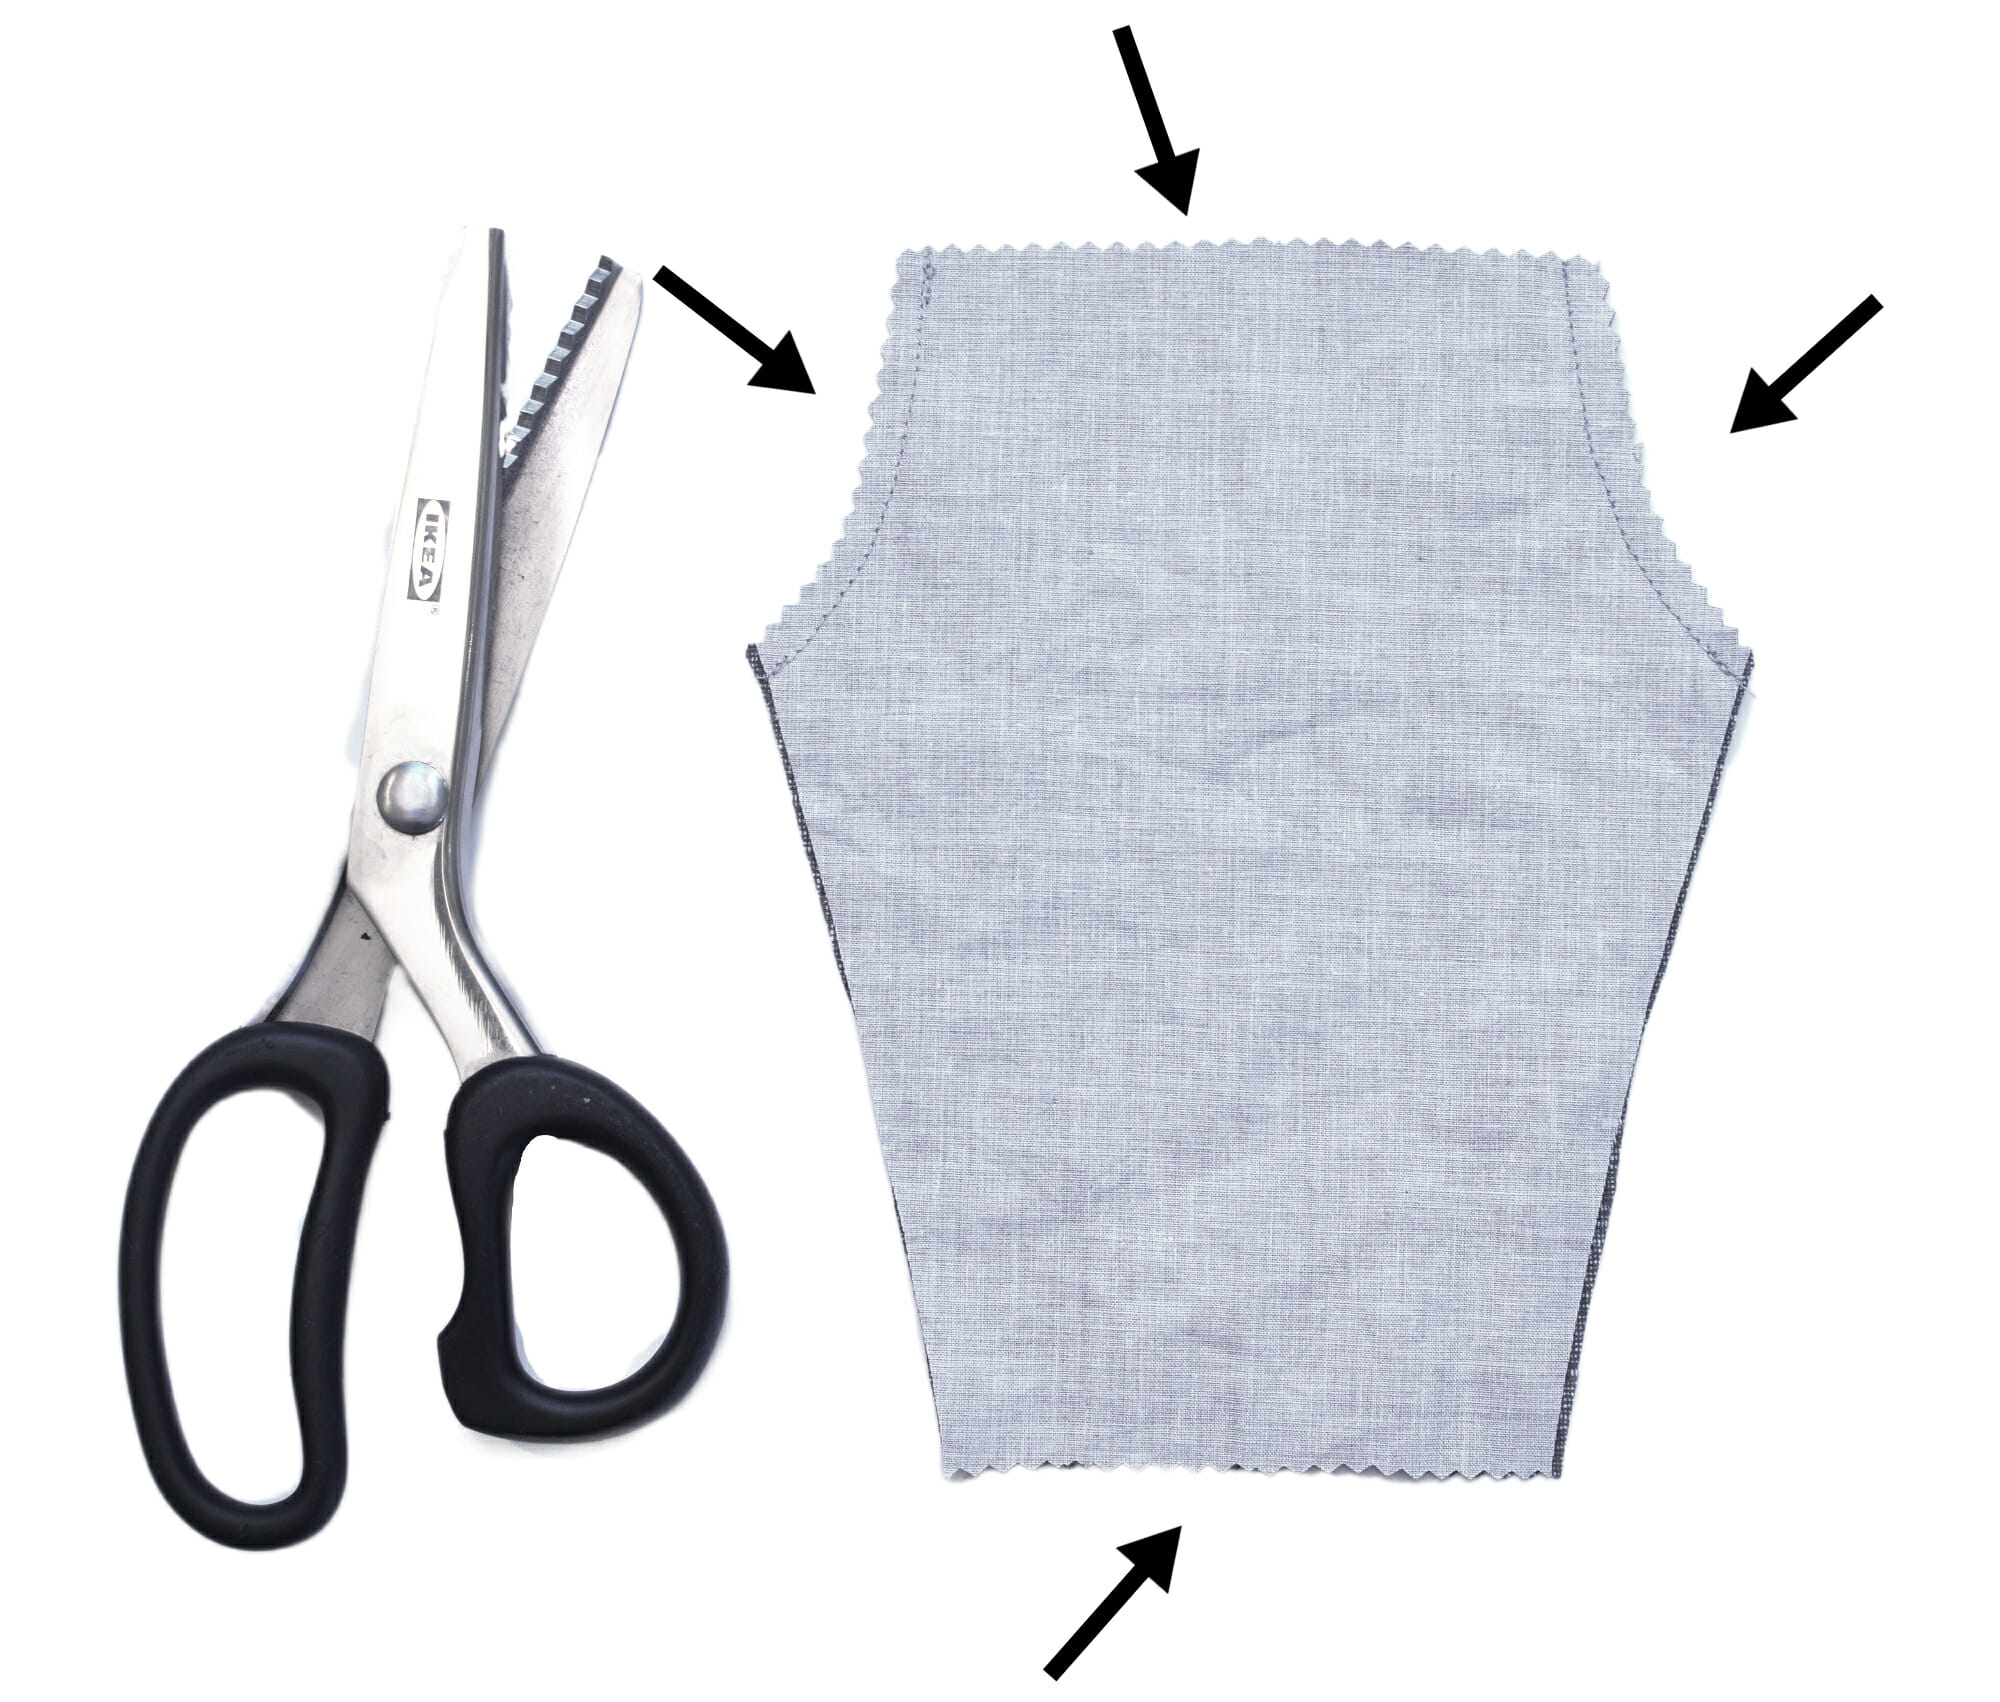
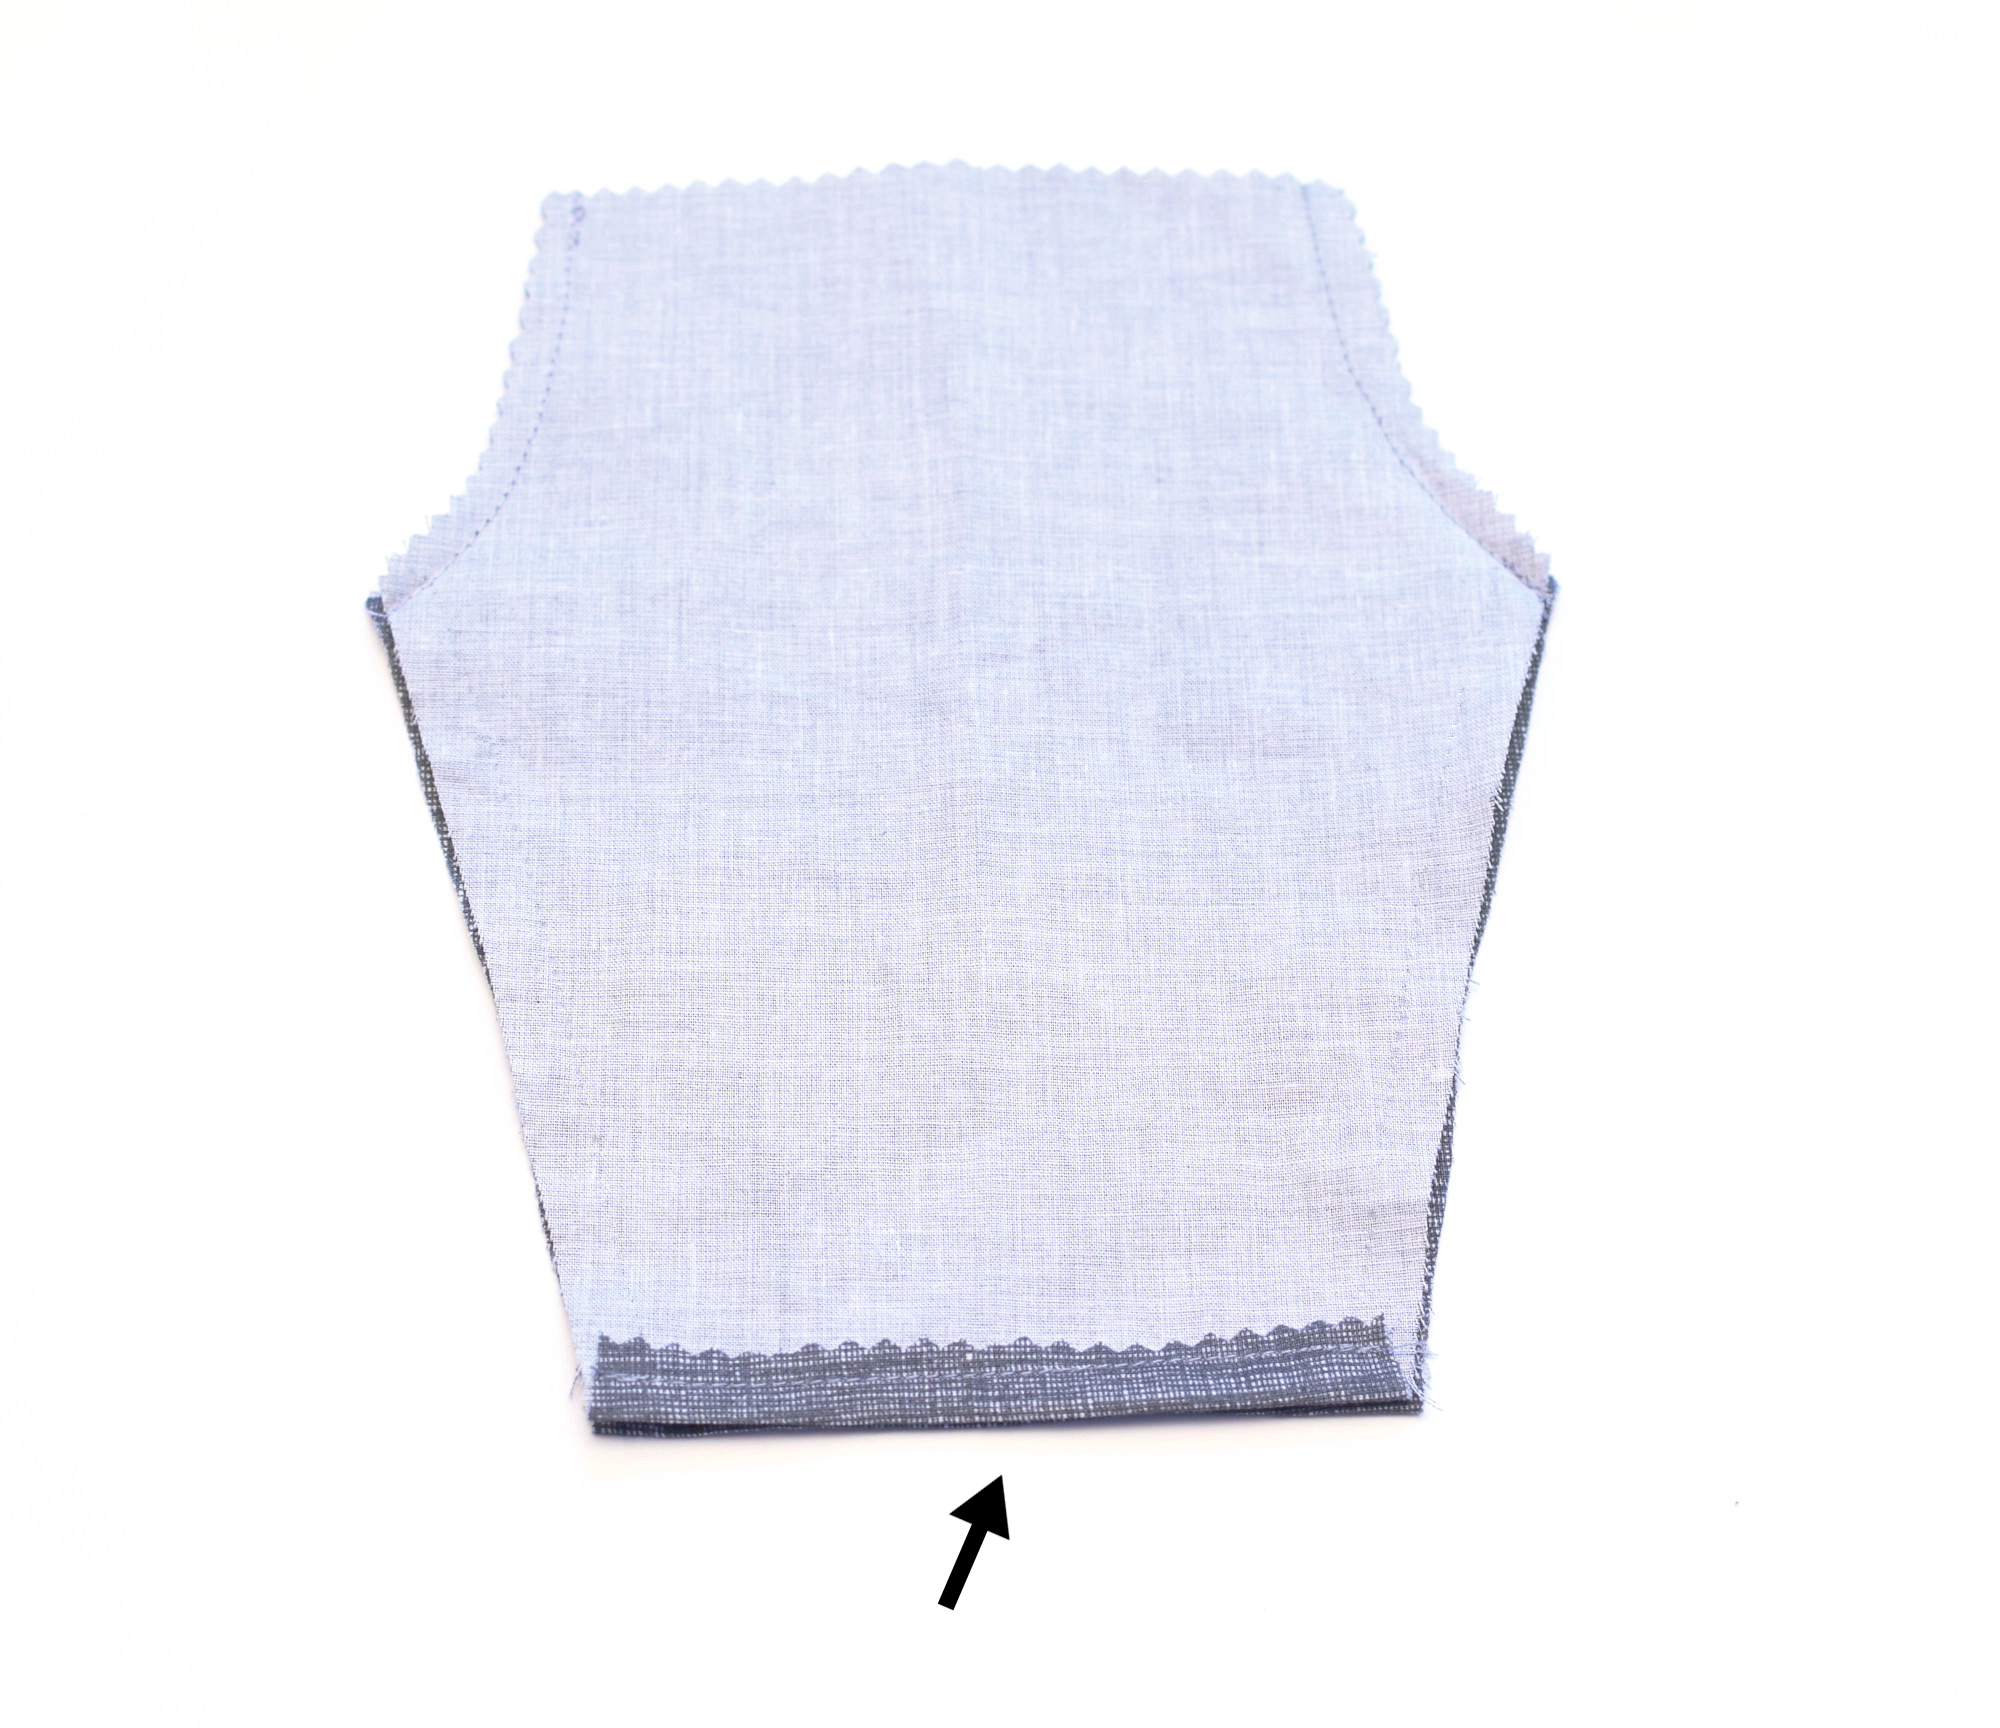
Step 2 – Sew the crotch seam
Place your two fabric pieces right sides together, lining up all the edges. Now stitch the curved crotch seams using a 1/4″ seam allowance—these are the seams marked by the arrows on the pattern.
Next, grab your pinking shears (or use a zigzag stitch) to finish the seam and prevent fraying. While you’re at it, go ahead and trim the top edge (waistline) and bottom edge (legs) of the pants too. Clean edges now will save time later!
Step 3 – Hem the pant legs
To hem the doll pants, simply fold the bottom edge of each leg up by 1/4″, press with an iron if you’d like, and sew a straight line close to the fold. This makes a nice, clean finish and helps the pants look like tiny real clothes—so cute!
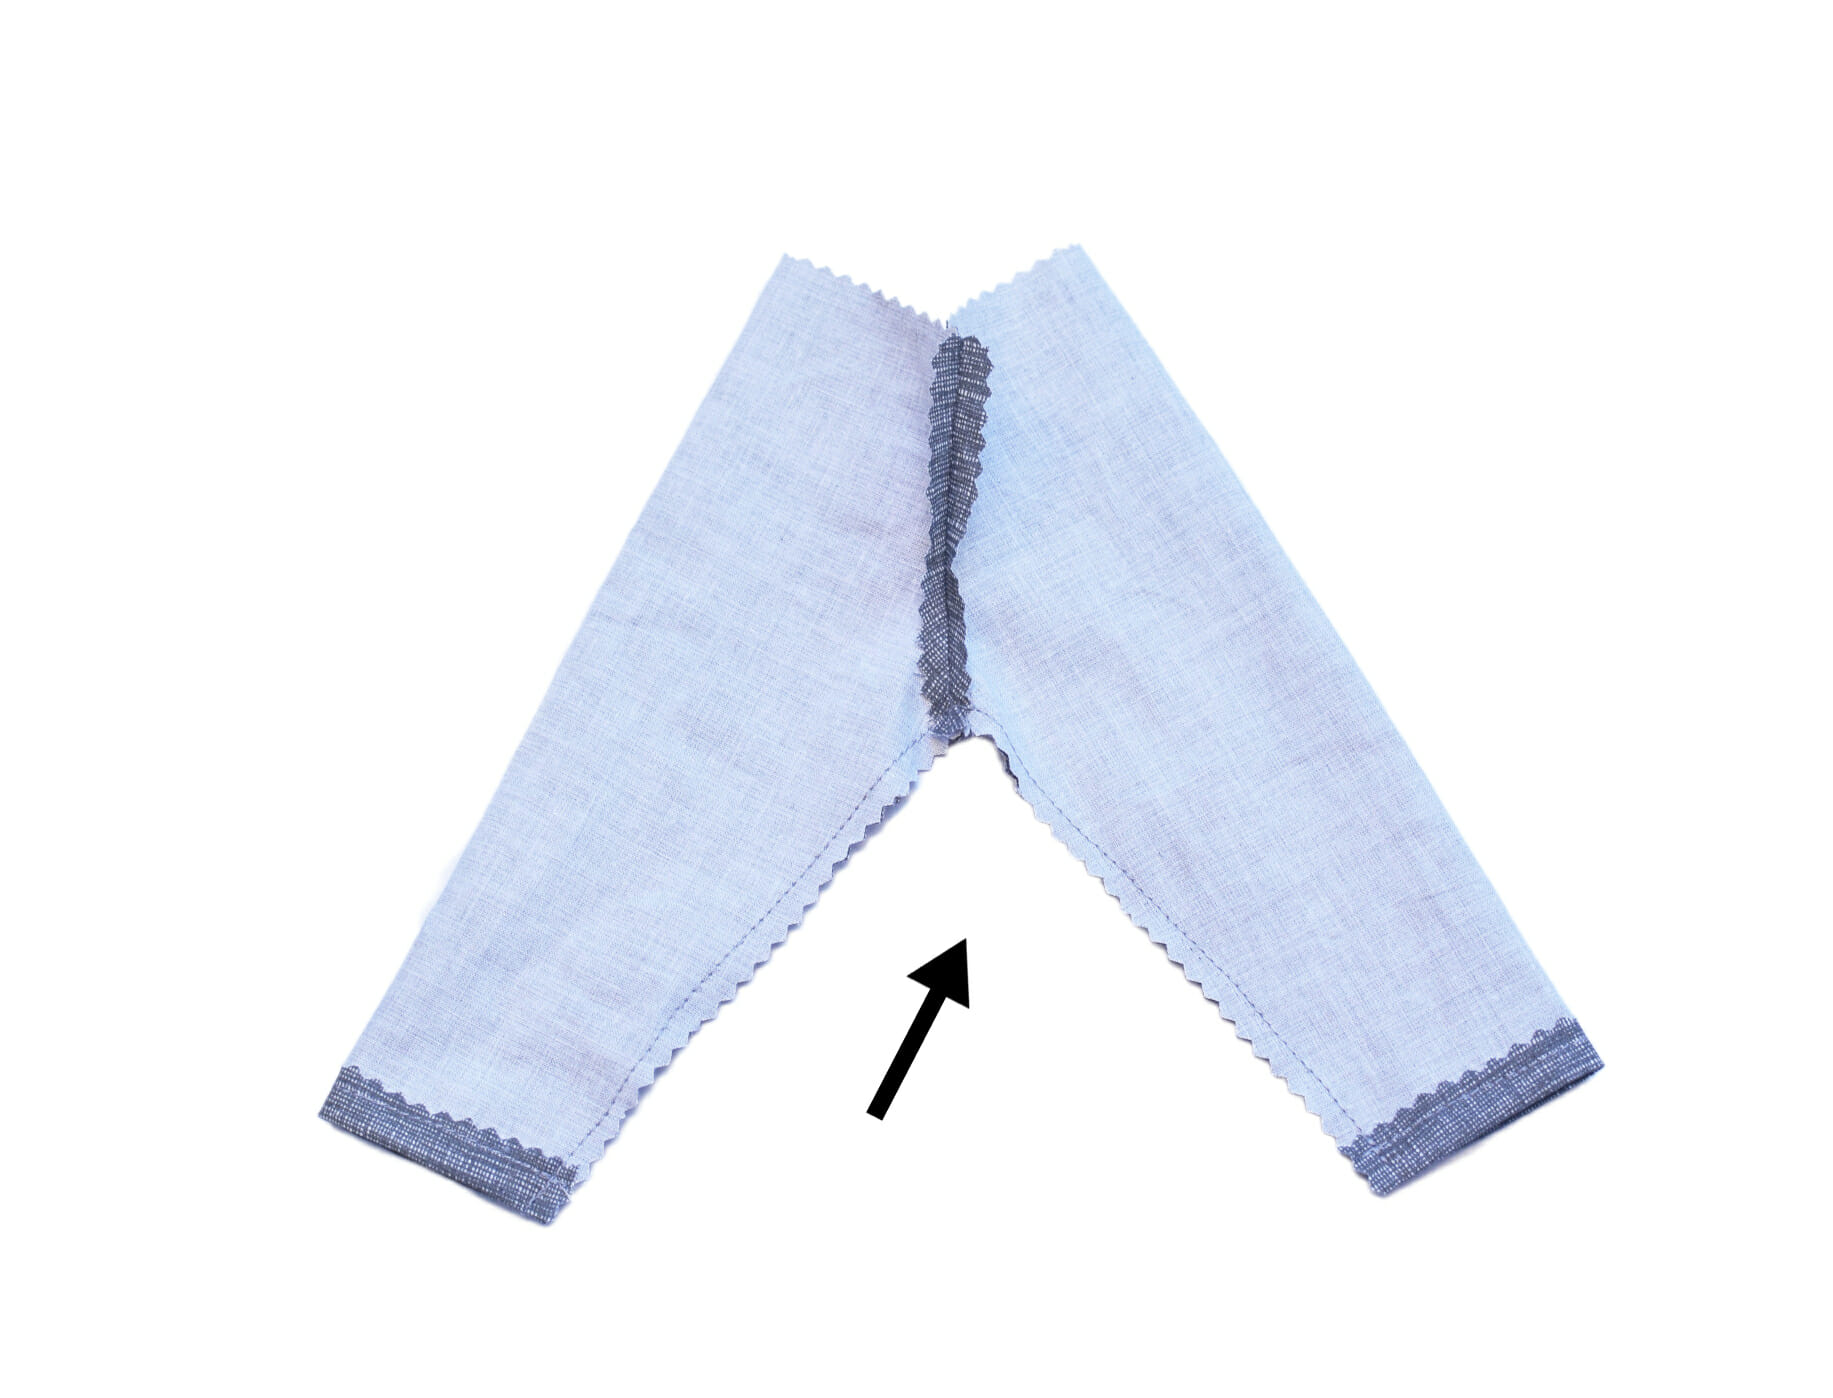
Step 4 – Sew the inseam
Now it’s time to shape the pants. Fold your fabric so the crotch seam is centered—you’re basically folding the pants in half, right sides together, with the legs stacked on top of each other.
Take each pant leg and fold it lengthwise, lining up the front and back at the crotch. You’ll notice this doll pants pattern doesn’t have side seams, which makes the whole process even quicker!
Once everything’s lined up neatly, sew the inseam in one continuous line, starting at one leg opening and going all the way across to the other. This creates the full pant legs in just one go.
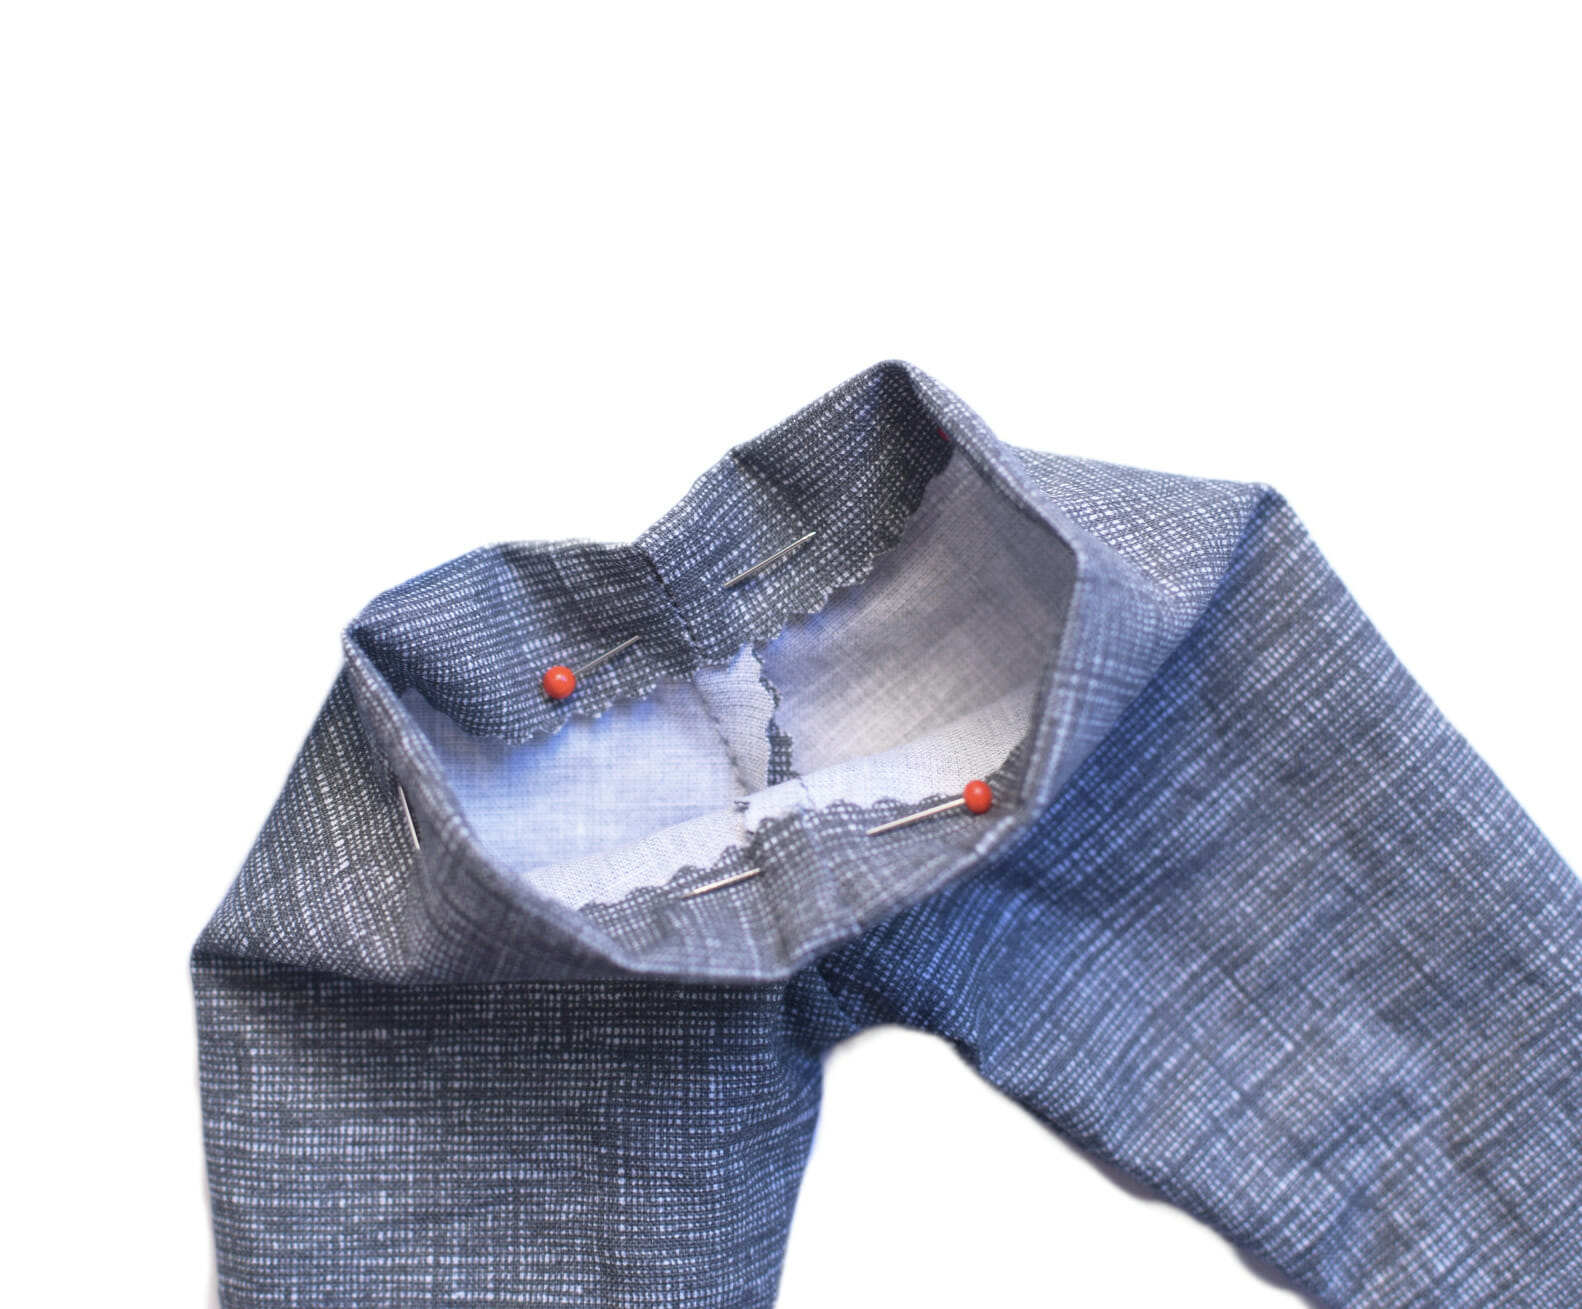
Step 5 – Make the waistband and insert elastic
Turn the pants right-side out. You’re almost there!
Now fold the top edge down about ½ inch to create a casing for the waistband. Sew around the folded edge, close to the raw edge, but make sure to leave a small gap—this is where you’ll insert the elastic.
Grab a piece of 1/4-inch wide elastic, about 6 inches long (adjust depending on your doll’s waist). Use a safety pin to feed it through the waistband casing. Once both ends are through, overlap them slightly and stitch them together to form a loop.
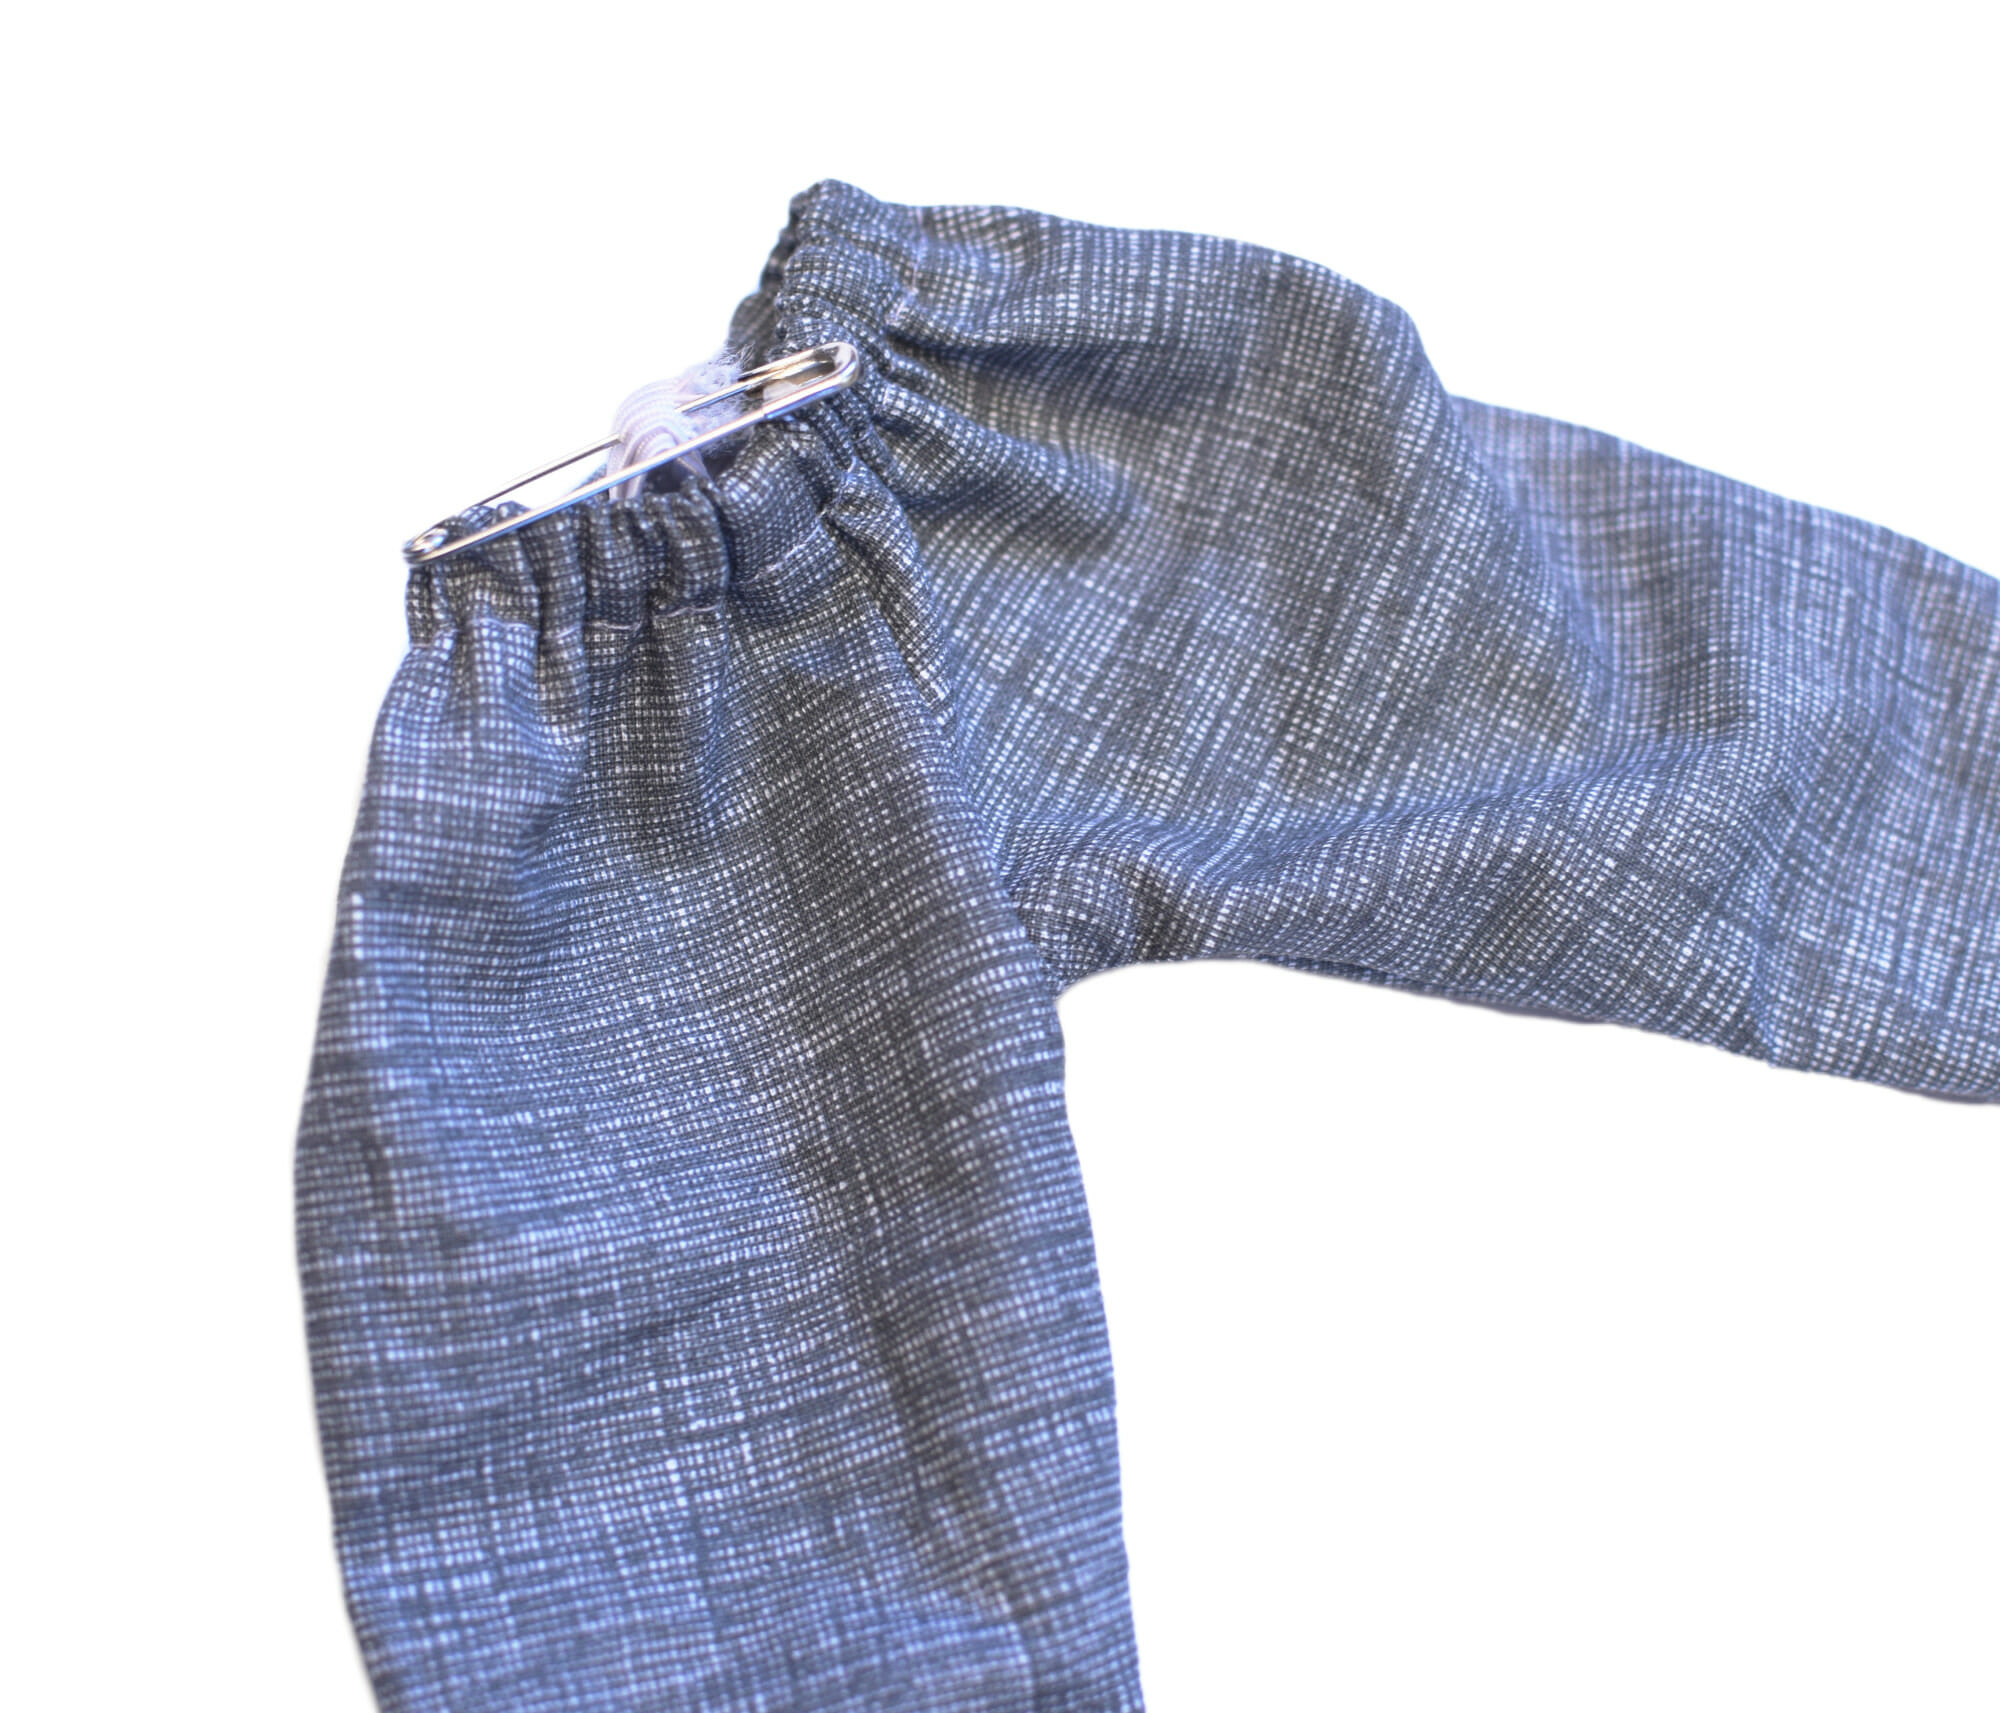
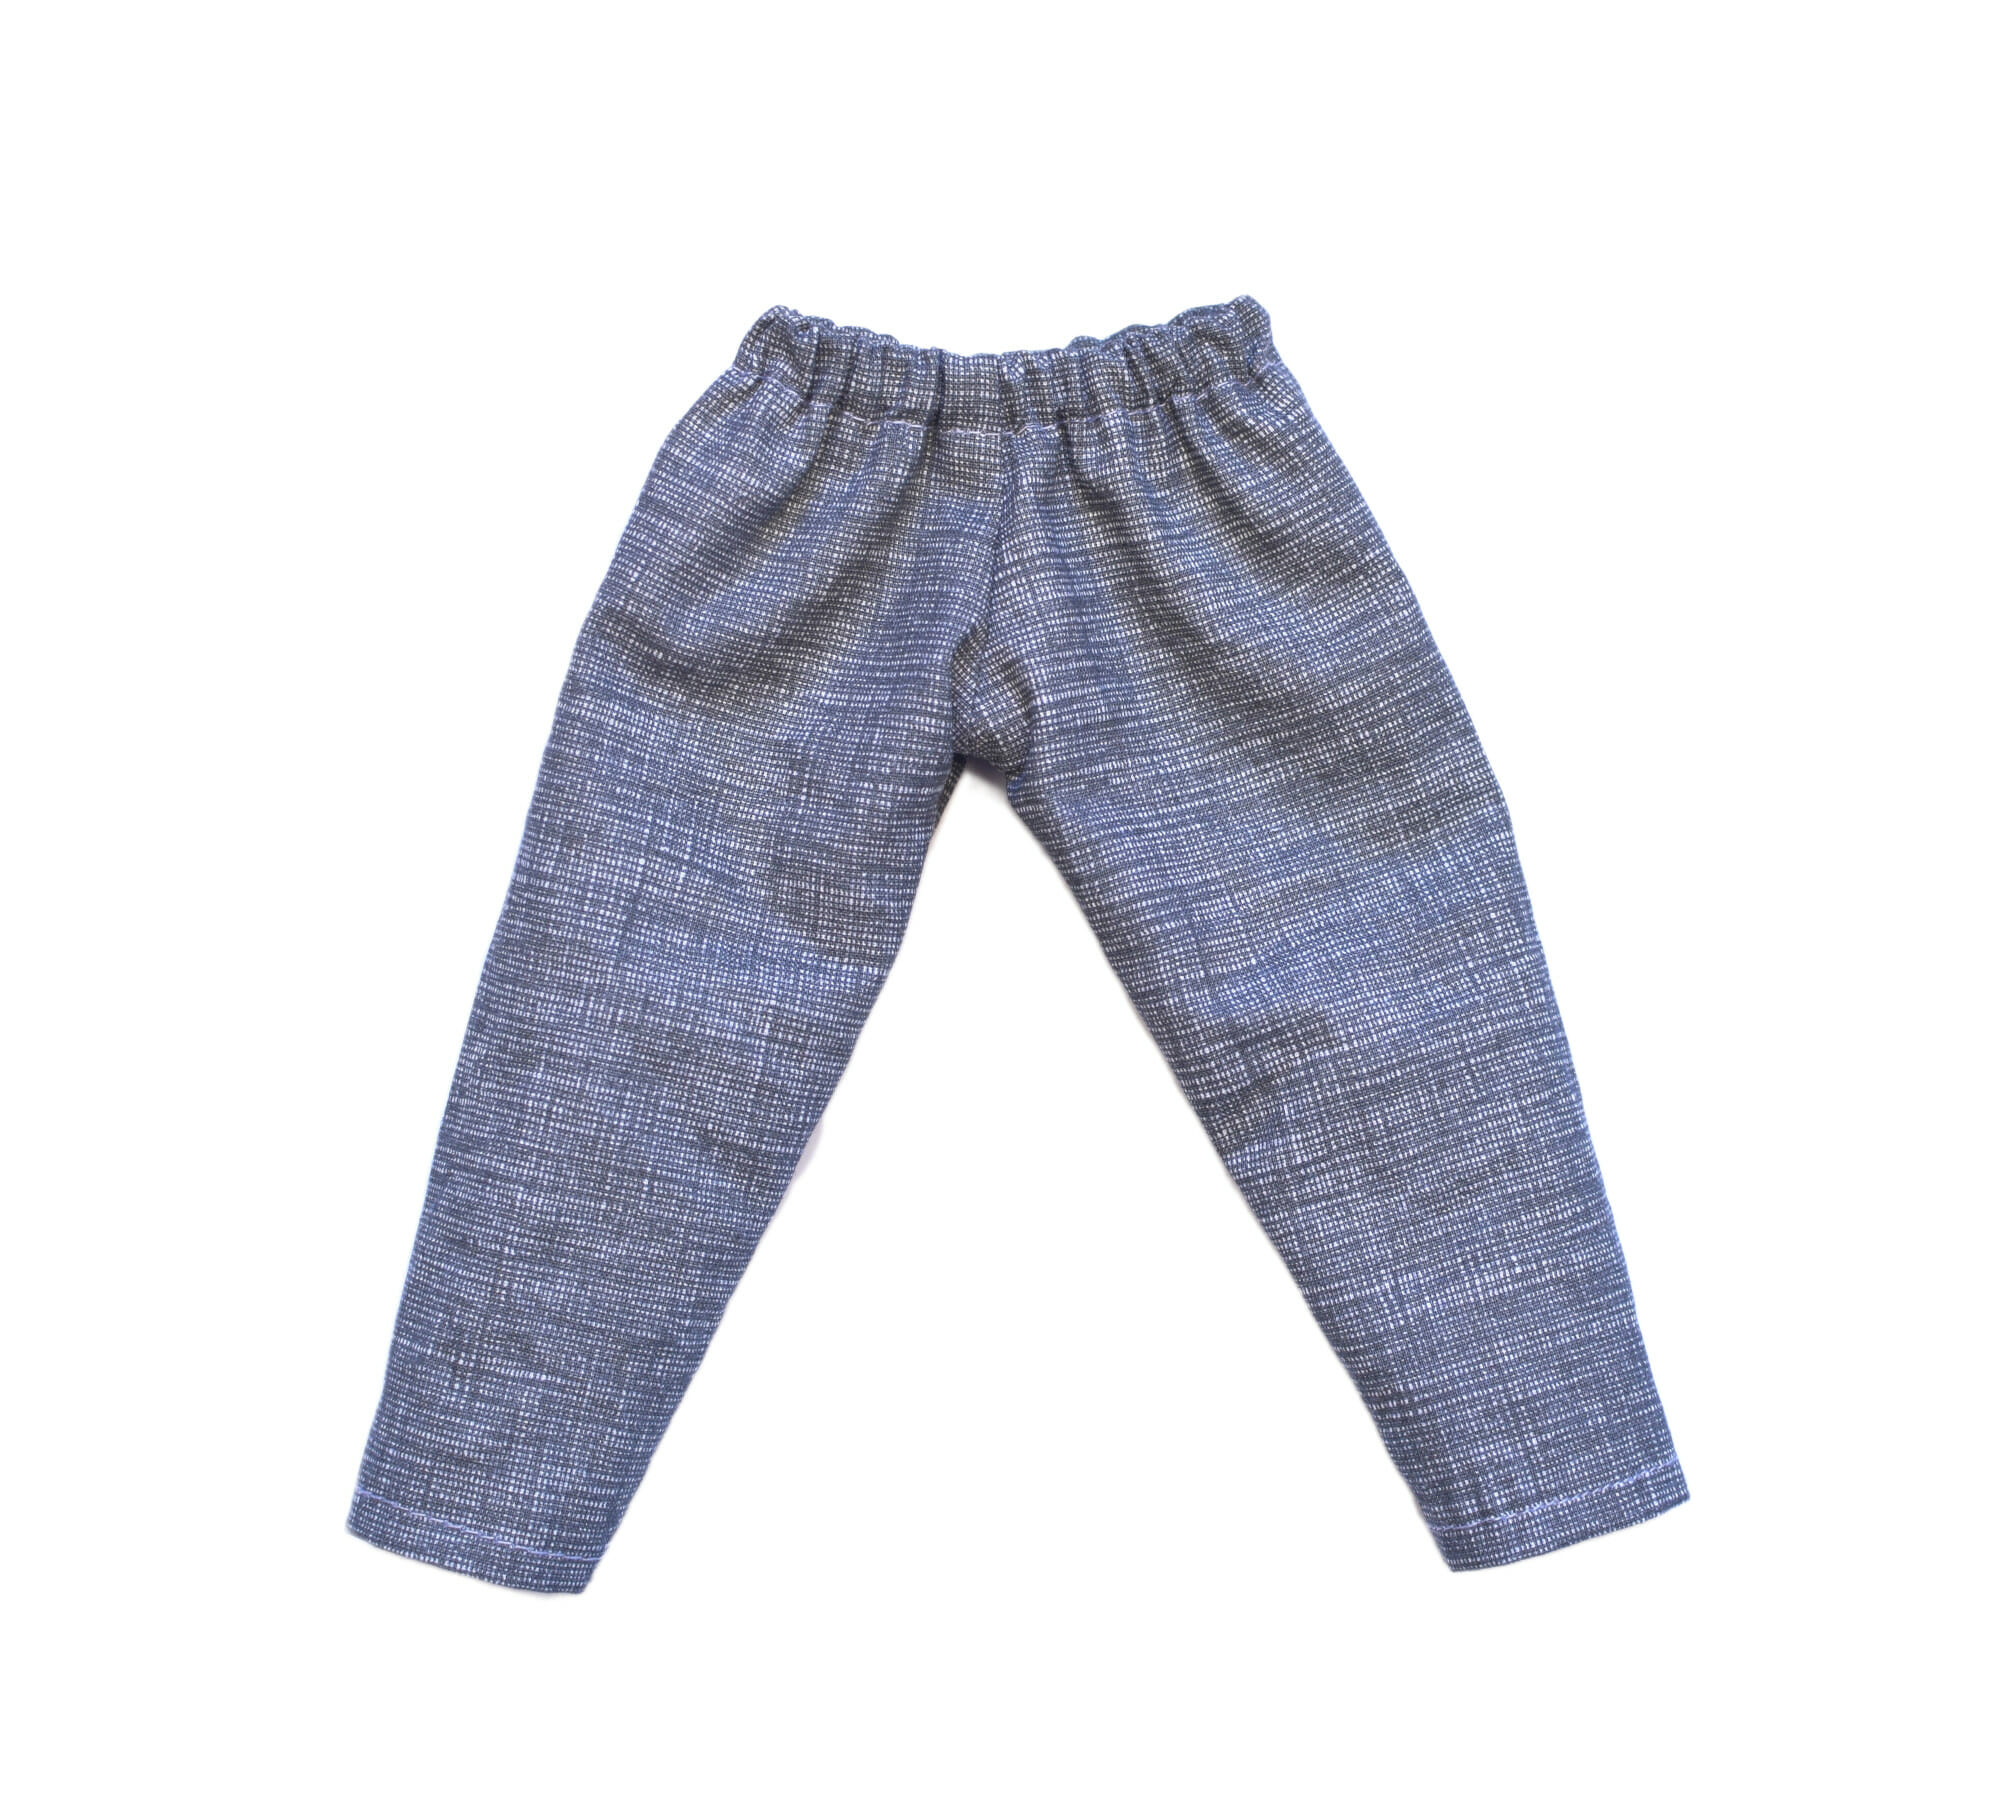
Finally, sew the small opening closed, and that’s it—your basic elastic waist doll pants are done!
Sewing a pair of miniature doll pants with an elastic waistband might seem fiddly at first, but once you try it, you’ll see how fast and fun it is.
Whether you’re sewing for Paola Reina dolls, Minikane dolls, or any other 12 to 13-inch dolls, this free doll pants sewing pattern is a great go-to for any mini wardrobe!
Let’s keep in touch! You can find me on Facebook, Instagram, and Pinterest.


I can’t find the printable patterns.
Hi, this is great x is it possible web sent a free pattern for this. You’ve made very clear to follow. Thanks for sharing xx
where is the link to download the pants pattern?
Does this pattern work on a rabbit doll very nice and clear tutorial.. Thank you
Cute pattern, how do I receive it? I didn’t get it in an email and it didn’t download automatically?
Thank you so much for these easy to follow and understand instructions for sewing doll’s pants! They are the easiest instructions I’ve ever seen!!! Looking forward to creating pants for all my dollies.
Dear Violet,
Thank you for showing and explaining how to make doll pants. I’ve sewed for myself with patterns yet for my dolls the few items I have sewed were with no pattern and so glad they turned out well 🙂
Sadly your wonderfully free download won’t display itself i\on an ipad pro as the format is not supported on my device. Good news is, all your images with explanation will prove to be most helpful.
Thank you, from Canada,
Ange ?
Hi Violet! Thank you for the free pattern and the clear instructions – bring a clumsy beginner, both are priceless! Quick question, though – is the seam allowance already included in the pattern, or should I take it into consideration while cutting my fabric?
Hi Juu,
Thank you for the kind words! Everyone starts as a beginner – never ever forget that! 🙂
My patterns always have seam allowance included – I think it’s faster to cut the fabric that way. I will add the information in the post, thank you for bringing this to my attention.
Awww thank you!!!
Please explain step 4 in more detail. How do you “open” the pants? And also, where is the crotch seam. Please note that I am only nine and not very experienced in sewing.
Hi Harmony,
You are nine and you are awesome! I’m so proud of you, and I’ll do my best to be of help.
So, you sew the crotch seam at Step 2 (the side seams indicated by the side arrows).
At Step 3 you hem the pants (and nothing more than that).
At Step 4 you have to fold the pants in half, so that the crotch seam is in the middle. Take the hem of each pant leg and fold it in half, with the right sides touching, then line up the front and back crotch seam. That’s all. Now your doll pants already look like real pants. These pants do not have a side seam, only an inner leg seam.
Also, I will edit the instructions in the post to make things clearer for future readers. Your comment made my heart melt!
Lots of love from Romania, and I’m always here if you have more questions.
Violet
Thank you for this step by step example. I needed it……lol. Very simple❤️
Thanks so much for this pattern! Your instructions were very clear and this pattern adapted well to a “Peter” doll from the book series, Snowy Day, Whistle for Willie…
I did it and it was so easy. Thank you!
Do you have approximate measurements for the pants and tops? I’m making some for my niece and I don’t have her doll to go by. But it is an 18” doll.
Hi Megan,
Sorry I can’t help you – this doll is 12 inches tall.
Thank you will try these in different guises for the ethnic dolls at my daughter’s Preschool used for teaching aids
Thanks for sharing. Can’t wait to try this.