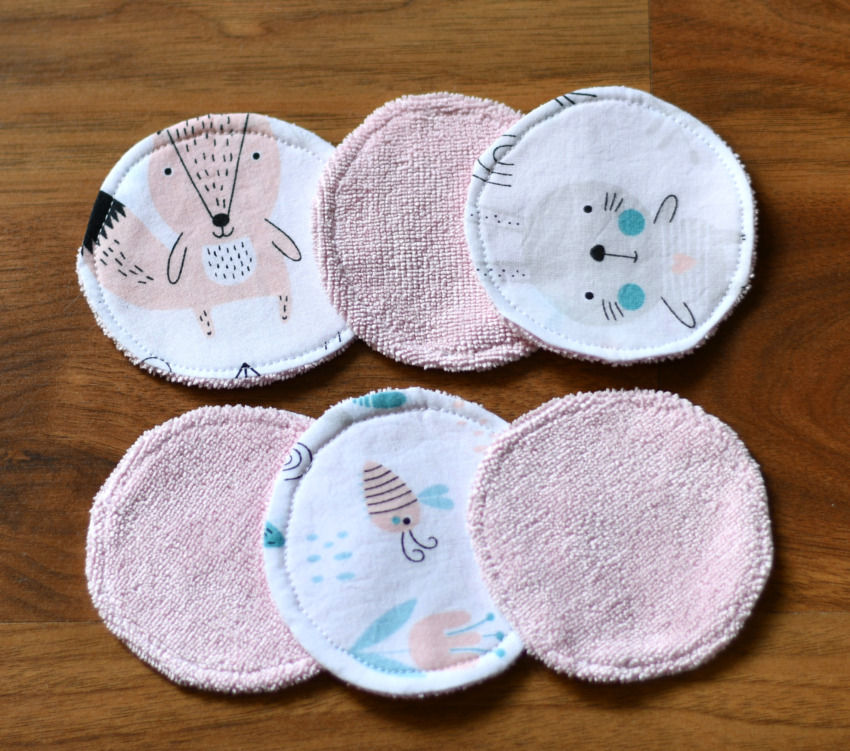
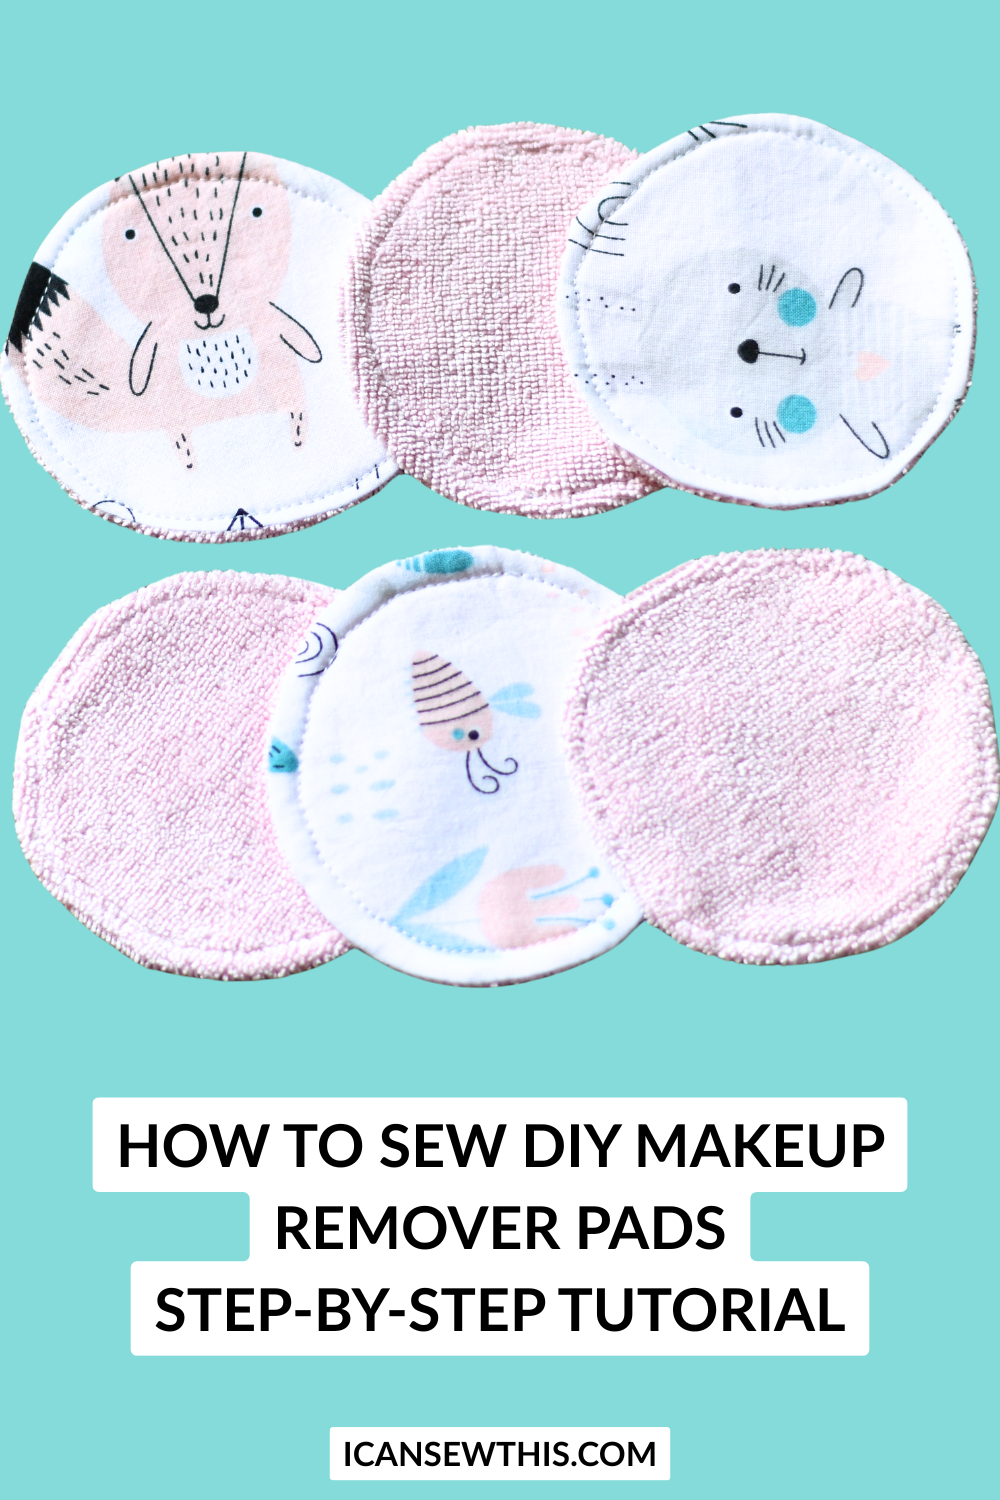
Want to cut down on waste and save money at the same time? Making your own DIY reusable cotton rounds is a super easy way to kick off a zero-waste beauty routine. In this beginner-friendly sewing project, I’ll walk you through how to make your own soft, durable makeup remover pads that you can wash and reuse again and again.
These little fabric rounds are perfect for removing makeup, applying toner, or even cleansing your face with micellar water. Plus, they’re so much cuter than the store-bought ones—and way better for the planet!
Why sew your own reusable makeup remover pads?
Let’s be honest—those single-use cotton balls and disposable wipes add up fast. Not just in cost, but in trash too. By sewing your own homemade facial cleansing pads, you’re not only making a smart, sustainable choice—you’re also creating something that feels really good to use. These DIY cotton rounds are soft on your skin, sturdy enough for daily use, and way more eco-friendly.
They’re made with absorbent cotton or soft flannel (you can even repurpose old baby blankets or towels), and they wash beautifully. You’ll never want to go back to the disposable kind again.
Super durable and machine washable
No fraying, no shrinking, no weird shapes after one wash—these reusable makeup pads are designed to last. I used a simple design with enclosed seams, so they can be tossed straight into the washing machine without falling apart. Just pop them in a mesh laundry bag or a DIY drawstring bag (more on that below) and wash them with your towels or regular laundry.
A great project for beginner sewists
If you’re new to sewing, this is a low-stress project with a high payoff. It’s also a great way to practice sewing curves! Once you’ve got the hang of it, you’ll be whipping out dozens of these cute little rounds in no time. They’re quick to make, don’t use much fabric, and they make your sewing feel instantly useful.
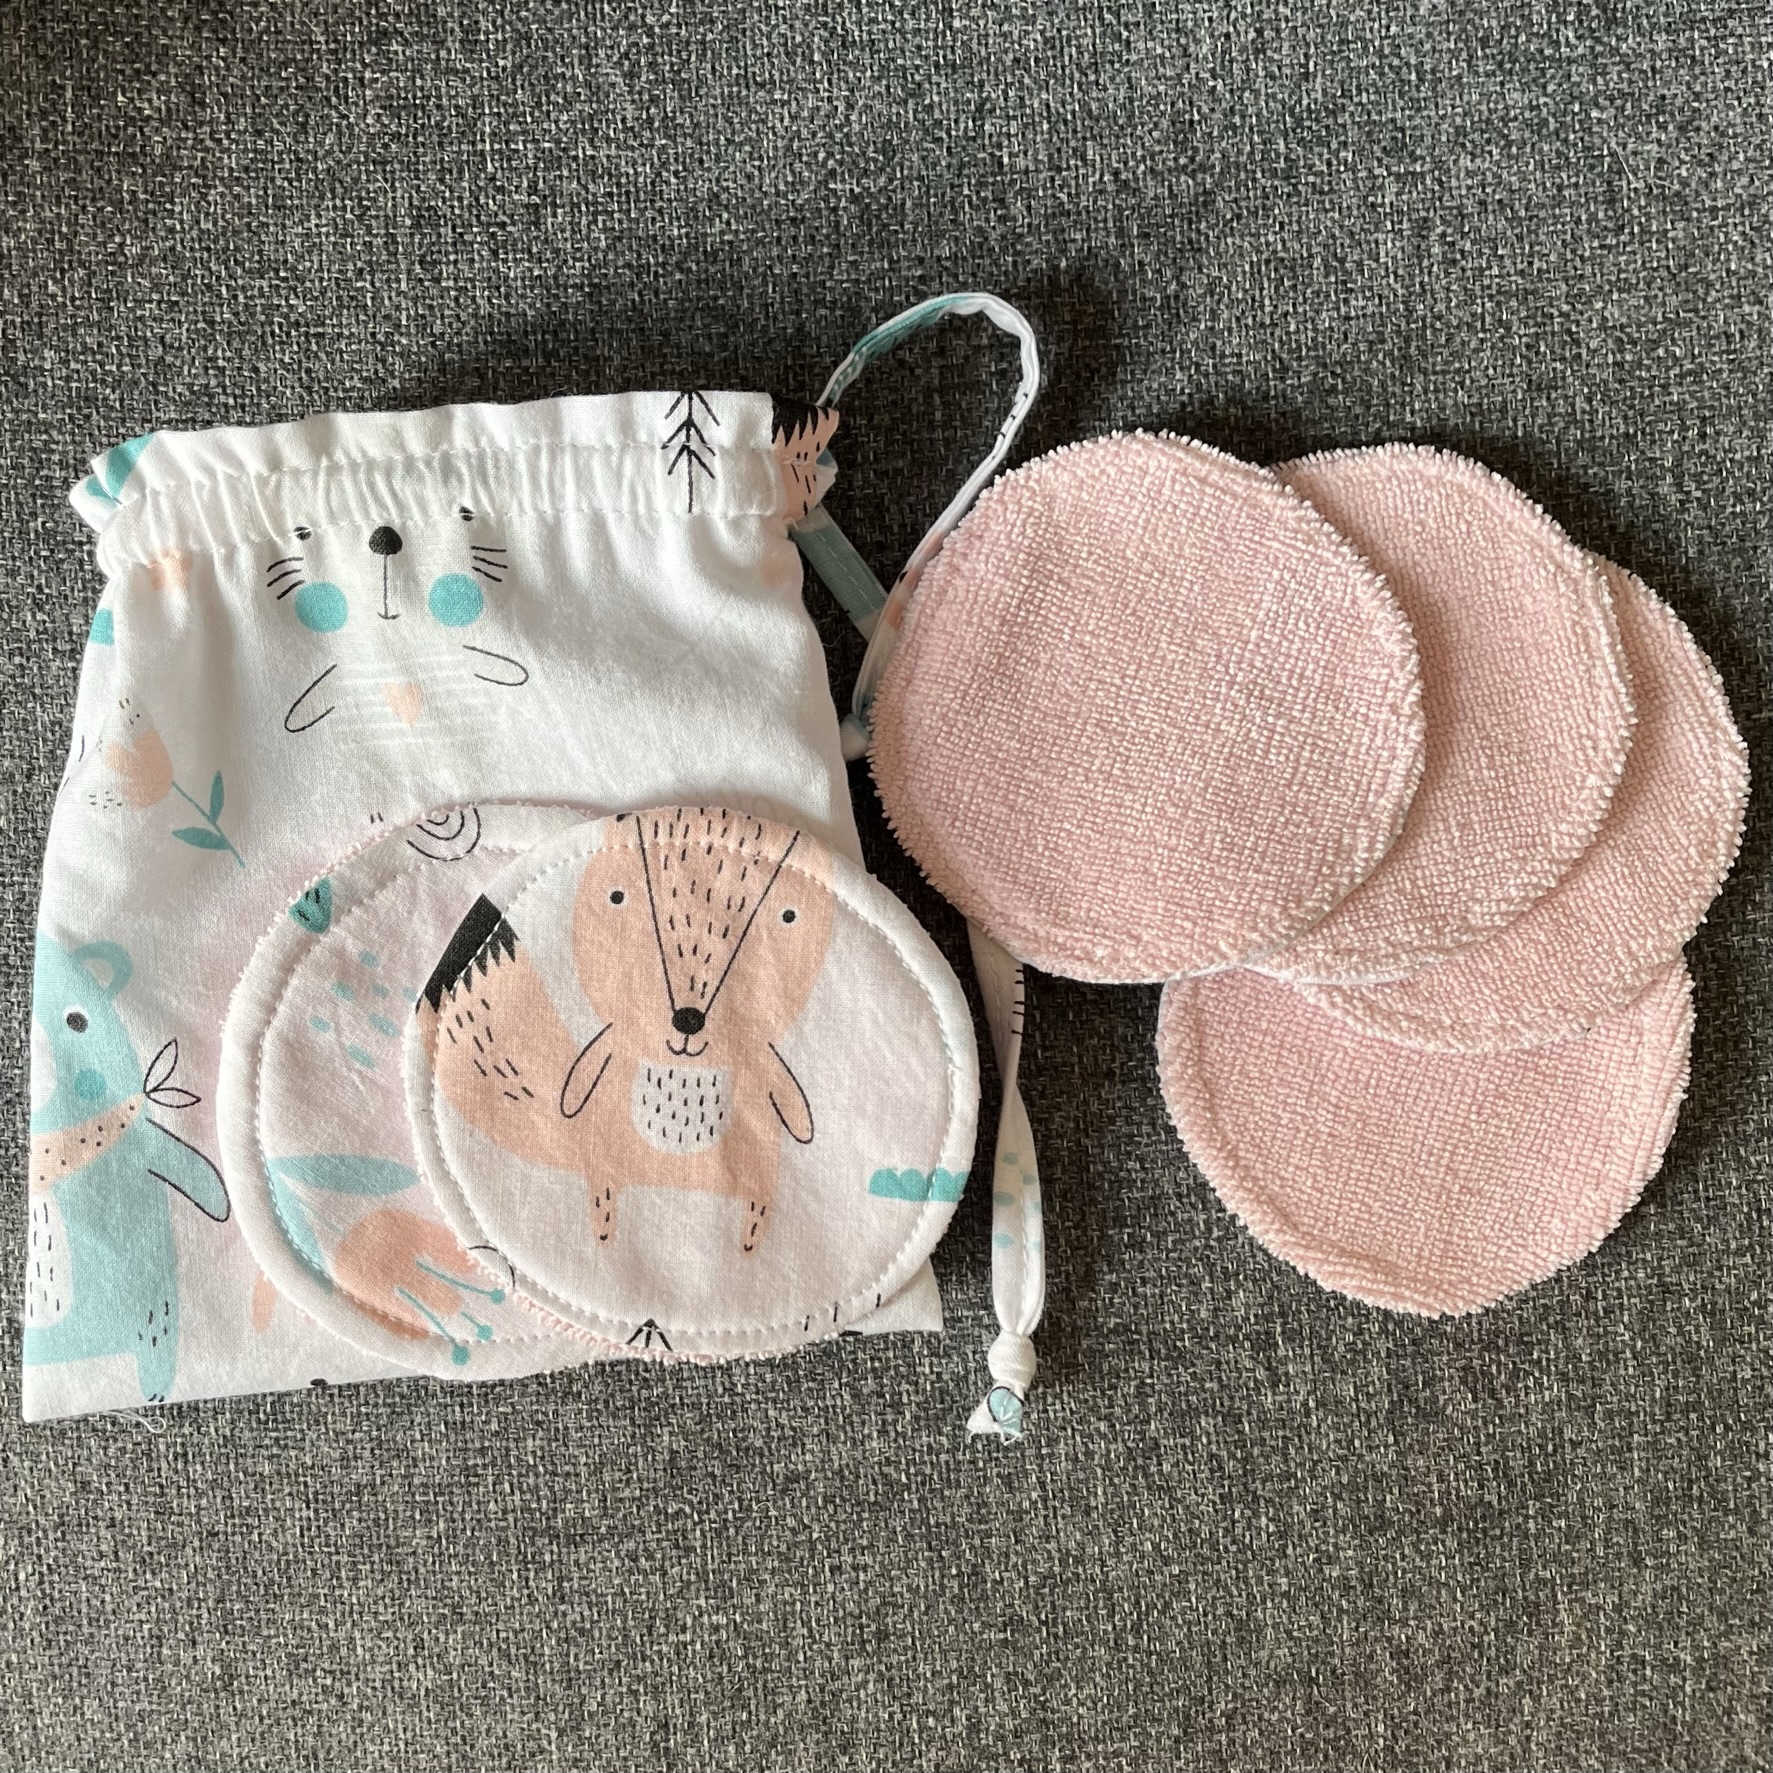
Bonus: Make a matching drawstring bag
I like to keep my cotton face pads in a small bowl by the sink, and after using one, I just drop it into a simple fabric drawstring bag. Once the bag is full, I toss the whole thing in the wash. No more lost pads hiding in the laundry! If you need a pattern, I’ve got an easy drawstring bag tutorial you can follow.
How to use reusable cotton pads for your skincare routine
These handmade makeup remover pads work just like the disposable ones. Use them with your favorite cleanser, toner, or micellar water. After each use, toss it in your wash bag and reuse it once clean. They’re gentle on sensitive skin, and way less wasteful. I love how soft they feel, even after tons of washes.
Thoughtful, eco-friendly gift idea
Need a quick gift? Make a small bundle of these DIY cotton makeup pads, tie them with twine, and pop them in a cute pouch or jar. They make lovely, sustainable gifts for friends, teachers, or anyone who’s into skincare or zero-waste living. Pair them with a little bottle of homemade toner or a natural cleanser, and you’ve got a spa-worthy present that feels personal and useful.
So if you’ve been thinking about how to make reusable makeup remover pads, give this easy project a try. It’s beginner-friendly, budget-friendly, and totally planet-friendly. Your skin (and the Earth) will thank you!
What’s the best fabric for reusable makeup pads? Let’s break it down
If you’re wondering what fabric to use for reusable makeup pads, you’re not alone! The key is to choose something soft enough for your face, absorbent enough to actually work, and strong enough to survive tons of trips through the washing machine. Basically, you want fabric that feels nice on your skin and does the job.
Here are some top picks for sewing reusable facial rounds:
- Microfiber – Super soft and great at grabbing makeup. It’s gentle on your skin and doesn’t soak up too much product.
- Terry cloth – Like a mini washcloth! It’s slightly textured, so it works well for gentle exfoliation while removing makeup.
- Bamboo velour – Extra soft and naturally antibacterial, this is a favorite for eco-friendly makeup pads.
- Brushed cotton or flannel – Smooth and soft, perfect if you want a cozy, natural feel. Great for sensitive skin!
- Jersey knits – Stretchy and soft, plus they’re easy to sew and often found in old t-shirts (hello, upcycling).
- Fleece – Budget-friendly and super soft. It won’t fray, so it’s perfect for no-fuss reusable cotton pads.
Don’t want to buy new fabric? Upcycle!
You totally don’t need to spend money on fancy fabric for this project. I made a bunch of homemade makeup remover pads from a set of microfiber cloths a friend gave me. I already had way too many for cleaning, so turning them into skincare goodies was an easy win. Think old flannel PJs, baby blankets, or worn-out towels—just wash them first, and you’re good to go!
A few extra sewing tips for success
- Match fabric colors on both sides – That way, if one side bleeds in the wash, it won’t mess up the other. Plus, it just looks nicer!
- Batch sew for speed – Want to save time? Do each step in bulk. Cut all your fabric pieces, then sew them all, then turn them all, etc. You’ll finish way faster this way!
- Not into sewing circles? No problem! – Squares are just as effective, easier to cut, and less wasteful. Honestly, they’re like mini fabric coasters for your face—just skip the batting layer.
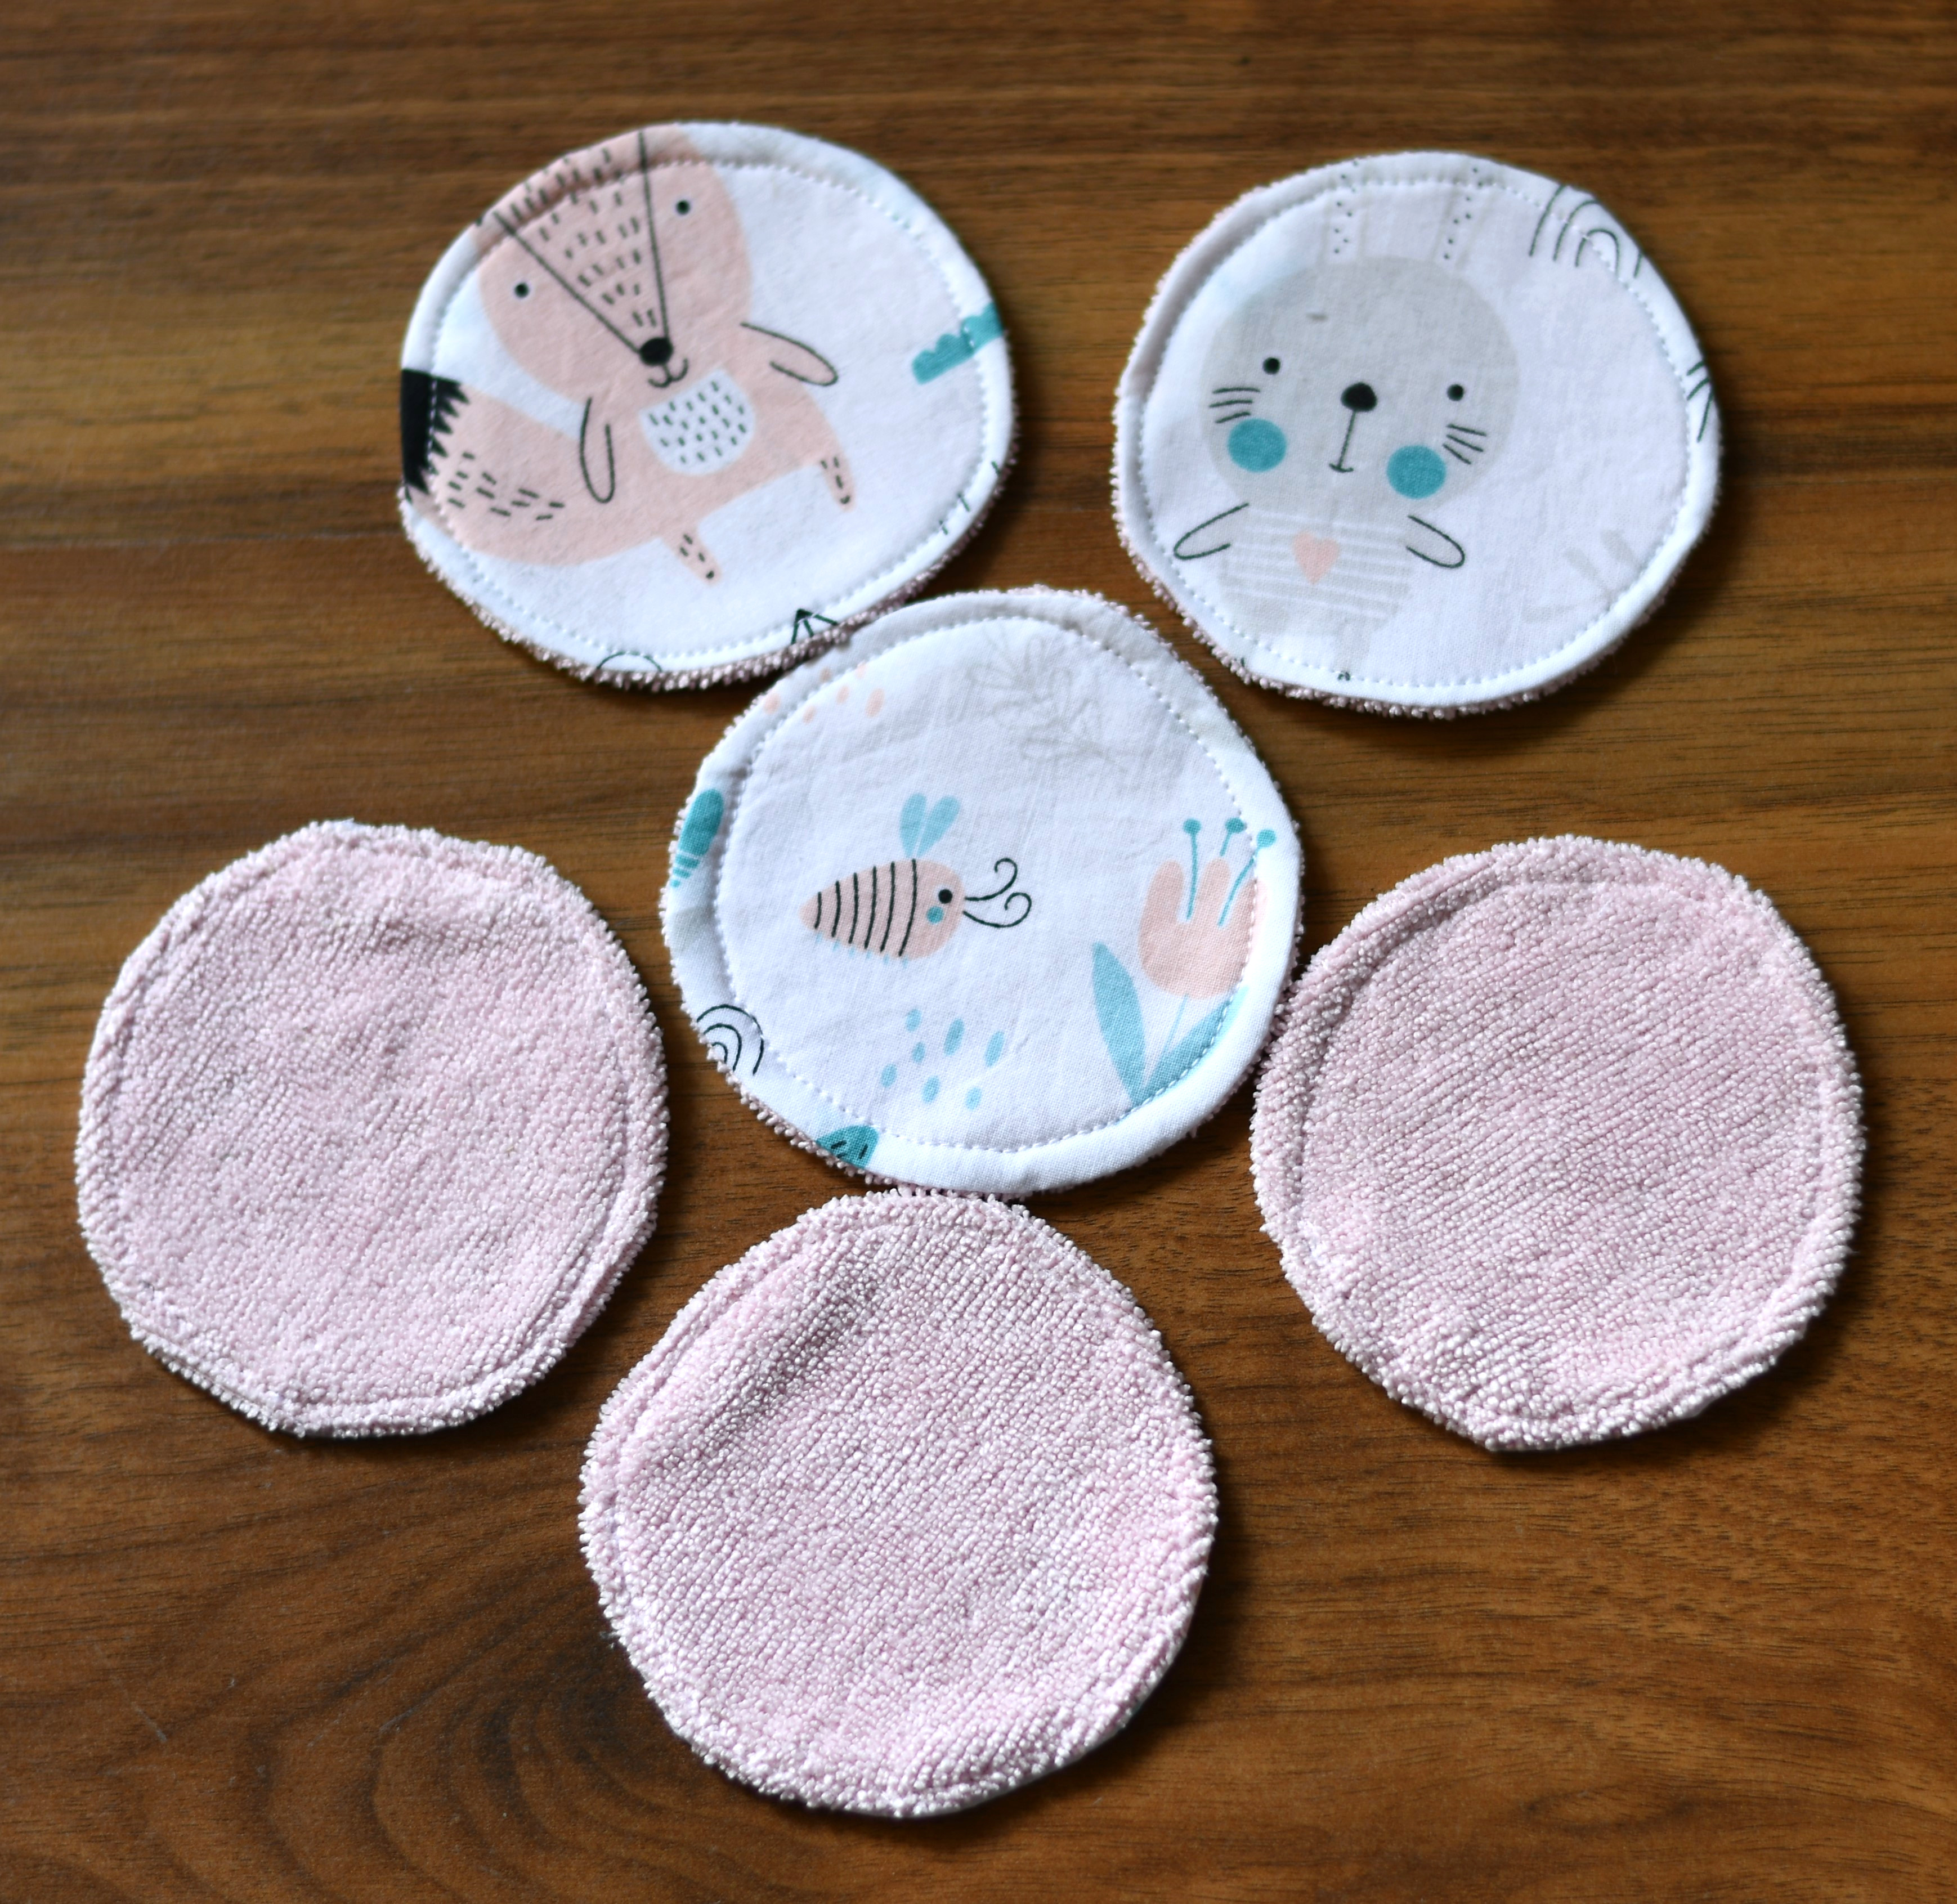
Finished size
I like to make mine about 3.5 inches across, which feels just right—big enough to be useful, small enough to stash in a jar or pouch. But feel free to tweak the size to fit your needs!
DIY cotton rounds – sewing supplies
- circle template – download PDF below (4 1/4″ diameter)
- fabric for the soft side: microfiber, terry cloth, bamboo velour, brushed cotton, jersey knits, fleece
- cotton fabric for the other side
- sewing machine
- needle
- matching thread
- fabric scissors / rotary cutter
- sewing pins / sewing clips
- iron
- fabric marking pen
How to make DIY makeup remover pads – step-by-step sewing tutorial
Ready to sew your own set of reusable makeup wipes? These are quick, beginner-friendly, and oh-so-satisfying to make. Whether you’re trying to reduce waste, save money, or just use up some fabric scraps, these homemade cotton rounds are a great little project.
Grab your materials, and let’s get sewing!
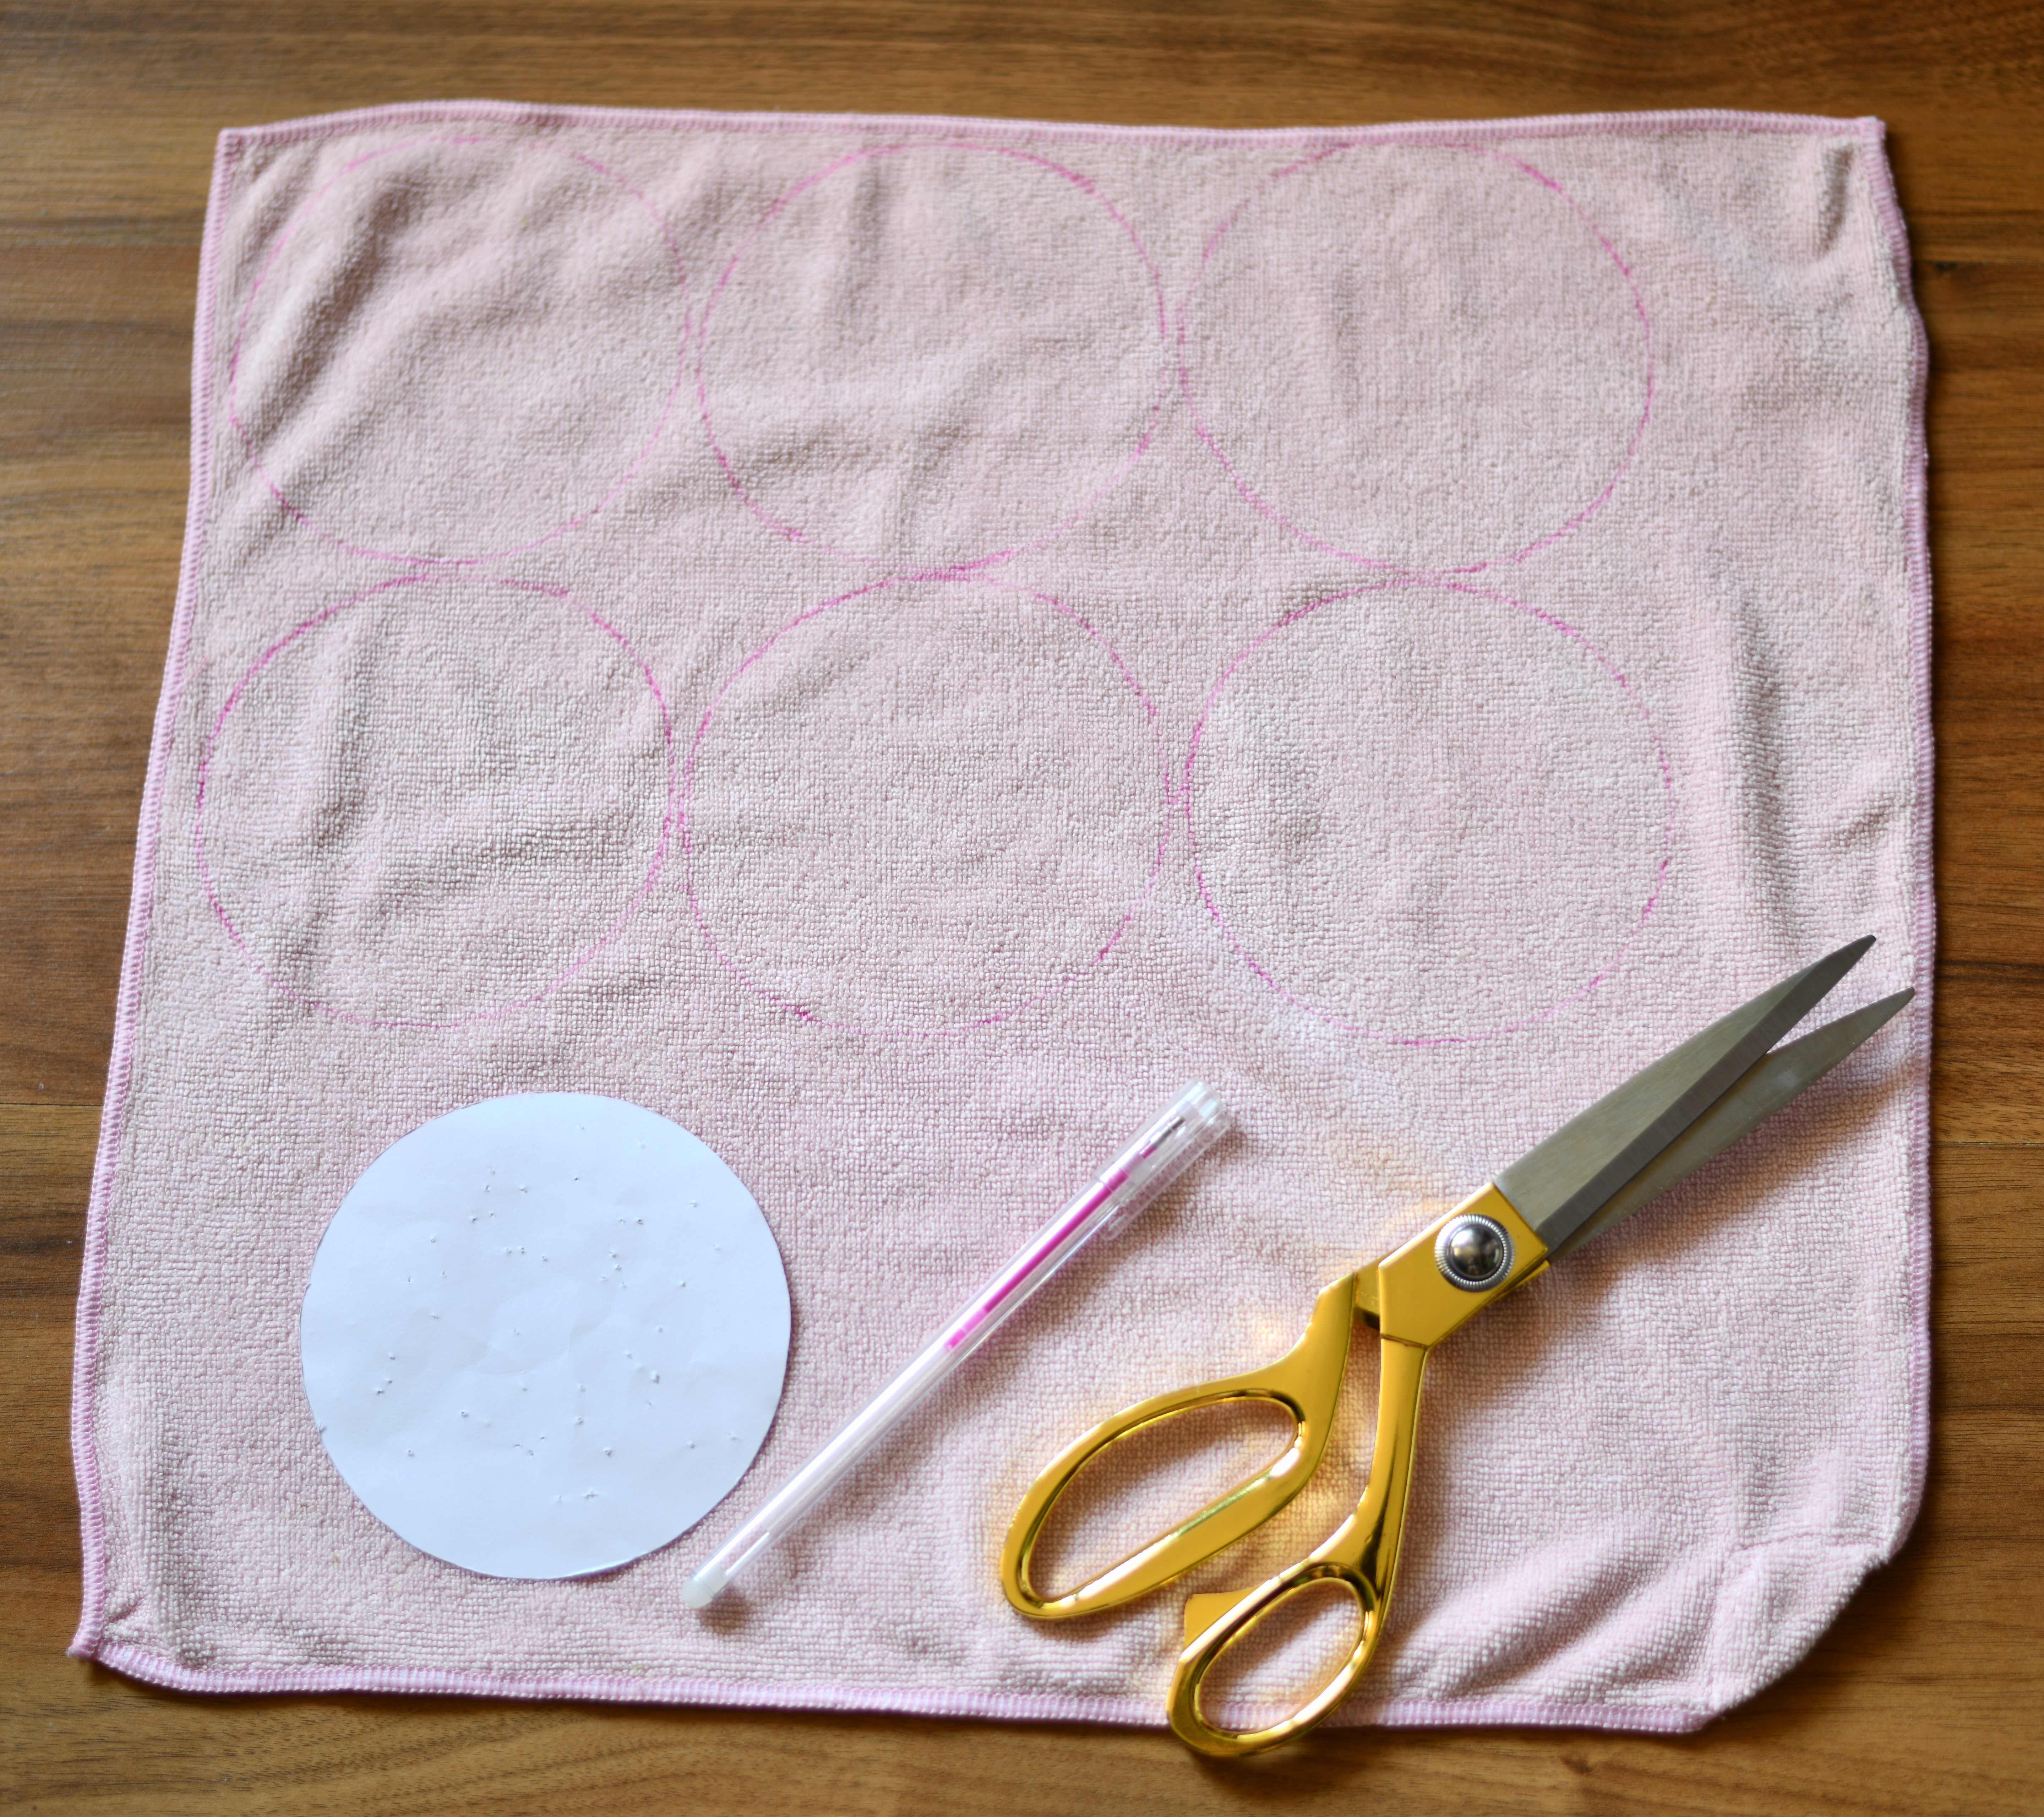
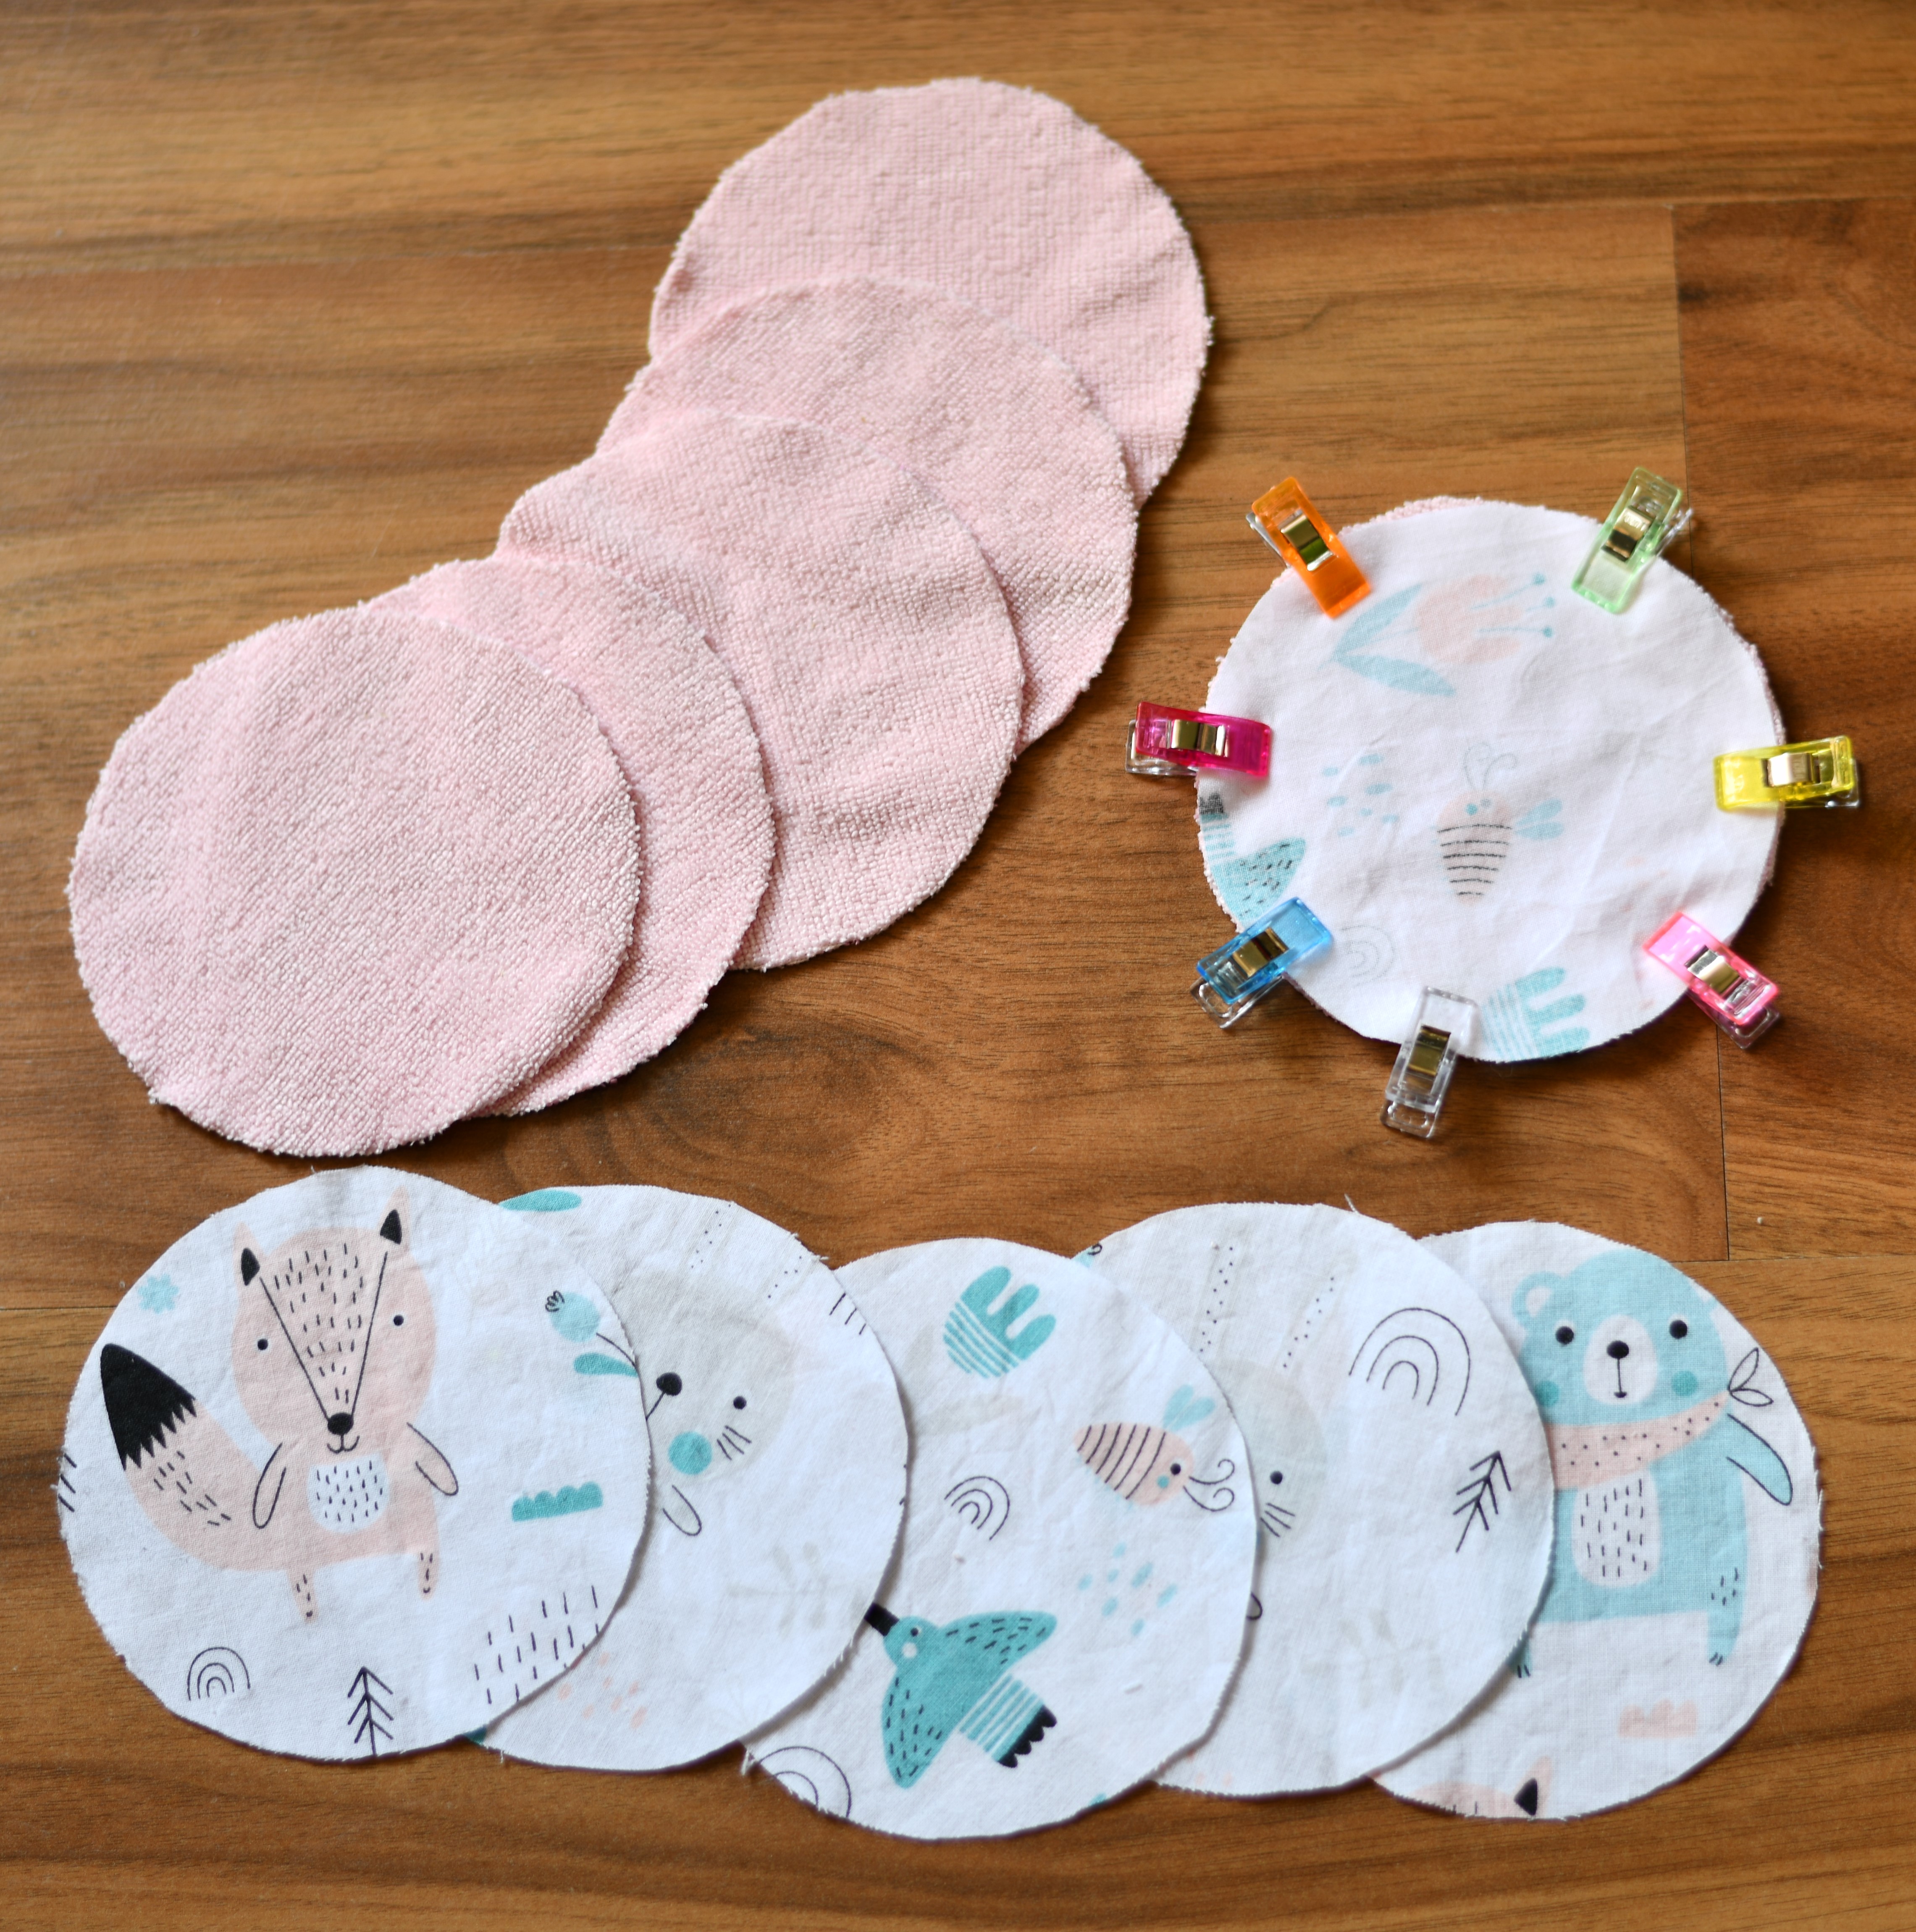
Step 1 – Cut your fabric circles (or squares)
First things first: choose your fabrics. I used a soft microfiber cloth for the back and some cute printed cotton for the front. You can totally mix and match—just make sure one side is nice and soft for your skin.
Use a template (a cup, lid, or even a cookie cutter works great!) to trace your shapes. I used circles, but squares totally work too and are easier to sew.
You’ll need two fabric pieces per pad—one for each side. Trace your shapes with a fabric pencil or washable marker, then cut them out using fabric scissors or a rotary cutter.
From a 15-inch square of microfiber, I managed to cut out 9 circles. Not bad for something that used to sit in the back of a drawer!
Step 2 – Stitch the pieces together
Take one piece of each fabric and place them right sides together—so the wrong sides are facing out. Use sewing clips or pins to keep them aligned. (I used more clips than necessary just because they’re adorable, but you only really need 3 or 4.)
Now, time to sew! Using your sewing machine, stitch around the edge with a 3/8″ or 1/2″ seam allowance—whichever you prefer. Just stay consistent for all your pads.
Important: Leave a 1.5” gap somewhere along the edge so you can turn the fabric right side out. Don’t forget to backstitch at the start and end of the gap to keep the stitches secure.

Tips for smooth curves:
Sew slowly, and imagine the circle as a bunch of tiny straight lines. Pivot your fabric slightly every few stitches to keep that curve nice and round.
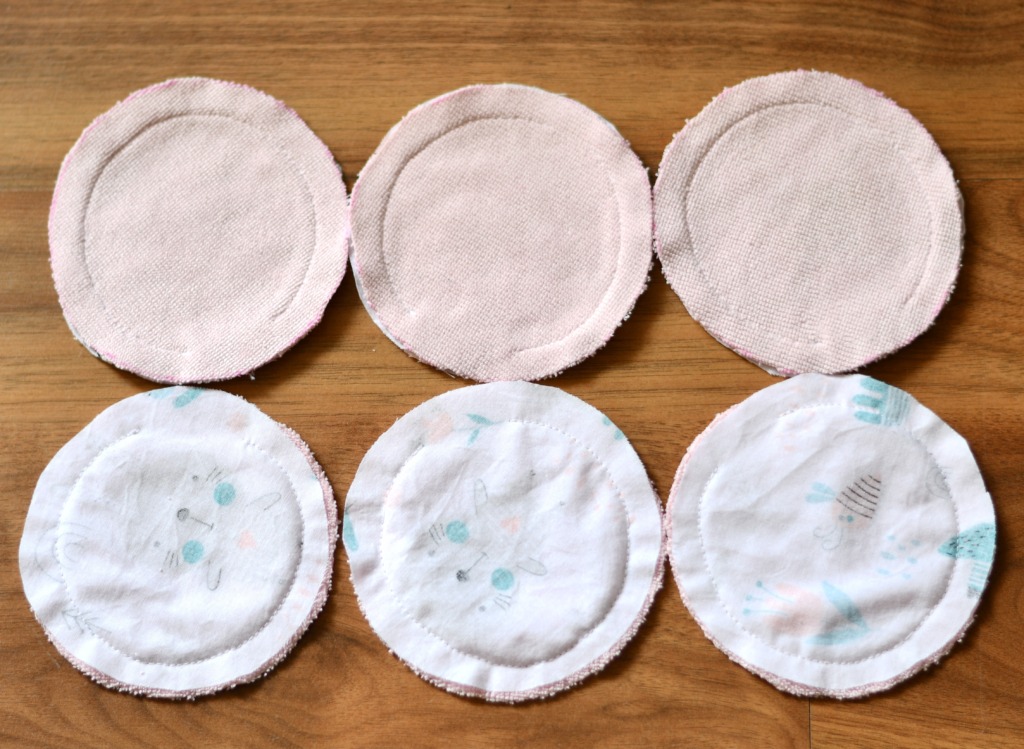
Step 3 – Trim the seams
After stitching, go back in and trim your seam allowance down to about 1/4 inch to reduce bulk. Be careful not to trim near the opening you left for turning—this little trick makes it easier to fold the fabric neatly when you’re closing up the pad later.
You’re already more than halfway done—how easy was that?

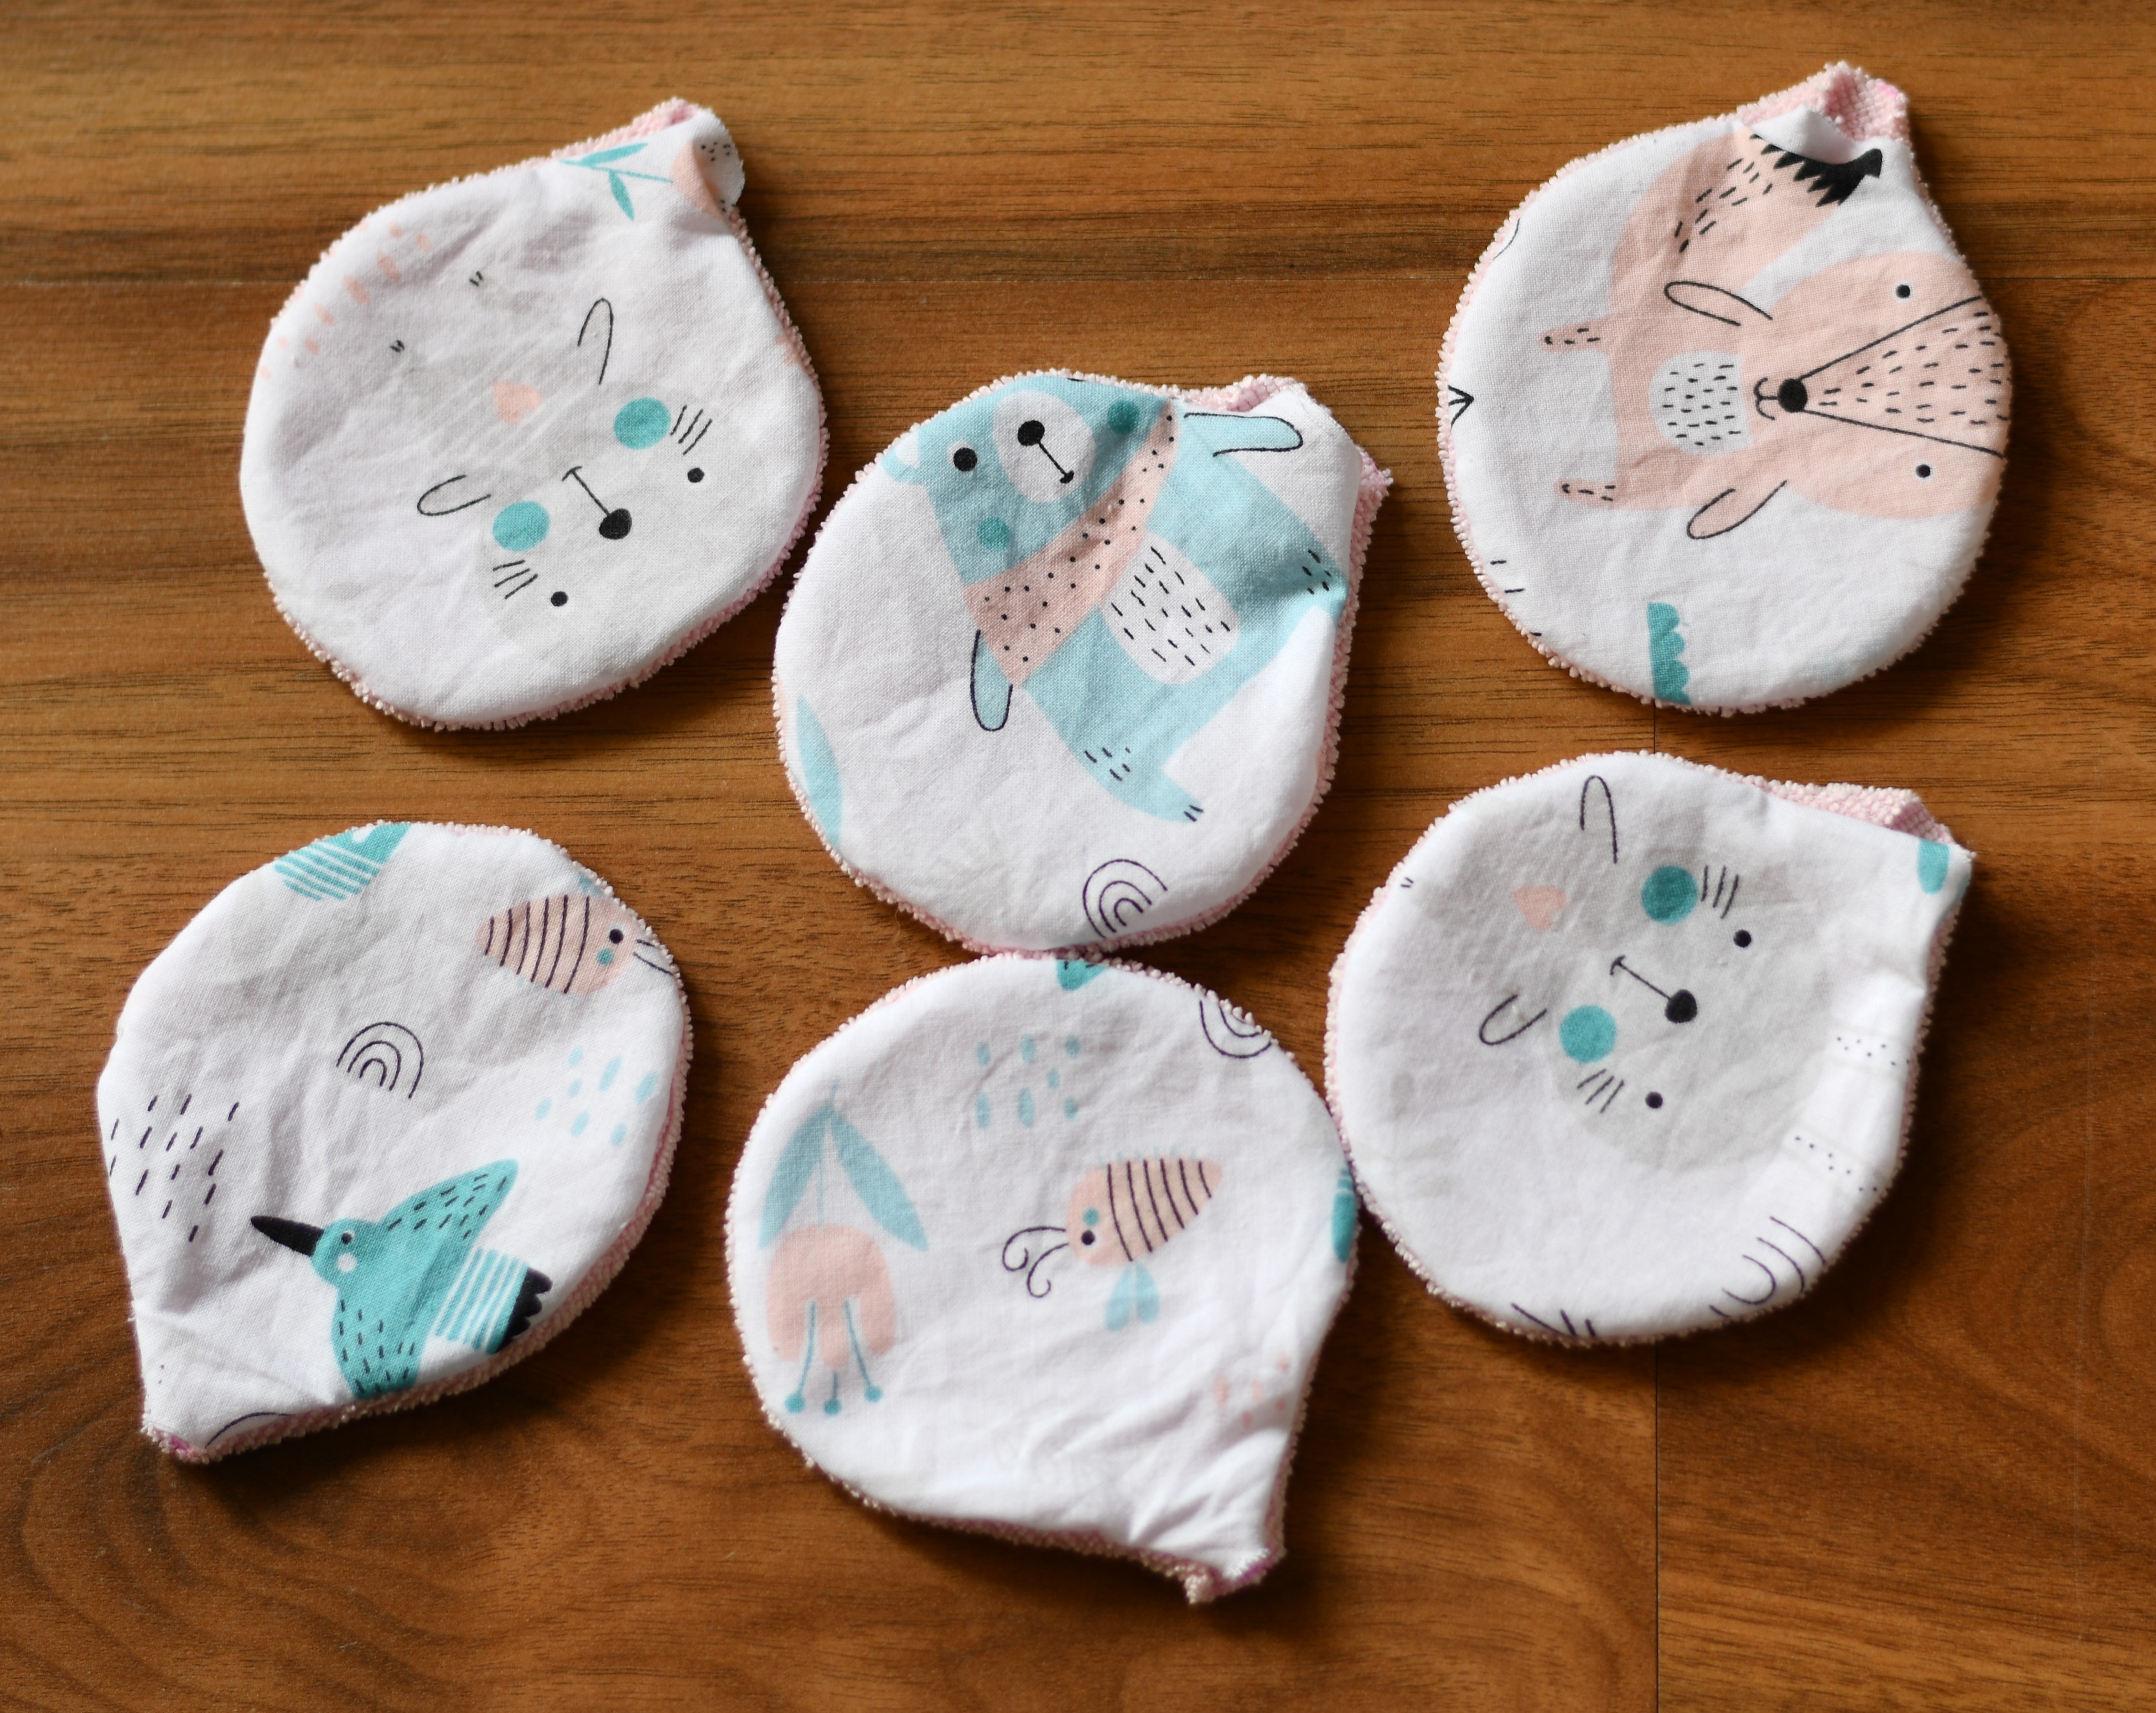
Step 4 – Turn your makeup pads right side out
Here comes the fun part—turning your cotton rounds right side out! Gently pull the fabric through the little gap you left. You can use a blunt pencil, chopstick, or the end of a paintbrush to help push the fabric through and smooth out those edges.
If you don’t have a tool handy, no stress—just roll the seams between your fingers to help shape everything into a nice, even circle. It might take a bit of fiddling, especially on your first few, but you’ll totally get the hang of it. Just be patient and keep smoothing as you go.
Now, fold in the edges of the opening you used to turn the pad. It might not want to sit perfectly at first, but a little gentle tugging and rolling will help. Try to shape it so the curve looks clean and even all the way around.
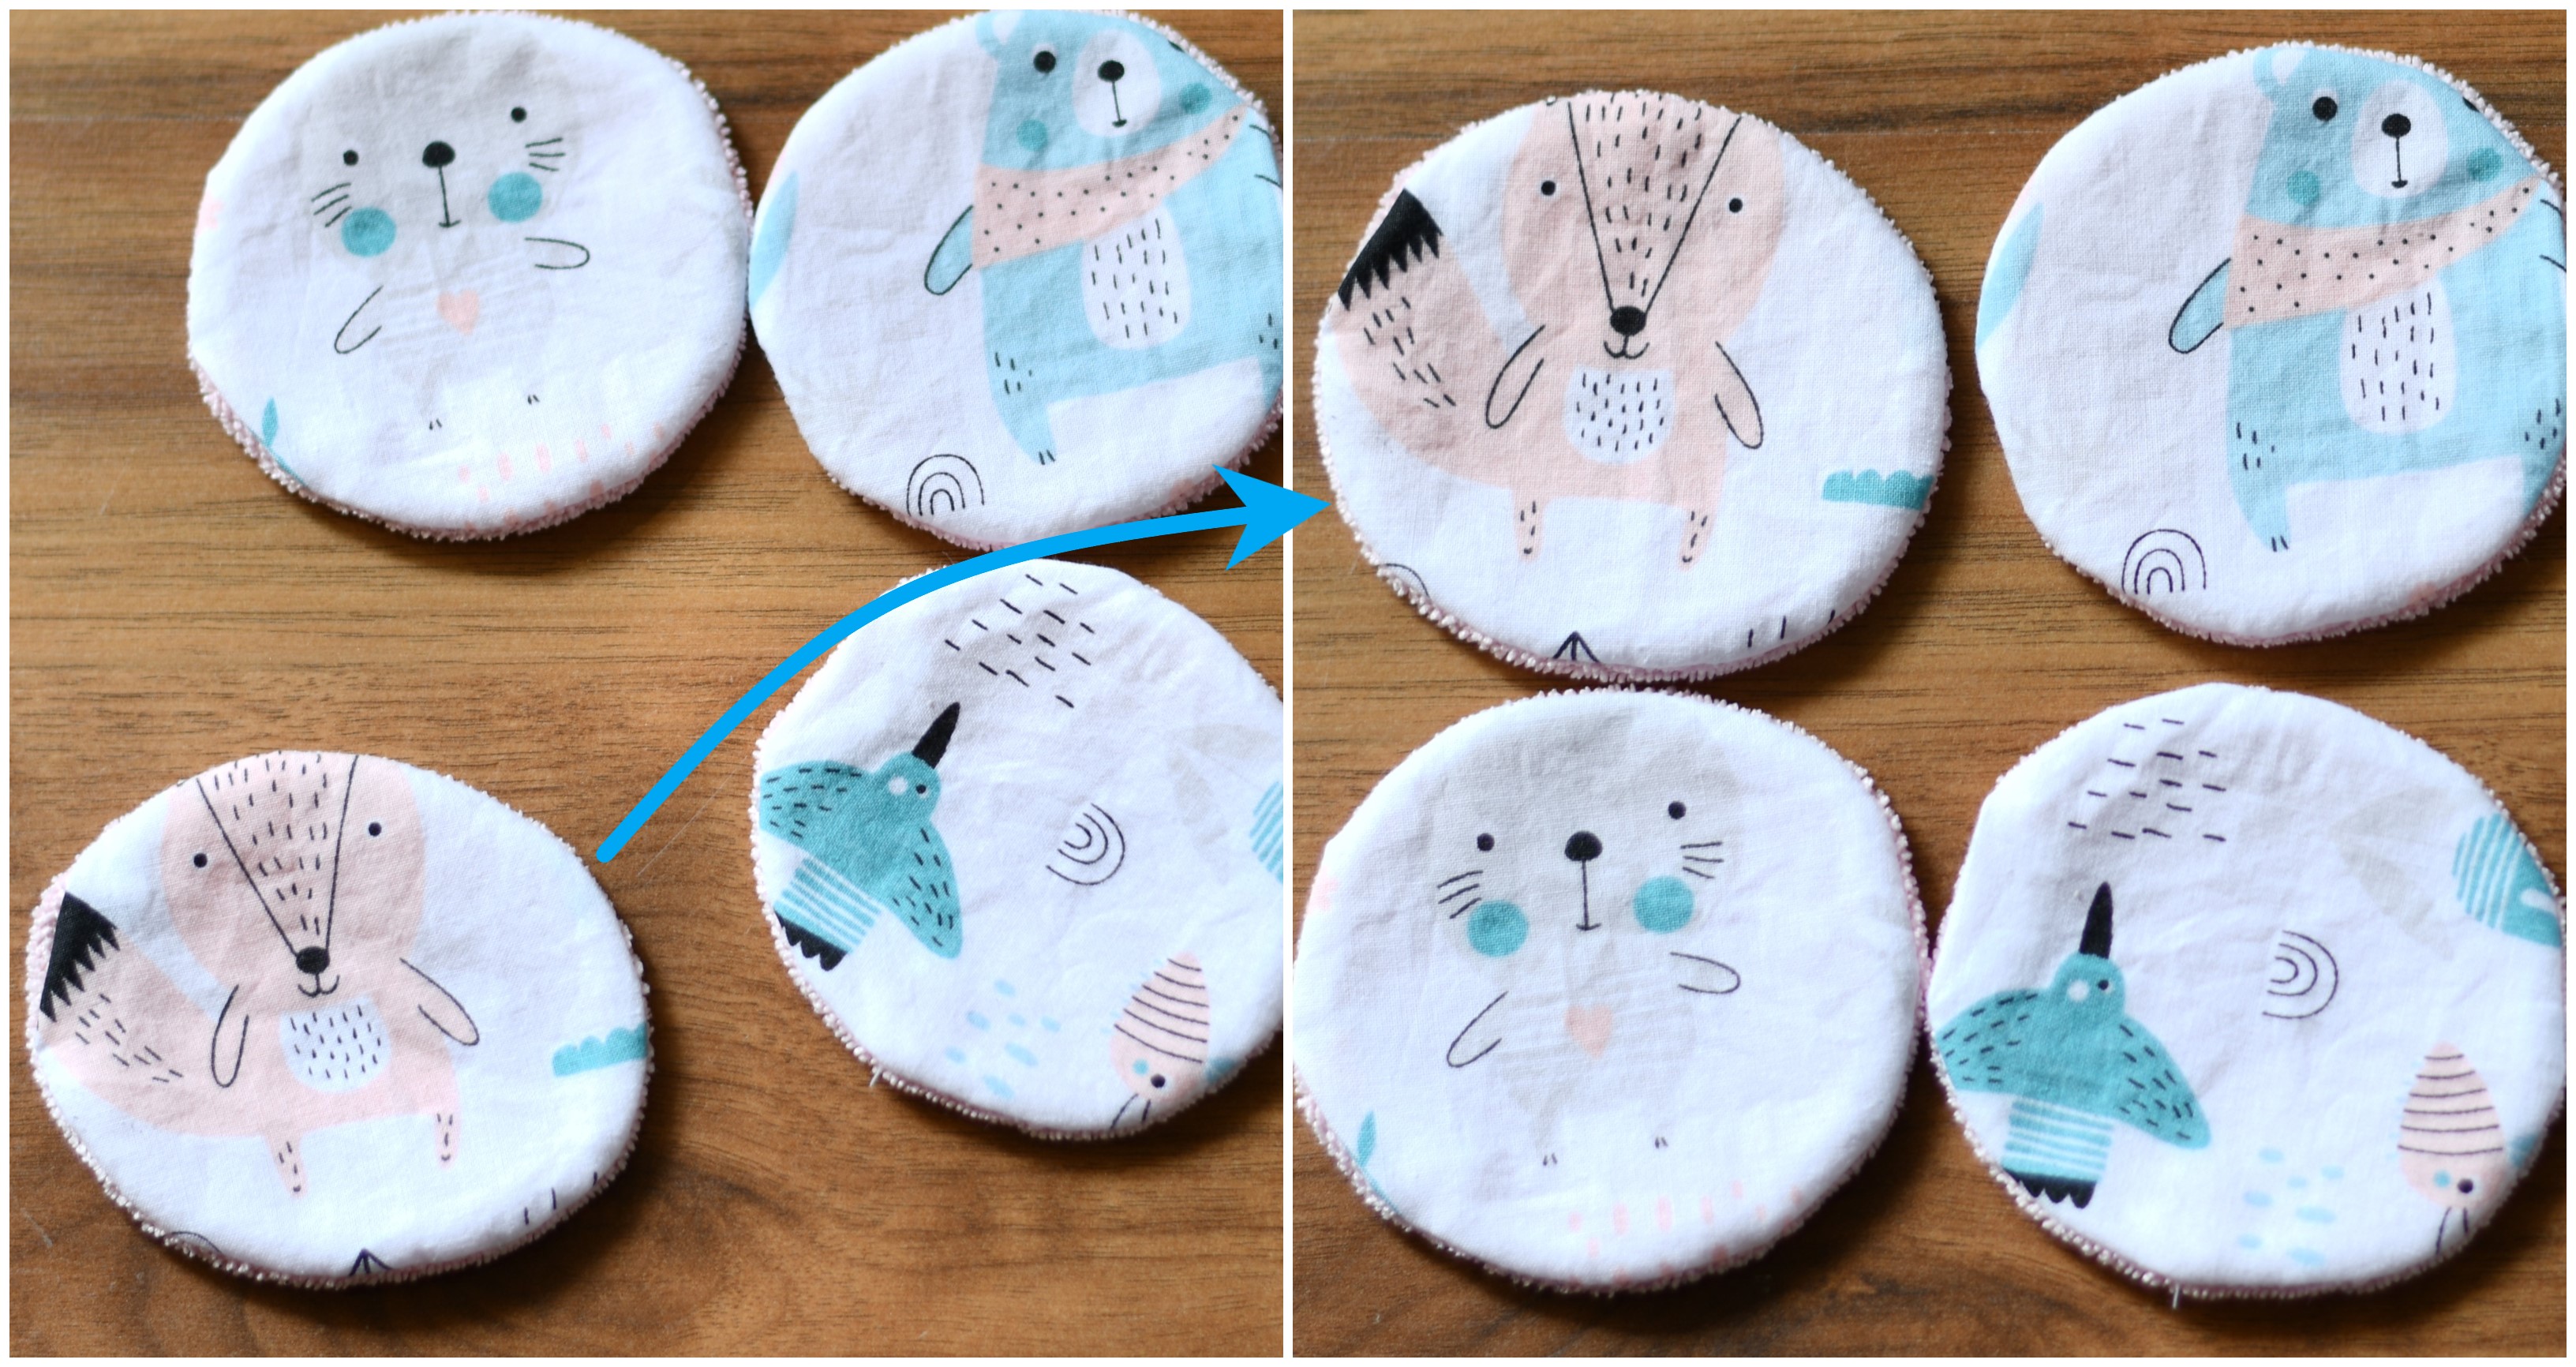
Once everything’s in place, give your cotton rounds a quick press with an iron. This step makes a huge difference—it flattens everything out and makes topstitching way easier. And hey, if your pads aren’t perfectly round, that’s totally fine. Handmade means perfectly imperfect!
Sewing tip: Your fingers are seriously underrated tools. Use them to shape seams, press edges, and feel for lumps and bumps that need smoothing. Think of them like your built-in sewing helpers!
Step 5 – Topstitch to finish
Now it’s time to give your pads that polished look! Take each cotton round back to your sewing machine and topstitch around the edge, about 1/8″ from the outside. This step not only makes them look finished and professional, but it also helps your homemade makeup pads hold their shape wash after wash.
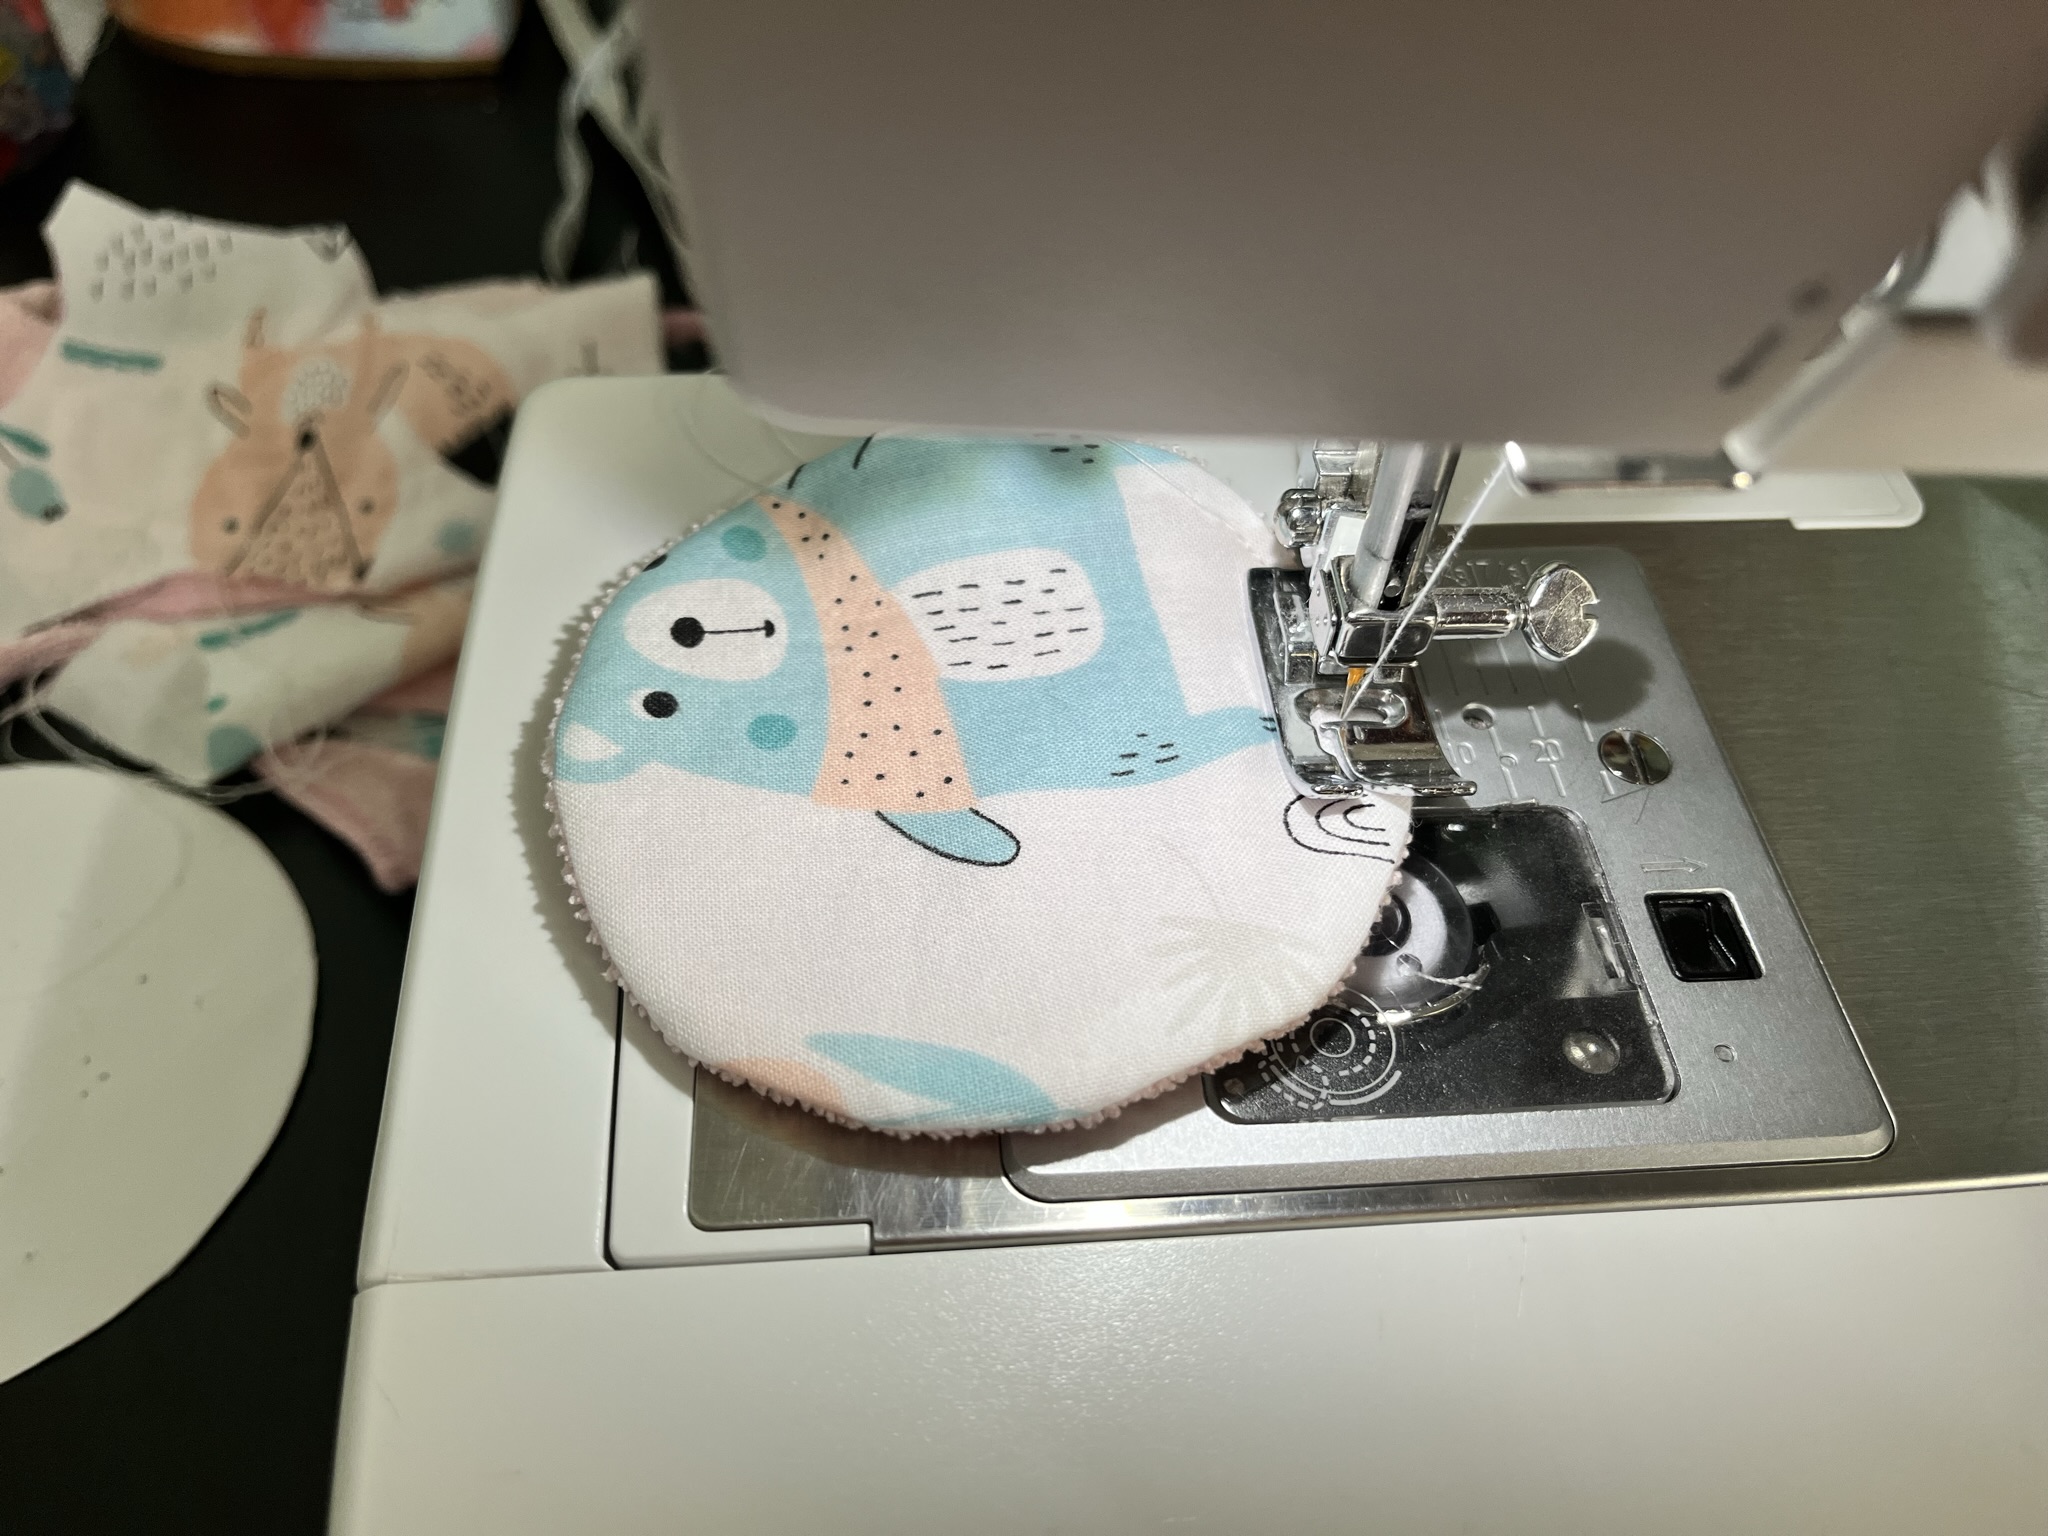
The topstitching will also close up that little opening you used to turn the pad—no hand sewing required! Just go slow and keep your stitching even around the curves.
And that’s it—you’ve just made your own reusable makeup remover pads!
I hope you had fun making these little fabric rounds! They’re useful, washable, and such a great beginner sewing project. Plus, they make cute gifts and help you cut down on waste—what’s not to love?
Stick around for more easy sewing tutorials for beginners, and don’t forget to check out the matching DIY drawstring bag tutorial if you haven’t already. Until next time, happy sewing!
More eco-friendly sewing projects you’ll love
Looking for more quick and useful sewing ideas? Here are a few beginner-friendly projects that are perfect for everyday use or gifting:
- DIY travel toothbrush holder – Keep your toothbrush clean and organized when you’re on the go. This little project is super handy and great for travel lovers.
- Free mini zipper pouch pattern – This simple pouch is just the right size for lip balm, coins, or other tiny must-haves. A great scrap-busting project!
- Quilted zipper pouch tutorial (free pattern) – Learn how to sew a sturdy, cute zipper pouch with a quilted touch. Perfect for makeup, pencils, or anything you need to corral in your bag.
- See-through produce bags – Make your own reusable mesh produce bags and say goodbye to plastic. These are lightweight, washable, and perfect for zero-waste shopping trips.
Let’s keep in touch! You can find me on Facebook, Instagram, and Pinterest.
Good idea to use up scraps and easy to do. Just a note: there’s a mistake in step 2-you have stated “put wrong sides together” when it should have said put right sides together (or facing each other). The pictures are correct, just the wording is wrong. Didn’t mean to be finding fault, but if a newbie was following those instructions they might not know the difference.
That’s right, LaNell, thank you for taking the time to point it out! I just modified the post.
All the best,
Violet
I followed all the steps and now I have 10 cute reusable cotton pads!
Thank you for the clear instructions!
I used to use these with cold cream but I find getting the cream out impossible. Has anyone experienced this and found a way to wash it out?
Hey Katherine,
My cotton rounds look a bit worn as well, but I don’t really mind. It’s one of these situations – either I’m not the type of person who takes thoughtful care of their things (I guess, in this case, they’d need pre-soaking as soon as possible), or some things that are used regularly are just not meant to look like new after a while.
These are so cute and great gifts! I have been wanting to make them and couldn’t find a “turn” version. Thanks so much!
Thanks for the clear cut instructions – can’t wait to sew up a bunch!
Can you use these for toner, astringent, etc.?
Yes, you can. 🙂
Thank you for this! I do have a question, why can’t both sides be microfiber? What is the reason for one side needing to be cotton?
Hey DeAnna,
Yes, you can indeed use microfiber for both sides. Personally, I wouldn’t do it though, because I’m pretty sure I won’t use both sides for removing make-up, the pad becomes “dirty” after one use IMO. Also, I made my pads with cotton on the “wrong” side because I have loads of cotton scraps.
What a fantastic idea, especially for a gift, ( and me of course):).
Can’t wait to try them. Also thanks for the drawstring bag pattern.
I have loads of scraps just waiting to be used.
Thank you!