Learn to make your own reusable produce bags with this step-by-step tutorial. This is a simple and quick DIY sewing project, and definitely a useful one. It ticks all the right boxes for me!
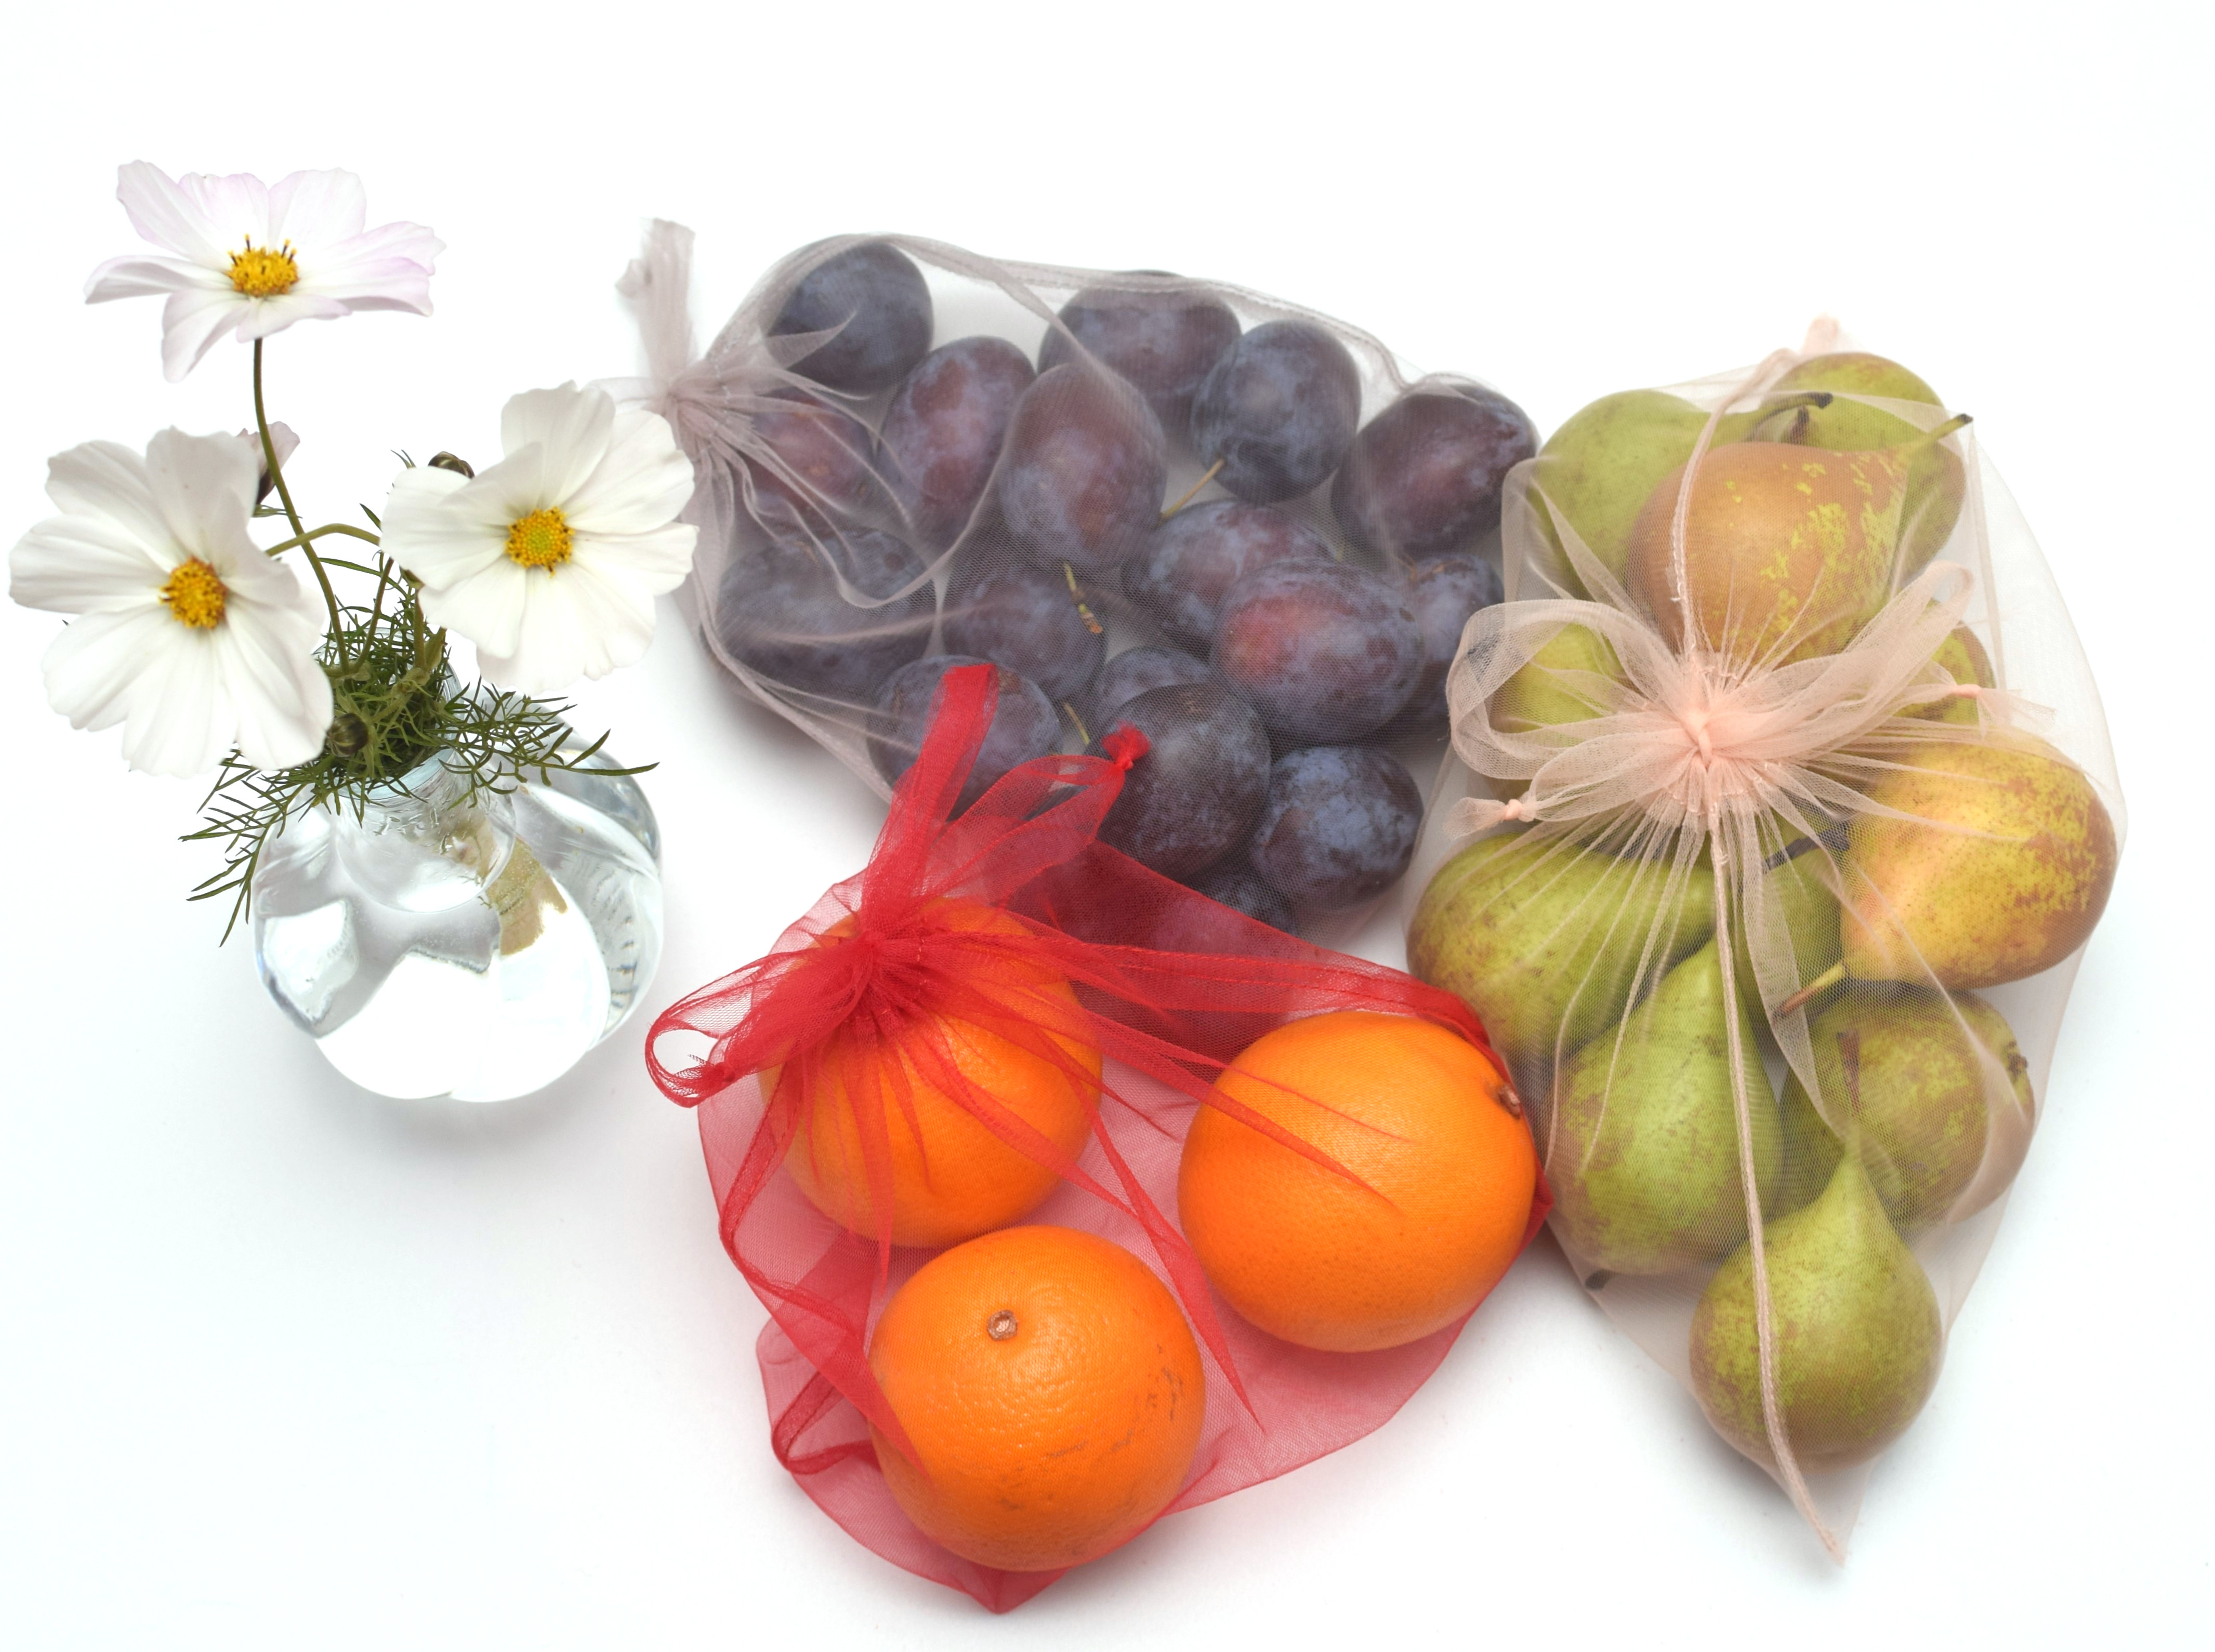
I made all my produce bags with scraps of soft bridal tulle – because that’s what I had in my scrap bin.
Related: How to make oven mitts (free pattern) / DIY reusable cotton rounds tutorial
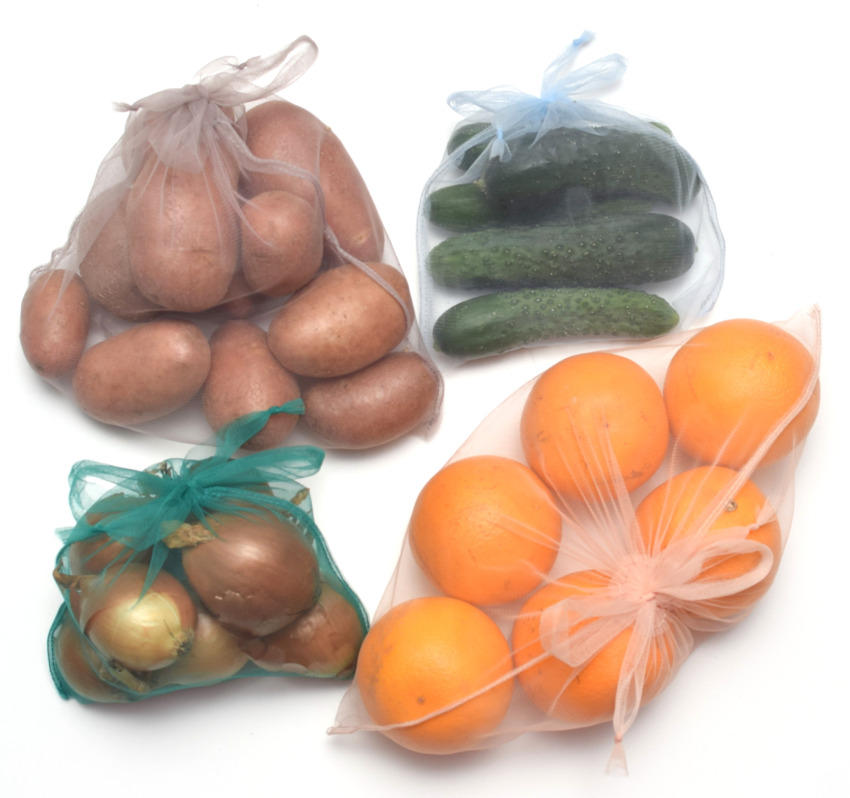
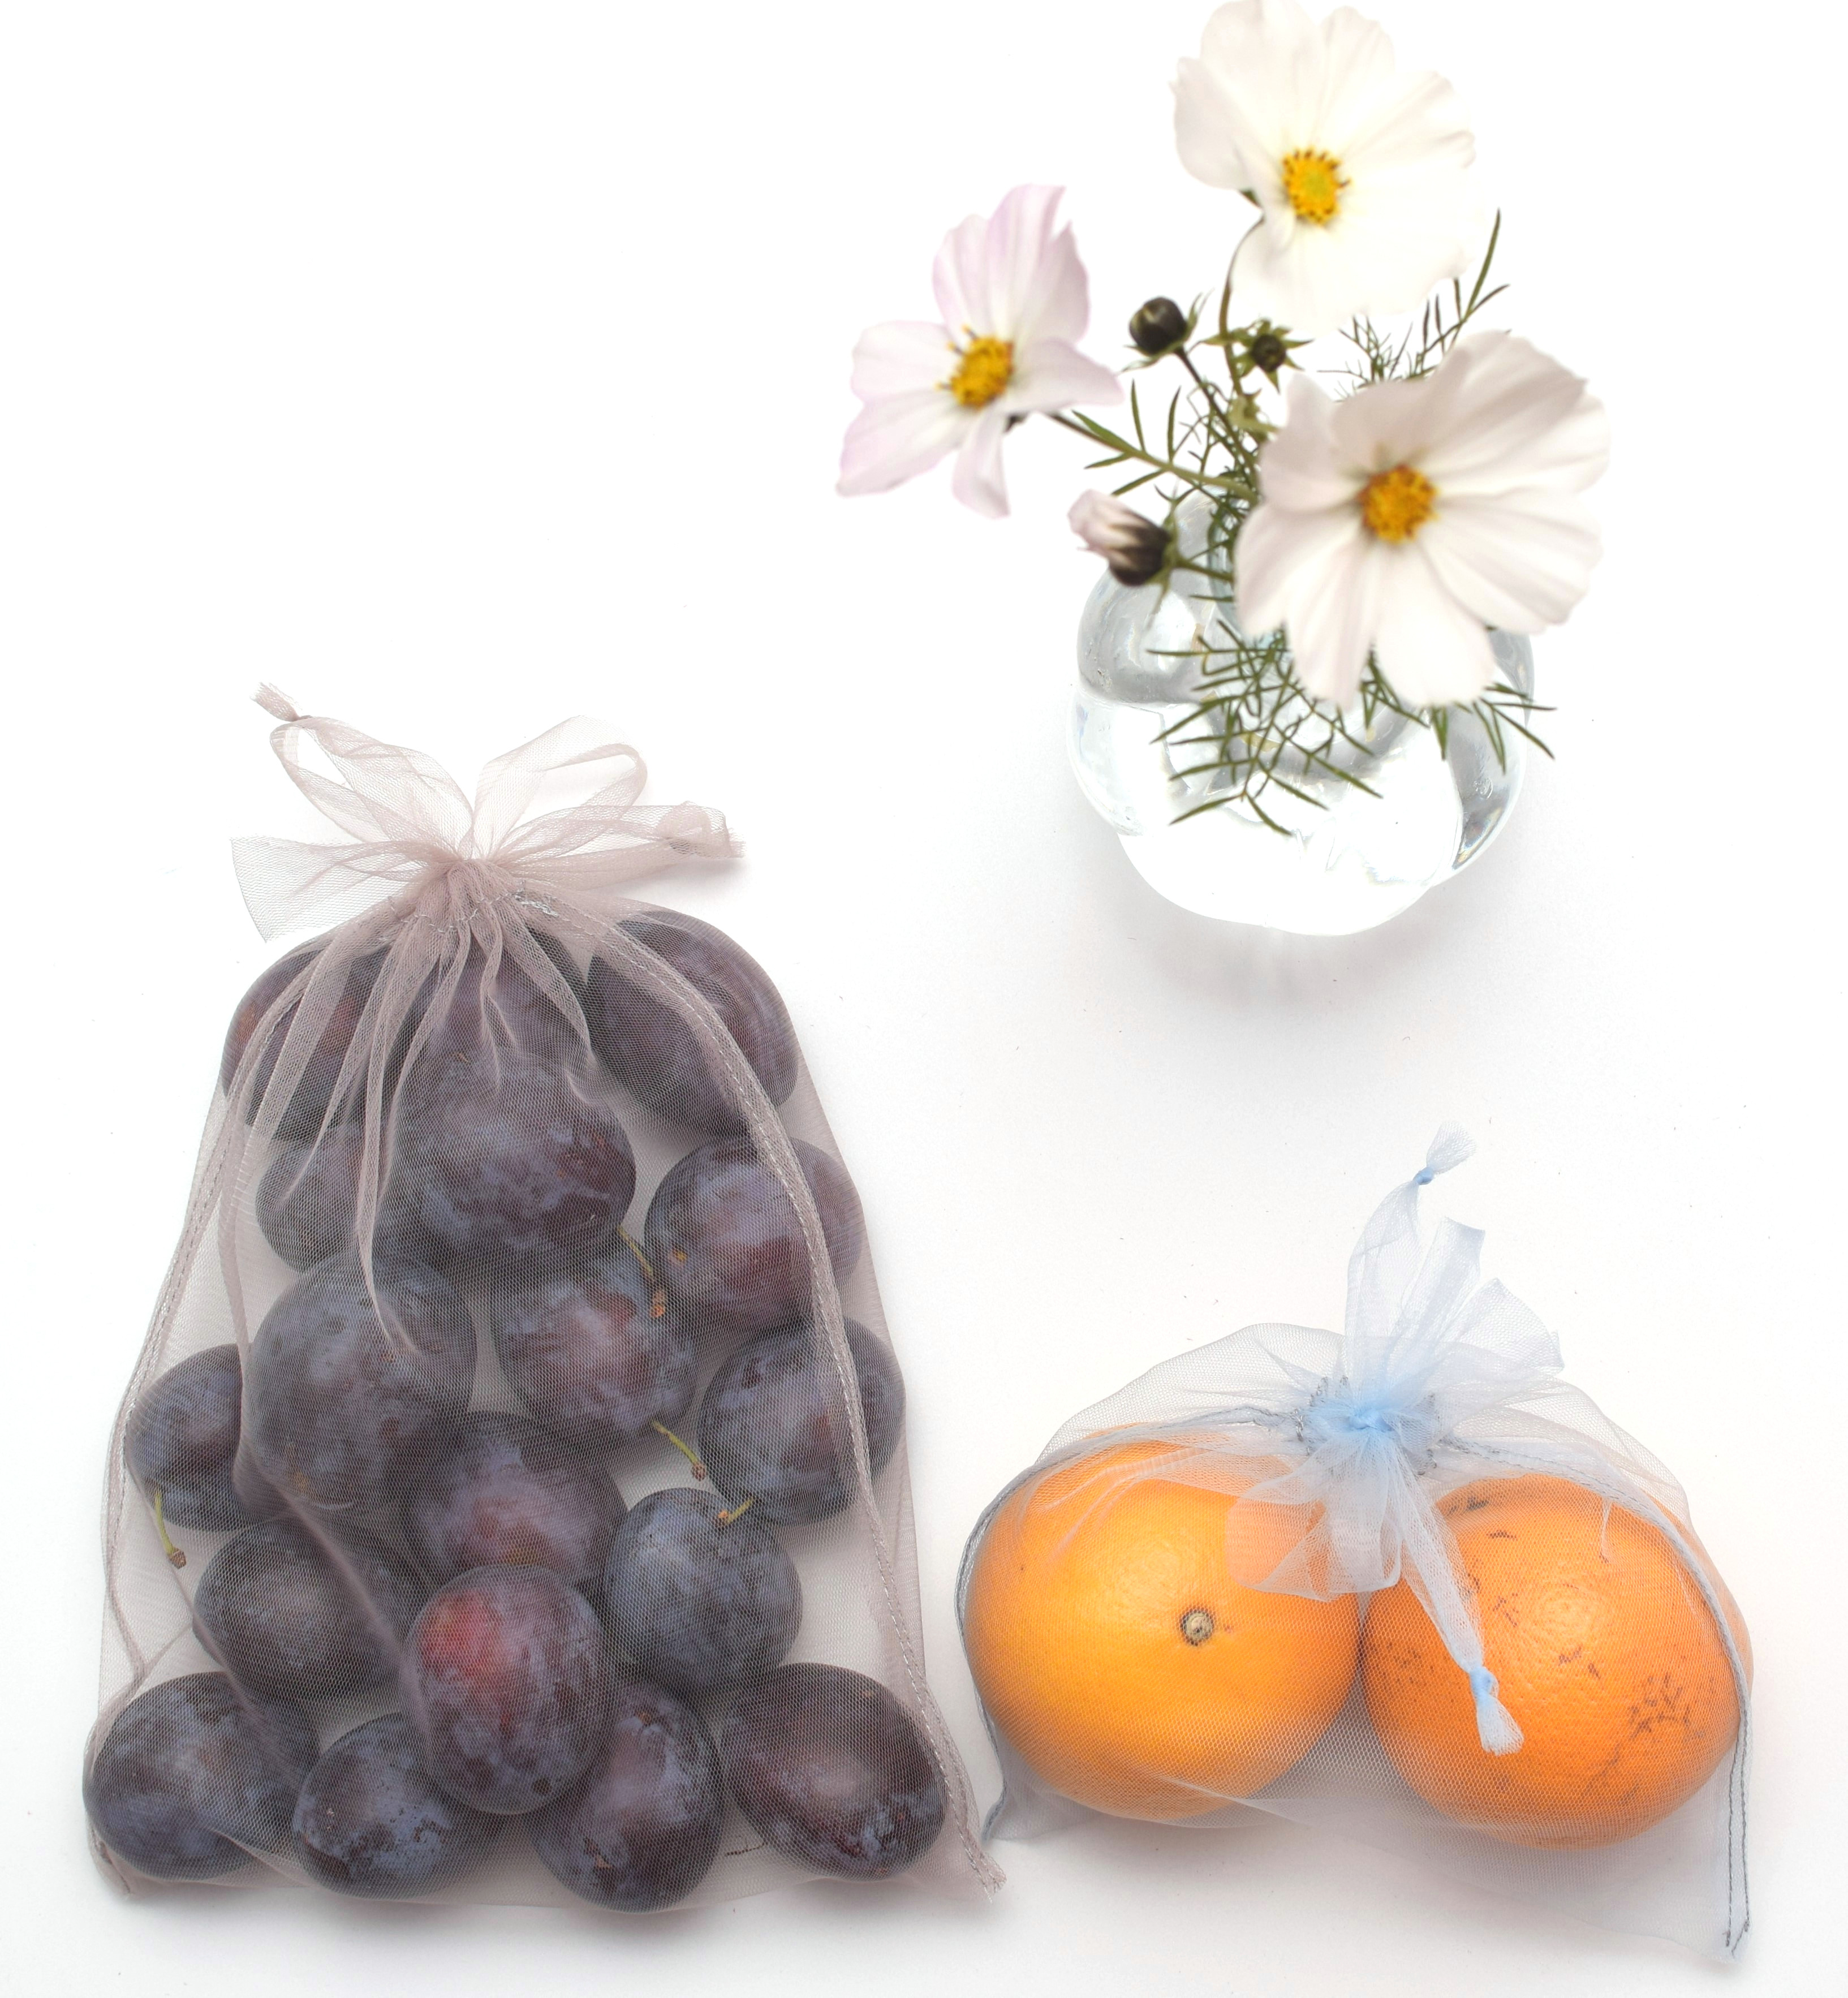
These see-through produce bags weigh almost nothing, are durable, easy to wash, and fast to dry.
What fabric is best for reusable produce bags?
Ideally, your produce bags should be sturdy but also transparent so your cashier won’t have to open them to figure out what type of fruit or veggies you’re buying.
Sheer fabrics such as tulle, mesh, netting, voile, or other lightweight cotton fabrics are best for reusable produce bags.
Instructions for creating your custom size
You can make your produce bags as small or large as you want.
- The desired width + 1 inch
- (The desired length x 2 ) + 1 inch
There’s something you need to know right from the start.
The most important part of this project – pay close attention to the fabric stretch direction.
The height/length of the bags needs to be in the direction of least stretch. It’s ok if the fabric has some stretch crosswise (around the circumference of the bag).
Lengthwise, my tulle fabric has basically no stretch.
I made my reusable produce bags with no seam at the bottom of the bag – because I want them to be as durable as it gets.
Also, I’ve used french seams for the side seams to give my bags a nice and neat finish.
Moreover, the drawstring cords are made of self-fabric, since tulle doesn’t fray. These cords are quite sturdy – I cut all of them in 1-inch wide strips.
Of course, you can use ready-made drawstring cords if you have them – I didn’t.
I have to admit that store-bought cord locks with toggle stoppers give a more professional finish to these produce bags if that’s what you’re looking for.
However, I’m pleased to inform you that my tulle drawstring cords hold the bag closed and don’t slip, not even in the slightest. To be honest, that was a concern of mine, with tulle being a 100% polyester fabric.
Related: Tips for sewing tulle on your regular sewing machine
The needle that works best with tulle fabric is a fine jersey needle – size 70/10. However, if the jersey needles do not deliver on, you should try stretch needles.
How to make your own reusable produce bags tutorial
Step 1 – Hem the top of the produce bag
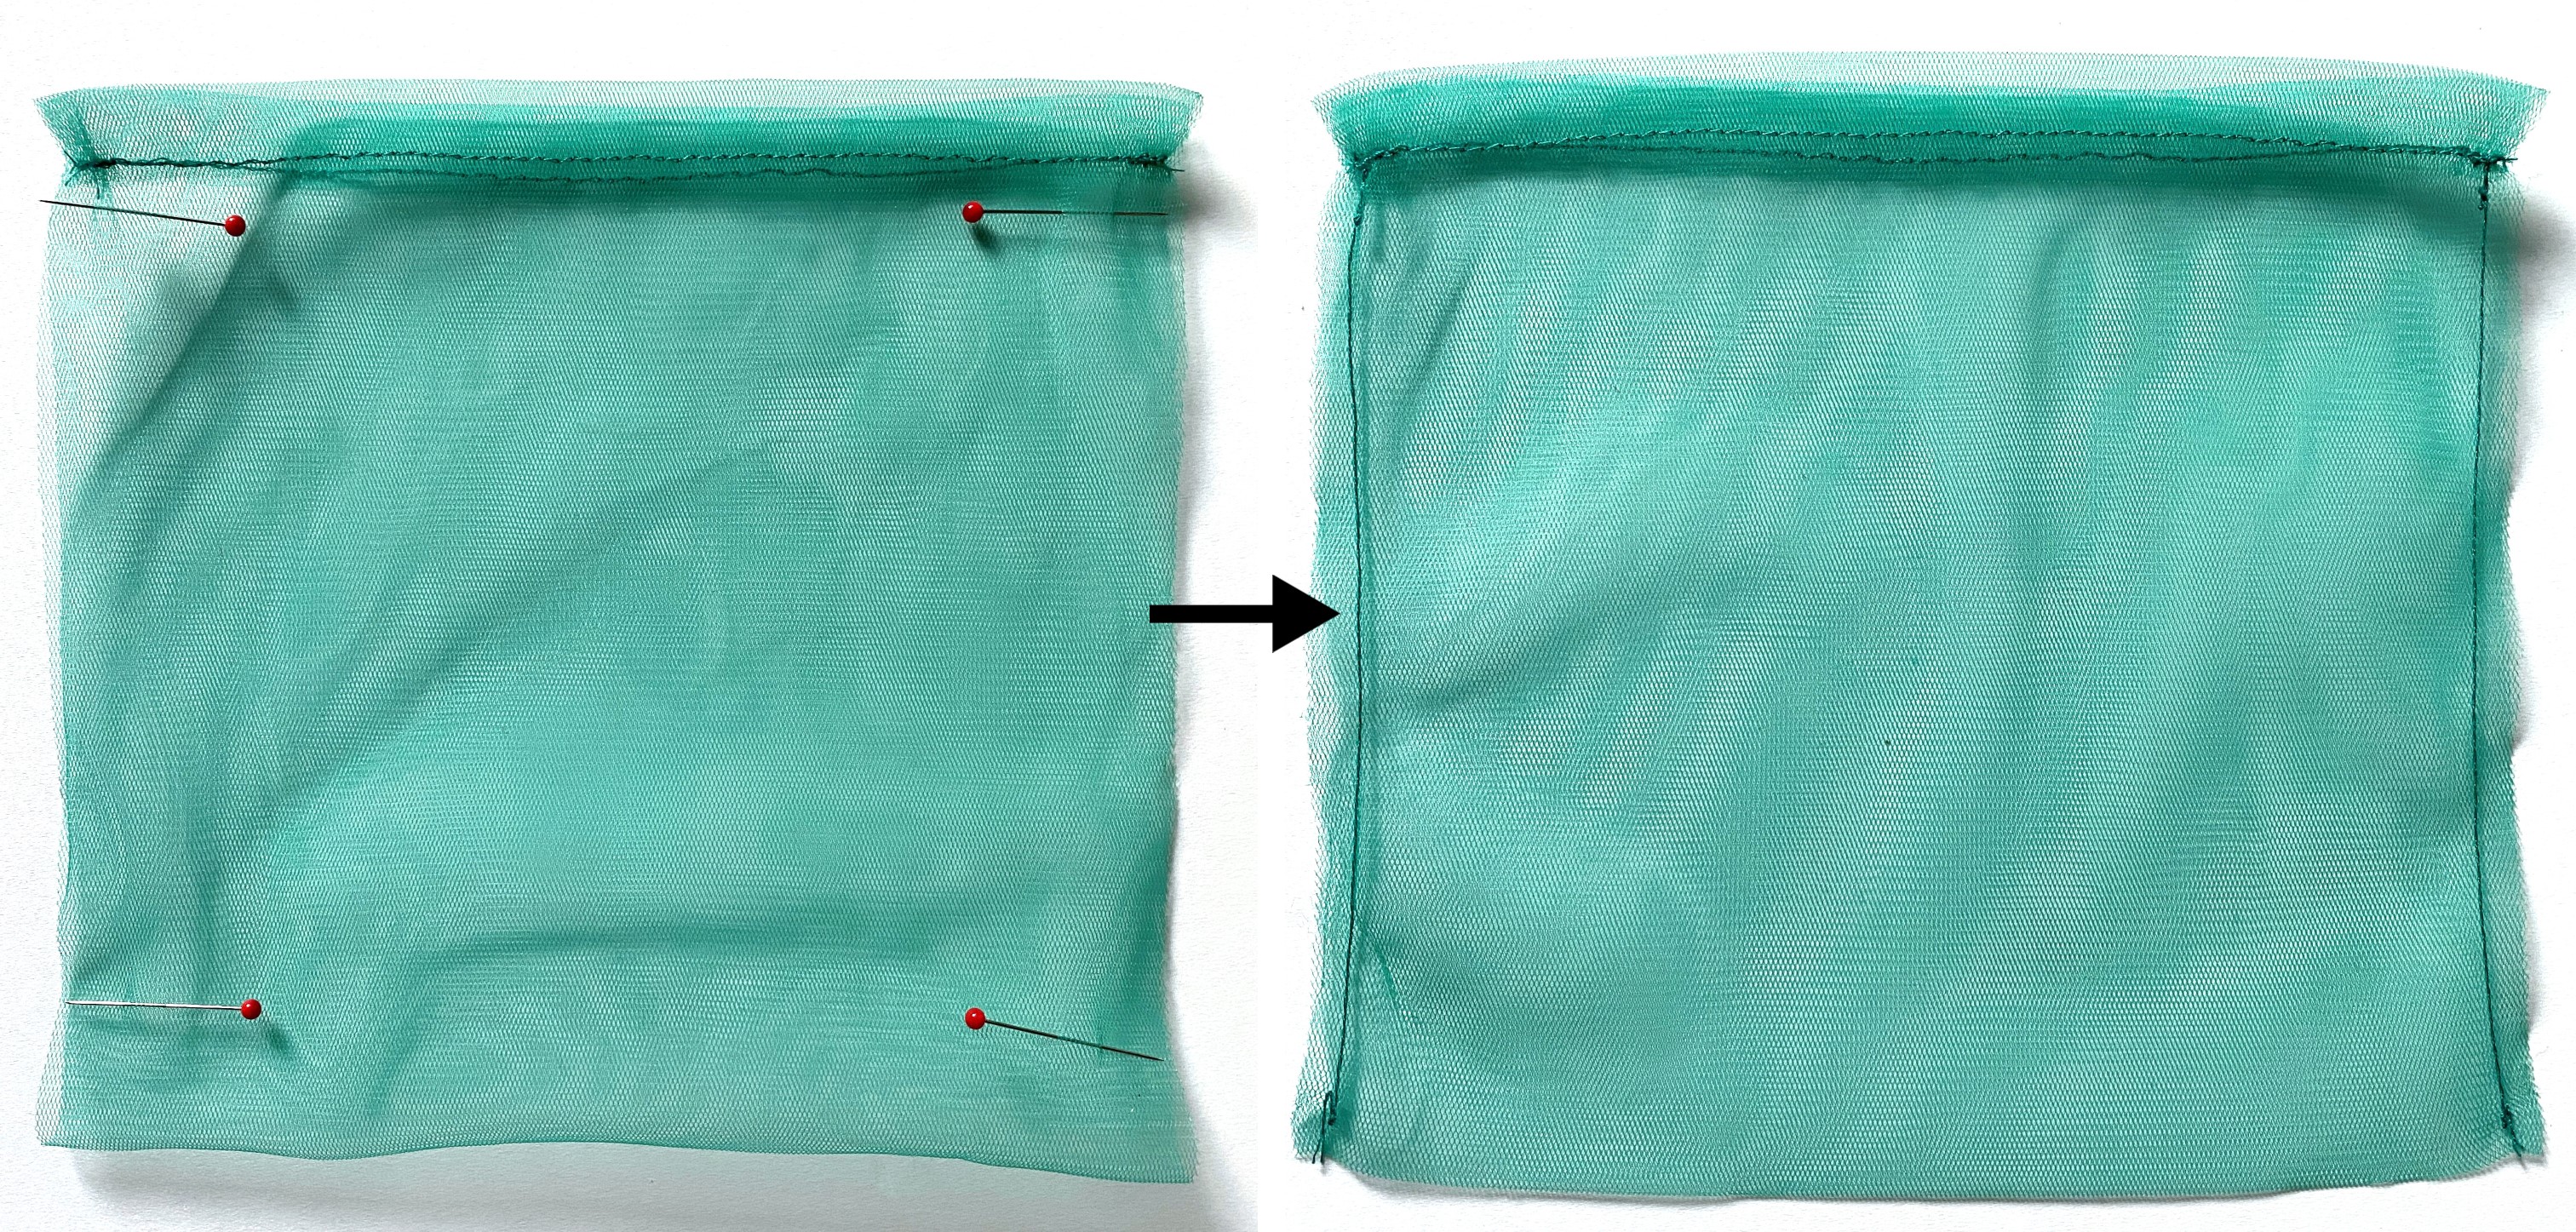
First, hem the short sides of your fabric piece to create the casing. Fold over only once, about 3/8″, and stitch. Be sure to backstitch at the beginning and end.
There is actually no need for pins or sewing clips (I only needed pins for the photo), just go easy and don’t stretch the fabric.
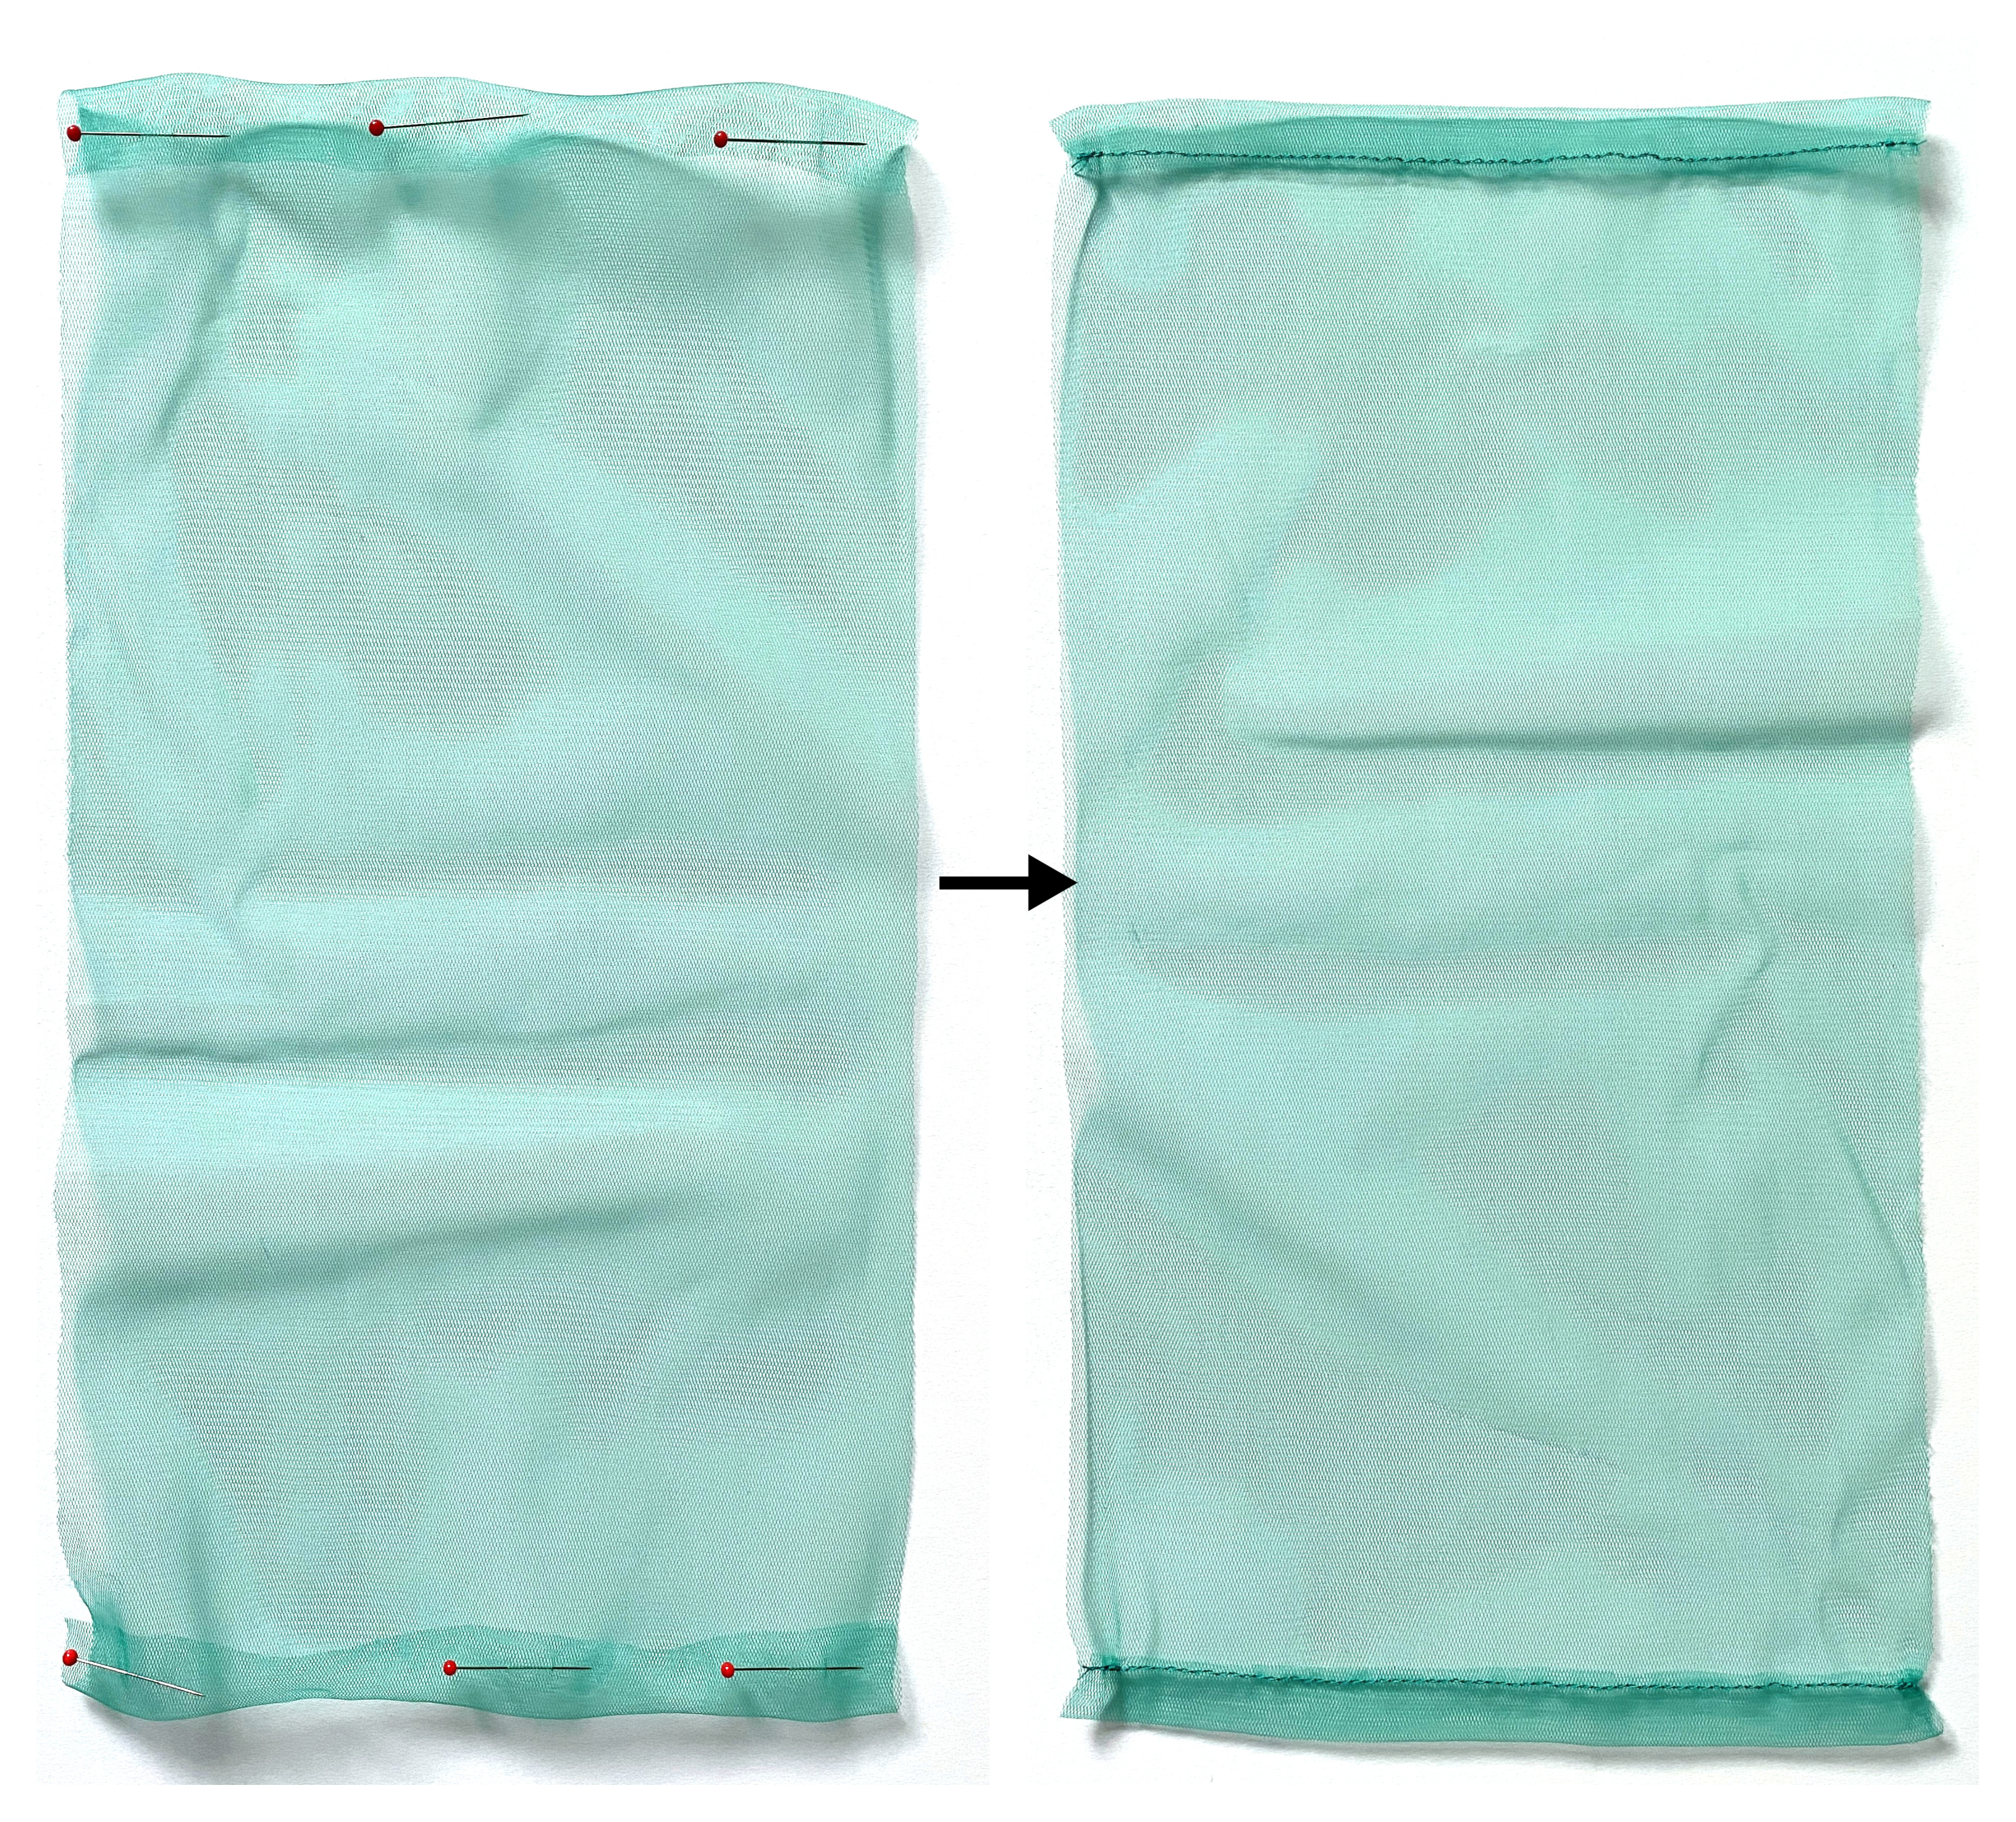
The „raw” edges of the tulle fabric are both placed on the same side of the fabric – this just became the wrong side of our produce bag.
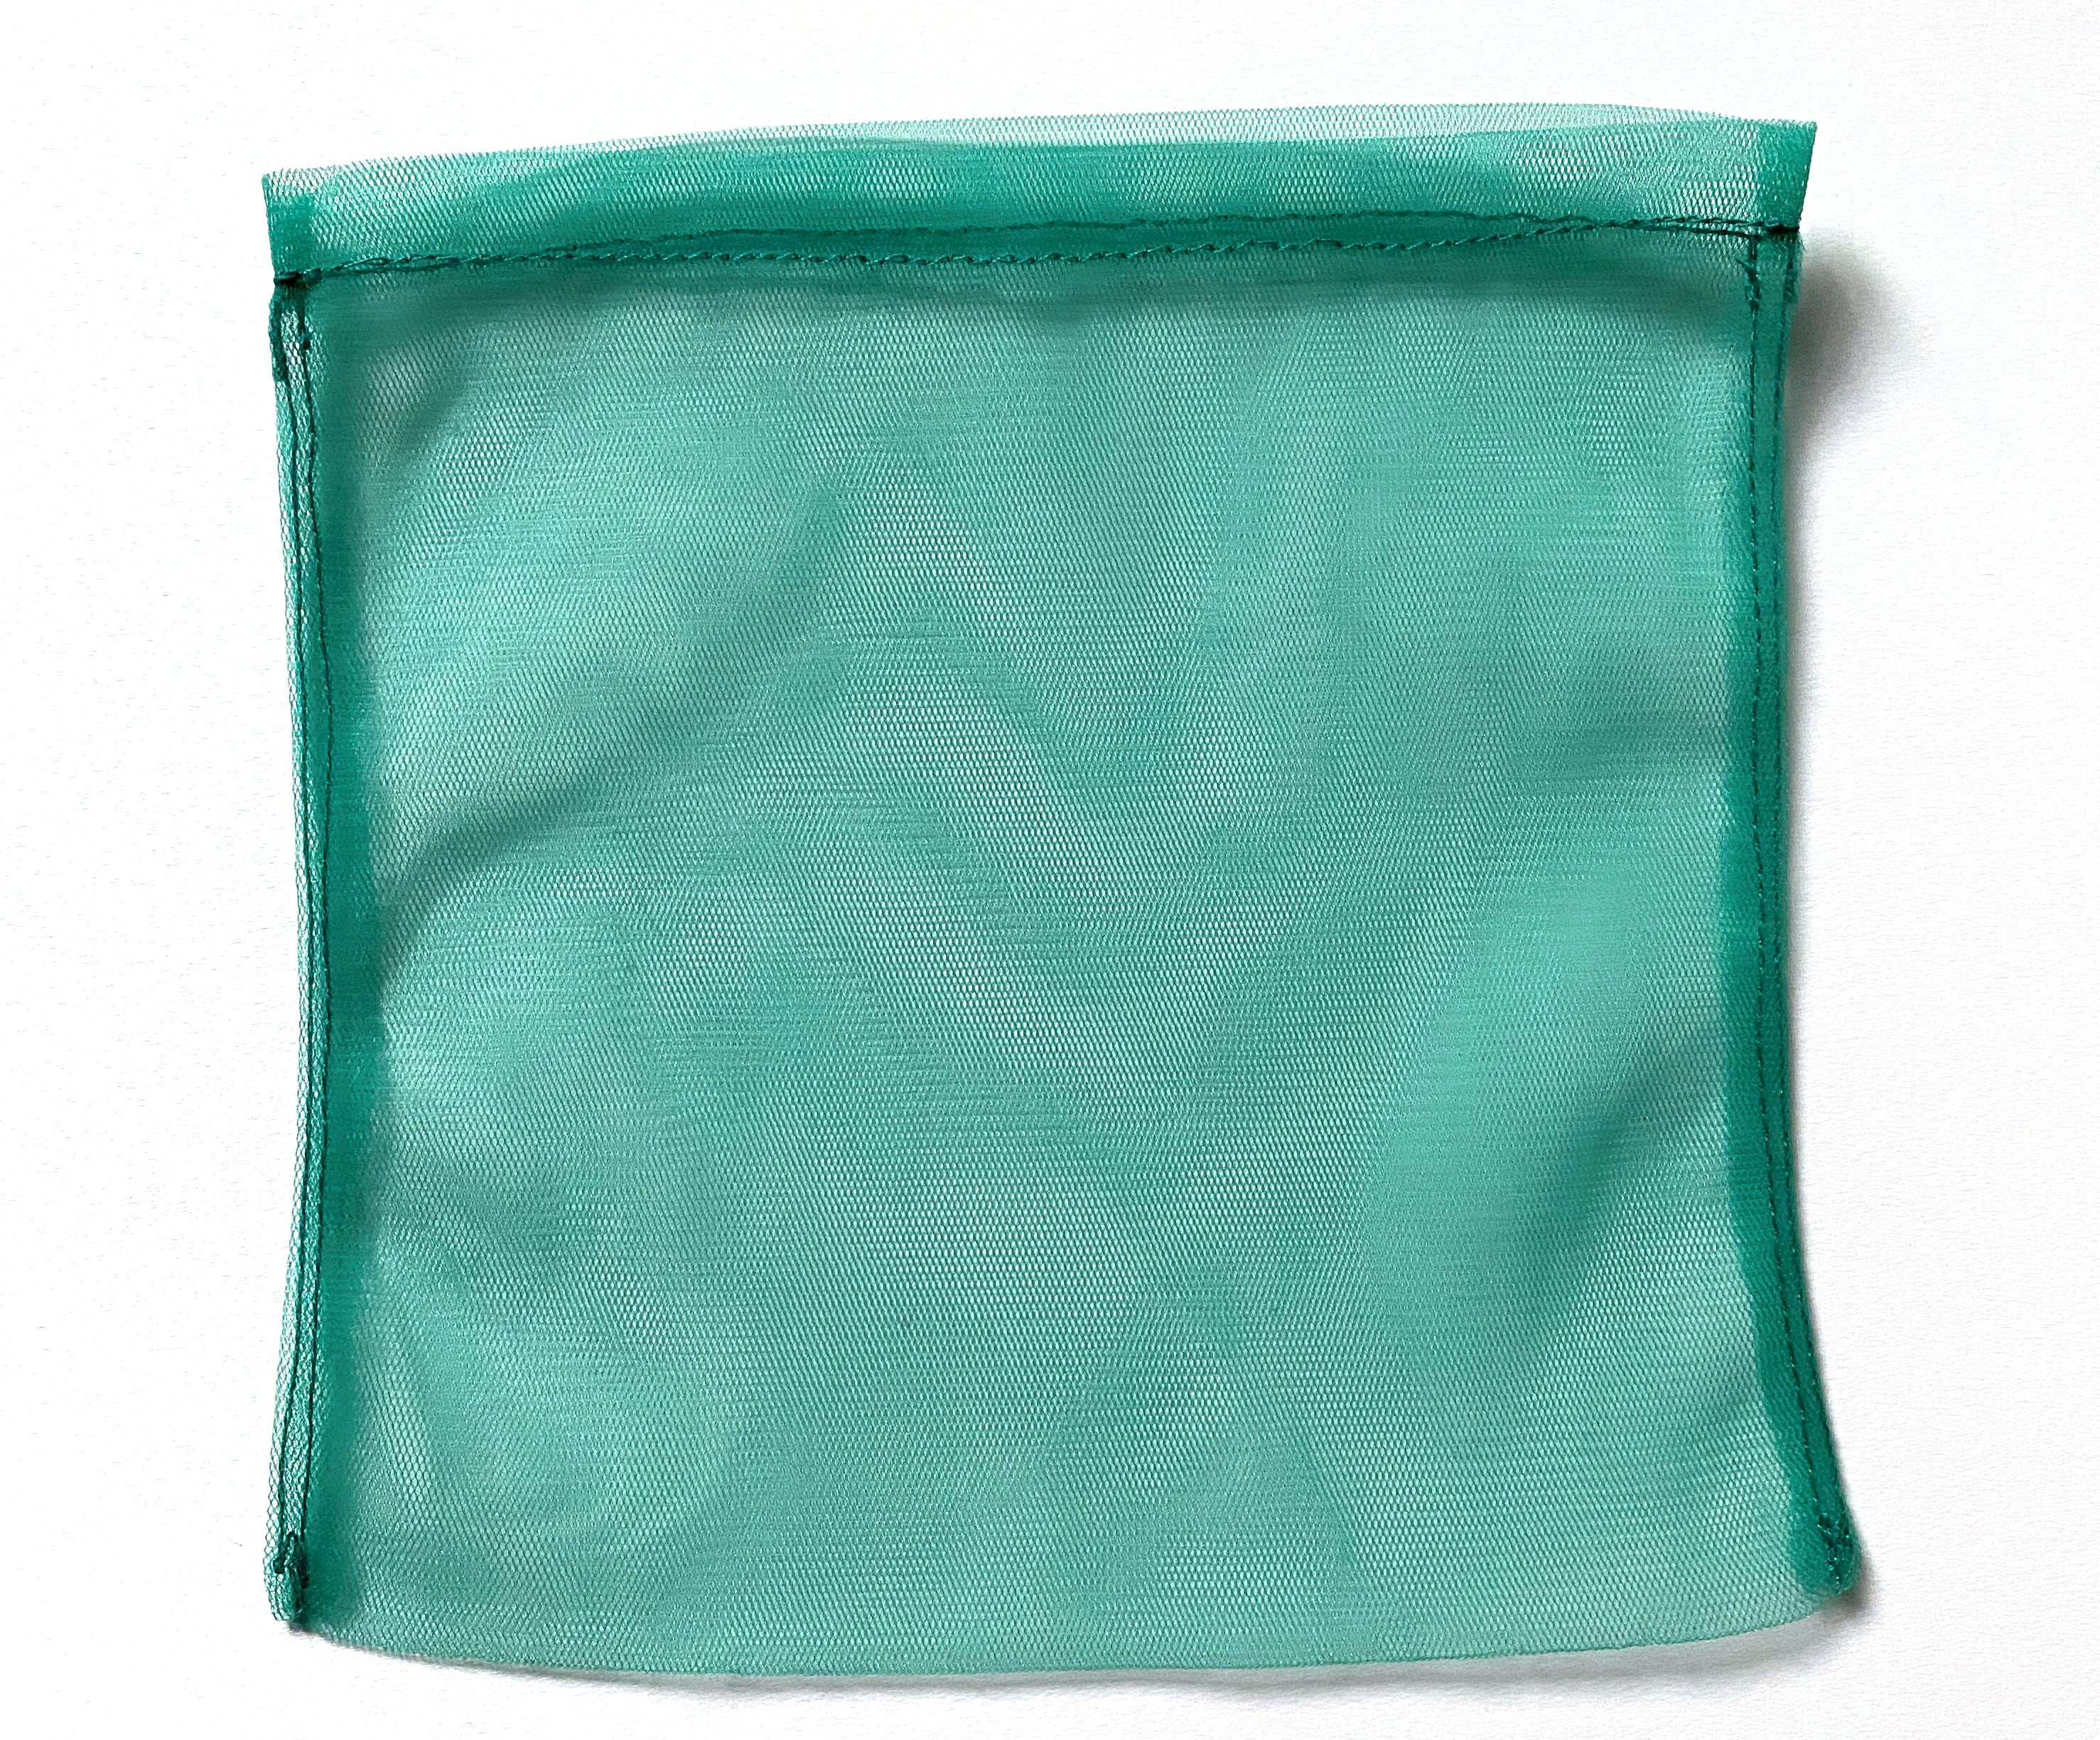
Step 1 – Sew the side seams
Fold the bag with the wrong sides together so the top edges are flush. The fold should be at the bottom.
Sew each side together using a 1/4 inch seam allowance. Start sewing right under the stitching line that creates the casing, to keep everything lined up nicely.
Now turn the bag right side out and stitch again the sides. Instead of enclosing the raw edges, I prefer to stitch over them to create a strong seam on my produce bags.
Step 3 – Thread the cords through the casing
Cut two long tulle strips, each approximately 1-inch wide, in the direction of least stretch.
You need two ties – each of them should be twice bigger than the bag’s width, plus 2-3 additional inches.
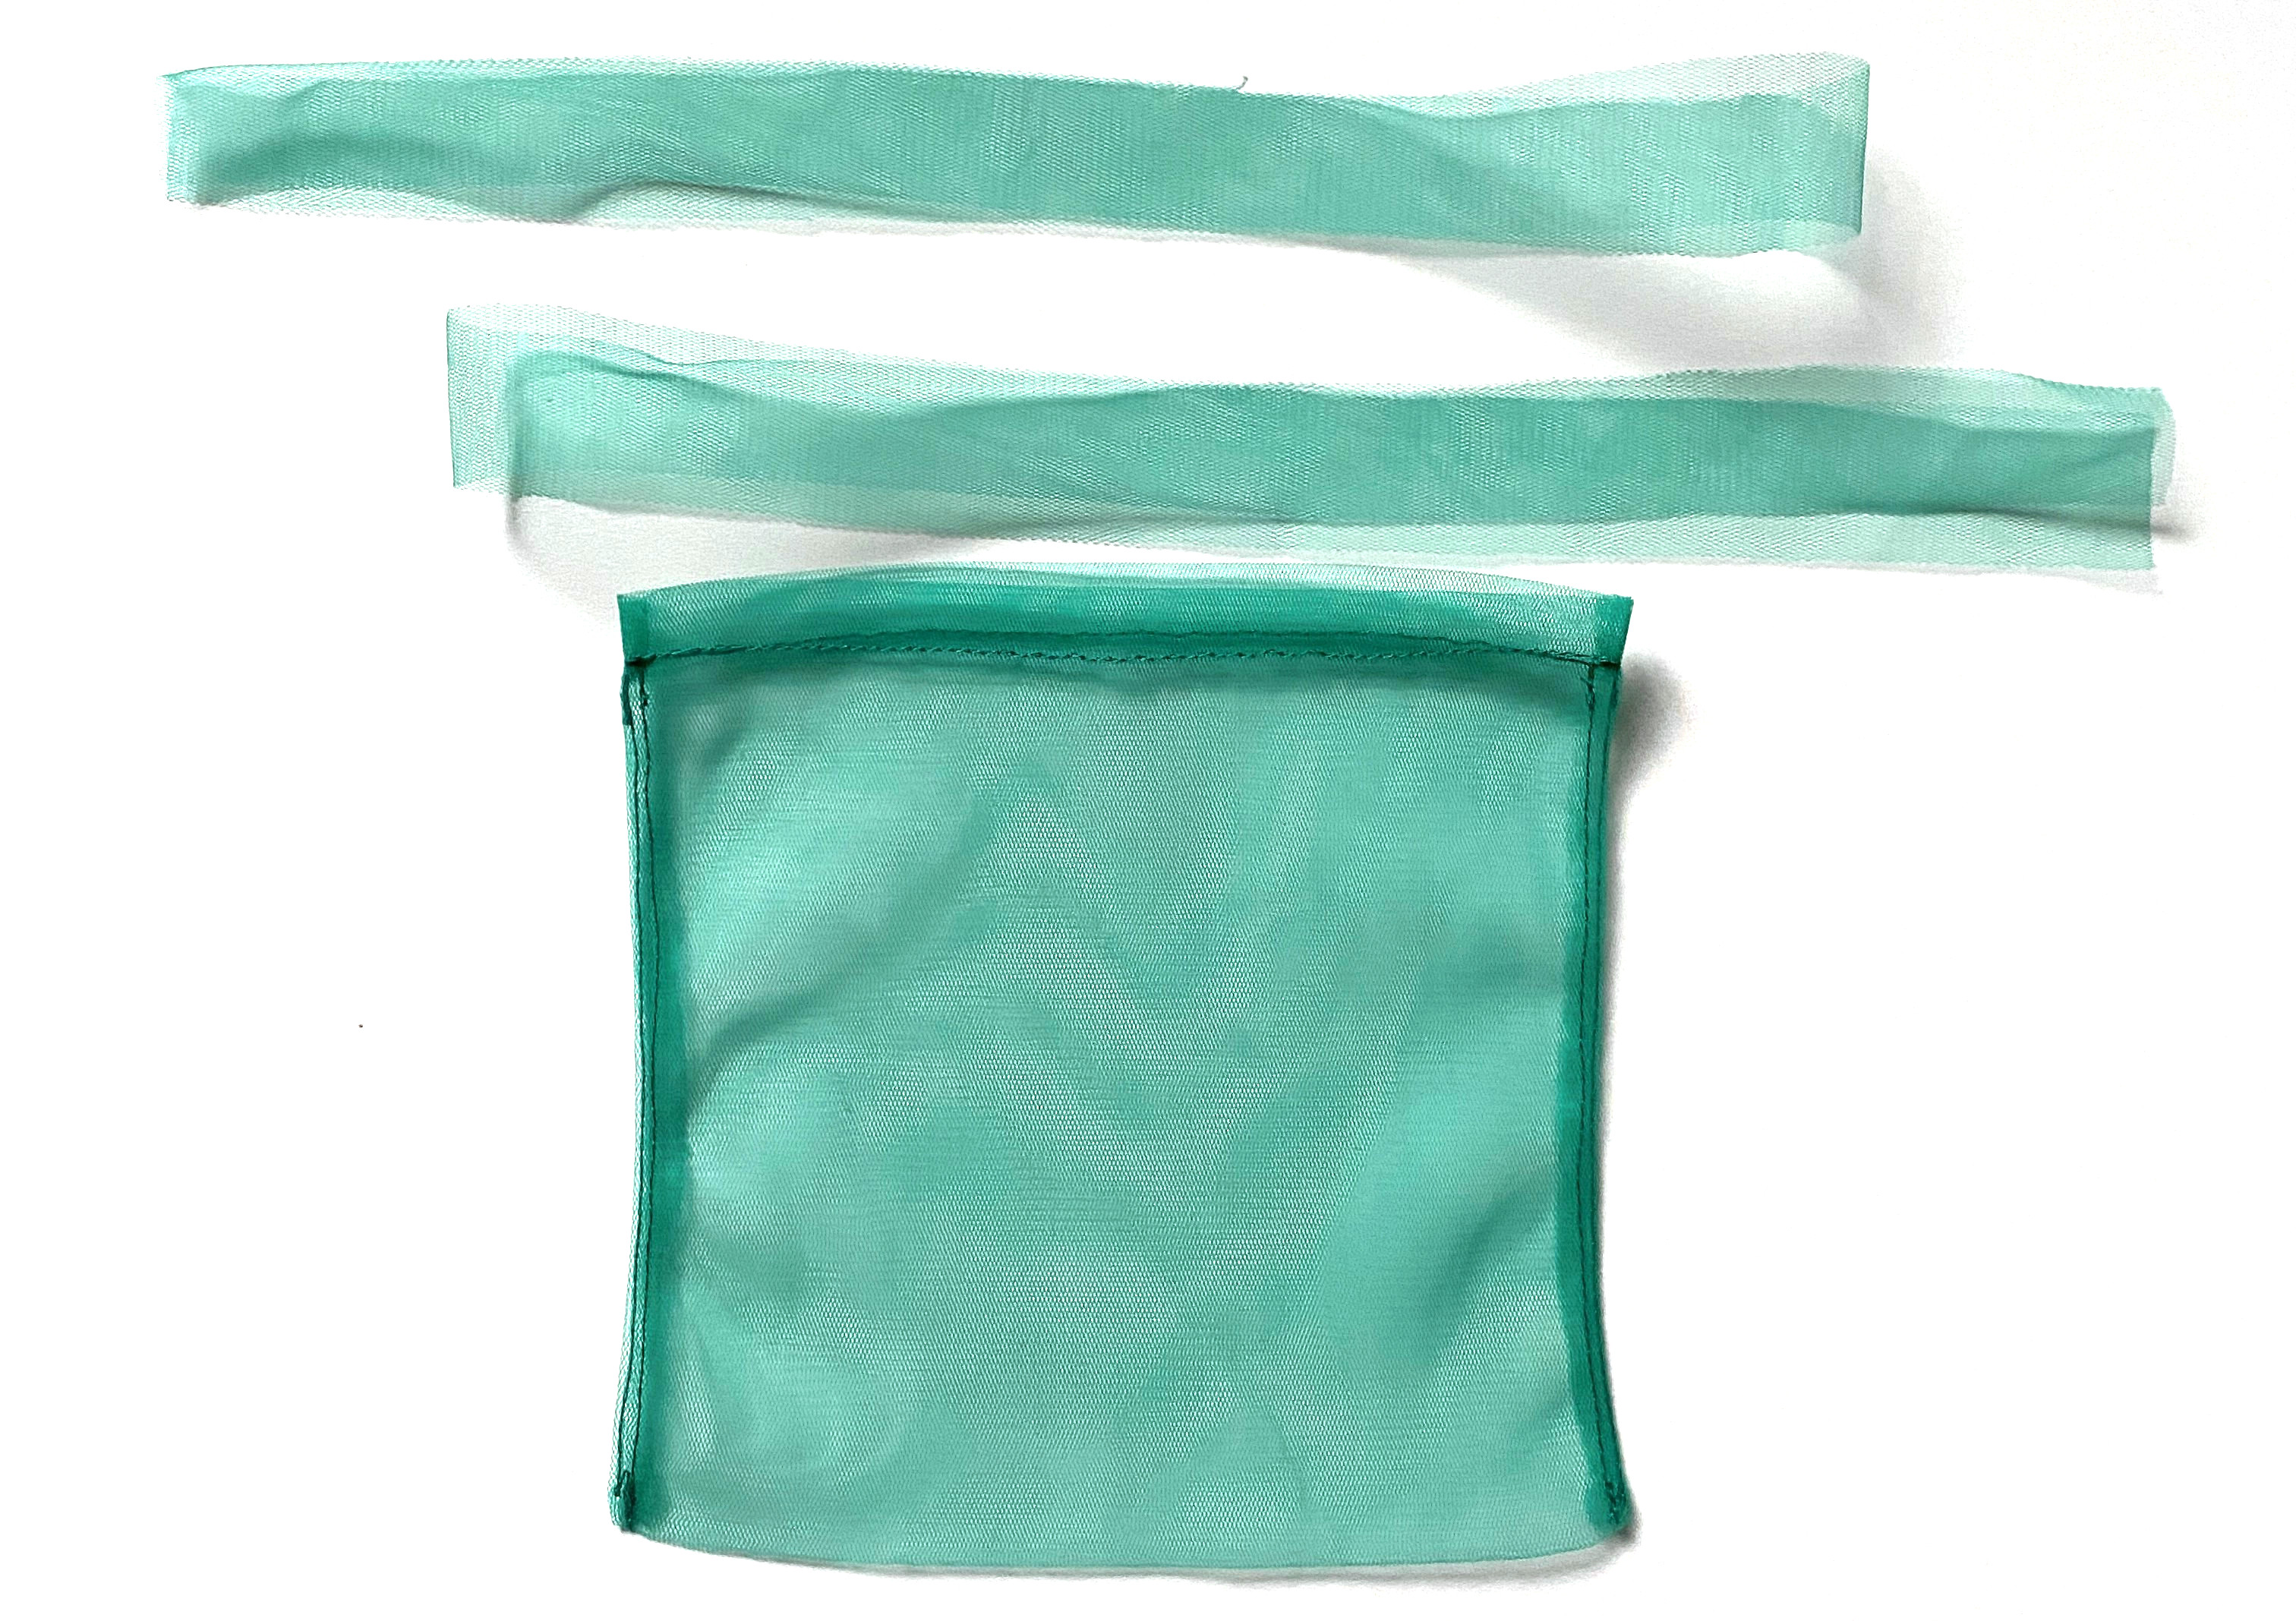
Now, take one tulle strip and thread it through the casing, using a safety pin. Then, start on the opposite side of the bag, and repeat with the other tulle cord.
The whole idea is to have one loop and two ends of the drawstring on each side so that when you pull them both simultaneously, the drawstring bag will close.
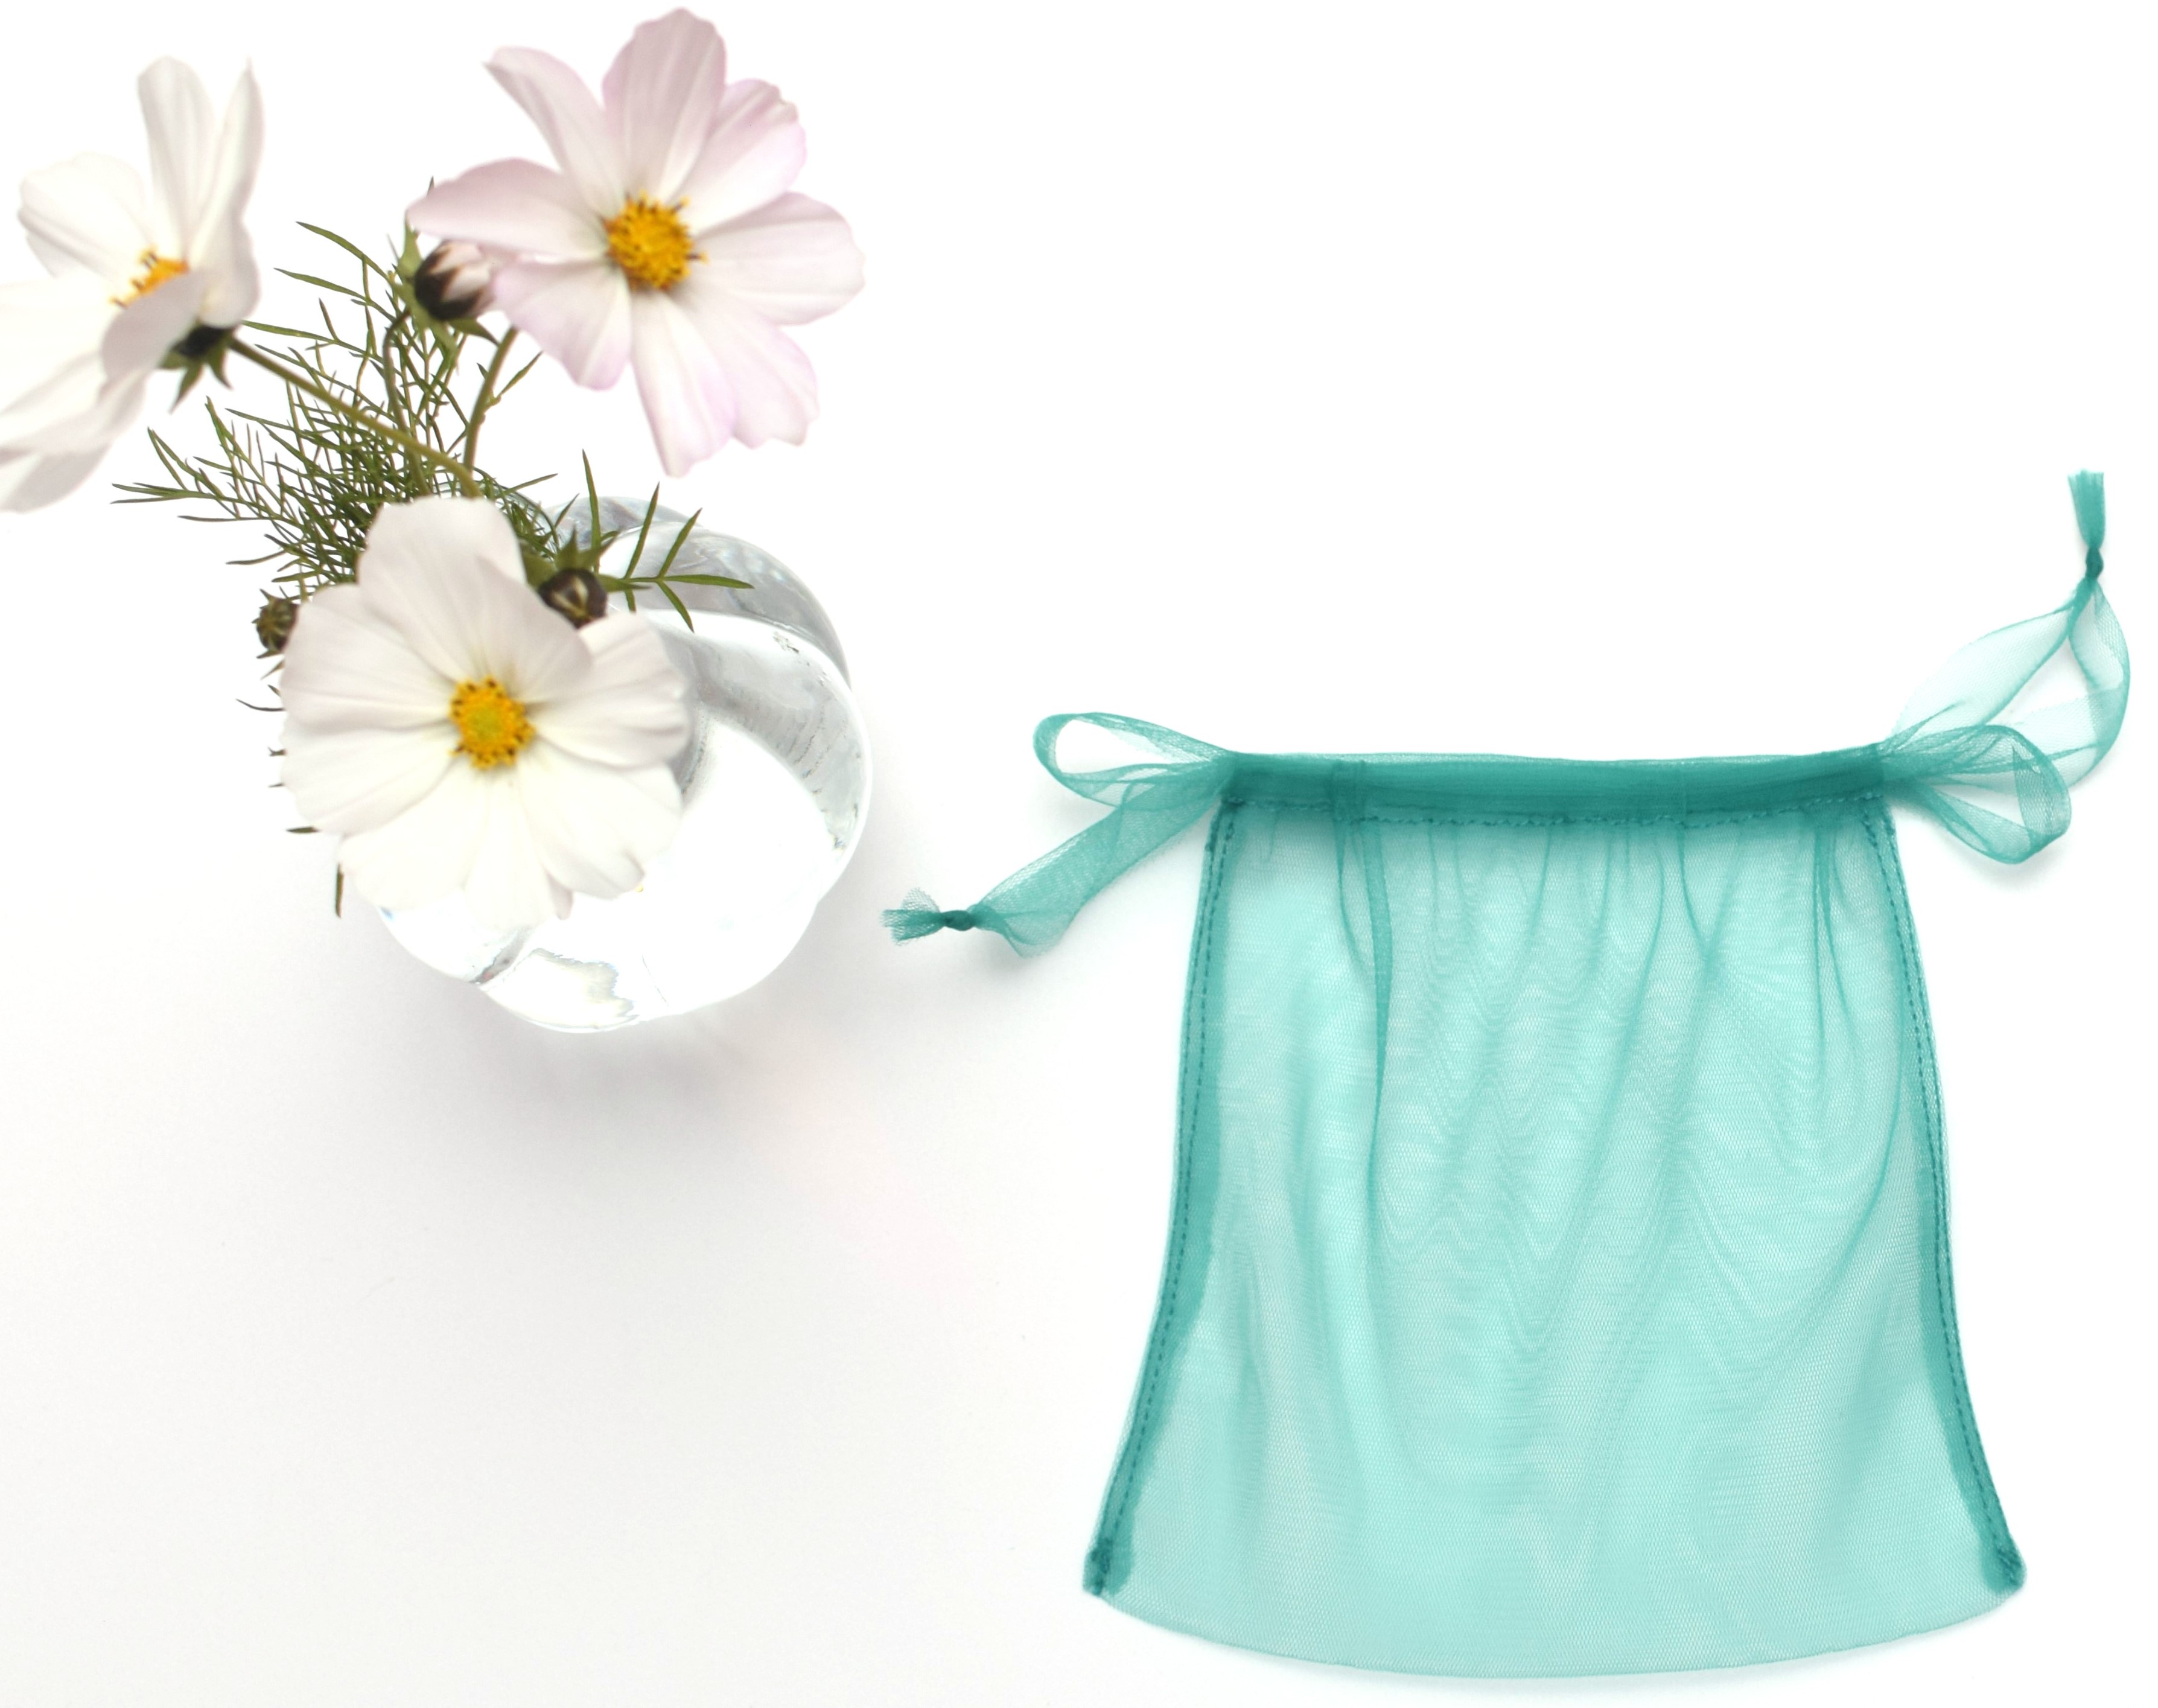
Tie the two ends together on each side of the bag and you’re done!

Your zero-waste DIY reusable produce bags are ready to be used over and over again.
Did you find this reusable produce bags tutorial helpful? I’d like to hear what you think of it!
Let’s keep in touch! You can find me on Facebook, Instagram, and Pinterest.
Related posts