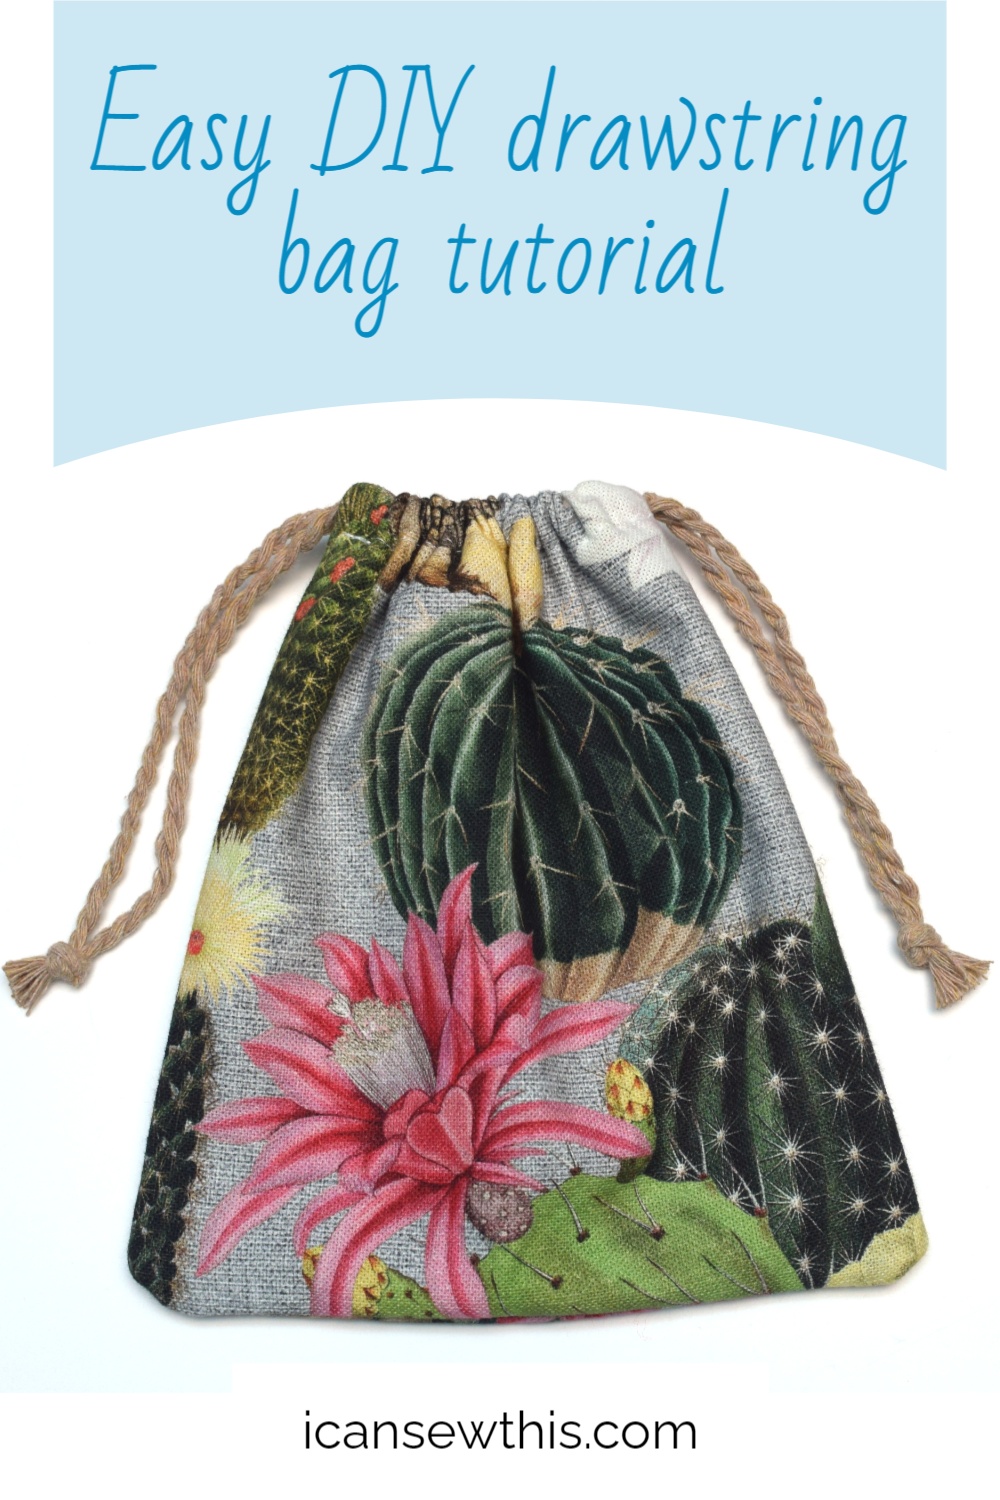
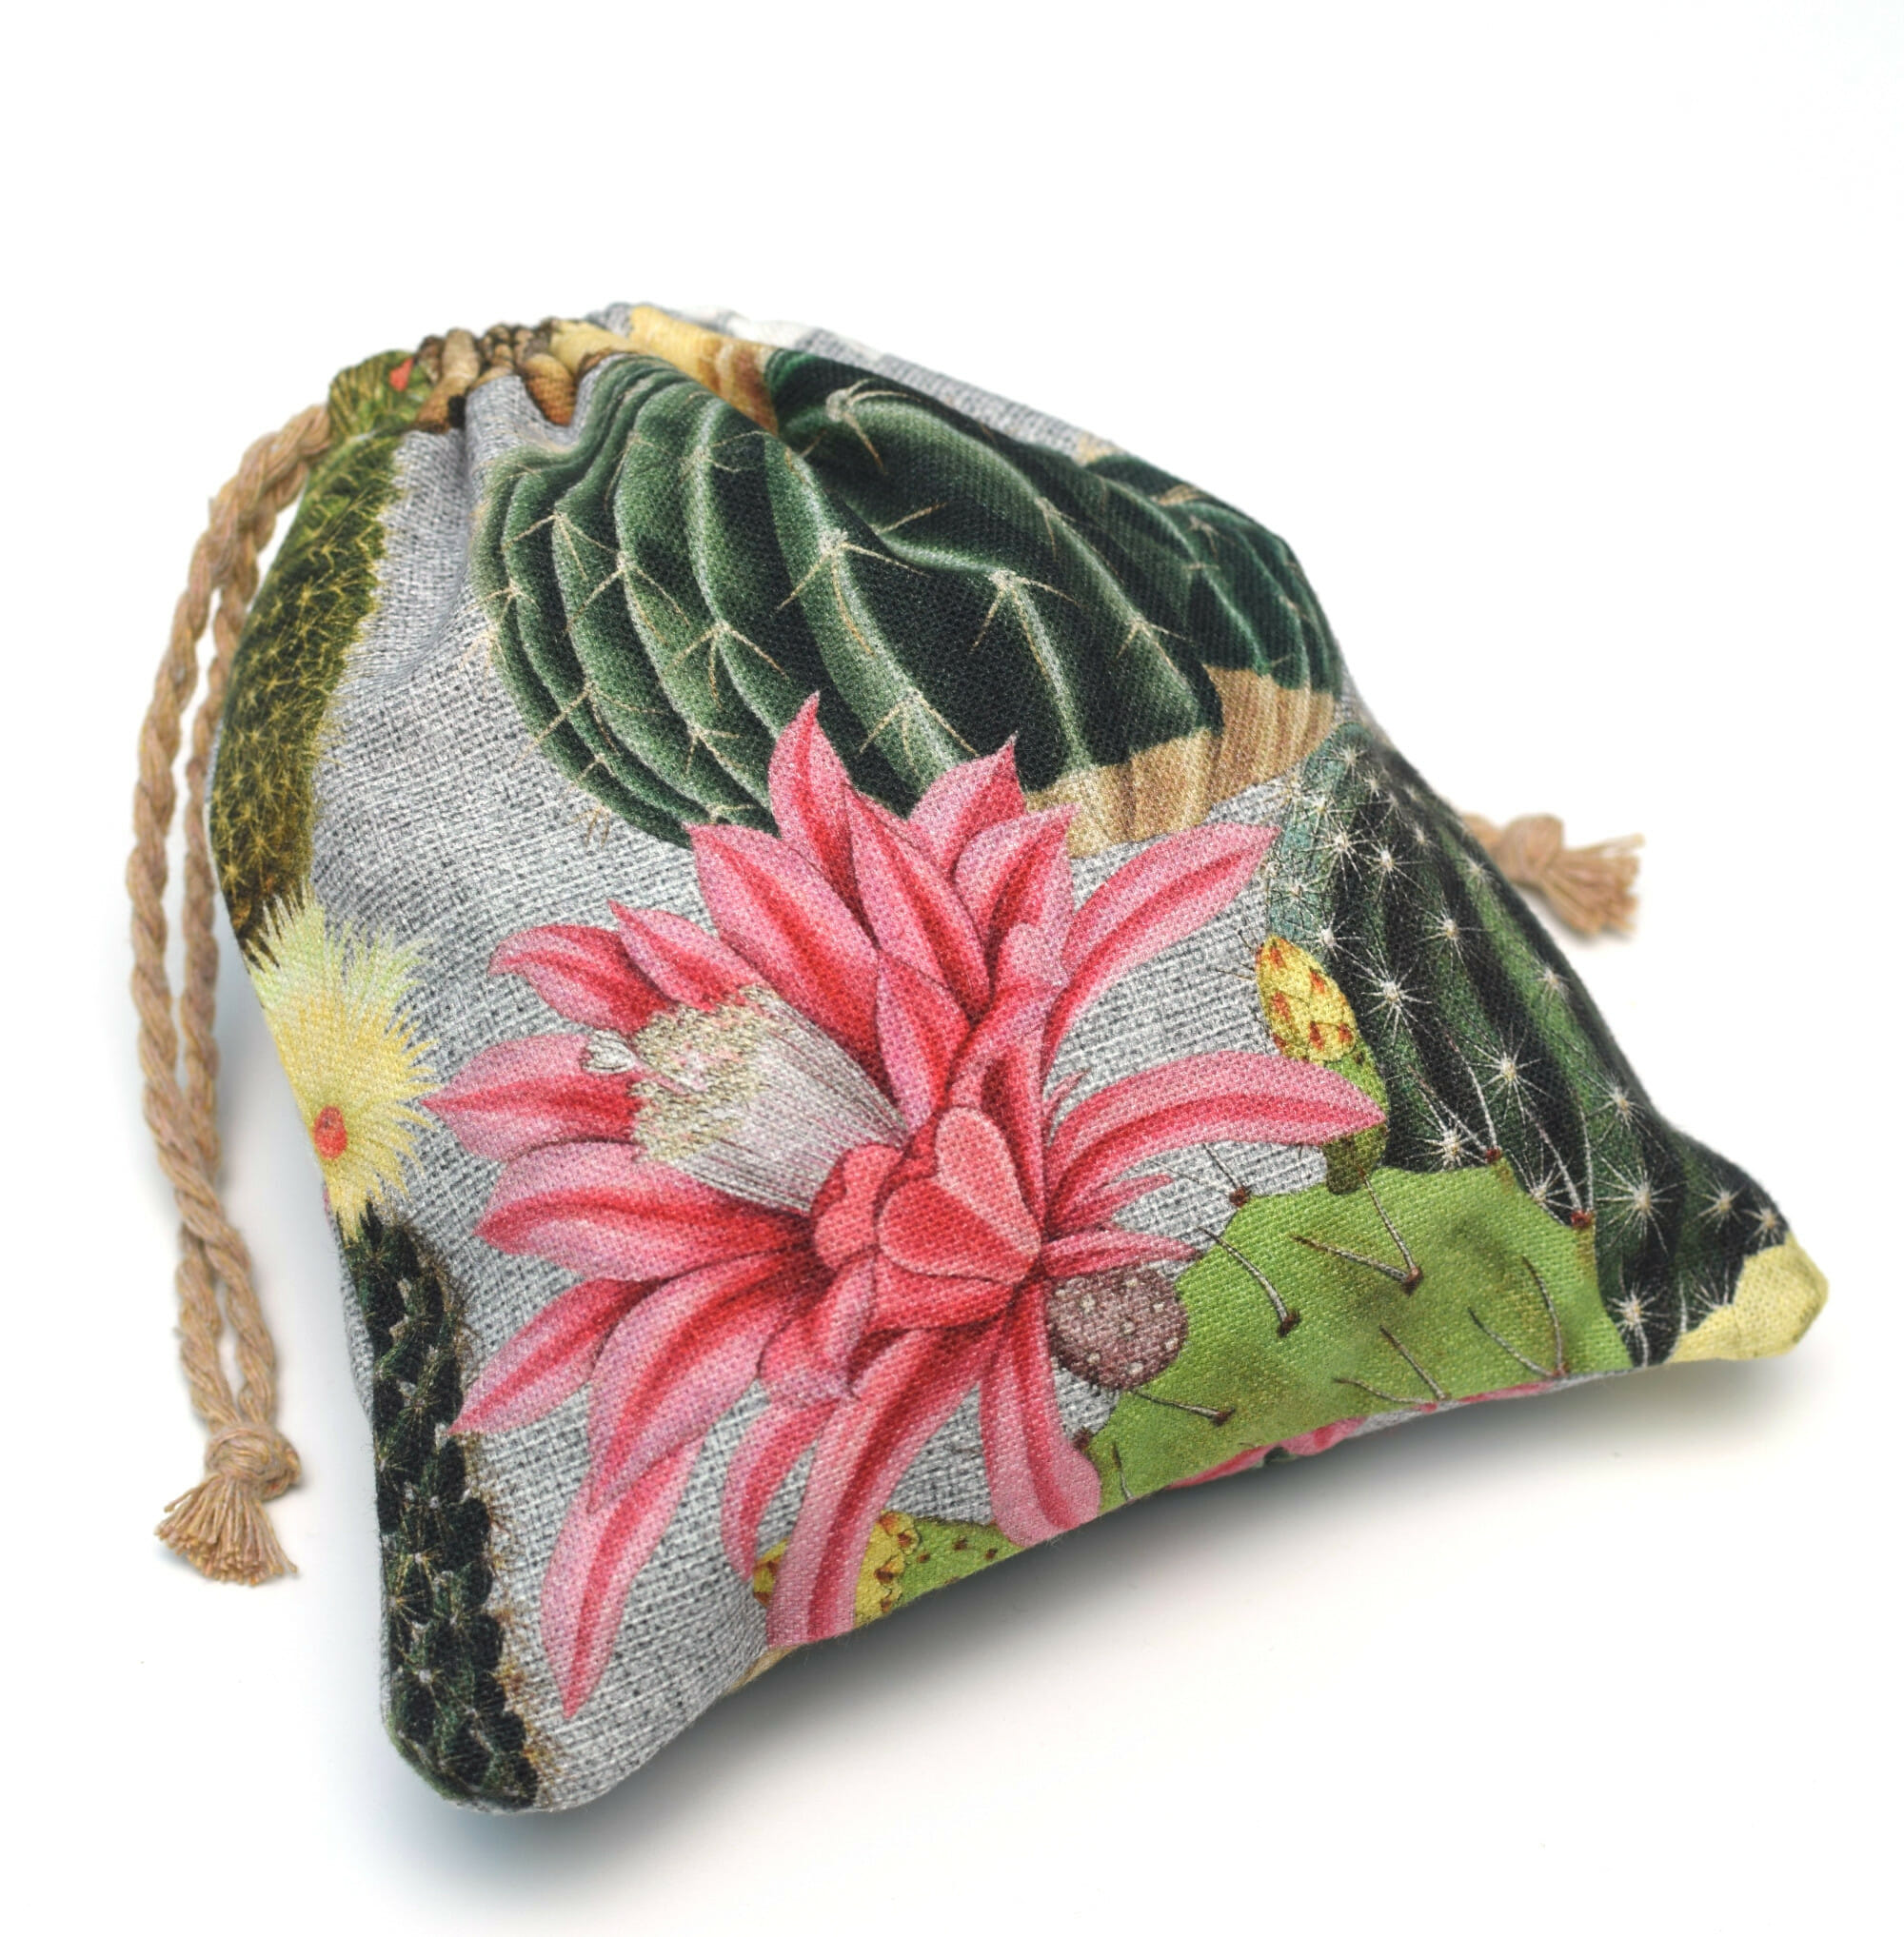
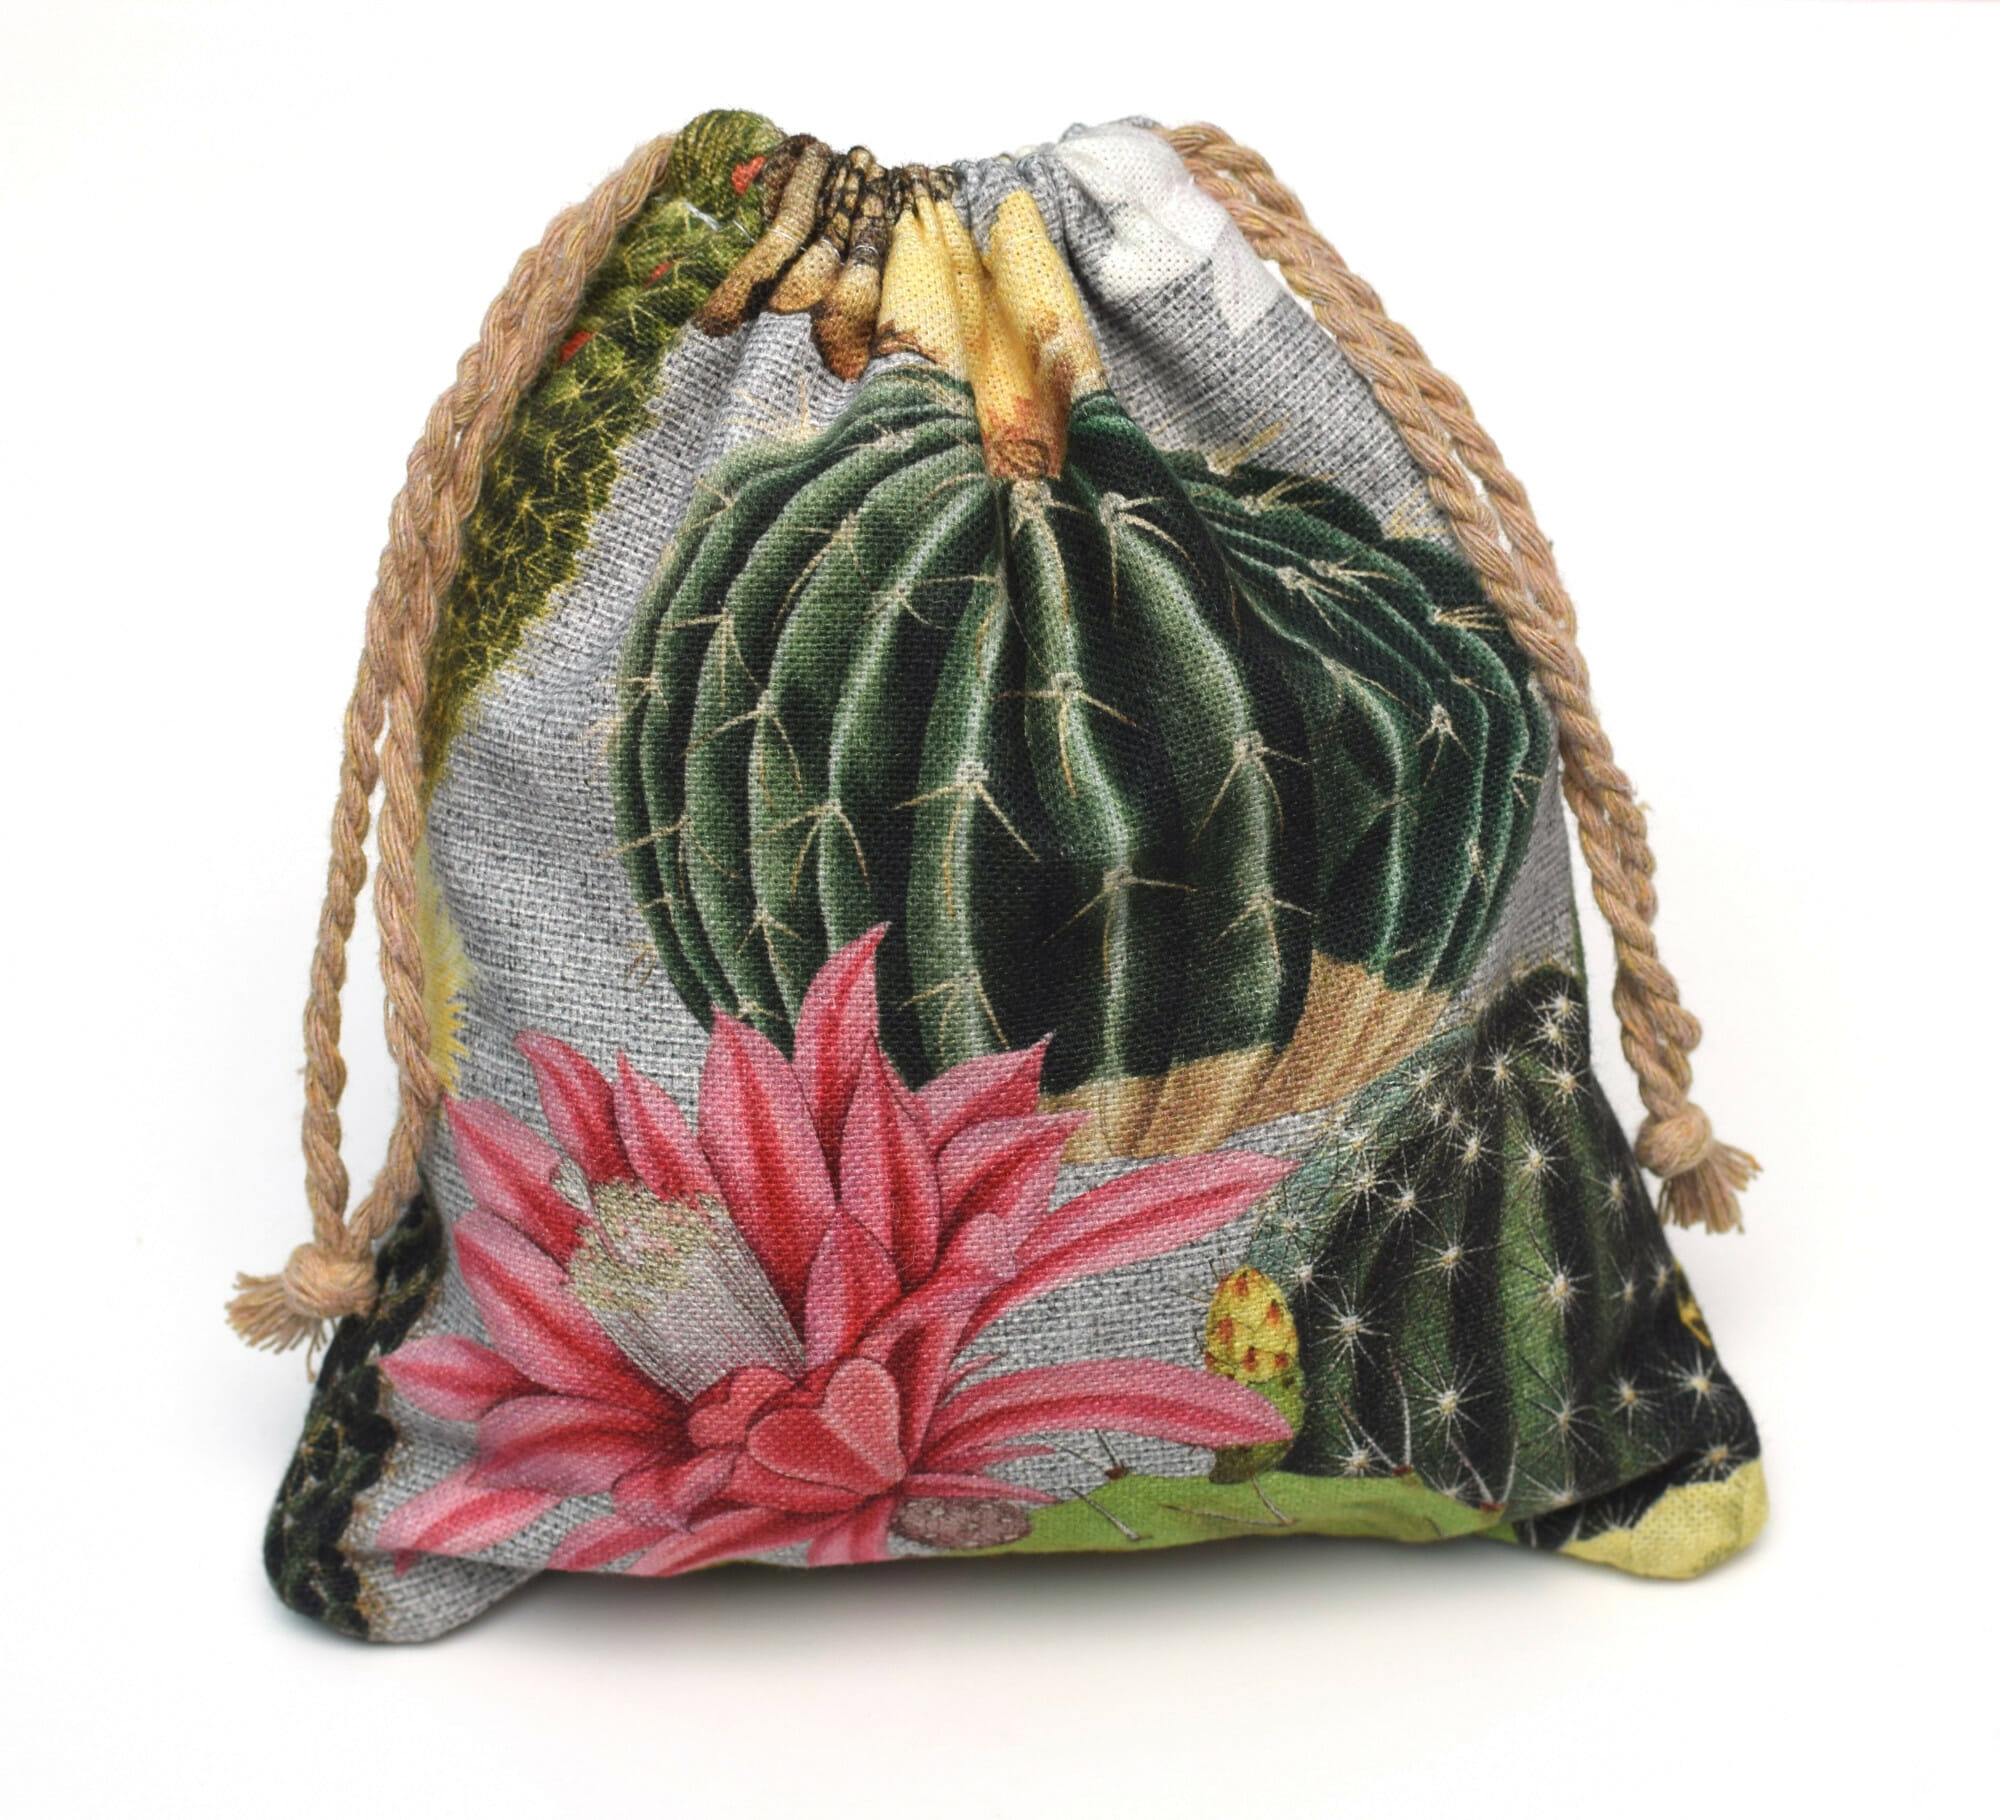
Learn to sew a simple DIY drawstring bag with beautifully finished seams using only a sewing machine – no serger and no pattern needed. You can make this drawstring bag extra-small or extra-large, and it will always be an easy and quick sewing project you’ll love.
This is a simple yet useful beginner sewing project.
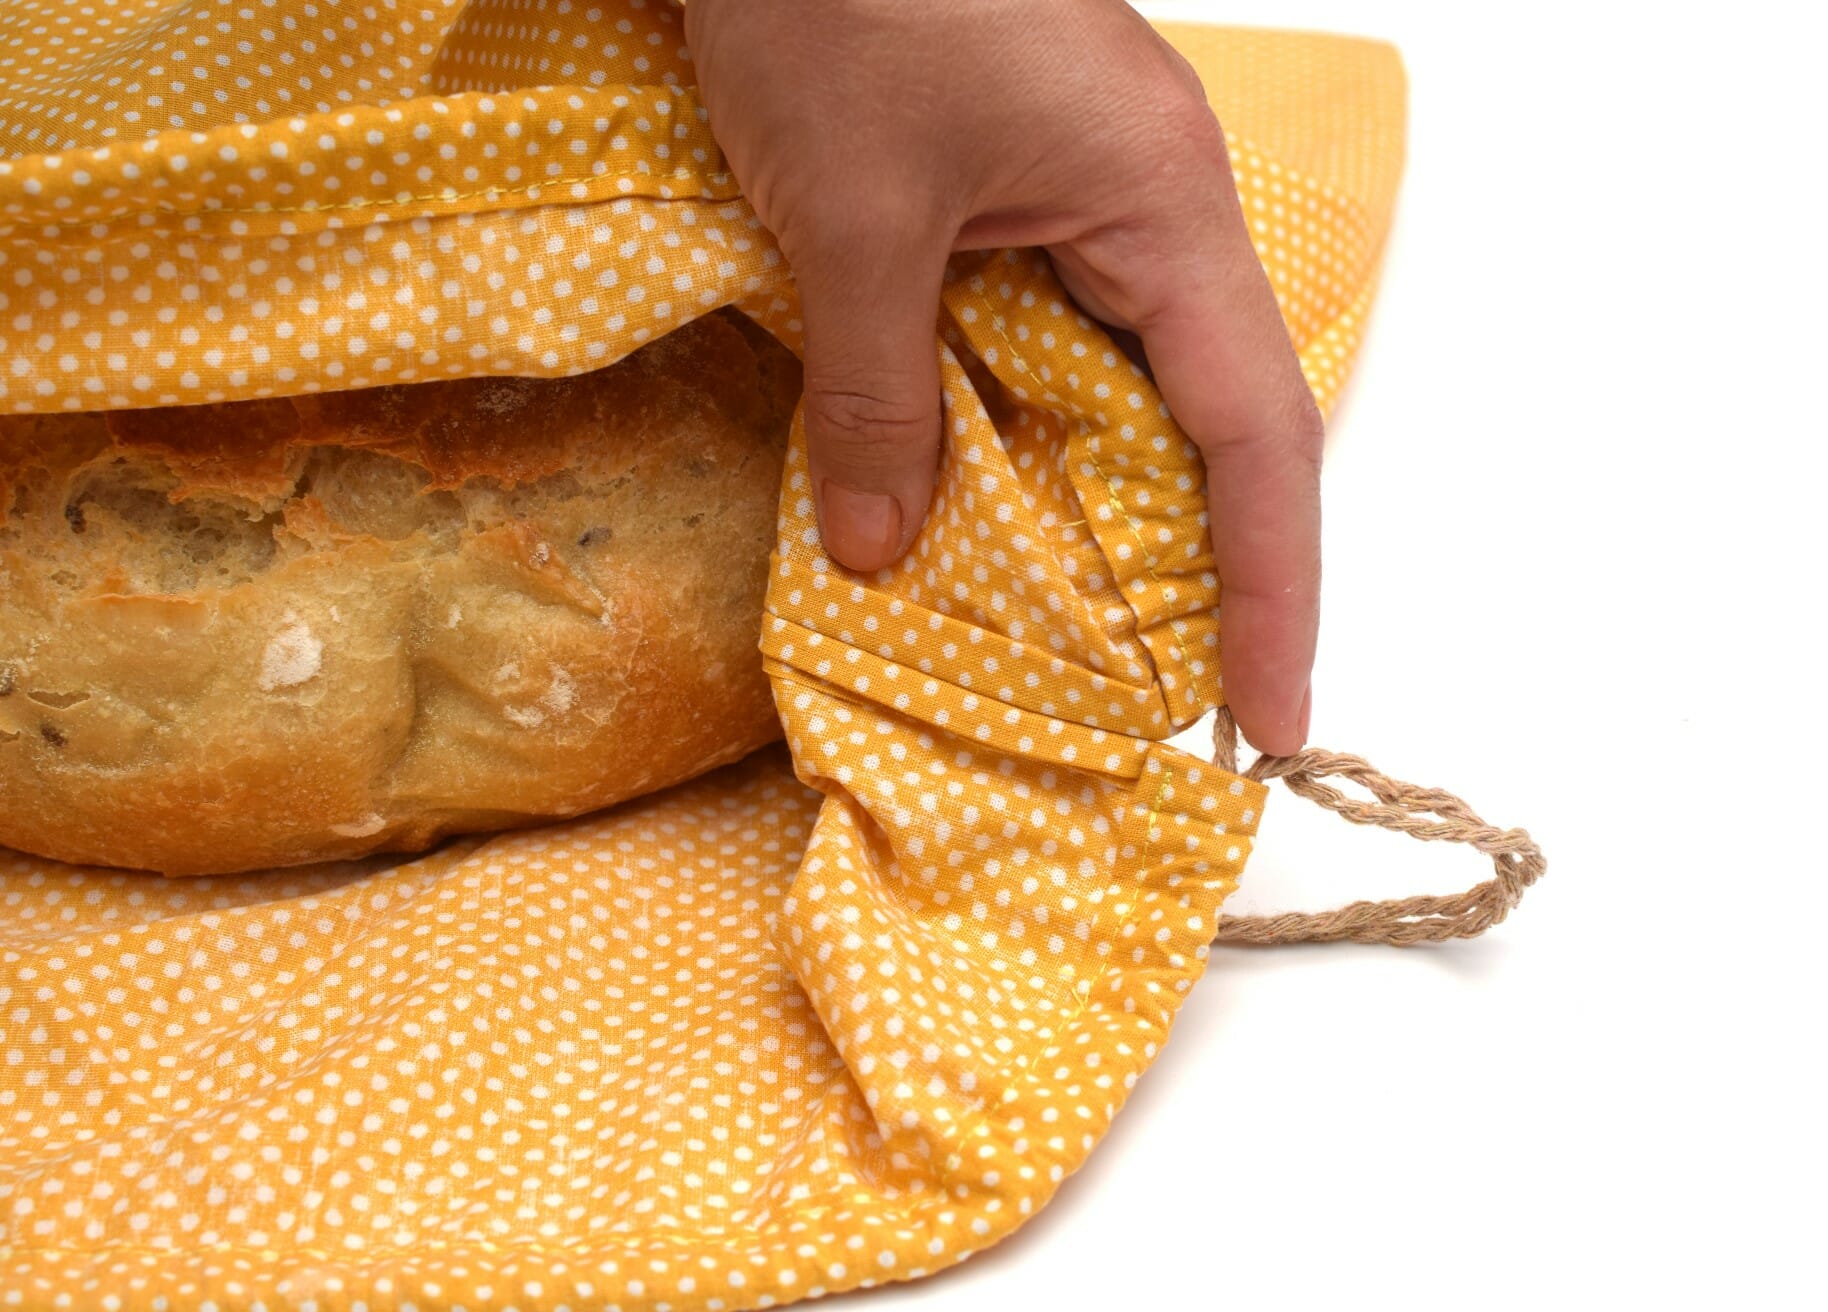
A drawstring bag is perfect for anything that requires a bag. Just pull the drawstrings in opposite directions to close the bag, and that’s it! This flexible container is great for storing and organizing things.
You can use a drawstring bag for anything you like
This bag with cinched drawstring closure is great for carrying items like exercise clothes and shoes, for holding toys, school supplies, towels, toiletries, or even snacks. It’s easy to wash, recyclable, and durable. You can reuse it over and over again, for many years.
A drawstring bag is also great as a gift bag, traveling accessories bag, medicine bag, money bag, reusable shopping bag, or even as a face mask bag – to keep it in your car at all times.
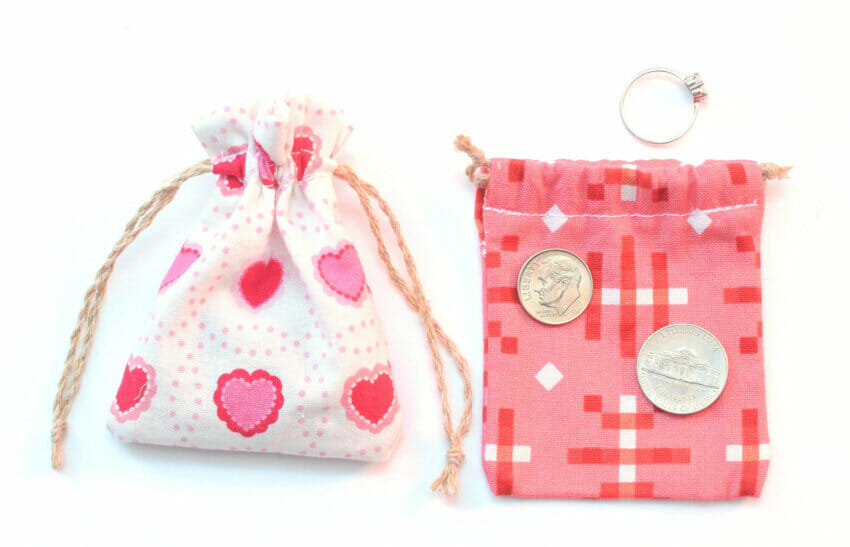
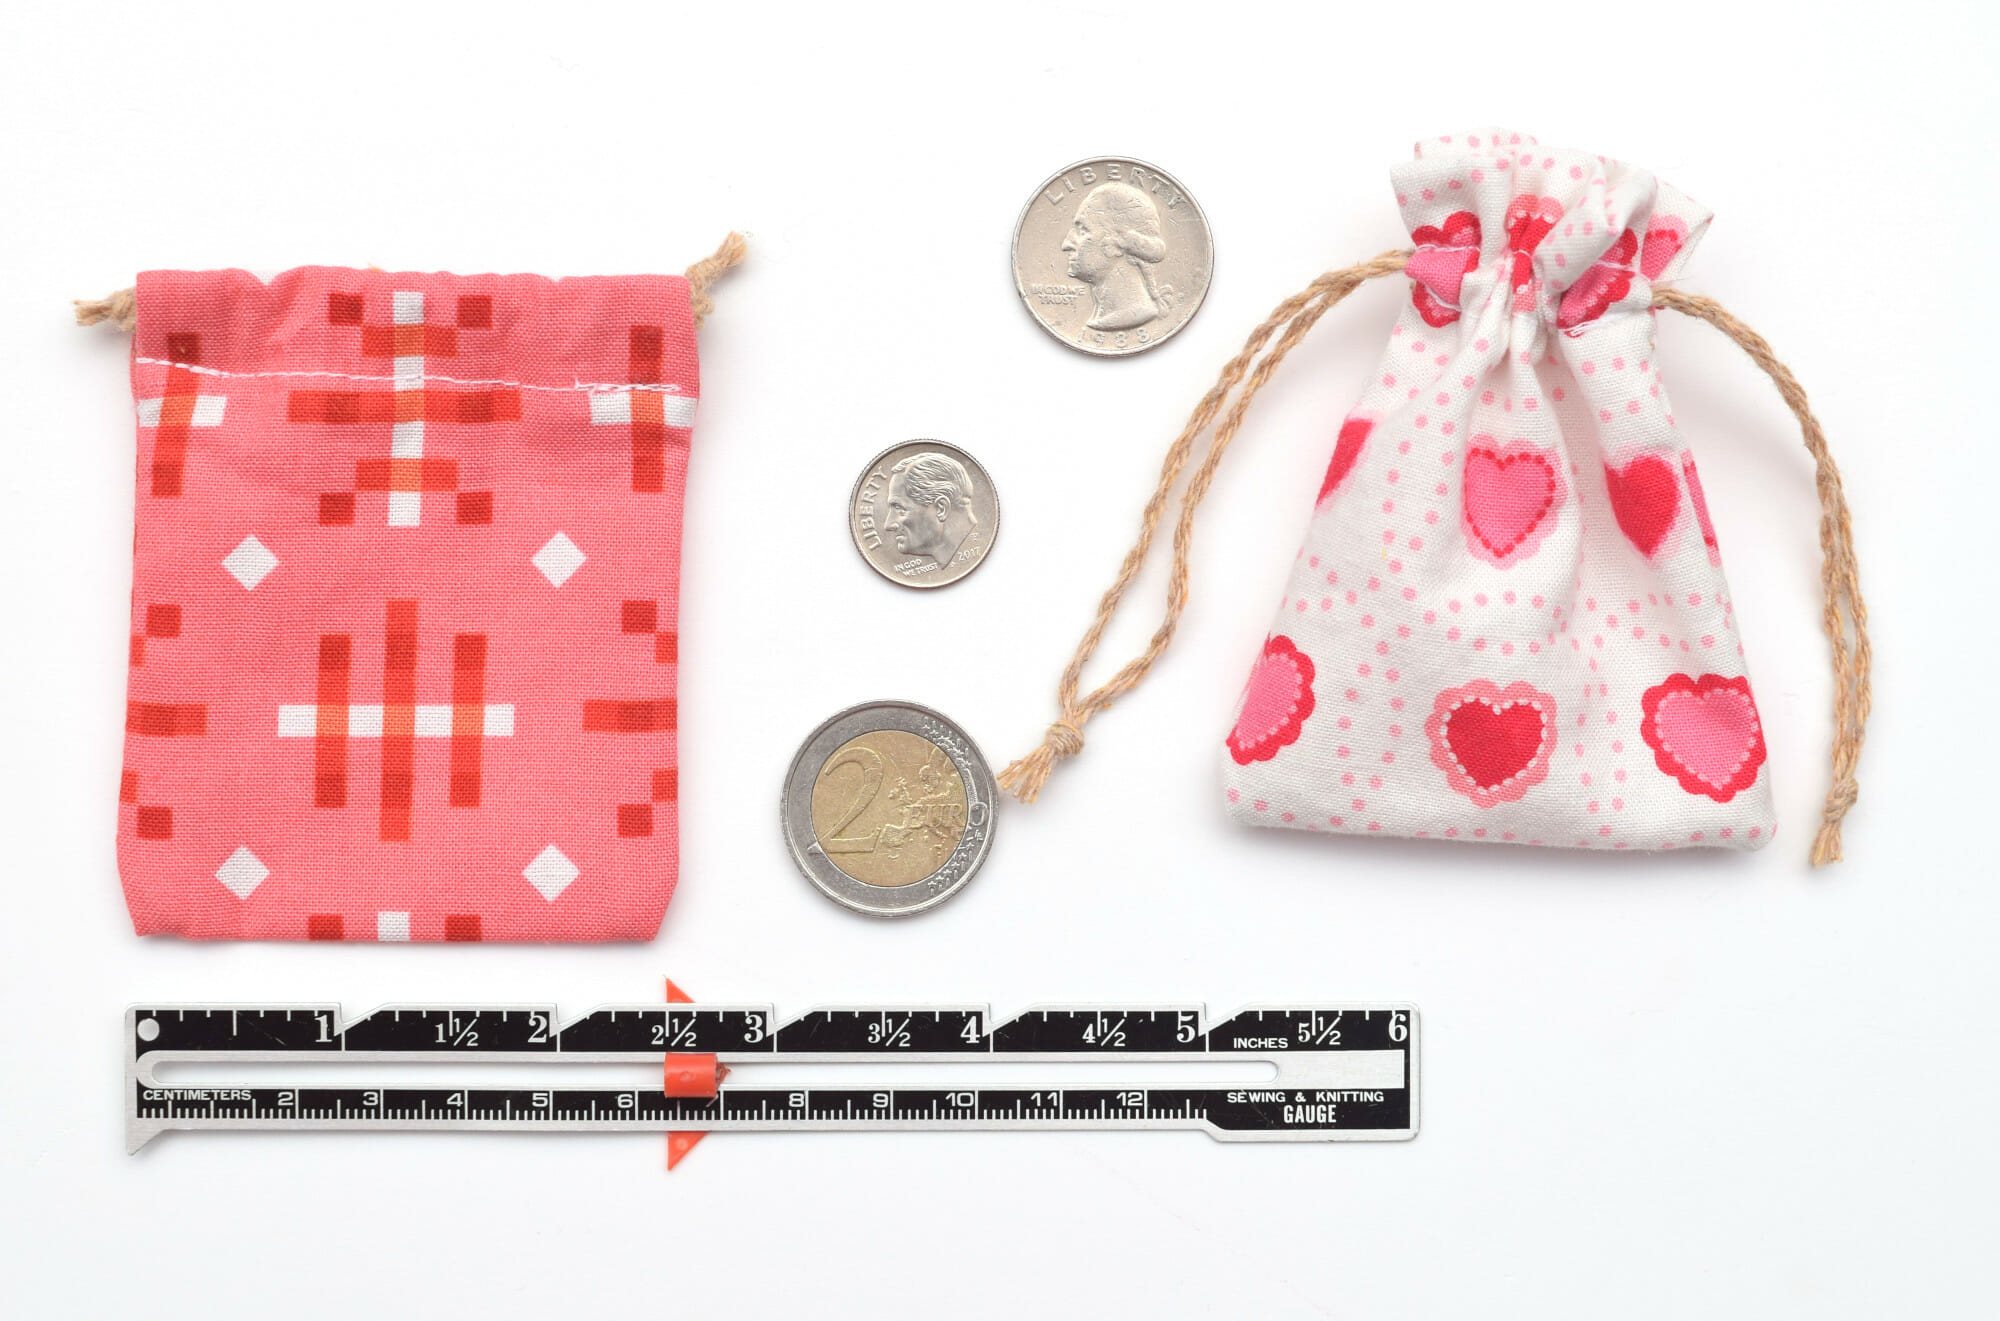
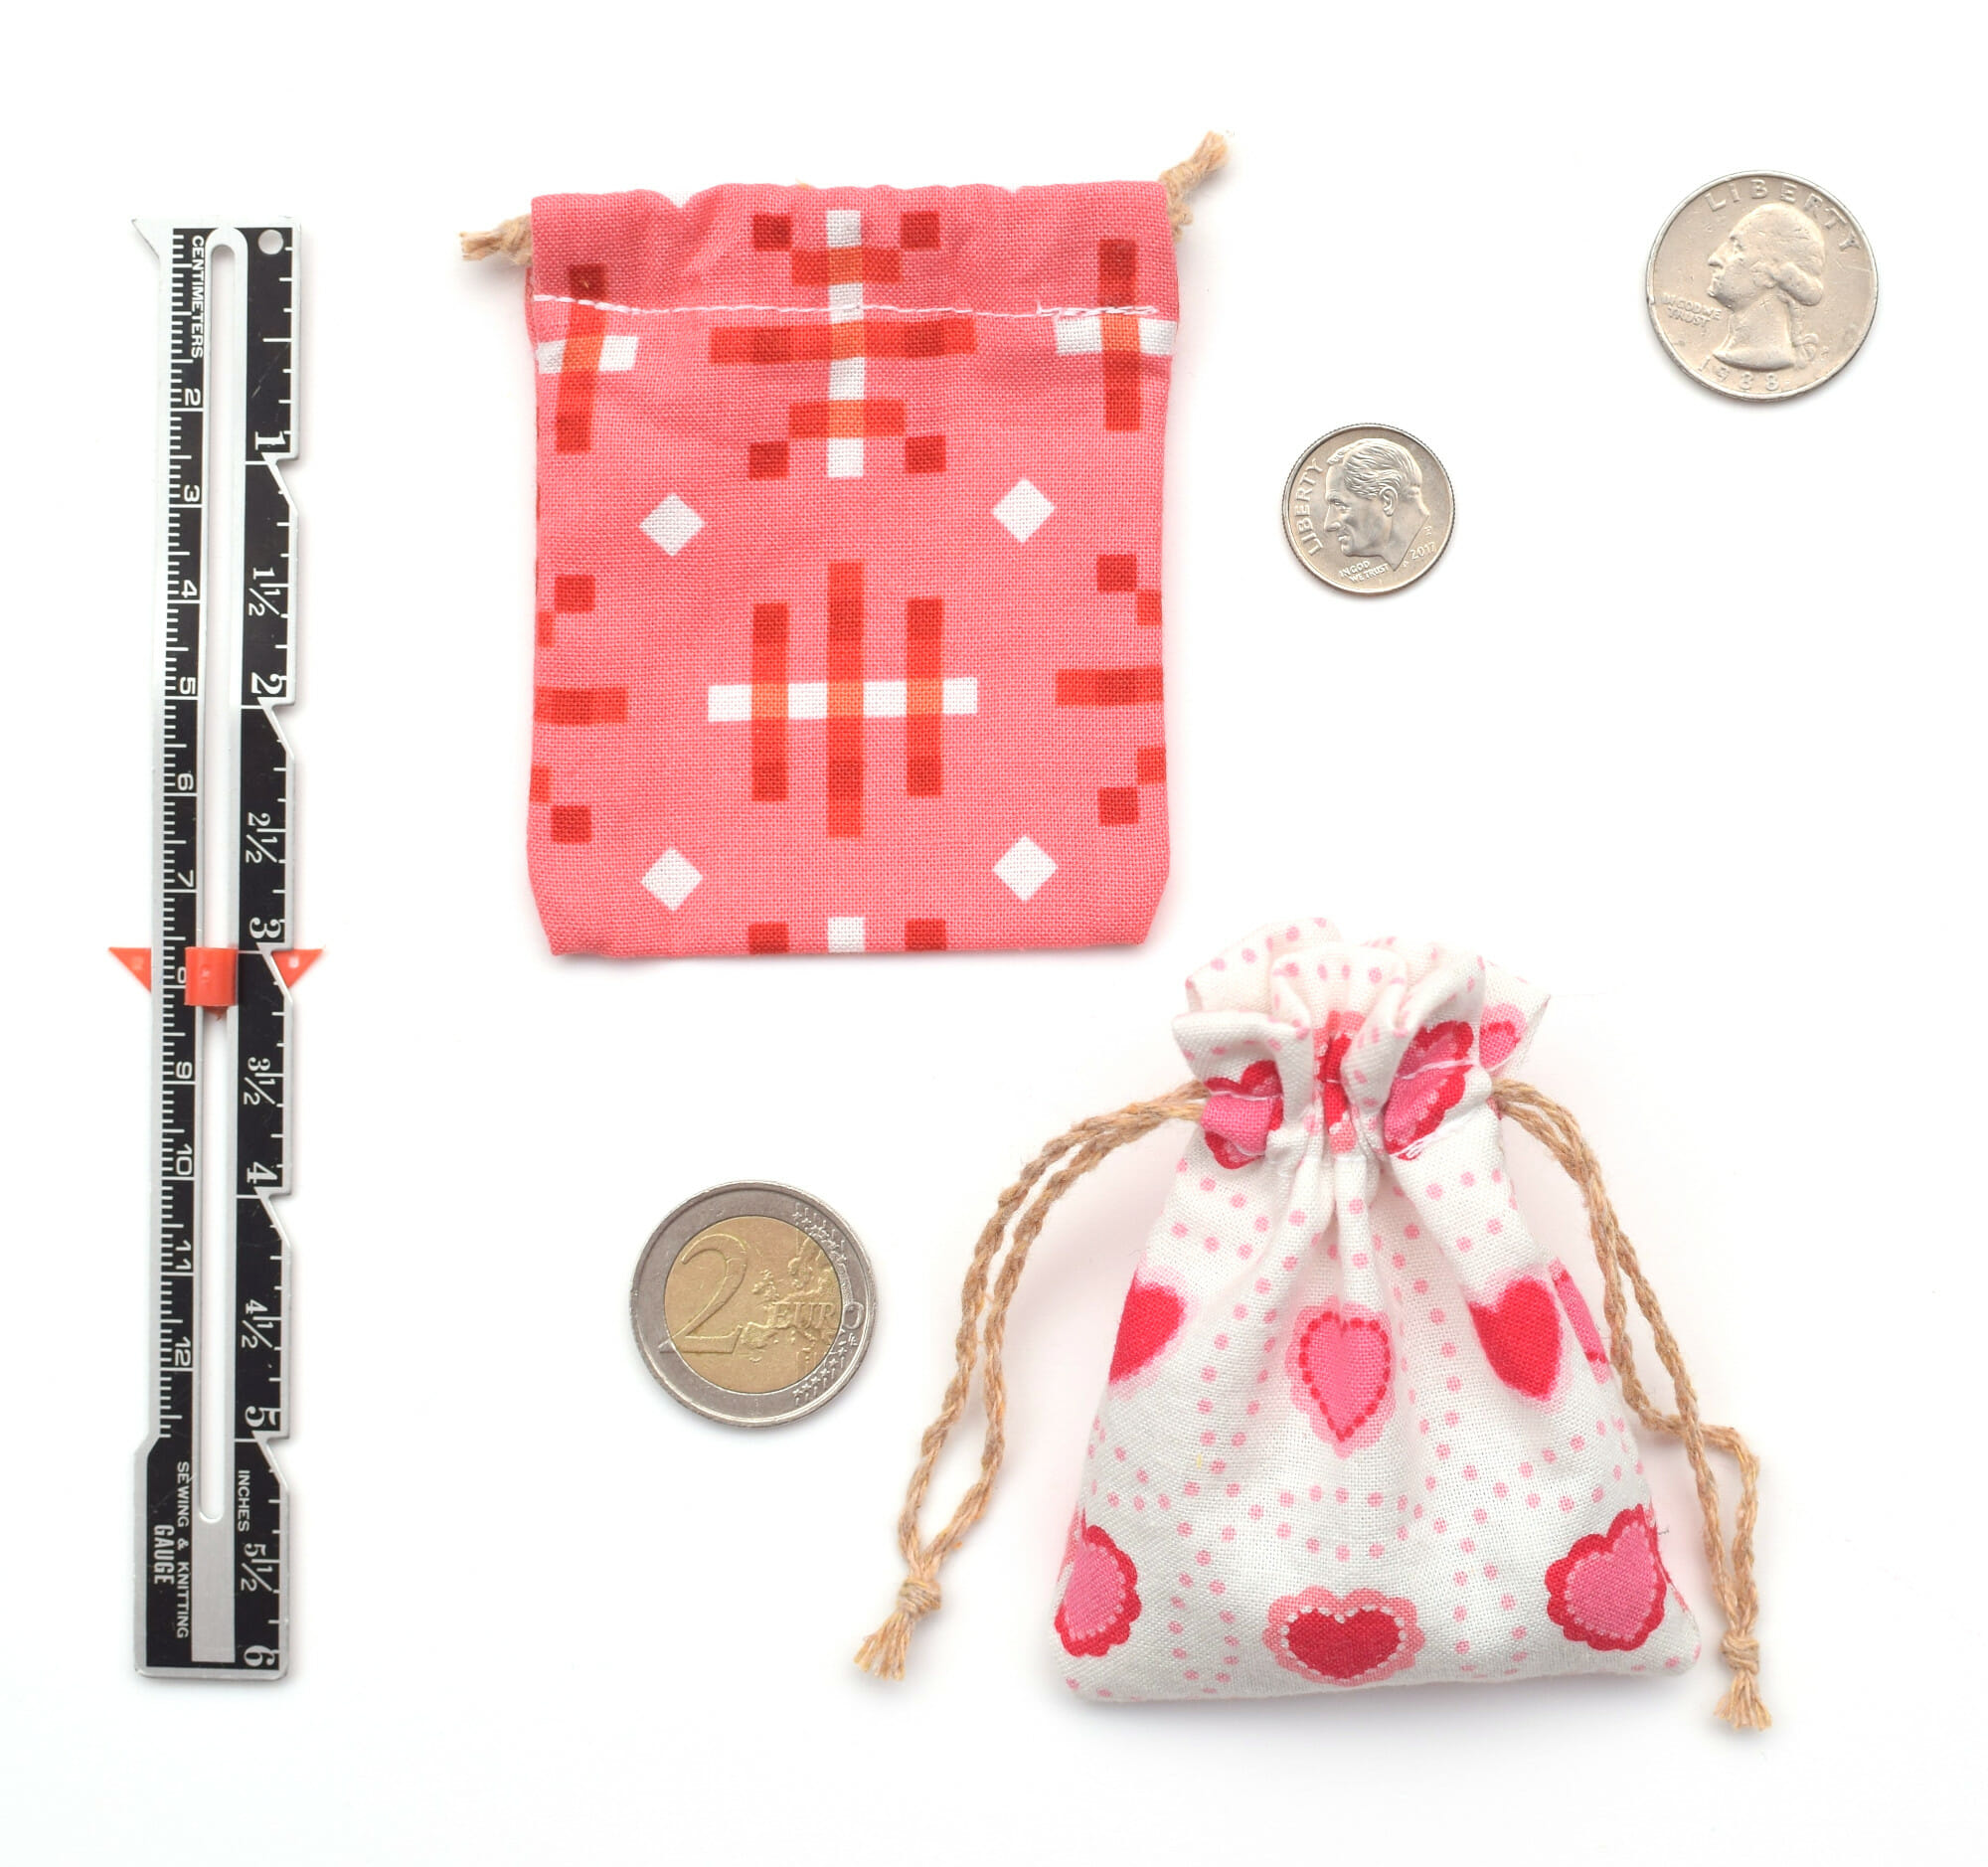
I made a few tiny drawstring bags to keep some of my kids jewelry, beads, and coins, and I followed the same directions. My bags (pictured below) are very small – we’re talking about 2 1/2” x 3” bags.
So, maybe you need a potpourri sachet, a pretty favor bag, or a small bag for a special gift – I’ve got you covered with this sewing tutorial.
And, of course, you can make a large drawstring bag for laundry, if you want. A bag like that is great for students living in a college dorm, to help them keep the dirty clothes off the floor.
These bags are light and easy to use as well as a laundry bag when you travel because they take up almost no room in luggage.
The bottom line, a drawstring bag is an eco-friendly item and a smart choice for families. A good, quality drawstring bag has become a must-have for anyone really, and this tutorial is exactly what you need to make your own.
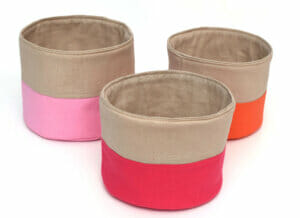
Make different sizes so you have just the right size for everything.
Related: 50 easy sewing projects for beginners to try
Sewing supplies – easy DIY drawstring bag
- fabric – cotton, canvas, linen, muslin
- ribbon or cord – 2 pieces, each one measuring two times the width of the bag, plus 2 inches
- sewing machine
- needle
- matching thread
- sewing pins
- sewing gauge
- fabric scissors or rotary cutter
- iron
How this drawstring bag is made
This DIY drawstring bag is made of two rectangles and has two side seams and one bottom seam.
For the bottom seam, we create a French seam, because we want a durable seam, and also a neat and clean finish. The side seams don’t have any visible raw edges as well.
I chose to make the bag with two fabric pieces instead of one because if you use a directional print, only one side of the bag will have the appropriate up-right orientation. A piece of directional fabric will always look upside down (or sideways) when you fold it.
But, if you want to use a non-directional print for your drawstring bag, you can forget about this precaution and just cut a large single piece of fabric, so that the bag has no bottom seam.
Related: How to make a lined drawstring bag in any size
How to make a drawstring bag in 7 simple steps
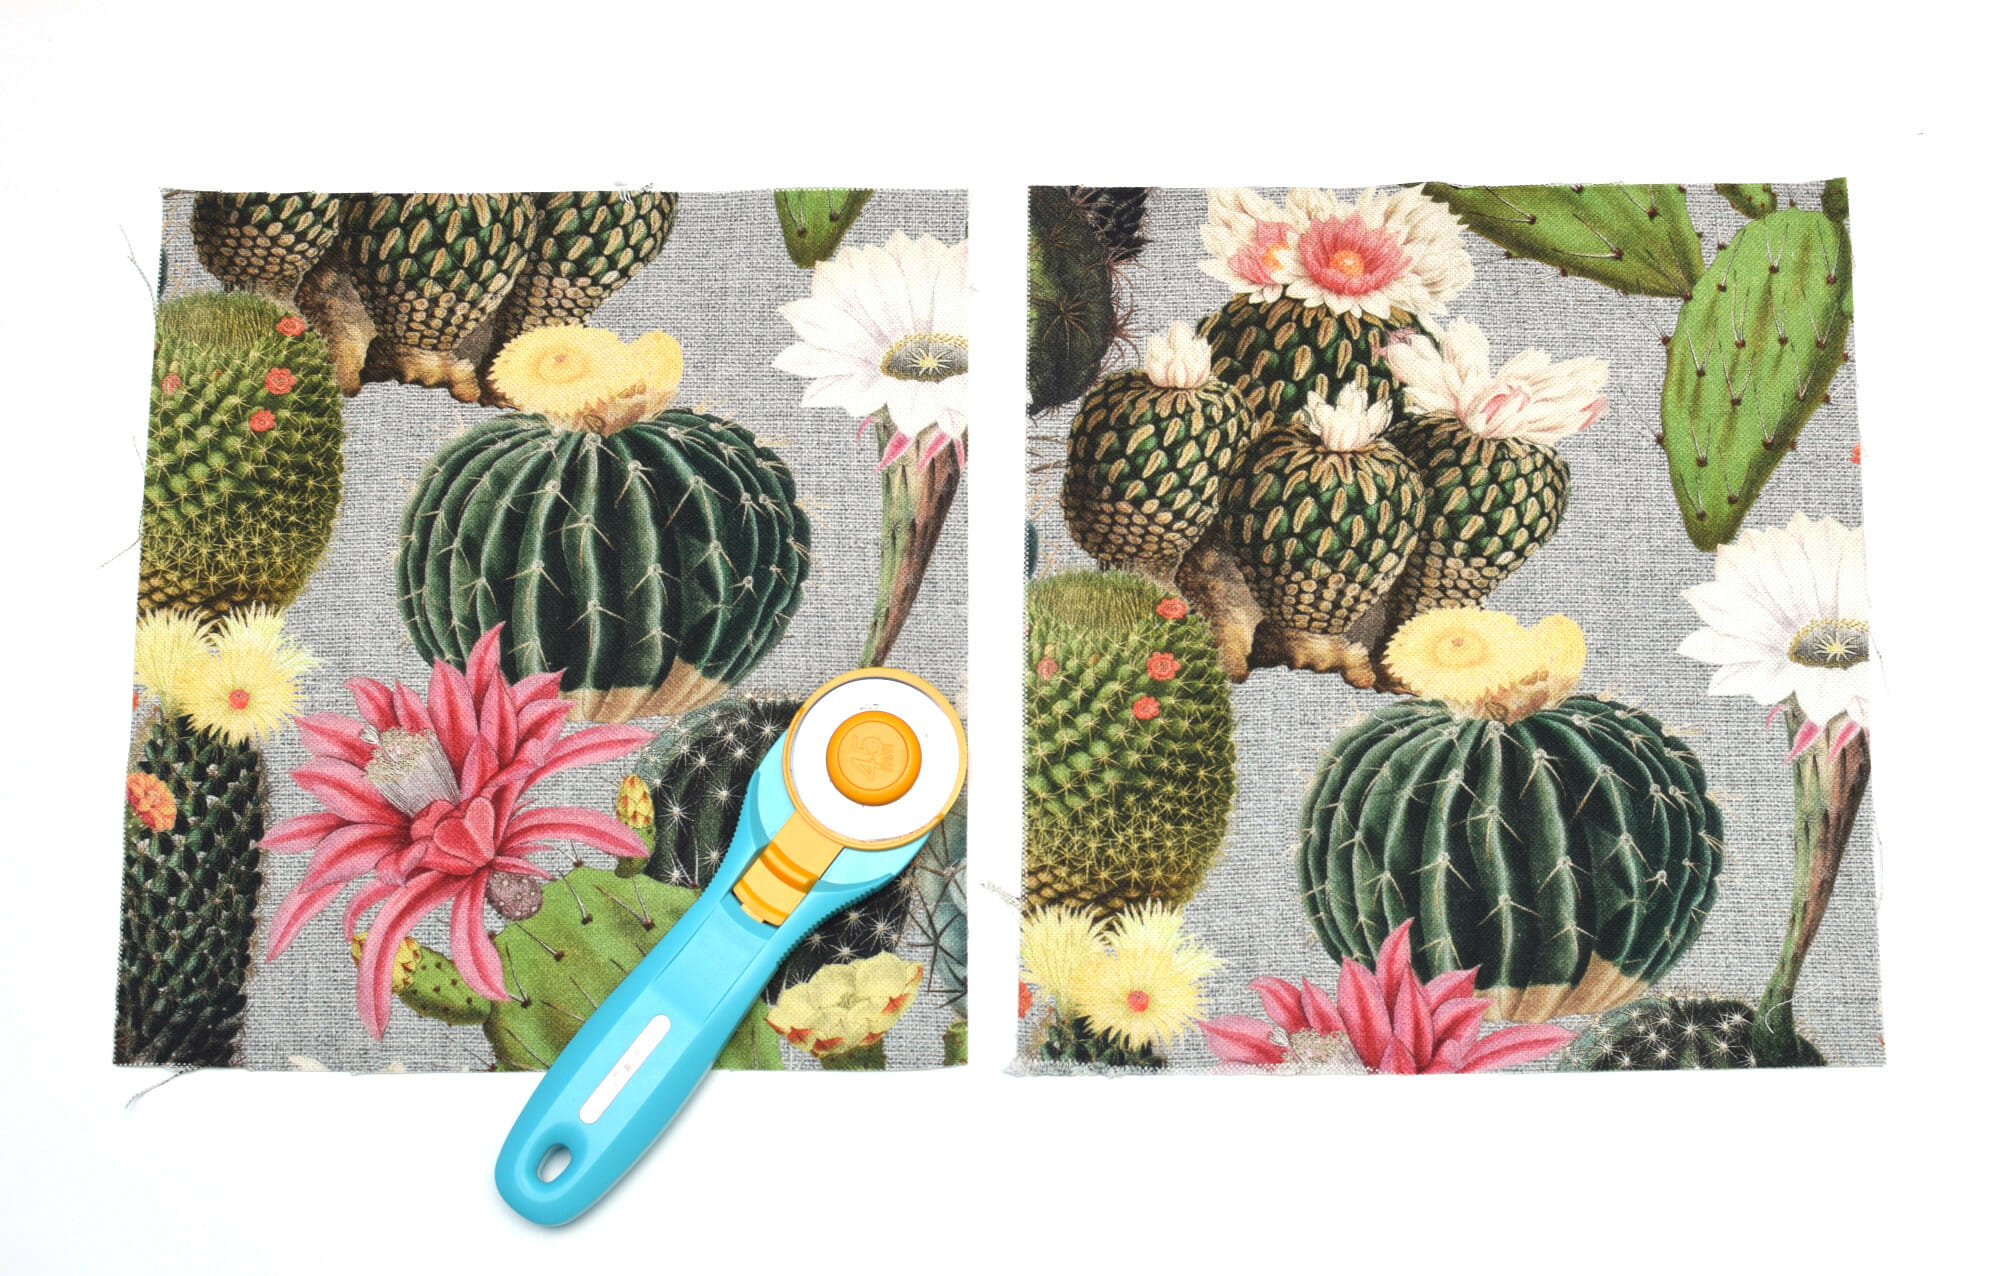
Step 1
Cut two rectangles of fabric measuring 9-inch wide by 10-inch long. The finished size of my drawstring bag is approx. 7″ W x 8″ H.
Step 2
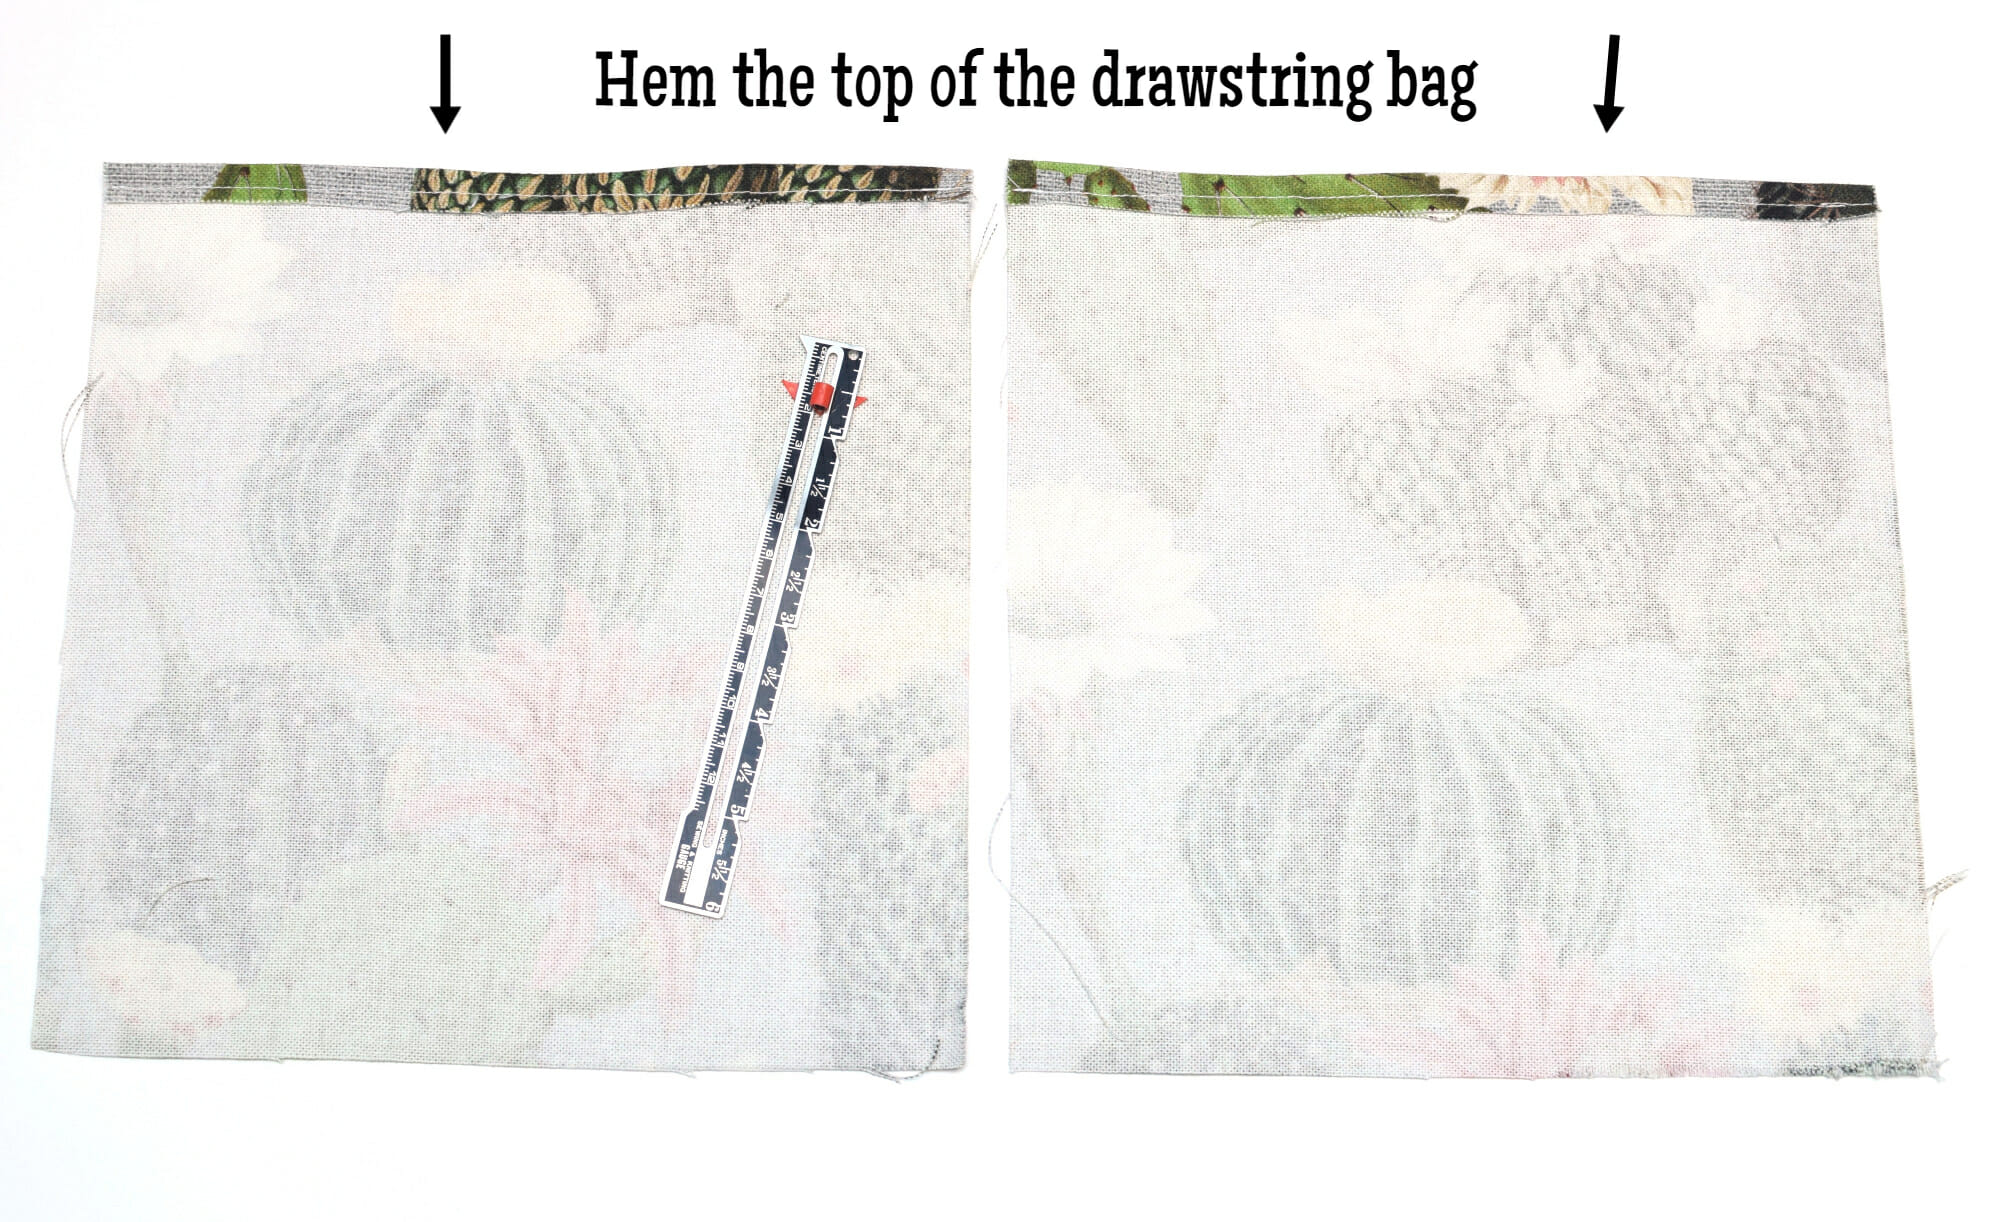
Hem the top of each fabric piece (the width) – fold over only once, about 3/8″, and stitch.
The top edge will be folded down again in Step 6, so the raw edge will be completely hidden in the end.
Step 3
Take the raw edge along the length of the bag and fold it up towards the wrong side of the fabric about 1/2”.
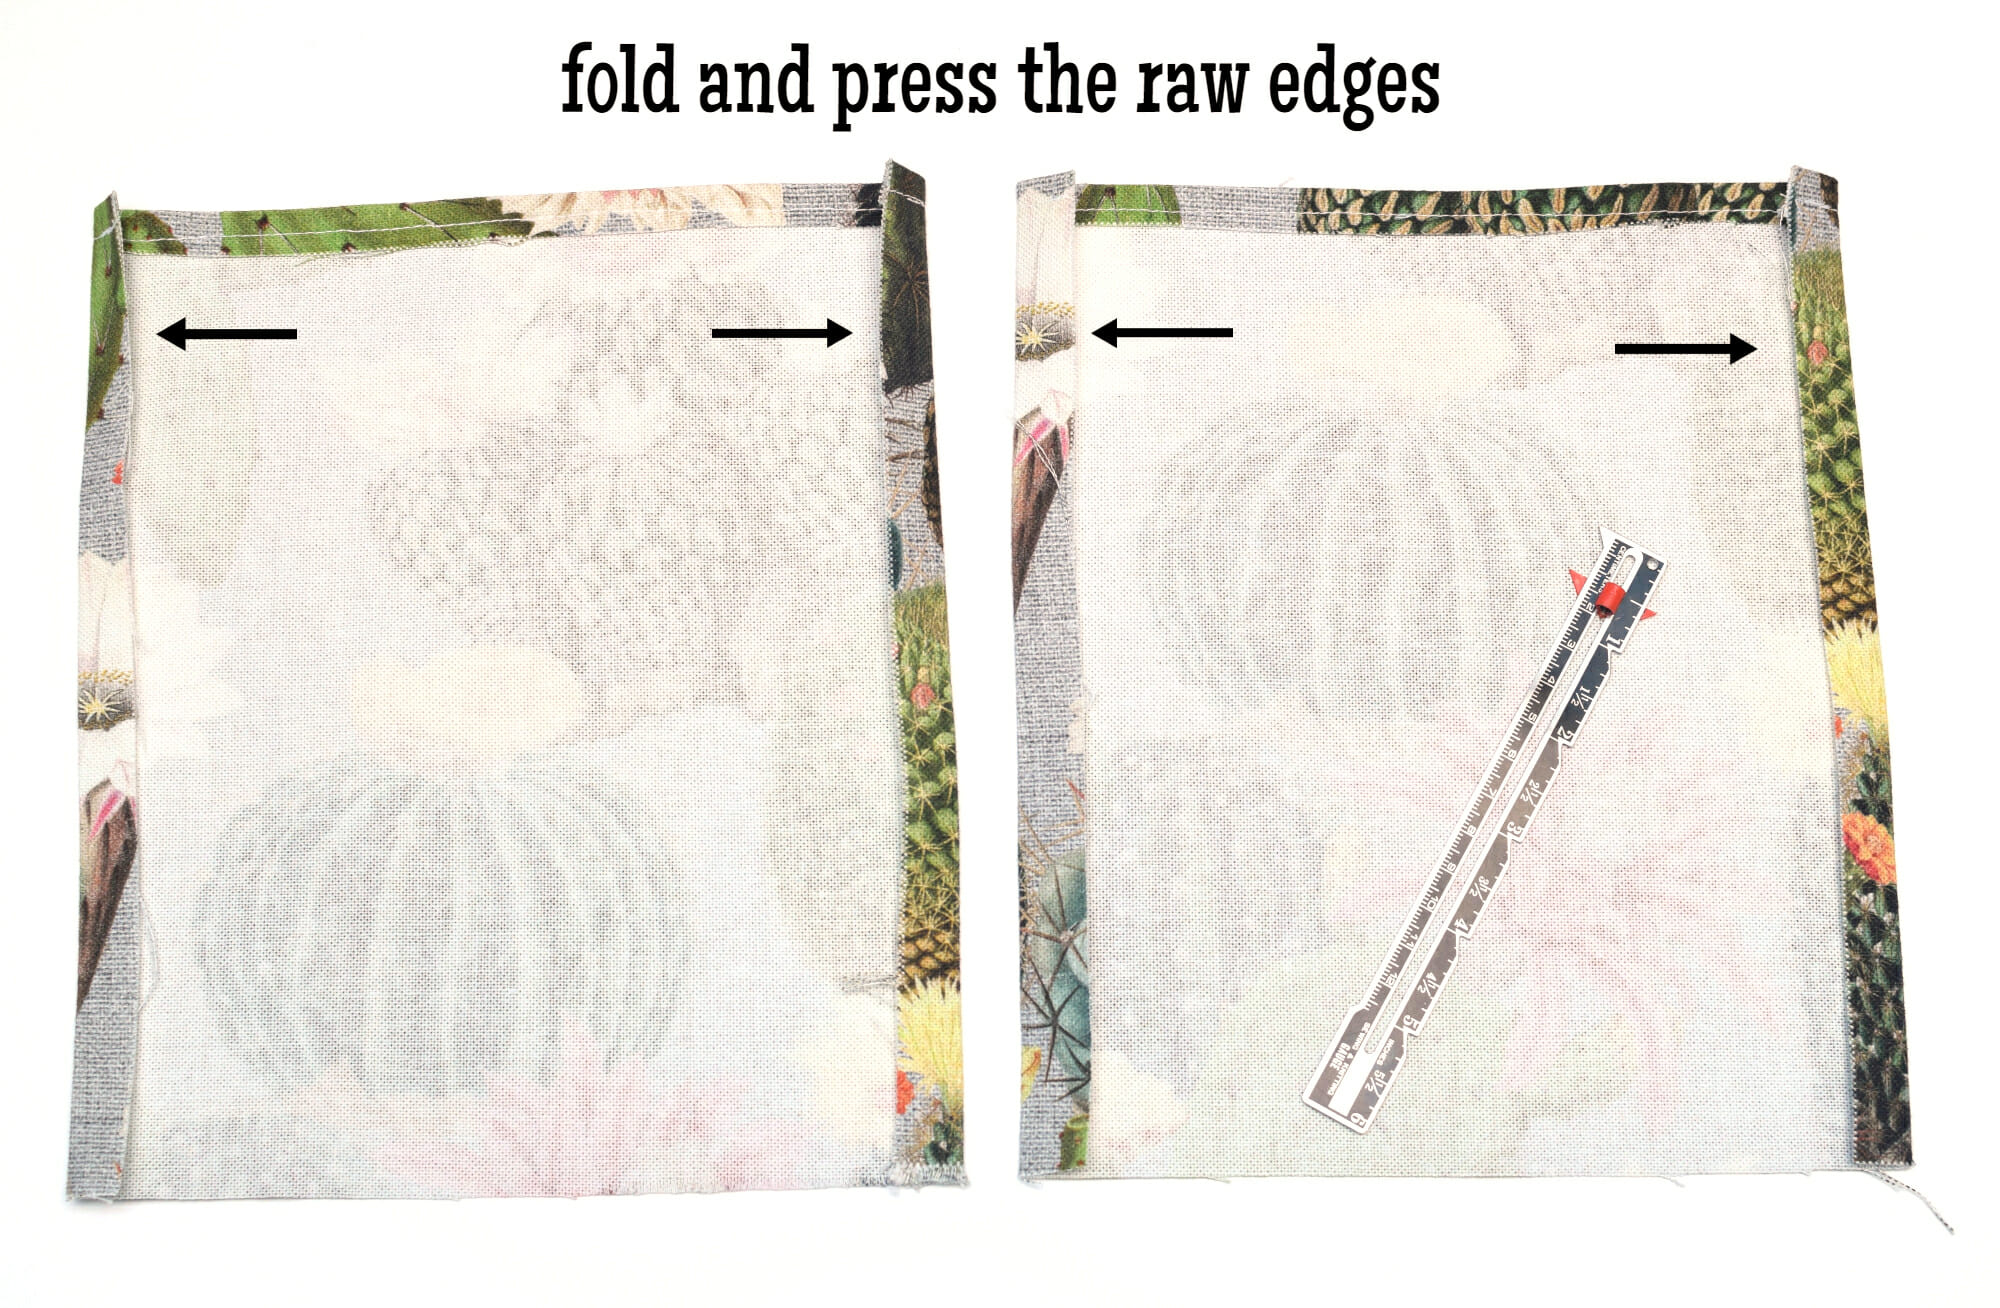
Repeat on all four sides.
Step 4
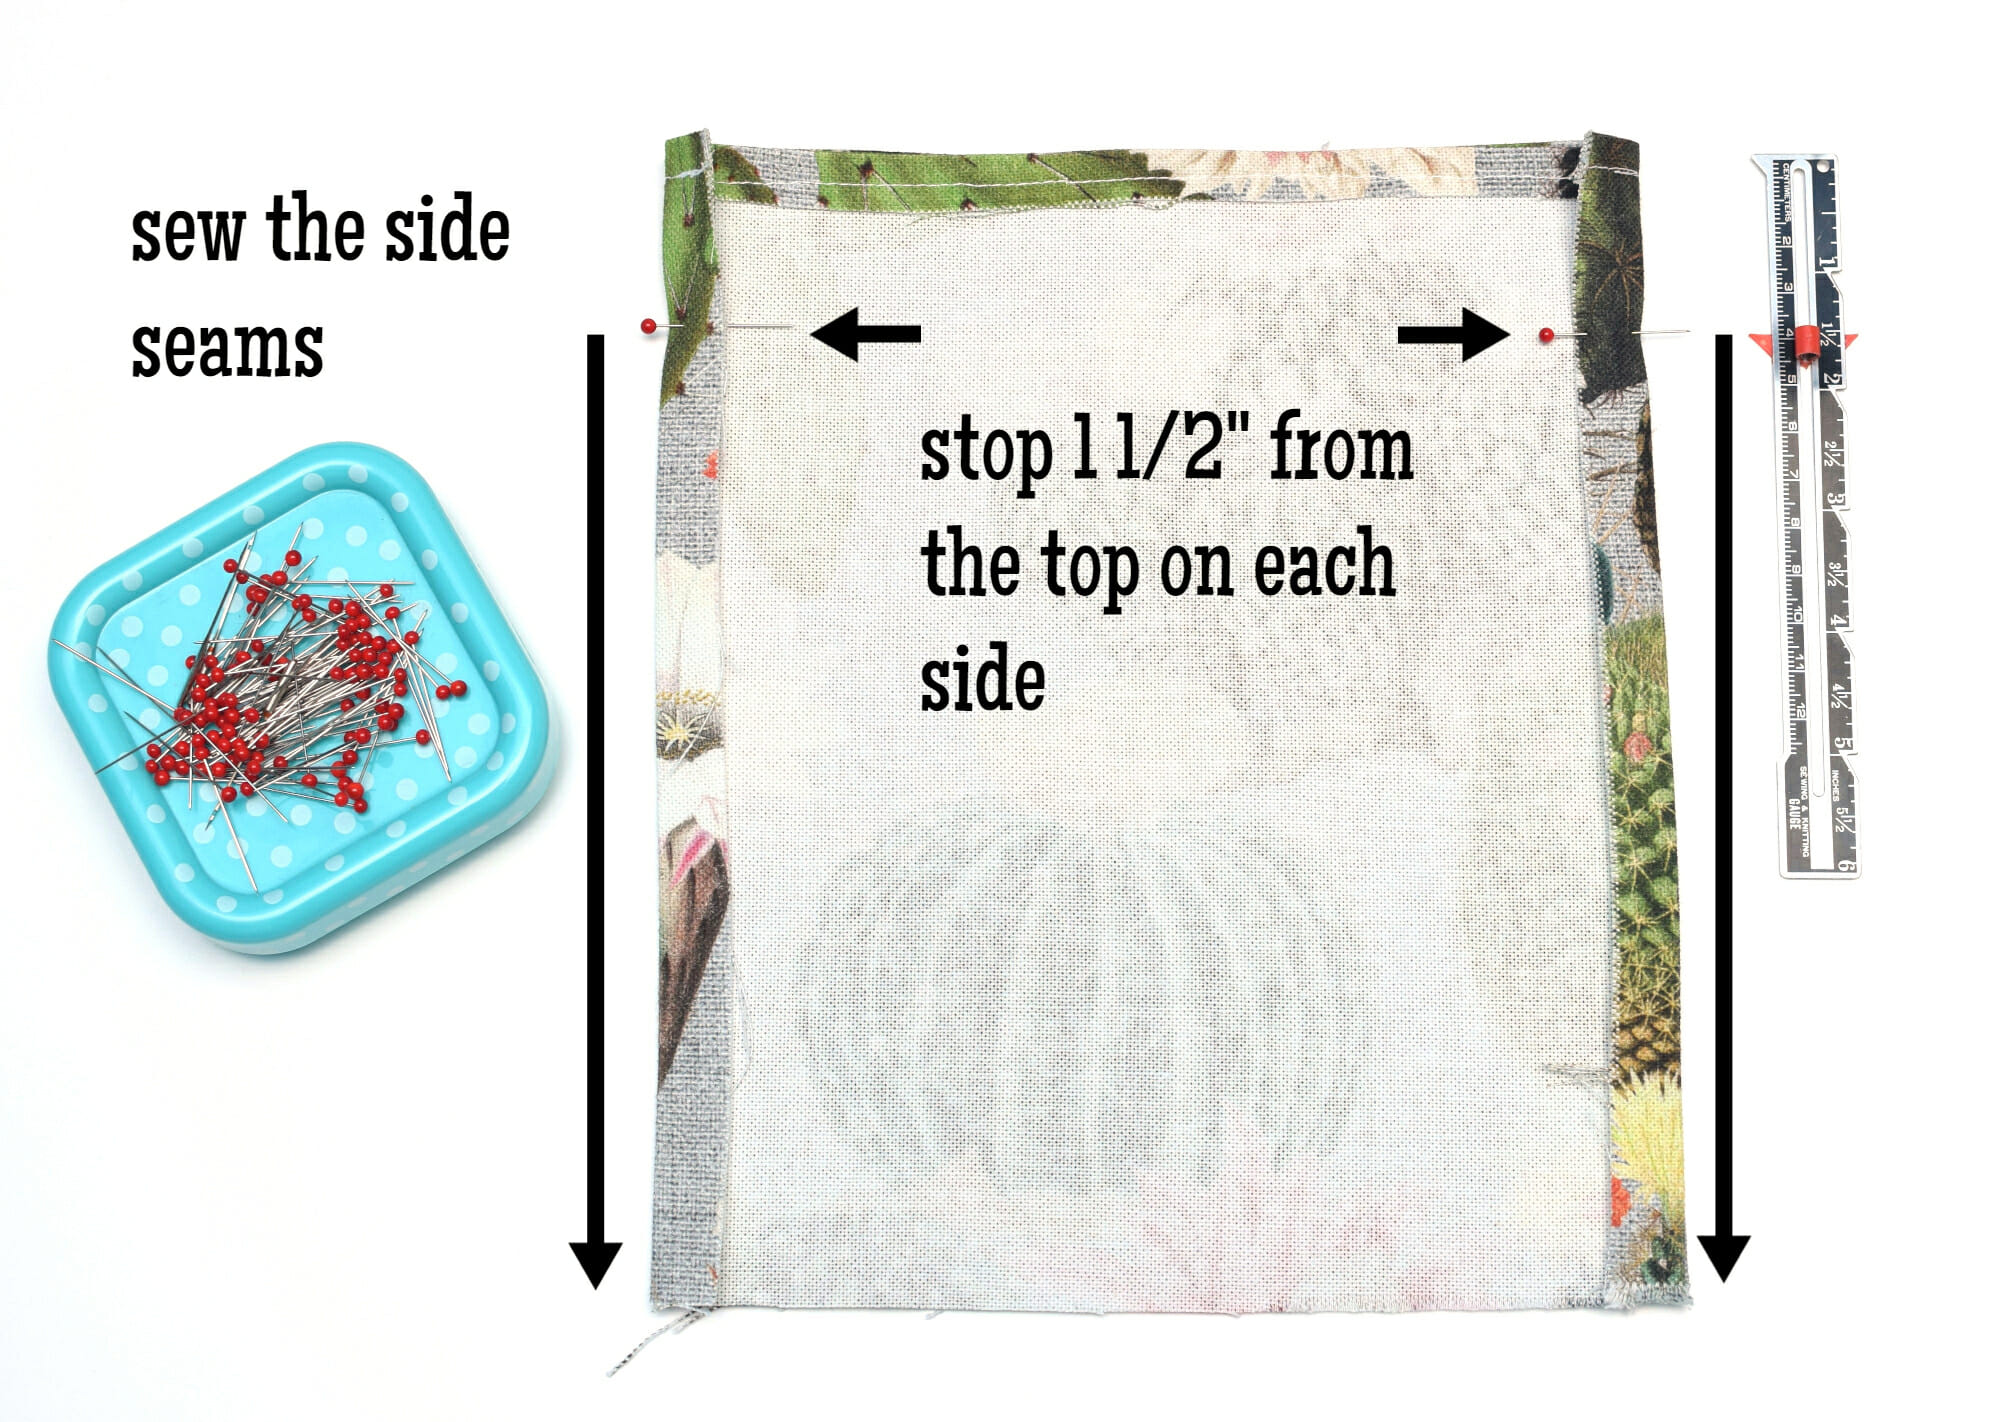
Place the two fabric pieces right sides together and stitch the long edges with a 3/8” seam allowance. Stop 1 1/2″ from the top on each side.
The side seams are folded only once, so you will sew through four layers of fabric. The raw edges are still visible, but only for the trained eye, since the seams are pressed.
Note: Folding over twice the side seams (to fully enclose the raw edges) is a little bit of overkill. You have to sew through six layers of fabric to completely hide those raw edges. However, it’s doable if you use a lightweight fabric.
Now trim off the bottom corners as shown in the below picture – make sure you don’t snip into stitches.

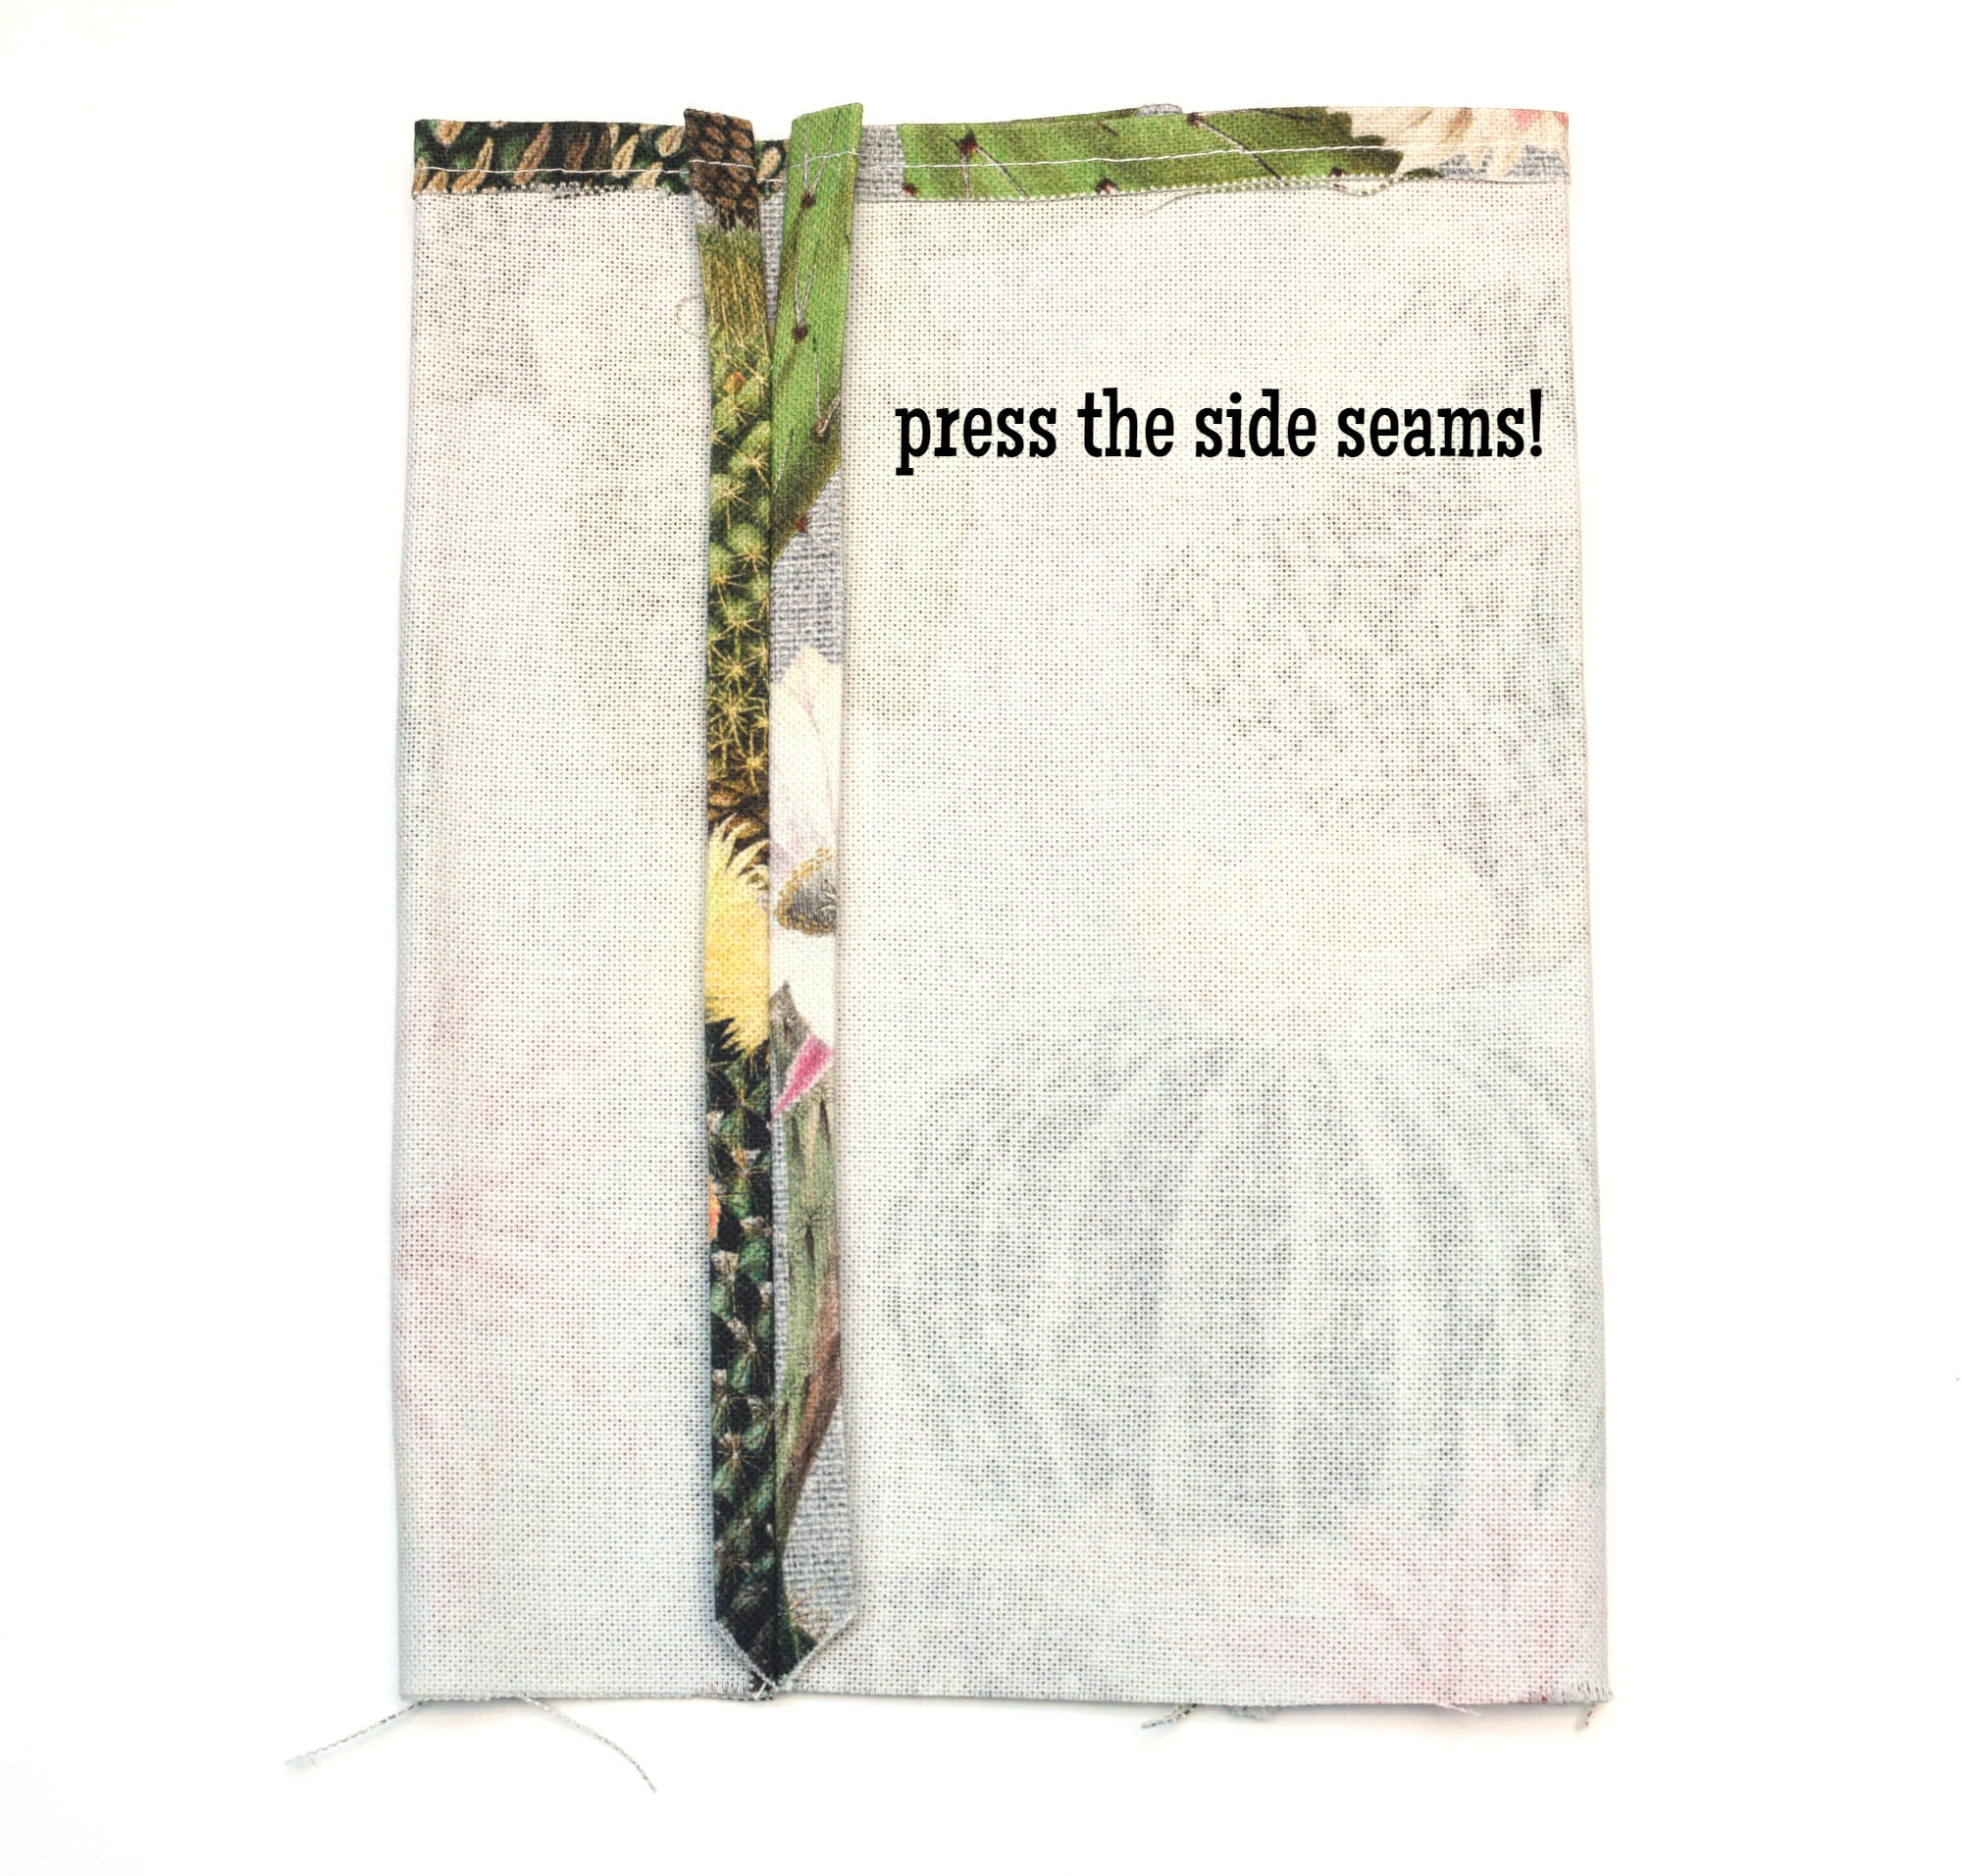
Press the side seams with an iron, then turn the bag right side out.
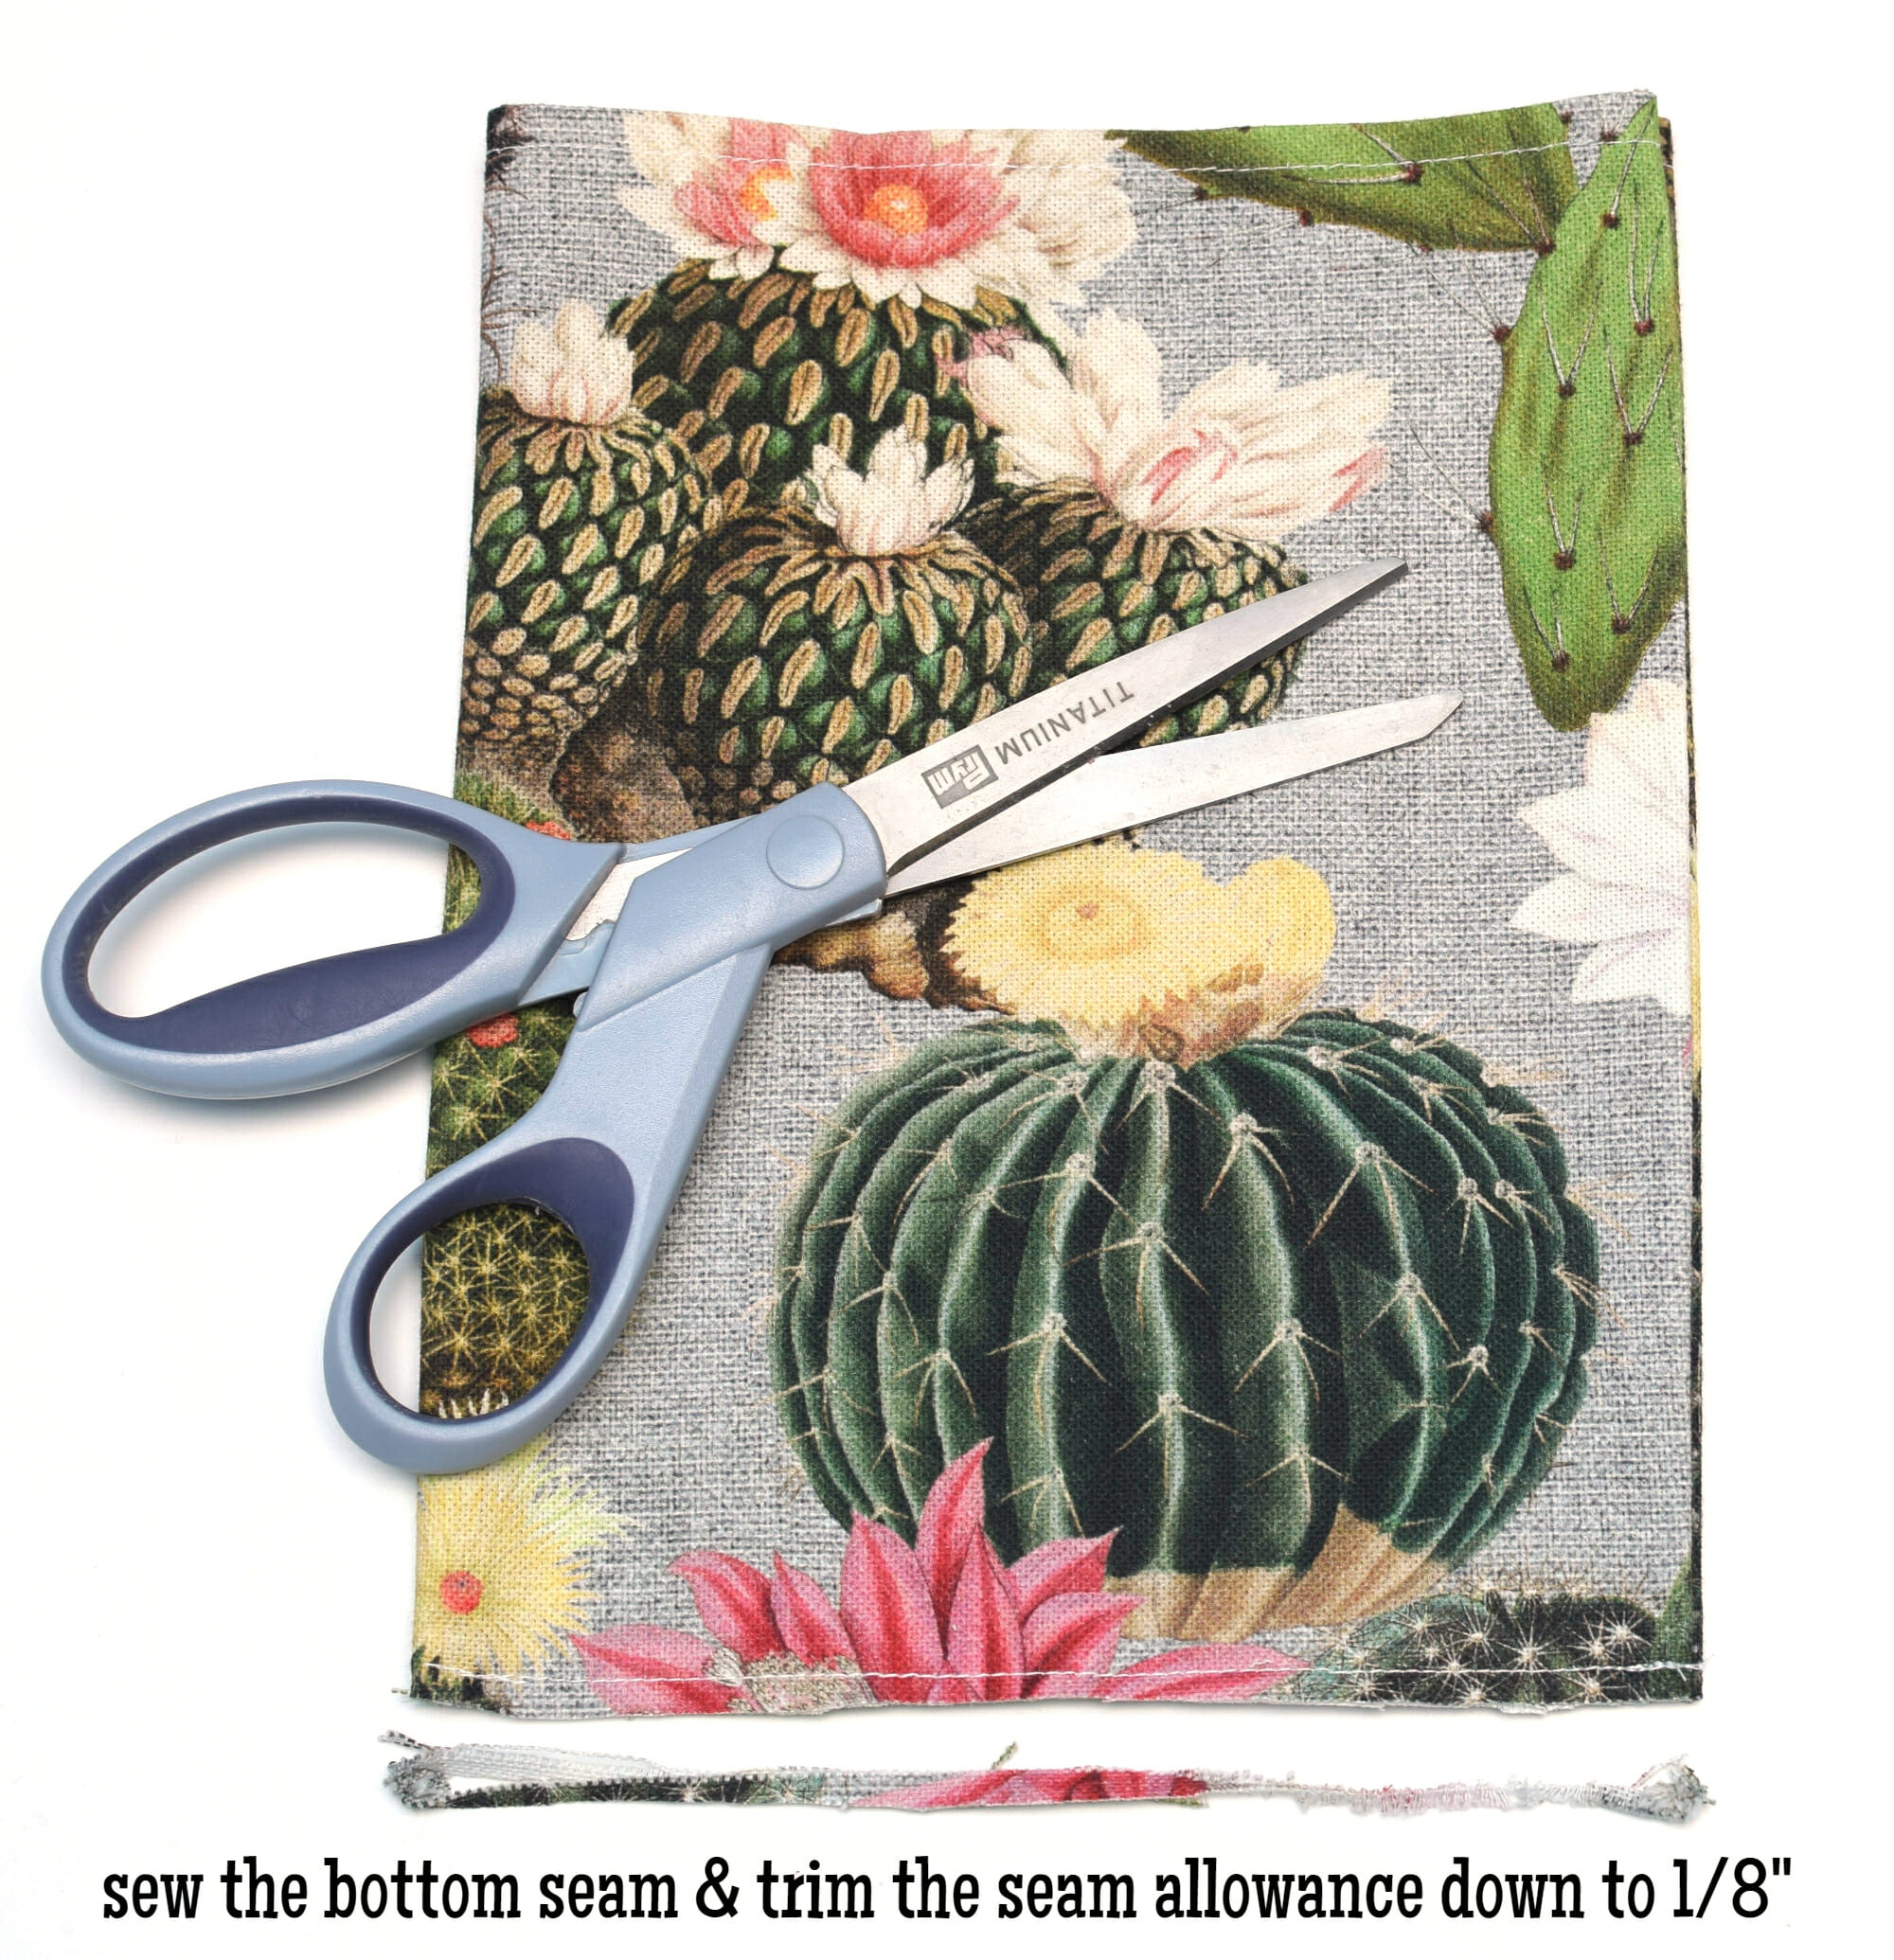
Step 5 – finish the bottom edge of the bag with a french seam
Here comes the french seams part. First, you’re going to sew the bottom seam with the pieces wrong sides together. Then you have to trim the seam allowance down to 1/8″.
Turn your bag with the wrong side out and press the bottom seam so that it lays flat. Now sew the second seam, this time with a 1/2” seam allowance.
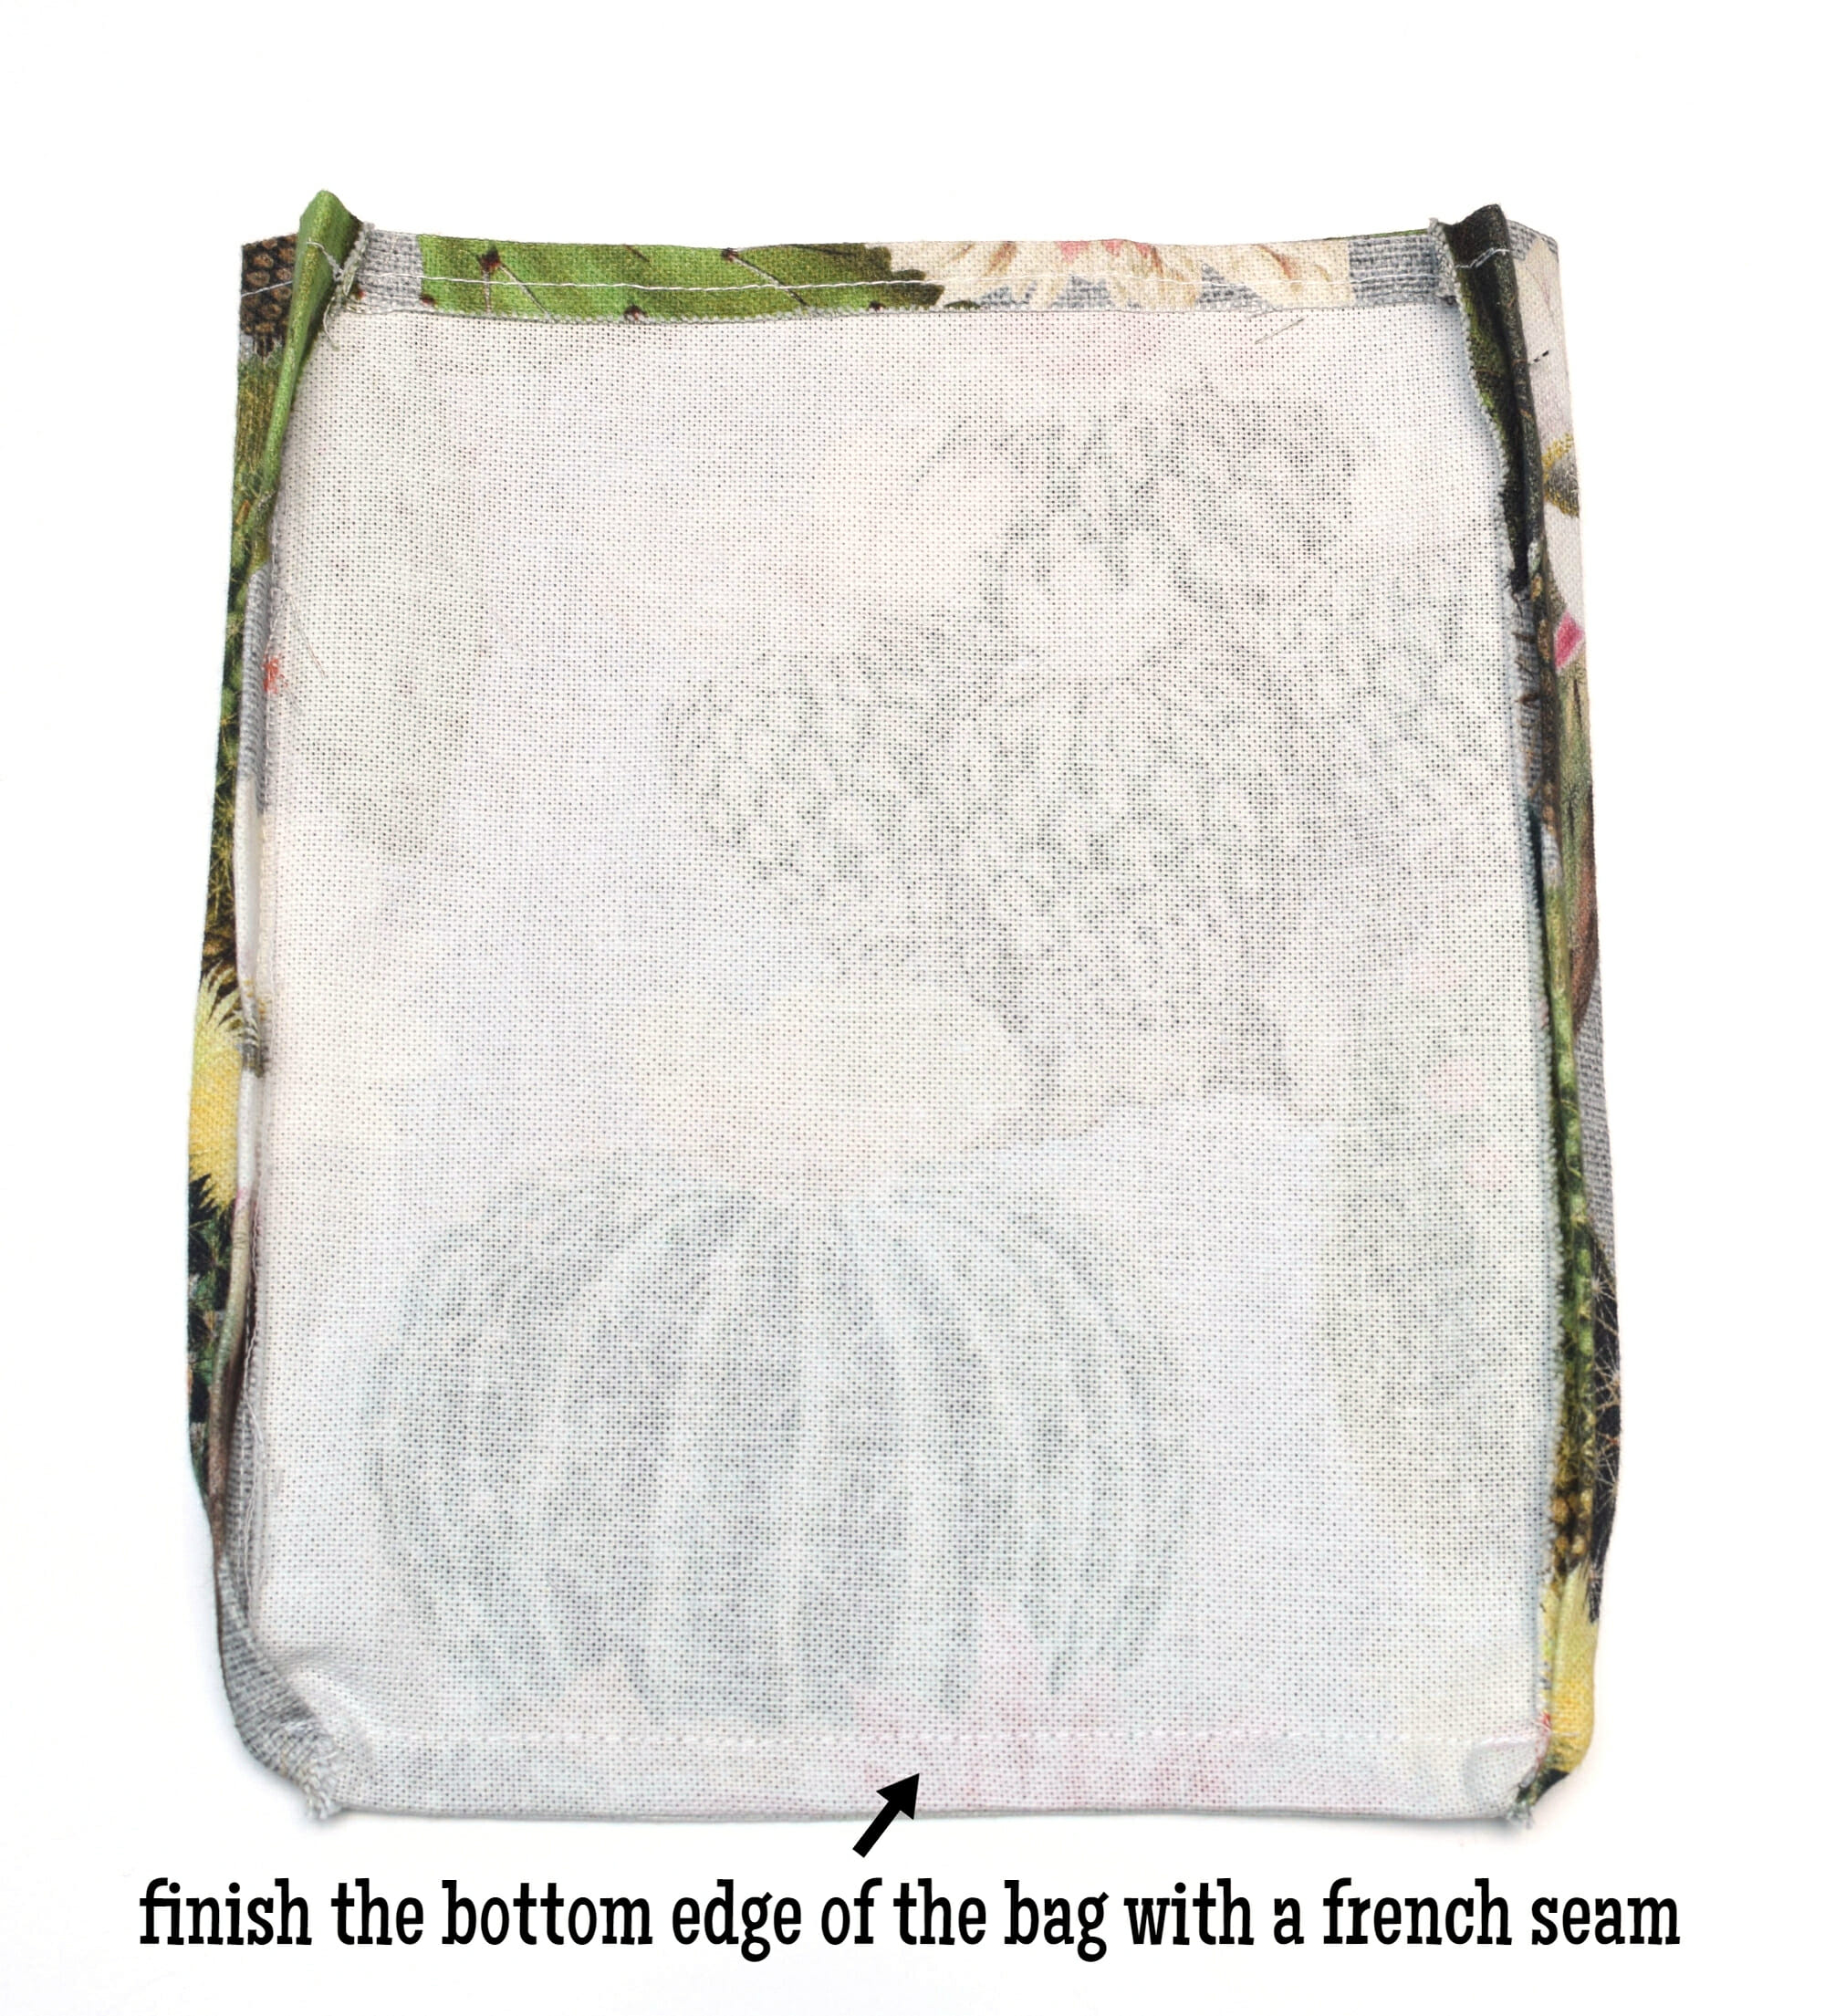
Clip bottom corners again – be careful not to clip your stitches.
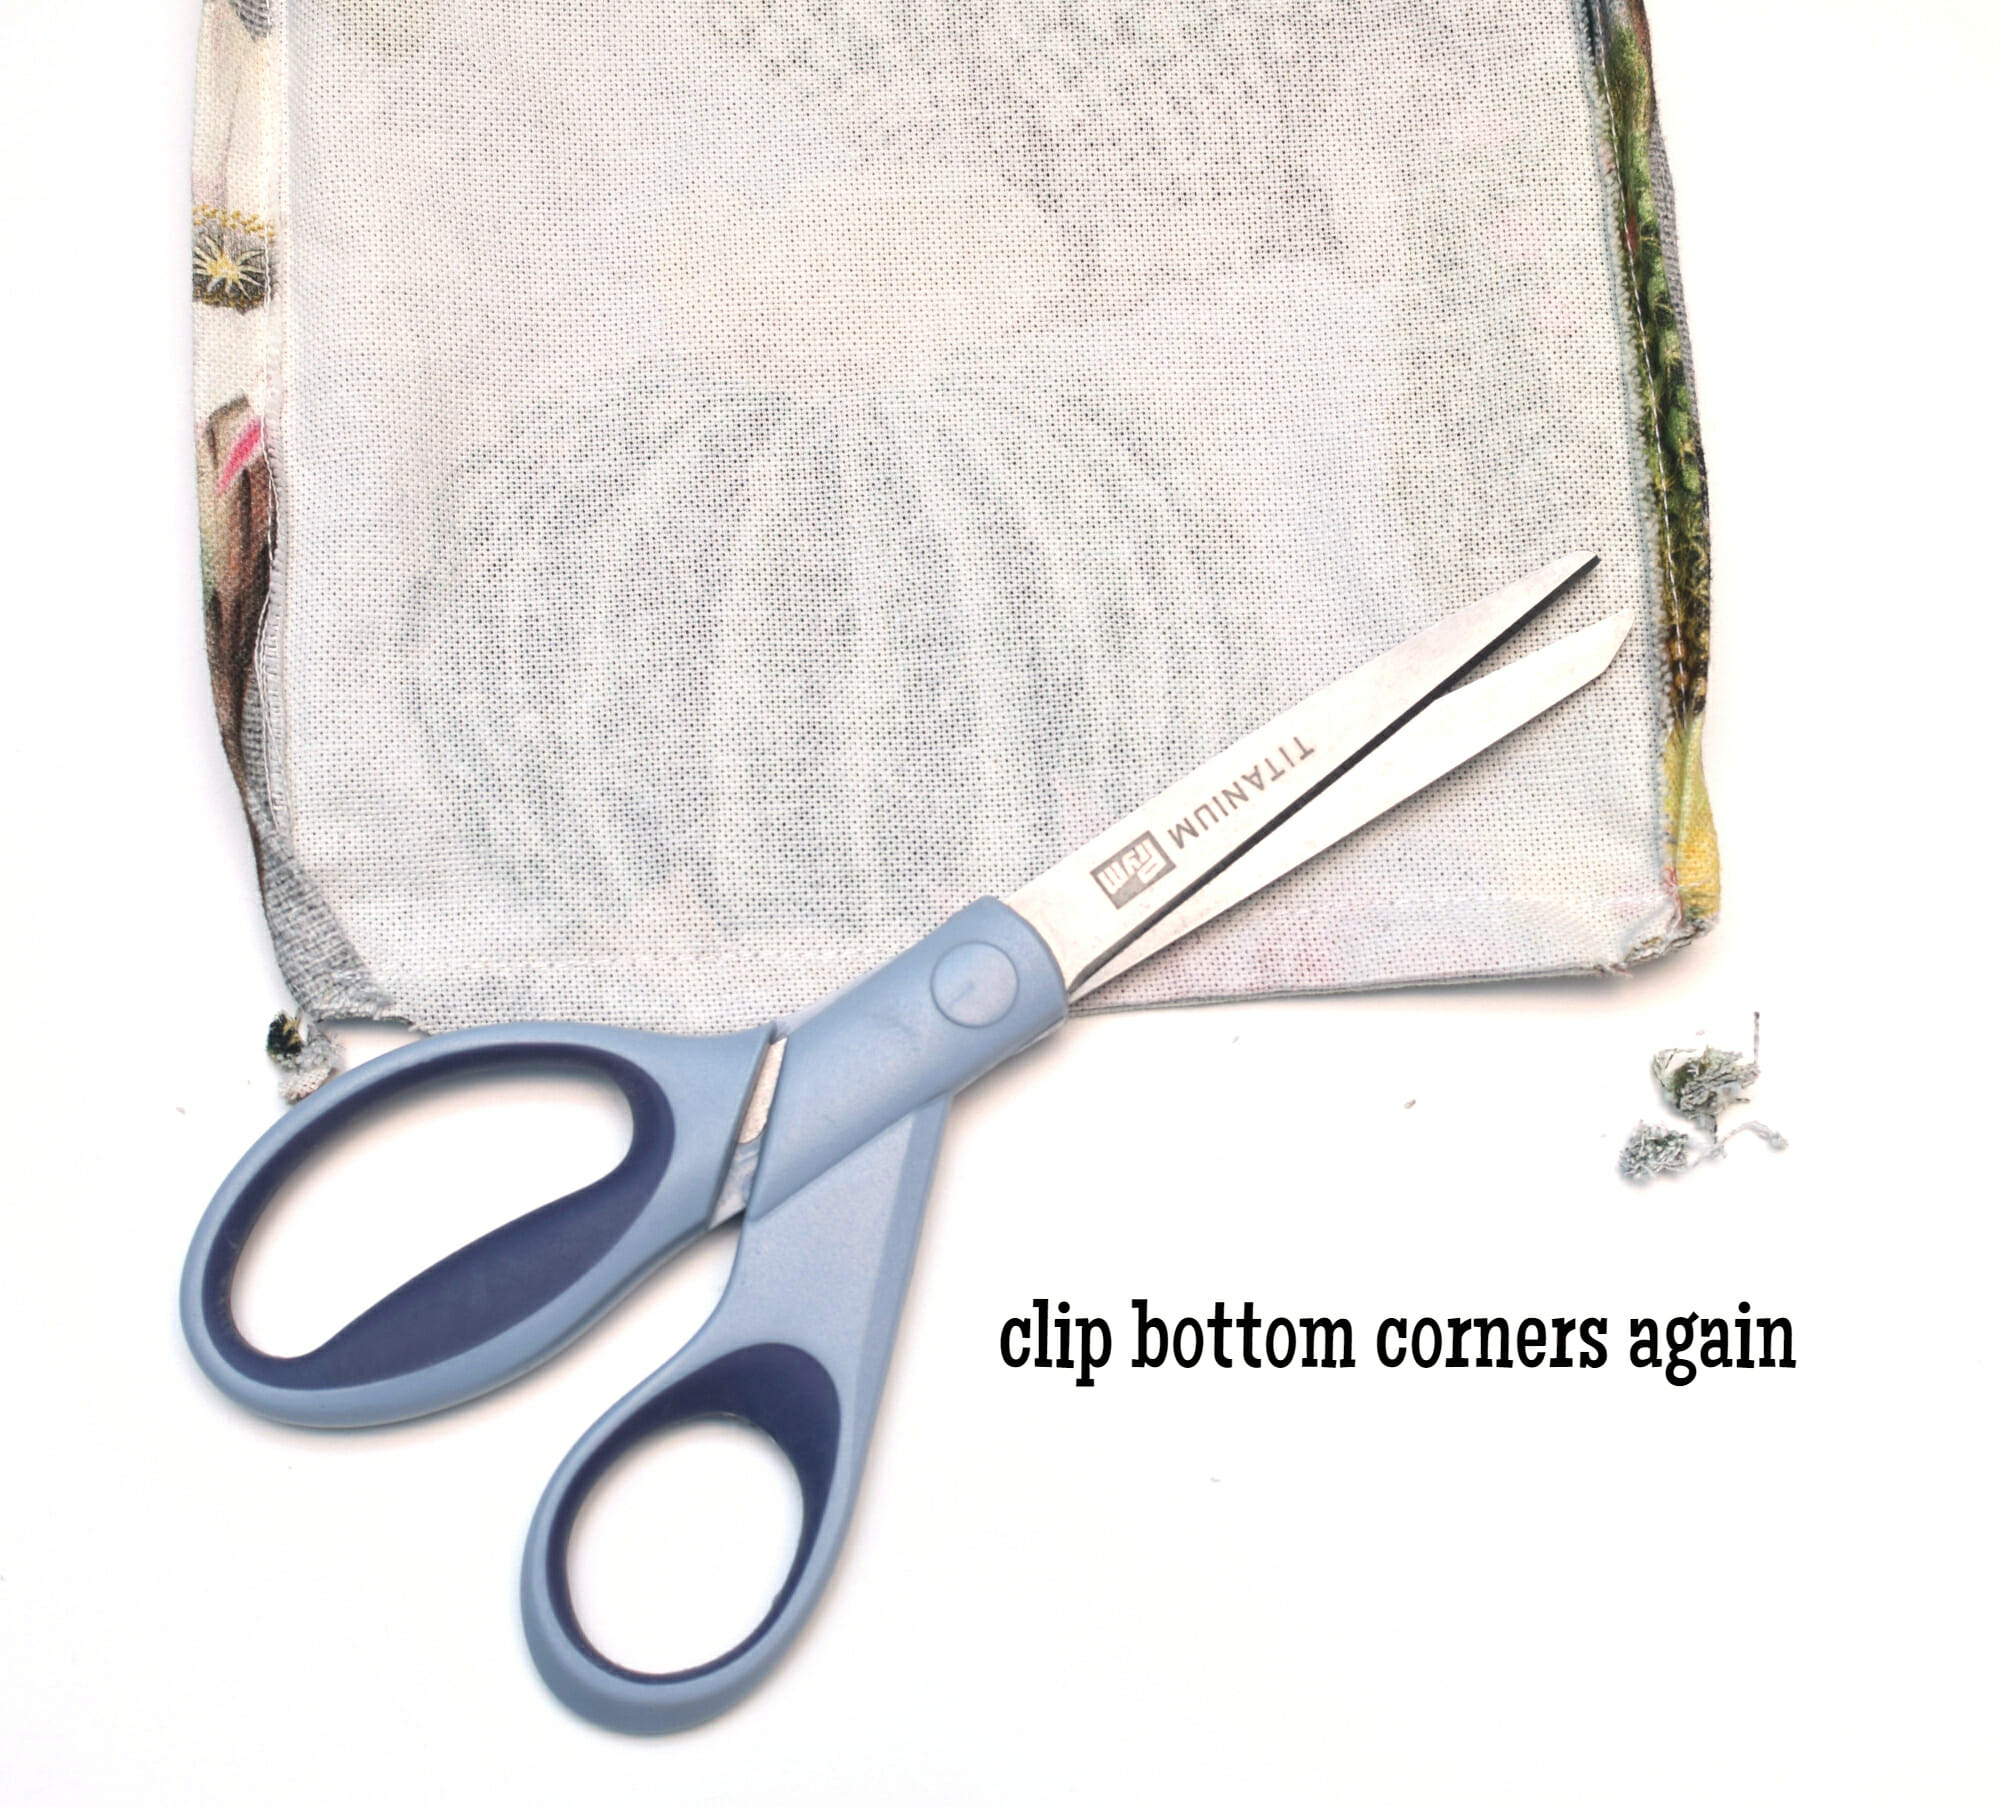
Clipping corners is an important step because we want to reduce bulk and give a professional look to the finished drawstring bag.
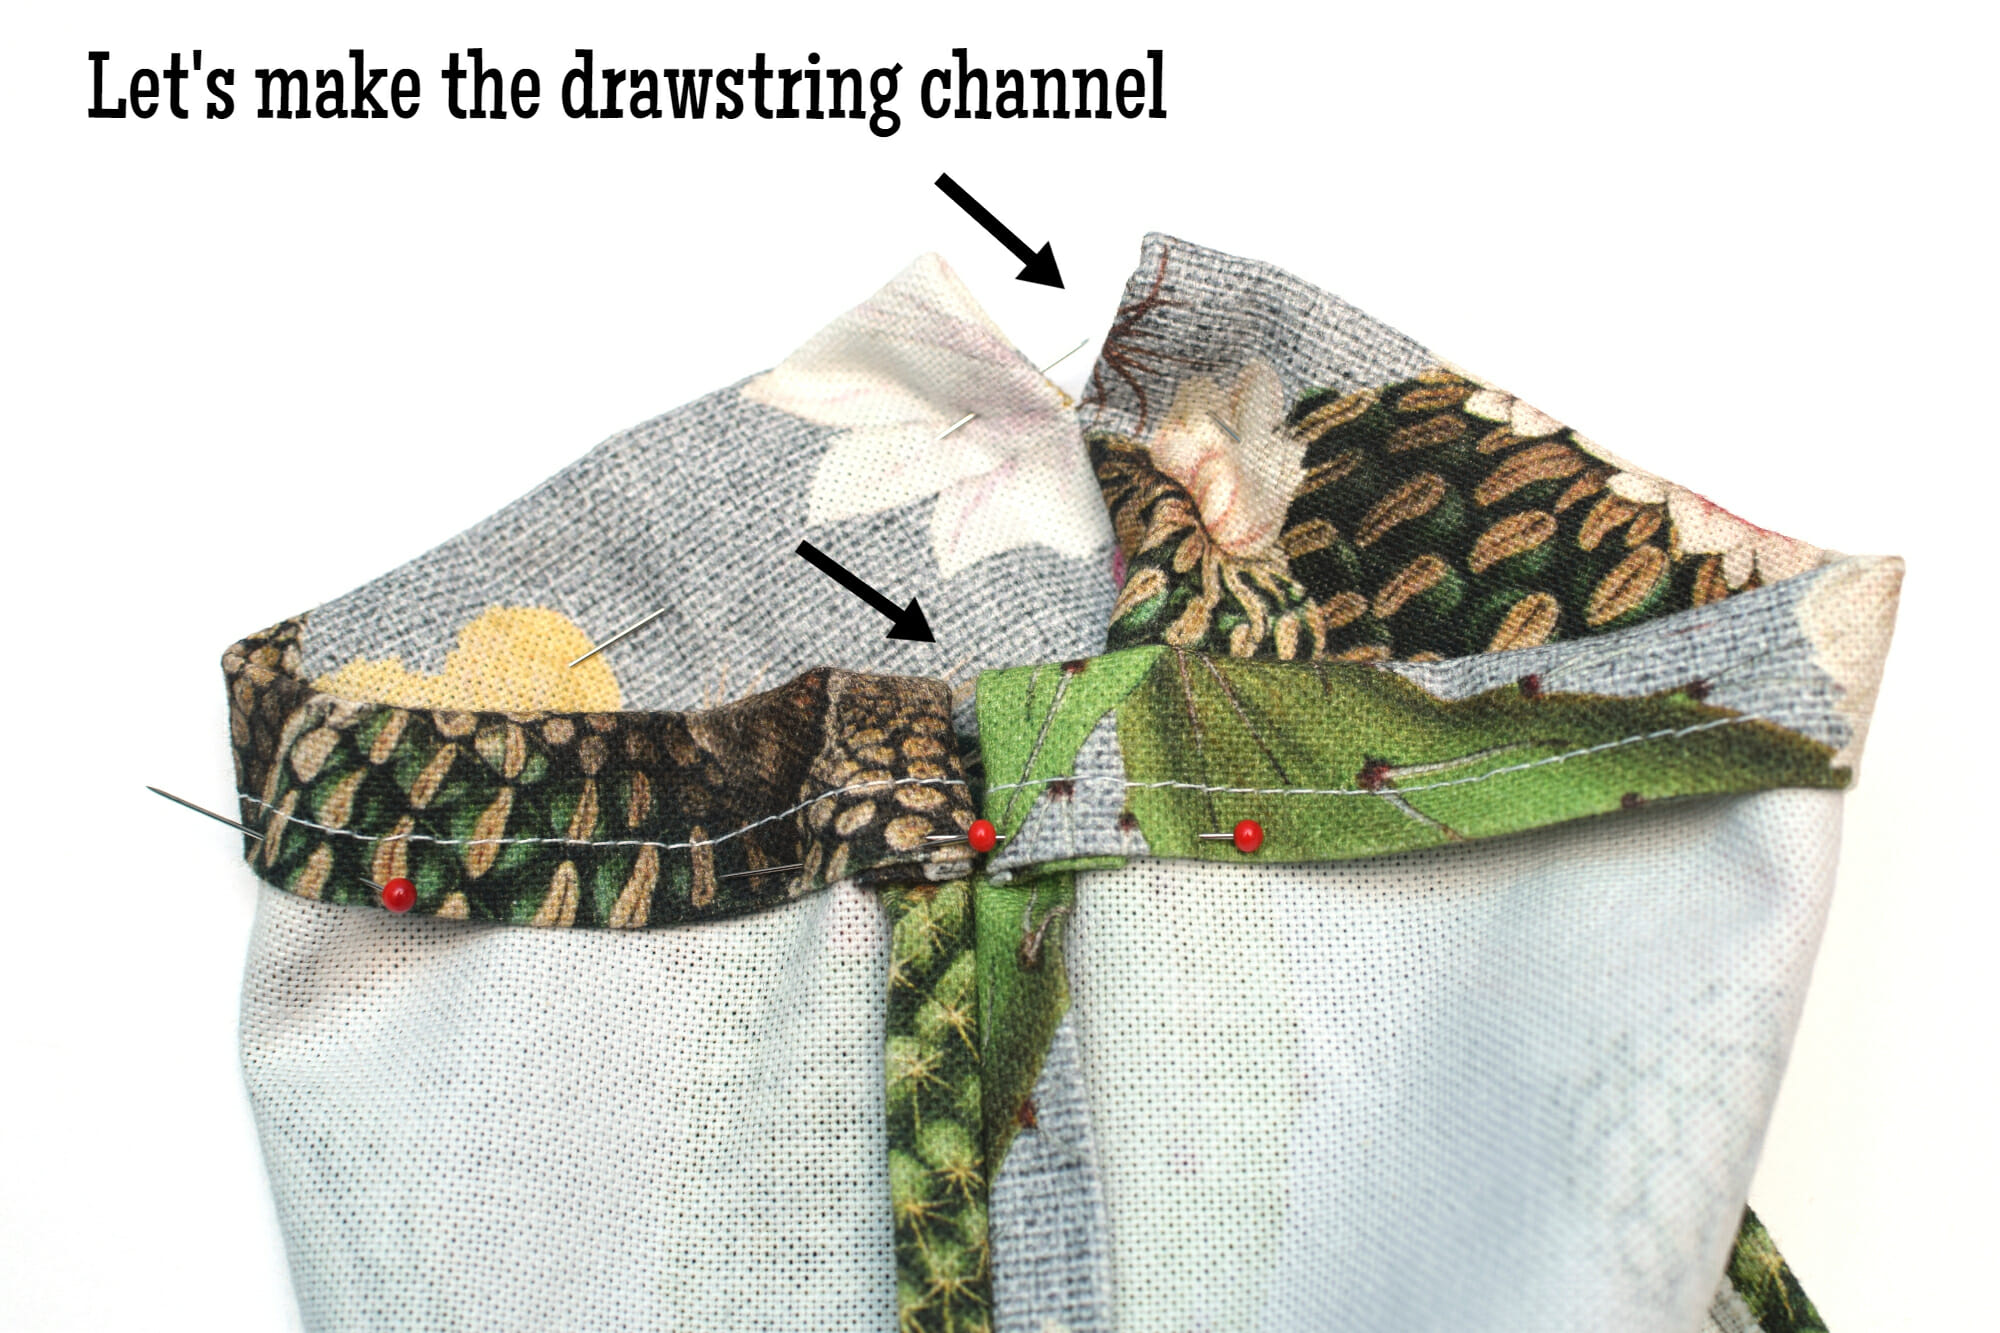
Step 6 – make the drawstring channel
This is where the pressing from Step 4 comes in handy. Fold the side seams (that 1 ½” part where you did not sew the seam on the left and right sides of the bag). Everything should be lined up, without any trouble.
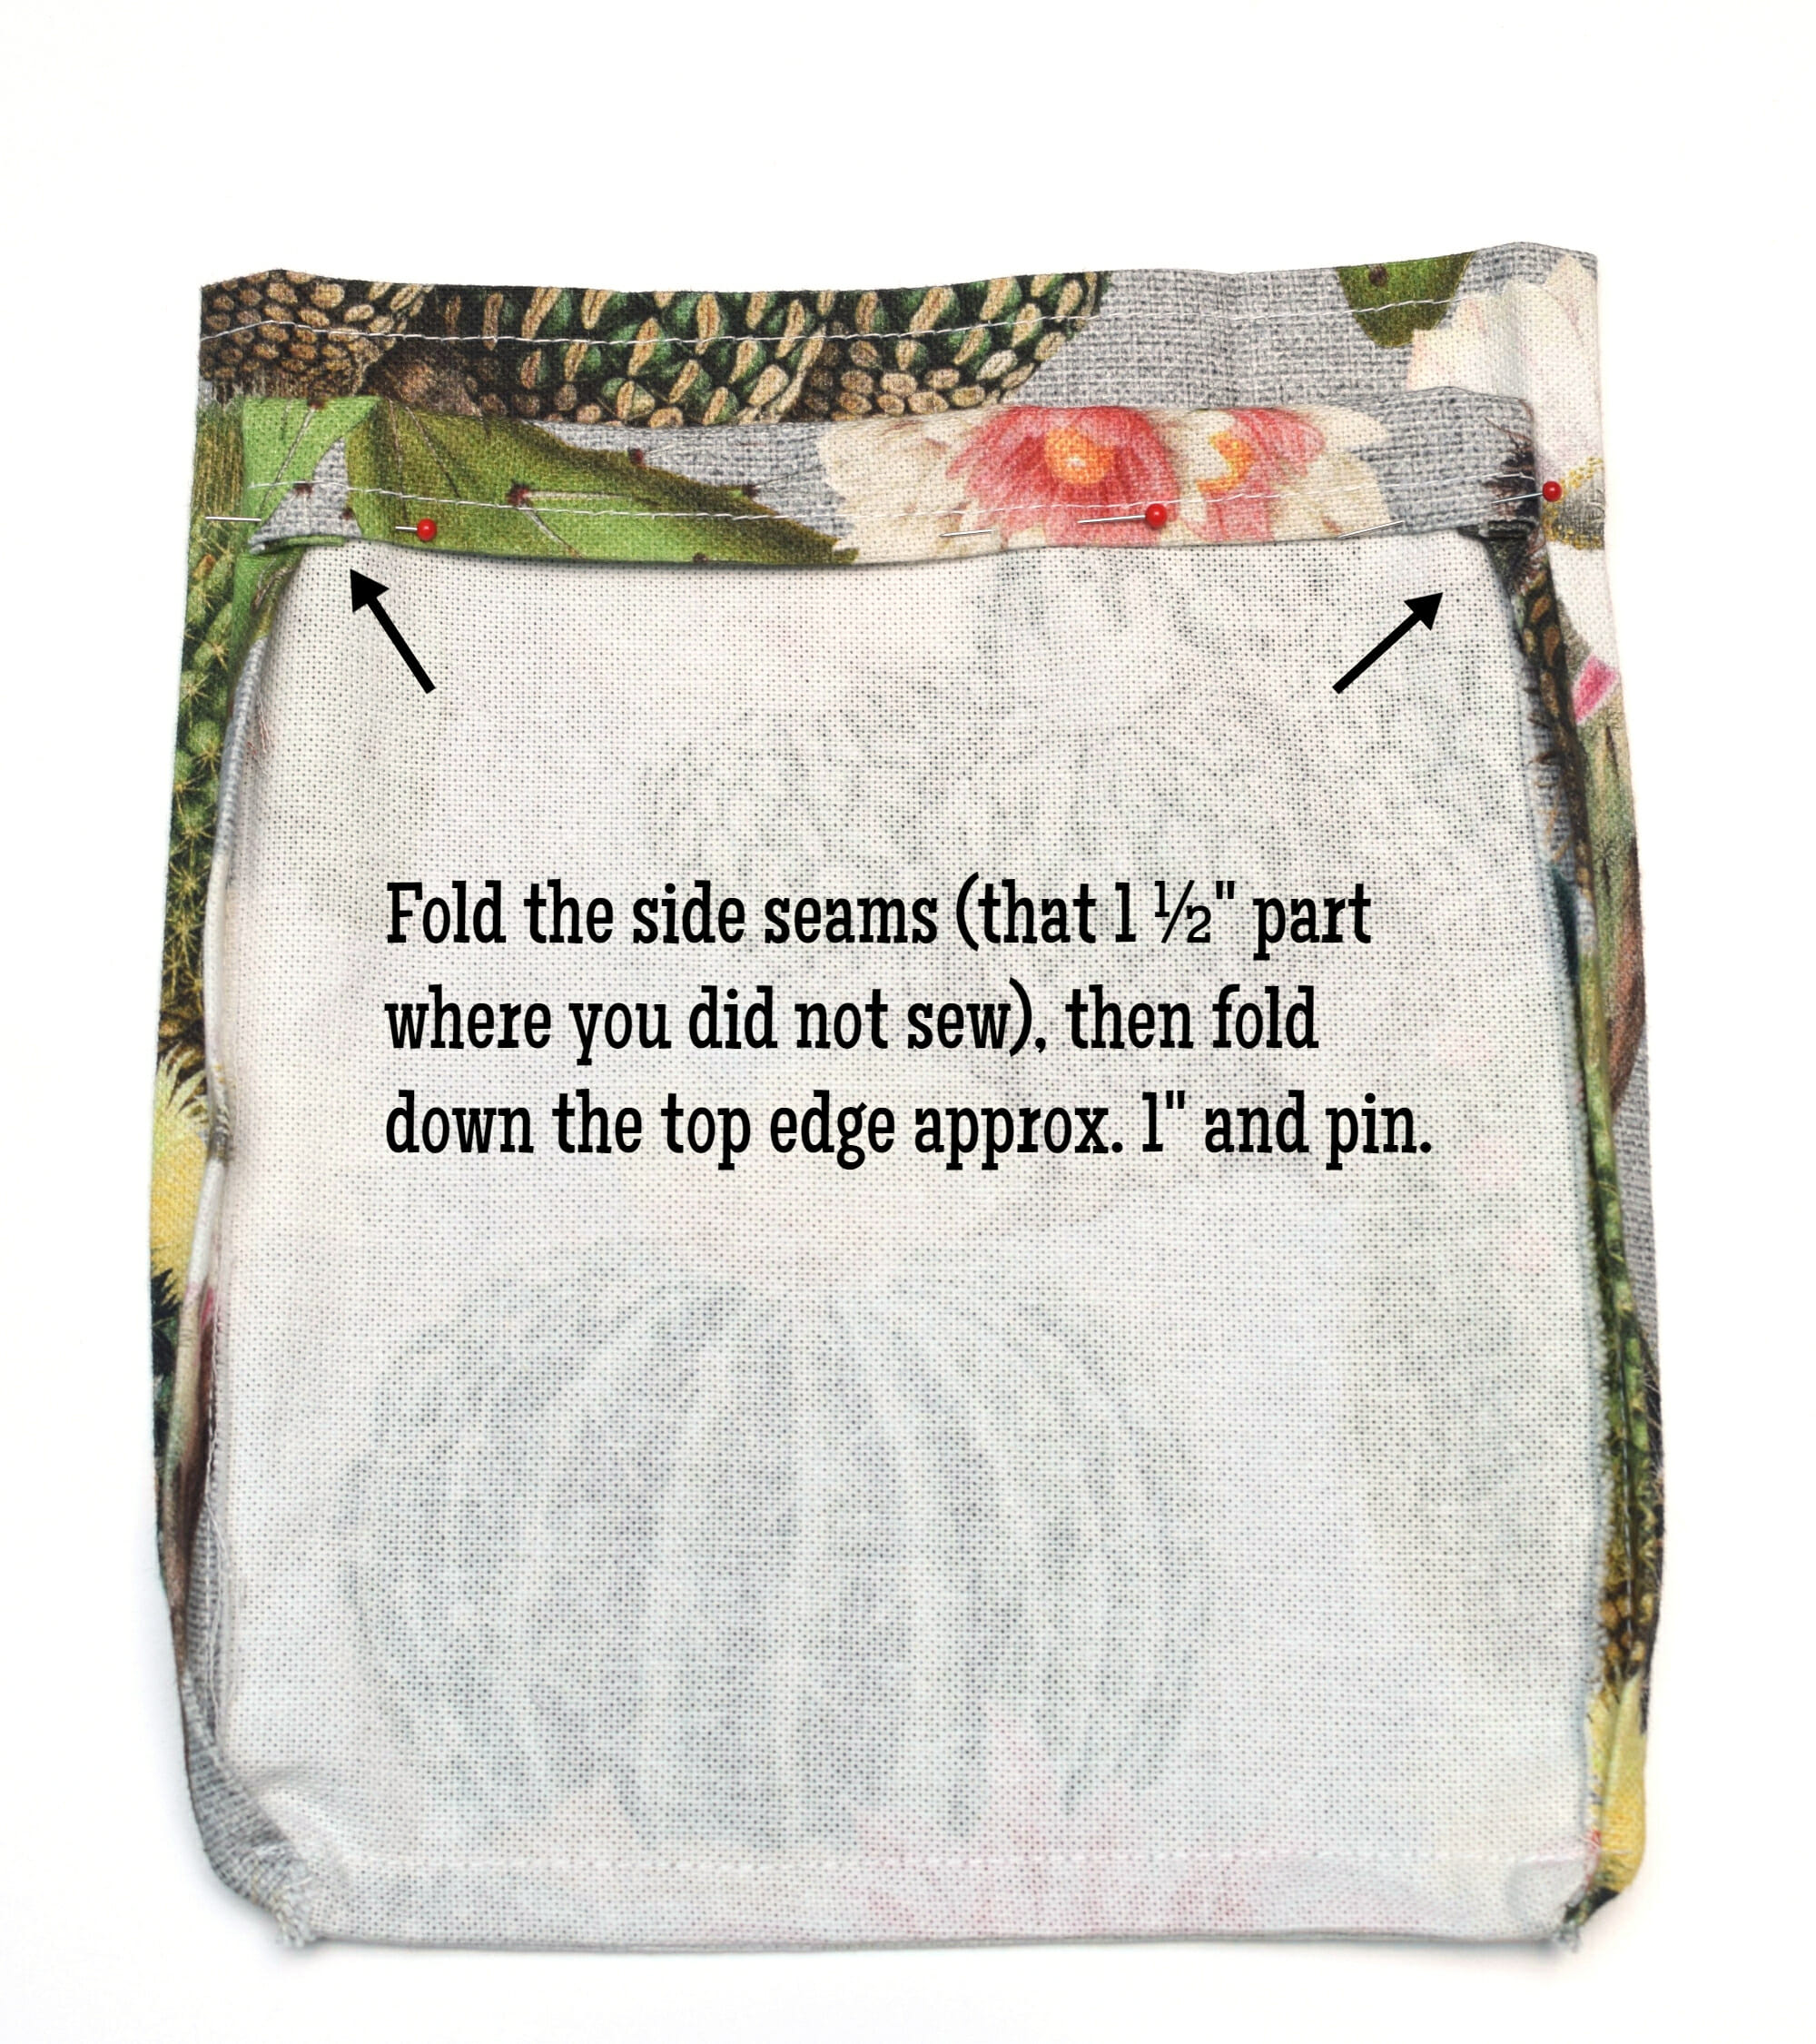
Now fold the top edge down approx. 1” and pin.
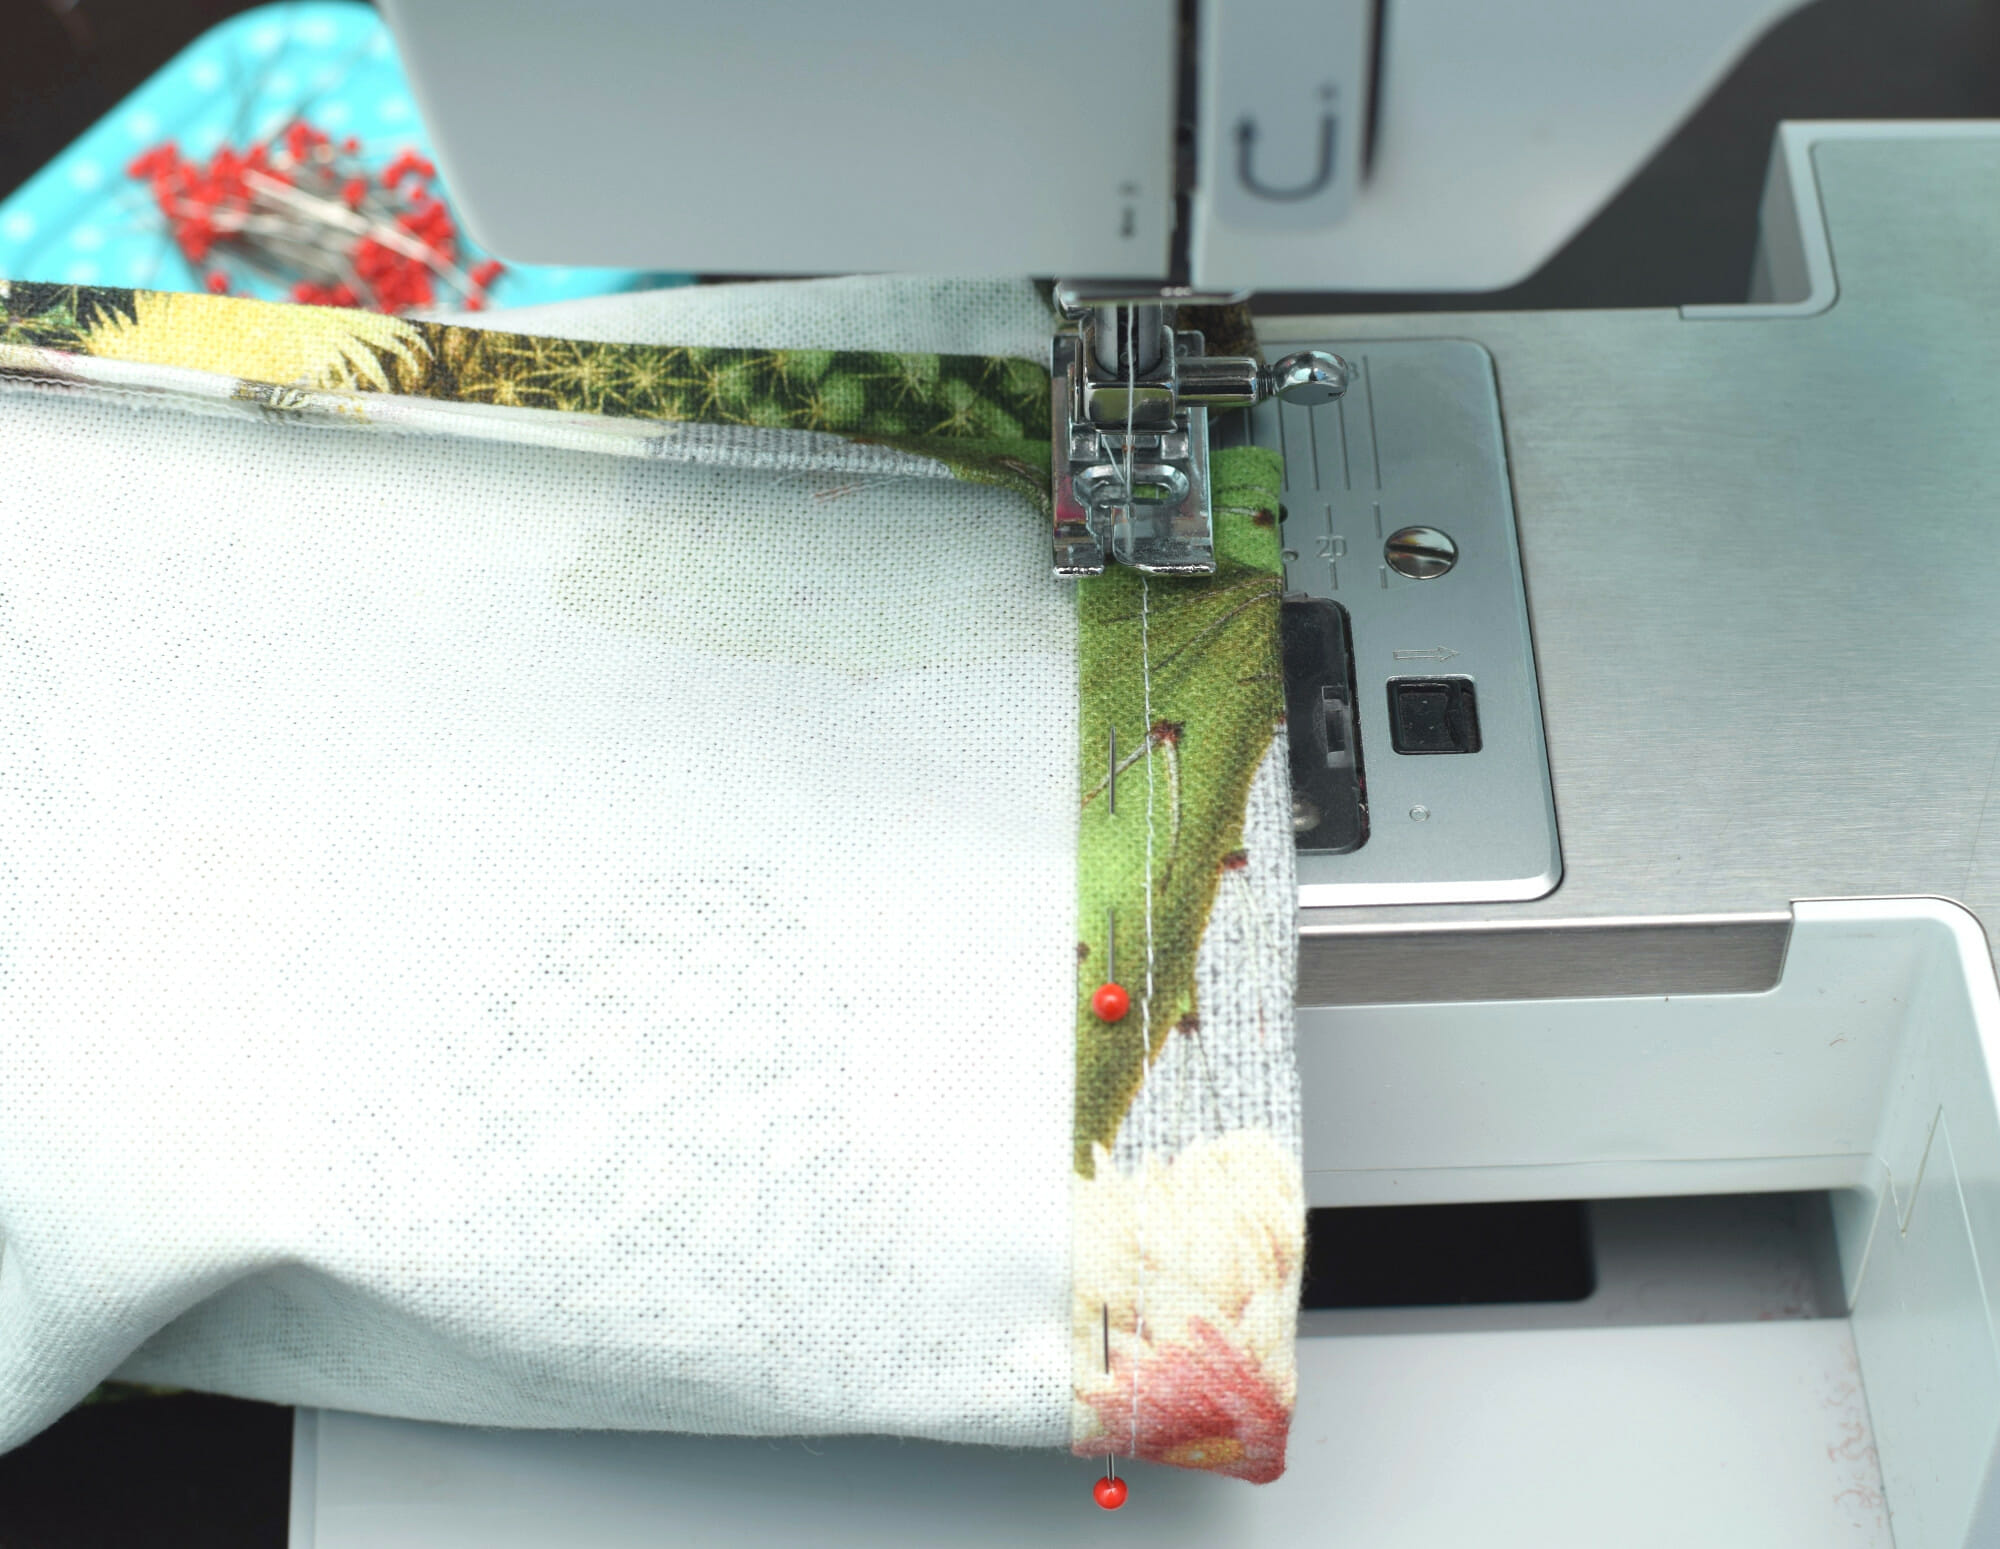
Stitch along (or just a bit below) the previous line of stitching to form a casing.
Step 7 – thread the ties through the channels
Now let’s prepare the ties for your DIY drawstring bag.
You need two ties, and each of them should be twice bigger than the bag’s width, plus 2 or 3 inches.
Related: How to make cords for drawstring bags using sewing thread
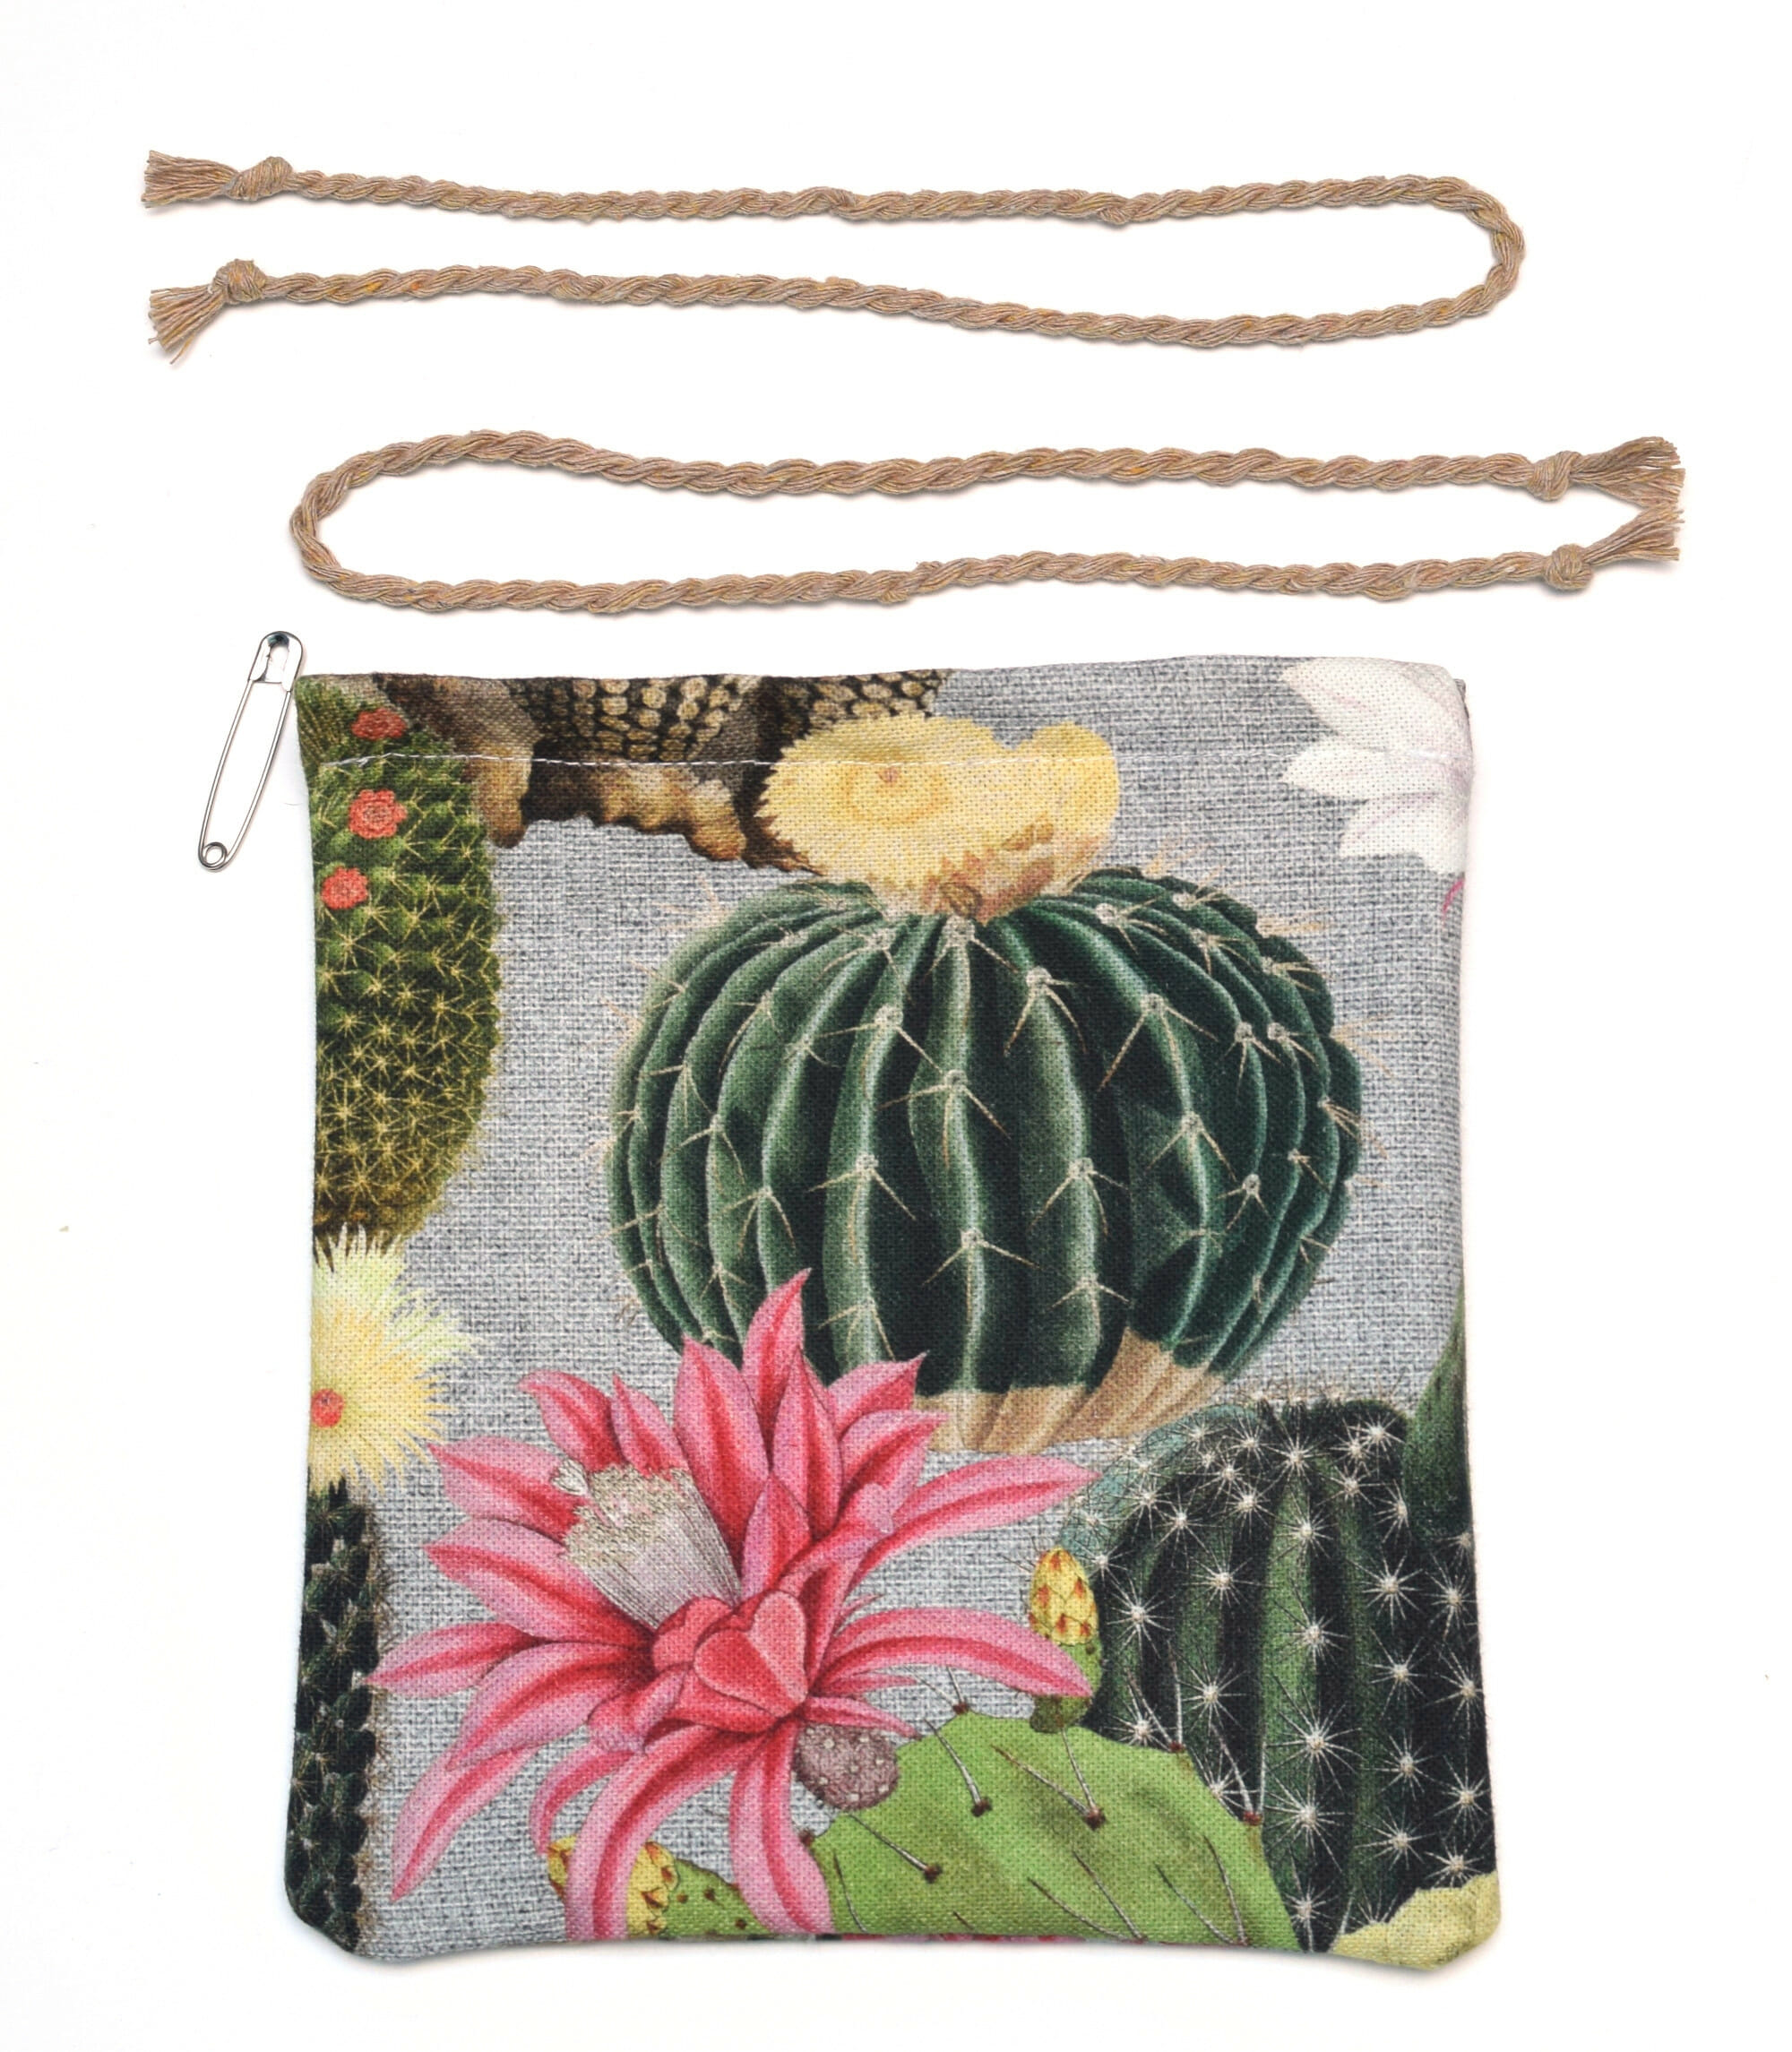
Now, take one cord and thread it through the casing, using a safety pin. Then, start on the opposite side of the bag, and repeat with the other cord.
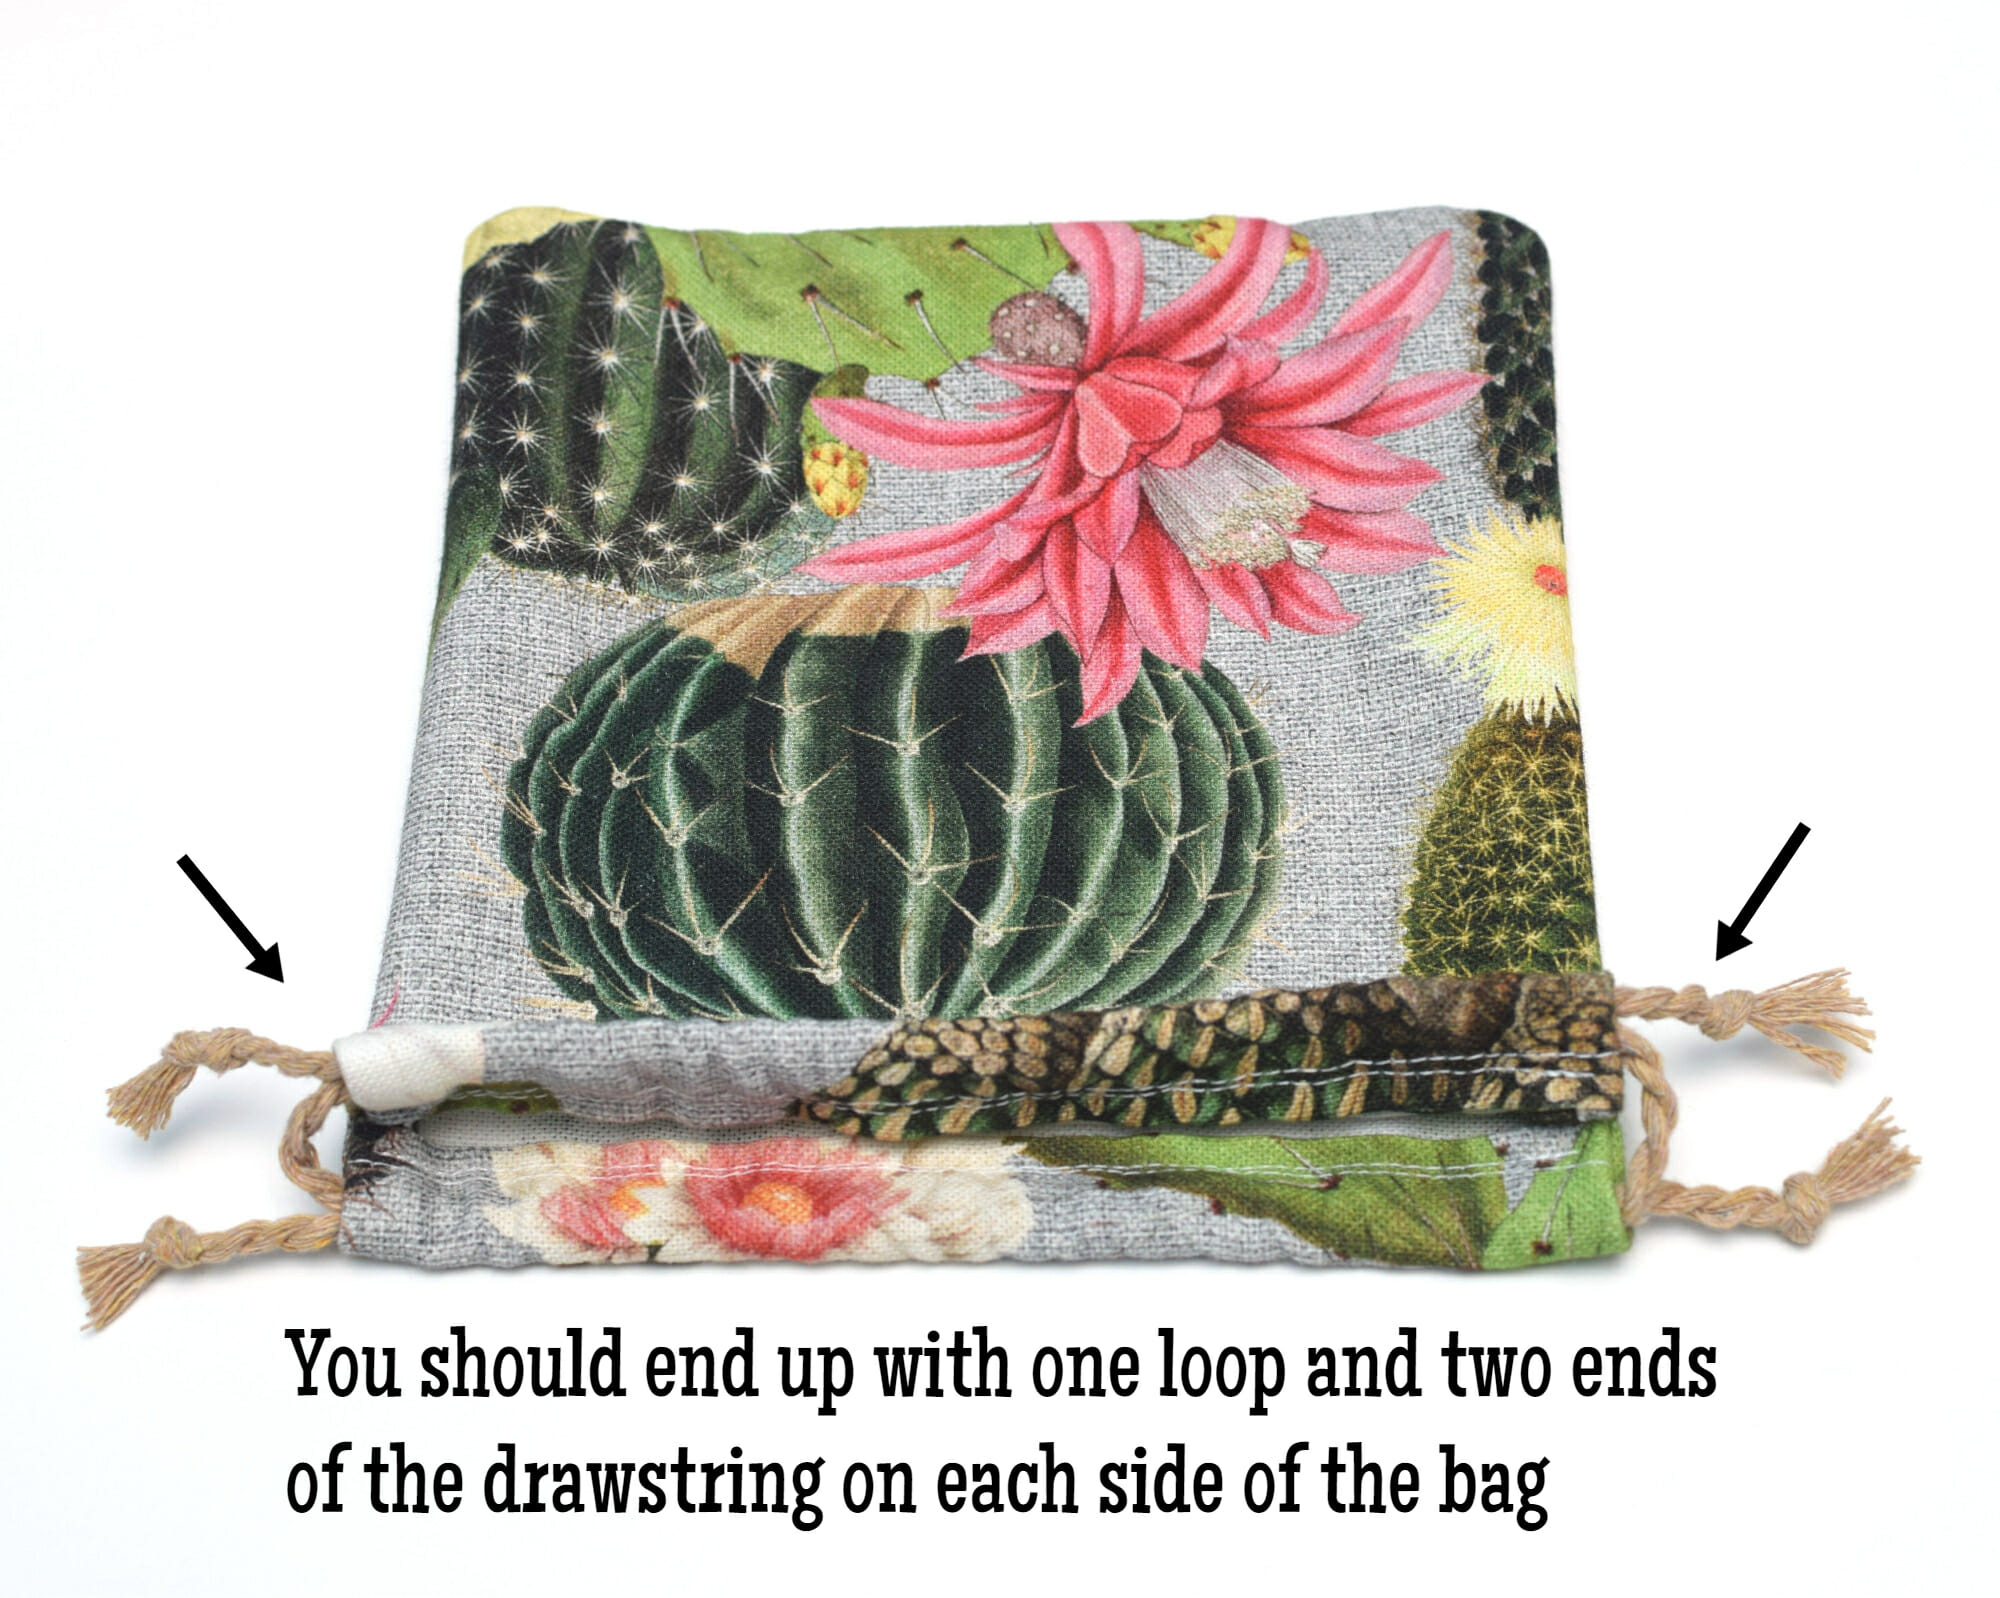
The whole idea is to have one loop and two ends of the drawstring on each side so that when you pull them both simultaneously, the drawstring bag will close.
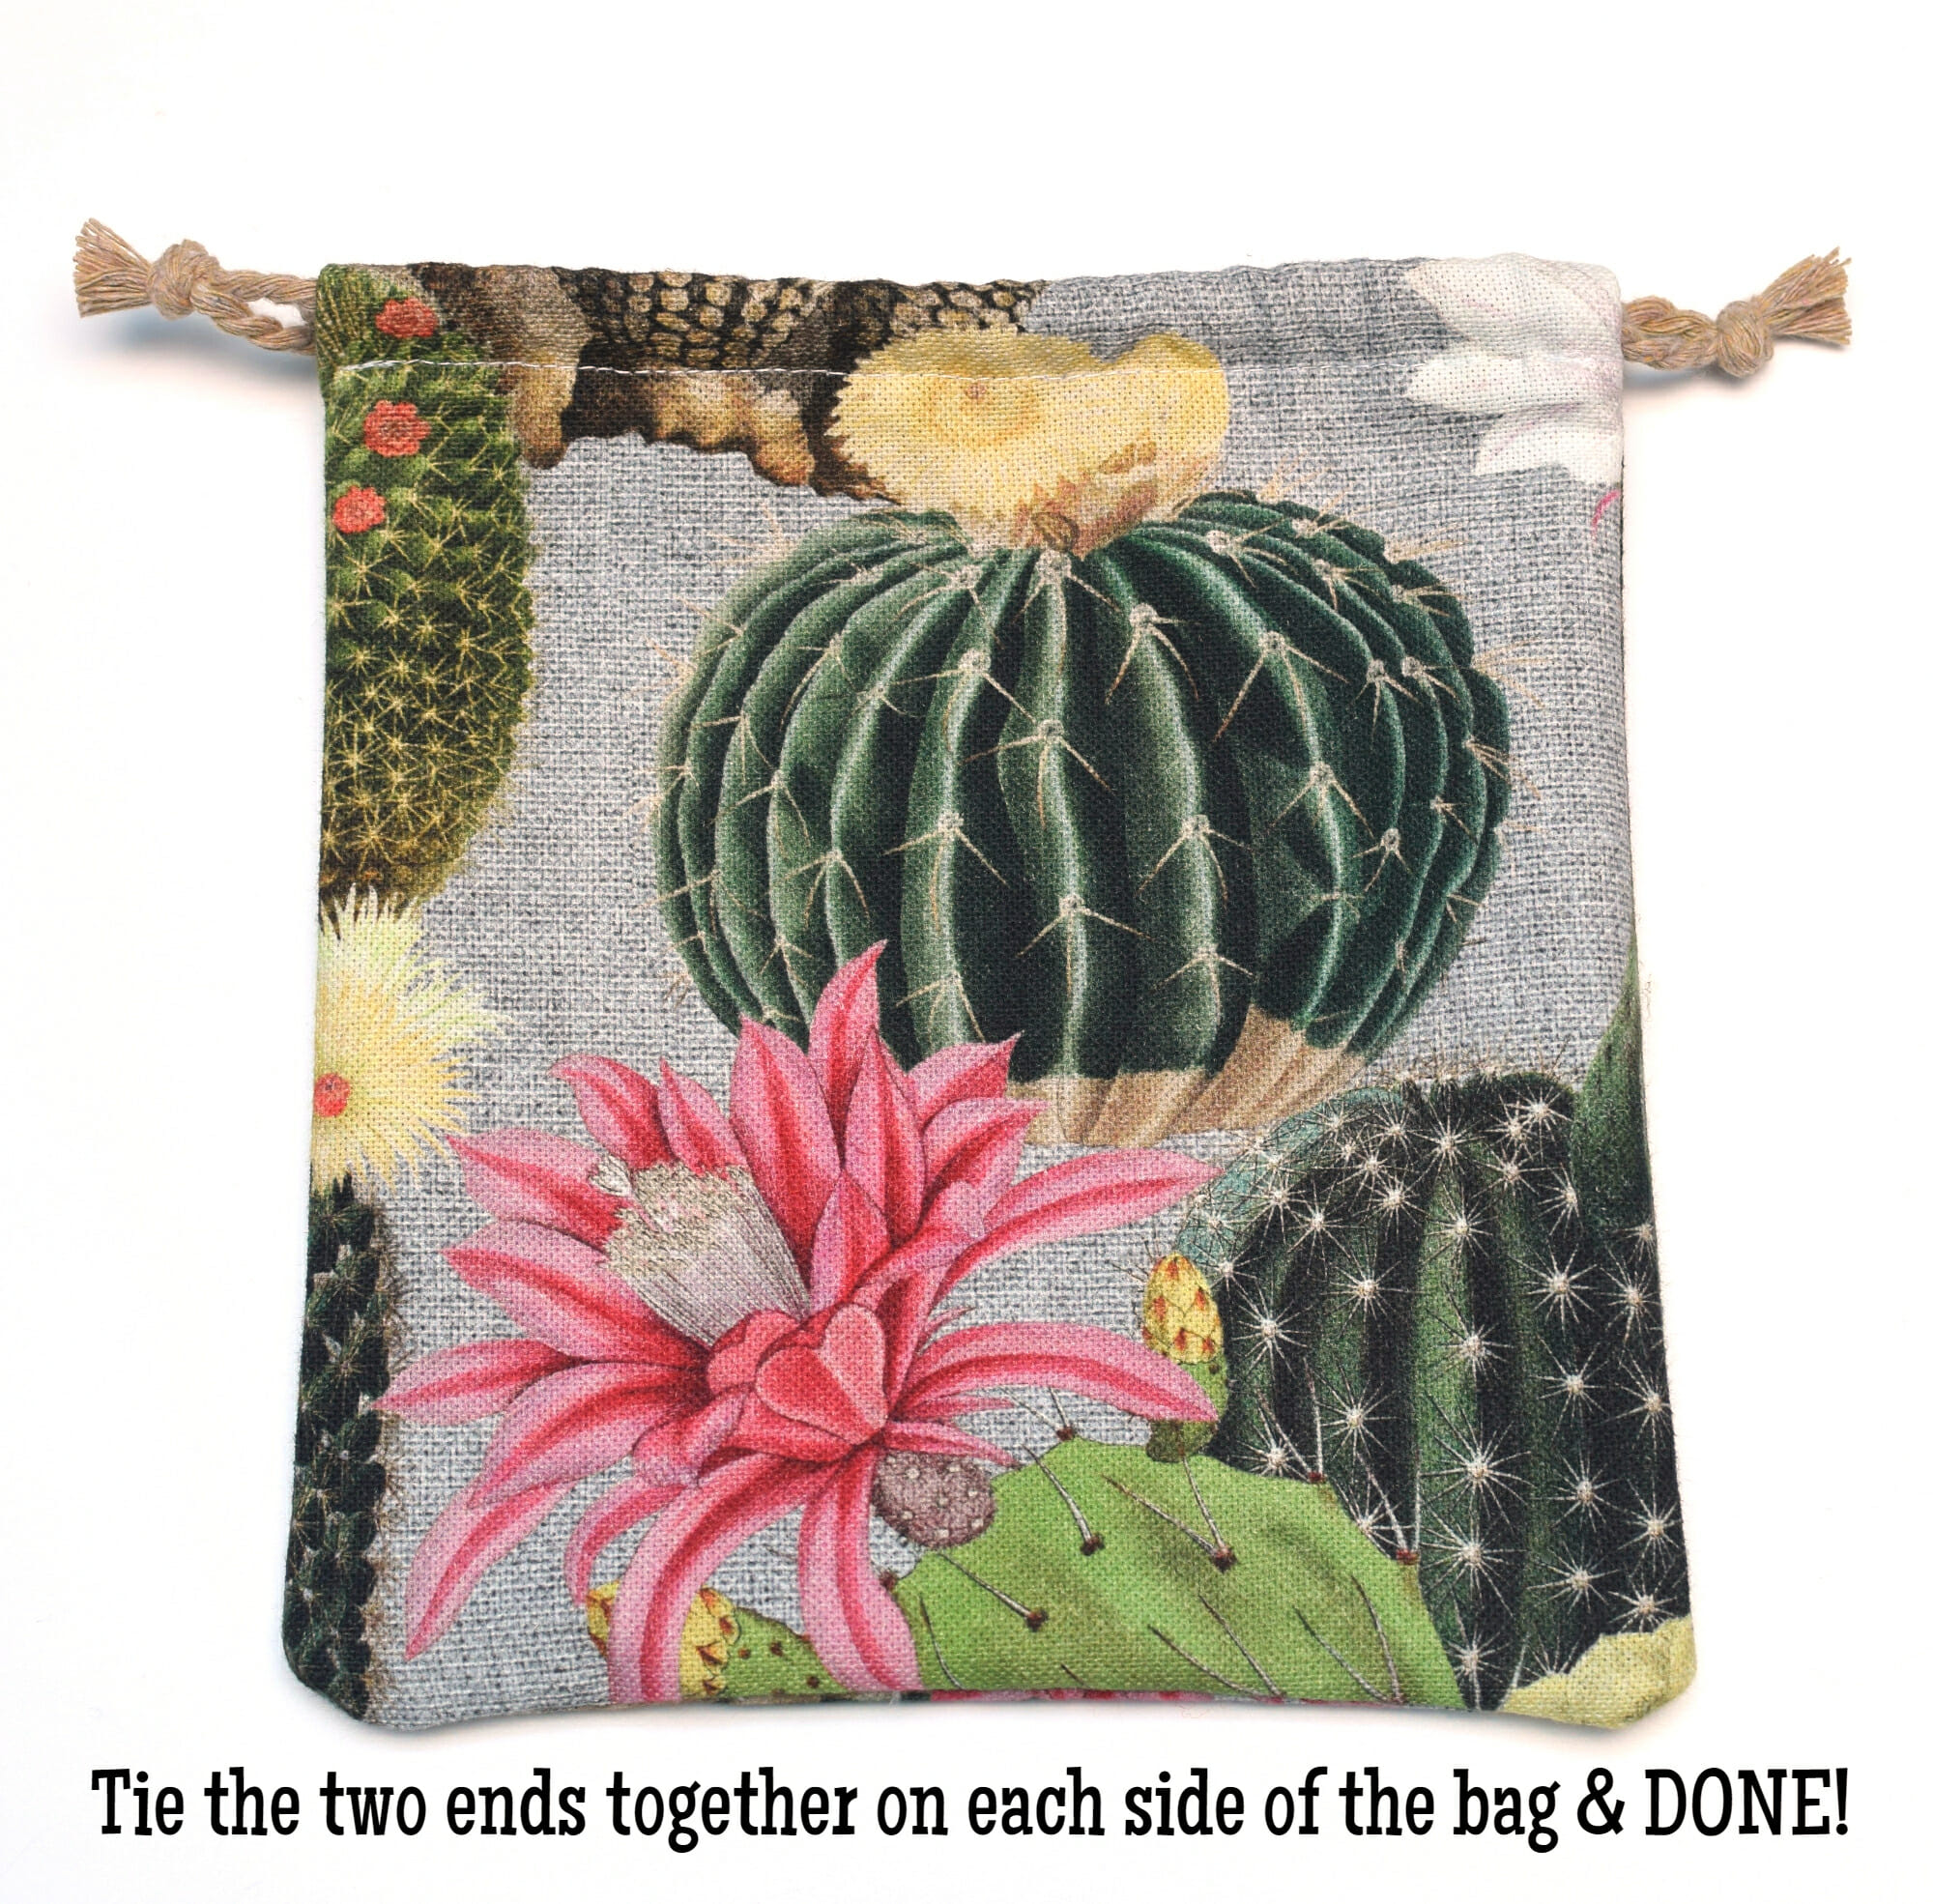
Tie the two ends together on each side of the bag.
Enjoy!
How to make the drawstring bag in different sizes
Extra small, tiny drawstring bag
– cut 2 fabric pieces, each measuring 4” W x 5” H
Small drawstring bag
– cut 2 fabric pieces, each measuring 6” W x 8” H
Medium drawstring bag
– cut 2 fabric pieces, each measuring 10” W x 14” H
Large drawstring bag
– cut 2 fabric pieces, each measuring 18” W x 22” H
TIP
To change the size for your DIY drawstring bag, just find your final desired size, then add 1 1/2” to the width and 2” to the height, for each of the two fabric pieces.
Should you choose to make the bag with a single piece of fabric, hence without a bottom seam, then add 1 1/2” to the width and only 1” to the height.
Let’s keep in touch! You can find me on Facebook, Instagram, and Pinterest.

Much appreciation, this was the first tutorial I’ve found with that has pictures that really really shows what’s done each step. Was able to follow this and make my little bag completely hand-sewn. All my excess fabric is now in danger of turning into these xD
Shayne, thank you for the lovely comment! I’m so glad you were able to sew your own small drawstring bag. They’re really cute and practical.
I love the detailed directions and the pictures! I followed them to the letter, except made my bag slightly bigger. It’s now hanging in our laundry room holding the dryer balls ?
Thank you!
Amazing tutorial, I’ve made 30 gifts bags already.
Super easy pattern to follow and man, was it a quick sew. Thanks for the great pattern!
This was so well explained and the photos were really helpful – thank you so much for this easy method to make a drawstring bag! I needed a quick and easy way to make my daughter a little bag for her tooth which she lost this morning…her first one for the tooth fairy! I left it too late to buy something so this was ideal. The only thing I found making the tiny bag was that I couldn’t finish it off on the sewing machine but had to sew the channel by hand. It didn’t take long though. I had one done in just over an hour, and made another one for her little sister for a few years’ time. Thanks again ?
Thank you, Anna! I’m glad you found it helpful.
This simple explanation saved my life! I’ve been sewing a long time (don’t ask), and my first sewing project was in 7th grade and we sewed drawstring gym bags! But I could not for the life of me remember (of course that was decades ago) how to get it so that the casing did not end up with a raw edge. This explained it beautifully. Thank you! I looked at other explanations but they were not clear to me.
Much appreciation