
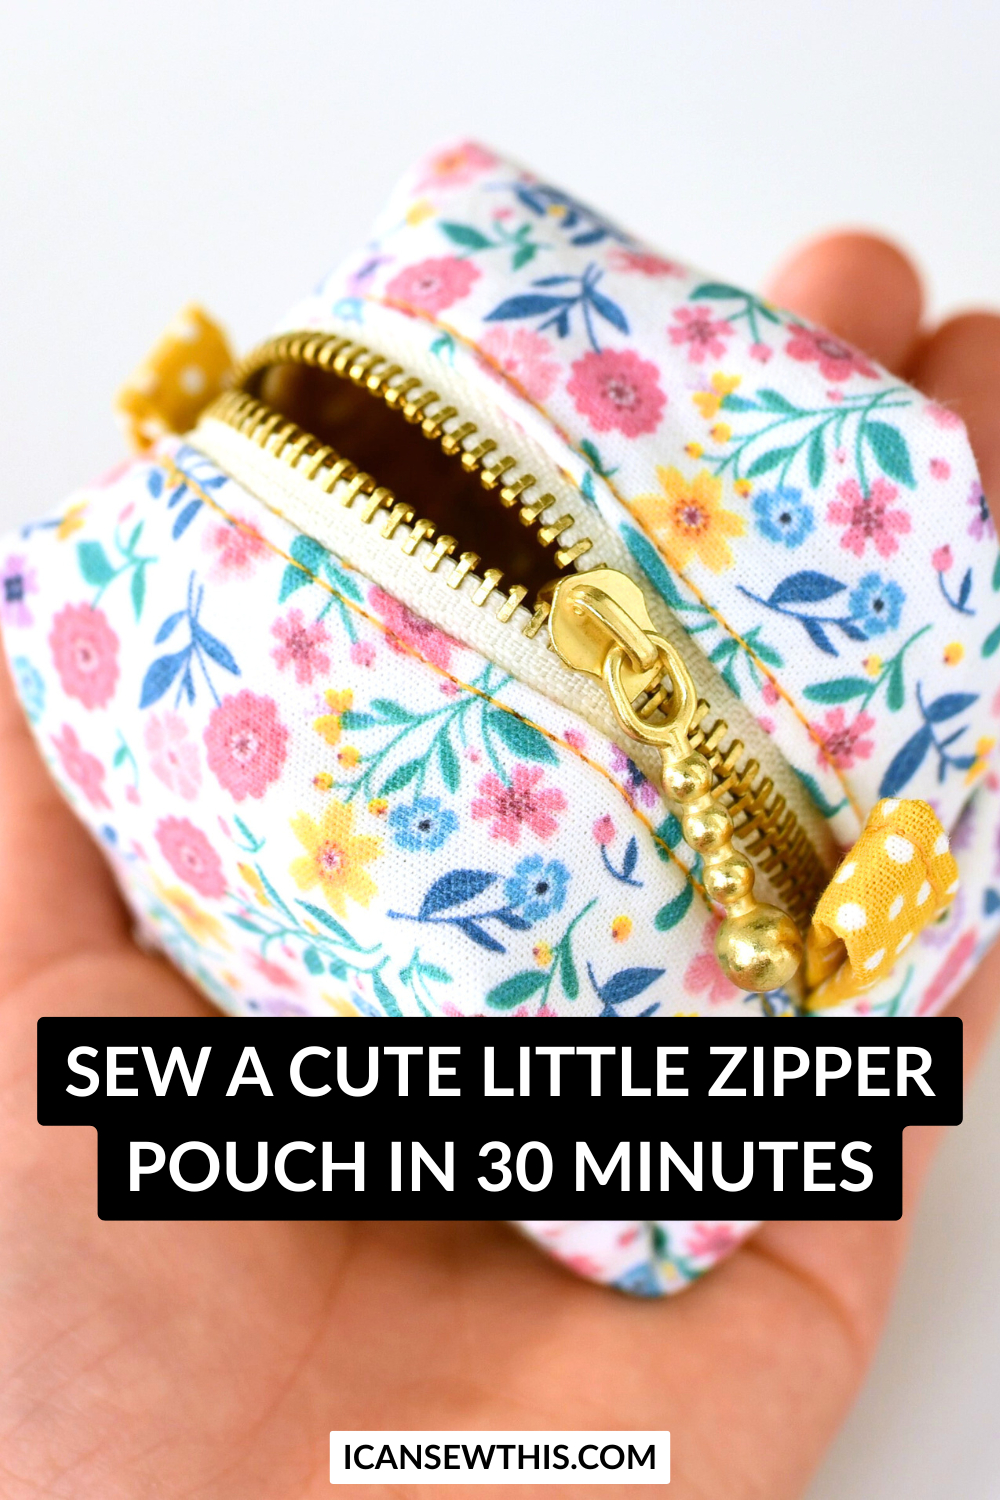
Let me show you how to sew a mini zipper boxy pouch – it’s cute, practical, and crazy easy to make! You don’t need a lot of fabric, fancy tools, or hours of your time. In fact, this quick sewing project takes less than 30 minutes from start to finish, even if you’re new to zippers.
There’s no printable pattern to download, no complicated measurements to mess with. Just grab two small rectangles of fabric (you can totally use scraps), a zipper, and you’re good to go. I promise it’s beginner-friendly – if you’ve ever wondered how to make a tiny zippered pouch, this is the perfect place to start.
These small boxy pouches make a great last-minute gift for Christmas, Mother’s day, or Teacher Appreciation Week. Anyway, you can also give a pretty little thing for no occasion at all. Just because!
These small boxy zipper pouches make awesome handmade gifts. Think Christmas stocking stuffers, teacher gifts, Mother’s Day surprises, or even party favors. Or, you know… make one just because it’s adorable and you feel like sewing something cute and useful.
DIY Mini Zipper Boxy Pouch Tutorial
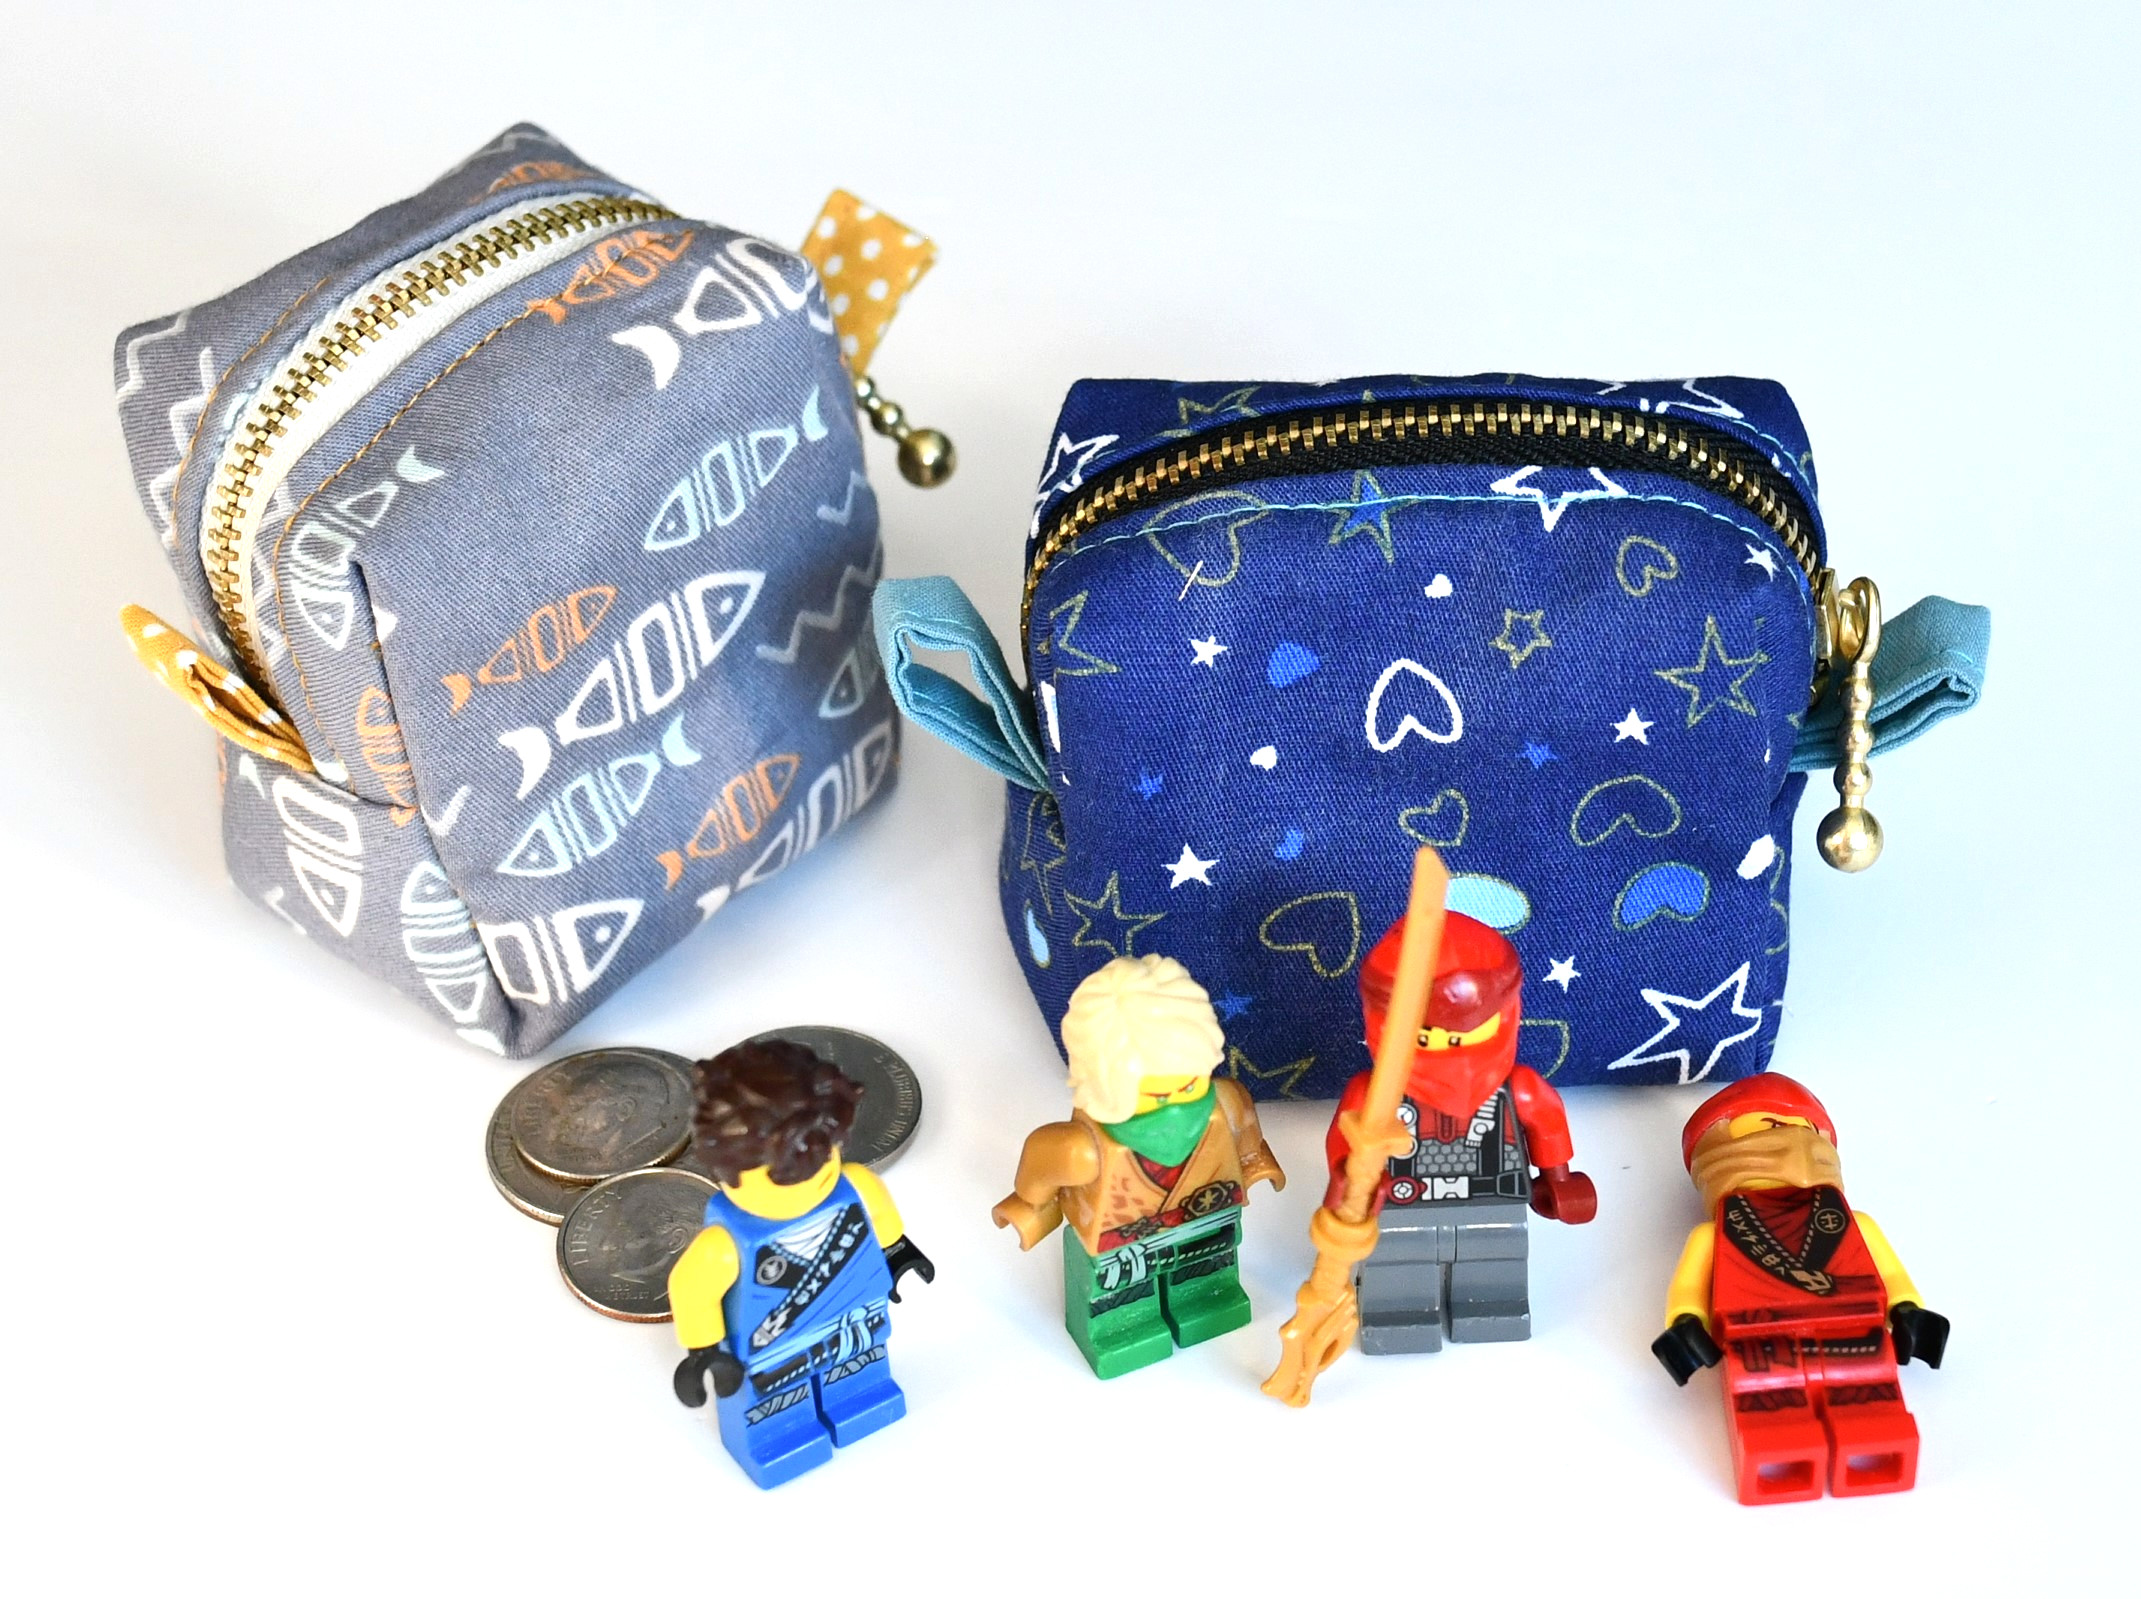
I originally whipped up one of these tiny pouches as a surprise for my 8-year-old son. Poor guy hardly ever gets handmade stuff from me – it’s just so much easier to sew girly things like skirts, scrunchies, and bows. But this little boxy pouch turned out so well, I couldn’t stop at one. Now all three of my kids have one, and they use them to stash coins, LEGO minifigures, Pokemon cards, erasers, and all those little treasures kids collect.

You might also like:
- Want something a bit more structured? Check out my quilted zipper pouch tutorial — it’s cute, sturdy, and comes with a free pattern!
- If you’re ready to try sewing zipper tabs, here’s a super simple guide on how to sew a lined zipper pouch with zipper tabs in just 5 easy steps.
- And if you’re just getting into sewing, don’t miss this list of my top 15 beginner sewing tips — plus a huge collection of free sewing patterns and tutorials for all skill levels. There’s something fun for everyone!
You can use these mini fabric pouches with zipper for pretty much anything – lip balm, hair ties, earbuds, tampons, mints, hand sanitizer, you name it. They’re small enough to toss in your purse or backpack but roomy enough to be useful.
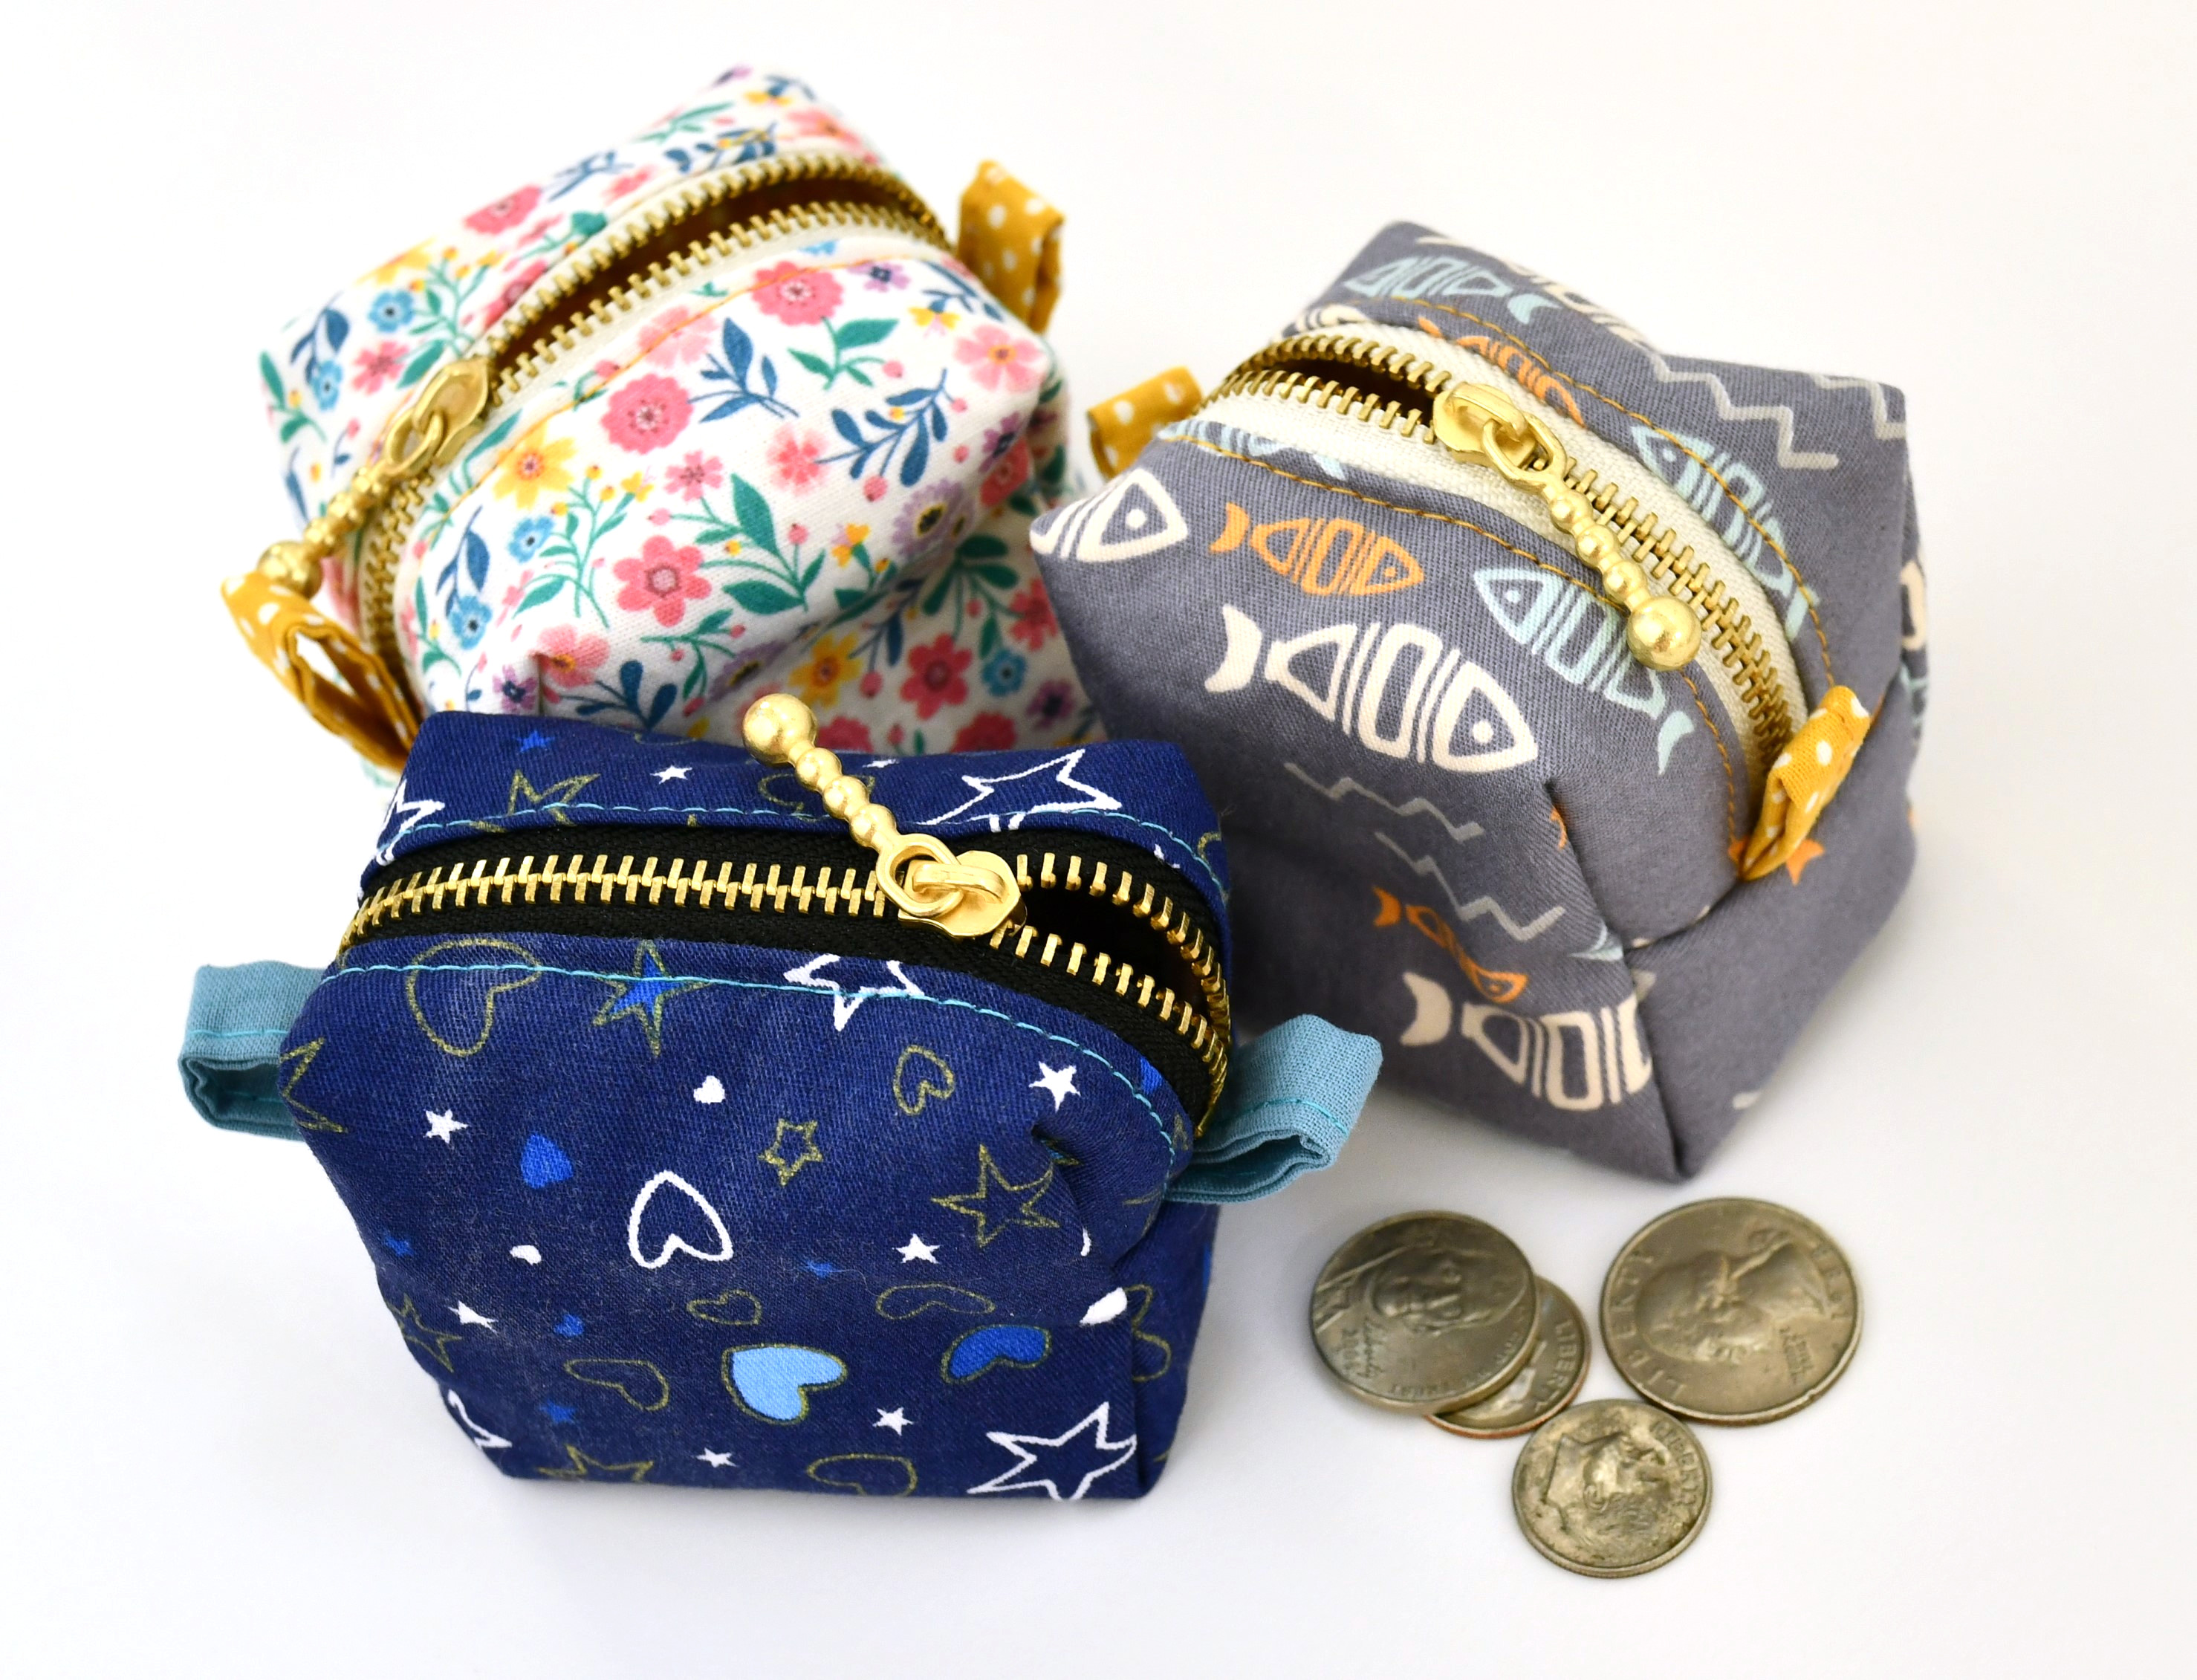
I made one in a cute floral fabric I had leftover from a knotted headband I stitched up for my daughter (that tutorial’s on the blog too if you want to match!). Now I’m officially obsessed. These mini rectangular zipper pouches are my new favorite way to use up fabric scraps.
Finished size: approx. 3″ long x 2″ deep x 2.5″ tall – super compact but surprisingly roomy!
Sewing Supplies – Small Zippered Boxy Pouch
- cotton fabric
- lightweight fusible interfacing
- zipper
- scissors or rotary cutter & cutting mat
- matching thread
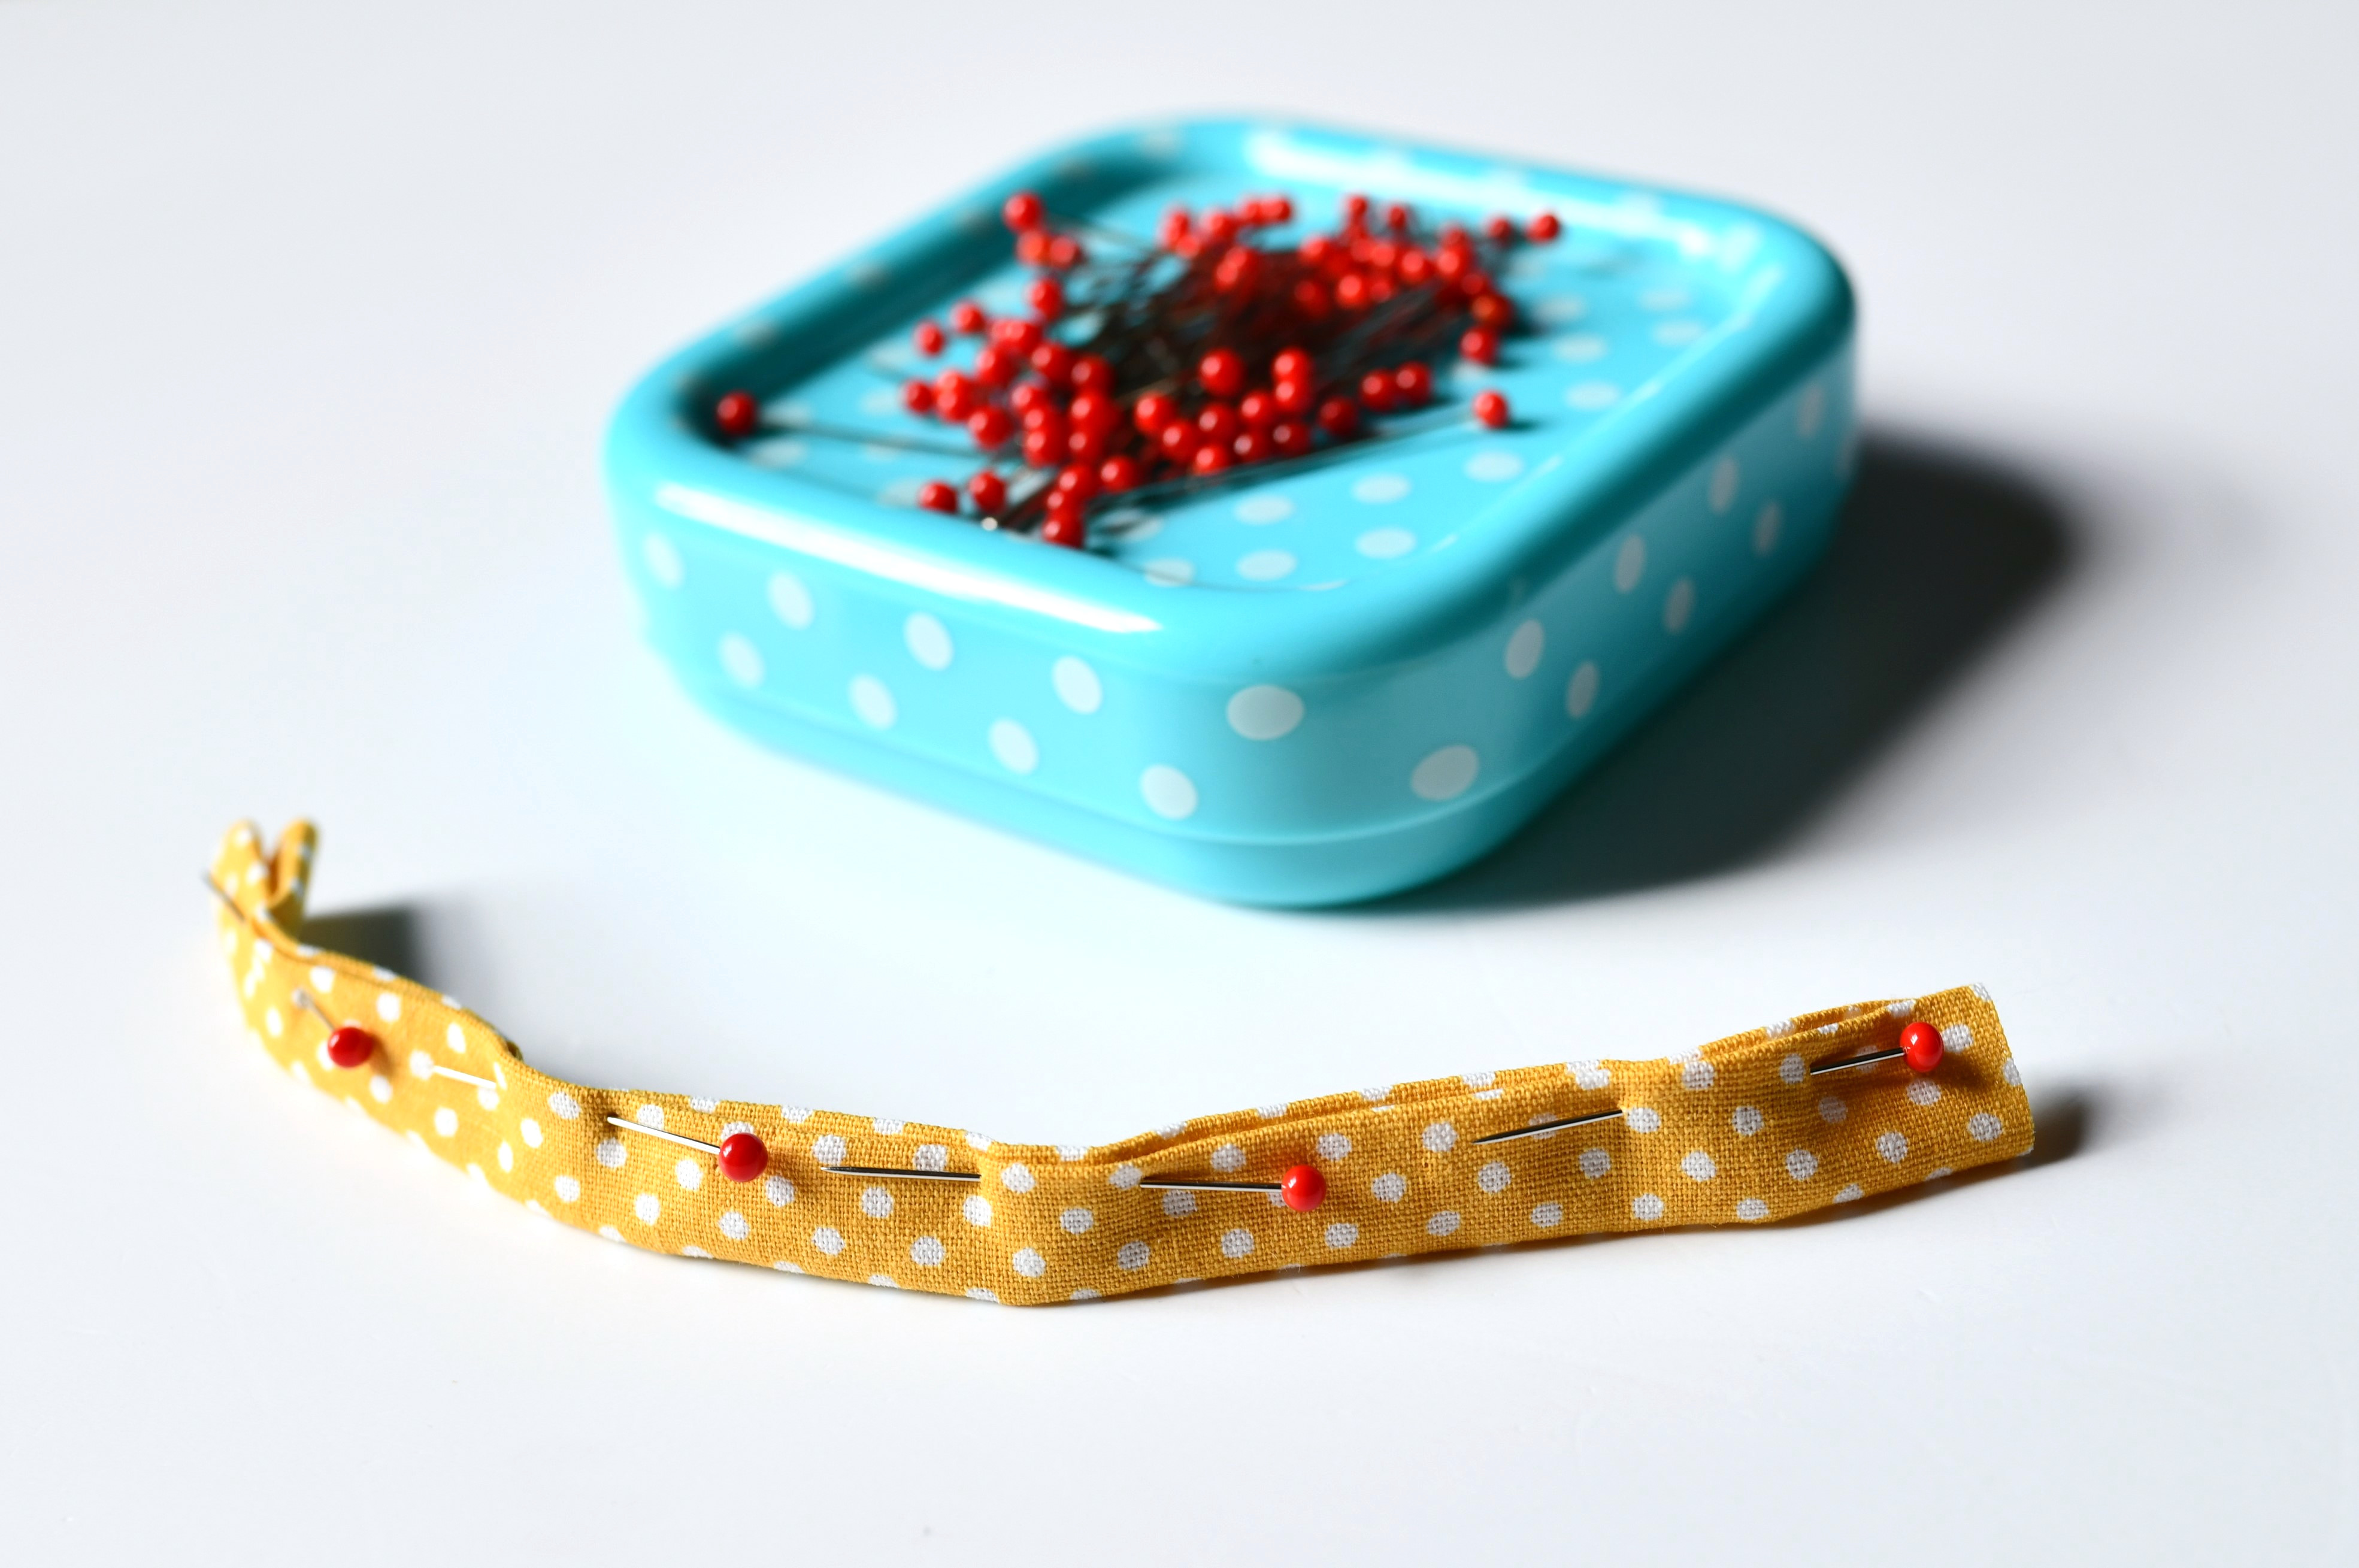
- sewing pins
- fabric marking pencil
- seam gauge / ruler
- universal sewing machine needle
- zipper foot
- sewing machine
How to make a mini zipper boxy pouch step by step
If you’re looking for a small zippered pouch sewing tutorial, want to sew a beginner-friendly fabric gift, or just need a fun way to use up your scrap stash, give this project a try. You might end up making a dozen like I did!
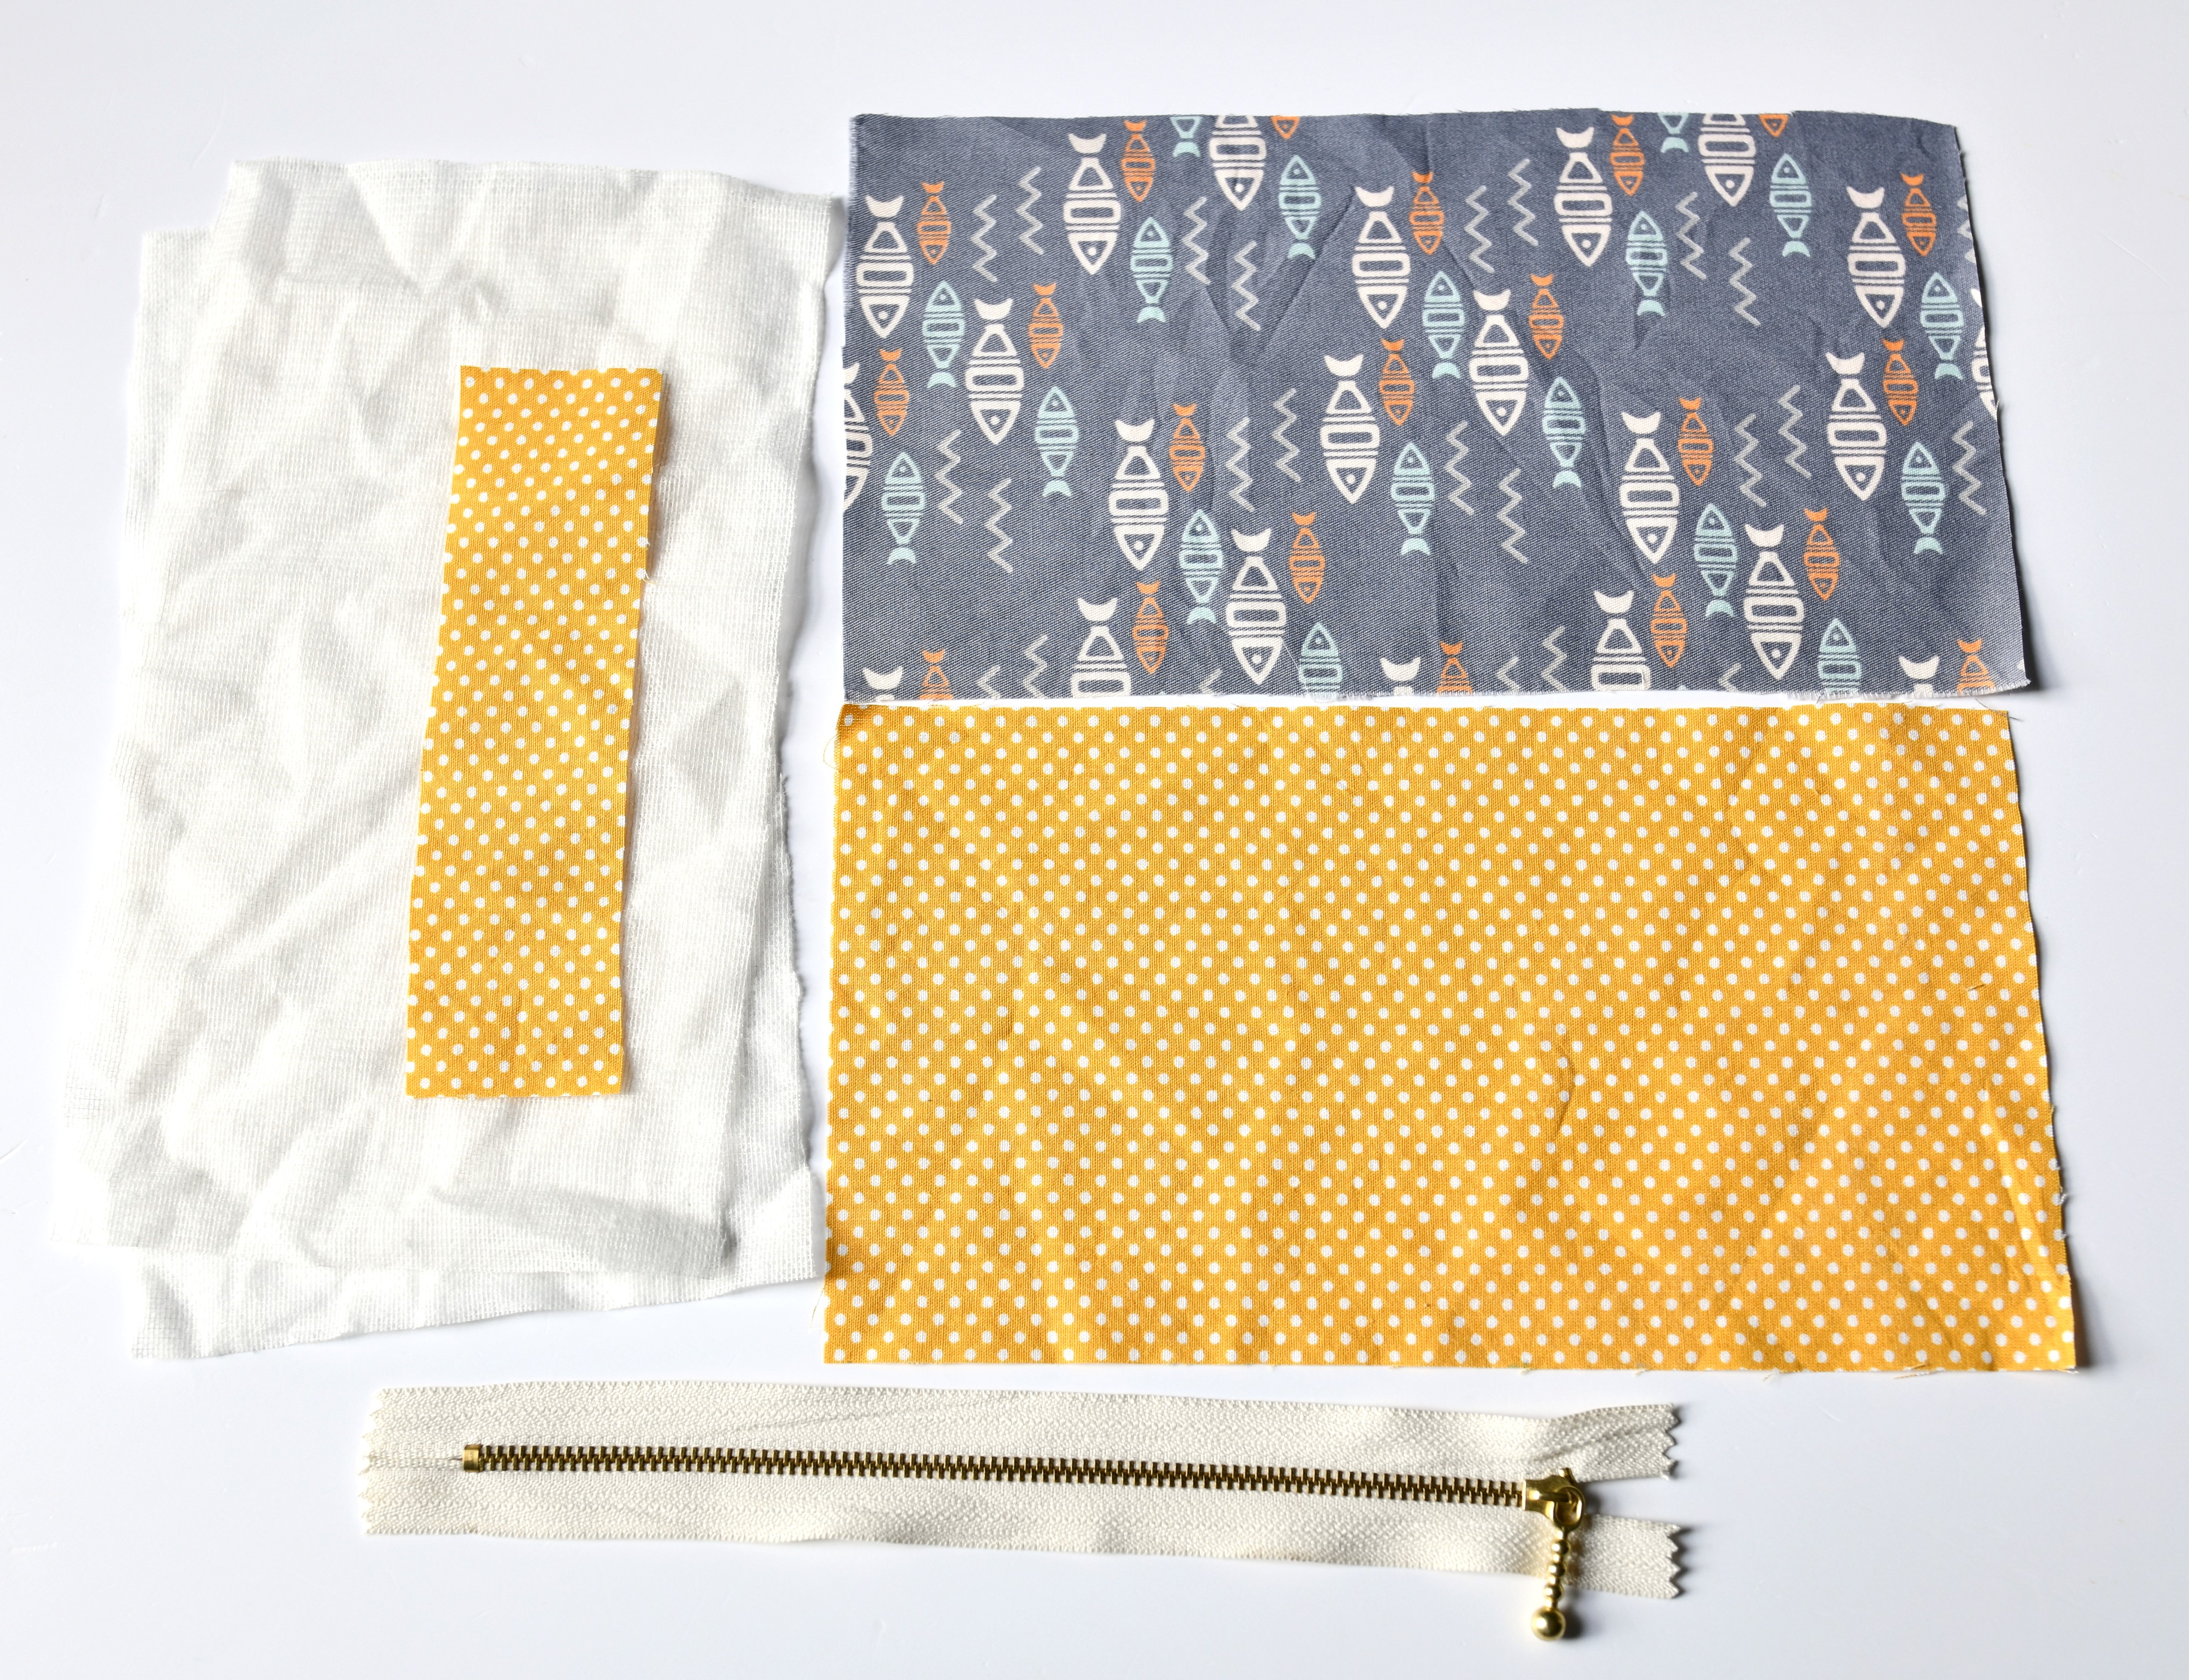
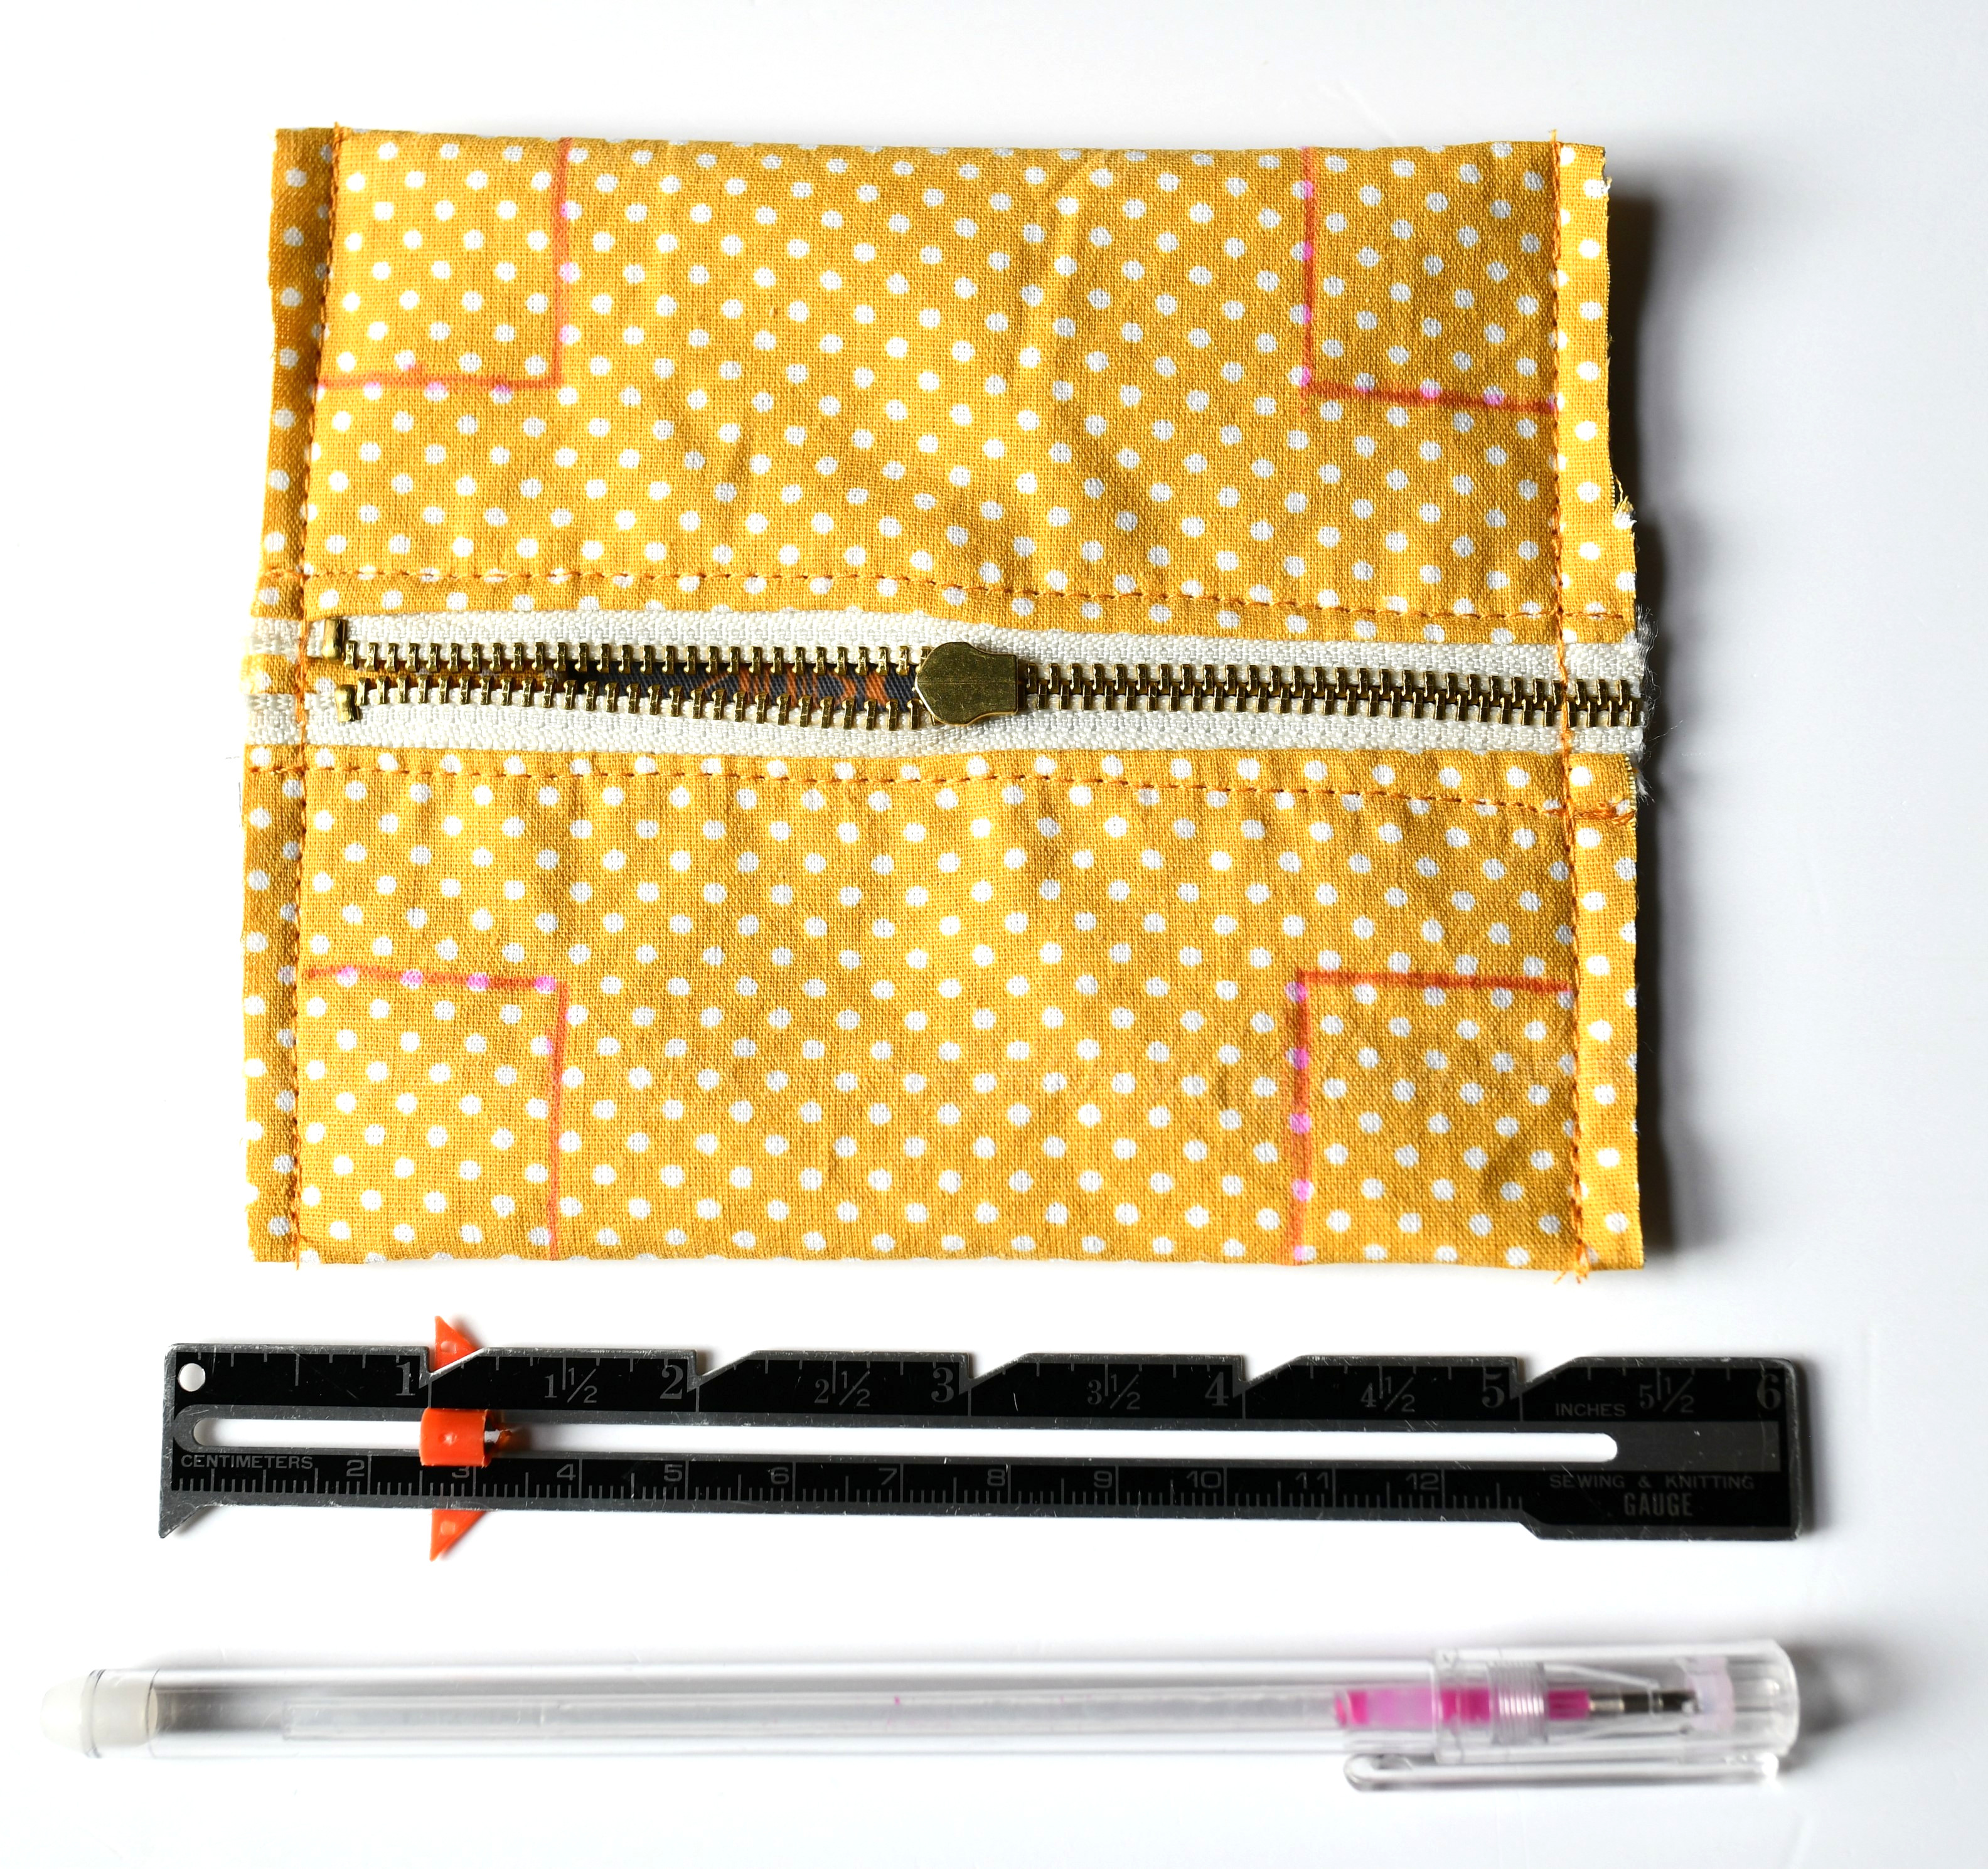
Step 1 – Cut Your Fabric Pieces
Here’s what you’ll need for one small zippered pouch with boxed corners:
- Cotton fabric – 2 pieces, 9” x 5” (one for the outside, one for the lining)
- Lightweight fusible interfacing – 2 pieces, also 9” x 5”
- Fabric strip for the pull tab – 1 piece, 5” x 1.5”
- Zipper – 4” long (but a longer one is actually easier to sew with!)
Tip #1: Don’t worry if you don’t have a 4” zipper – anything 6” or longer works great. Longer zippers make it easier to sew around without struggling to move the zipper pull out of the way. I always avoid lifting the presser foot mid-stitch just to wrangle that little zipper tab!
Tip #2: If you’re using a directional print (like fabric with animals, letters, or flowers facing one way), pay close attention to how you cut it. You don’t want upside-down bunnies or crooked cupcakes!
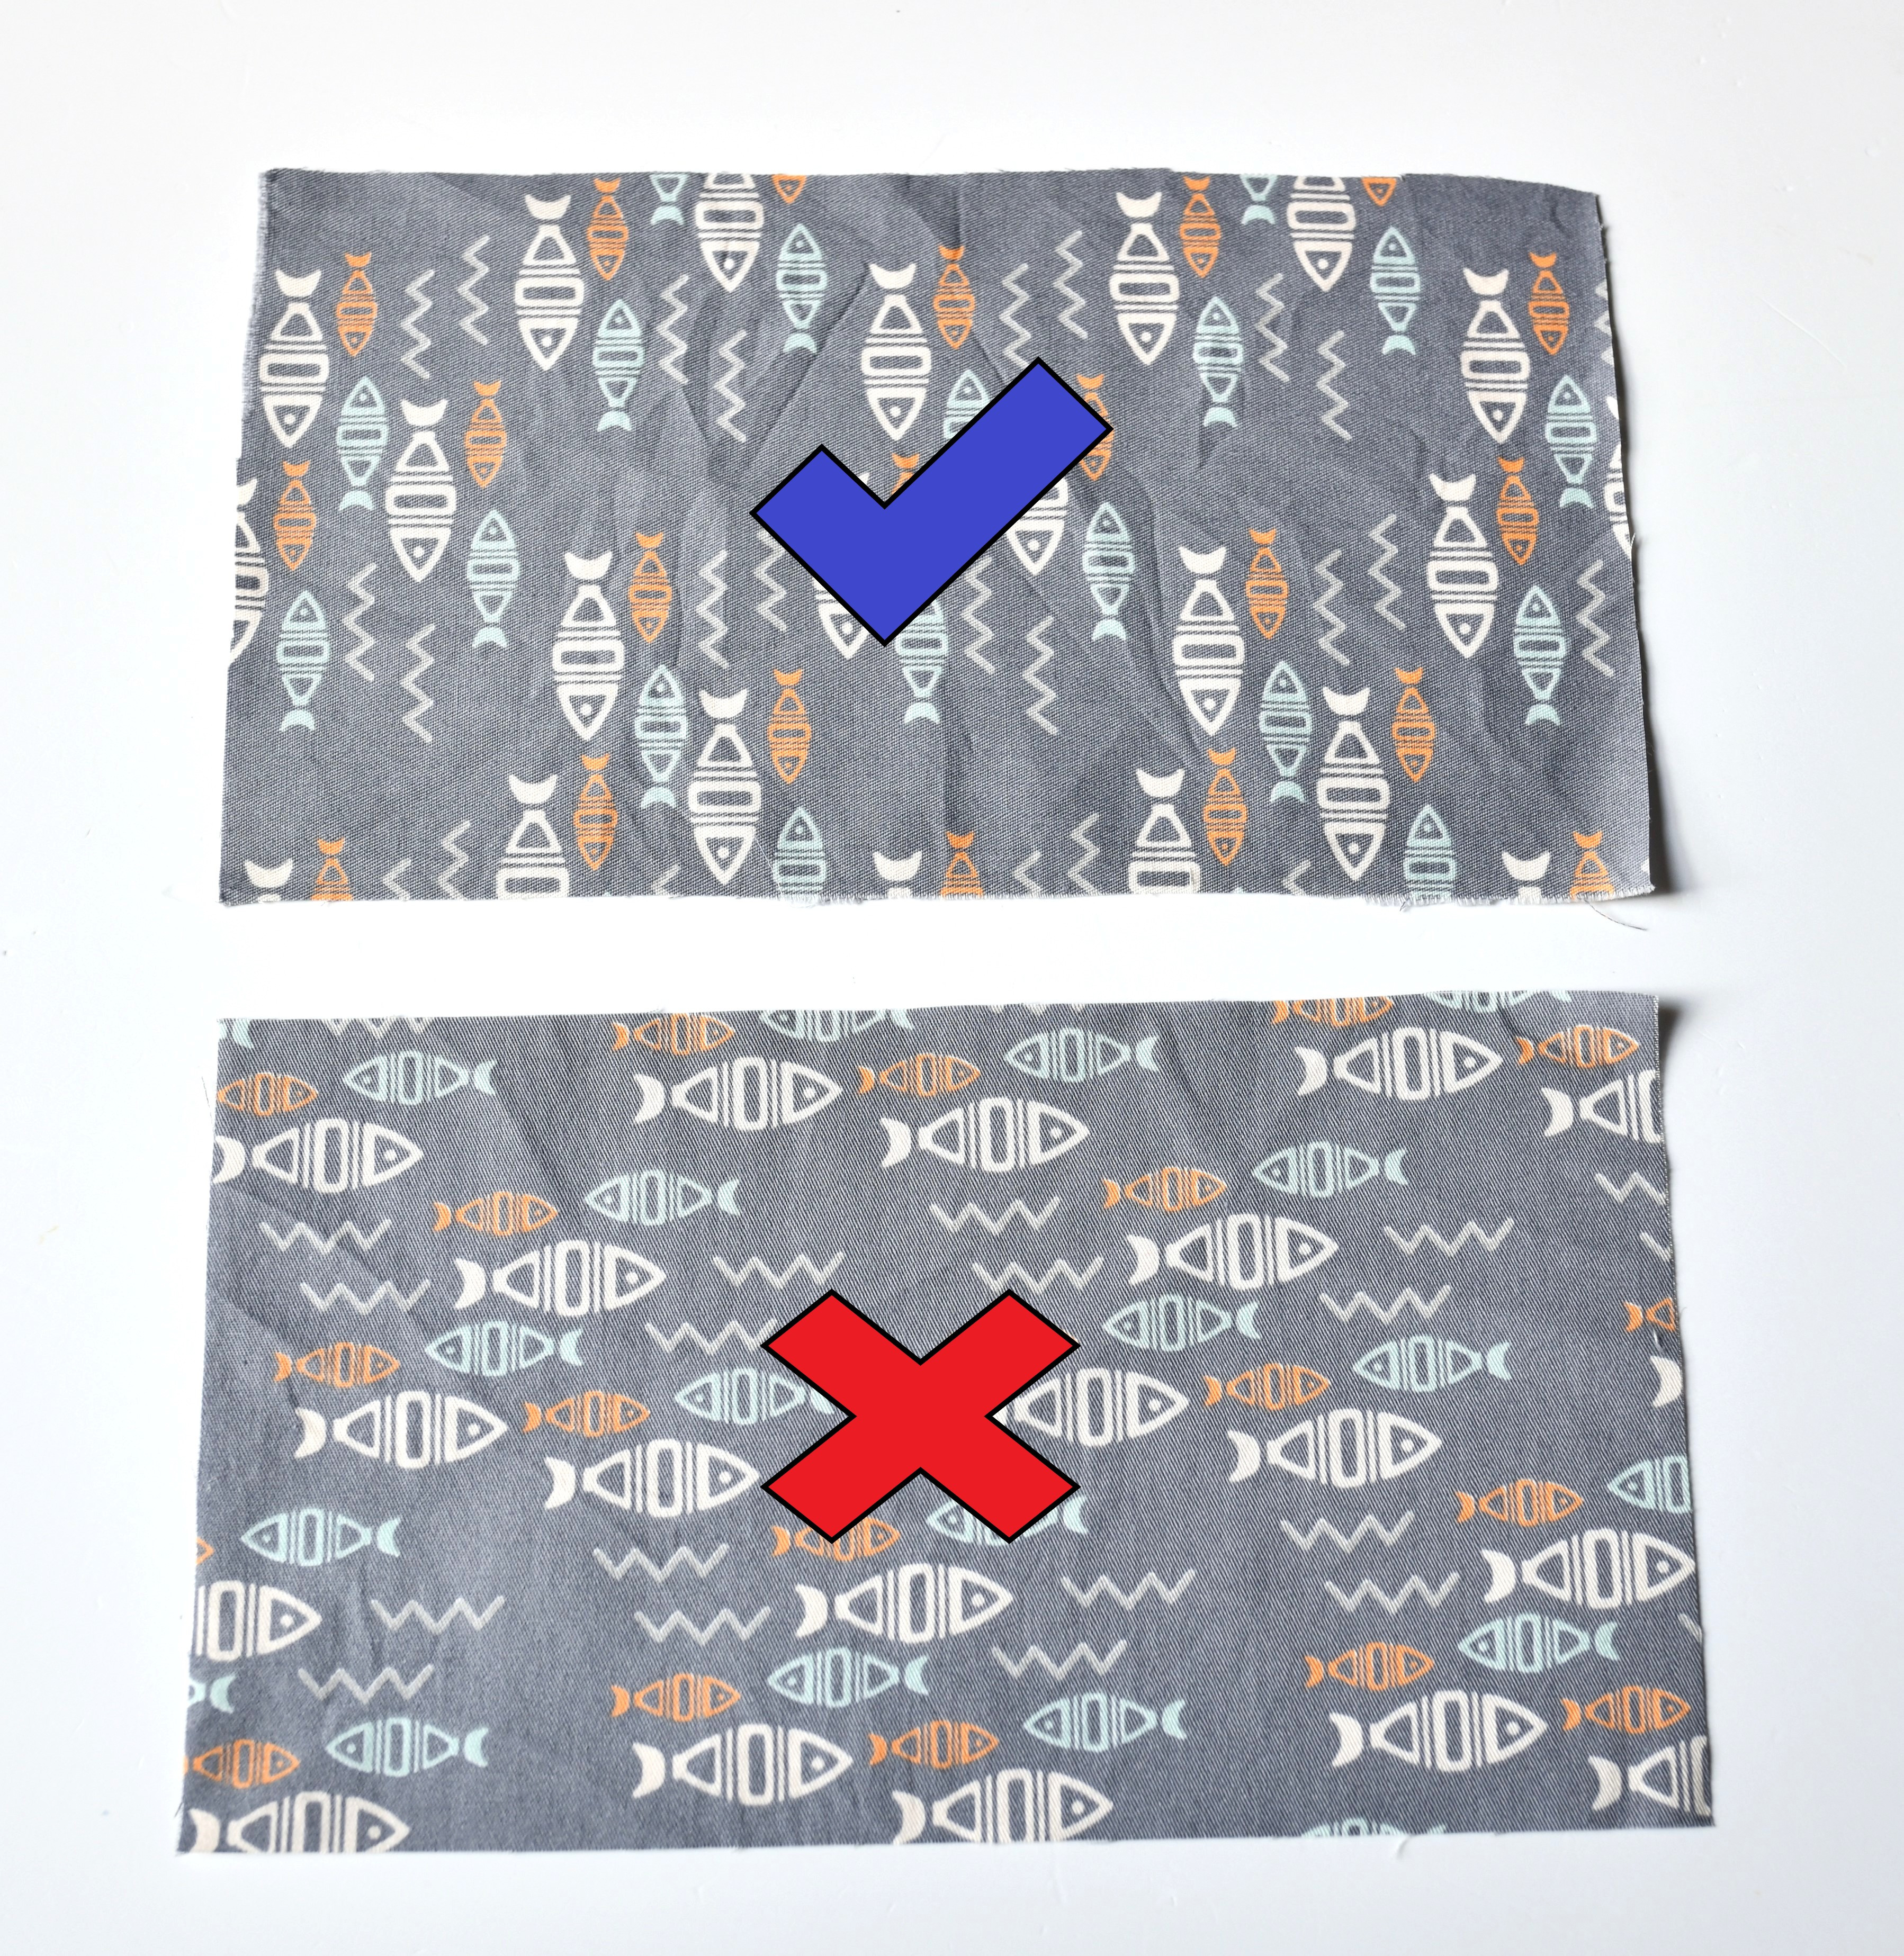
Here’s what you can do: instead of cutting one 9” x 5” piece for the exterior, cut two squares that are 5” x 5”. That way, both sides of your pouch will have the design facing the right way once it’s all sewn up. (More on sewing with directional fabric here.)
Step 2 – Make the Pull Tab
The little pull tabs on the side aren’t just for looks – they help you open and close the pouch more easily, and they’re a great place to show off a contrasting fabric.
Here’s how to sew the pull tab strip:
- Take your 5” x 1.5” fabric piece and fold it in half lengthwise, wrong sides together. Press to make a crease.
- Open it up, then fold each long edge in toward that center crease. Press again.
- Fold the whole strip in half lengthwise one more time, enclosing the raw edges inside.
- Give it one more press or pin it in place, then topstitch close to the open edge (about 1/8” from the edge).
Boom – your pull tab is done!
Step 3 – Add Interfacing
Now it’s time to give your mini pouch some structure. Fuse the interfacing to the wrong side of both the outer fabric and the lining.
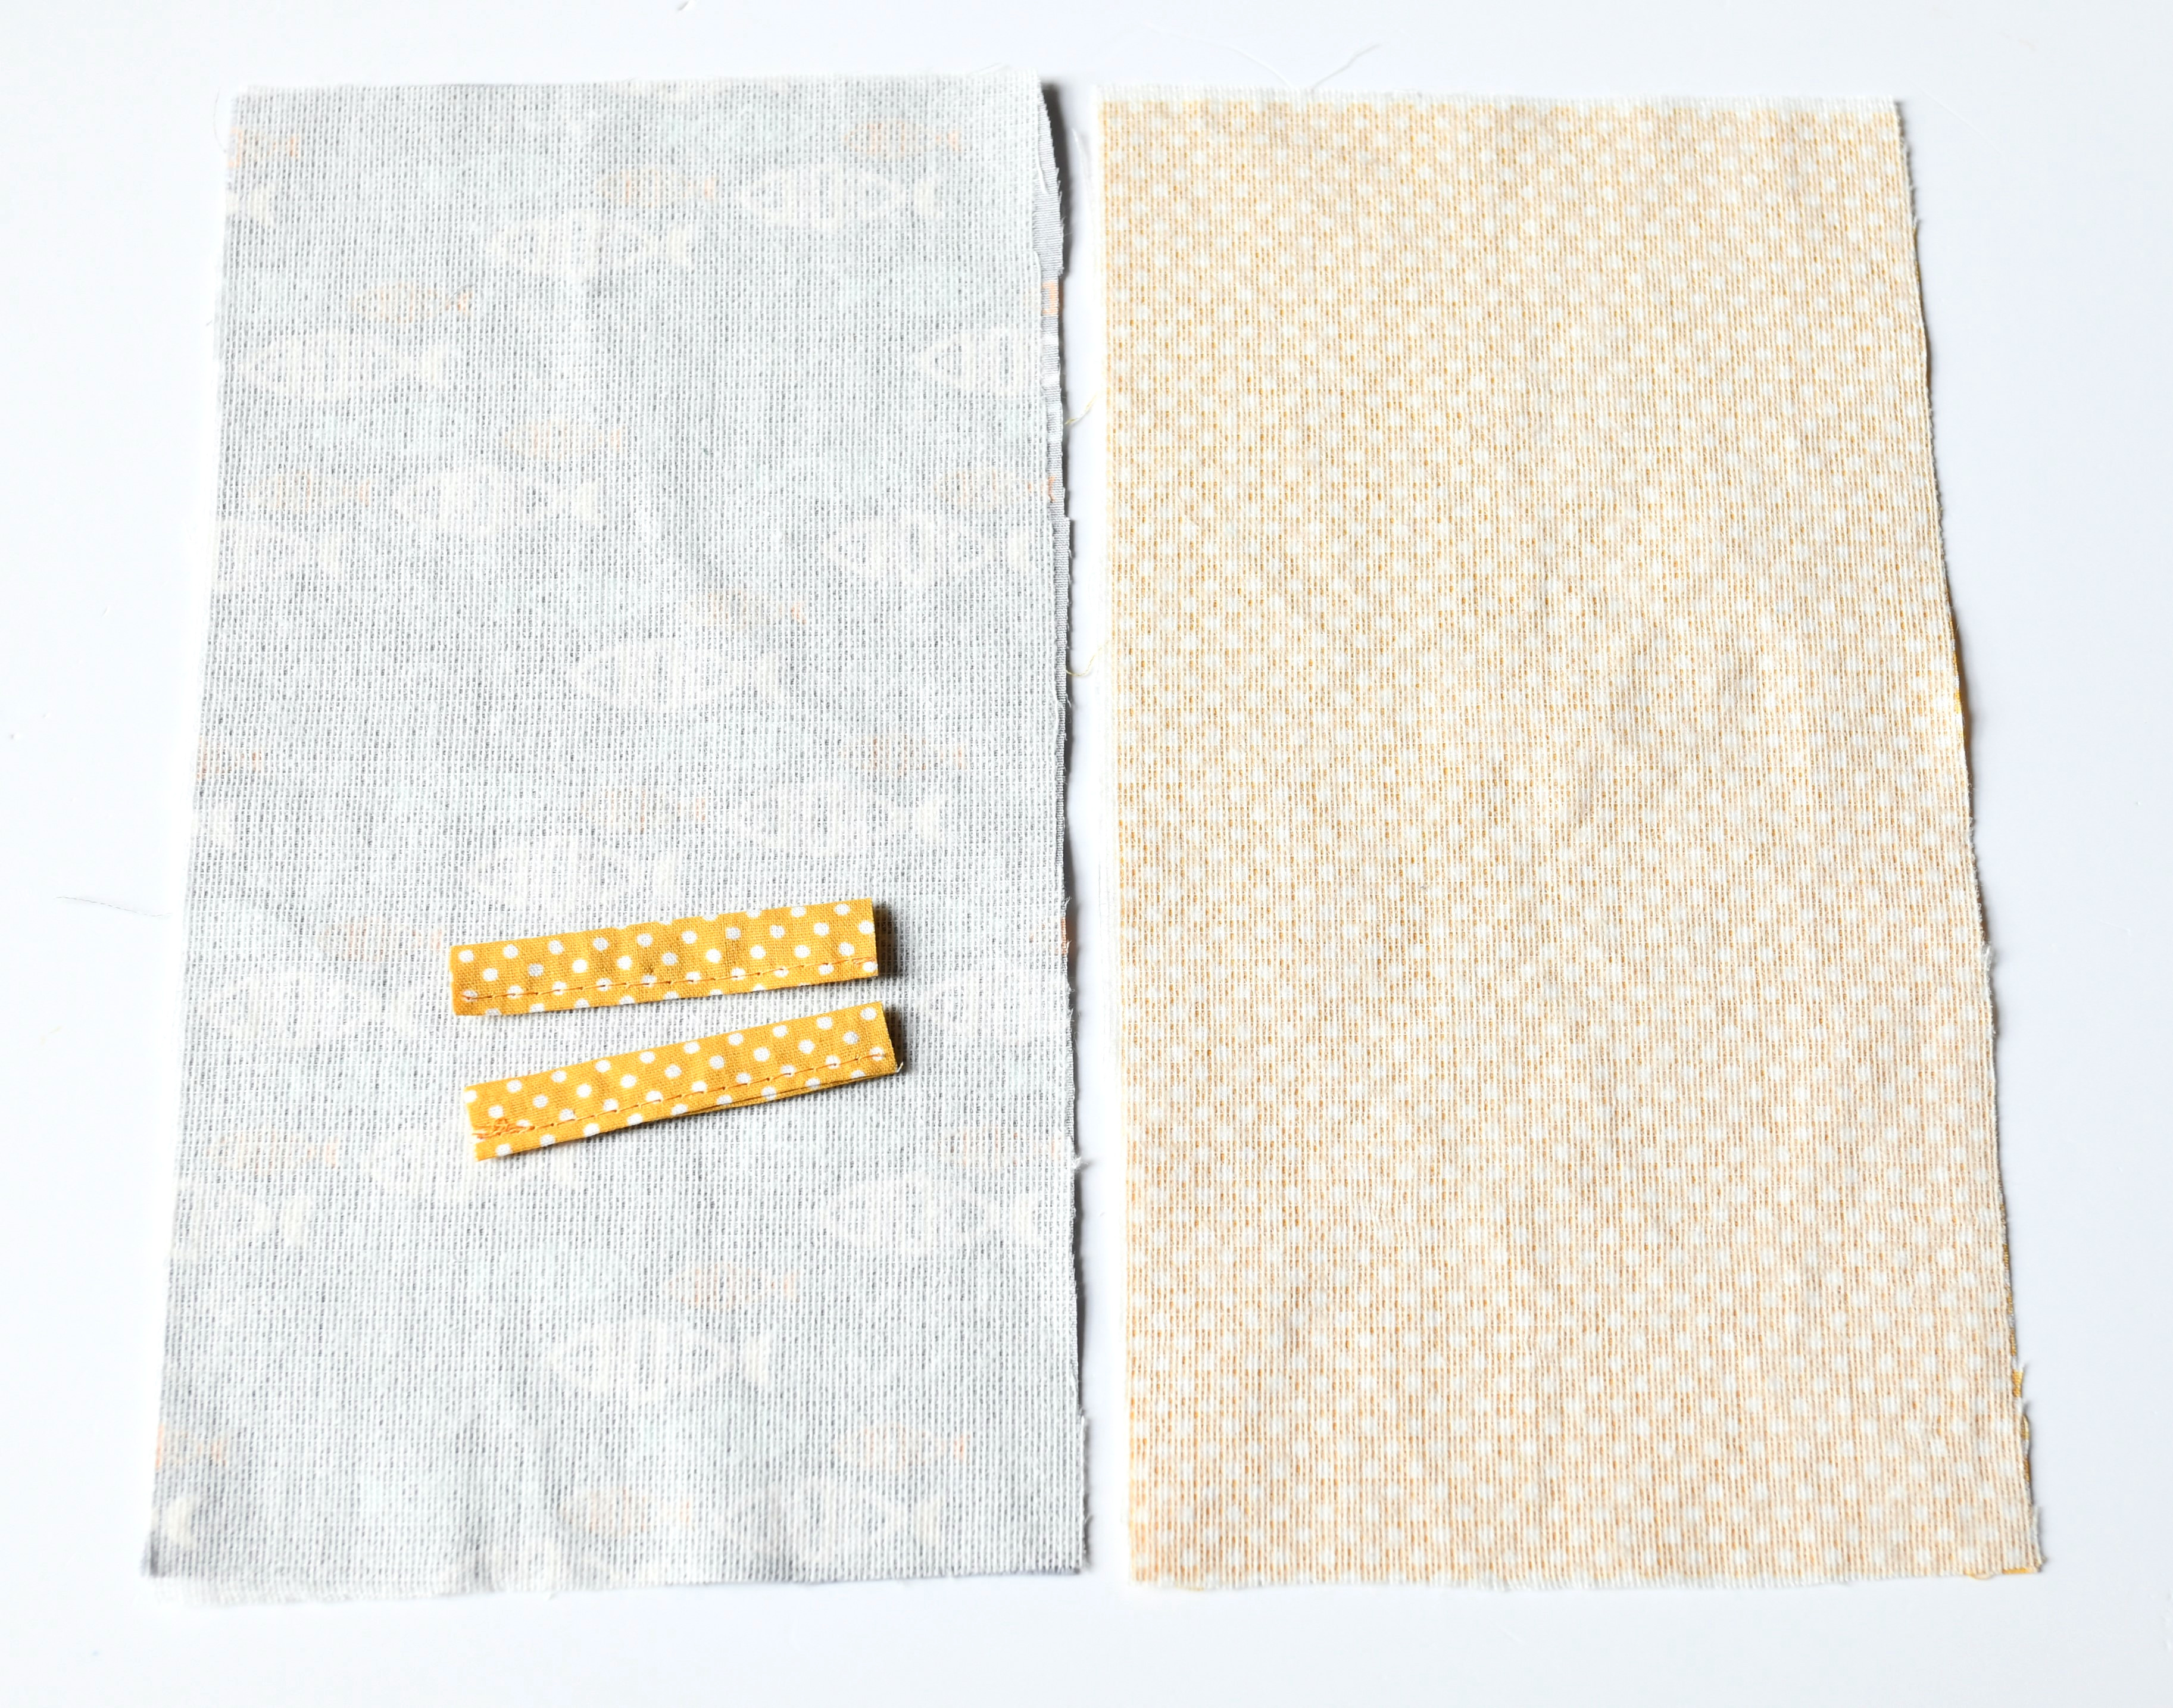
Then, grab your pull tab piece and cut it in half to create two little tabs, each 2.5″ long.
They’re ready to be sewn into the side seams later, giving your pouch that professional look – even though it only took you half an hour to make!
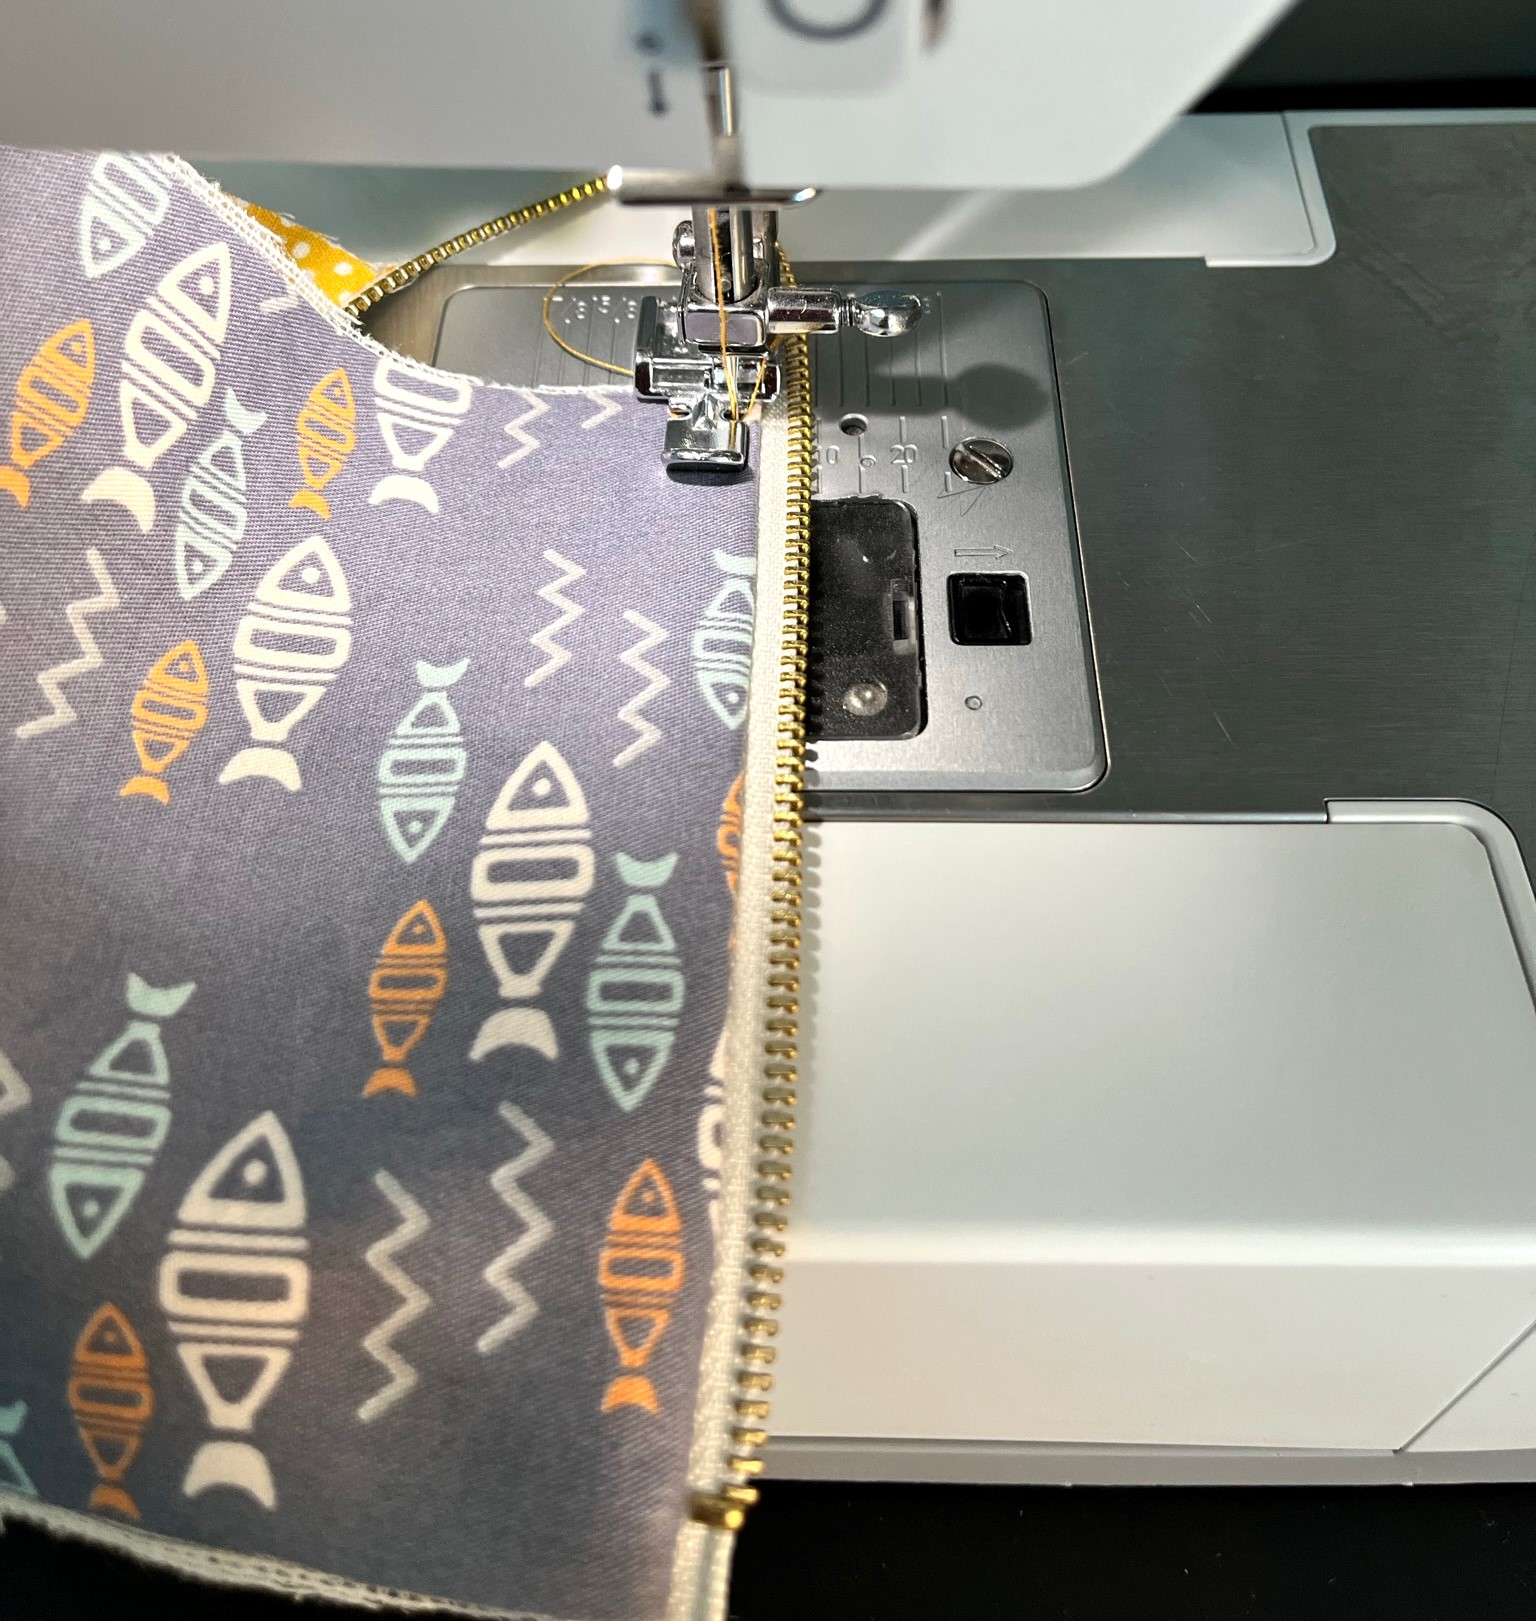
Step 4 – Sew One Side of the Zipper
Time to tackle the zipper! Don’t worry – this part is way easier than it looks. If you’ve never sewn a zipper before, this is a great intro. We’re doing the classic zipper sandwich method here.
Start by placing your main fabric piece (the outer one) right side up on your work surface.
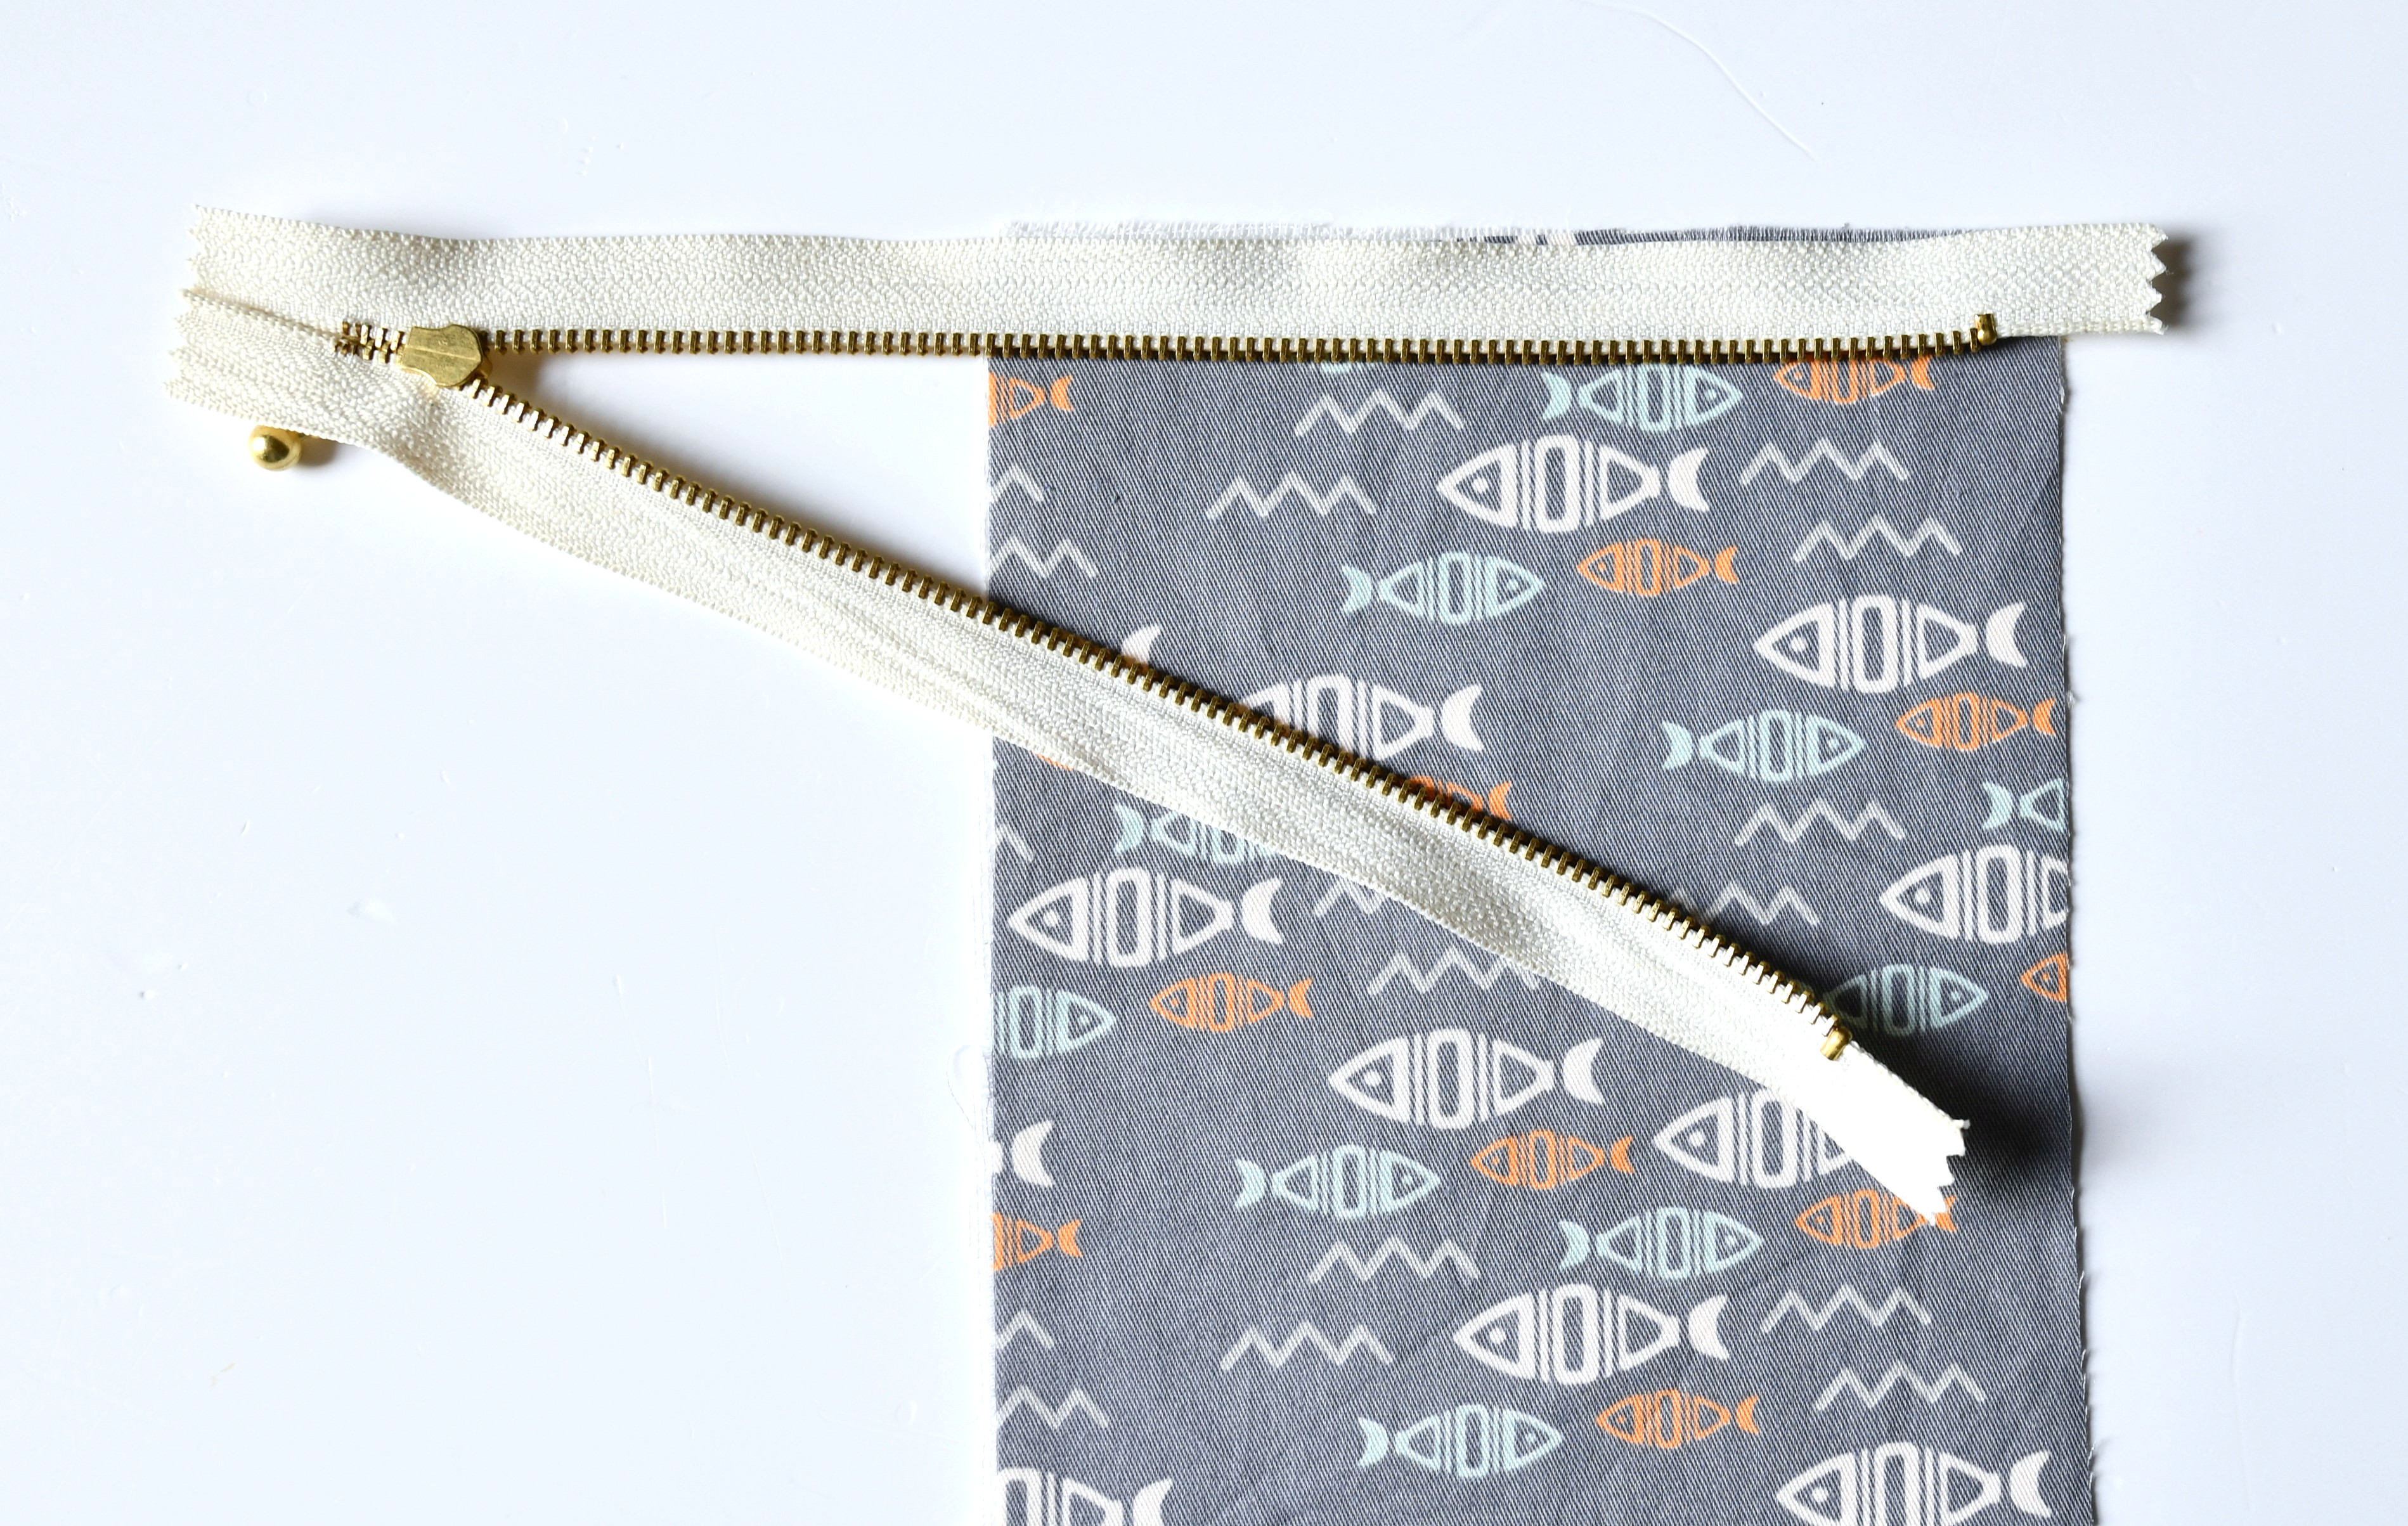
Now grab your zipper and lay it face down (zipper pull facing the fabric) along one of the short edges (the 5″ side). Line up the edges as neatly as you can, and make sure the metal zipper stop is about 3/8″ away from the edge – this helps the corners of your pouch turn out nice and clean later.
Next, grab your lining piece and place it right side down on top of everything. So now you’ve got this little zipper sandwich: main fabric on the bottom, zipper in the middle, and lining on top. Line up all the raw edges.
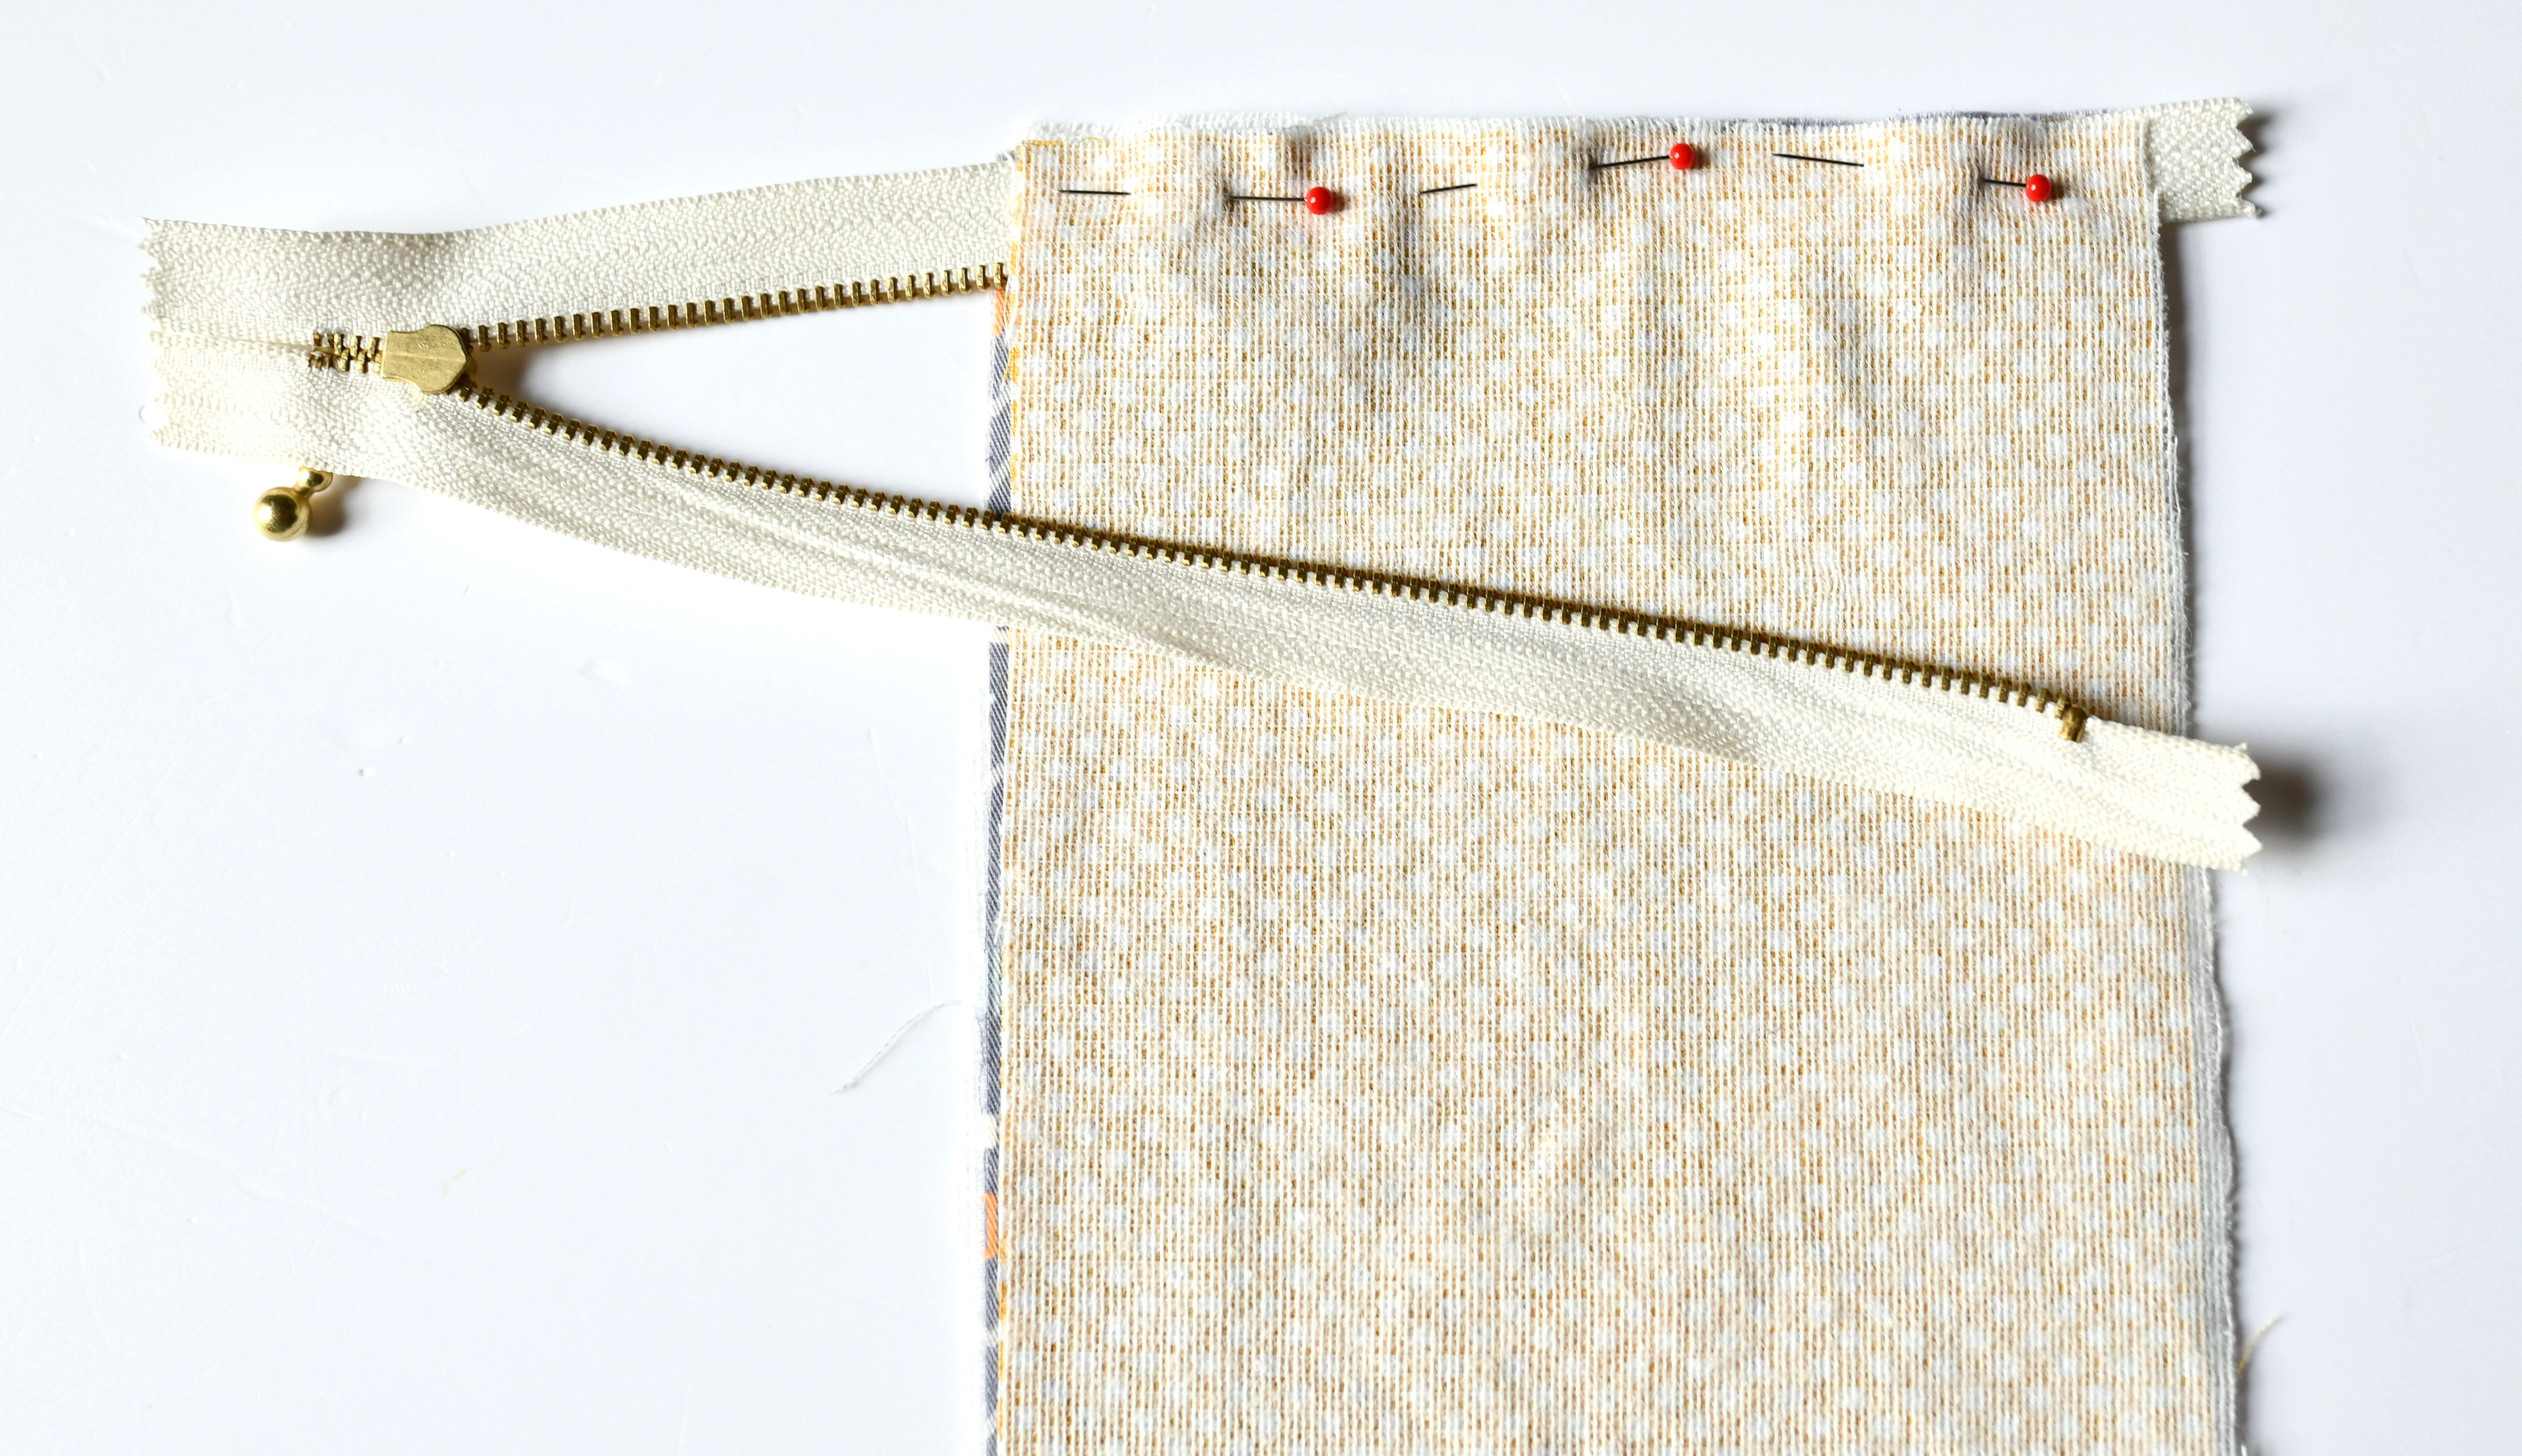
Pin everything in place – don’t be shy with the pins!
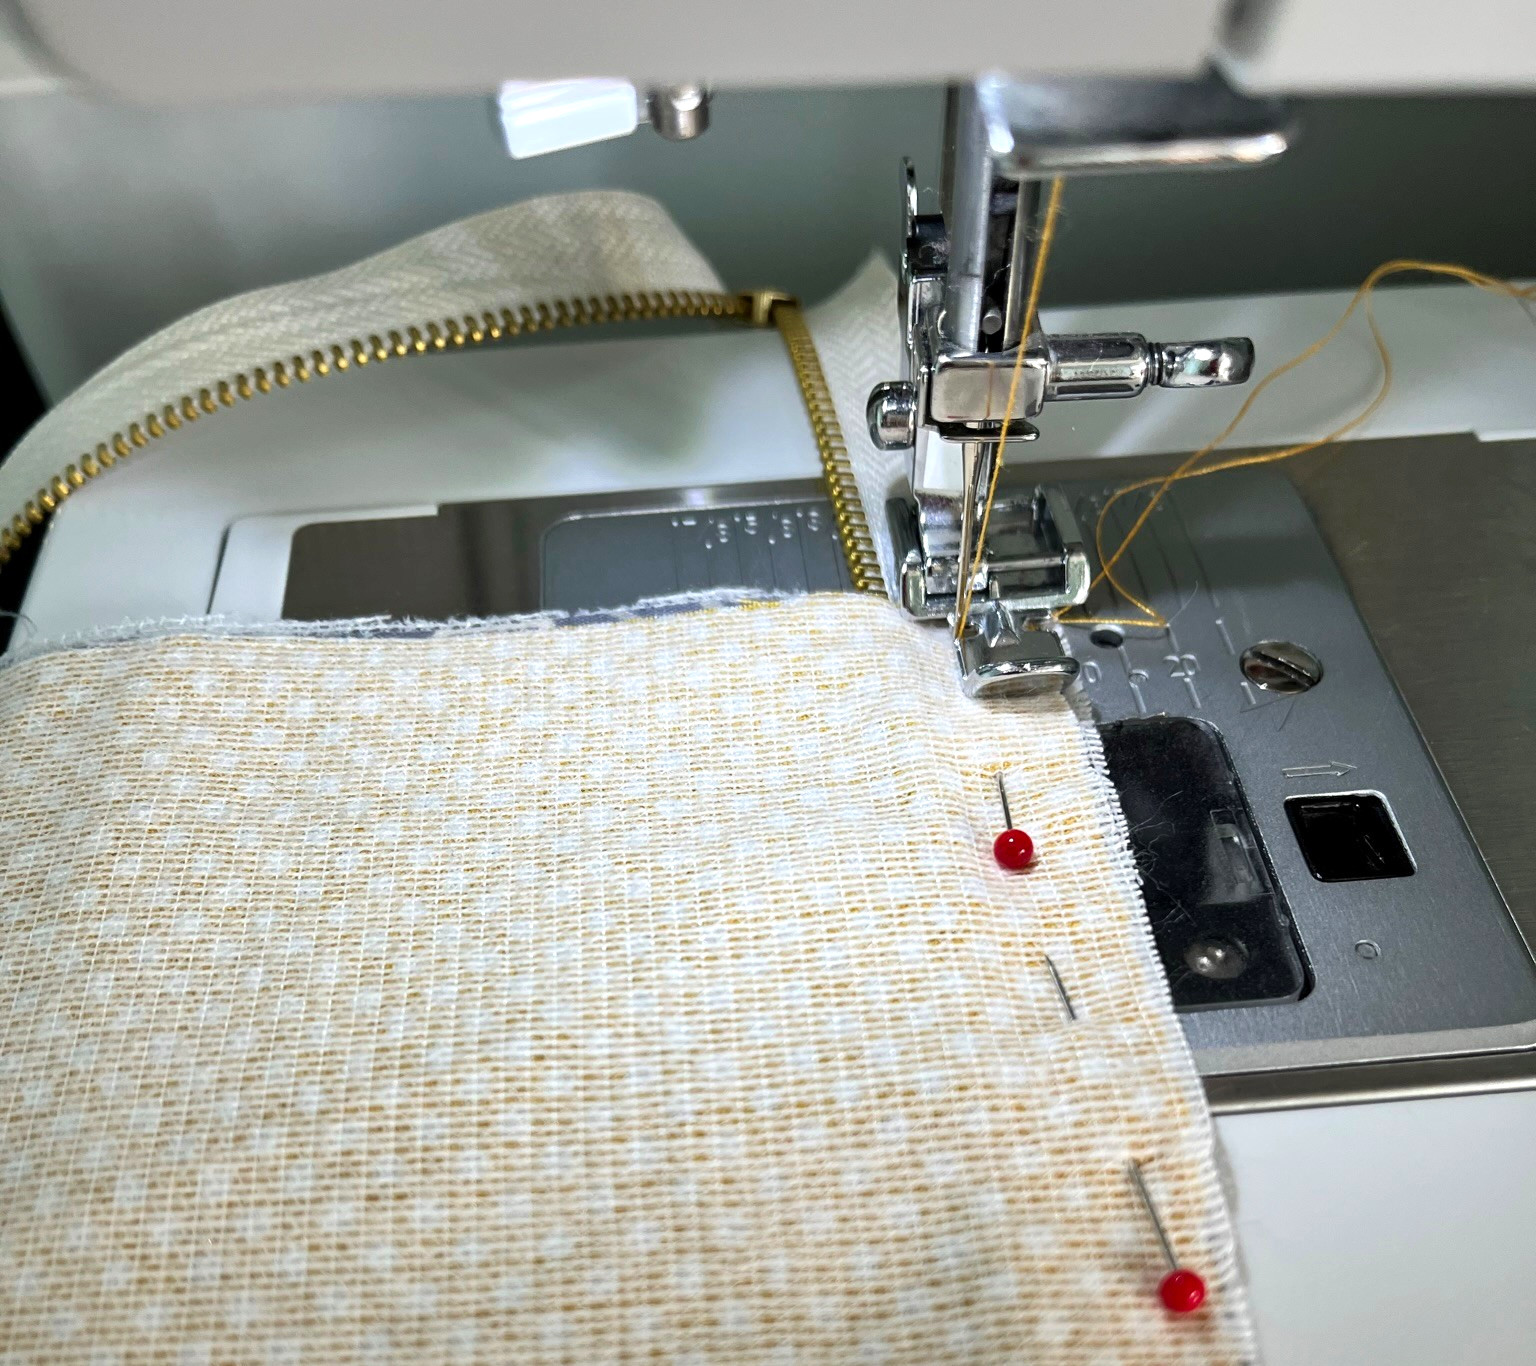
Now switch to your zipper foot on the sewing machine, and sew along that edge. You’re sewing through all three layers at once: outer fabric, zipper, and lining.
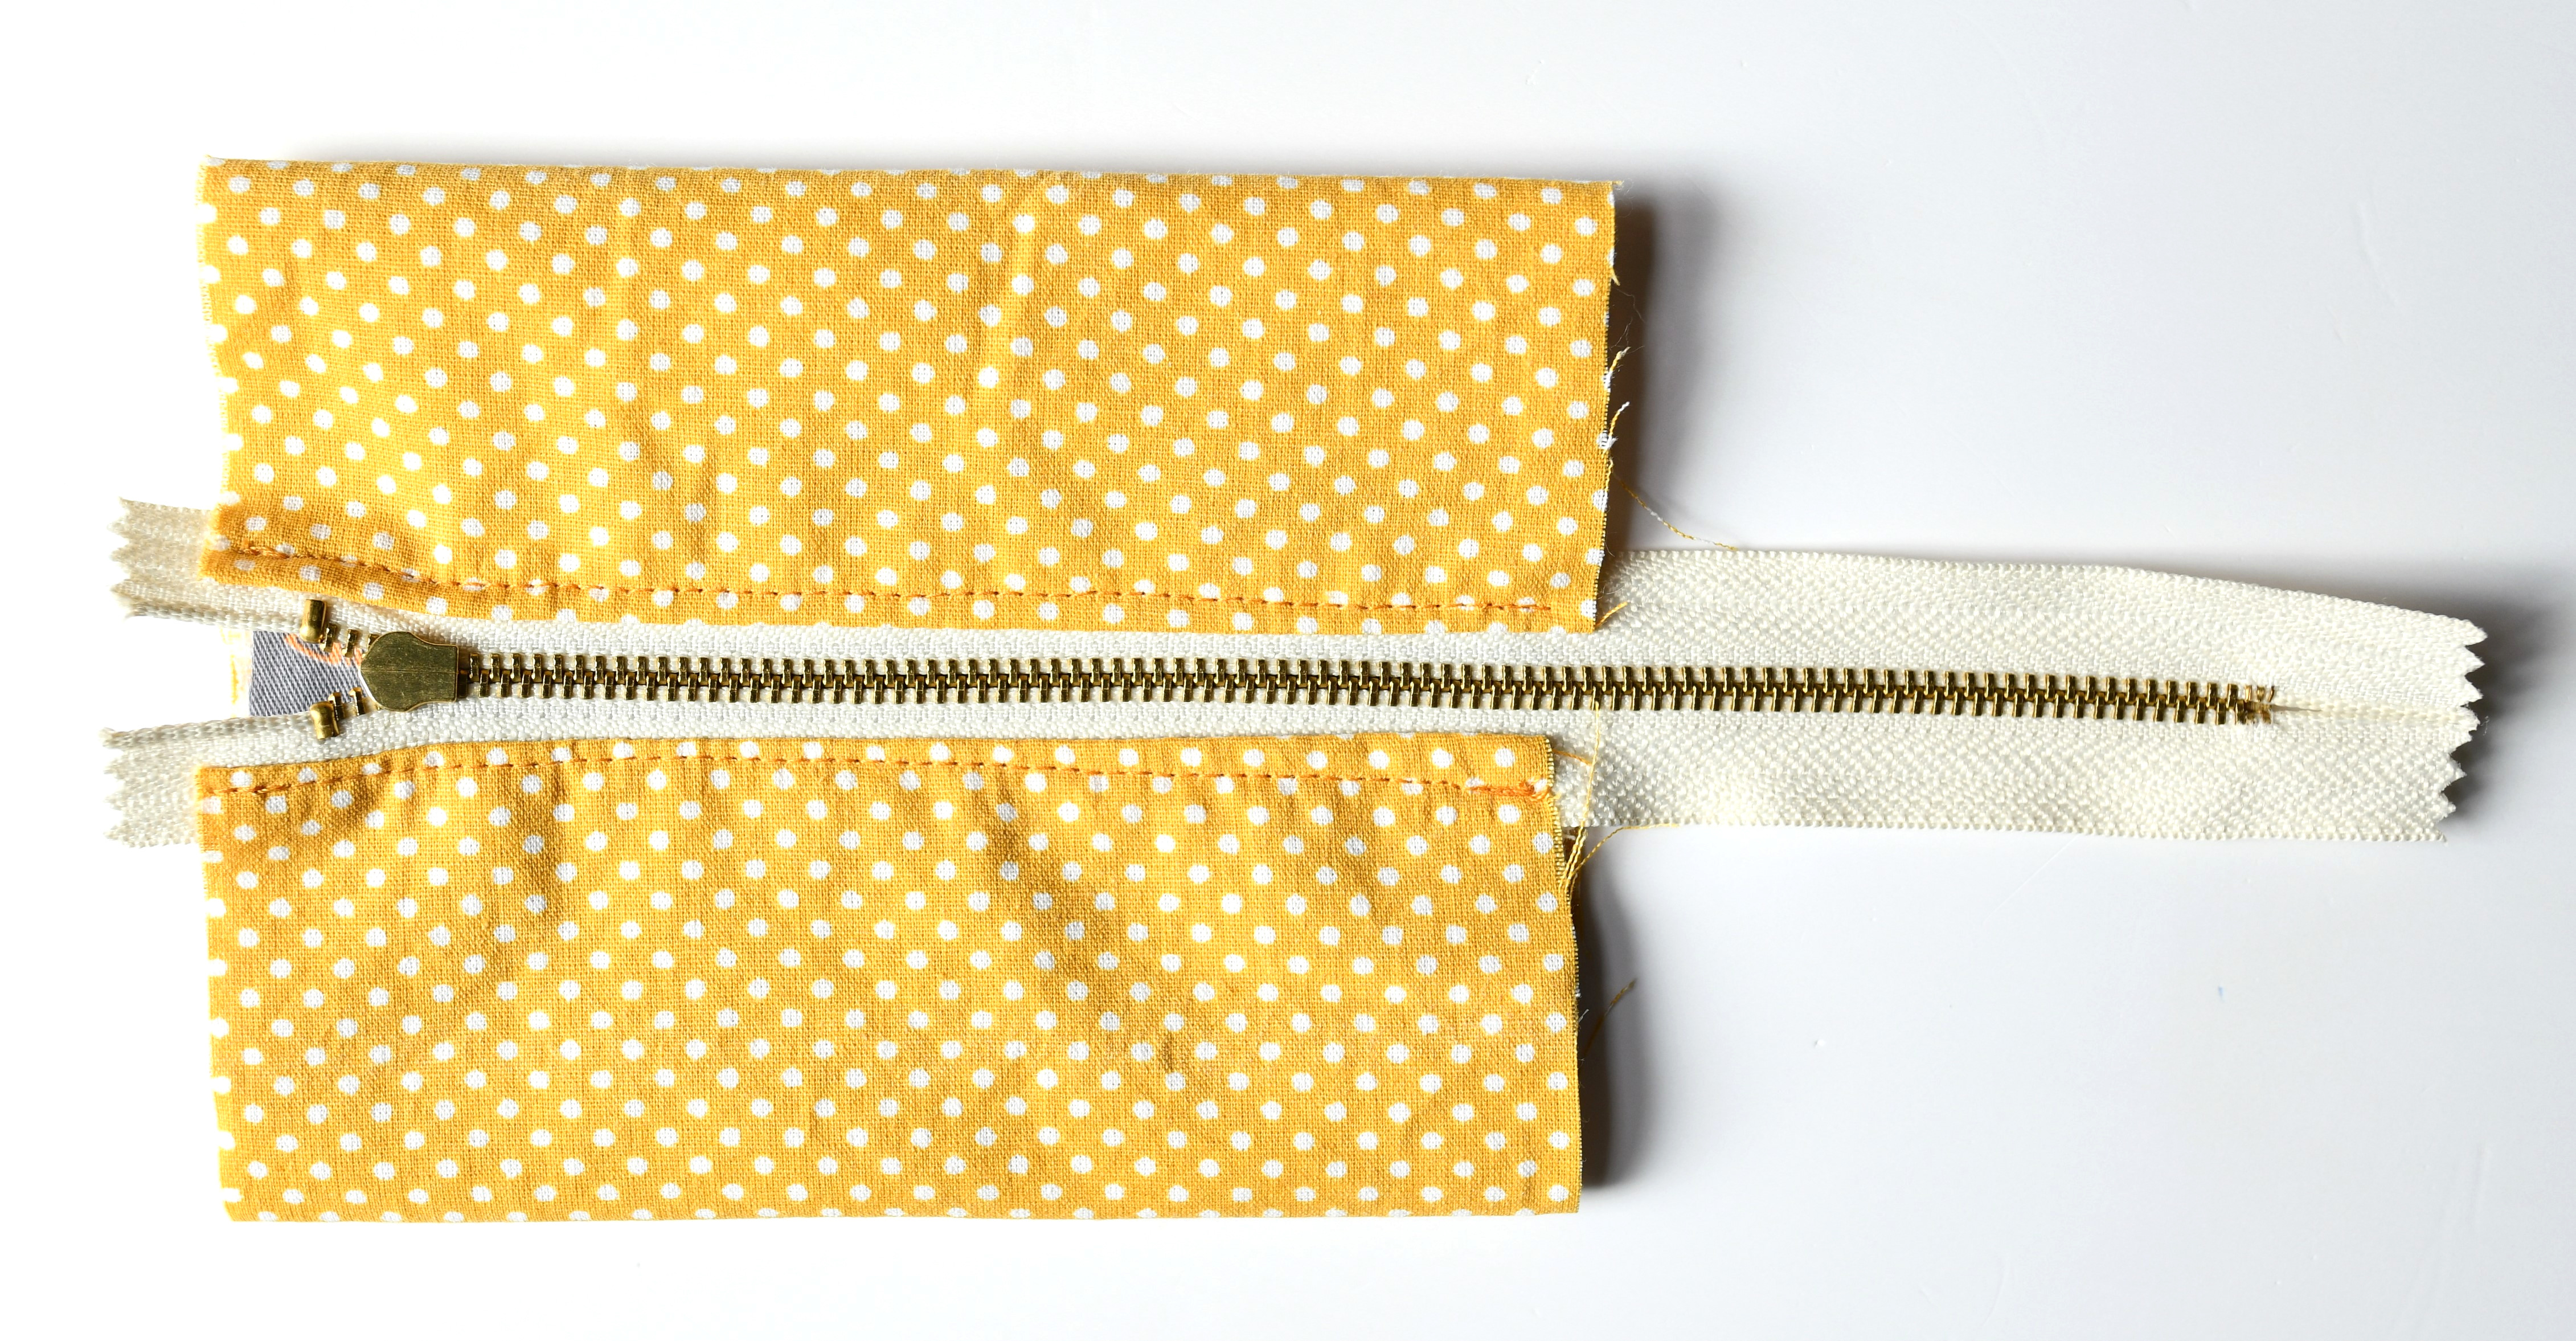
Step 5 – Sew the Other Side of the Zipper
Looking good so far? Now let’s attach the other side of the zipper and finish the sandwich.
When you open it up, your pouch should look like a little flap – both fabric pieces attached on one side of the zipper, with the other side still free. Don’t worry, this is exactly how it should look.

Now just repeat what you did in Step 4, but on the other side:
- Take the free edge of the zipper and line it up with the remaining short edge of your main fabric (right sides together).
- Then, lay your lining piece on top, right side facing the main fabric, lining up all the raw edges.
Before you pin, double-check that the zipper isn’t twisted inside and that the zipper stopper matches up evenly with the side you already sewed. This helps your finished pouch look polished and symmetrical.
Once everything’s lined up and straight, pin it all together and sew with your zipper foot – just like before.
You’re halfway done already!
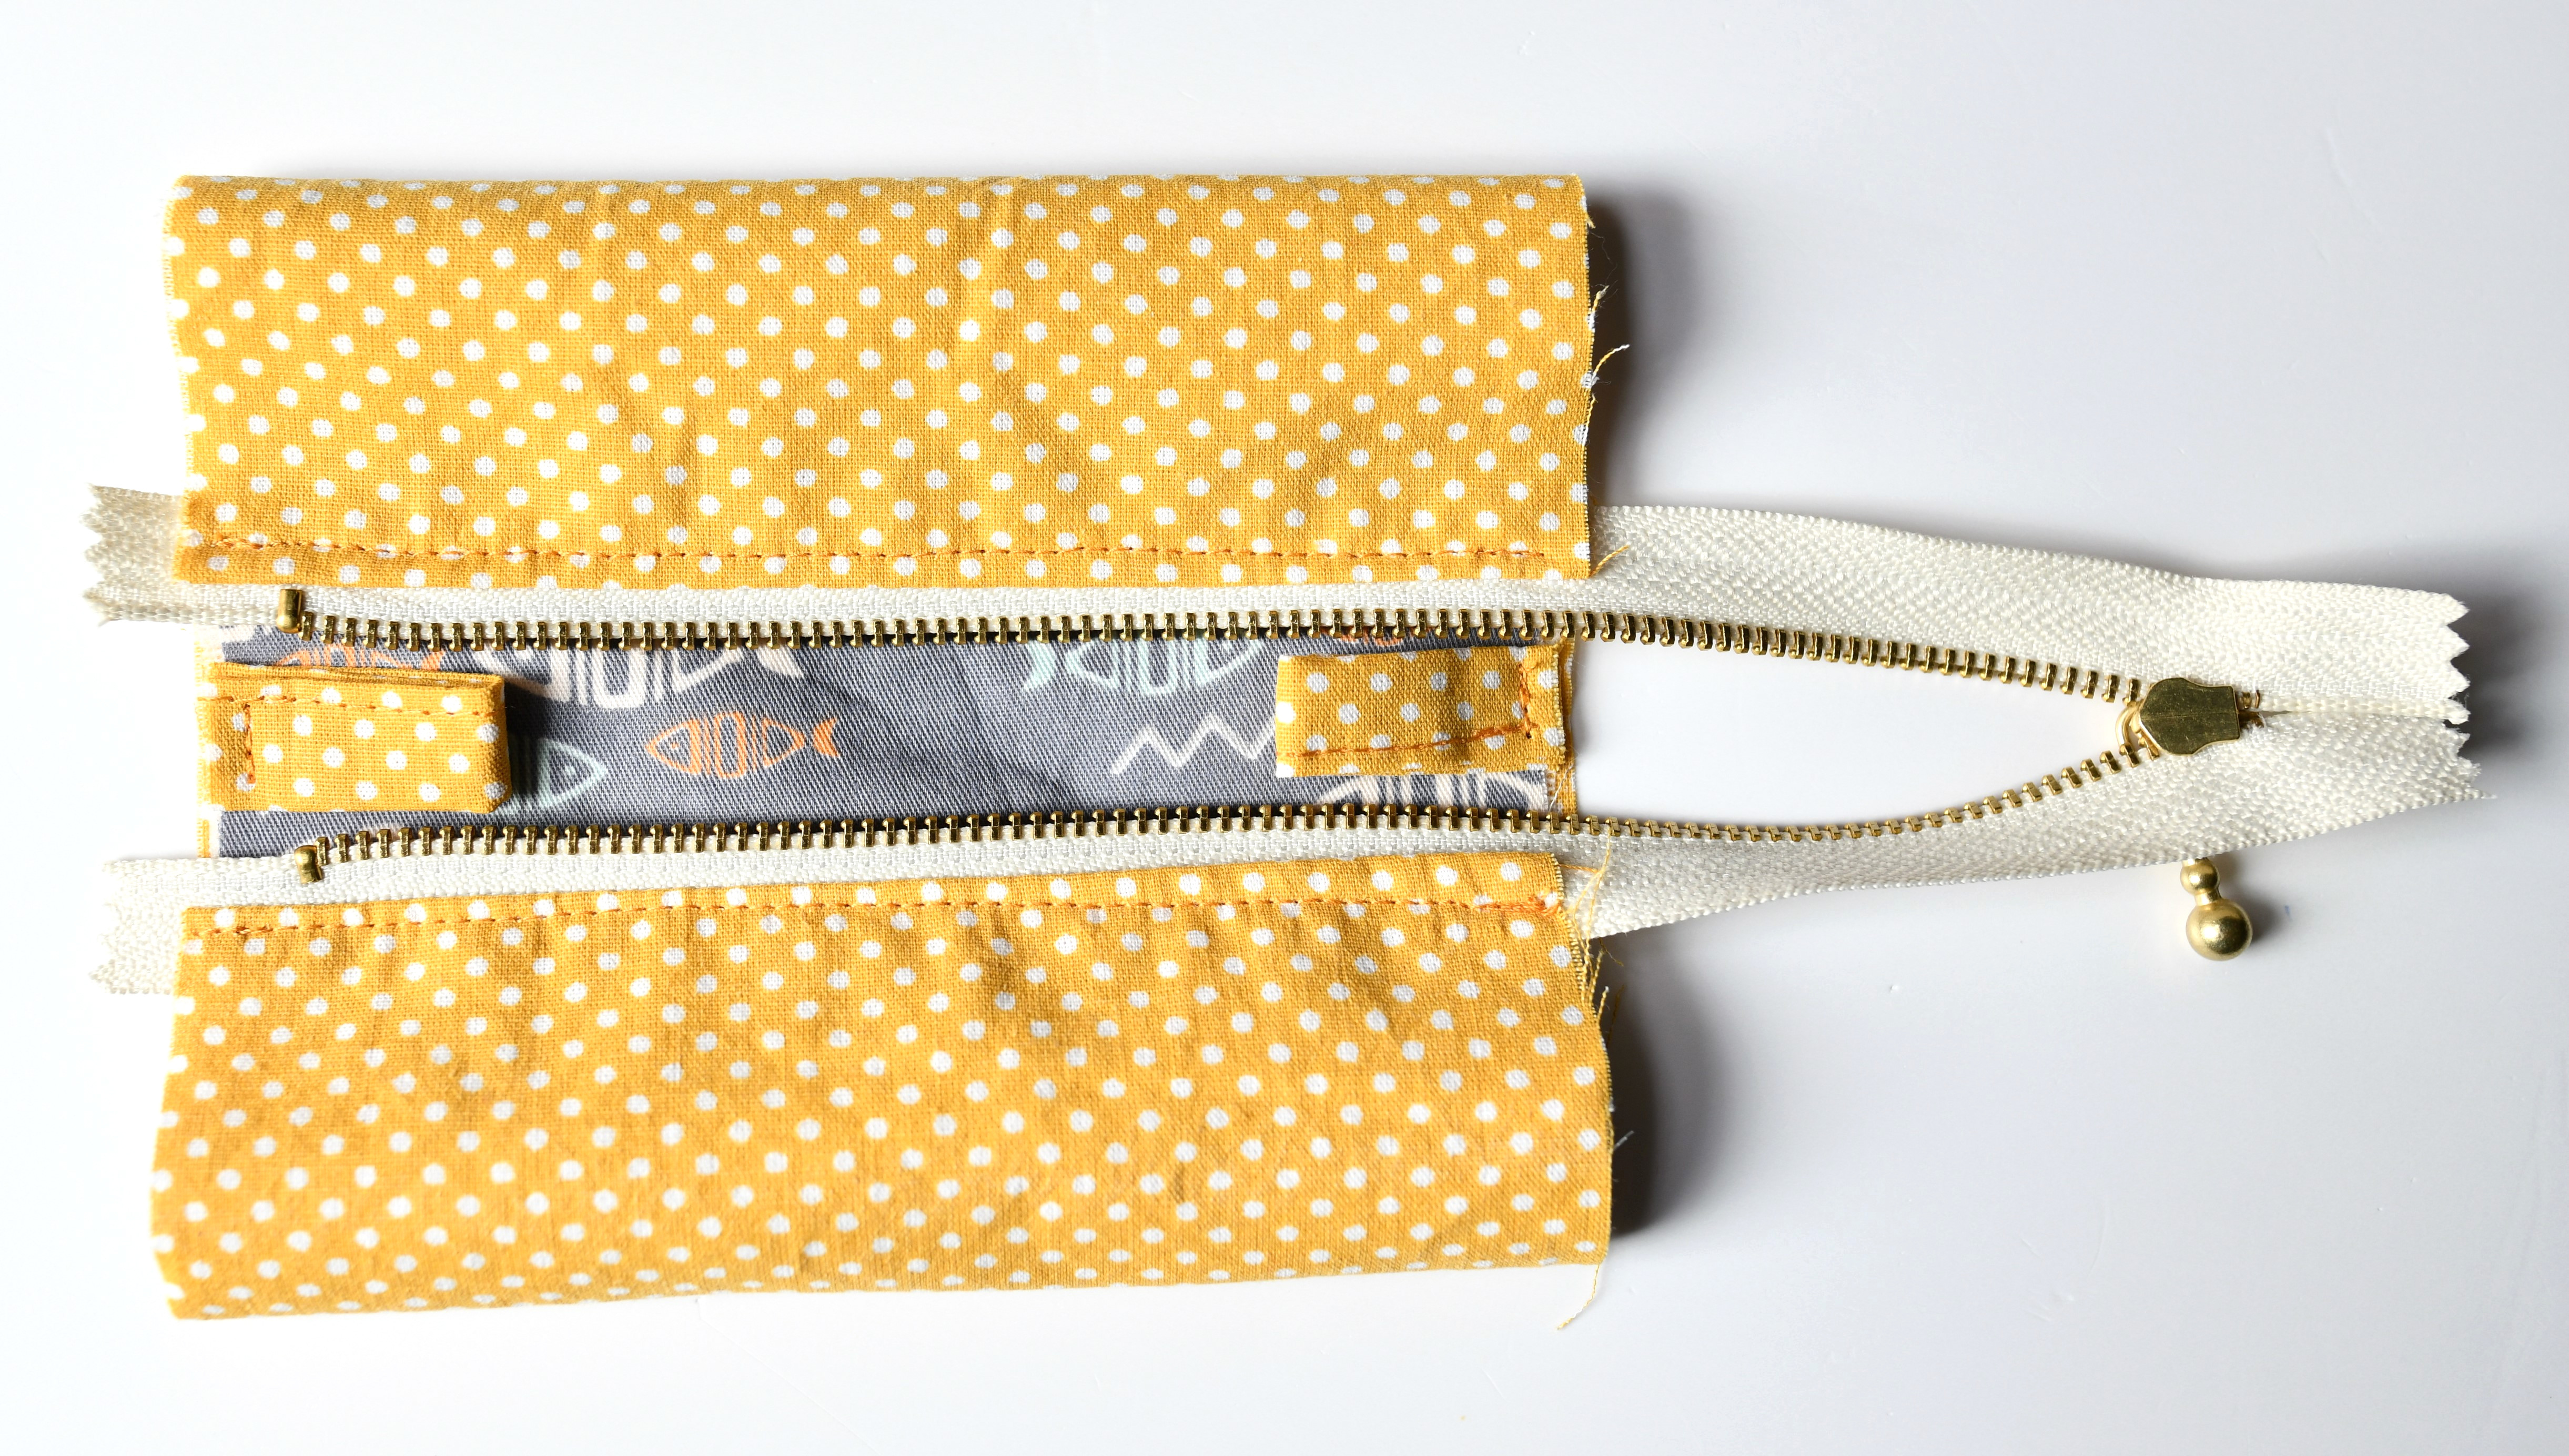
Step 6 – Topstitch Along Both Sides of the Zipper
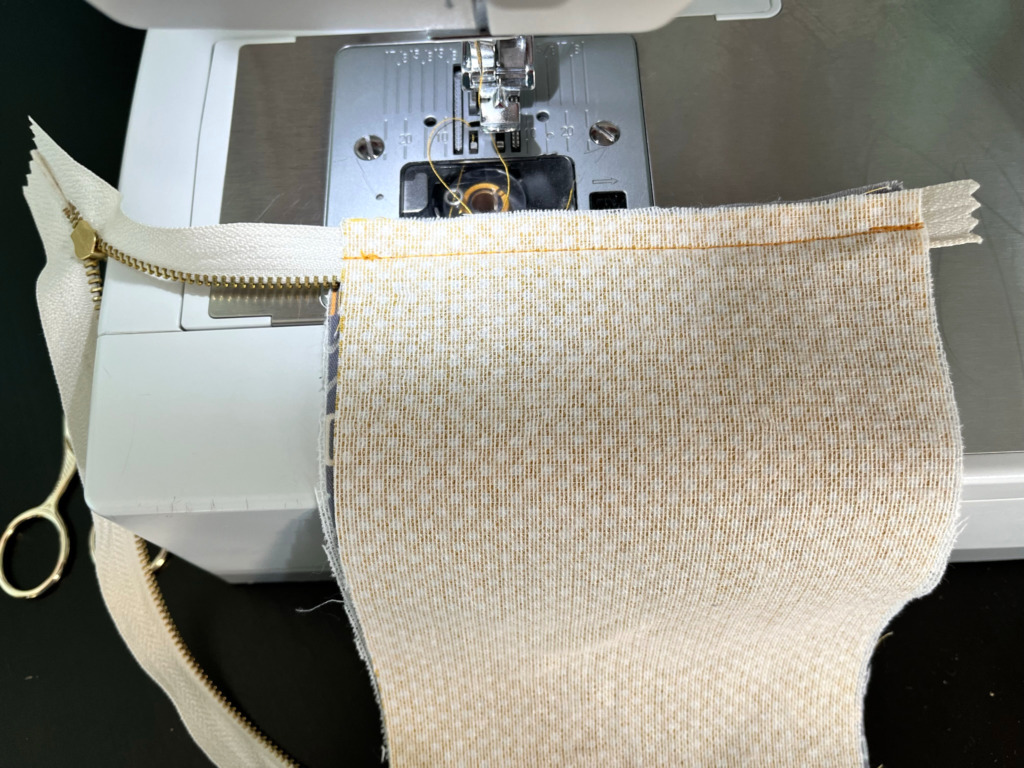
Now that both sides of your zipper are sewn in, it’s time to flip everything right side out and give your pouch a nice, crisp finish.
Use your fingers to gently press the fabric away from the zipper teeth on both sides. You want everything to lie nice and flat so the zipper doesn’t get caught later. Once it’s looking smooth, topstitch along both sides of the zipper – about 1/8″ from the edge.
This step really makes a difference! Not only does it give your mini zipper pouch a professional look, but it also keeps the lining from getting stuck in the zipper every time you open or close it. Trust me – totally worth the extra minute!
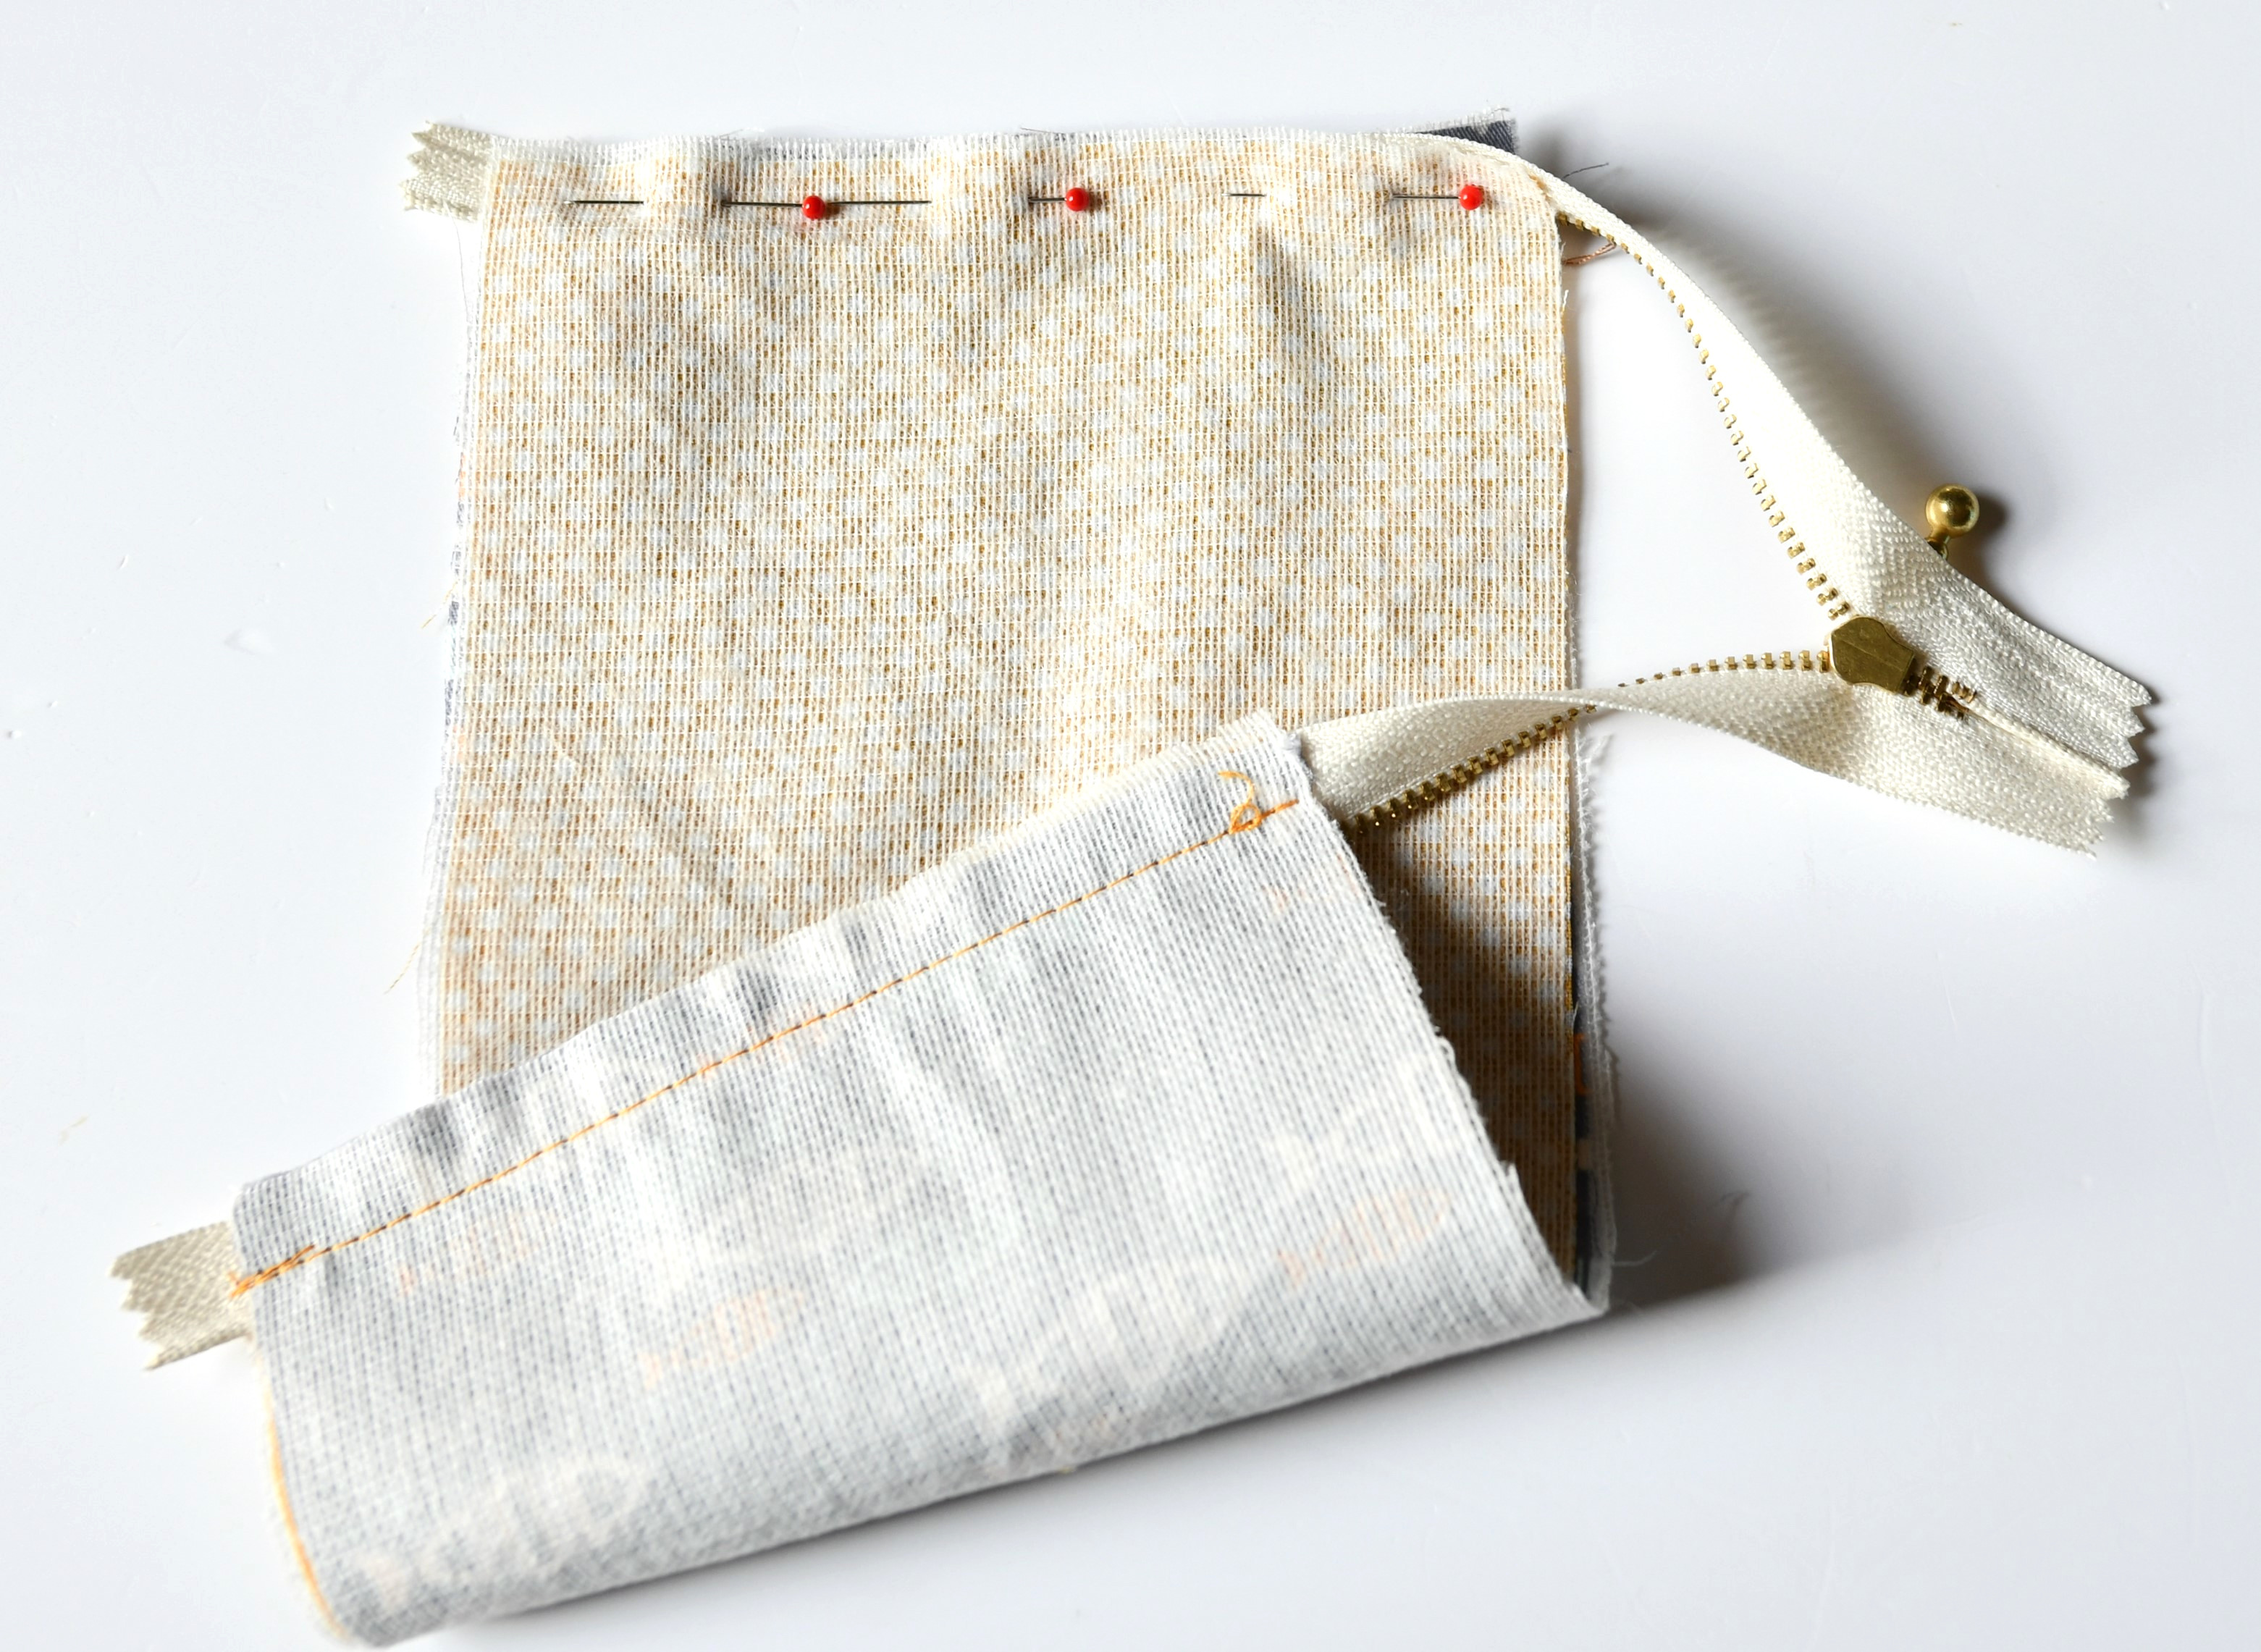
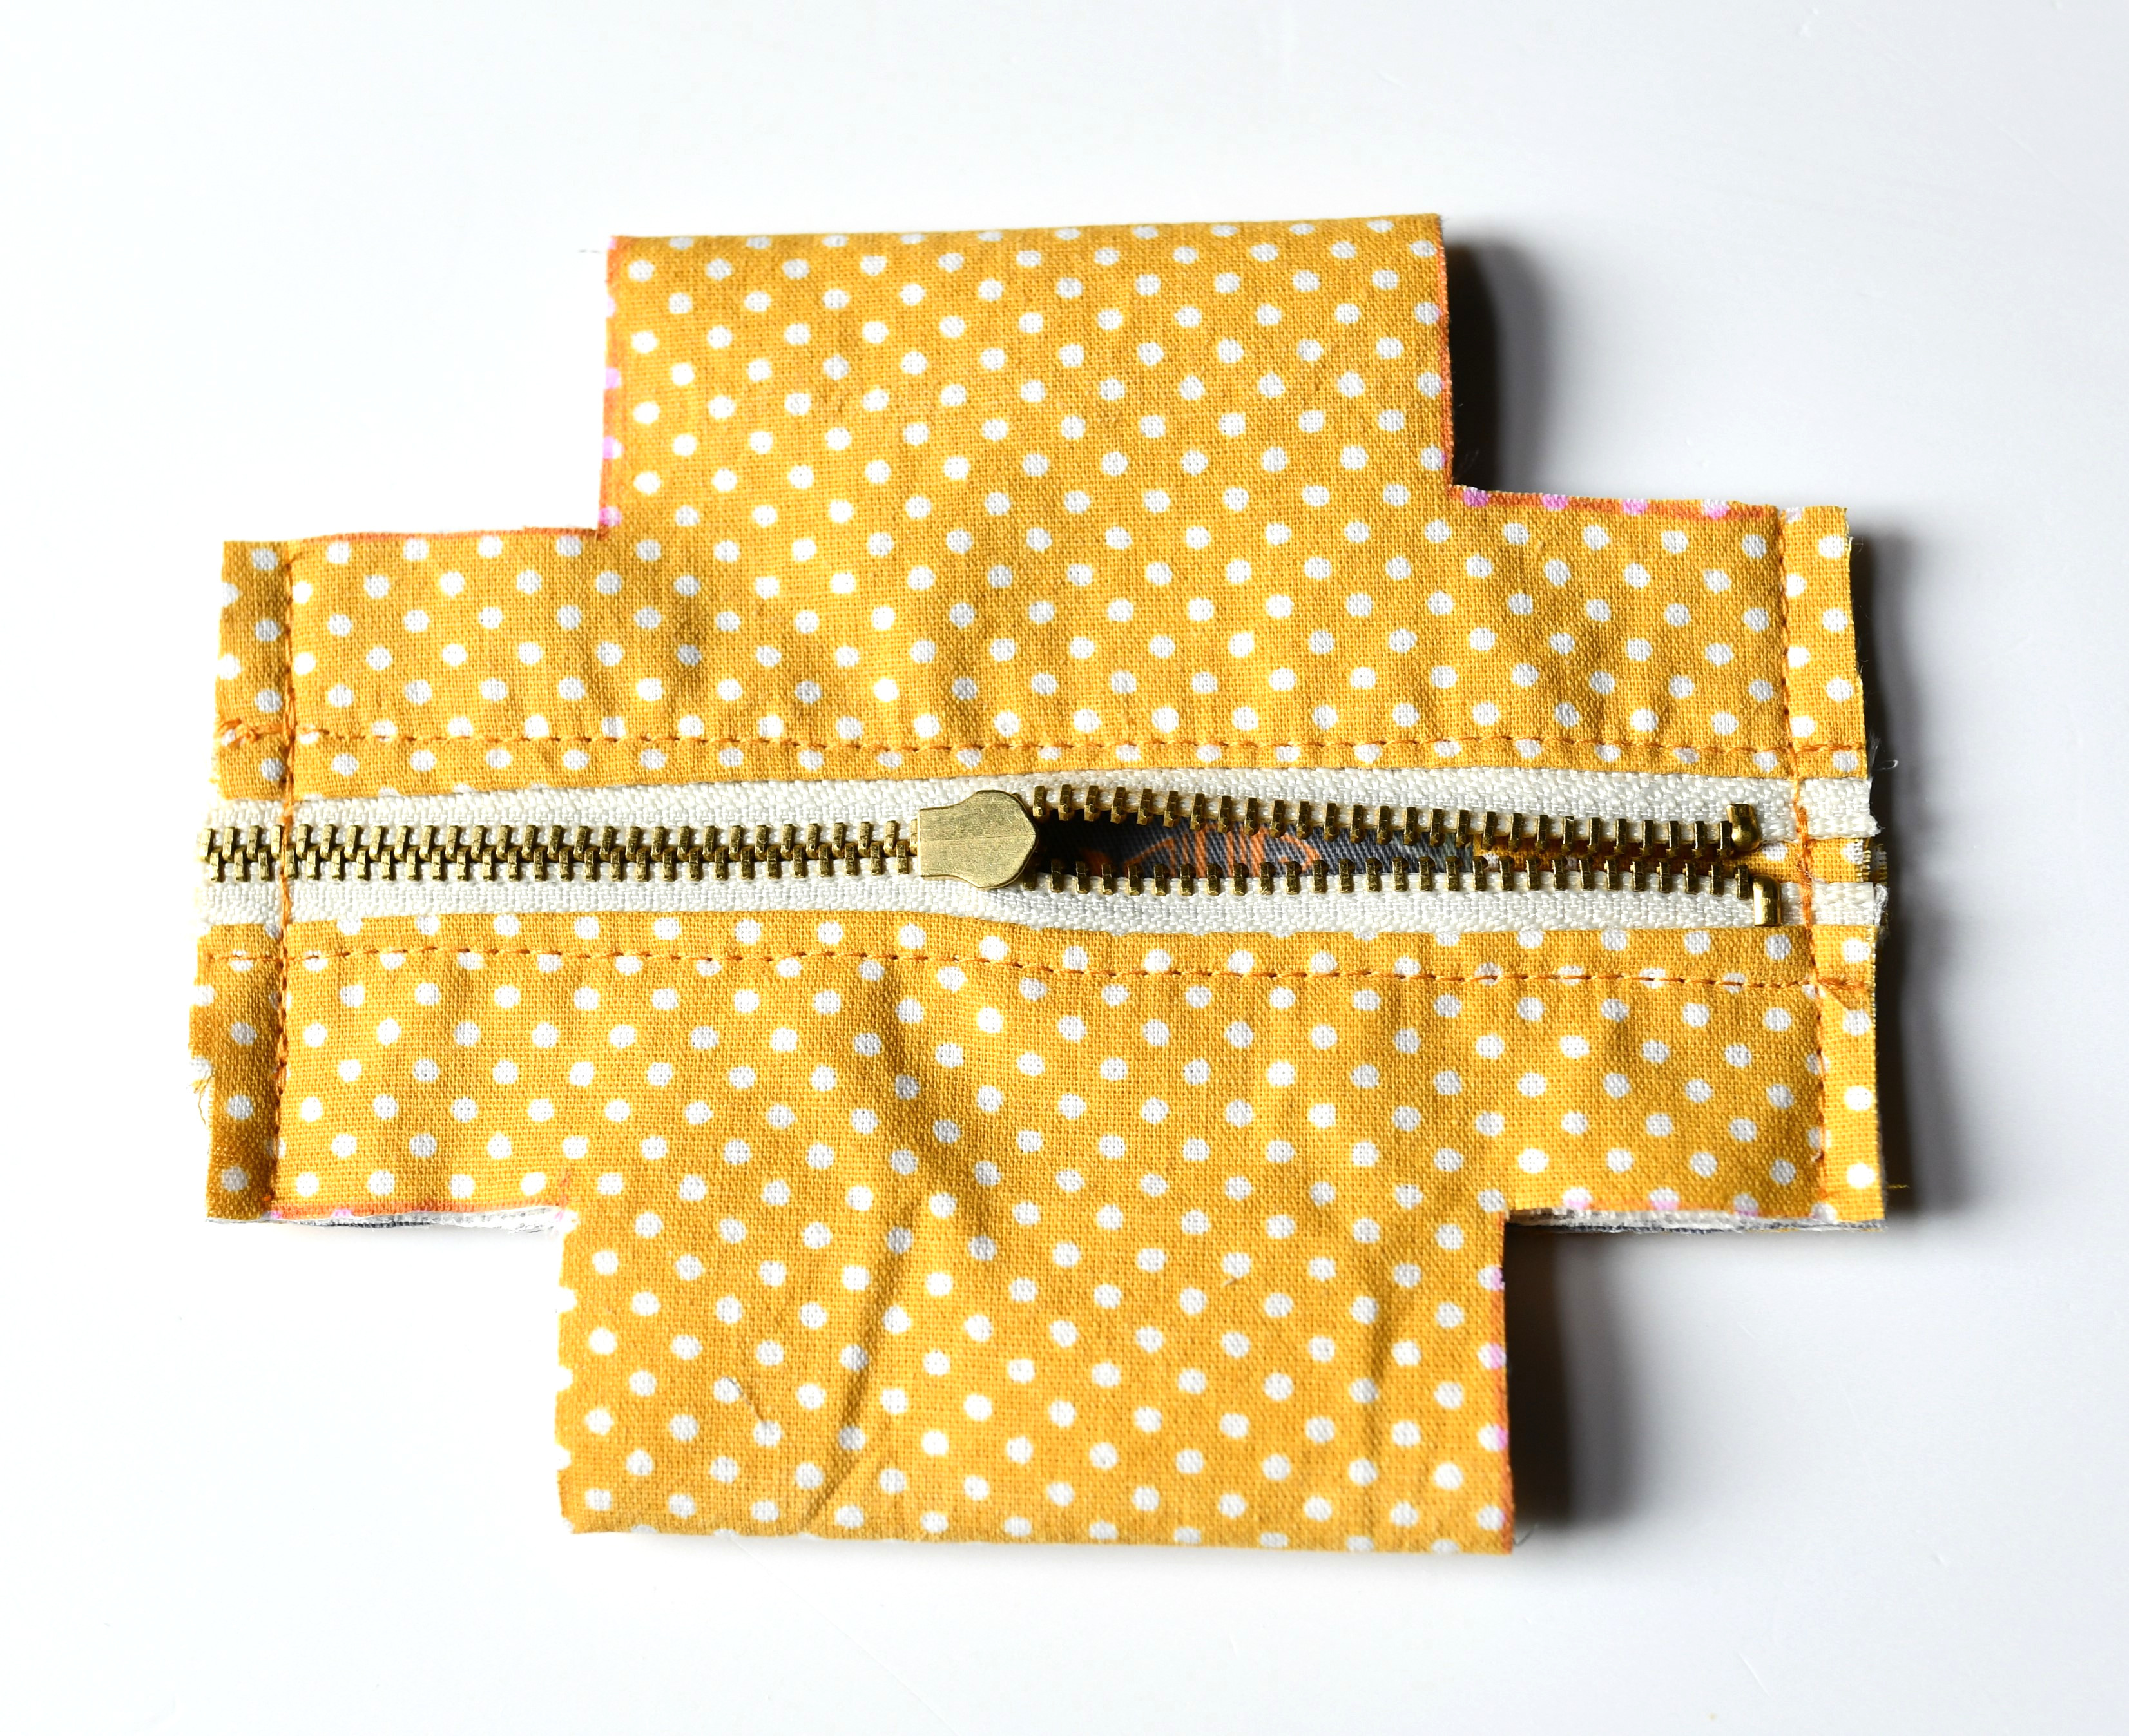
Step 7 – Add and Baste the Pull Tabs
Now let’s prep the pull tabs – those cute little fabric loops on the ends that make your boxy zipper pouch easy to grab and unzip.
First, flatten your pouch so the zipper is centered along the top. You should have one neat rectangle now, with the right sides of the fabric showing.
Take your two pull tab pieces and fold each one in half to form a loop. The raw edges should face out, and the folded edge should point inward toward the center of the pouch. Tuck one pull tab between the outer fabric and the zipper tape at each end of the pouch.
Pin them in place, and then baste (sew with a long stitch) each one close to the edge. Don’t stress about making it perfect – this is just to hold them in place before we sew the pouch closed.
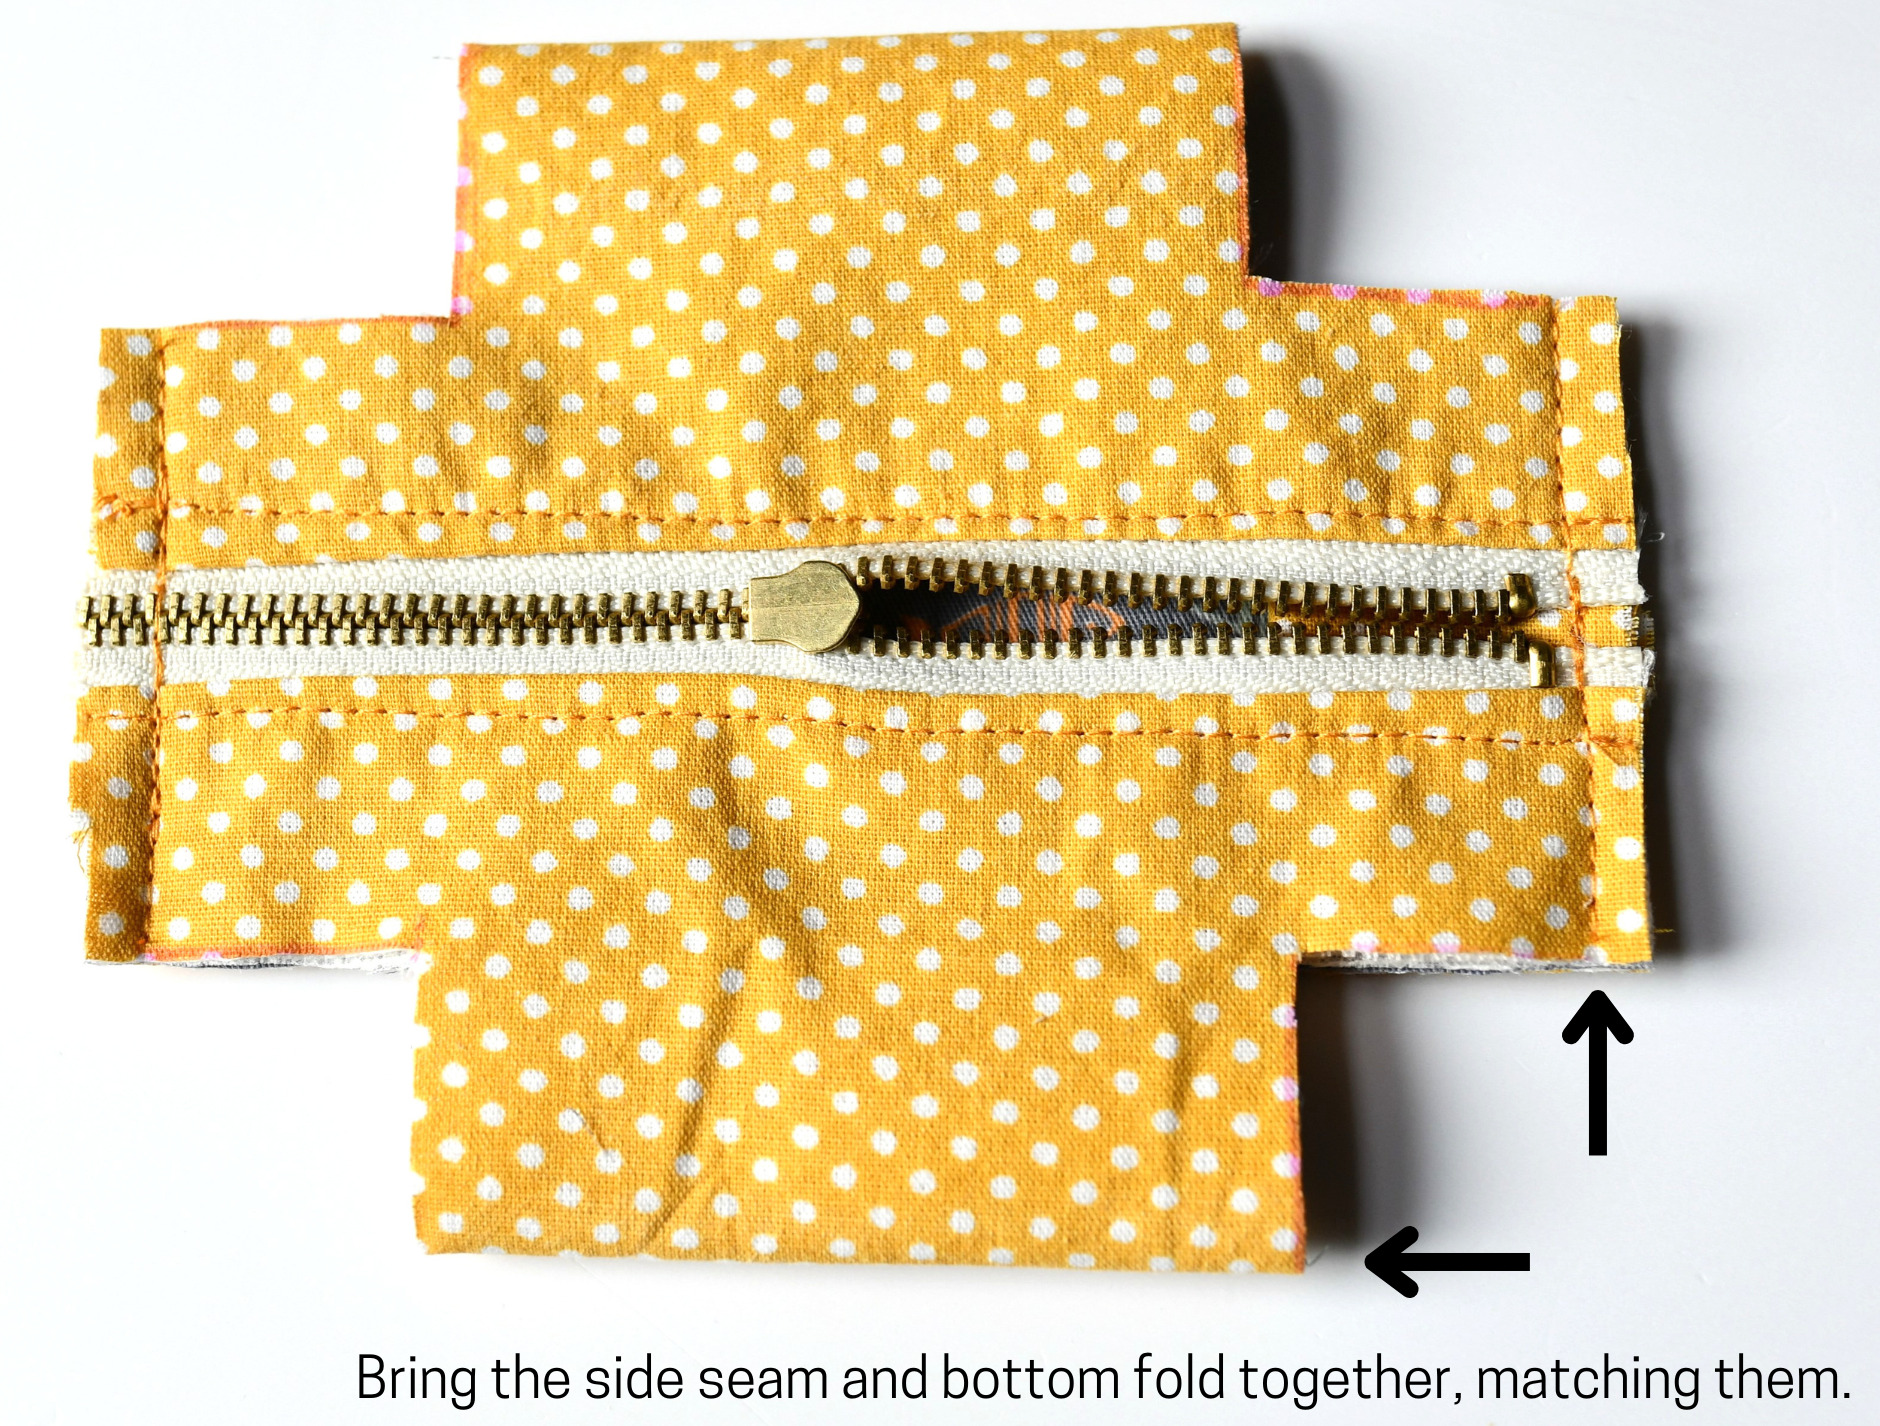
Step 8 – Sew the Sides of the Pouch
Before we move on, make sure to open the zipper at least halfway. If you forget this step, you won’t be able to turn your pouch right side out later. Ask me how I know!
Now, line everything up so the zipper is sitting evenly in the middle, and pin the sides of your pouch together. Use a ruler or sewing gauge to check that the zipper is the same distance from each side seam – this helps your finished pouch look symmetrical.

Stitch along both sides of the pouch using about a 1/4″ seam allowance. If you’re sewing over a metal zipper, go slow when you reach the metal teeth. You can’t sew through them, so when you get close, stop, take your foot off the pedal, and use the handwheel to inch the needle forward.
You might need to wiggle the pouch slightly to find a good angle to sneak your needle past the zipper stop. Take your time – you’ve got this!
For extra strength, I like to sew another row of stitches right on top of the first seam. It helps the sides hold up to a bit more wear and tear, especially if your pouch will get tossed into a backpack or purse.
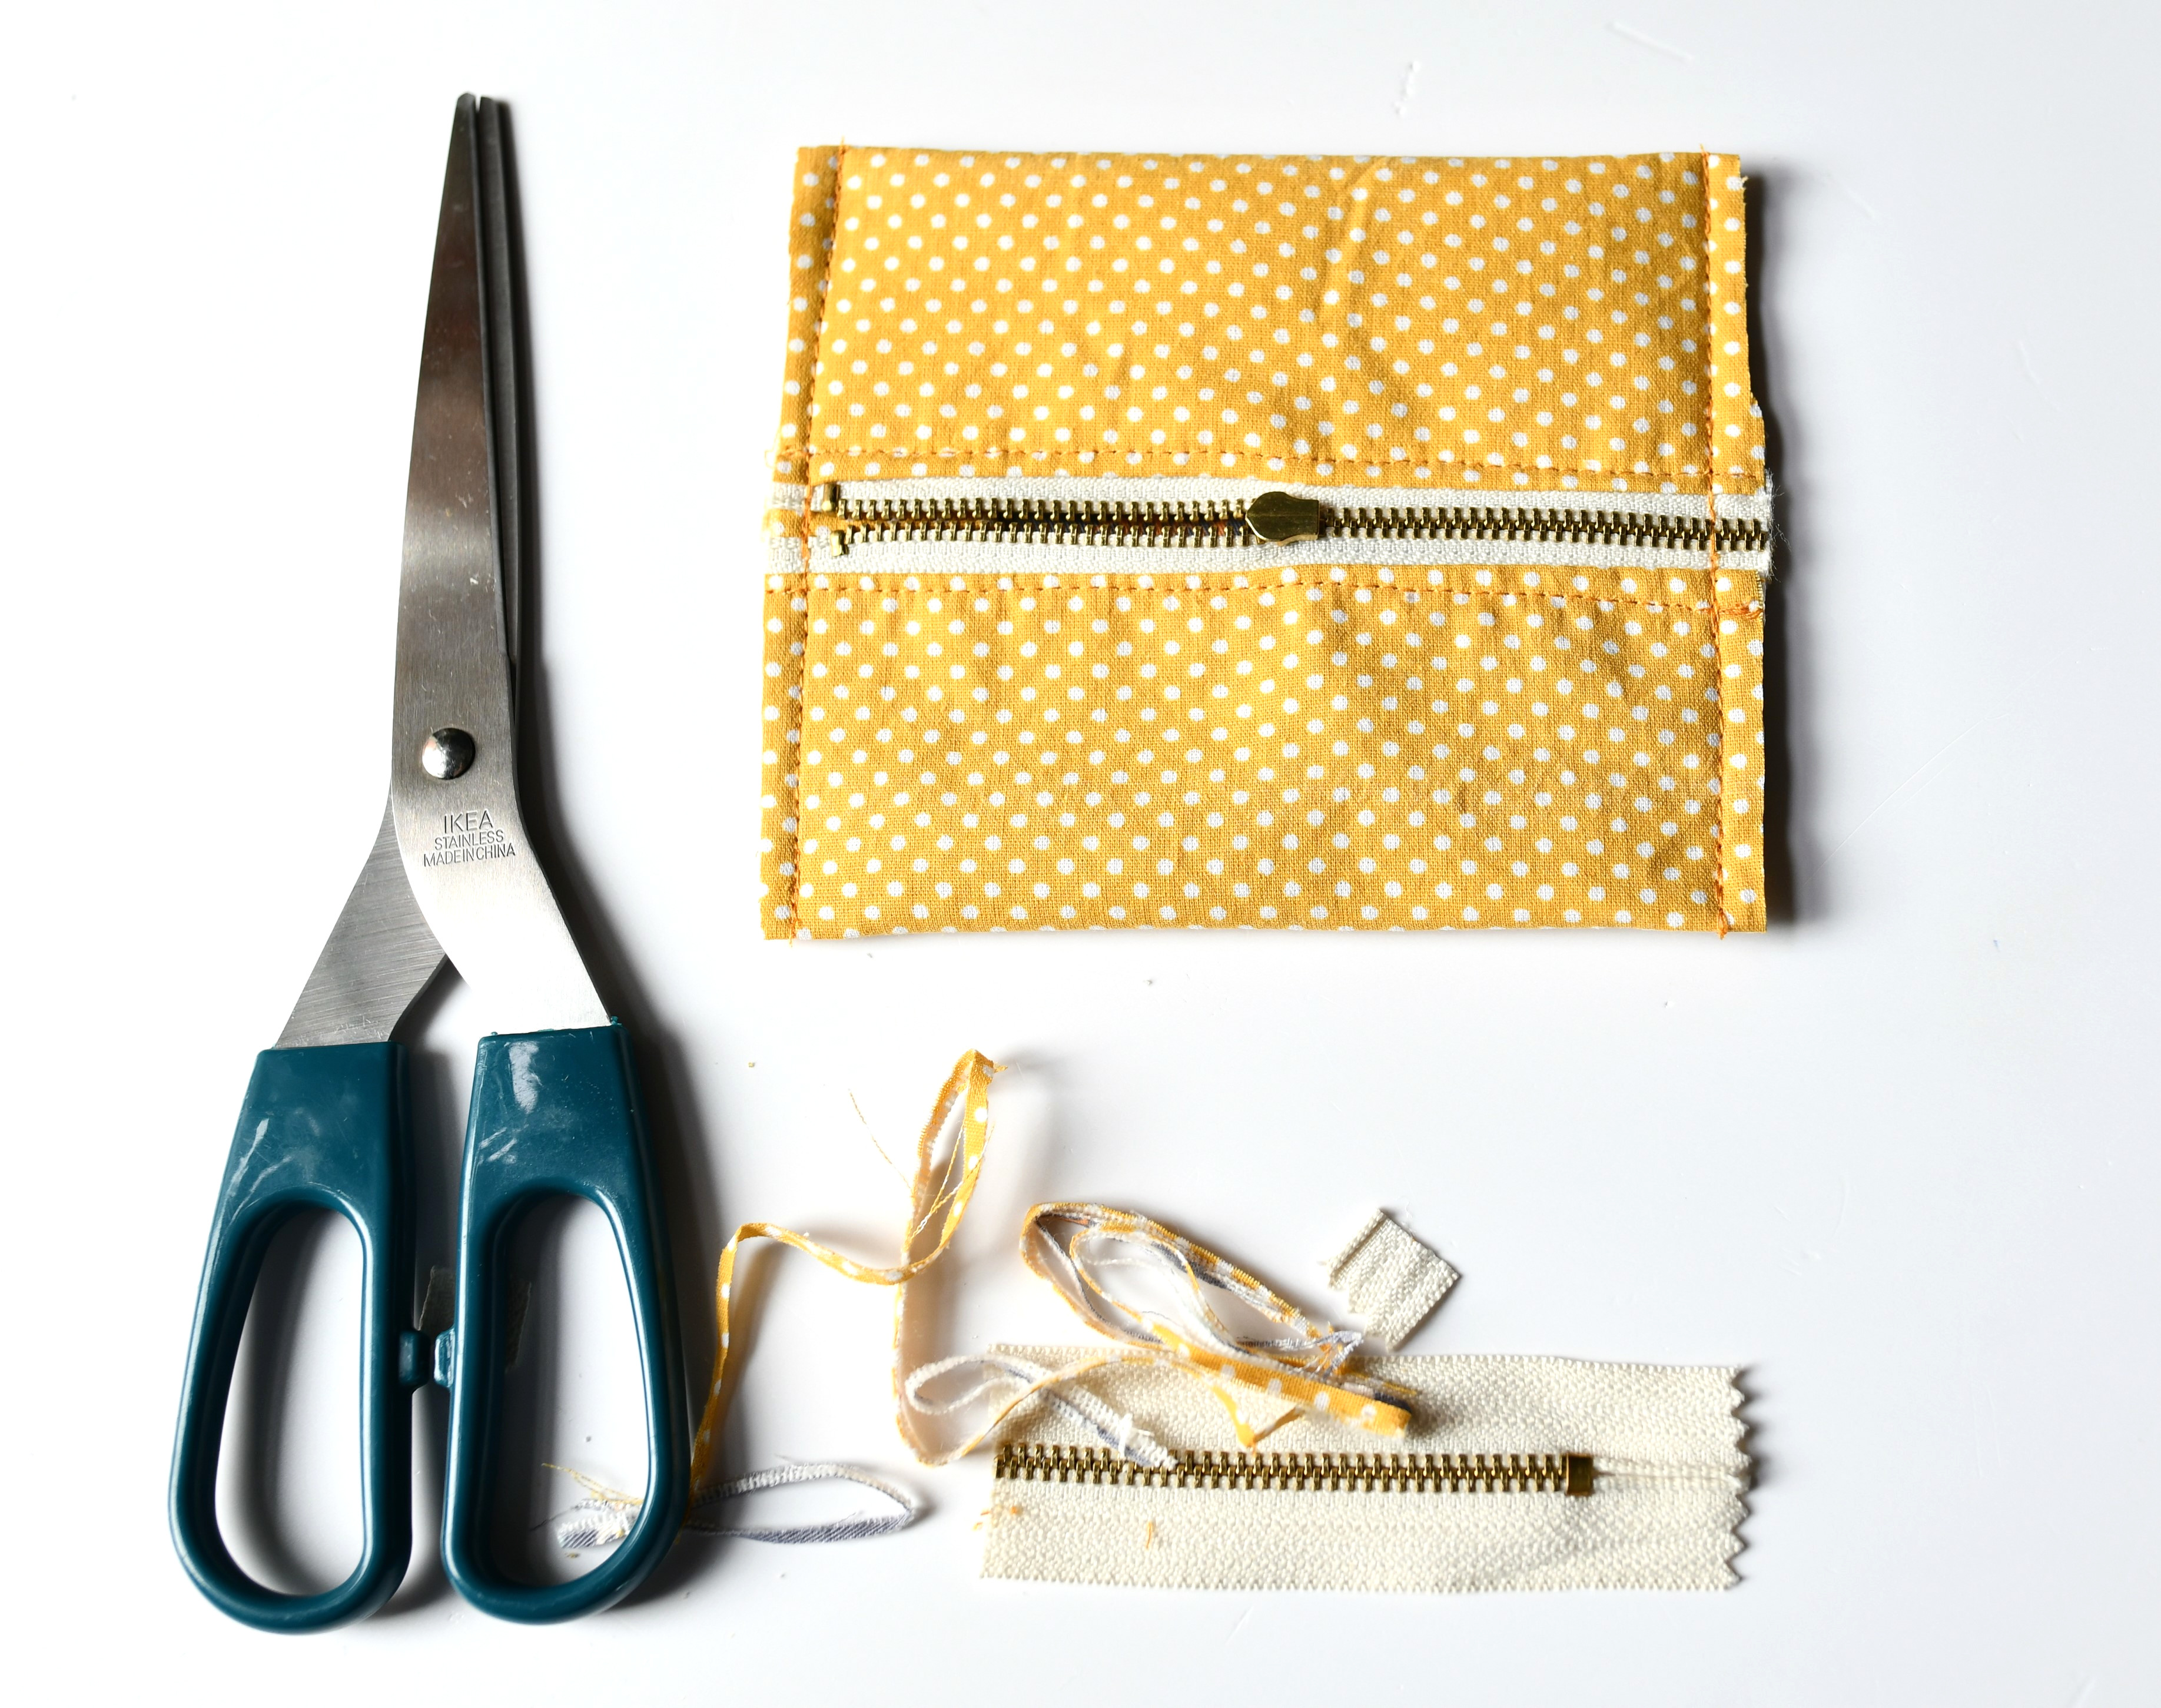
Once both sides are stitched, use regular scissors to trim the seam allowances and snip off the extra zipper ends. Just be careful not to cut too close to your stitching.
Step 9 – Box the Corners (Cut 1″ Squares)
Still working with the pouch wrong side out here!
Now we’re going to give your pouch that cute, boxy shape by cutting small squares out of the corners. This part turns your flat rectangle into a 3D mini boxy pouch with zipper.
Use pins or clips to keep everything from shifting, then grab a ruler and measure a 1” square from the fold and 1” from the side seam on each corner.
Important: Don’t include the seam allowance in your measurements! You’re measuring from the stitching lines, not the raw edge. Otherwise, your corners will turn out wonky, and the diagonals won’t line up.
Mark the 1” squares using tailor’s chalk, a disappearing ink pen, or a fabric pencil – whatever works best for you. Then cut them out carefully.
At this point, I like to backstitch at the start and end of the side seams (if I haven’t already), just to make sure the seams don’t come undone when I sew the boxed corners in the next step.
To keep the raw edges from fraying, you can zig-zag stitch over them or trim with pinking shears. Honestly, though? I sometimes leave them raw – it’s a mini pouch, not a ballgown, and it holds up just fine!
Step 9 – Box the Corners to Get That Cute, Chunky Shape
This is the part where the magic happens – we’re turning your flat little pouch into a proper mini boxy zipper pouch that stands up on its own.
Start with one of the cut-out corners. Open it up and press the raw edges together, lining up the side seam with the bottom fold of the fabric to form a straight line. You’ll start to see the box shape forming right away – exciting, right?
Pin that corner in place, then sew straight across the opening with a small seam allowance (about 1/4″ to 3/8″). Repeat the same thing for the other three corners.

Pro tip: Try to keep the new stitching lines parallel to the zipper – this helps your finished pouch look neat and helps it stand up straight instead of tipping over.
And that’s it! You’re officially done.
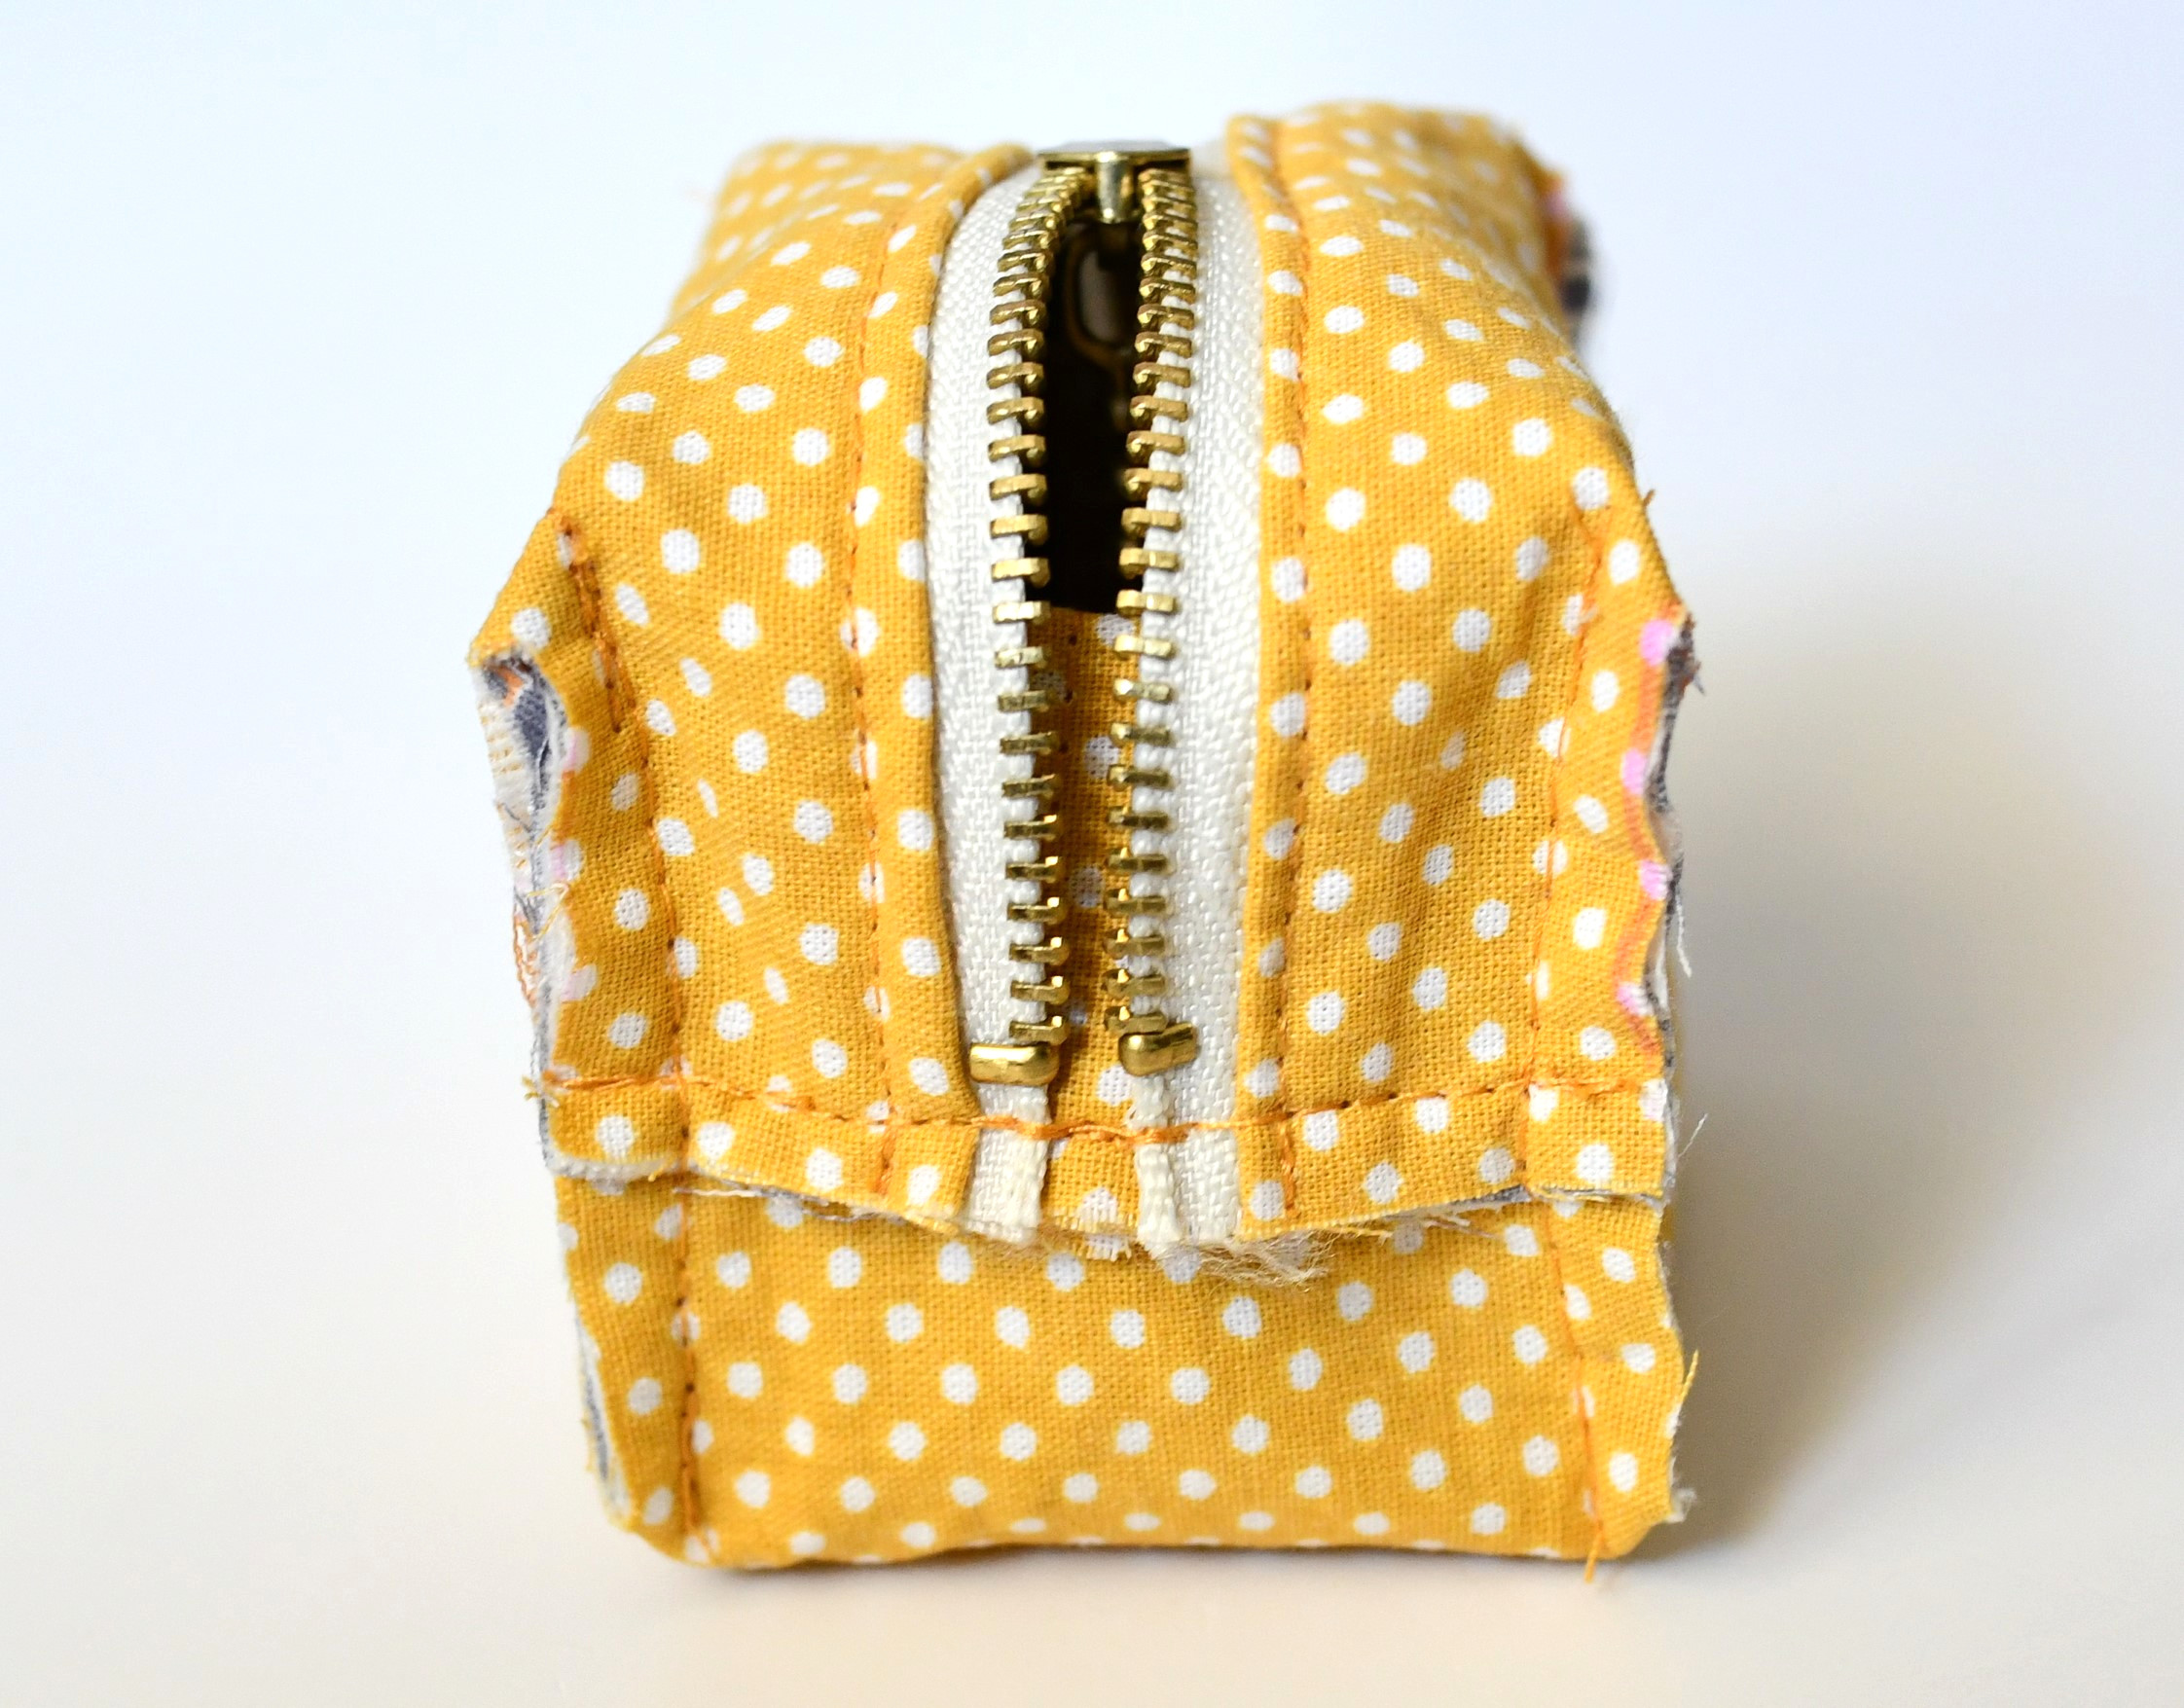
Now just turn your mini pouch right side out, gently poke out the corners with a chopstick or pencil, and admire your adorable, handmade zipper pouch. Whether you’re keeping it for yourself or giving it away, it’s such a satisfying little project, right?
Thanks for following along with this DIY mini boxy pouch sewing tutorial – I hope you had fun making it! Until next time, happy sewing!

Let’s keep in touch! You can find me on Facebook, Instagram, and Pinterest.

Hi! Is there a tutorial or a way on how to add a lining to this? I love the shape but would love to add an inner lining to make it super professional looking. Thank you!!
Thanks for a great tutorial! I made one this afternoon and it is so cute!
Thank you for the great instructions and visuals. I am making these as gifts for family members.
I’ve been wanting to make a mini boxy pouch for so long…this is perfect for what I was looking for.
Thank you for a great tutorial!
You’re so welcome, Patricia! I really enjoyed making that tutorial, so I’m happy it’s being put to good use. Happy sewing!
Beautiful concise instructions!
Thank you, Patrice!
I love this!! Took 1 or 2 tries but I finally got it!
The instructions were great, although Step 9 is very confusing ? I see a new added photo but I am still unable to understand/see exactly what you are doing to create the 3D shape — i had to give up there and try to find another tutorial
I can’t seem to find a zipper like the one you used in your project. I like the look of it but haven’t found it. Can you list a source for that particular zipper? Thanks.
Hi Jan,
You can find metallic zippers with gold sliders on Amazon or other sites! I also like their look, it’s really neat.
I am going to make one to be used as a dog training treat pouch for my small dog. I cant find a nice quality pre made pouch anywhere that seems worth the money, so she will have her very own custom pouch. Thanks for the measurements and instructions 🙂
Thanks for the instructions! They were great. I made larger ones. Started with fabric 10×18. Used heavier fusible fleece on just the main fabric. Worked out great. Very sturdy. I also placed binding on all of the raw edges!
Planning on making a few of these to donate to an organization that gives less fortunate kids back to school items. Last year I donated 25 zippered pencil pouches to the school my granddaughter teaches at. One little girl was overjoyed that a “grandma” made her a special pouch. All the kids loved them and use them.
That’s a great idea, Betty! Thank you for taking the time to leave me a comment. A while ago, I made a few zipper pouches for my kids and they eagerly came back from school the next day, asking me to sew pouches for all their classmates. It turned out that everyone wanted one as well!
Ive just finished this Mini Purse. I was fine until Step 9. I think Ive not done this step correctly. Couldnt quite understand the directions. The picture with the pink clips I just was unable to follow. I do have a completed purse but I think I made mistake on this final step.
Hi Jenny,
Step 9 is when we give a 3D look to our zipper pouch. I have updated the tutorial with this picture, I hope this helps. https://static.icansewthis.com/2023/01/sew-mini-zipper-pouch-768×583.jpg
I am new to sewing and your instructions and photos are wonderful….clear and easy to follow! This will be my next project! It will be my first zipper ??
Thank you, Judy! I’m keeping my fingers crossed for you <3