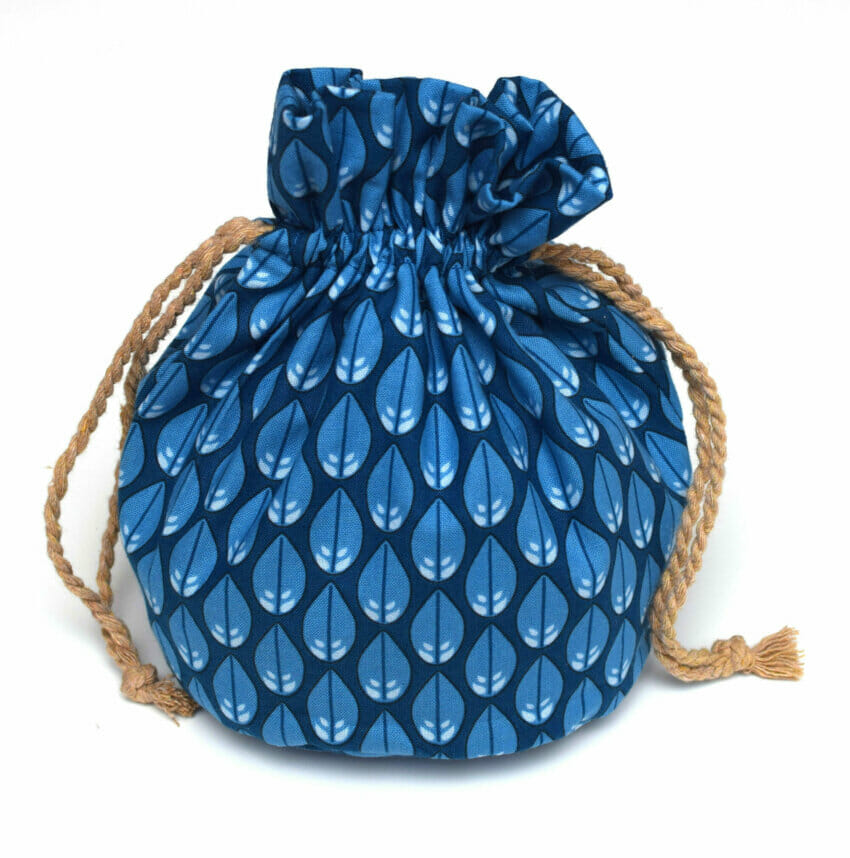
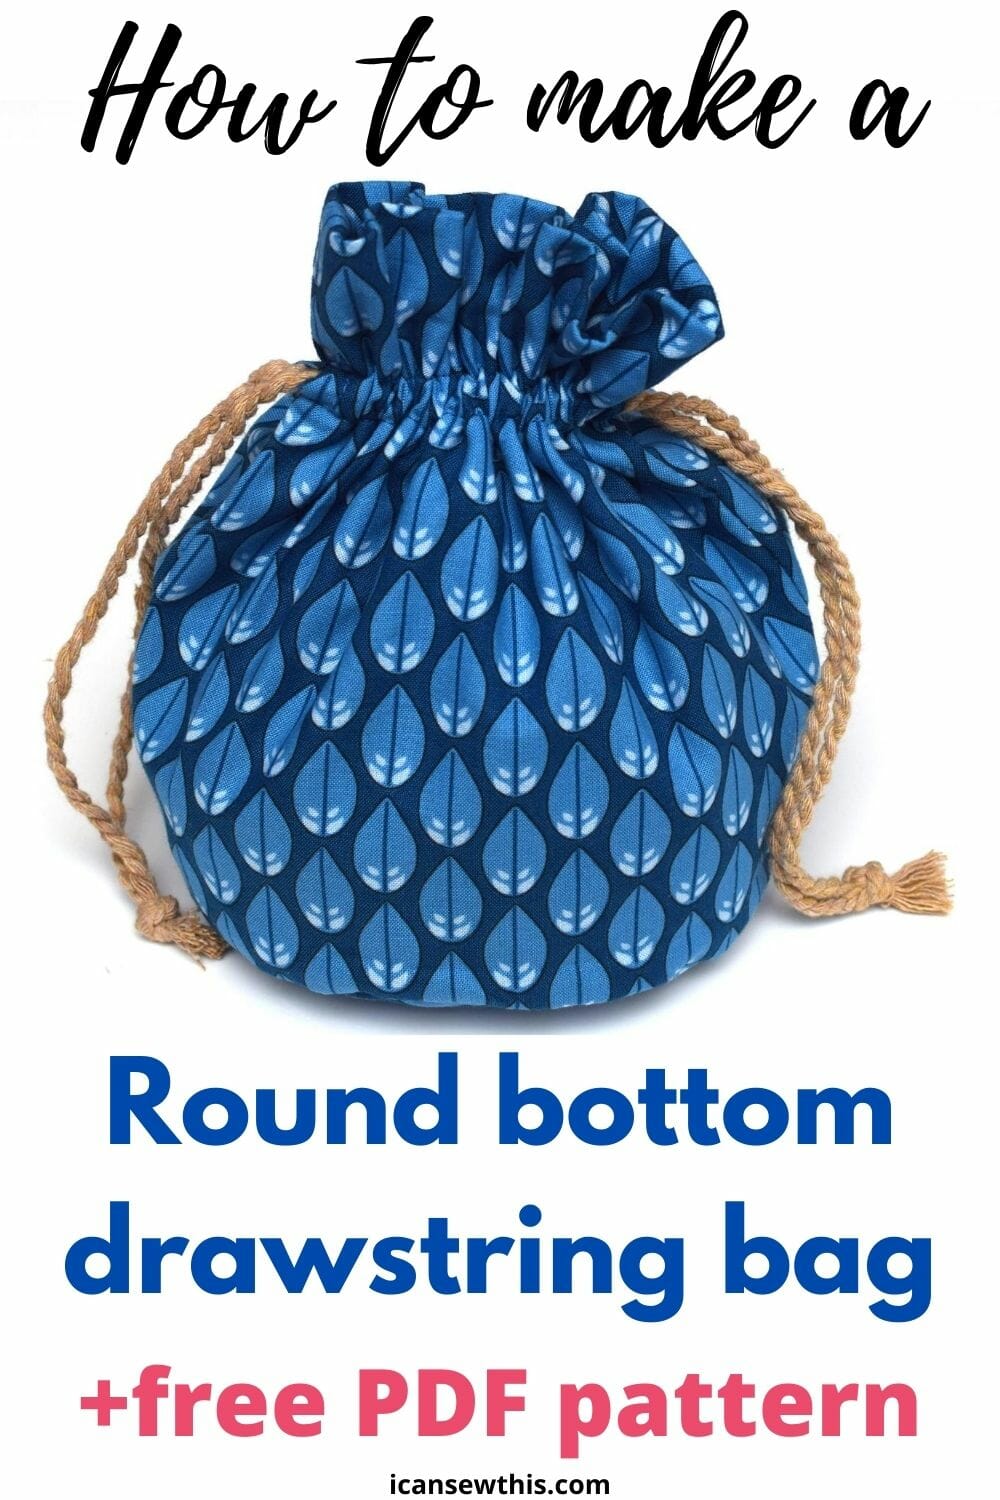
Looking for an easy sewing project that’s both functional and adorable? Learn how to make a round bottom drawstring bag with this beginner-friendly tutorial and free pattern! In just about 30 minutes, you’ll have a reusable, roomy bag that’s perfect for holding everything from toys and jewelry to makeup and travel essentials.
This DIY drawstring bag is not only quick to sew but also a great way to use up fabric scraps. Ready to dive in? Let’s talk about why this flat-bottom drawstring bag design stands out!
Why make a drawstring bag with a flat, round bottom?
What makes a round-bottom drawstring bag special? Here are a few reasons to love this design:
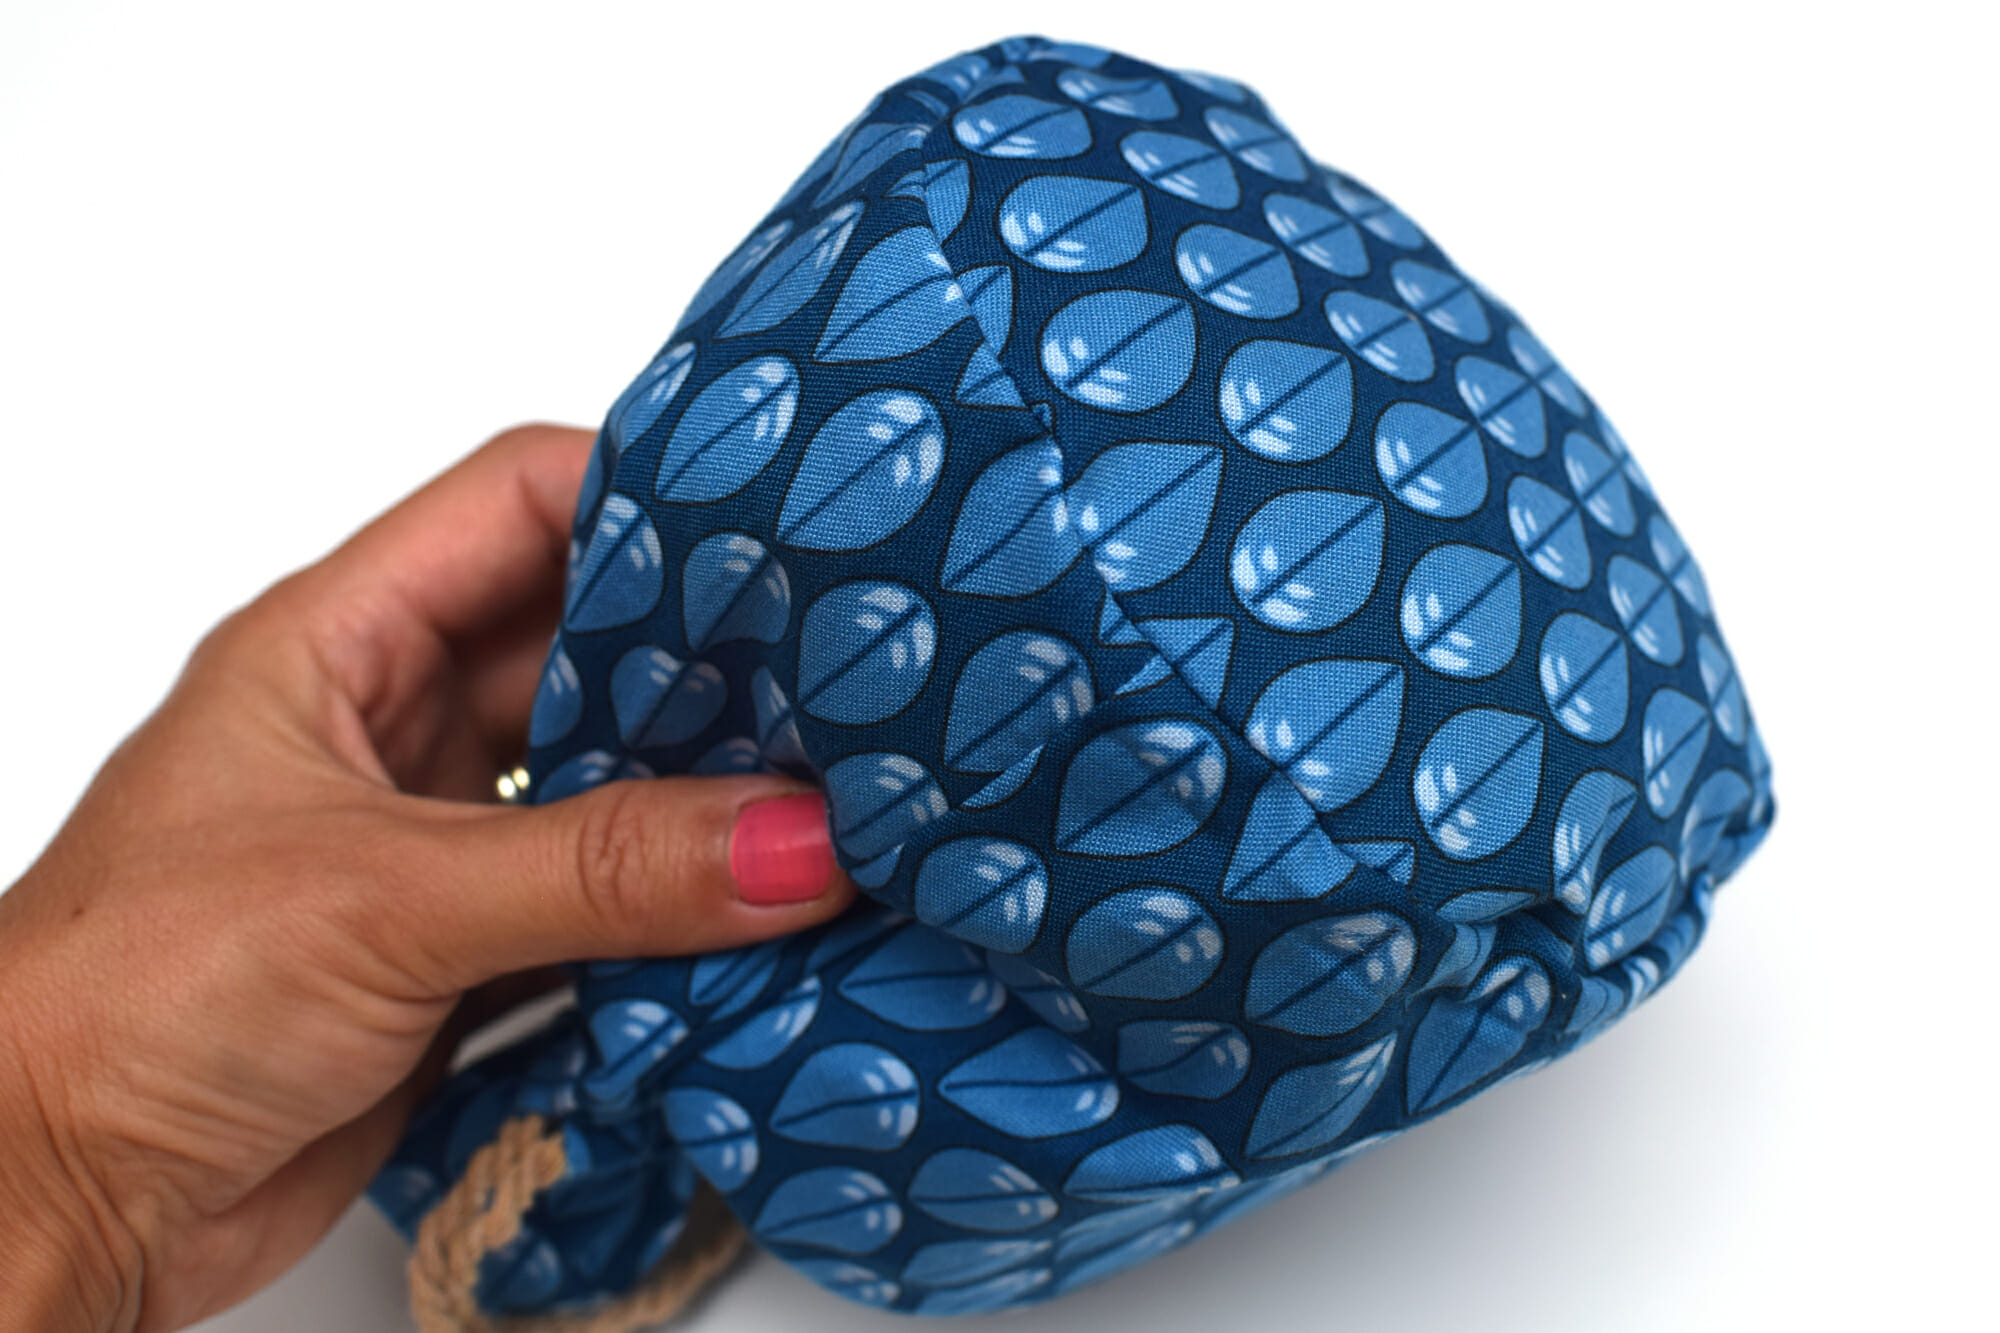
- Stands Upright: Unlike flat, two-dimensional bags, this one stays upright on its own, making it easier to see and access your items.
- Unique Look: The circular base adds a polished, professional touch to a simple bag, giving it a stylish upgrade.
- Secure Drawstring Closure: The drawstring sits 1.5 inches from the top, keeping your treasures snug and secure.
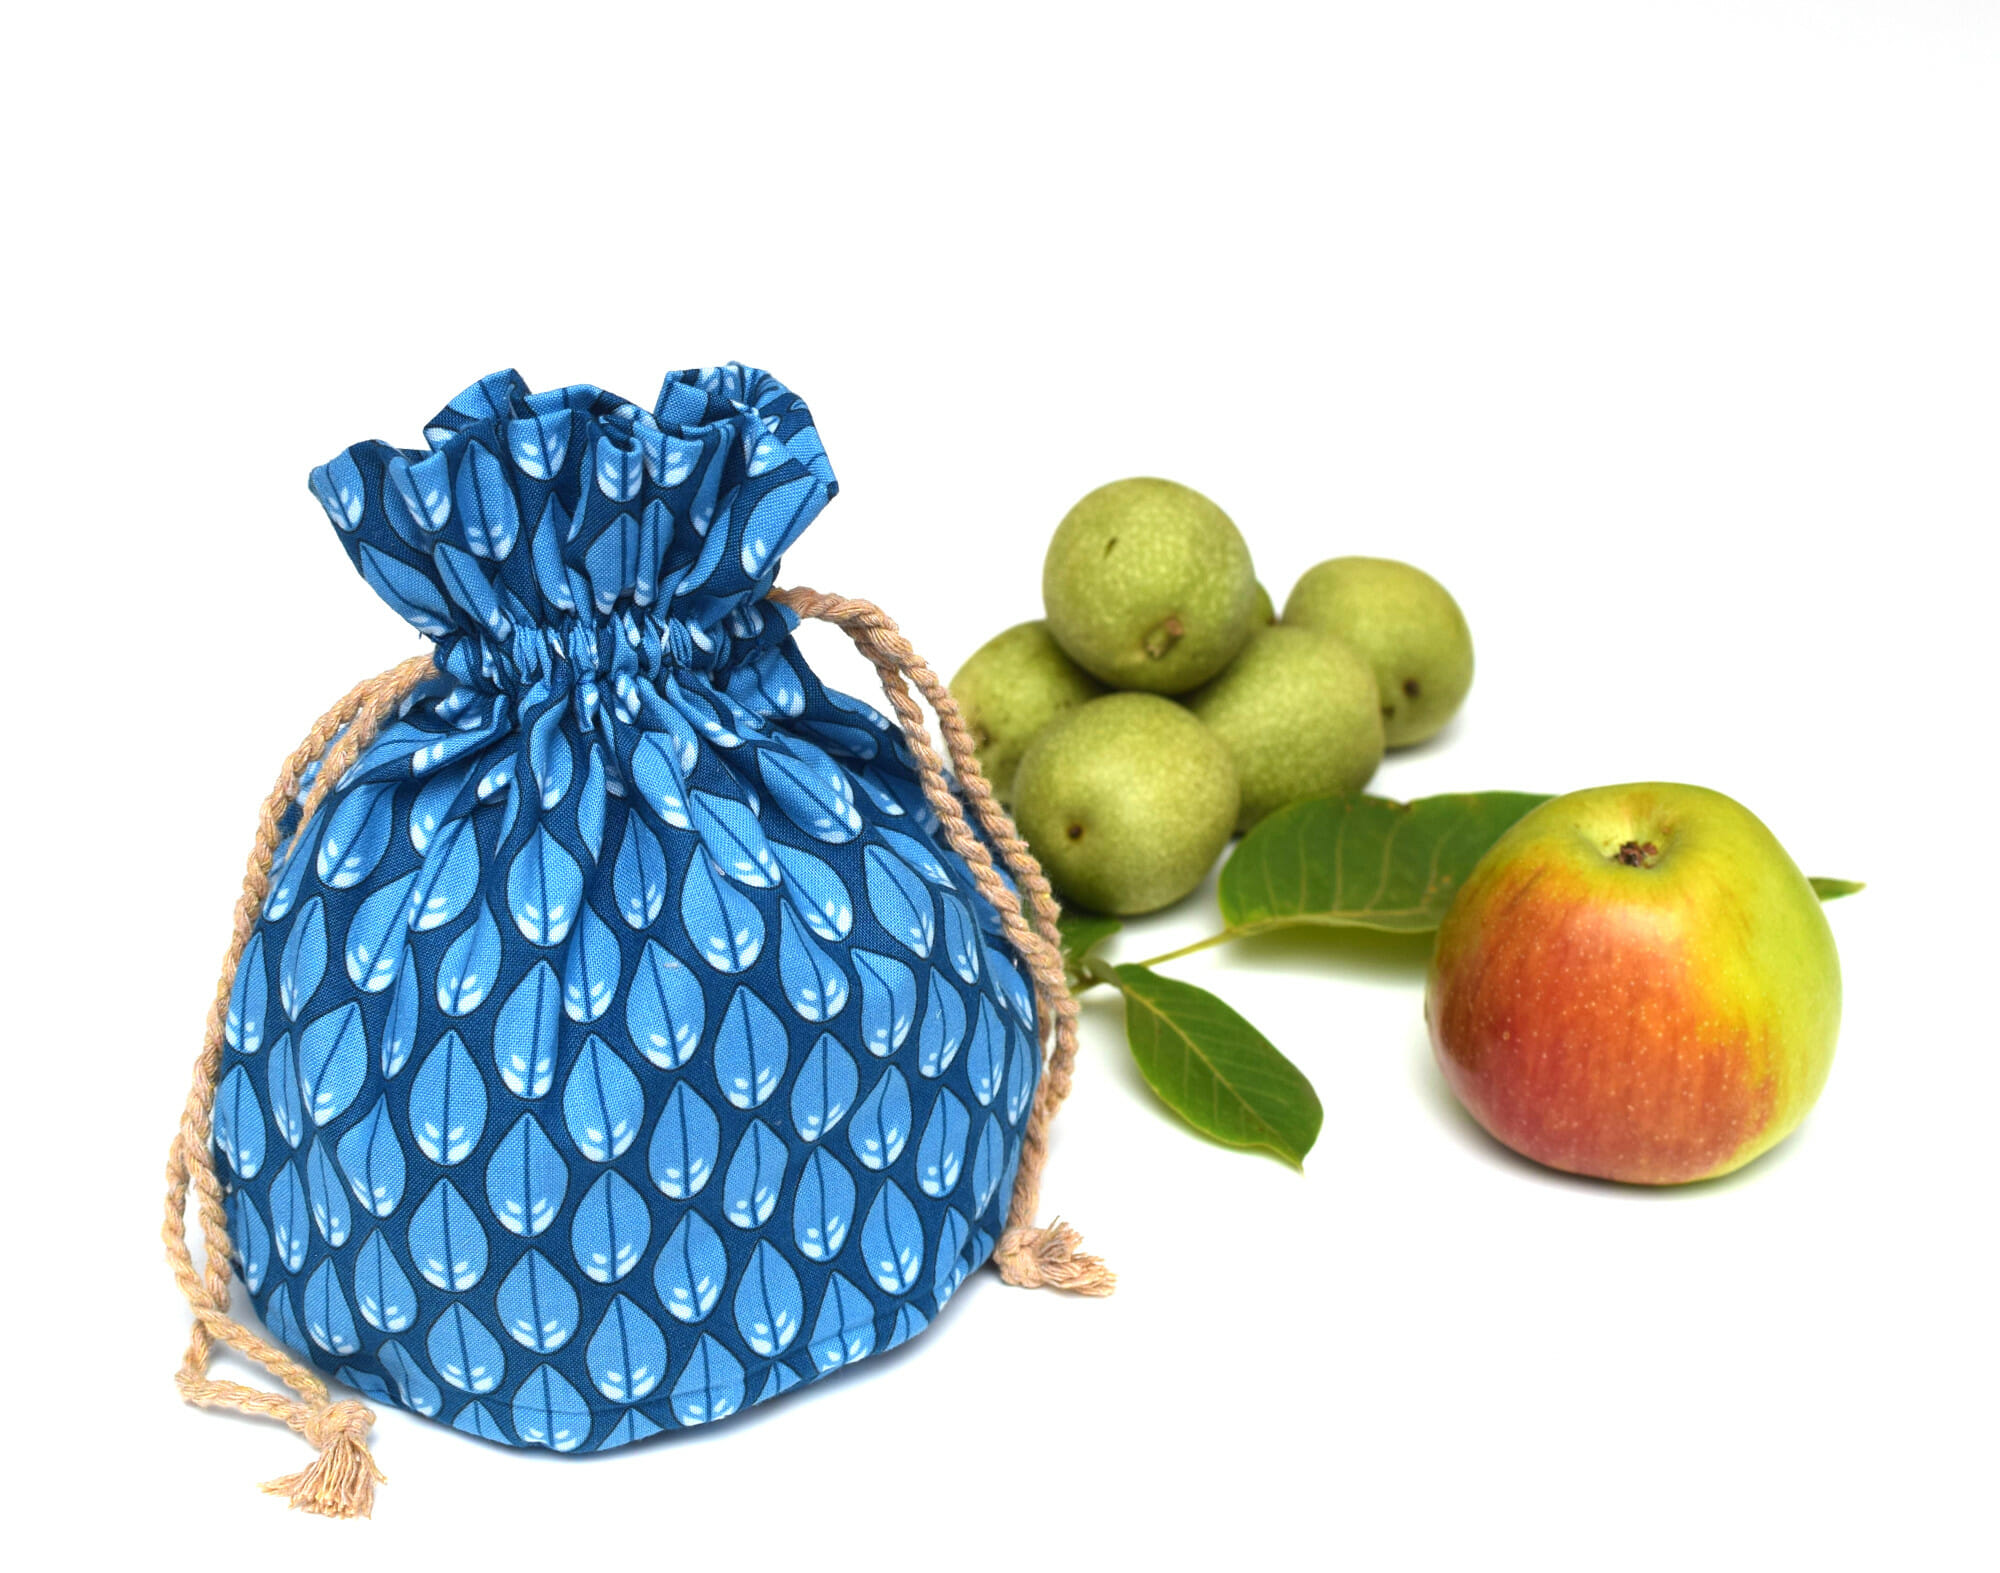
This bag is perfect for so many uses, from organizing items around the house to creating thoughtful handmade gifts.
What can you use a round bottom drawstring bag for?
The possibilities are endless! Here are just a few ideas for how to use your new circle-bottom drawstring bag:
- Gift Wrapping: Use it as a reusable fabric gift bag for birthdays, holidays, or special occasions.
- Travel Companion: Keep your toiletries, socks, or small essentials neatly organized while traveling.
- Storage Solution: Store toys, craft supplies, or even candy. It’s a fun and functional way to keep clutter at bay.
- Jewelry or Makeup Holder: The secure closure makes it perfect for delicate or small items.
Materials you’ll need for a round bottom drawstring bag
One of the best parts of this project is how few materials it requires. You’ll need just a few small fabric pieces, making it an excellent scrap-busting sewing project:
- Fabric: Use 100% cotton for a lightweight, unlined bag, or try sturdier fabrics like canvas or denim for a more durable option.
- Circle Template: No need to search for the perfect size! Download my free pattern for a 5 7/8″ (15 cm) circle bottom (see below).
- Drawstring Cord: Choose a colorful ribbon, cord, or even a handmade fabric strip for the drawstring.
- Basic Sewing Supplies: Scissors, sewing machine, pins, and thread are all you need.

Related: Free drawstring dice bag pattern / Basic zipper pouch / Fabric gift bag pattern
Why you’ll love this project
This DIY round bottom drawstring bag is a fantastic project for sewists of all levels:
- Quick and Beginner-Friendly: You don’t need advanced skills to make this bag – just a little patience and a sewing machine.
- Great for Scrap Fabric: It’s a sustainable way to use up fabric scraps from previous projects.
- Cute and Practical: It’s not just pretty – it’s also incredibly useful for everyday organization or as a thoughtful handmade gift.
Whether you’re new to sewing or looking for a quick and satisfying project, this drawstring bag is sure to be a hit!
Related Sewing Tutorials
Looking for more fun and practical sewing projects? Check out these tutorials:
Ready to Get Started?
Grab your fabric scraps and download the free circle-bottom pattern to make this cute and practical bag. In the next section, I’ll guide you step-by-step through the process of sewing your own round bottom drawstring bag. Happy sewing!
Sewing supplies – flat bottom drawstring bag
- free PDF pattern – ad-free version. Download below
- fabric – cotton, canvas, denim
- ribbon or cord – 2 pieces, each one measuring two times the width of the bag, plus 2 inches
- sewing machine
- needle
- matching thread
- sewing pins
- sewing gauge
- fabric scissors or rotary cutter
- iron
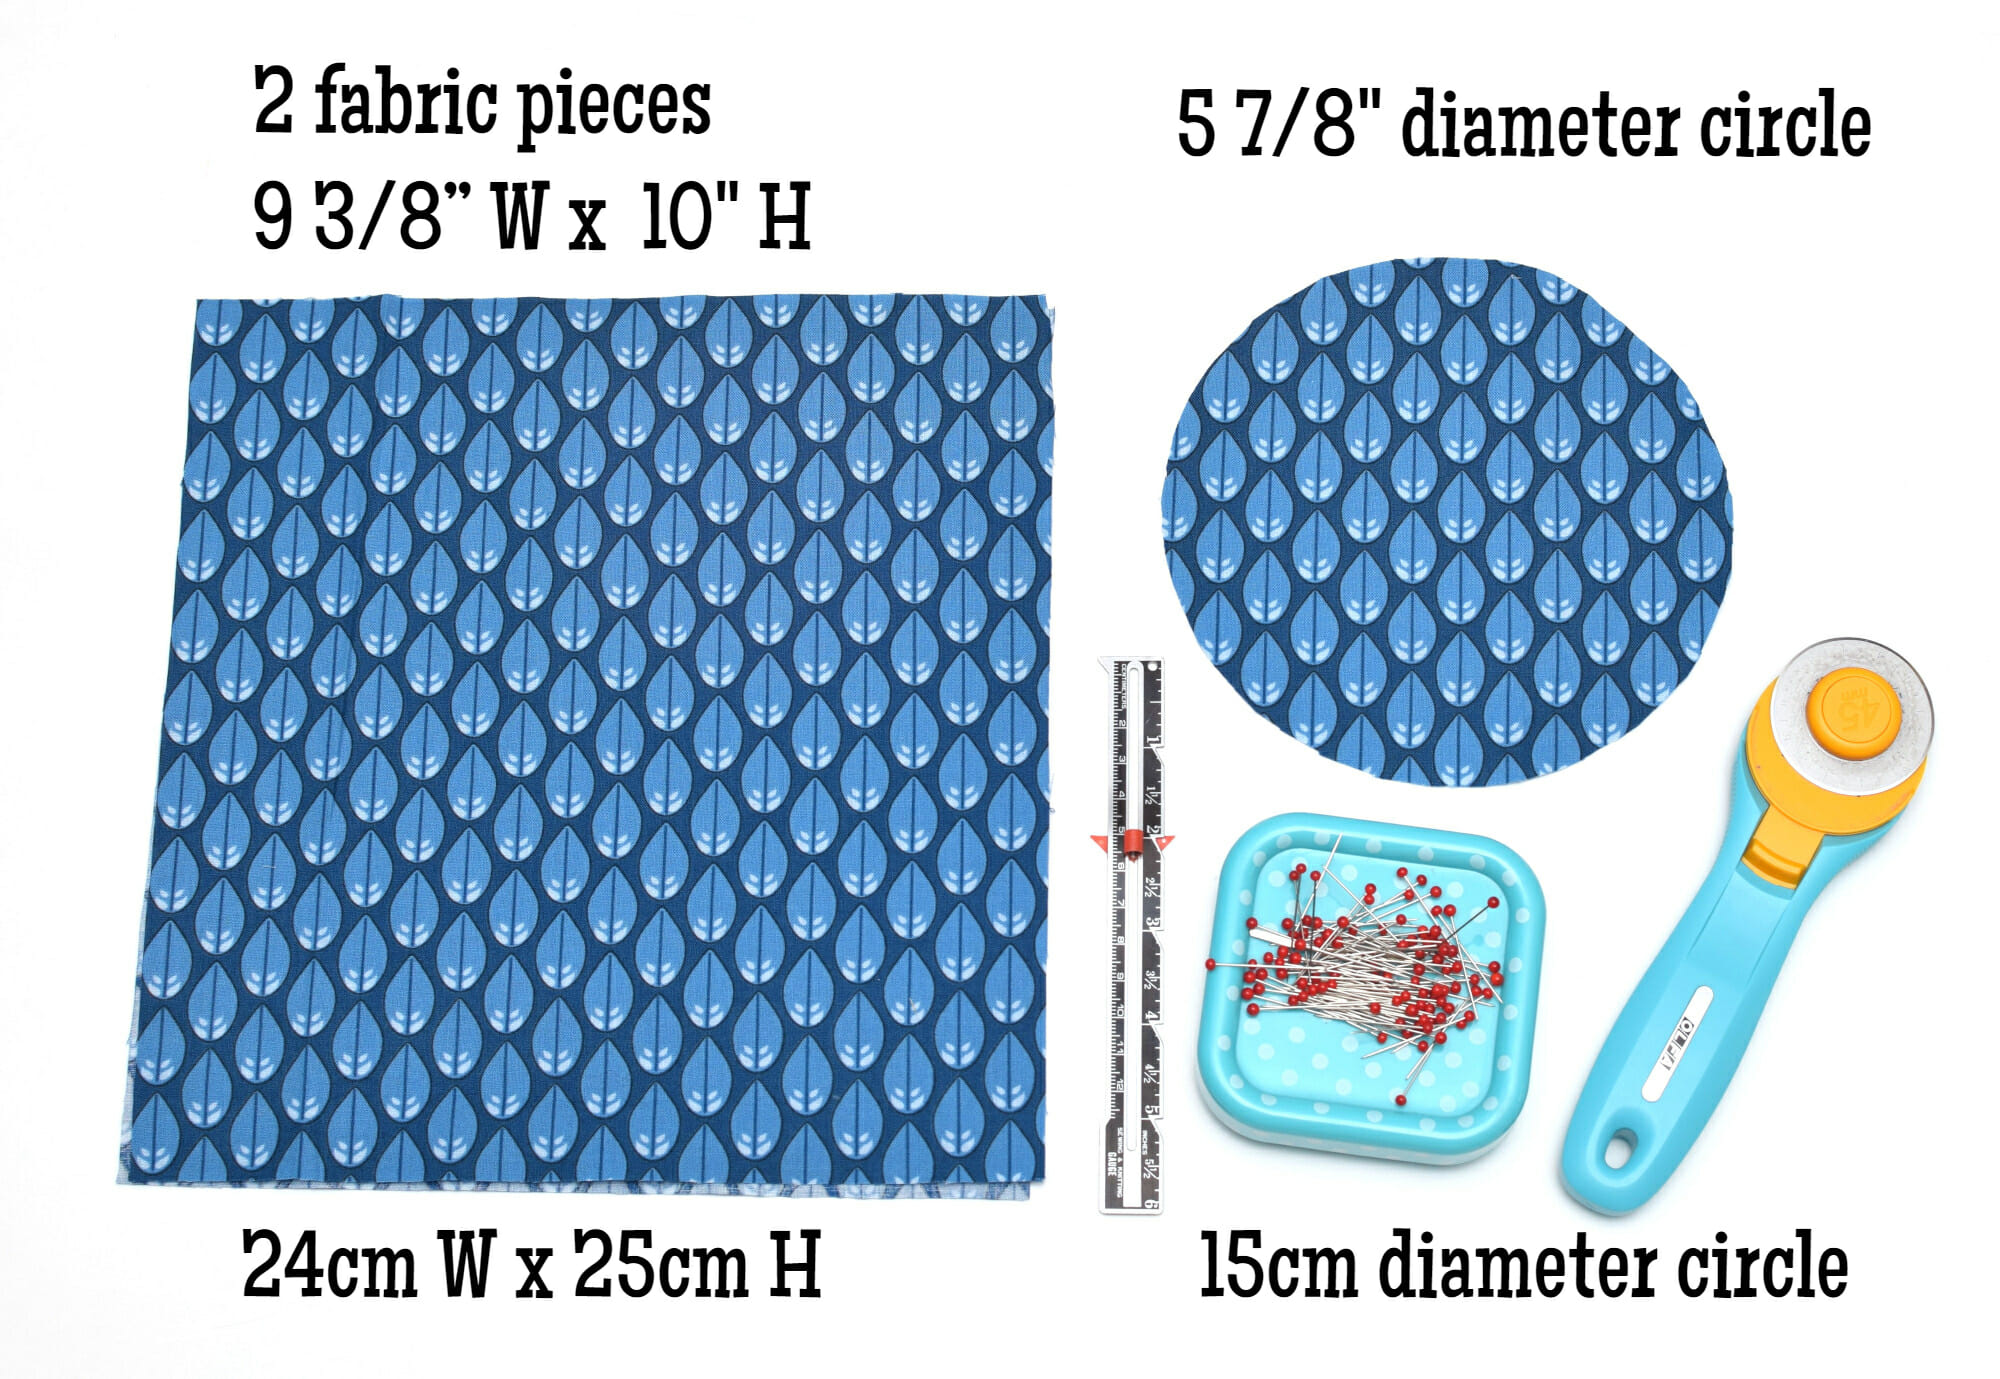
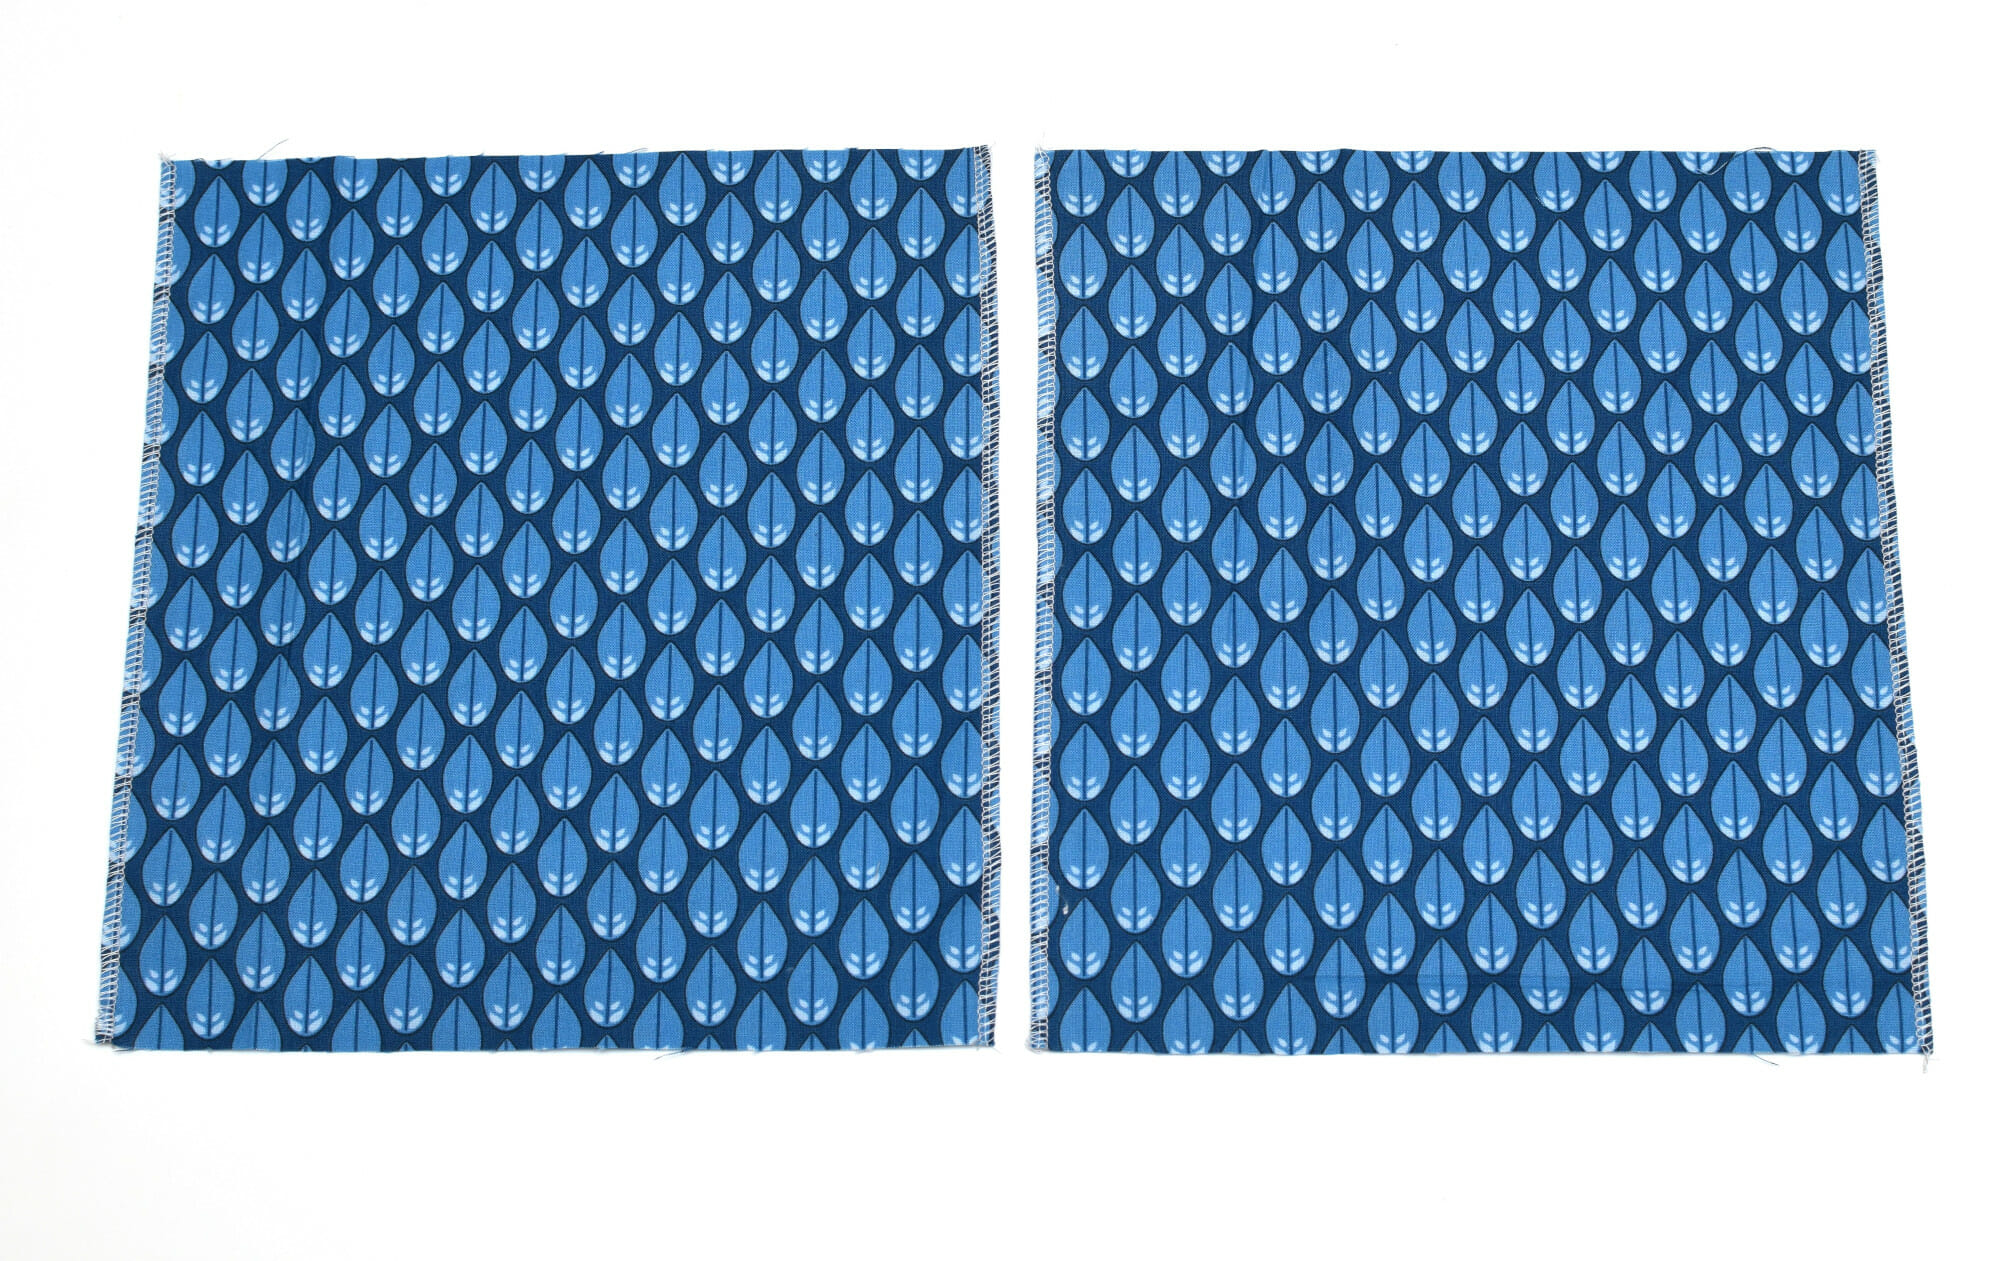
Step 1 – cut your fabric pieces
Start by cutting three pieces of fabric:
- One circle with a diameter of 5 7/8 inches (use the free PDF pattern to trace this).
- Two rectangles each measuring 9 3/8 inches wide and 10 inches high.
Tip: If you’re using fabric with a design that faces a certain way, make sure to cut so the pattern will look right-side-up on your finished bag!
Step 2 – serge the edges
Next, serge the two 10-inch edges of your rectangle pieces. (This helps keep the fabric from fraying and gives it a nice finish.) If your fabric doesn’t have a clear top or bottom, lightly mark the top edge with pencil or chalk to avoid any mix-ups later.
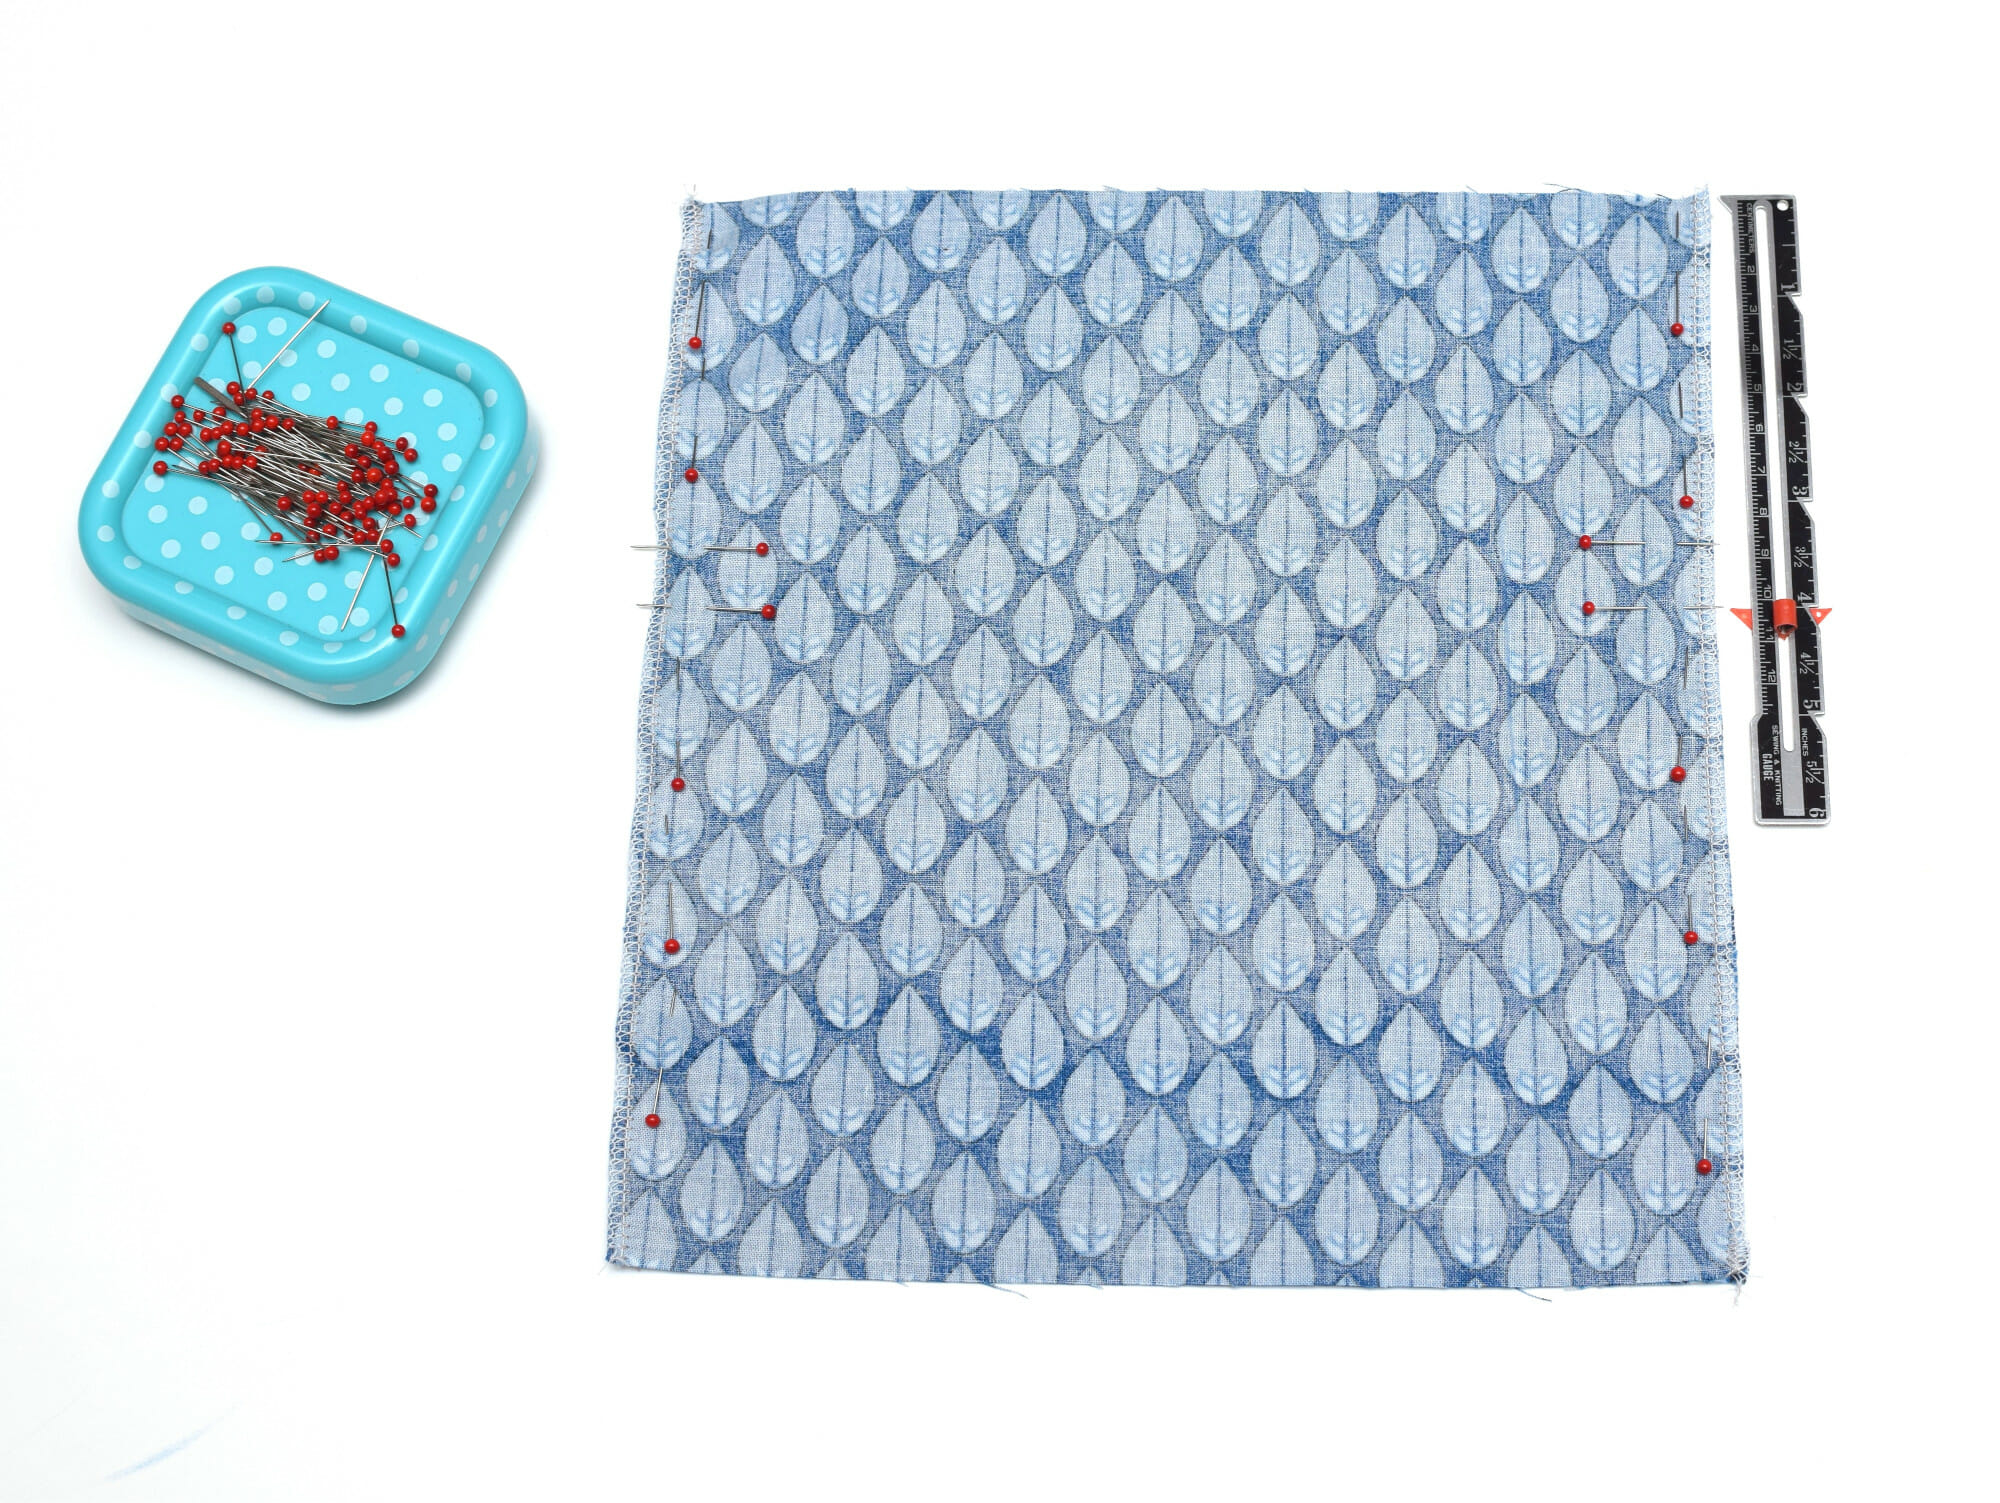
Step 3 – sew the side seams and mark the drawstring casing
Pin the side seams: Place the rectangles with the right sides (the pretty sides) together and line up the serged edges.
Mark the drawstring opening: Place a couple of pins vertically to mark two points on each side of the bag. The first mark should be 3 1/2 inches from the top, and the second at 4 inches. This 1/2-inch space will stay unsewn to create the opening for the drawstring.
Sew the side seams: Sew down each side seam with a 3/8-inch seam allowance. Remember to leave that 1/2-inch gap open at the top for your drawstring.
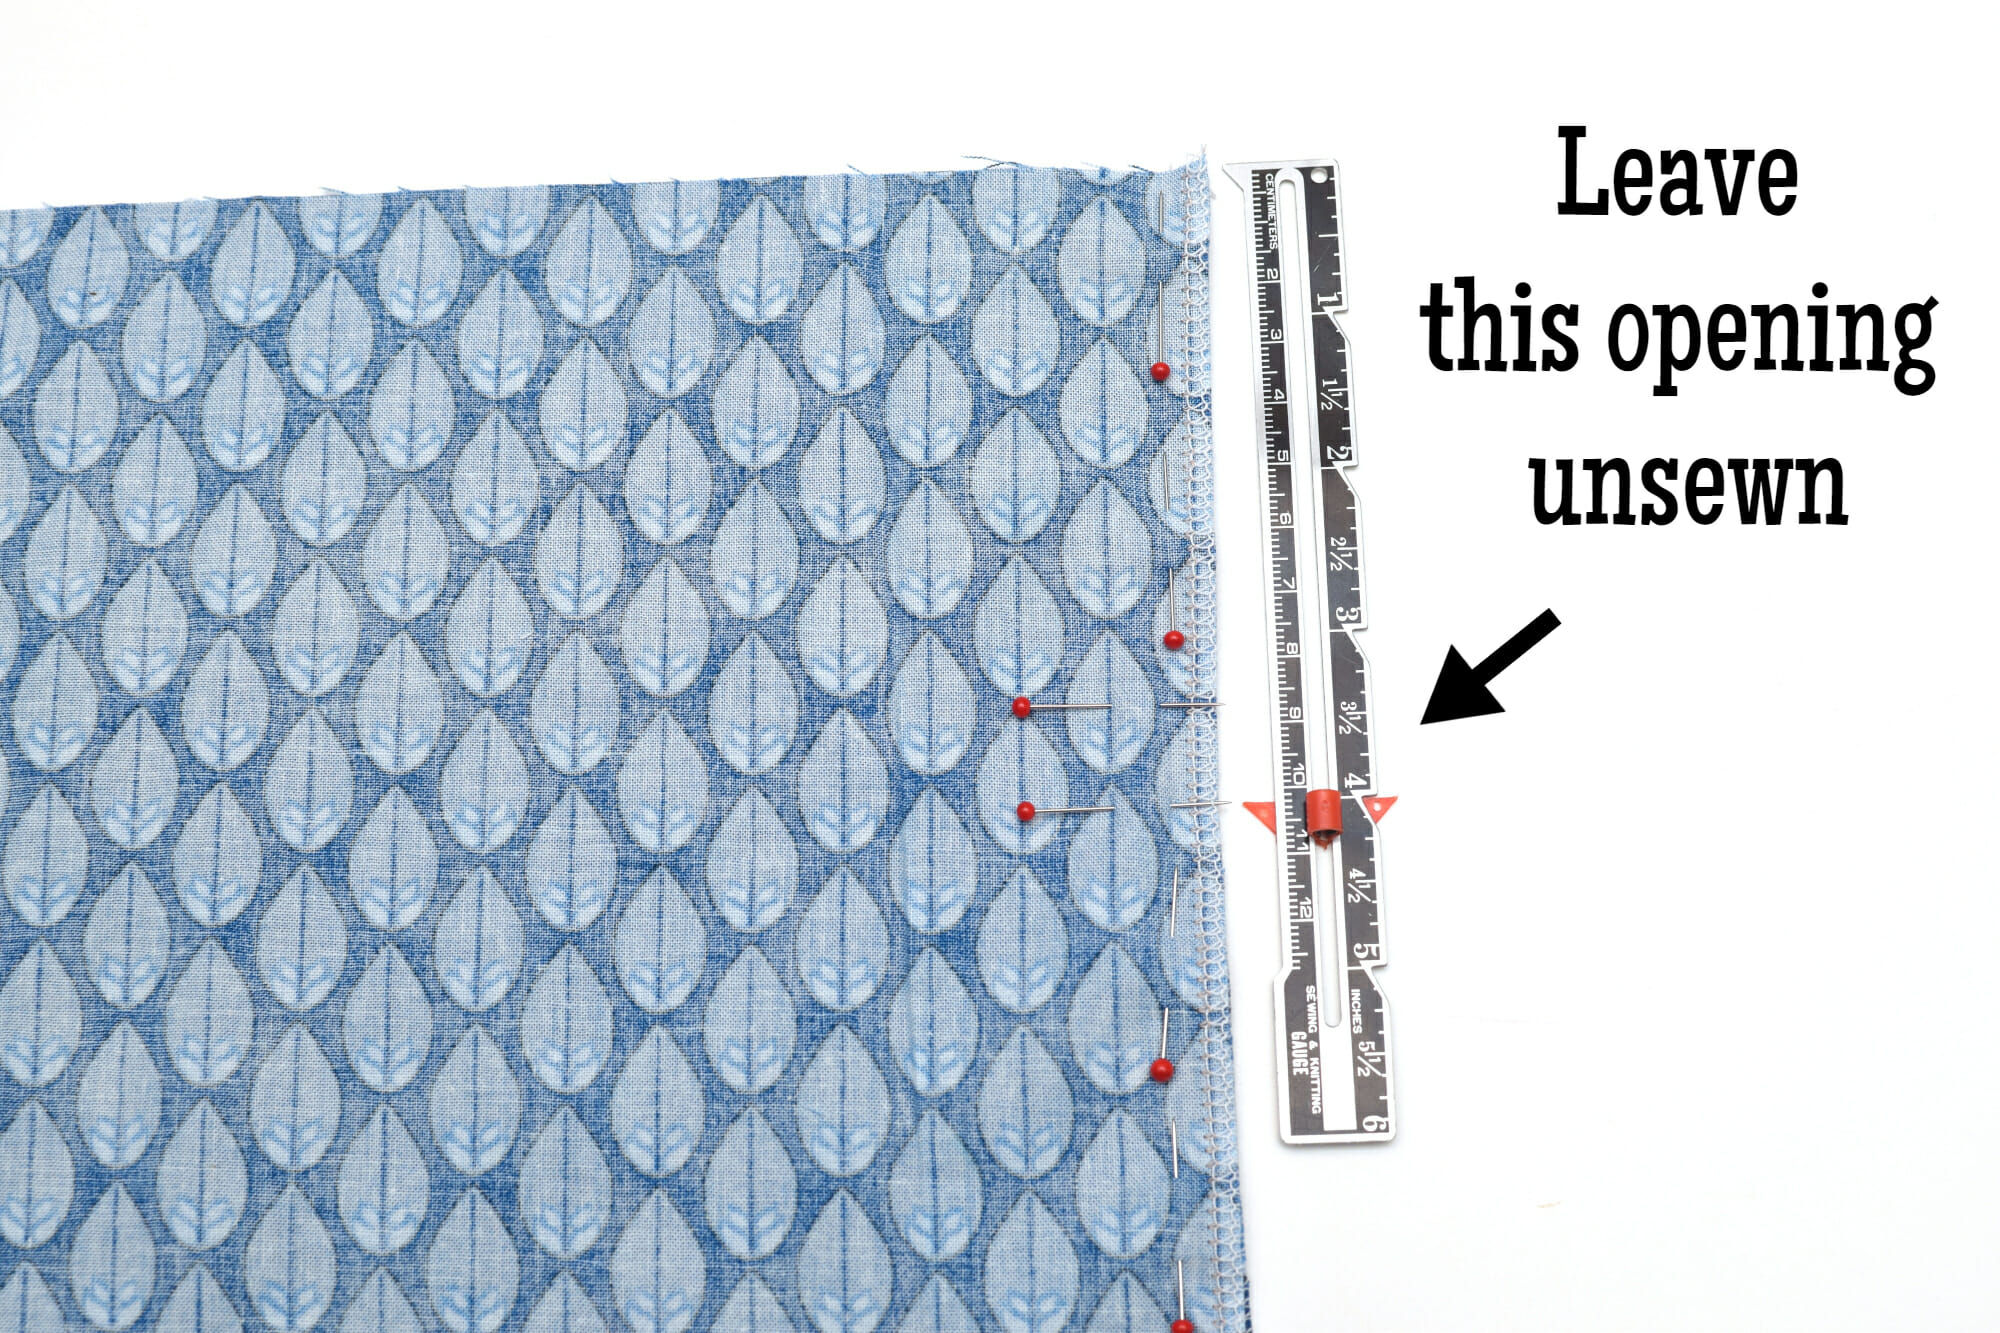
Backstitch at the beginning and end of each seam to make it sturdy.
Step 4 – press and secure the seam allowances
After sewing the side seams, press the seam allowances open and sew around the small gap where the drawstring will go.
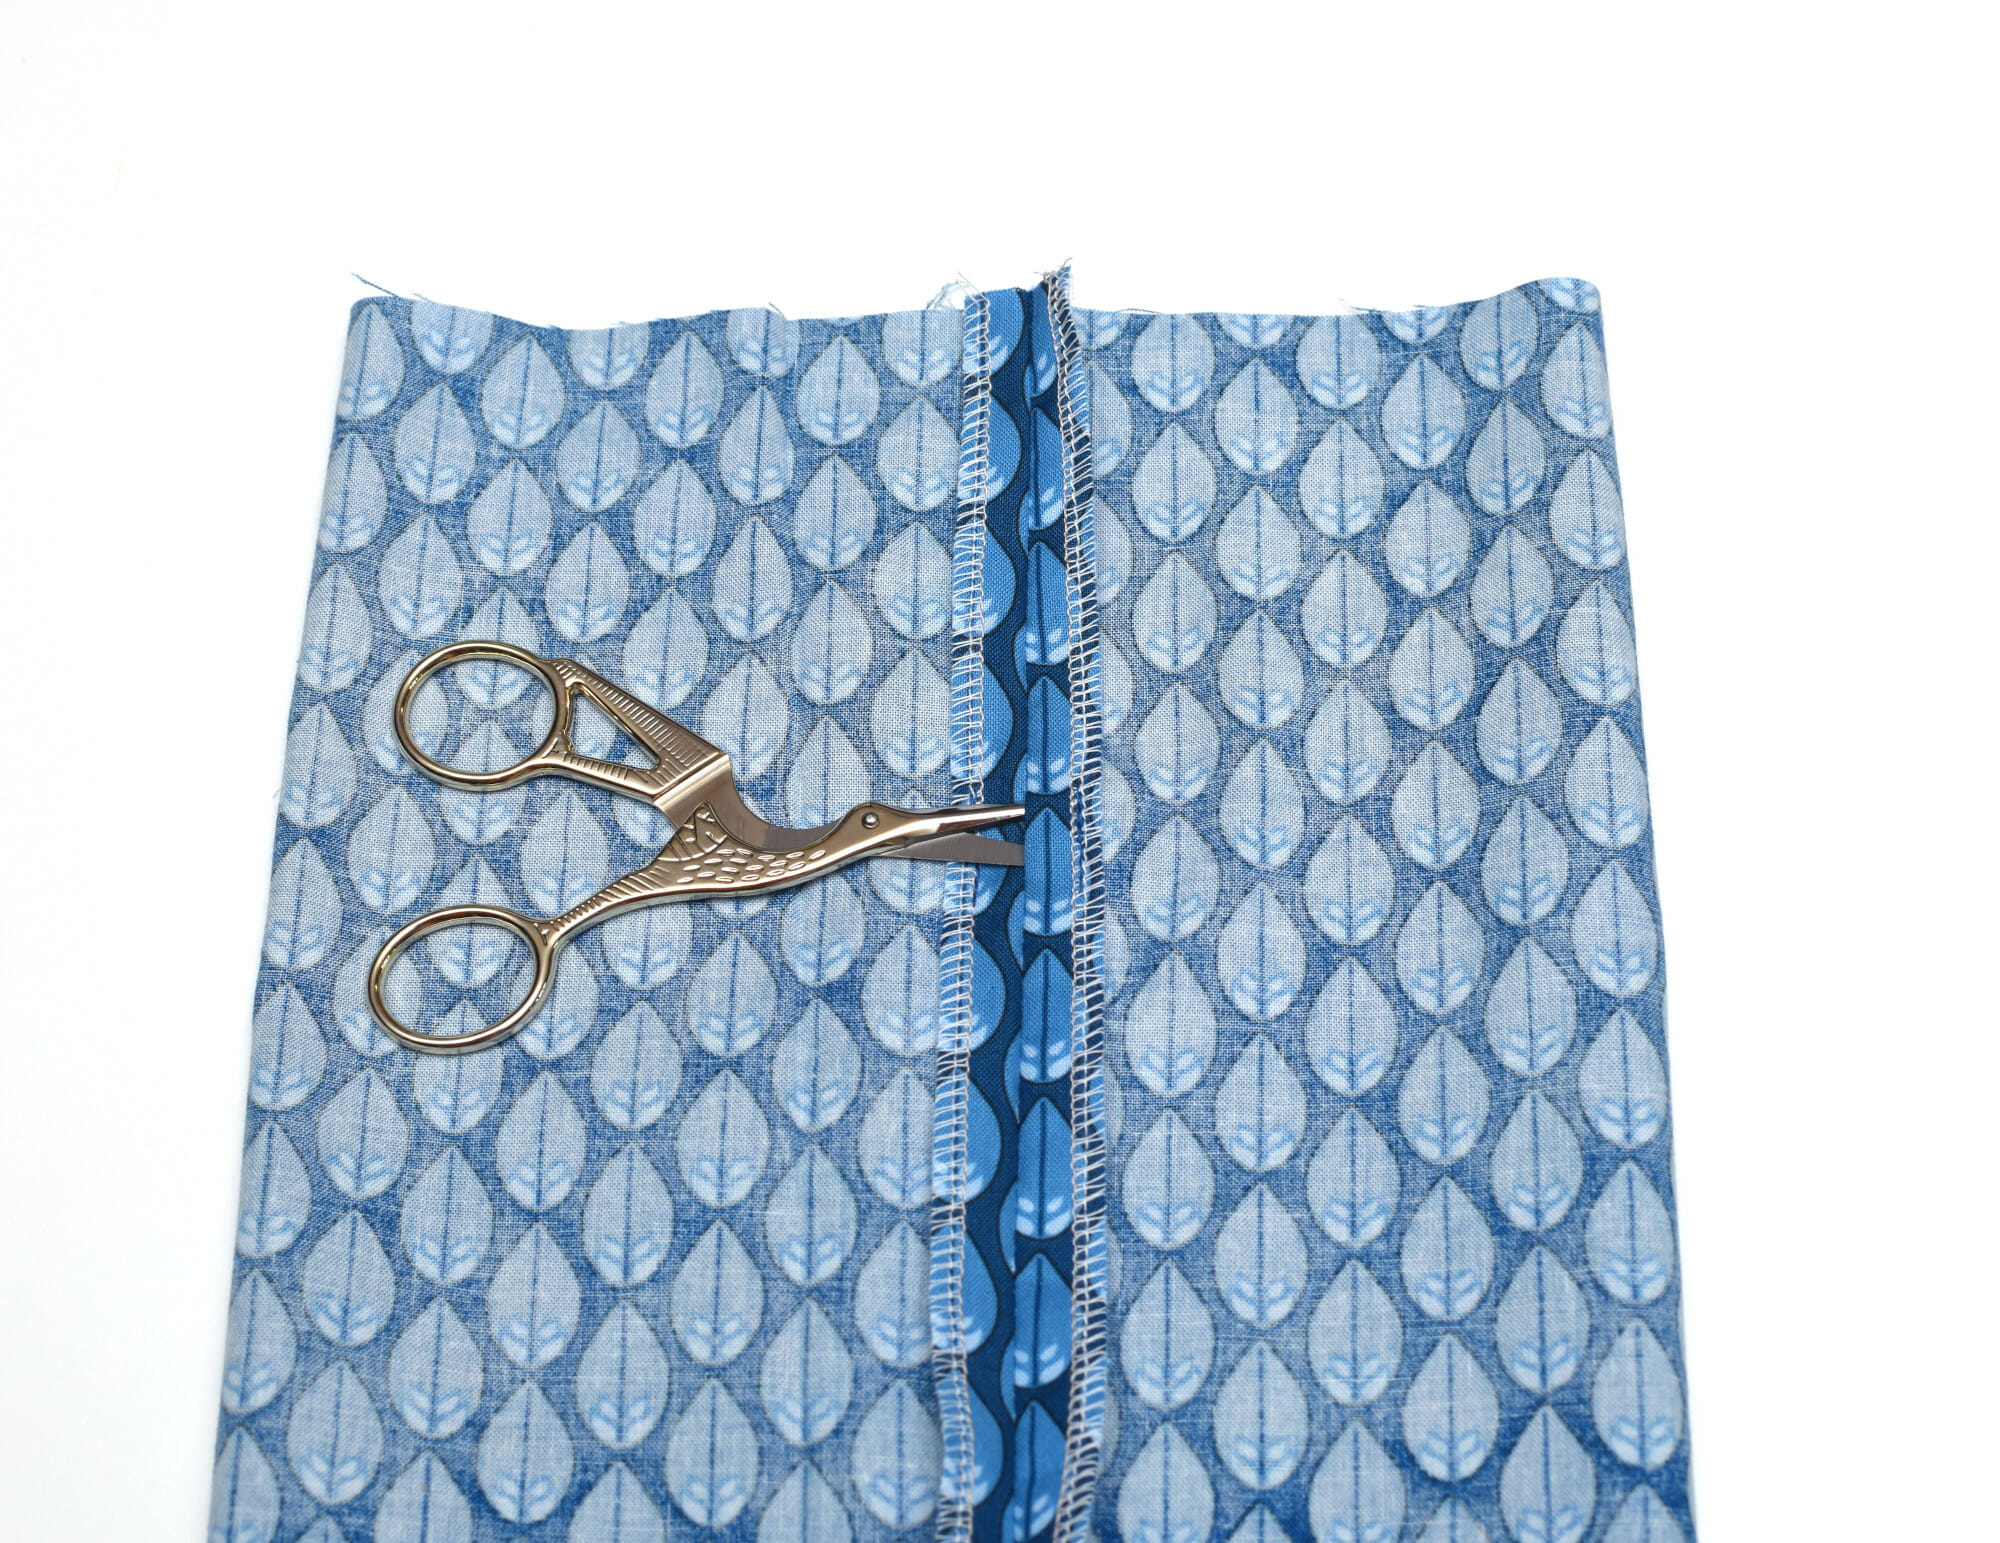
This keeps the fabric out of the way when you insert the drawstring later, so you don’t end up struggling with a stuck safety pin!

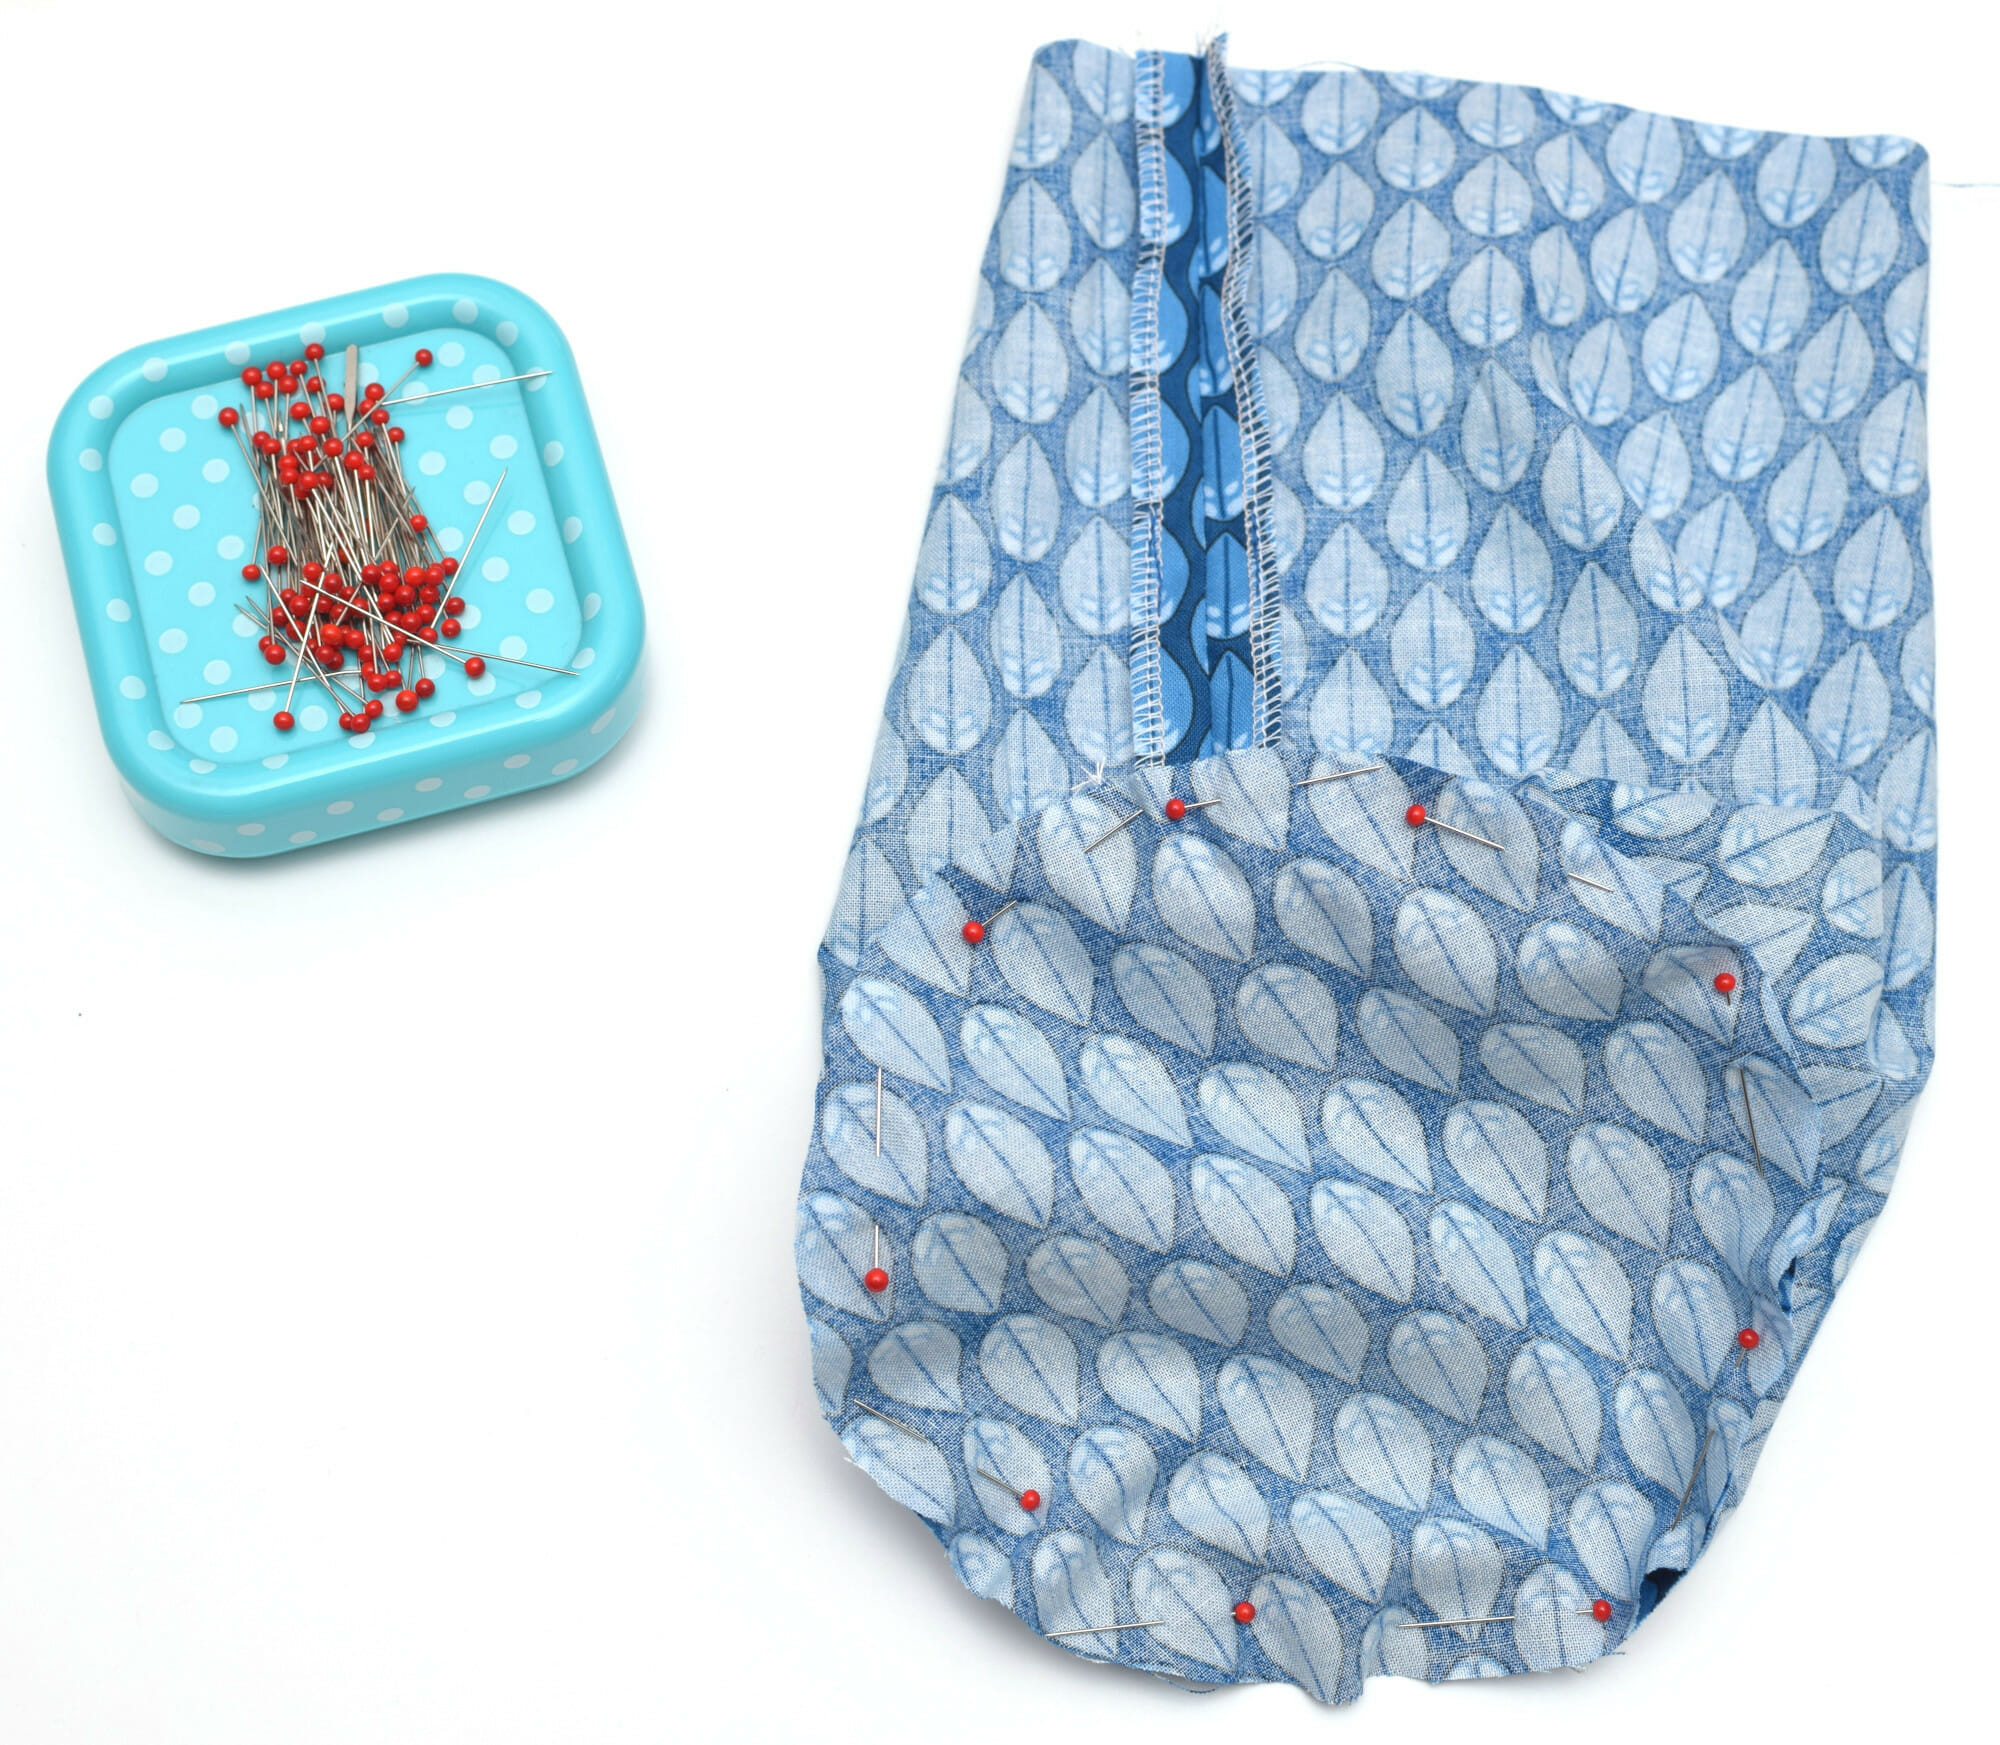
Step 5 – attach the circle bottom to the bag
- Pin the circle bottom: Line up the fabric circle with the bottom of the bag, making sure the drawstring opening stays at the top. Pin all around the circle to keep it in place.
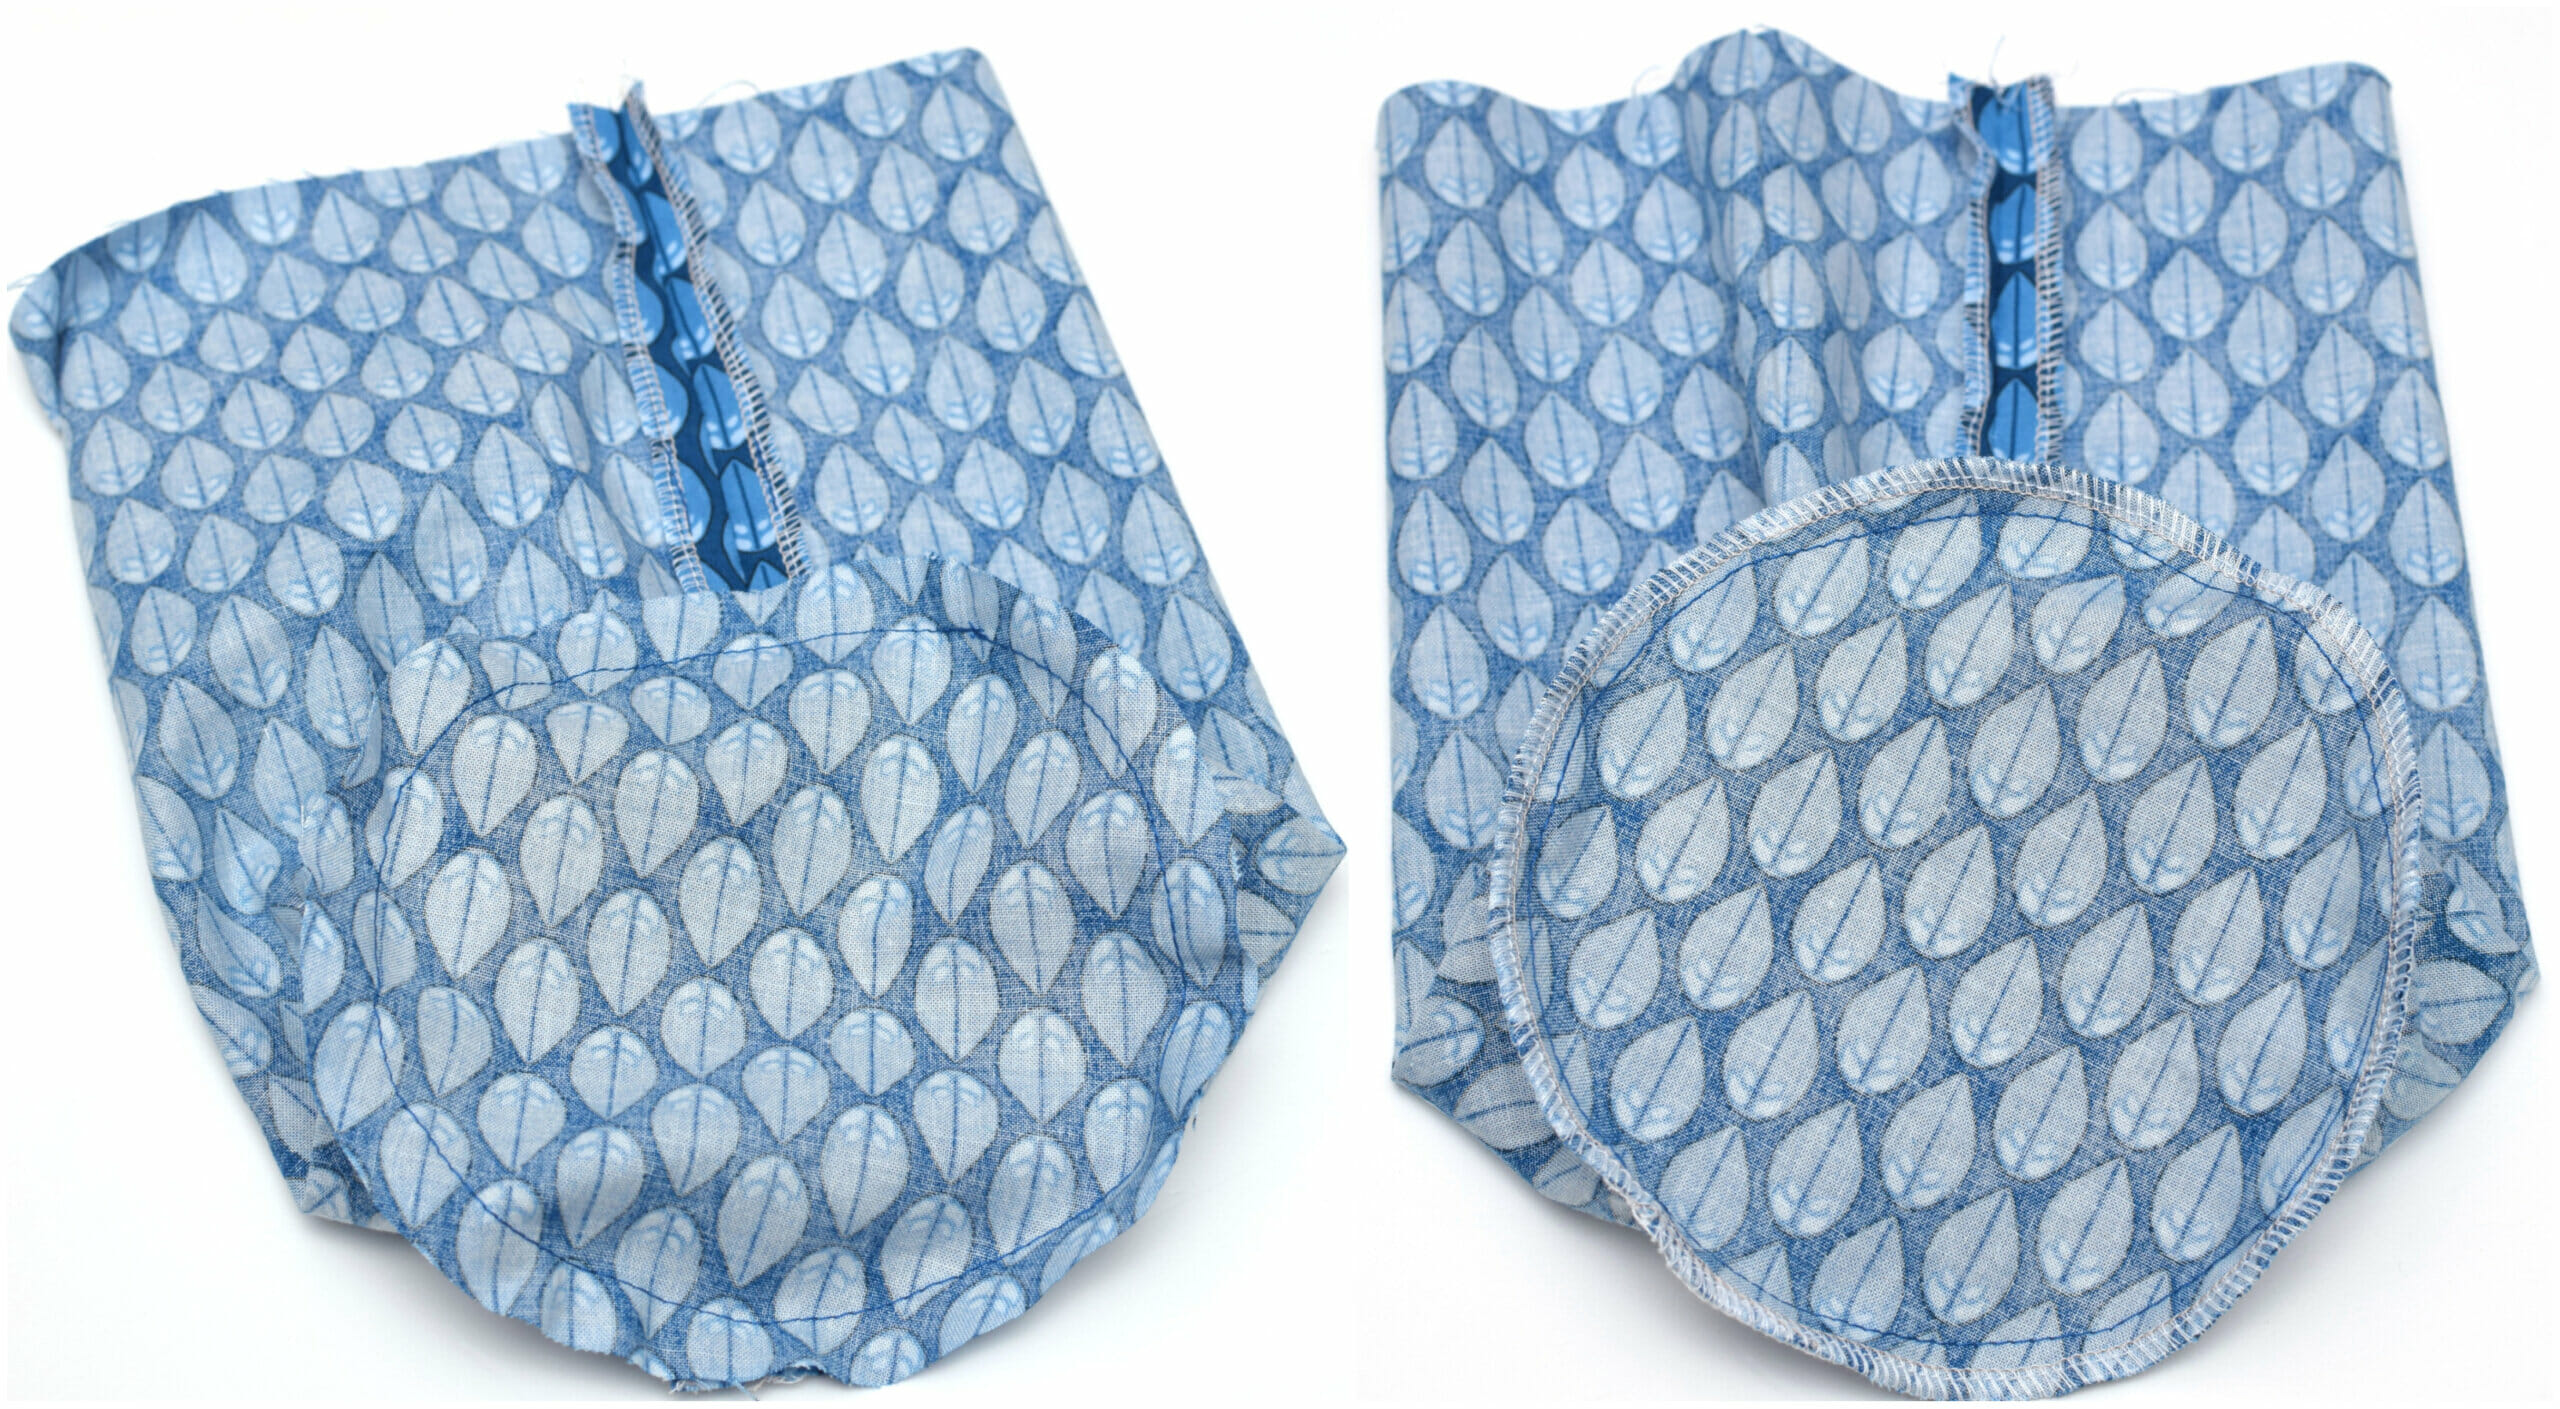
- Sew with a 1/2-inch seam allowance: Sew around the circle with a 1/2-inch seam allowance to secure it to the bag.
To keep your bag neat, finish this seam with a serger or pinking shears to prevent fraying.
Tip for sewing curves
Don’t stress about sewing a perfect curve! Think of it as a series of tiny straight stitches. Set your stitch length to about 2.0–2.5 mm to go slowly and keep control. Every few stitches, lift your presser foot and gently pivot the fabric, then continue sewing. This trick helps guide the fabric around the curve smoothly. If you’re new to curves, here’s a helpful YouTube tutorial for beginners!
Step 6 – create the drawstring channel
Serge the top edge: Start by serging the top edge of your bag to keep it neat and prevent fraying.
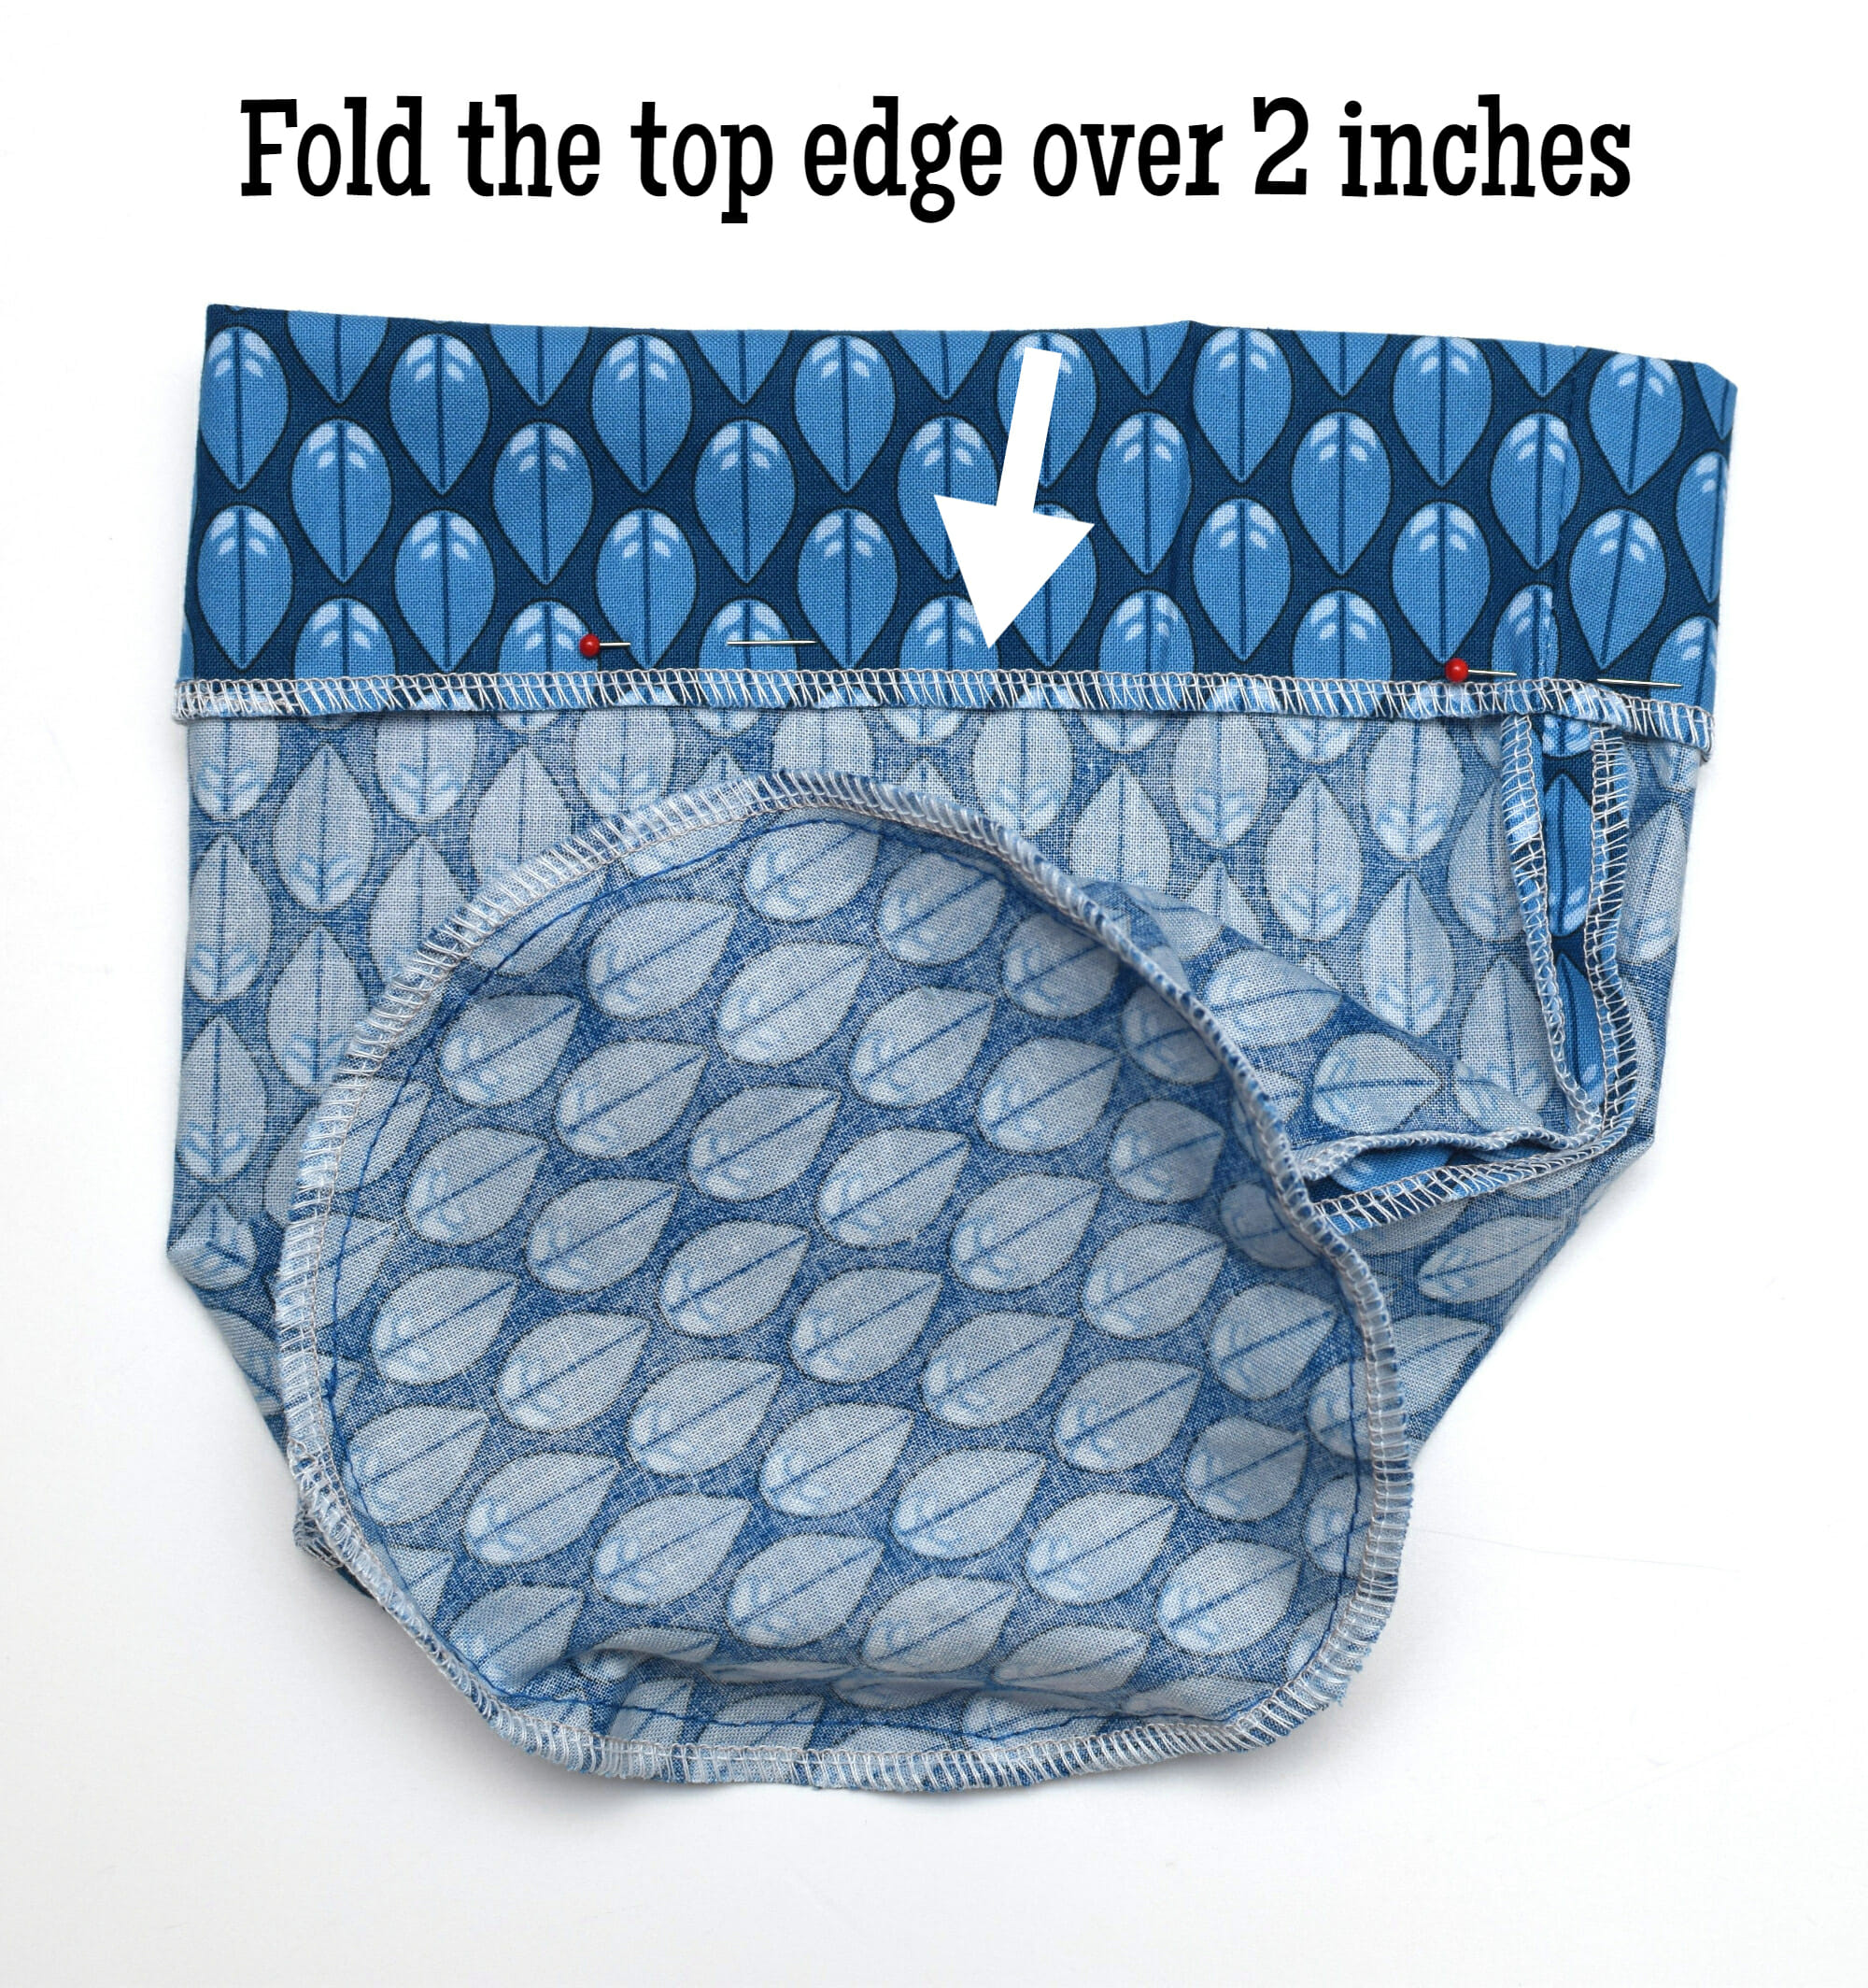
Fold over and check the opening: Turn the top edge down by 2 inches and double-check on the right side to make sure the small opening is in the right spot for your drawstring.
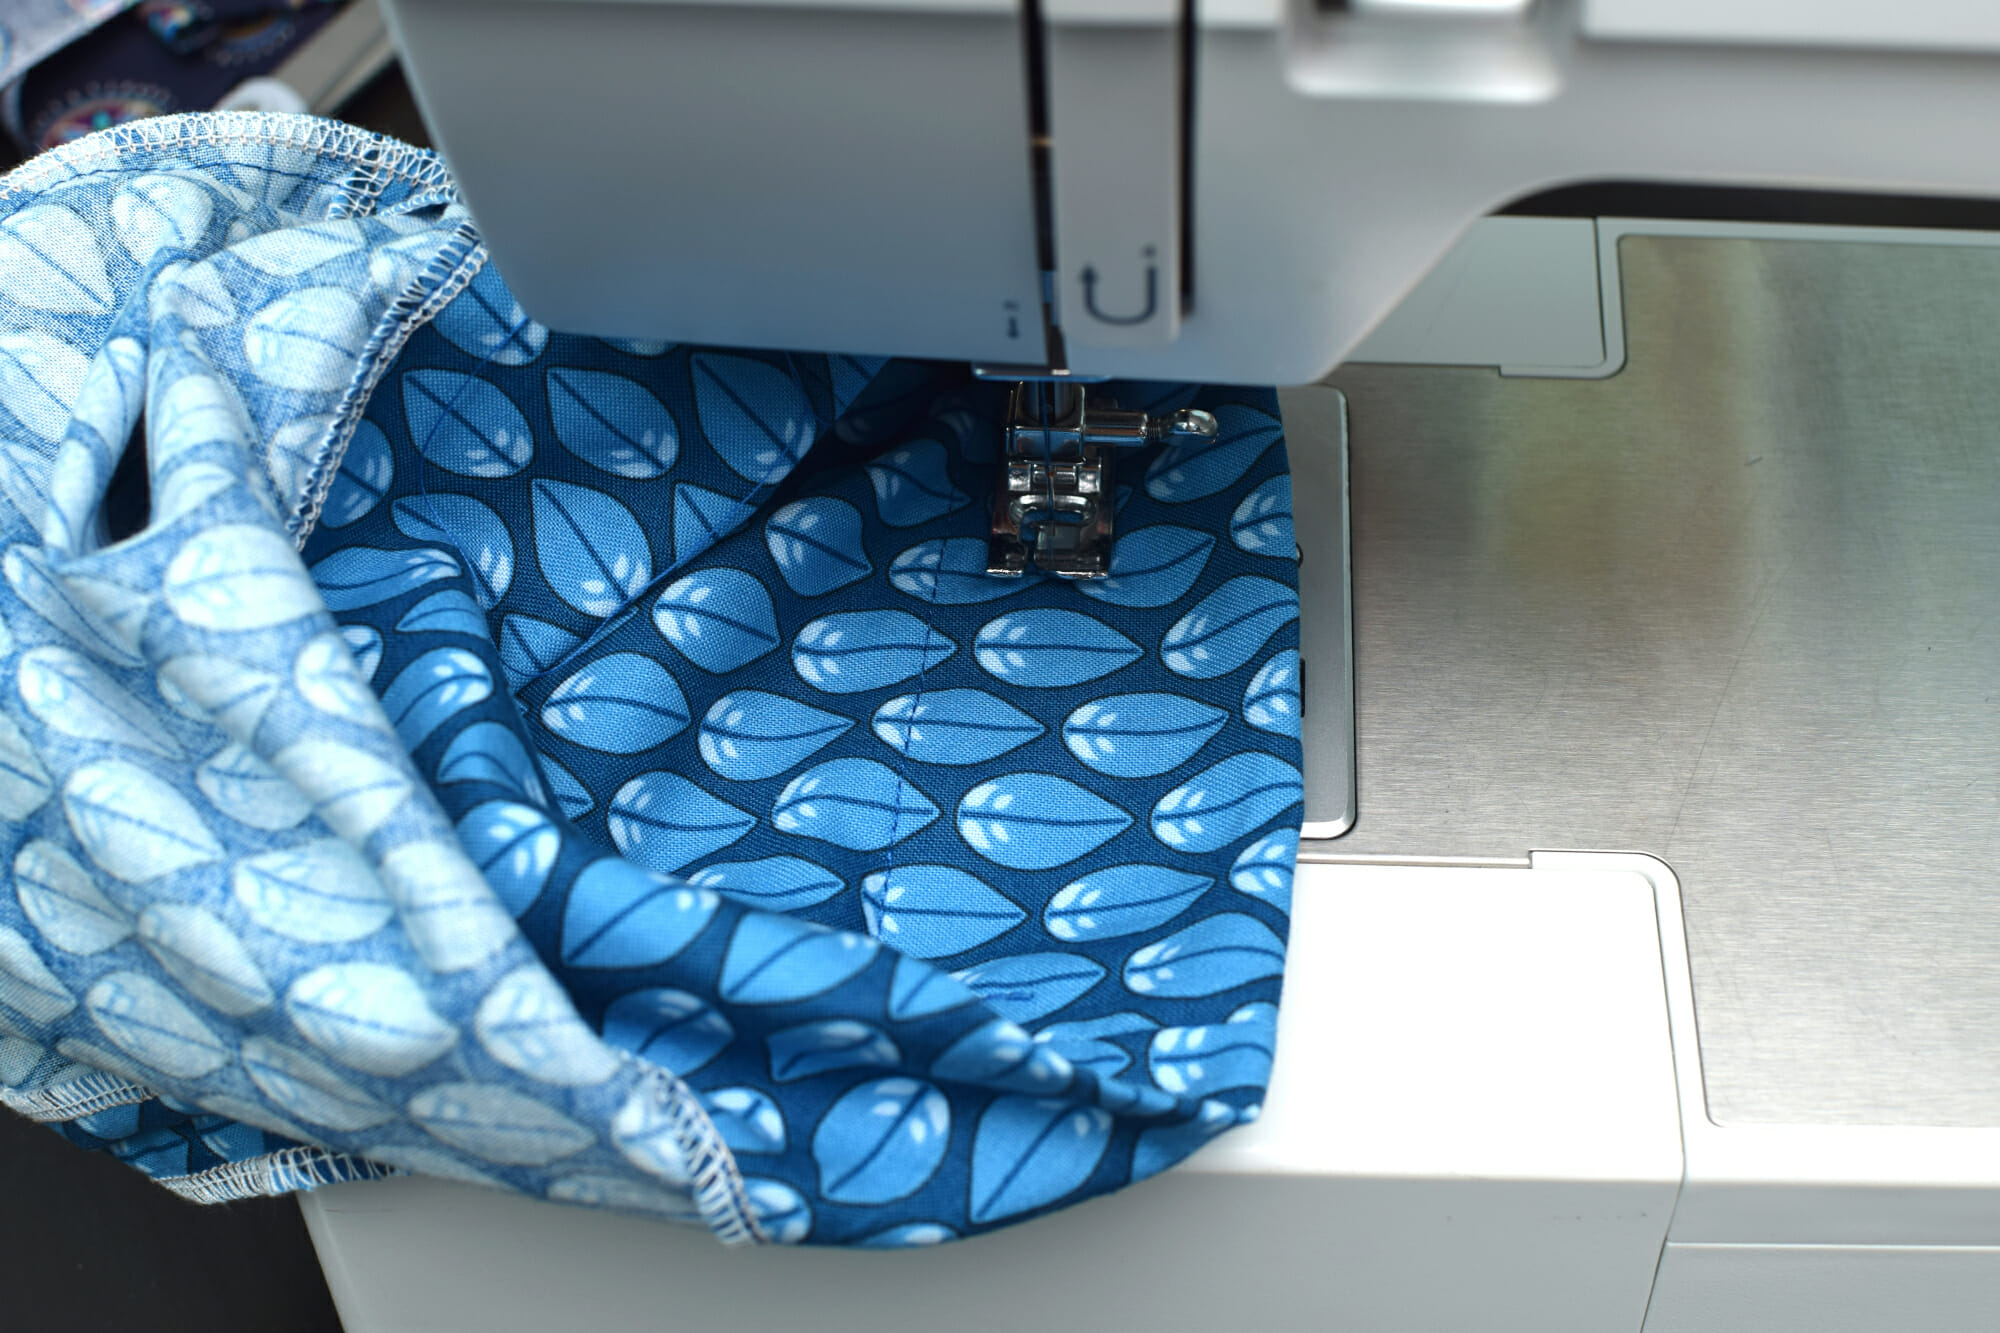
Sew the drawstring channel: Now, it’s time to make the channel for the drawstring! Sew two parallel lines around the folded edge – one above and one below the small opening.
The spacing between the lines depends on your cord’s thickness. For a thin cord, about 1/2 inch works great, but for a thicker cord, try 1 inch.
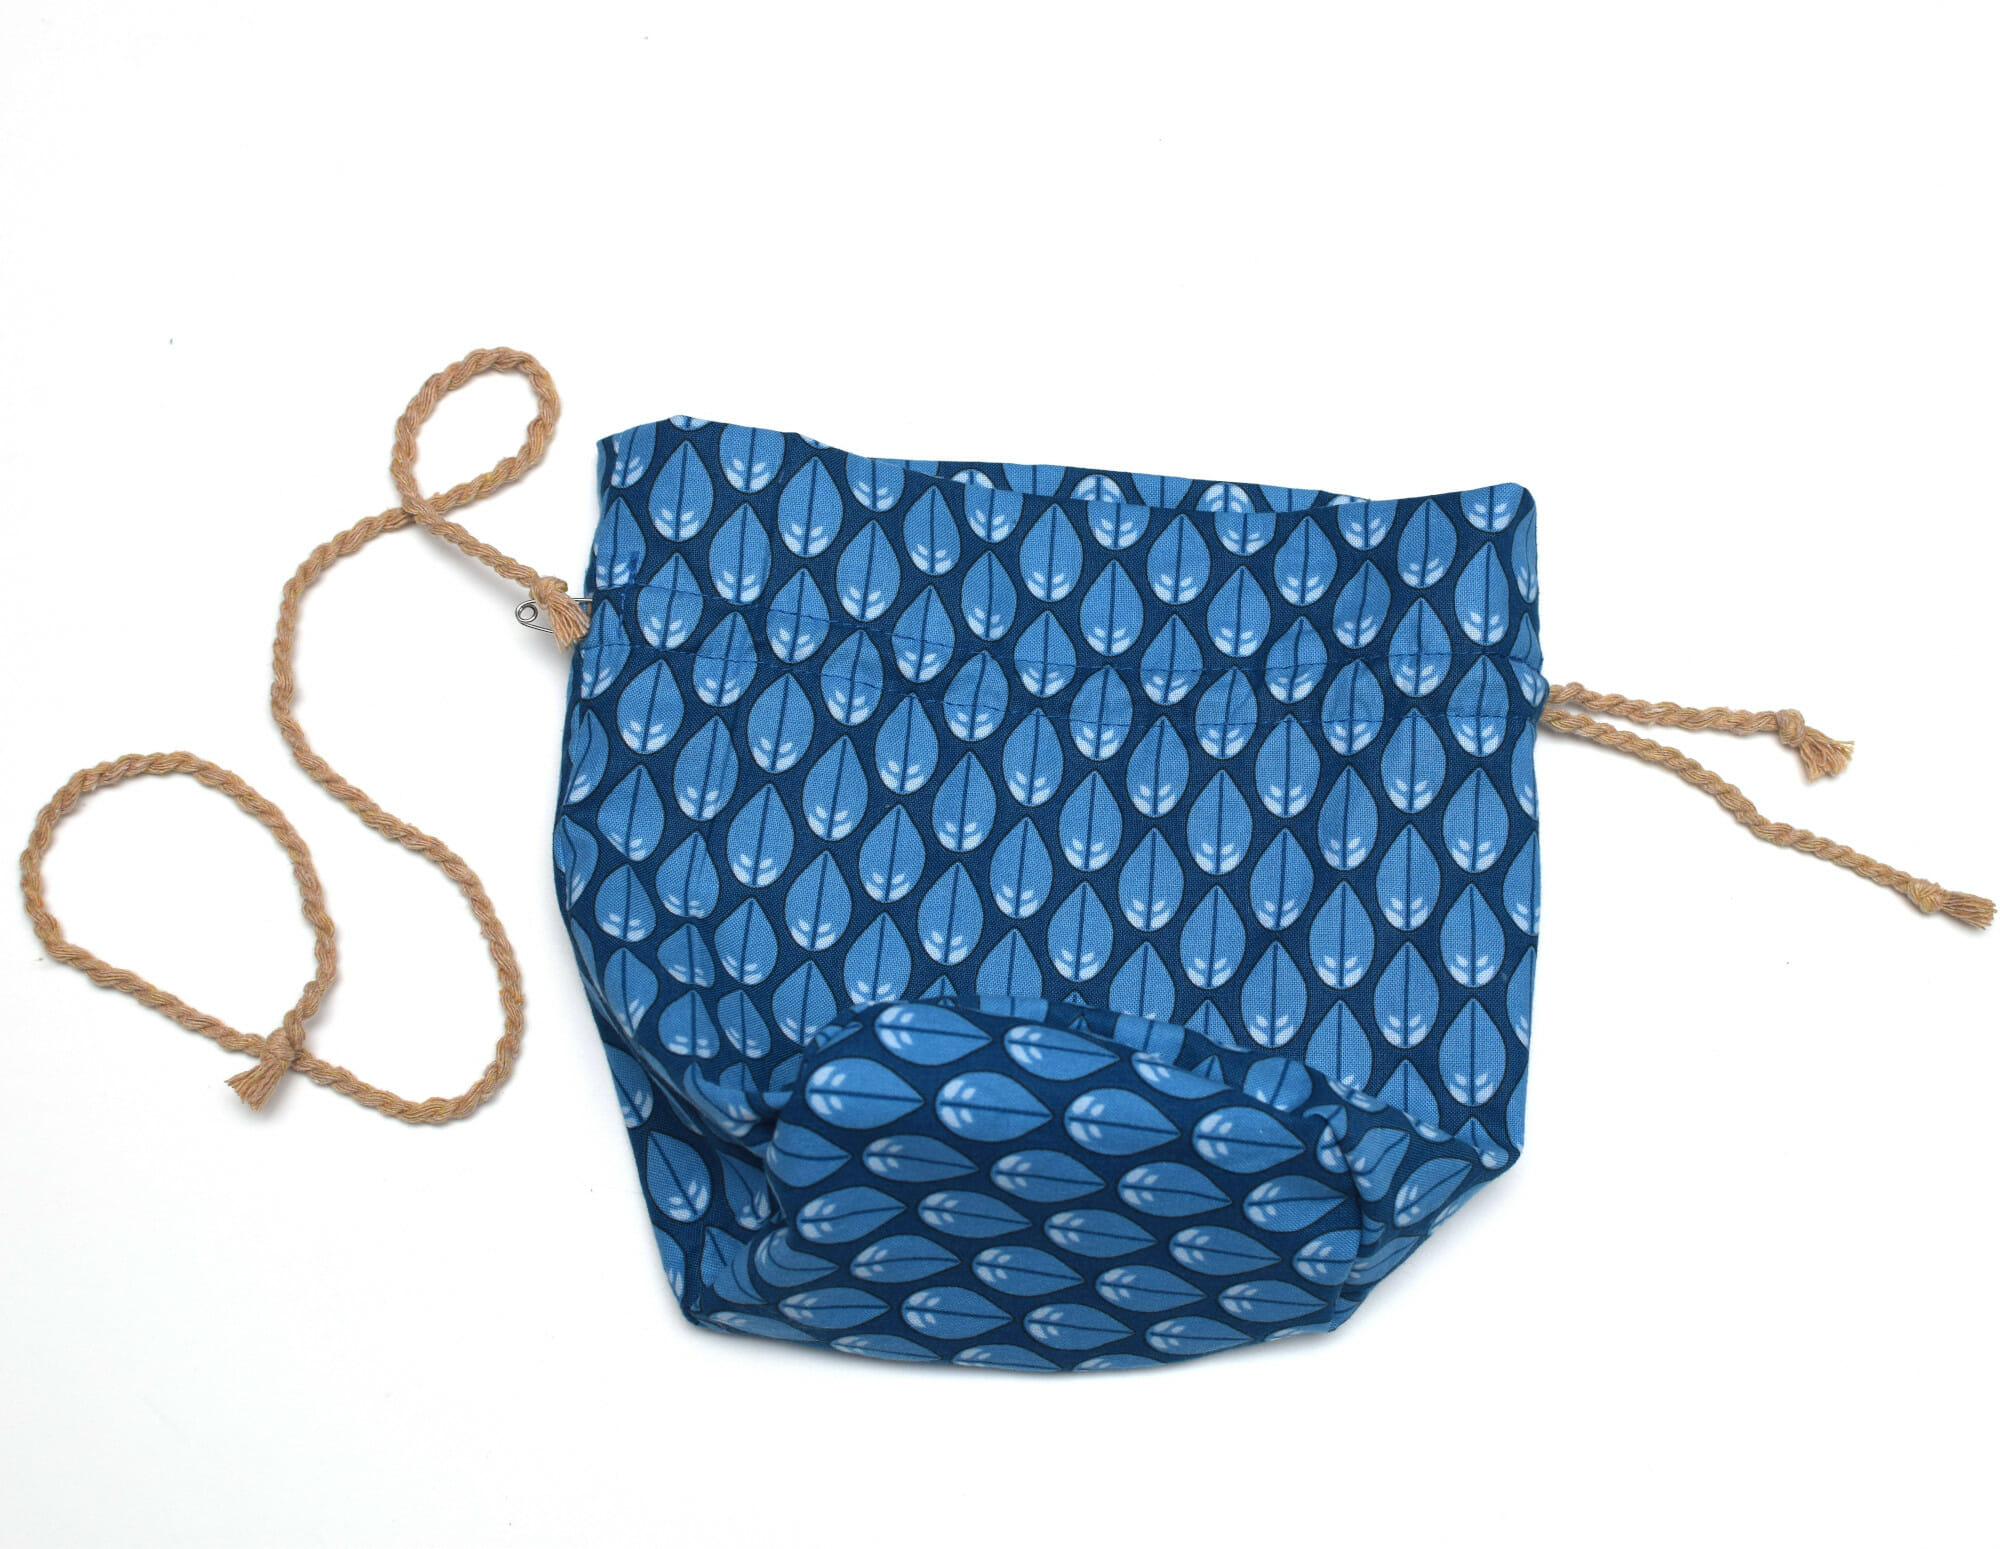
Step 7 – insert the drawstrings
- Thread the first cord: Attach a safety pin to the end of one drawstring cord, and use it to guide the cord all the way through the channel. Once you’ve pulled it through, tie the ends together with a knot.
- Thread the second cord: Repeat the same process with the second cord, starting from the opposite side. With two cords, you’ll get that nice, snug cinch when you pull them.
And there you have it – your very own round-bottom drawstring bag! It’s amazing how a few simple steps can turn fabric scraps into something so cute and functional.
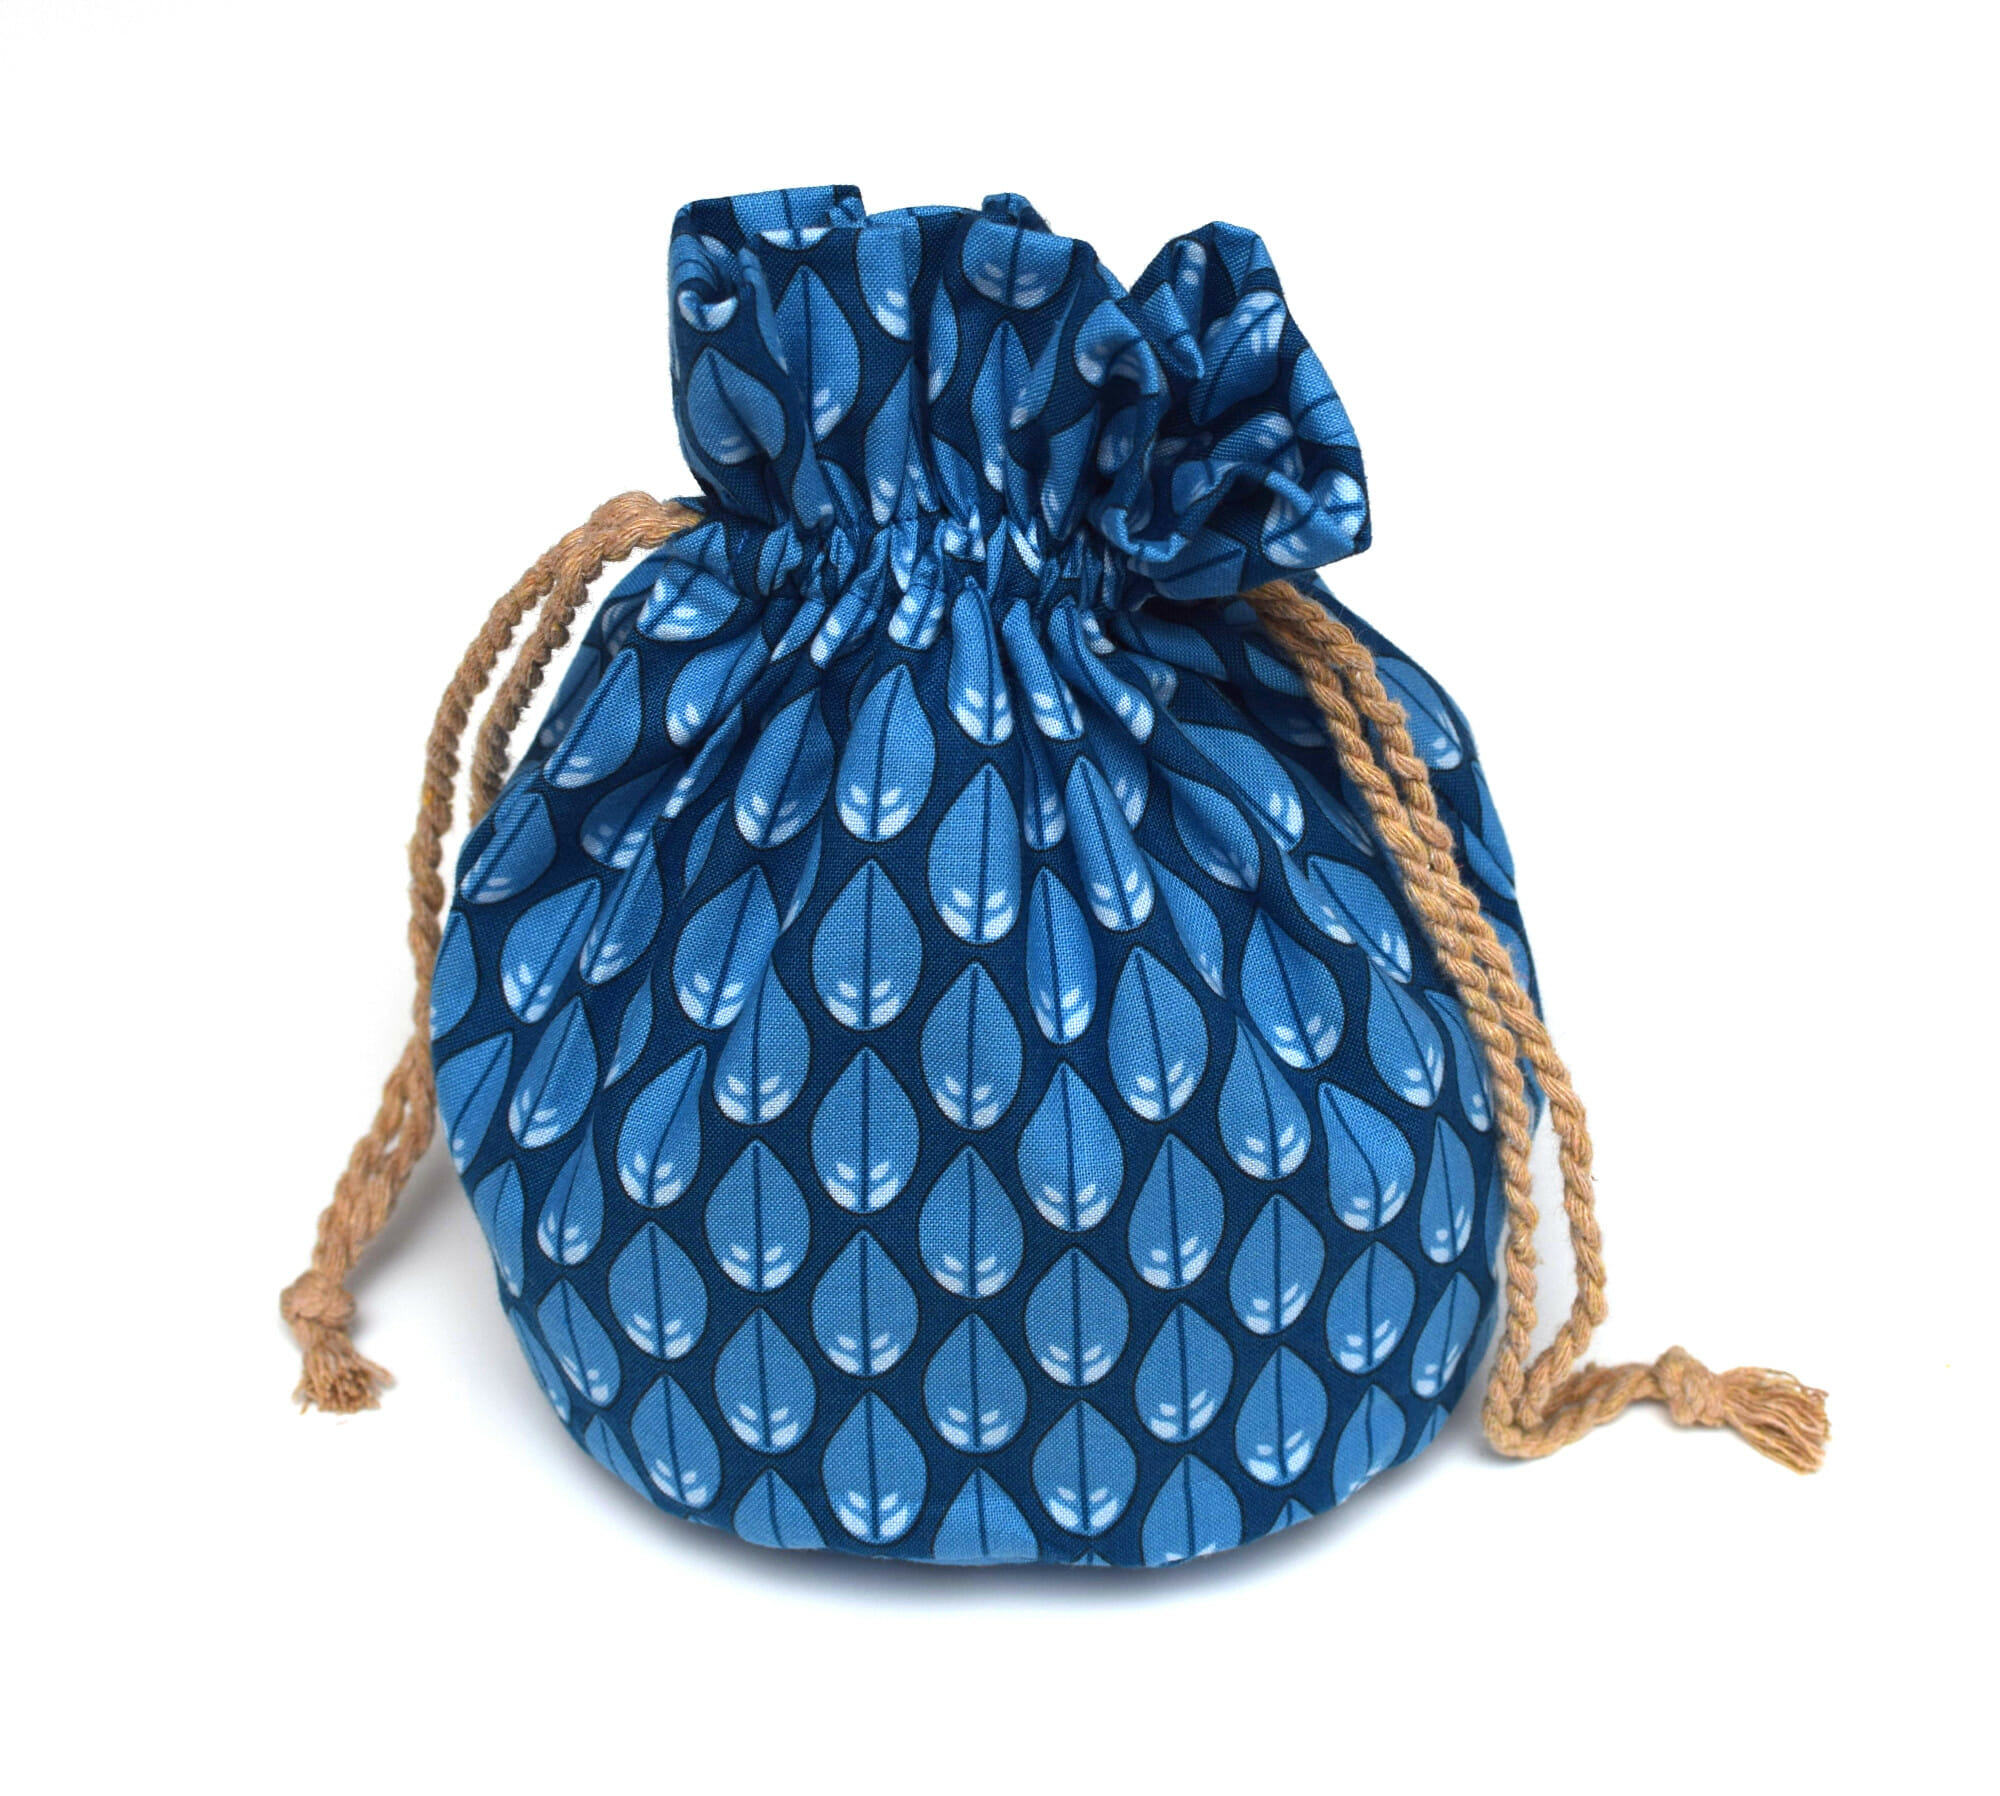
Perfect for trips, gifts, or keeping things tidy, this bag is as handy as it is cute! Plus, now that you’ve nailed the basics, you can experiment with different fabrics, sizes, or even add a lining for extra durability.
So grab your favorite fabric and make a few more – you might just end up with a whole collection of these versatile bags. Happy sewing, and don’t forget to share your creations @icansewthis!
Let’s keep in touch! You can find me on Facebook, Instagram, and Pinterest.
Hello,
I just discovered this post can you explain to me how to figure the fabric needed if the base has an 8” or 10” circle base? The bag would be used to store toddler’s toys.
Thank you,
Marianne
Hi Marianne,
The circumference of a 10-inch circle would be approximately 31.4 inches.
When you create the pattern, you have to take into account the fact that your stitches will create a new, smaller circle – 10 inches minus 2 times 3/8 inch for the seam allowance, which is the width of the fabric tube that will be attached to your circle bottom.
The total amount of fabric you need will depend on the height of your desired finished bag size. If you want a 15″ tall drawstring bag, you will need two fabric pieces measuring ~16″ wide and 17″ tall (you have to fold over the top edge for the drawstring cord). Additionally, you will need the 10-inch fabric circle.
Hi, when measuring the 2 inch openings, why do
You measure one side 3.5 inches down and the other 4 inches down? Why wouldn’t want to do them the same distance?
Hi,
Thank you for pointing this out! I apologize for any confusion caused by the phrasing! What I meant is that you should use pins to mark two points on each side of the bag: the first pin at 3 1/2″ and the second at 4″ from the top. This will create equal openings on both sides.
So cute – thank you for this! I am completely new to sewing and have a question: why sew together two pieces of square fabric rather than cut out one piece that is double the length? ‘Just trying to understand better. Thanks again : )
Hi S. Ogden,
Sorry for the late reply! That’s a great question. We need 2 fabric pieces because we need to leave 2 small openings on each side, to insert the drawstring cords. You can of course make the bag from one continuous piece, but then you have to adjust the measurements to account for one missing seam allowance on one side. Therefore, your one fabric piece will be 2x larger than the initial fabric, minus 1 inch. I hope that helps!
Thanks for this easy to follow pattern. I’m planning on making “glam bags” for our group of Gogos (Grandmothrs) who are raising funds for African grandmothers. I will line the bags and use some classy fabric that I’ve purchased from the local thrift store. I hope they will be a hit.
Thank so much, Lauris! I’m keeping my fingers crossed for you! Lining the bags is a great idea – it improves the overall product quality and makes them much more appealing to any audience. Best wishes for a successful fundraising event!
I want to make Santa sacks out of red velvet with the white furry top and embroidery on them will I need to do anything different
this is just what i’m looking for to make animal crossing bell bags for my daughter’s party favors
thank you! xx
Thank you beautiful! It took a lot of time to make this tutorial and I am grateful!! Thanks Judy
Thank you, Judy! Lovely comments like yours make my day. Wishing you all the best!
Loved this tutorial. Will use for my acnh bell bags. ?
I’ve just seen your comment after using this tutorial to make an acnh bell bag. Hope you are as happy as I am!
I read this was a free PDF pattern and tutorial. But, all I find is a PDF for the circle. I don’t want to print all of this out without all the unnecessary (ads) that are here. Just wondering why most of you guys don’t provide a downloadable pattern and tutorial? I realize it’s free, and I appreciate that, but it takes a while to copy and paste everything to make my own file. Makes me want to move on somewhere late where I can get an all in one PDF to save until I’m ready to make something.
Hi Brenda,
Thank you for the suggestion, it didn’t cross my mind and I’m not sure yet how to do it, but it’s definitely something to think about.
You do realize it is free Brenda, right? When bloggers and designers create something for FREE, they only make money with ads on their blogs, MOST designers that offer patterns for free do NOT create PDFs because then you would have no reason to be here and see the ads. Many designers actually charge if you want it in PDF form. So maybe just be THANKFUL she is offering the pattern for free or like you said, go somewhere else, you are NOT hurting her by not using her pattern. It is so sad that more people complain than compliment especially when someone is offering something for free.
Love this pattern! I made lined drawstring bags for yard dice Christmas presents last year. Going to try to make bags for ring toss games with 18” circular wood bases this year. Will line them or use denim. Fingers crossed that they turn out well!
Wow, I’m so glad you like it! Thank you, Brenda!
I think your tutorial is well done! So many tutorials I look at are not as thorough nor as well explained as yours. Keep up the good work!
Hi Lisa,
Thank you so much for your kind words! <3 You made my day! 🙂
Thank you for the great tutorial! I am wanting to make one a little bit bigger for game tiles, can you tell me how would I go about enlarging the pattern? thank you!
Hi Kari,
Please take a look at this post https://icansewthis.com/drawstring-dice-bag-pattern/
If you plan to store heavy items in your bag, I think it would be better to make it lined.
What size do you have in mind for your circle piece?