Learn how to make a cute, professional-looking tutu skirt for a child in less than an hour. This DIY tulle skirt is fully sewn (not tied or knotted), making it durable, comfortable, and perfect for everything from birthday parties to everyday play.
Project overview
- Skill level: Beginner-friendly
- Time to complete: 45–60 minutes
- Key techniques: Gathering tulle and sewing an elastic waistband
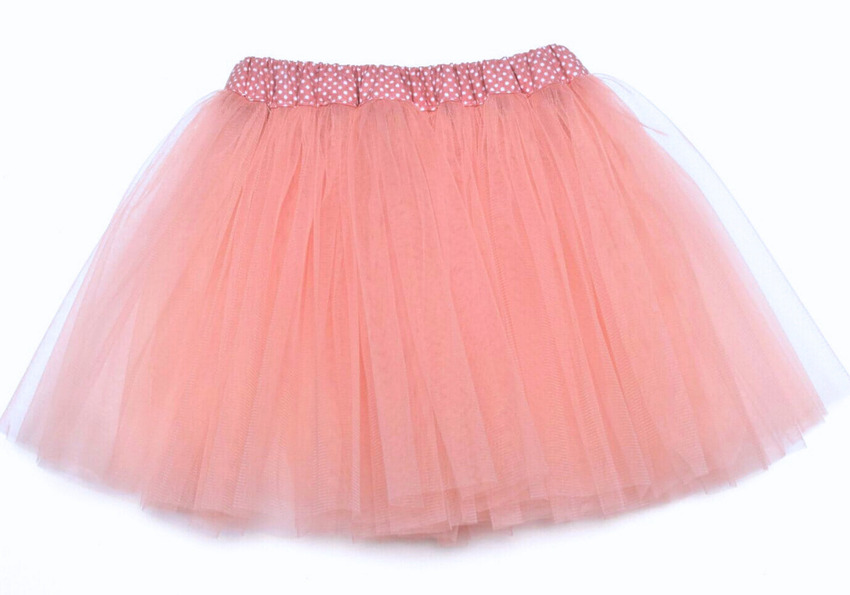
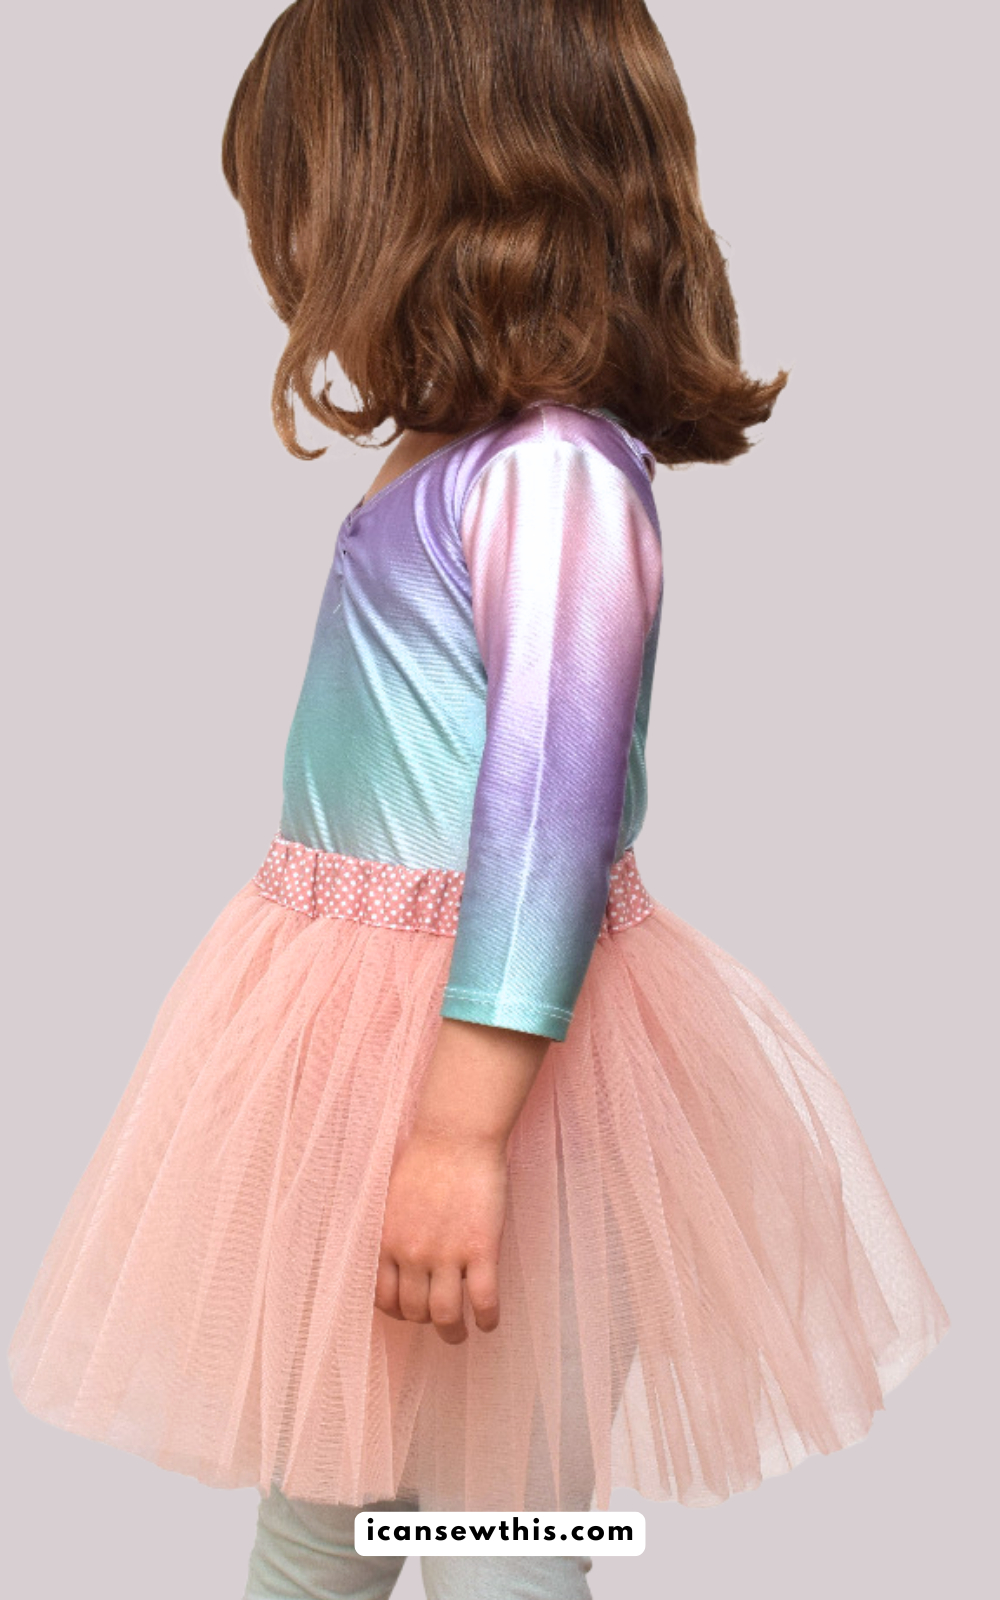
- Main benefit: A fluffy, double-layered skirt that won’t fray or sag
Why sew a tutu instead of making a “no-sew” version?
While “no-sew” knotted tutus are popular, they can be itchy at the waist and often lose their shape. This sewn version uses an exposed elastic waistband or a fabric-covered casing, ensuring a comfortable fit that stays fluffy wash after wash.
Sewing supplies you’ll need
- Matching thread, fabric scissors, sewing pins, and a sewing gauge
- 1 yard soft tulle fabric (Available in bolts)
- Cotton or satin fabric (For the waistband casing)
- 1-inch wide elastic
- Sewing machine with a 70/10 ballpoint/jersey needle
- satin ribbon/ velvet/ grosgrain trim (optional)
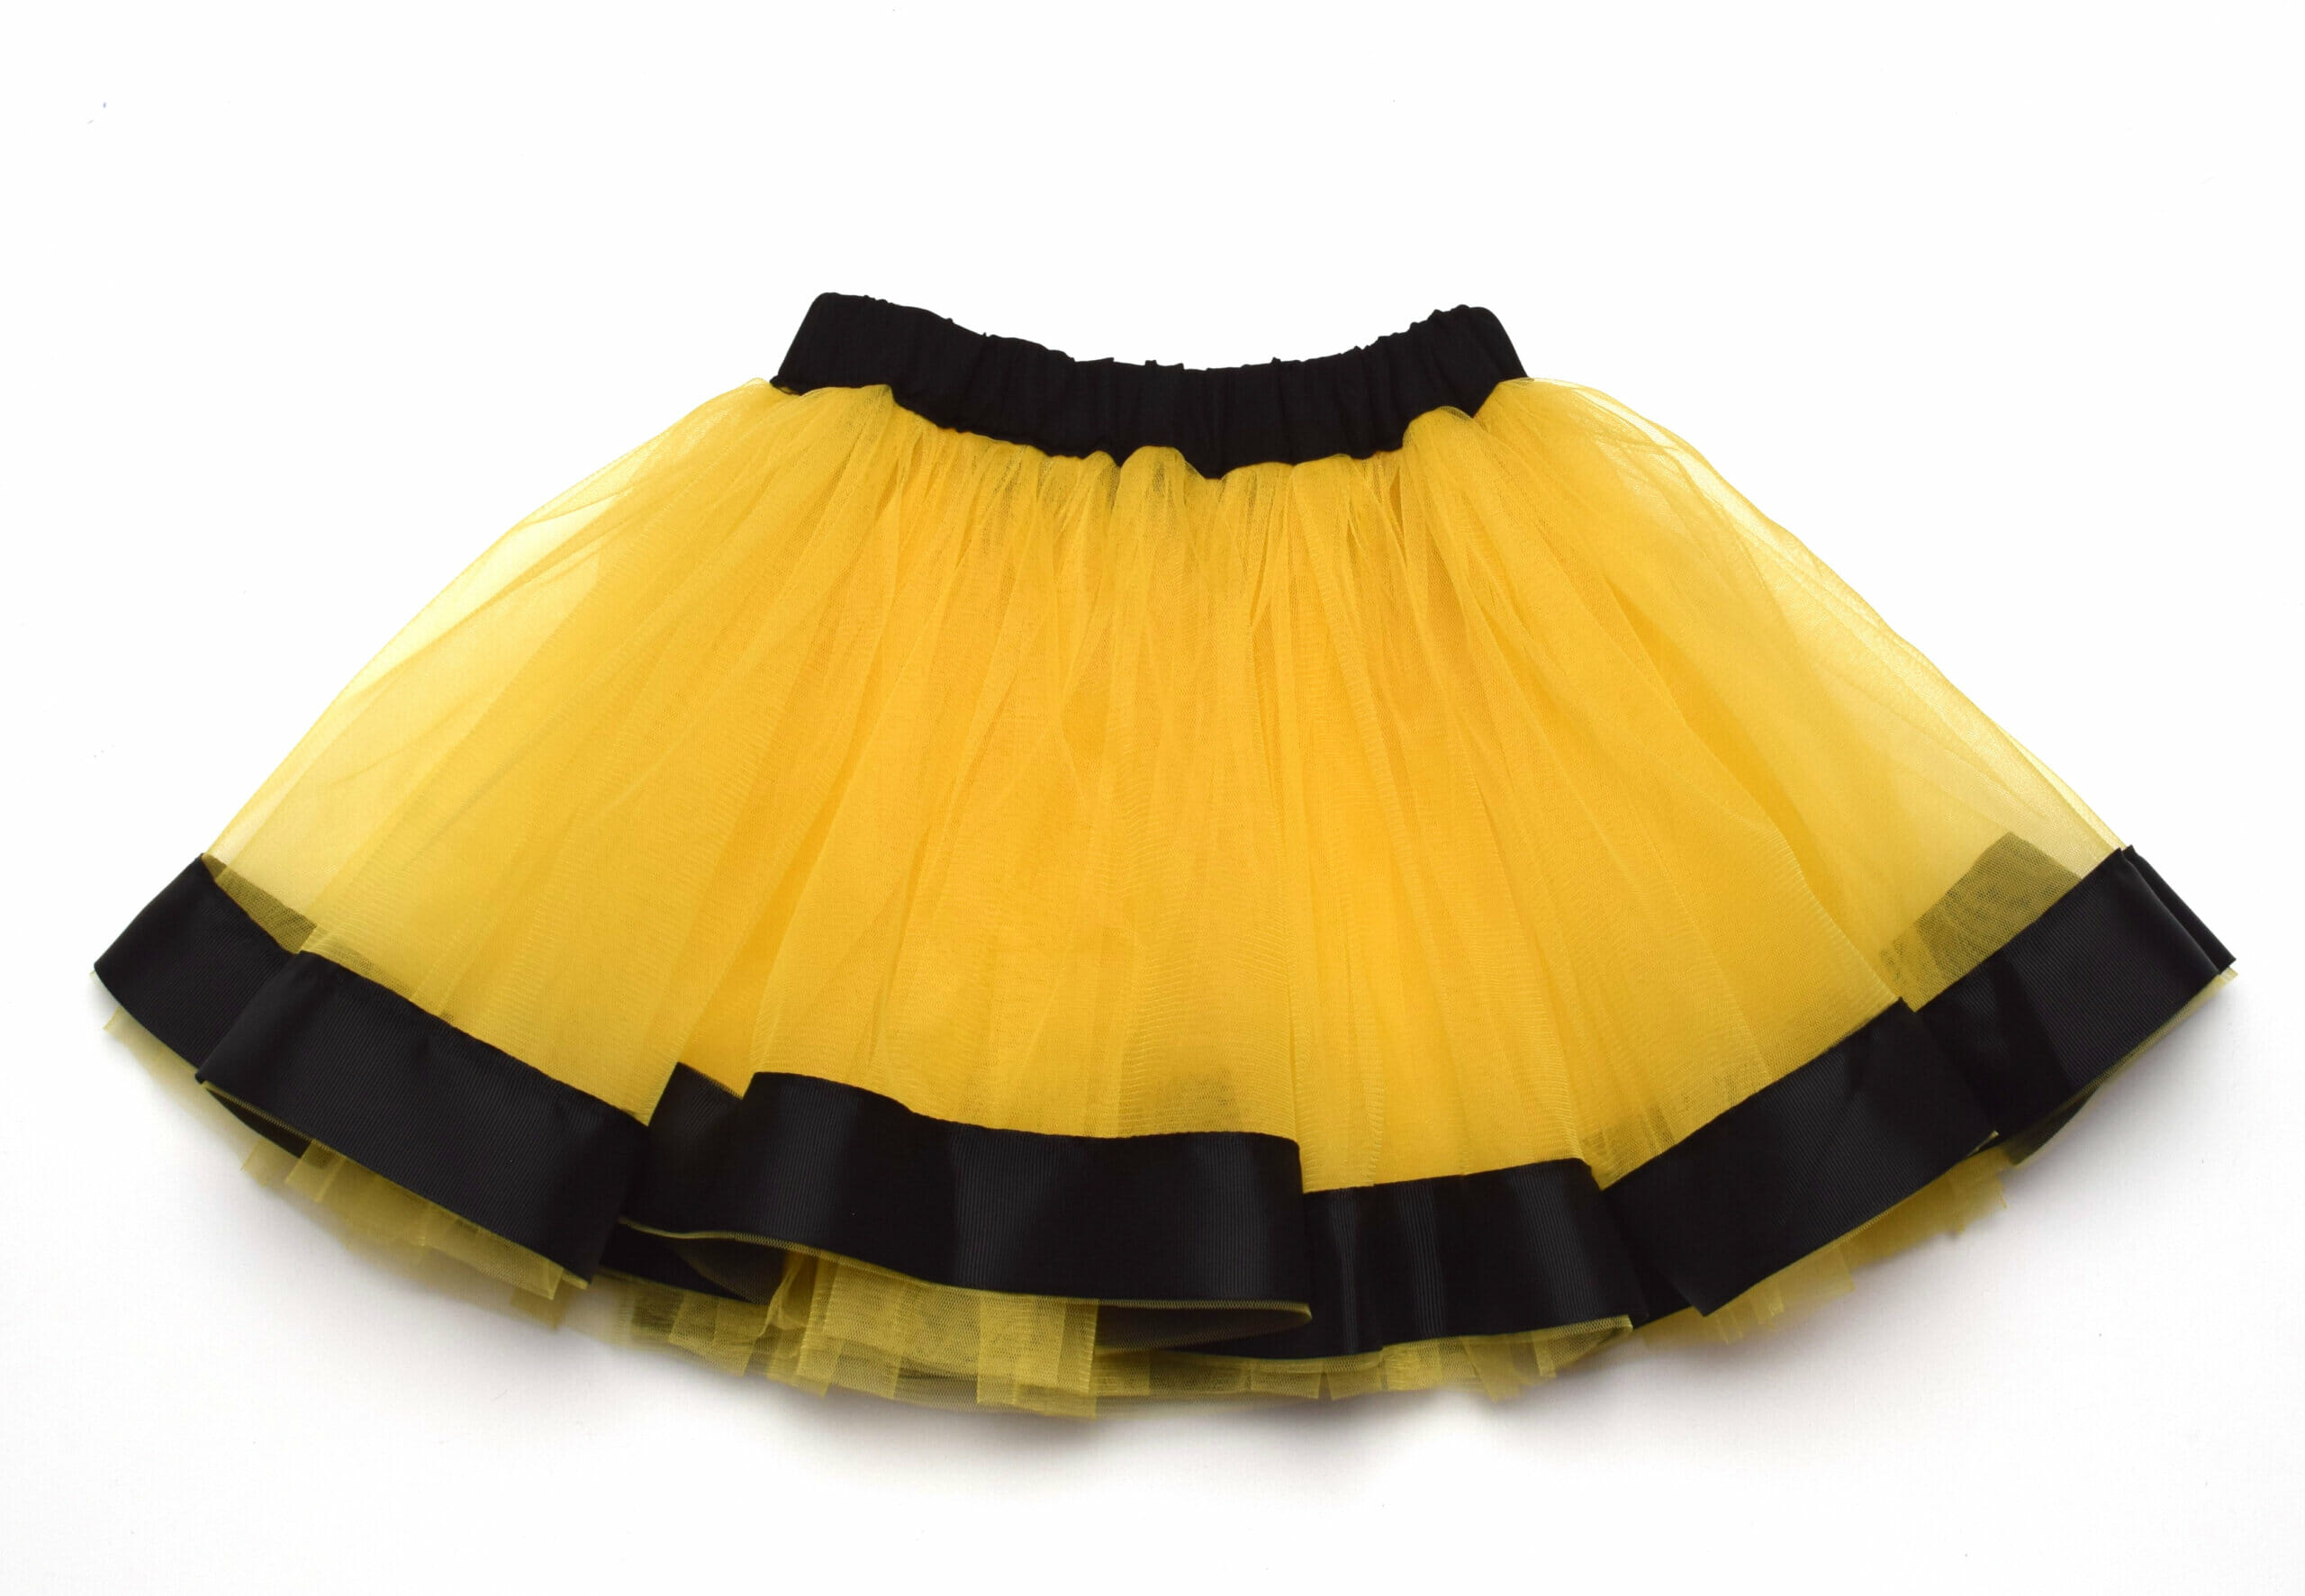
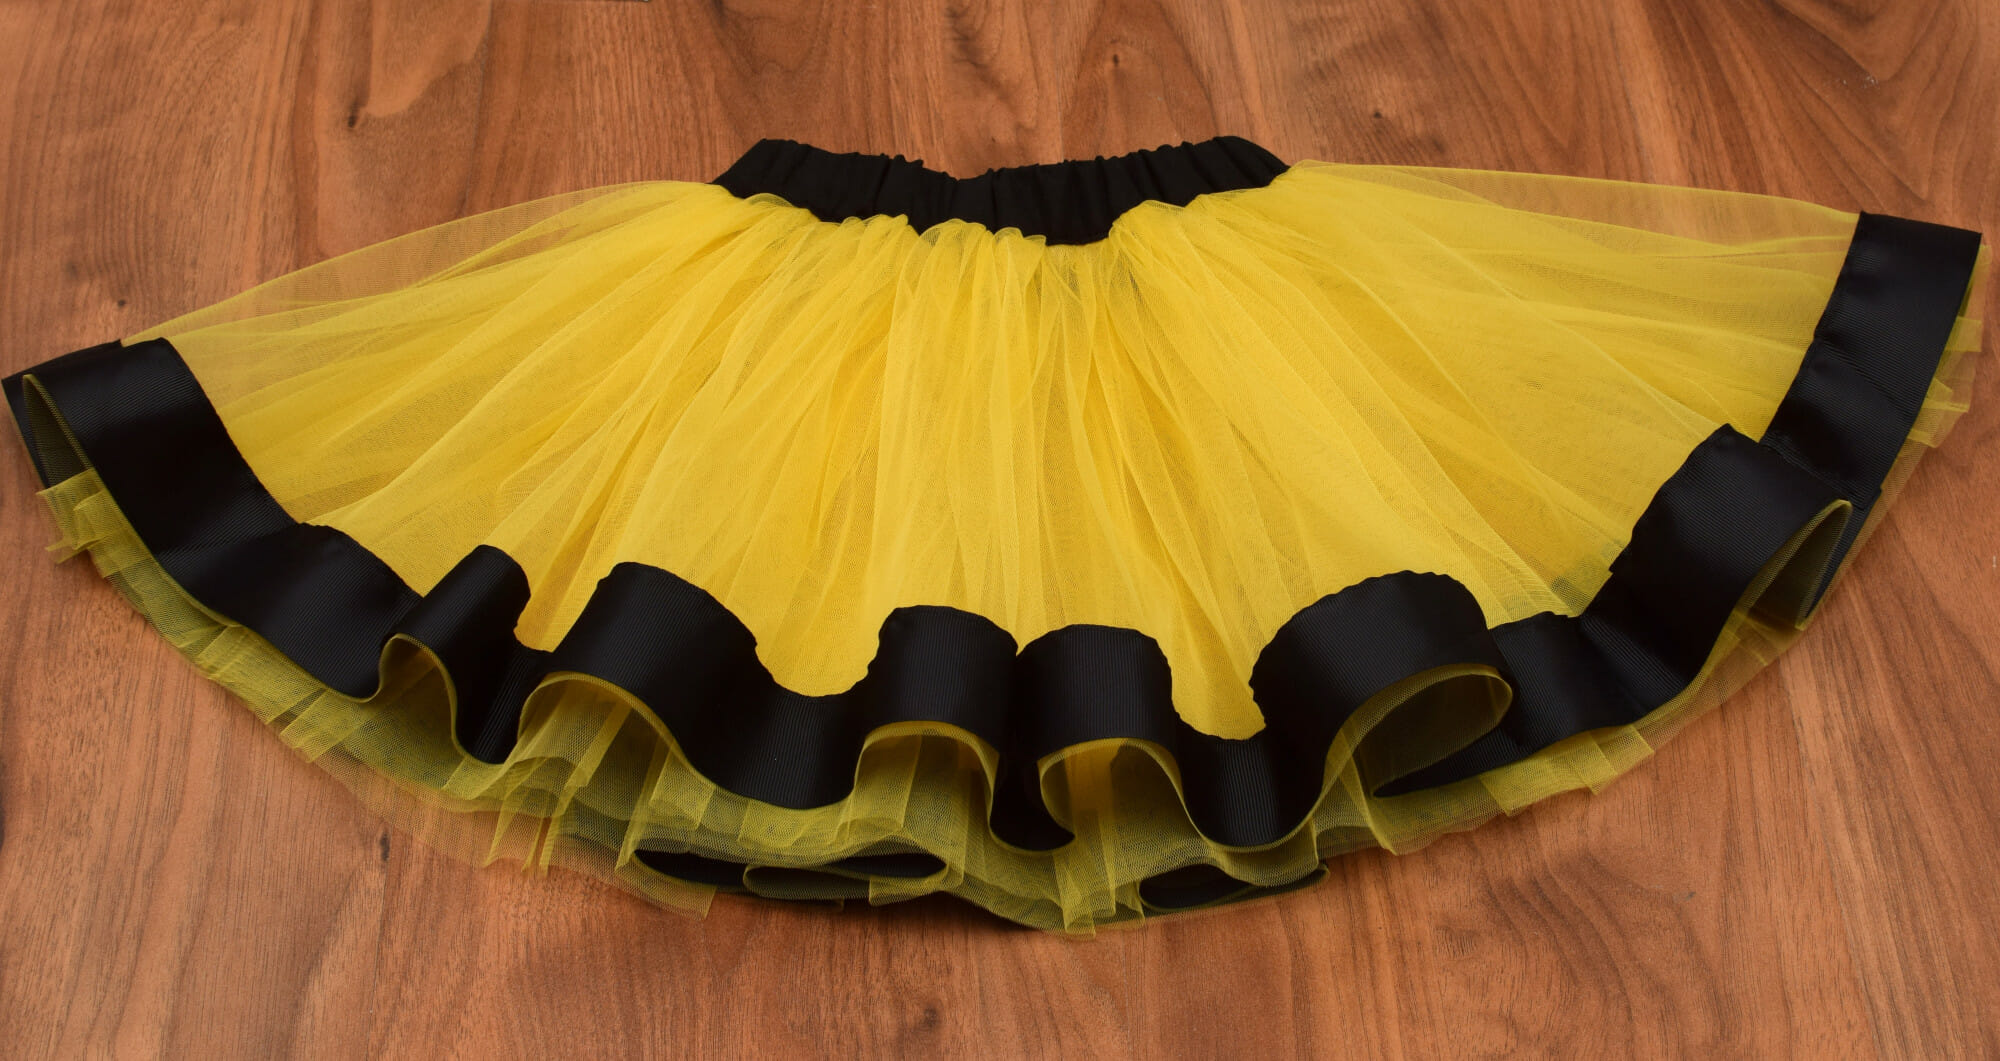
The “busy bee” costume: For a quick DIY costume, try yellow tulle with a black satin waistband and black ribbon trim. It’s an instant bumblebee look that is much more comfortable than store-bought outfits!
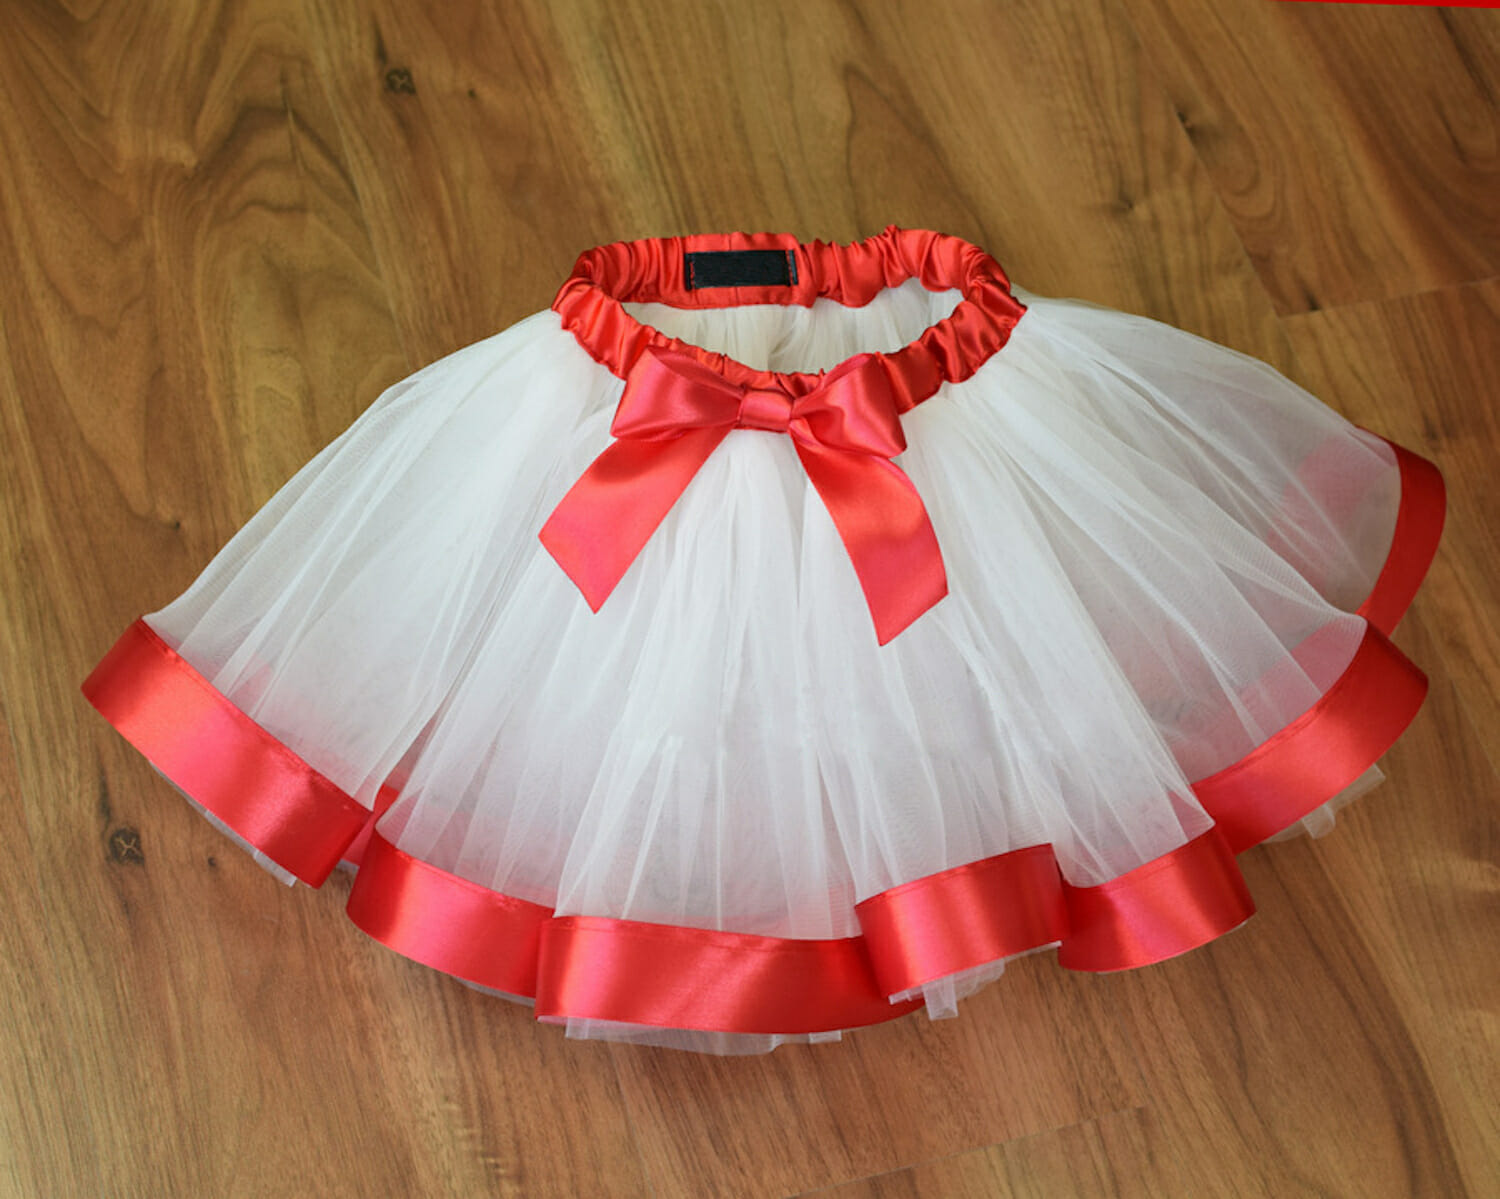
The holiday classic: I made a crisp white tutu with a bright red satin waistband and matching red ribbon trim. It’s perfect for Valentine’s Day, Christmas, or even a “smash the cake” photo session.
What else can you make with tulle?
Tulle fabric is most commonly used to make tulle skirts, and I have written lots of tutorials on how to sew different patterns. Here are a few of my most popular posts: Simple tulle skirt in 10 easy steps / Tiered tulle skirt / Circle tulle skirt. However, you can also make reusable produce bags with tulle, and tulle scrunchies too!
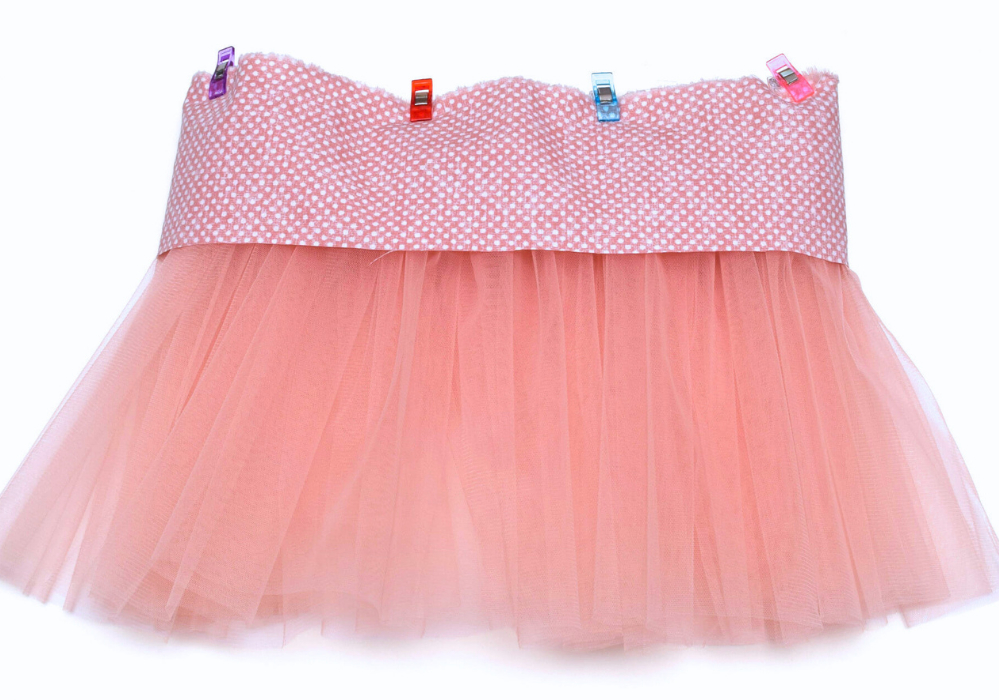
Step 1: Measuring and cutting your tulle
For a standard size 2T to 3T (approx. 20-inch waist), follow these measurements:
- Tulle Layers: Cut two pieces, each 118 inches wide by 10 inches tall.
- Waistband Casing: Cut a fabric strip 24 inches long by 3.5 inches wide.
Pro Tip: If your tulle is wrinkled, use the lowest heat setting on your iron. Tulle is synthetic and will melt instantly if the iron is too hot!
To make your tutu skirt in a different size, it might be useful to check this tutu size chart for children. However, the chart is based on estimates, so it’s better take your child’s measurements.
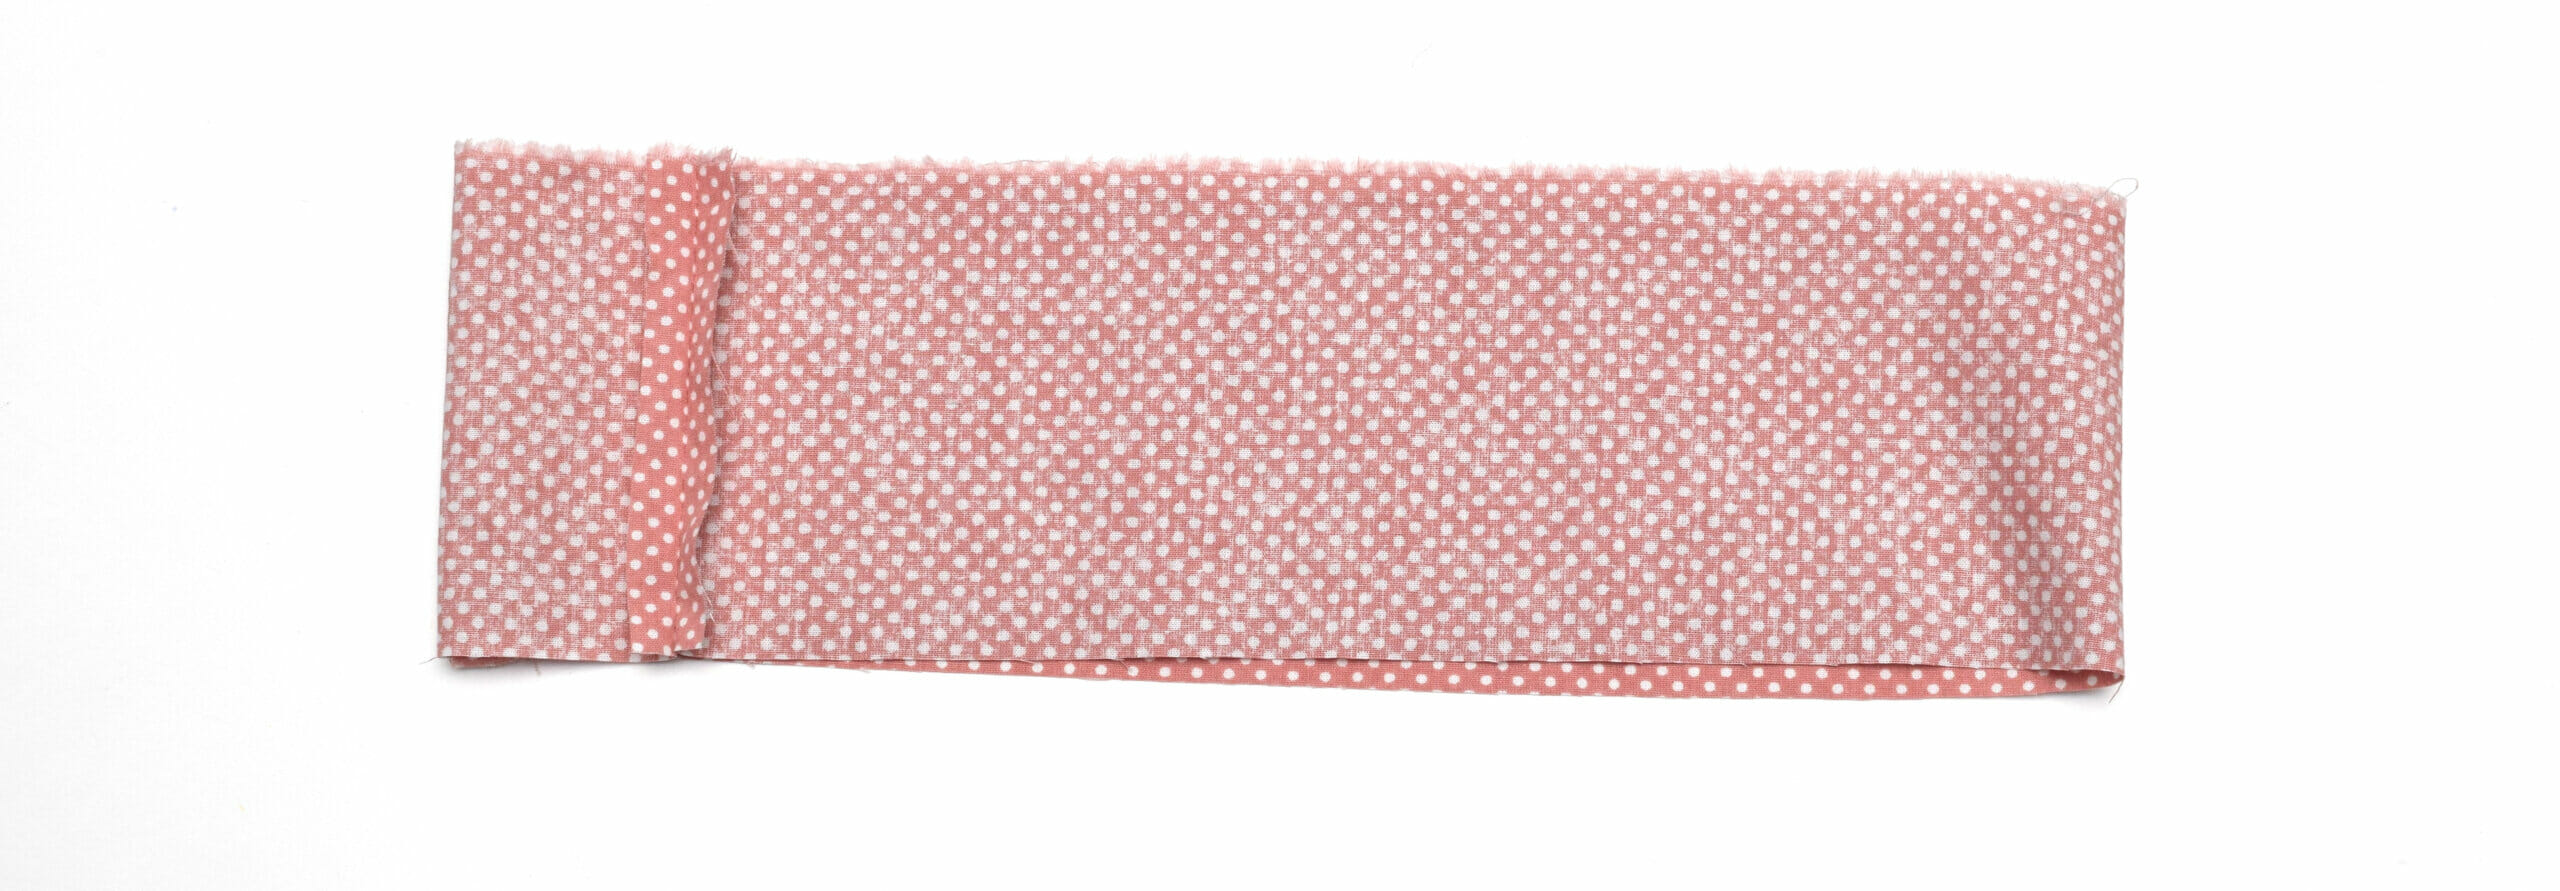
Step 2: Preparing the waistband casing
Take your waistband fabric strip and sew the short ends together (right sides facing) to create a continuous tube. This creates a clean, professional finish for your elastic.
Step 3: Sewing the back seams
Sew the side seams of each tulle layer separately to form two large loops.
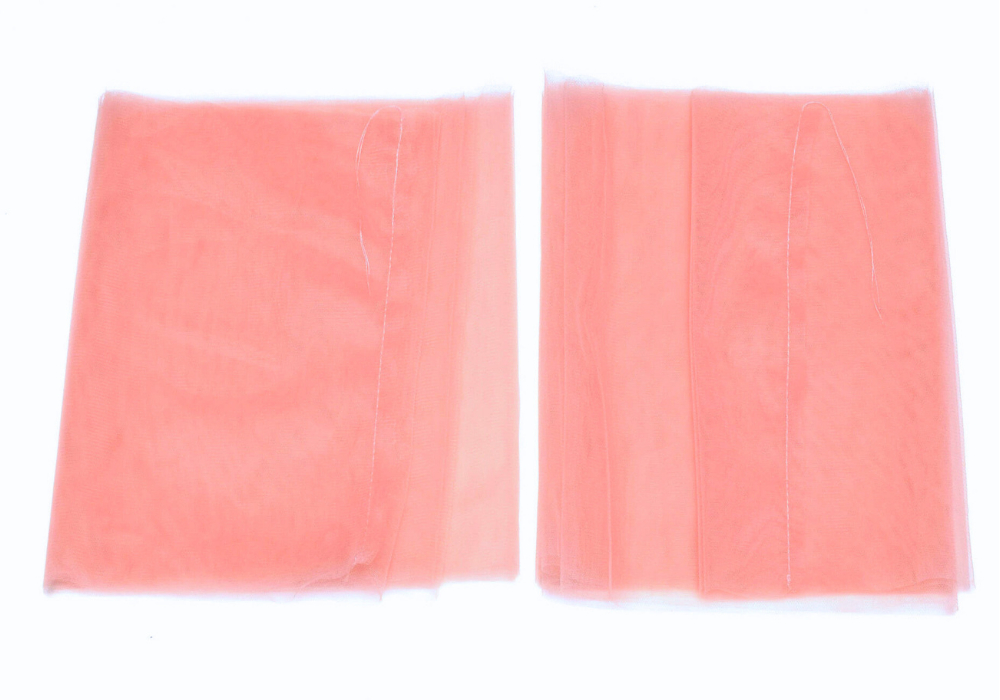
- Needle choice: A fresh ballpoint needle is essential to prevent the fabric from snagging.
- Avoid puckering: Use a short straight stitch and a slow machine speed.
Step 4: How to gather tulle fabric
Set your machine to the longest possible stitch length. Run a basting stitch along the top edge of both tulle layers.
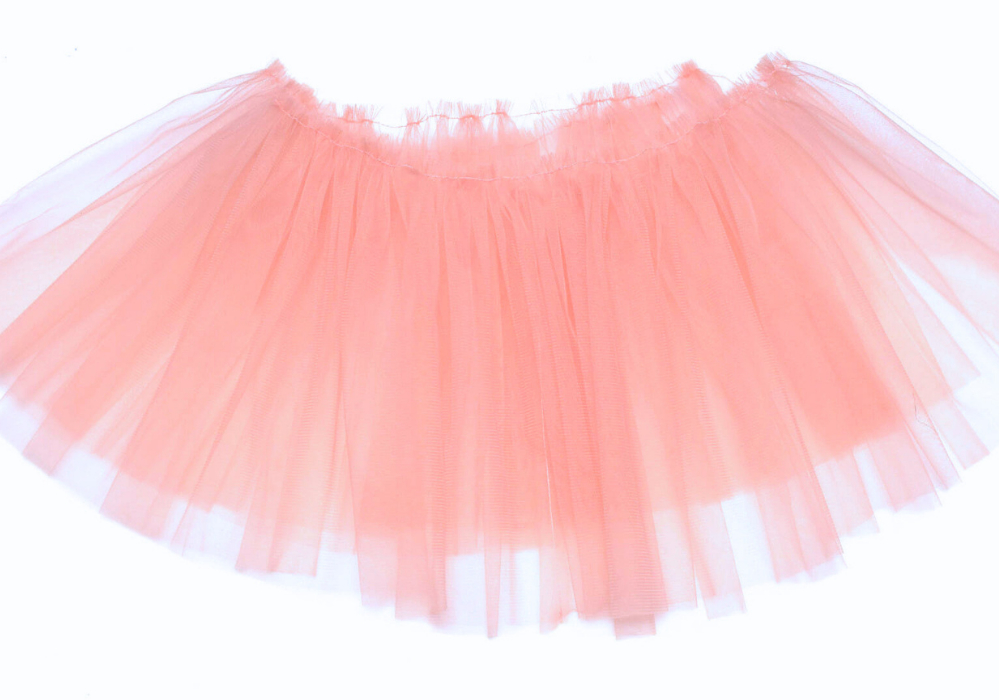
- Leave long thread tails at each end.
- Gently pull the bobbin threads to gather the fabric.
- Adjust the gathers until the total width matches your waistband (24 inches in this example).
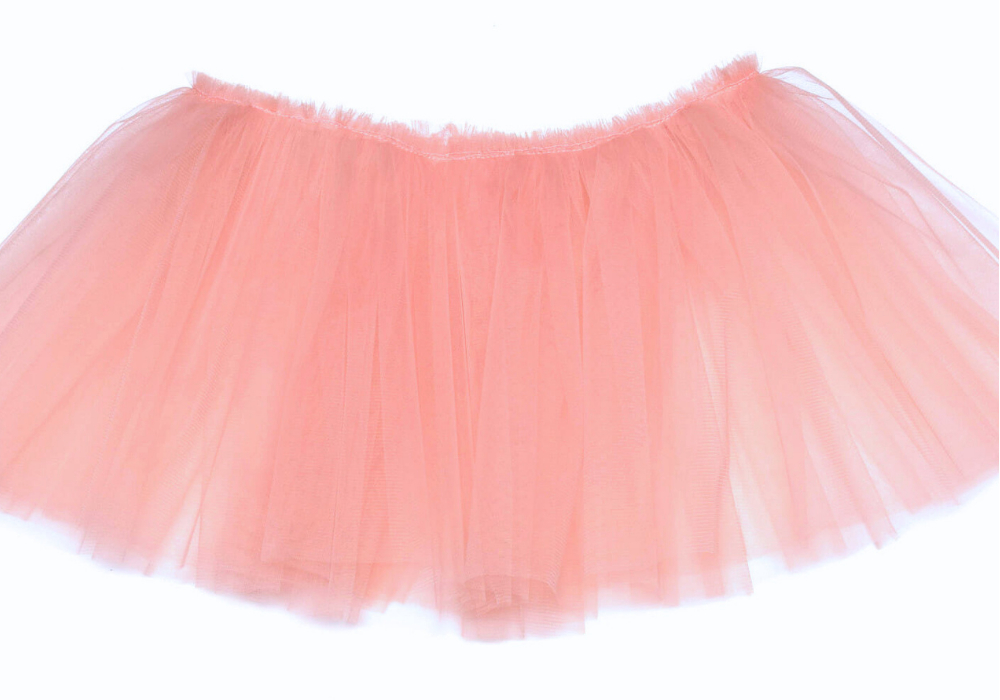
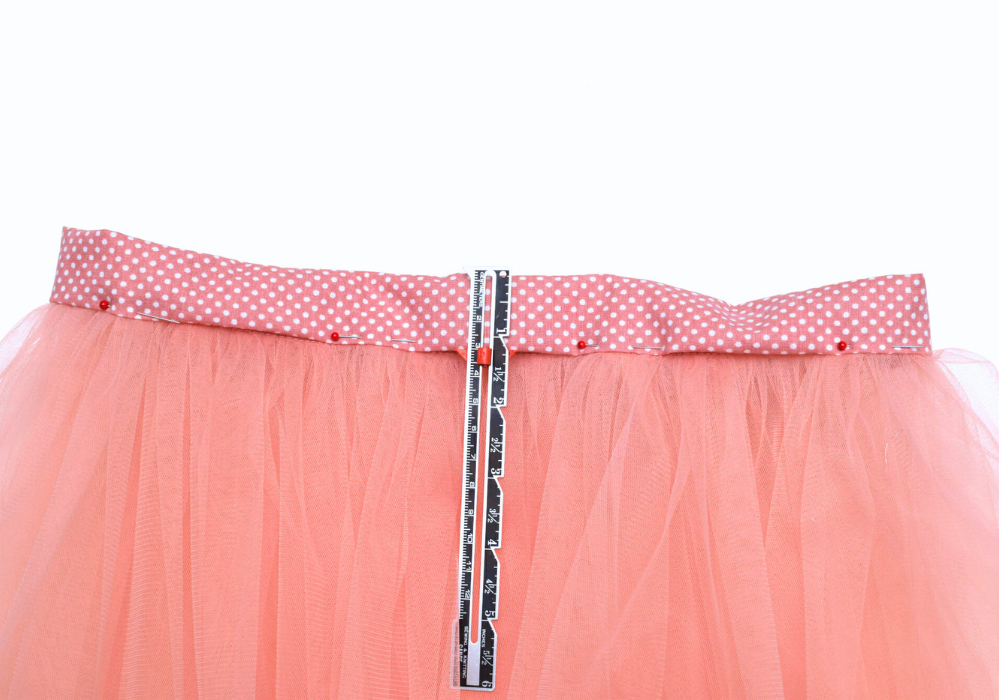
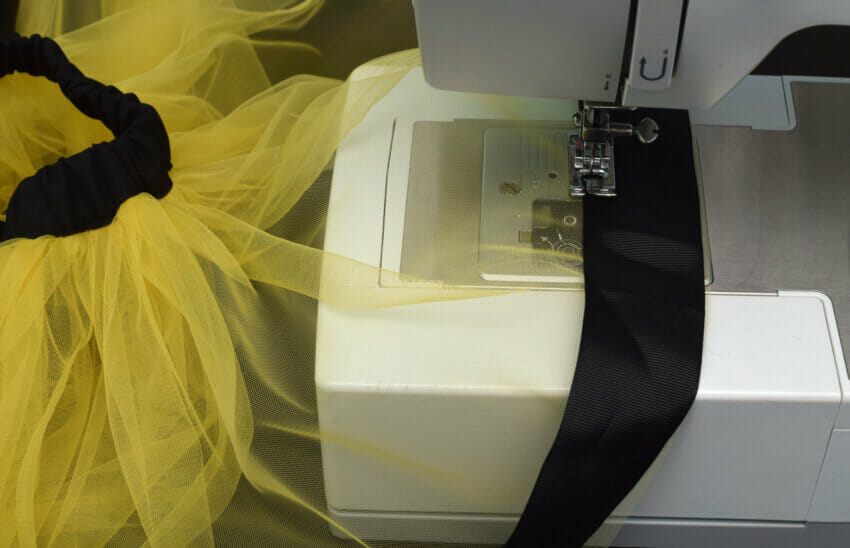
Step 5: Attaching the waistband to the skirt
Place one gathered tulle layer inside the other. Pin the waistband to the top of the tulle layers (right sides together) and sew with a 1/2-inch seam allowance.
Fold the waistband over, tuck the raw edge under, and topstitch to create the casing. Leave a 1-inch gap to insert the elastic.
Pin the waistband to the tulle skirt, right sides together, and sew with a 1/2” seam allowance.
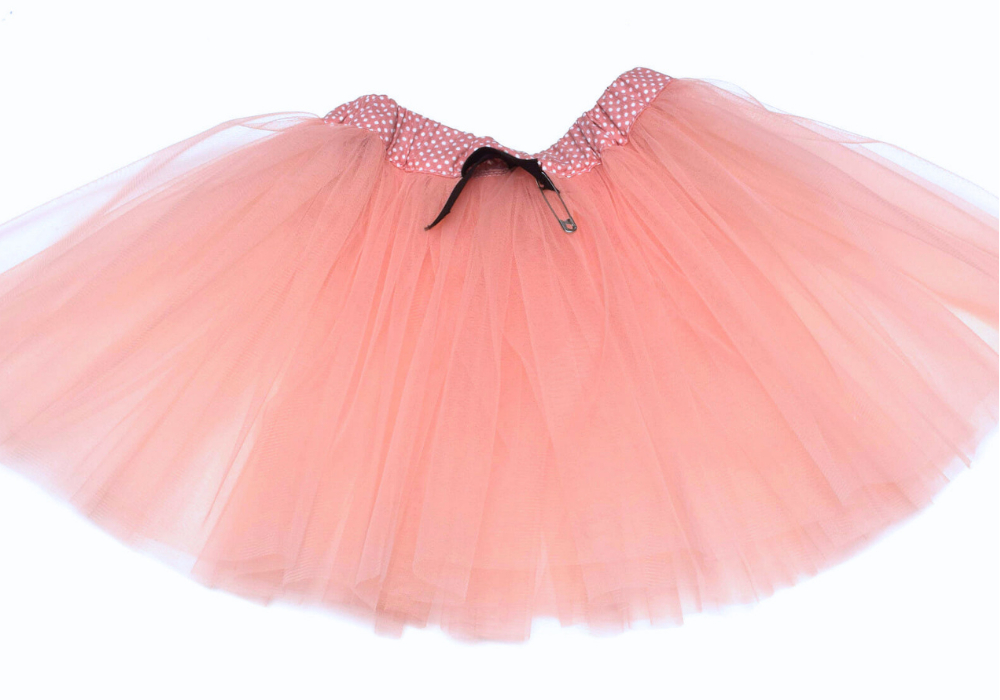
Step 6: Inserting the elastic
Cut your 1-inch elastic about 1–2 inches smaller than the child’s actual waist measurement. Thread it through the casing using a safety pin, sew the elastic ends together, and close the gap in the fabric.
Step 9: How to add a ribbon trim (optional)
Adding a ribbon border is the best way to give your tutu extra volume and a professional finish.
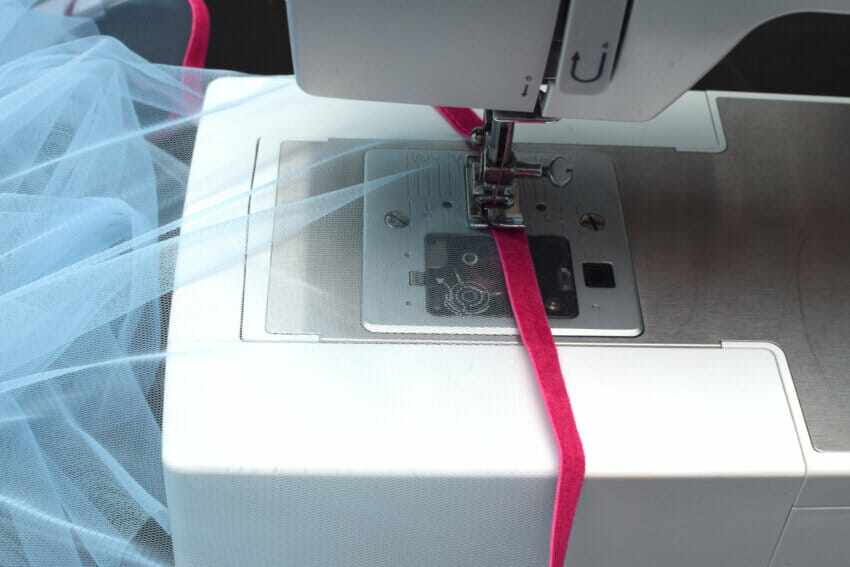
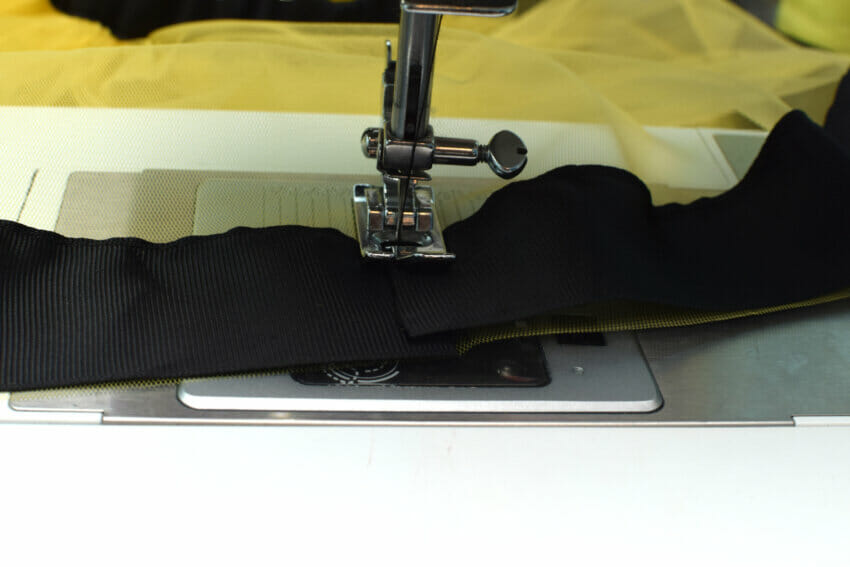
- Align the edges: Choose a satin, velvet, or grosgrain ribbon. Place it as close to the bottom edge of the tulle as possible.
- Check the “curl”: Ribbon naturally tends to curl slightly once sewn. Pay attention to the direction so it curls “out” or “in” consistently for a bouncy look.
- Sew with a long stitch: Use a longer straight stitch length. This prevents the needle from creating too many holes, which can weaken the ribbon.
- Finish the loop: Sew all the way around the hem until you reach your starting point. Overlap the ribbon ends by about half an inch and secure them with a quick vertical stitch.
Pro Tip: Want even more flair? You can “jazz up” the waistband by hand-sewing a matching ribbon bow to the center front or side.
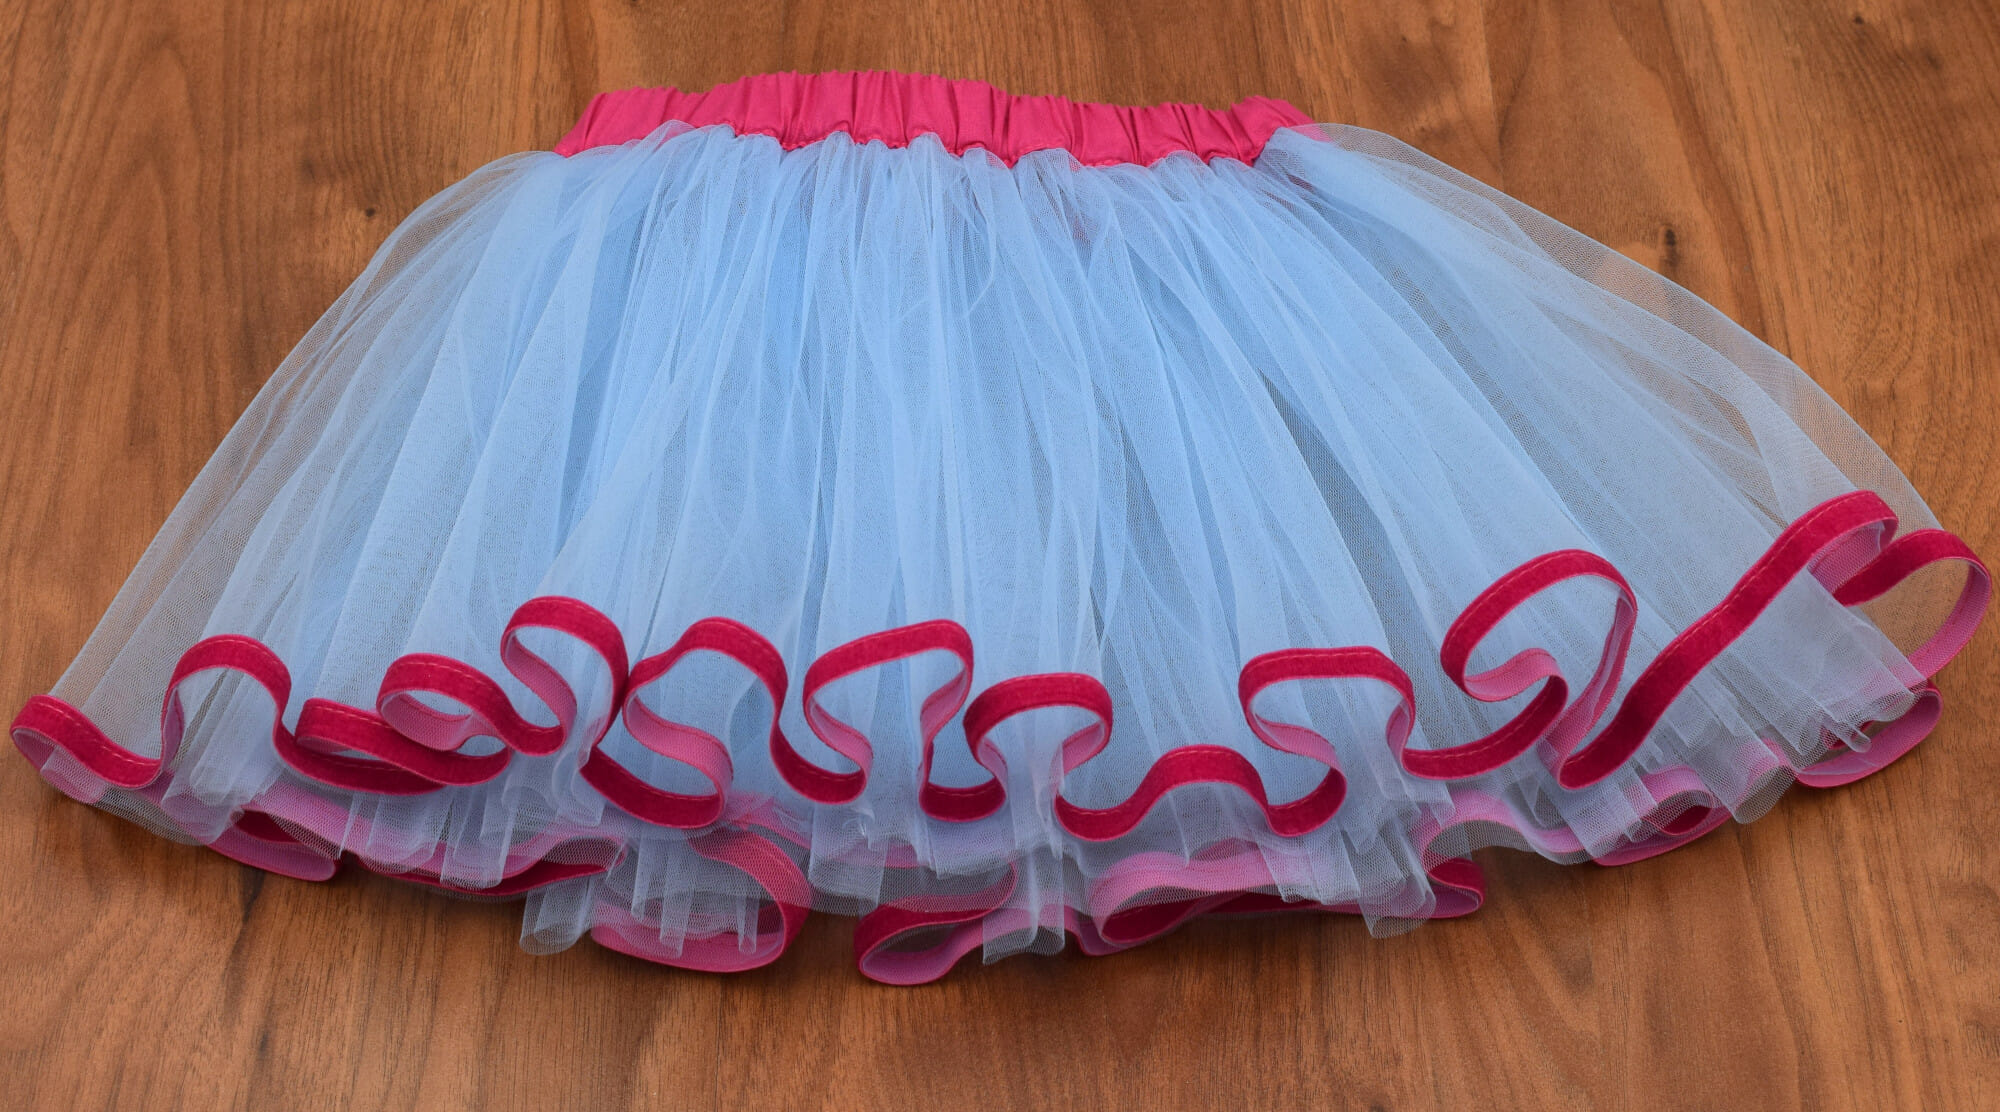
The “bubblegum” blend: My daughter’s current favorite is a bright blue tutu paired with a pink cotton waistband and soft pink velvet ribbon. The mix of textures makes it feel extra fancy for everyday play.
Frequently asked questions
Is tulle hard to sew? Actually, it’s easier than satin or jersey! Because tulle doesn’t fray, it is very forgiving for beginners.
How do I wash a handmade tutu? Hand wash or use a gentle cycle in a laundry bag with cold water. Always air dry to keep the fluffiness intact.
Can I make this for older children? Yes! The 118-inch width fits most children up to size 10T. Just increase the length of the tulle and the size of the waistband based on their hip measurement.
I hope this tutorial shows you that sewing with tulle isn’t nearly as scary as it looks! Whether you’re making a bright yellow bumblebee costume or a dusty pink skirt for everyday play, these tutus are a guaranteed hit with any little girl.
I’d love to see what you create! If you give this DIY tutu a try, please tag me @icansewthis or leave a comment below to share your progress. Happy sewing!
You might also love:
- Easy lined sleeveless dress pattern
- 20 fun sewing ideas you can make as party bag fillers for kids
Let’s keep in touch! You can find me on Facebook, Instagram, and Pinterest.

I am in the midst of making this cute tutu. Thanks so much for the tutorial. I am confused when you say to make the waistband hip measurement + 4″. Shouldn’t that be the waist measurement + 4″ ??
Hey Clare,
Thanks for your comment! When it comes to measuring for the skirt, you can use either your hip measurement or your waist measurement. It doesn’t really matter which one you choose, just go with the bigger number. The main idea is to make sure the skirt can easily go over your hips and sit comfortably on your waist.
Happy sewing! Hope everything goes well with your tutu skirt!
Hi! Is there a reason you baste each layer separately, as opposed to basting and gathering the two layers together? Making three, so I’m trying to streamline the process. ? Thanks so much!
Hi Kaitlin,
Thank you for the comment! Yes, there is a reason, but either option is fine. If you gather two layers together, your skirt will look like this https://static.icansewthis.com/2020/01/diy-navy-tulle-skirt-elastic-waistband-for-girls-768×599.jpg
(it’s a pic from this tutorial https://icansewthis.com/how-to-sew-a-tulle-skirt/)
Gathering each layer individually makes for a fuller and fluffier skirt, but gathering the layers together results in an equally gorgeous skirt. The only difference is that the gathers are more tame / put-together in the second version. Not sure how to describe it, but hopefully you get the idea.
Hi – Lve your patterns! I just stumbled on your site looking to make some dress up clothes for my granddaughter for her birthday. I’m super excited to get started. Can you please tell me the height and width of the bodice pattern piece? I want to be sure I printed it in the correct format.
Thanks so much, Sue
Question—I cut the waistband 3.5” as instructed, sewed the tulle on with 0.5” seam, turned under other edge of waistband 0.5”. So now I can’t make waistband 1.5” wide as now it is only 2.5” wide before folding. Should the original waistband be cut 4” to accommodate a 1” elastic?
Hi Mary,
Everything seems to be fine from what I gather. Your waistband is now 2.5″ wide, as it should be. Once you fold it, it will become approximately 1.25″ wide and that’s just perfect for inserting a 1″ wide elastic. I’m keeping my fingers crossed for you! Best of luck!
Wow! Thank you for this simple and easy steps. I will give it a trial.
Lovely tutorial. I am adding a cotton underlayer so my granddaughter can wear the skirt out, as I know she will want – with wellies preferably! I will use same fabric at waistband. Thank you
Thank you “sew” much for this wonderful sewn tutu skirt tutorial! I am an extreme novice at sewing and your tutorial walked me step-by-step as I needed to complete this wonderful project! The addition of the bottom ribbon really turned the project from so-so to wow! Thank you for showing this option and how to complete it! Thank you for the encouragement to try a new material. I found sewing the tulle a breeze! I am so proud to be able to send my daughter to school for “tutu” Tuesday (2/22/22) with my project that looks professional! While I’ve come across many of the tulle-tied-around-the-waist tutu’s (which I have made and are also fun), this method is very classy and will work for a lined skirt as well. So many options. Thanks again for this excellent tutorial!
Was that one yard of tulle for your daughters size?
Hi Michelle,
I wish I got back to you sooner, so sorry I missed your comment!
To answer your question, I used far less tulle for these tulle skirts (length 12” = tulle layers+waistband length).
For each tutu skirt I used 2 tulle layers, each being 118” (300 cm) wide and 10” tall – so that means 118” by 20” in total for one skirt.
That means that you can make 4 such tutu skirts out of 1 yard of 118-inches wide tulle.
118 inches = 9.8 feet. Is this really the measurements?
Hey Cindy,
Yes, 118″ width tulle is a thing! I was surprised too at first, but it makes sense because it’s a super fine fabric. It’s most commonly used for wedding dresses, bridal gowns etc.
Hello! I wonder if you could please give me some advice? I’d love to use your tutorial to make a tutu for my niece but having measured her her waist and hip are the same size (22”) so I’m not what size to cut. Any advice is very gratefully received x
Hi Natalie,
I think that’s very common with kids – their waist measurement is always close to the hip measurement. The most important thing is to make the skirt opening big enough to slide easily over the hips – meaning 22” + 4 or 5 or 6 additional inches for ease. I always look at a kids size chart by age (search on Google) to find out what to expect in the future, because I always want my daughter to be able to wear the skirt for 2 years. So, the waistband of your skirt will be 27” long, let’s say, and the elastic will be shorter than the waist measurement, maybe 20-21” (that depends a lot on your elastic, I sometimes cut mine at 18”…)
Thank you so much that’s really helpful! Will let you know how I get on! Thanks for the fab tutorial! X