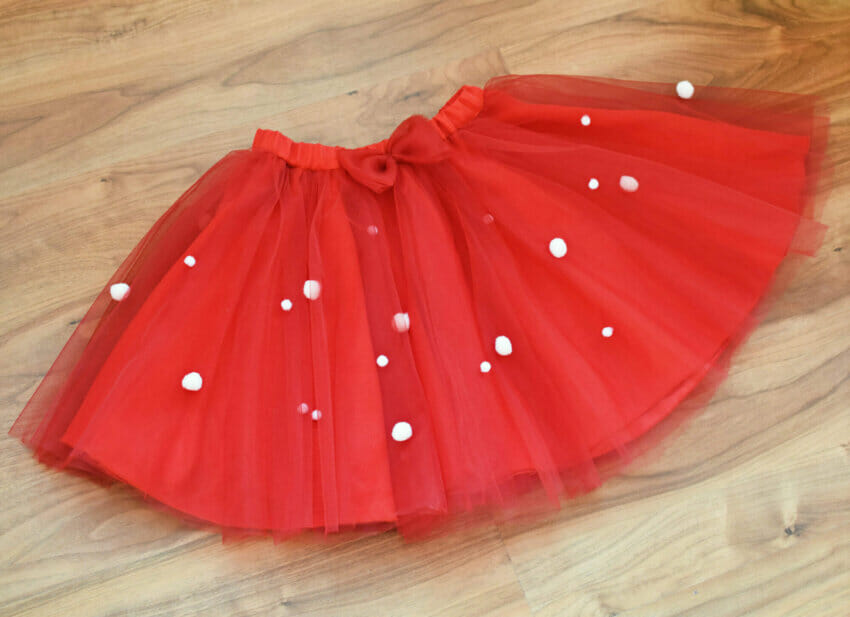
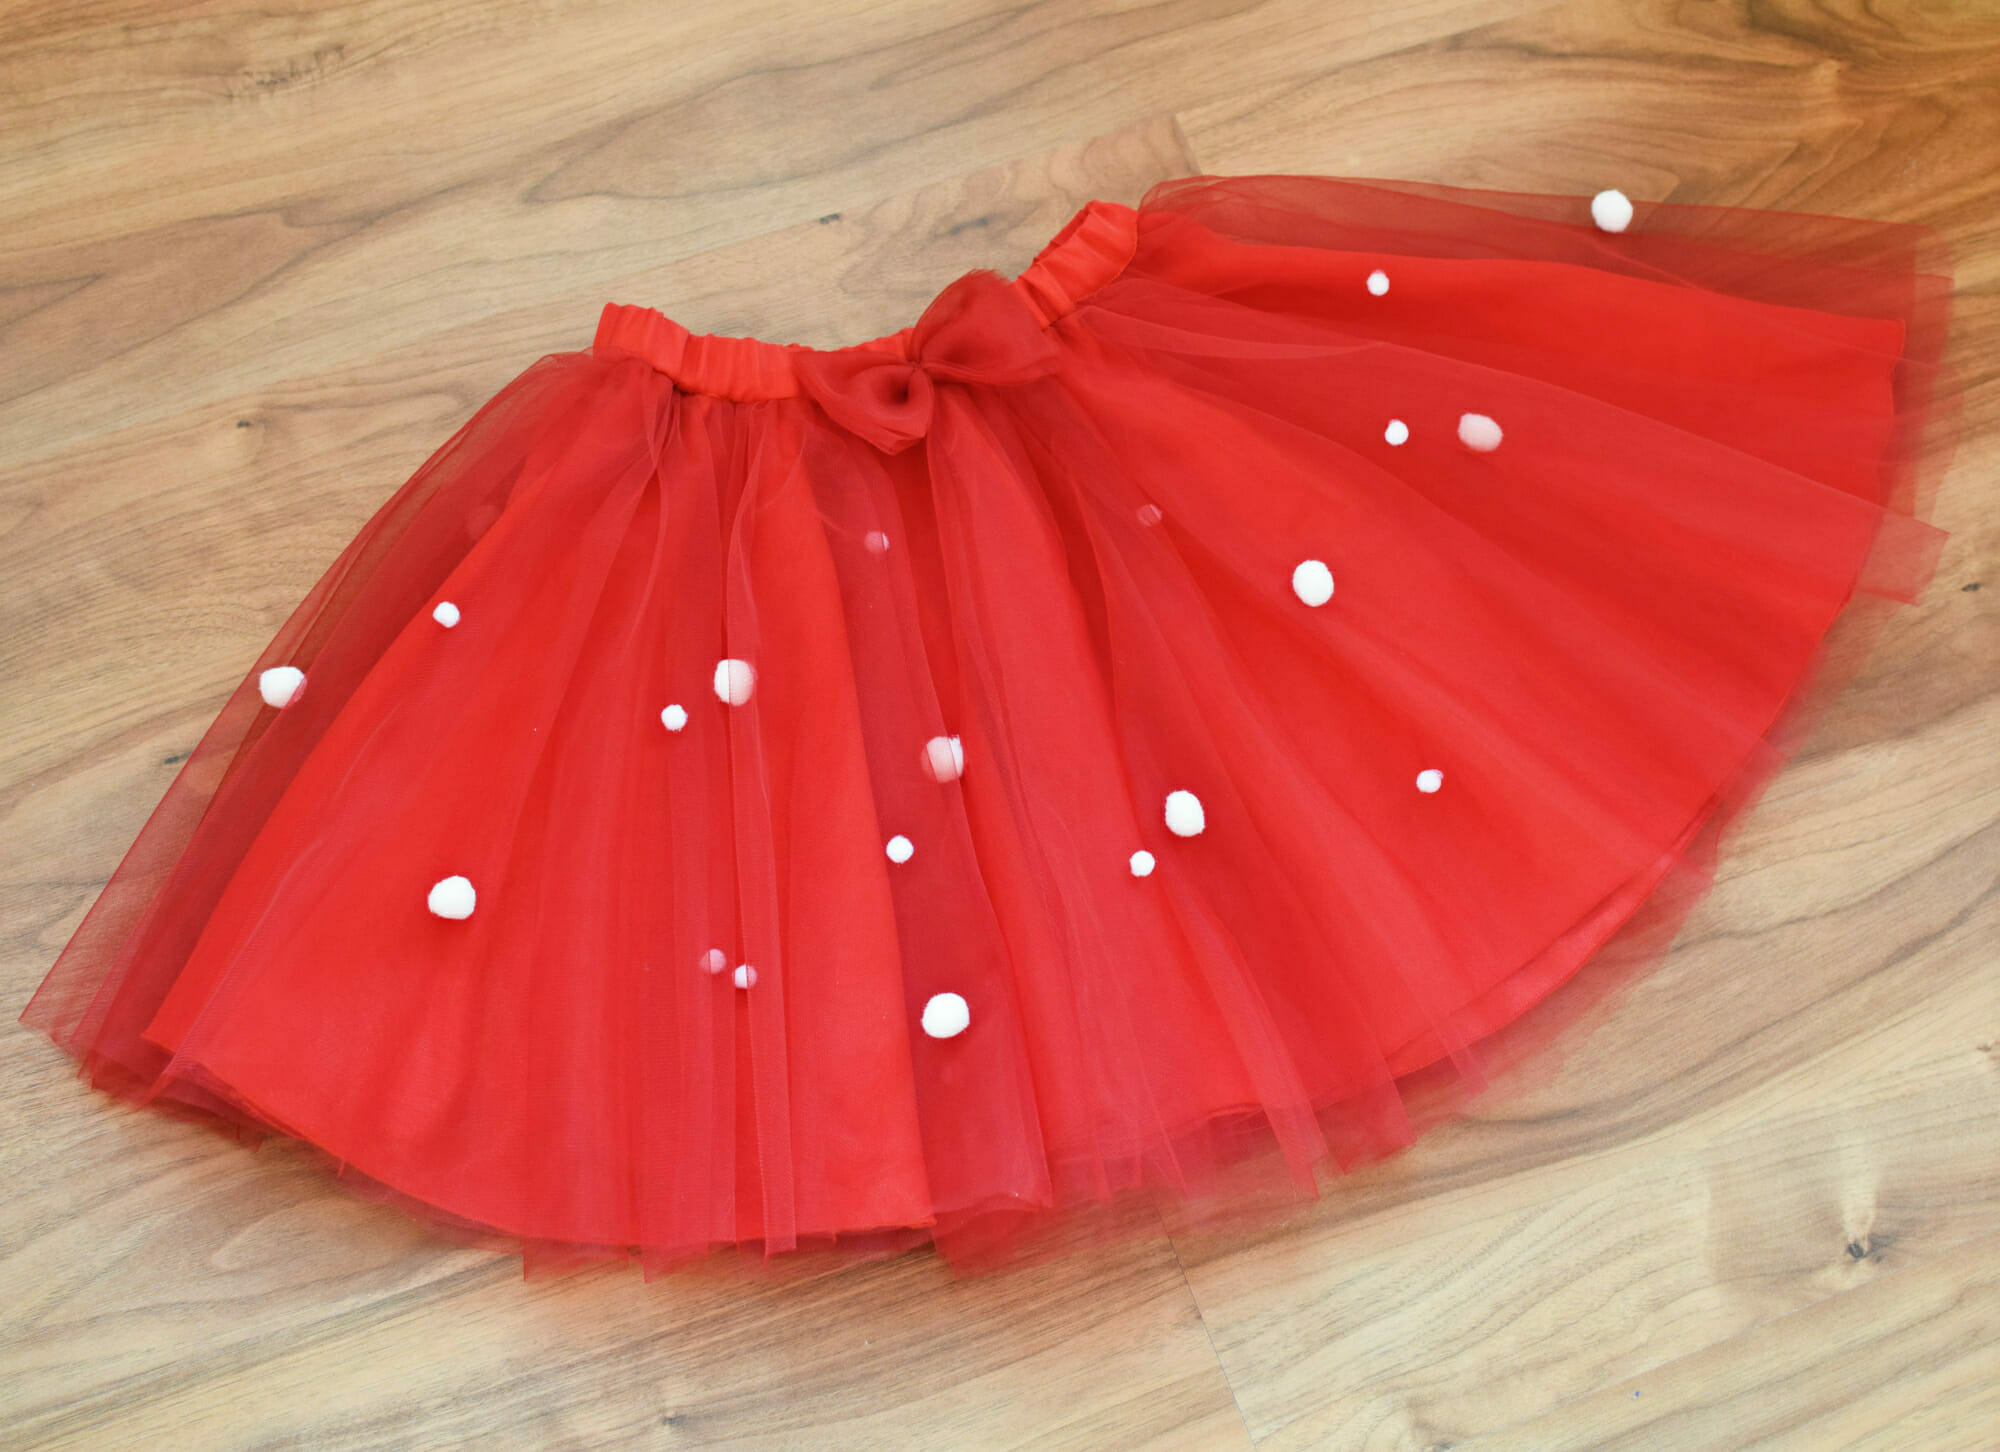
How to make a circle tulle skirt with pom poms and elastic waistband. Learn to sew a super fun tulle skirt for girls, that will look gorgeous at any party. This red pom pom DIY circle skirt is perfect for twirling and dancing, and makes a great gift for little girls.
Hey everybody! Look at me! It snows on my tulle skirt! This skirt is surely one of the most fun pieces a girl can wear in the winter.
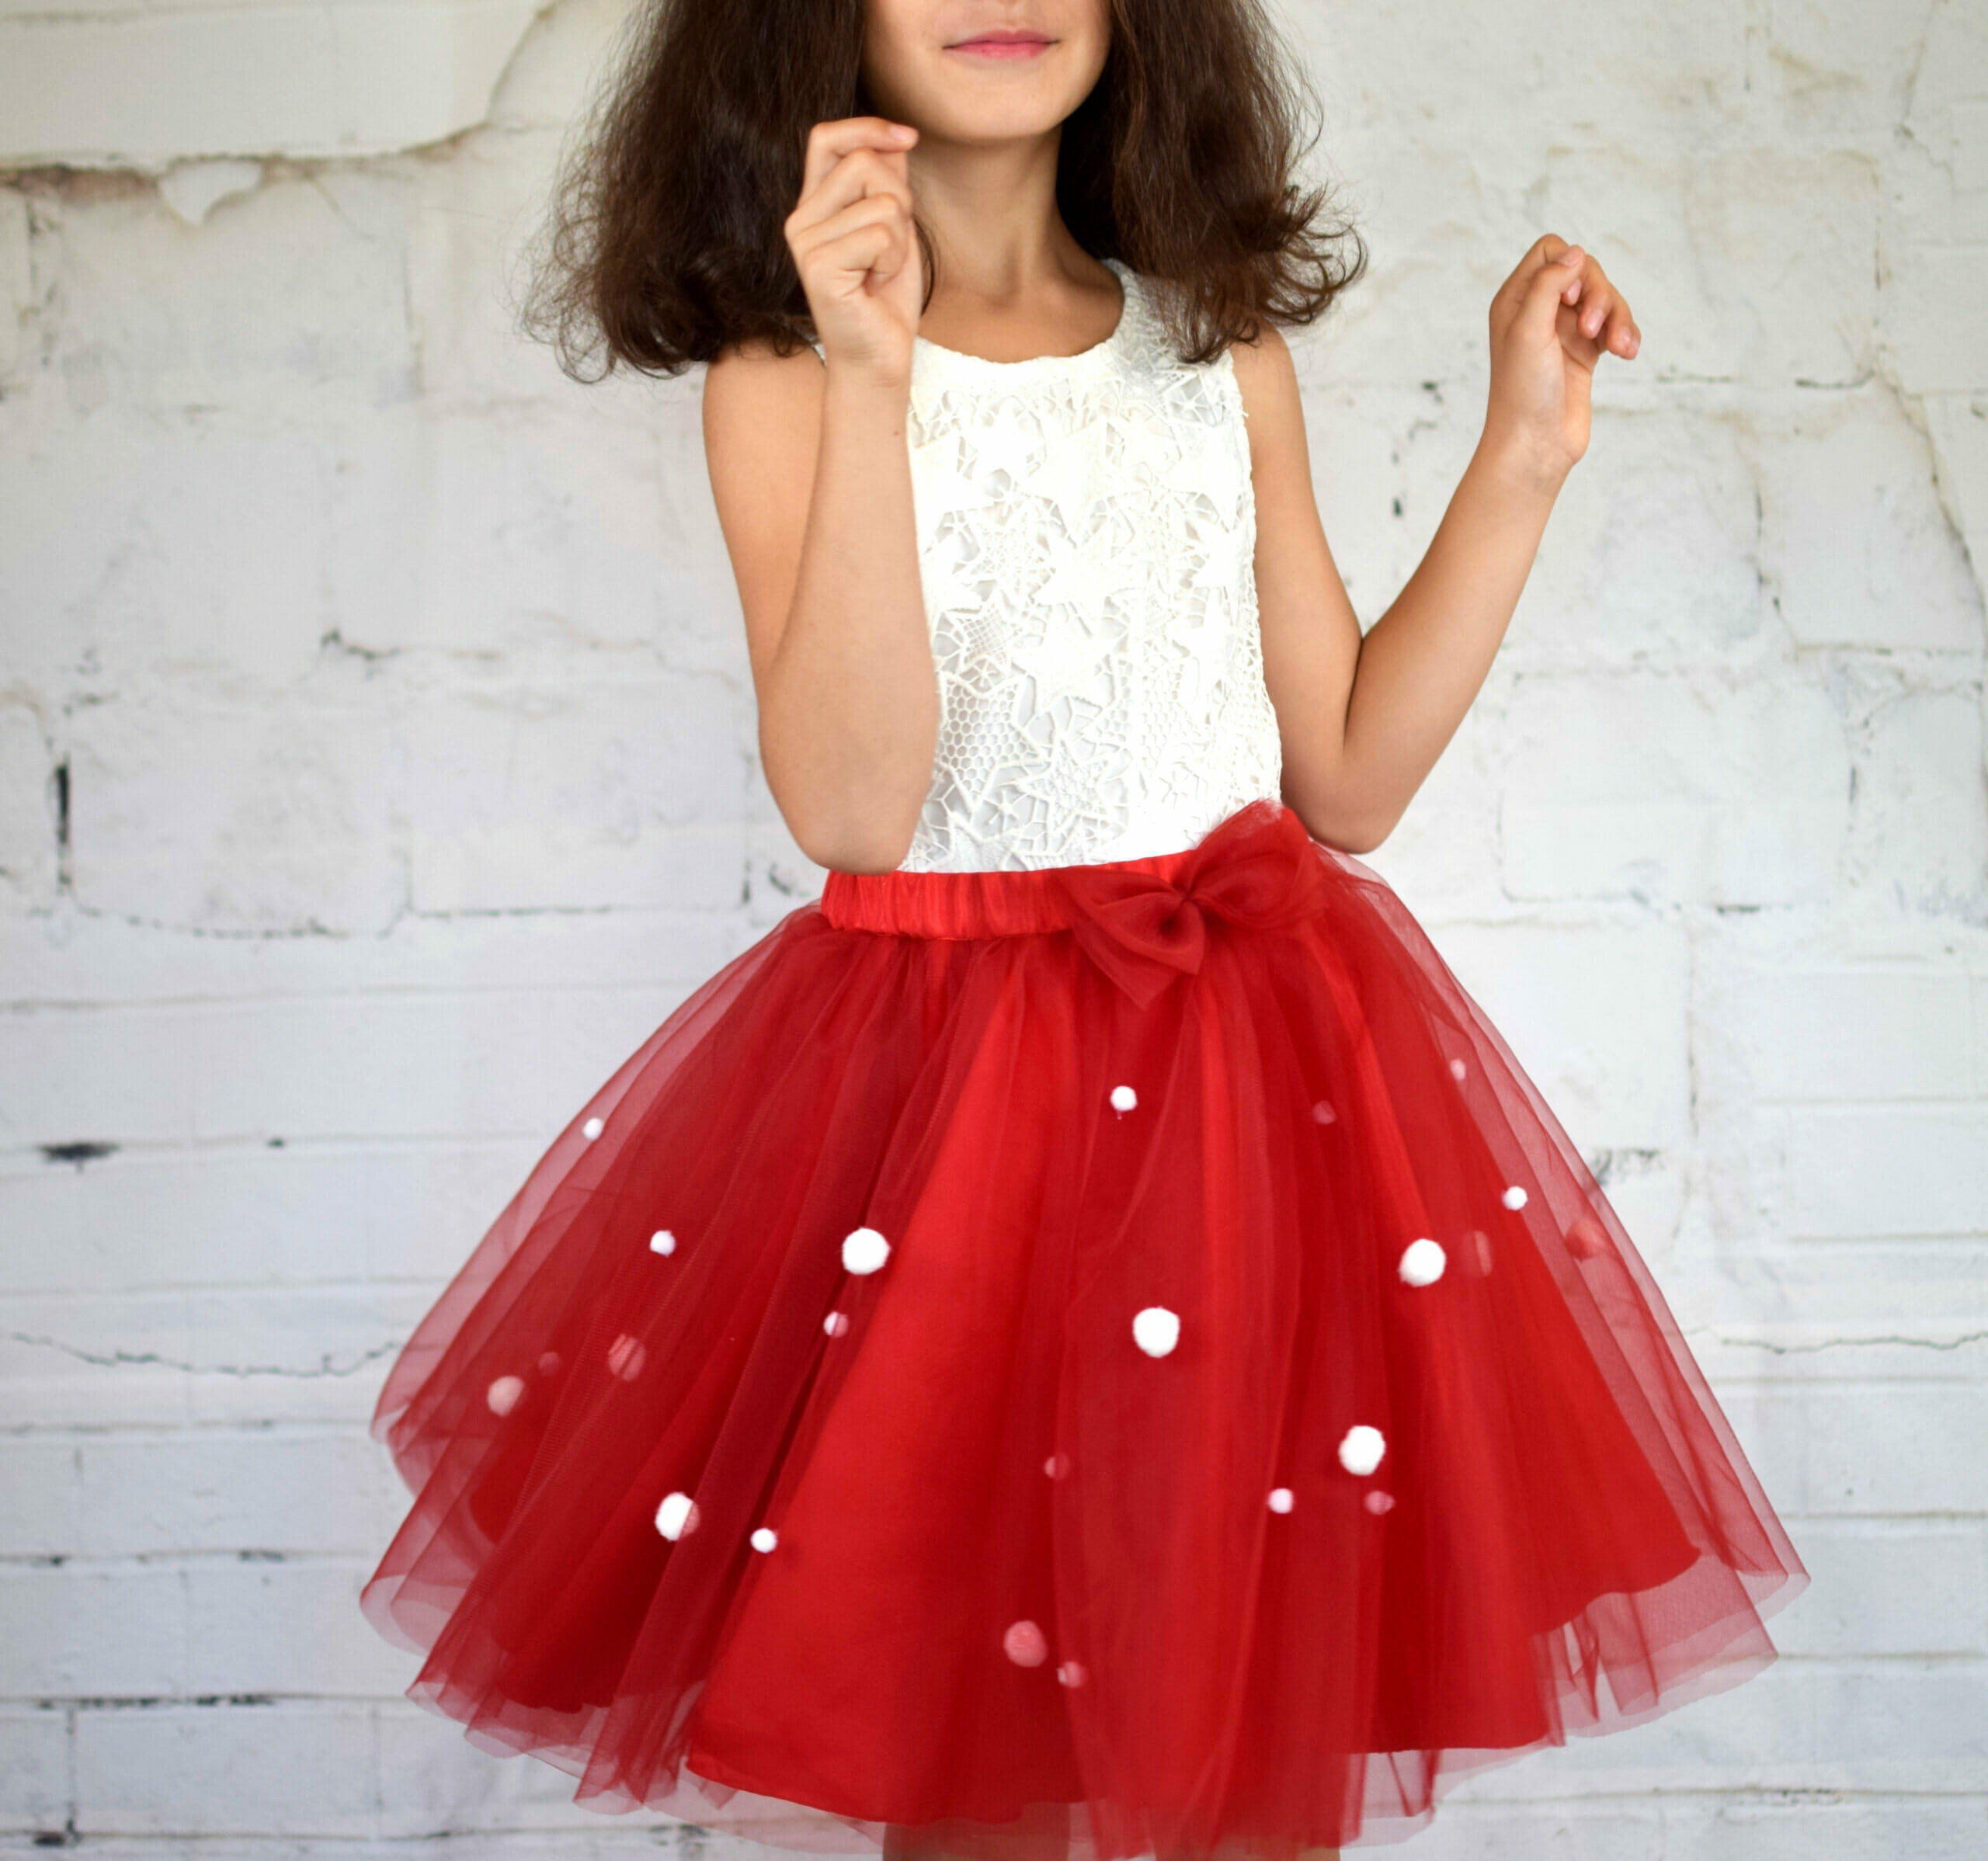
So, if you’re looking for some fun and easy sewing projects, you may want to try your hand at it. This adorable tulle skirt with elastic waistband usually takes less than 1 hour to complete. But, if you’re an absolute beginner, you might want to take things slow – even so, you can create something special for your little princess in just one evening.
Now is the perfect time to sit down at your sewing machine and make a super cute DIY gift for your kid!
Besides, this red pompom circle tulle skirt is also a great sewing project to make and sell.
I know this firsthand since I owned a small business selling handmade tulle skirts, and this red pom pom tulle skirt with elastic waistband has been a hit during the holiday season.
And here’s the best part – it’s super easy to make this awesome circle tulle skirt!
How to make a circle tulle skirt
Namely, both the tulle layers and the skirt lining are full circle skirts.
To make a circle skirt you need to know a little bit of math, but don’t worry, it’s super simple!
You only need two measurements: 1. Waist circumference and 2. Length of the skirt.
See the pink donut below? This is how a full circle skirt pattern looks like.
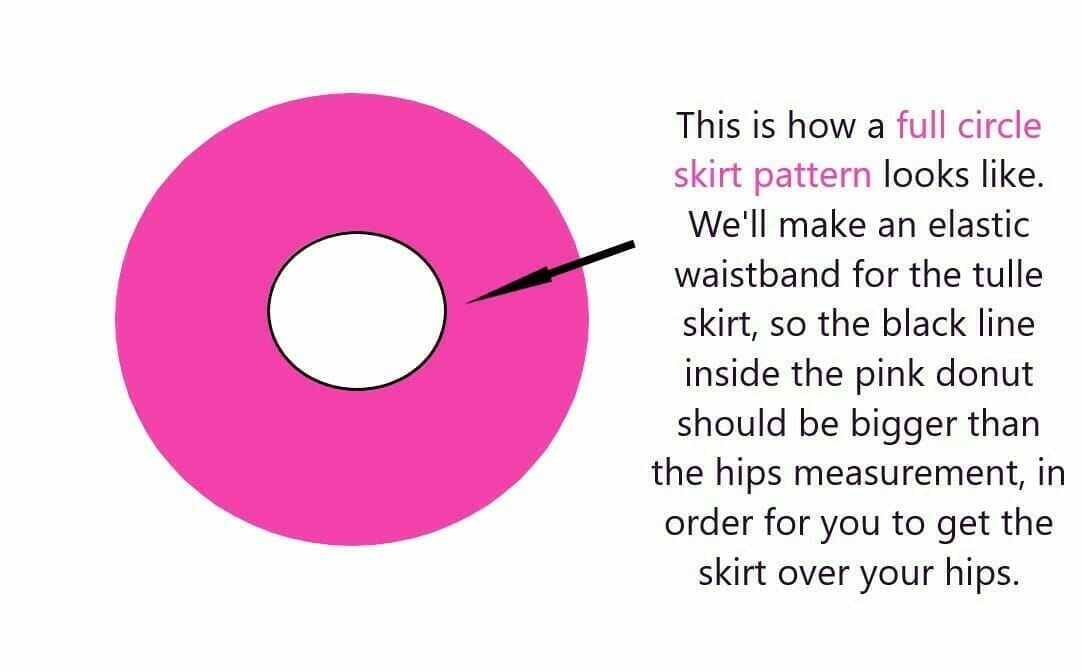
To cut such an amazing piece of fabric, you need to figure out the radius of the circle – that’s the circumference of the circle (your waist measurement) divided by 6.28.
Here’s the magic formula:
Radius = Waistline Circumference / 2π (and π=3.14)
To make your own personal full circle skirt, you need to fold the fabric twice – once along the width and again along the length, and then measure the radius from the folded corner.
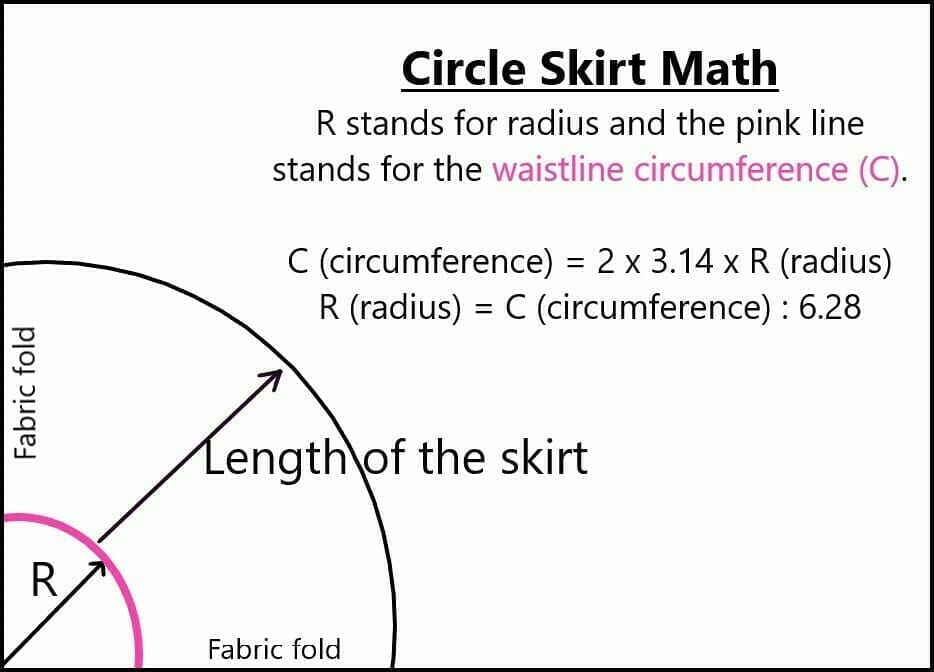
If you don’t understand yet, just take a look at the instructions and photos in this tutorial.
How to make this circle tulle skirt with elastic waistband in ANY size
I made this circle red tulle skirt for my oldest daughter and I used these measurements:
Length of the skirt – 16 inches
Waist measurement – 23 inches
Hip measurement – 28 inches
To cut the fabric for this elastic waistband skirt, we mostly use the hip measurement, because the waistline of the skirt has to be larger than the hip measurement. The waist measurement comes in handy when we have to decide how long to cut the elastic for the waistband.
As a result, for a 28 inches waistline circumference, the radius is 4 ¼ inches (use the circle skirt calculator from byhandlondon.com). Altough I rounded the radius to 5 inches for the satin lining (you may or may not do so – 4 ¼” is fine, too).
For the two tulle layers, I used a bigger radius – 13 inches, that’s approx. 8 inches larger than the first radius.
In other words, you can make this tulle skirt in any size you like, and you only need these three measurements: length of the skirt, waist measurement, and hip measurement.
For the skirt lining, calculate the skirt radius like this:
R = hip measurement / 6.28,
And for the tulle layers, add anywhere from 8 to 10 inches to that ‘R’ measurement. For better understanding, see the instructions below.
Here are my top tips for sewing tulle on your regular sewing machine.
What can you make with tulle fabric?
Tulle fabric is most commonly used to make tulle skirts, and I have written a lot of tutorials on how to sew different patterns. Here are a few of my most popular posts: Simple tulle skirt in 10 easy steps / Tiered tulle skirt / Girls tutu
skirts.
However, you can also make reusable produce bags with tulle, and scrunchies too!
DIY circle tulle skirt – sewing supplies
- 2 yards of 118-inch-wide soft tulle fabric
- 1.5 yards of satin for the skirt lining
- 1-inch wide elastic – approx. 23 inches long
- sewing machine
- sewing machine needle
- matching thread
- fabric scissors
- measuring tape
- fabric marking pencil
- sewing pins
- hot glue gun
- White pom poms – I’d recommend you to use two different sizes
How to make a circle tulle skirt with elastic waistband – instructions
Step 1
Cut the lining piece as shown in the picture below.
Fold the satin fabric in half, then in half again. Starting
at the folded corner, use a ruler to measure and mark the radius in various
places, so you can draw up an arc.
For a 28″ waistline circumference, the radius is 4 ¼ inches, but I cut a little further than that.
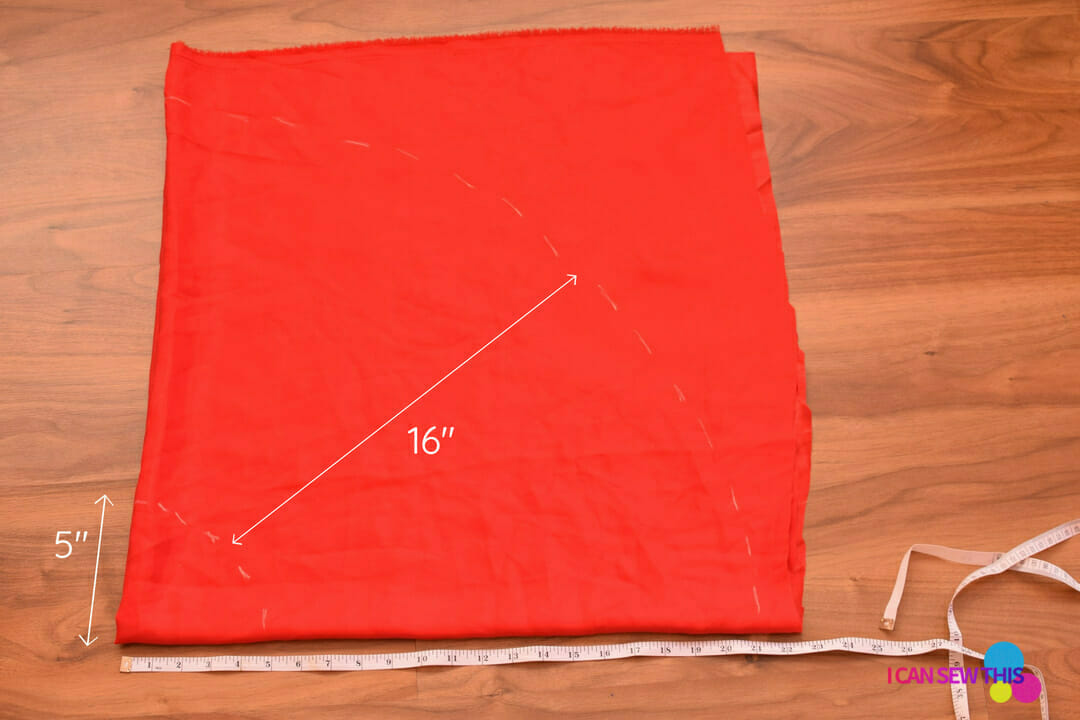
I went with a 5 inches radius for the satin lining, which resulted in about 32 inches waistline circumference. I did this because I wanted to have more gathers to the skirt’s waistband and make the skirt easier to put on and take off.
Now use that arc as a starting point to measure and mark the desired length of the skirt – that’s 16 inches for me. Draw up another arc, that will be the hem of the skirt. Cut the fabric.
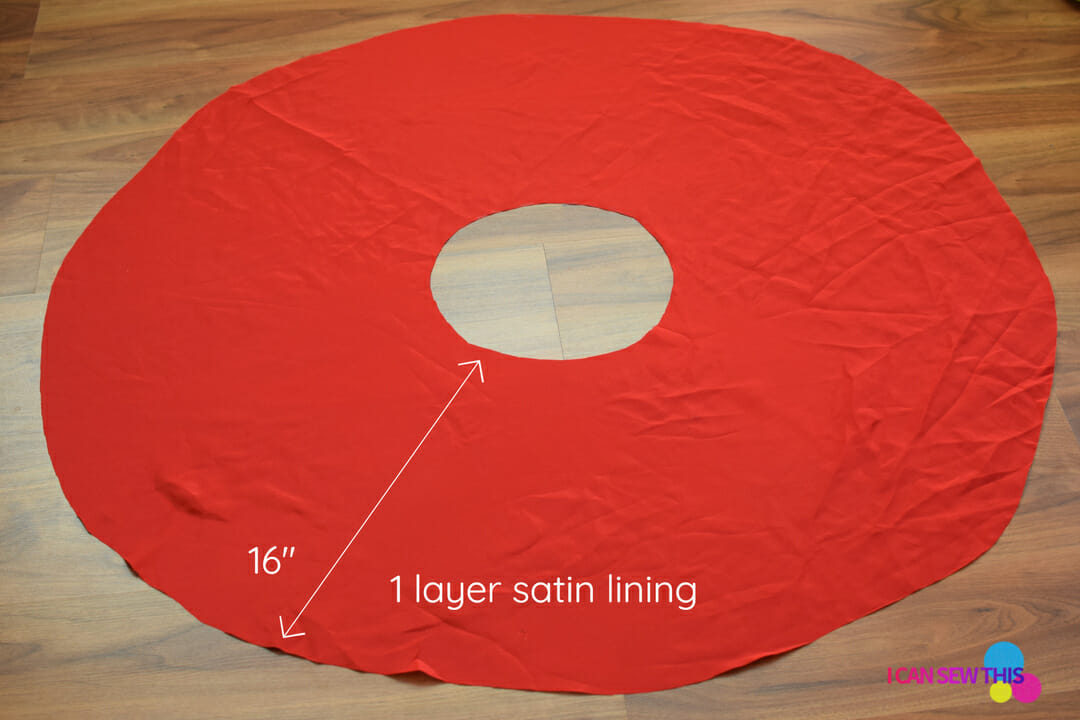 32 inches waistline circumference
Be sure to check out my other tutorials on how to make a flared summer skirt with pockets (for yourself) and a basic zipper pouch.
Step 2
For the two tulle layers, I cut even further than I did with the skirt lining.
I used a 118 inches (300 cm) super wide soft tulle and folded the fabric in half lengthwise – twice, then in half again, therefore I had eight layers in total – see the picture below.
I wanted to cut two tulle skirts at once, so I went with the biggest radius I could fit into the tulle fabric.
Consequently, I marked a 13 inches radius which resulted in a giant 81.64 inches waistline circumference.
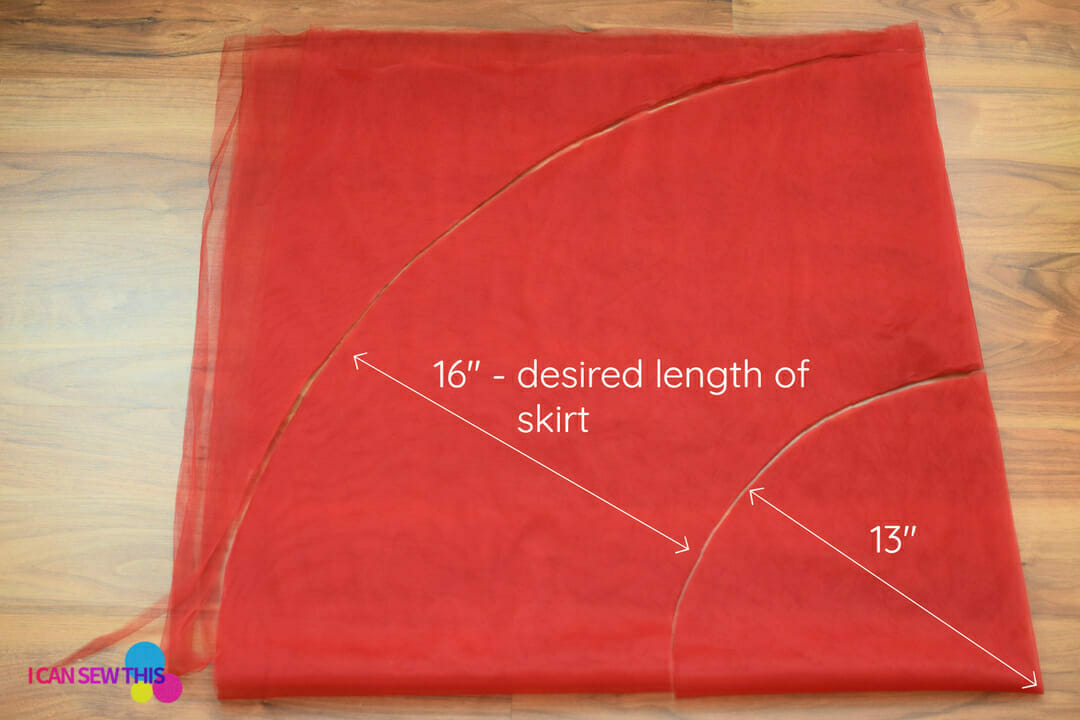
That’s cool because tulle is a very lightweight fabric and I want a fluffy gathered circle skirt.
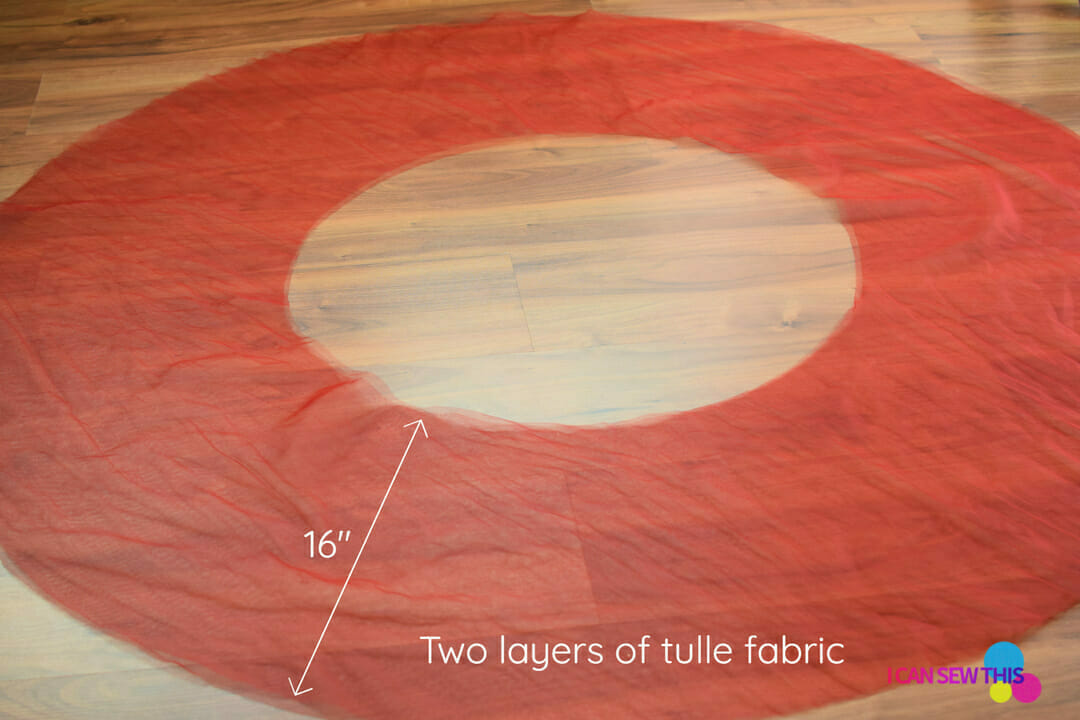
If your fabric is not wide enough to fit such a big circle,
you can sew a set of two half-circles together to make a full circle.
Step 3
To maximize the fluffiness of the skirt, I gathered each tulle layer individually.
Just run a basting stitch at the top of each tulle layer and gather them to fit the waistline of the satin lining.
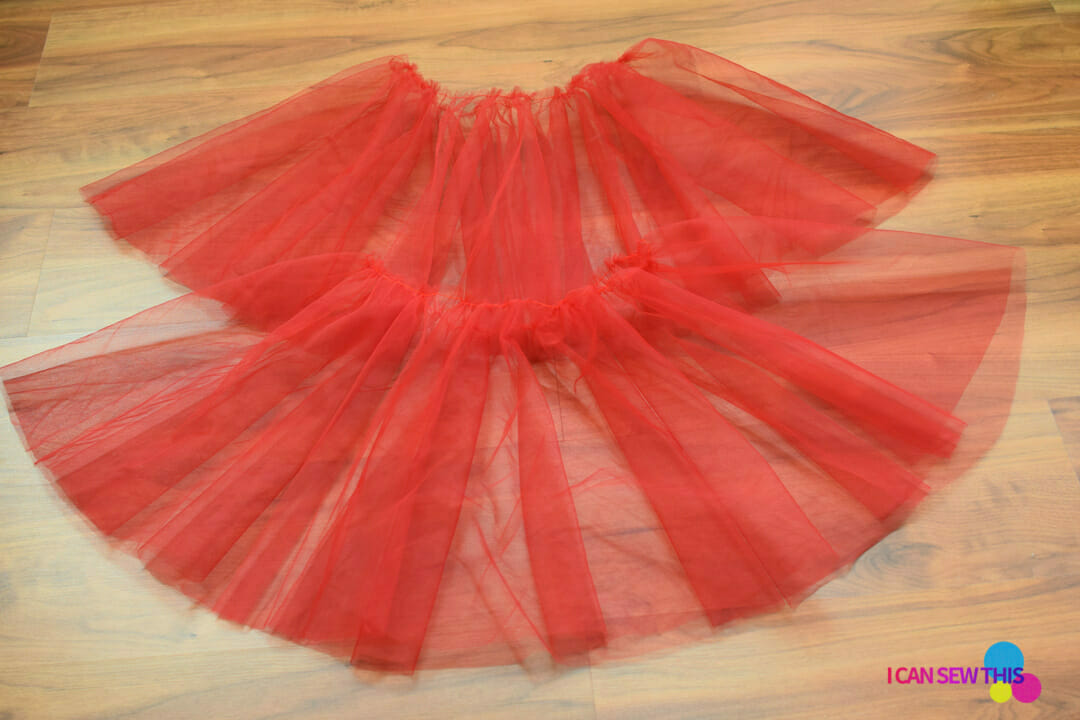
If you use more layers of tulle, the skirt will be poofier.
My skirt only has two tulle layers, and it’s just the right amount of fluffiness for my taste.
Step 4
Now place one tulle layer inside the other and sew them together. I have no seams on my tulle circles, so there’s no wrong or right side.
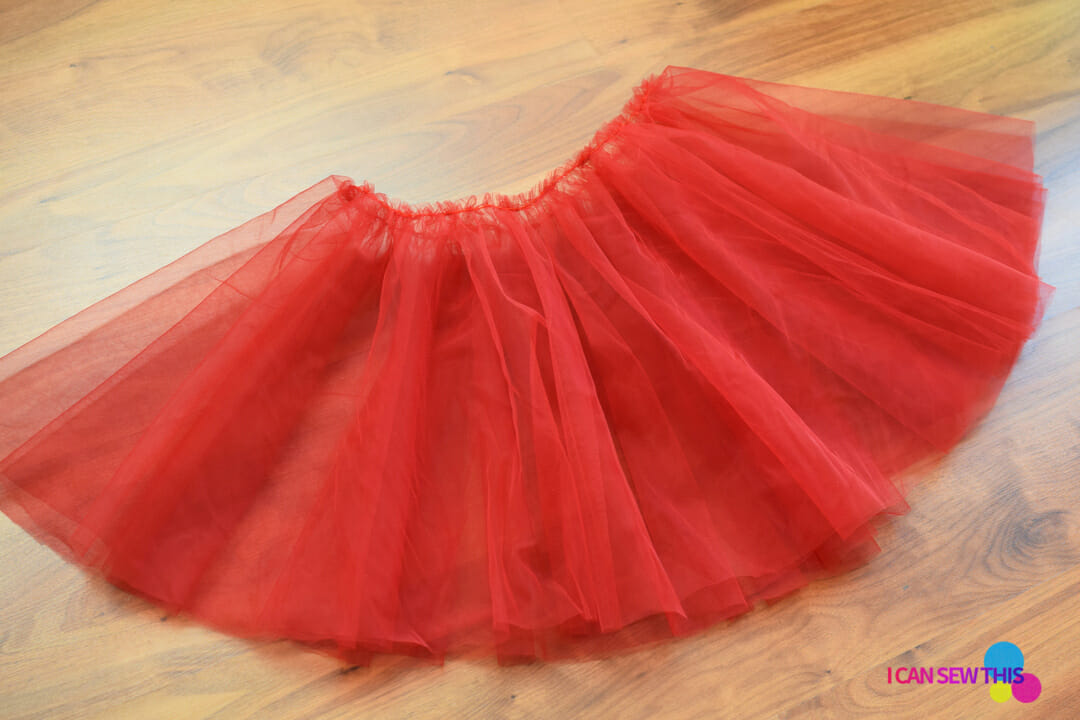
Step 5
Sew together the tulle layers and the satin lining.
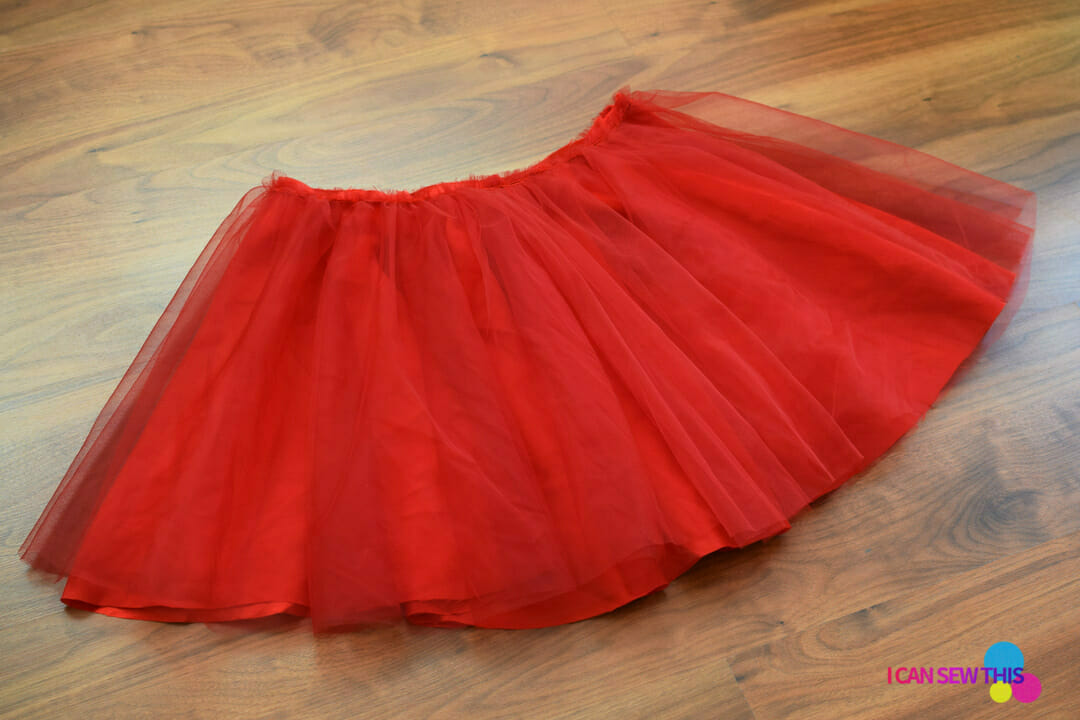
Step 6
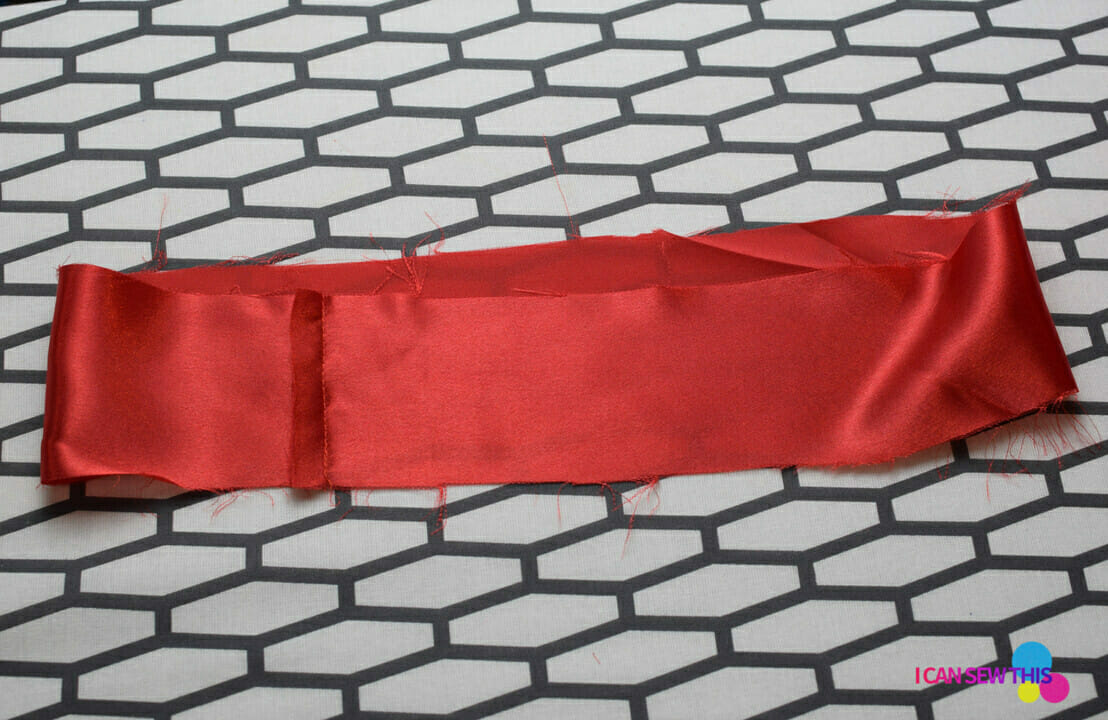
Cut the fabric strip for the waistband 31 inches long x 4 inches wide. The width of the strip is just fine for inserting a 1″ elastic.
Take the waistband piece and sew the short ends together to make a tube.
Step 7
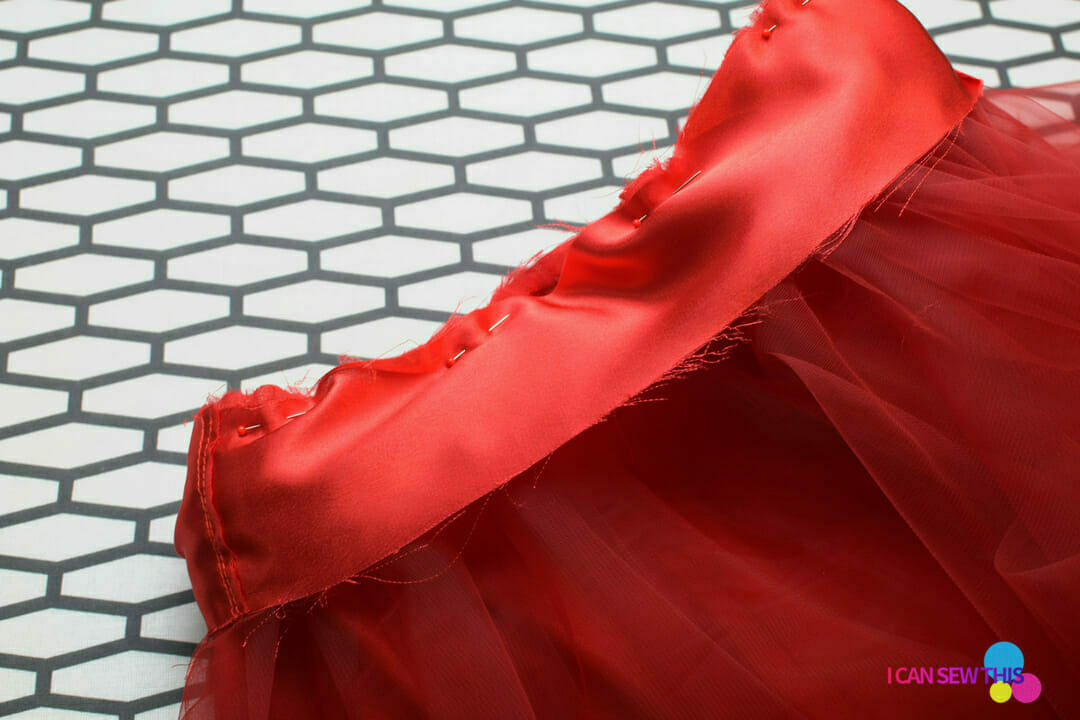
Pin the waistband to the tulle skirt, right sides together, and sew with a 1/2” seam allowance.
Step 8
Turn the raw edge under ½”, then fold the waistband to extend a little beyond the waist seam.
The waistband width should be about 1 ½ inches, to accommodate the width of the elastic.
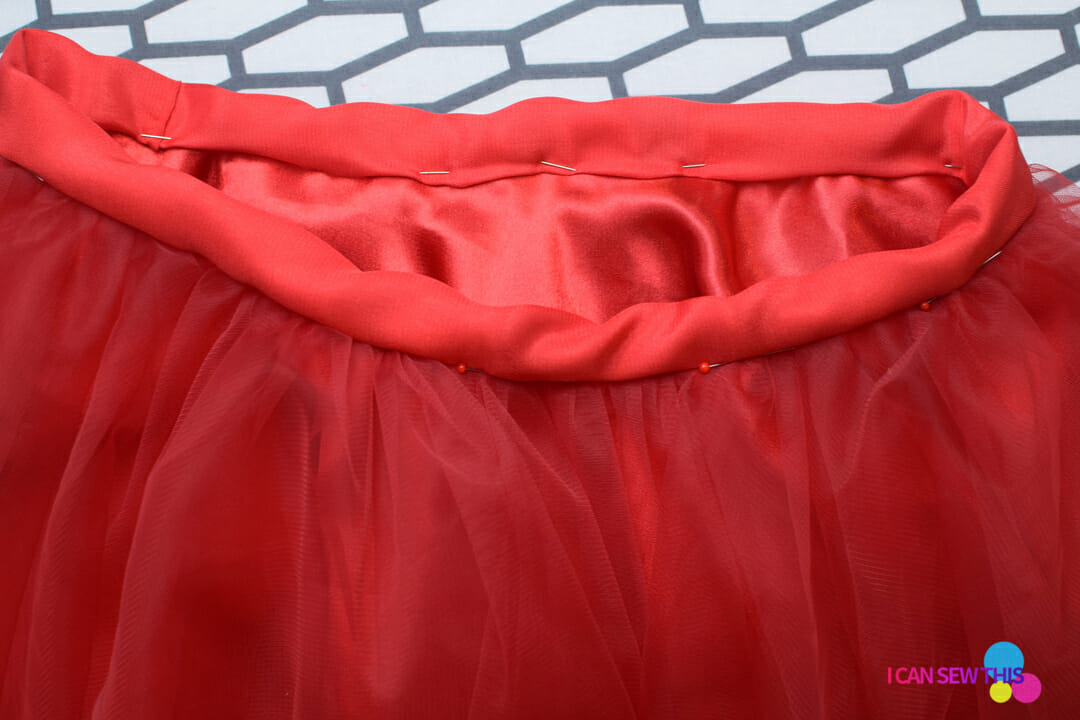
Pin the waistband in place and double-check on the inside of
the skirt that the folded edge covers the original stitching all the way.
Stitch in the ditch of the waist seam to secure the waistband.
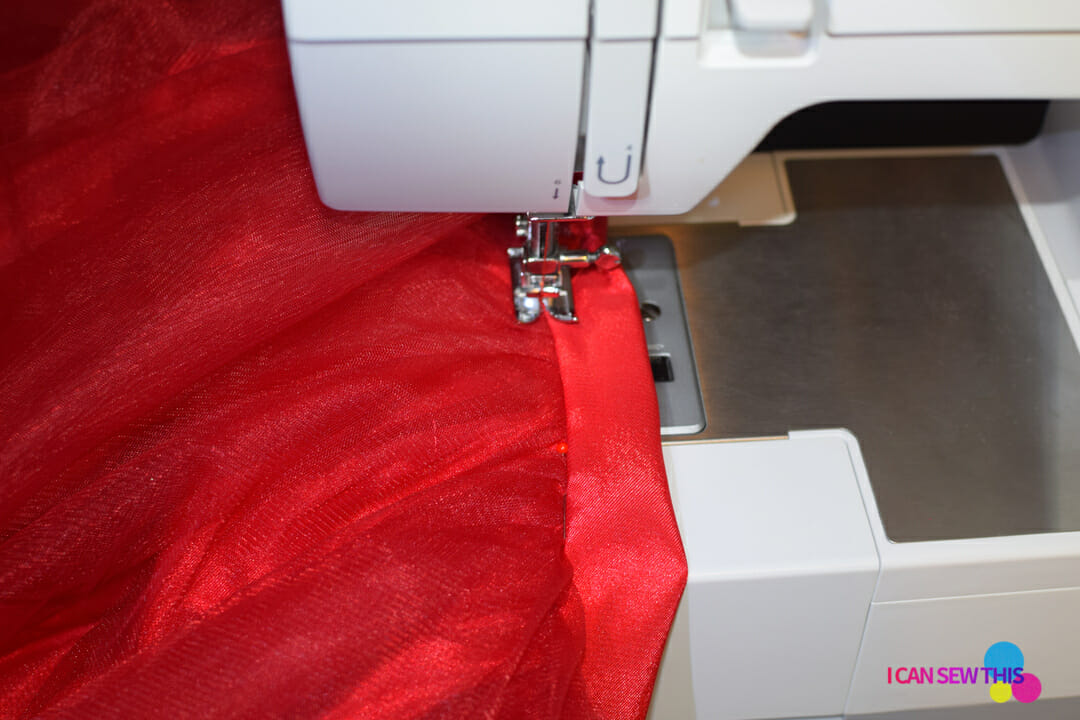
Leave a small gap for inserting the elastic into the casing.
Step 9
Insert the elastic through the opening using a safety pin. Make sure the elastic is not twisted inside the casing.
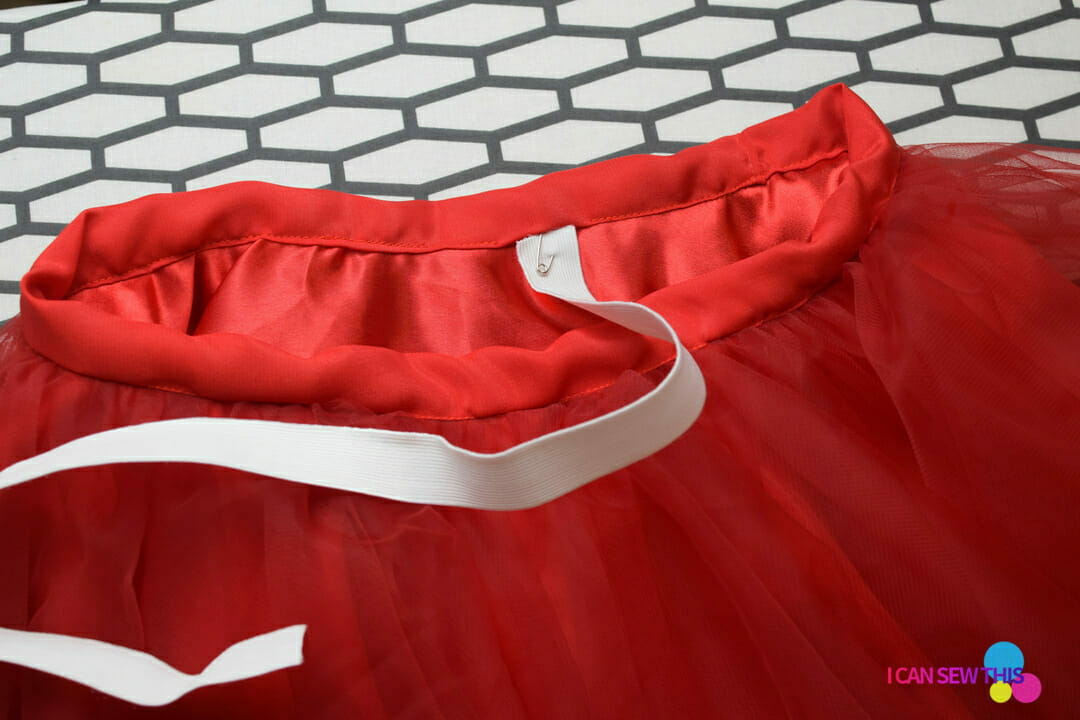
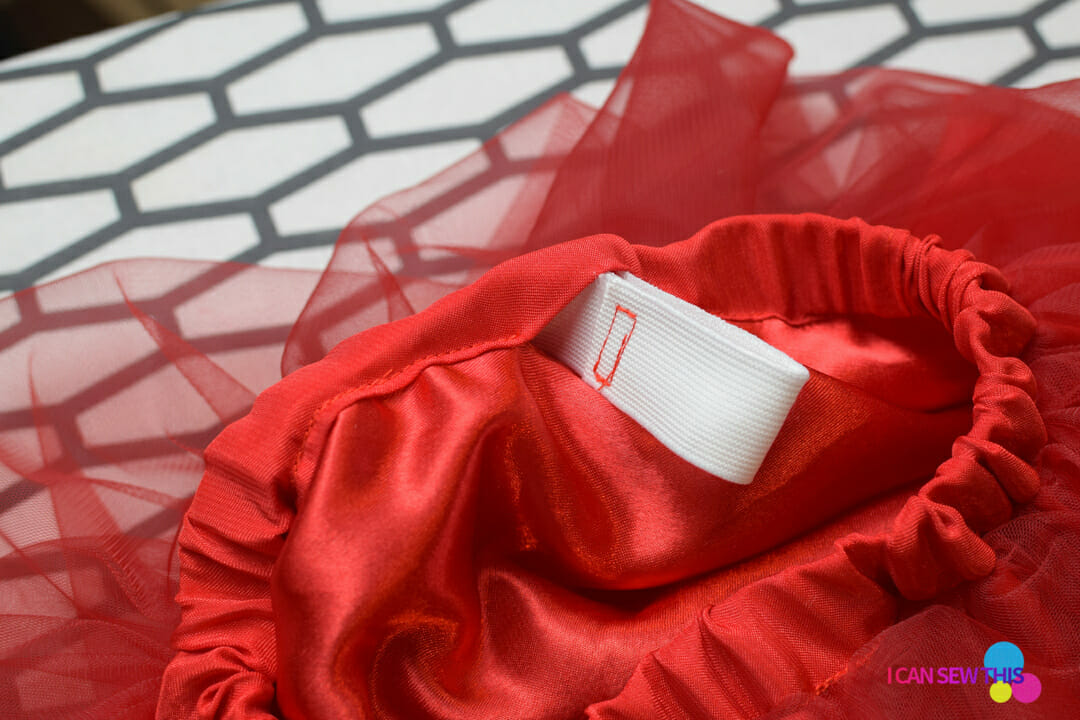
Overlap the ends of the elastic and sew them together, then close the small opening in the waistband.
Step 10
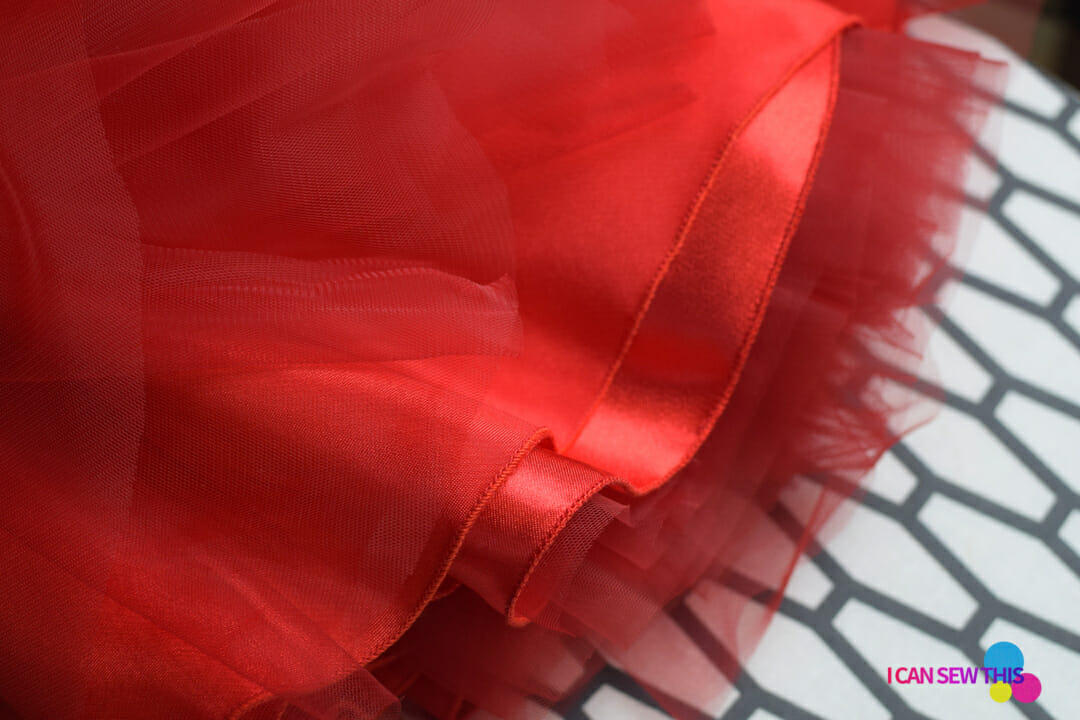
Hem the satin lining.
Trim the satin lining to the same length as the tulle. In the end, the lining will be a little shorter than the tulle.
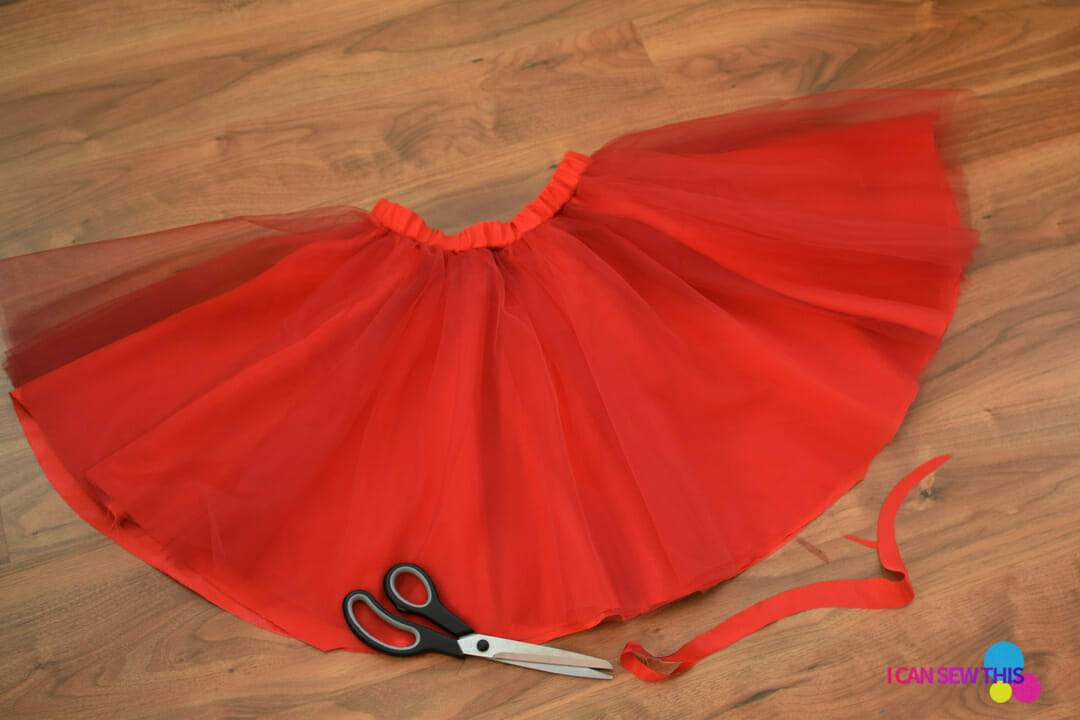
Hem the satin lining with a rolled hem on your serger – that’s the easiest and fastest method.
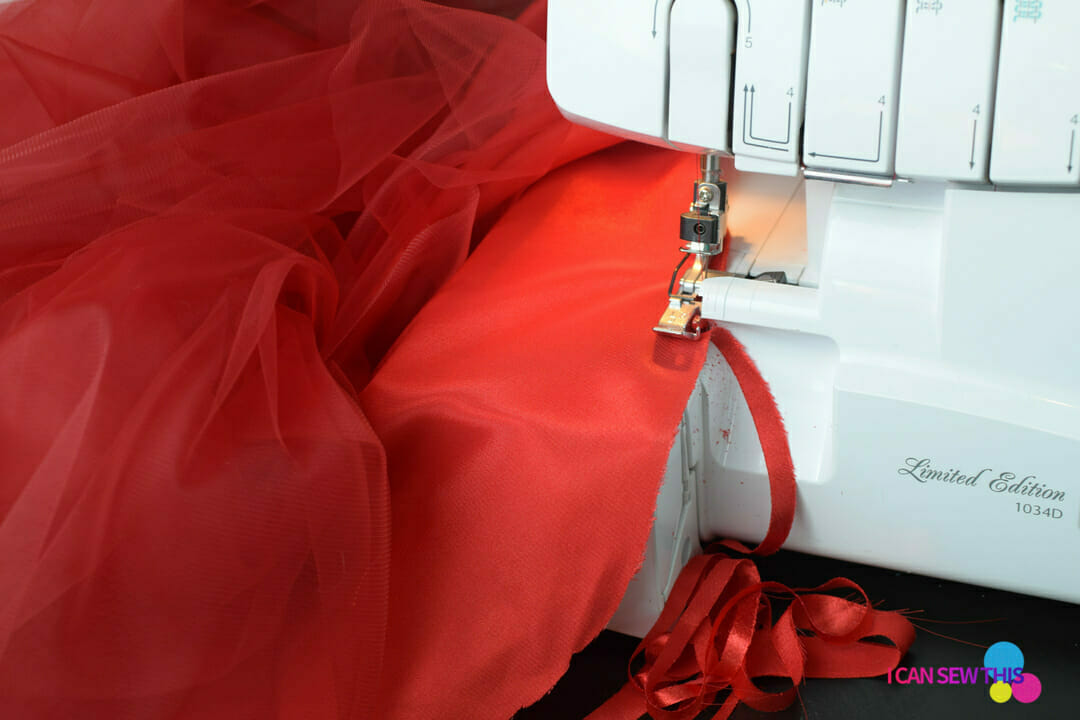
If you don’t have a serger, you can make a rolled hem with a hemmer foot, or a basic double fold hem where you fold and iron the edge up twice.
Step 11
Attach white pom poms to the first layer of tulle, using a hot glue gun. I used white pom poms in two sizes and I love how the skirt turned out!
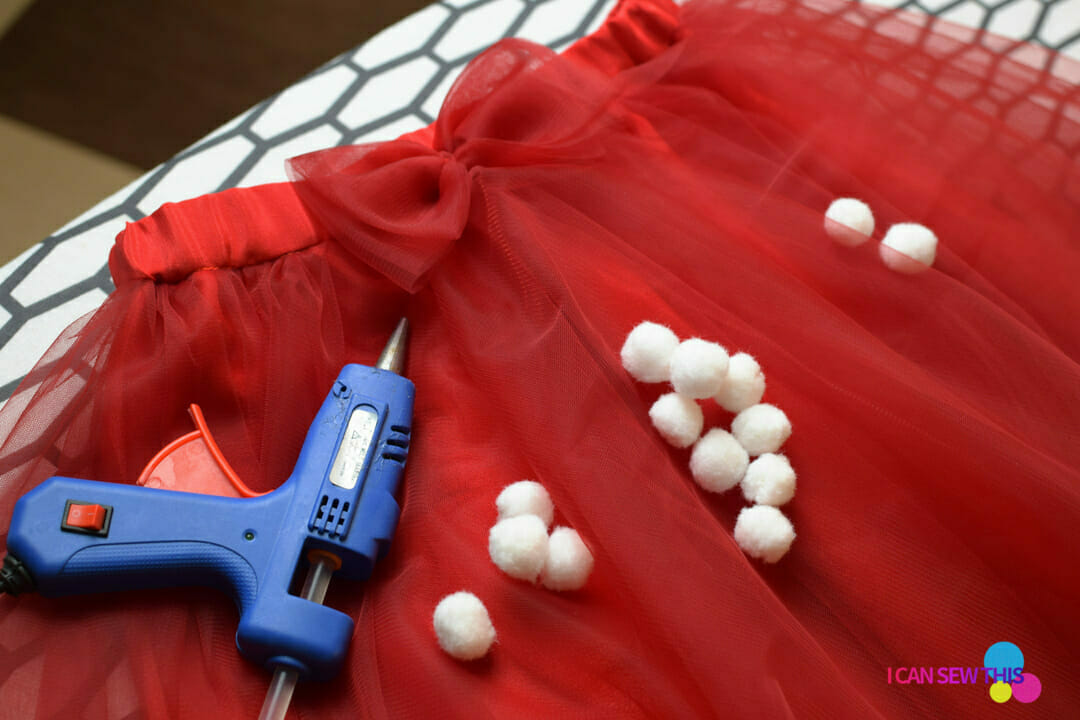
Work with one pom pom at a time – just dab a bit of hot glue on the pompom and then fix it to the tulle layer.
Make sure you don’t glue the pom pom on all the tulle layers.
If you have to remove glue stains from the tulle, scrape off the stain using a cotton swab with acetone nail polish remover.
Step 12 (optional)
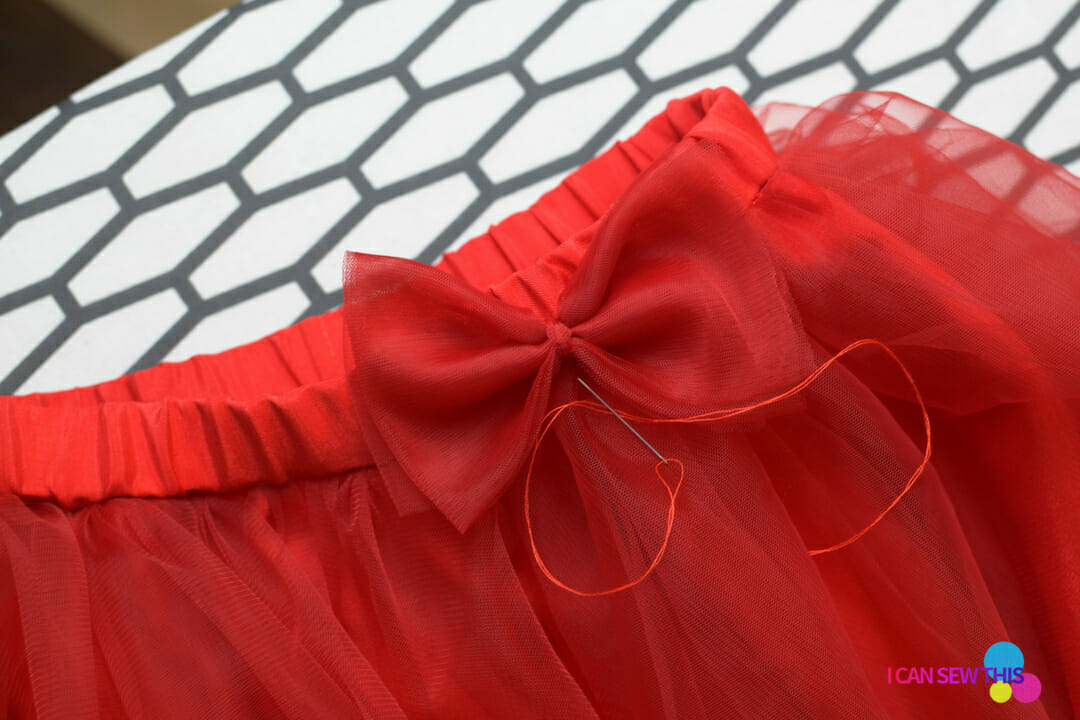
Add a tulle bow to the skirt. I made the bow using a tulle piece 9 inches wide x 12 inches long, folded in half three times.
Secure the bow with a small strip of tulle, then attach the bow to the waistband by hand stitching in place.
DIY circle tulle skirt – hemming tips
There’s no need to hem the tulle layers since tulle doesn’t ravel, but you will notice after a few wears that the circle skirt “falls” on the bias.
The uneven hemline is a problem for all circle skirts.
This type of tulle is soft and elastic, so it stretches big time on the bias while having basically no stretch on the grainline.
I find most of the circle tulle skirts fall on bias after washing and wearing, so you can’t level the hem once and for all.
In my opinion, there’s no point in letting the tulle skirt
hang overnight before hemming, as the tulle is such a lightweight fabric and it
won’t drop much with gravity.
When the hem of the tulle becomes uneven, just level it off with your scissors.
Let’s keep in touch! You can find me on Facebook, Instagram, and Pinterest.



Hello,
Thank you for the tutorial. I can’t wait to try this. However, I do not want to use pompoms because the kids will pick them off. Can I sew sequences on the tulle.
Excited to try this!
Karen
Thank you so much for this tutorial! I have watched so many YouTube videos, and asked a bunch of questions in Facebook groups about making a circle skirt, but with a gathered waist like you did with the tulle. Every time I just got confusing information. Now it finally makes sense to me. Thank you so much!
Hello, can you please tell me the measurements in centimeters?
Very helpful, now on my way to make my daughter a beautiful tulle skirt.
Hi Patricia,
I hope all goes as smoothly as possible, and I’d love to see your finished skirt! Maybe you could tag me on Insta or Facebook. 🙂 Thank you!
These instructions were so clear and helpful! I’m relearning how to sew and I made my daughter a gorgeous “Princess Elsa” blue tutu skirt in one evening! Thank you! 🙂
Thank you, thank you, thank you, Violet, SO very much! My 5-year-old granddaughter asked me to make her a ballerina dress for her birthday and now I can! Blessings!
Thank you for your tutorial. I plan on making two tutus. Your information will come in handy and helped me figure out how to add a lining.
Can you please elaborate the fold you did on step one and two and how you have the faberic to begin with?
I want this type of skirts i really like it
Two skirts need for my kids
Pleas send me
What a cute skirt!
Thank you so much!
This is just adorable!!!
Wooow! This is the very first comment on this blog, so I did a little happy dance! <3 Thank you!