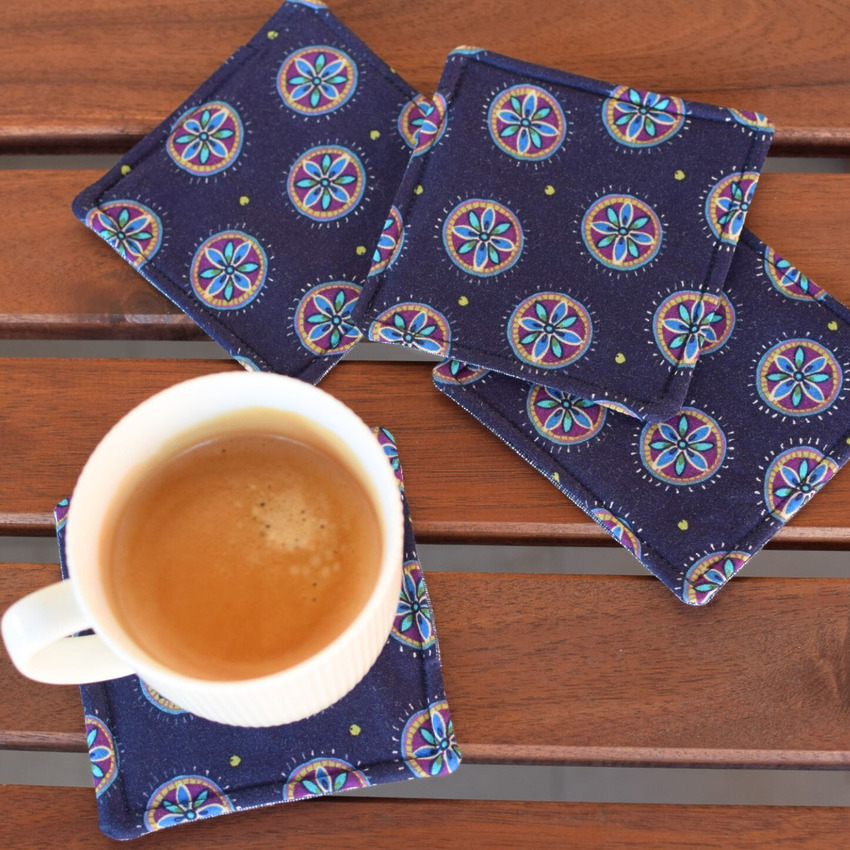
Want a fast, fun sewing project that’s actually useful? Try these DIY fabric coasters! If you can sew a few straight lines, you’re good to go. Seriously – this might just be the easiest sewing project ever. It’s the perfect way to learn how to sew straight lines on a small, manageable piece of fabric. No stress, just quick wins.
This is a great first sewing project for beginners, kids, or anyone just getting back into sewing. You’ll be stitching up simple fabric squares with batting inside – nothing complicated, and you’ll end up with something you can actually use every day.
Bonus ideas: Want to mix things up? Use the same steps to sew mini pillows for dolls (just shrink the size a bit). Or go bigger and turn your square into a doll blanket. Even bigger? Boom – you’ve got a cozy handmade placemat. Same technique, endless options!

Looking for more super quick and easy sewing projects you can whip up in about 10 minutes? These are perfect for beginners and great for using up leftover fabric scraps. Try making a DIY envelope pillow cover, a lined drawstring bag, or some cute fabric scrunchies. You can also sew a cozy infinity scarf or even reversible placemats – yep, all of these can be done fast! So if you’re wondering what can I sew in under 15 minutes, these ideas have you covered.
I made my fabric coasters using fleece batting, and they do a great job soaking up any sweat from cold drinks or heat from mugs. Plus, they help protect your table from stains and moisture rings – and they just look cute sitting there.
One of the best parts? These coasters are machine washable. So if they get stained or dirty (hello, spilled coffee), you can just toss them in with your regular laundry. No fuss.
And if you’re looking for a quick DIY gift idea, fabric coasters are a total win. Make a set of 4 or 6, tie them up with a ribbon, and pair them with a coffee mug or a little box of chocolates. Easy, thoughtful, and homemade – your friends will love them.
")
So grab your fabric scraps, your sewing machine, and let’s get stitching. This easy fabric coaster tutorial is beginner-friendly, fast, and super satisfying.
Let’s sew!
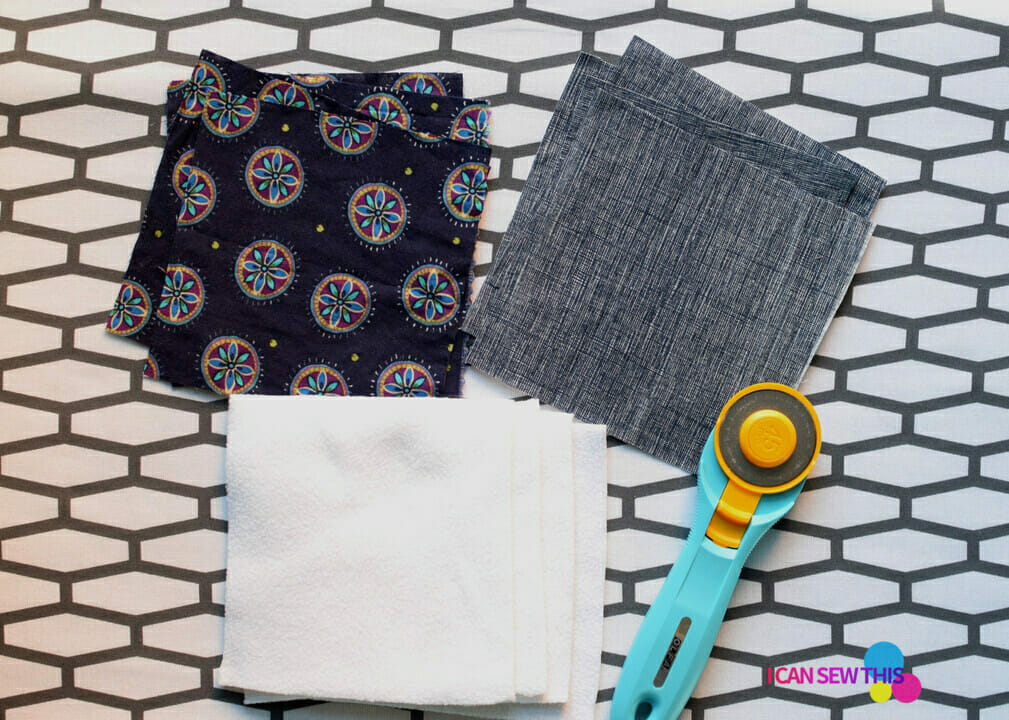
DIY fabric coasters – sewing supplies
- 2 pieces of cotton fabric – 5×5 inches
- 1 piece of interfacing, fleece or terry cloth – 5×5 inches
- sewing machine
- sewing machine needle
- fabric scissors / rotary cutter
- sewing pins
- iron
- matching thread
Step-by-step: How to sew easy fabric coasters
Step 1: Cut your fabric squares
Start by cutting your fabric into 5″ x 5″ squares. You’ll need three squares per coaster – two from cotton fabric (this will be the top and bottom), and one square of batting for the middle. I like using fleece or cotton batting, but use whatever you have on hand!
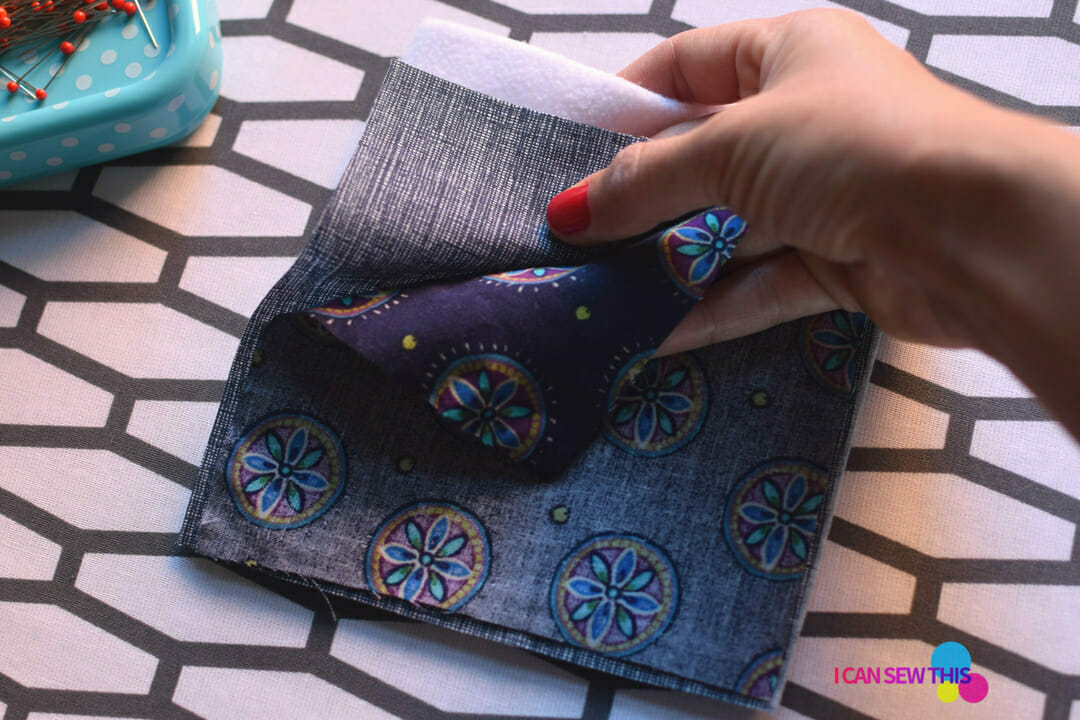
Step 2: Layer everything together
Now, let’s make a little fabric sandwich. Lay down your batting square first, then place the two cotton squares right sides together on top of that.
You should have batting on the bottom, and the pretty sides of the cotton facing each other in the middle.
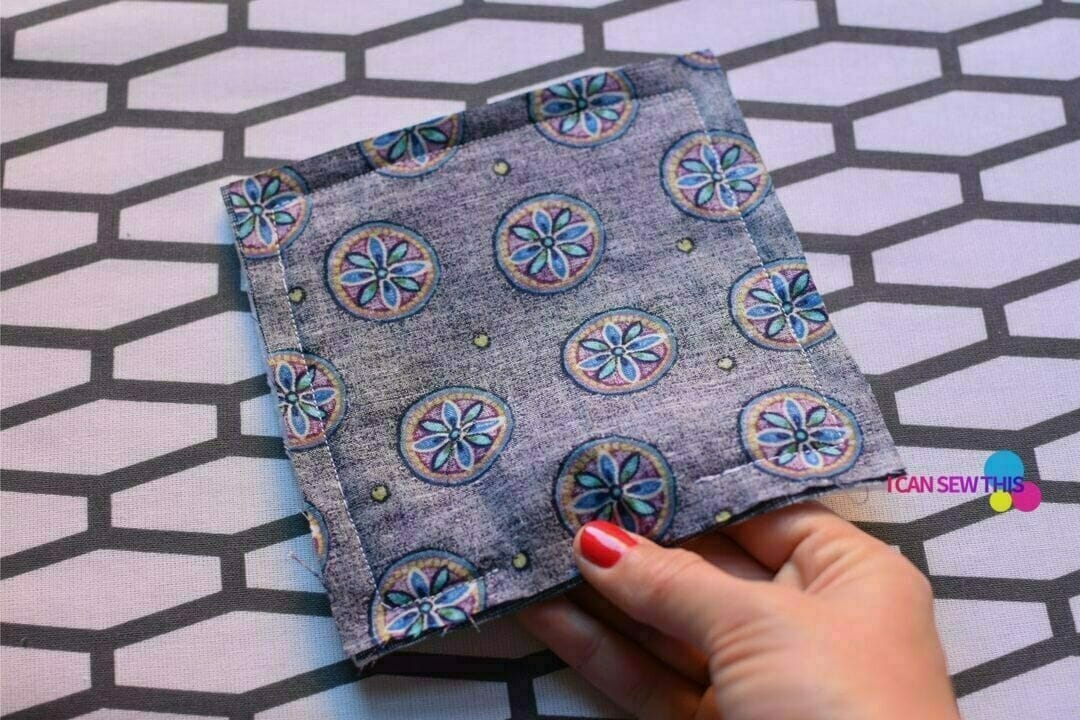
Step 3: Pin and sew (but leave an opening!)
Pin the layers in place so nothing shifts around. Then sew all the way around the edge using a 1/4″ seam allowance – but don’t sew it completely shut!
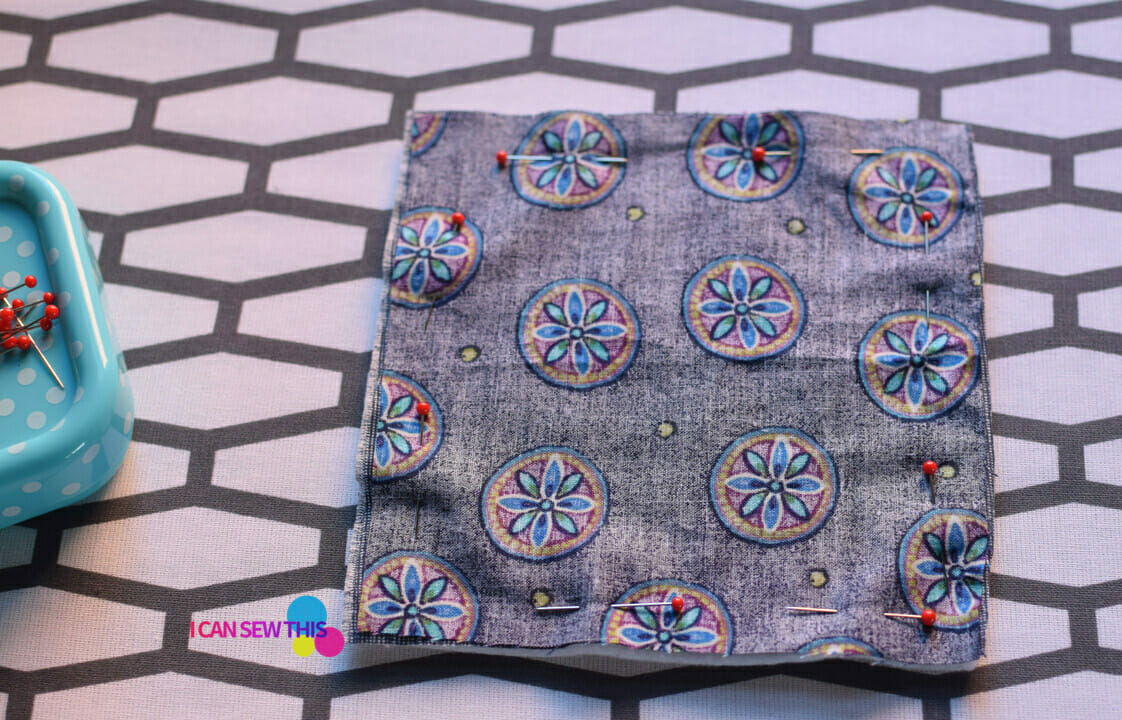
Leave about a 2″ gap on one side so you can turn the coaster right side out later. Don’t forget to backstitch at the beginning and end to lock those stitches in.
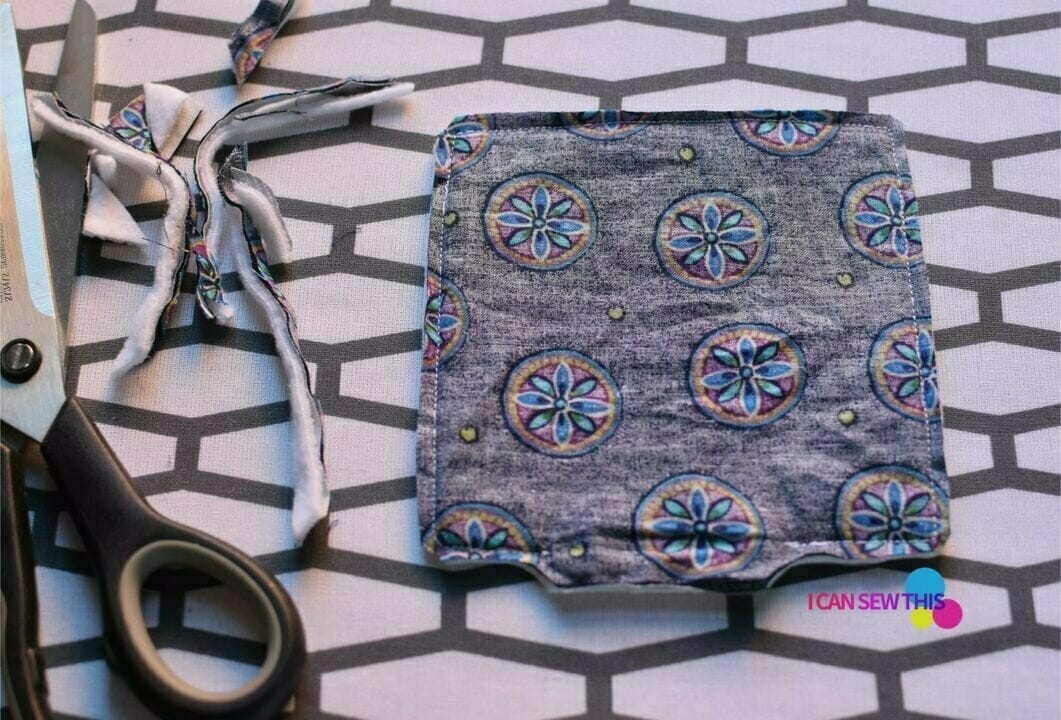
Step 4: Trim the corners
Carefully trim the corners at a diagonal (this helps get nice, crisp corners when you flip it), and trim down the sides just a bit too – but don’t cut near the opening.
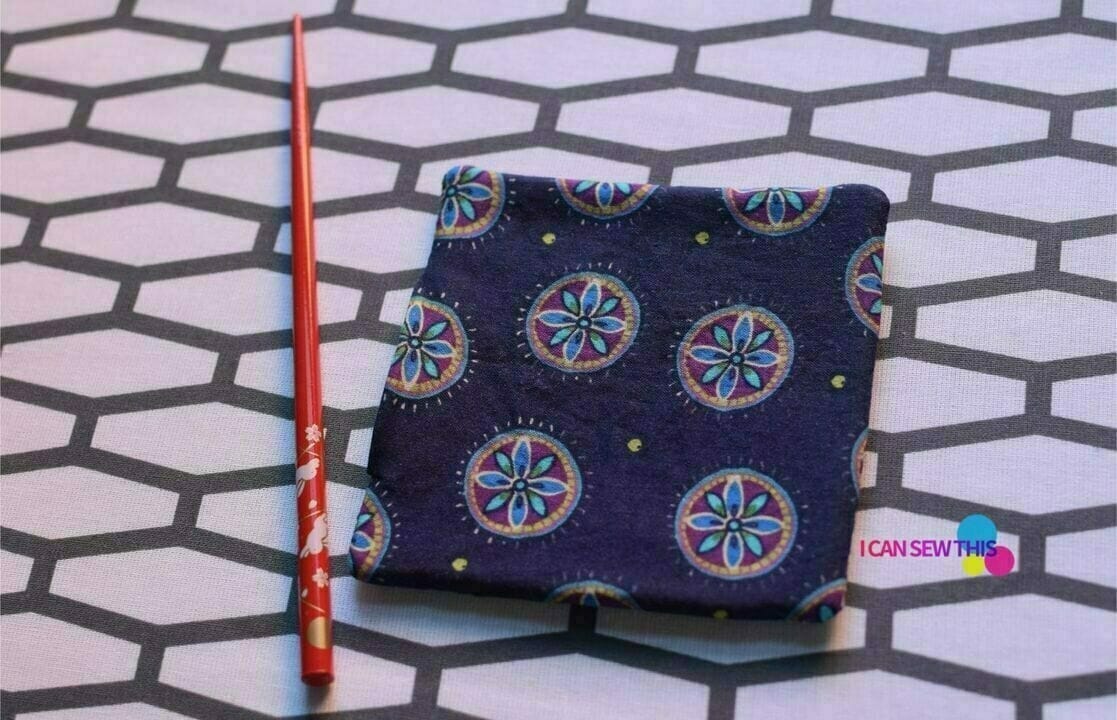
Step 5: Turn it right side out and press
Now for the fun part – turn the whole thing right side out through that opening. A chopstick or pencil works great to poke out the corners. Tuck the open edge inside neatly and press the whole thing flat with your iron.
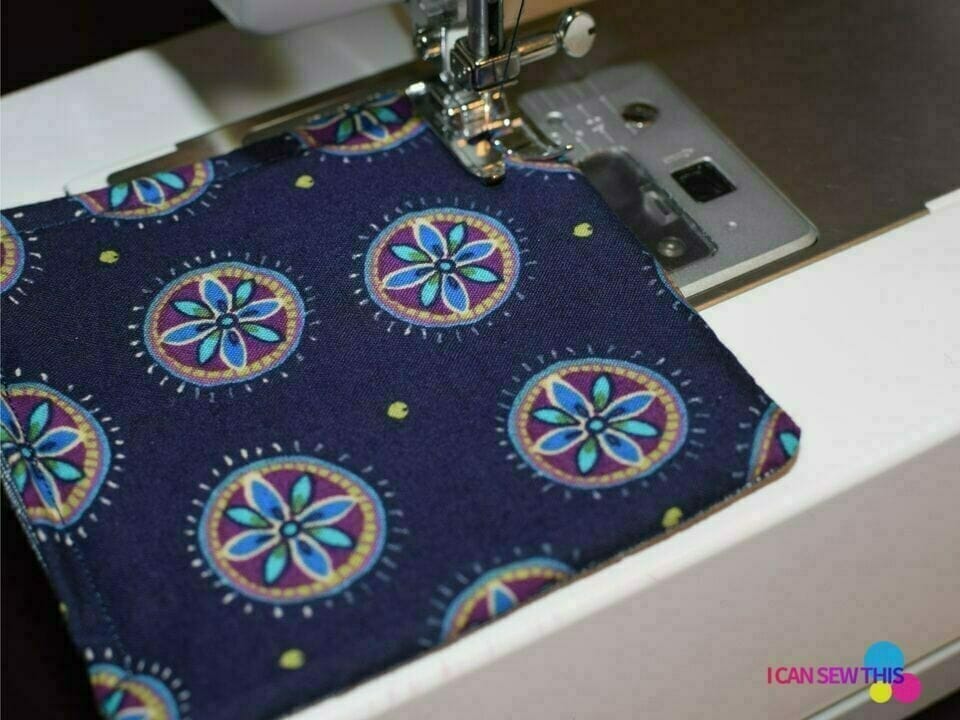
Step 6: Topstitch to finish it off
Finally, topstitch all the way around your coaster – about 1/8” or 1/4” from the edge. This not only closes up the opening but also gives your coaster a polished, finished look.
And that’s it! You just made a super cute fabric coaster – in about 10 minutes. This is such a fun way to use fabric scraps and practice sewing basics. Plus, you can make a whole matching set in no time!
")
Let’s keep in touch! You can find me on Facebook, Instagram, and Pinterest.

Thanks for this video… an easy project for this 65 year young retiree! I am still a beginner!
I have really enjoyed making these for myself and gifts..thank you for sharing..