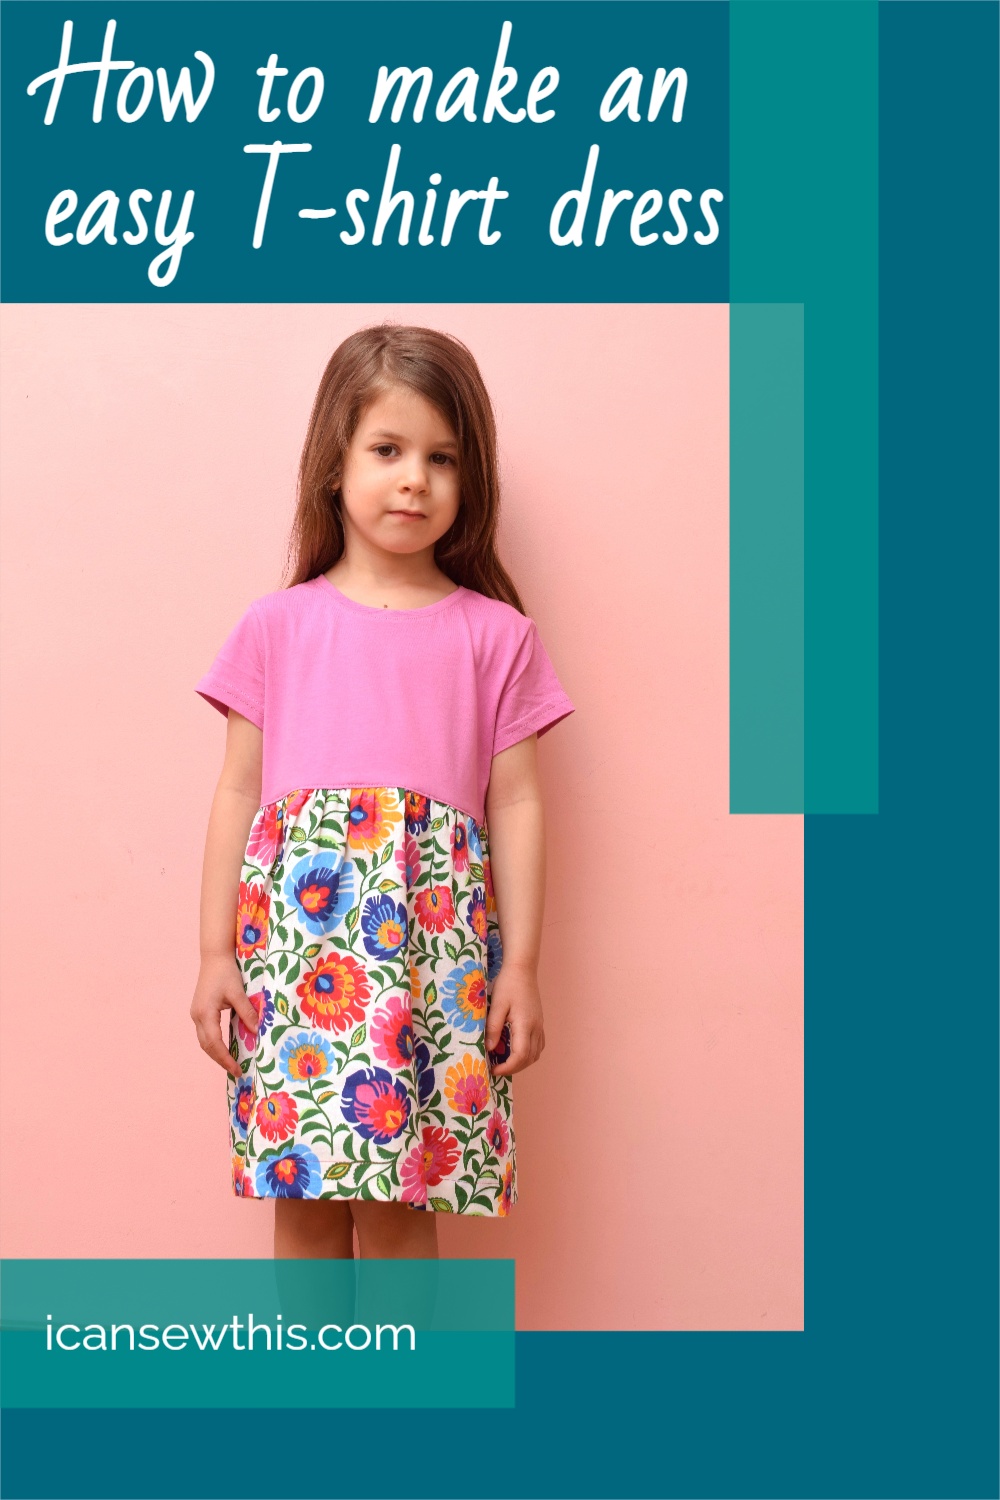
Learn how to turn a T-shirt into a girls’ dress in 5 simple steps. You can have your own T-shirt dress in half an hour, or so, made from your favorite cotton fabric. A beginner-friendly DIY project.
This is one of the quickest sewing projects I’ve tried lately.
Since you’re using an existing T-shirt, you don’t have to finish the neckline or the sleeve hems. And the skirt part comes together really fast.
To set yourself up for success with this DIY project you’ll need a ballpoint needle or a stretch needle.
I’ve found that sometimes jersey needles don’t work with jersey fabric on my Heavy Duty Singer machine, but stretch needles always do. More specifically, a 90/14 stretch needle works best for me.
Unfortunately, while sewing this dress I noticed that I had run out of 90/14 stretch needles, and none of the needles I had at the ready worked well – now and then I still had skipped stitches. I’ll get that fixed soon.
Related: Another easy t-shirt refashion / How to make scrunchies / Knotted headband (free pattern)
How to choose fabric for your skirt
The best fabrics to make your skirt from are woven fabric – light to medium weight, such as quilting cotton, linen, cotton blends, chambray, etc.
For this beginner sewing project, I recommend you wash your fabric before you cut it out, to avoid any shrinking.
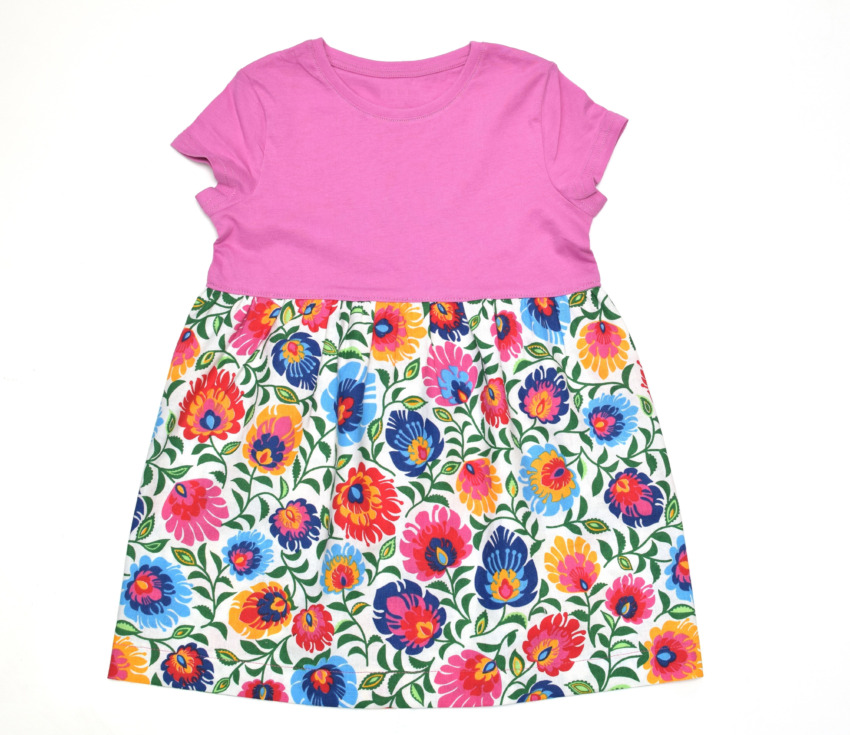
Learn how to make a simple girls’ dress without a pattern, by adding a gathered skirt to a T-shirt.
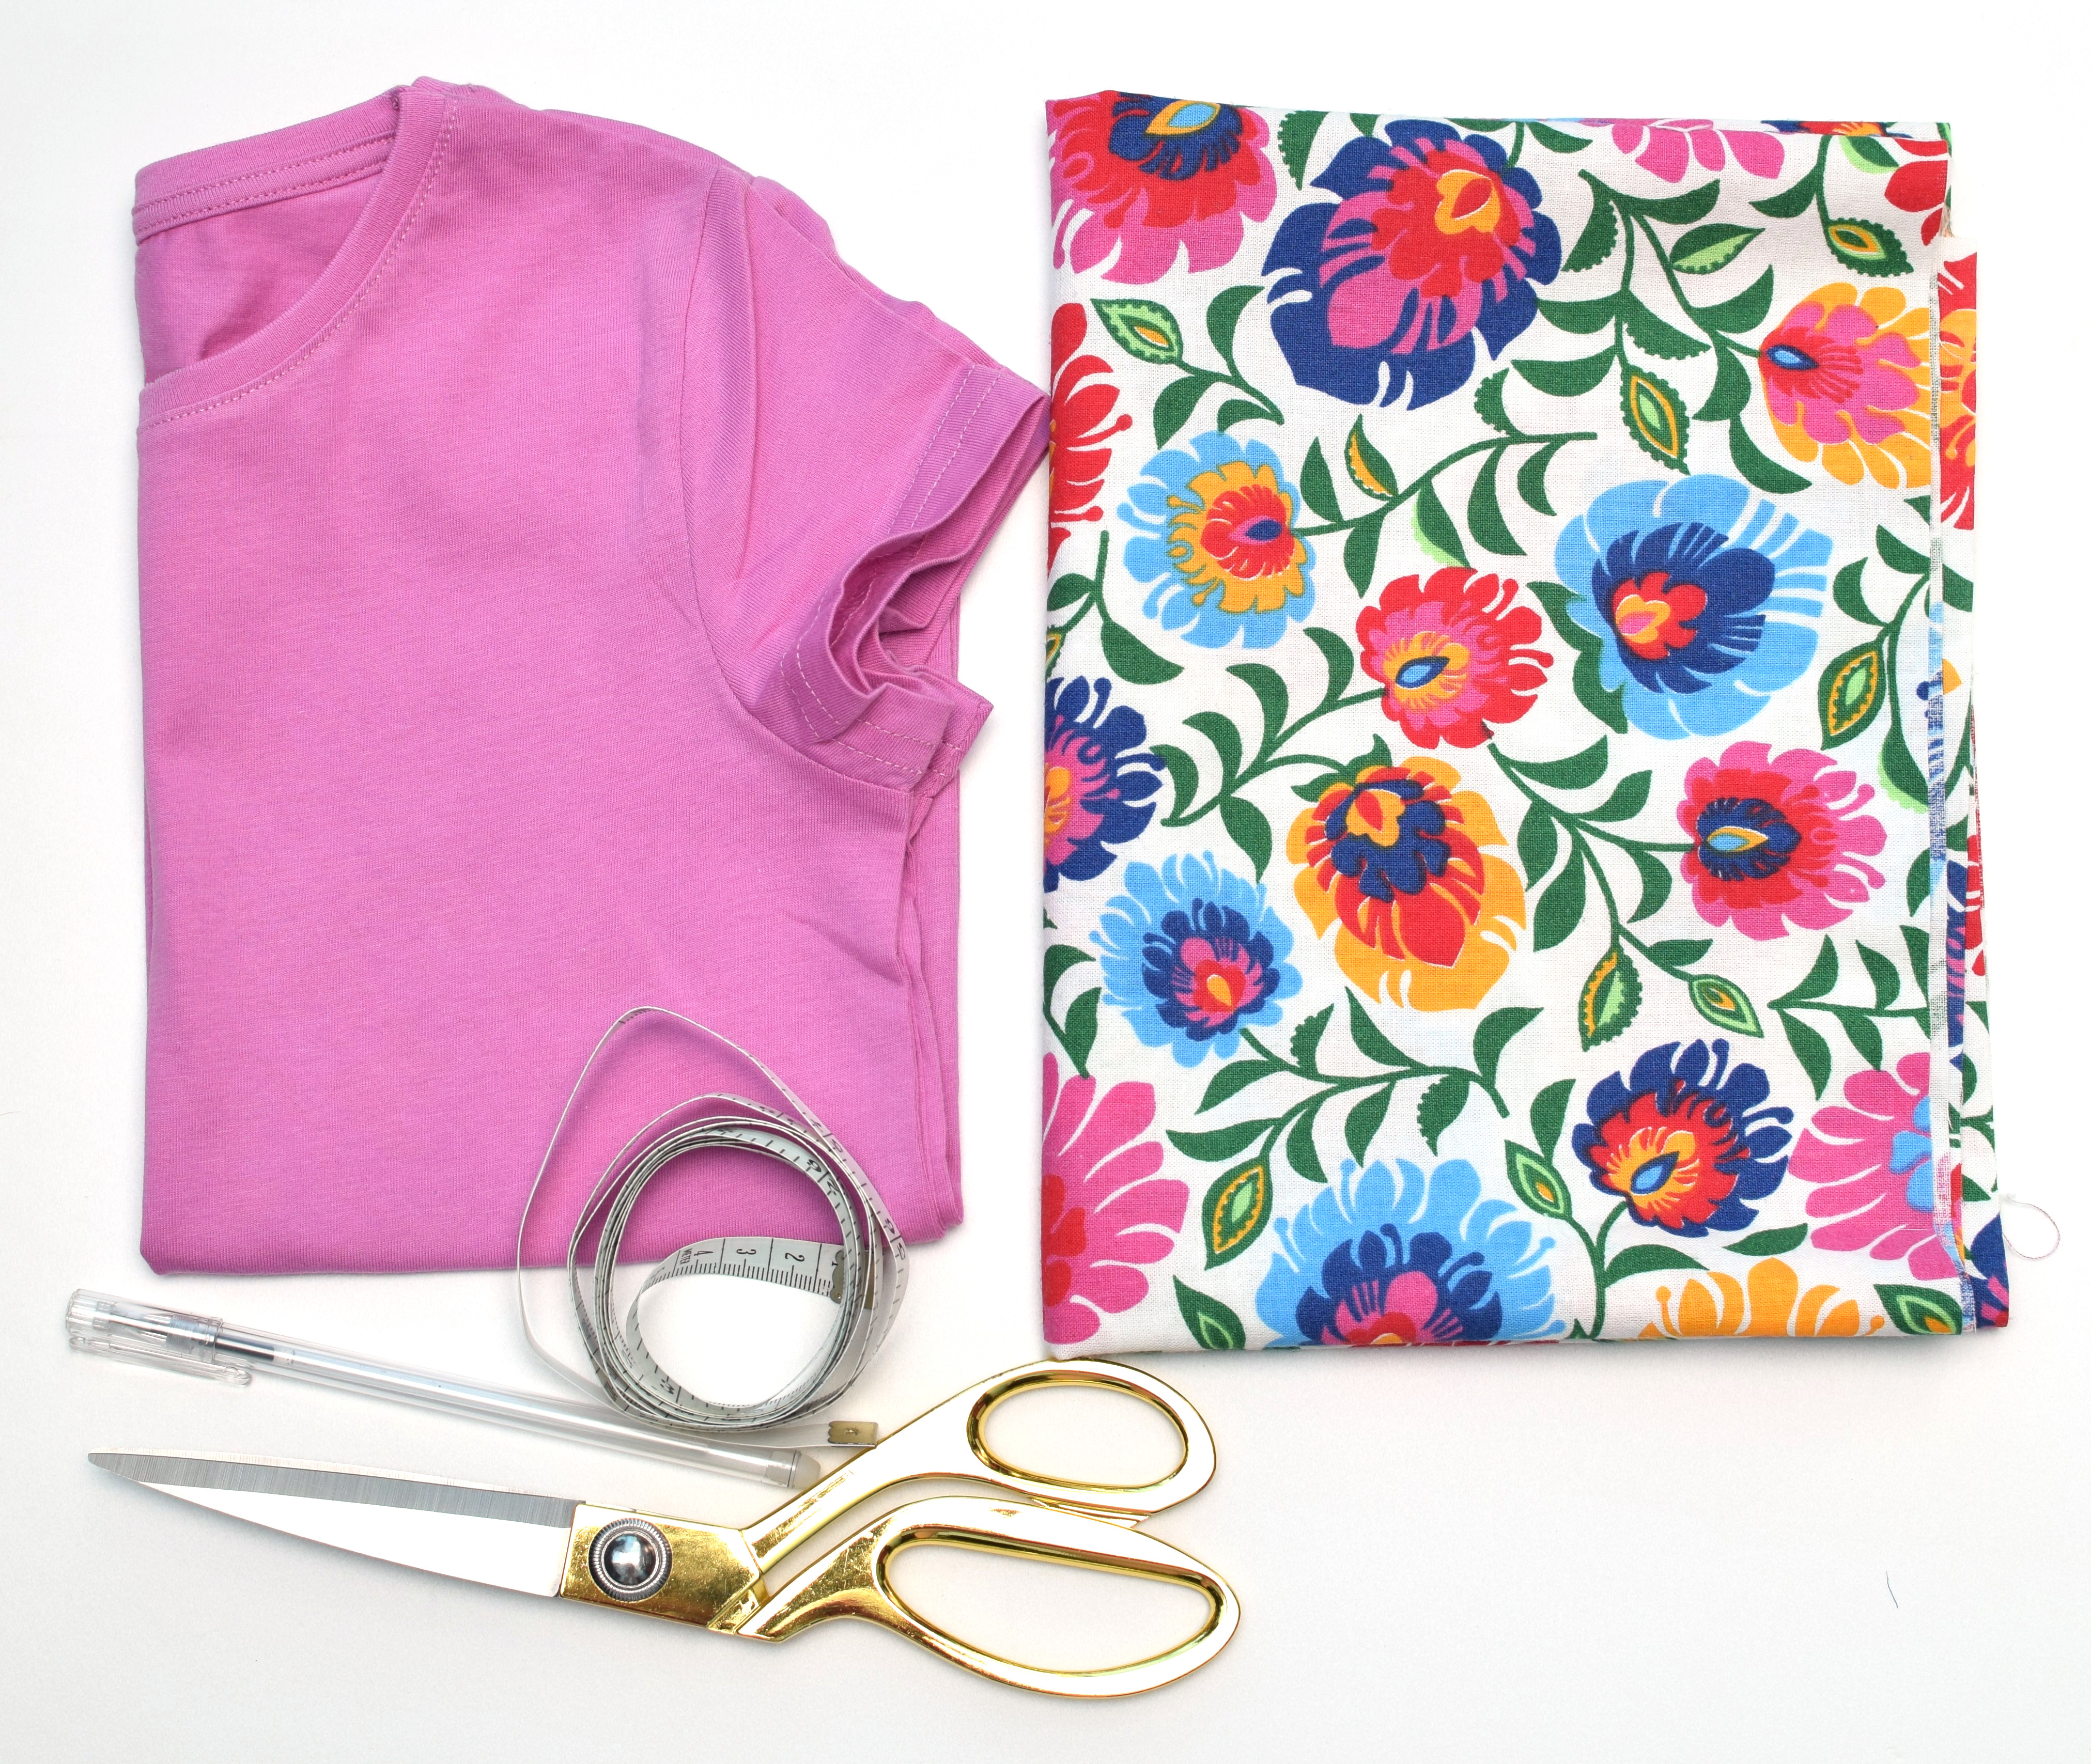
Sewing supplies – DIY T-shirt dress
- Cotton fabric – approx. 1/2 or 1 yard
- Sewing machine
- Ballpoint needle / stretch needle
- Measuring tape
- Scissors
- Sewing pins / sewing clips
- Matching thread
- Seam gauge
How to turn a T-shirt into a girls’ dress tutorial
Step 1 – prepare your bodice
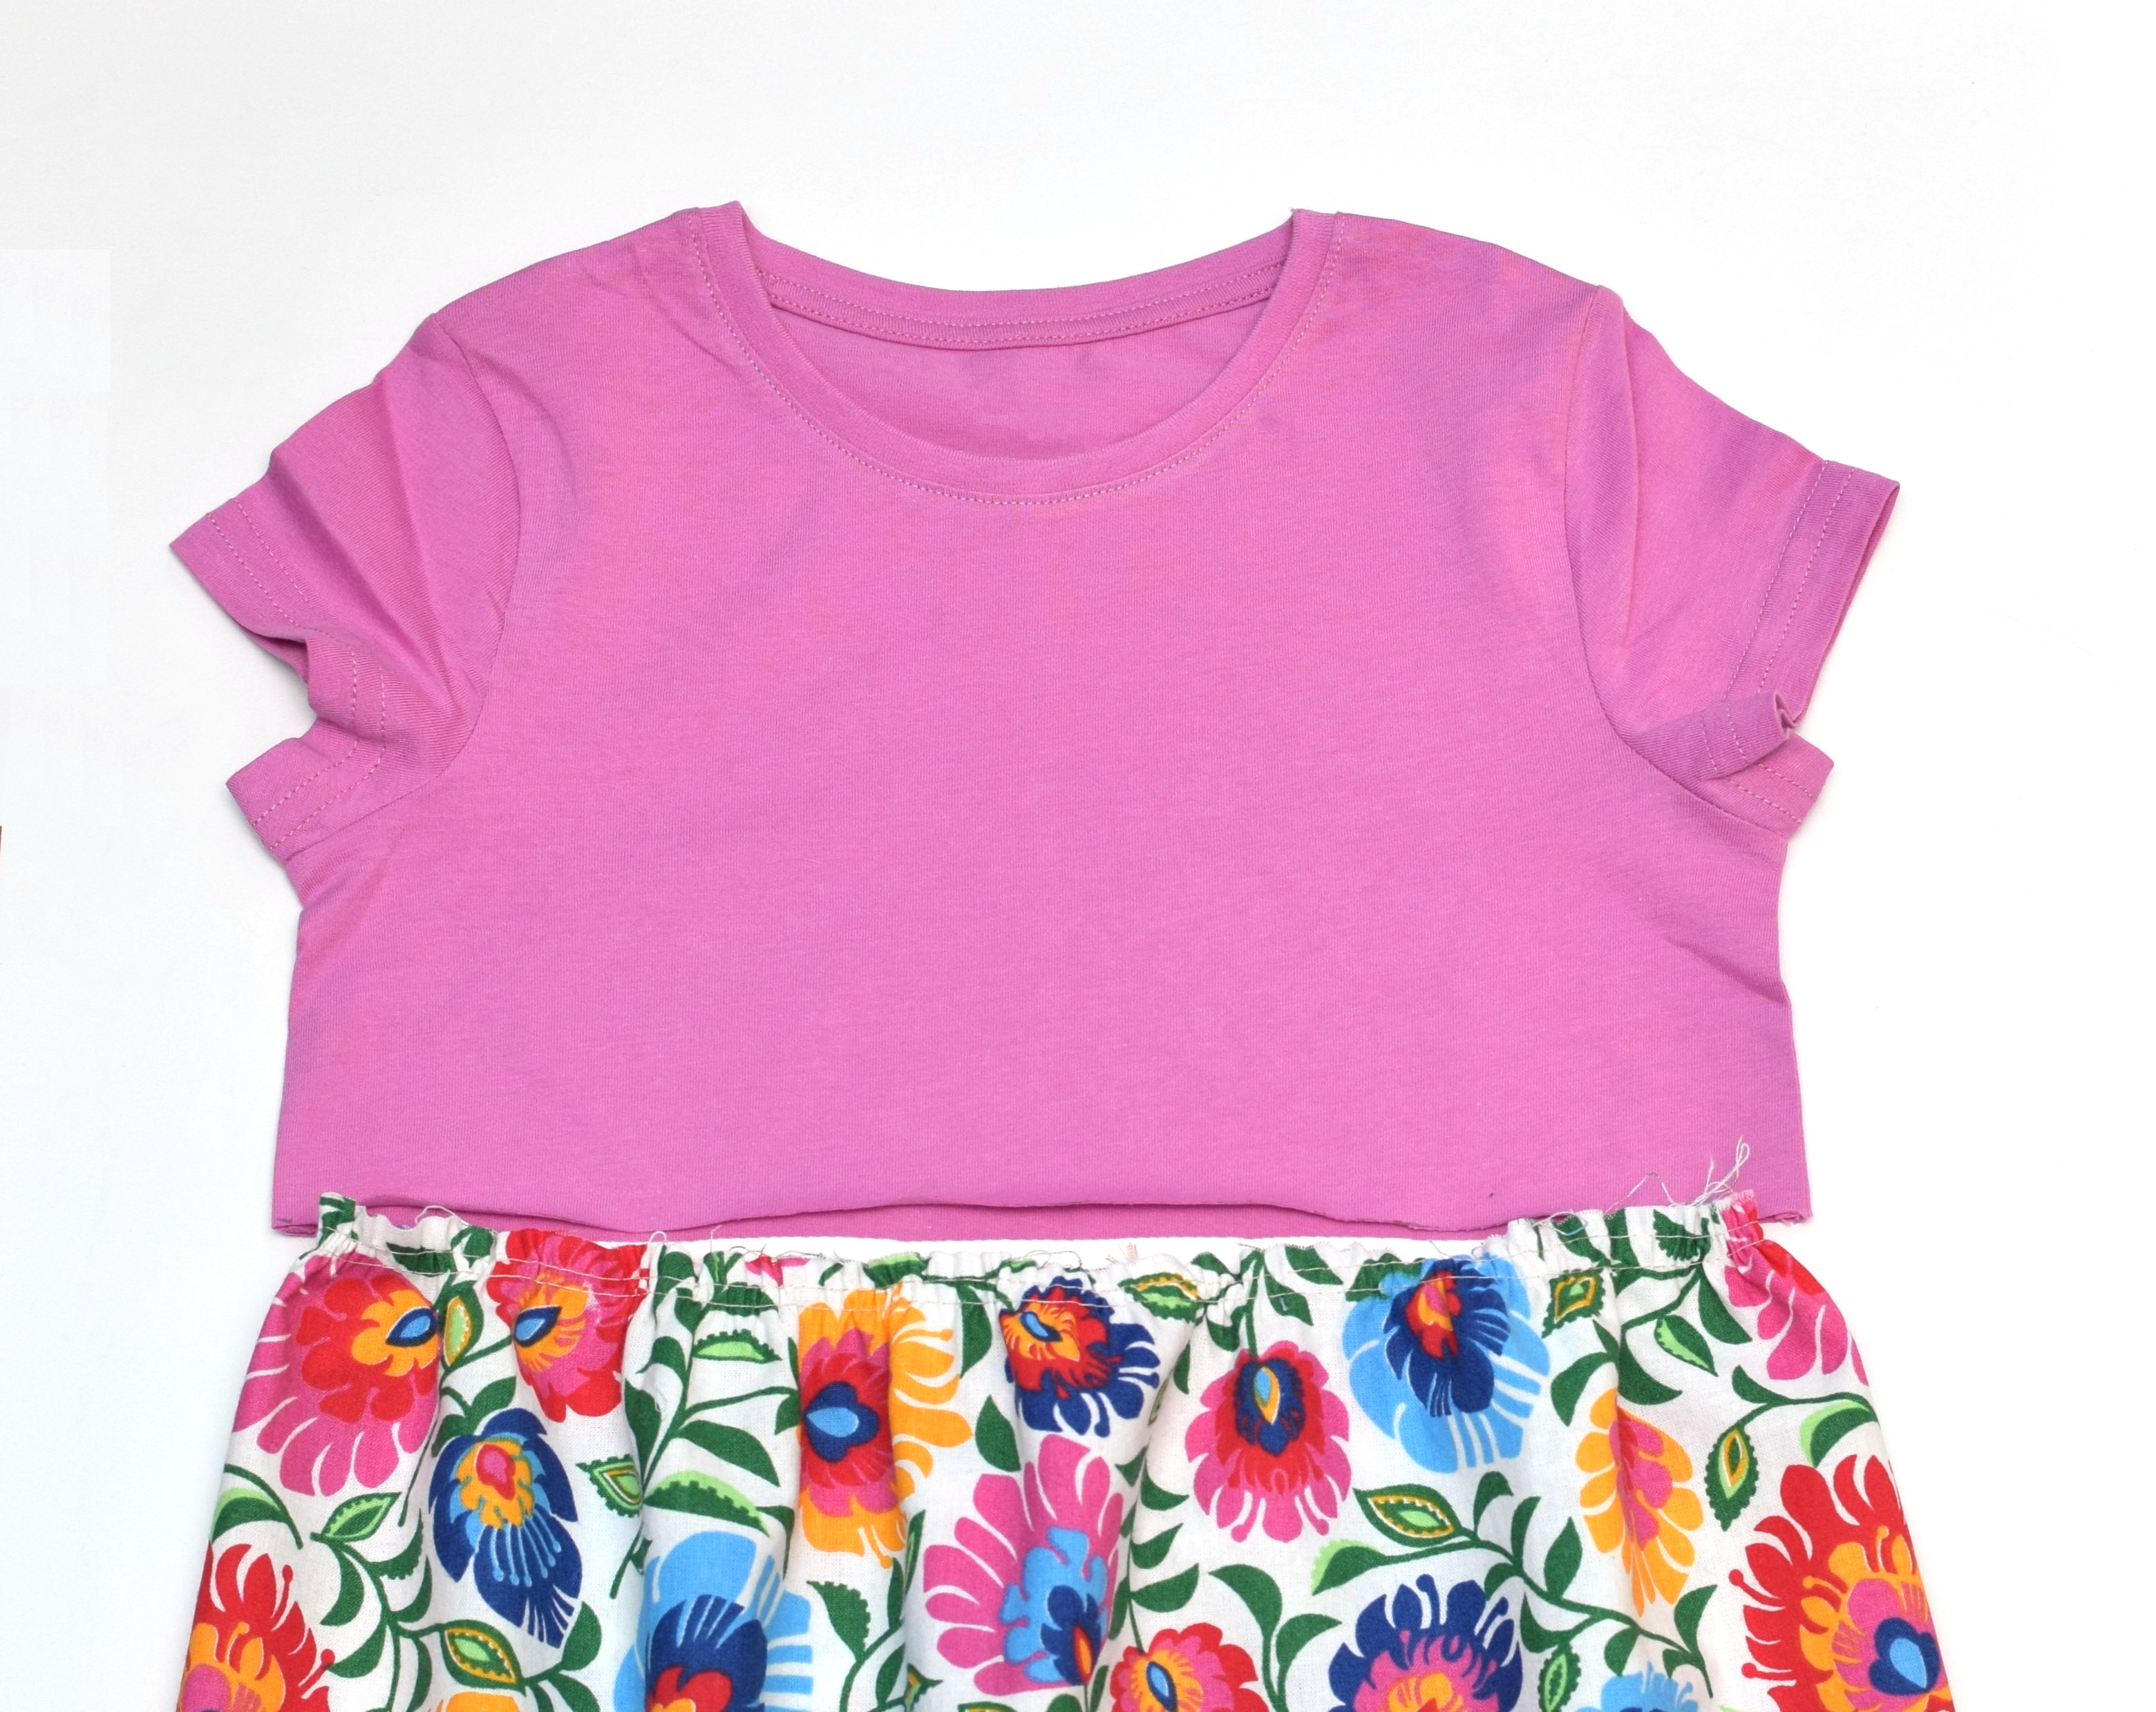
Pick out a T-shirt that currently fits your kid and 1/2 or 1 yard of fabric for the skirt (depending on the desired skirt length and the shirt’s size).
Decide where you want your skirt to start. Lay your T-shirt flat and mark two points on both sides. I started 3 1/2 inches below the underarm. Draw a line from one side to the other, then cut the T-shirt.
Related: How to repurpose an old sweatshirt. Upcycle ideas

I did not apply interfacing to the cut edge of the T-shirt, I just left it as-is (and nothing bad happened).
Related: 15 things I wish I knew when I started sewing
Step 2 – prepare and sew the skirt
I didn’t want too many gathers, so I multiplied the circumference of the bottom edge of the T-shirt by 1.5.
The waist circumference of my T-shirt is about 26 inches, so my cotton fabric piece is 39 inches wide.
Now you have to decide how long you want your finished dress to be.
I want my finished dress to be 22 inches in length, and my T-shirt bodice is currently 10 inches. So I have to do a little math.
22 minus 10 equals 12 inches, but I also have to think about the seam allowances at the waist, plus the hem of the skirt – that’s another 3 inches, approximately (it might be 2 inches if you want a narrow hem).
So my 39 inches wide fabric piece should be about 15 inches long.
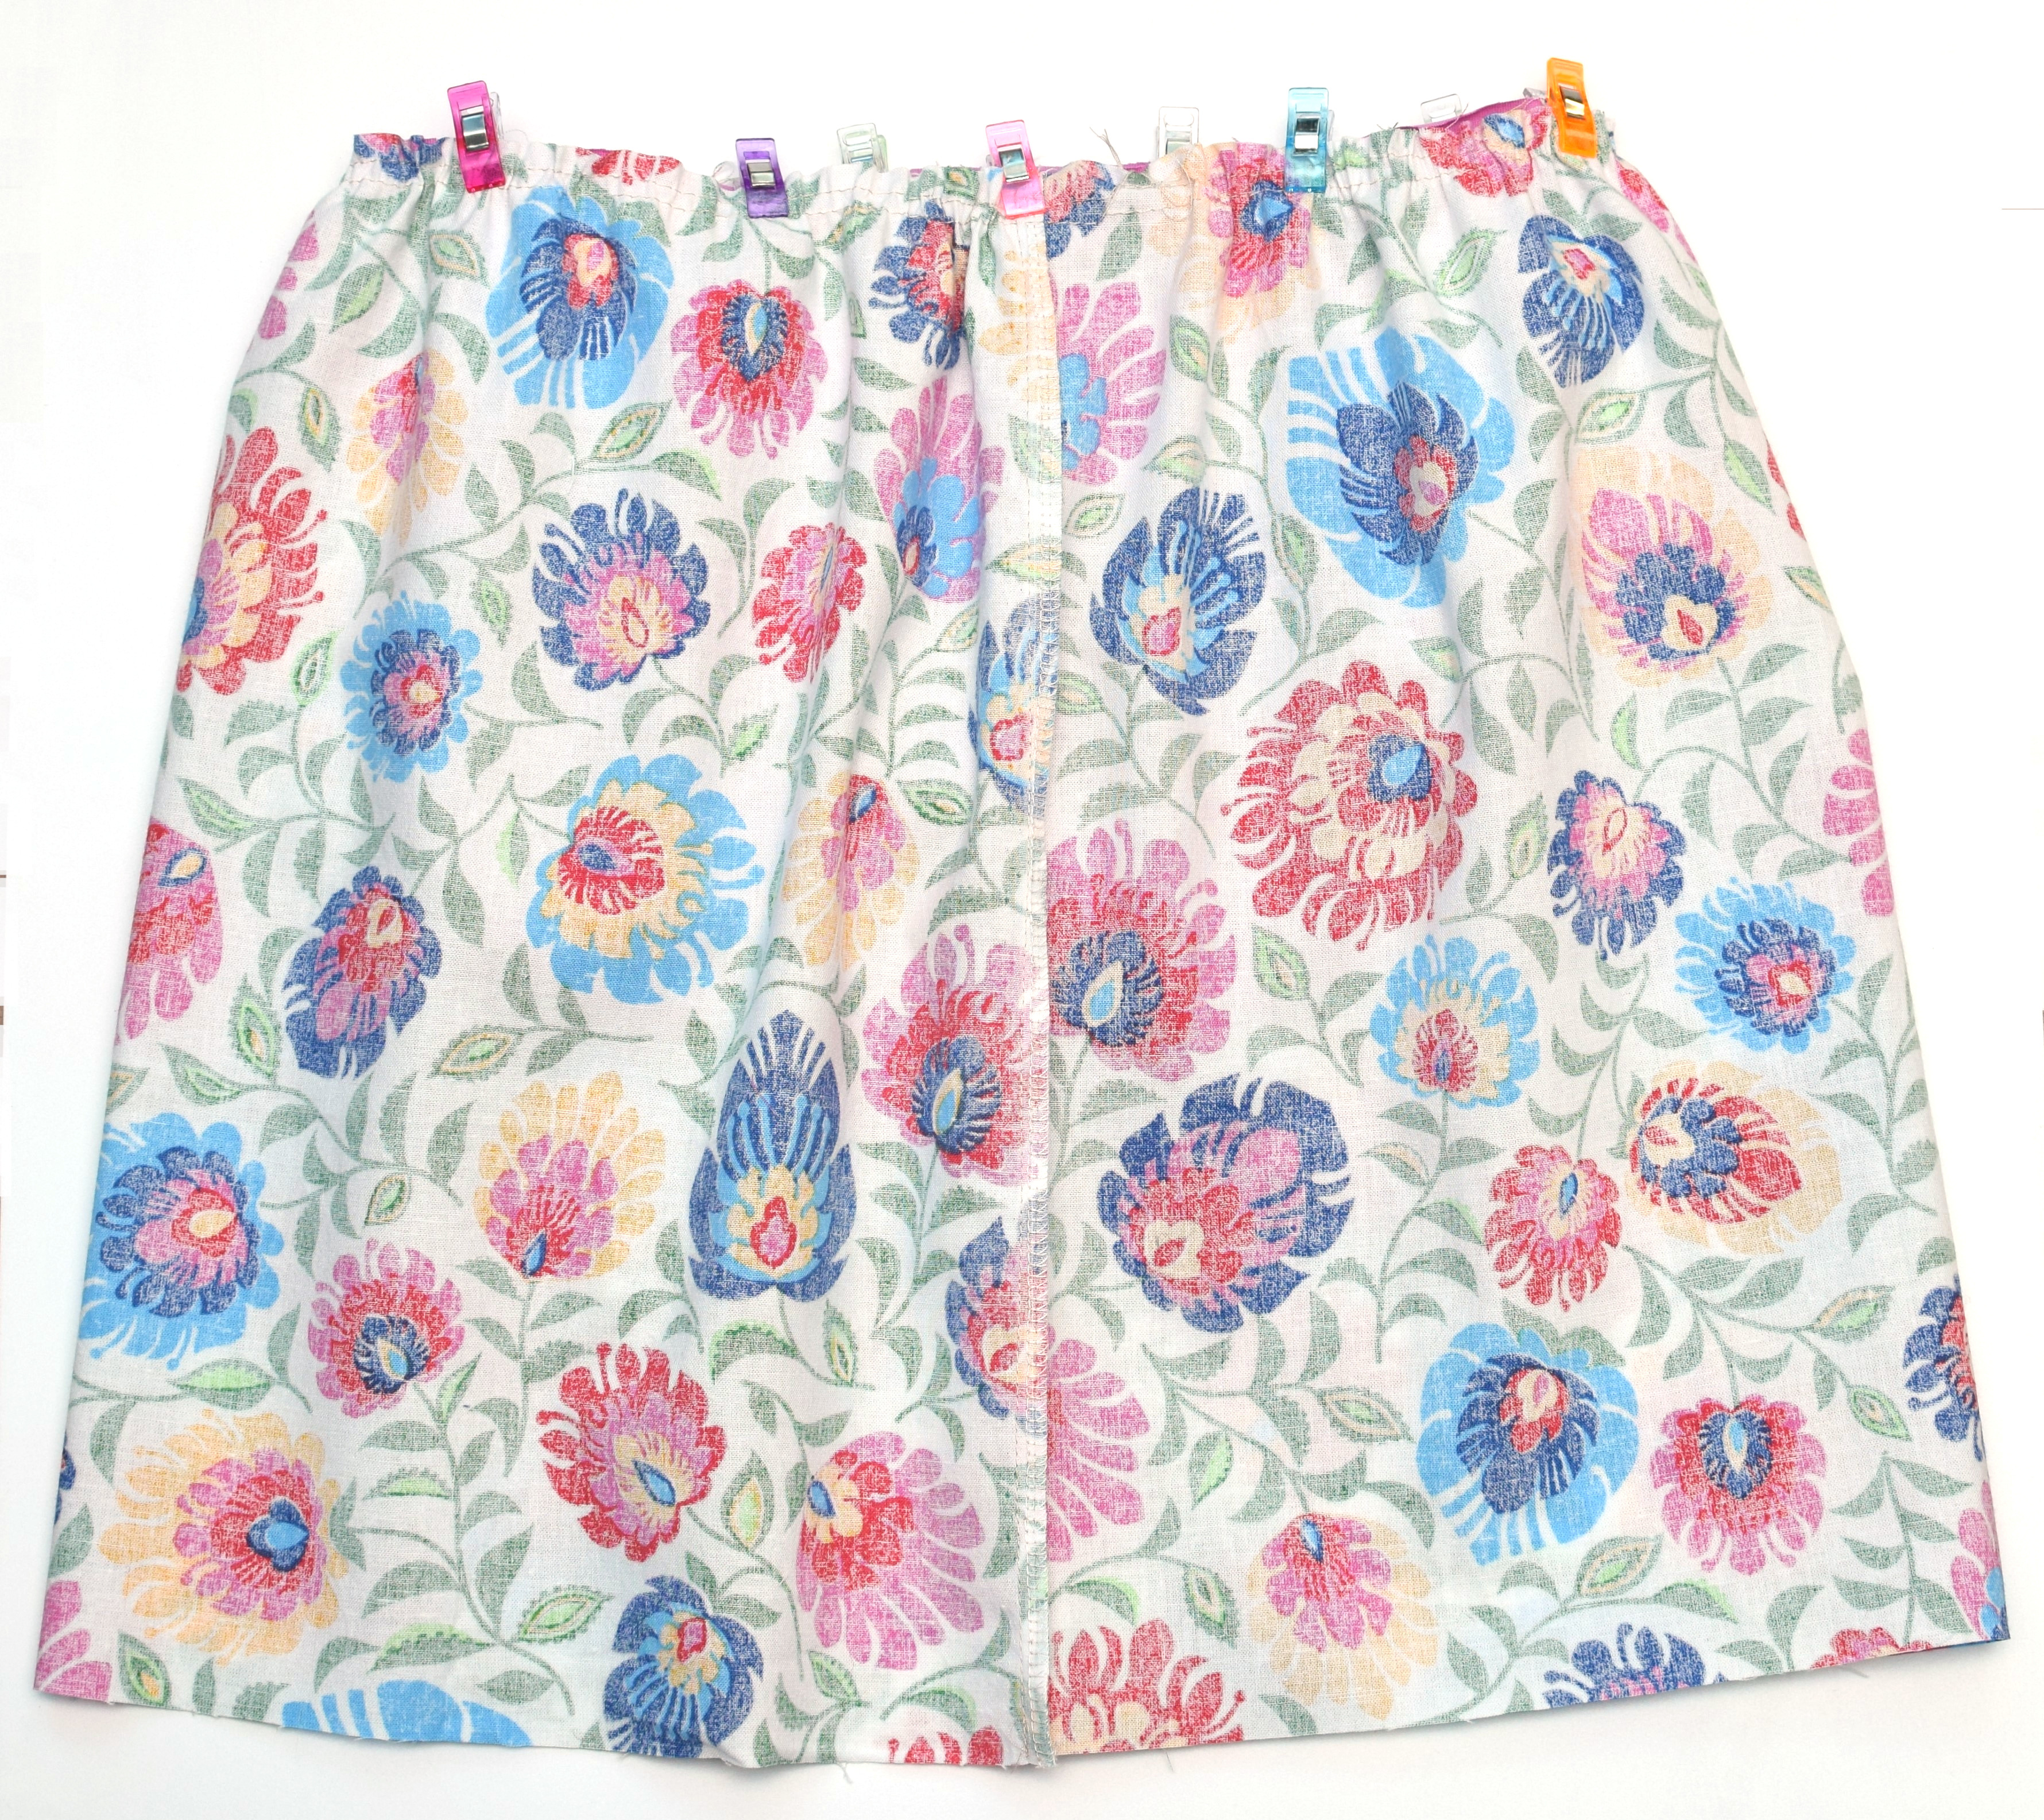
Now take that rectangular fabric piece and fold it in half lengthwise, with the right sides together, lining up the short edges.

Use a 1/2 inch seam allowance to sew the center back seam of the skirt – backstitch at the beginning and end. Then, finish the raw edge of the seam allowance – I used my serger. Do not forget to press the seam (not optional!).
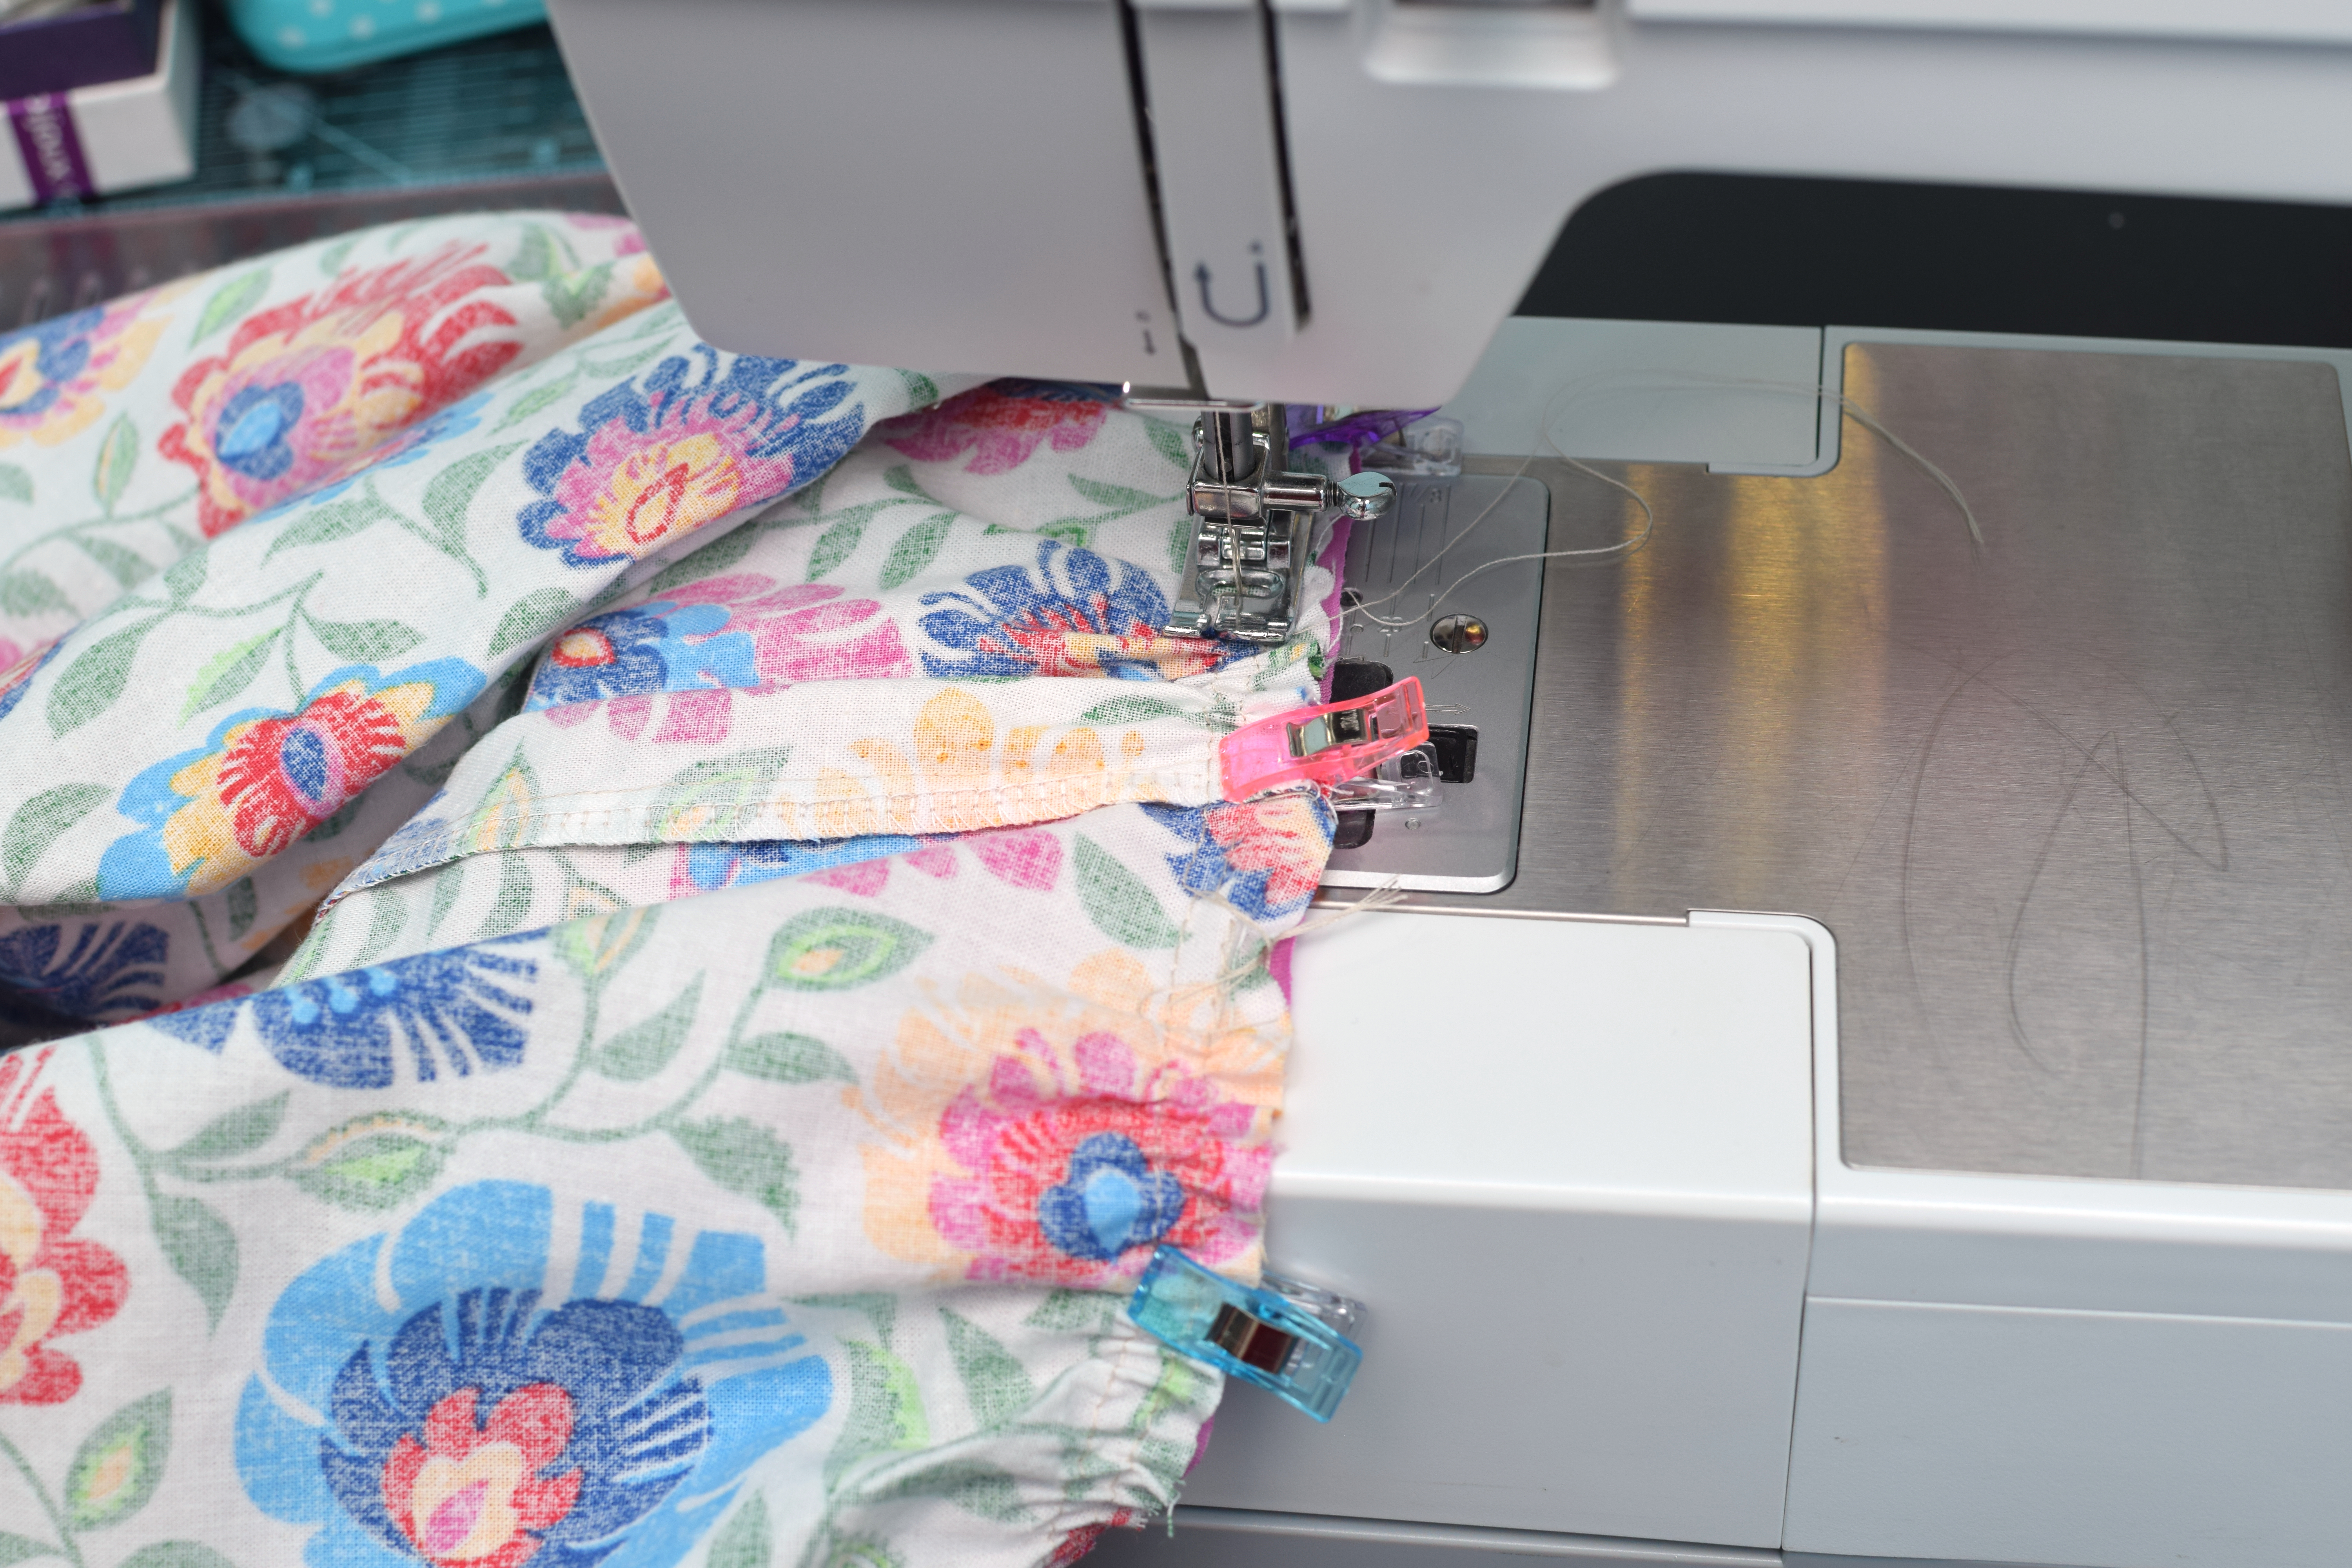
Step 3 – gather the skirt
Use a long gathering stitch (stitch length should be at least 4.0) to make two parallel rows of stitching along the top edge of the skirt. Don’t backstitch at either end and leave long tails.

Now start pulling both the bobbin threads to gather the skirt.

Gather the top of the skirt to fit your T-shirt hem. Then readjust the gathers to distribute them evenly.
Be sure to check out my other tutorials on how to make a simple zipper pouch, an envelope pillow cover and ruffled scrunchies.
Step 4 – attach the gathered skirt to the T-shirt
For this step, the skirt should be with the wrong side out, and the T-shirt with the right side out.
Place the T-shirt inside the skirt, and line up the raw edges. The right sides of both shirt and skirt will be touching as you sew the waist seam.
Sew the cotton skirt to the shirt with a 1/2″ seam allowance and make sure not to stretch the T-shirt fabric in the process. Finish the seam, then press it flat with an iron.
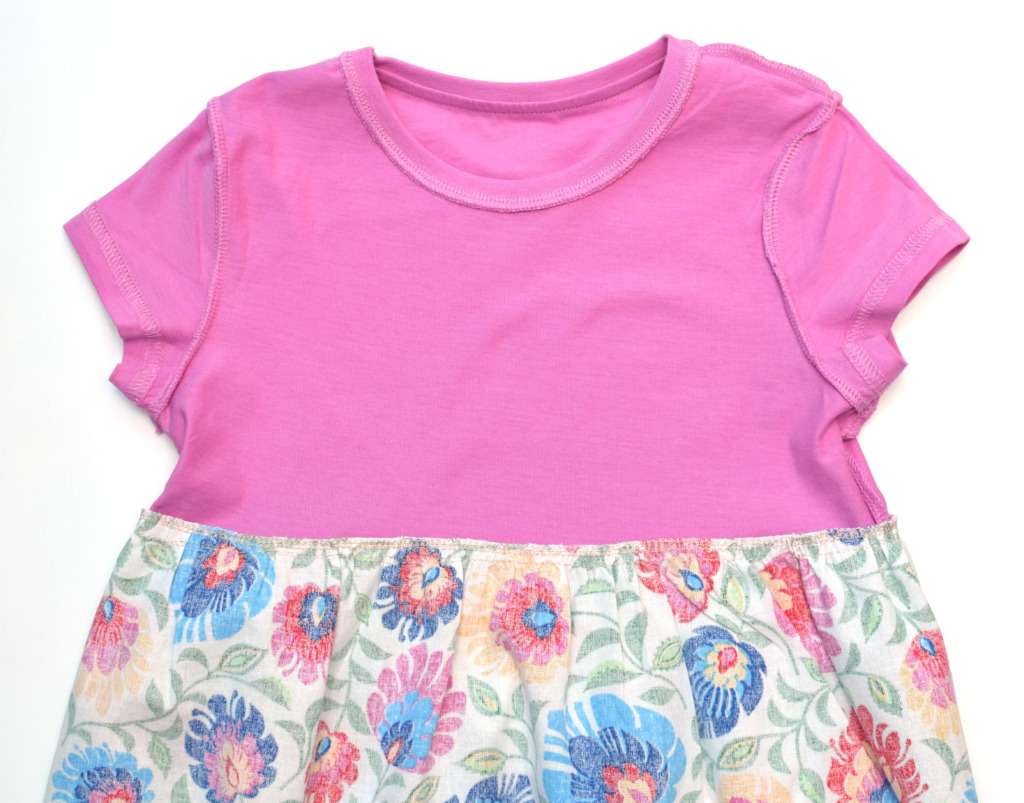
And finally, topstitch on your T-shirt to catch the seam allowance underneath. Stitch 1/4” from the waist seam.

Step 5 – hem the skirt
I opted for a single-fold hem. First, you have to finish the raw edge of your skirt with a zigzag stitch or with a serger. Then, use a seam gauge to turn your hem up to the desired length – mine is 1.5”.
Stitch the hem, then press it flat, and you’re done!

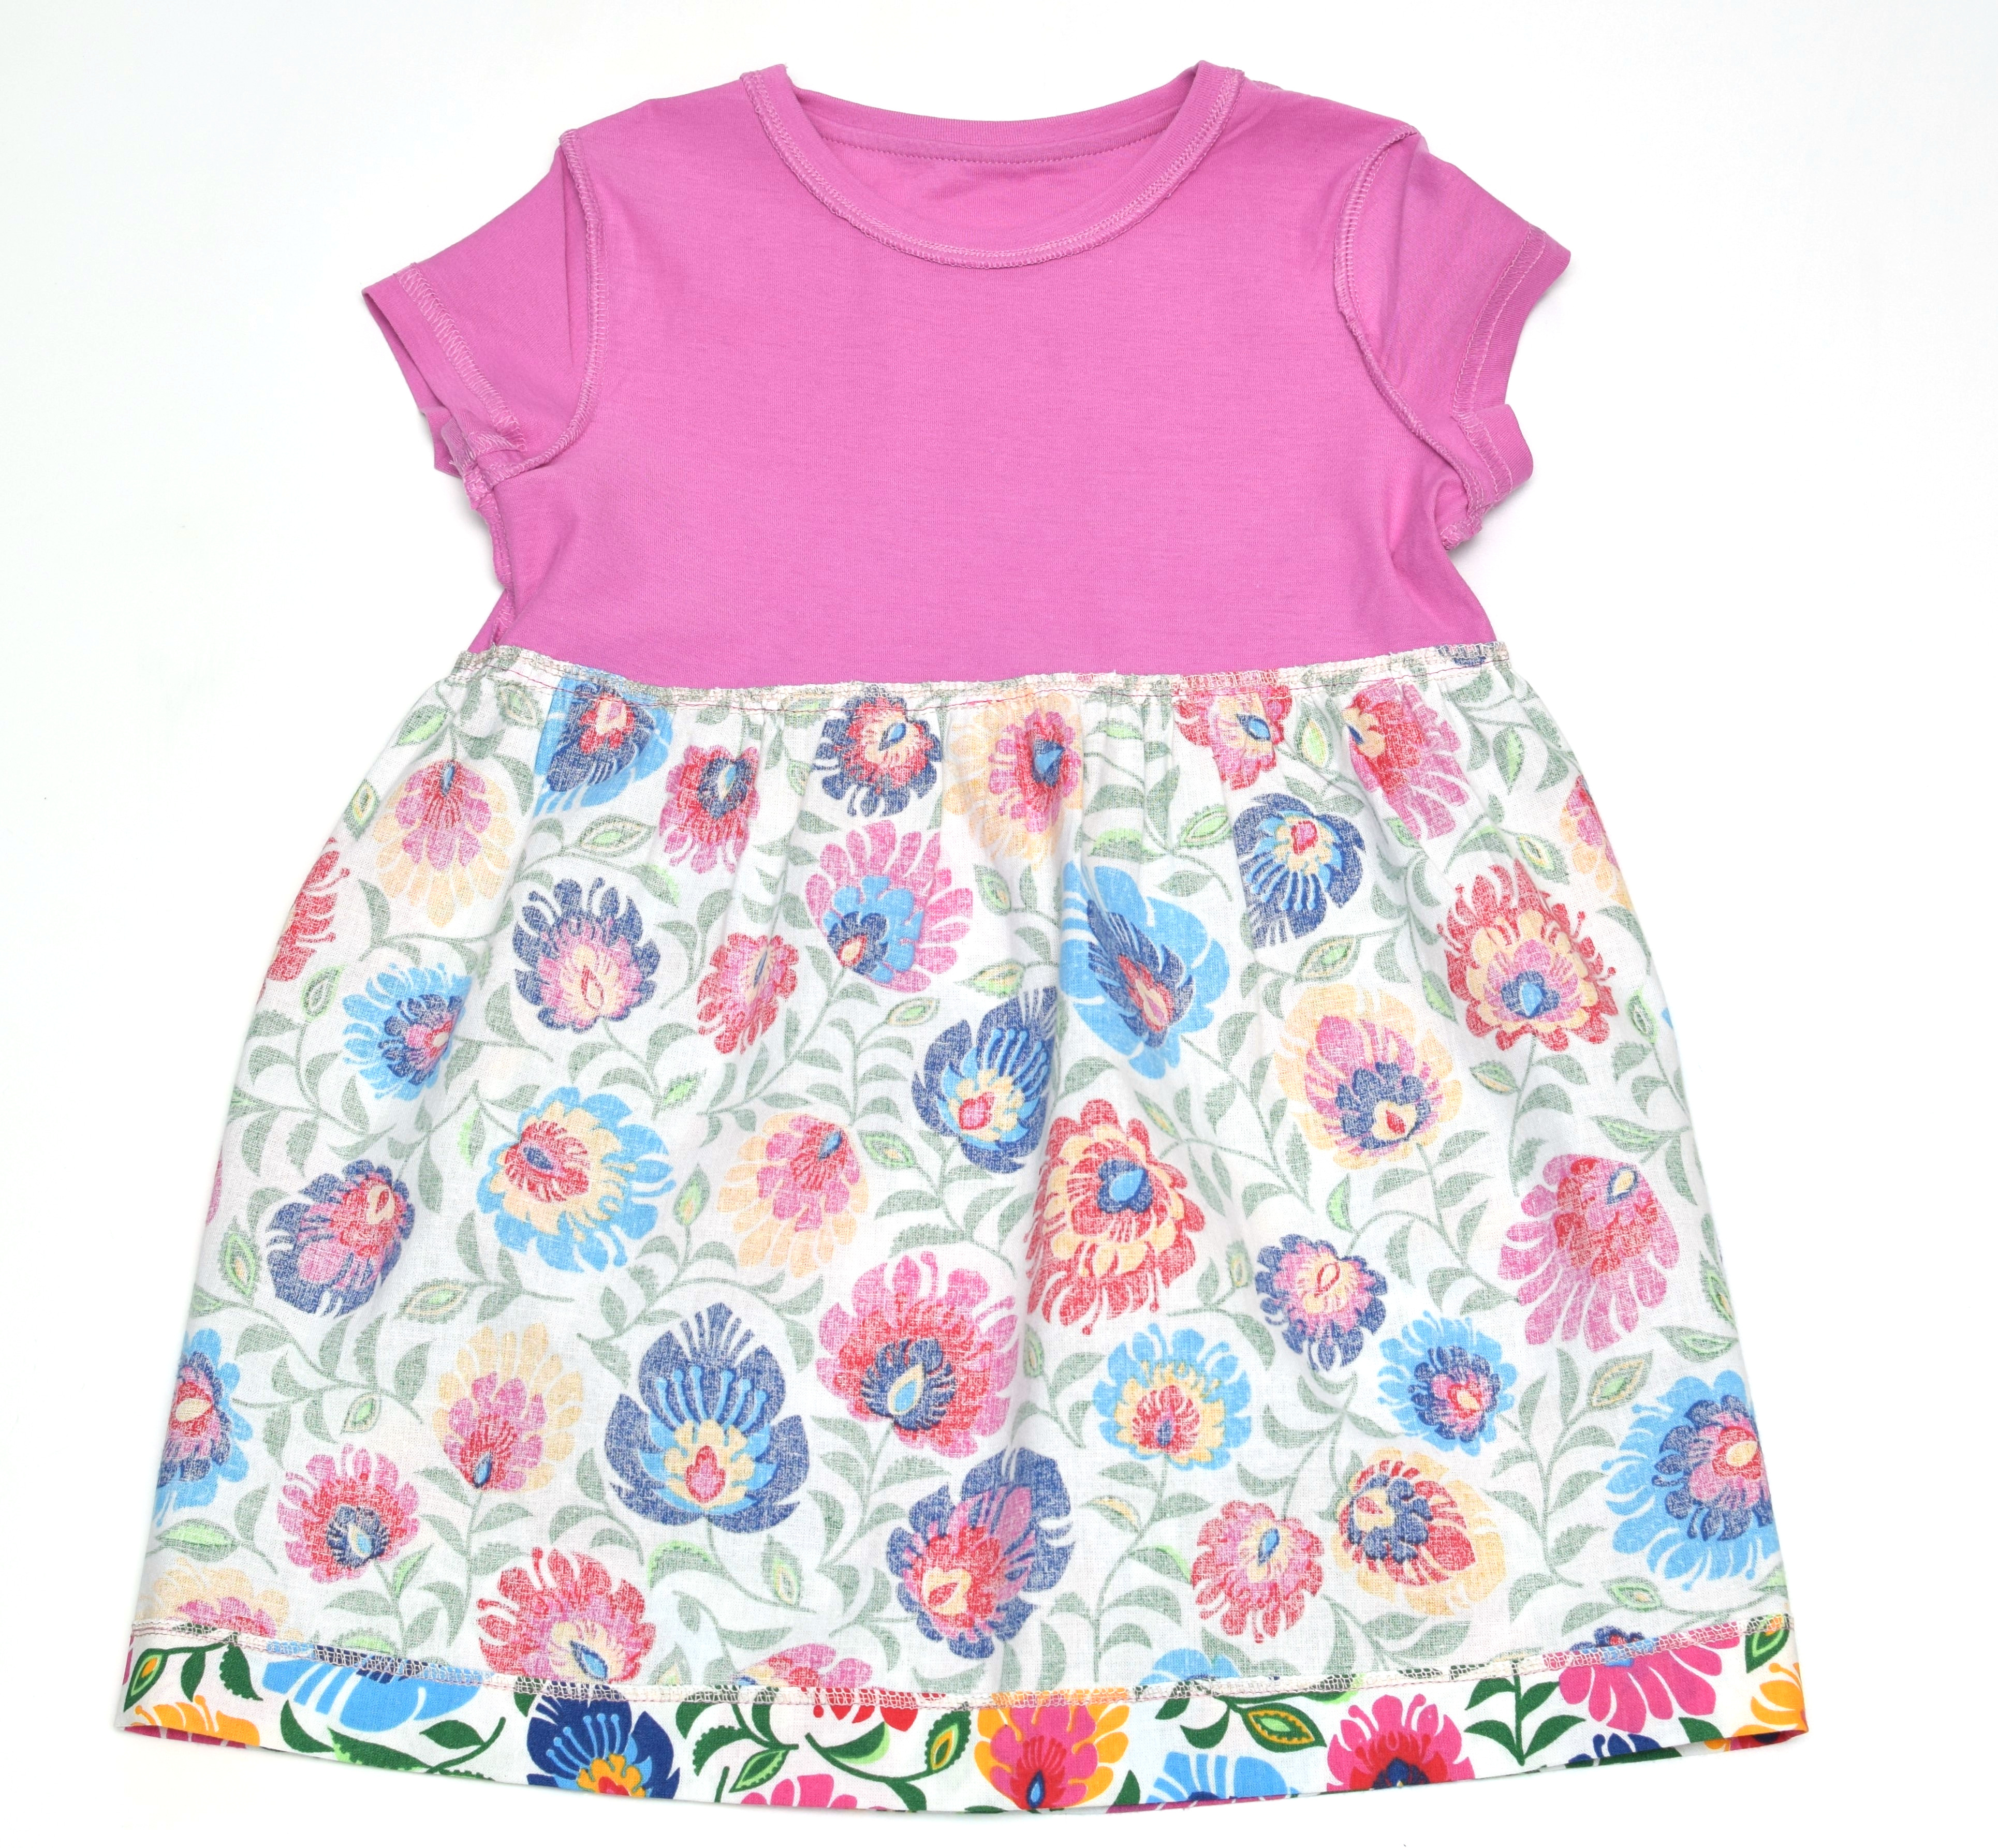
This is what the inside of this cute T-shirt dress looks like.
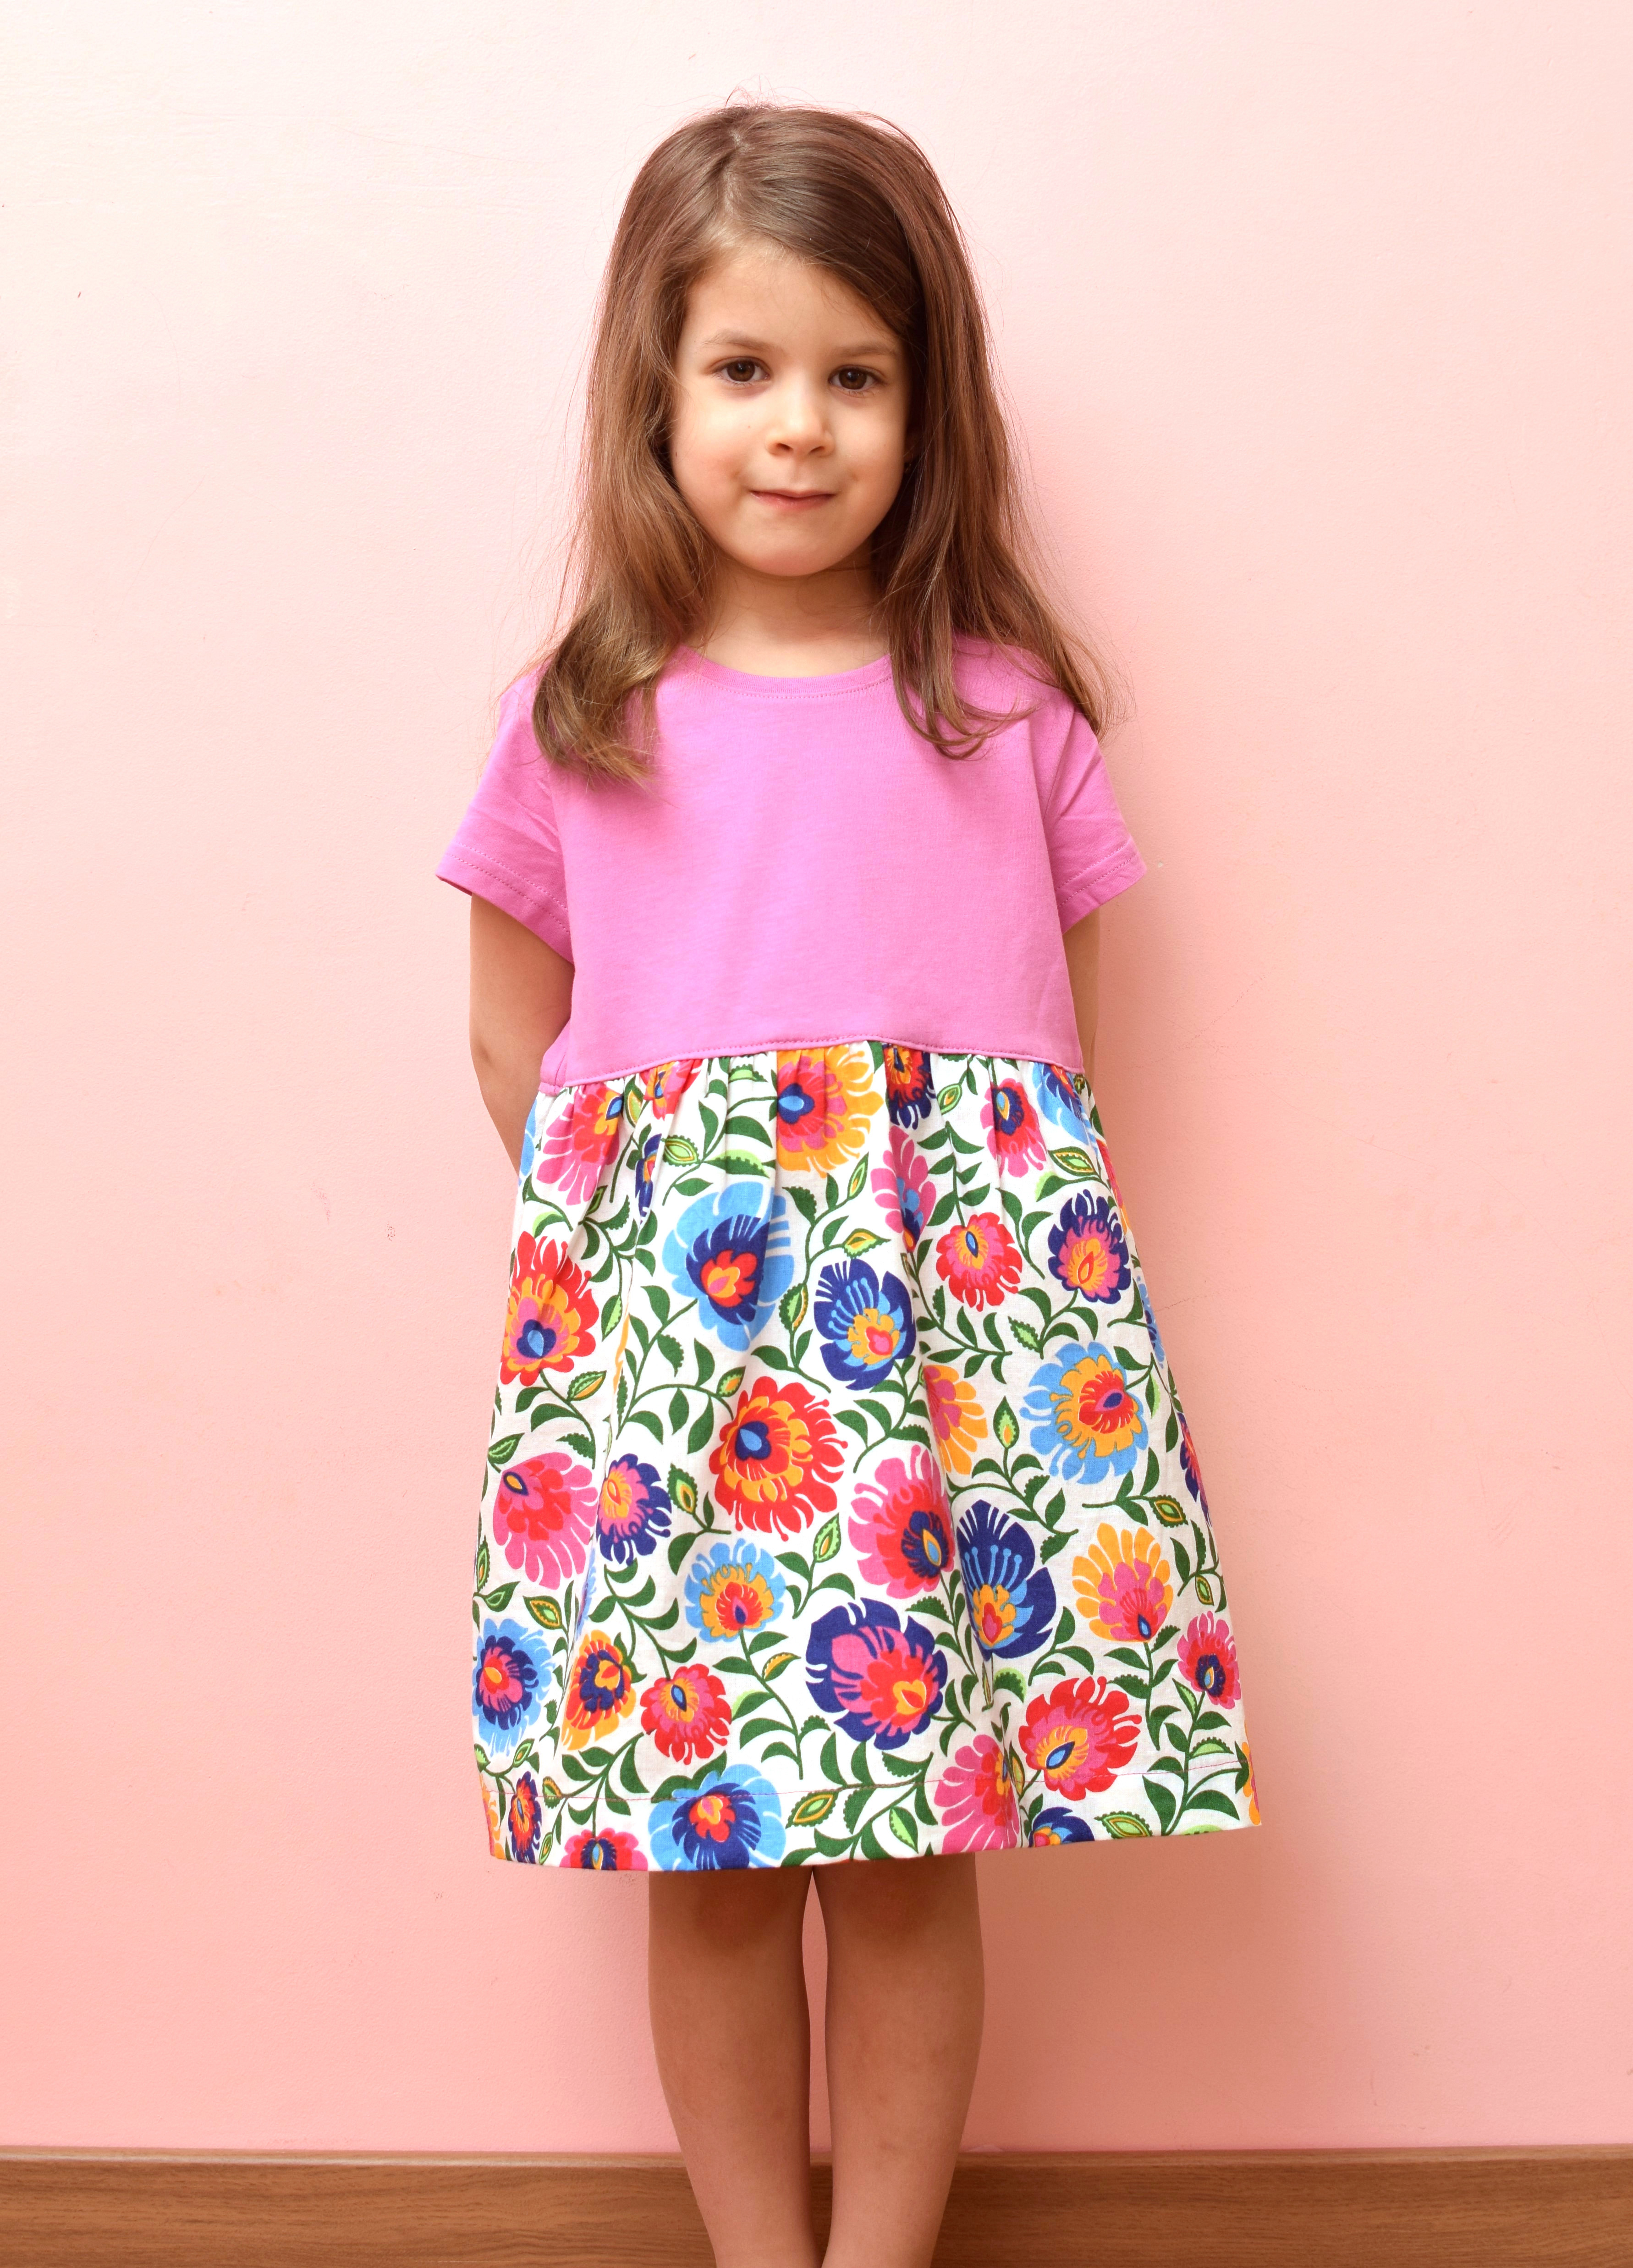
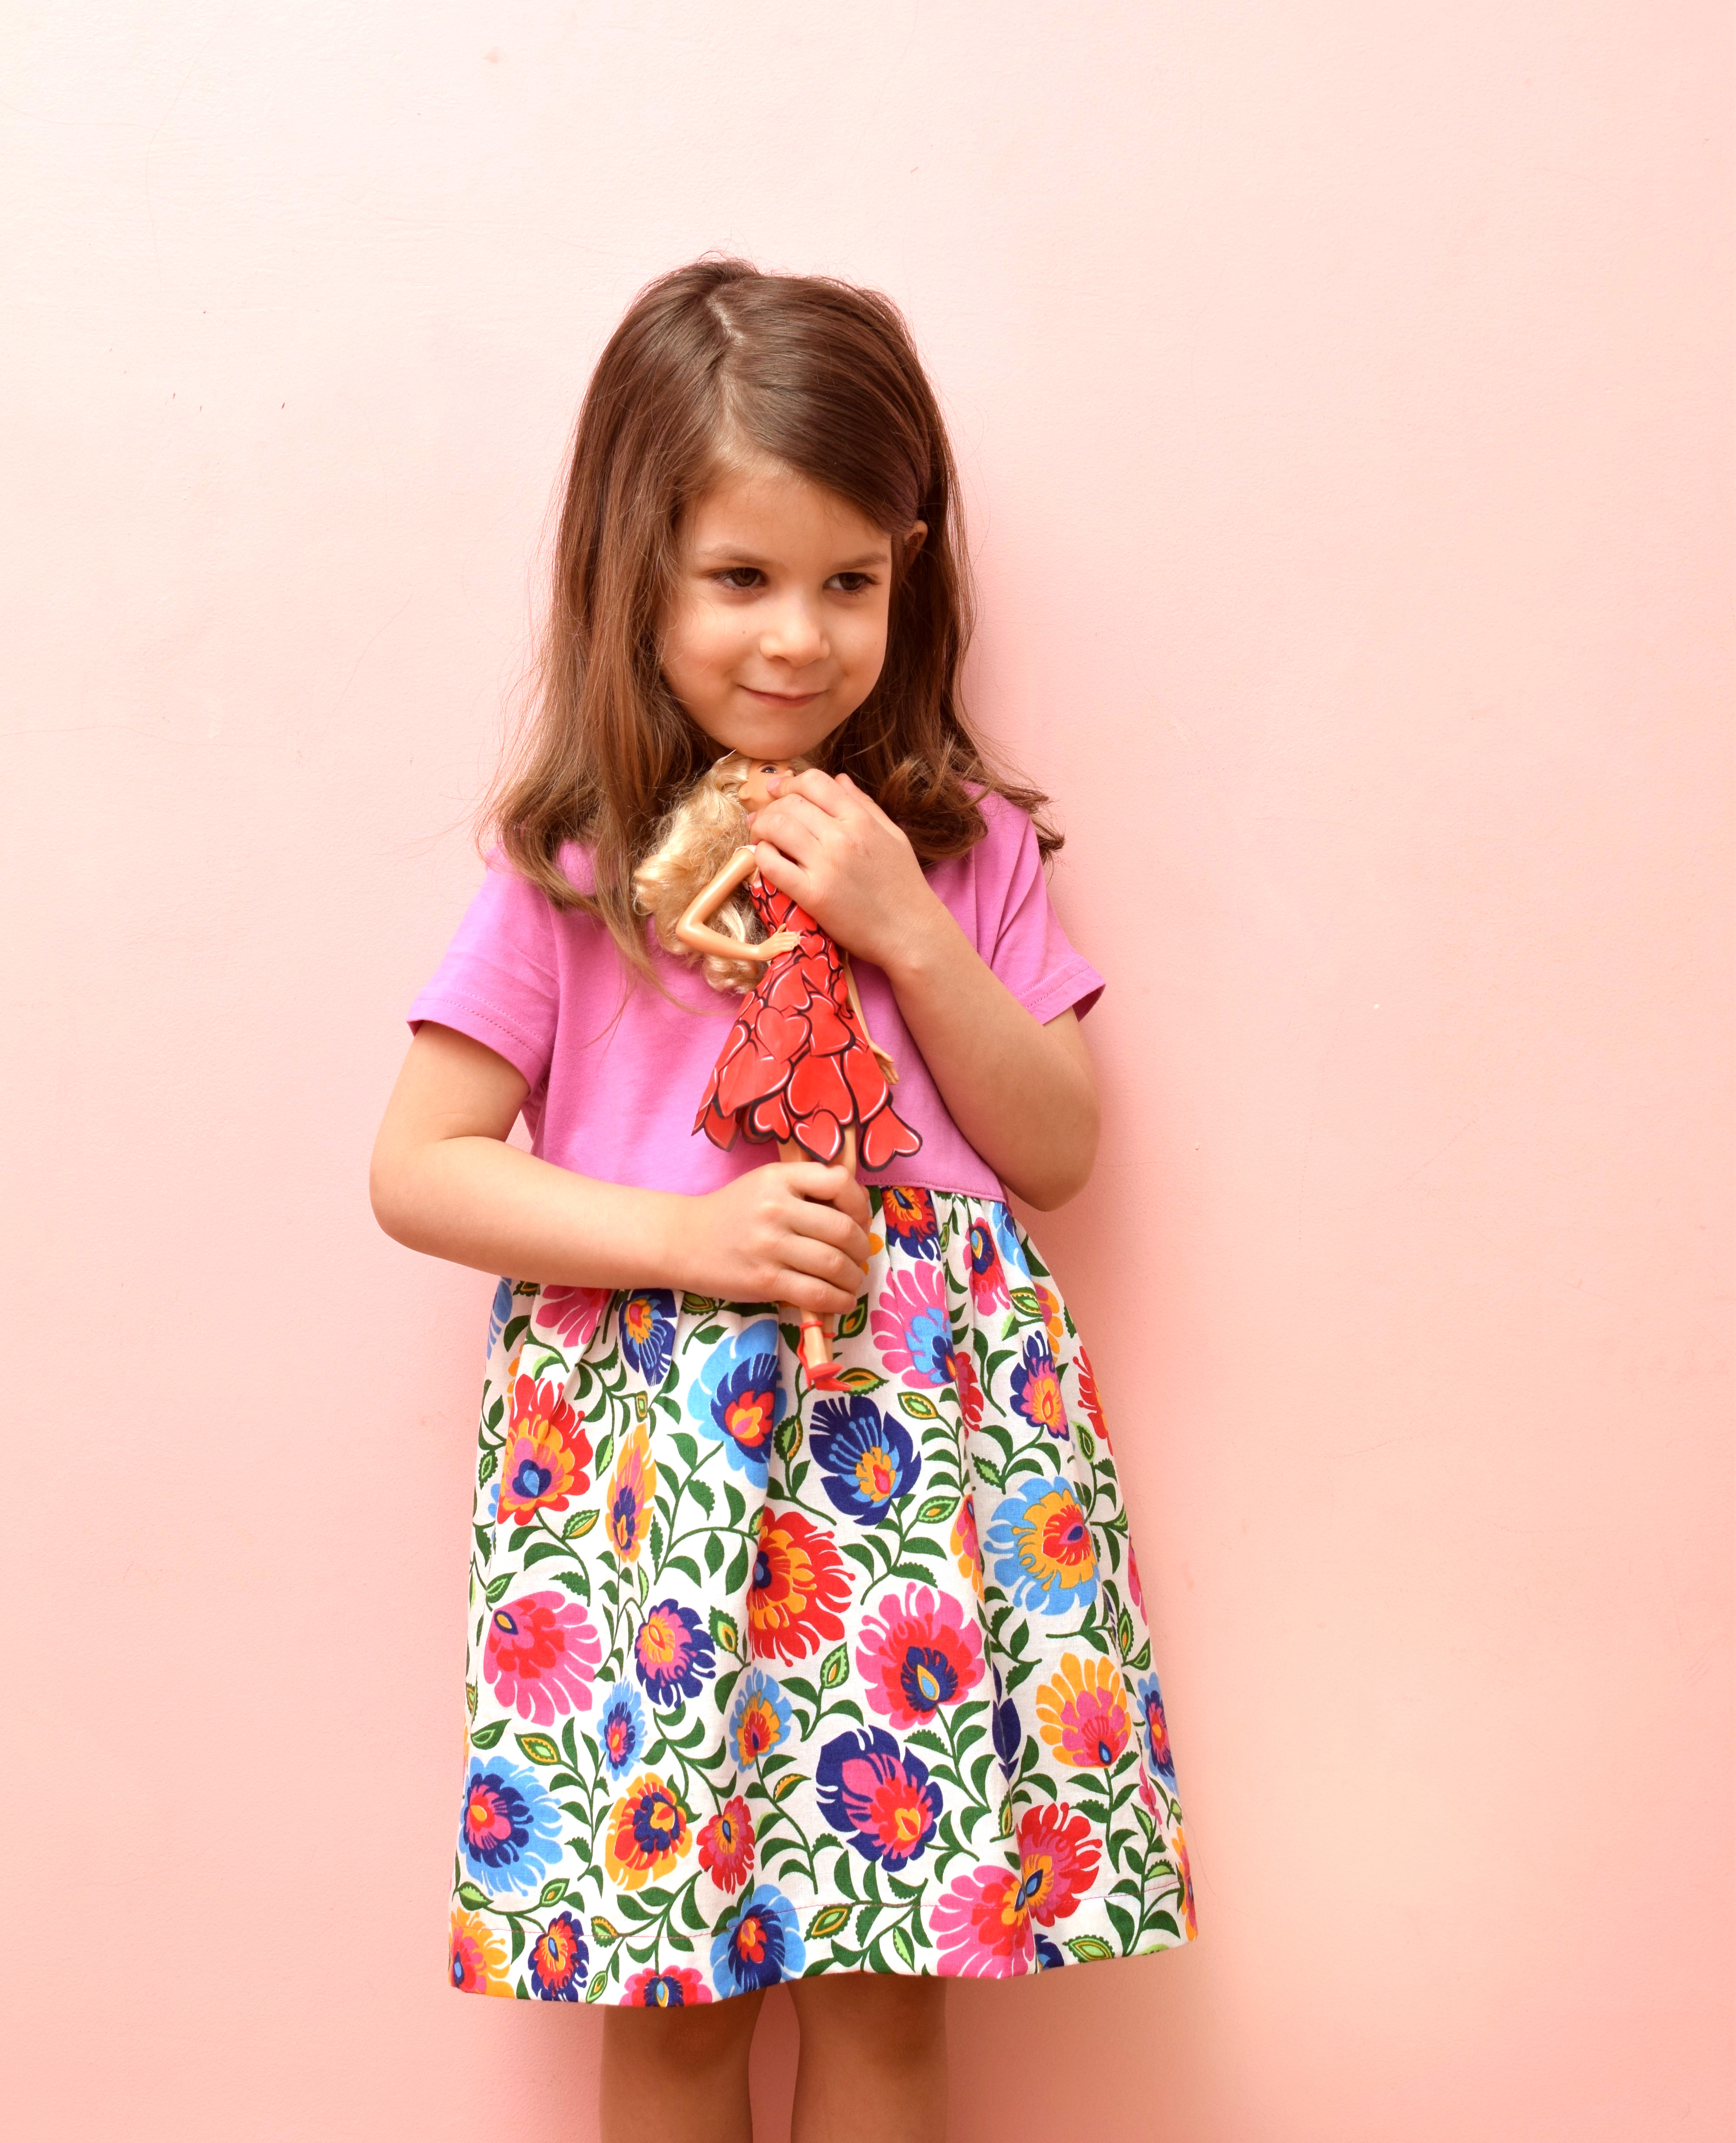
My daughter loves wearing her cute and comfy T-shirt dress.
Did you find this T-shirt dress tutorial helpful? I’d like to hear what you think of it!
Let’s keep in touch! You can find me on Facebook, Instagram, and Pinterest.


How does the child get the dress over the shoulders? The cotton skirt waist does not stretch like the T-shirt.
Do you have any ideas to repurpose the bottom part of the t shirt that you cut off?
I make my t-shirt dresses almost the same way, except I use 1/4 or 1/2 inch wide elastic sewn to the top of the skirt in place of gathering stitches. I use “quarter pinning” on the elastic, skirt, and the t-shirt to even out the gathering.
I like this idea! The elastic makes the dress form fitted at the waist, yet provides the stretch necessary for the child to easily put the dress on.
Just measure the child’s waist and subtract an inch or two to get the length for the elastic. If you can’t measure the child, do a web search for a children’s body size chart. It will list waist sizes by age. Find the waist size for the age you are sewing for and subtract a little to get the length you need for the elastic.
I also use the 1/4 inch elastic to gather the waist. it is easier and fits the child better.
I sew t-shirt dresses and pillowcase dresses for charity and after I get a few pieces of the cut off t-shirts, I make a dress with them. pretty neat to keep reusing fabric🫠
Thank you for the great tutorial. What size T shirt as this? I want to make one for Project Dress a Girl and since you did the calculations, I will buy a T shirt the same size. Many thanks.