Want to make a cute tulle skirt with an elastic waistband? This beginner-friendly sewing tutorial has got you covered! Wondering how much tulle you need or what kind is best? I’ll break it down for you step-by-step, with plenty of tips along the way.
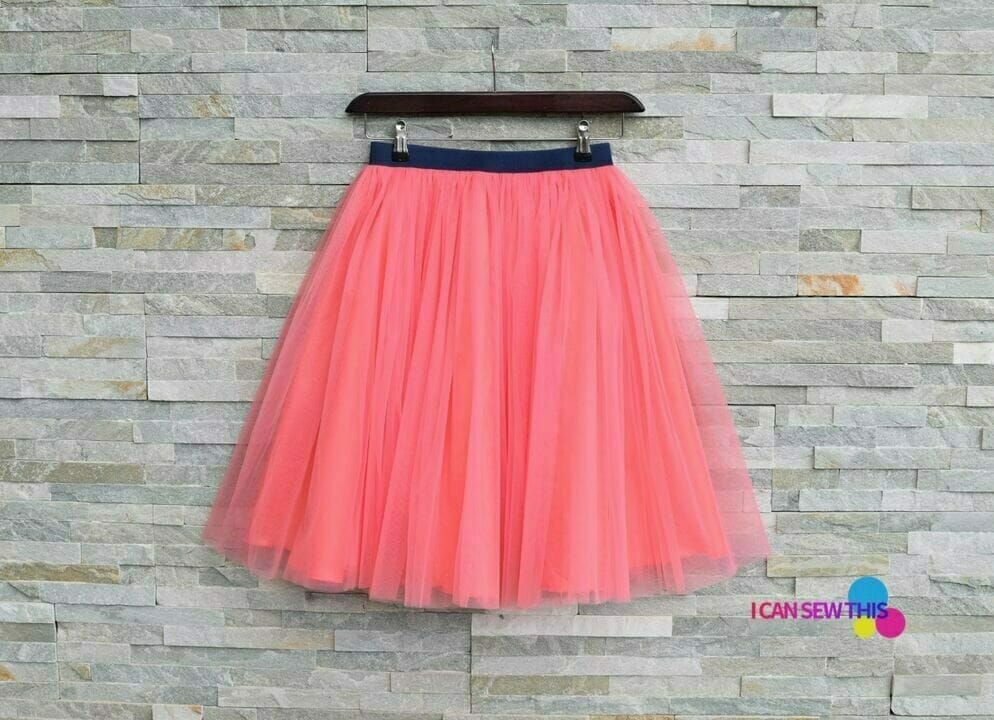
This skirt has an exposed elastic waistband and is super full, using a 1:8 ratio (the tulle is 8 times the waist size).
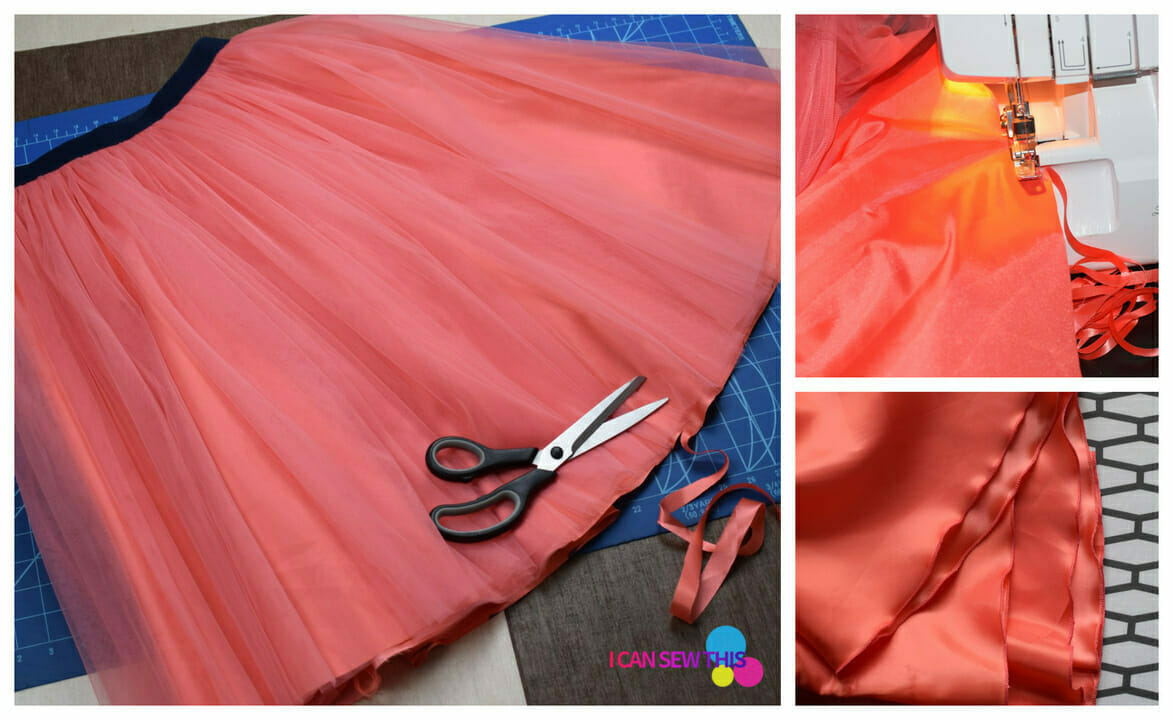
I used four pieces of 118” wide tulle, each 23” long. I stitched them together, gathered them up, and attached them to a half-circle skirt lining made from taffeta.
If you want less fluff, go for 2 or 3 layers instead, or adjust the width. You’ll need about 3-4 yards of 118” soft tulle. If you can’t find that width, just join the fabric pieces to make it work!
For the lining, I used 2 yards of taffeta to add shape and volume without bulk. Once your tulle and lining are together, sew on the elastic, and you’re done!
That’s it – your own fabulous tulle skirt!
Related: How to make a tiered tulle skirt / gathered tutu skirt / circle tulle skirt / reusable tulle produce bags / easy one-seam tutu skirt
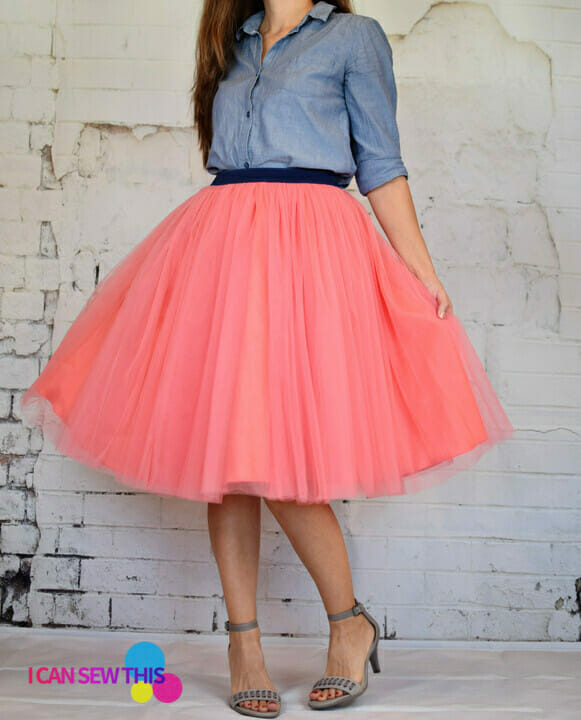
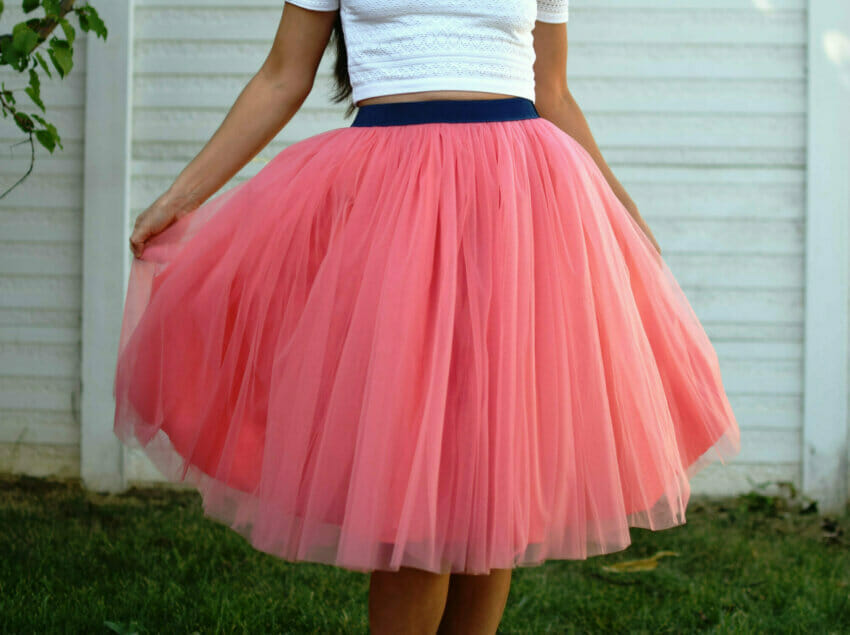
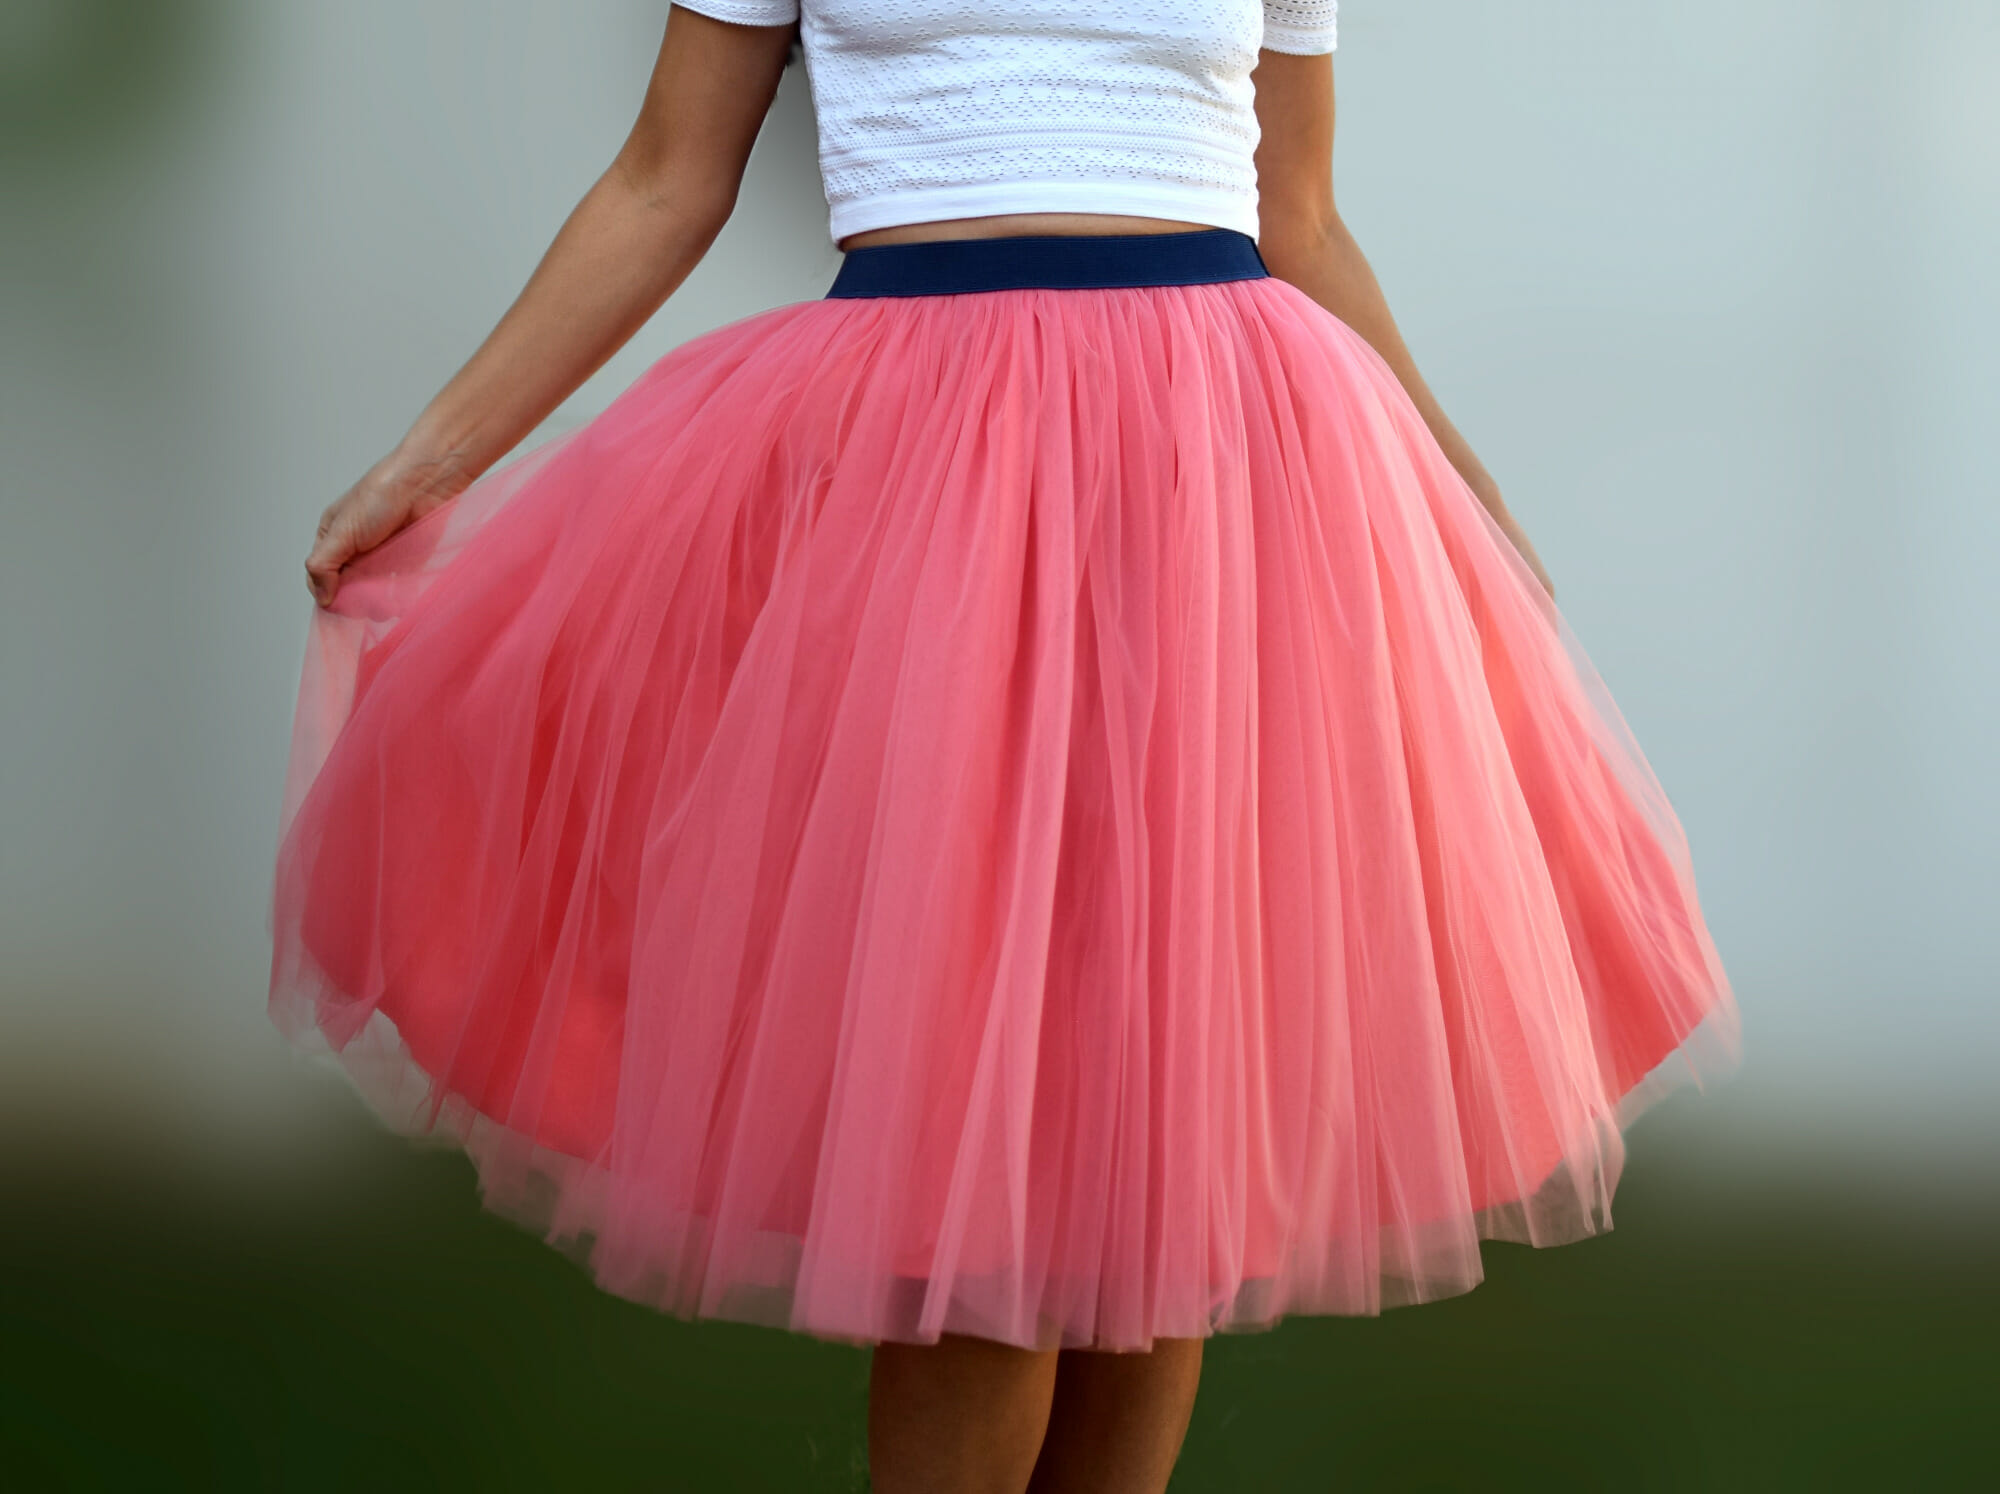
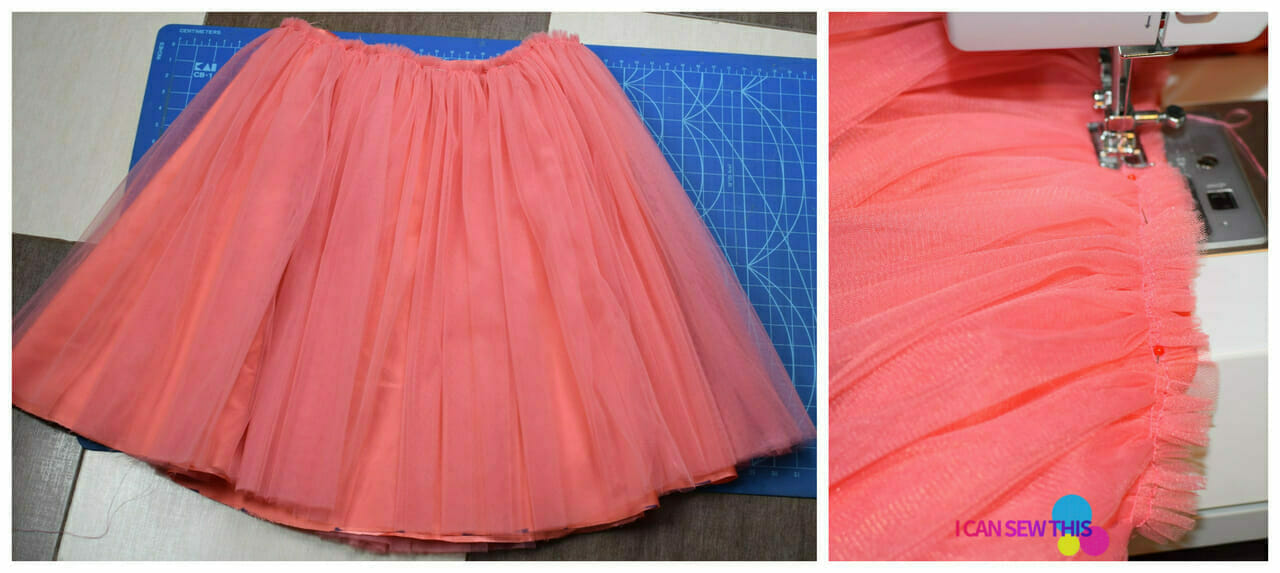
I totally fell in love with midi skirts and pleated skirts this summer, and that’s how this pink tulle skirt came to be!
It’s pleated, fluffy, super girly, and that exposed elastic waistband keeps everything cinched in just right. Plus, there’s so much volume at the hem – what’s not to love?
So, what’s tulle anyway?
Tulle is that light, super-fine netting you often see in wedding dresses and dance costumes. It’s usually made from polyester and has this dreamy, delicate feel. But don’t think it’s just for brides, ballerinas, or little girls – tulle skirts are for everyone!
Related: Tips for sewing tulle on your regular sewing machine / Sewing inspo – a collection of photos of tulle skirts that I sewed many moons ago

DIY tulle skirt tutorial – fabric choice
For my tulle skirt, I used 118-inch (300 cm) super wide soft tulle and lightweight taffeta for the lining. Satin works too, but I went with taffeta because it’s crisper and gives the skirt more volume.
The elastic waistband is 1 ½ inches wide, and I used navy blue since that’s what I had on hand – didn’t want to bother with a zipper!
Sewing supplies – DIY tulle skirt
- 3-4 yards of 118 inches (300 cm) super wide soft tulle
- 2 yards of satin/taffeta fabric for the skirt lining
- 1 ½ – 2 inches wide elastic
- sewing machine
- sewing machine needle
- matching thread
- fabric scissors
- rotary cutter
- cutting mat
- fabric marking pencil
- sewing pins
How to make a tulle skirt in 10 simple steps
Step 1 – cut the tulle fabric pieces
First, decide how long you want your skirt to be, then add 1 inch. That’s the length of each tulle piece. You’ll need four rectangles, each 118 inches (300 cm) wide.
If you’re working with 118-inch wide tulle, fold it 3 times until it’s about 14.7 inches wide – makes cutting so much easier! Use a rotary cutter, ruler, and self-healing mat for a straight edge.
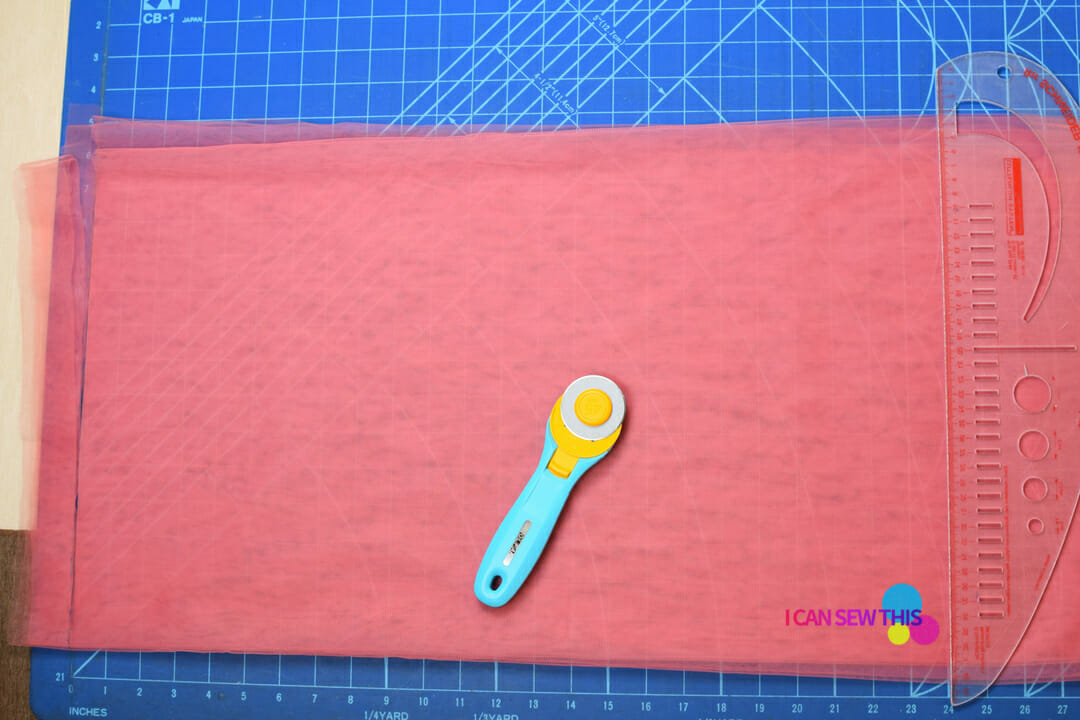
Got wrinkles? Give the fabric a quick press on a low heat setting before cutting. For my skirt, I wanted it 23″ long, so I cut four pieces, each 118 x 24 inches.
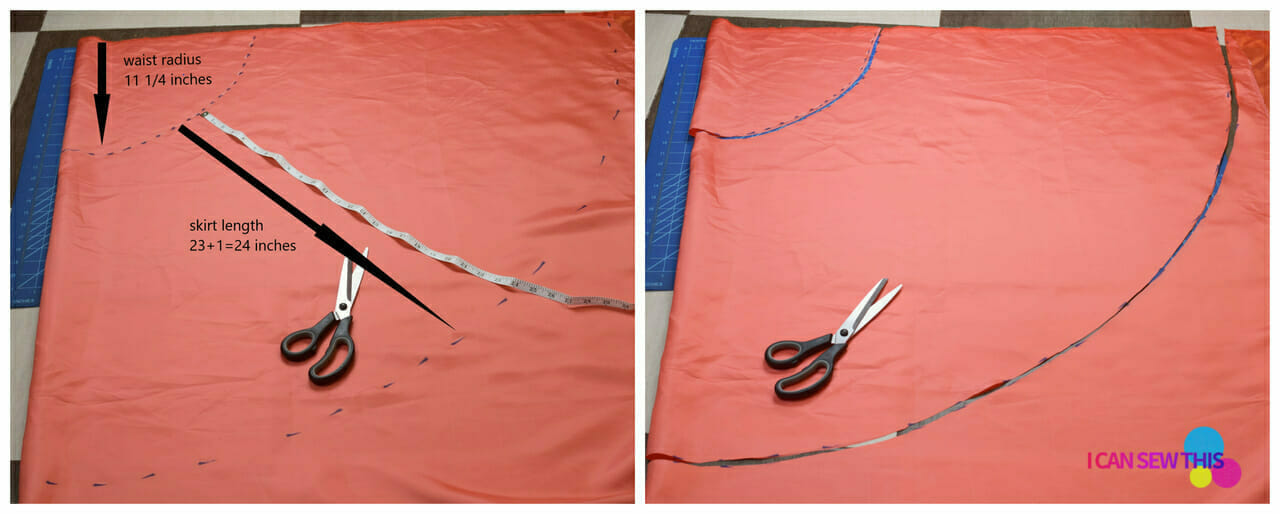
Step 2 – cut the lining
Start by measuring your hips. Since we’re using an elastic waistband, the skirt needs to fit over them! I added 2 inches for wiggle room – so for me, that was 37 inches total.
Next, divide that number by 3.14 to get your waist radius. I used an online circle skirt calculator and got 11 ¼ inches for a half-circle skirt.
For the lining length, add 1 inch to the length of your tulle pieces (that’s for the hem). Remember, you don’t need to hem the tulle, but taffeta frays, so you’ll need to finish that edge!
Waist radius – 11 1/4 inches
Desired length of skirt – 23+1=24 inches
I used a regular marker so you can see it better, but you’ll want to use tailor’s chalk or a fabric pencil.
Lay your lining fabric on the floor and fold it in half, matching up the selvage edges.
From the top corner, measure out your waist radius to draw a curve. Then, measure again for the hem curve using your skirt length.
Step 3 – sew the side seams for the lining
Sew the side seam of the lining – place the fabric wrong sides together, pin, and sew slowly.
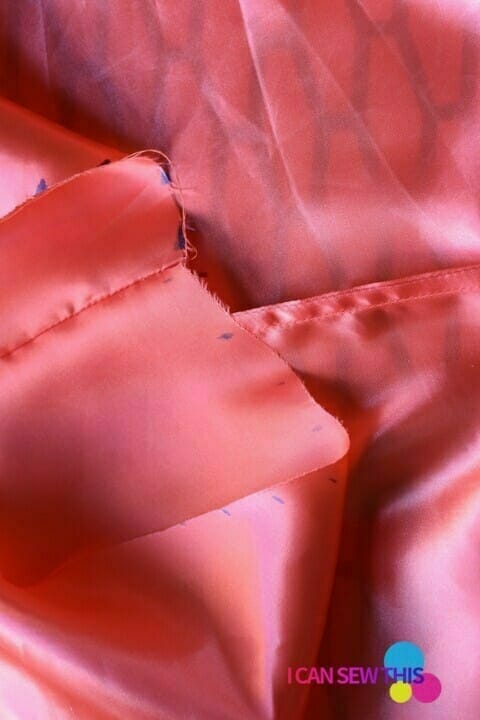
You can use a serger (sew right sides together if you do), but I prefer the French seam method for this tulle skirt.
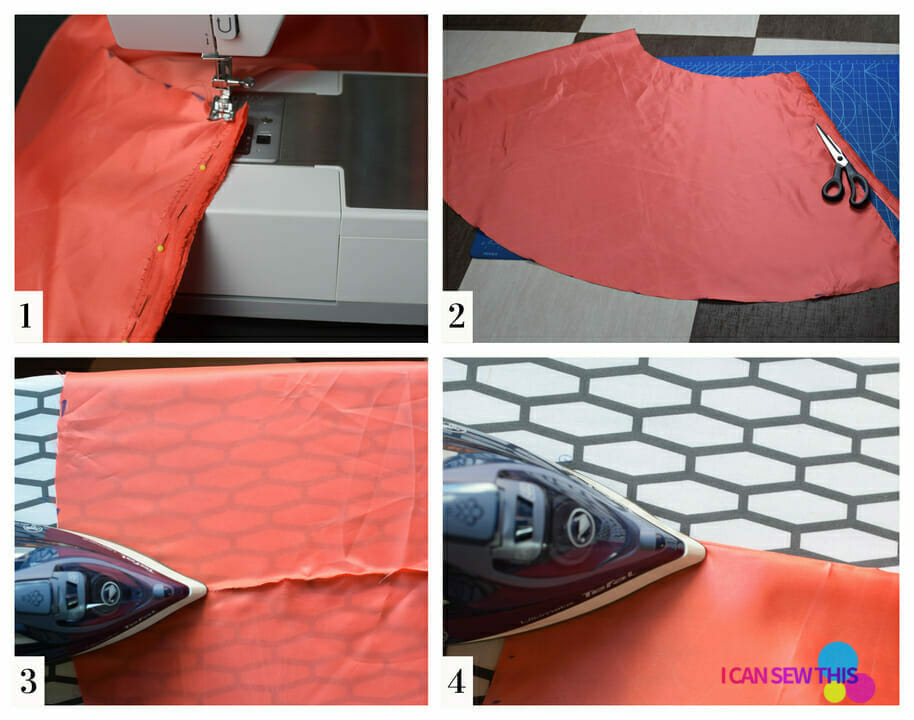
I trim the seam allowance and press with an iron.
Then, I turn the fabric right sides together, press again, and stitch to hide the raw edges. Now, no fraying!
Step 4 – sew the side seams for the tulle
Layer two pieces of tulle on top of each other, align the edges, and sew the side seams, backstitching at both ends.
Repeat with the other two tulle layers.

To avoid puckering, use a new ballpoint/jersey needle (size 70/10) and a short straight stitch. Slow down your sewing speed. Check out more tulle sewing tips here.
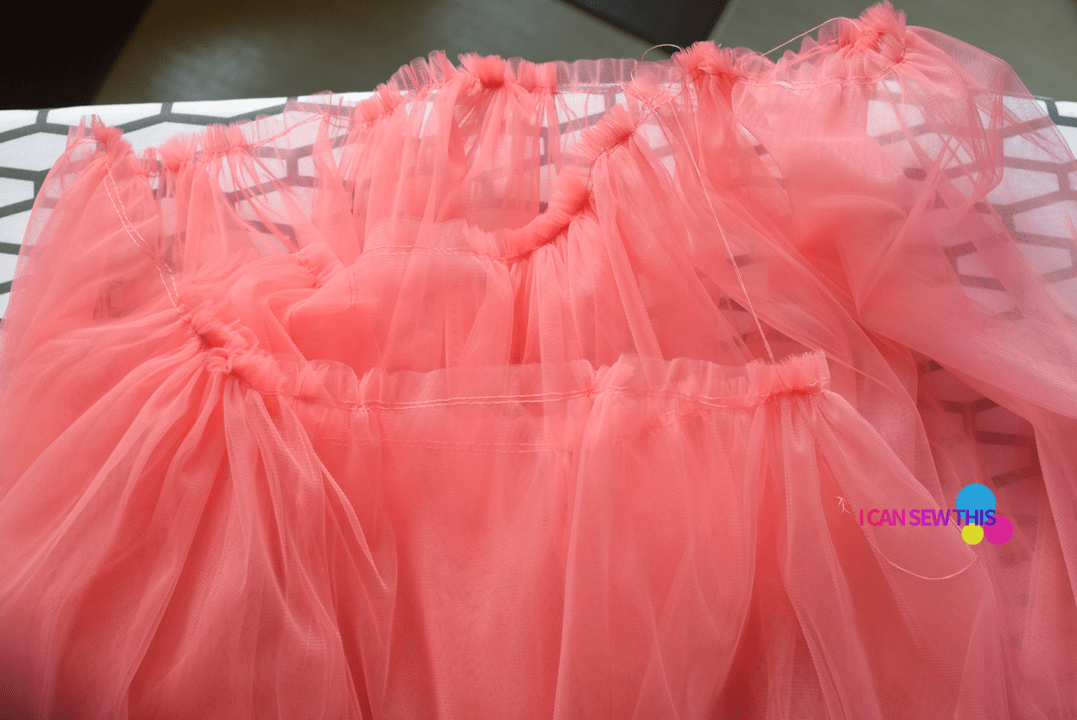
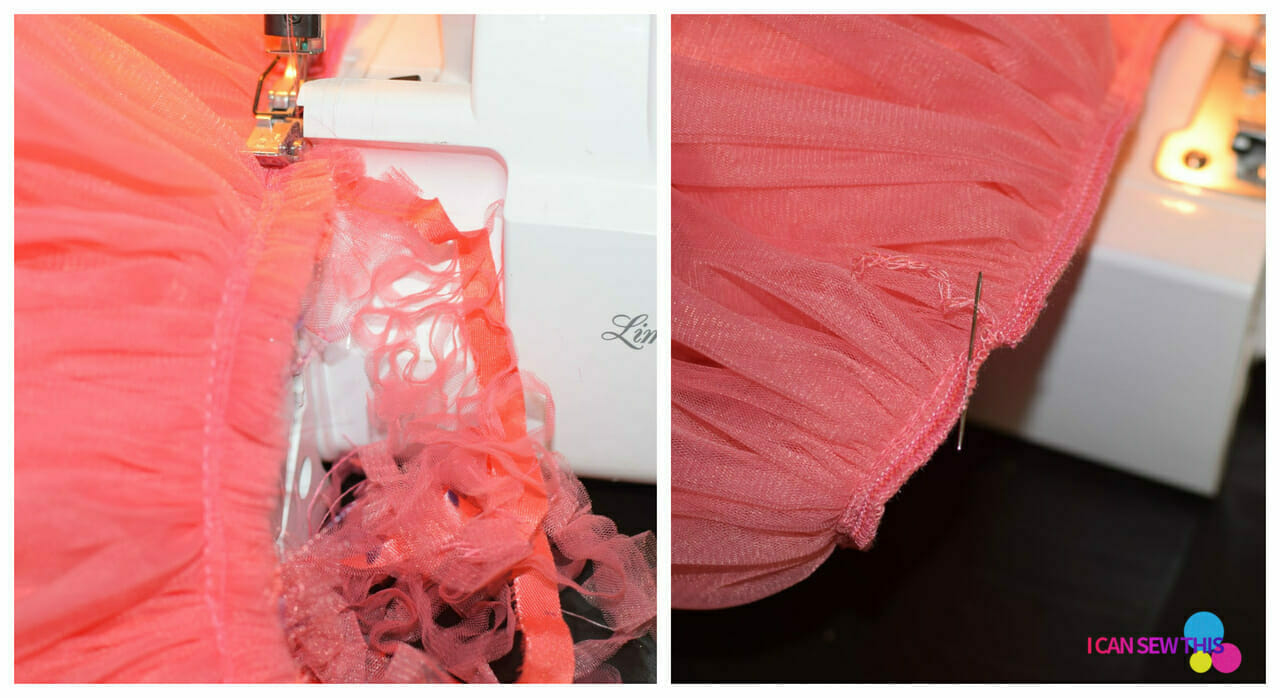
Step 5 – baste the tulle layers around the waistline
In the last step, you turned the four tulle pieces into two large fabric tubes, each 236 inches wide.
Now, align the side seams of both tulle tubes, placing them right side to wrong side. Baste through both layers.

Set your stitch length to the longest and sew two parallel lines of basting stitches. Leave long thread tails at each end, and don’t backstitch!
It’s a bit tedious, but take your time and avoid crossing your stitch lines – it’ll be worth it soon!
Step 6 – gather the tulle to match the top of the skirt lining
Time to create the gathers! Hold the two top threads with one hand and gently push the tulle with the other.
Keep going until the gathers are even and match the top of the skirt lining, then tie the threads in a knot.
Step 7 – sew the tulle and the lining together
Place the skirt lining inside the tulle – satin right side to tulle wrong side. Pin them together and stitch along the gathering line.
I aligned the lining’s back seam with the middle of the tulle side seams.
Finish the waist seam with a serger.
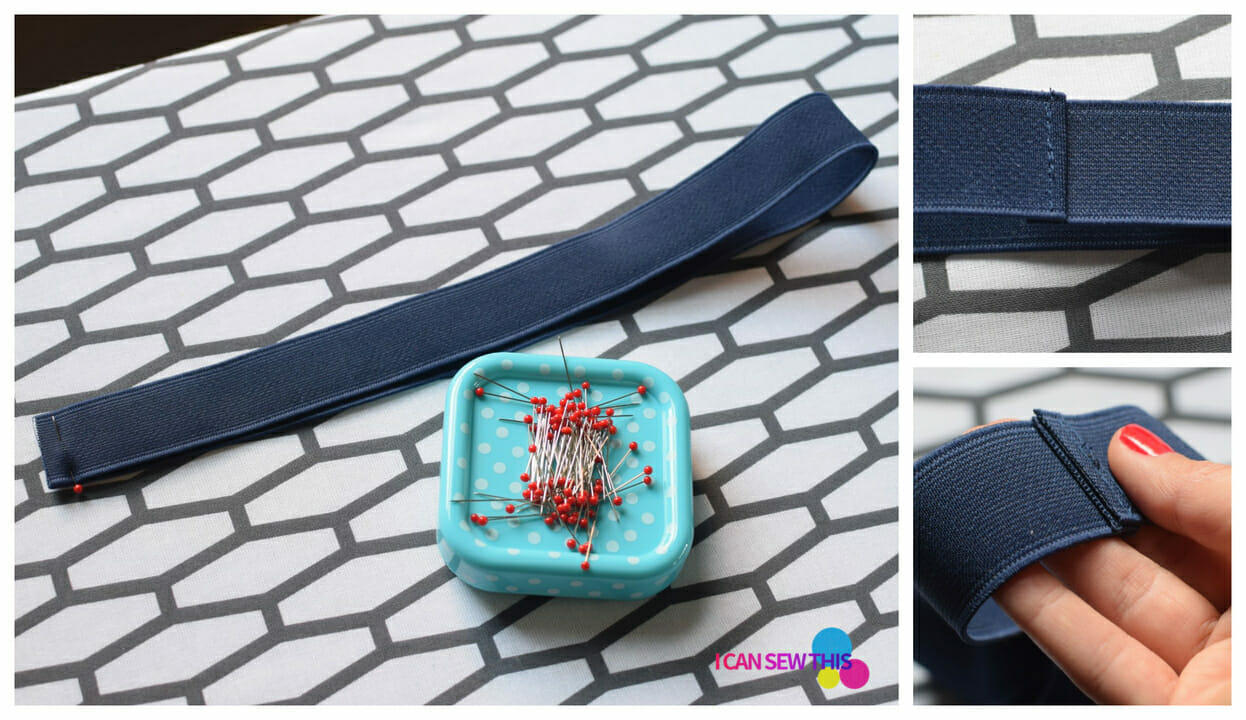
Step 8 – prepare the elastic
Cut the elastic band to fit comfortably around your waist when stretched, adding ½ inch for seam allowance. Sew the ends together.
Step 9 – sew the elastic to the skirt
Mark the tulle waistband and elastic into four equal segments: center back, center front, and halfway points on each side.
Match the pins and sew the elastic to the skirt, with the elastic’s wrong side facing the skirt’s right side.
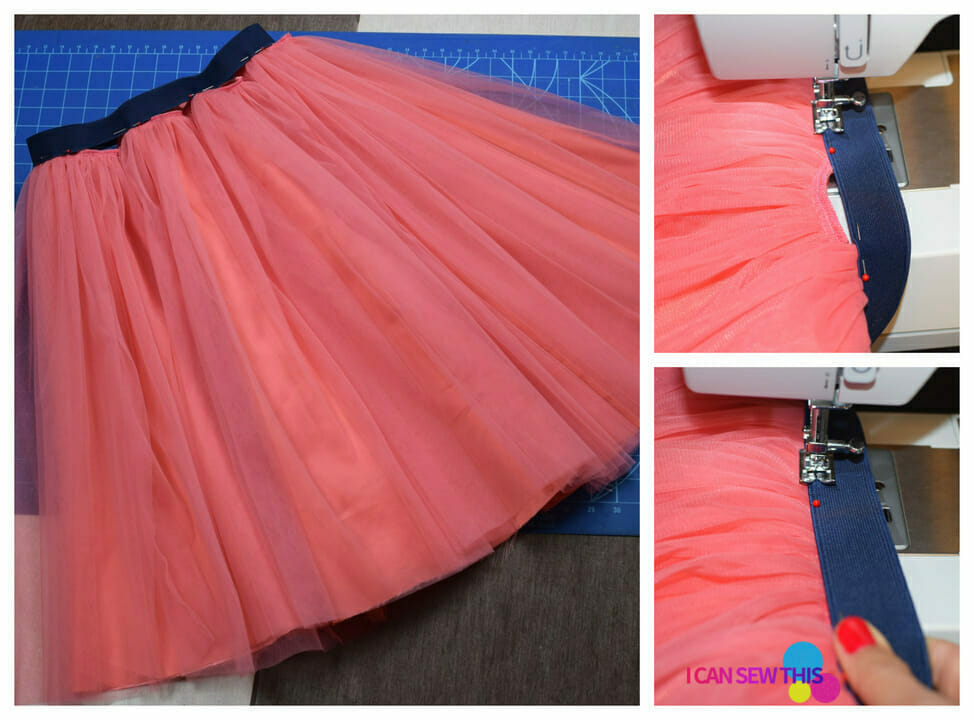
The elastic will be smaller than the skirt opening, so you’ll need to stretch it as you sew, pulling gently from front and back until the fabric gap straightens.
Take your time, sew slowly, and stop to remove each pin. Keep the needle down when you pause. I used a straight stitch to attach the elastic.
Step 10 – hem the lining
Now, just hem the skirt lining. Use sharp scissors to trim any excess fabric, but be careful not to cut the tulle.
I finished the lining edge with a narrow rolled hem on my serger.
The lining is a bit shorter than the tulle, which I think looks nicer.
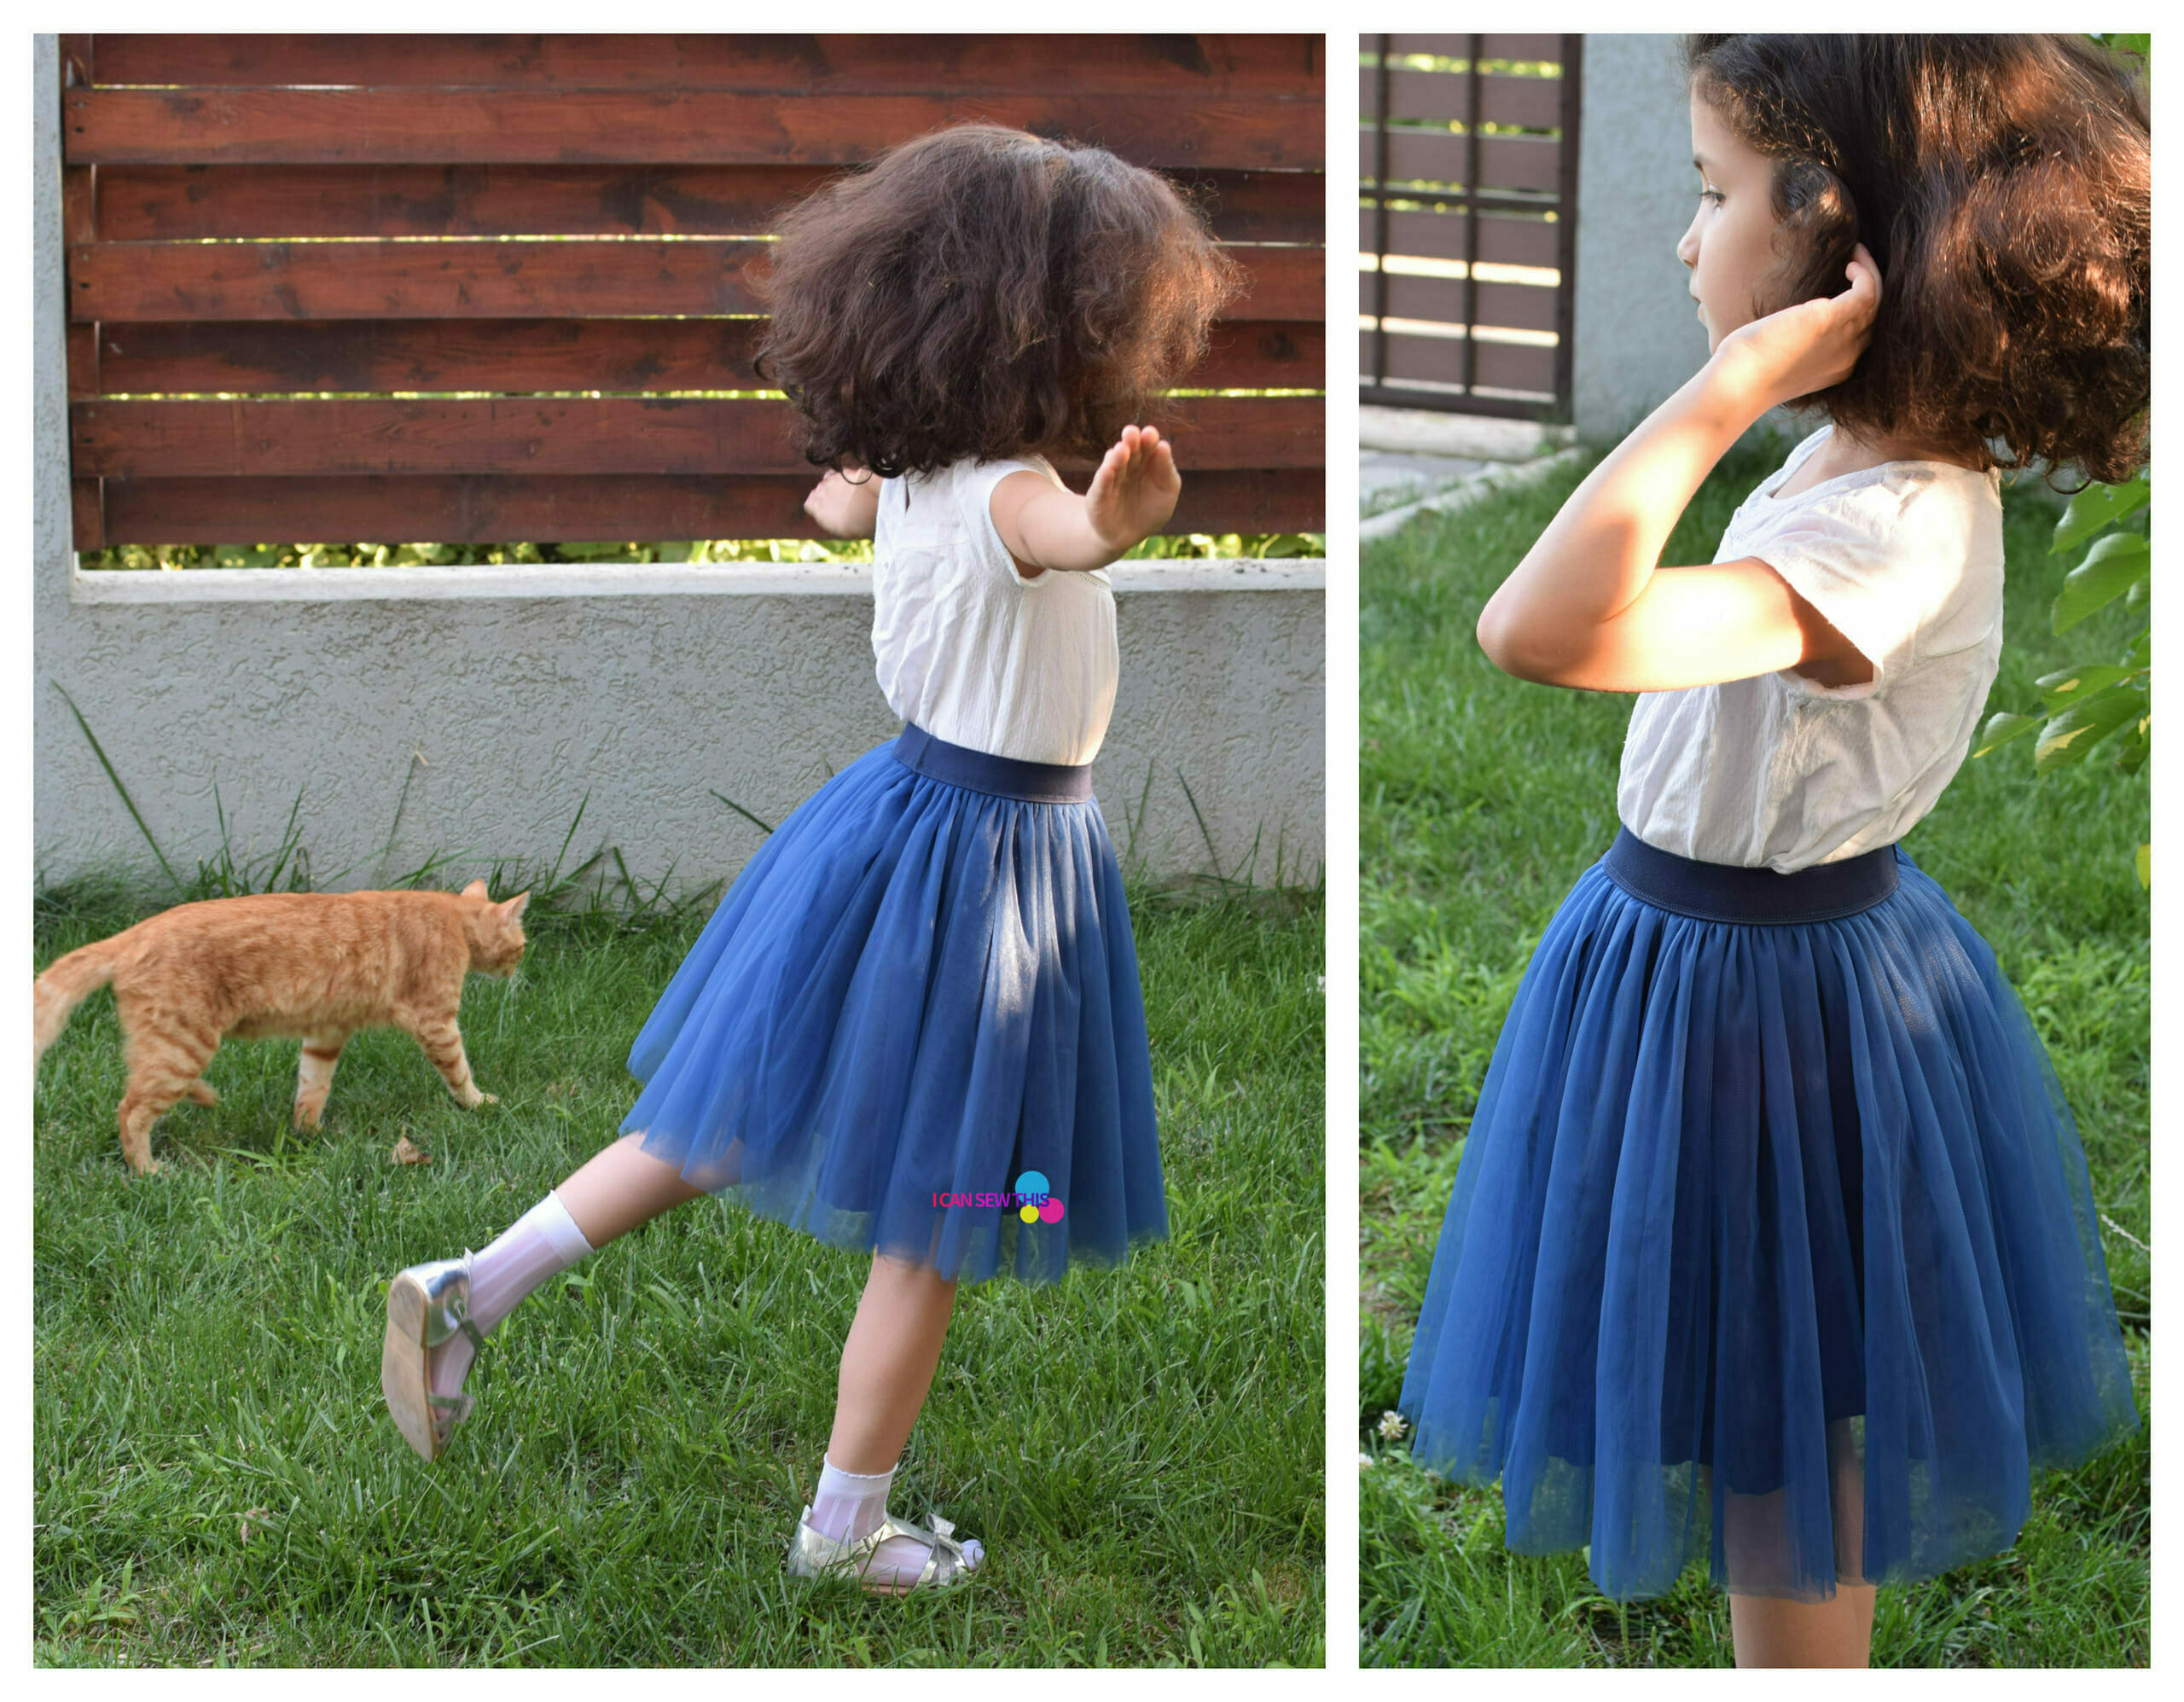
I made a pleated tulle skirt for my daughter too, using the same steps but with less fullness.
Her navy skirt has three layers of 118” soft tulle, all basted and gathered together, instead of the two super-wide layers used for the pink skirt – see Steps 4 and 5.
How to care for your tulle skirt
- To prevent wrinkles, store your tulle skirt on a hanger.
- You can hand wash it or use a washing machine. If machine washing, turn it inside out, place it in a laundry bag, and use a mild detergent on a gentle cycle with cold water. Dry on low heat.
- To iron out wrinkles, use the lowest heat setting and keep the iron moving. Never touch the tulle directly with the hot iron – it’ll melt! Place a towel over the tulle to be safe.
Was this tulle skirt tutorial helpful? I’d love to hear your thoughts!
And if you make this DIY tulle skirt, please share a picture and tag me on Instagram or Facebook @icansewthis.


Do you have a video by any chance? I am trying to make one and I am a very new sewer and I’m really struggling.
Hi,
I just came across your skirt tutorial, I am going to make a skirt for my daughter. I just had a question in regards to finish the waistband before attaching the electric banding and finishing the hem on the lining fabric on a normal sewing machine (not using an overlocker).
Thank you for your help ?
Laura
I have a question . how can this be done with 57 inch wide fabric.
Hi!
I’ve made one squirt using your tutorial and about to begin another one for myself. My tulle is only 55in in width and I’m having mom brain. Can you help me figure out how to measure and cut the tulle that is 55in in length? I have 3 yards total. Thank you
Hey Jen,
Thanks for the comment. I totally get you 🙂 So, this is what you’re working with – you have a large tulle piece that measures 55″ in width and 108″ in length (3 yards). According to my tutorial, you’ll need 8 rectangles of tulle each 55″ wide to make your gathered skirt.
But, you can’t fit 8 rectangles in 108″ of fabric, unless you cut each piece 13.5″ long – totally unrealistic, considering this is an adult tutu skirt. However, you can make it work, and the best part is that the compromise doesn’t mean your skirt won’t be full and gorgeous – don’t worry.
So, here’s how I’d go about this – you have 108″ of tulle, and you want 2 gathered layers of tulle for your skirt. So, that means you can ‘spend’ max 54″ on 1 layer. Depending on your skirt length, you can make your layers by joining 2 or 3 tulle pieces (3 only if you want a mini skirt, 18″ long). In the first case (joining 2 tulle pieces), your final 2 tulle layers will be 110″ wide each, and that’s still a pretty good gathering ratio for your skirt. The most important thing would be to make the lining a half-circle skirt, not a gathered skirt – that combo looks a bit weird, IMO.
I hope that helps, and I’ll keep my fingers crossed for you! Also, I’d love to see your skirt when you finish.
I also added some info in my latest post https://icansewthis.com/gathered-tulle-skirts-sewing-inspiration/
“All of these are adjustable parameters:
-the number of your tulle layers (use 1, 2, 3, or 4, why not)
-the gathering ratio for the tulle layers
-the width of your tulle layers. To give you an idea, your layers can be anywhere from 55″ to 250″ wide.”
Now i know how to design the tulle skirt.Thank you for the essay …Now i need to know about the Zip part.That’s if i want a tulle skirt with a zip at the back.How do i insert the zip?
This is so beautiful! What color are the tulle and taffeta fabric? Thank you.
How to make a multi color tulle skirt for a little girl.
Yes, this really helps a lot. Thank you so much! I am making one for a size 3T little girl. I appreciate your quick response! Have a great weekend!
Glad to be of help! For size 3T, you can keep the 118″ width or use 100″ or 110″, if you need some tulle scraps. I generally didn’t, so I used the full width. Either way, the skirt will turn out just fine.
When you make the lining, if you go the lazy way, aka gathered skirt (easier to cut & make a pretty hem, in my opinion), there are 2 things to consider – the freedom of movement, and the bulk at the waist. I usually went with a 1.5 ratio (hips measurement x 1.5). All the best and thank you for reading me! 🙂
How many yards of the 118″ soft tulle did you use for the child’s skirt? How many yards of taffeta did you use for the underskirt for the child’s version? Thank you!
Hi Linda,
How many yards of tulle you use for this type of skirt depends solely on the skirt’s length.
My daughter’s tulle skirt was 12 inches long, and I used 3 pieces each measuring 12” in length and 118” in width – that means I only used 1 yard of tulle. My daughter was 7/8 years old at the time. If you plan to make the skirt for a smaller child, you can reduce the width of the tulle pieces – for example, for a 1-year-old I’d use 3 tulle pieces each 90” wide x 9” long.
As for the lining, you can make it either a gathered skirt from a rectangle (and use 1/2 yard of fabric) or a half-circle skirt (and use about 1 yard of fabric).
Hope this helps,
Violet