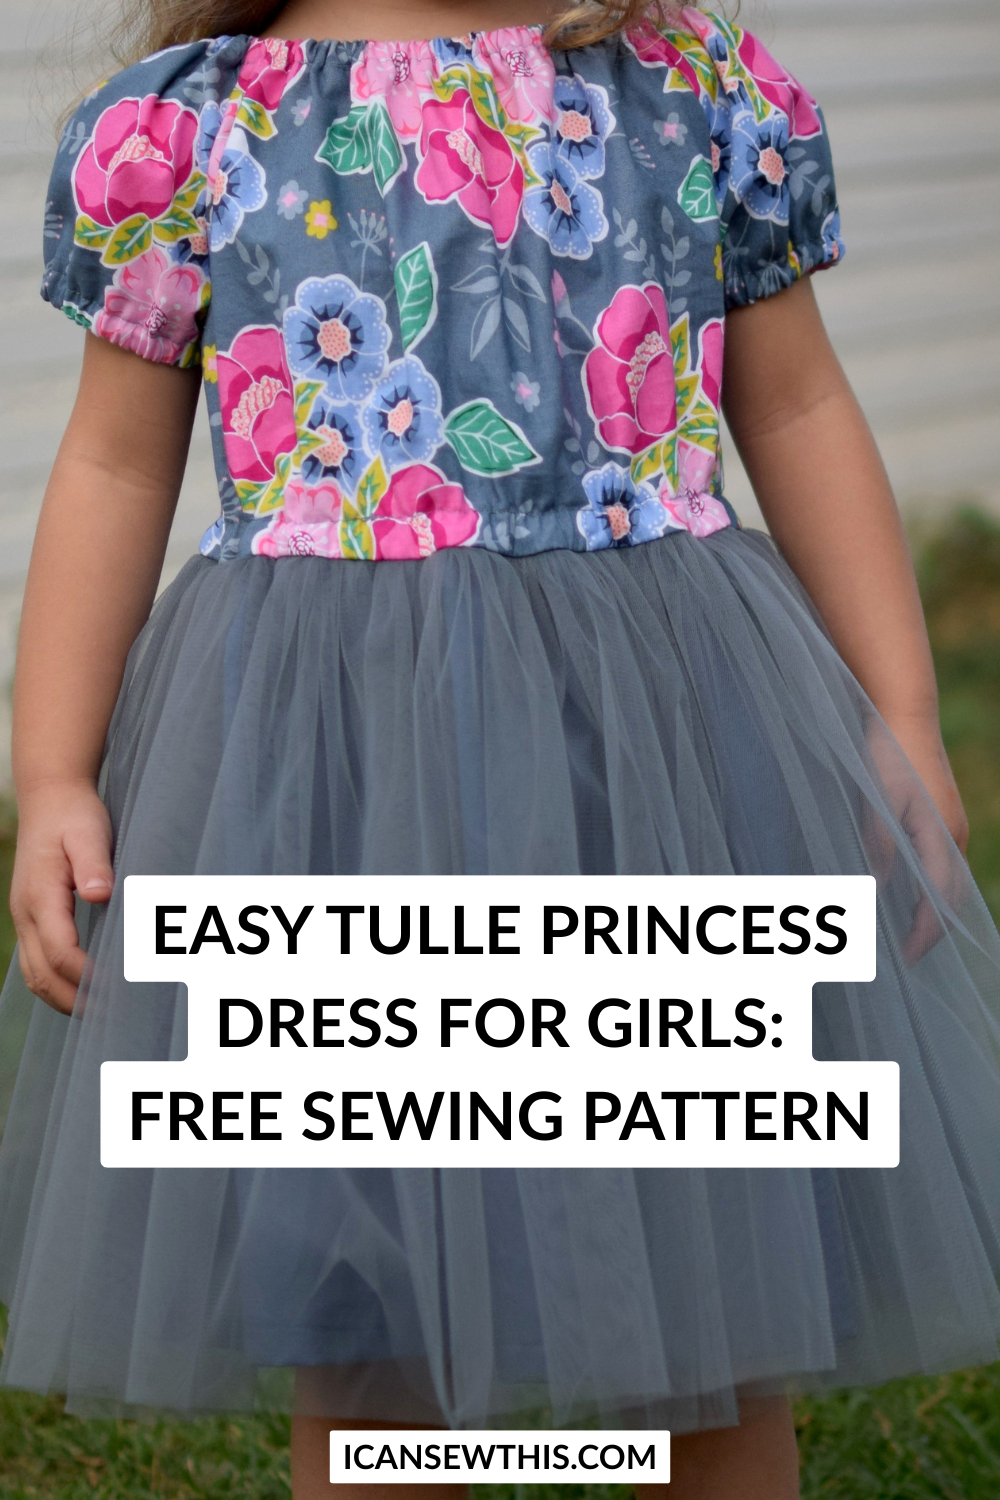
Want to make a magical princess dress for your little girl without any sewing stress? This easy princess tulle dress tutorial is perfect for beginners – no zippers, no buttonholes, no tricky bits! Just straight stitches and lots of fun. You’ll get a free toddler princess dress pattern and step-by-step instructions to help you sew a dress that’s as cute as it is comfy.
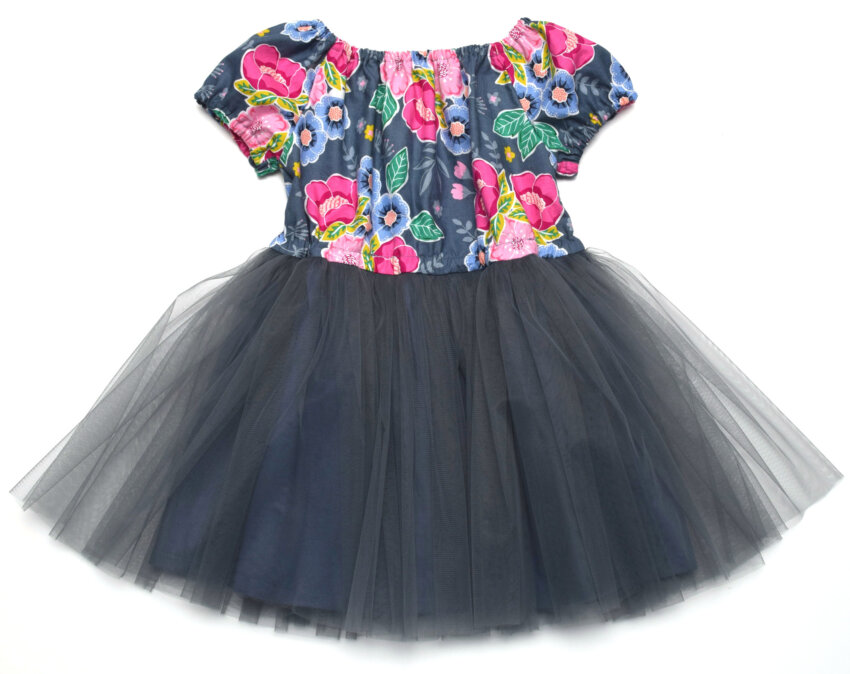
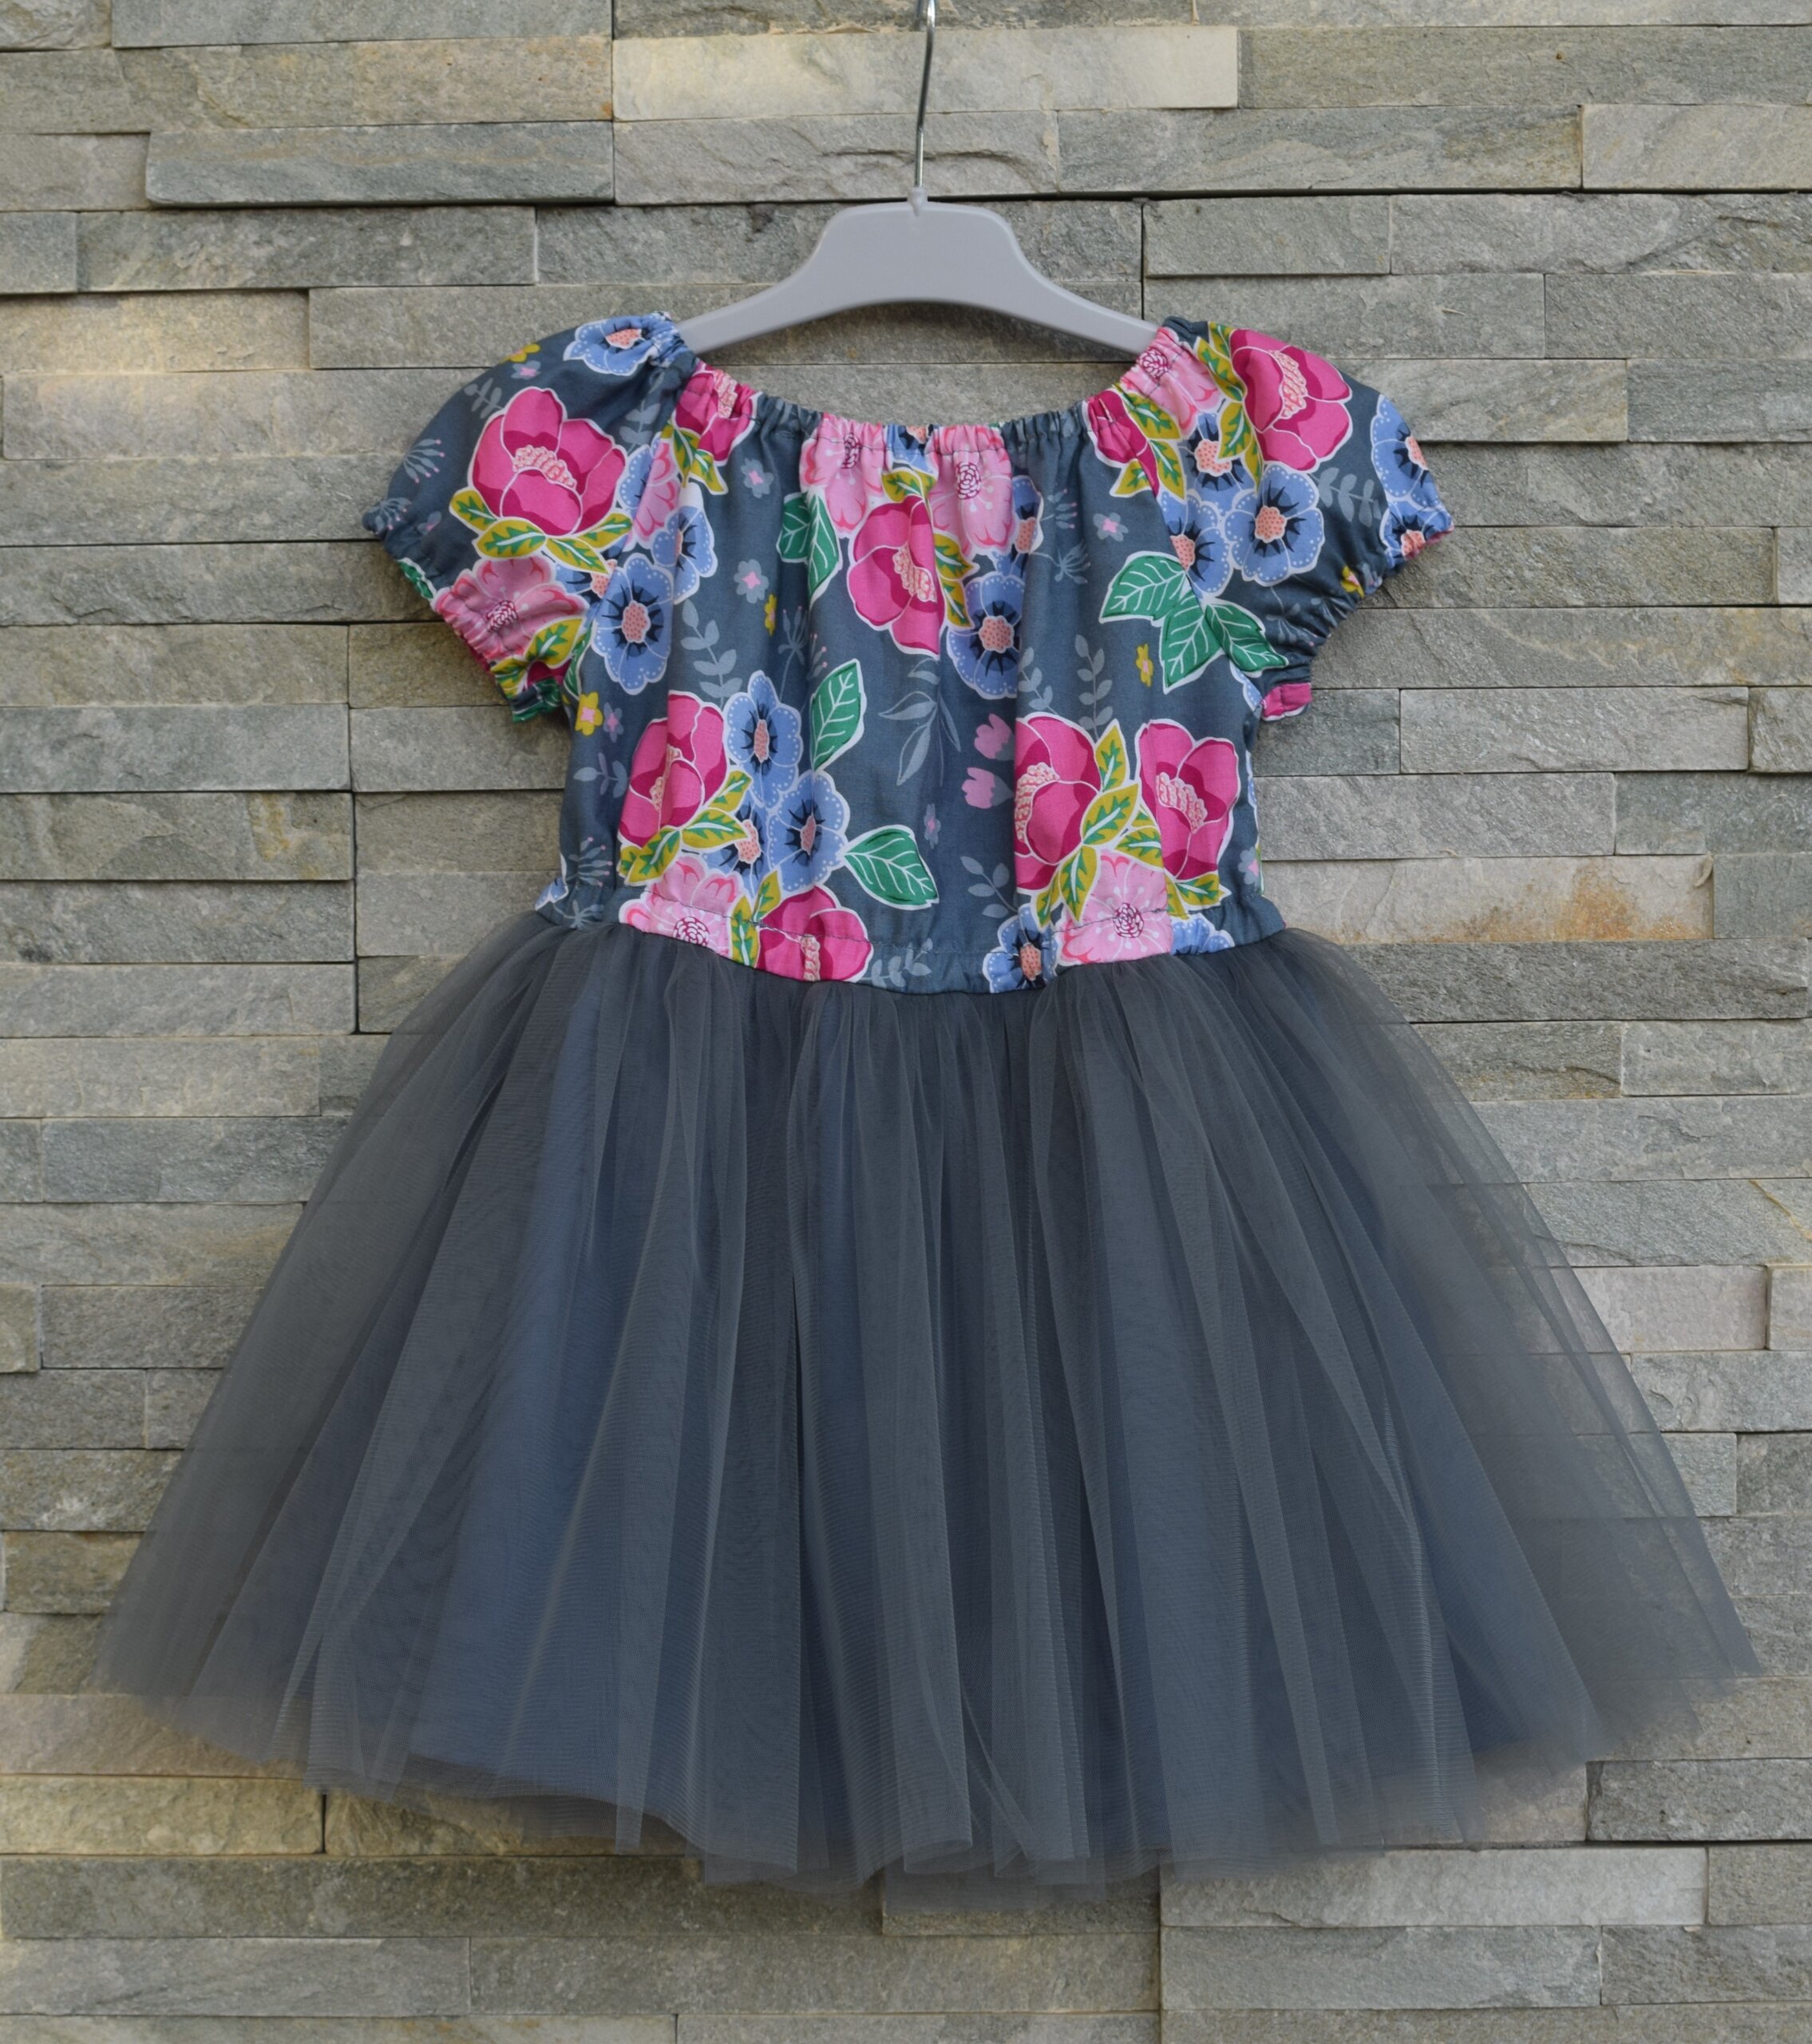
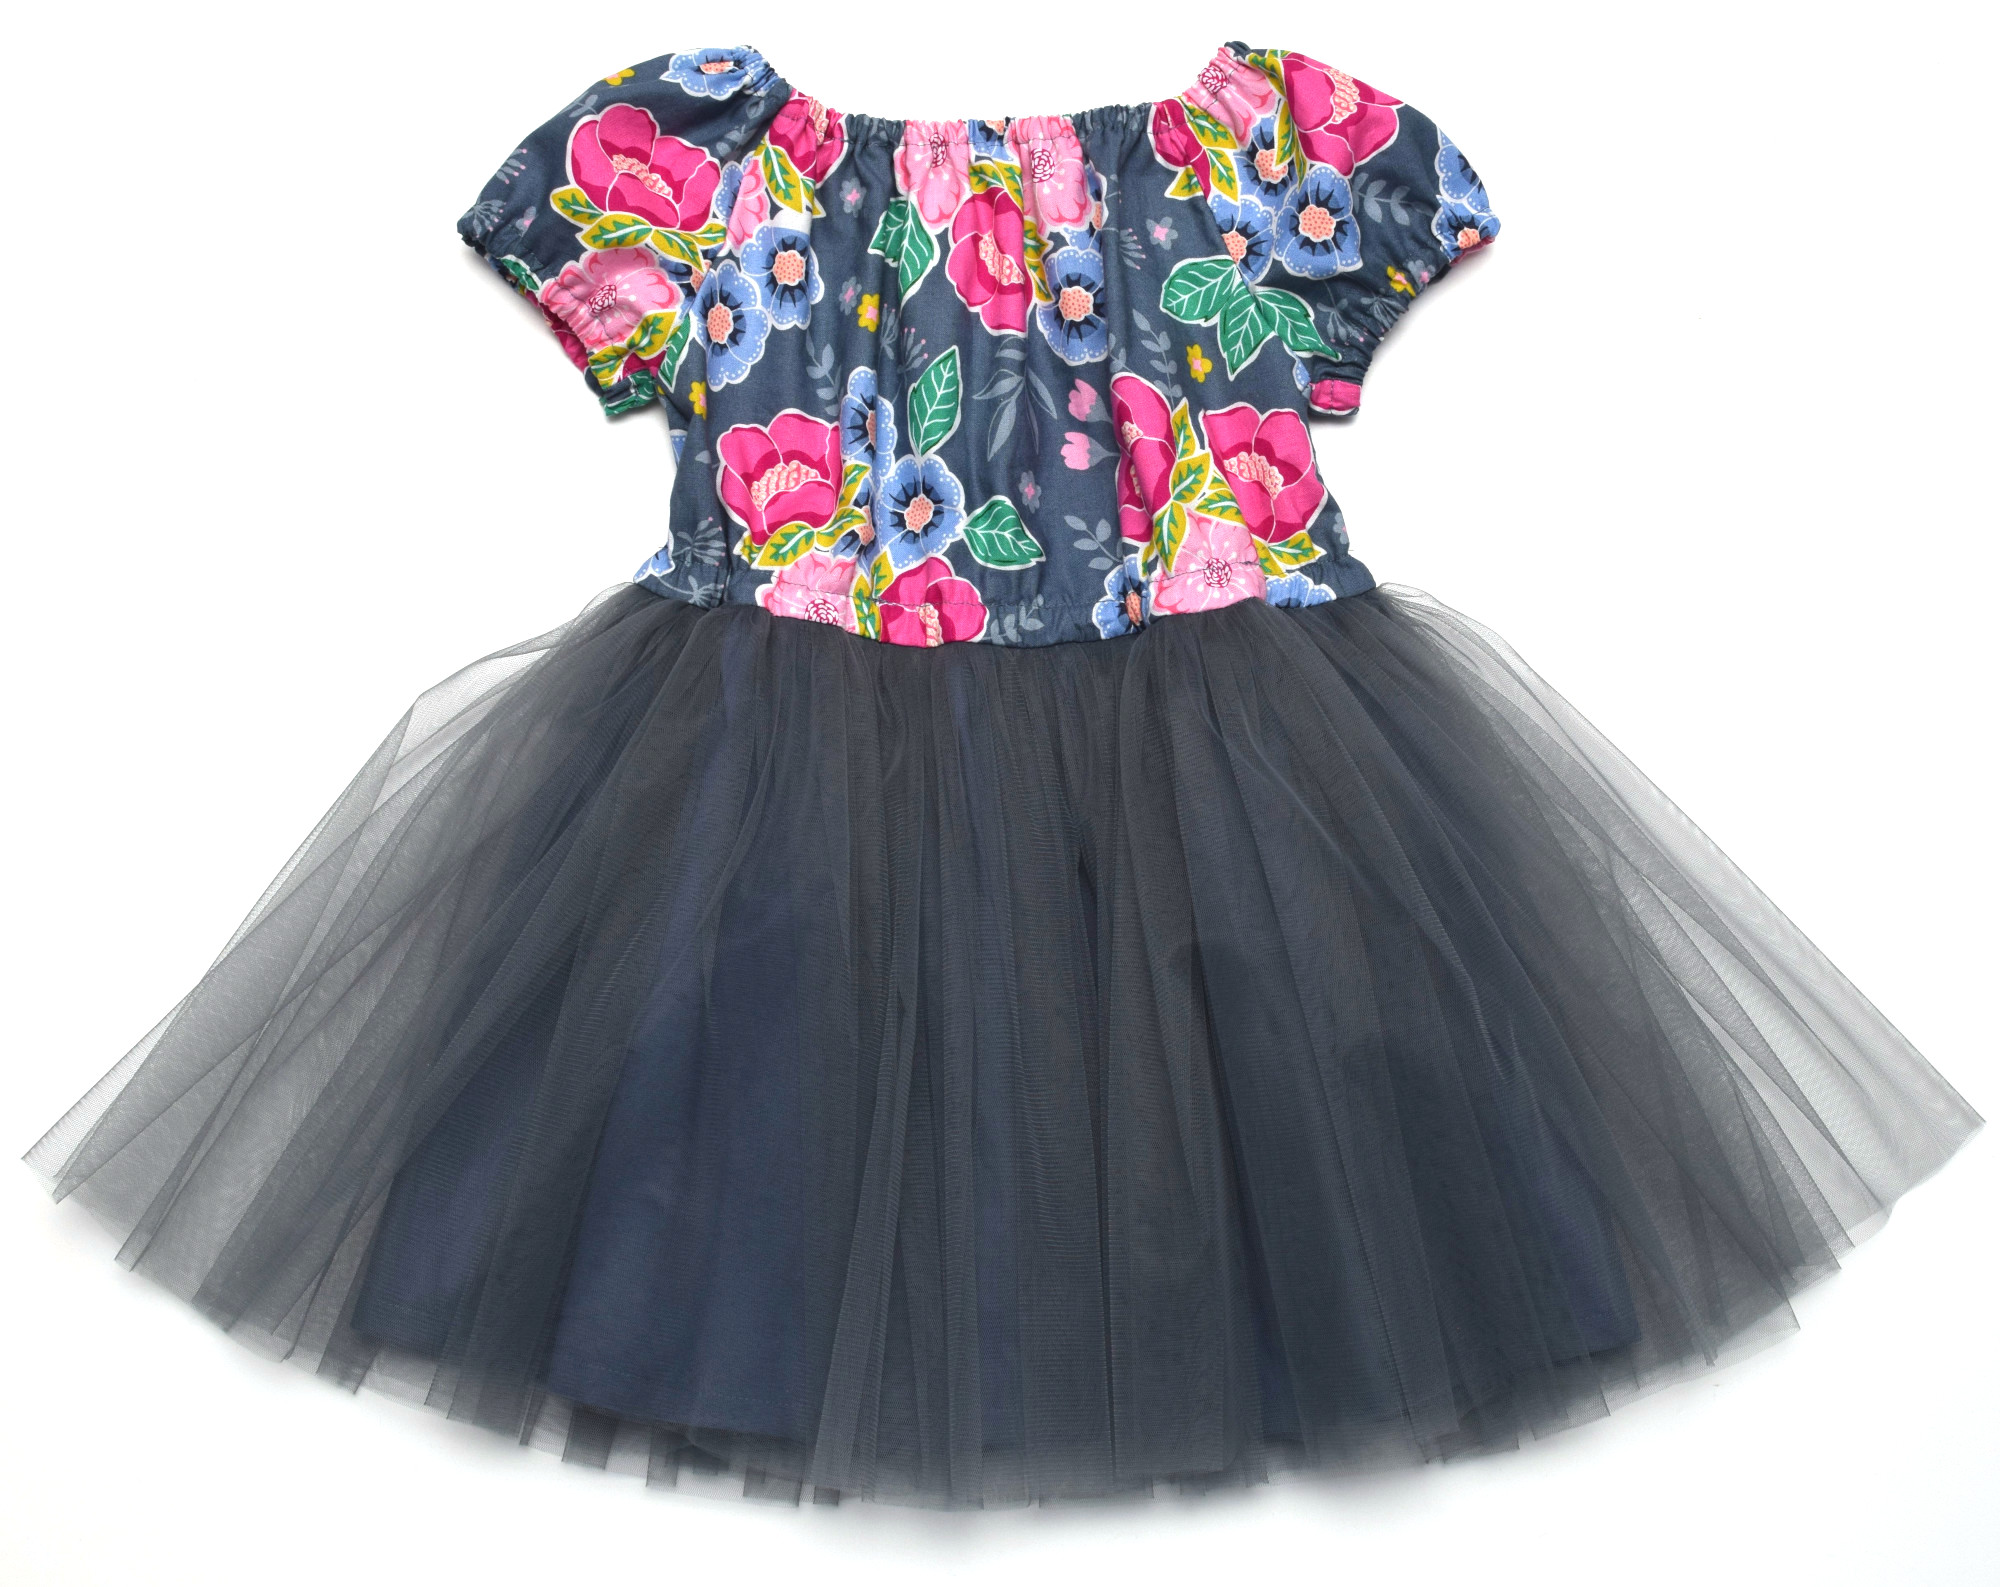
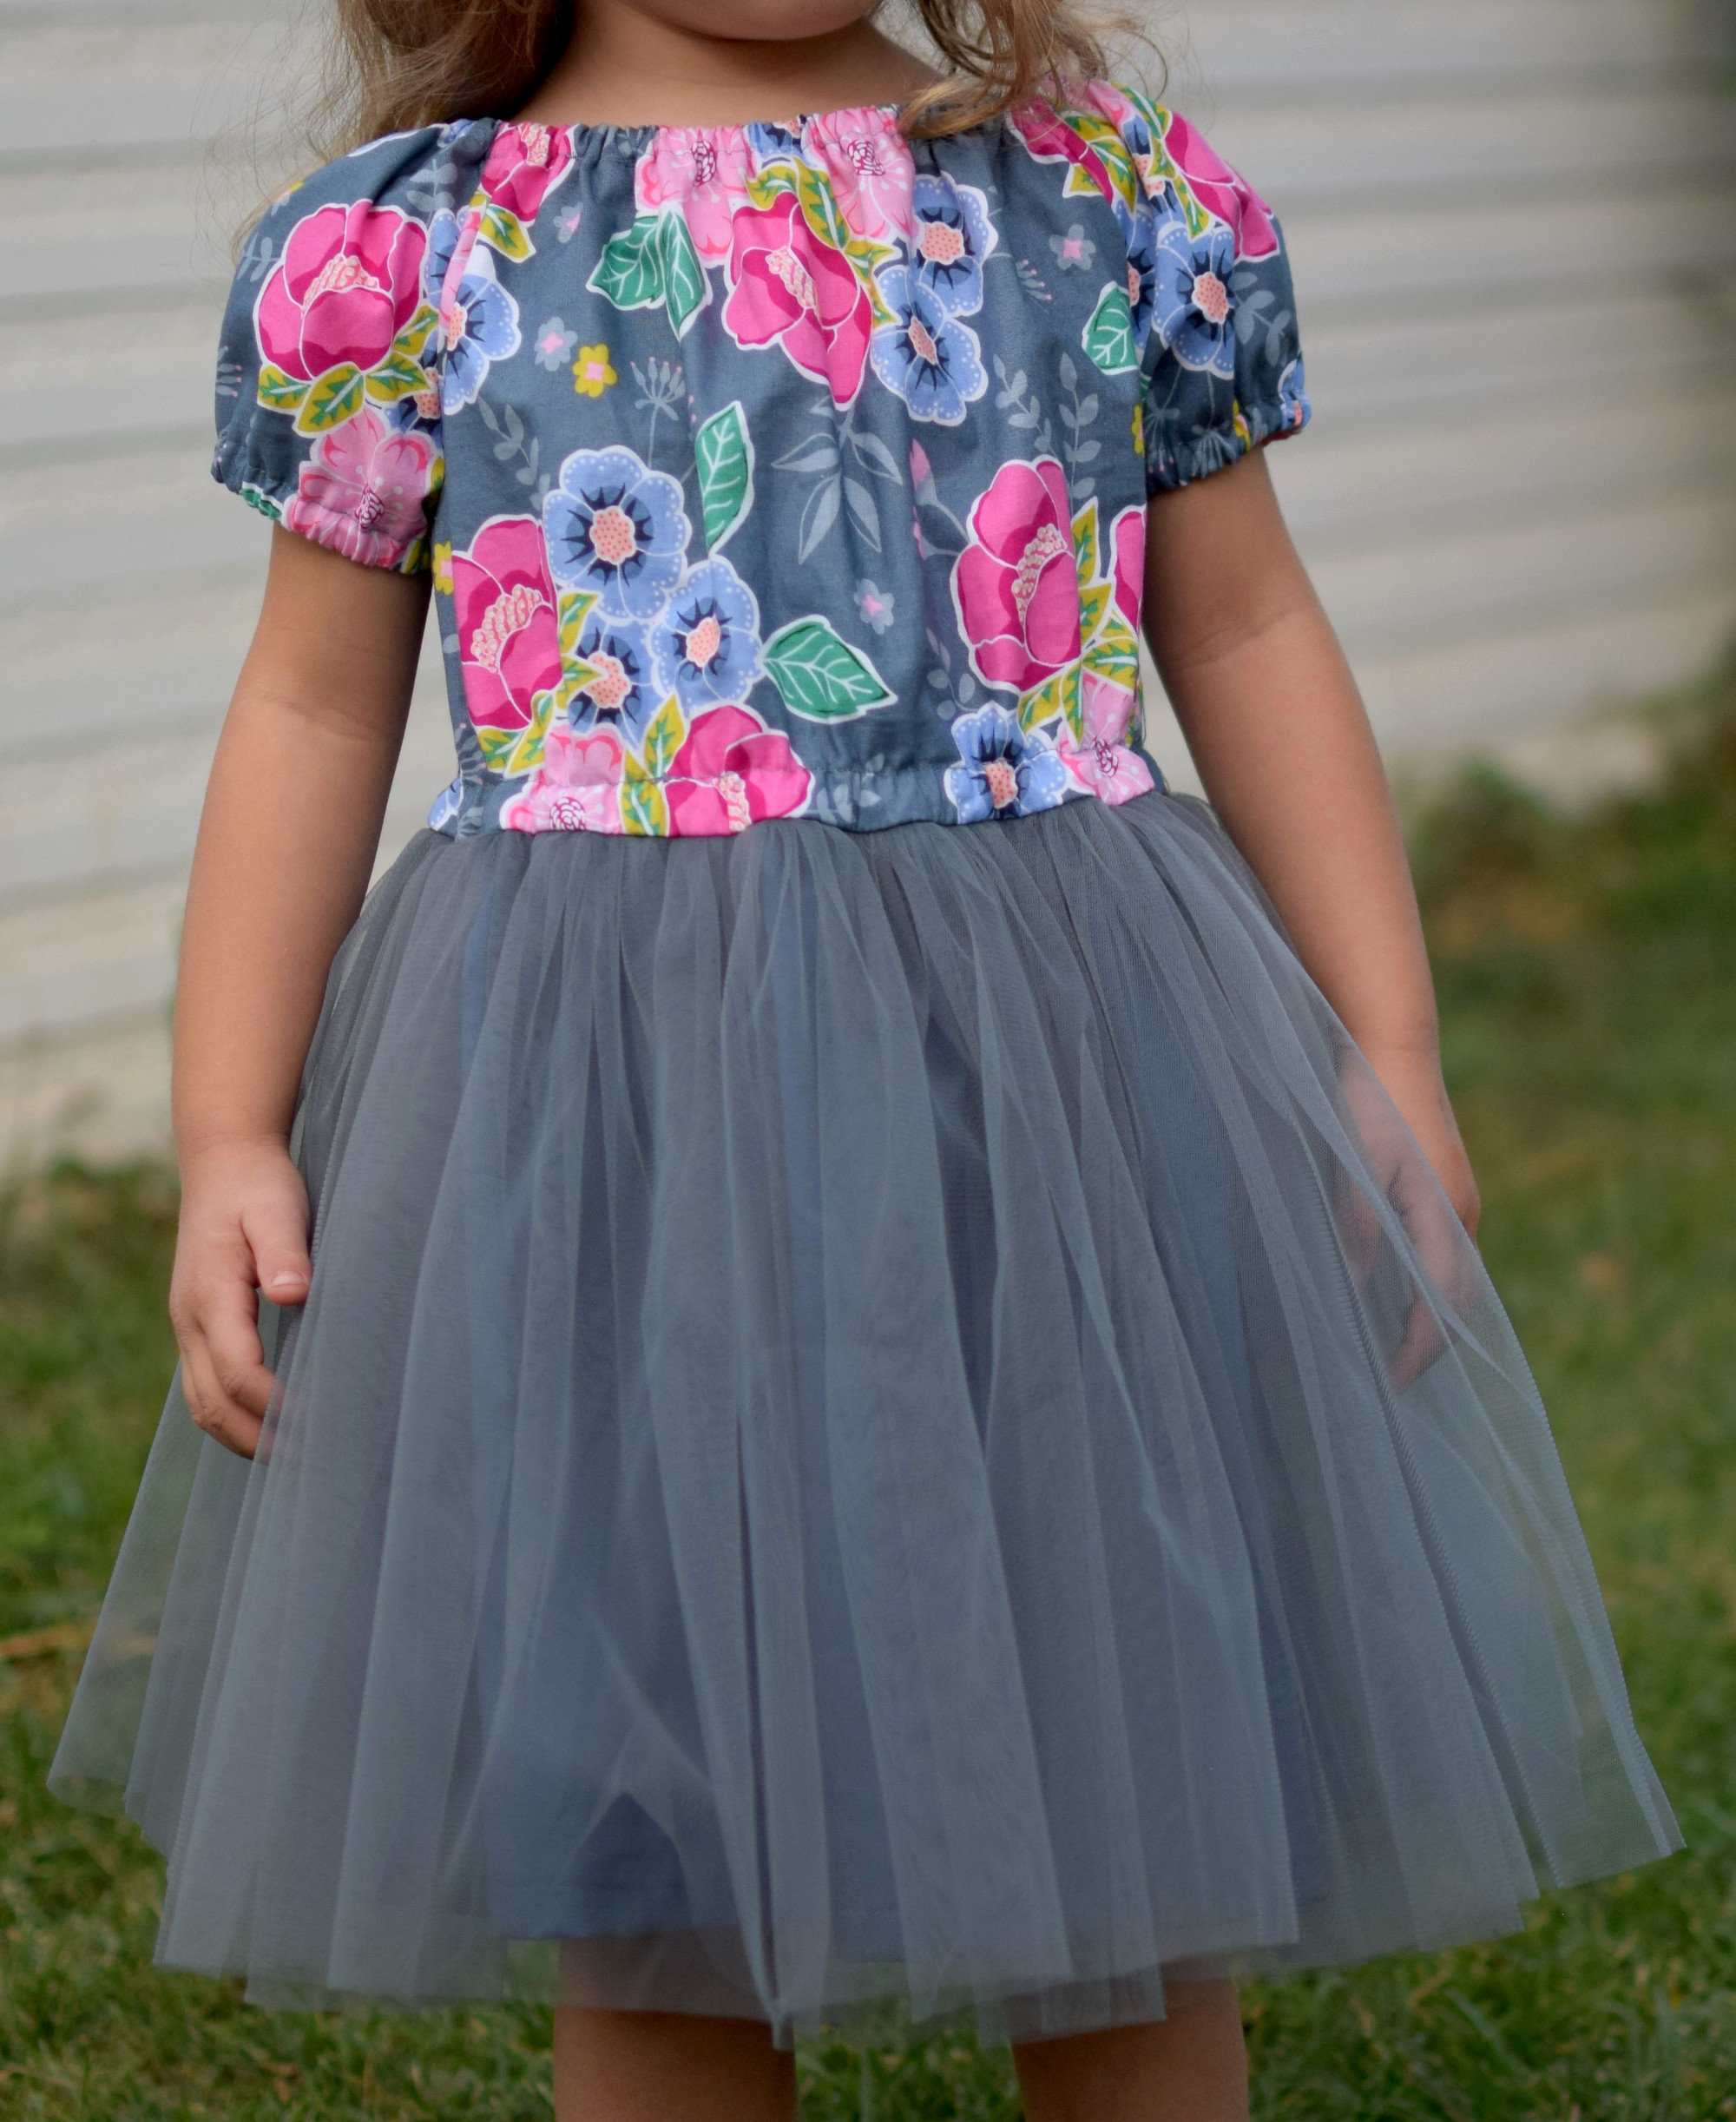
This toddler dress is a mix of sweet and simple – it’s basically a peasant-style cotton top with an elastic neckline and a twirly tulle skirt sewn on. That’s it! It’s one of those projects that looks fancy but is secretly super easy to make.
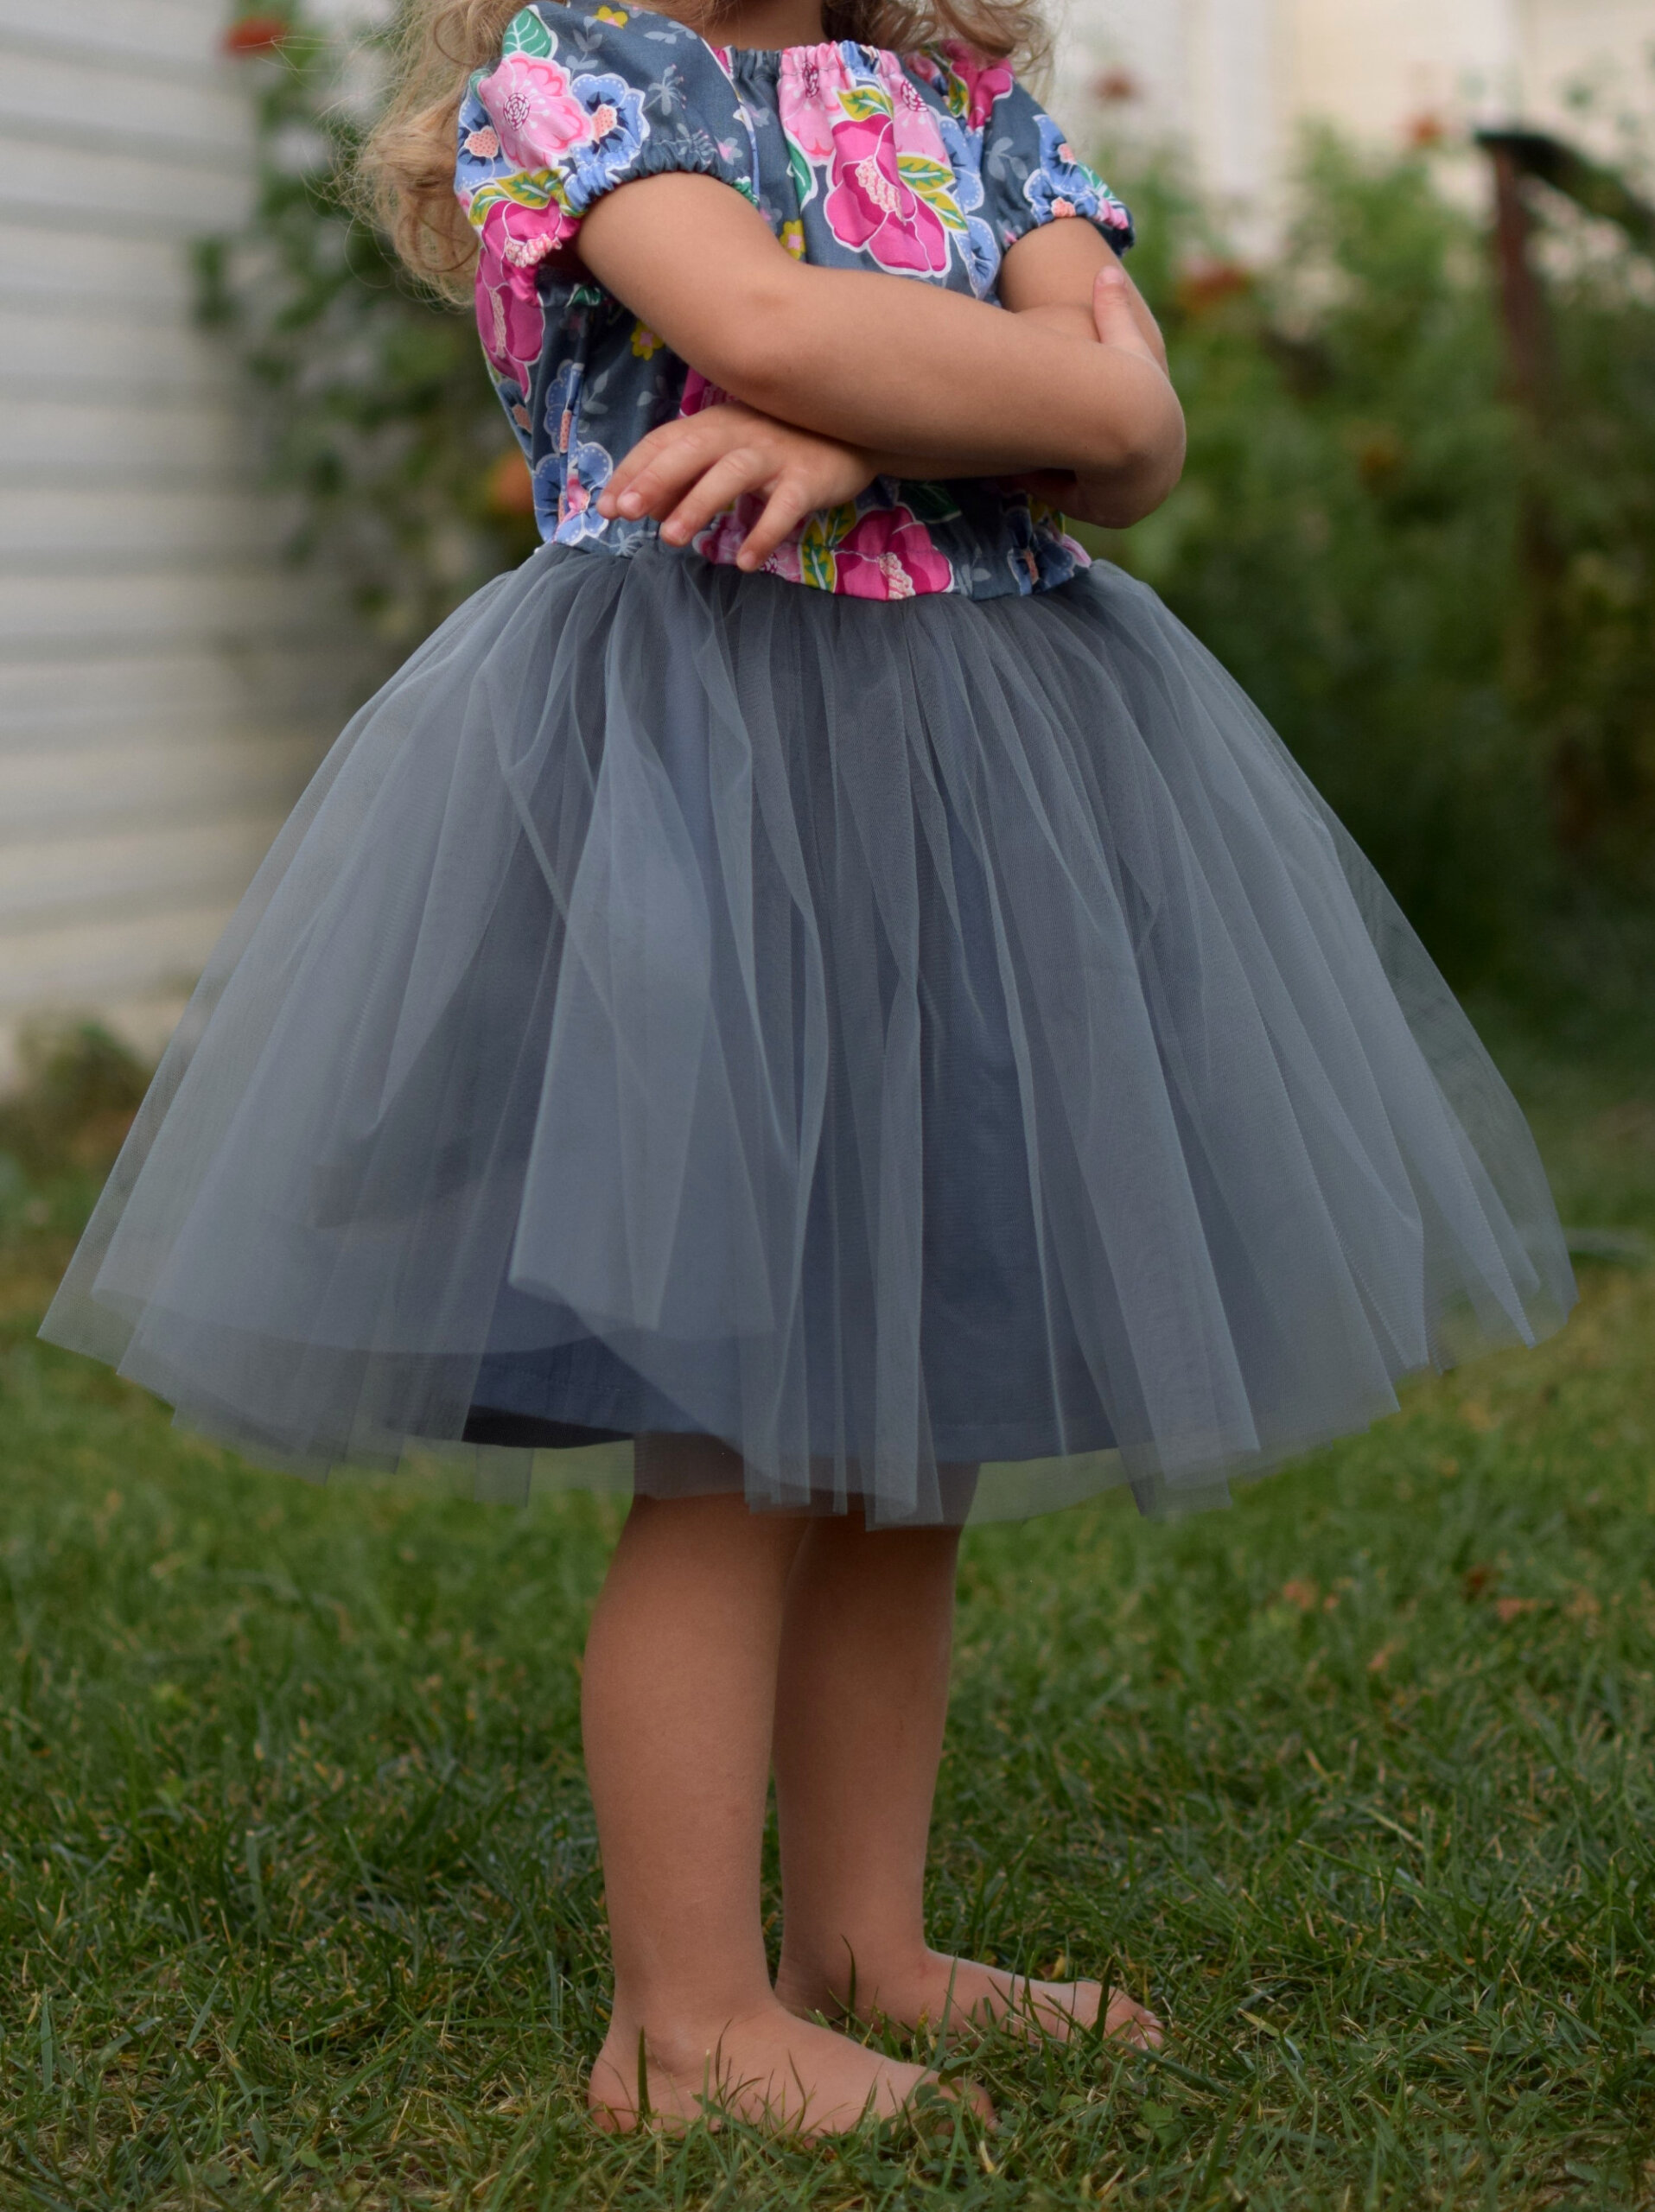
I made this DIY princess dress for my 3-year-old daughter, and she was absolutely thrilled! She wears it to play pretend, twirl around the house, and sometimes even insists on wearing it to the grocery store. It’s got that perfect mix of everyday comfort and sparkly fairytale vibes.
Why you’ll love this free toddler princess dress pattern
- It’s a beginner-friendly sewing project – even if you’ve only made a few things before, you can totally do this.
- The elastic neckline means no closures to fuss over – no zippers, buttons, or snaps.
- Your little girl can easily dress herself – there’s no front or back, so she won’t need help putting it on.
- You can customize it with any cotton and tulle combo – use what you already have or go all out with glittery tulle! Totally customizable to match your child’s favorite princess.
- It’s perfect for birthday parties, Halloween, playdates, or everyday dress-up fun.
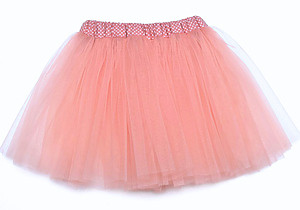
I had this floral cotton fabric in my stash for years, just waiting for the right project. Paired with some soft tulle, it turned into the sweetest little dress. It might sound like a weird combo – peasant top meets ballerina skirt – but somehow it just works. It’s comfy enough for everyday wear and cute enough to feel like a real princess dress.
The easiest toddler princess dress you’ll ever make
If you’re into easy sewing projects for little girls, this one’s a winner. I promise it won’t stress you out, and you’ll feel like a total boss when your kiddo puts it on and lights up with joy.
Also – don’t miss my other free sewing patterns for girls! If you like the top part of this dress, check out my flutter sleeve peasant top and long sleeve peasant top tutorials – both beginner-friendly and free, too.
Some days I tackle big sewing projects (like button-down shirts or this cute hooded coat pattern), and other days I just want a quick win. This DIY princess dress for toddlers is definitely one of those feel-good projects that you can finish in an afternoon and feel proud of.
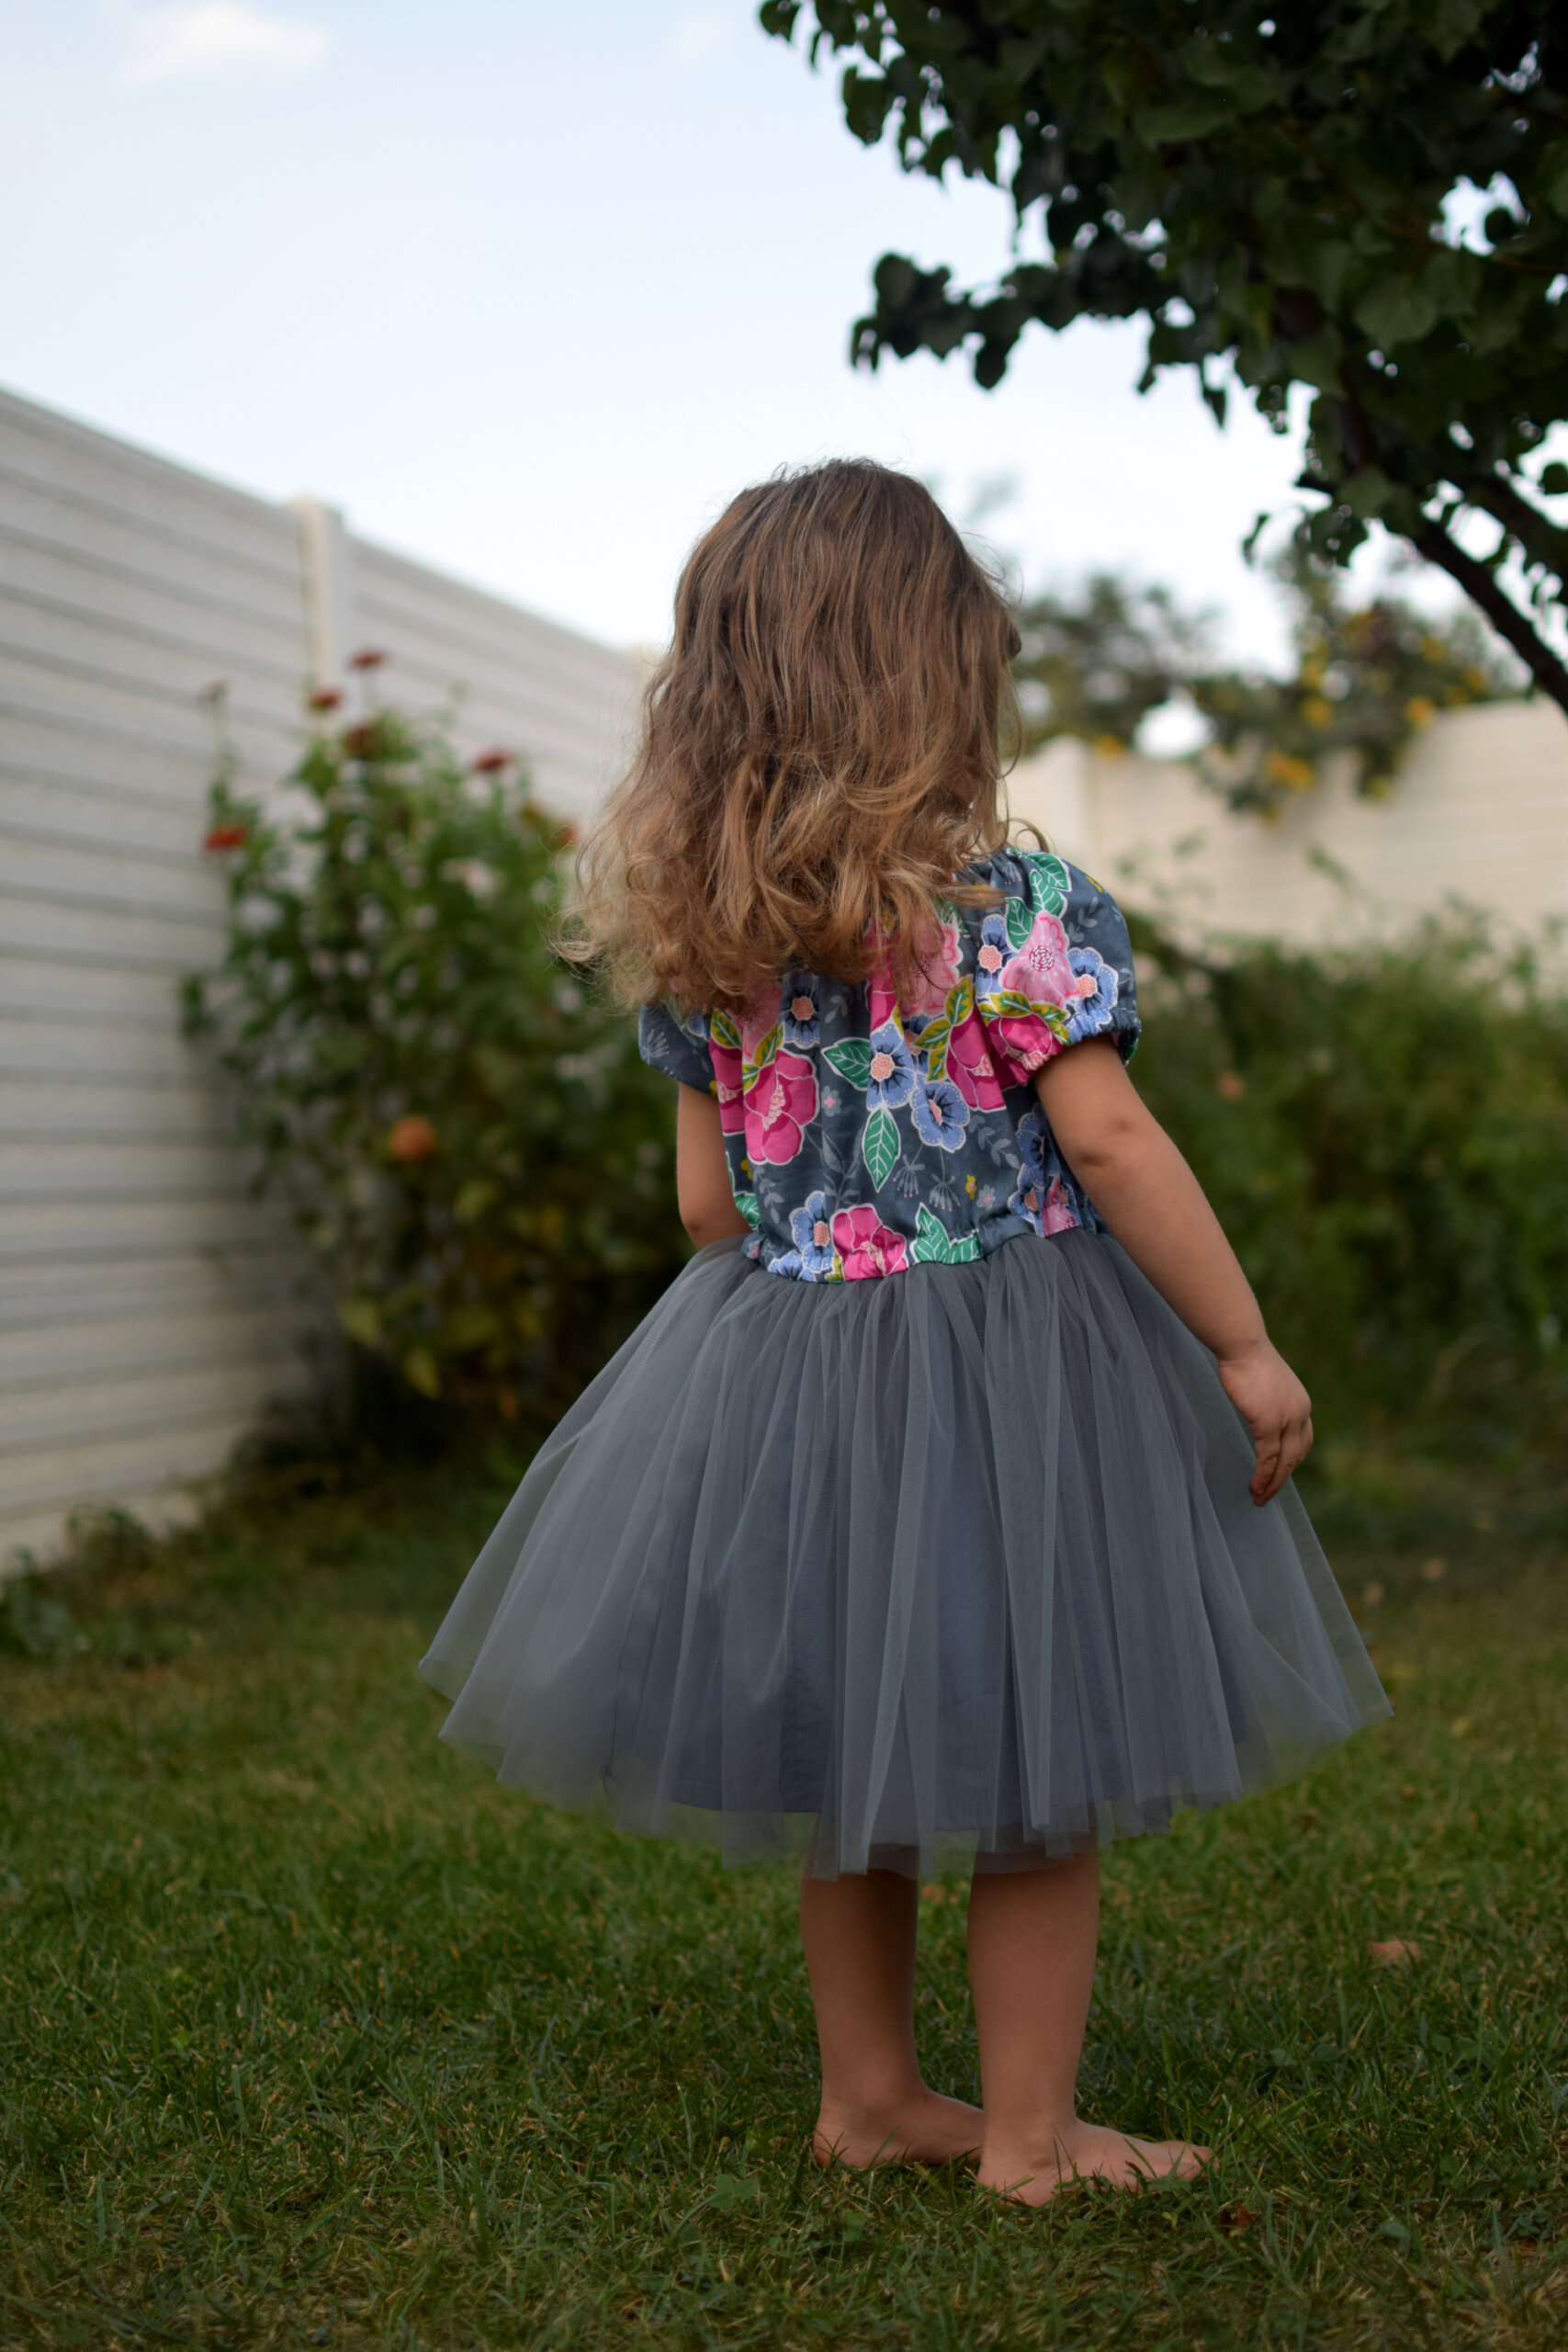
My daughter is super independent, and one of the things I love about this dress is that she can put it on all by herself. No fuss, no drama. That was a big deal for me – encouraging her to dress herself and giving her that little bit of confidence.
So if you’re looking for a free printable princess dress pattern for toddlers, or just want to sew a cute little dress for pretend play or a special occasion, give this one a try!
DIY Disney princess-inspired dress for toddlers – easy tulle dress tutorial
Got a little girl who’s obsessed with Disney princesses? With just a couple of hours at your sewing machine, you can whip up a magical DIY Disney princess-inspired tulle dress that’ll make her feel like royalty. It’s easier than it looks – and you don’t need fancy skills or a huge budget to make it happen!
Use this free toddler princess dress pattern and sew a dreamy dress in no time. Want to make a yellow Belle dress from Beauty and the Beast? Done. A sparkly blue Elsa dress for your Frozen fan? Easy. This simple sewing project gives you the freedom to pick colors and fabrics that match your child’s favorite princess.
Whether your little one loves Cinderella’s soft blue look, Rapunzel’s dreamy purple, Ariel’s bold red, or even Tiana’s green and gold glam – the options are endless. Just grab some cotton for the top, a bit of tulle for the skirt, and you’re all set to create the perfect Disney princess costume for toddlers.
This homemade princess dress is surprisingly practical, too. It’s comfy enough for running around the house or playing dress-up with friends – and it holds up to being worn (and washed) again and again. You know how kids are – if they love something, they’ll wear it on repeat.
You might also like these easy sewing projects for girls:
- Want to use up some cotton scraps? Try this cute knotted headband tutorial – it’s a quick and fun sew, and there’s a free pattern included!
- Looking for more summer sewing inspiration? Check out how to sew a sweet little skirt with side bows – it’s perfect for sunny days and super beginner-friendly.
- I’ve also got a tutorial for a double gauze peasant top that’s breezy, comfy, and great for warm weather.
- And if your little one loves twirling, don’t miss this free pattern for a twirly circle skirt dress – it’s as fun to wear as it is to make!
Sewing supplies – girls tulle dress pattern
- The free PDF pattern for the peasant top – size 3T – download below (seam allowances included)
- Cotton fabric of your choice
- Soft tulle fabric
- Lining fabric for the skirt – satin/cotton
- sewing machine
- sewing machine needle / jersey needle
- matching thread
- sewing pins
- fabric scissors
- 1/8 inch elastic / 1/4 inch elastic
- bias tape
Free step-by-step tutorial – how to sew a tulle dress for girls
Ready to start sewing? This is where the magic happens! Follow this easy tulle dress tutorial for little girls, and you’ll have an adorable princess-style dress ready in just a couple of hours. It’s the perfect sewing project for beginners who want to try their hand at making a special outfit for their daughter, niece, or granddaughter.
Let’s break it down step by step. No stress – just take it slow and enjoy the process!
What you’ll need:
- Bodice (peasant-style cotton top)
- Cut on the fold: 1 front piece, 1 back piece, and 2 sleeve pieces.
- Skirt lining
- 1 piece of cotton: 13 inches long x 44 inches wide.
- Tulle skirt
- 2 pieces of tulle: 13 inches long x 118 inches wide.
- Notions
- About 32 inches of bias tape (for the neckline and sleeves)
- Around 55 inches of ¼ inch wide elastic

Let’s get sewing!
Step 1: Start with the bodice
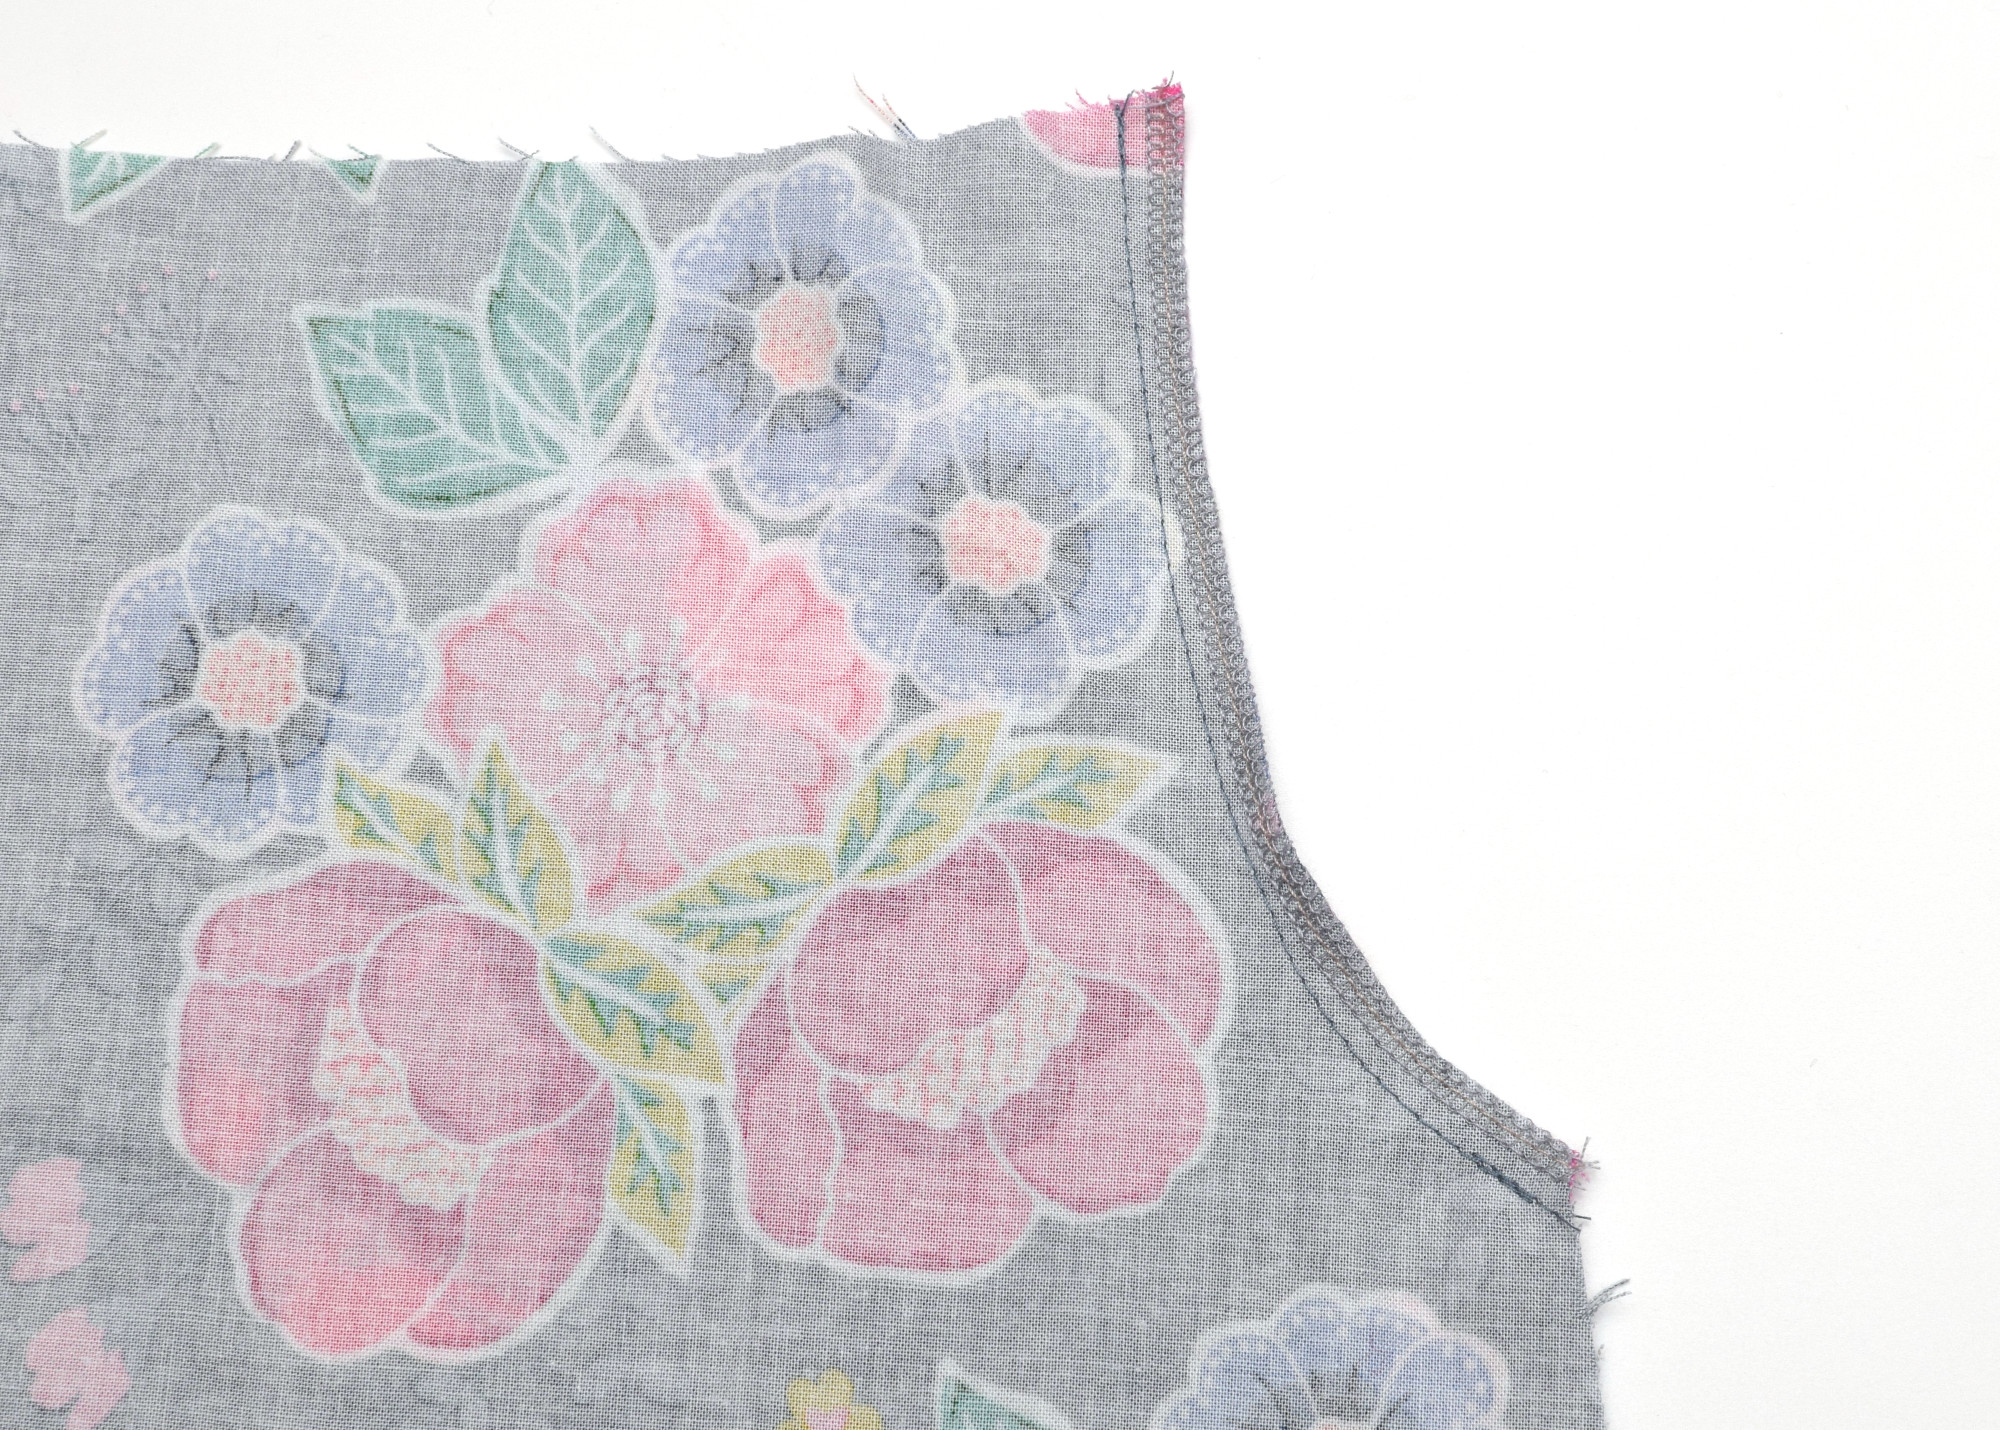
Lay your fabric out and pin the front bodice piece to one of the sleeve pieces, aligning the armhole curves – right sides together. Sew it using a 3/8” seam allowance. Then do the same on the other side with the second sleeve.
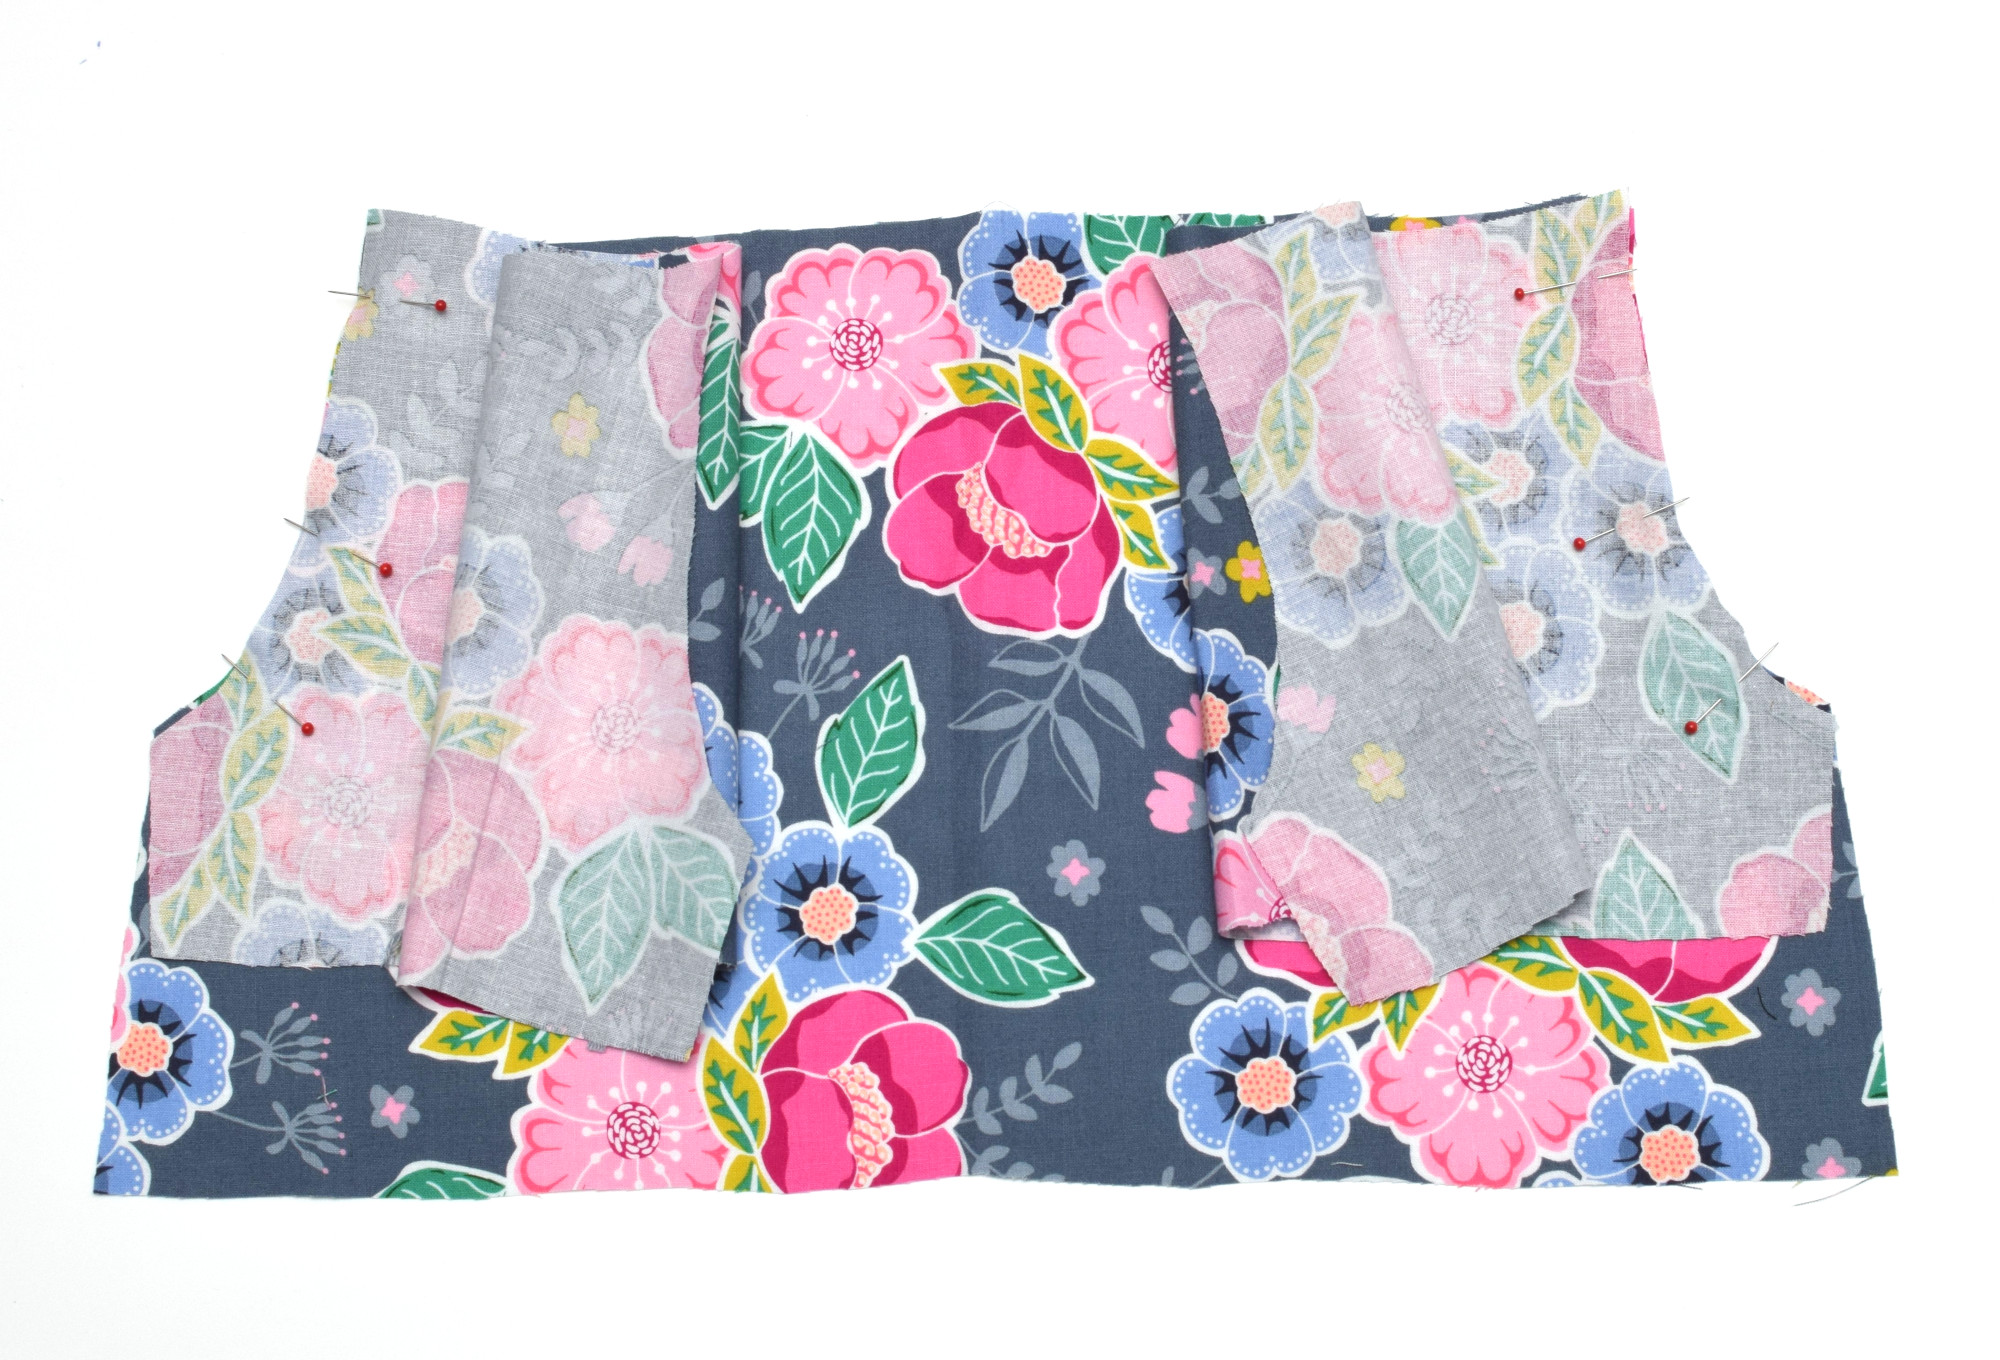
Quick tip: Press your seam allowances to one side after sewing – I skipped this once and regretted it later when the seams didn’t sit flat!
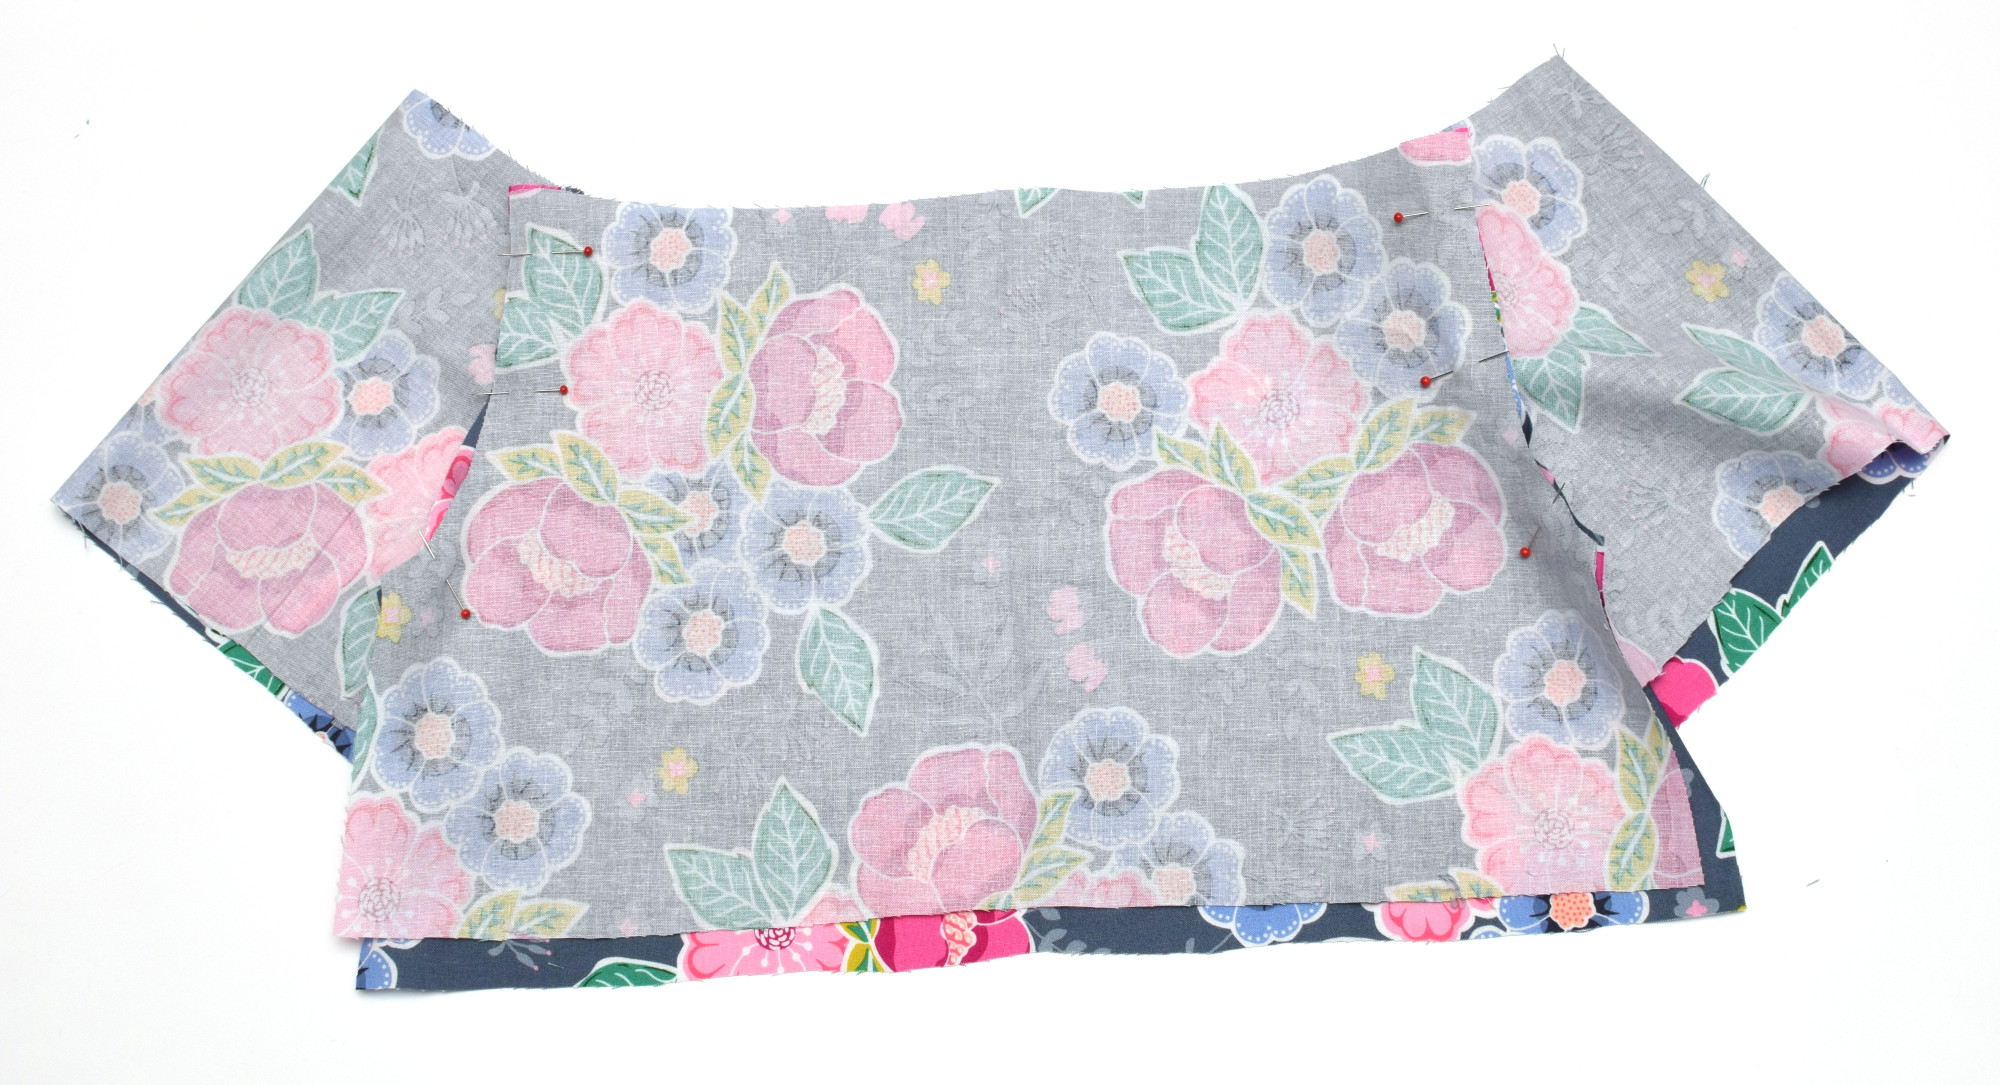
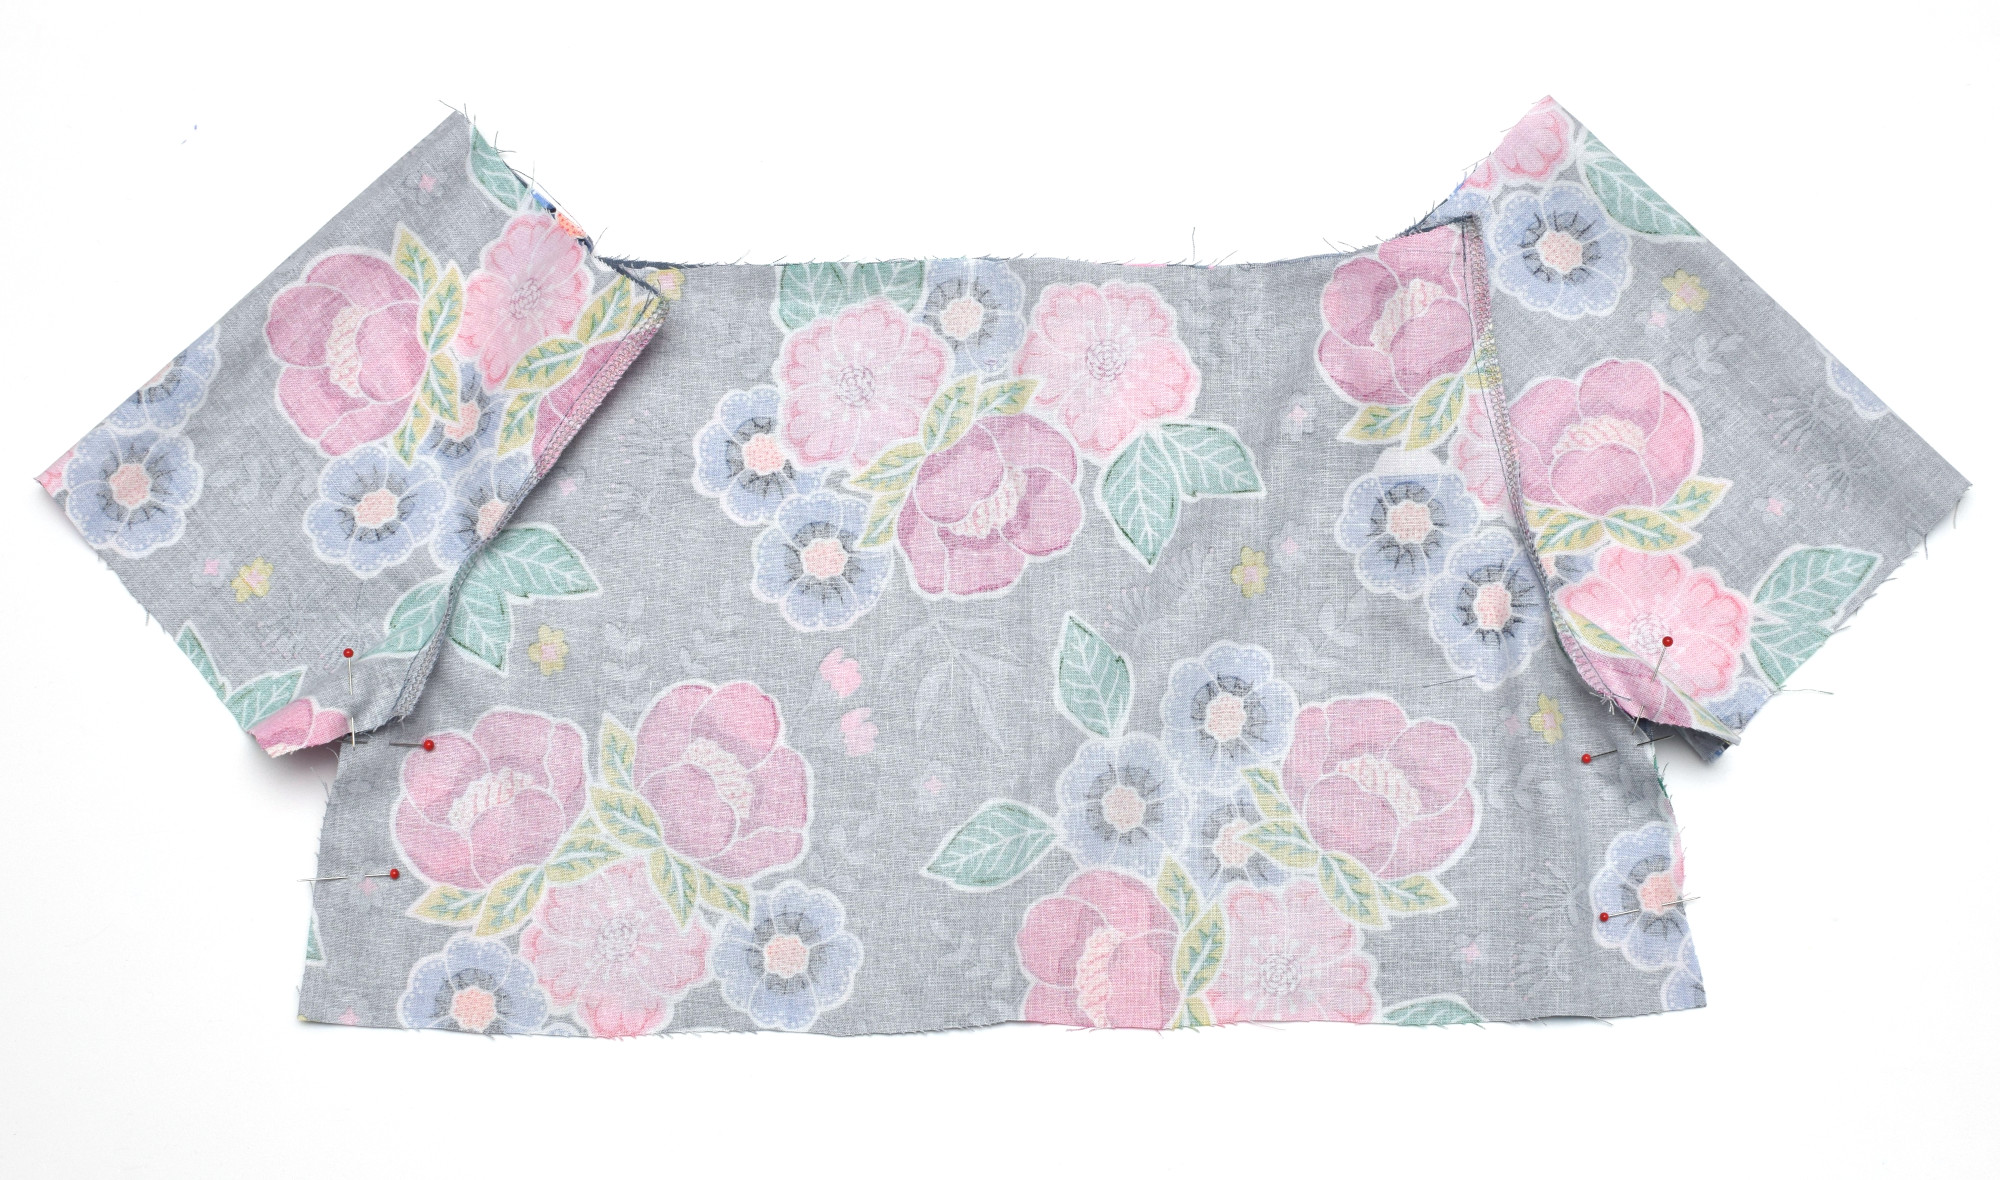
Step 2: Add the back bodice
Now, take your back bodice piece and line it up with the sleeves’ other side, matching the armholes just like before. Again, right sides together – sew it all in place with a 3/8” seam allowance.
After that, go ahead and finish all four armhole seams. You can use a serger if you have one, or just a basic zigzag stitch to keep the fabric from fraying. It doesn’t have to be perfect – just secure and neat.
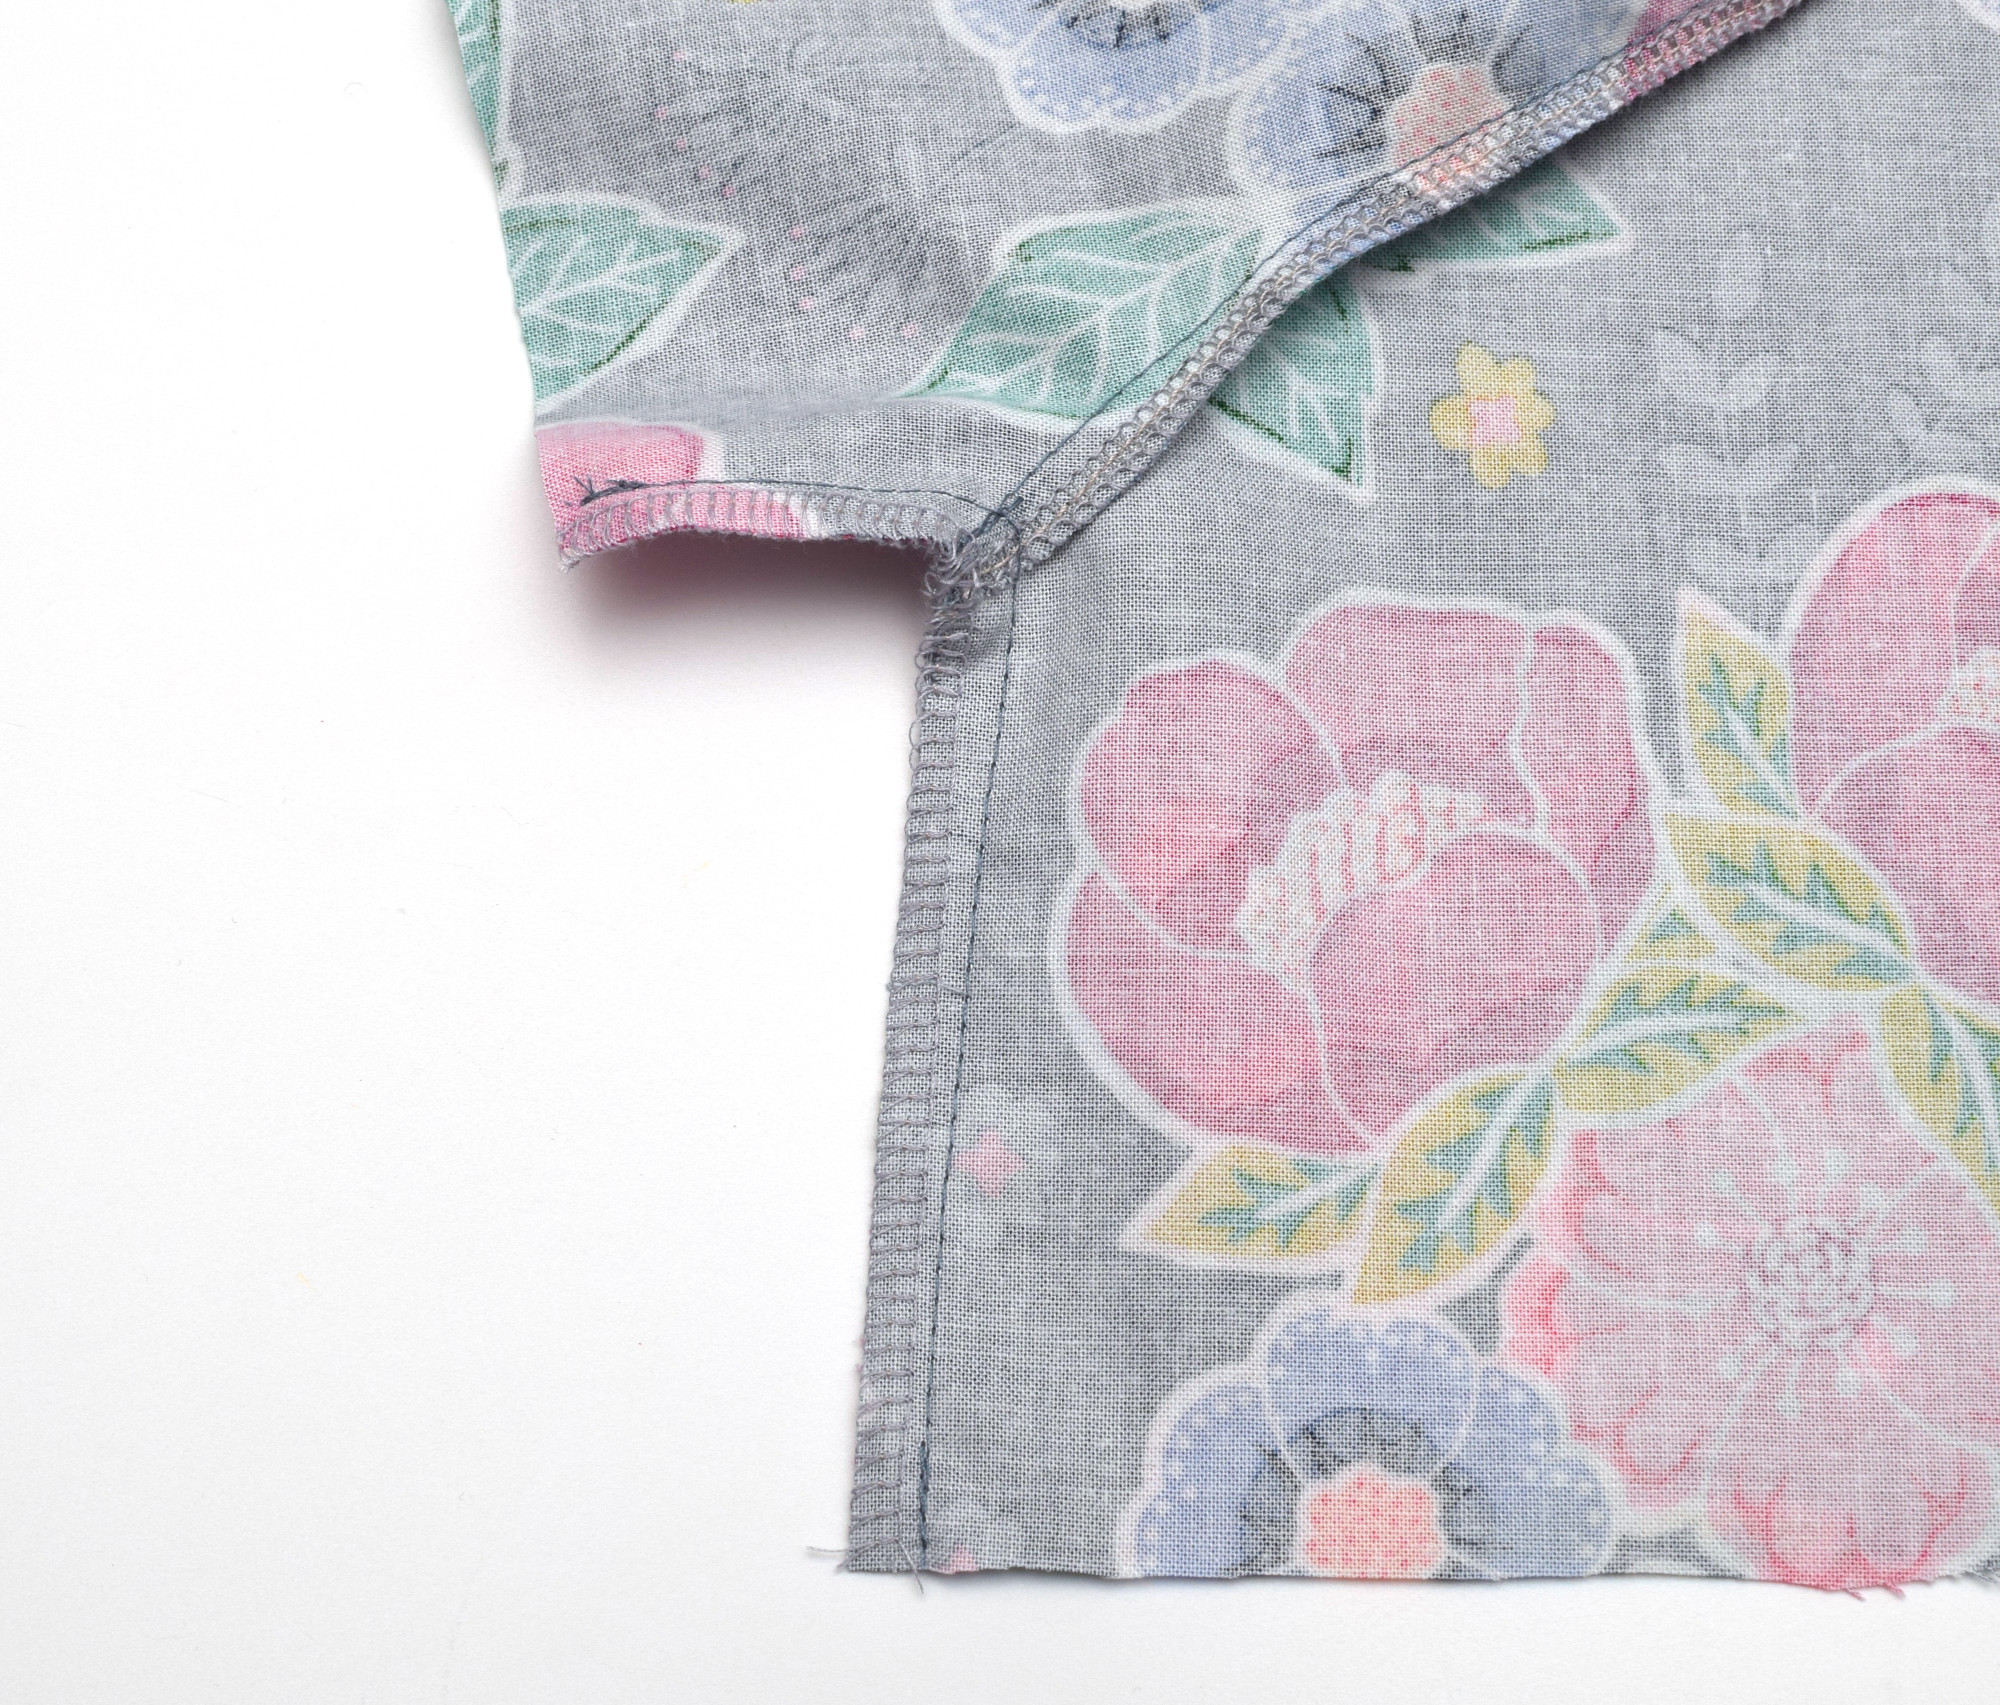
Step 3: Sew the side seams
Now that the sleeves and bodice are all attached, it’s time to sew the peasant top together at the sides. Place the front and back right sides together, making sure the underarm seams line up neatly. Pin them in place and stitch down each side with a 3/8” seam allowance.
Once that’s done, go ahead and finish the seams with your serger or a zigzag stitch, and press them flat so everything looks tidy. Trust me, that little press makes a big difference!
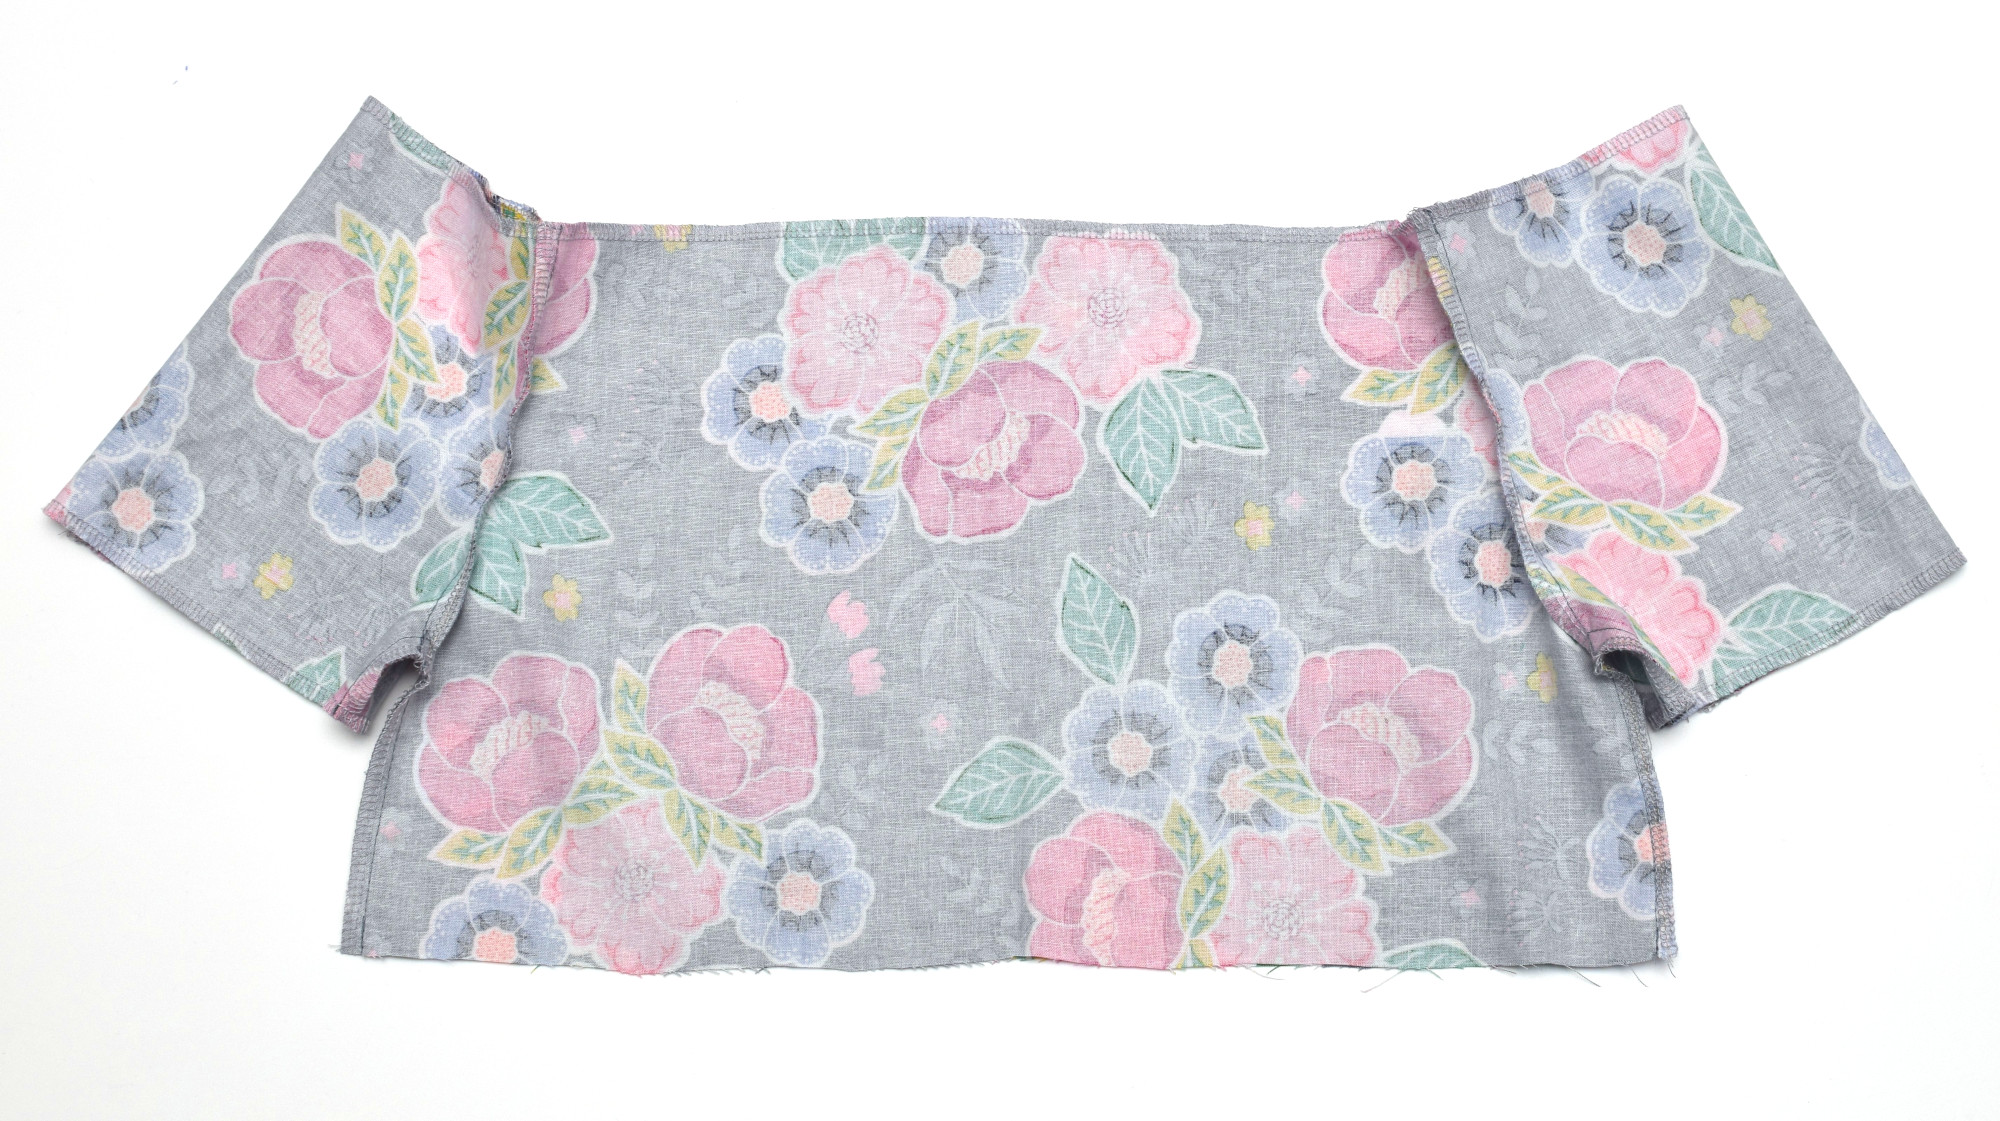
Step 4: Finish the raw edges
Let’s clean up the neckline and sleeves next. Use your serger (or a zigzag stitch if you’re working with a regular sewing machine) to finish the raw edge around the neckline and the bottom edge of each sleeve. This step helps prevent fraying and gives your dress a more polished look.
Step 5: Make the elastic casings
Time to form those casings! Start with the sleeves – fold the bottom edge under about 1/2 inch, press it, and sew close to the raw edge, leaving a tiny opening so you can insert the elastic later.

Repeat the same process for the neckline. This is how we create stretchy openings for the arms and head, which makes this DIY peasant dress for toddlers so easy to slip on and off – no buttons or zippers required!
Once the casings are sewn, set them aside for a bit – we’ll thread the elastic through later.
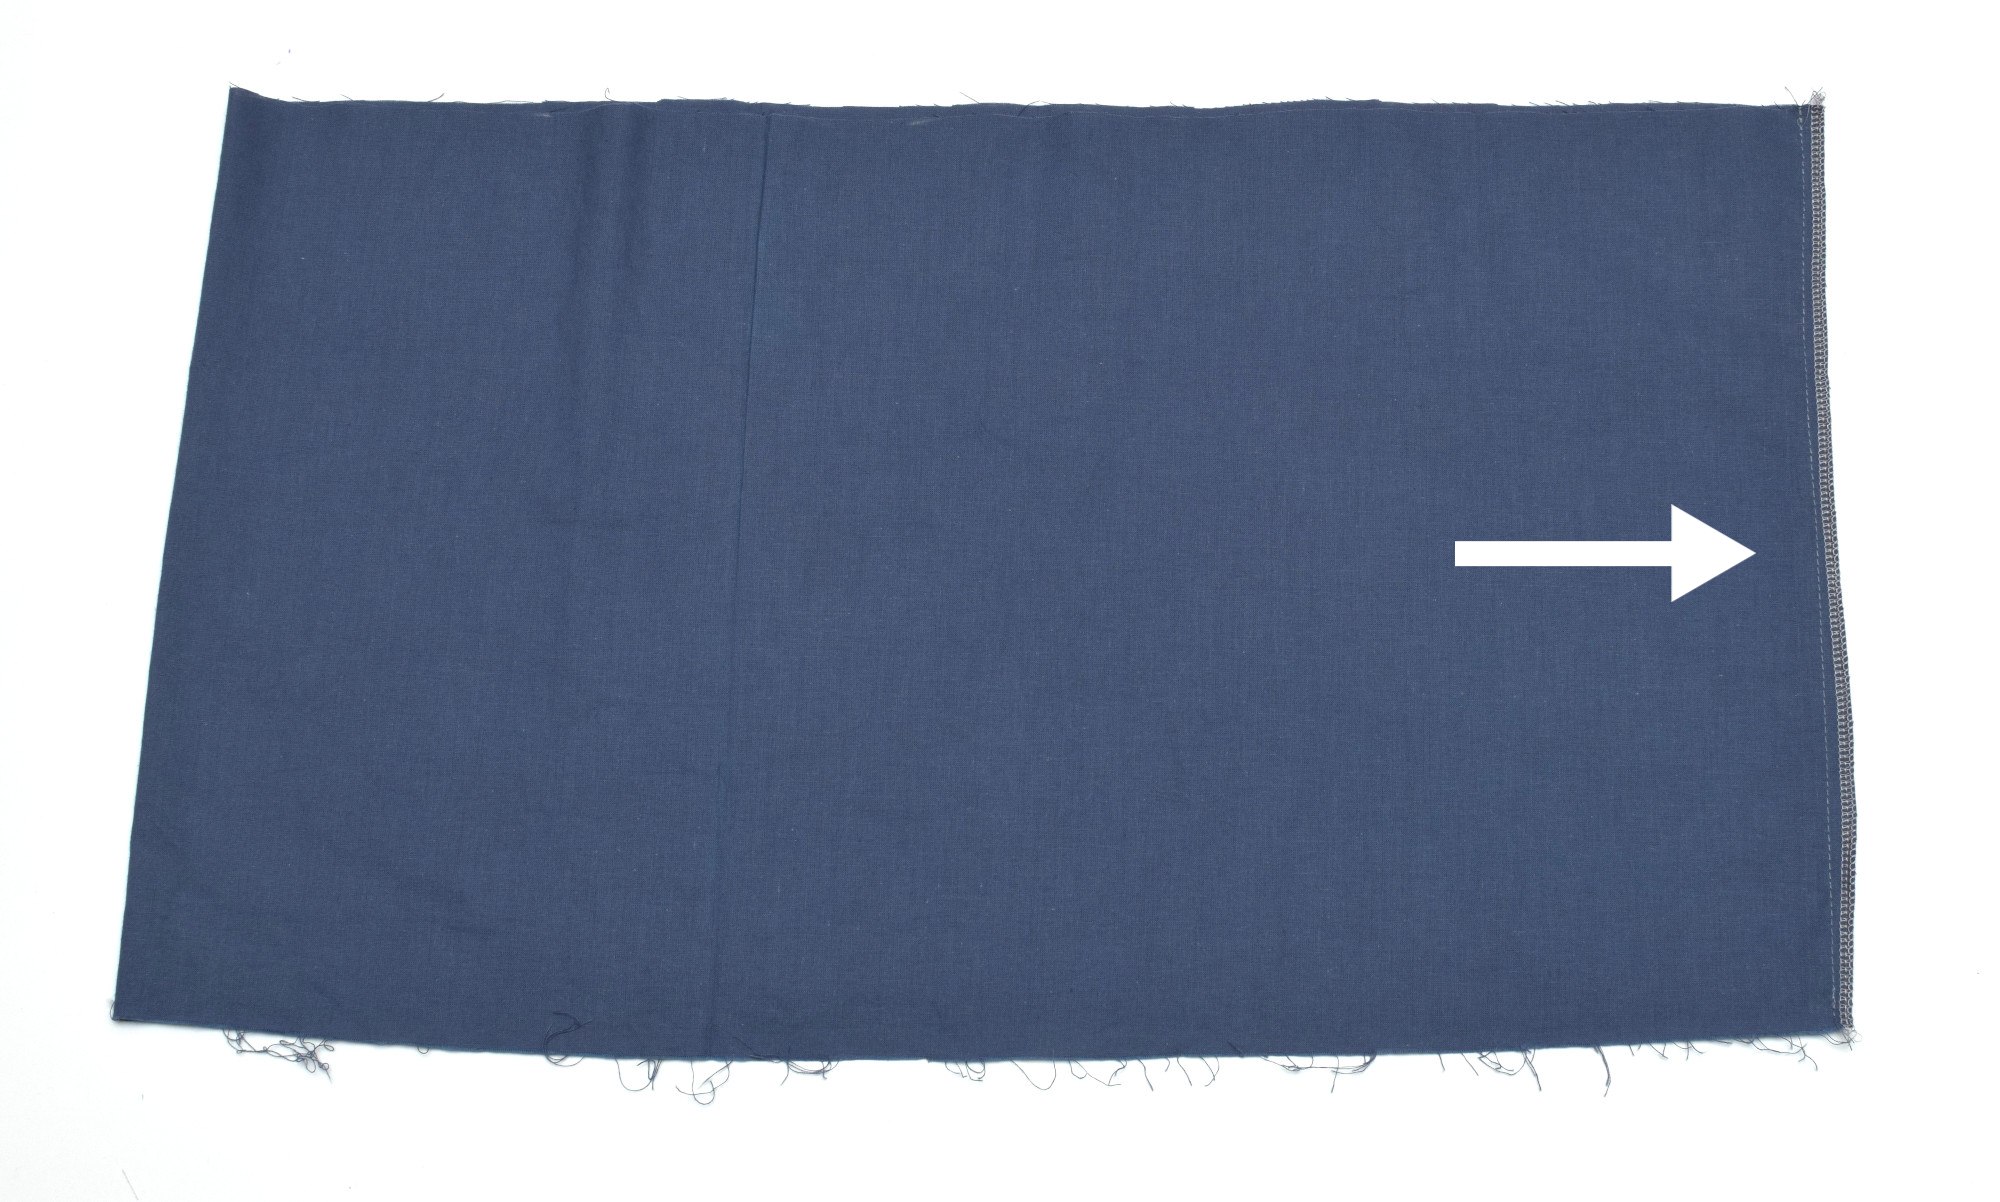
Step 6: Create the skirt lining
Grab your 44” x 13” cotton rectangle – this will be the lining for the tulle skirt and help make the dress more comfortable to wear. Fold it in half, right sides together, so the short edges meet. Pin and sew the side seam using a 3/8” seam allowance.
Finish that seam with your serger or a zigzag stitch to keep it nice and neat.
Now it’s time to gather! Switch your stitch length to the longest setting on your sewing machine. Sew a basting stitch all the way around the top edge of the skirt lining, about 1/4 inch from the edge. Don’t backstitch!
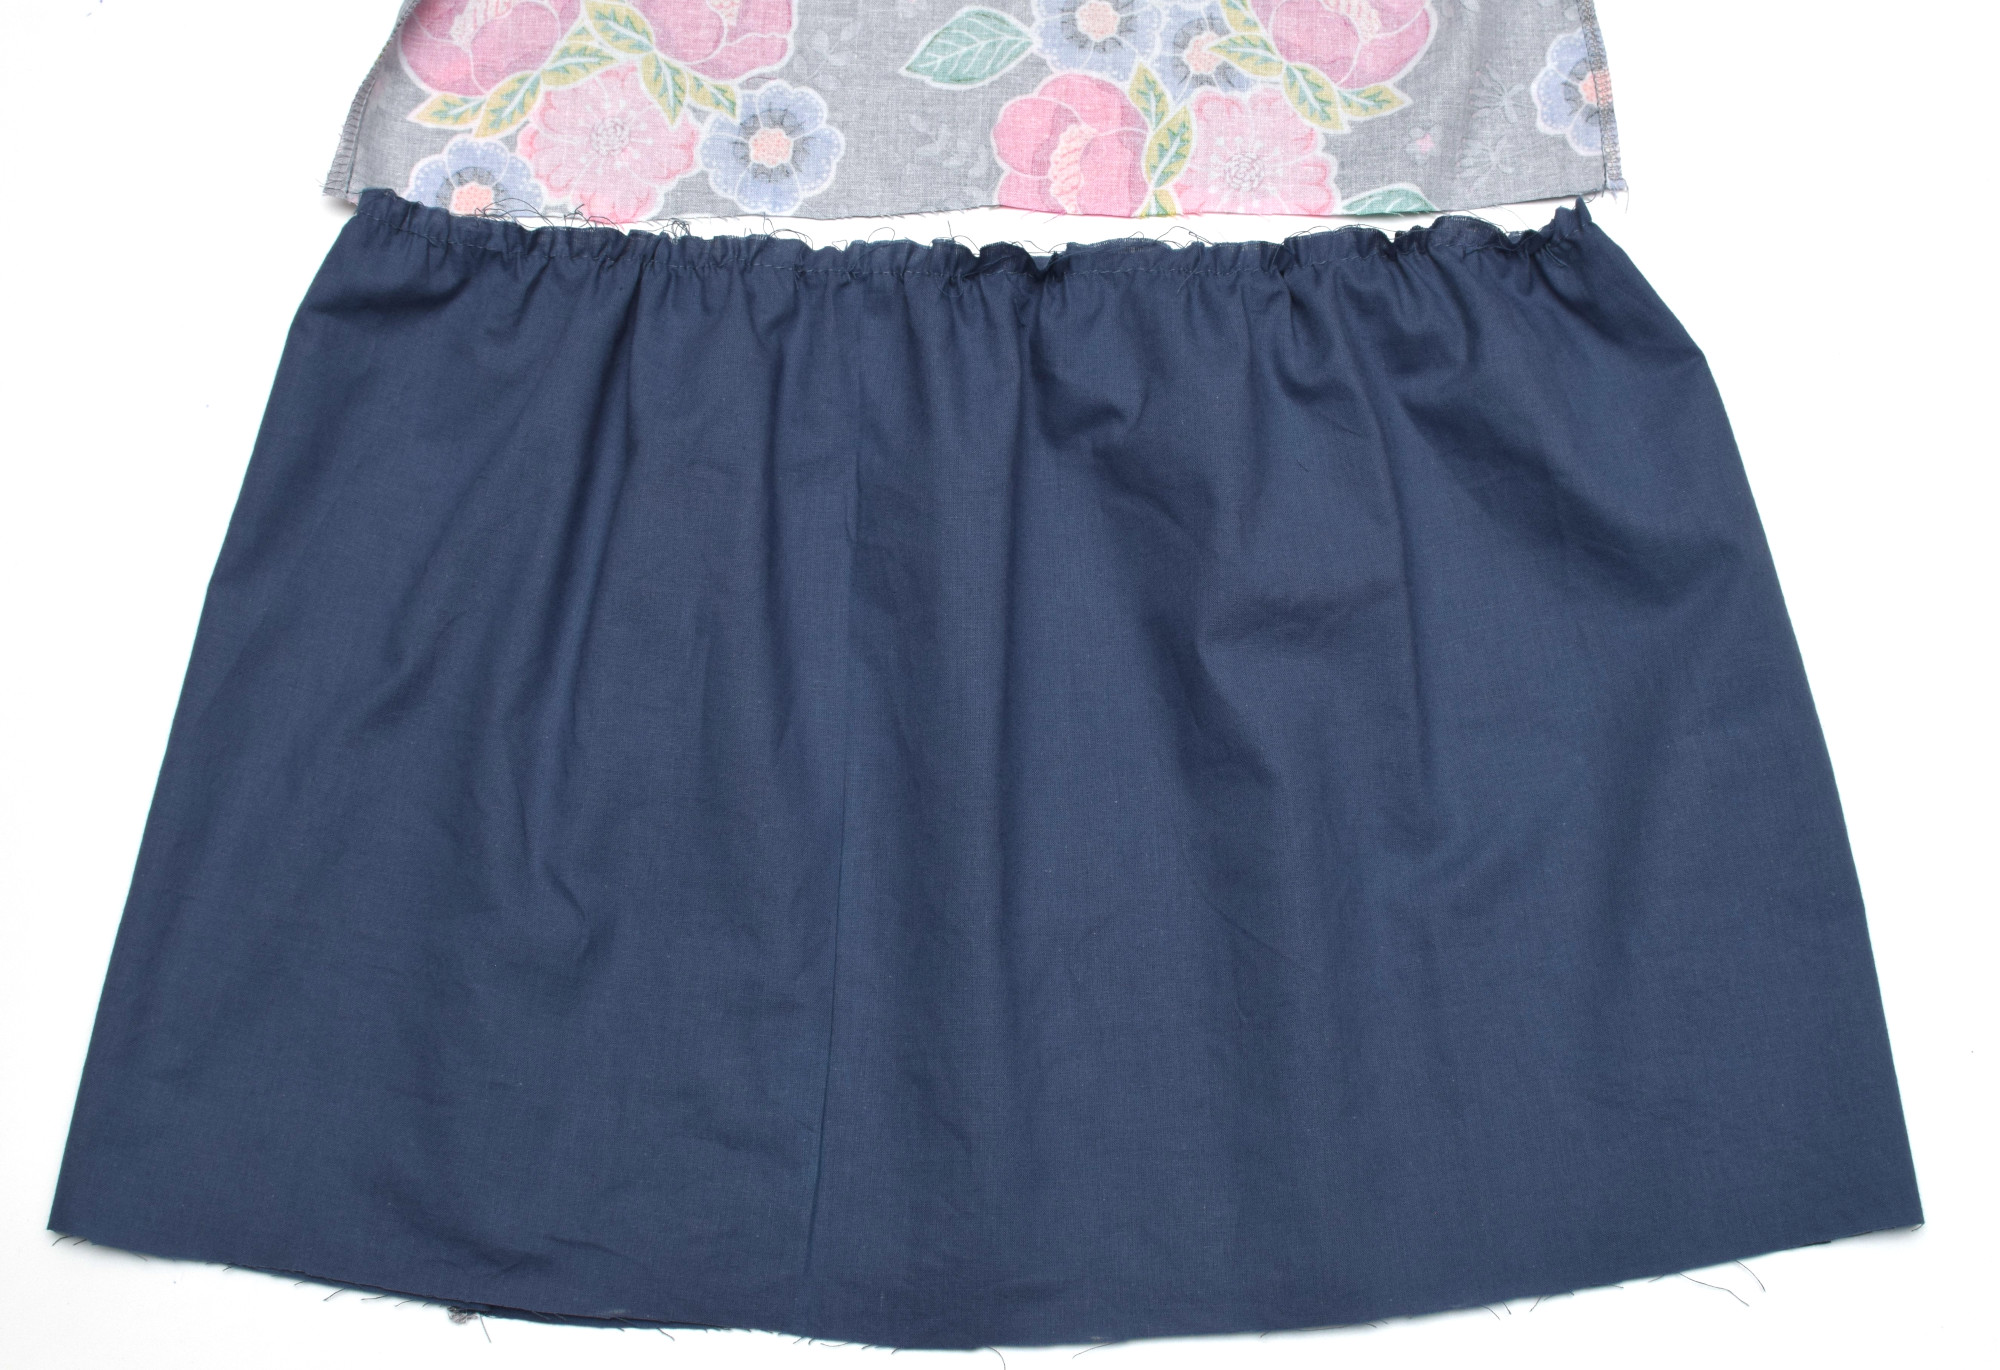
Gently pull on the bobbin threads to gather the fabric until the top edge of the skirt lining is the same width as the bottom edge of the peasant top bodice.
This is where the dress starts coming together, and it’s so exciting to see it take shape!
Step 7: Sew the tulle skirt layers
Tulle can be a little tricky to work with, so here’s how to avoid those annoying puckers and stretched-out seams. First things first – switch to a fresh ballpoint or jersey needle. I used a size 70/10 and it worked perfectly. Then, set your machine to a short straight stitch and slow it way down. Tulle is delicate and slippery, so patience is key!
Start by sewing the side seam of your first tulle rectangle, right sides together. Then do the same for the second piece. You’ll have two big loops of tulle now.
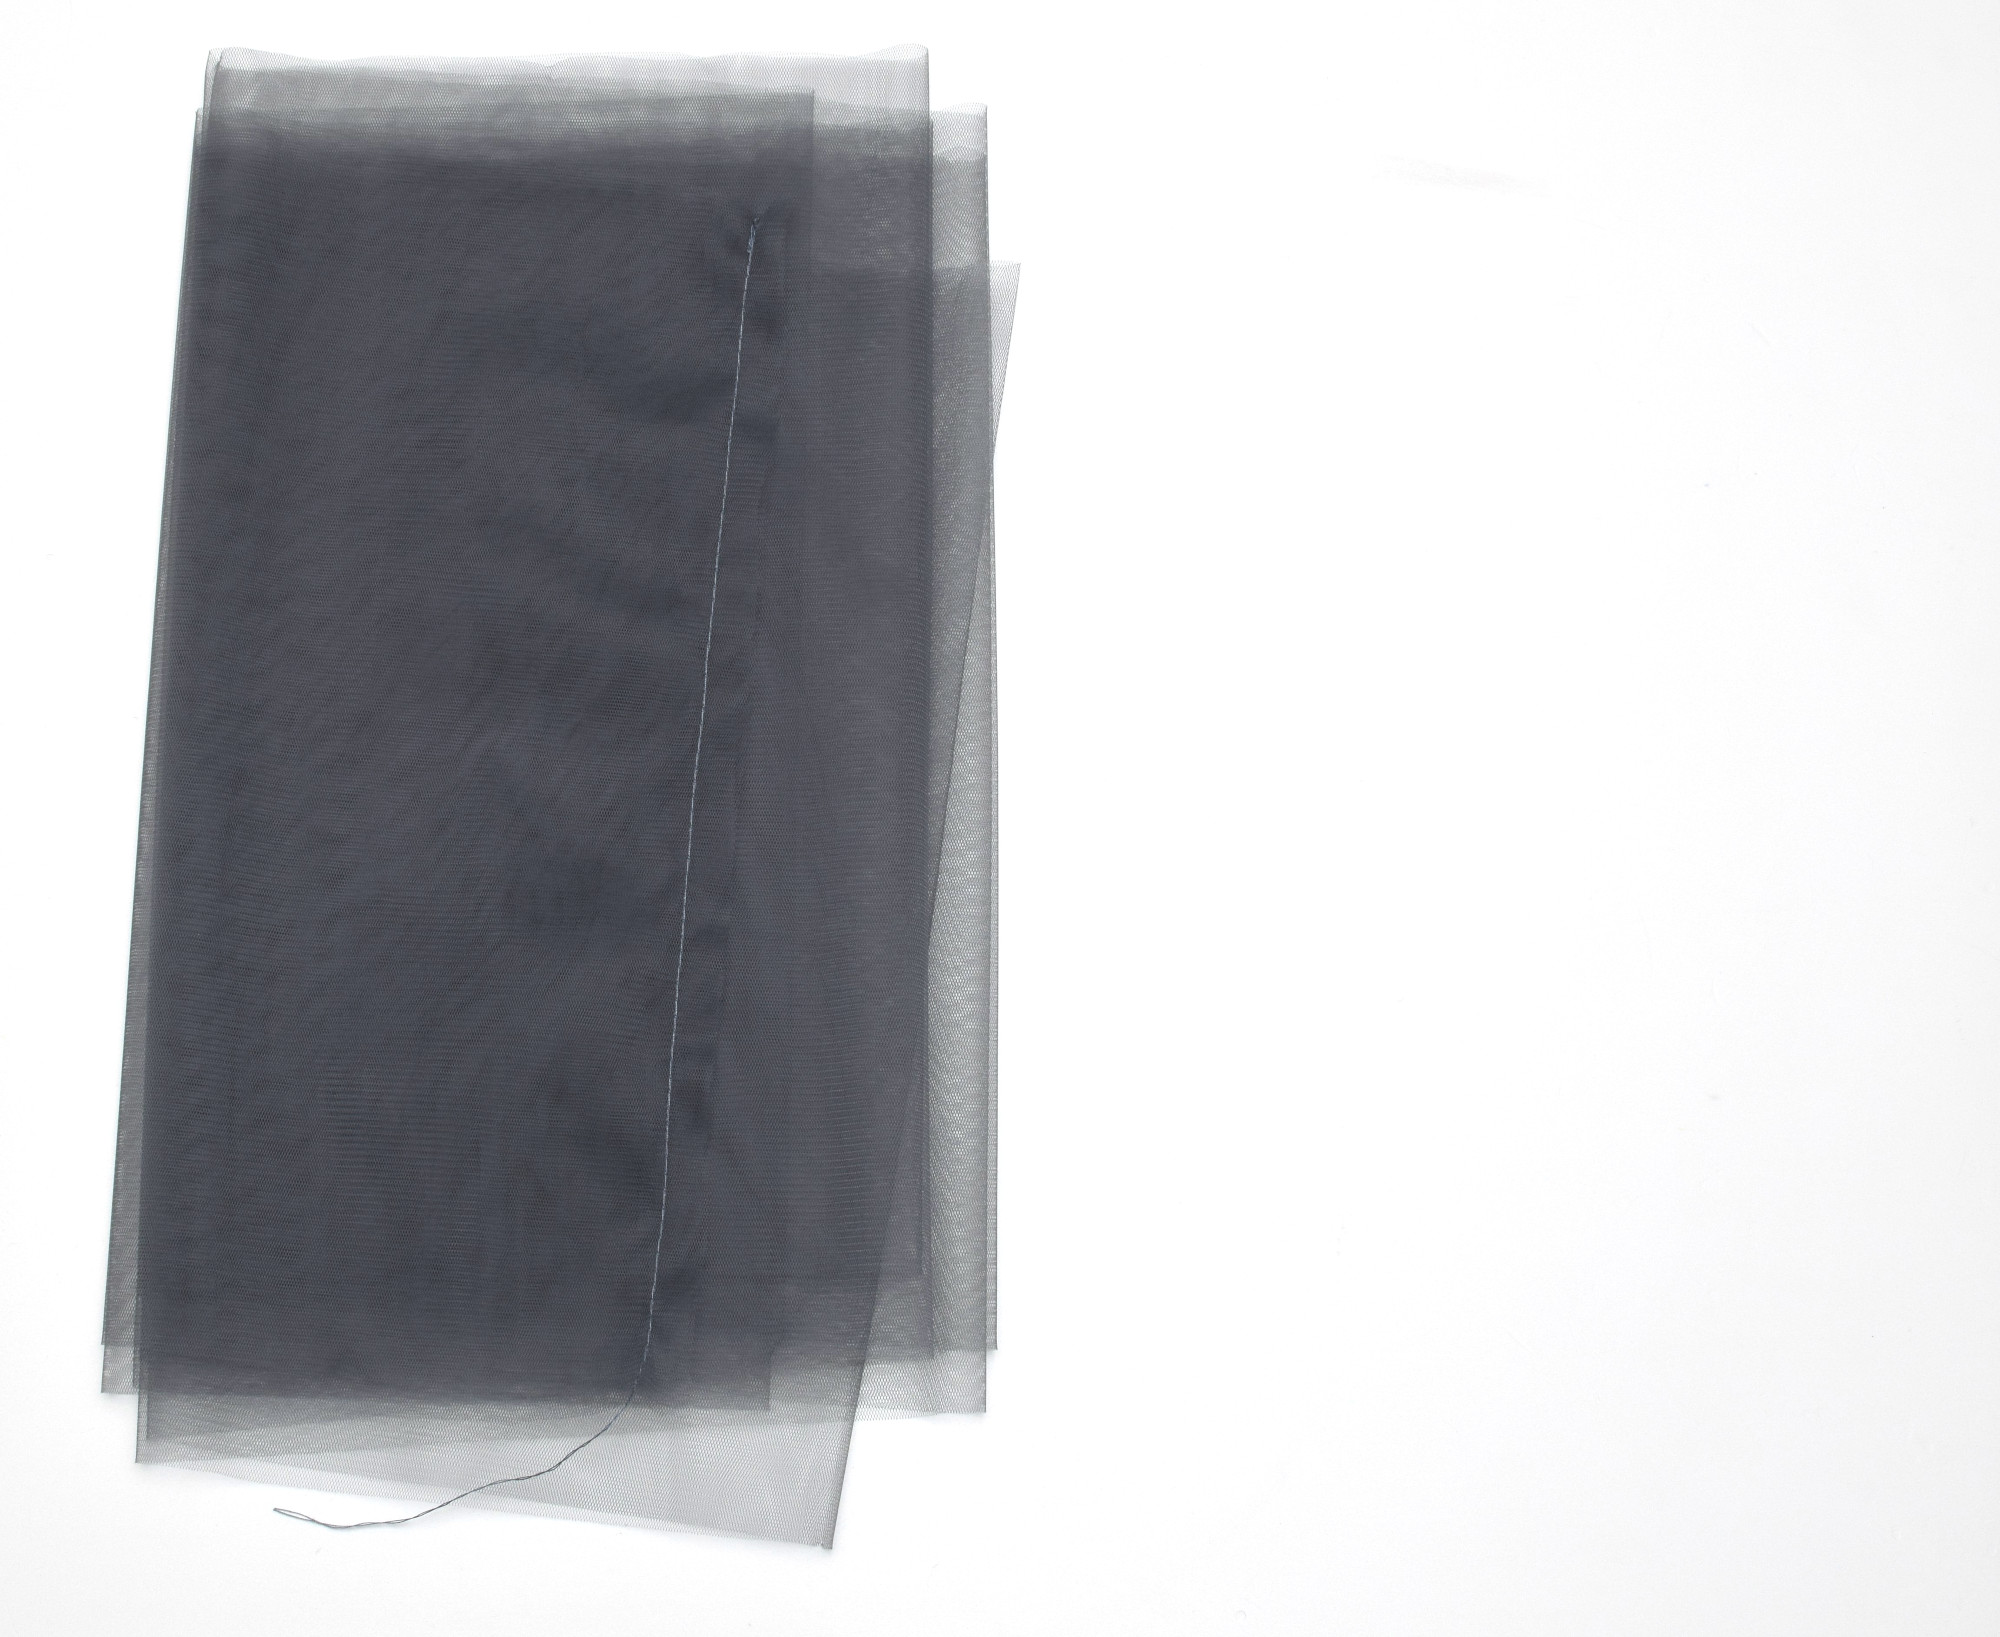
Pro tip: Set your iron to the absolute lowest heat setting and gently press the tulle side seams to help flatten them without melting anything. Be careful here – tulle doesn’t love heat!
Next, gather each tulle layer individually. Use a long basting stitch all around the top edge of the first tulle layer and gently pull the bobbin thread until it fits the bottom edge of the peasant top. Then do the same with the second tulle layer.

Once both layers are gathered, it’s time to stack them: place one tulle layer inside the other, lining them up so the wrong side of the first layer touches the right side of the second. Pin them together and sew around the top edge to join them.
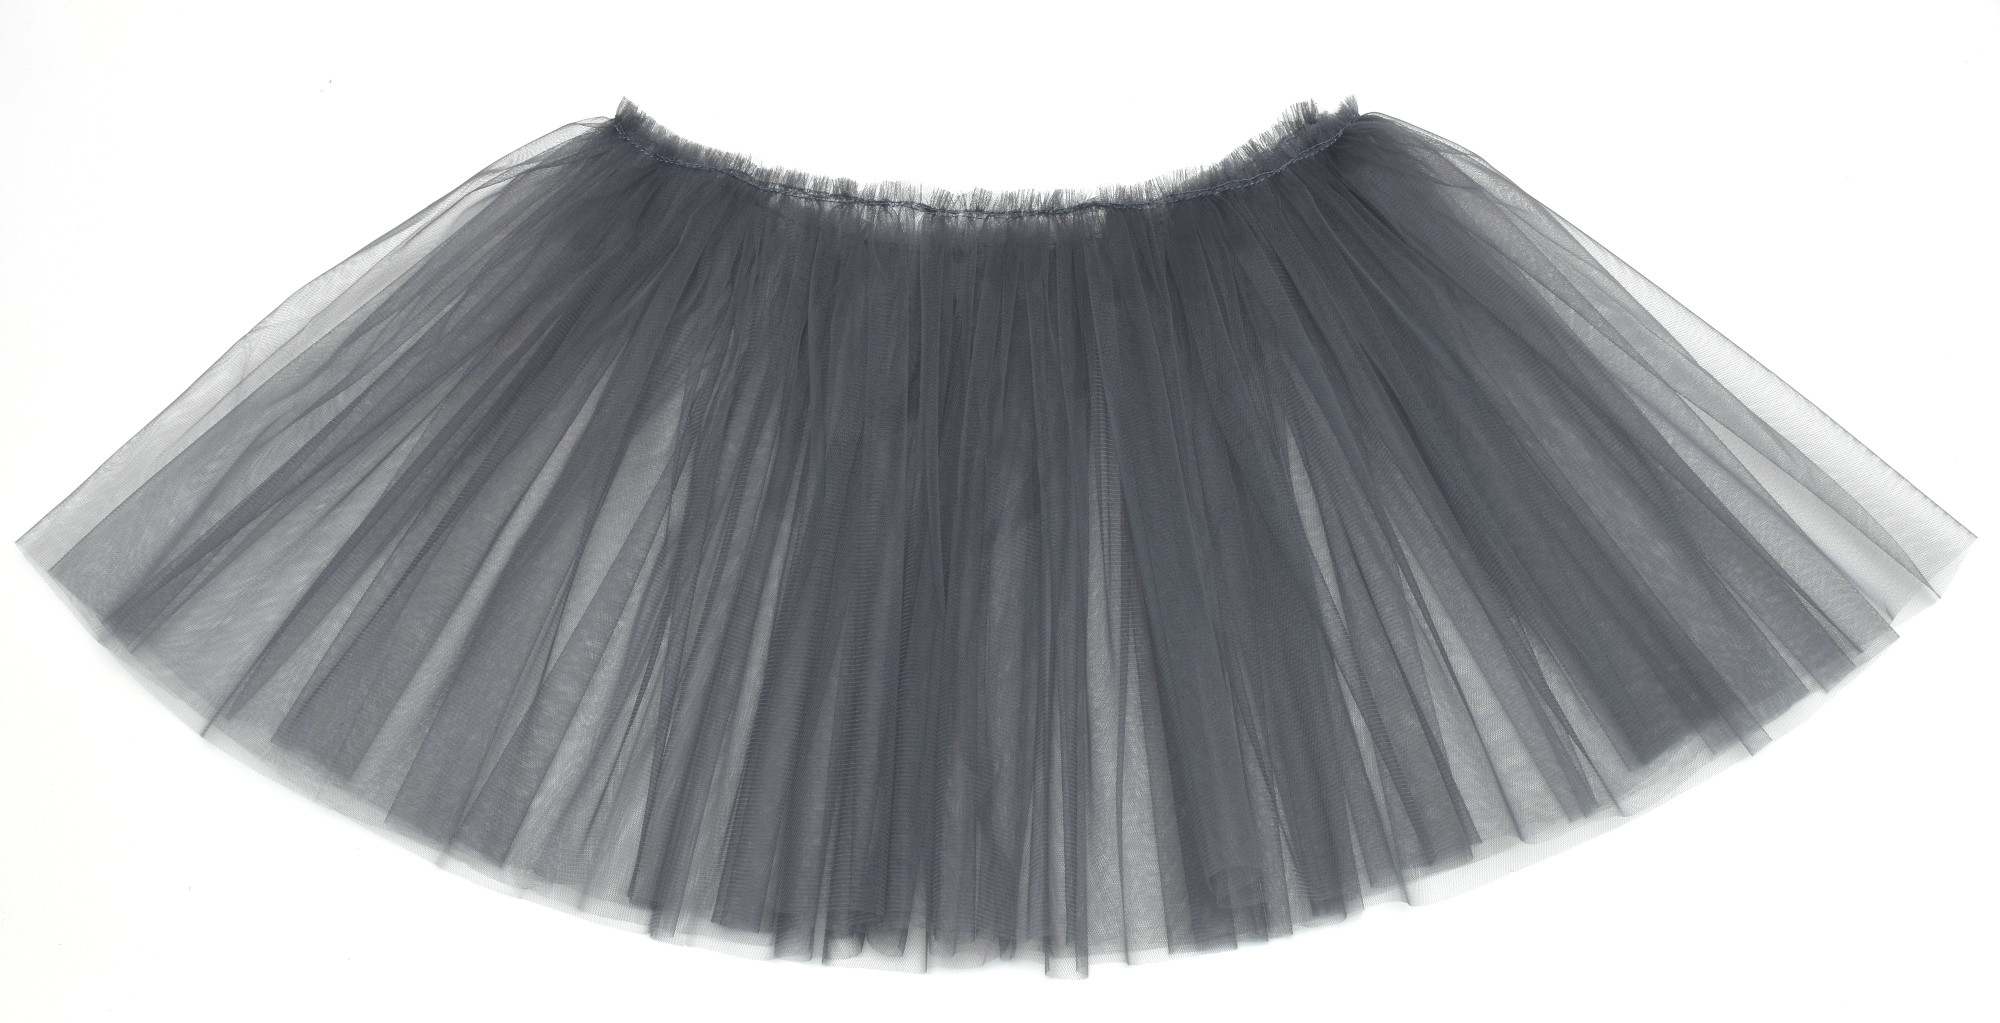
You’re basically making a double-layered tulle skirt that looks fuller and fancier without adding bulk – it’s perfect for that classic princess look! (If you need more tips on working with tulle, I’ve got a full tutorial linked.)
Step 8: Attach the skirt lining
Now that your tulle layers are sewn together, it’s time to add the cotton skirt lining. Take the lining you gathered earlier and place it right sides together with the second tulle layer (that’s the outermost one). Match the top edges and sew all the way around.

This step gives the dress a nice finish inside and keeps the scratchy tulle from touching your child’s skin – super helpful if your little one is sensitive to fabrics.
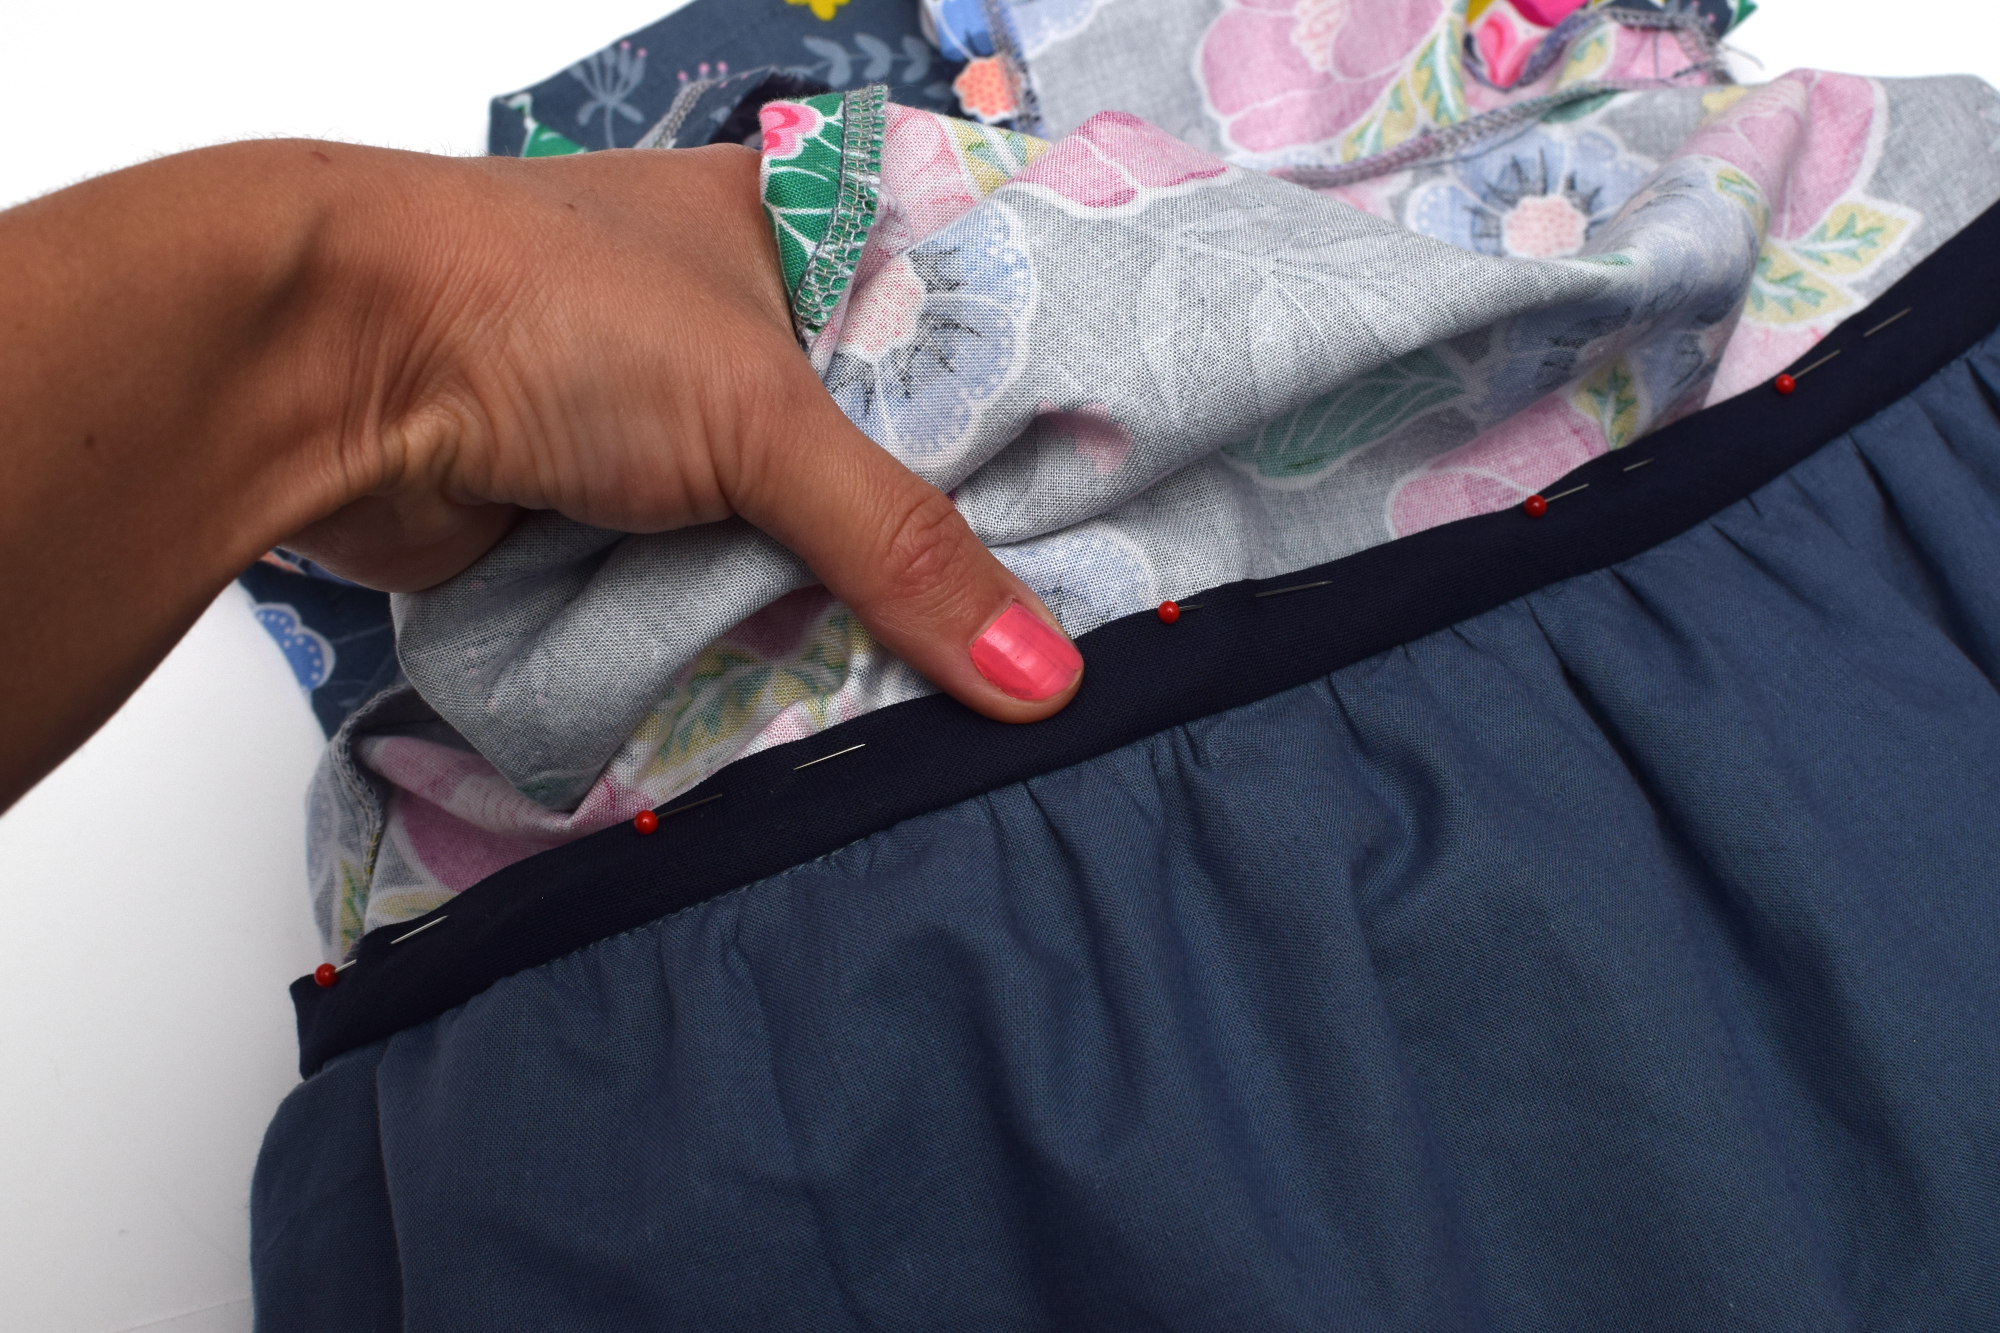
Step 9: Join the skirt to the bodice
We’re almost there! Take the completed skirt (tulle + lining) and turn it right side out. Then, place it inside the peasant top, which should also be right side out. Line up the gathered top edge of the skirt with the bottom edge of the bodice. Pin everything in place, making sure the side seams line up nicely.
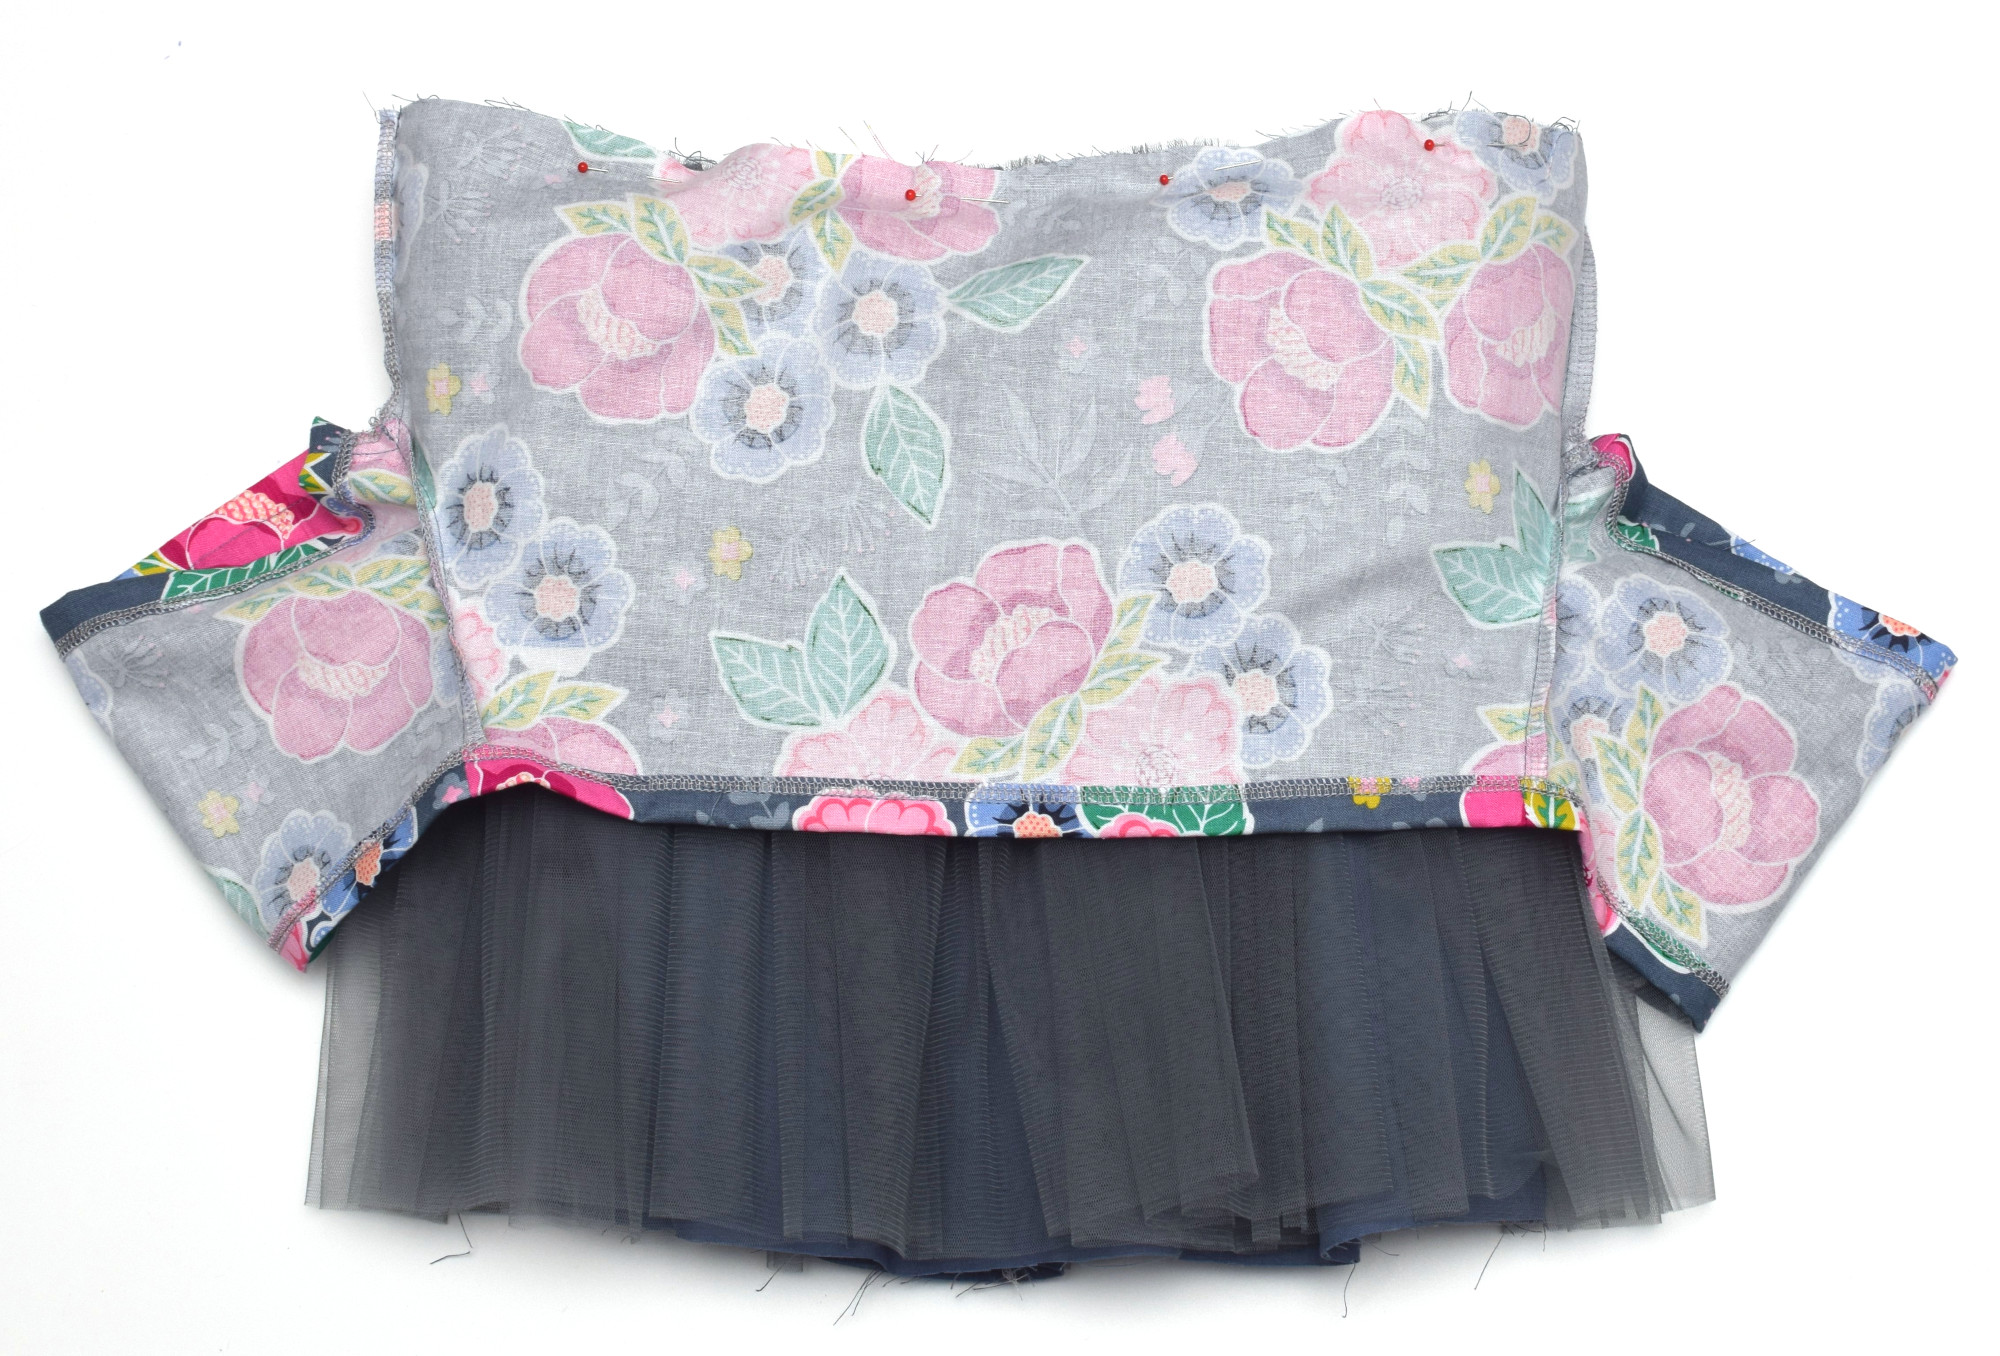
Sew all the way around with a 3/8” seam allowance, then finish the raw edge using a serger or zigzag stitch. Flip the dress right side out, and voilà – your princess tulle dress is almost done!
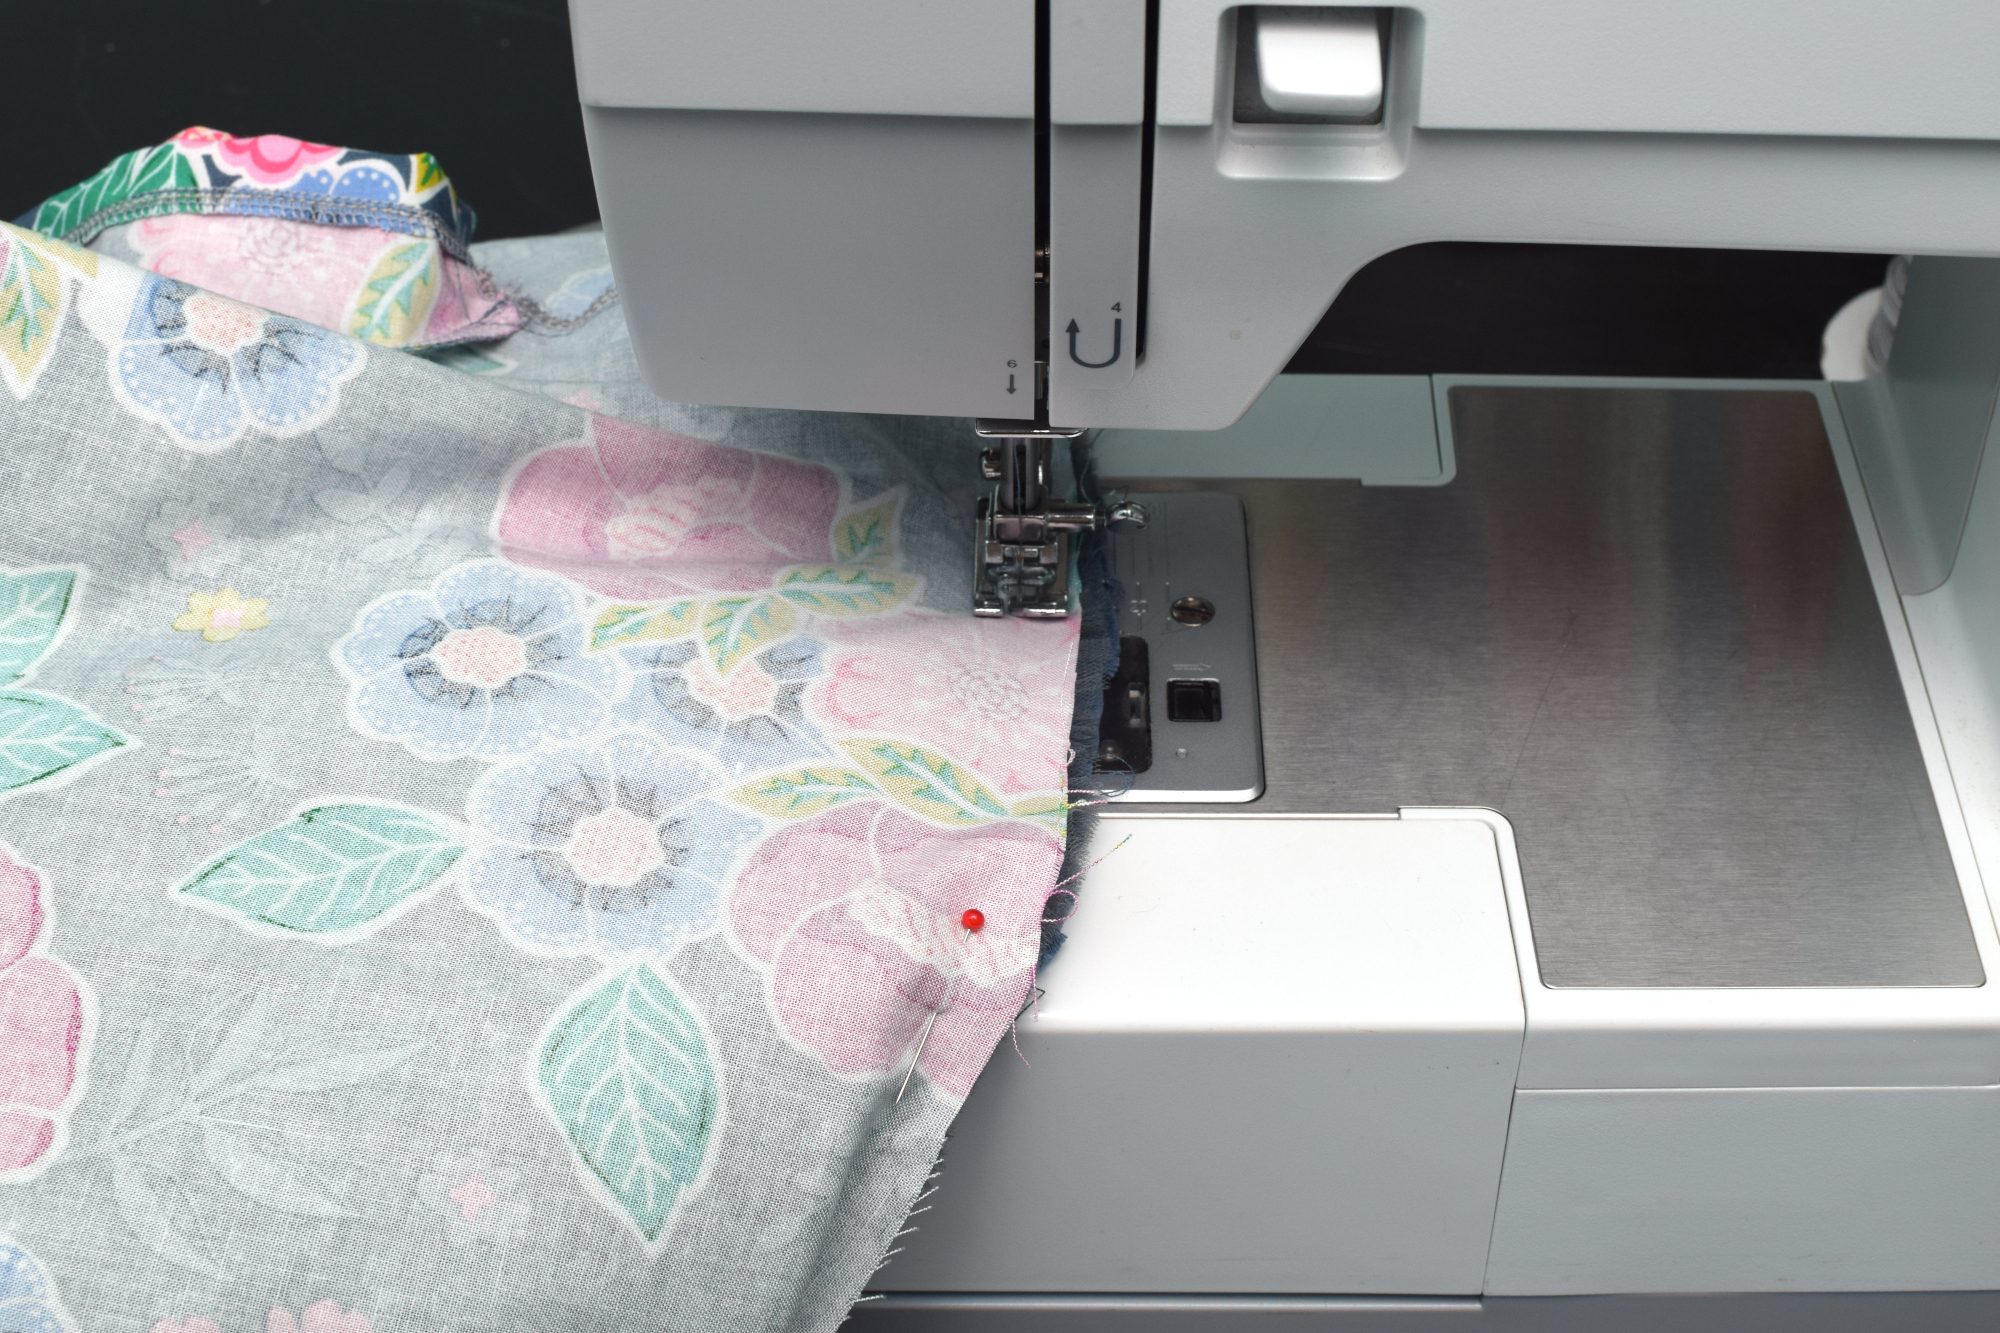
Step 10: Add the waistline casing with bias tape
Let’s make the waistline look neat and add a comfy stretch! Take your bias tape and pin it along the serged edge where the bodice and skirt meet, with the right sides facing and the folded edge lined up with the seam.
Sew along the crease of the bias tape, just like you would when making a casing. I like to fold the short ends of the bias tape inward before stitching – this keeps the raw edges hidden and leaves a small gap for inserting the elastic later. It’s a small trick that makes a big difference!
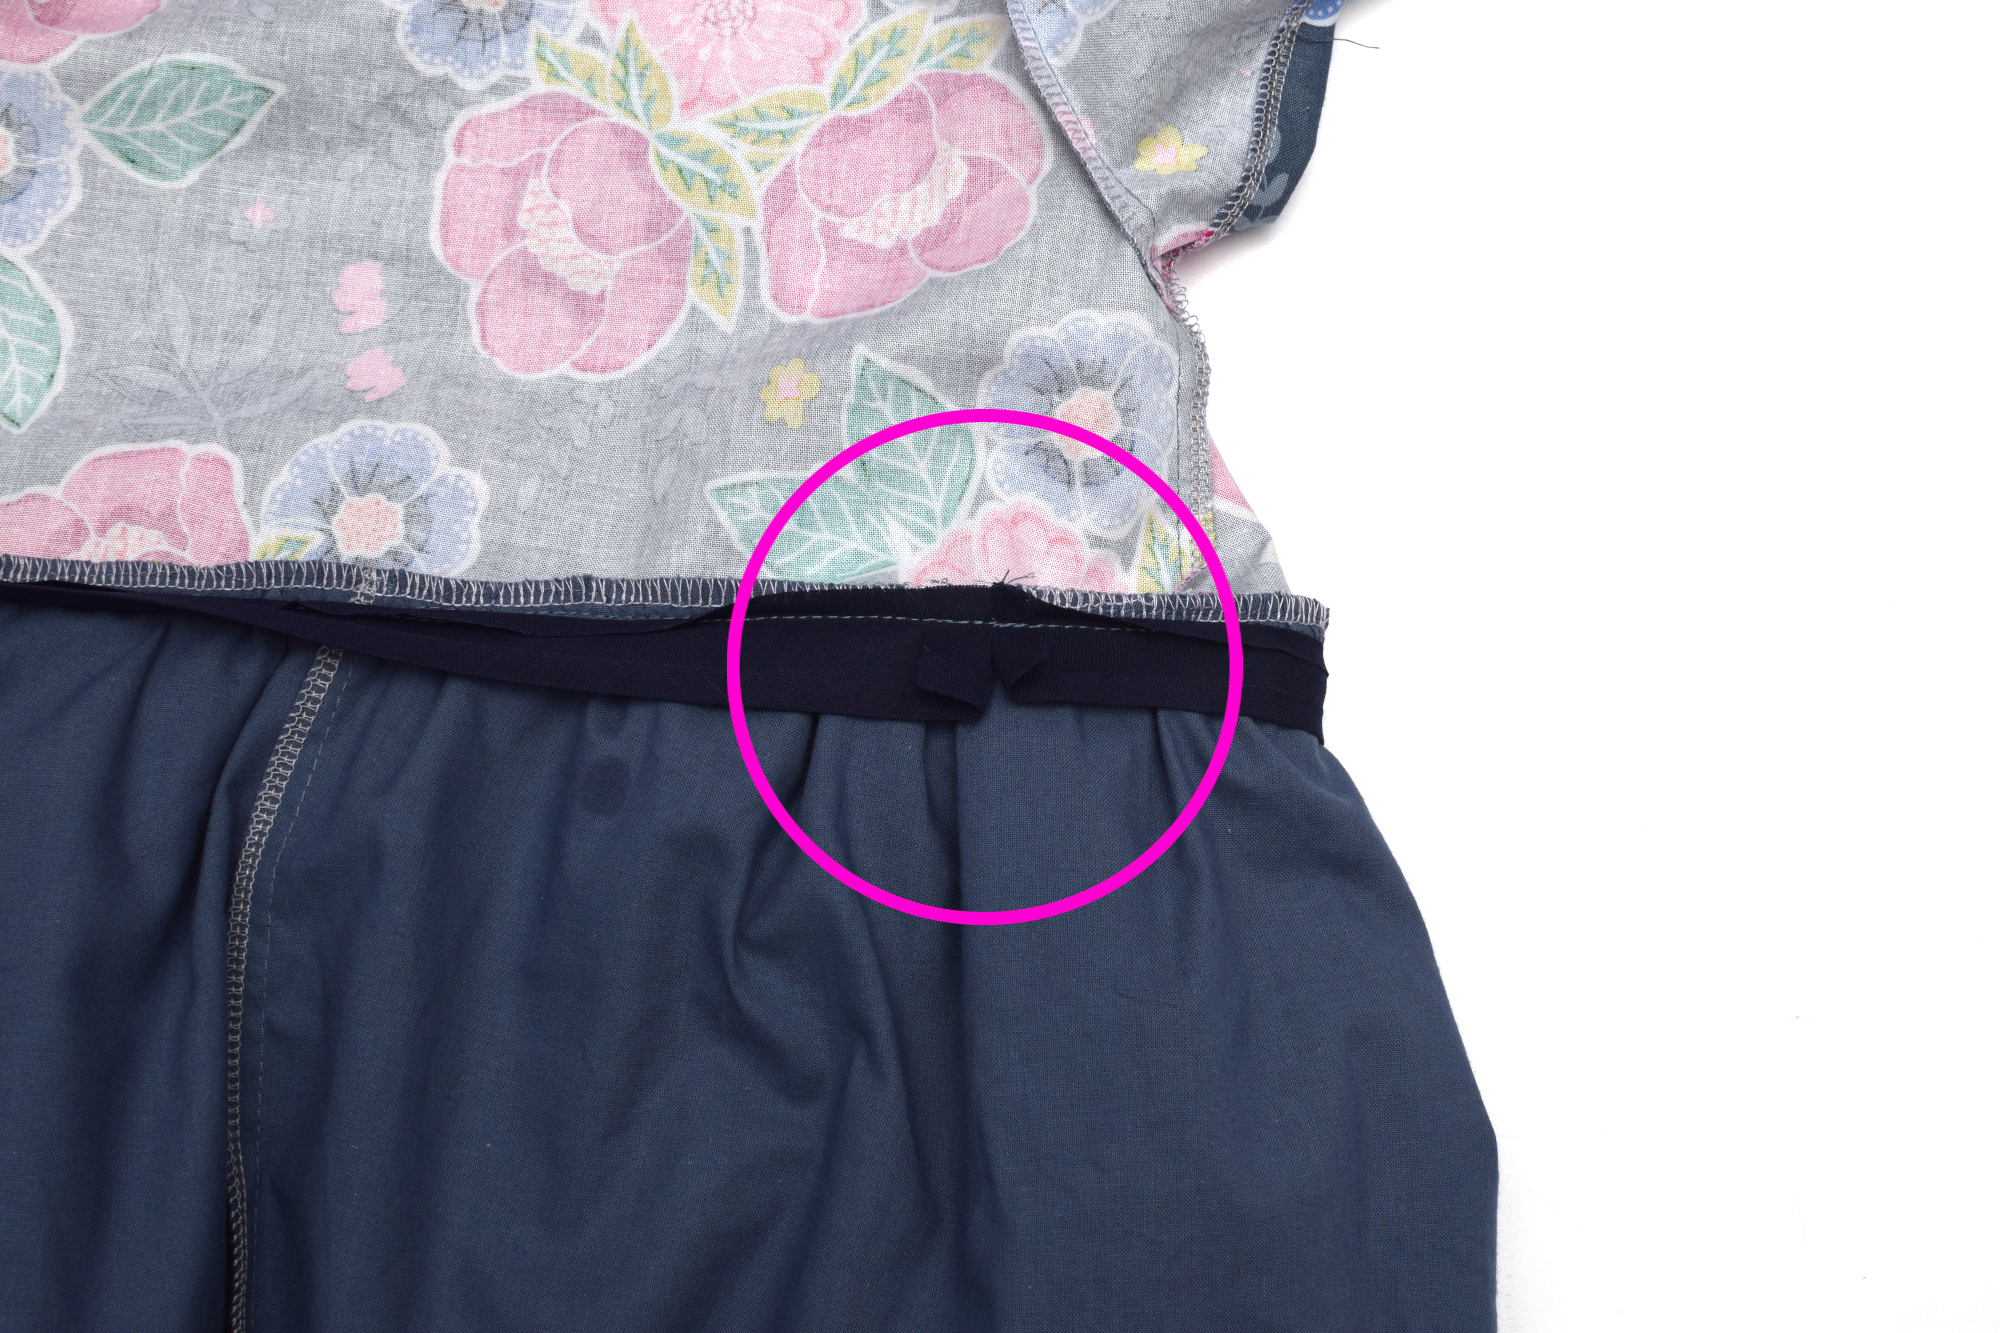
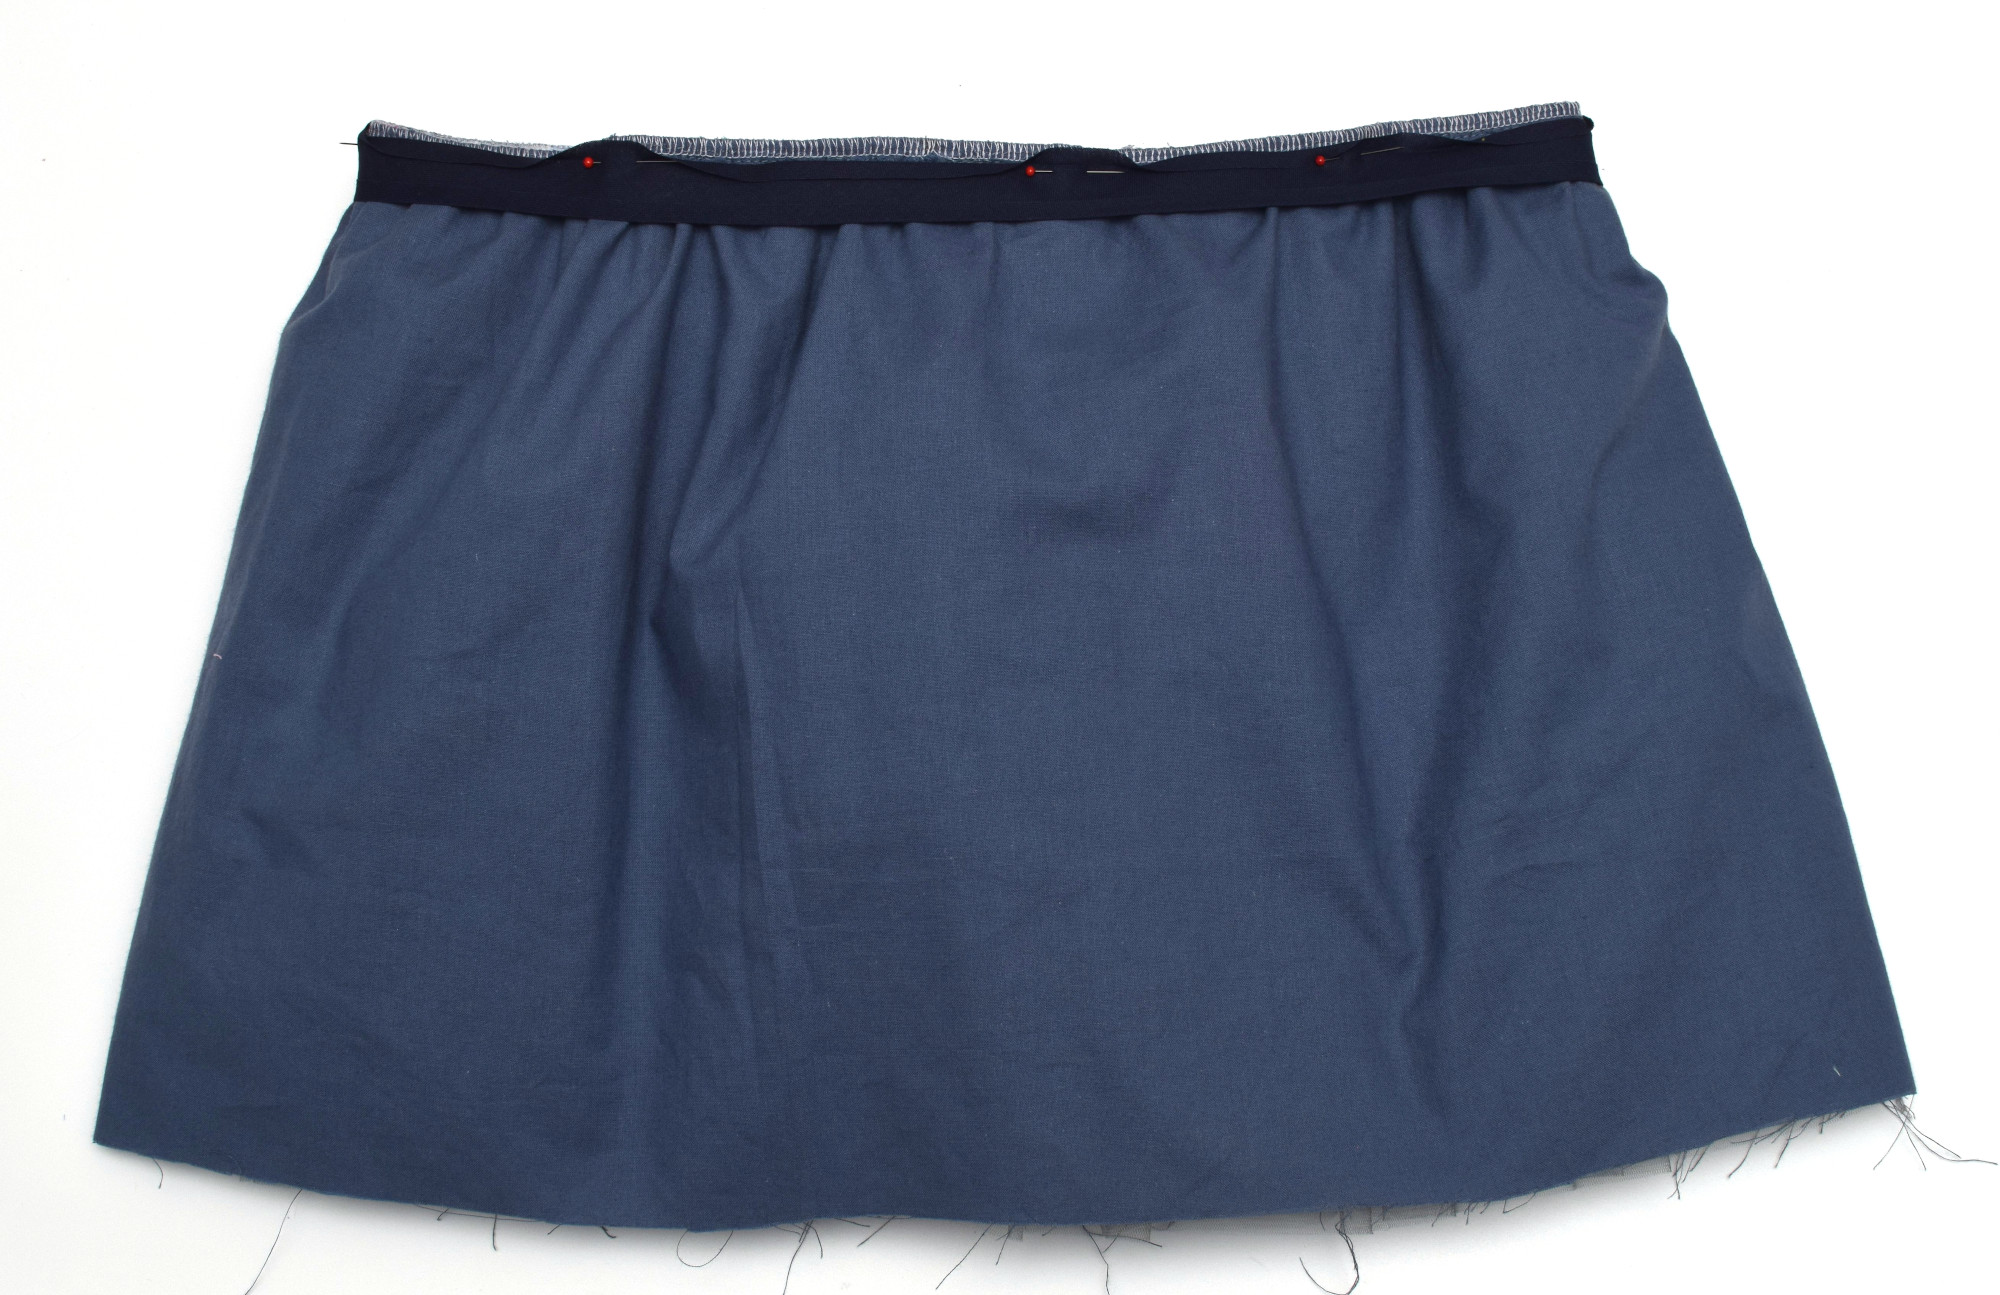
Next, fold the bias tape down toward the bodice and topstitch the other edge to the inside of the dress, smoothing it as you go. You’ll now have a clean, tidy casing all the way around the waistline.

Step 11: Cut and insert the elastic
Now it’s time to add the elastic – this is what gives your tulle princess dress for girls its shape and helps it stay put during all those royal twirls and cartwheels.
Cut the following pieces of 1/4 inch wide elastic:
- Neckline: around 18 inches – adjust based on your child’s head size
- Sleeves: about 7–7.5 inches each – make sure they’re snug but still comfy
- Waistline: measure your child’s waist and add 2 to 3 inches – I used 22 inches

Use a safety pin to thread the elastic through each casing – neckline, sleeves, and waistline. Once it’s all the way through, overlap the ends and sew them together securely. Then close up the small opening in each casing with a few extra stitches.
You’re so close now – your dress is basically done!
Step 12: Hem the skirt lining
To finish things off, hem the cotton skirt lining so it looks nice and professional. Start by serging or zigzag stitching along the raw edge to prevent fraying. Then fold the hem up by about 1/2 inch to the wrong side and stitch all the way around.
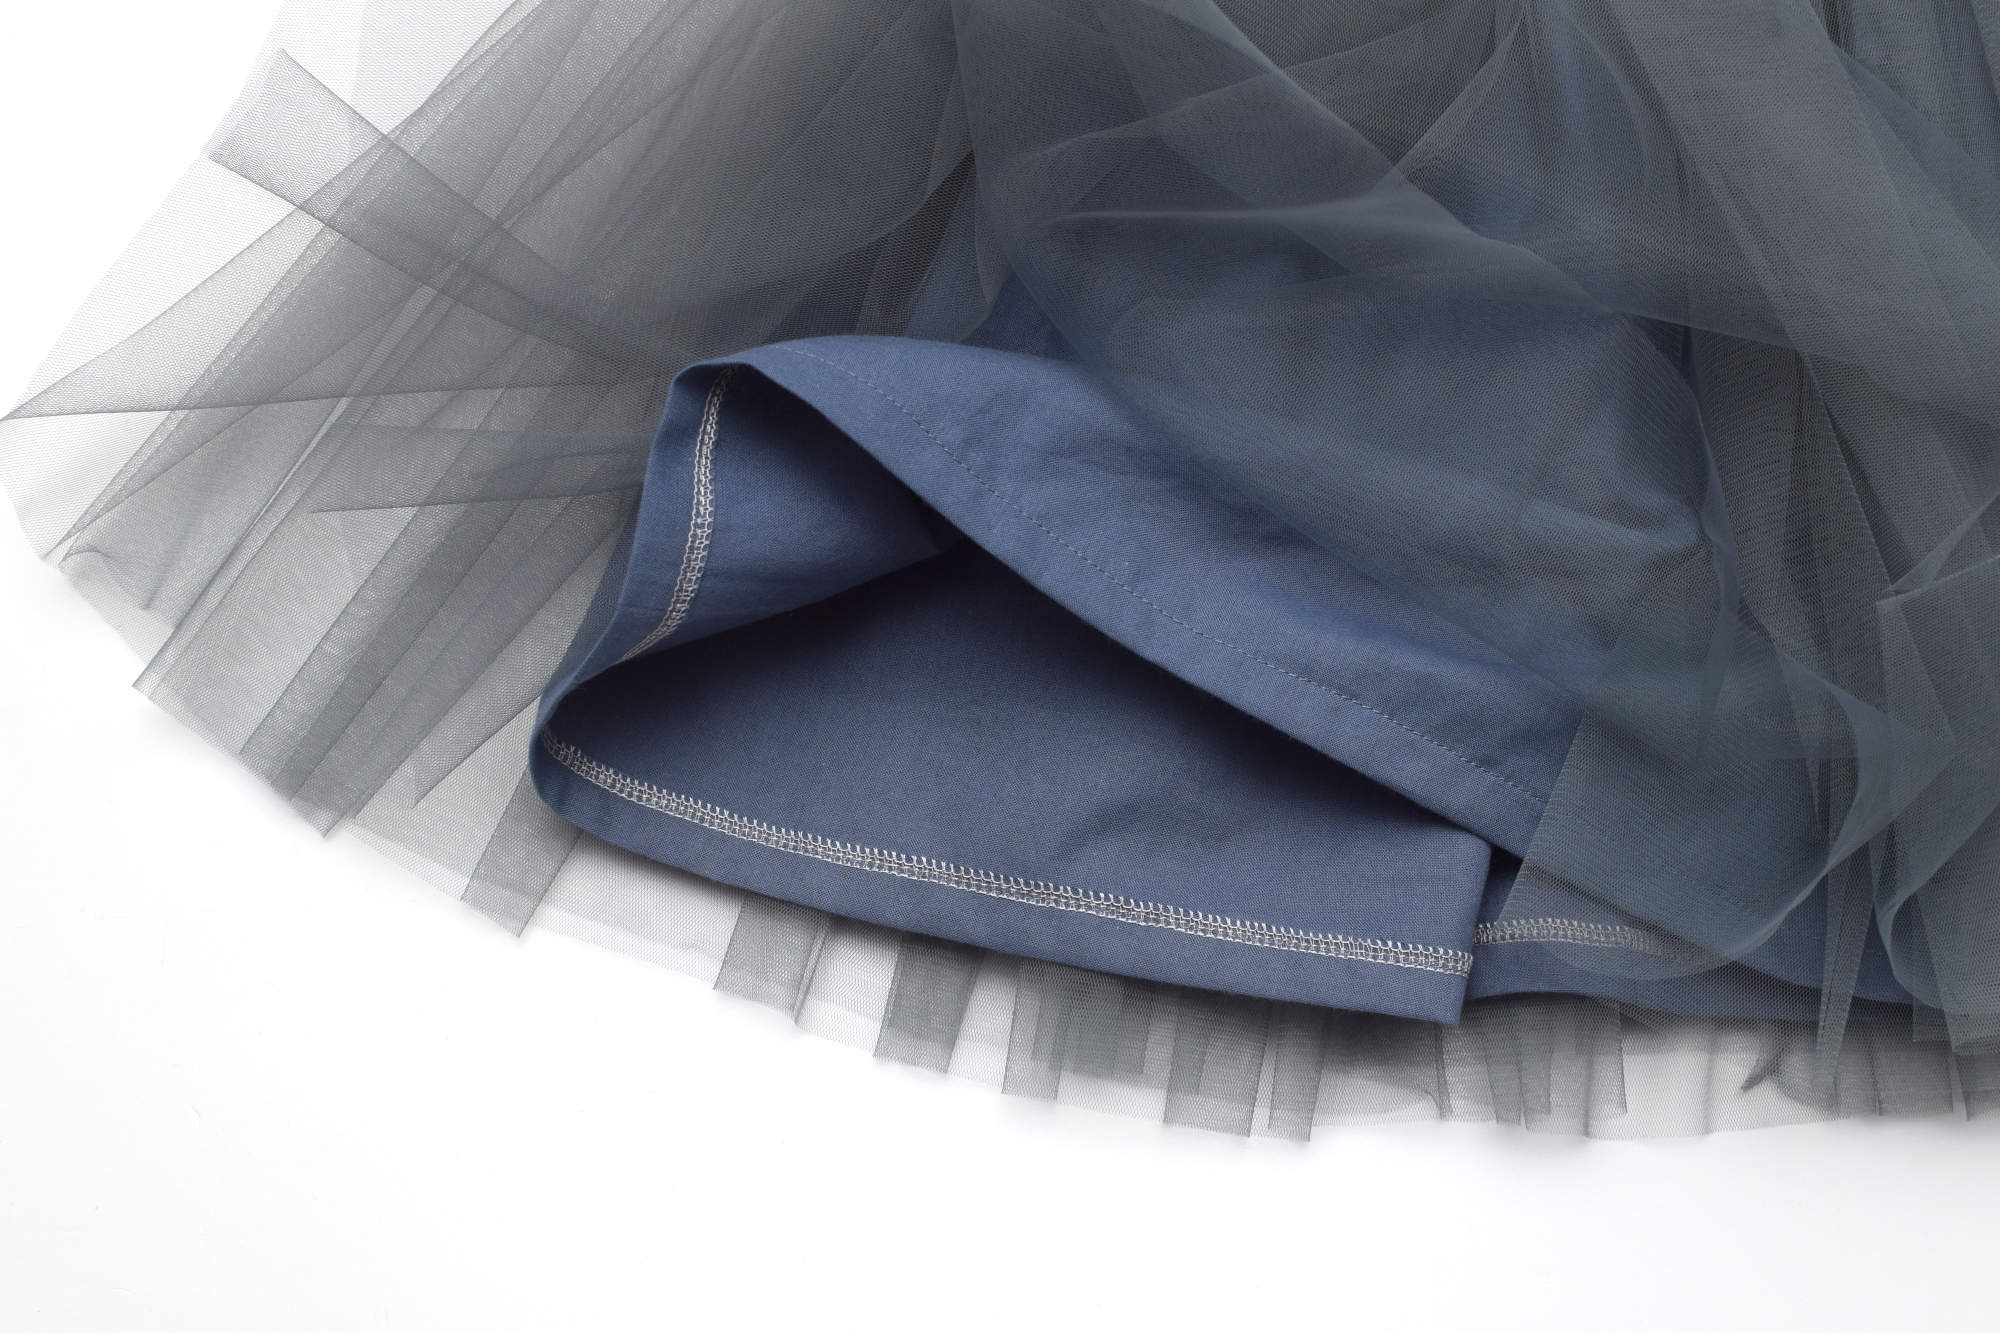
Give the hem a quick press with your iron to make it nice and crisp. And that’s it – done and dusted!
You did it!
Your DIY girls’ princess tulle dress is now ready to wear! Whether she’s headed to a party, dressing up like Belle or Elsa, or just playing pretend at home, your little one is going to love it – and you’ll feel amazing knowing you made it with your own hands.
Did you find this step-by-step tutorial helpful? I’d love to know what you think – and if you give this free girls tulle dress pattern a try, don’t forget to tag me or send pics. I’d be so happy to see your magical creations!
Post Scriptum
This post was originally published on March 2, 2020, in a slightly different form.
I decided to remake the whole tutorial and sew a new girls’ tulle dress since I was not happy with the quality of the step-by-step photos and the bias tape I used for that dress – it was kinda ugly and clashing, and it bothered me, no matter how hard I tried to ignore it.
It was really cute , but I felt this free princess dress pattern deserved a better sewing tutorial. I hope I achieved it!

Let’s keep in touch! You can find me on Facebook, Instagram, and Pinterest.


hello how can i get the pattern i already subsribe
Hi Violet
Can you please re send the pdf for this free pattern. I joined your newsletter yesterday and the pdf couldn’t download.
Regards
Erica Phillips
I have tried to download the pattern, but it is not downloading. How can I get this pattern,
Kind regards,
Marie
Hi, I have just downloaded the pattern as a PDF and want to know what size paper it should be printed on to get the right size pattern for size 3, normally when I print them from online they have a 1inch square to make sure it is printing the right size. Thanks.
Hi,
Sorry for that! Here’s my typical process: I draw a pattern on an A4 sheet, scan it, and then upload it as a PDF. So, to answer your question, you should print the pattern on an A4 sheet, at the default size.
All the best,
I seem to be unable to download pdf pattern. I think all the ads are confusing me. Can you send a direct link for me to download? I have my fabric and am dying to make the dress!
Hi Leslie,
So sorry for the late reply! I forgot to log in and check the comment section, life has been hectic lately. To get the pattern, you first have to subscribe – start by entering your email address in the pink box (it is right after the “Sewing supplies – girls tulle dress pattern” section). Next, check your email to confirm your subscription (it’s a double opt-in). Don’t forget to also check your spam folder, just in case. Once you’ve confirmed your subscription, the pattern will be sent to your inbox right away.
All the best,
I was not able to get PDF!
Any suggestions?
Hi, I am cutting out the skirt and tulle, is it inches? 118 inches seems like a lot so not sure if I am cutting right! Thanks
Hey Kayla,
Yes, it’s 118 inches long, but just a heads up, I’m using this super soft tulle fabric. There’s another kind of tulle that’s a bit stiffer and can be a little scratchy, but with that one, you won’t need as much yardage.
Hi Violet,
does the pattern include seam allowances?
Thank you ?
Hi Zuzana,
Yes, my patterns always have seam allowance included – I think it’s faster to cut the fabric that way. I will add the information in the post, thank you for bringing this to my attention.
What size is pattern for girls. I would need to make in size 6 (if dress bought at store). Can you assist. Thanks you.
Hi Pat,
The dress pattern here is for girls aged 3, my daughter was about 39 inches tall when these photos were taken. If you need to make the dress in size 6, the safest bet is to find a free peasant top pattern in that size, shorten it at the waistline, (or draft your own pattern) and then attach a tulle skirt. It would be helpful if you already had a dress that fits your daughter/niece, so you would know exactly how long to make the skirt, and where the waistline is. My patterns don’t come in a variety of sizes because I don’t know how to grade them, I can only draft them for me and my kids. I will keep my fingers crossed for you!
Hi, I’m attempting to make this dress and wondering what the part 2 of the top pattern is for? I’m a little confused. And could you explain the fold? Thank you!
Hi Chloe,
The first two pages will become one pattern piece, you have to join them – the writing should be in the same direction. That is the bodice of the dress, and it was too big to fit on a single sheet.
Then, you will have 1 pattern piece for the bodice, and 1 pattern piece for the sleeves.
Each of these pattern pieces will be used twice, each time with the fabric on the fold – you’ll need 2 bodice pieces (the front & the back are the same), and 2 sleeve pieces. (as shown in this photo https://static.icansewthis.com/2020/10/free-princess-dress-pattern-tutorial-3.jpg)
I hope that helps 🙂 happy sewing!
Hi Violet – I think this tulle dress is absollutely too cute. Thank you so much for the pattern, for the many patterns I have used over the years.
My name is Jewel Melia and I live in South Africa
Hi I am searching for a pattern template for an Elsa dress to make for my granddaughter 6 yrs old. It is a surprise for her birthday so I dont want to measure her. If you have every made one for your daughters I would love to be able to copy it with chest and height measurements. I dont want to cut the fabric and it go to waste if it all goes wrong as I’m not sure what fabric to use for the bodice, if its lining and ney over. Please can you help I would appreciate it. Thank You.Ann
Hi Ann,
I think an Elsa dress is a wonderful idea! Unfortunately, I don’t have a template for 6 yo, but I would recommend this site – https://www.scatteredthoughtsofacraftymom.com/howtomakeapeasantdress/ – there’s a free pdf dress pattern and tutorial, available in size 12 months to size 14. Just shorten the dress and attach a tulle skirt, as I did here. It would be better if you already had a dress of your granddaughter’s, just so you know where the waistline is and how long to make the finished dress. Besides that, there’s no need for other measurements. I’d use a plain blue cotton fabric for the bodice, but that’s up to you. Good luck!
Thank you so much for sharing your ideas on these darling clothes you have made. Can you tell me the measurements of the little girl you used this pattern for so that I’ll have an idea if it will fit my granddaughter?
Hi Debbie,
I’m so glad you consider making this dress! Thank you!
To answer your question, when I made this dress my daughter was 35 inches tall, now is 36 inches tall, and the dress still fits her very well – in fact, I expect her to wear it the next year, too. Her weight is average, I guess, for her age.
As for the (hand-drafted) pattern, the dress’ circumference at the waist (where the cotton top ends and the tulle skirt begins) is around 31 inches – while the average waist size for 2/3 years-old kids is 21 inches, hence the need for the elastic. I hope this helps!
Thank you for this great idea! I’ll be recommending it in my blog and when I add to some of the facebook groups I use. Just one minor little detail: on page 3 of your pattern, the pattern piece has been flipped horizontally, which might confuse less experienced sewists. If it’s not too difficult to correct the pattern, it would be a good idea to do it. Otherwise, what I’ve done, is to cut the bit on page 3 out before sticking the pages together, and flipped it over, then stuck it on to page 2. Now to see what I’ve got in my stash!
Wow! Thank you so much, Sheila!
And yes, I will correct the pattern right away. My bad, I scanned the PDF late at night and I forgot to check it out.
I love discovering new blogs and you’ve made so many pretty dresses. Heading off to your blog right now! <3