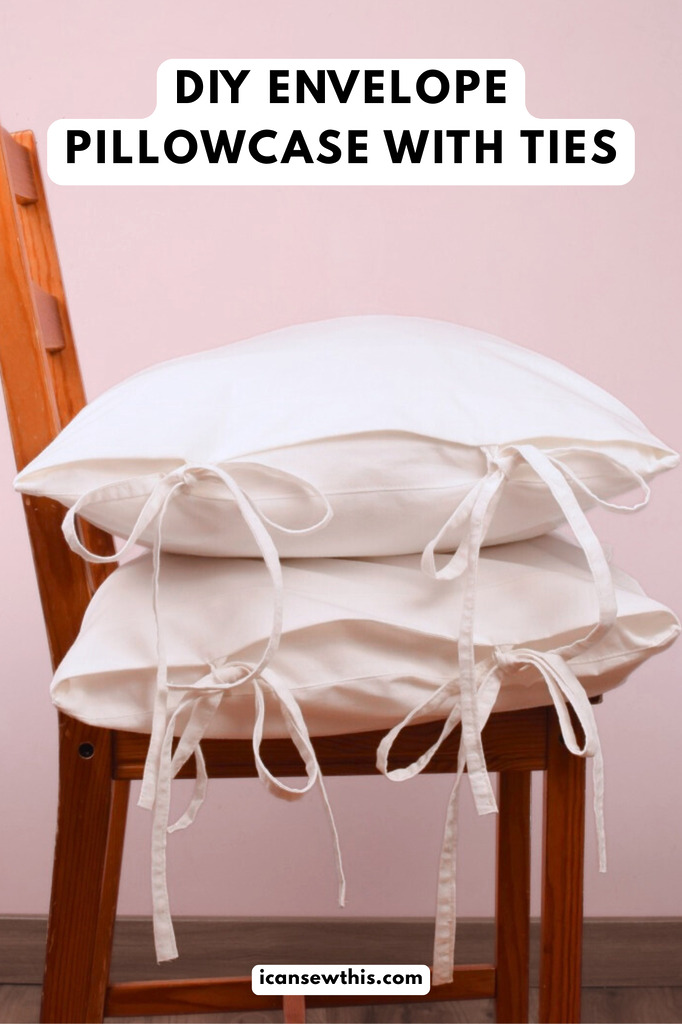
Want to give your bedroom or living room a fresh, handmade touch? Let me show you how to sew an envelope pillowcase with ties – it’s simple, fun, and perfect for beginners! This DIY pillow cover is a lovely way to add charm to your space, and the best part? You don’t need a serger – just a regular sewing machine and about 1 yard of fabric.
I used some plain white cotton I already had in my stash, but you can totally customize these to match your style. Think soft linen, cozy flannel, or even a linen-cotton blend for that dreamy, slightly rustic look. Whatever you choose, your DIY pillowcase with ties will look amazing.
I spent some time figuring out the easiest way to make this, because let’s be honest – nobody wants to spend hours on something that’s supposed to be quick and beginner-friendly. This method uses straight lines only (yes, really!), and it’s all about clean finishes and a cute tied closure that makes your pillow cover stand out.
Why You’ll Love Making a DIY Envelope Pillowcase with Ties
These handmade envelope-style pillowcases with ties are great if you’re new to sewing and want a project that feels doable but still gives you something beautiful in the end. They’re also a lovely way to get comfortable sewing French seams, which sound fancy but are honestly super easy – and they’ll make your pillowcase look neat and professional, inside and out.
Beginner tip: Take your time, read through the steps before starting, and don’t skip the photos! Your first pillowcase might take a little longer, but once you get the hang of it, you’ll be whipping up custom pillow covers for everyone in the house.
These tied envelope pillowcases make great handmade gifts, too – think Mother’s Day, Christmas, housewarming presents, or even a birthday surprise. They’re simple to sew, practical, and super stylish. You can go neutral and minimalist or pick a fun fabric print for a pop of color.
And yes, I’m already planning to sew more – one for each of the kids, a couple for our guest room, maybe even a seasonal version for the holidays!
So if you’ve been looking for an easy pillowcase sewing pattern, a DIY envelope pillow cover with ties, or just a relaxing weekend project, give this one a try. It’s satisfying, beginner-friendly, and totally customizable.
Also, if you’re short on time, check out my 10-minute envelope pillow cover tutorial – it’s a quick win and a great place to start!
DIY Envelope Pillowcase with Ties – How It’s Made
Don’t worry, this cute pillowcase with envelope closure and ties only looks fancy – it’s actually super easy to make! You’ll just need two main fabric pieces: one larger rectangle (which includes the inner flap) and one smaller rectangle. Both pieces will have two fabric ties attached. That’s it!
Now, technically, each of those rectangles is made from two smaller pieces of fabric sewn together – but I promise it’s not complicated. I’ll walk you through all the steps and explain how to put everything together, step by step.
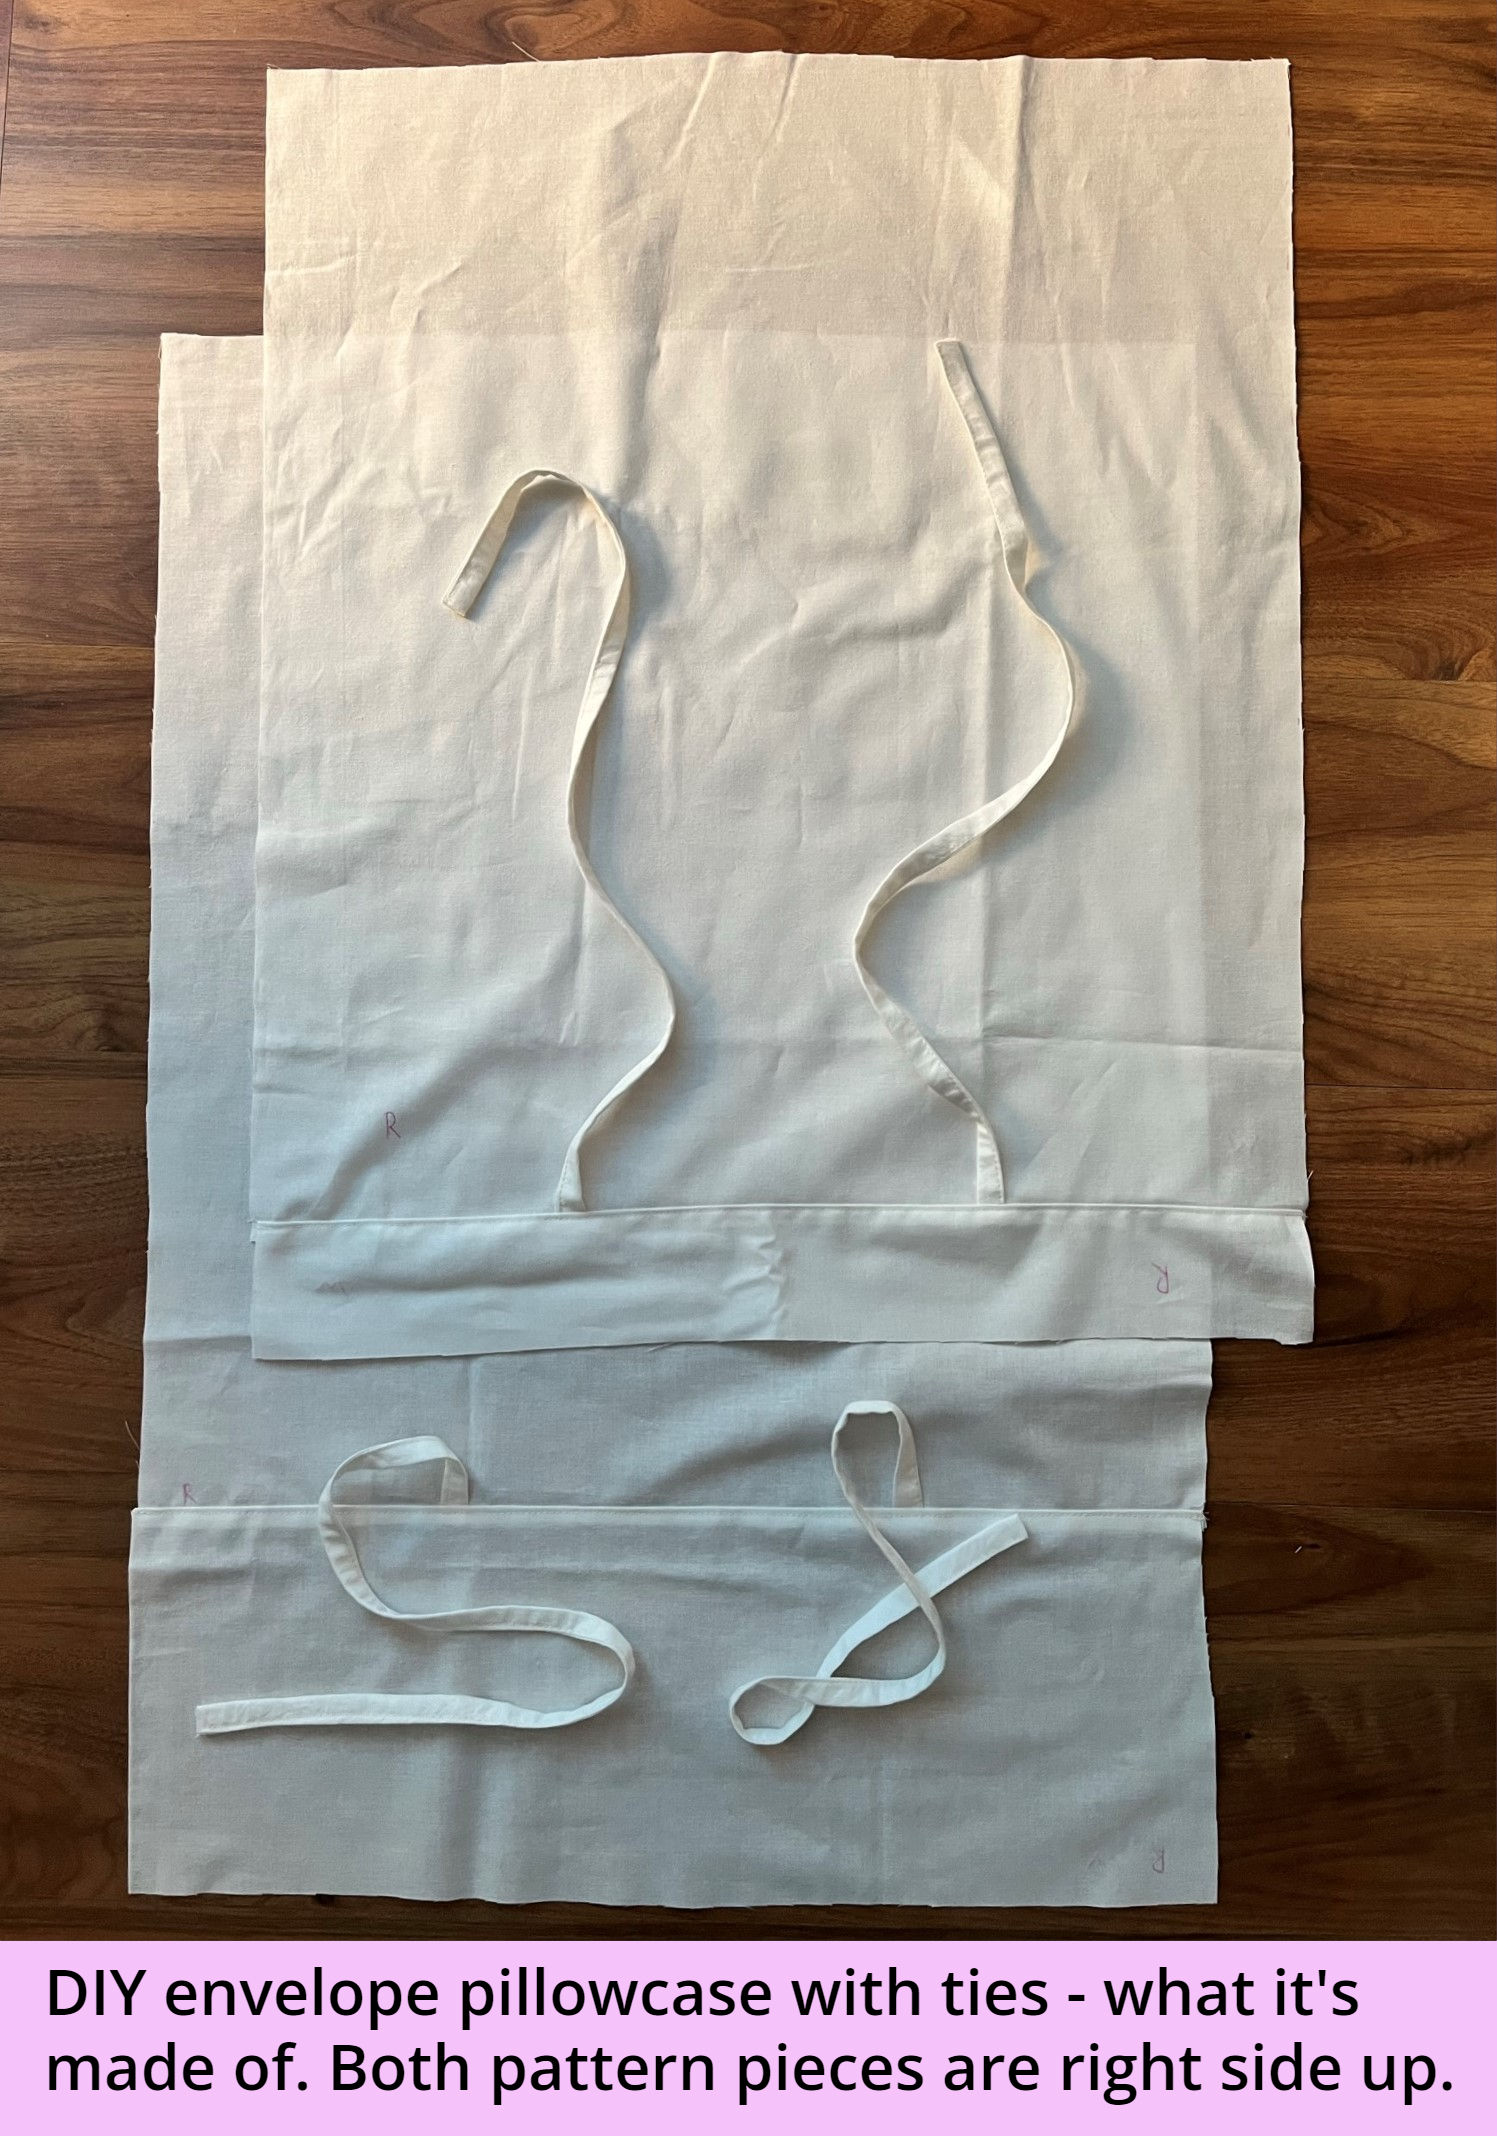
The longer piece forms the back of the pillow and includes the built-in envelope-style flap – that’s the part that folds over and neatly hides the pillow insert inside. No buttons, no zippers – just a clean finish and a sweet tie closure that keeps everything in place.
Once you’ve made one, you’ll see how easy it is to adjust the size and make a bunch of these for different rooms or gift occasions. Whether you’re searching for an easy envelope pillow cover pattern with ties or want to try a simple tutorial for sewing pillowcases with flaps, this project totally delivers!
You might also like these beginner-friendly sewing tutorials:
- Want to level up your nursery sewing? Check out my step-by-step guide on how to sew the perfect crib sheet with French seams – no serger needed, and it fits like a dream!
- If you’re looking for a quick project, try this reusable drawstring gift bag – it’s super cute, eco-friendly, and takes less than an hour to make. Plus, there’s a free pattern included!
- Feeling cozy and creative? Learn how to sew your own quilted oven mitts with this easy DIY pattern. It’s a great way to use up fabric scraps and practice basic quilting – perfect for beginners!

DIY envelope pillow cover with ties – sewing supplies
- a pillow you want to cover-up
- cotton or linen fabric (how much you need will depend on the size of your pillow)
- sewing machine
- sewing machine needle
- fabric scissors
- matching thread
- sewing pins
- iron
How to Make a DIY pillowcase with ties – Step-by-Step
If you’re new to sewing, don’t worry – this is a great project to start with! I’ll guide you through each step to help you make a beautiful envelope pillowcase with ties. It’s all straight-line sewing, no tricky techniques, and the result looks amazing. Let’s get into it!
Step 1 – Measure Your Pillow Insert
Pillow sizes can be all over the place, but making a custom envelope pillow cover with ties that fits just right is super easy. First things first – grab your pillow insert and a measuring tape.
Here’s what you need to do:
- Measure the width of your pillow insert from seam to seam – this is W.
- Then, measure the height of your pillow insert from seam to seam – this is H.
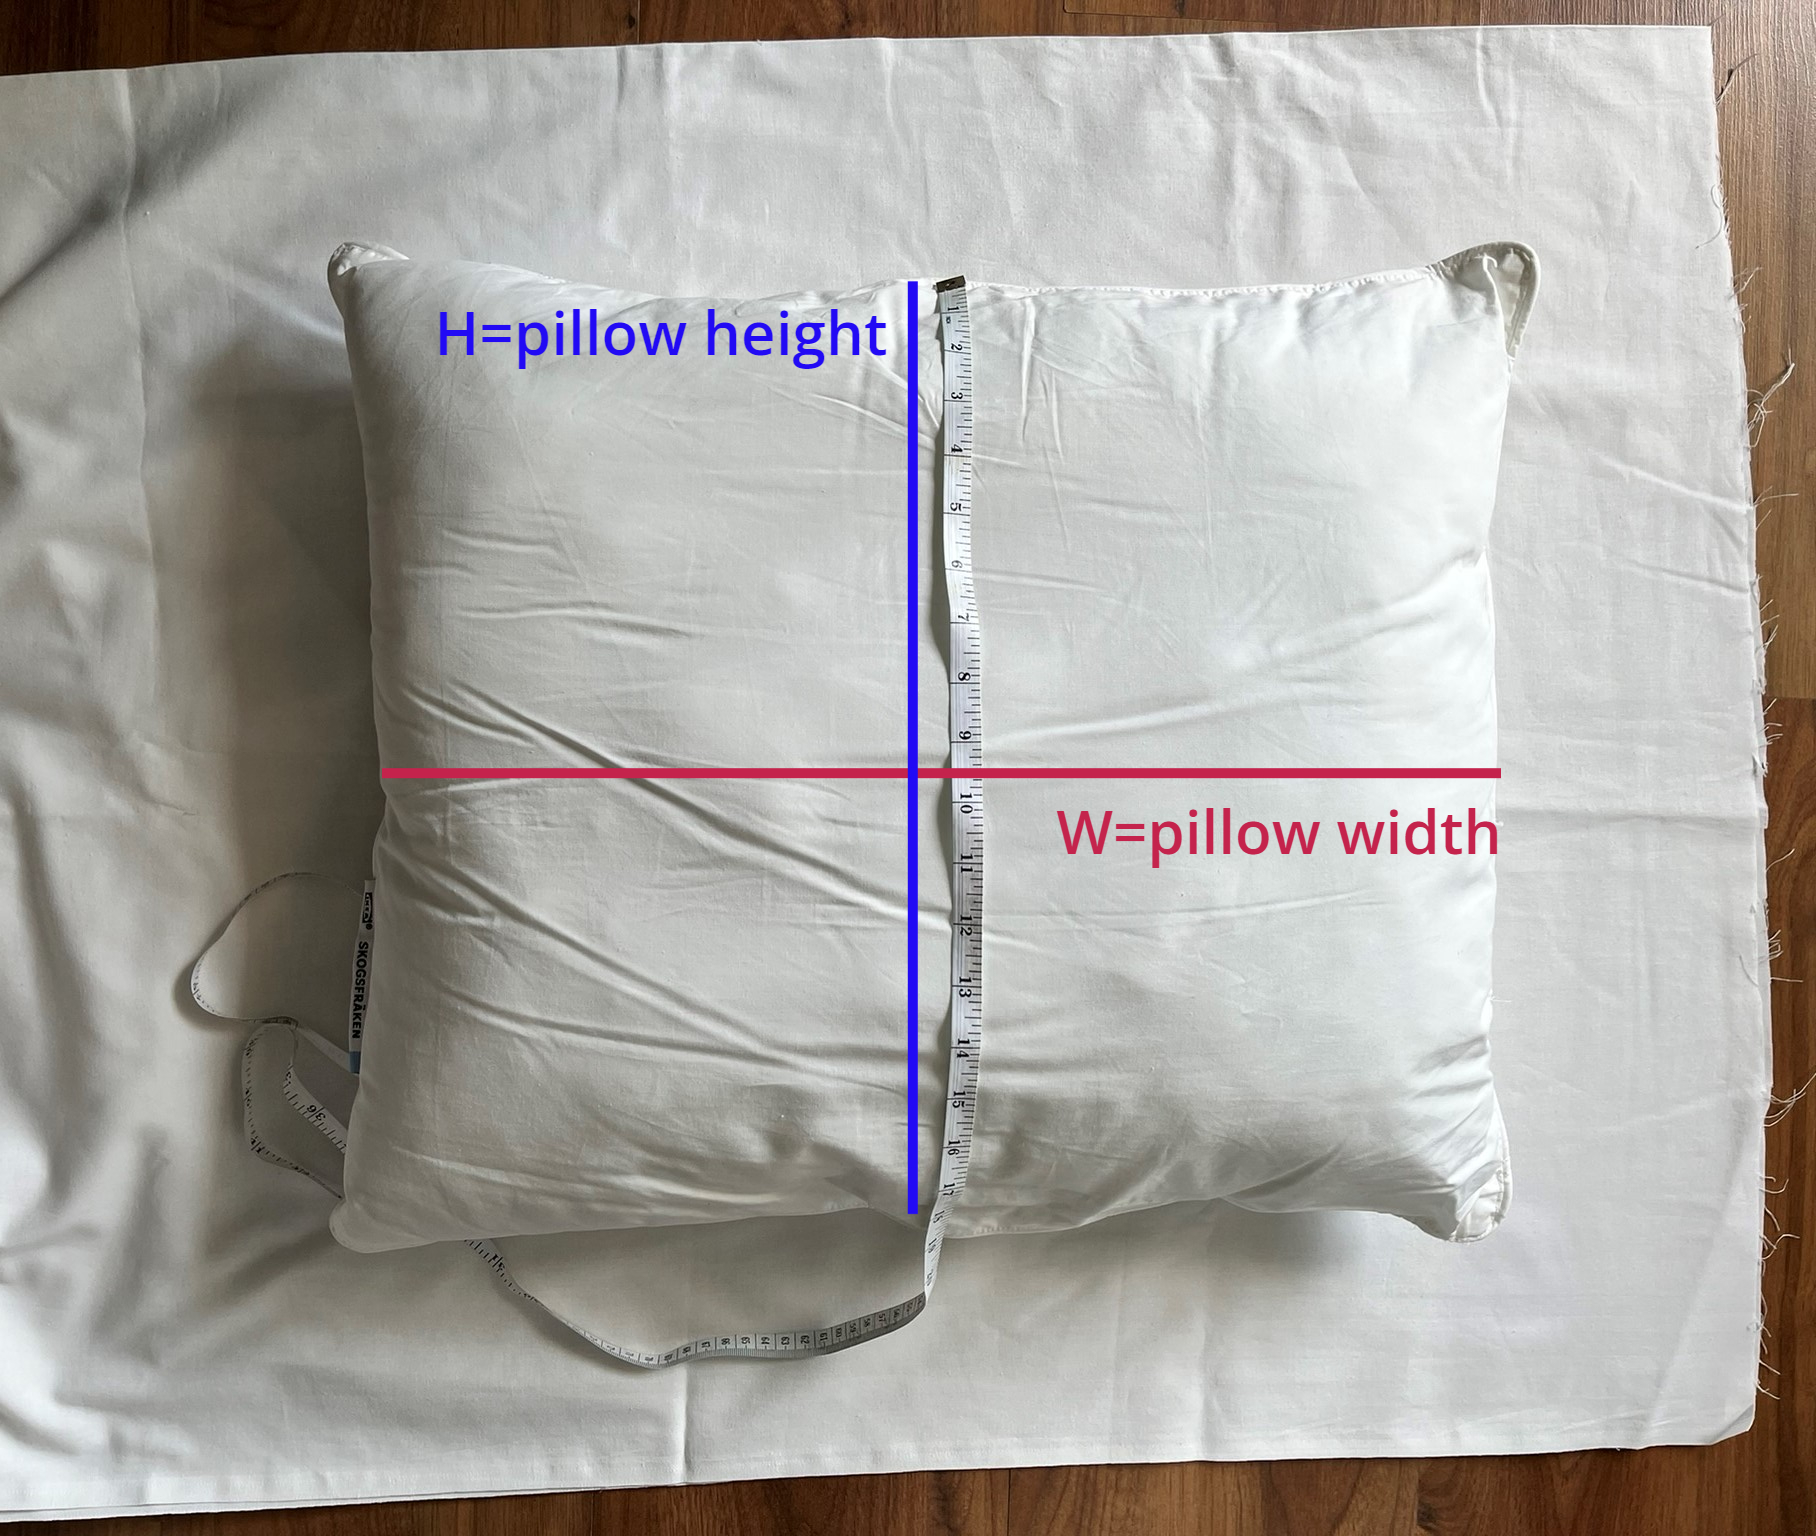
That’s it! Just two measurements – W and H – and you’re good to go. With these, you can sew your own pillowcases with ties that fit perfectly, whether it’s for your bed, couch, or a thoughtful handmade gift.
Step 2 – Cut the Fabric Pieces
Let’s talk cutting. I’m going to assume you’ve already prewashed your fabric (highly recommended to avoid shrinkage later), and now you’re ready to cut your pattern pieces.
Here’s the formula:
- Large piece: (includes the flap): cut (W + 8″) x (H + 1″)
- Smaller piece: cut (W + 4″) x (H + 1″)
This gives you a nice inner flap that’s around 6 to 7 inches long – just right to keep the pillow insert tucked in and out of sight.
Tip: For super clean cuts, use a rotary cutter and a cutting mat – it makes the job easier and more accurate!

Now for the ties:
Cut 4 rectangles, each 2″ wide and 10″ to 20″ long, depending on how dramatic you want them. For thinner ties, cut them 1.5″ wide. I went with standard ties – not too skinny, not too wide – and they turned out just right.
No time to prewash? No worries – just size everything up a bit:
- Cut the large piece to (W + 9″) x (H + 2″)
- Cut the smaller piece to (W + 5″) x (H + 2″)
This gives your fabric room to shrink after the first wash while still fitting your pillow insert snugly.
For example:
My pillow insert is 23” x 19”. I didn’t prewash my cotton, so I cut:
- One piece at 32” x 21”
- One piece at 28” x 21”
I also made longer ties and cut 4 strips at 2” x 21”.
Step 3 – Make the Ties
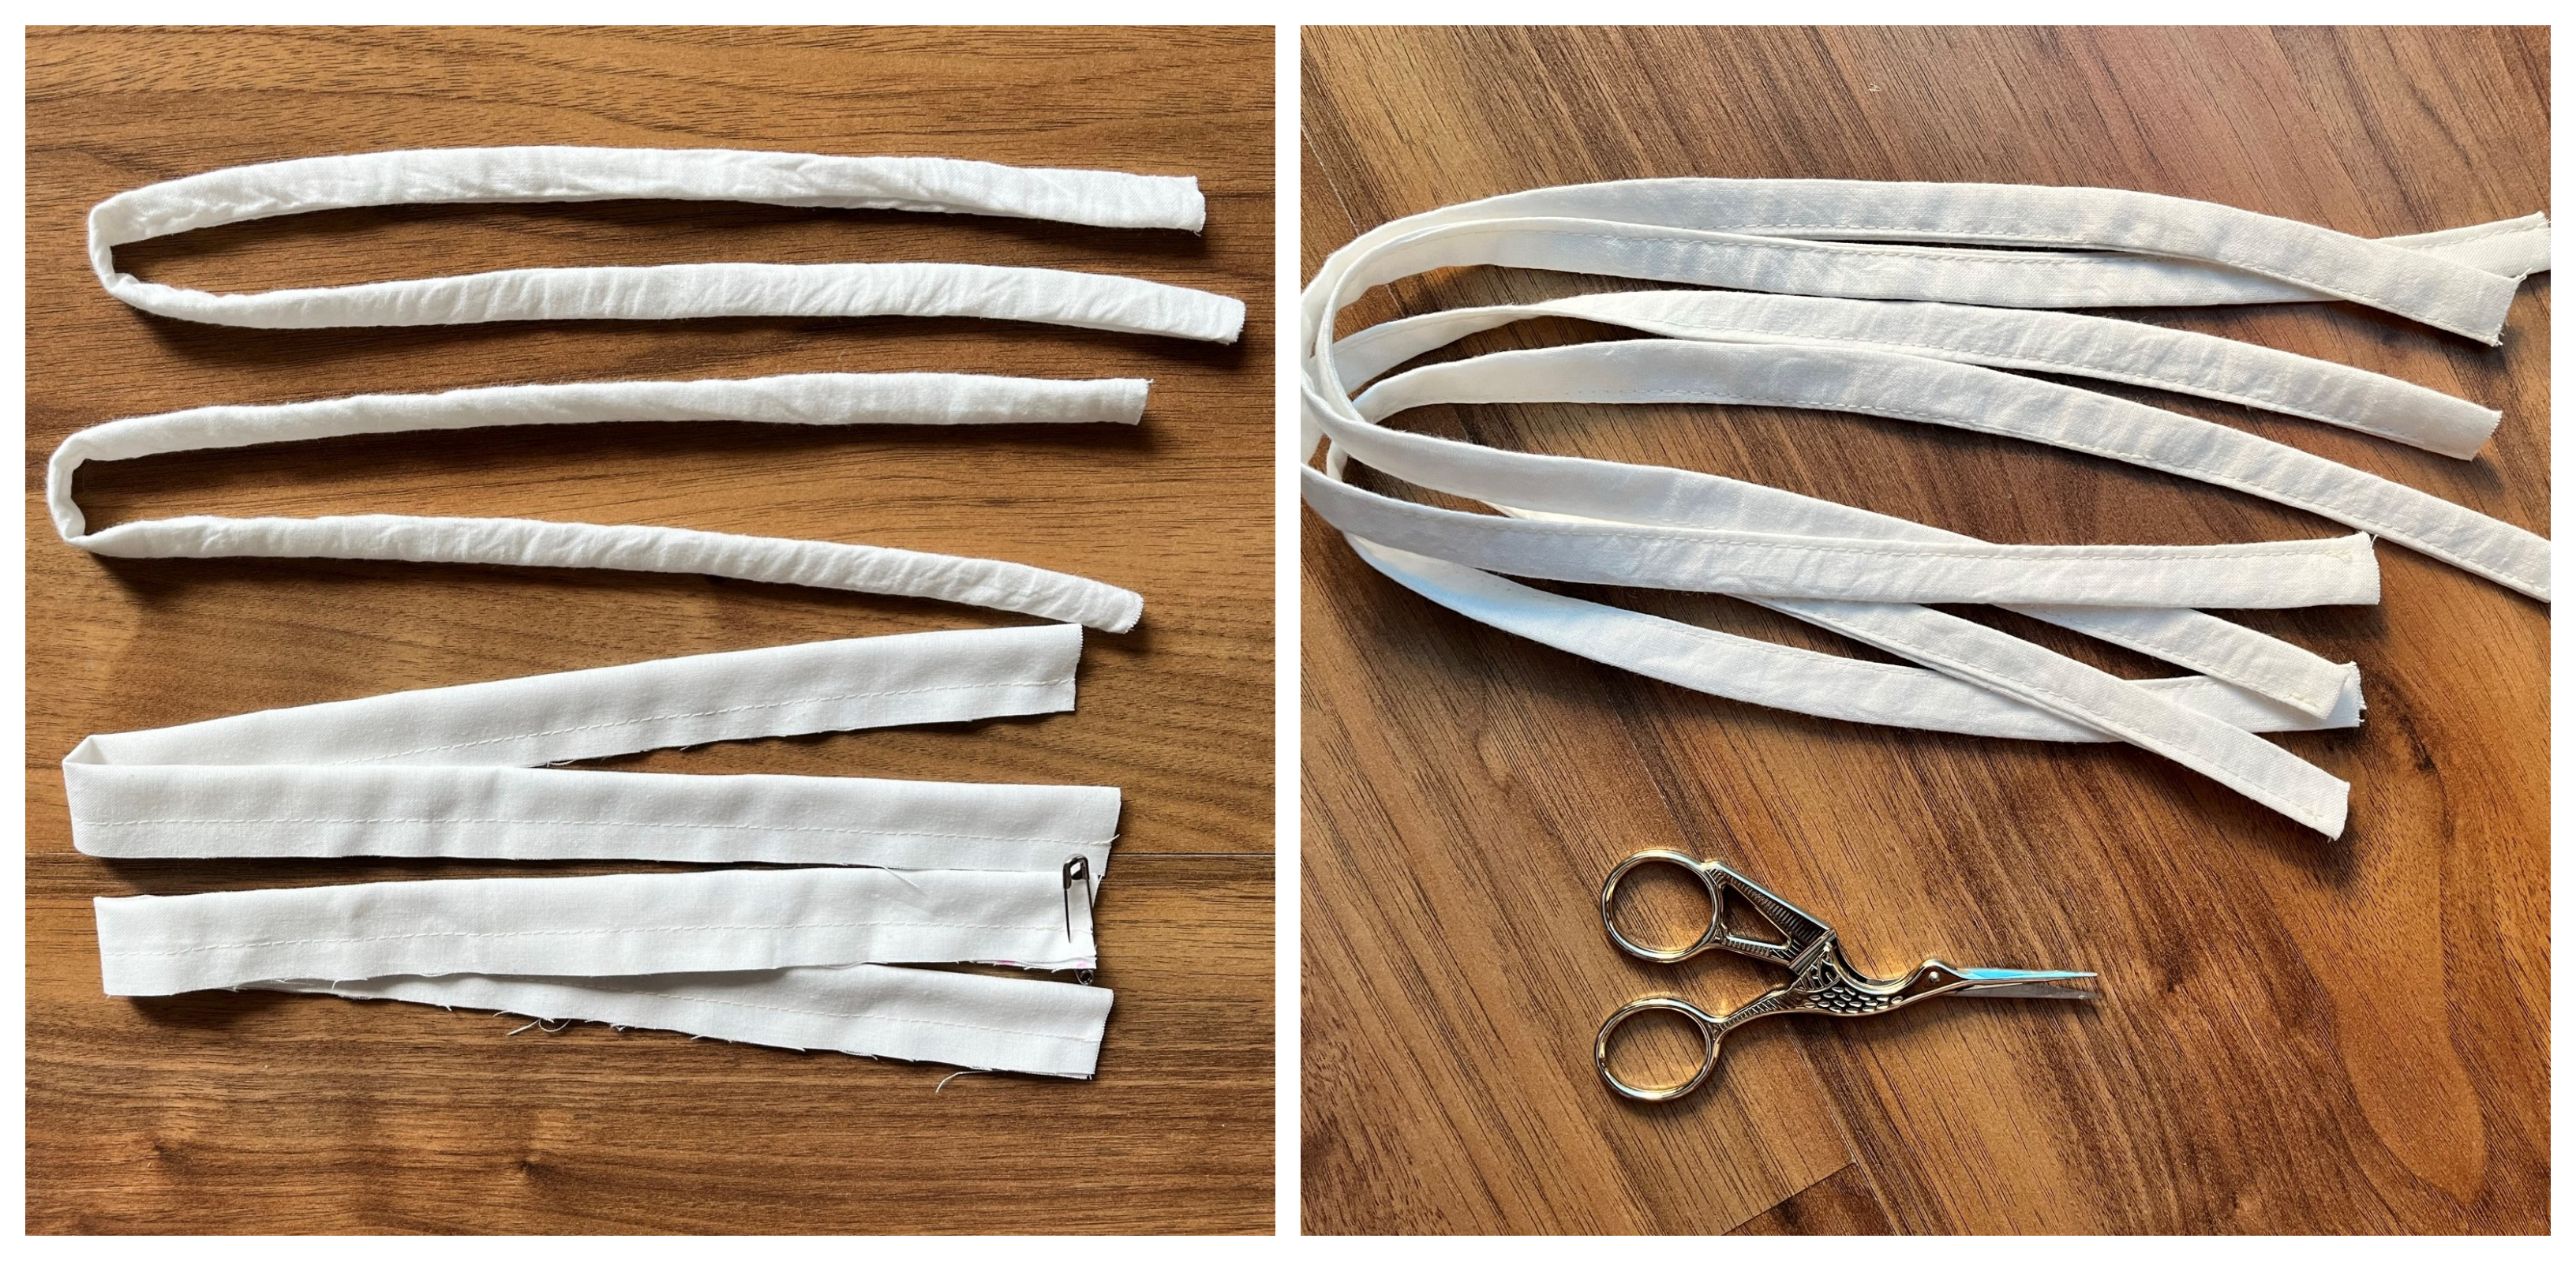
Let’s make those cute ties!
Take each fabric rectangle, fold it in half lengthwise (right sides together), and stitch along the long edge using a 3/8” seam allowance to make a tube.
You can leave both ends open if you like. To turn the tube right side out, grab a safety pin, chopstick, or pencil – whatever works – and push it through from one end to the other. You’ll get the hang of it quickly.
If you want one end closed, sew across the short edge before turning. Once all 4 ties are turned right side out, give them a good press with the iron, then topstitch around the edges to give them a nice finished look.
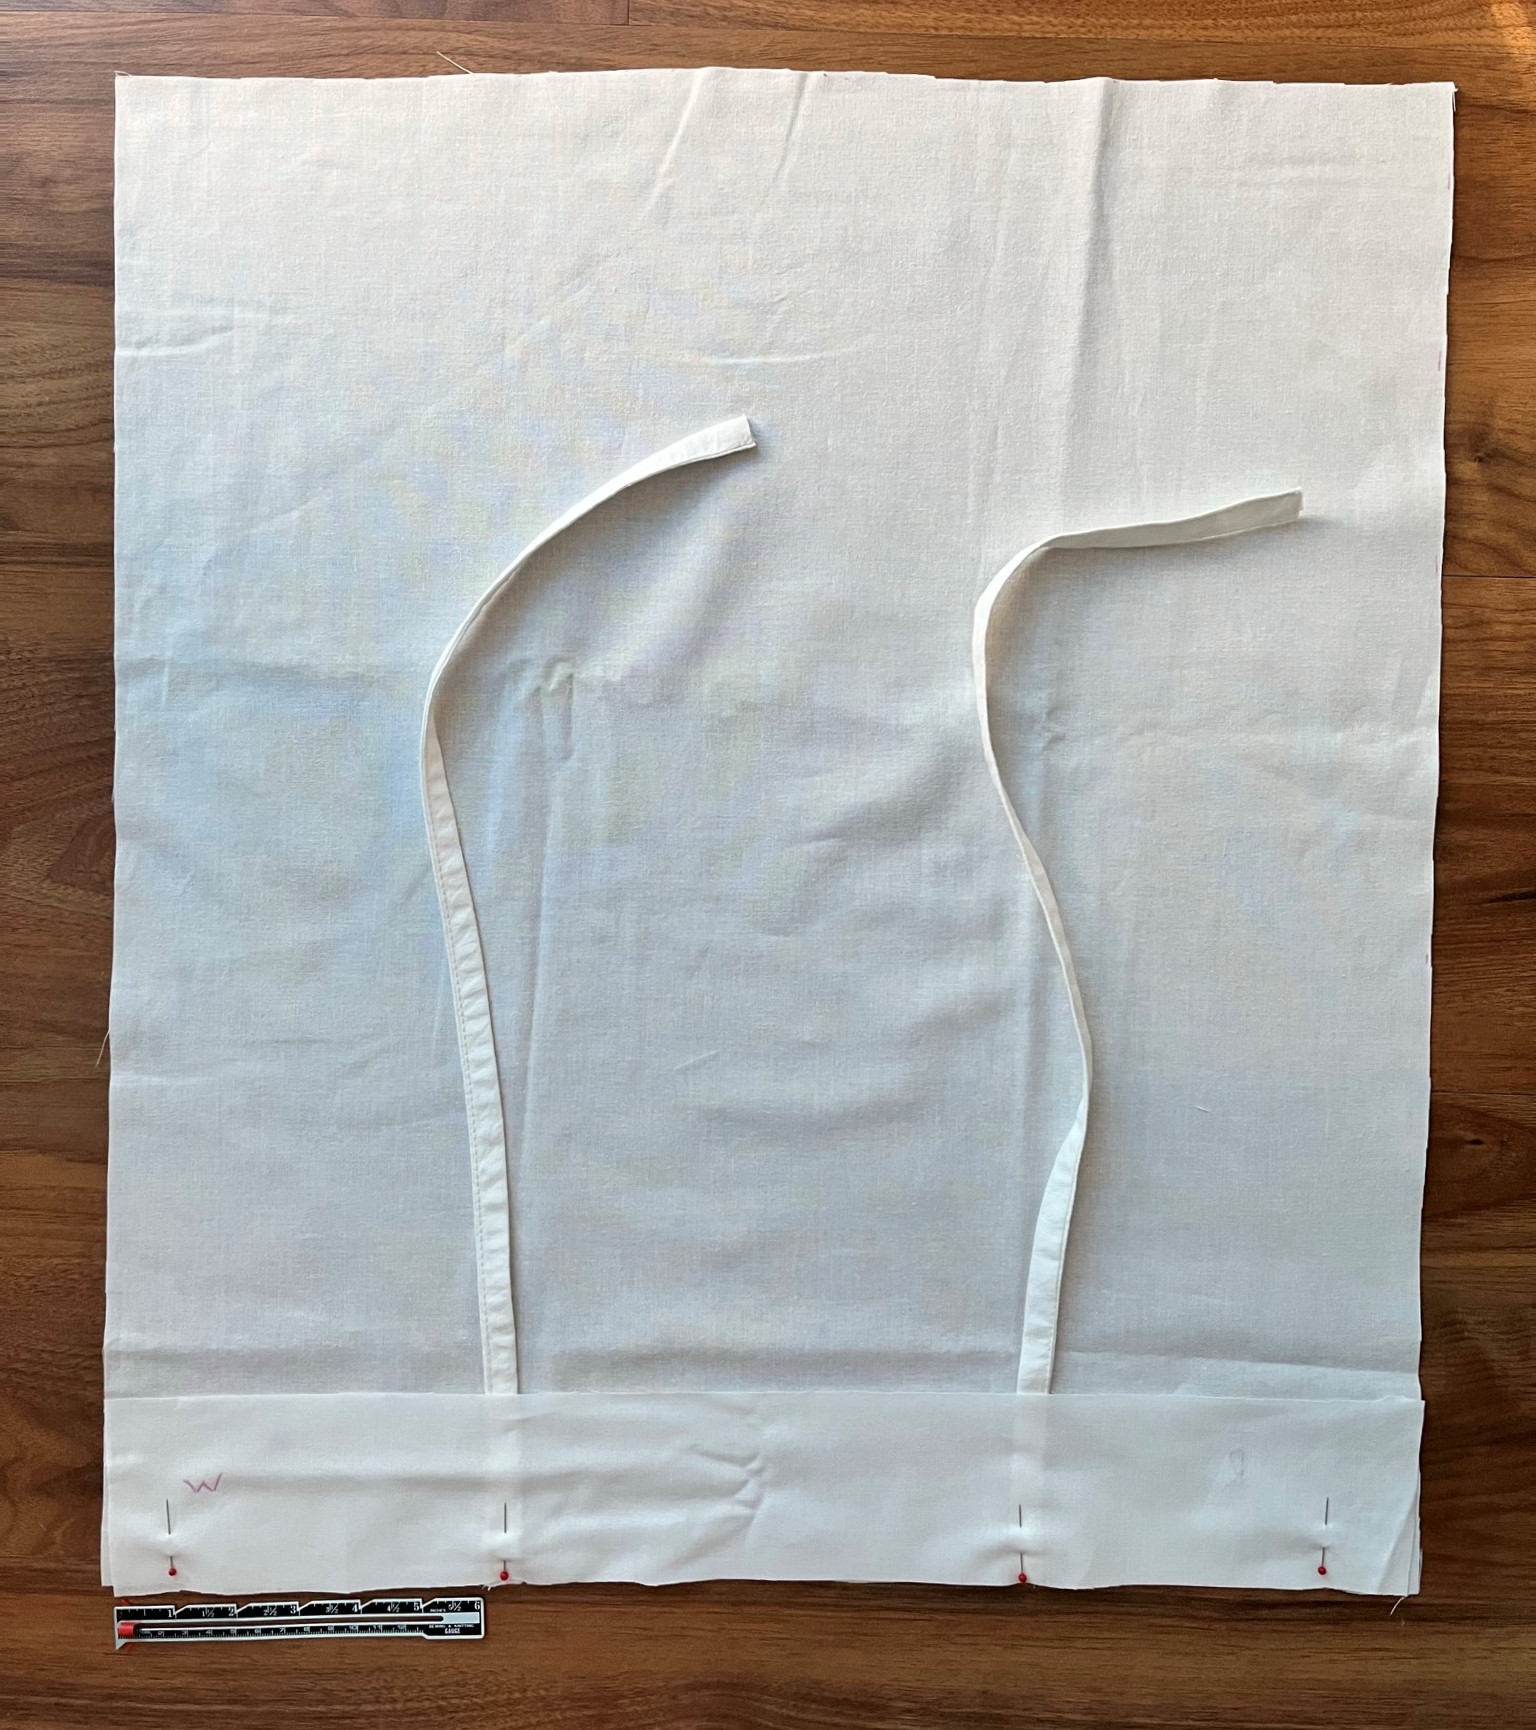
Step 4 – Prep the Large Fabric Pieces
Now it’s time to prep your main pieces.
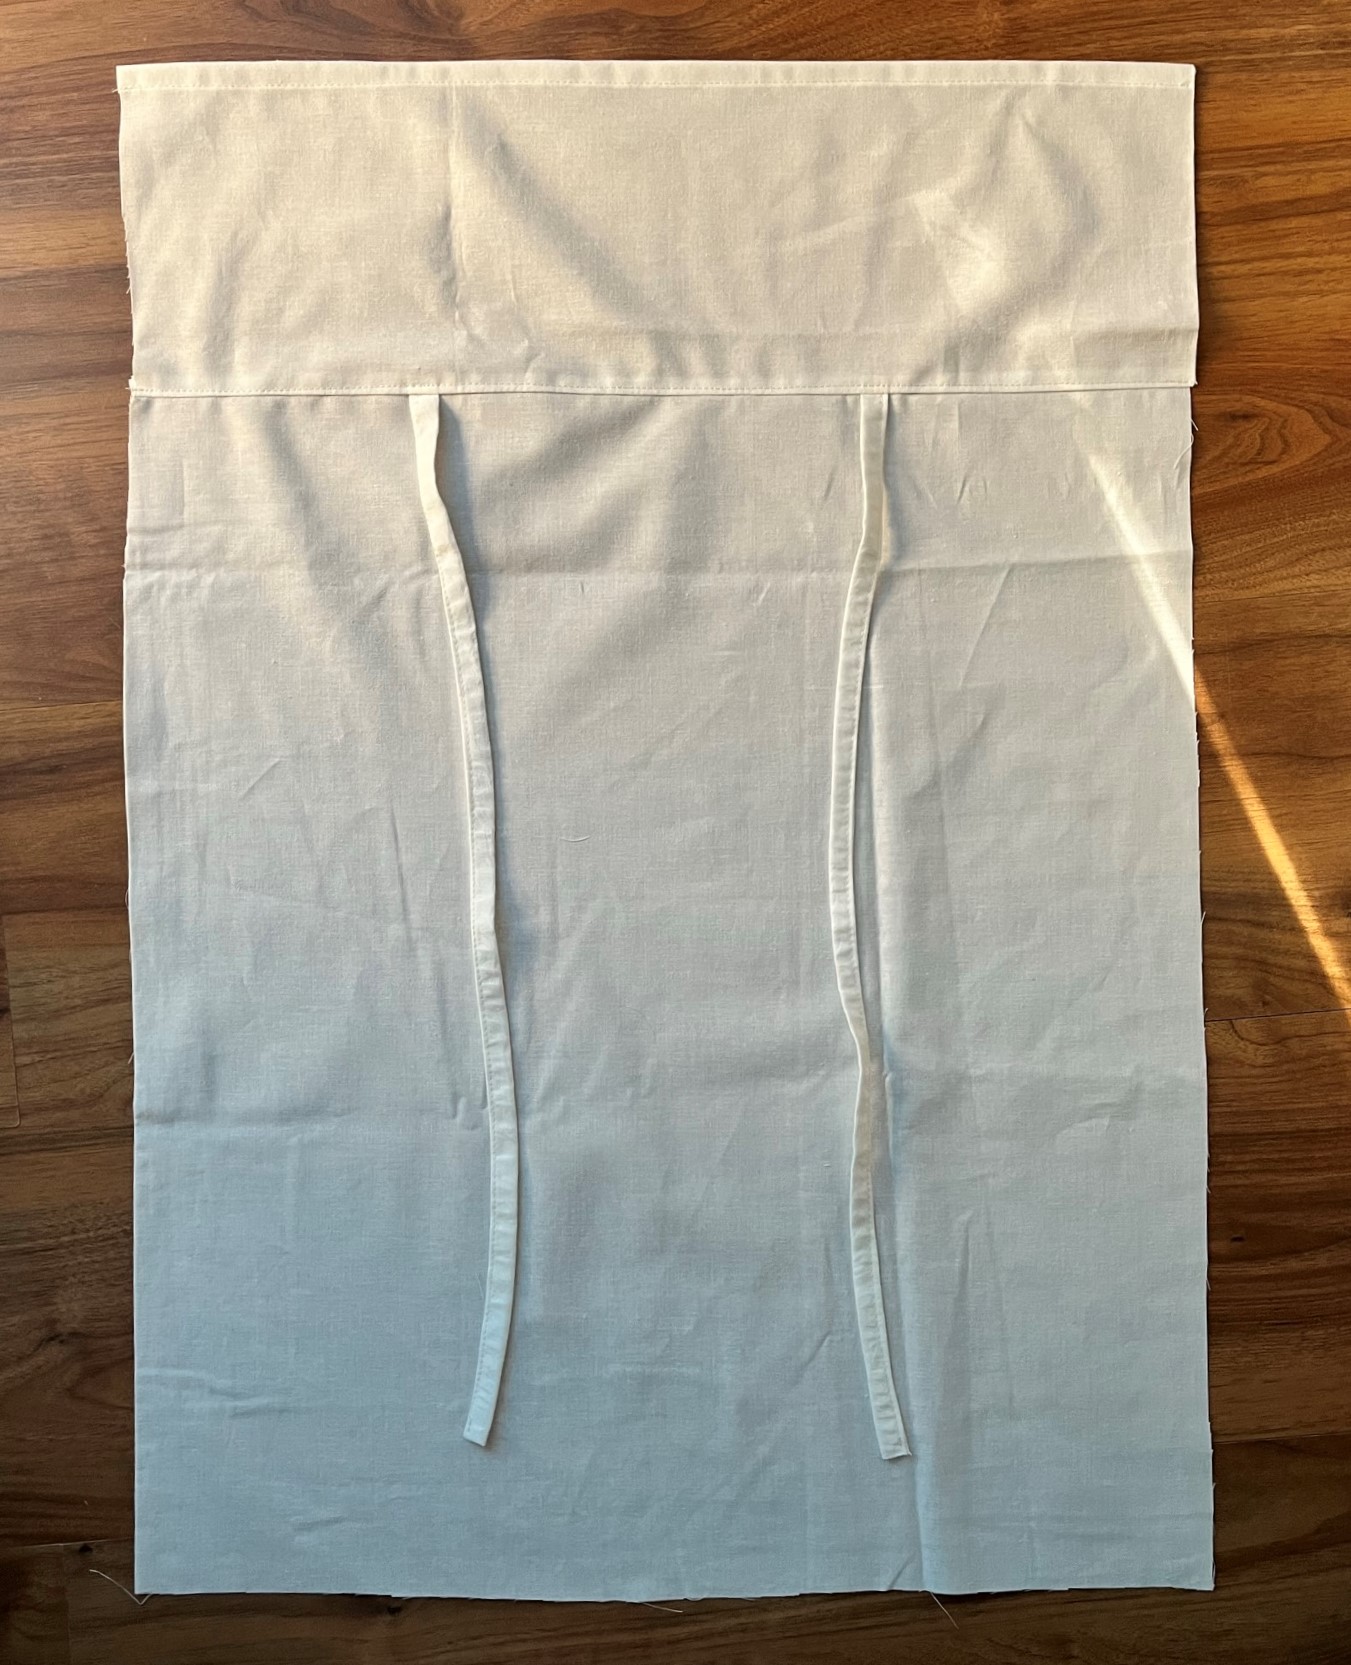
Lay the two big rectangles on top of each other, aligning all the edges neatly. Grab your ruler and measure 3 inches up from the bottom edge of the smaller rectangle – that’s where you’ll cut straight across both layers. This will give you 4 pieces total.
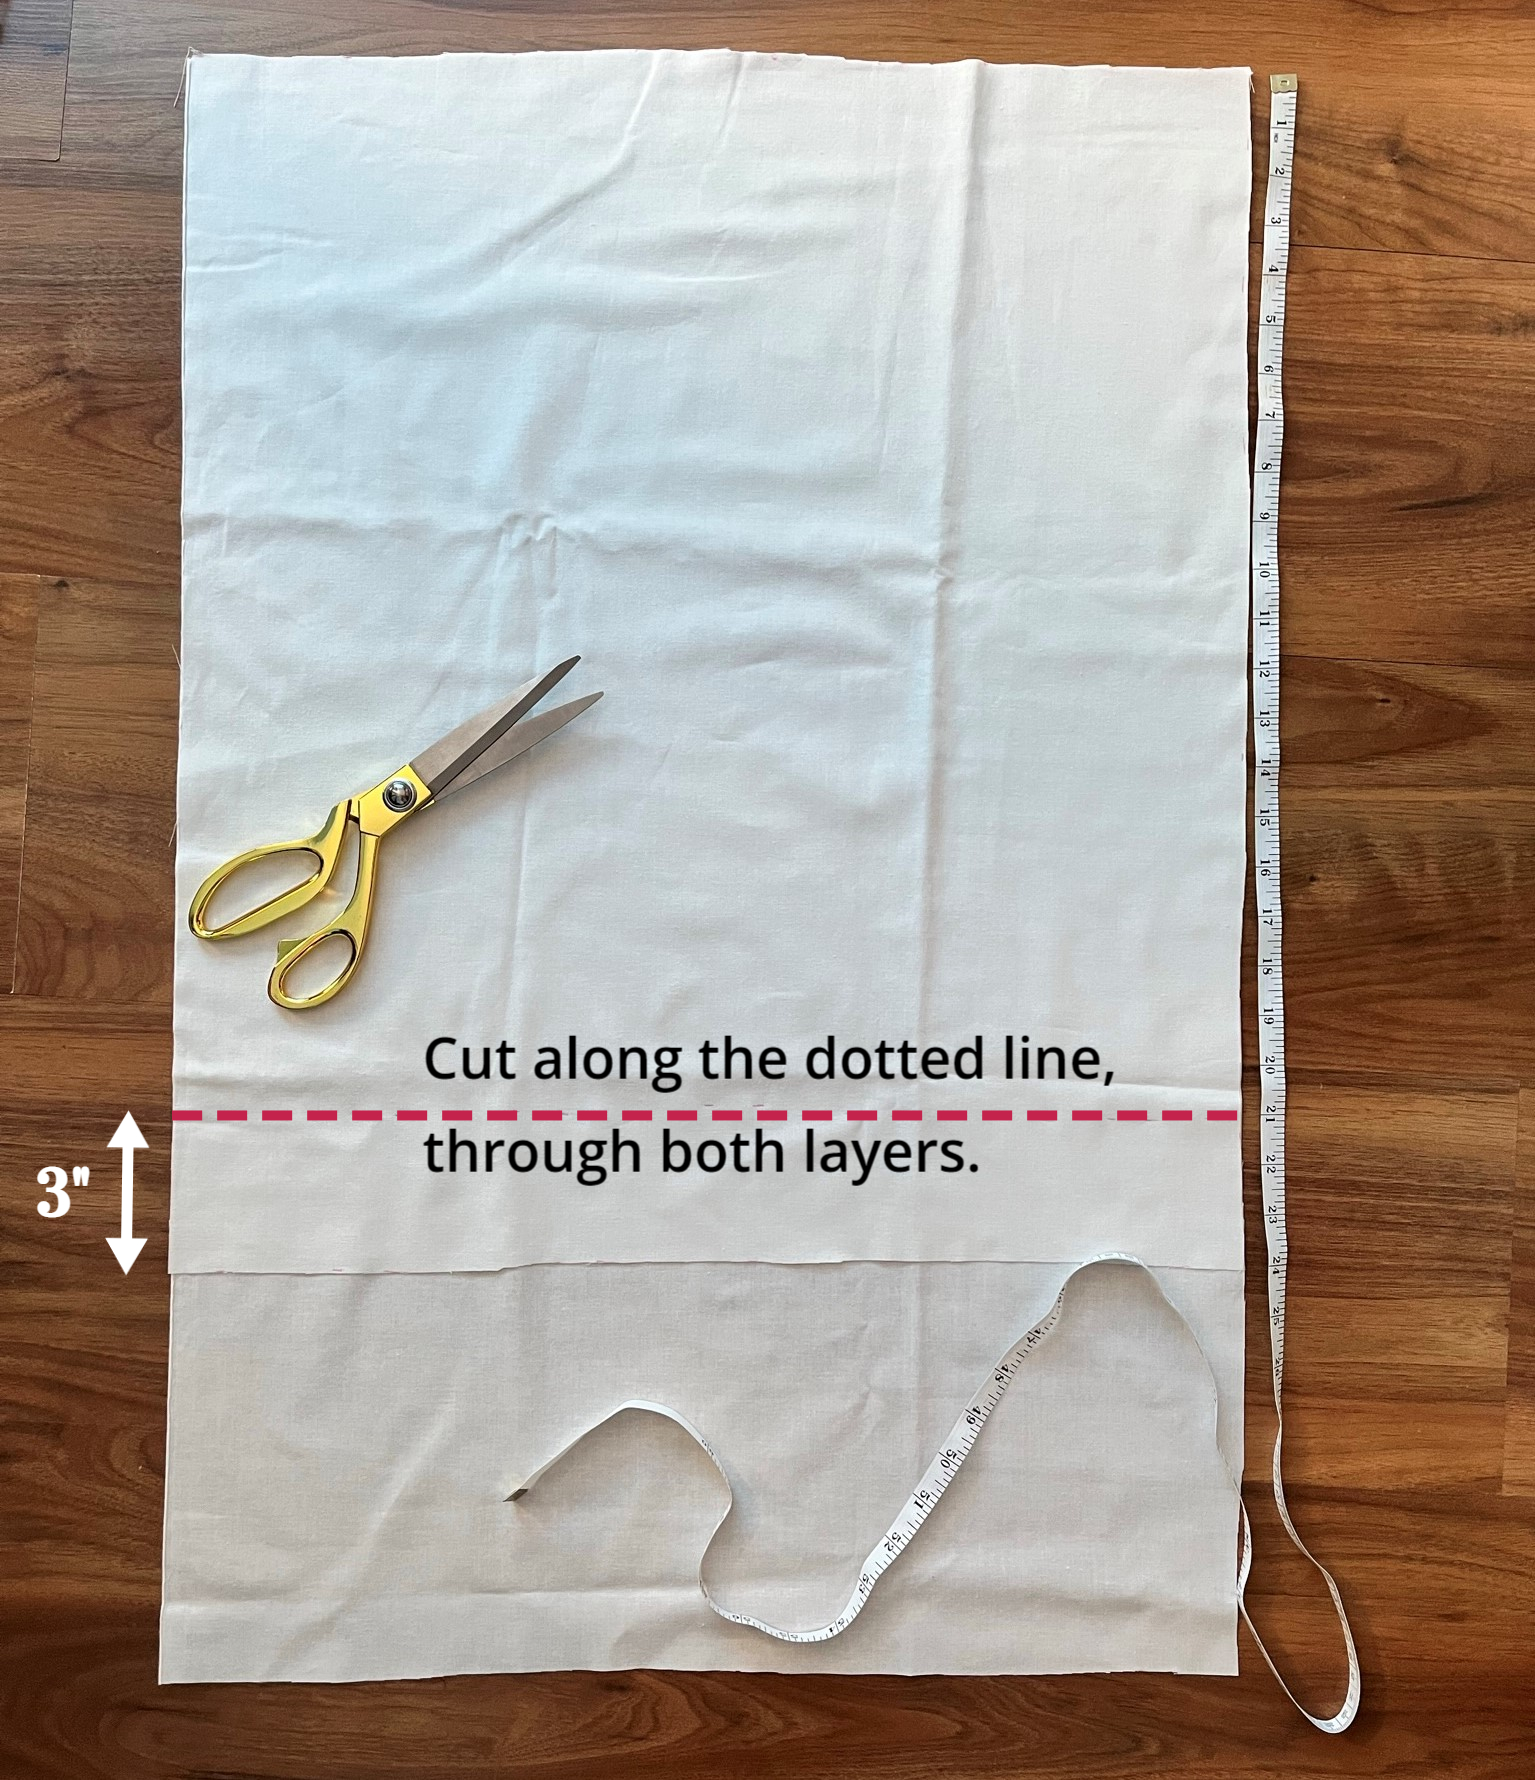
Why cut here? Because this is where the fabric ties will be inserted later on to create that beautiful tied closure.
Before you forget – grab some tailor’s chalk or a marking pen and label the right side (RS) and wrong side (WS) of all your fabric pieces. Trust me, it helps keep things straight!
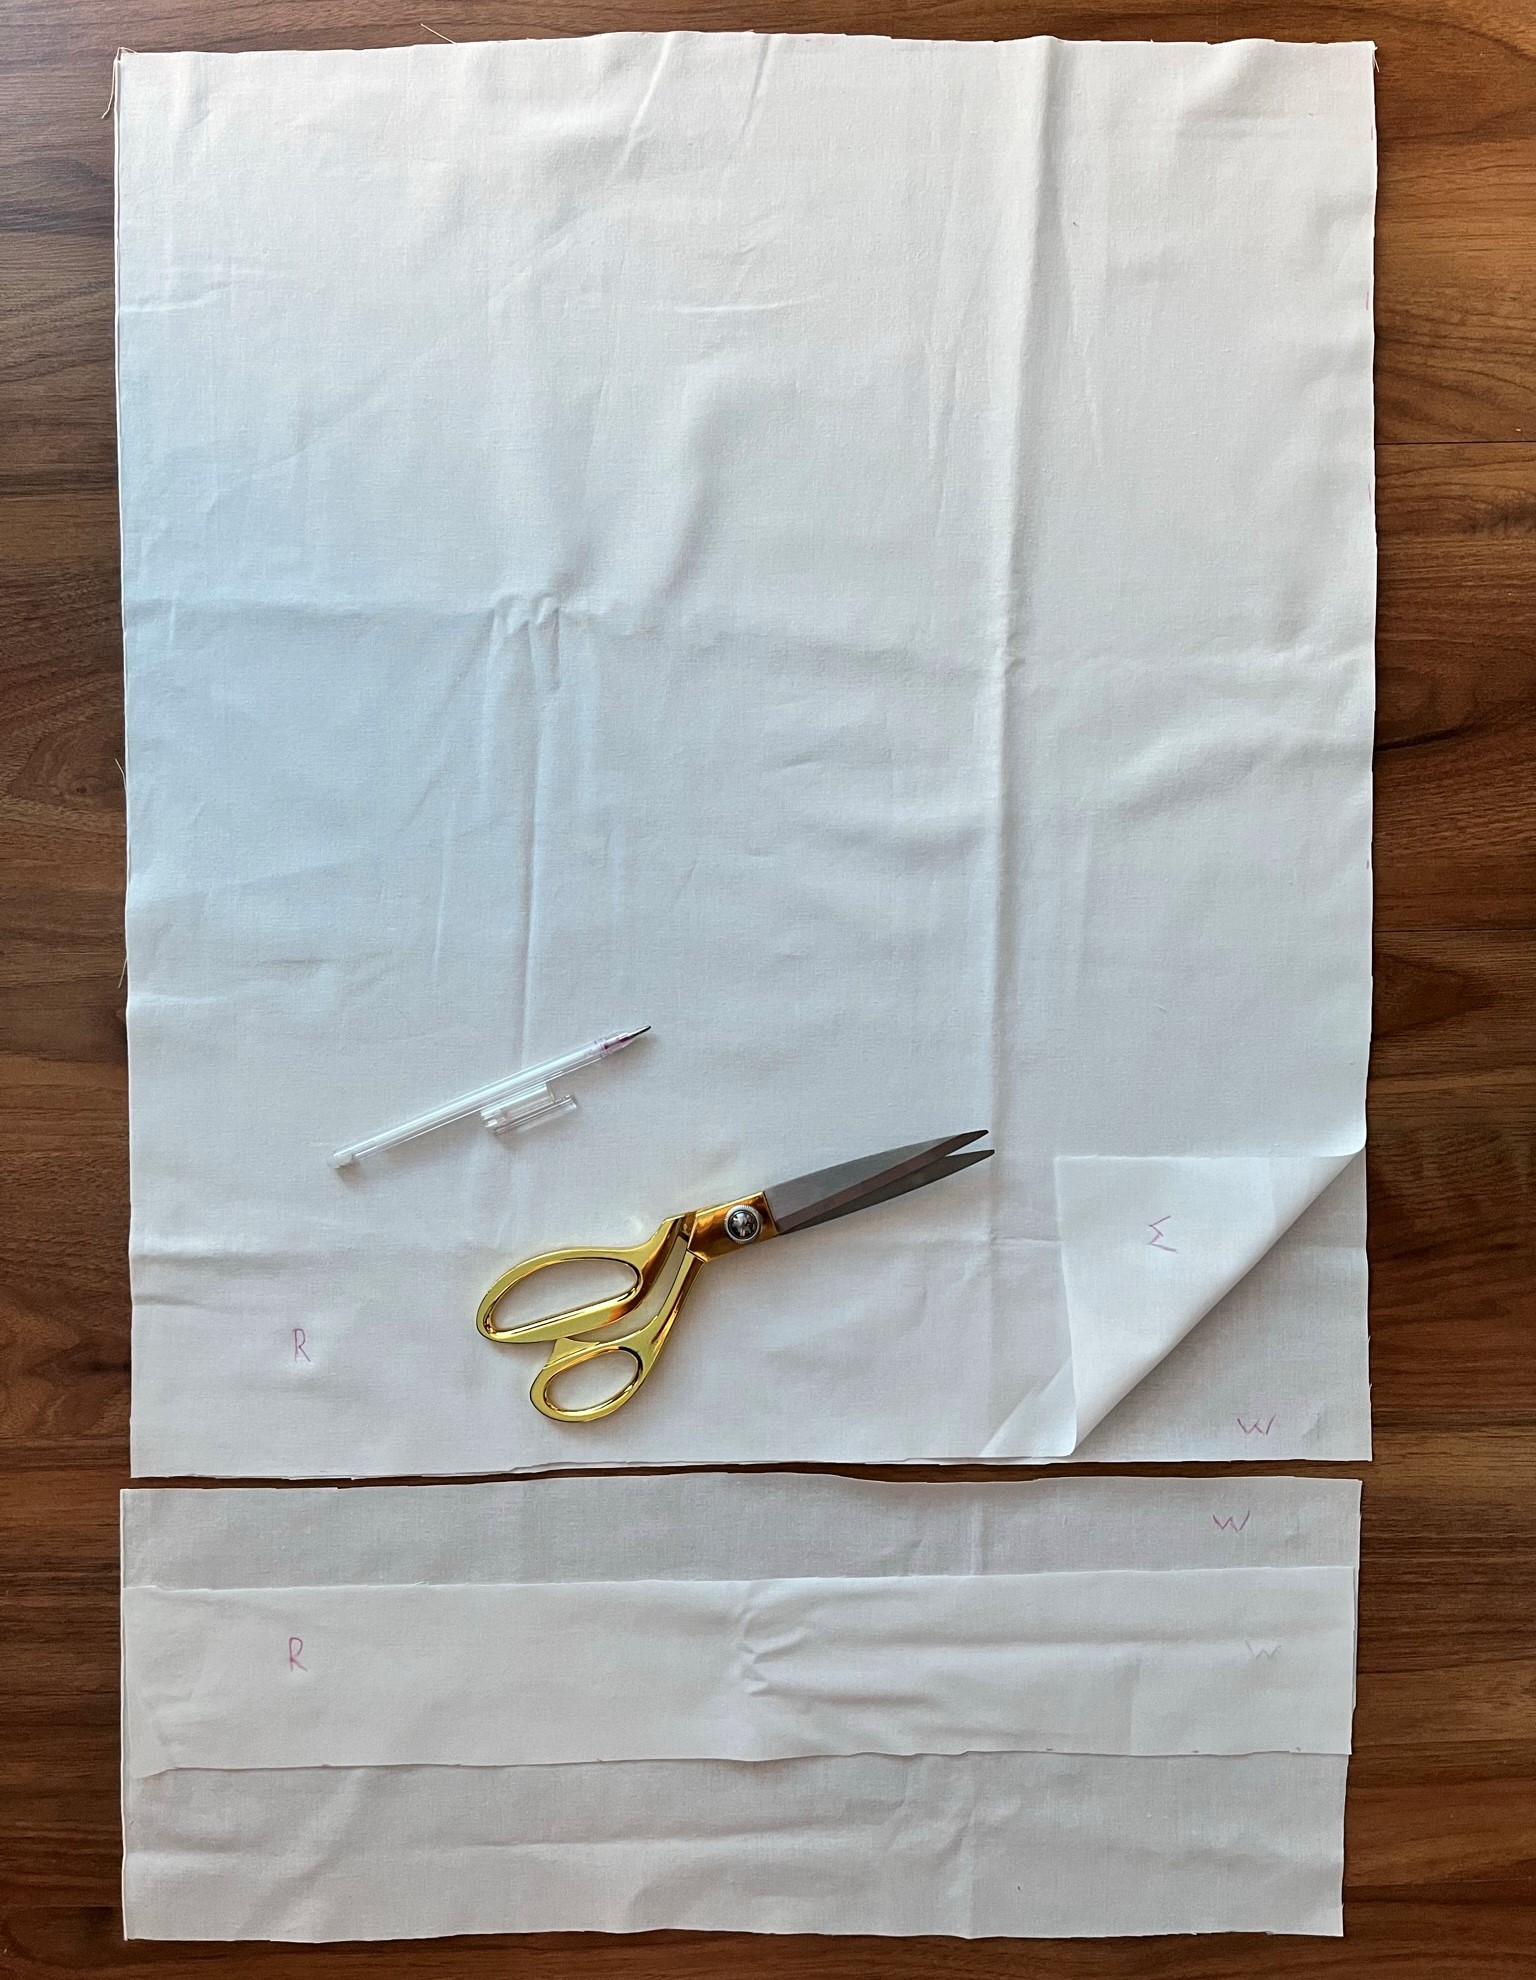
Set the bottom piece aside for now – we’ll get back to it in just a bit.
Step 4 – Finish the First Pillowcase Piece (the Smaller One)
Alright, let’s put together the top part of our envelope pillowcase with ties. This smaller piece is now made of two fabric sections – and it’s time to join them with the ties sandwiched in between.
Place the two fabric pieces right sides together (so the pretty sides are facing in). Slide two of your fabric ties in between the layers, making sure the raw edges of the ties line up with the raw edge of the fabric. I placed mine about 6 inches in from each side seam, but you can adjust the spacing depending on how long your pillow is.
Pin everything in place, then sew along the raw edge with a 5/8” seam allowance. No need to finish this seam – it’ll be hidden inside and won’t fray.
Next, press that seam allowance toward the shorter piece (the one on top), and topstitch it to keep everything flat and tidy. You’ll start to see it coming together!

Now let’s take care of the top edge. Fold it over 3/8” toward the wrong side, then fold it again so the raw edge is completely tucked in. The ties should now peek out from the top – cute, right?
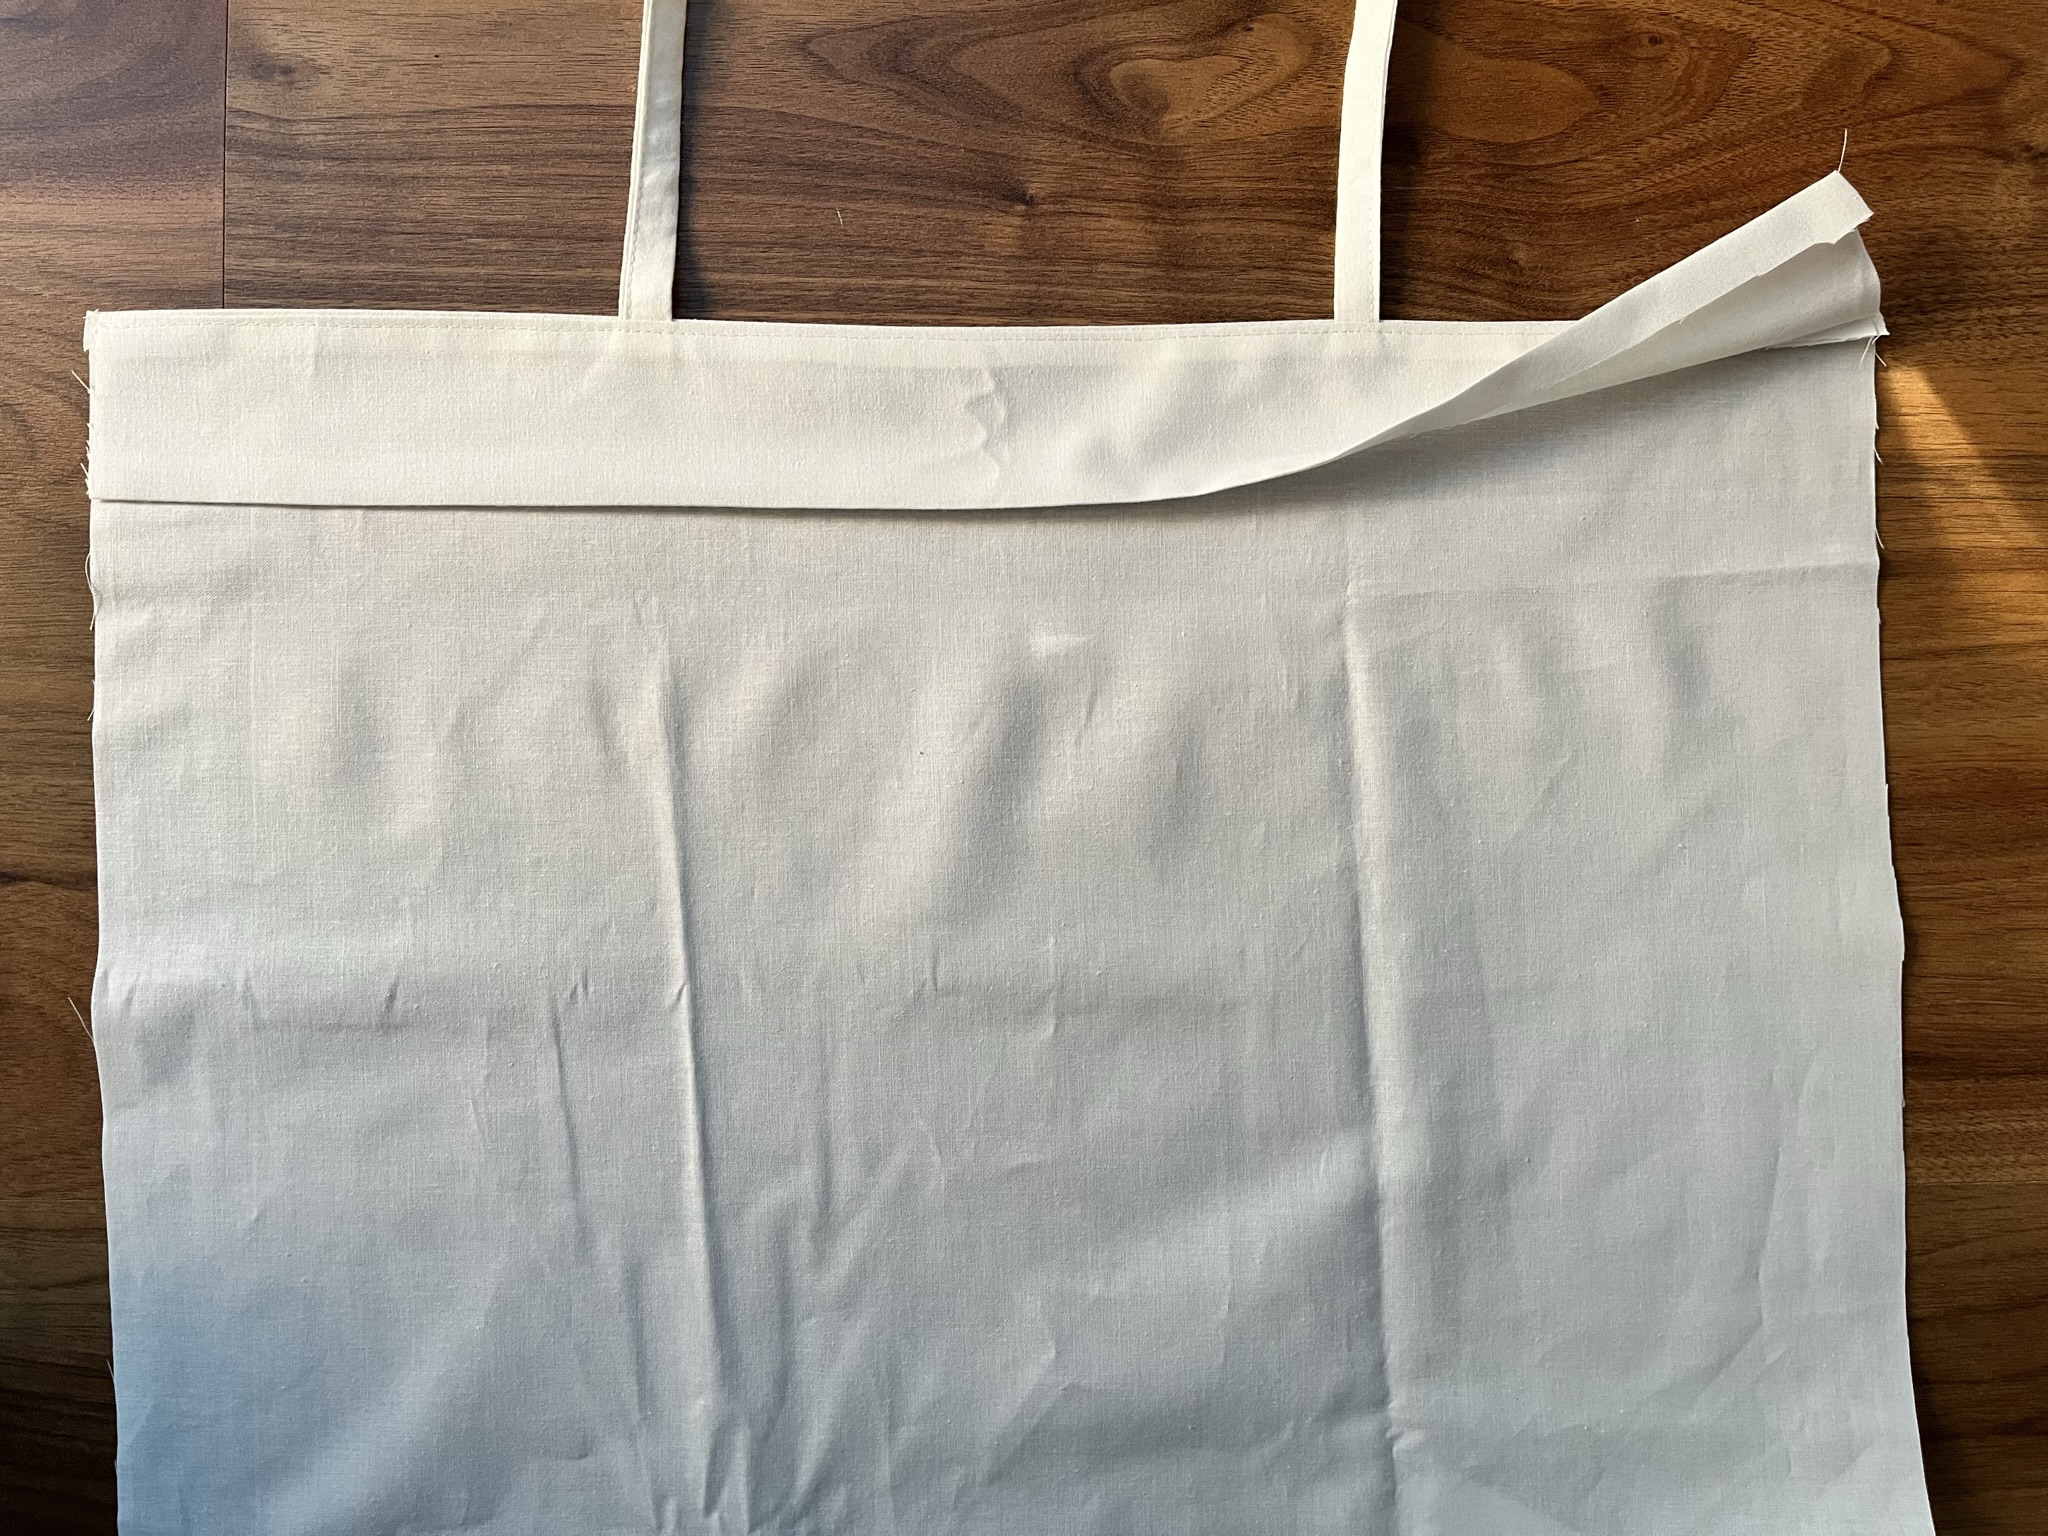
Press it well and sew along the folded edge to create a nice clean hem.

And that’s it – the first pillowcase piece is done! This will be the visible top flap of your pillow cover.
Step 5 – Finish the Second Pillowcase Piece (the Larger One)
Now let’s move on to the larger fabric piece – this one forms the bottom half of your DIY envelope pillowcase with a flap and ties.
Just like before, place the two fabric sections right sides together. Then insert the remaining two ties in between, spacing them about 6 inches in from the side seams, just like you did with the first piece.
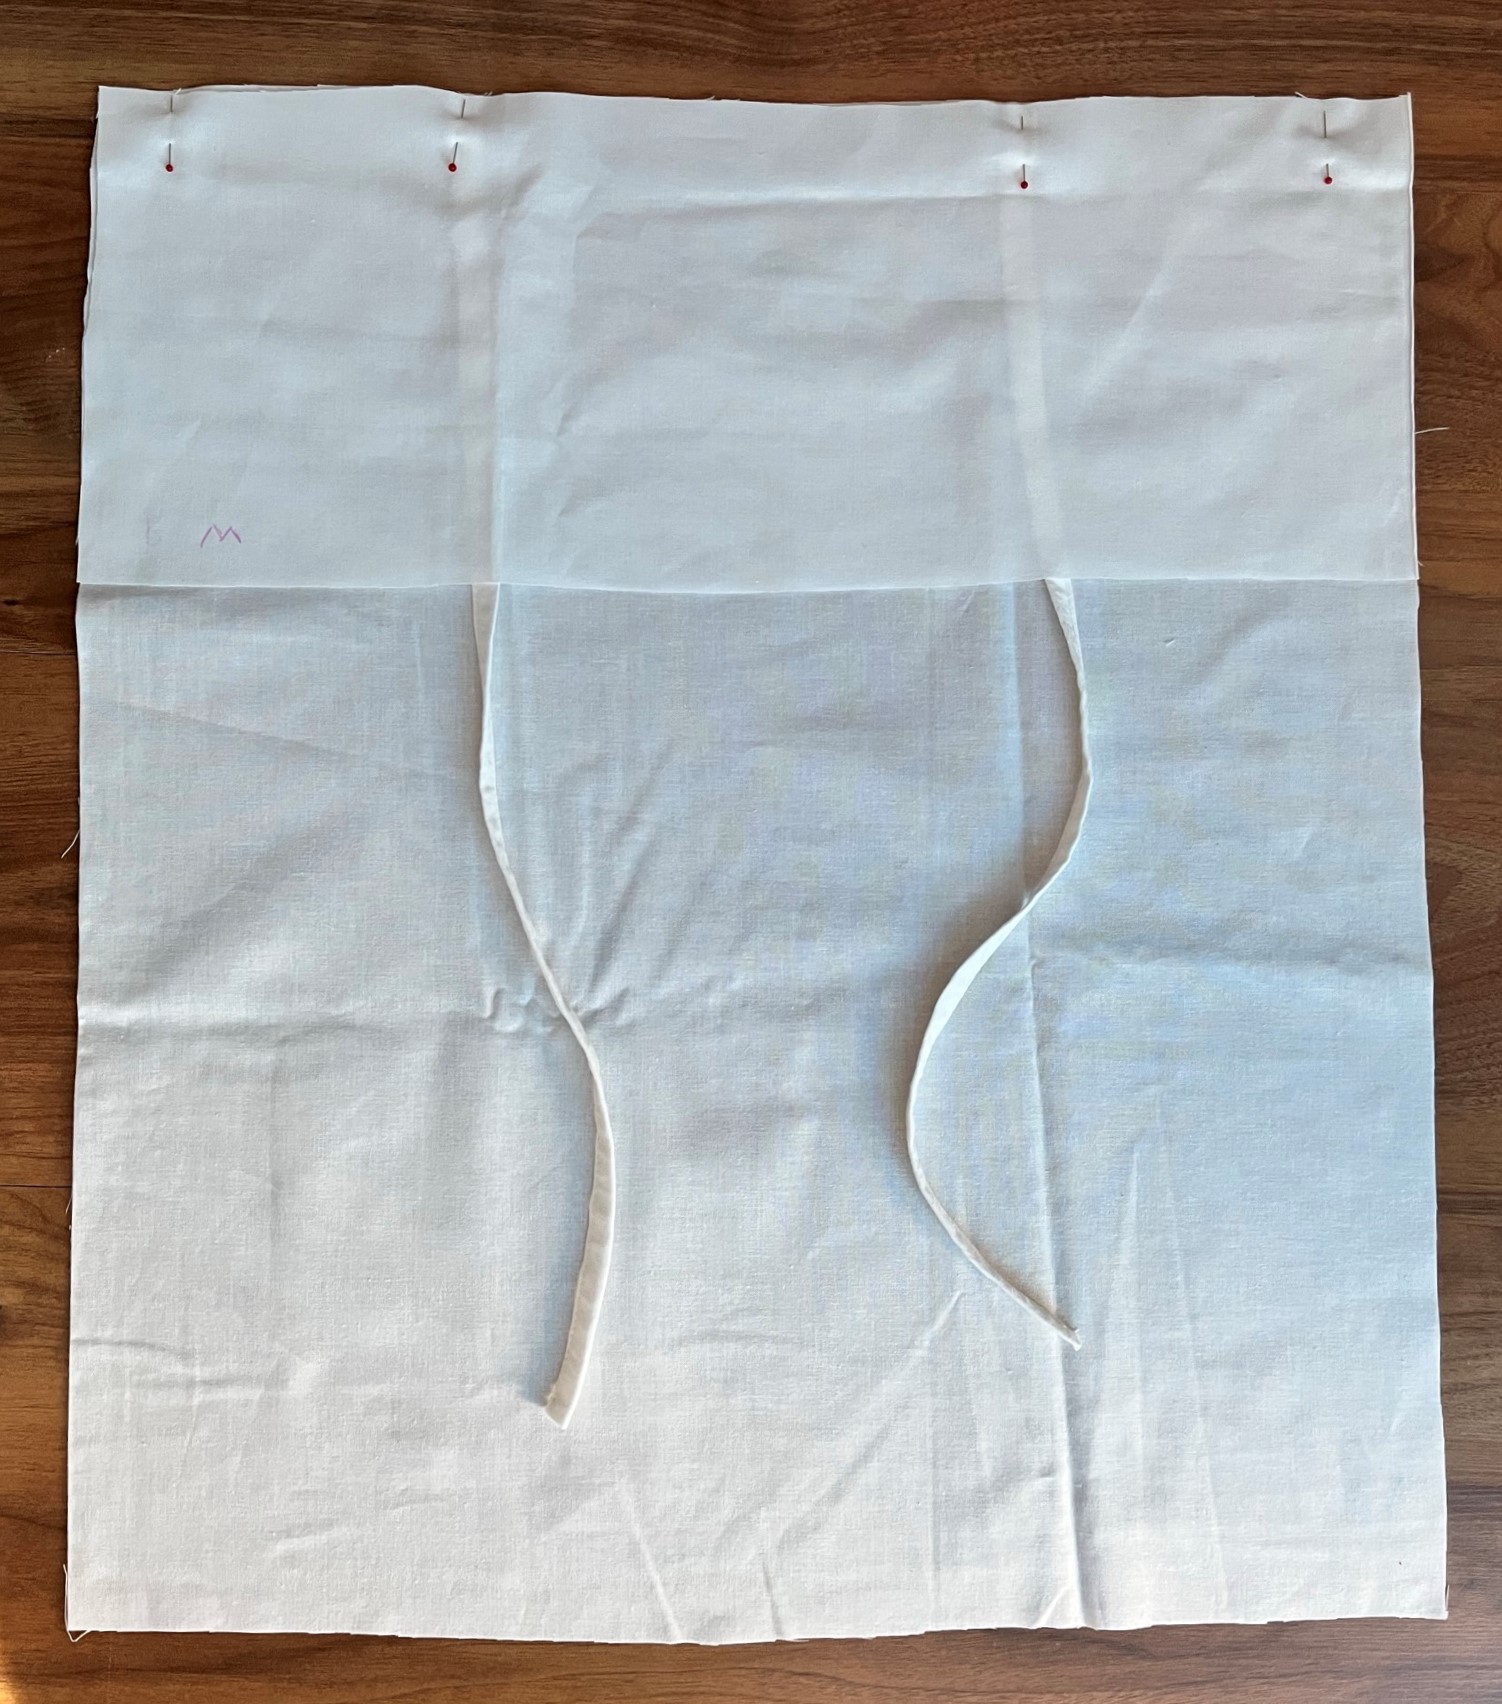
Pin those ties in place, sew along the edge using a 5/8” seam allowance, and don’t worry about finishing the raw edge – it’s staying hidden inside.
Press the seam toward the smaller rectangle (the top portion), and then topstitch for that nice, polished look.
Now let’s clean up the top raw edge. You’re going to make a double-fold hem to keep things neat.
Here’s how: Fold the raw edge of the smaller rectangle inward by 3/8”, then fold it again so it’s completely tucked under. Give it a good press and stitch it down.
That’s it! You now have your second pattern piece ready to go. Both pieces look great from the outside. Now we’re just about ready to sew the front and back together to finish your handmade envelope pillowcase with fabric ties.
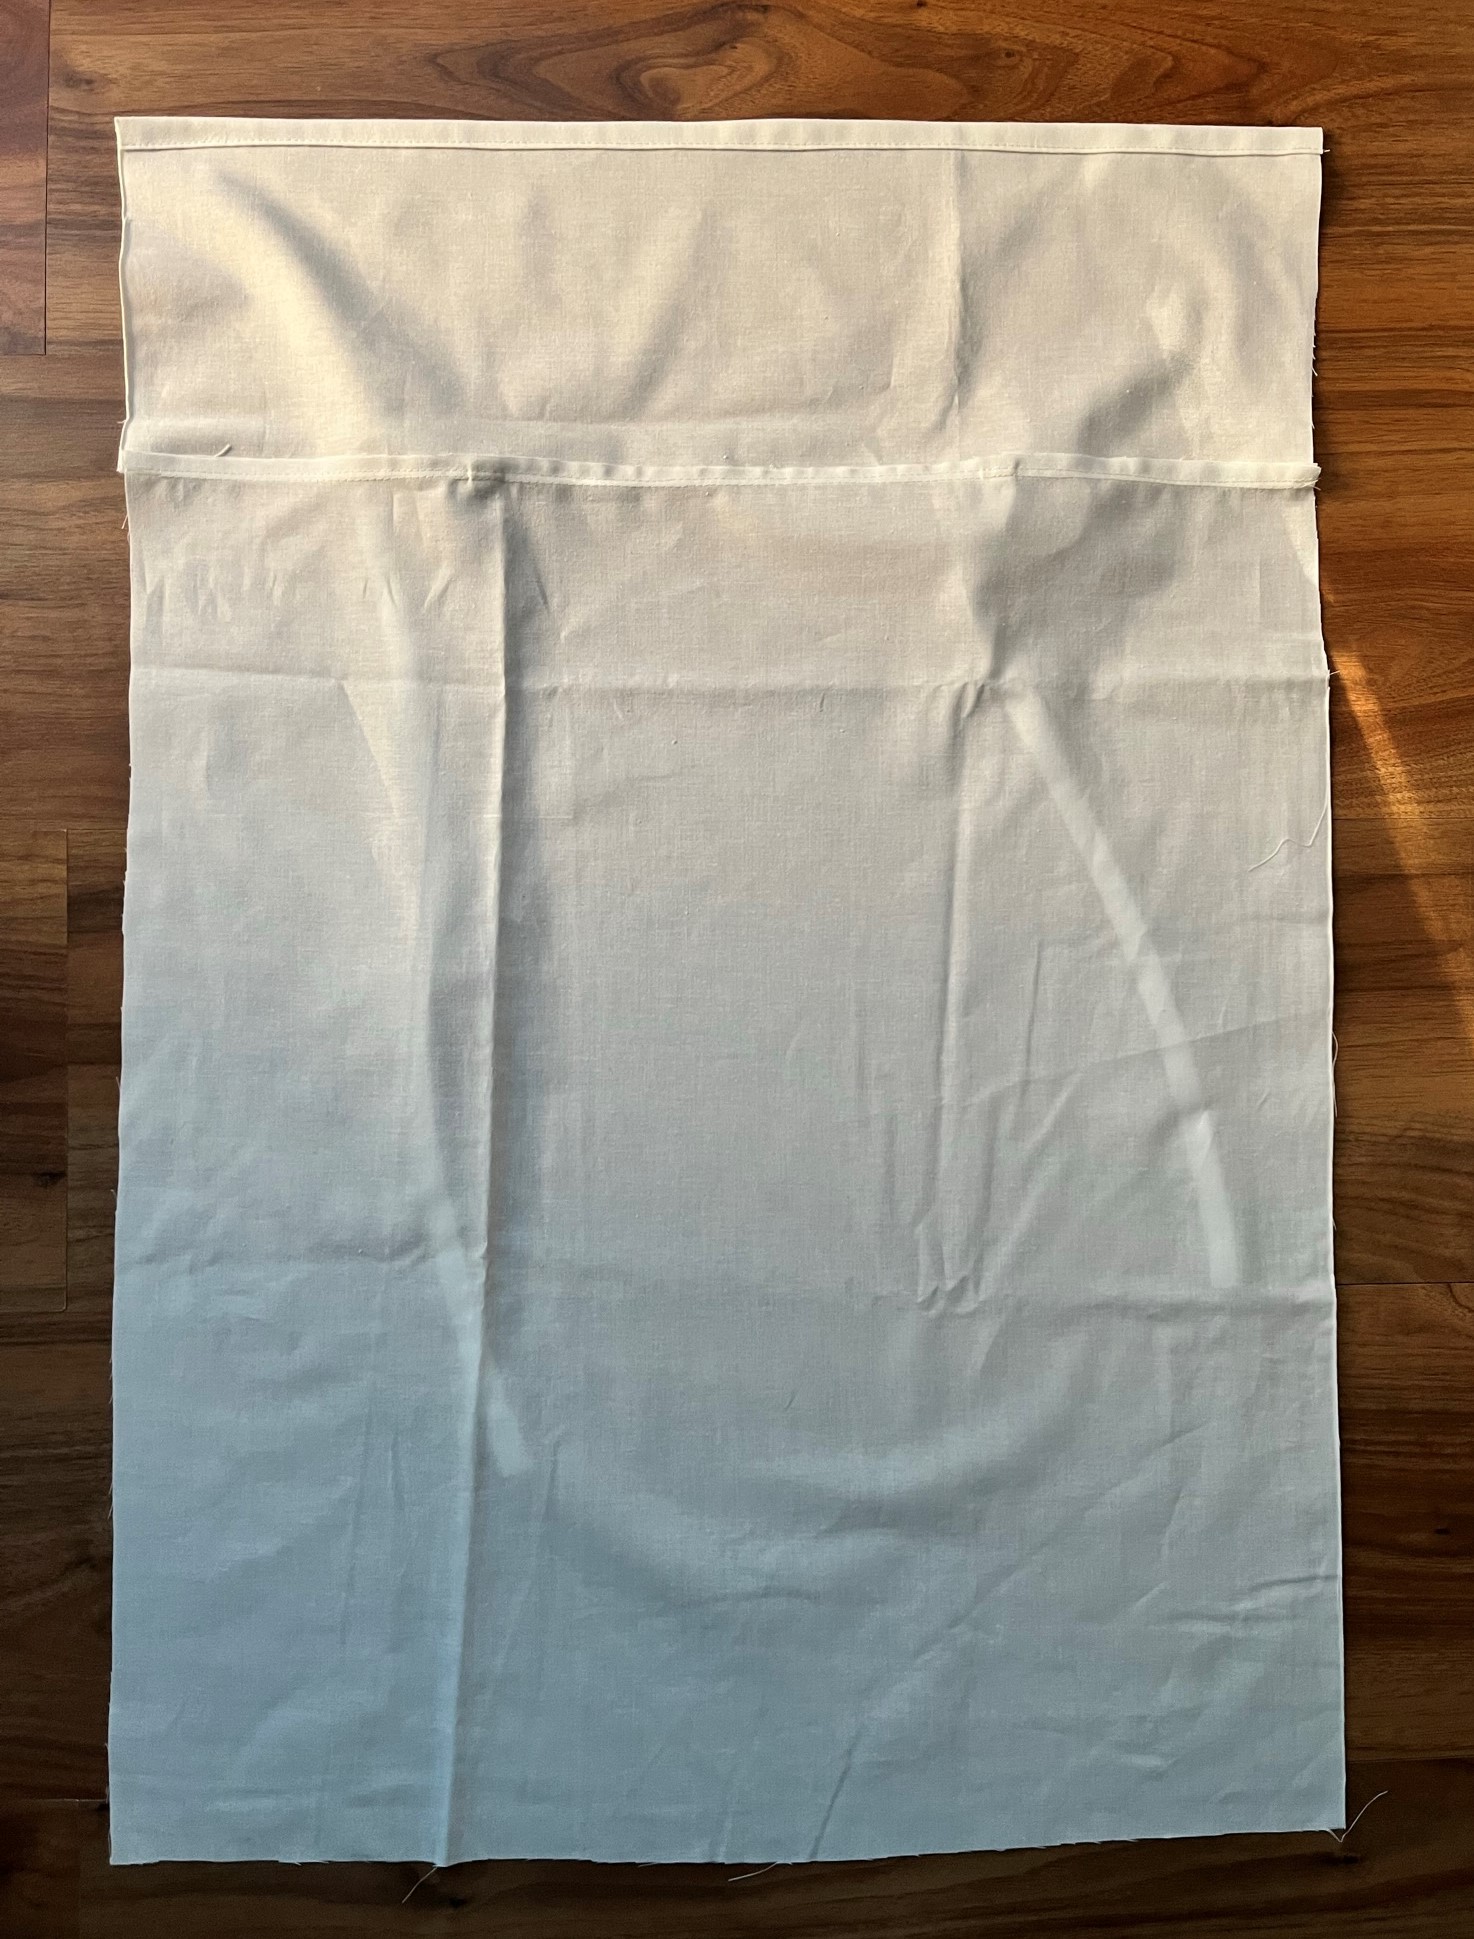
Step 6 – Sew the Two Pillowcase Pieces Together (Let’s Do a French Seam!)
Now for the fun part – putting everything together and finishing it off with beautiful French seams. This is how we’ll hide all the raw edges and give your DIY envelope pillowcase with ties that clean, store-bought look – no serger needed!
Start by laying the larger piece down on your work surface with the wrong side facing up.
Next, place the smaller piece on top, with the right side facing up – so you now have wrong sides together. This feels a bit backward, but stick with me – that’s how French seams work!
Line up the side and bottom edges neatly. The top edge of the smaller piece should sit just below the first seam of the larger one. Don’t worry about the flap yet – we’re not sewing that part down just yet.
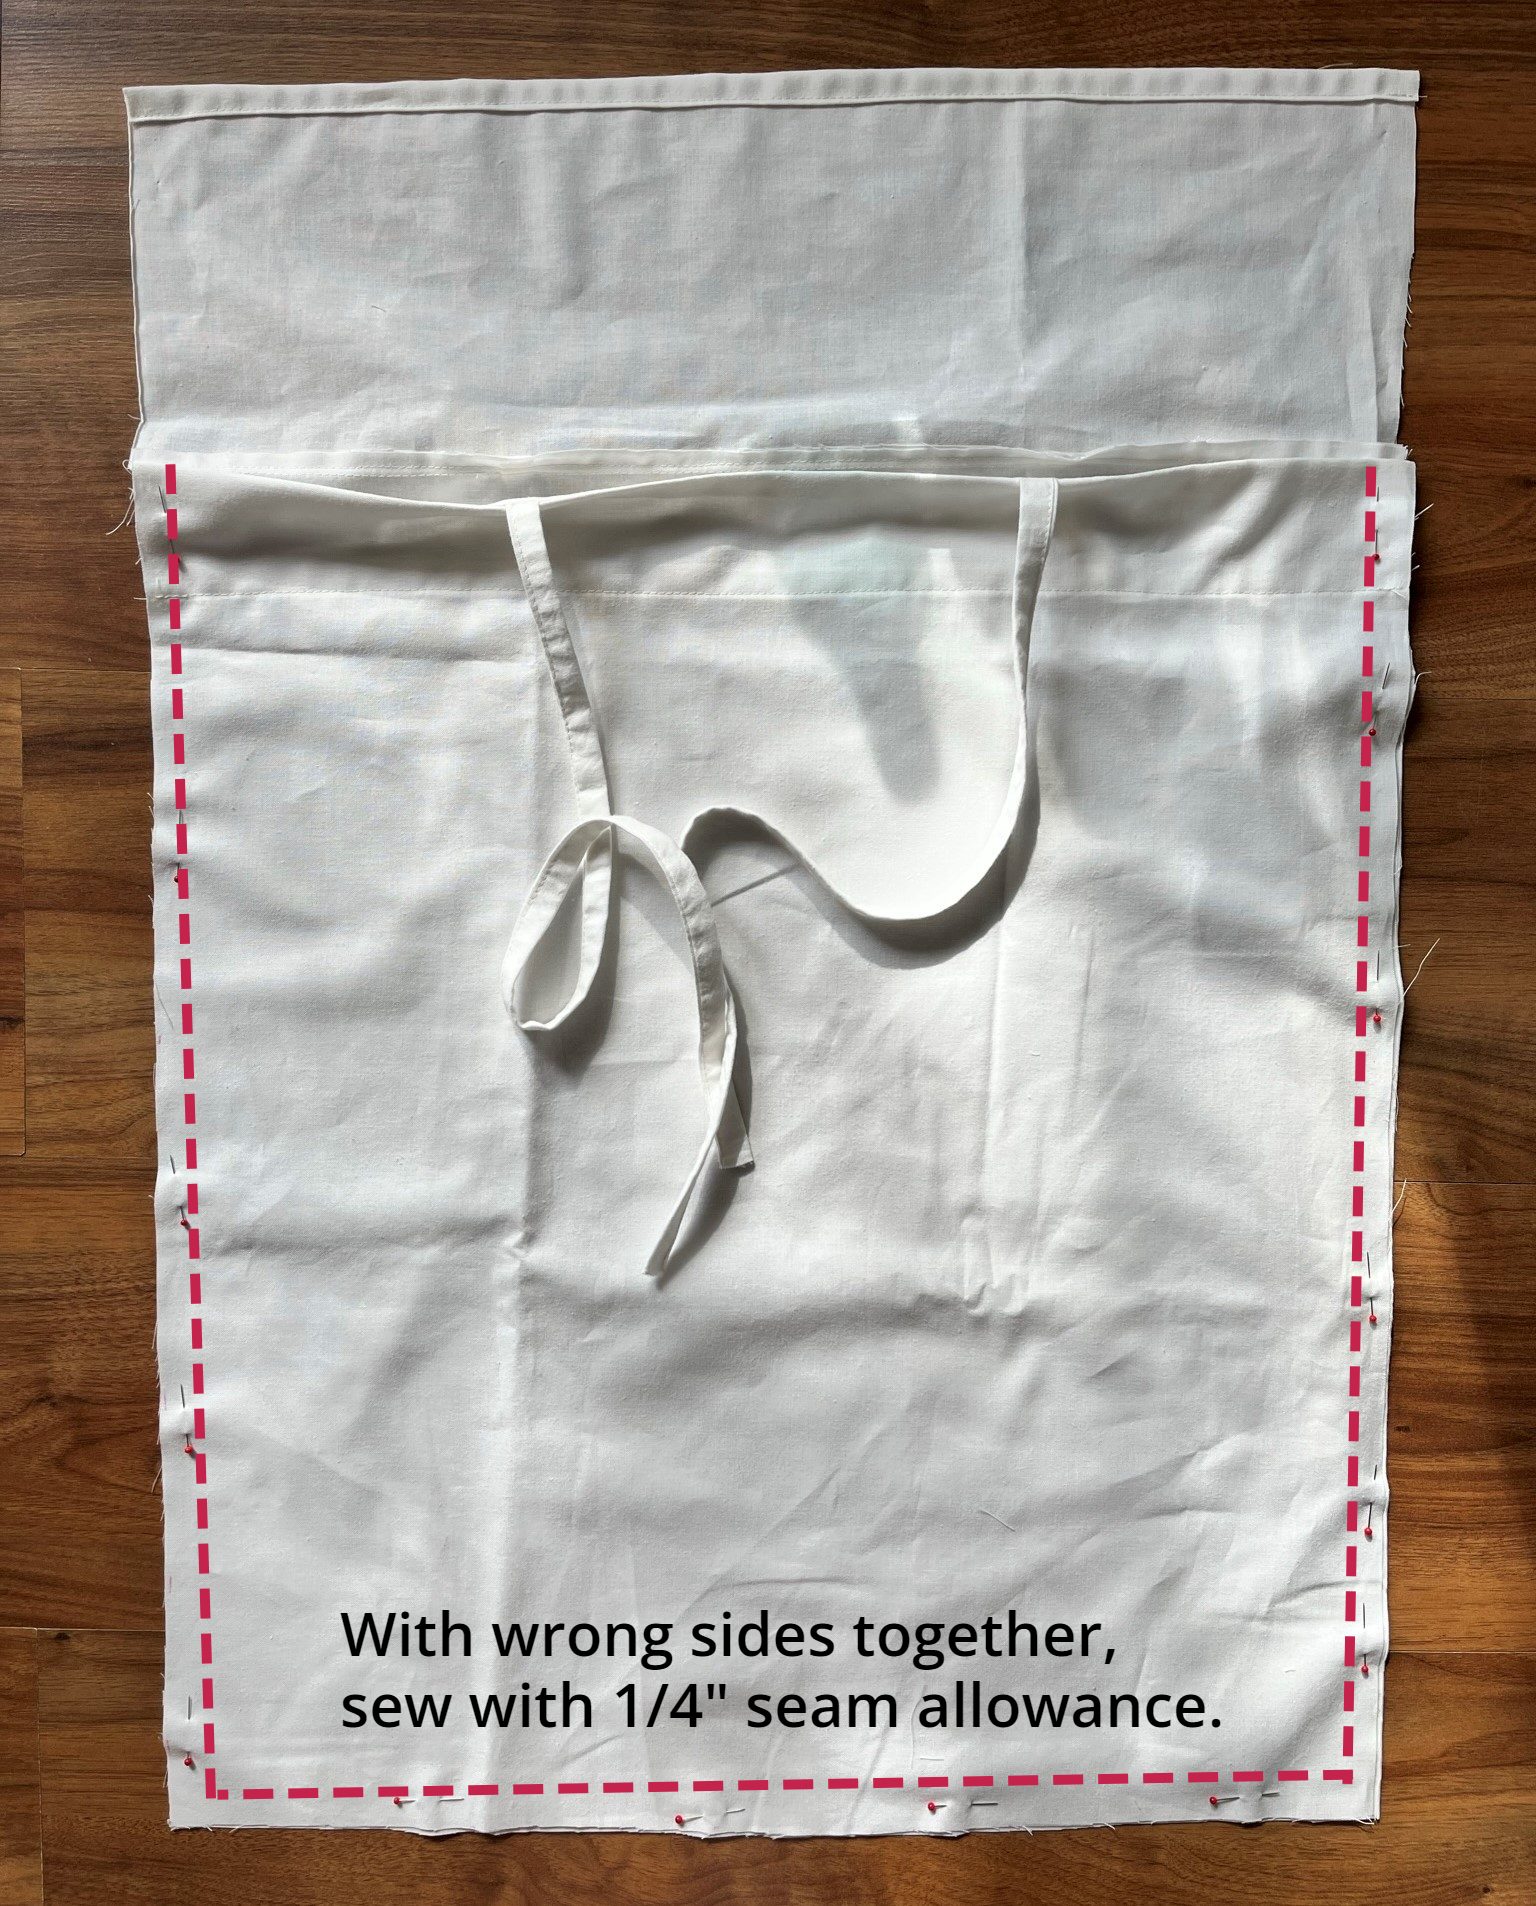
Pin everything in place, then sew around the two sides and the bottom of the pillowcase using a 1/4” seam allowance. Backstitch at the start and end of each seam near the folded edges – this keeps everything strong and secure.
Now go ahead and clip the corners to reduce bulk.
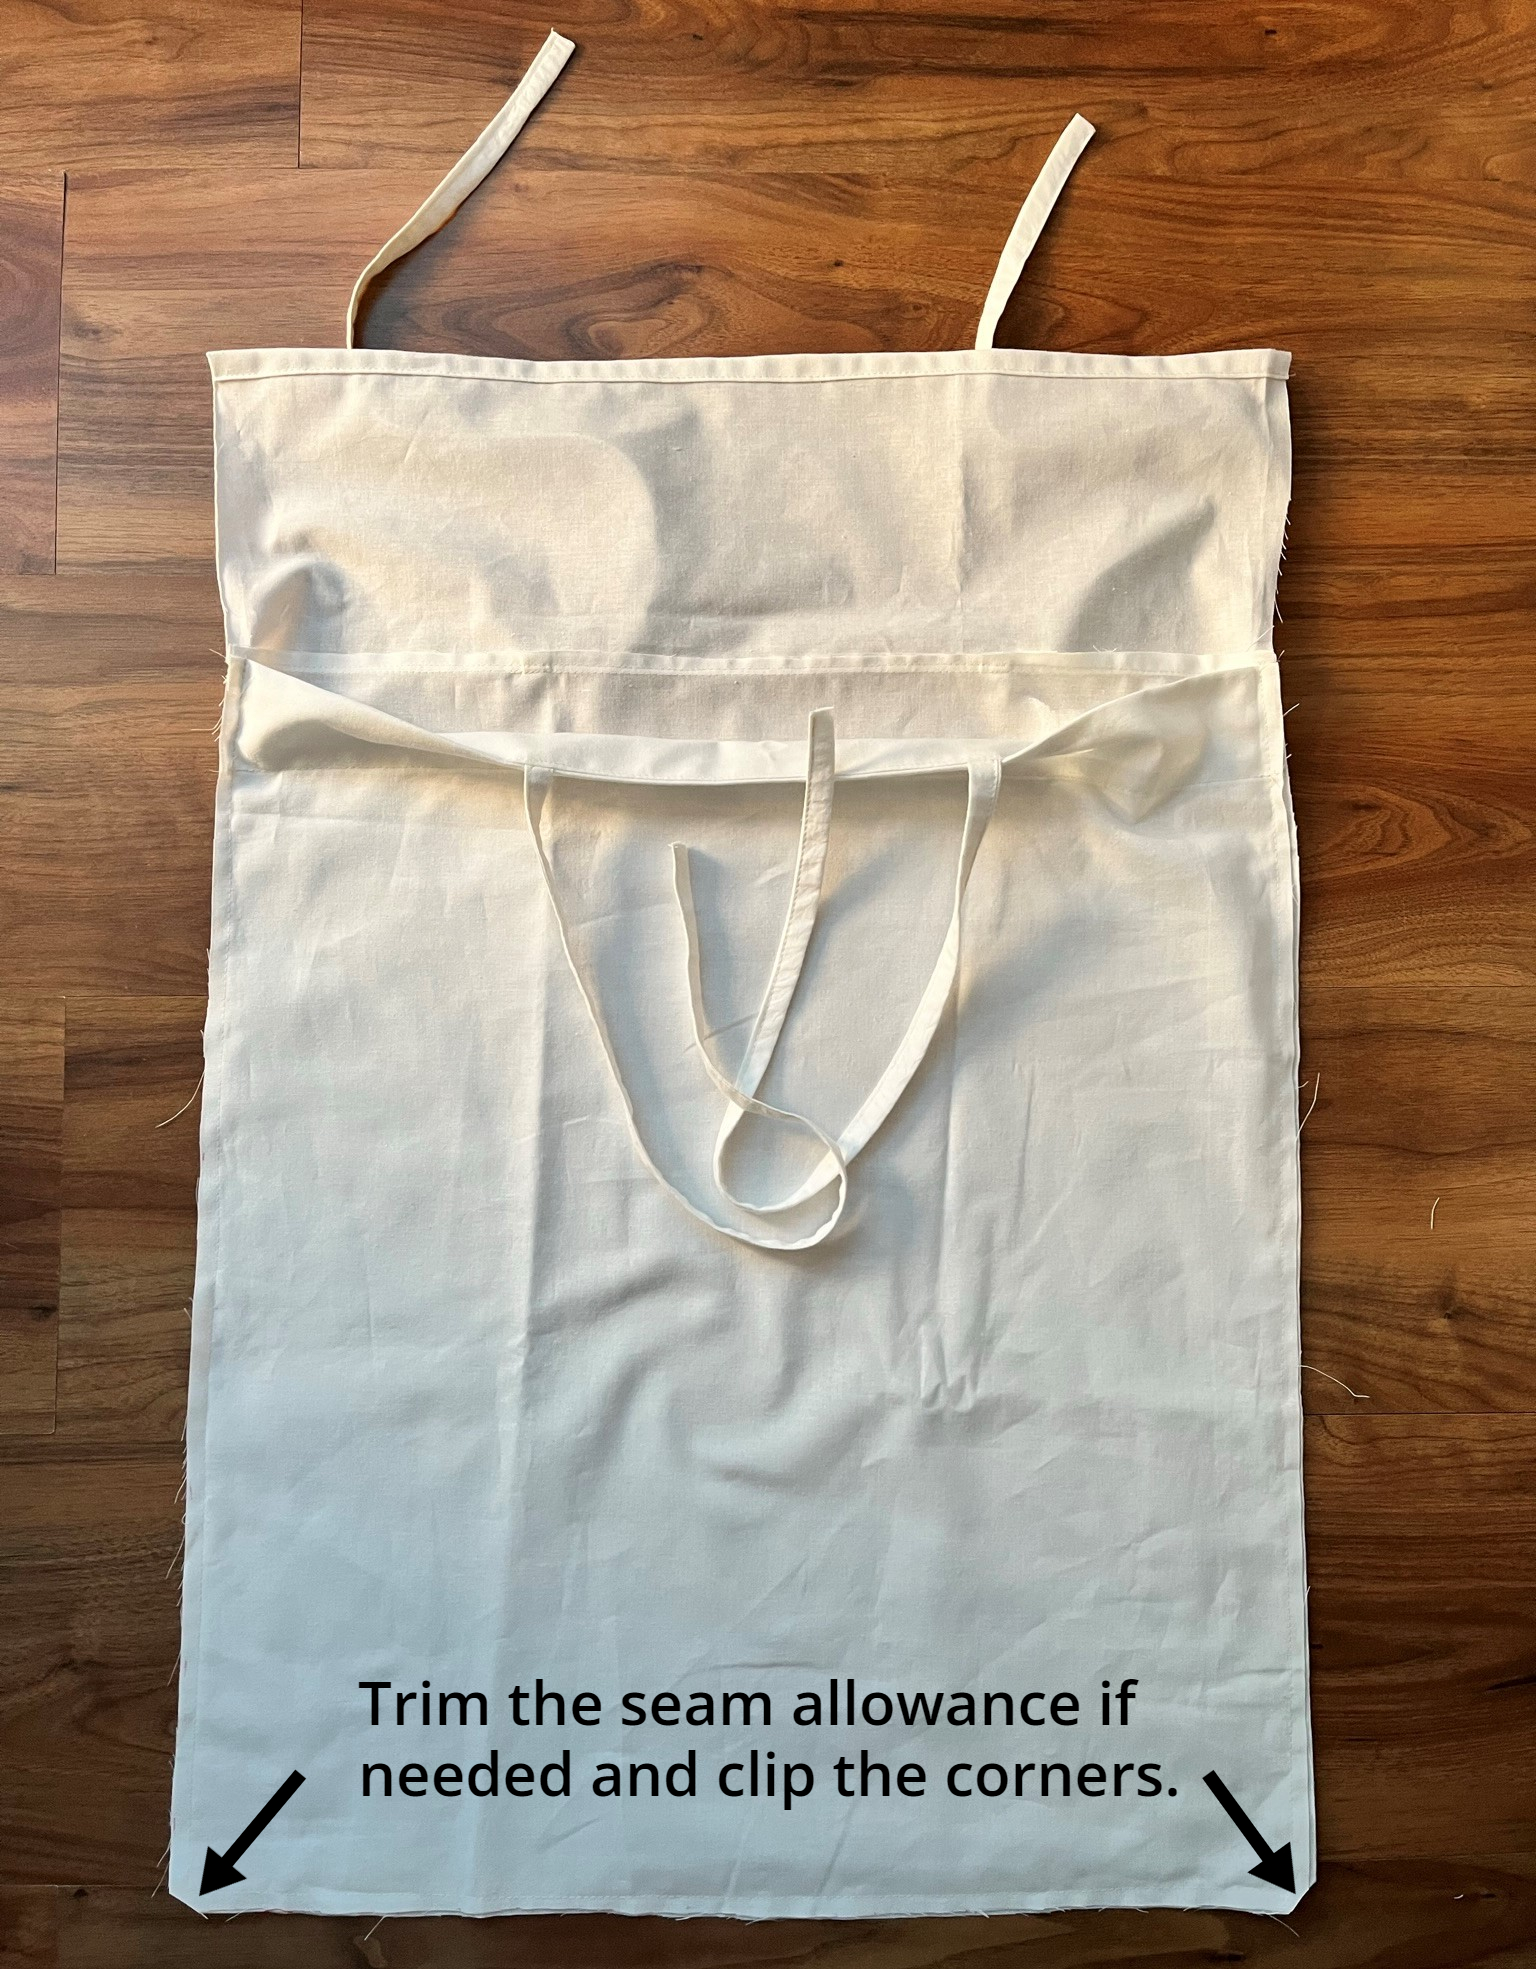
Turn your pillowcase right side out, poke out those corners with a pencil or chopstick, and give the whole thing a good press with your iron.
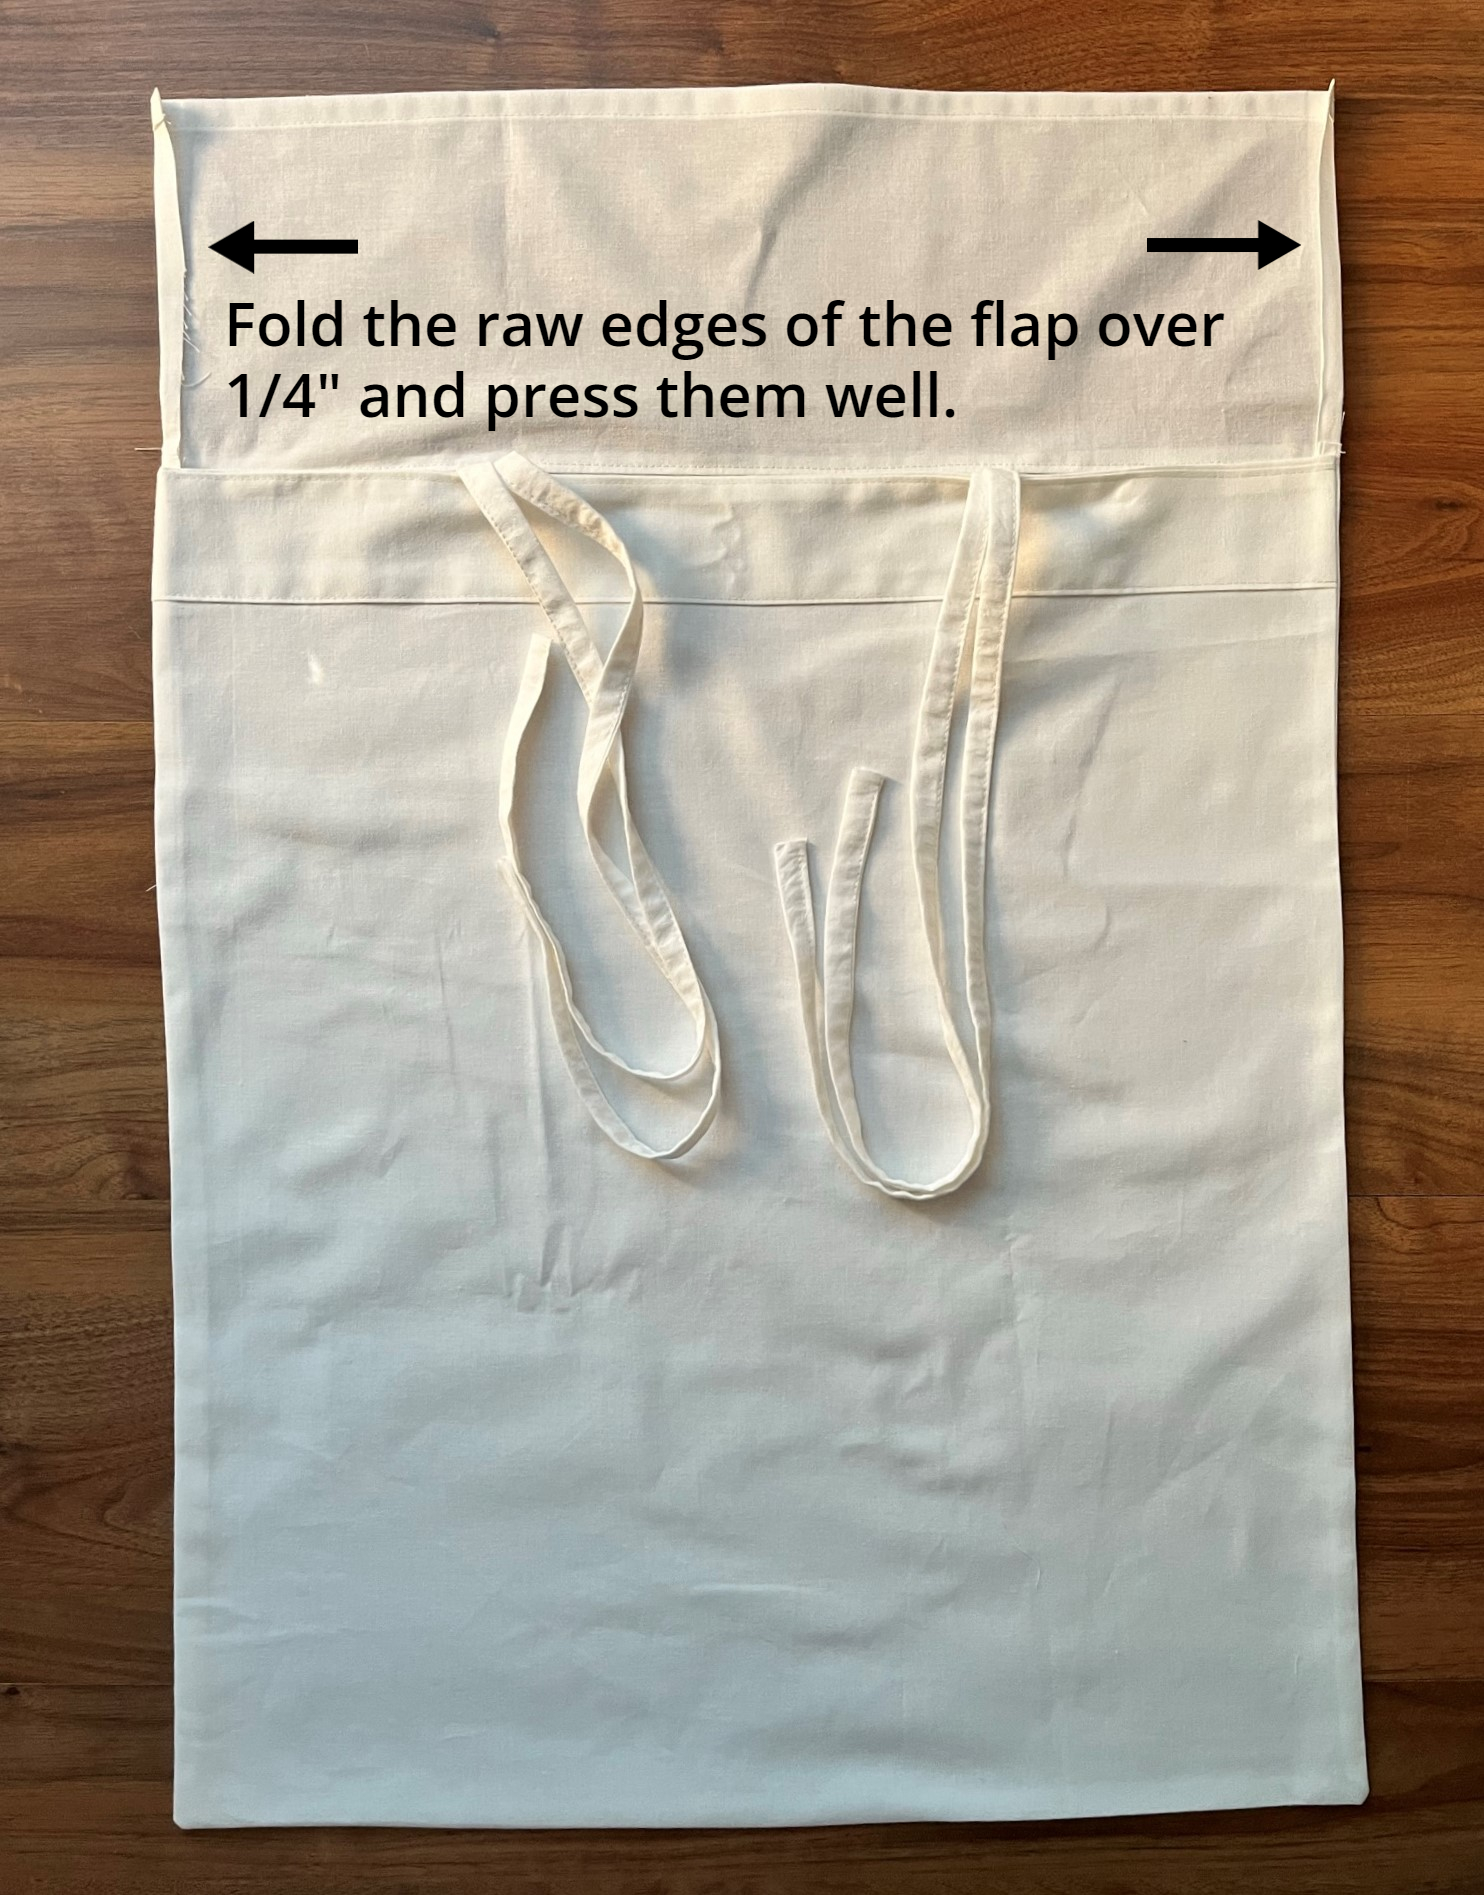
The French seam finish: hiding raw edges
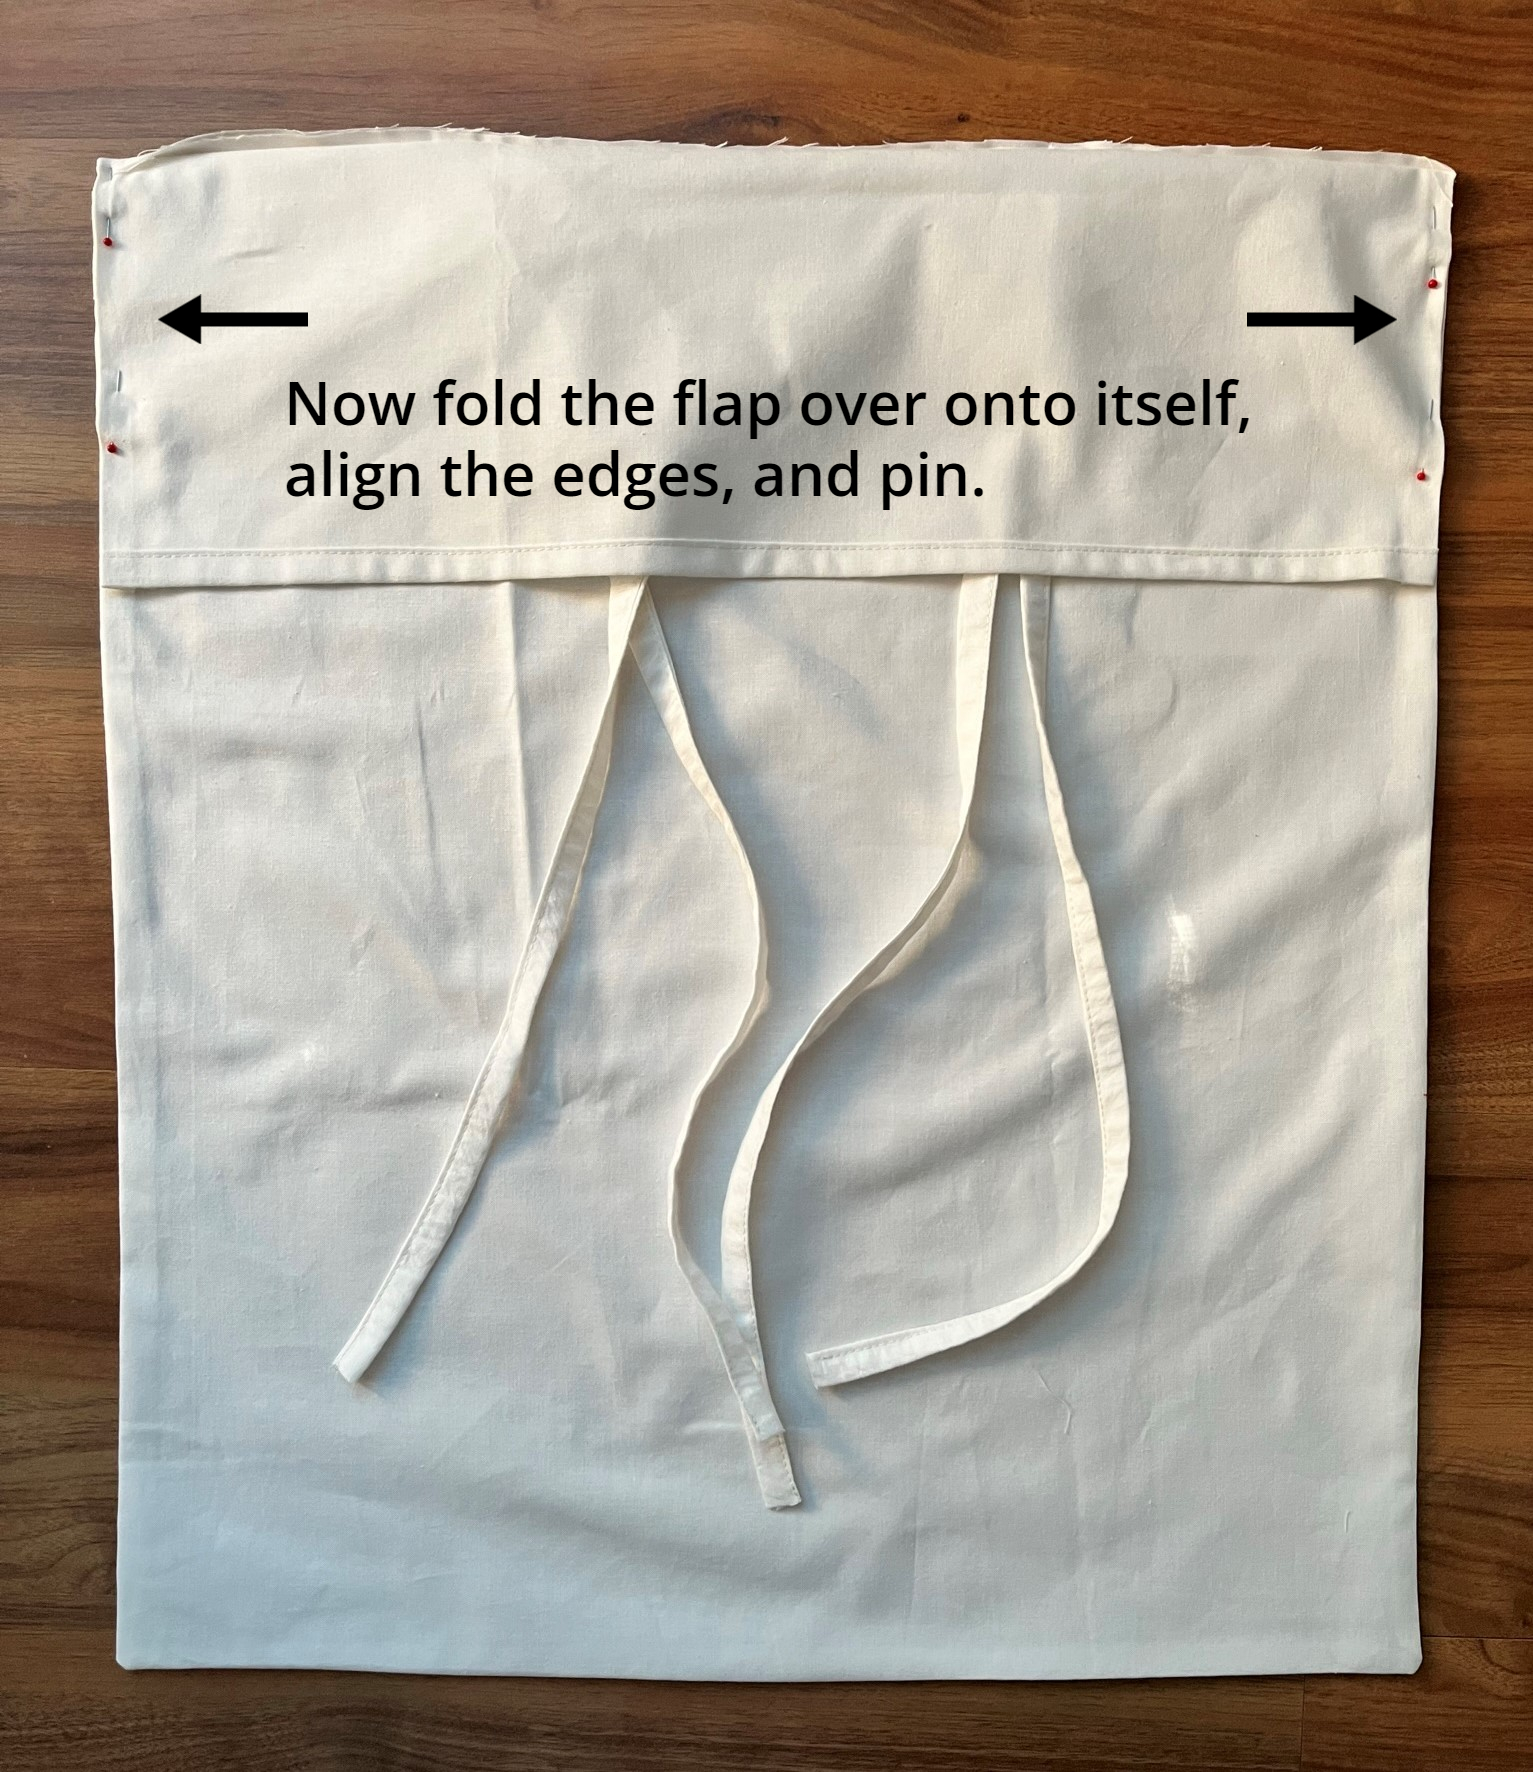
Next, fold in the raw edges of the flap about 1/4″, press them flat, and then fold the flap over onto itself to create the envelope closure. Line up the edges and pin it in place.
Now sew along the same three edges again – sides and bottom – this time with a 5/8” seam allowance.
This second seam wraps the raw edges from the first one neatly inside. Backstitch again where the flap starts and ends – these little reinforcements help your pillowcase hold up over time.
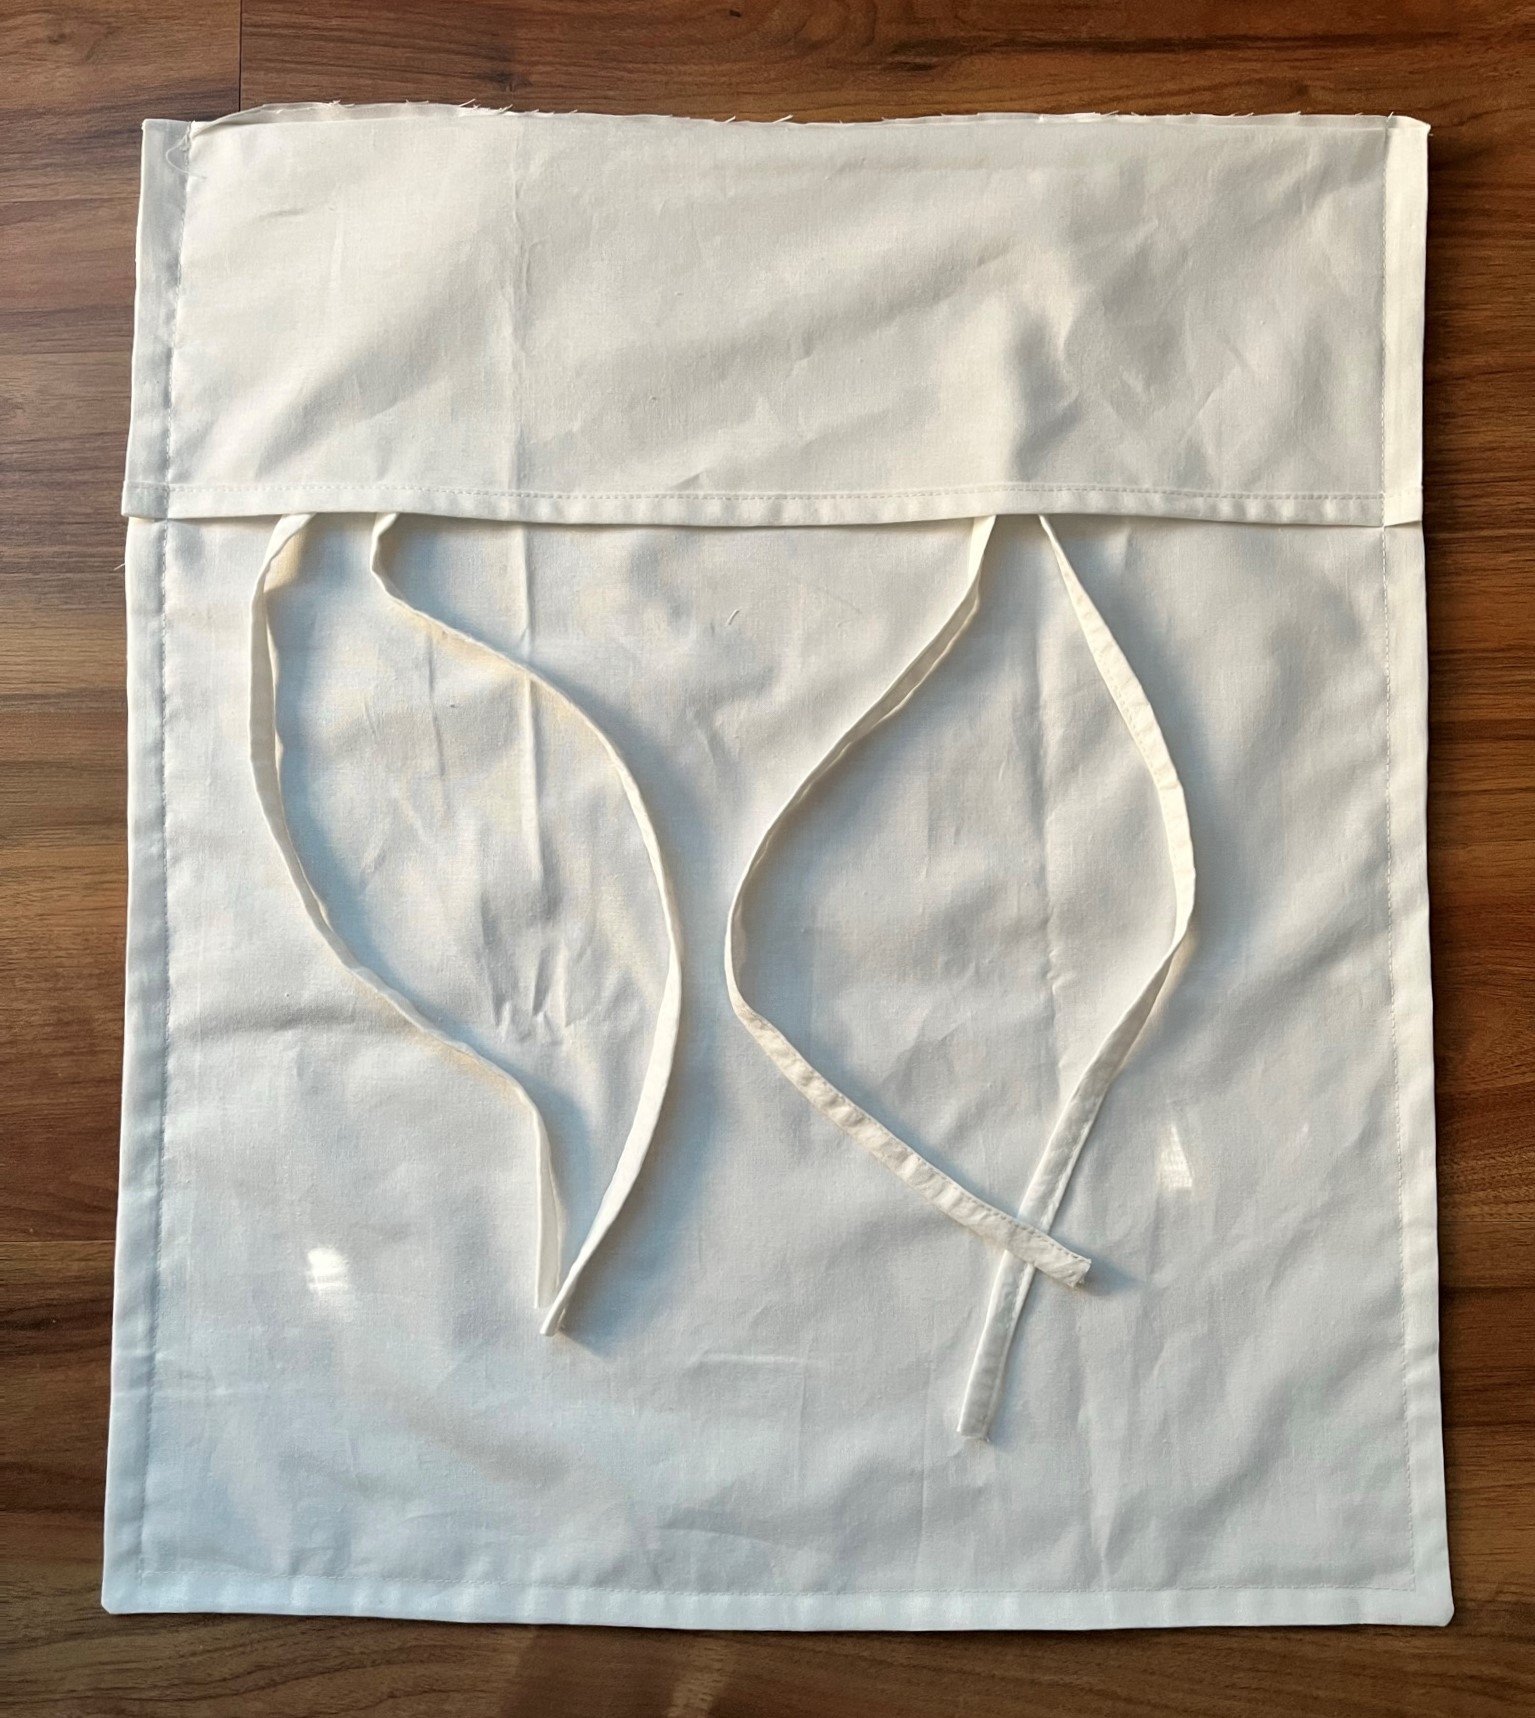
And that’s it – all done! You’ve just made a beautiful envelope-style pillow cover with fabric ties and a hidden-flap closure, and all the seams are neatly enclosed. No fraying, no exposed edges, and no serger required.
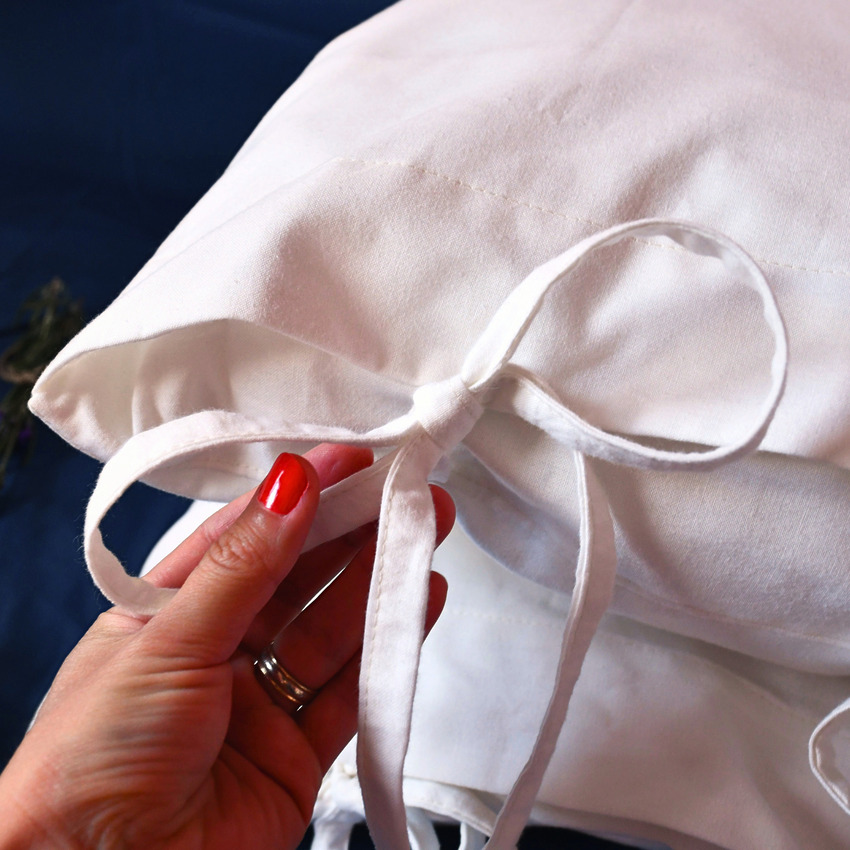
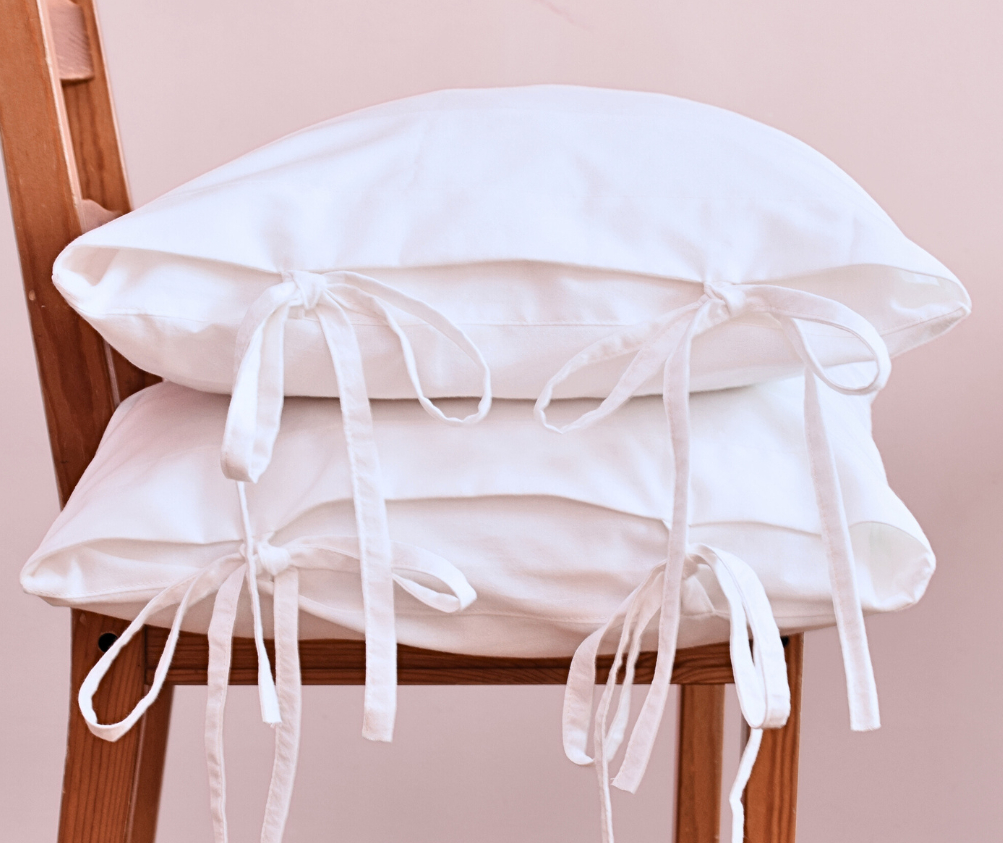
DIY Pillowcase with Ties – No Zipper, No Serger, Just Straight Stitches!
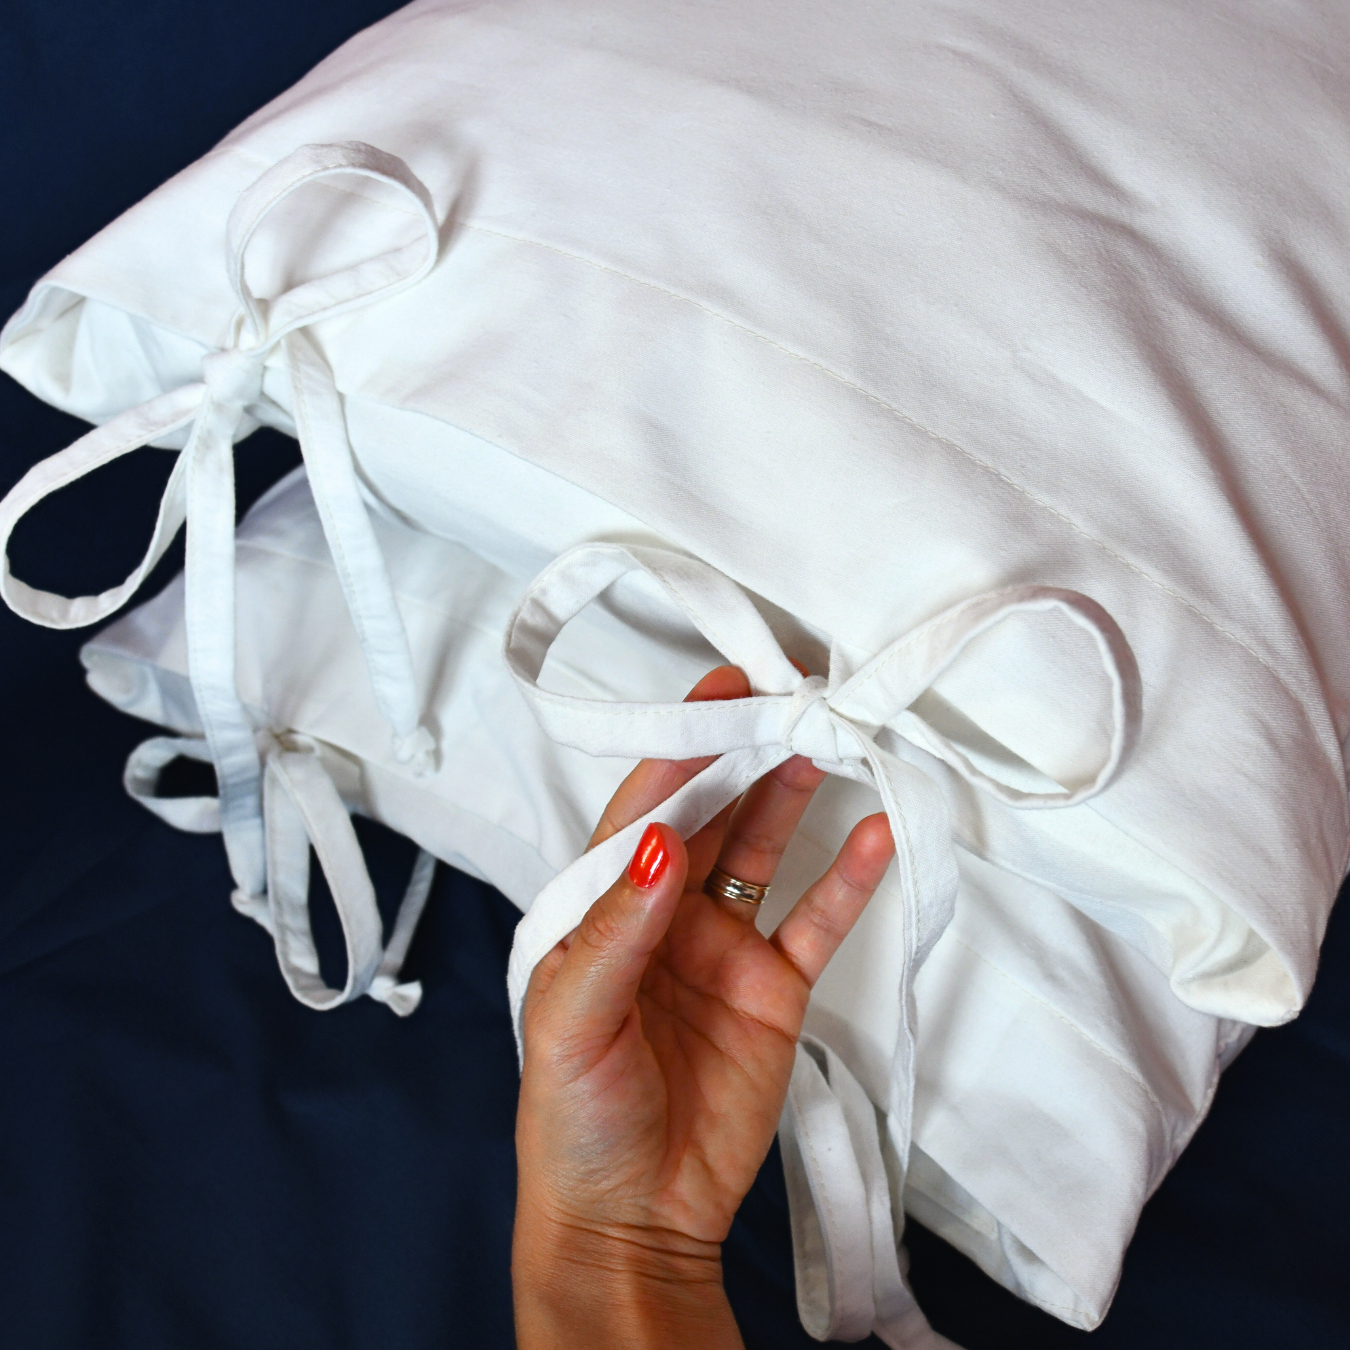
Slide in your pillow insert, tie the ties into a cute bow, and admire your work. Whether it’s for your own home or a thoughtful handmade gift, this DIY pillowcase is cute, cozy, and full of charm.
Did you enjoy this easy pillowcase sewing tutorial for beginners? I’d love to know how yours turned out! Feel free to drop a comment or tag me in your photos. I’d be thrilled to see your finished pillow covers with ties!
Let’s keep in touch! You can find me on Facebook, Instagram, and Pinterest.


Could you do a you tube video of you making these pillowcases? I would love it, to help me make it correct.
I’ve been looking for this for a very long time.
I want to make my granddaughter, who’s away at college. It will help keep her pillow in her case.
Thank you so much!
I think when you were explaining the French seams, you need to recheck your “wrong sides” and “right sides” instructions. They are incorrect.
Mary, thanks so much for pointing it out! There was indeed a mistake, I’m sorry – I’ve now corrected it.
I’m confused on how the last step causes the flap to function as an envelope closure? Either the ties will not function or the flap will fold outward and not function as an envelope
I agree. I cannot for the life of me figure out this last step. Please help!
I agree with you! it’s confusing in regard to the ties.
great tutorial, just what I was looking for, thank you! my pillowcases turned out perfect.
Stoked to hear that, Ines! Here’s to many fantastic sewing projects ahead!
Thanks for sharing this super helpful tutorial. Very pleased how it turned out
Great to hear this, Nuria! I really appreciate you taking the time to leave me a comment. Thank you!
Thank you so much for this lovely pattern! I followed your details instructions closely and the pictures helped very much. I’m delighted with how my pillow turned out!
These were very good directions. Thank you.