Today I’ll be sharing my best 15 sewing tips for beginners to help you get started and improve your skills. Even if you just need a refresher, these tips will come in handy.
Sewing is a fun and satisfying hobby for many people. You can make your own clothes, decorate your home, and make all kinds of other cool stuff. It’s super rewarding to finish a project and see what you’ve created with your own two hands.
Although sewing can be a calming and relaxing activity, it can also be frustrating, especially when you’re just starting out or working on a difficult project. Like anything else, it takes a lot of practice and patience to get better at it.
Here are my top 15 tips for beginners to give your sewing journey a boost.
1. Start with easy projects
Ideally, start with projects that have a small number of pieces and straight seams. This will help you build up your skills and get more comfortable with the process.
Some simple projects that you could try as a beginner include pillows, simple skirt, easy two tone pincushion, reversible fabric coasters, placemats, simple zipper pouch, headbands, scrunchies, infinity scarf, travel toothbrush holder, fitted sheets, or a drawstring bag.
2. Gather your supplies
Make sure you have all the necessary tools and materials before you start sewing – like a sewing machine, fabric, thread, scissors, needles, pins, and a seam ripper. Here’s a list that breaks down 12 essential sewing supplies for beginners, so you’ll know exactly what you need to get started.
Nothing is more frustrating than getting halfway through a project and realizing you don’t have the right tools or materials. Having everything you need within reach is key to an enjoyable sewing project.
3. Choose the right fabric
Take a moment to think about these questions. What do you want to make? Is it clothing, a home decor item, or something else? No fabric is a jack-of-all-trades.
Is your fabric lightweight or heavy? Does it drape well or not? Some fabrics, like viscose, silk, or chiffon, are drapey and ideal for dresses and blouses. Others, like denim or canvas, are stiffer and therefore great for bags, coats, or jackets.
Select a fabric that is appropriate for your project and your skill level. Avoid fabrics that are too delicate, stretchy, fuzzy, slippery – that is, more difficult to work with – until you have more experience.
4. Learn how to thread your sewing machine
Make sure you understand how to thread the machine, wind the bobbin, and adjust the tension. Learning how to thread your sewing machine is important because you’ll use this skill every time you want to sew.
Depending on the project, you might need to use different types of thread and needles. For example, you might use a heavier thread for denim or a finer thread for silk. Properly threading your sewing machine helps to ensure that you’ll get the most out of your sewing projects.
5. Press your seams
Use an iron and ironing board to press your seams as you go.
Pressing your seams is a crucial step in the sewing process because it helps to set the seam and gives your project a professional, polished look. Also, it makes it easier to sew accurately.
6. Use a straight stitch for most projects
A straight stitch is the most basic and versatile stitch, and it is suitable for most sewing projects. Start with a simple, straight stitch and then move on to more advanced stitches as you become more confident.
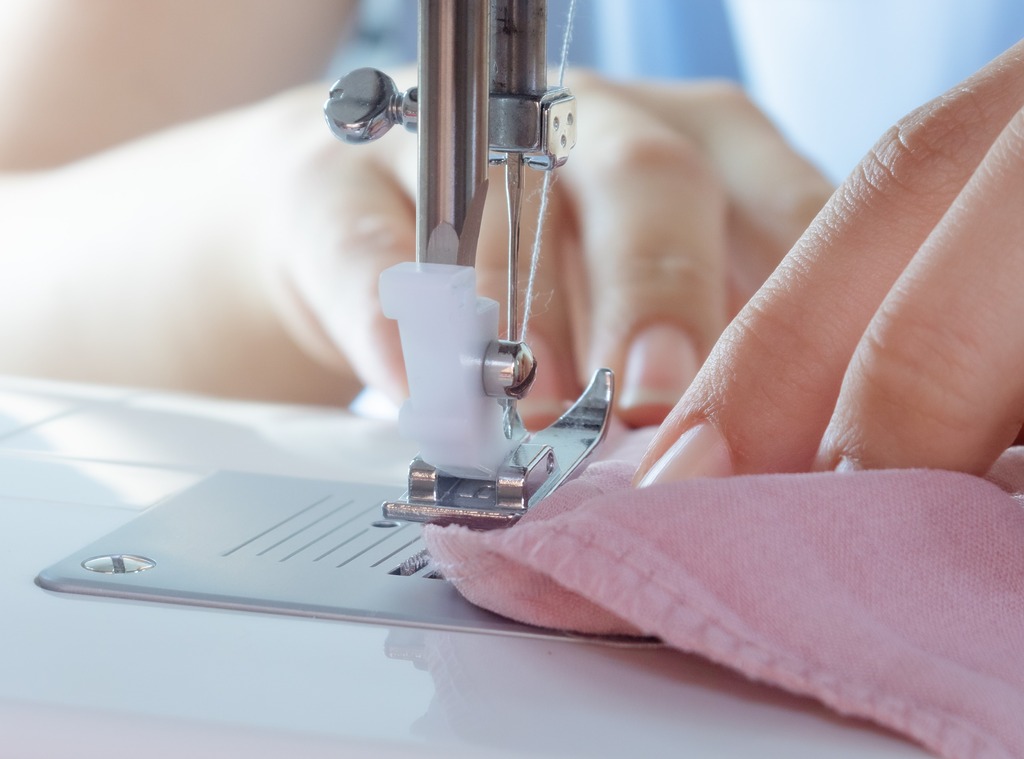
Also, use the seam allowance guide on your needle plate to make sure all your seams are the same width.
The needle plate is a metal piece located directly below your sewing machine needle and presser foot. That plate has some lines and numbers engraved on it. It’s important to know that these markings are meant to be used as a seam allowance guide.
Related: Here are my top tips and tricks for sewing a straight stitch, and all the things I wish I’d known when I started learning to sew.
7. Read the instructions before you start
Take the time to read through the instructions before you start sewing. It makes the process a lot easier if you know what you’re supposed to do before you start doing it. It can also help you spot any potential problems or challenges before you get too far into the project.
When I was a beginner, I would often skip over parts of tutorials or skip reading them altogether. But as I gained more experience, I learned that taking the time to fully understand the process is much more effective in the long run.
Now I routinely take the time to read and understand the whole tutorial, even if it takes a bit longer. It has helped me to learn new things more quickly and effectively.
Related: 15 things I wish I knew when I started sewing
8. Slow down
Take your time measuring and cutting the fabric and be patient with yourself. You can’t be both fast and meticulous while you’re a beginner, it’s an unreasonable expectation.
It’s totally OK to finish a quick „10-minute project” in 1 or 2 hours if you’re a novice. Just focus on doing it right the first time. You will get faster over time, once you have more experience.
9. Take breaks
Sewing can be tiring, especially if you’re a beginner. Make sure you have good lighting and a comfortable workspace and take breaks when you need them, to rest your eyes and hands, and to avoid fatigue and back pain.
While it feels great to get into a flow state when you’re sewing, don’t go further than 2 hours without taking a break. Use that time to do some stretches, drink water or tea, have a snack, and take a look at your project with fresh eyes.
10. Practice on scraps first
Before you start your project, practice your stitches and techniques on scraps from the same material.
This will give you a chance to get a feel for the fabric and the sewing machine and to make any necessary adjustments.
11. It’s ok to make mistakes
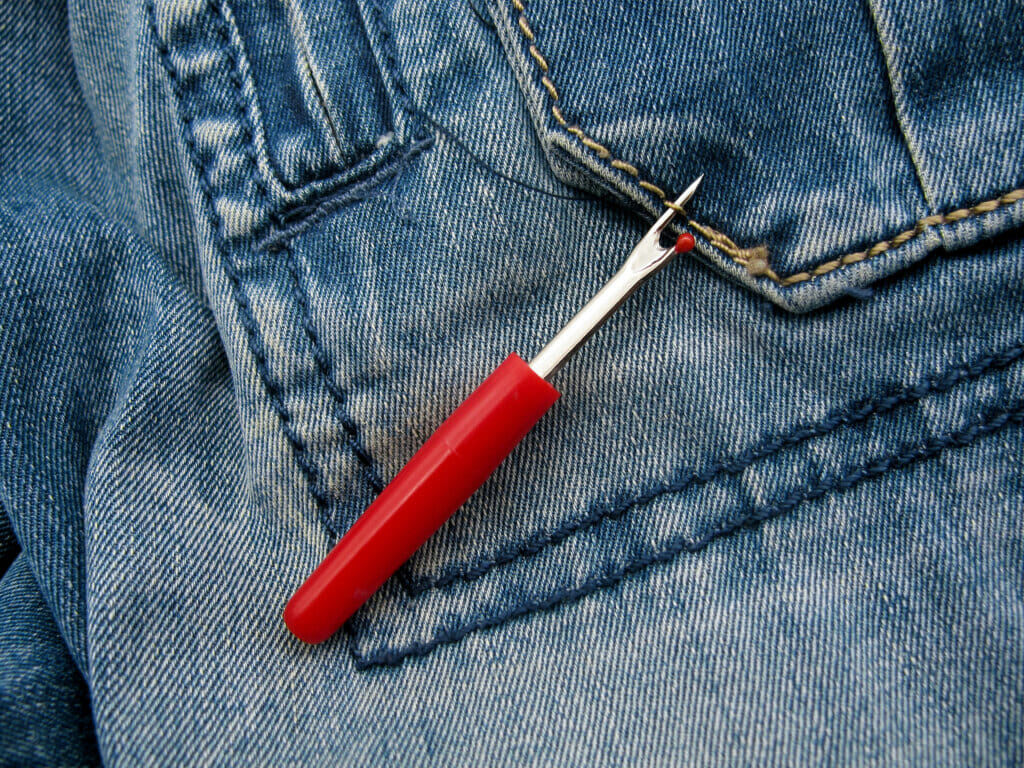
If you make a mistake, don’t panic! A seam ripper is a tool that is specifically designed to help you remove stitches without damaging the fabric. Just gently slide the point of the seam ripper under the stitches you want to remove and push it through the fabric to cut the threads.
Don’t be afraid to use it – it’s better to fix a mistake than to end up with a finished project that doesn’t look quite right.
Sewing is a skill, and like any skill, it takes time and practice to get it right. Don’t get discouraged if your first projects aren’t perfect – just keep practicing and you’ll improve with time.
Be persistent and willing to keep trying even when you experience setbacks. By persevering, you’ll eventually achieve your learning goals!
When you make a mistake, take a moment to think about what went wrong and how you can prevent it from happening again in the future. This will help you become better at sewing over time.
Also, if you’ve made a mistake that you can’t fix, it’s okay to start over. It’s better to start fresh than to end up with a finished project that you’re not happy with.
12. Invest in good-quality sewing tools
Quality sewing tools can make a big difference in the ease and accuracy of your sewing.
Cheap scissors may not cut as cleanly and can even leave jagged edges on your fabric. Here’s a list of the best sewing scissors that cut through layers of fabric like soft butter.
Using the right needle for your project can make or break a sewing project. Different needles are designed for different types of fabrics. For example, using a leather needle on lightweight fabric may result in tearing or uneven stitches. Also, using a universal needle for stretch fabric simply doesn’t work.
Sewing pins should be sharp and smooth so that they won’t leave holes or snags in your fabric. A good-quality sewing machine can save you time and frustration by sewing more accurately and handling different types of fabrics more easily. Here’s a list of the best sewing machines for beginners you can buy this year.
13. Don’t be afraid to ask for help if you get stuck
If you’re having trouble with a particular step, don’t hesitate to ask for help.
There are many resources available, including online tutorials, sewing forums, and groups that can provide guidance and support.
14. Take care of your machine
Your stitches will start to look wonky and weird-looking if you don’t clean your sewing machine regularly. You need to brush the lint and fuzz off the bobbin area after each project, ideally. That way, the sewing machine can feed the fabric smoothly again.
Here’s what a sewing machine cleaning kit looks like.
Regular maintenance and cleaning can help extend the life of your sewing machine and keep it running properly. Follow the maintenance instructions provided by the sewing machine manufacturer in the user manual.
15. Experiment and have fun
Sewing is a creative and rewarding hobby, so enjoy the process! Don’t be afraid to try new things and take on more challenging projects as you become more comfortable with your skills.
These sewing tips for beginners are a great starting point for anyone looking to improve their skills or get started with sewing.
Finishing a sewing project can bring a great sense of accomplishment and pride. It takes patience, focus, and problem-solving skills to see a project through to the end. Moreover, sewing can be a therapeutic and fun way to express your creativity.
Whether you’re making clothes, home decor items, or sewn gifts, a finished sewing project is always a source of happiness and fulfillment.
Happy sewing everybody!
Let’s keep in touch! You can find me on Facebook, Instagram, and Pinterest.


Hi, Violet:
I liked your post about making a child’s wool coat. When you mentioned saving the (printed at home) pattern for future use I thought I might share my ideas on the subject. Rather than keeping the taped together printed pdf patterns, I buy pellon grid fabric by the yard
https://www.pellonprojects.com/shop/sew-in/pellon-810-tru-grid-material/
– and trace the paper pattern pieces onto the pellon fabric. A less expensive alternative is to use remnants of quilting cotton, especially the kind that’s printed on one side only. I trace the pattern pieces on the blank side of the fabric.
Marjorie